Forum adverts like this one are shown to any user who is not logged in. Join us by filling out a tiny 3 field form and you will get your own, free, dakka user account which gives a good range of benefits to you:
No adverts like this in the forums anymore.
Times and dates in your local timezone.
Full tracking of what you have read so you can skip to your first unread post, easily see what has changed since you last logged in, and easily see what is new at a glance.
Email notifications for threads you want to watch closely.
Being a part of the oldest wargaming community on the net.
If you are already a member then feel free to login now.
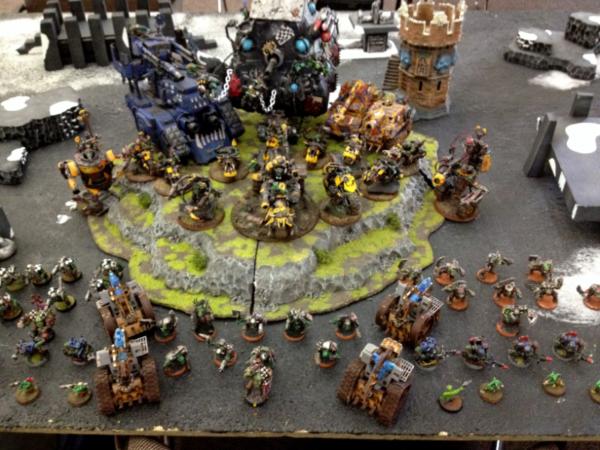
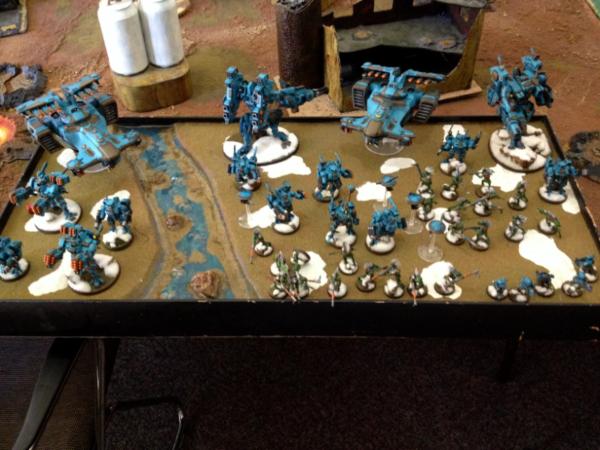
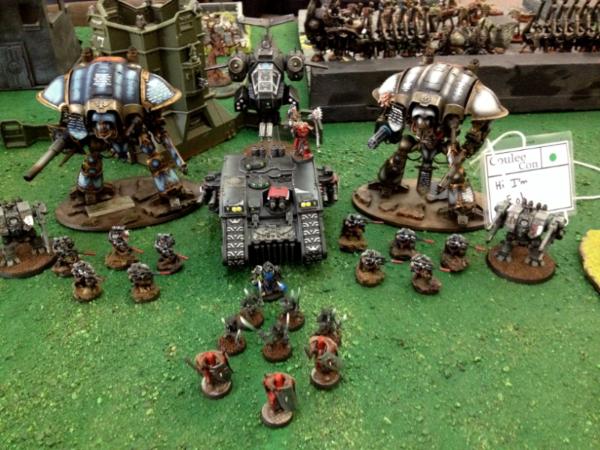
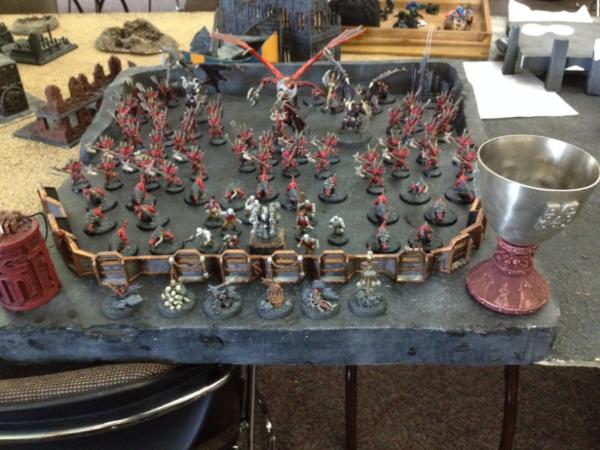
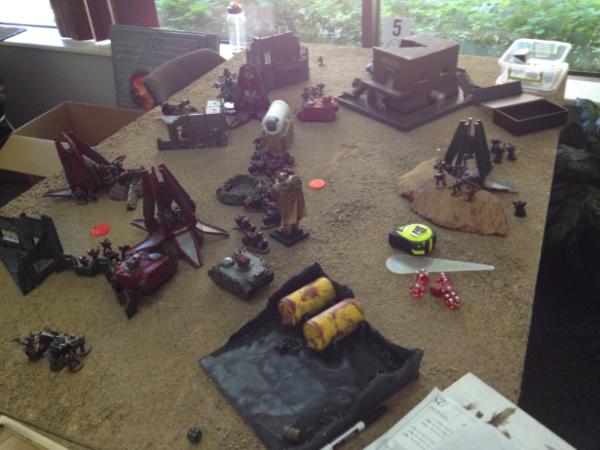
Several weeks ago I took my Sentinels of Terra Gladius Strike Force to a tourney a few hours away, and managed to snag pics from the first couple rounds. We squeezed in 4 rounds of play, and it was an exhausting but incredibly fun day. I'll start off with some pics of the overall Armies on display, and then get into the batreps.
Spoiler:
Orks! Gundam Tau Beautifully painted and converted SM/Inquisition/Knight army Blood for the Blood God!
My list
Spoiler:
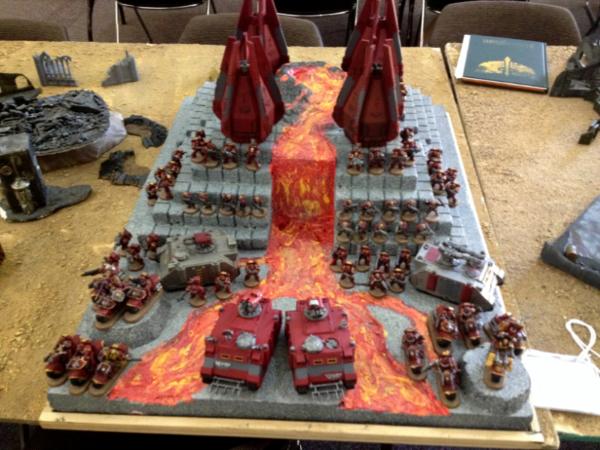
Here is my army. My opponent didn't bother displaying his because he hadn't gotten a chance to get them all painted up before the tourney. My list was:
Captain: bike artificer armor, TH/SS, Eye of Hypnoth Chaplain: bike, Auspex, combi-grav Tac squad: 5 man, plasma gun, sarge w/ combi-plaz, drop pod Tac squad: 5 man, plasma gun, sarge w/ combi-plaz, drop pod tac squad: 5 man, melta gun, sarge w/ combi-melta, drop pod tac squad: 5 man, melta gun, sarge w/ combi-melta, drop pod Tac squad: 5 man, plasma gun, sarge w/ combi-plaz, Razorback w/ twin-linked heavy flamer, dozer blades Tac squad: 5 man, flamer, sarge w/ combi-flamer, Razorback w/ twin-linked heavy bolter, dozer blades Dev squad: 7 man, 4 Lascannons, Razorback w/ twin-linked Assault Cannon Dev squad: 7 man, 4 Lascannons, Razorback w/ twin-linked Assault Cannon Bike Squad: 5 man, 2 Grav guns, sarge w/ combi-grav Bike Squad: 5 man, 2 Grav guns, sarge w/ combi-grav Scout squad: 4 bolters, 1 heavy bolter Scout squad: 4 bolters, 1 heavy bolter Scout squad: 4 bolters, 1 heavy bolter
How do you think the Strike Force did?
My opponent's list (a guess at best)
Spoiler:
2- Interrogator-Chaplains, one with a special DA killy cc weapon 1- Command Squad, maxed out 1- Darkshroud 1- Deredo Dreadnought 3- minimum units of bike squads, maybe a special weapon or two in each 1- 10 man tac squad in a drop pod 3- scout squads 5- Knights (the Stormshield/Mace variety) 1- 2 man attack bike squadron with Meltas
1st Turn
Spoiler:
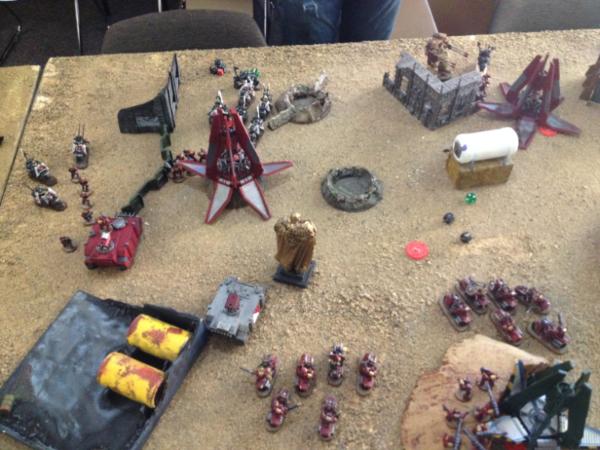
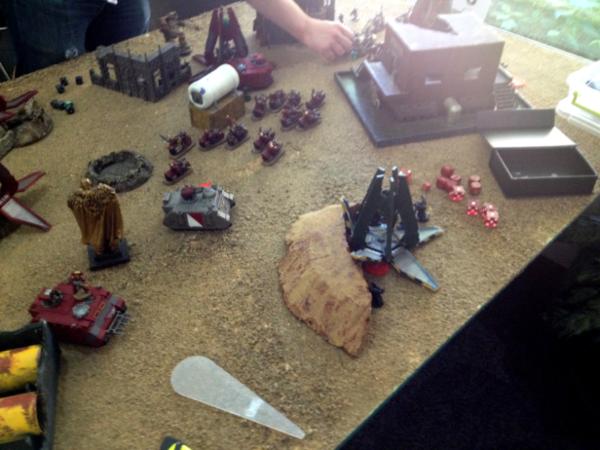
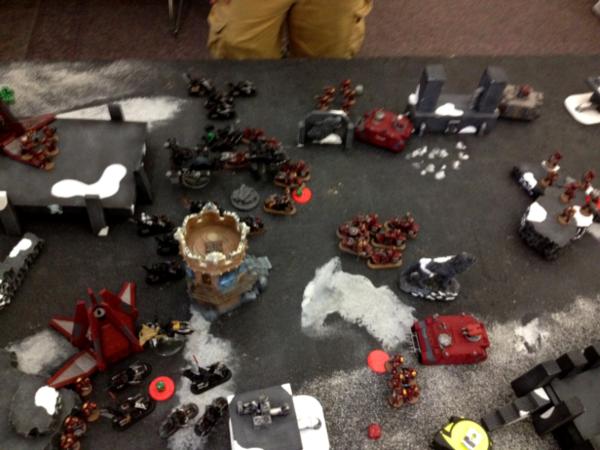
This mission was a mixture between a few Maelstrom Objectives and the Relic. The twist was that after both of us deployed, the relic scattered 20" to my right/my opponent's left. The roll was randomized, and was kind of neat. This army, and actually mostly this list, were what I mostly feared going into this tournament. Re-rollable jink saves is pretty awesome, and the Angels put out pretty good firepower. I deployed both biker squads centrally, and moved up cautiously, not wanting to be charged by the Command Squad. I began dropping some pods on/near objectives, and tried to whittle down the biker squad in the ruins; however they passed their their re-rollable saves. I made a pretty big mistake right away, thinking I would drop in with a melta squad and take care of his Deredo. However, in my haste to start the game, I missed that he had bought Ceramite Plating, so my Melta Tac squad didn't do anything to him. My Lascannons either didn't have line of sight or couldn't punch through the Cover save either. Basically, I don't do much damage this turn; my opponent knew how to maximize his Darkshroud, keeping all his important units at least barely within the 6" to get its stealth/shroud bonus. My opponent scooted his command squad over to my left, and broke off an Interrogator Chaplain to go spank down my Melta squad. The Deredo probably helped, that thing has awesome firepower. His drop pod came down on my backfield objective and his tacticals began shooting up my Devastators.
Turn 2
Spoiler:
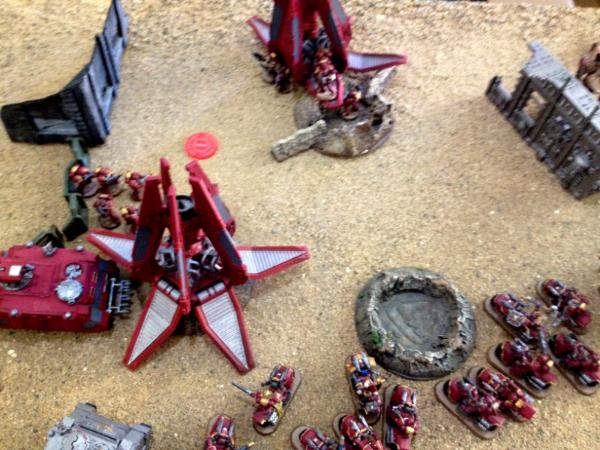
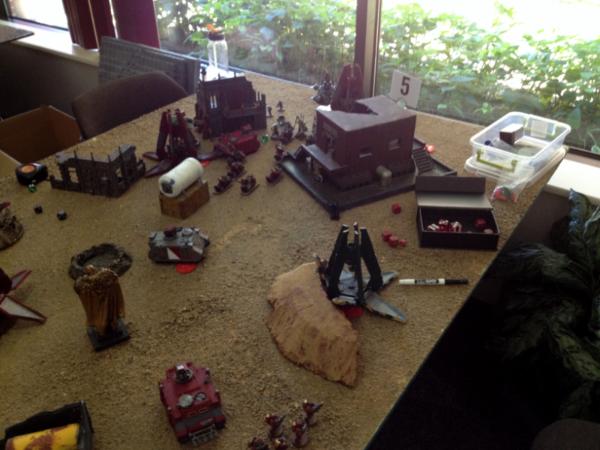
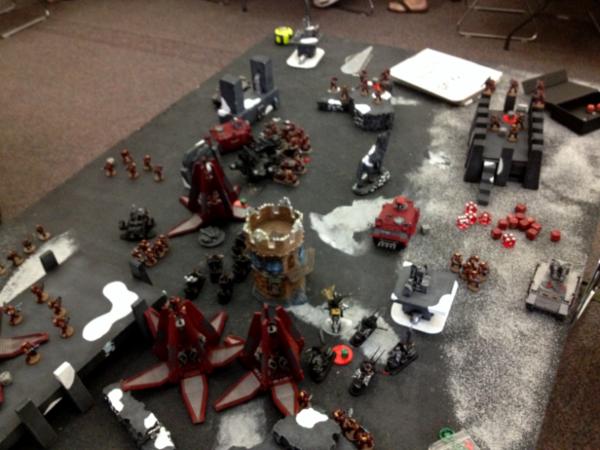
My other pods come in, again trying to snag objectives. I direct almost my entire army's shooting just at his command squad, and it takes the entire army to take it down. Re-rollable 3+ jink with 5+ FNP is crazy good. On this flank his bikers assaulted my scouts, but the plucky scouts held strong and killed a biker. He would fail his hit and run for that unit either 2 or 3 turns in a row, and be stuck fighting those scouts. Here's where the Command Squad was. Mine now. The Deredo continued to pound away at anything in sight, killing my drop pod, and I believe some Marines. My heavy flamer razorback torched some of his scouts, and the Tacticals with their Plasma Guns hopped out and unleashed death on another unit of scouts. I didn't get a pic, but just to the right of this tac squad, my scouts are moving up to take the relic under cover of an assault cannon razorback.
Turn 3(ish)
Spoiler:
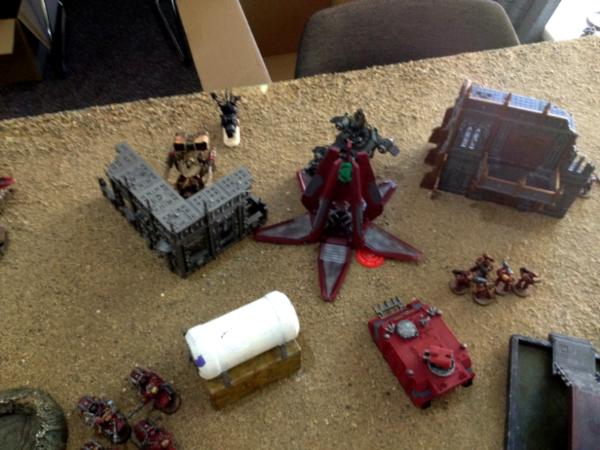
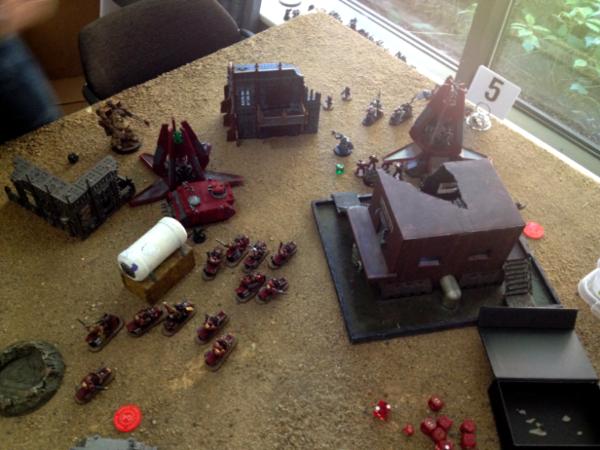
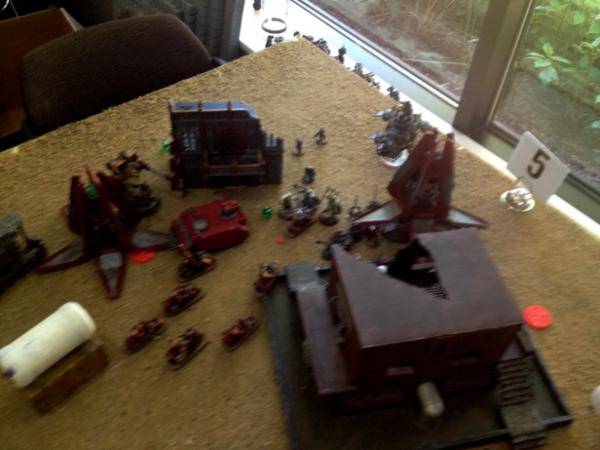
I got lazy with my picture taking, so it got a bit blurry here. My opponent went hard to this flank for a few turns, outflanking a couple bike squads that both came in on the side near the relic. He also teleported in his Knights in a ballsy location right by the relic, and he landed dead on. The pic doesn't show them, but it again took massive amounts of firepower to whittle those Knights down and keep them away from the Relic. I was too slow in mobilizing my Razorbacks to get back to my backfield and clear out his Tacticals and that Drop Pod.
Turn 4/5
Spoiler:
My Captain and his biker gang make combat with the Knights, the Chaplain fails the charge to join them. My bikers are mostly crushed, but Captain America stood strong. We take turns picking up the Relic and shooting it out of each other's hands. This tourney ruled that being within 3" of the Relic did not control it, that it must be held by a unit in base to base. The game ended with us stuck in combat, with nobody holding the Relic, and with me ahead on Maelstrom points. I took a minor victory here, begrudgingly from a very good opponent with a very good list.
This message was edited 2 times. Last update was at 2015/10/09 05:11:50
Round 2 is against...Dark Angels again! The only two DA players at the tourney, and I draw them both, lol. He took the Ravenwing Strike Force, the Ravenwing Support Squadron, and the Silence Squadron. He was all bikers, skimmers, and flyers, with Sammael leading the charge. He had a big command squad, a big squad of Black Knights, and several smaller bike squads, along with a MM Attack bike squad. His Silence Squadron was kitted out with all different weapons, and he had the one that could drop the Vortex.
Deployment
Spoiler:
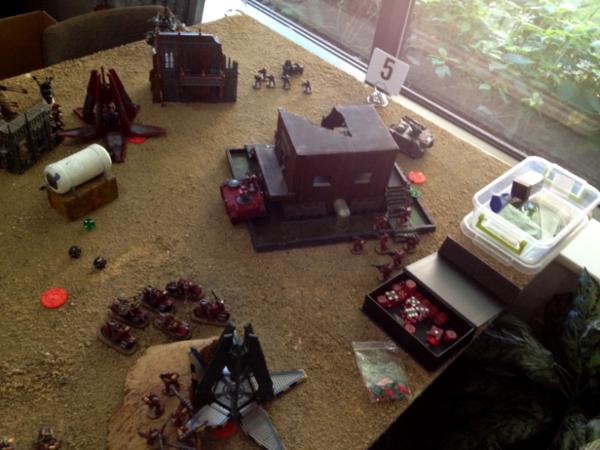
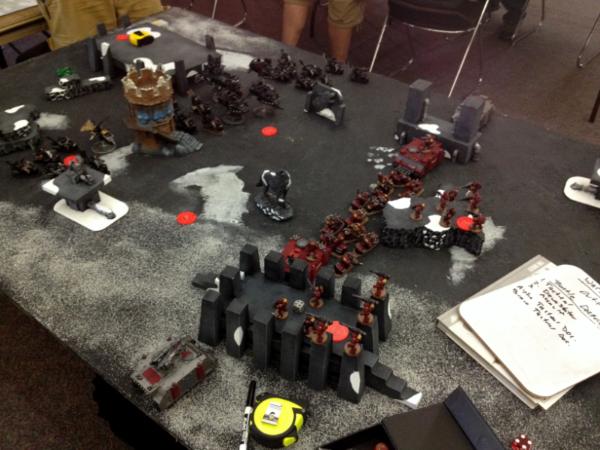
In true Ravenwing style, he parks everything up on the line ready to zoom forward. I do the same, as I have first turn unless he seizes. I know how durable his army is, and its speed will overwhelm me easily. Also, this is a kill point primary mission, which would ordinarily mean I'm screwed. However, the dice gods smiled upon me and leveled the playing field. For this particular kill point mission, fast attacks and elites were worth 2 points! Almost his whole army was worth two points each unit!
Then my opponent makes a fatal mistake, and he was kicking himself immediately after we started: he scouted his command squad, black knights, and Support Squadron forward, directly toward my bikers. He scouted everything else forward as well. This would negate any charging in the first turn, which hurt him badly.
Turn 1
Spoiler:
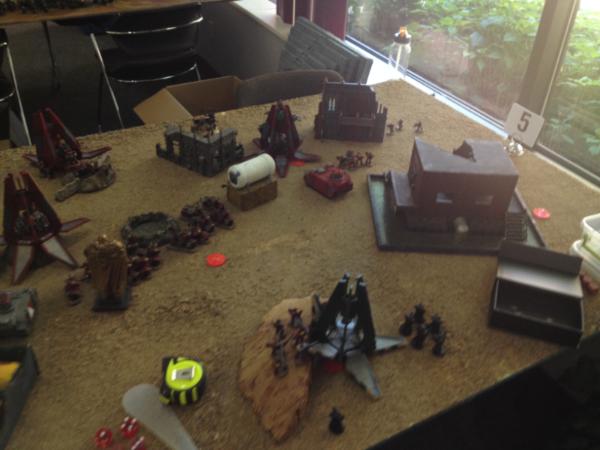
I start dropping pods on objectives, specifically trying to snipe his Apothecary with my tactical squad, and failing due to his re-rollable jink and FNP. My other podding tacticals fail to do much to Sammael's squad for the same reasons. The vast majority of my fire goes into the attack bike squad, barely being able to finish them off for first blood. Captain America and his biker gang fail their charge on the Support Squadron, but the Chaplain and his crew make their charge and two of the speeders are wrecked. I force all his units to jink, and so his firepower is very limited in return. To add insult to injury, his army is stuck staring angrily at me since he can't charge, while I prepare to run amok for another turn.
Turn 2
Spoiler:
I continue to pound away with all my firepower, slowly whittling down the command squad. My bikers run down the Support squadron, smashing it in close combat. I drop more pods on objectives, and my scouts come in and add more bolter fire to the battle. Finally able to assault, Sammael and his crew smack down some of my tacticals, and hit and run out afterward. He made the mistake of assaulting one of my bike squads with his weakened Command Squad; despite the awesomeness of Ravenwing Command Squads, his numbers were too few and he lost combat; I believe he hit and ran away. Even worse for him, I believe his Silence Squadron failed to arrive.
Turn 3
Spoiler:
Sammael and his crew continue to assault and run away from my tacticals, failing to wipe them out on the left flank. His flyers start damaging tanks, and he actually created a StrD Vortex with one of his flyers by rolling doubles! Luckily for me, it scatters away from its target to hit nothing. My combined bike units assault his Command Squad and crush it. If not this turn, then the next.
Turn 4
Spoiler:
Sorry, no pics from here. The game was getting badly lopsided, and I decided not to take photos. I focused my Lascannons and twin-linked assault cannons, along with using Devastator Doctrine to help my tacticals re-roll ones shooting their melts and plasmas up at the flyers. I didn't knock them out, but I forced them to jink, which was almost as good. He had too little left to do any real damage on the ground, and I continued to rack up Maelstrom points and whittle his units down.
Turn 5
Spoiler:
His ground presence is almost entirely gone, if not gone. My scouts had jumped into combat to help knock out his bikers on the ground, and I could then continue to force his planes to jink with all my firepower. Game ended with full points for me, a major victory.