Switch Theme:

Anfauglir's Complete Beginner Journey; Starting From Scratch! (featuring Vampire Counts)  [RSS] Share on facebook Share on Twitter Submit to Reddit
»
Author Message
Advert


Forum adverts like this one are shown to any user who is not logged in. Join us by filling out a tiny 3 field form and you will get your own, free, dakka user account which gives a good range of benefits to you:
  • No adverts like this in the forums anymore.
  • Times and dates in your local timezone.
  • Full tracking of what you have read so you can skip to your first unread post, easily see what has changed since you last logged in, and easily see what is new at a glance.
  • Email notifications for threads you want to watch closely.
  • Being a part of the oldest wargaming community on the net.
If you are already a member then feel free to login now.


Made in gb
Wing Commander


Hello hello, welcome welcome. I've never done one of these before but here we go. As I said in another recent thread the last thing I modelled and painted was some LotR stuff in the early / mid 2000's, and before that some 3rd Ed. Space Marines in the late 90s. So... pretty much a complete beginner. I've been putting off getting started again for years due to no longer having any hobby stuff meaning I'd have to start from nothing, but after a hell of a 2020 and heading into a second lockdown thanks to the Covid-19 pandemic, I've finally bitten the bolter shell and taken the plunge! Over the past couple of weeks pretty much all of the hobby supplies I've bought has now arrived, and this weekend I've actually started my journey, so I thought I'd document my progress and share it with you fine guys and gals. Now, putting on my best Karl Urban voice let me quote him from Thor: Ragnarok and say, "Behold - my stuff!"


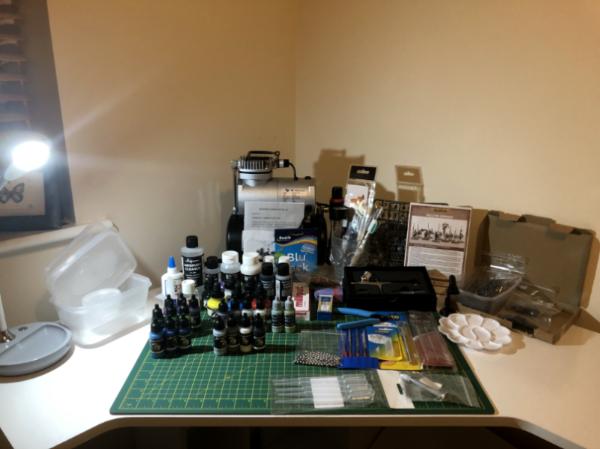
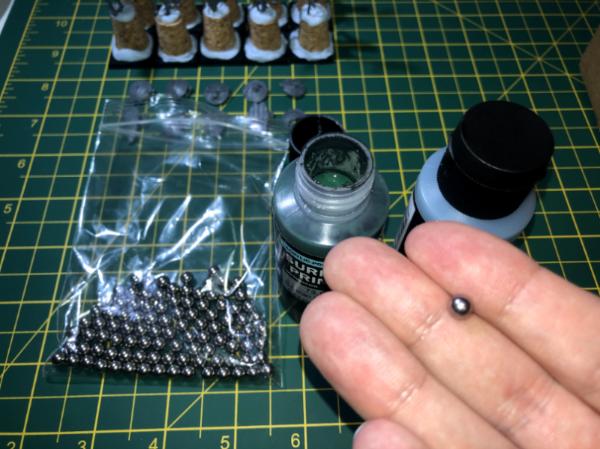
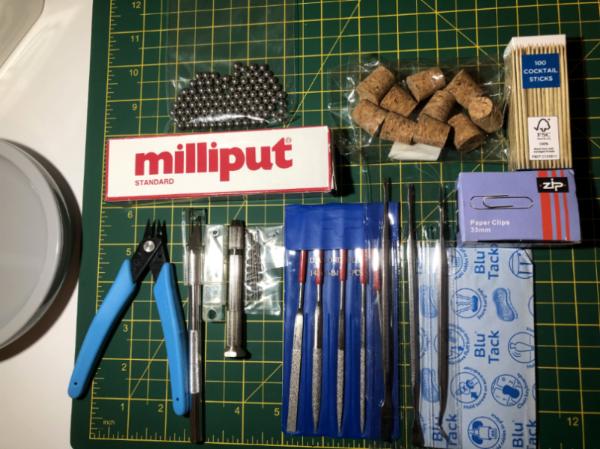
Some close ups of everything in the above image. First the tools; LED daylight lamp (base of which is just in the left side of frame), 5mm stainless steel balls, milliput, cork bungs, cocktail sticks, paper clips, side cutters, craft knife & replacement blades, pin vice & drill bits, needle / diamond files, sculpting tools, blu tack (poster putty) and an A2 self-healing cutting mat underneath it all.


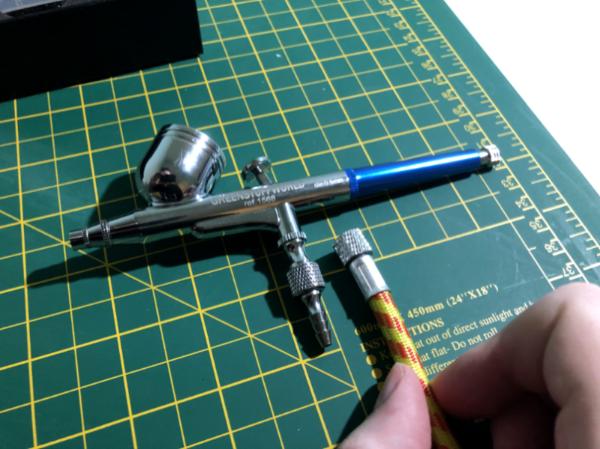
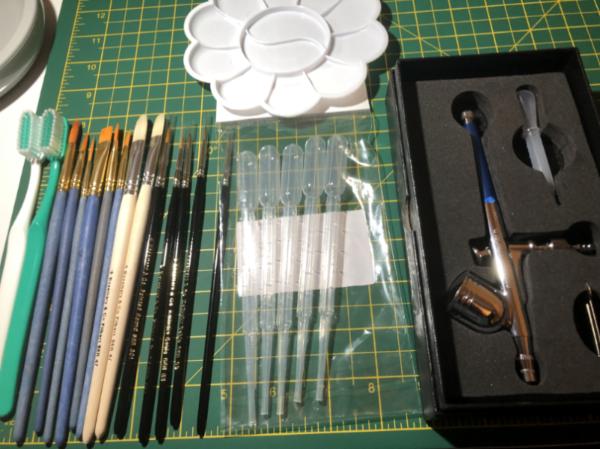
Next up is brushes; plastic flower palette, cheap toothbrushes (for dusting and wiping), six-pack of cheap golden taklon brushes, seven various Rosemary & Co. brushes, plastic pipettes and a .5mm airbrush from Green Stuff World.


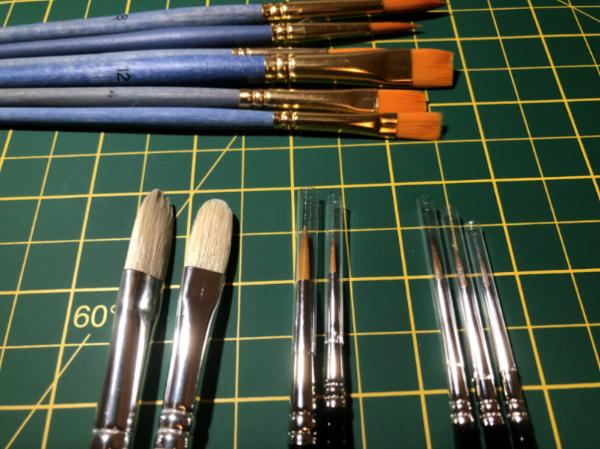
A further close up look at the brushes; the cheap taklons at the top, three round and three flat (for all the 'tough' or 'nasty' jobs like basing, gluing, paint mixing, varnishing, etc), two hog filbert series 47s (drybrushing and washing), two golden nylon series 301s in size 4 and 2 (metallics, washes, general work) and three kolinsky sable series 33s in size 2, 1 and 0 (detail and general work).


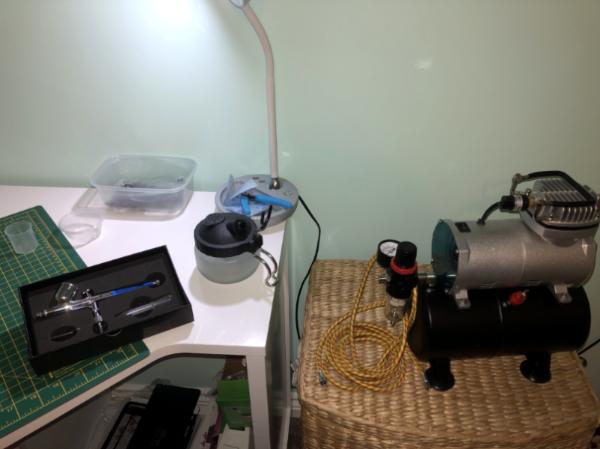
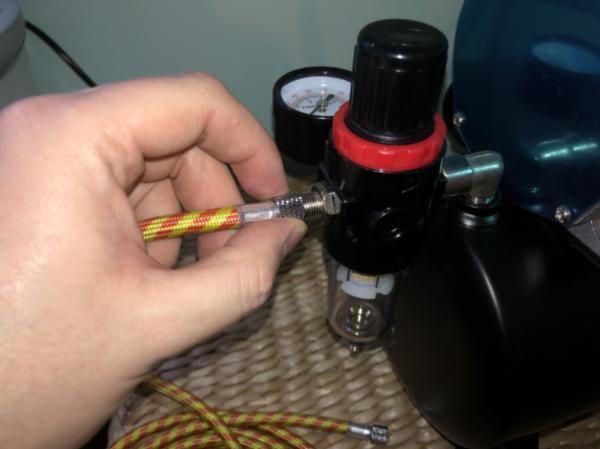
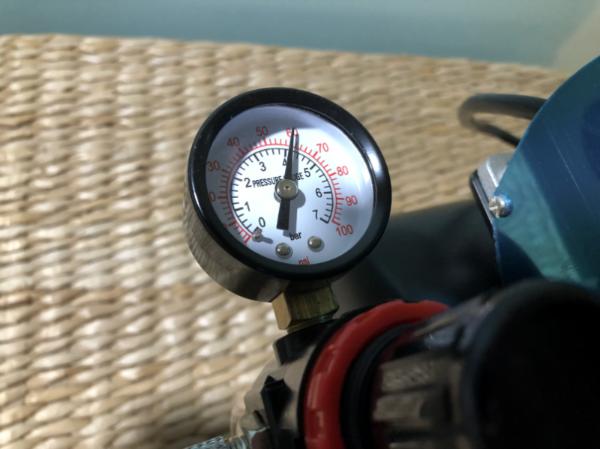
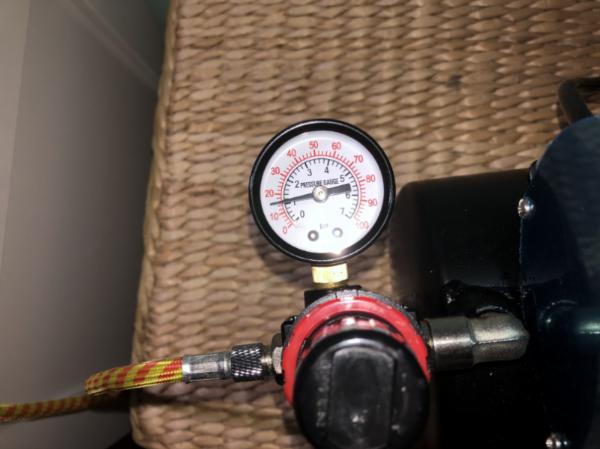
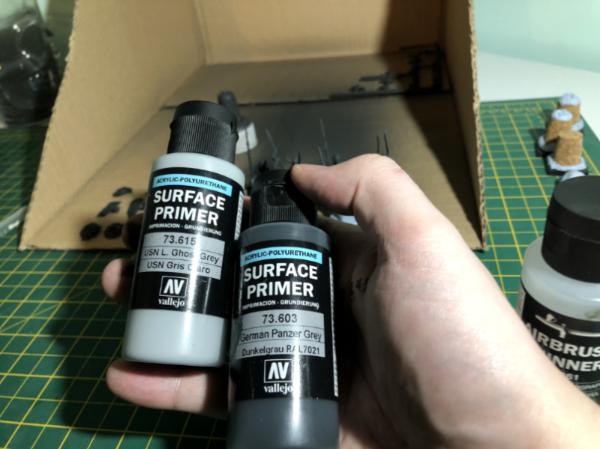
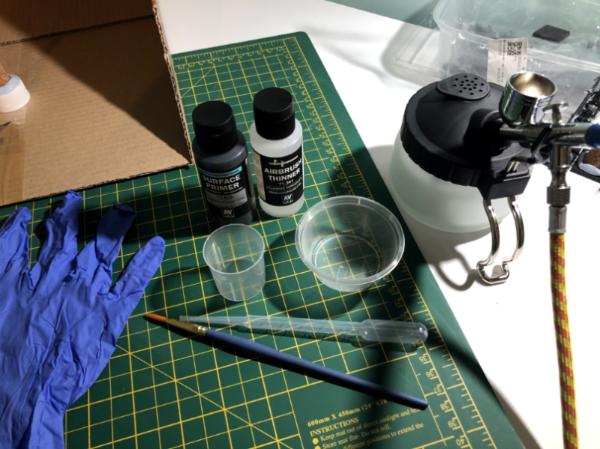
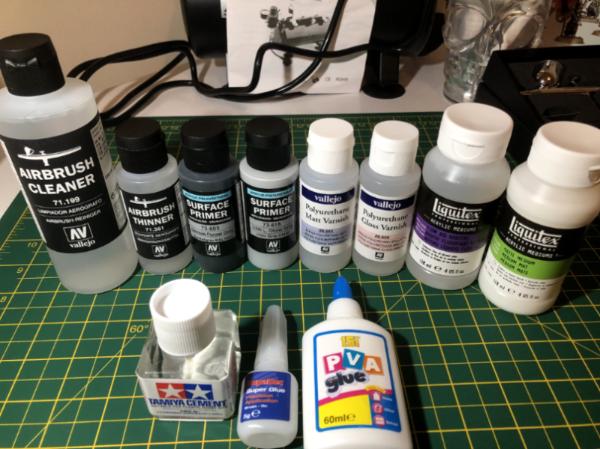
Next is various essentials and extras; hiding at the back is my AS186 compressor (all my research said this was the most basic, affordable option that still provided needed features like an air tank and moisture trap), airbrush cleaner and thinner, two primers for zenithal priming (german panzer grey and usn light ghost grey), matt varnish, gloss varnish, flow aid (for thining paints 1:10 with water and making ink washes) and some matte medium (for making ink washes). Then the glue; tamiya cement for plastics, super glue for anything that's not two bare plastic surfaces (both brush-on types) and some cheap PVA glue for basing.


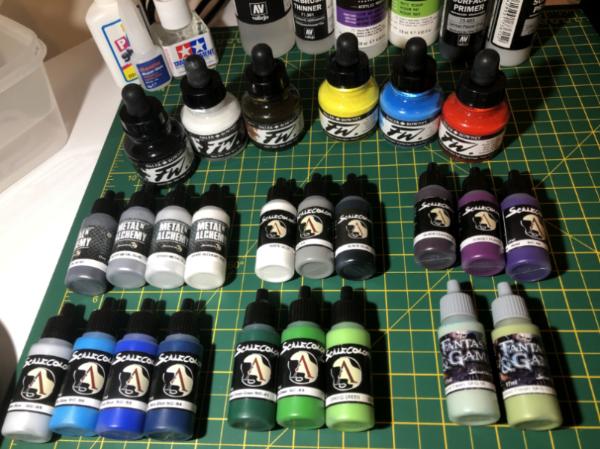
Now onto the more exciting stuff... next up is paints (you'll notice only cool colours as my VC / Undead project is going to be a 'cold death' theme meaning mostly black, white and grey and a ban on any warm colours - no reds, browns, golds, etc); Up top is Daler-Rowney FW inks for making ink washes and thinning paints. Black, white and sepia, and the three primary colours of cyan, flame red and lemon yellow so that I can mix up greens and purples, too. Paints from Scale 75; metallics of Black Metal, Heavy Metal, Speed Metal and White Metal. Obviously the core colours of White, Granite and Black. Black Leather, Sunset Purple and Violet (may be allowed, but not sure yet). Arctic Blue for a cold grey tone, a blue triad (Sky, Tesla and Navy), a green triad (Spring, Irati and Black Forest) and finally two Fantasy & Games paints that looked like good additions for VC / Undead; Hellbound Flesh and Undead Flesh.


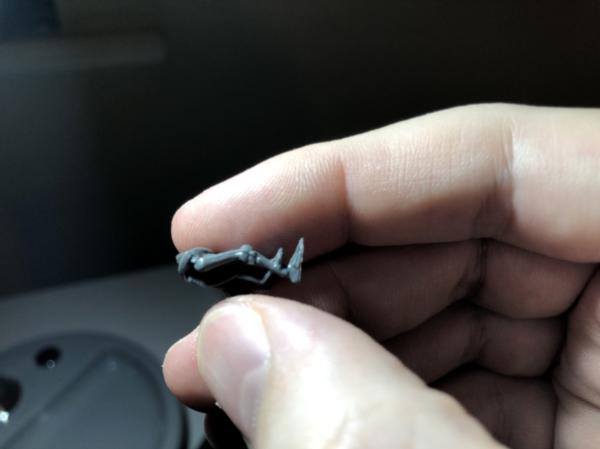
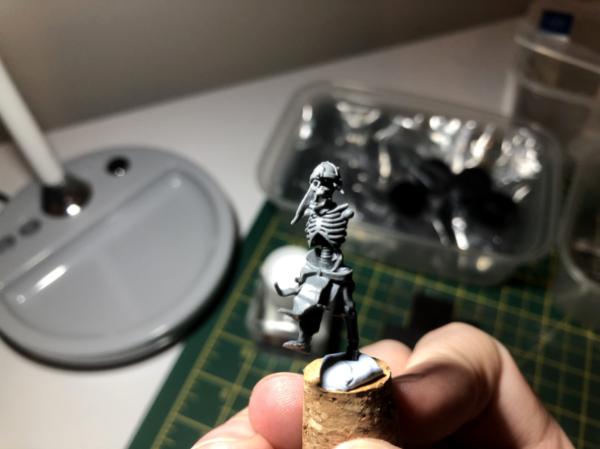
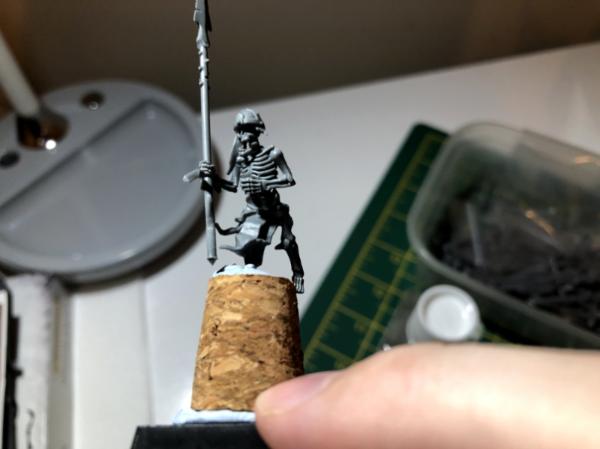
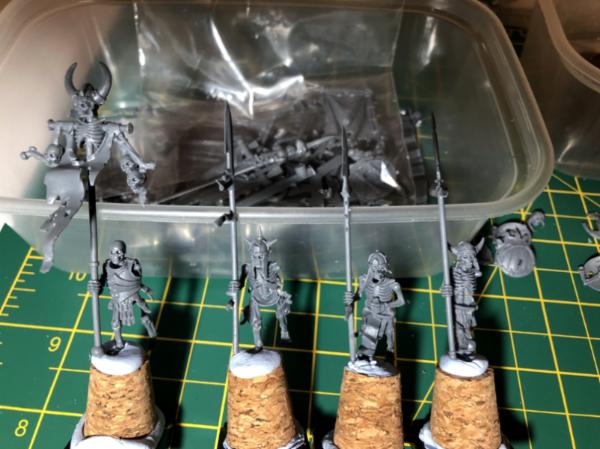
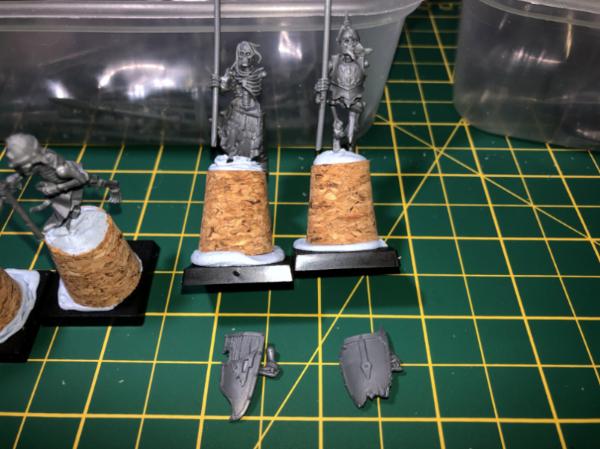
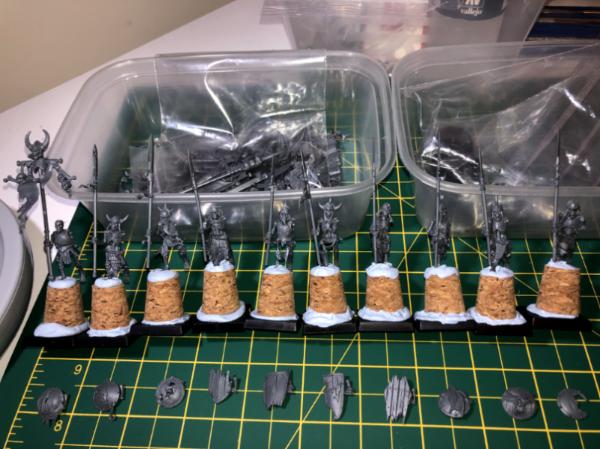
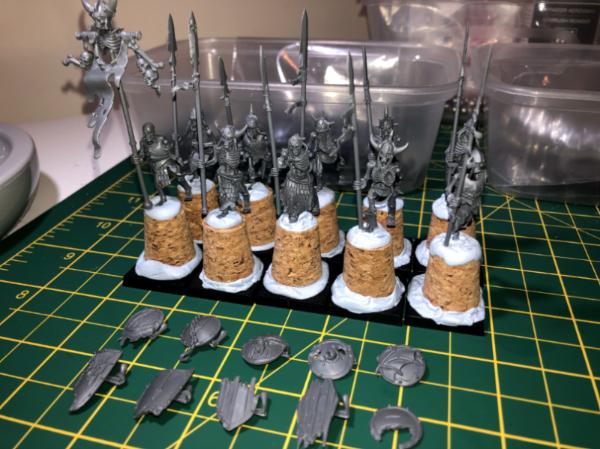
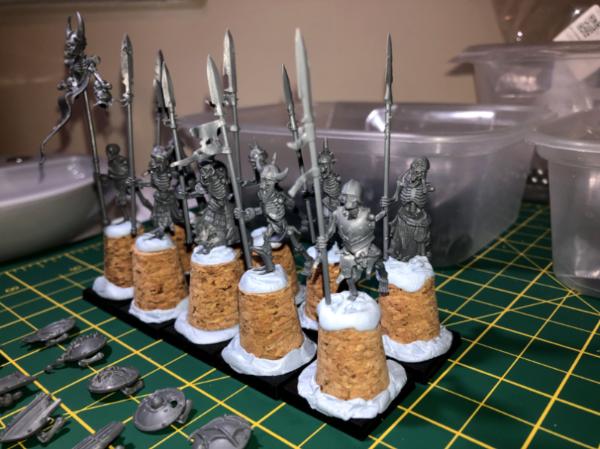
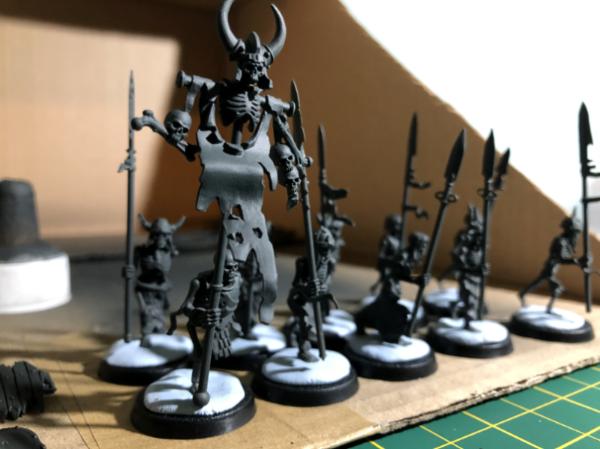
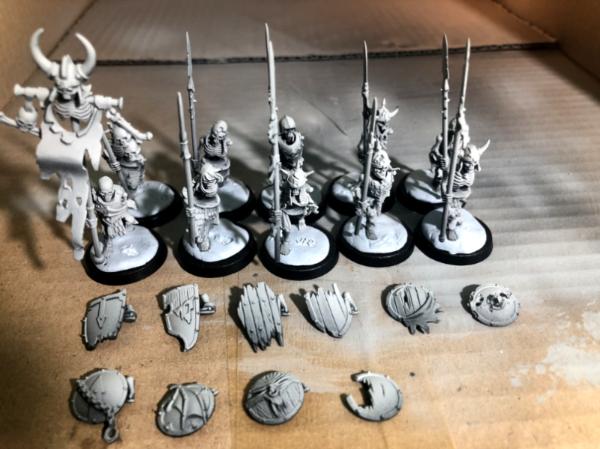
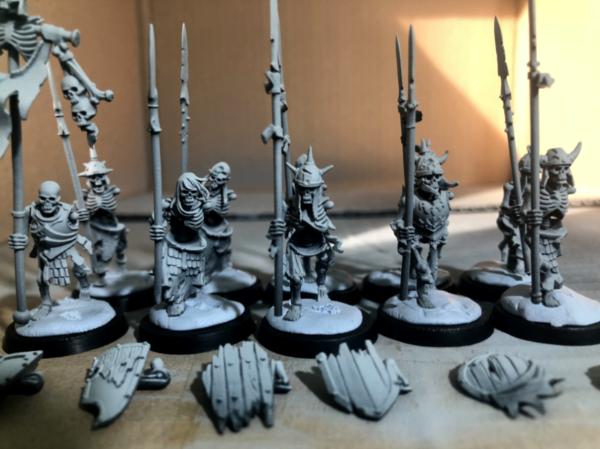
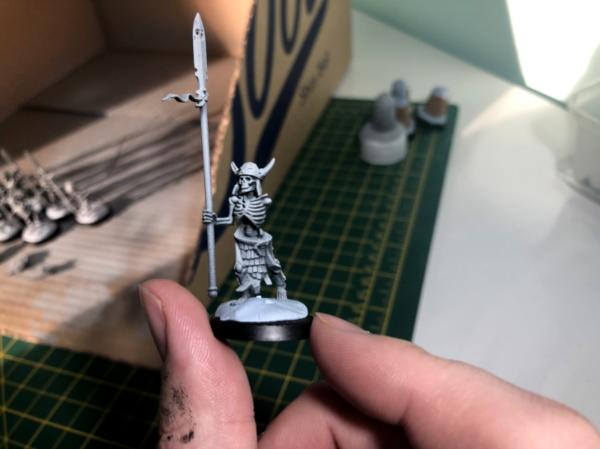
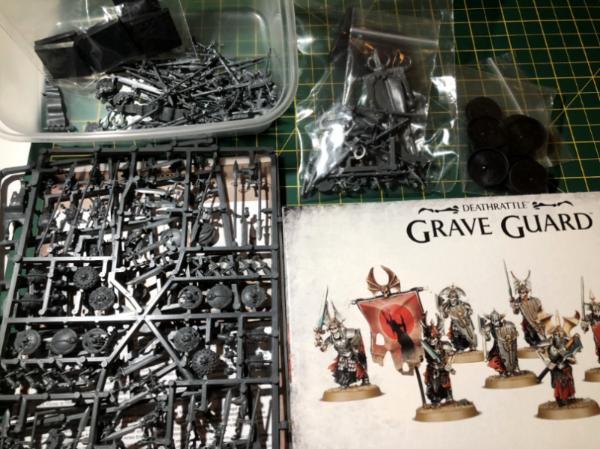
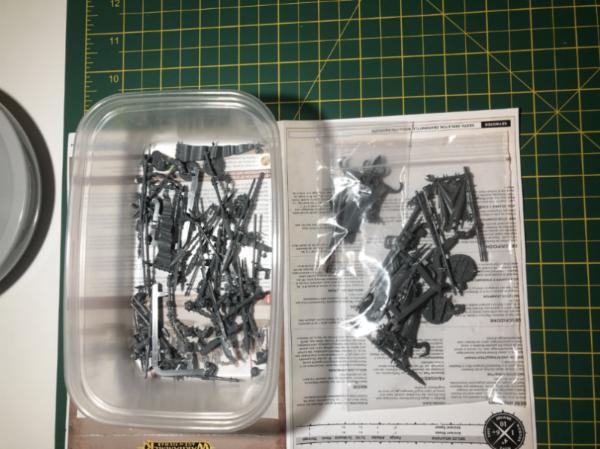
And some actual models at last. Ten Skeleton Warriors to start my army off. I also grabbed a box of Grave Guard, but not to build as a unit, for kitbashing and converting purposes. I've got my eye on the high crested helms for my Black Knights when I get some of them, and the rest can be used to spruce up and add variety to my regular skellies here and there. I've also grabbed a bunch of extra bits from a couple of bits sites for even more variety and some flavour and character when basing. Finally I had to buy some square bases separately as everything comes with rounds ones these days. So, I'm gonna say it... I'm a bit of a grumpy old man who doesn't like change, therefore WHFB > AoS. But also one of things I always liked about Fantasy was the regimented look of the units on the field arranged into neat blocks, so that's what I'm going for with my VC army - square bases for everyone!


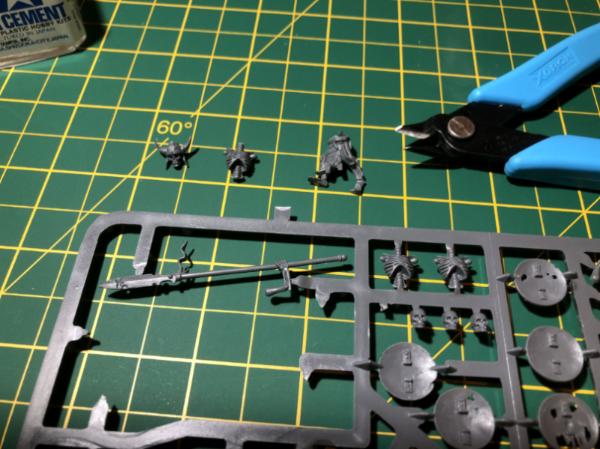
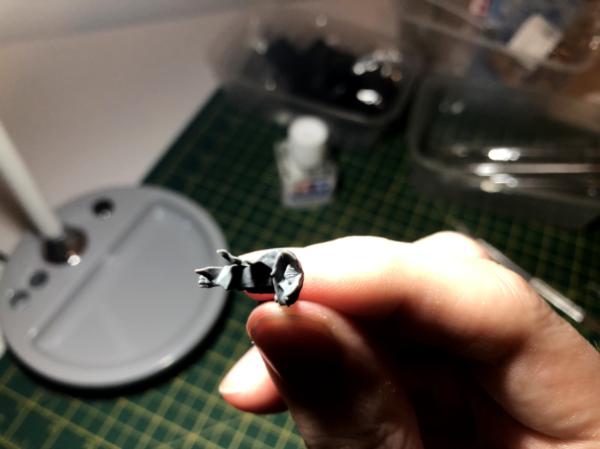
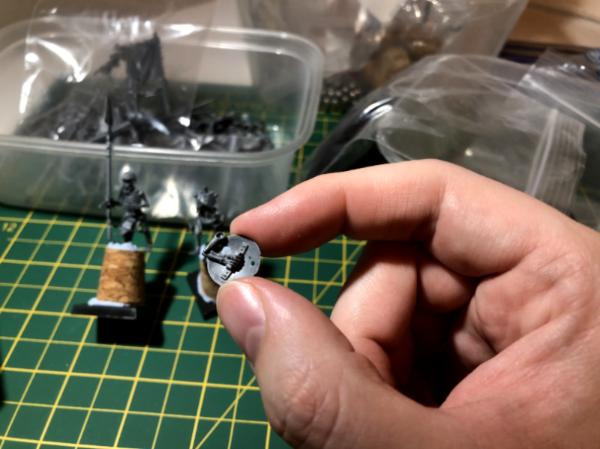
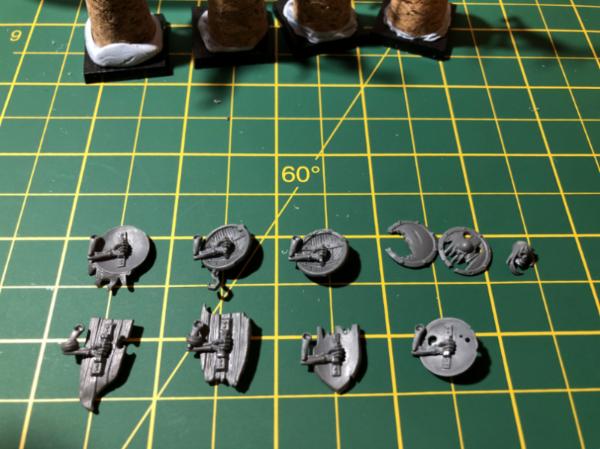
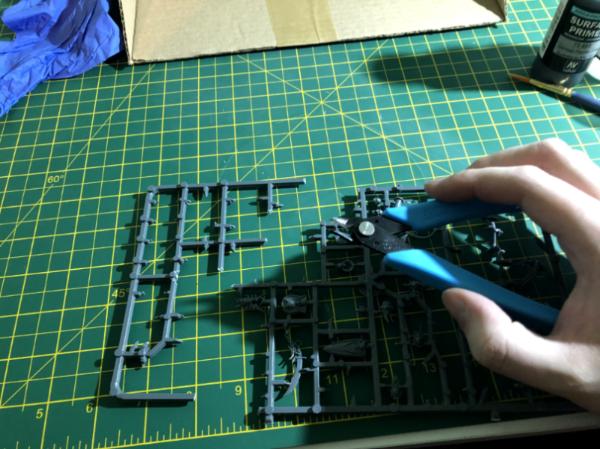
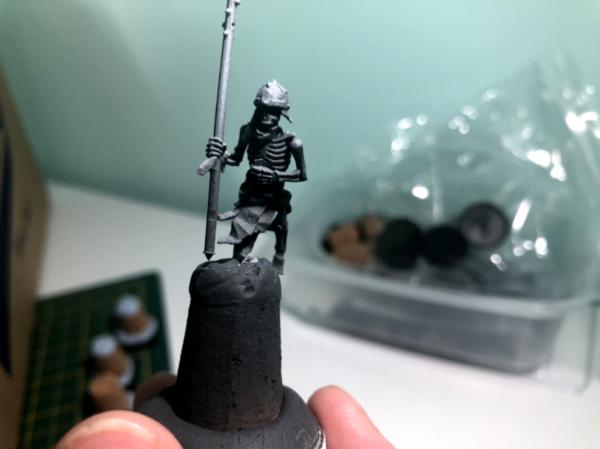
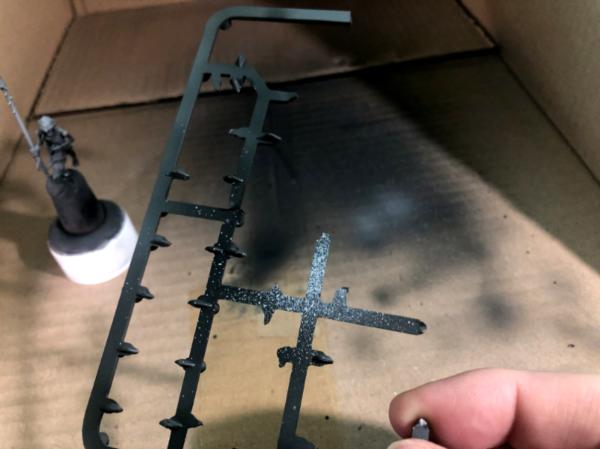
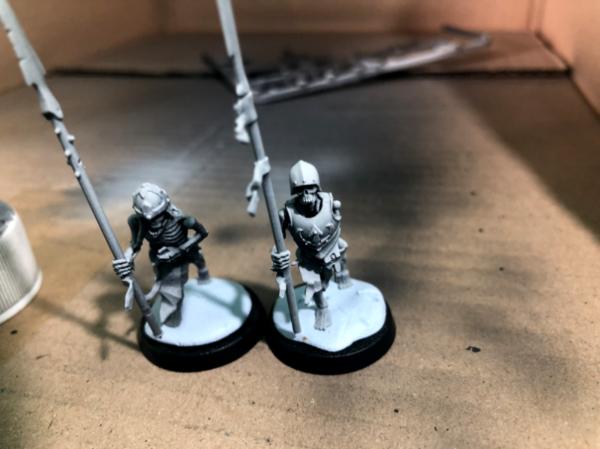
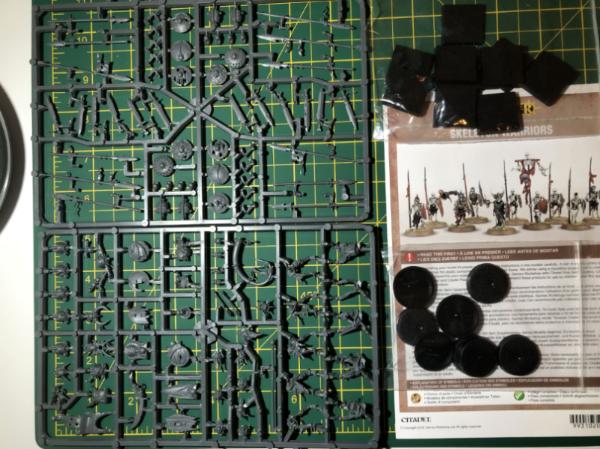
Close up of the Skeleton Warriors sprue (all my skellies will be getting spears because spear-blocks look cool);


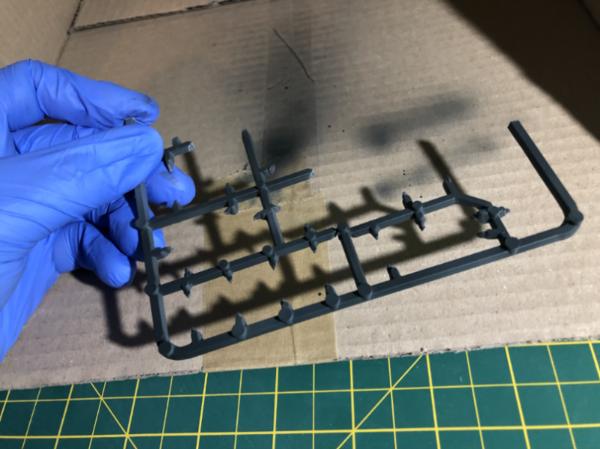
Close up of the Grave Guard sprue. I was a little bit surprised to find that it's just five sculpts repeated on two copies of three sprue pieces, instead of the standard ten. Meaning each unit can build two standard bearers, two musicians and two champions.


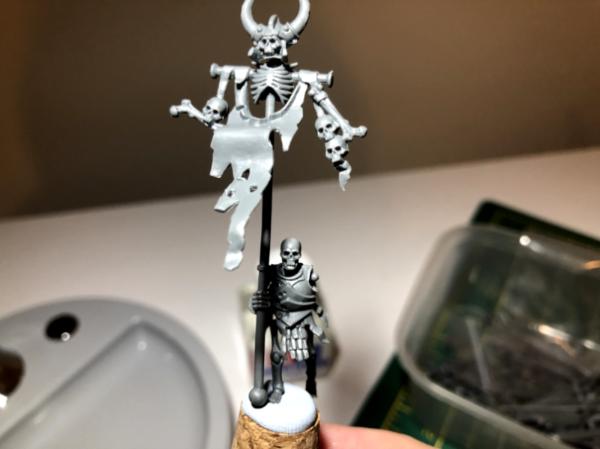
And here's my bits box, which has been filled with various banners, spears, chains, hooks, spikes, shields, skulls and heads, from Chaos, Beastmen, Skaven, even some 40K Dark Eldar... anything that looks grim or nasty or pointy I've grabbed for some extra flavour and character for when I do bases and things.


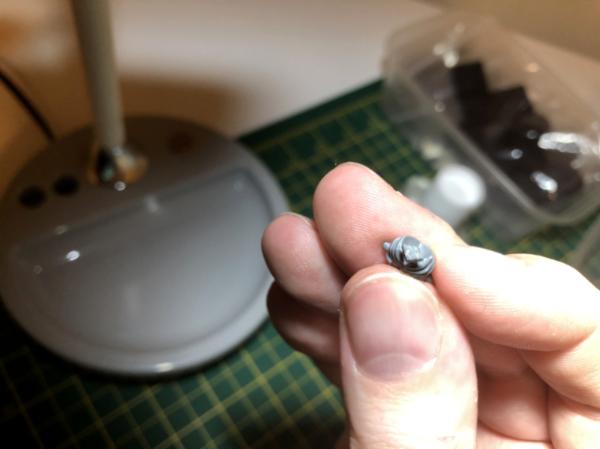
Just some funny perils of buying everything cheap online; first is the cork bungs that were advertised as "1 Gallon" ... whereas they're not nearly big enough to plug any gallon-sized receptacle I've ever come across. This highlighted to me how surprisingly difficult it was to find a reliable visual guide / reference for sizes through online pictures.


And also this "desk lamp" I bought that was shown in pictures to be regular size, whereas it's actually a book light that doubles as a novelty sized lamp.


The lesson here being don't be an impatient fool like me who just picks things purely off cheap prices and pictures without reading the full product descriptions and especially the size / dimensions.

So there we have it, 
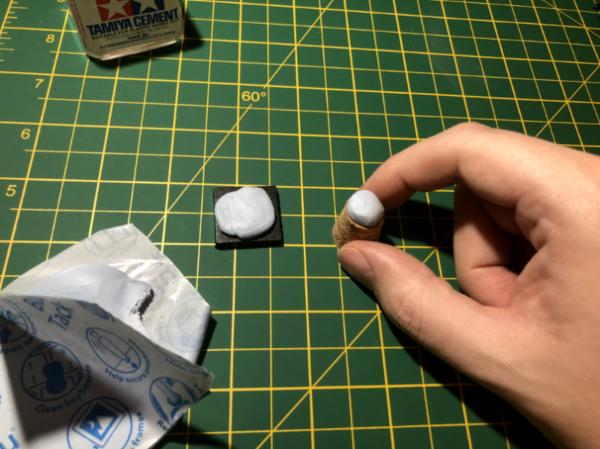
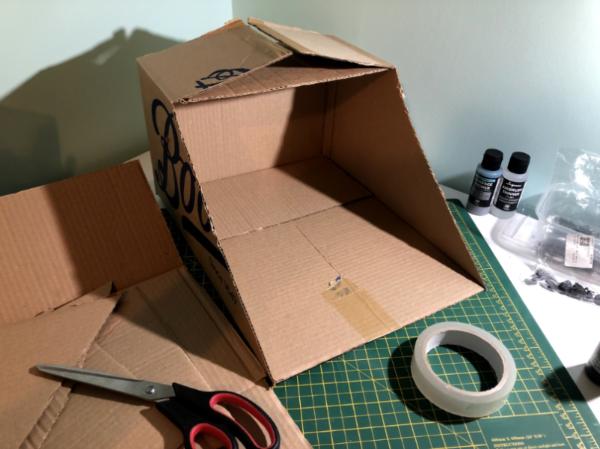
almost everything a complete beginner could possibly need to get into the hobby. The only things that are yet to arrive are my airbrush hose, my Master's Brush Cleaner and Preserver, and my second attempt at getting some decent-sized cork bases for stands / handles when painting my minis (which I've ordered from Green Stuff World as I gave up finding a cheap non-miniature marketed source of cork). I'm planning on DIY'ing a spray booth and also a wet palette for when I'm at the priming and painting stages (respectively). Onto the model prep and assembly stages, then!
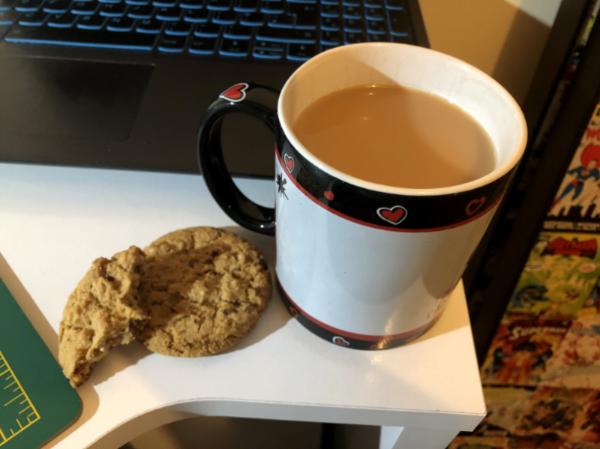
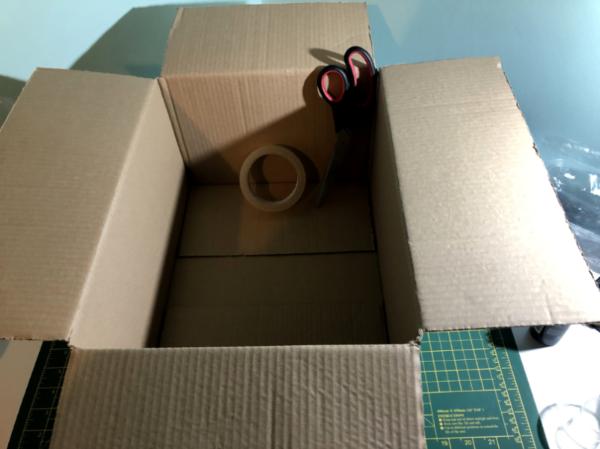
Oh wait, I forgot the most essential, important thing of all before I can get started...


Homebrew Imperial Guard: 1222nd Etrurian Lancers (Winged); Special Air-Assault Brigade (SAAB)
Homebrew Chaos: The Black Suns; A Medrengard Militia (think Iron Warriors-centric Blood Pact/Sons of Sek) 
   
Made in gb
Walking Dead Wraithlord


That light... hahaa!!! Gold.

Id return it man.
You can get some nice lamps of amazon.
Idealy you want a daylight lamp those things are bright af.

https://www.dakkadakka.com/dakkaforum/posts/list/772746.page#10378083 - My progress/failblog painting blog thingy

Eldar- 4436 pts


AngryAngel80 wrote:
I don't know, when I see awesome rules, I'm like " Baby, your rules looking so fine. Maybe I gotta add you to my first strike battalion eh ? "


 Eonfuzz wrote:


I would much rather everyone have a half ass than no ass.


"A warrior does not seek fame and honour. They come to him as he humbly follows his path"  
   
Made in ca
Regular Dakkanaut


Oh Canada!

Aw, that lamp is adorably small. Not very practical but my inner child is delighted. If you're looking for big corks, try 'mason jar cork' or 'wide mouth jar cork' as search terms. They're pretty big! Blu-Tack and a spare small jar or pot will get you started in the meantime.

Only thing I'd add to your setup beyond what you're already planning is a notebook. Keeping track of what mixes you use for models, which paints you liked or ratios for washes & glazes is surprisingly handy. If you get an artist one with thicker paper you can even keep paint swatches in there.
   
Made in fi
Phanobi


Good luck!

Read 28-mag.com yet? 
   
Made in fi
Locked in the Tower of Amareo


That lamp is funny as hell

Now waiting for first painted model

2024 painted/bought: 109/109 
   
Made in au
Alluring Mounted Daemonette


Australia

Hey mate, welcome to Dakka! (or at least to the P&M blogs section )

The scene is nicely set to see those minis get some love. I laughed out loud at the lamp mishap - been there before!

Love the old school WHFB stuff and excited to see how you progress with the project. Good luck!

This message was edited 1 time. Last update was at 2020/12/16 08:15:18


t z you are k 
   
Made in gb
Wing Commander


Hello peeps, finally got the assembly done on my skellies after some Christmas-themed distractions. First up is, of course vital fuel for the modelling; cup of tea and some apple crumble flavoured cookies (very nice)!


Although small, the cork bungs still came in use as stands, so I blu tacked them onto a plastic base and then tacked the minis to the top of the cork.


Assembly obvioulsy began with me cutting pieces from the sprues. I tend to decide on what legs and torso to use first, followed by which head to put on top.


Clean up consisted of using the hobby knife to scrap away mould lines and the diamond files to smooth off sprue tags. I found the files a little too big to get into all the nooks and crannies properly, so might need to look into buying even smaller ones. I fear some of it will show up in the paint job, we'll see. I tried to get a pic of a mould line running down the length of the leg, but it didn't come out very clear. The worst lines on these guys are the ones that run down the middle of their knuckles and down the sides of their rib cages, which are almost impossible to get at for a completely clean, smooth finish.


For gluing the pieces together, I made criss-crossing scores with my knife. I have no idea if this actually helps, but I think I've read / seen a video once where if you make a rough, irregular surface with some tooth to it, the poly cement seeps into the grooves and forms a better, more solid bond vs. simply two flat surfaces pushed together. I guess it couldn't hurt, either way? Tried to get a pictures but not sure how clear it is.


My first skellie. I started with gluing the torso to the legs, followed by the head to the torso. Then the arms were added. Spears and shields. This first one I glued the shield arm on without the shield, which I'm leaving off for painting purposes. Then I realised that I'd glued the arm too tightly drawn in against the body, which will make attaching the shield difficult later on.


So instead of trying to guess where the shield arms will best be placed, I decided my sub-assembly for painting will have the shields glued onto the arms separately, which can then be glued and positioned easier after painting.


Next up is the Standard Bearer. I wanted use the head with the flowing hair, but found it didn't fit quite right with the breastplate torso I'd selected, so I went with a generic bald head instead as there's nothing hanging down against the chest.


First four skellies assembled.


For the next few guys I started mixing in pieces from the Grave Guard kit, armoured legs with plain torso or armoured torso with plain legs to keep them from looking too different from their comrades. I've also used some of the Grave Guard shields to mix things up and add further variety to the squad, as well as a couple of the non high-crested, more 'normal' looking heads (not pictured here).


And here we have them, all ten glued and assembled and ready for priming.


Homebrew Imperial Guard: 1222nd Etrurian Lancers (Winged); Special Air-Assault Brigade (SAAB)
Homebrew Chaos: The Black Suns; A Medrengard Militia (think Iron Warriors-centric Blood Pact/Sons of Sek) 
   
Made in ca
Regular Dakkanaut


Oh Canada!

Lookin' good!
For the mould lines, a hobby knife / x-acto blade generally does a good job of scraping off the unwanted plastic, especially in tight areas. I have a dull blade I keep around specifically for this purpose.

Really really fine sandpaper is also an option, the kind that's used to polish polycarbonate can get all the way up to a mirror shine. Wet-dry automotive sandpaper in 600+ grit is more commonly accessible and works too. Can be cut to size and glued to a wooden popsicle stick of any size/shape you desire.

All those skellies look like they're perched on snow covered hats - a good solution to your temporary mounting challenge.
   
Made in gb
Wing Commander


Hey peeps, so after some delays in having some painting and decortating of the spare room (my current hobby space) done, and also some procrastination on my part for never having used an airbrush before or done any actual painting for so many years... I've finally made some more progress. Yay.

So first I set about making a DIY spray booth from a simple cardboard box, cut to shape by some scissors and cellotaped up all the seems and corners where I could see light coming through the small holes.


Next came setting up the airbrush, the stand / cleaning pot, the compressor and the air hose.


Connecting the air hose first to the compressor by screwing one end onto the connector that's on the part with the moisture trap and pressure gauge. The airbrush came with like a quick connector already attached, which had to be unscrewed and removed in order to screw the hose connector onto it instead.


Turning on the compressor on for the first time made the gauge rise steadily all the way to 60 psi, despite me turning the adjuster knob both ways to try and stop it. Once the pressure settled I finally managed to get the pressure to lower using the adjuster, however. I turned until it dropped below 20 psi to reach that desired 15-20 sweet spot for priming (apparently). I realised that when the trigger is pressed on the airbrush, the gauge immediately drops by a further 5 psi or so, therefore I increased the standing pressure to the 20 mark to that when the trigger is pressed it drops to around the 15 mark.


I've got two shades of Vallejo Surface Primer to do my zenithal airbrushing; German Panzer Grey (dark) and USN Light Ghost Grey (light). I added stainless steel ball bearings as agitators to all my paints including the two primers. Now, I got these online and they were advertised as marine grade, true stainless steel and therefore won't rust in paint, but I've read a few horror stories of ball bearings rusting and ruining paints despite being advertised and sold as stainless steel. Therefore before adding them I did two tests that tell the fakes from the true; first I tried a magnet on them and there was no attraction - passed. Then I boiled some water and dissolved some table salt in it in a glass and then added a couple bearings and left them in there for a couple of days. No rusting occured - passed!


Read to get priming! Airbrush attached and ready in its holster. Primer and airbrush thinner (also from Vallejo). A nitrile glove (large), a small measuring pot and one of the cheap brushes for mixing (pipette wasn't needed).


I didn't want to dive striaght in on one of my skellies, so first I practiced on some empty sprue that I clipped off so that I could get a feel for using the airbrush in terms of its trigger action and the distance and how the primer behaved while being sprayed. The mix I used was 1:1 primer to thinner, so I filled the measuring cup to the 2.5ml mark with thinner, then added the primer to the 5ml mark, then it was mixed with the brush and poured into the airbrush cup. I was happy with how easily and smoothly it went onto the sprue.


Ready to move onto my skellies now, I assembled a bigger, more robust mount for priming by using a pill bottle top with plenty of blu tac on it, to which I stuck one of my little cork bungs topped with another generous amount of blu tac with which to hold the model in place.


I'm really happy with the results of the Panzer Grey, and the 1:1 mix seems to do the trick nicely. It went on really easily and really smooth. It's hard to tell that it's even primed until you compare it with some non-primed plastic. For someone who's a complete noob at this the airbrush allowed me to quite quickly and easily have the ten done nicely.


The next day it was time for the light grey zenithal priming. Now, this went less smoothly. First of all it came out the airbrush a bit splattery and sputtery, and the first skellie I tried it went on very grainy. I'd not practiced first on the piece of sprue first, so I switched to that but the effects got worse and worse, primer wasn't coming out and I had to pull back on the trigger more and more, leading to an even worse splatter effect. I finally realised the issue was that after turning off the compressor the night before, I'd not turned it back on, meaning I'd steadily lost all of my pressure!


So... after turning the compressor back on and getting back to the steady 15-20 psi I tried again; surprise surprise the results got better after that, and the second skellie got a smoother, much less grainy finish.


I found the light grey harder to work with compared to the dark, whether that's just how it works for light colours vs dark colours I'm not sure, or maybe the primer : thinner mix needs tweaking a bit for the light grey, I dunno. It was a slightly less smooth, less easy time compared to the previous day's work, but I eventually got the ten skellies and the shields done, and am still very pleased with my zenithal results.


Easy parts are now done. Next comes the actual painting! Arrggh!

This message was edited 1 time. Last update was at 2021/02/11 19:09:04


Homebrew Imperial Guard: 1222nd Etrurian Lancers (Winged); Special Air-Assault Brigade (SAAB)
Homebrew Chaos: The Black Suns; A Medrengard Militia (think Iron Warriors-centric Blood Pact/Sons of Sek) 
   
Made in us
Dakka Veteran


Columbus, OH

What a great start, excited to see where your hobby journey takes you. Getting started can be hard, but once you're up and running you'll find the hard part can be trying to stop!

Thanks,

MegaDave  
   
Made in ca
Grisly Ghost Ark Driver


That's a fantastic start, the zenithal looks really good!
*googles 15-psi*
oh.
That would explain a lot of the trouble I've been having!

See what's on my painting table Now painting: Gravis Captain 
   
 
Forum Index » Dakka P&M Blogs
Go to: