Forum adverts like this one are shown to any user who is not logged in. Join us by filling out a tiny 3 field form and you will get your own, free, dakka user account which gives a good range of benefits to you:
No adverts like this in the forums anymore.
Times and dates in your local timezone.
Full tracking of what you have read so you can skip to your first unread post, easily see what has changed since you last logged in, and easily see what is new at a glance.
Email notifications for threads you want to watch closely.
Being a part of the oldest wargaming community on the net.
If you are already a member then feel free to login now.
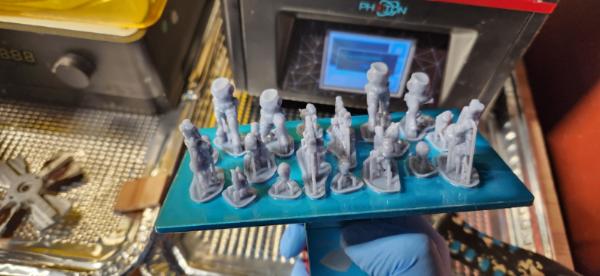
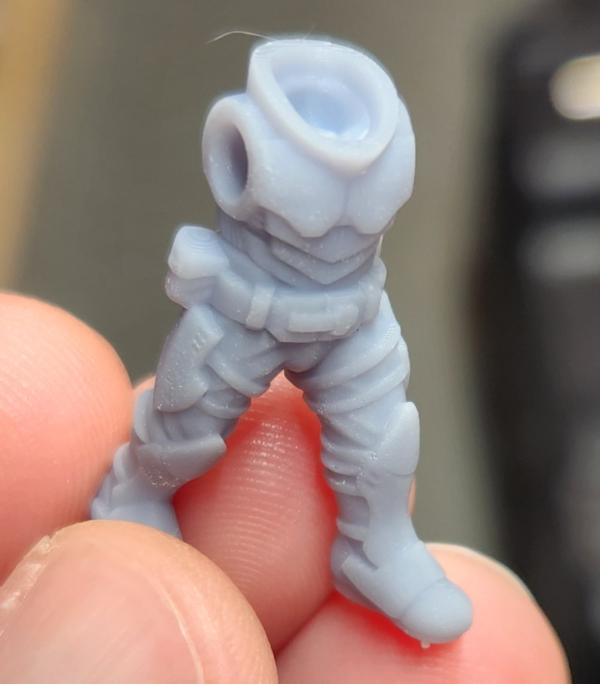
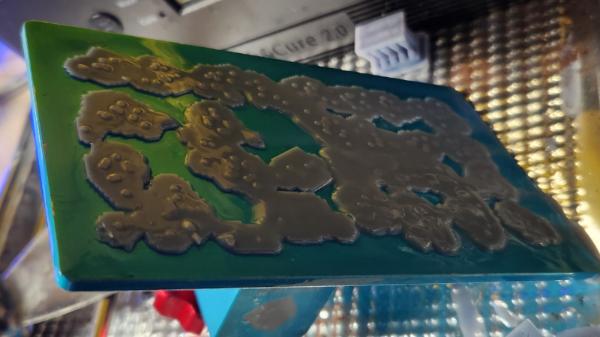
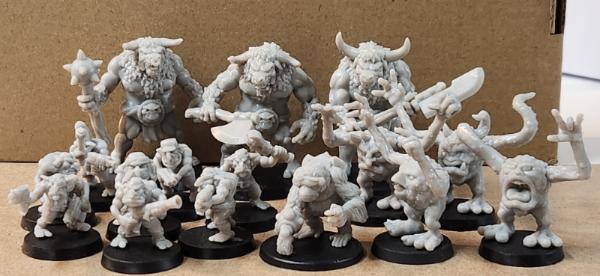
Well, I picked up a used Photon for $50 well over a year ago and am finally getting around to giving it a shot. First plate of minis only had one fail, so that's encouraging. Quality seems to be okay for now. Have some Maelstrom's Edge minis I've wanted to print for a while, so figured I'd start with them. Using Lychee for a slicer so far and it's working alright.
Trying to figure out if I keep going with this or pick up a Saturn for around $300 since it would print faster with better quality and could fit more figures on the build plate. For now I'll keep going with this unit.
I know nothing about Photon, but as for the Saturn, I typically hear people warn newbies away from it, as it brings a host of weird physics issues thanks to the big plate (like suction pulling prints off the plate in between layers, etc) and that huge vat is a pain to clean out all the time if you're having things detach. That said, it's a helluva machine, especially if your goal is volume of miniatures. I've personally dodged the Saturn because I already print too much and don't need to generate more faster
I'm torn. I'd like to be able to have a plate of minis done in under 3 hours so I can have time to do set up and clean up in one night. Right now the Photon takes 4+ hours. I guess I could get a newer Photon or a Mars. That would cost less too. Had a few more fails, so I'll have to clean the vat out and see if anything is stuck, but the nice thing about filling up the buildplate is there are still fun things that haven't failed.
2023/12/19 22:16:52
Subject: Re:getting started with resin 3d printing
Could I recommend getting a flexible, magnetic build plate? Rather than having to scrape models off the build plate you just pull off a magnetic sheet flex it and off pops the models. Means you don't have to relevel the build plate which is a really common cause of print failures in my experience.
Newer printers aren't really much faster and often you'll find that the marketing for "superfast speeds" is a combination of them using a very thick layer height (eg 1mm) and also using vroom or fast lifting speeds, which isn't bound to a specific printer body.
It just means they are using 180mm lift speeds instead of 50 or slower for their normal layer lifting speeds.
Otherwise it will take hours, that's just part of 3D printing and unavoidable at this point in time.
Automatically Appended Next Post:
cody.d. wrote: Could I recommend getting a flexible, magnetic build plate? Rather than having to scrape models off the build plate you just pull off a magnetic sheet flex it and off pops the models. Means you don't have to relevel the build plate which is a really common cause of print failures in my experience.
They're like 10 or 20 from amazon, well worth it.
If you're having to relevel the build plate that often then you've not set it up correctly to start with and/or your scraping method is dangerously bad. Once setup the build plate shouldn't need re-levelling for ages.
flex plates can work well and they can be a source of errors. In general if you're printing with rafts and presupports you shouldn't need a flex plate to get the model off. I think flex plates have a place if you are printing flat on the build plate, but otherwise you shouldn't need one at all.
This message was edited 1 time. Last update was at 2023/12/19 22:35:36
bbb wrote: Right now the Photon takes 4+ hours. I guess I could get a newer Photon or a Mars.
My first printer was a Mars 1 Pro, and I got really used to 7-13 hour prints. Then I got a Mars 4 Ultra this summer/fall when it released and I was blown away by how much faster it is. Like, it's literally twice as fast! I chose it over a Saturn 1, which had finally dropped to $300 (so same price), and have no regrets. The extra speed means I'm already churning out way more than I can do anything productive with
Oh, I'm also not a magnetic plate user. I've seen more negatives than positives, and the way the Ultra's print plate attaches I don't see releveling being much of an issue, even if I dropped the thing while scrapping prints off.
This message was edited 2 times. Last update was at 2023/12/20 15:31:12
Do you need a specific resin to get those fast prints on the Mars 4? What about it gets those results?
Everything I've looked at so far has to do with UV light curing the resin, so where does the speed increase come from?
Had some resin stuck to the fep. Managed to make the problem worse, so now it looks like I need to replace the fep. Ordered a 2nd vat so I can try to have one handy in case I need to replace the fep in the future again.
Lots to learn.
This message was edited 1 time. Last update was at 2023/12/20 19:15:16
For easy FEP cleaning watch this (his other videos are also great). This video covers pretty much any printer, even those which don't have this tank clean feature built in
Everything I've looked at so far has to do with UV light curing the resin, so where does the speed increase come from?
There are a couple factors there that make some of the newer printers faster. One is that newer resins formulated for them may have slightly less cure time required in general, which certainly helps. The bigger thing, though, is the strength of the light in the newer, especially monochrome, printers. Also, some are using different materials for the vat film (FEP, nFEP, ACF) which can lead to faster lift times, which saves surprisingly a lot of time when added up.
You can also get a little bit of a speed increase depending on the bed lift and retract speeds, but that can get wonky if you dial it in wrong and lead to more failed prints or torn nFEP.
Even with "standard" resins, though, newer printers often can still do a faster cure than older ones with lower light output. To get the most in speed and quality, it's a juggle between finding a resin that works best with whatever machine you have.
This message was edited 1 time. Last update was at 2023/12/21 16:10:33
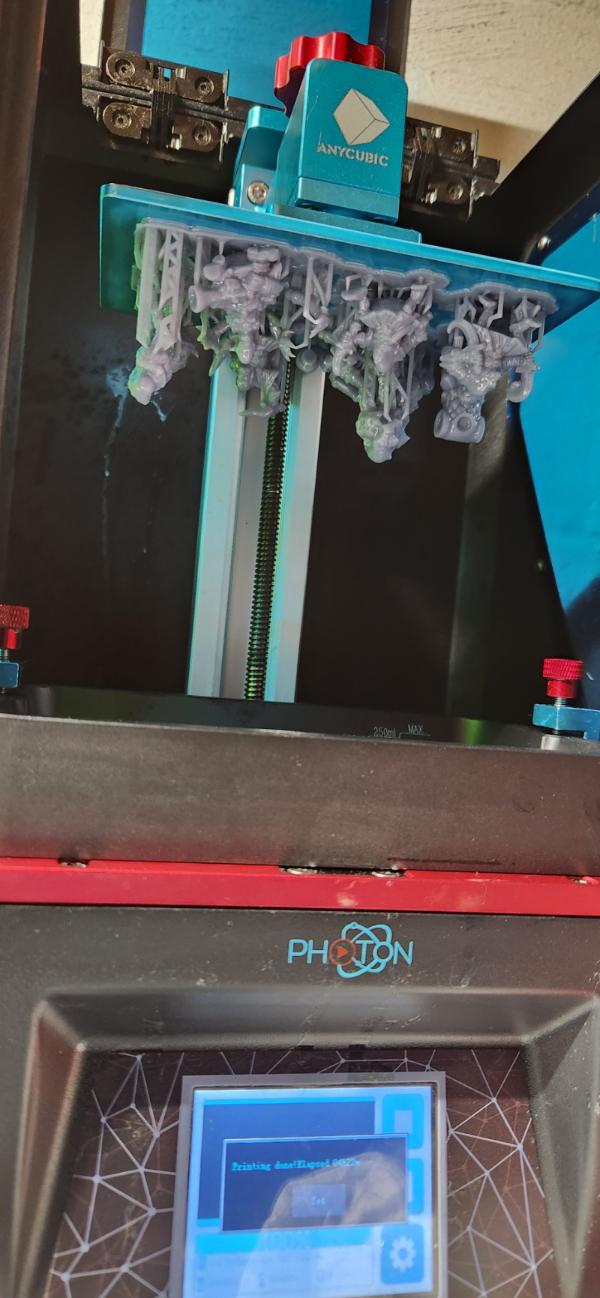
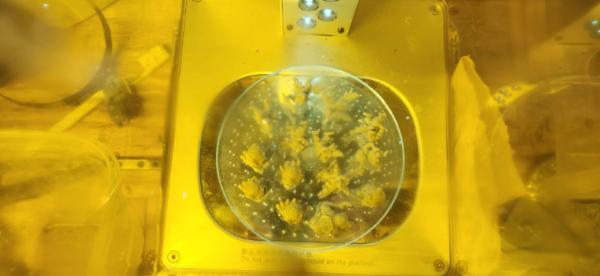
Spare vat came in with fep already installed so got back to printing.
Still have some failures, but mainly on free models I found and created the supports on my own. Even still, having a full build plate means there's plenty that we're sucessful.
Thanks for the video above, Overread. I used that technique and it worked great.
Automatically Appended Next Post: ... and just had my first full plate fail.
Adding insult to injury, when I ran the fep cleaning print, the support I placed in the vat didn't adhere to the cured layer so now I have a solid layer of resin with no easy way to pull it off.
Oh well. Back to troubleshooting.
Automatically Appended Next Post: Ended up taking the vat out, draining most of the resin, and used some cardboard to mask the edges so I could use my daughter's UV nail polish curing light to cure a support to the sheet of resin stuck to the fep without curing the whole vat of resin.
Whew.
Now the printer is going brrrrrrrr again, so hopefully we get a success!
This message was edited 2 times. Last update was at 2023/12/23 22:23:17
Overread wrote: For easy FEP cleaning watch this (his other videos are also great). This video covers pretty much any printer, even those which don't have this tank clean feature built in
Dennys Wang's channel has some great videos especially if starting out, well worth spending an afternoon watching them,
I cannot say enough good things about my Saturn. I started FDM, but went with resin on an original Mars and probably had well over 1500 runs on it before I got a Saturn and I love it. Just get it dialed in and no sweat.
Nice to see someone getting some good use from the STLs!
Nice, clean prints, too. I think it took me a while to get the Photon printing that smoothly. I wound up upgrading to the Mono 4K during one of Anycubic's periodic half price sales, and have been loving the prints from that.
Original Timmy wrote:
Dennys Wang's channel has some great videos especially if starting out, well worth spending an afternoon watching them,
Thanks, I'll have to dig into that channel some more.
MDSW wrote:I cannot say enough good things about my Saturn. I started FDM, but went with resin on an original Mars and probably had well over 1500 runs on it before I got a Saturn and I love it. Just get it dialed in and no sweat.
I'd really like to get a newer printer, but since the Photon is working so far, I'll try to work on getting a good workflow together and then plan out a future printer purchase. Ultimately I'd like to be able to:
print bigger
print finer resolution
print faster
insaniak wrote:Nice to see someone getting some good use from the STLs!
Nice, clean prints, too. I think it took me a while to get the Photon printing that smoothly. I wound up upgrading to the Mono 4K during one of Anycubic's periodic half price sales, and have been loving the prints from that.
Thanks for making MEdge, insaniak! I've built MEdge models, printed Medge models, made suggestions on MEdge rules... Now I really need to get around to painting and playing MEdge. Hopefully 2024!
There've been some fails, but overall I'm shocked how relatively smoothly it's running.
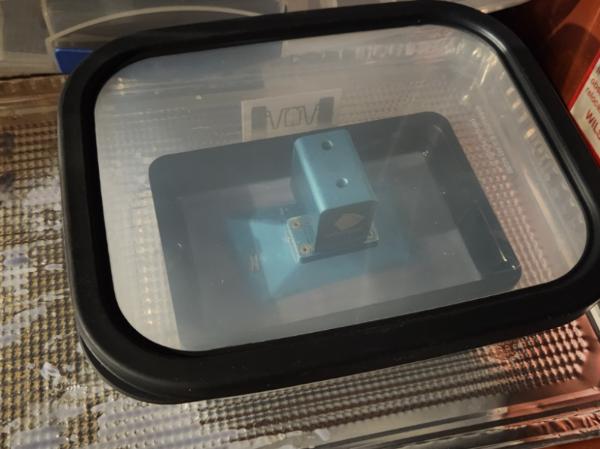
Took a break from printing to work on my setup.
Picked up an airtight food container to keep my vat and buildplate in so I didn't have to drain it when not in use.
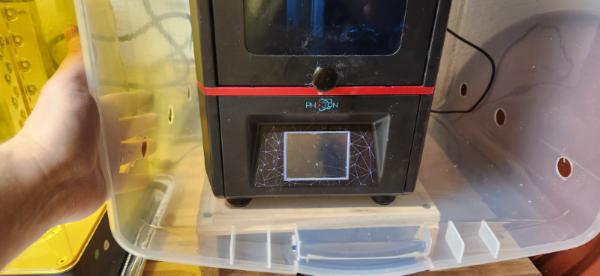
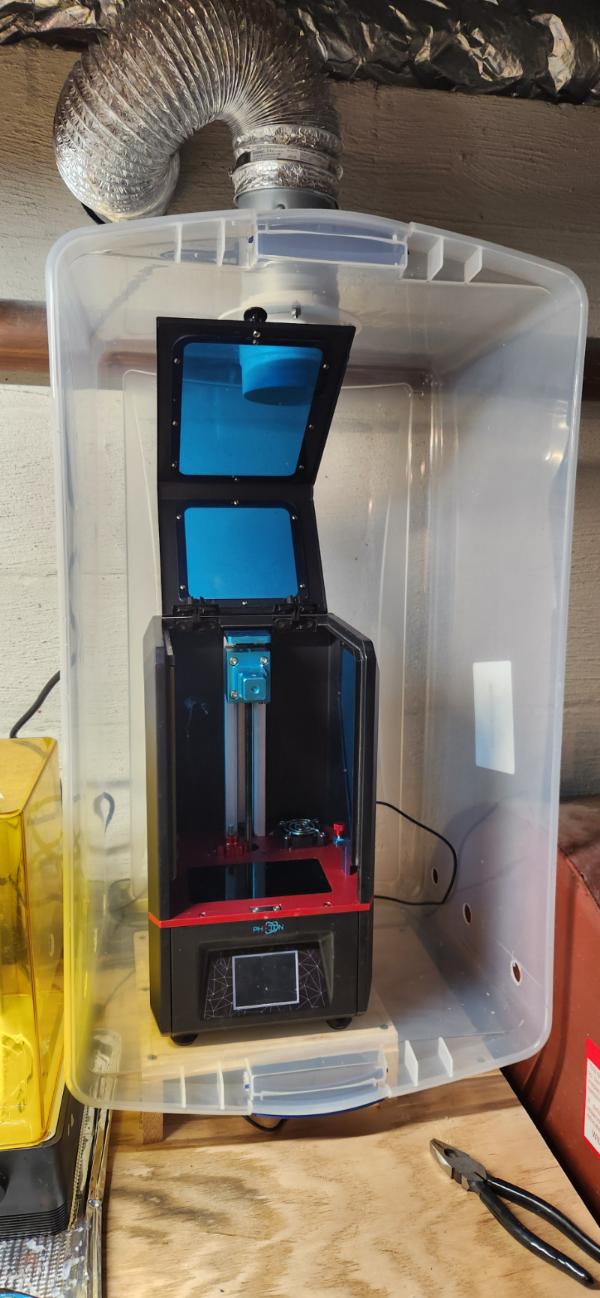
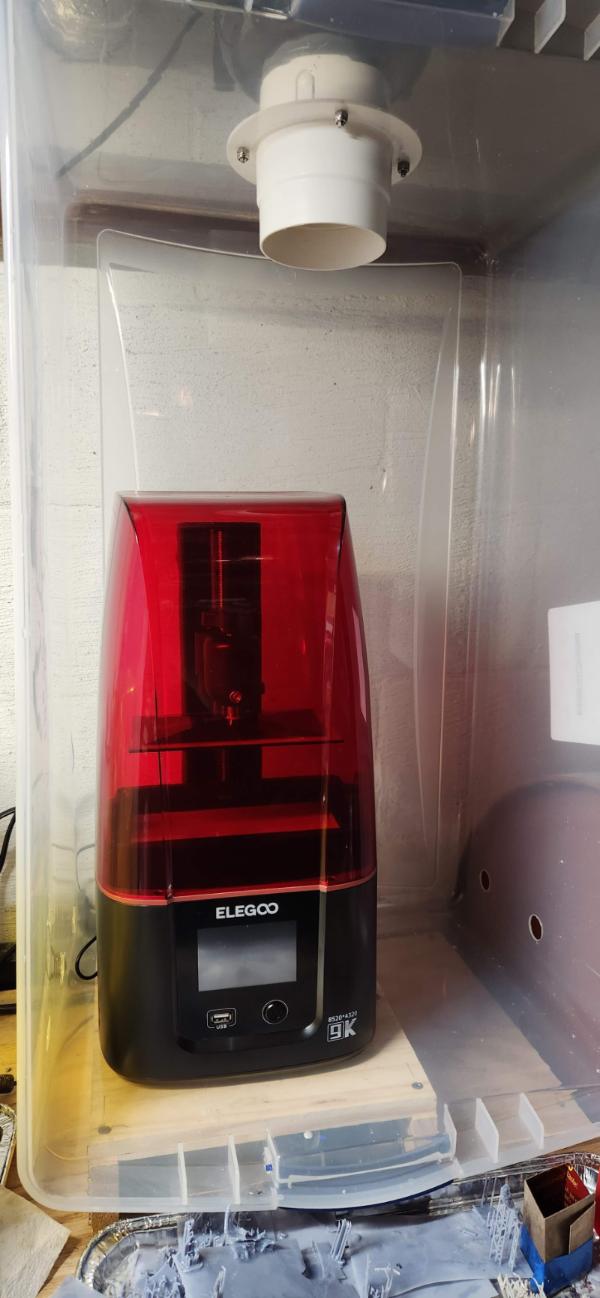
Then bought a large clear box to contain the printer so I could vent it directly outside. I'm not sure how effective it will be, but I want to make sure I'm being as responsible as I can be for my family.
Drilled holes in the back for the plug and the sides to help pull the air from the bottom to the top. Not noticing a difference in the fan sound when the front is closed, so between the lid gaps and the holes I'm hoping that the airflow is sufficient. If not then I might have to pick up a more powerful fan.
I had to go with such a tall box to account for how the Photon opens up.
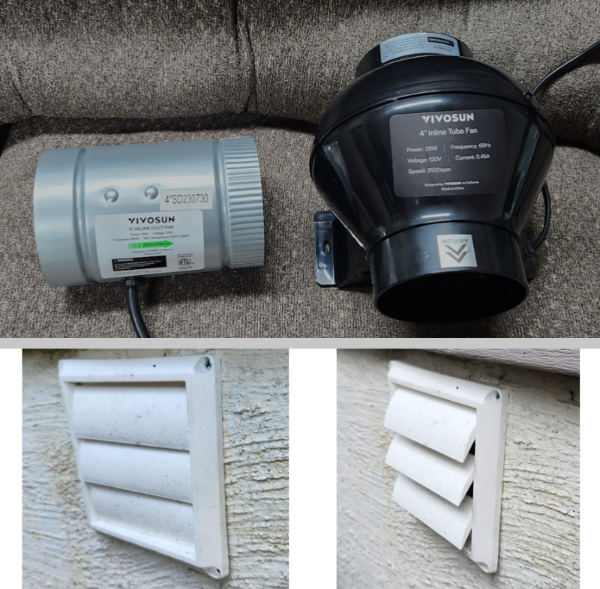
Total cost for the box set up so far is around $60. Approximately: $15 for the box, $13 for the fan dock used on the top, $27 for the inline fan, $5 for the worm clamps.I had the other odds and ends already.
Newer printers aren't really much faster and often you'll find that the marketing for "superfast speeds" is a combination of them using a very thick layer height (eg 1mm) and also using vroom or fast lifting speeds, which isn't bound to a specific printer body.
It just means they are using 180mm lift speeds instead of 50 or slower for their normal layer lifting speeds.
Otherwise it will take hours, that's just part of 3D printing and unavoidable at this point in time.
Unless you're talking about going from the old style printer to a mono, that is genuinely a big speed increase because exposure times go from several seconds down to 1 to 2 seconds.
I don't know whether that Photon is a mono or not, I imagine it isn't?
Oh very true! I forget about RGB as I got in with the Mimi 4K so I was part of the monoscreen revolution and never experienced the RGB system.
But yes if you had a much older printer or picked up a super super cheap RGB then that would have much much longer exposure times than the current mono-screens.
So basically the RGB screen block more UV light going through them than the mono-screens. The screen is only there to block/permit the light passing through it from the UV light source. So RGB have more layers to them which means more light gets blocked so the UV light has to remain on for longer to expose the resin.
I believe resolution also improved because of fewer layers and thus less light scatter.
How fast varies because of layer thickness, UV power levels and UV wavelengths, but in general I'd say you could at the very least halve your exposure time for a mono-screen.
Yeah, on my Mono 4K I'm currently printing with Anycubic Tough resin, layers of 35um, and 2.9s exposure. A vertically oriented 28mm model takes about 5 and a half hours. I think it goes down to around 3 hours at 50um.
Some resins on mono screens will get down to 2 seconds per layer.
This message was edited 2 times. Last update was at 2023/12/31 21:15:17
The non-mono screens are very similar to a screen that you'd find in a monitor or a laptop or a tablet. It has red green and blue "pixels". They weren't specifically designed for UV light, so were very inefficient at letting UV through. This meant a ton of light got blocked by the screen, which meant longer exposure time and shorter lives before things started to die.
Eventually they started making mono screens that only have pixels designed to be more efficient with UV rather than your typical red green blue, so printers got a whole lot brighter without having to upgrade the light source or power rating.
My Photon Mono SE, I use 1.2 to 1.4s exposure time... I could definitely drop it down to less because I can see my models are overexposed, but I REALLY hate cleaning up failures as I'm sensitive to the resin and so can't work with it for any period of time, so I err on the side of overexposure.
This message was edited 1 time. Last update was at 2024/01/01 06:42:37
Upgraded my vent fan. First one I picked up moved about 100 CFM, but you can see in the picture that it barely moved the vent gates. New one moves 195 CFM and is noticeably better not just visually, but I can feel it pulling the door in when I close my "enclosure." It didn't cost that much more than the first, but it does draw more current, so it will technically be more expensive to run, but I doubt I'll run it enough for that to be an issue.
Feel a lot better about leaving the printer running without poisoning my family now.
Returned to work from Christmas/New Years break to find I got some reward points for doing a call-in over vacation, so I'm thinking about picking up an Elegoo Mars 4. As much as I'd like to go ahead and grab a larger format one, I feel like I need to spend more time with this aspect of the hobby before I commit too much extra funds out of pocket.
What type of resin does everyone use for minis? I'm using Anycubic gray right now, but it seems pretty fragile.
This message was edited 2 times. Last update was at 2024/01/02 13:05:34
Joined a Patreon since the creator offered their entire back catalog. Spent the last few days downloading so now I have 39 gb of stls... will I ever use even 10%? So far it seems I've grafted 3d printing into my miniatures hobby seamlessly...
bbb wrote: Joined a Patreon since the creator offered their entire back catalog. Spent the last few days downloading so now I have 39 gb of stls... will I ever use even 10%? So far it seems I've grafted 3d printing into my miniatures hobby seamlessly...
Big tip - get 7zip and start zipping those models. That will cut 39gb to 19.5GB!
Also I'd check out what kind of presupports they provide. Eg for many creators now they provide .stl and .lys or .project (chitubox format I honestly forget its actual term so it might be different).
As the proprietary file types keep supports and model as separate things what I do is delete the .stl and keep only the .lys versions. I can use those in lychee and if I want edit the supports or leave them as-is. So the .stl version has no importance to me.
However if they provide the chitu versions I delete those and keep the .stl as my computer does not like running chitubox at all.
So basically instead of keeping both versions I keep only the one I will use. In theory you could even remove the unsupported stls and keep only the lychee/chitu versions as models and supports are separate so you can always just go back to the bare stl if you wanted. However I like keeping the basic stl since:
1) sometimes there are versions of files provided which are not presupported (eg combined versions). Esp from smaller creators who have more limited time/budgets so not all parts may be presupported.
2) The basic STL will work with any slicing software or 3D editing software. Proprietary ones could always end up with issues in the future. Eg a new update renders the old versions incompatible; or they shift to paid only access or such.
Keeping files organised is a big thing. I also make sure I've always got at least 1 render of each model stored in the ZIP and stored in a regular "Renders" folder. That way if I want to find a model or see what I've got I can check the renders folder for the images so I don't have to unzip everything. Including renders in the zip just helps with keeping a single store of all the mode's info, and sometimes there are lots of renders for parts and such that I might not want in the renders folder.
I tend to organise render folders by month and source. So I might have one for each month of a patreon and then one for purchases from that creator etc....
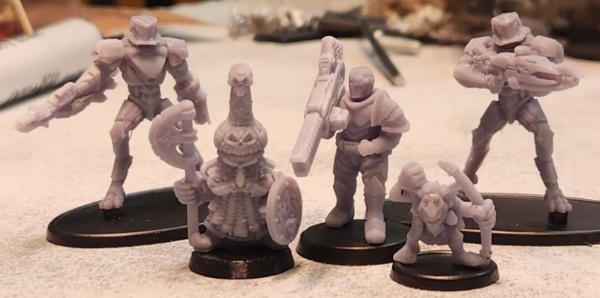
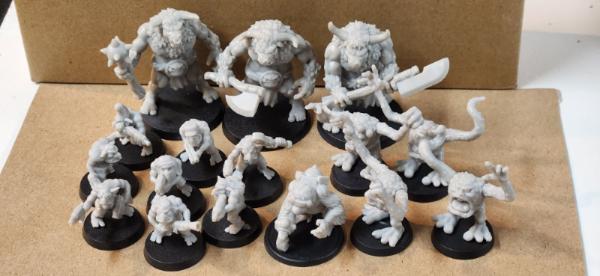
Upgraded my printer, but haven't had a chance to do anything with it until yesterday. Have some minis I printed from the Red Nebular Patreon, so looking forward to put some paint on them.
I also used a new resin. Sunlu ABS Like. Seems good so far, but the supports were crazy hard to pull off compared to what I'd printed before. Not sure if that's a material issue, an exposure issue, or a support issue. Maybe it's normal, but I was shocked at how tough it was compared to the prints I did before.
When it comes to resizing minis, if they're pre-supported do you need to make any adjustments to supports, or if resizing should you just resupport the whole thing?
This message was edited 1 time. Last update was at 2024/02/25 18:53:35
Just open, slice, print, wash, dry and then take photos of all 4 sides and the top.
No need to presupport it; just print it as is at your chosen settings.
NOTE when taking the photographs to share because you take them BEFORE you give it the final curing; the resin is only part cured and thus a skin-touch hazard. So Nitrile gloves on when handling.
From there if you were still getting strong presupport adhesion it might well mean that you can reduce the tip size. Presupports are generally made for "mass market" so they are thicker than a well calibrated, mechanically good resin needs.
2) With resizing if you resize a presupported STL you've got about 10% either way (up or down) to play with. Going smaller will make the tips smaller to a point they simply won't work; going larger the tips will work, but will start to separate harshly and leave far more scarring and cleanup.
If you are using a lys or chituproject file then you've still sort of got the 10%; only now you can use the original supports and edit them.
This is important since sometimes going smaller (esp by a lot) might well mean that some areas get too dense with supports and they fuse together during printing (acting like one big support); and going up might mean that a support that was just ok at supporting an island; is now not quite where the island starts.
Oof... I just started a print resized to 82% and then left the house. Might have a mess to clean up when I get home. Ugh.
Automatically Appended Next Post: The models I scaled down to 82% did fail, but it was because of an issue with the thumbdrive. Tried a different thumbdrive and they printed successfully. Ended up with a nice little batch of minis off the new machine for the first time printing in a few weeks.
All minis are from Red Nebular. She's got a great Patreon where you can get her whole back catalog once you join.
This message was edited 1 time. Last update was at 2024/02/26 06:06:39