This image needs more votes. Please use the vote box on the left to rate this image.
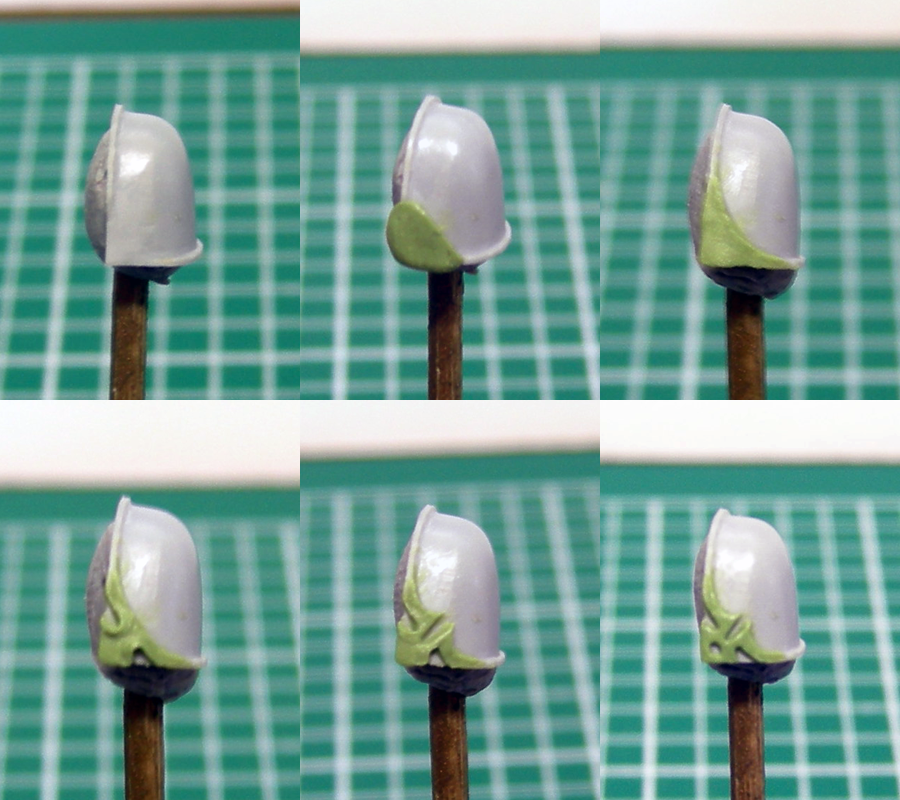
Image Description: 1. Scrape off the existing trim on the corners.
2. Whack on a small blob of greenstuff and/or milliput, whatever you're most comfortable working with.
3. Shape the blob.
4. Use a sculpting tool or something (personally I just used an old crochet needle for this) to push in the greenstuff from the side and bottom to create the indents.
5. Press the tool into the middle and pull it out towards the center of the pauldron to create the middle indent.
6. Add the little hole in the corner (if so desired!) and tidy up the edges. Don't worry about raised areas of greenstuff, they can always be sanded off later once it dries. As long as you get the edges of the actual trim neat and tidy, any bumps and uneven bits can be sanded off with fine-grit sandpaper afterwards!
And a tip - only do one side of a pauldron at a time! Let that dry before you try to do the other side. No matter WHAT you have the pauldron attached to, if you try to do the second side while the first is still soft, you WILL inevitably end up squishing your previous work accidentally. Be patient! Let it dry!