Creating Custom Banner Art in PowerPoint
From: http://www.kan.org/tips/powerpoint_art.php
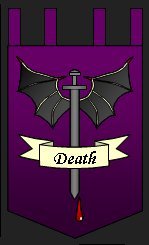
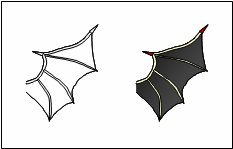
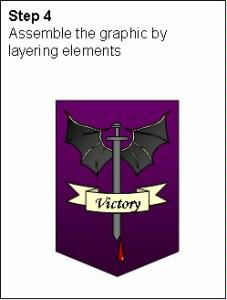
Need banners? You can use PowerPoint to create some pretty nice pieces for your armies. The banner below was created in PowerPoint for a Vampire army I was noodling around with. I made these in PowerPoint because a) I could, b) I can make graphics in PowerPoint better than I can freehand paint them, and c) I can print them on a color printer as many times as I want. What I'll do now is walk you through my process for creating custom graphics.
Assumptions and References
My working assumption is that you know how to create and manipulate basic shapes in PowerPoint. If you don't, read the Intro To PowerPoint article I wrote for another website of mine: http://www.kan.org/tips/powerpoint_overview.php
The Basics
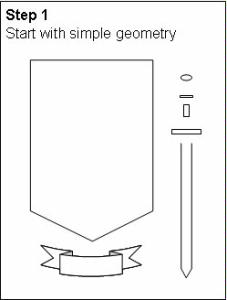
It always helps if you can sketch your design out on a piece of paper to get a good feel for what you want as an end product. As you're laying out your graphic, think about it in terms of simple geometric shapes. In this case, the basic shield, banner, and sword elements are simple AutoShapes. Disaggregated this way, it seems pretty simple so far, right?
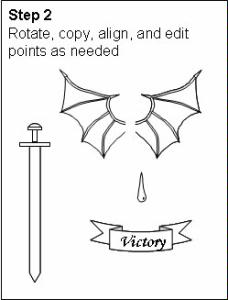
The next step is rotating, aligning, and layering elements as necessary. I lean heavily on the Draw menu of the Drawing Toolbar. It has tons of buttons to help you align, center, and arrange your graphical elements into something a little more recognizable. I'll talk about Editing Points in a little bit. For now, let's focus on the large simple elements.
Next, use the options in the Fill Color palette to color, texture, and blend your elements.
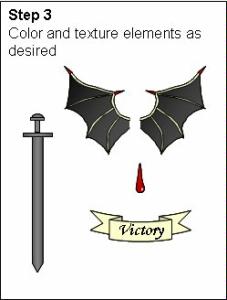
Lastly, move them all together, organize and align your discrete elements using the Draw menu and viola!
Detailed Ad Hoc Pieces
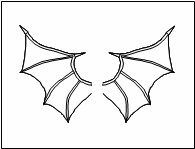
So, we just addressed the large simple pieces. How did I make the bat wings? First, it's important to note that the bat wings are really only a single group of elements, which has been resized, copied, and flipped. Let's walk through this one.
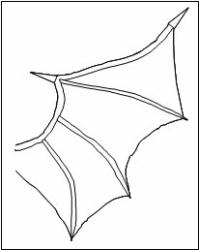
First, when I do freehand work, I'll make each element very large. This is an example of the bat wing element at 250% of the example, but it's not unusual for this piece to take up the entire 11 x 8.5 screen and then be shrunk down 10-15X. Why? Because it's easier to see details when the graphic is large and I can always shrink it down to fit. Note, that even at this size, you can see how rough my lines really are.
Another tip. If you can draw something and scan it, or if you find a nice graphic on-line, you can always insert a picture (ALT I, P, F) into your PowerPoint page and trace over it to get the general outlines.
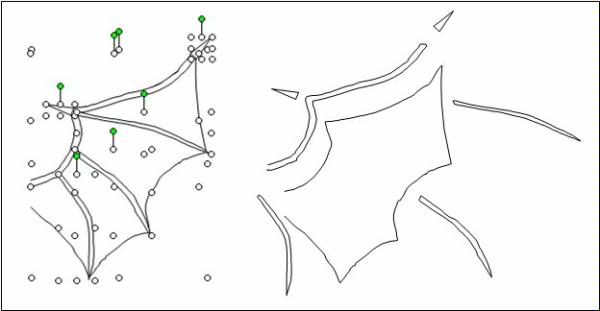
Here, you can see how the actual bat wing is deconstructed. First, here's what it looks like when all of the elements are grouped together (you can do this from the Draw menu). Below. you can see an exploded view of the elements. At this size, you can really see how rough my work is.
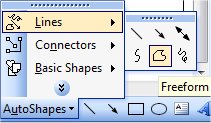
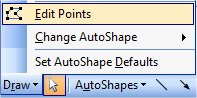
These elements are just done with the AutoShapes:Lines:Freeform tool and then edited using the Draw: Edit Points tool, both of which are available from the Drawing Toolbar:
The combination of these two tools let you draw and refine a freeform drawing into something that looks roughly like what you probably originally envisioned. Note, it is not necessary to get everything perfect. It may look very rough at the current size, but once you shrink it down, most people don't even be able to see any roughness.
Once the large scale piece looks more or less like I want it, I group it, then I resize it. It's critical that you group first then resize, otherwise the composite graphic won't stay together. To finish off the set of bat wings, I color the graphic, clone it, flip it, the quickly make sure they are vertically aligned and I'm done.
There you go. Have fun!