Jed's Guide to Creating a Cheap Lightbox and Photography with an iPhone 4S
Hi guys and girls.
First and foremost, I am a complete noob at photography and all I have to take my miniature photos is an iPhone 4S. Whilst the camera is ok, it's certainly not a digital SLR costing 600 of her majesty's pounds. This guide I have made to help all of you out there in the same situation, wanting to show off your models without having to shell out a bucket load of equipment on photography equipment that's going straight back in the cupboard after it's been used.
I will firstly go into creating a super cheap lightbox which will help you get the perfect lighting for taking those photos. This lightbox in total cost me around 10 pounds to make and around 45 minutes of my hard earned saturday off.
Creating The Light Box
Equipment Required
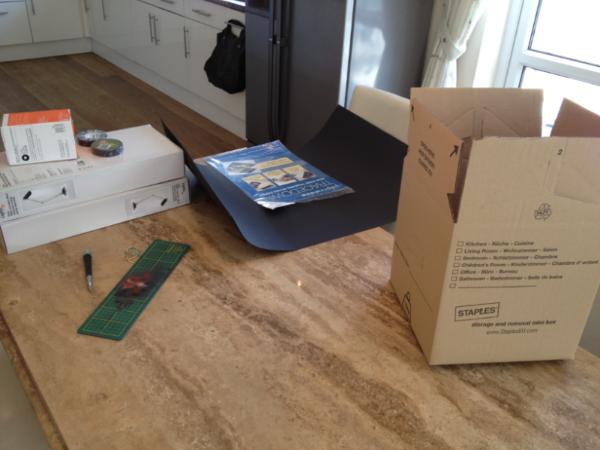
- A sharp hobby knife
- A cutting mat or an old table you suddenly don't mind having deep scratches in
- Some Tracing Paper
- A decent sized cube shaped box
- some black card/paper
- some white card/paper
- some black tape
Cut Holes into 3 sides of the box
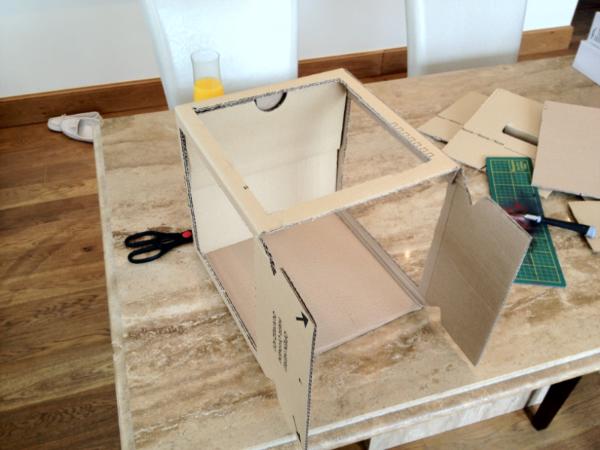
Designate the floor of your box, This should be a side so you can keep two of your top flaps on the box for the finished product. This side and the rear side of the box we want to leave as standard. As for the two sides and the top, we want to cut some square holes in them as shown.
Stick Tracing paper to each of the holes

As per the photo, I have now stuck down square pieces of tracing paper over each of the holes created. I have added more tape to the front edge as it is a little weak now without the added support it had before.
Cut Black squares and add them to the back and floor of the lightbox
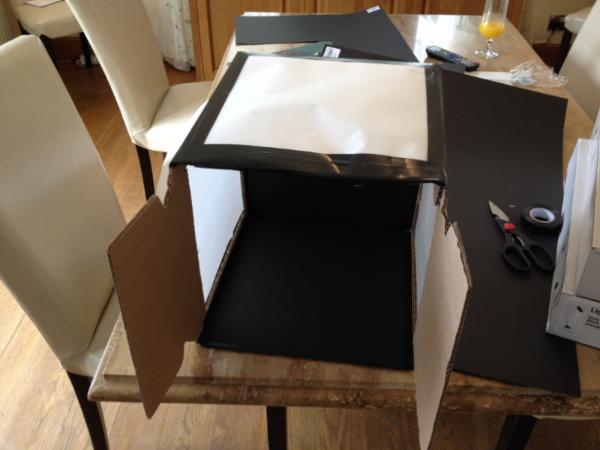
As shown in the photo, 2 black squares are added to the floor and rear of the box.
Add the White paper around the rear and floor of the box
One continuous strip of white paper is added. This will provide the seamless gradient between the floor and the rear of the box for the background of the photo
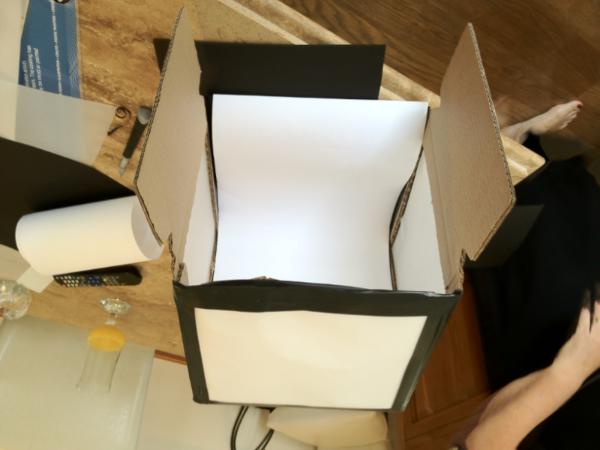
Voila! One LightBox!
iPhone Goodies
To turn the iPhone into a nice little camera for this, I have two main piece of equipment and one piece of software
- - A GliF iPhone mount (allows you to connect the iPhone to any camera generic tripod) http://www.amazon.co.uk/Studio-Neat-Glif-for-iPhone/dp/B0052G679K/ref=sr_1_1?ie=UTF8&qid=1340044338&sr=8-1

- - A Gorrilapod (by Joby) tripod. This is cheap and effective for our level of work, yes it vibrates a little but nothing that wont stop after the 5 second timed photos http://www.amazon.co.uk/Joby-GP1-D1EN-Gorillapod-Original-Black/dp/B000EVSLRO/ref=sr_1_1?s=electronics&ie=UTF8&qid=1340044355&sr=1-1
- - ProCamera+ for the iPhone (available from the iTunes AppStore)
ProCamera+ is pretty damn good for 69p, it adds auto white balancing, tap screen focussing and most notably, a photo timer which is required to get our tripod nice and still with nothing touching it. I'm still playing with it to get the best results but it really is significantly more powerful than the standard Camera app.
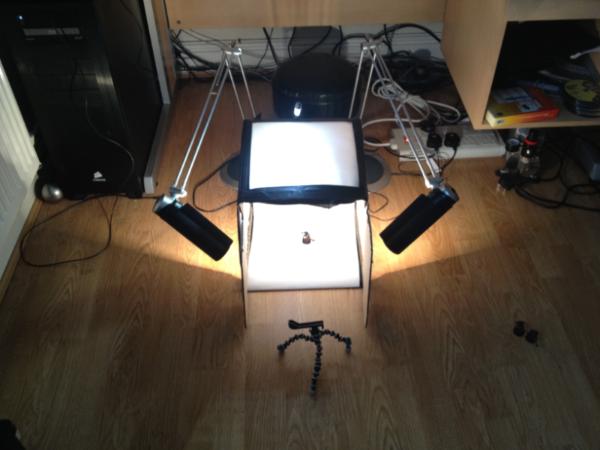
Lighting
For this I have gone to a local B&Q. The lights you see in the photo above are some 18 pound articulating lights. I have fitted each with a Daylight Bulb. These are the most important parts to the project. Most everyday bulbs have a temperature of 2700K. This is very soft, yellow lighting that saturates all of those lovely colours you have painted. To see their full vibrancy, you need something with a much high temperature. Crafting Bulbs can be found at most specialist electrical stores and have this blue tinted glass to them. Give the bulbs a couple of minutes to warm up and you will notice how much more intense the lighting is.
For the test photos you will see I have positioned the light sources on each side of the lightbox and my lower intensity LED light from above (not perfect, but hey, I'm not made of money)
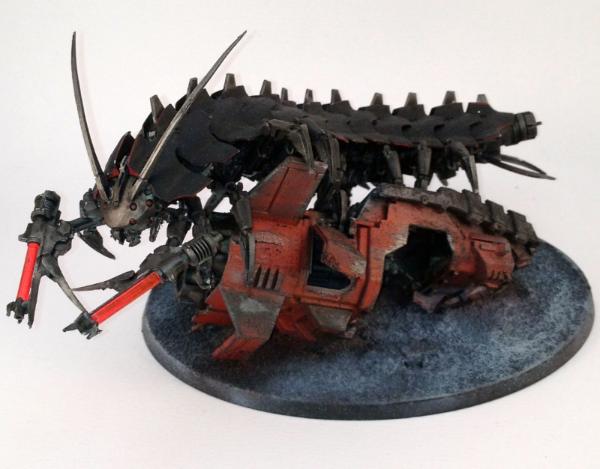
Below you can see the result of such a photo taken of my TombStalker.
You can see for yourself that for a very small investment, the quality of the photo is significantly better.
Anyways, it's a short and sweet guide. I hope that it helps you. Anything that you think can help me is greatly appreciated! (Although I know many things I need help with, no help currently exists...)