How to make Tyranid Buildings with a Hot Glue Gun.
a Tutorial by Clem Robertson (superscenic)
Tyranid Spires
It is the duty of all Xeno's the world over to cover tabletops with the organic beauty of tyranid spires. Let your enemies tremble as they trespass within your hostile territory. Clog their respirators with billions upon billions of spores as they advance blindly into the dusk of their impending doom.
Materials:
a Hot Glue Gun. Preferably with a trigger.
Lots and lots of glue sticks.
(You will need at least a kilo box full so find a bulk supply place as buying them singly will work out expensive)
Cardboard or poster board thin enough to fold.
Scissors.
Masking tape.
Tips on Gun Control:
It is important to practice how to shoot your sticky load. First do a test on a scrap piece of card. Try to draw straight parallel lines without letting them touch. The glue will want to settle and spread when molten so watch out. A fan will help to make the glue cool down and solidify faster: A good blow may stop unwanted drips. You want to apply pressure gently and consistently to the trigger to avoid blobs ruining your neat lines.
Blobs or thicker areas will form at the start and end of each stroke. Drag the tip of the gun along the card as you keep constant gentle pressure. When your lines are of uniform thickness you have mastered your splooge pistol. Pull the gun far away from the object after each line so that the thin threads wont fall back on the finished lines until after they have cooled.
If you want your line to end in sharp points, hold the object upside down and pull the gun away downwards when finished with a line. This way the threads will hang down until they have stiffened and will leave nice sharp points when the excess threads are jerked off.
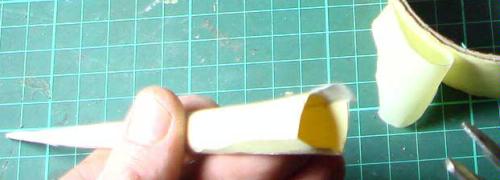
Step 1:
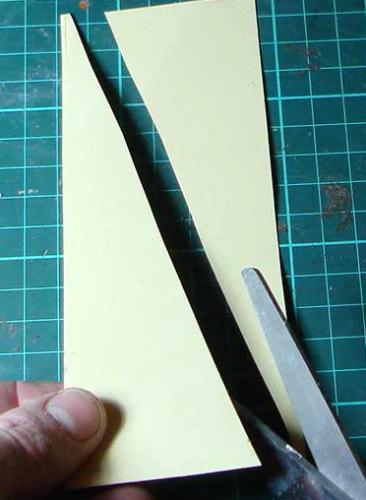
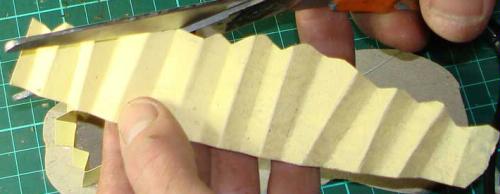
Cut Triangles out of card
Cut long triangles out of the card. You will need one for the core and one for the scales covering the core:
When you have mastered the process you may want to fold the Triangle into a zig zag pattern. This makes the components look Extra cool when they are joined and covered with stripes.
Pre-Fold triangles into Zig Zag pattern (Optional but advised)
Step 2:
Tape together the core into a cone.
Curl one triangle into a cone and stick together with masking tape. Tip: It helps to start wrapping from the tip and work the tape around to the wider base.
Step 3:
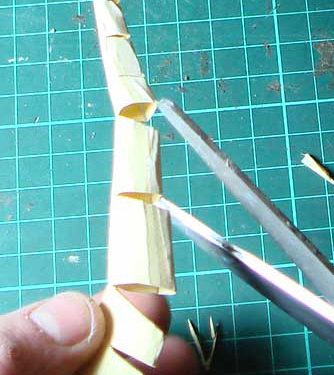
Curving the Core.
Cut narrow triangles out of the core cone. Be careful not to cut all the way through or cut the slices too big. These slices must be very thin and spaced far appart as they will dictate how much the spire curves.
Step 4:
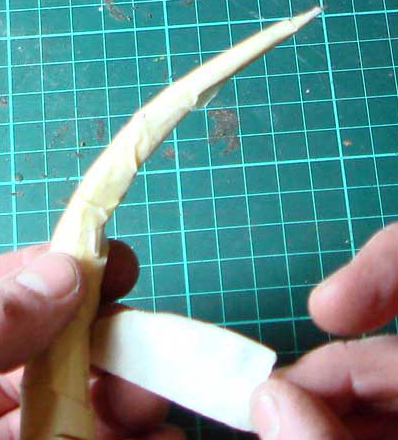
Tape the now curved core again.
Now tape the spire together again with the new curved shape you have made:
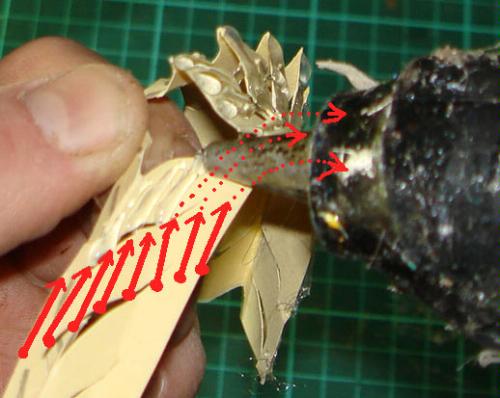
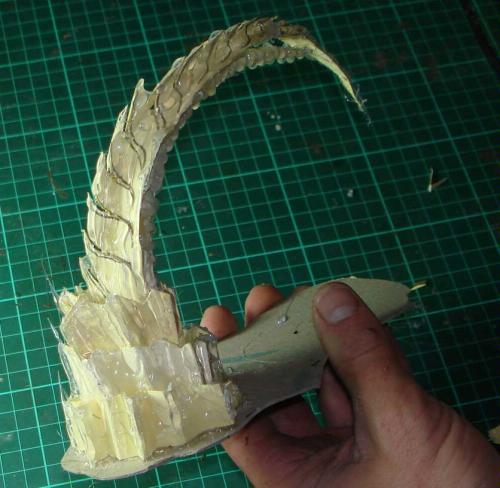
Step 5:

Draw parallel "V" shapes around the sides of the core
Finally time to use your Glue gun. Hold the core by the tip and start from the inside of the curve. Draw parallel "V"s down the side of the core. You can also draw "U"s depending if you want the "Ribs" pointing down. The back of the core will be covered so ensure the inside is neat and the "starting blobs" all line up vertically:
Step 6:
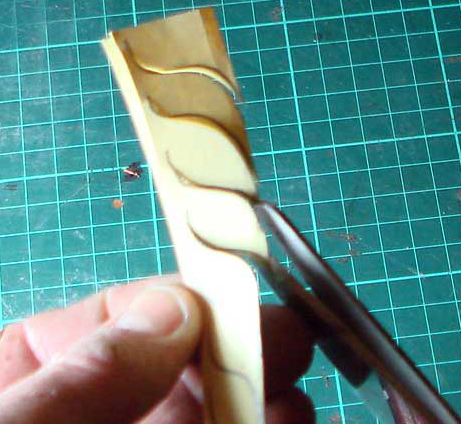
Cut "S" shaped cuts into the second triangle.
Cut "S" shaped parallel cuts into the second triangle. This will become the scales covering the back of the core.
Step 7:
Draw parallel glue lines along the scales.
Now draw stripes along the length of the scales. When you come to the end of a line pull the gun away from the object. It is easier to pull the gun away from yourself.
Try to get neat uniform lines.
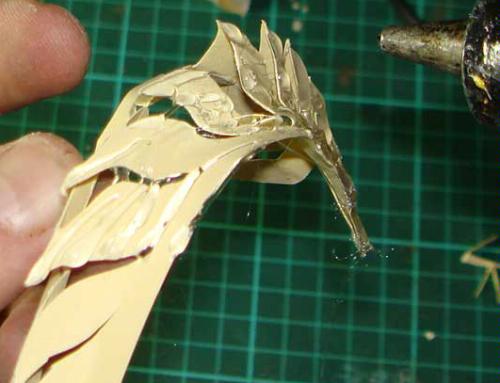
If you create strings that join the different scales don't worry these can look good and can always be pulled off.
Step 8: Draw along edge to give it a strong border:
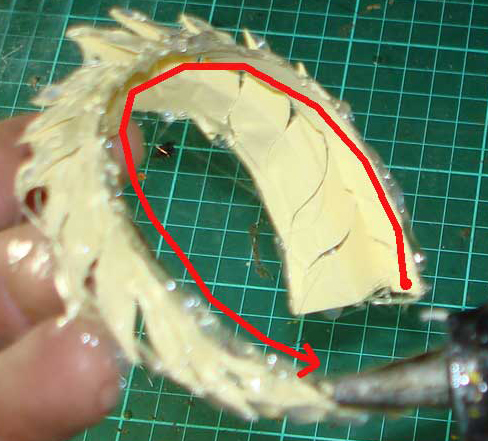
Put glue along the edge.
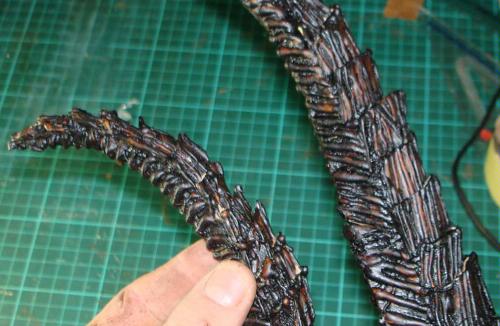
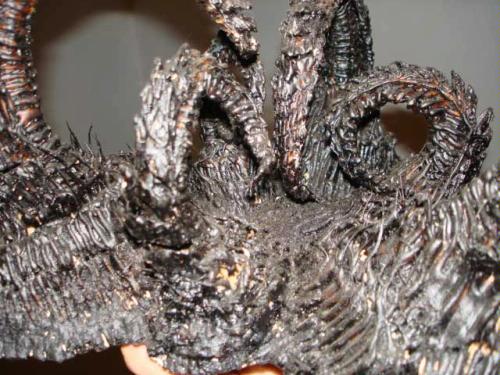
Now put the core and the Scales together. DON'T GLUE IT TOGETHER YET! You want to paint both parts with a black primer first. I use a bituminous solvent based paint to paint mine. This is basically a tar meant for waterproofing and ponds. The tar remains flexible and sticks to the flexible glue even when it takes knocks. Also it gives a nice base coat for later painting effects.
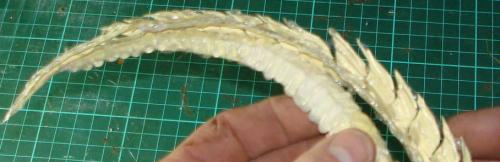
Now you have a spire!
Congratulations! You have now completed one spire. You can attach it with the glue gun to any structure or terrain piece, but for a proper Tyranid structure you will need at least Three spires mounted on their own bases.
Painted with rubberised bitumen waterproofer, lovely!
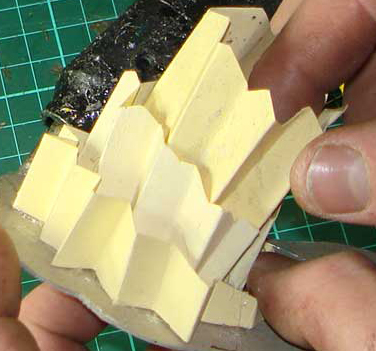
Step 9: Making the Base.
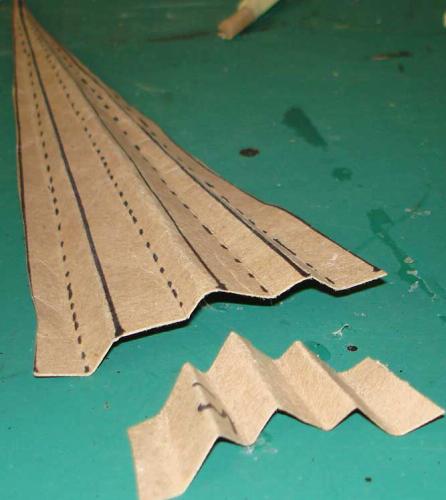
To block LOS and to build a proper Tyranid structure you will need to attach each spire to a tiered base. This is easy and it looks much better than a loose spire. You will need to cut three pieces of card. These pieces must be of different thicknesses. The thickest one will be the inside ring and the thinnest will be the outer ring. Fold them back on themselves into a concertina Zig-Zag.

Cut tapering strips and fold them Zig-Zag.
This is the thin outer ring folded into a Zig Zag pattern.
Cut the strips' top edges jagged as you folded them.
Cut the top edges of each strip into a sharp jagged line, try to follow your folds, one high, one low, etc.
Step10:
Glue the strips into rings then attach them to a base.
Glue these rings unto a thick piece of card or MDF, starting with the centre ring (tallest) first then add the others around it.
Step 11:
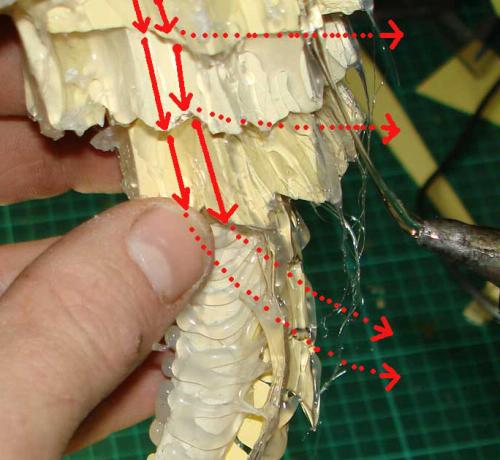
Hold upside down and draw glue lines down from the base.
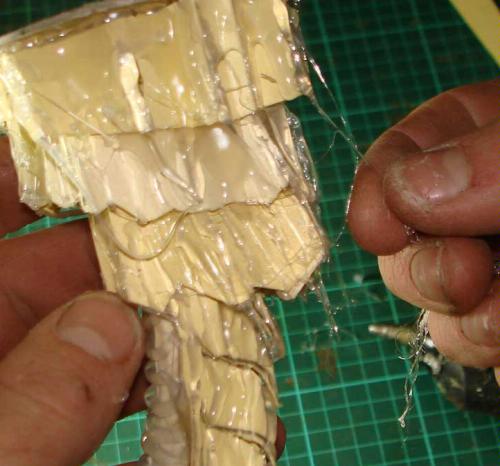
Hold the entire base upside down as you prepare to add some sticky stuff. Start from the base (now top) and draw vertical lines down. When you come to the edge of a ring press on it with the tip of the gun and press the trigger gently as you pull a long thread away from the edge of the ring. This will create nice long tentacles along the jagged edges of the rings. Pull the gun away quite a bit so that the strings have a couple of seconds to cool down and not attach to others.
You can now pull the excess threads off or leave them to be painted along with the rest of the structure.
Now you should have one spire with base. Repeat the process three to six times for a complete Tyranid structure.
Step 12:
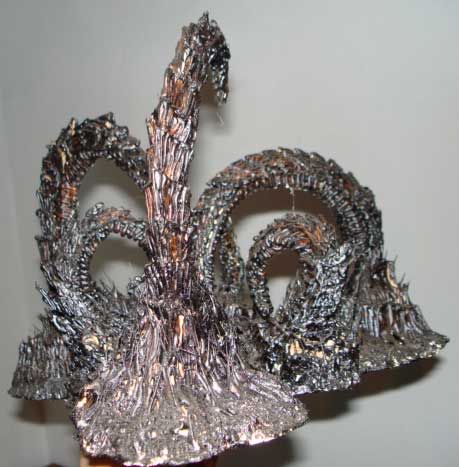
One spire with base done, ready for painting.
Touching up. If you have made areas that are messy or some areas have melted together, you can use the hot tip of the gun to carve new grooves into the existing hardened glue. You can also use a hot knife or soldering iron to carve back detail you have lost.
Close up; A pool would fit nicely in the centre.
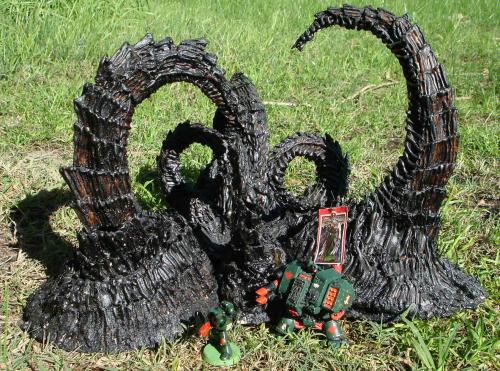
Scale reference. What could be around the next corner?
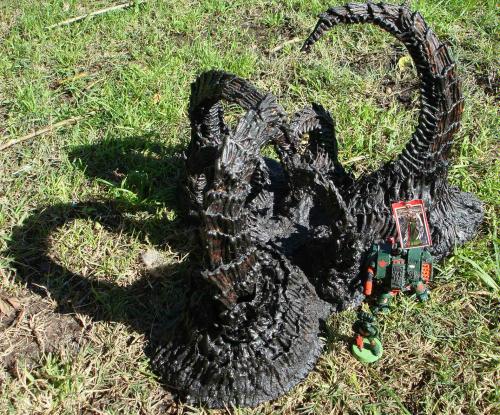
Another view.
Now you can paint your Tyranid structure with the colours of your hive and spread the infestation.
Thank you for reading;
superscenic
 My Art Blog and Portfolio
 Artificial Reef Scapes