 Created by MWNCIBOO
Spiritual guide on a one way trip to painting enlightenment
PRIMING versus UNDERCOATING
Using the words “primer” and “undercoat” interchangeably can paint a picture of confusion. One basic rule of thumb to remember: An undercoat is always a primer, but a primer is not always an undercoat.
Undercoats are a subset of the primer category and serve a special function an undercoat’s key purpose is to provide a smooth, uniform, even surface for topcoats.
Good primers seal, hide and bond to form a firm foundation for the topcoat. Primers can be alkyd or latex formulations, and are used on interior and exterior applications. Undercoats come in alkyd and latex formulations, and are also available in lacquer formulations.
Alkyd-based paint releases a stronger odor and takes longer to dry than latex-based paint the advantage is, it stays wet longer, allowing it to penetrate the surface and bond deeper. The latex dries quicker, and this allows you to paint faster.
Generally, primers bond well to flat or low-gloss surfaces. Glossy surfaces or surfaces that have low surface energy are more difficult to bond to. Primers are formulated with select additives that promote surface wetting specific to the surface and bonding to a specific surface.
A specific category of primers — bonding primers — are formulated to tightly anchor topcoats to slick surfaces that are difficult to paint. These surfaces can include polyvinyl chloride pipe, laminates, galvanized metal, hardboard, plastic trim/molding, varnish/enamel and gloss surfaces.
SPRAY PAINTING IN LESS THAN IDEAL ATMOSPHERIC CONDITIONS
HIGH HUMIDITY
The Relative Humidity (RH) plays a critical role during the curing of waterborne coatings. If the RH is too high it affects the speed at which the water and coalescing solvents evaporate relative to each other. The evaporation of solvents from solvent based coatings is how Spray Paints work using a (Solvent with pigment powered by a propellant), but you must avoid the condensation of moisture vapor on the uncured coating. The real issue at work here is the Dew Point temperature
The dew point is the temperature to which a given parcel of humid air must be cooled, at constant barometric pressure, for water vapor to condense into water. The condensed water is called dew. The dew point is a saturation temperature. The dew point is associated with relative humidity. A high relative humidity indicates that the dew point is closer to the current air temperature. Relative humidity of 100% indicates the dew point is equal to the current temperature and the air is maximally saturated with water. When the dew point remains constant and temperature increases, relative humidity will decrease. The dew point is an important statistic for general aviation pilots, as it is used to calculate the likelihood of carburetor icing and fog, and estimate the height of the cloud base.(Any fellow Mariners out there will understand this term as we use the Wet & Dry temperatures with a Dew point Graph to predict Fog, mist and restricted visibility conditions at Sea read up on Advection Fog, Radiation Fog and Katabatic drainage if you wish there is some seriously interesting things in this but I digress!).
At a given temperature but independent of barometric pressure, the dew point indicates the absolute humidity of the air. If the temperature rises without changing the absolute humidity, the dew point will rise and the relative humidity will lower accordingly. Reducing the absolute humidity will bring the dew point back down to its initial value. In the same way, increasing the absolute humidity after a temperature drop brings the dew point back down to its initial level. For this reason, the same relative humidity on a day when it's 80°F, and on a day when it's 100°F will imply that a higher fraction of the air on the hotter day consists of water vapor than on the cooler day, i.e., the dew point is higher.
But to us with Miniatures and Spray Priming/undercoating/painting what does it mean? Well simply solvents must always evaporate. If the surface temperature at the air/coating interface fall's below the dew point as then the solvent will stop evaporating and the Coating will not cure. You really want the RH below the 50% level, this is a real problem for some Dakkanauts (Off the top of my head the Southern United States, Equatorial regions places like Singapore would be difficult areas to spray models in).
HIGH/LOW TEMPERATURES
Temperature is also a consideration and a temperature of about 50 - 90 F ( 10 - 30 oC) is good but above or below this range you can have a number of problems. At Low temperatures Cold paint (even in a Solvent) thickens and this means the paint does not atomize properly resulting in uneven coating of surfaces and a ragged non-uniform delivery of paint and propellant.
Atomization is the spraying of any kind of liquid or fluid sprayed using the Venturi effect. When a gas is blown through a constriction it speeds up; this reduces the pressure at the narrowest point. The reduced pressure sucks up a liquid through a narrow tube into the flow, where it boils in the low pressure, and forms a fine spray of small droplets (not atoms despite the name). This can be extremely dangerous in the case of oil or Flammable liquids and usually results in a high chance of a Chemical reaction e.g FIRE!!!!!!!!!!!!!!!!!
However for Miniature painters it's great because this is how Spray Can's and Airbrushes work. (Point to everyone no matter how funny it is do not put a flammable liquid through an airbrush and near a source of flame, you have been warned! I have seen Lub-oil systems on Ship's produce Atomised oil at reasonably high pressure and the resulting fire was terrifying to behold!)
SPRAY PRIMING IN HOT & HUMID CONDITIONS By Heart Serenade.
HIGH WIND
Don't be silly I don't need Science to prove Spray painting in these conditions is retarded. You should not spray in windy conditions (Saints preserve us!)
MINIATURE PAINTING
Priming is important on Miniatures as new miniatures need the Primer to bond on the miniature. If you don’t Prime it will make it much more difficult to achieve a good standard of paint job and can result in paint not bonding to the miniature and rubbing off. When Priming the consideration should be what is the overall effect you are aiming for?
1. A light Bright, colourful miniature? Use a White Primer. This gives a brighter under tone and is perfect for High Elves, Eldar, Bretonnian Knights and applications that require a light, bright Paint scheme.

2. A Dark Miniature or lots of Armour? Use a Black Primer, this allows the Armour and to be shaded with Metallic Paints or NMM methods and adds a further depth to the model. A White paint under the metal makes it very bright & shiny (A Mythril effect) Ideal for High Elves but not for your Hulking Chaos Space Marine Champion or Dark Eldar Lord.
3. Somewhere in the middle? Use a Grey Primer, this gives the best of Both worlds, adding shading in corners and difficult to reach places. It also accentuates brighter colours, so it tends to be good on Space Marines and is applicable to almost all miniatures.
Grey Auto Primer is ideal for most miniature applications and is a good middle road solution to most Priming requirements. Most miniature painters use a Spray Can solution to this as it gives a nice clean, even coat. Points to bear in mind are that climatic conditions, such as ambient temperature and humidity can have a dramatic effect on your miniatures and the quality of an Priming or Undercoating using Spray Undercoat or Primer.
COLOUR UNDERCOAT
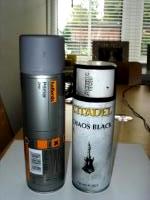
Many of us like to shortcut, to save time and money and this is all good and you can in certain circumstances miss out this step if using a coloured Undercoat such as the MONTANA GOLD series or the ARMY PAINTER SPRAY COLOUR.
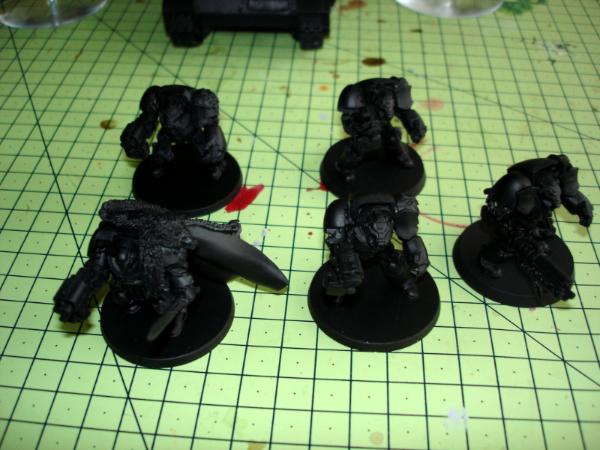
Here is one of my Terminator Squads in Chaos Black Primer from GW. I then sprayed with Undercoat the ARMY PAINTER SPRAY COLOUR. The finish was not as smooth as I was hoping, I sprayed in 25 Degree Celsius on a High Pressure (Cold Air sinking), low humidity Day in May. The only thing I can think of is that is was either a duff can or I did not agitate it enough with 2 minutes of vigorous shaking. I have been advised by other Dakkanauts that MONTANA GOLD is a superior Product all round and that the ARMY PAINT range is notoriously poor in finish. I will investigate further and report back as I have ordered Spray Cans of both and will test them on the same day with the Same miniatures, in the same conditions. (It's lucky I have 20 Spare AoBR Space Marines!)
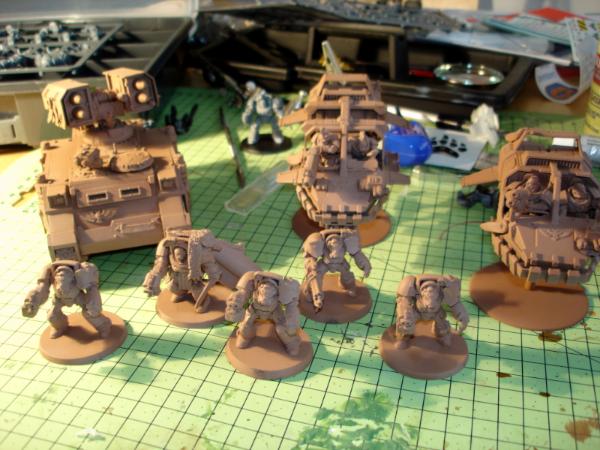
I experimented with this and found I could skip the Black Priming Step and therefore sprayed the Undercoat directly onto my future Miniatures.
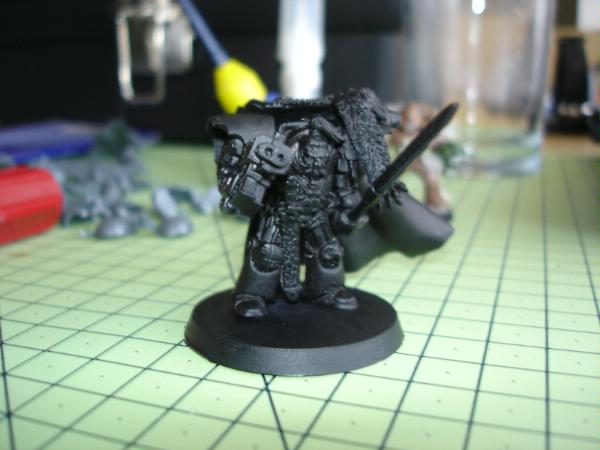
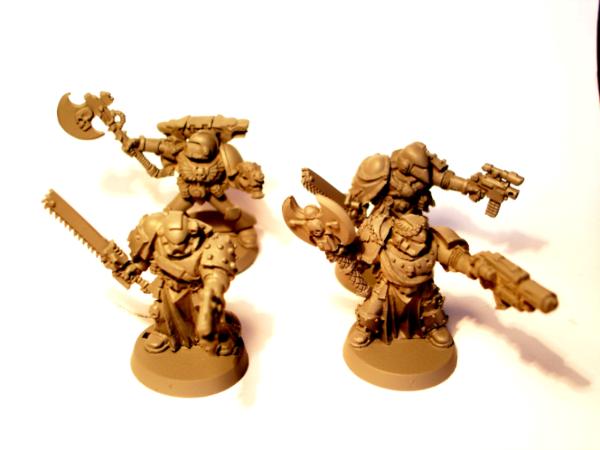
My Veterans have a large amount of detail and significant fabric and robes so decided a Grey Auto primer would be more appropriate.
Bottomline, always Prime or Undercoat your miniature if you want to achieve the best results.
BRUSH ON PRIMER
COMBINATIONS OF PRIMER / UNDERCOAT
I know of one Professional painter who uses an Airbrush and generally sprays his miniatures White (Skull white), from there any area's he wants darker he undercoats a darker shade with Black Undercoat and a brush and he occassionally for mid-tones uses a lightish grey. This is obviously an advance technique but shows how a simple skillset can be used across a single miniature with several methods being employed!
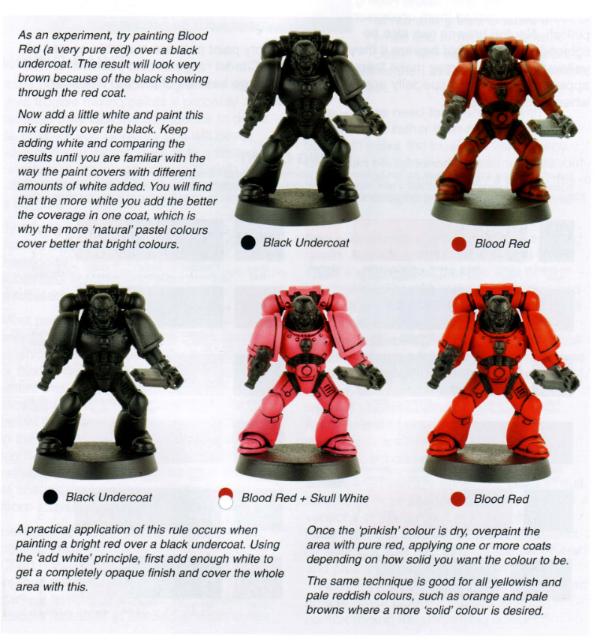
If you don't believe the effect of undercoating makes, the example below shows clearly that painting the colour required directly onto a Black Primed miniature results in a duller darker effect. If the same miniature has a lighter tone of the required colour painted on, the overall effect is much brighter.
When primed in lighter tones (whites or Greys) some painters Dark Wash their models (with a Paynes Grey or Badab Black etc) in order to bring out details in the models. This Prime, wash, paint method although not applicable to Black primed models, can be very useful.
GESSO PRIMING
So now onto Part 4....Brushes and applying Painting
