This is Article was made by mwnciboo

The Spiritual Guide of Dakka
Okay alot of people decry the use of Quickshade, well I am a convert after the last 24 hours.
QUICKSHADE is not miracle in a can, neither can it turn a basic painted miniature into a Golden Daemon
Winner in one miraculous dip (I'm sure someone will prove me wrong on this at some point!).
What it can do, is take a reasonably painted neat miniature and turn it into a nice Table top quality
miniature that people will look at and say "Nice Army" though they won't be astounded.
POSTIVE POINTS
It is quick and a very simple technique.
It will allow you to do a lot of miniatures very quickly, Orks and Tyranids especially.
It can be dipped or brushed on.
It can be used on Tanks and Vehicles.
Gives a solid table top quality finish.
Less time painting equals more time gaming.
It seals and protects your investment.
NEGATIVE POINTS
It is not cheap.
You need to buy Anti-Shine Varnish to achieve best results.
It can obscure detail.
It is not suitable in all circumstances.
Some People might mock you, however Challenge them with Dice for a grudge match. Then Grind their
Haughty Nonce Army into dust; it is the only way to be sure!
WHAT YOU NEED
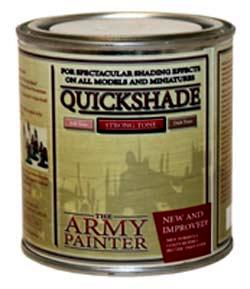
QUICKSHADE - Which type? Well I tried SOFT Tone initially but it is only really appropriate on certain miniatures
with light/bright coloor schemes e.g certain Eldar color schemes, White Scars, Imperial Fists etc or in other words
where a STRONG tone would muddy and ruin a light toned miniature or color scheme.
Most applications are best served by STRONG Tone which is what I have used below, it works well on Darker Miniatures
and extremely well on Tyranids and Orks. My experience is only with Space Marines however YOUTUBE shows some
brilliant Tyranid results where you can paint a huge Swarm in literally hours.
DULL COTE Anti Shine Varnish.
A pair of Pliers and somewhere outdoors to do it all.
TUTORIAL
1. Following the standard, CLEAN, FILE, GLUE, PRIME Technique for the miniature you wish to dip. It is your decision
if you wish to add a base, but be aware you will need a pair of pliers to dip the miniature later and you could damage the base.
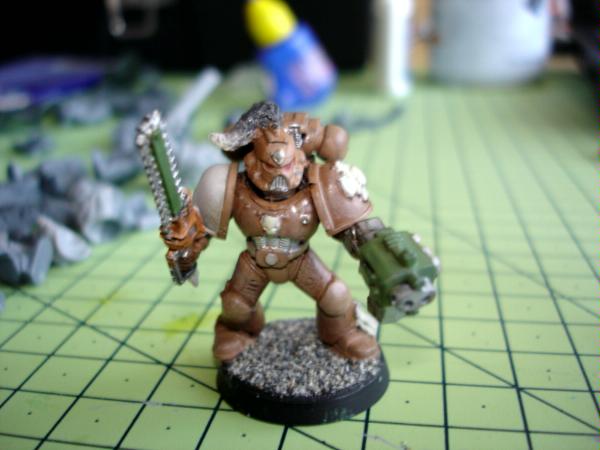
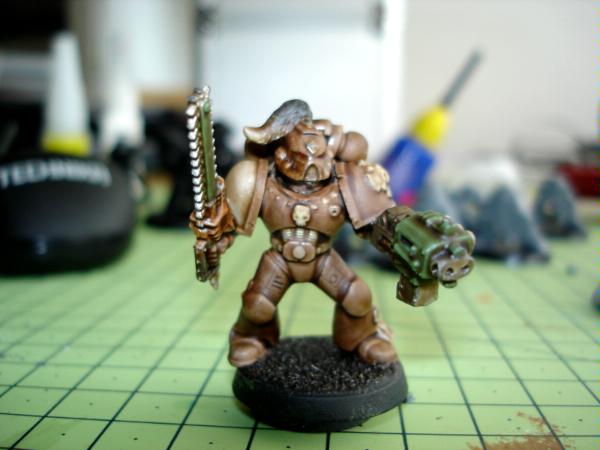
2. Focus on painting a neat foundation color scheme (see image below) with the focus on a good solid color finish.
There's some mistakes on your models that QuickShade can't help fix.
3. Ensure model has had adequate time to dry.
4. Do not apply basing details. (yes I did, very foolish of me!)
5. Do apply Decals prior to dipping.
6. So when you model is dry with decals on, you are now ready to dip. Ensure you do this outside or in a well ventilated area,
then Shake the tin of Quickshade vigorously and ensure it has a good mix. Remove the lid carefully with a screwdriver or flat blade.
Ensure the area you are dipping in has coverings over it (do not this indoors and definitely not over carpets, tiles or it will ruin it).
7. Using a pair of pliers or another holding device, invert the miniature and dip it wholesale into the tin. Remove it slowly and let
the excess run off, this will take a good 1-2 minutes.
      <i>[Note - you can paint on the Quickshade on larger models. Use a good half Inch brush and ensure you give it a even
covering, this technique gives a lot of control and I have seen some people thin the Quickshade with a little turpentine]</i>
8. Using your pliers holding the miniature (try not to damage the base) swing the miniature firmly toward the floor. The flicking
action is a bit like playing "Conkers" for all my fellow Brits out there, excess Quickshade will fly off in small amounts.
It is a form of Varnish, so don't wear your best clothes, don't do it towards or near windows, Cars etc or anything that you will
get a kicking for ruining/ damaging (unless that's your thing)
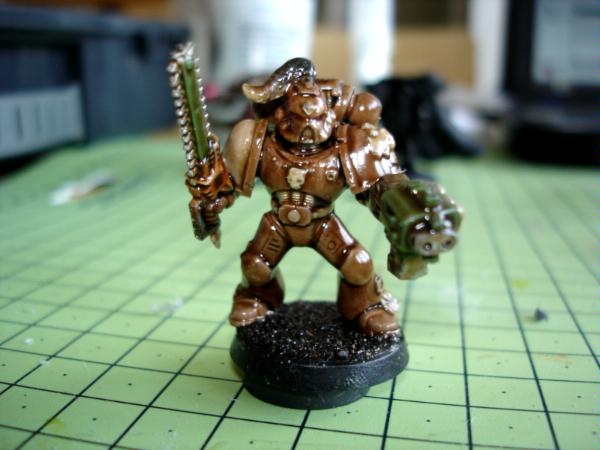
9. The next stage is to allow the miniature to dry for 20 - 30 mins, then go back and remove any pooling or drips.
Areas prone to pooling are elbows and joints, Eyes & Heads or the base of the miniature. You can remove excess
carefully with a brush (don't leave brush marks!) or very carefully with a piece of paper towel.
an advanced technique which I have read about but not used is to use Cotton Buds/ Q-tips dipped in Turpentine
(this sounds dangerous as the turpentine could potentially ruin the entire model if you use too much so I advise
caution before trying this technique).
10. Allow your miniatures to dry for 24 hours. Do not be tempted to touch them before this, many a good model has
been ruined with finger prints especially if the Varnish has not yet cured.
11. Now finally the best bit, DULLCOTE. I have only used DULLCOTE and its results are brilliant, as for other
MATT Anti-shine Varnishes I cannot say. Feed back for this Article is always welcome so share the Information
if you find another good product.
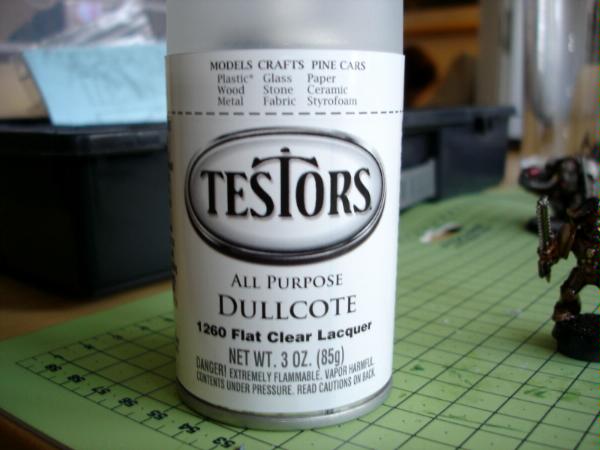
12. Take your Miniatures outside, in a well ventilated Area, Shake up the DULLCOTE and ensure you are a good
12" Away. Spray a with a smooth action a light coat on the Miniature from the Front back, Left side, right side.
The miniature will look very shiny, do not lose Heart, have faith it will go dull. Give it 30 mins go back and be
prepared to be quite impressed at how simple it all was...
13. Repeat and get your Army out pronto - After all there is a War on! - MWNCIBOO
UPDATE:-
Ok so a few months on and a few experiments later I have found the following.
DARK TONE Quickshade can be a little too thick in certain circumstances. I now, do not dip the miniatures. I use a small beaker and and take about 10ml of quickshade and add 1-2ml of White spirit. This thins down the mix and makes it better and makes it pool less, whilst still being thick enough to shade. I then paint it on using a Tank Brush and the effect is quite good.
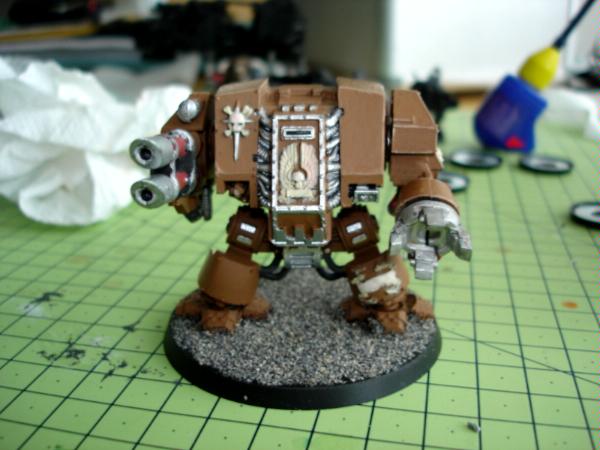
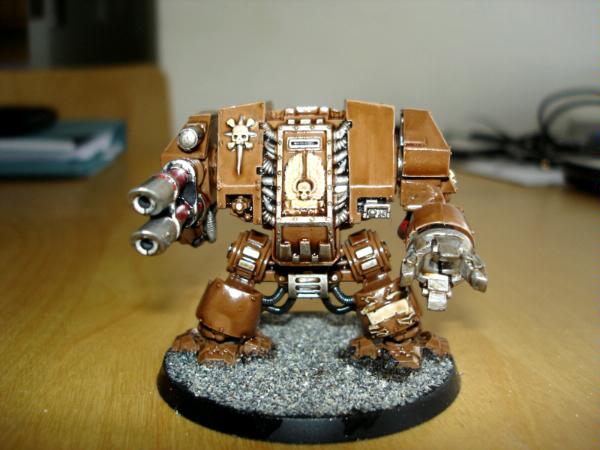
Another example of thinned quickshade, it looks good and adds to the miniature without overpowering it as per my test miniature above.
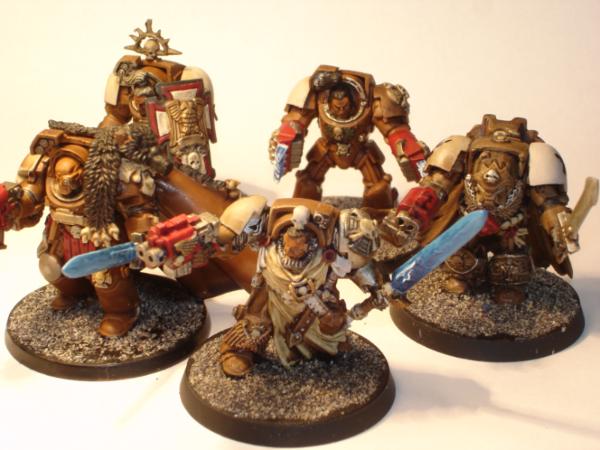
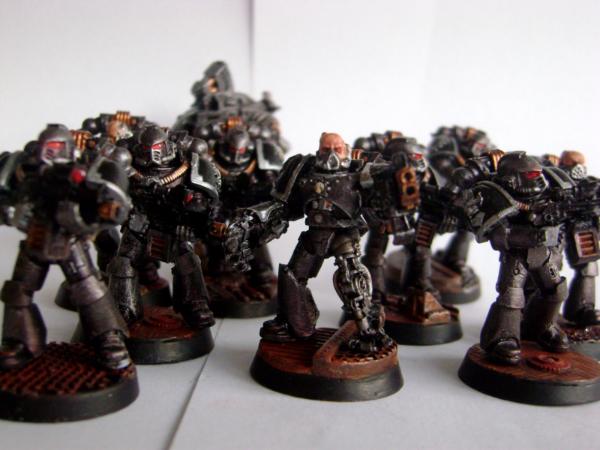
My Termie Command team, all dressed up and no one to fight...and yes they were all dipped after a basic paint job (not bad huh?)
ADVANCED TECHNIQUES
I now thin my Quickshade DARKTONE, at 3 different ratios. Using White Spirit I mix,
1:1 Ratio for Thin minimal shading, good for light vehicles or models.
1:3 Ratio for Medium shading, good for most models.
1:5 Ratio for Heavy shading, for really dark or weathered/ damaged/ dirty vehicles
This has 2 main advantages, 1. Less waste and 2. Dries more quickly 3. Uses less DULLCOTE to get a nice matt finish.
I then paint the thinned mix onto the vehicle/model. (Note I use Urine Sample bottles to mix up my ratios).
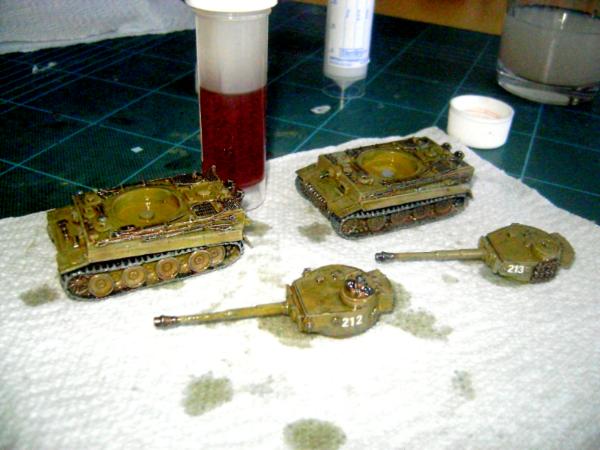
Tigers completed after two light coats of Dullcote (This gives a much better more realistic effect).

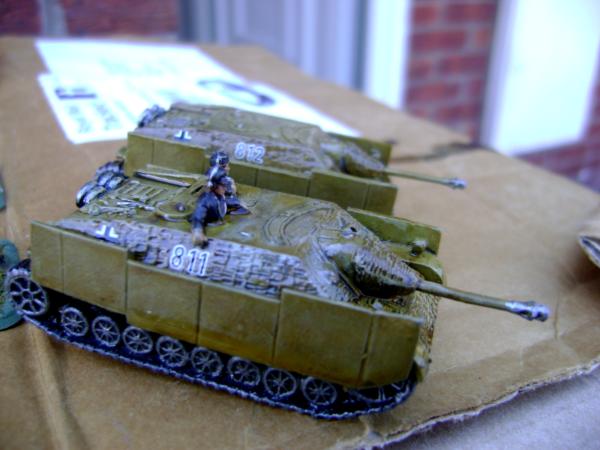
My Jagdpanzer IV's - You can see how Glossy the model is before DULLCOTE.
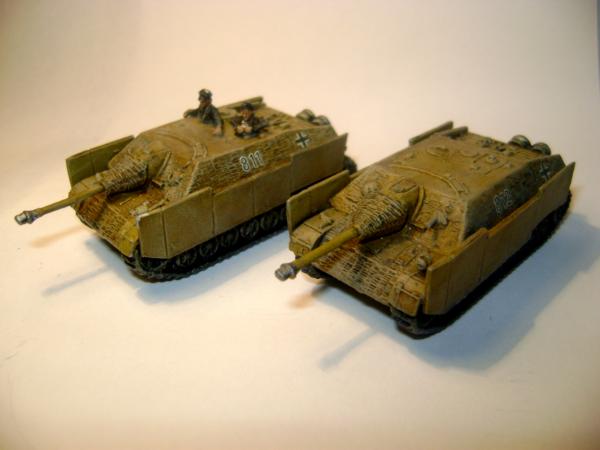
After the DULLCOTE
USING DULLCOTE
Have the can at room temperature (do not use if cold e.g. left out overnight in the garage, put it inside your house 24 hours before use!) and shake vigorously for 2-3 minutes before use) Use several (I use 3 light coats) coats of DULLCOTE, if in doubt, do it extremely lightly, and keep doing it once every 24 hours. The effect is more pronounced the longer you leave it between coats.
POST VARNISHING
I have been taught techniques by Historic and more advanced techniques by Veteran Gamers. These apply to all varnishes including Quickshade and normal Poly varnishes.
1. Varnishing is not the end of the process!!! (Wow what? yep!)
2. You can paint over varnish, you can wash over varnish etc. Modern Historical Tank modelers, use a technique called "Pin Washing". This is done a Base coated model, with some detailing, which is then Varnished. The Wash is then applied in a "pin-point" manner by a fine brush, the thin wash on the smooth varnish runs incredibly finely giving beautiful definition. See the video link below.
http://www.youtube.com/watch?v=-ws5pXCWpdE
3. You can apply weathering powders straight onto the varnished layer, rather than underneath the varnish layer. Some White spirit is used as a fixative, and the DULLCOTE secures the weathering pigments/powders.
4. If you ruin a model at this stage you can clean the washes and powders off, with a bit of water or lite brush of white spirit, the Cured Varnish protects the layer below! (Awesome - especially if you get a really good crisp paint job, seal it before you do details such as the face etc.)
5. Models ruined at varnish stage are rarely beyond salvage. If you get clouding or strange effects, often a another coat of glossy varnish, will return the model to it's former glory.
MY LATEST EXAMPLES
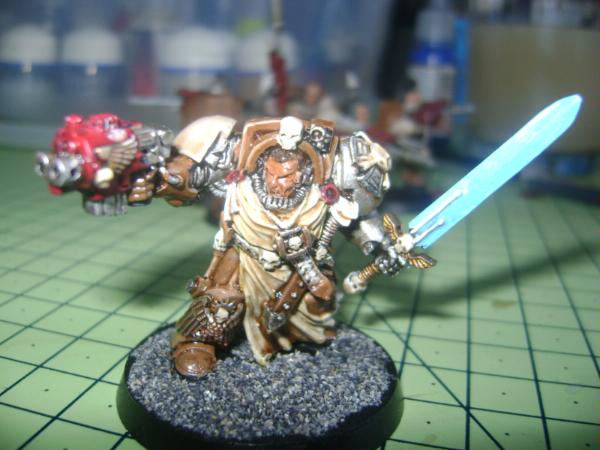
This picture is a composite Varnish Technique. I have used Vallejo Glossy Varnish, with Quickshade techniques and DULLCOTE to get the effects below. All this came from Dipping, so I get annoyed with anyone who decry's it, it's just another effective technique and another tool in the armory.
TOP TIPS
1. Consider using Weathering Powders post Dipping, once the varnish is cured, and brush on some white spirit then add weathering powders.
2. Try painting a whole Unit at a time, not just the Odd model. It's more efficient and tends to produce a more homogeneous look.
3. Do wash certain areas before dipping, certain miniatures look great others look terrible. A face is a good example, a light wash with Ogryn flesh and then devlin mud, and maybe Badab Black.
4. If you want to use STRONG Tone consider getting some of the Army Painter's Color Spray Primers. It speeds things right along.
5. Decals apply transfers BEFORE dipping! The best technique is paint a small section with glossy varnish (Vallejo Gloss varnish is good cheap example). Once dry, wet the area then tease the prepared decal onto the surface. The water on the smooth varnish runs easily and allows you to brush Air bubbles out (It's air bubbles trapped underneath the decal that give that Silvery shine, get rid of the Bubbles and the silvery shine goes and it looks like it was painted on!). Another layer of varnish over the whole model ties it all together and you won't see the edges of the decal at all, This is the best technique I have come across for Decals.
6. Check out The Army Painters website. They've got a really cool blog on there.
Please feel free to PM if you experiment find techniques that do or even don't work, It's all useful information and above all enjoy.