Forum adverts like this one are shown to any user who is not logged in. Join us by filling out a tiny 3 field form and you will get your own, free, dakka user account which gives a good range of benefits to you:
No adverts like this in the forums anymore.
Times and dates in your local timezone.
Full tracking of what you have read so you can skip to your first unread post, easily see what has changed since you last logged in, and easily see what is new at a glance.
Email notifications for threads you want to watch closely.
Being a part of the oldest wargaming community on the net.
If you are already a member then feel free to login now.
2015/11/27 23:25:38
Subject: 1850 ITC game Tyranids Endless swarm vs Necron Decurion
Well, I thought this was going to be the third game I practice with my army on, however due to failing a wife roll. My second game has been delayed at least a couple of weeks. Thus this game will happen first.
Once again I'm running the endless swarm as I envisage it. After my third game I think I will have enough experience to potentially tweak the list a little here and there. Little things like one of the gant squads drops its devourers for 5 more bugs instead. Only lose 5 shots over all, but gain more wounds for a first group. Still want to wait on the miasma cannon for the trygon prime before I consider removing it. Game one was over the turn the trygon came in, so I didn't even get a chance to use it.
Now as to this game. The Necron decurion formation really emphasizes the long lasting capability of the necrons. I expect to see some bikes, some wraiths, and most of all tons of warriors in barges, with an HQ that improves their better than feel no pain. I think one of the keys to the game will be to target that HQ early on. If I remove the re-rolling 1's or +1, whatever that bonus is, then the whole army crumbles faster. Kill points would be the mission that I have the greatest problem with most likely. I think this battle will give me plenty of chances to exercise my return from reserve rolls as the vast majority of his weapons ignore my armor.
All right, I got his list there. So the primary target will be the jet bikes first with their ignores cover weapons. After that, there are only a couple of goals really. If I can get the fex in close combat with the vault, that is about the only way I have to combat it. Everything else will mostly be bury them in bodies. If I can get a monstrous creature in combat with a ghost ark I can take it out, but that's about the only way.
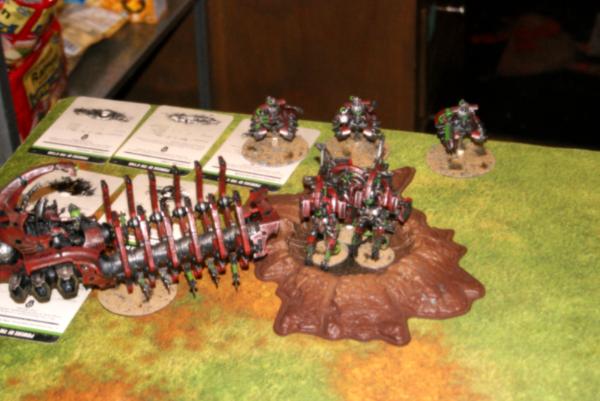
Destroyer Cult
The Rampage(Destroyer Lord) 110pts
Warsythe 20pts
Phaseshifter 25pts
Gauntlet of Fire 10pts
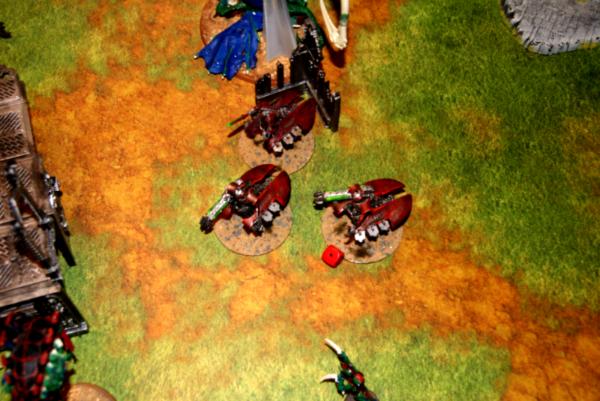
3-Destroyers 120pts
3-Destroyers 120pts
3-Destroyers 120pts
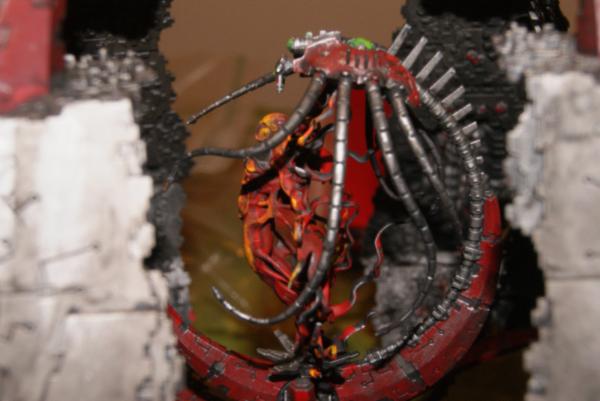
Star God
Yggra'nya the World Shaper
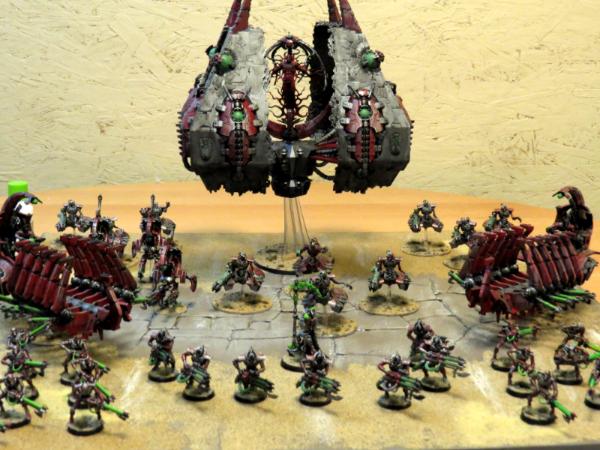
Tesseract Vault 550pts
1,849 points
We rolled our mission a couple days early. Gives us both a chance to think ahead and plan what we will do to secure the objective. This one in particular is the modified crusade with a dawn of war set up. No special deployment to worry about, my swarm should be nice and close to his guys. While I won't have any trouble getting over to his side of the table with my high speed guys, deep striking, etc.. I think the Necrons will have a little bit of trouble getting across the hoards. Jet pack guys can move, but can they get past my line and then out of reach for the next turn as well? First game I had was the book version of crusade, and I left my objective totally open to the deep striking daemons. I don't think that will be an issue here. If the destroyer cult decides to deep strike, they will not be available for firing for a couple turns, while my masses will be able to get that much farther across the field unopposed.
I've noticed everyone expecting great things from the Necrons, but I just think they will have trouble causing enough damage to my army to gain the freedom of movement they will need to win. I look forward to seeing how this all ends up.
Deployment:
Spoiler:
Mission: ITC mission 6 (Crusade+)
Deployment: Dawn of war
Tyranid warlord trait: 3 pinning tests for my opponent. (useless)
Necron warlord trait: Reroll close combat attacks. (useful.)
Pregame thoughts:
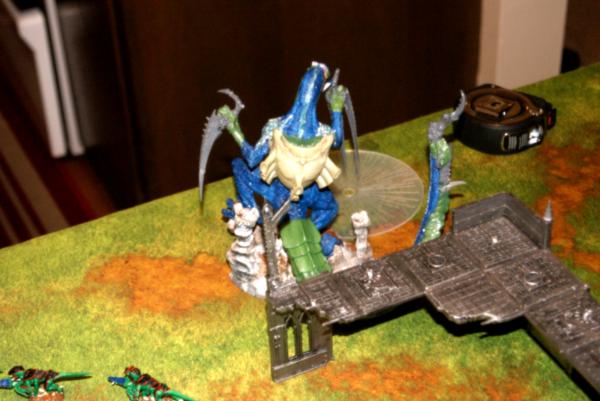
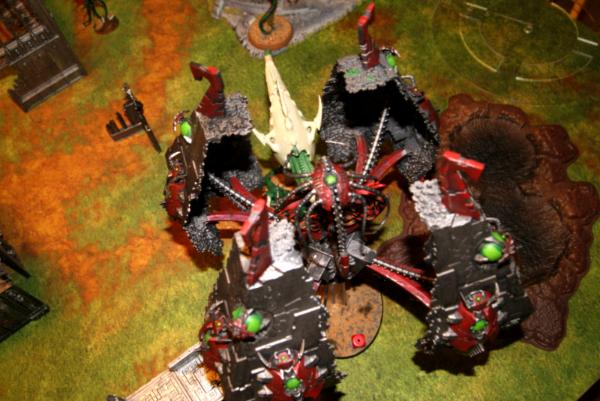
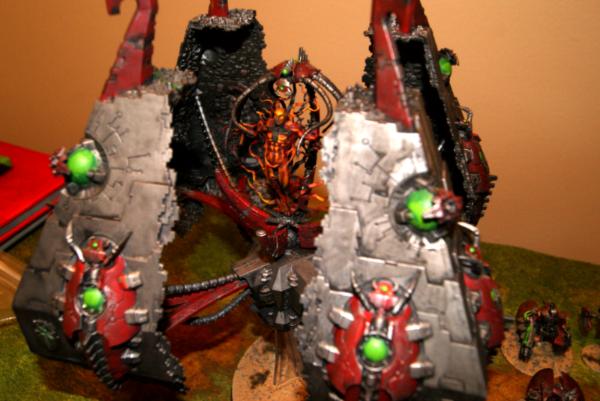
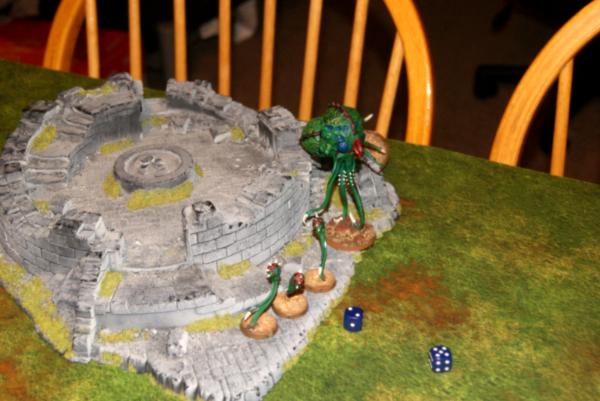
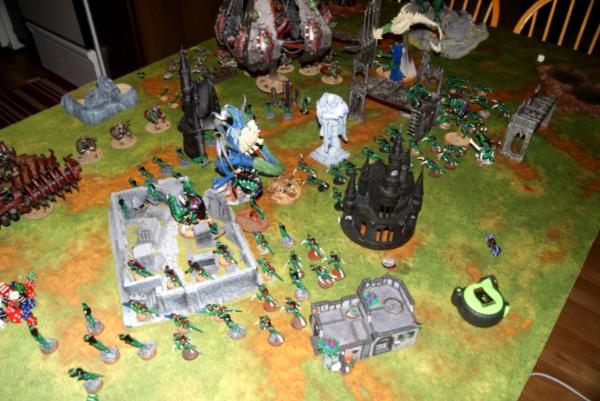
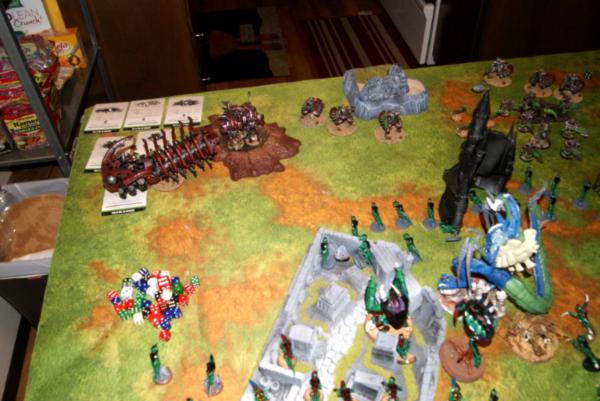
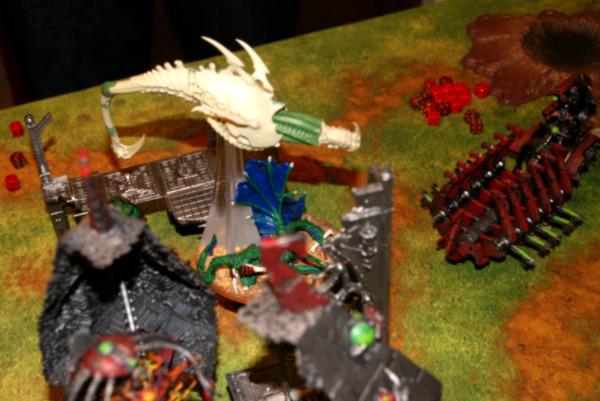
Man that tesseract vault is huge, imposing, and pretty cool looking. Too bad I plan on ignoring it most of the game. We set up quite a few ruins on the table, some good craters, and then rolled off. I won and decided to defer to go second. I figured he might make a mistake moving models too close and allowing an early charge, and being able to effect the bottom of the turn scoring.
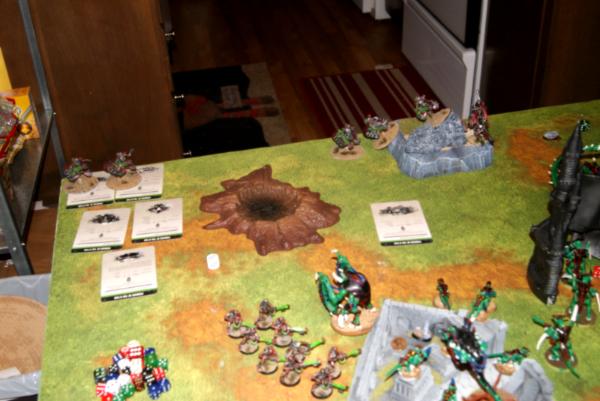
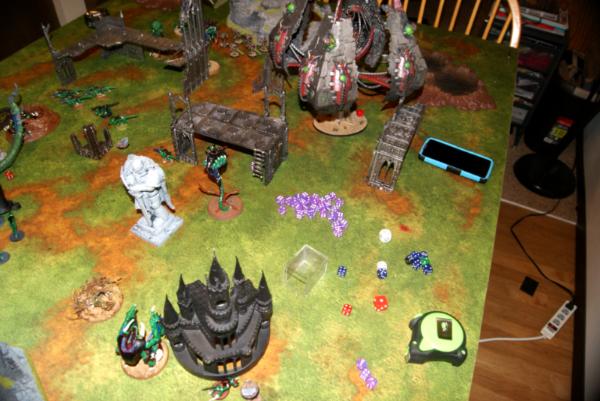
Deployment:
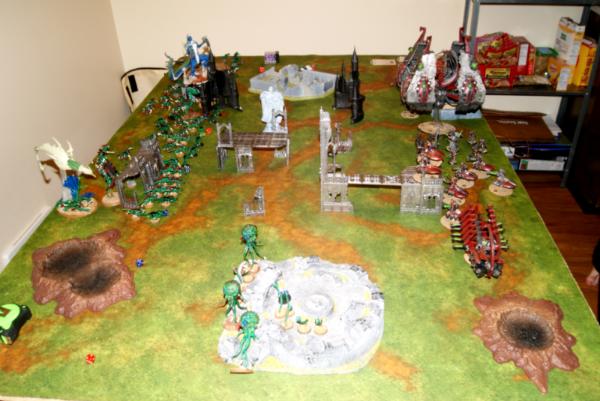
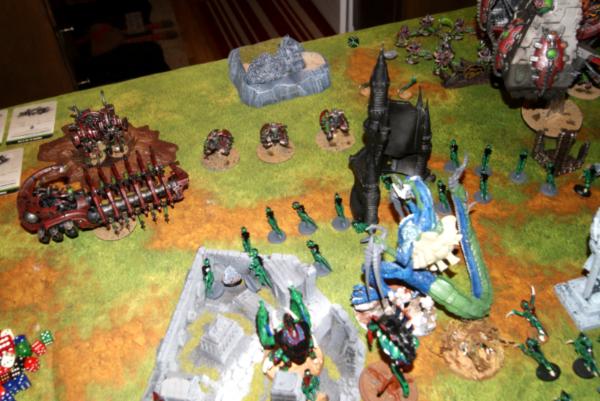
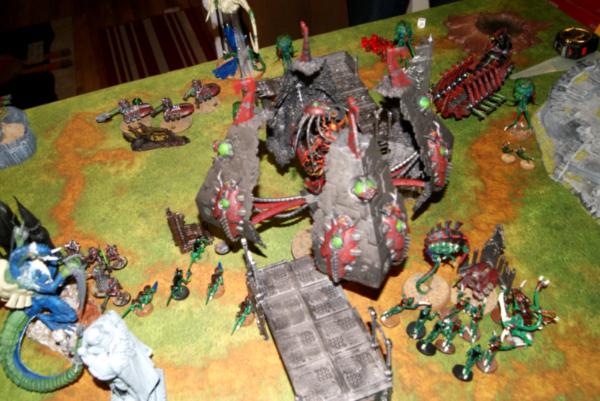
Maelstrom/crusade objectives were laid out with the tyranid #1 in front of my bunker. The tyranid #2 was in the ruins at the top of this pic. Necron #1 was in the center of his deployment zone, directly under the vault here. Necron objective #2 was straight forward 18 inches in the small ruin.
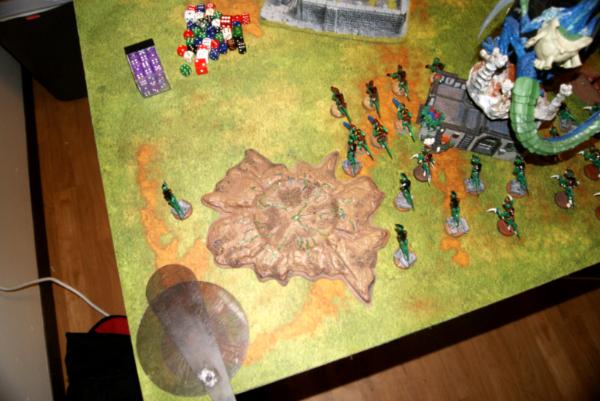
Necrons set up with a heavy emphasis placed on what was my right flank. He didn't know how I was going to set up, but it seems like he was hoping he could flank me away from the objectives and then roll up my line of battle with his destroyer lord an ark, and two squads of destroyers. With the way he set up I expected the vault would do its best to take center stage of the whole battle, allowing all four weapons to shoot pretty regularly. The left flank where most of the objectives were had an ark, destroyers, and the bikes. This seemed more a delaying force then anything for the masses that would be coming his way.
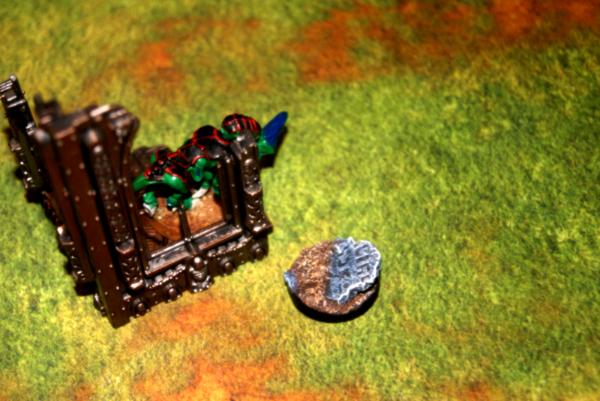
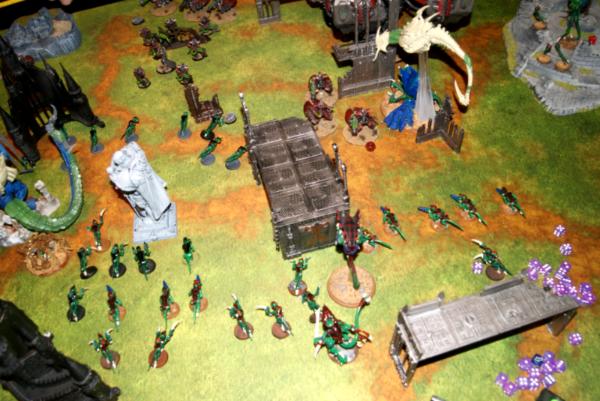
My counter to this was to put 20 hormagaunts in the bunker, the escape hatch was placed equidistant from the two objectives in the middle of the board. This should allow hatching gaunts or gants to run to either of the objectives when I need it. A malanthrope and another 17 hormagaunts rounded out my left flank for numbers. Dimachaeron on the bunker and the carnifex amidst it all were my heavy hitters.
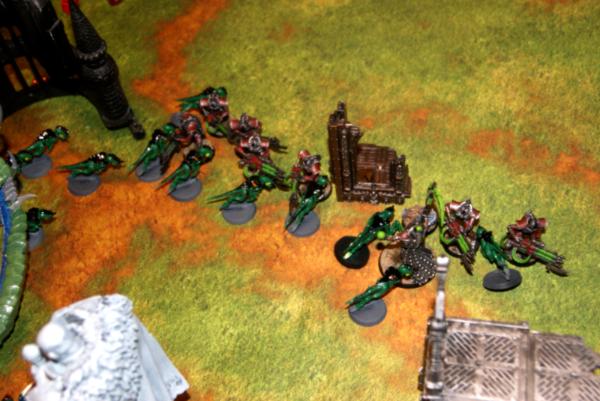
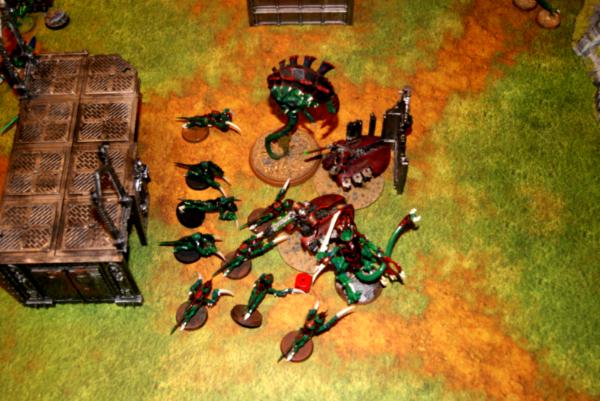
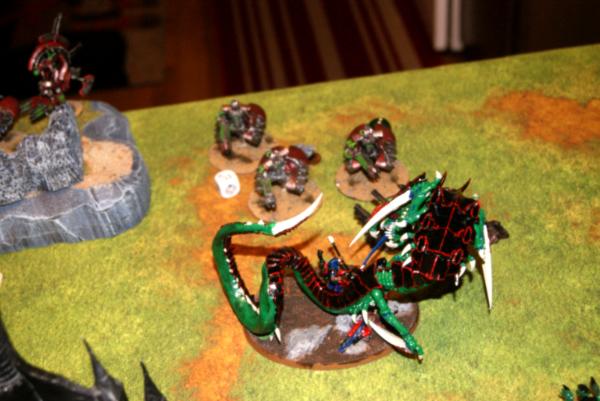
The right flank had my prime, crone, second malanthrope and a full 20 hormagaunt squad. The three termagant units were spread evenly across the front of the whole line, creating more cover for those behind. I put all my infiltrating spore field spores in the right side ruin. My intention being to distract fire power to the right side of the battle, where there were no objectives. If he chose to ignore them, they would pop out of cover and do their best to put pressure on the ark over here.
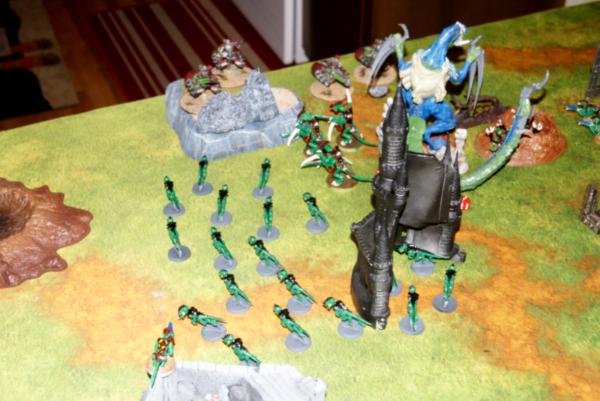
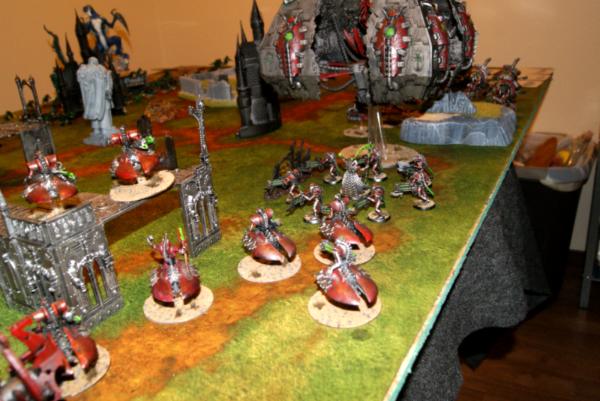
From the Necron lines, looking towards to great swarm.
First turn:
Spoiler:
Necron turn one:
Necron objectives 4/6 (destroy a unit/have three units in your deployment zone, and no enemies.)
The vault slid towards the right flank, moving away from the carnifex, and dimachaeron. This effectively set my tactic to ignoring the lord of war as those were the only two that really had a hope of causing major damage. The destroyers and destroyer lord all moved forward along that right flank as well, putting that early pressure on what was my weaker side.
Shooting from the vault killed a couple of gants, and one of the mucolids, (which made its return roll.) the ark and one destroyer squad continued to fire on the spores, eventually removing one spore mine squad permanently, one spore mine squad that came back, as well as a wound on one of the other mucolids. 2+ cover is tough to beat. This was not yet first blood as the spores can never be VPs. We did decide to count it as the one unit killed however. The random shot from the vault targeted a squad of hormagaunts, that included the prime. He rolled the two D shots with precision strike, followed by a pair of 1s. Whiff.
On the left side of the board, heavy fire from the ark and destroyers managed to kill some hormagaunts, this would limit their movement a little as they had to regain coherency.
Tyranid turn one:
Tyranid objectives 5/6 (one unit in your opponents deployment zone/have three units in your deployment zone, and no enemies.)
Ongoing reserves! The two units from the spore field that regenerated deep struck into my opponents deployment zone, both of them hit right where I wanted, and then ran to either disperse, or hug cover. Mucolid landed next to that right flank ark again.
Spores went center of his deployment zone between immortals and some destroyers.
On the left flank everything moved super fast. Twenty gaunts popping out of the escape hatch got a massive 6 inch run due to +3. So they moved 12" from the escape hatch marker. Everything else followed suit as termagants, dimachaeron, and carnifex all got 5-6 inch run moves. Getting the whole left flank solidly into the ruins where the second tyranid objective was. Even the malanthrope managed to get a toe in the terrain.
The right side, and center moved a little bit slower. Both squads of termagants found themselves in range of the destroyer lords squad. This in turn slowed down the hormagaunts, and malanthrope as their run was limited by the units in front of them.
At the end of the first turn the necrons had killed a unit, scoring them one point. While the tyranids had reached the enemy deployment zone, and had three units with a toe in their own deployment zone.
Turn wrap up:
I managed to prevent one of his two objectives, and nailed both of mine. The spores have worked beautifully so far causing distraction and soaking up shots. Sure, most of those shots wouldn't have had a target if they hand't been there, but I think the fact they were there effected the placement of the vault, and kept the ark on this side of the table. If I can counter the destroyer lord moving up, that would help me establish control. Getting the prime and hormagaunts into close combat, along with the malanthrope for preferred enemy in the future will be my goal there.
Necrons: 1
Tyranids: 2
Second turn:
Spoiler:
Necron turn two:
Necron objectives: 3/4 (destroy a unit x2)
The vault continued it's move to the right side of the battlefield, allowing it to shoot at more spore mines, as well as down the length of the tyranid line. The ark on the right flank shifted to a midpoint between the mucolids and opened fire from both sides.
The destroyer lord star also moved forward, while the second destroyer squad moved back a touch.
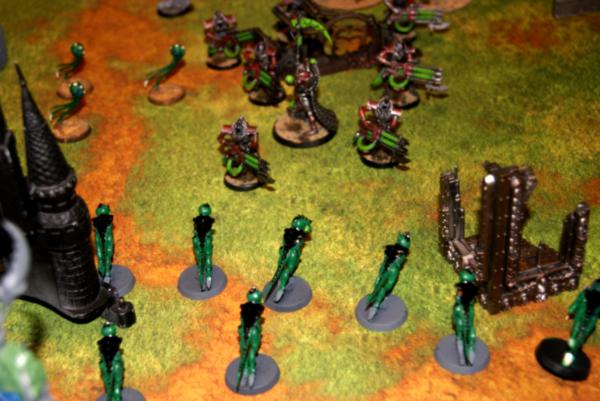
The immortals and warlord pushed right up the middle, making for the Hormagaunts that had come out of the escape hatch.
On the left flank the ark and bikes set up and fired at the left gaunts, and the escape hatch gaunts. Half a dozen losses here and there.
On the right flank, once more the ghost ark and the vault fired on spore mines and gaunts, killing off a couple of mucolids, but both of them returned. The spore mines were lost forever. Vaults random weapon was the apocalypse str 6 ignores cover blast that killed six hormagaunts and seven termagants in the center of the board.
Everyone that could then assault jumped back away from the swarm.
After they fired, the immortals and overlord charged into the hormagaunts, killing all but five, with only two of their own falling.
On the other side the destroyer lord star also assaulted, losing one to overwatch, before they wiped out a squad of termagants. The gants made their; but wait, there's more roll and went into ongoing reserves.
Tyranid turn two:
Tyranid objectives: 4/5 (destroy a unit/have one unit in opponents deployment zone.)
I continued to move my forces on the left flank as far forward as I could. The carnifex poised himself on the edge of the ruins, just inside of the cover bubble of the malanthrope. It would be a 9 inch charge to the ark, so worth it near the end.
The termagants took up a position of fire on the necron jet bikes, and a mucolid dropped in to ad another threat. Also in from reserve was a squad my squad of warriors, they entered and immediately stepped into the bunker. Gaining protection, and a nice jump through the escape hatch next turn.
On the rigth side, ongoing reserve mucolids once again landed around the ark, continuing to put pressure on the right side. The hive crone had the choice of vector striking either the destroyers or the ghost ark. I erred on the destroyer thinking I could shave a wound off, but the reanimation protocol worked its magic. Drool cannon failed to do anything to them either.
One mucolid and a squad of spore mines had made it into assault range of the ark, the spore mines were shot away, and the mucolid failed to cause any damage.
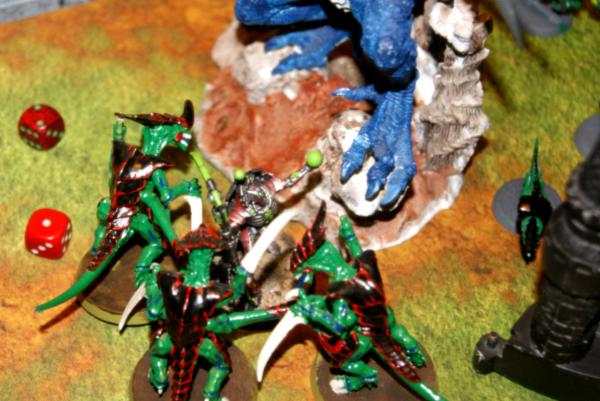
The malanthrope and the hormagaunts led by prime had much better success. The prime caused one wound, while the hormagaunts succeeded in pulling down the destroyer. The malanthrope grasped the destroyer lord in a challenge, cutting his attacks in half. Of those two attacks, only one landed, and it failed to wound.
The destroyer is left all alone, and the nids are safe from counter attack next turn.
In the center of the board, the dimachaeron launched itself into battle with the immortals and the overlord. Strength 8 attacks from his sickle talons felled two of the immortals, somehow the three others, and the strength 10 maw attack were all saved by 5+ reanimation. The hormagaunts were brought down to only a single model remaining, tying the combat.
Necrons: 2
Tyranids: 4
Turn summary:
Once again, I achieved my maelstrom objectives, getting the crone to his deployment zone, and killing off the destroyer unit. Bombs are still entertaining the ark and the vault. If I can keep moving the warrior prime and malanthrope along I should be able to take out the ark and its warriors. On the left flank, he either has to abandon the area, and full speed away, or I'm going to smash the ark with my fex, and swamp his warriors with swarm. In the center, the dimachaeron had a poor statistical run at the immortals, I'm sure it will balance out next round.
Third turn:
Spoiler:
Necron turn three:
Necron objectives: 1/3 (hold either objective 1/destroy a unit)
Well, this is the opposite of what I expected, instead of the ark on the left flank retreating or heading centerfield asap, he decided to park two inches from the carnifex and open up on the mucolid, the termagants in 2+ cover, and the hormagaunts that are out in the open.
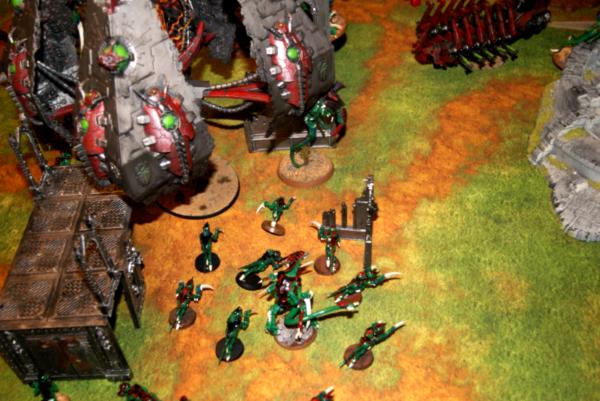
In the center he is fairly trapped by the dimachaeron, so not much movement there. The vault shifted around a little bit more, moving towards the right most ruins, so that it could fire at the bombs still there, as well as targeting the left flank malanthrope and surrounding gribblies. The random roll however was not ignores cover, and so only killed one termagant, and one hormagaunt. Termagant squads nearby took a handful of deaths. A mucolid however was not as lucky, eating half the fire from the right side ghost ark and vanishing. This one didn't make it back.
In the assault with the dimachaeron I decided to use the instant death claws. (Gain ID on a 4+) With some ten attacks due to rampage and such, I got 7 wounds on the unit. However, only one immortal failed his 5+ reanimation protocol. What?
The immortals then killed the last gaunt, and the overlord managed to poke the dimachaeron once. The last gaunt killed, that squad of twenty made their roll and will be back next turn.
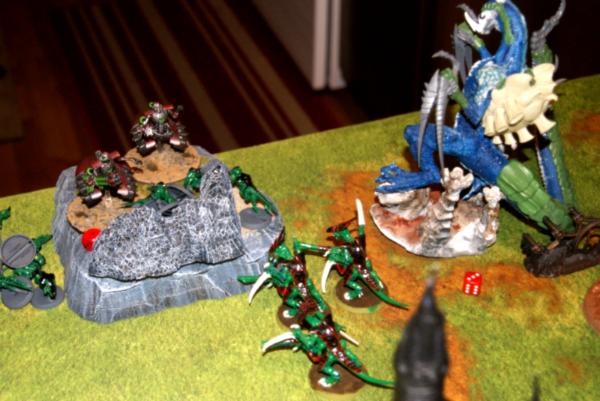
On the right flank, the destroyer lord takes a wound, but manages to fend off all the other attacks from the malanthrope and prime. He causes a wound to the malanthrope, but it is regenerated the next turn.
Tyranid turn three:
Tyranid objectives: 2/5 (Hold either objective 2/have a unit in enemy deployment zone)
Trygon prime arrived, scatter was minimal and it was well placed to use the flamer from the miasma cannon. As well as all his shots. He would provide some more synapse and a major threat to deal with for the two squads of destroyers. Sadly, even though he caused some five of six wounds, armor saves and reanimation protocol meant he did squat.
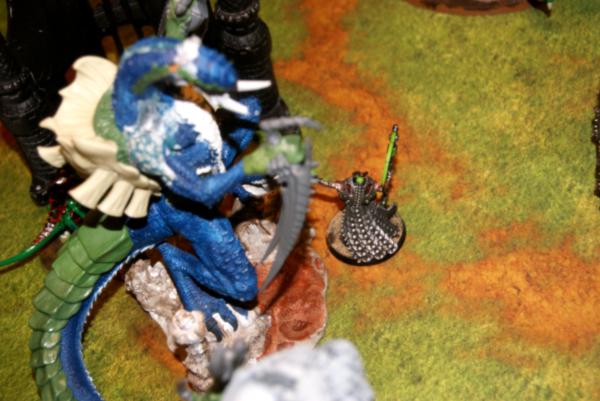
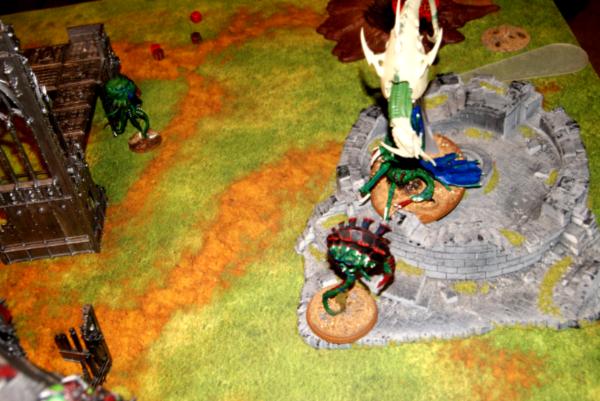
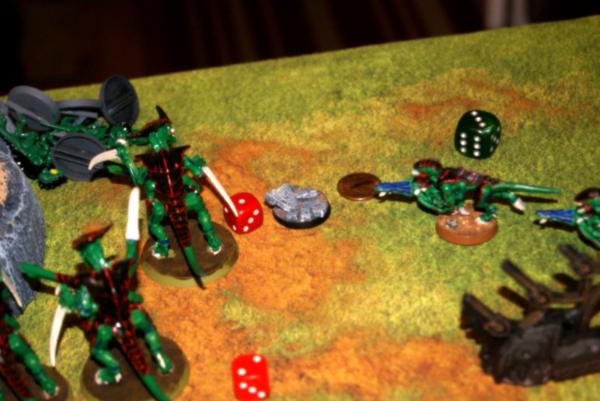
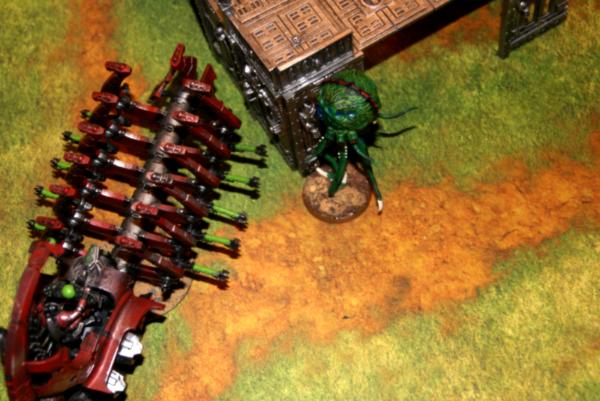
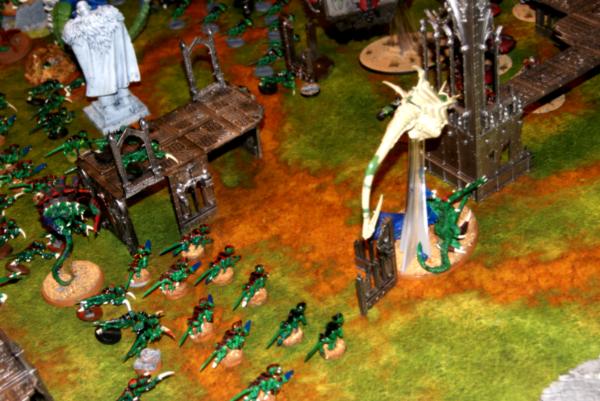
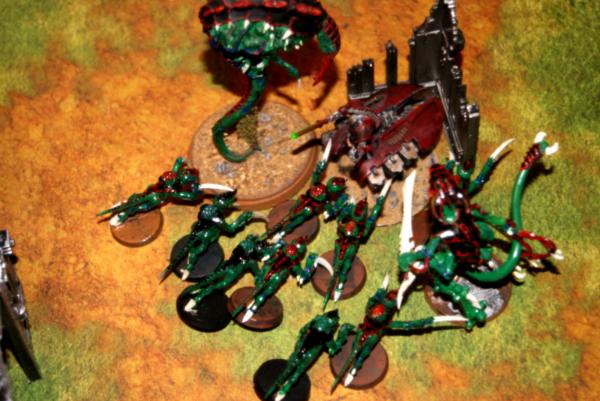
On the right flank my Crone landed in the ruins, so that it would have the opportunity to charge the ghost ark the next turn, wherever it went. Drool cannon managed to kill one warrior, and a haywire shot took off one hull point, but no glance.
[url=http://www.dakkadakka.com/gallery/761443-T3%20Crone%20jumps%20onto%20the%20ruins%2C%20prepare%20to%20attack%20the%20ark.html]
[/url]
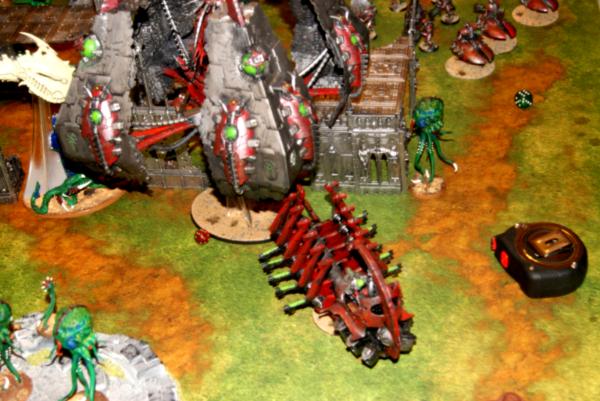
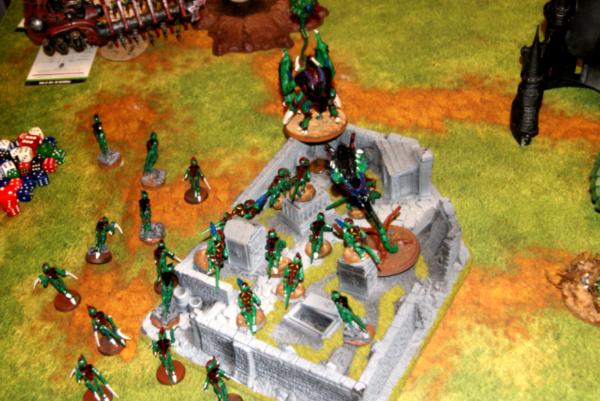
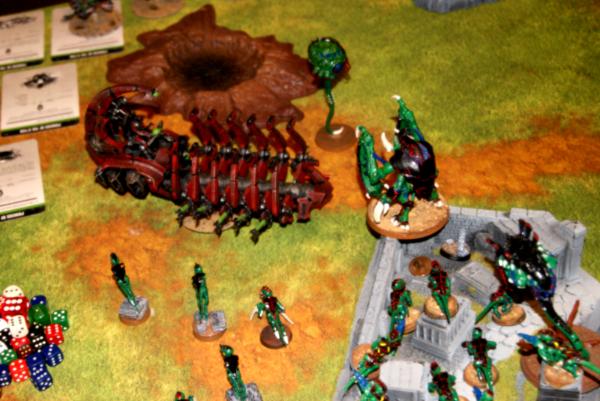
On the right flank, the warriors who had arrived the turn before popped out of the escape hatch, vacating the bunker just in time for my regenerated hormagaunt squad to take their place. The carnifex and a squad of hormagaunts prepared to charge the ghost ark. While termagants with devourers took pot shots and killed a single destroyer.
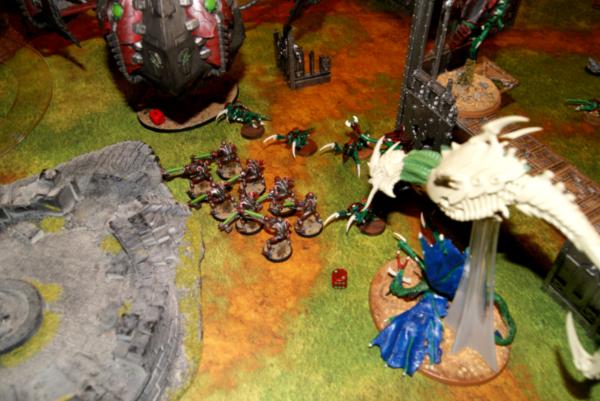
Assault went as expected, the stone wrecker caused three hull points of damage with hammer of wrath, followed by three hits that absolutely smashed the ghost ark, blowing it into a hundred pieces. Only one warrior died from the explosion.
In the center of everything, the dimachaeron finally got his attack in. With another nine attack round using the instant death claws, he killed all five of the remaining immortals in one go. The overlord once again survived a carry over wound with his invulnerable save. He also made his leadership test successfully. He then caused two wounds to the dimachaeron, who promptly regenerated one.
On the right flank, the destroyer lord finally died. The hormagaunts had a minimal spread consolidation, while the malanthrope moved right up against the ruins.
Necrons :4
Tyranids: 6
Turn summary:
Endless swarm is doing its thing as I have had two squads come back. I believe at this point the spore field has given me 7 mucolids, instead of the initial 3. My opponent is doing a fair job though of winnowing down some of my units without killing them off. Shots from the vault have killed all but three of one termagant squad, and taken another down to five. I once again achieved my two maelstrom objectives, but so did my opponent, so I'm just maintaining my lead.
Turn four:
Spoiler:
Necron turn four:
Necron objectives: 3/5 (Destroy a unit/have a unit in enemy deployment zone)
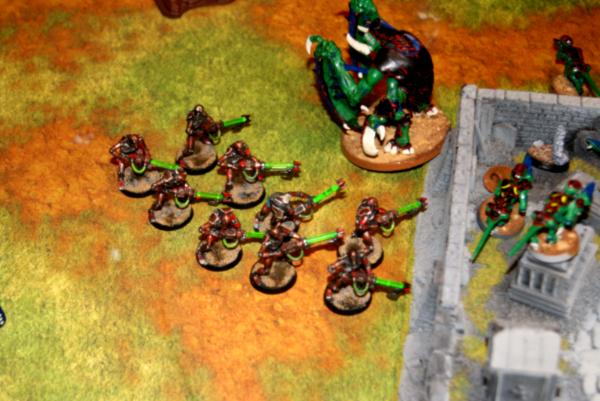
Once again on the right flank a surprise move. The warriors instead of moving slowly backwards and firing at the carnifex like I thought he would, they decide to press the attack. They move into the space next to the stone wrecker, and instead shoot and charge the termagants there. To be fair, these had done the most damage to his bikes and destroyers so far.
Back on the right flank, the ghost ark and vault team up to try and drown the malanthrope in firepower. Malanthrope had fluff armor apparently and shrugged off some thirty shots without a wound making it through his armor.
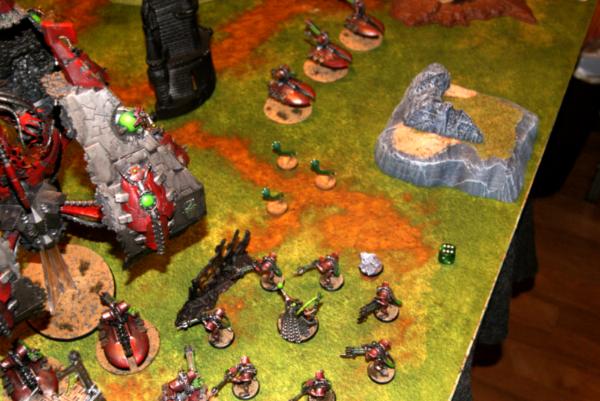
In the center of the battlefield, the two destroyer squads opened fire on the trygon, causing four wounds to the expensive beast, but were unable to put him down.
After the shooting phase, the destroyers on the right jumped as far into the corner as they could get, to prevent the carnifex from reaching them. The warriors then assaulted and managed to kill all but two of the termagants, only losing one of theirs in the process.
Tyranid turn four:
Tyranid objectives: 4/5 (destroy a unit/have a unit in enemy deployment zone)
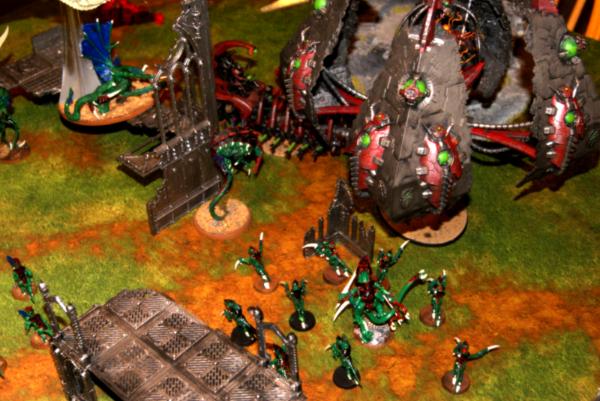
Hormagaunts leapt from the escape hatch, pushing up the center of the board towards the N1 objective.
There was almost no shooting in my turn, except for the trygon who shot up the destroyers on a rock ledge, managing to kill one this time. He then attempted an assault, took a wound in overwatch, and then failed his charge twice. (fleet reroll.) The warriors who had stepped out of the escape hatch joined the dimachaeron in combat, trying to amass the wounds it apparently took to kill the overlord. However, once again, even with all the instant death attacks in the world, they failed. Dimachaeron went for the gulp attack, and landed it, but invulnerable save prevented the pay off.
On the right flank, the warriors, malanthrope, and crone all attacked the ghost ark, exploding it and killing four hormagaunts in the process.
Back to the left flank once more, the fex, malanthrope, and beat up hormagaunt squad assaulted the remaining warriors, taking them all the way down to one. He held fast, and did not run away.
Necrons: 5
Tyranids: 8
For a moment there either the jet bike, or the lord of war were considering zipping as far as they could to get to my deployment zone. However the vault would have had to forego shooting, and the bike would have been directly next to the bunker full of hormagaunts. Either way, not a good trade off. I have secured the left side of the field, and that battle around the overlord has to resolve pretty soon here I think. I hope. I'm up three maelstroms at this point, I think I have achieved that goal. Now to clench the victory and take control of the markers.
Turn five:
Spoiler:
Necron turn five:
Necron objectives: 4/6 (destroy an enemy unit/have three units in your deployment zone, and no enemies.)
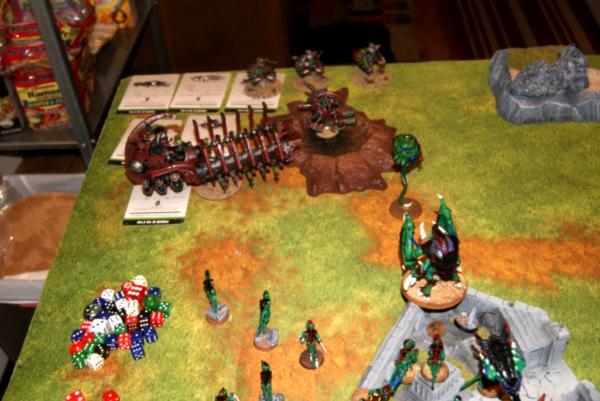
I forgot to take pictures of the Necrons this turn it seems. The vault moved into my deployment zone firmly in case that was a future maelstrom point. It then opened up along with the warriors at my prime who had been left out in the open. The random vault roll turned out to be the 20 strength 6 shots, which very quickly overwhelmed the prime and his handful of remaining gaunts. In the center of the field, the necrons were unable to resist firing at the trygon once more, although it took both destroyer squads to manage to kill him.
In the assault phase, the left flank fight ended, and everyone consolidated. Malanthrope and carnifex both got a 6, so getting greedy I started pushing them towards the lord of war. I wanted to spread out my synapse so that I could control all the little squads that were currently drifting about. The single termagant that had survived this battle grabbed the T2 objective where the combat had been. The pair of hormagaunts started moving towards the bunker T1 objective.
The central battle finally resolved as the dimachaeron gulped the overlord down, gaining three turns of feel no pain 4+. He and the warriors moved towards the remaining two squads of destroyers.
Tyranid turn five:
Tyranid objectives: 1/4 (Hold either objective 1/destroy an enemy unit)
Continuing their mad dash, the malanthrope sprinted across the battlefied, while the carnifex stubbed his toe, just about ending any chance of reaching the vault.
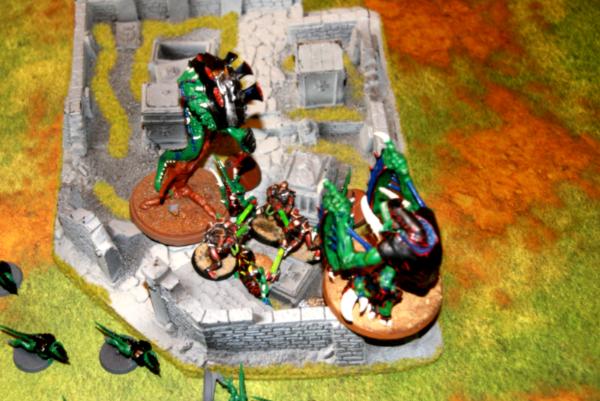
On the right flank, the malanthrope and hive crone set up to charge the warriors who had been in the ghost ark.
Hormagaunts continued their mad dash in the center of the battlefield, they made it to the base of the rock outcrop the second squad of destroyers were on. Warriors flanked them, and the dimachaeron moved towards the two destroyers holding the N1 objective.
Dimachaeron slaughters the destroyers he charged, gulping another one in the process. Hormagaunts make it into combat, but the warriors fail their charge.
After flaming half the warriors with drool, the malanthrope and crone jump into the warriors and slaughter them, the last one caught as he attempted to run. Both consolidated into the ruins and prepared to try something against the vault.
Necrons: 6
Tyranids: 10
Turn summary: My opponent is down to the vault and two destroyers. I'm up four points on the maelstrom objectives. My partial squads of termagants that have been wandering around have secured the N2 objective in the center of the board. This game is mine, the question is can he reclaim some maelstrom points.
Turn six:
Spoiler:
Necron turn six:
Necron objectives: 3/2 (destroy a unit, hold either objective 2)
The vault was unable to harm the malanthrope in the ruins, and spent most of its effort shooting at the dimachaeron, who shrugged off most of the wounds with armor or feel no pain. He had also made two regeneration rolls at this point, bringing him back to only two wounds caused.
The destroyers punched a couple of hormagaunts, and the gaunts did nothing except wrap around the destroyers, preventing anyone else from assisting them.
Tyranid turn six:
Tyranid objectives: 2/3 (hold either objective 2/destroy a unit)
Carnifex once again tries to run across the field towards the vault, and stubs his toe once more. He's tired after all the work he did on the left side.
In response to the vault attacks, I moved the dima behind some ruins. Termagants moved down to claim objective N1.
The crone charged the vault, smashed it and missed.
Necrons: 6
Tyranids: 11
Turn summary: Just about there. I have all four objectives at this point, he just wants to shoot the carnifex.
Turn seven:
Spoiler:
Necron turn seven:
Necron objectives: 1/3 (Hold either objective 1/destroy enemy unit)
All the vaults furry, causes two wounds on the fex.
tyranid turn seven:
Tyranid objectives: 3/4(Destroy enemy unit X2)
Tyranids have objective T1 at the bunker.
Tyranids have objective T2 in the left ruins.
Tyranids have objective N2 in some center ruins.
Tyranids really have the objective N1 in the central Necron deployment zone.
Hormagaunts still couldn't wound the destroyers.
Necrons: 6
Tyranids: 11
Turn summary: There wasn't much to do. Here comes the final wrap up.
Final thoughts:
Spoiler:
Time: 3 hours for seven turns. (Really happy at making things move faster. Getting finished models that are obvious which is which will help, and weighted bases that keep them upright.)
Deployment:
I think my deployment was pretty good. I considered putting the stone wrecker fex in a better position to threaten the vault. However, it would have left me with fewer solutions for the two arks. Especially as they were so far apart. With how centrally placed the escape hatch was, I probably could have even started the trygon on the table, using both its shooting, and fleet assaulting to help counter the arks. The spores all being on one side really worked well, and I think will try to do that more in the future.
First turn:
My first turn I fired two haywire shots from the flyer at the vault. Those were completely wasted. I could have used them against an ark, destroying it sooner. I could have used just the flamer template against the destroyer star. I could have gone super fast and then next turn landed in ruins to take out the ark a turn sooner. My use of the crone still is just rough.
Second turn:
I was surprised at my opponents aggressive attack on my, definitely not what I was expecting. I thought he would slowly retreat from my swarm on the left flank, and end up bunching himself in the center and to the right. Shooting my forces the whole time. Instead his pressing my lines gave me an opportunity to bury him in bodies. I was astounded at how durable the decurion forces were. Every time I play against them, it surprises me when it takes nearly ten times the attacks or fire power then what I expect. The aggression threw me off a little, and I became conservative in how I placed my carnifex, making sure to keep to the 2+cover I had. I think this was a good choice, but it felt out of character to the list.
Third turn:
The trygon arrived, I placed it middle of the board mostly for the use of the hole. In retrospect, with the placement of objectives, I could have had him on the board. Or at least when he came in, I could have placed him on the right flank, to be a greater threat over there and help free up the prime and the crone faster. The miasma cannon once again was underwhelming, however I think that is largely due to the survivability of the Necrons. I'm going to give it one more chance against a guard player. My primary plan for it was to use against the imperial armor 13 artillery that has been poping up everywhere.
Fourth turn:
I have noticed that the warriors really are not good at doing anything except provide synapse. I'm considering if I remove the miasma cannon, putting some of those points into either death spitters, or rending claws. A little bit of strength 5 shooting would have been good against the destroyers, although adding in some rending assault would have helped in the support against the overlord. (I really thought the Dimachaeron would chew him up in just a couple turns of combat.) In general at this point I was feeling pretty good, I wish I had protected the prime a little better, but if he had rolled one of the blast versions, really any of the other options. Chances are the prime would have survived.
Fifth turn:
At this point it was cleanup. The glaring mistake was the charge into the destroyers with my hormagaunts. Without the warriors making it, I just wasn't making enough wounds to kill them. (9 over four assault phases. Necrons are just soooo durable.) However, by tar pitting them with the wrap around gaunts, it at least guaranteed that I would be able to take possession of all of the objectives.
Sixth/seventh turn:
Game was over and we were just having fun at this point.
This message was edited 16 times. Last update was at 2015/12/05 19:00:42
~seapheonix
2015/12/01 04:05:24
Subject: 1850 ITC game Tyranids Endless swarm vs Necron Decurion
Can't wait to play you seapheonix on December 2nd.
"I acknowlede no master, save for the almighty spectre of death. In its name, I will reap all signs of life from this galaxy. Leaving nothing but a barren monument to timeless inevitability.
Call it what you will, but this is the pursuit of nothing less than absolute perfection. Those who cannot understand its necessity are clearly flawed, but they should not despair - I will ensure that they do not live to see the final stage of the work completed."
-Executioner Ezandrakh of the Mephrit Dynasty
Herald of the Red Harvest
2015/12/01 14:55:20
Subject: 1850 ITC game Tyranids Endless swarm vs Necron Decurion
Personally I'd take out the extra bodies and upgrades for the Endless Swarm formation and ditch the Sporefield, this way you could run 2 bare bones Endless Swarms instead, plus the CAD.
Have fun!
2015/12/03 18:35:07
Subject: 1850 ITC game Tyranids Endless swarm vs Necron Decurion
Glad you liked it. I'll have the one against my IG friend taken care of next week. As well as putting a tactical thoughts section on the army blog. Forming some more concrete thoughts surrounding this type of army.
~seapheonix
2015/12/05 22:31:37
Subject: 1850 ITC game Tyranids Endless swarm vs Necron Decurion


 [/url]