Switch Theme:

My V-shaped Dozer Blade Tutorial  [RSS] Share on facebook Share on Twitter Submit to Reddit
»
Author Message
Advert


Forum adverts like this one are shown to any user who is not logged in. Join us by filling out a tiny 3 field form and you will get your own, free, dakka user account which gives a good range of benefits to you:
  • No adverts like this in the forums anymore.
  • Times and dates in your local timezone.
  • Full tracking of what you have read so you can skip to your first unread post, easily see what has changed since you last logged in, and easily see what is new at a glance.
  • Email notifications for threads you want to watch closely.
  • Being a part of the oldest wargaming community on the net.
If you are already a member then feel free to login now.


Made in us
The Last Chancer Who Survived


Norristown, PA

Hey kids


So I had this idea to make a dozer blade that was shaped like a V. After a lot of cutting and filing and gluing I pulled it off and took some pics along the way, so here's a little tutorial on how I made it


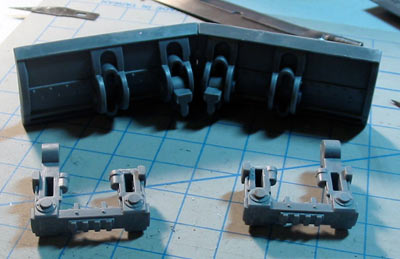
As far as bitz go, all you need is 2 dozer blades and the parts that attach it to the tank.


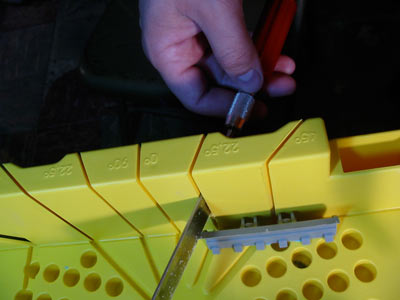
To make the angled cut to make the V shape, I had to use a Miter Box for a saw. You can get these at hardware stores. There's a hobby sized one that Xacto makes for use with their razor saw, but their box wasn't tall enough. Here's the box I got, from Home Depot, for like $15, if the link works.. Most miter boxes only cut 90 or 45 degree angles, this one does 22.5 also.. I didn't want the angle on the blades to be too big and this 22.5 angle worked out perfect.


So here we go..!


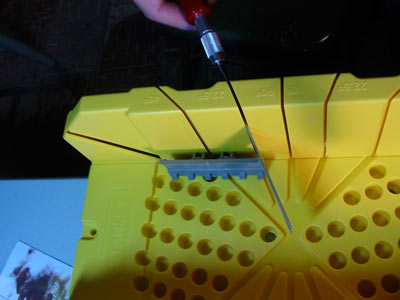
Using your razor saw and miter box, stand up the dozer blade in the box and cut along the box's guide. After you get 1 side done, get your other dozer blade and stick cut it on the other side of the box so the angle goes the opposite way.


After that's done, use a file and sand down the cut area so it's nice & smooth, then just glue em together.


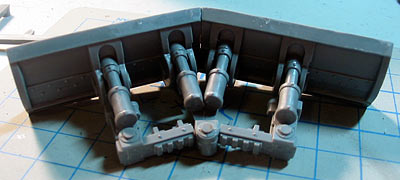
Take your mounting bitz and with your saw carefully cut off the part with the rails that attaches to the tank. They're too close together to mount to the other bars propery once it's all done, so you need to make the rails wider. Snip em in half, spred em out and connect em with a an extra piece of sprue. Use the bottom of the tank as a guide, they should fit perfectly on the rails right next to the treads.


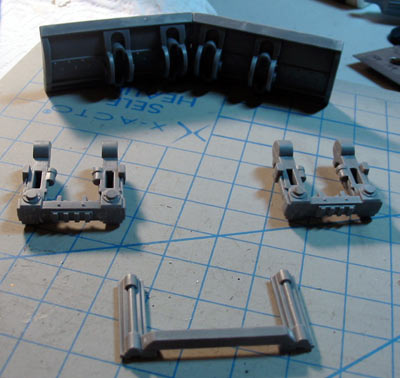
Next cut the inner parts of the bars off at the back of their bottom hydraulic thingy and glue them inside


Then, cut off the little stubs that are left, so you have 2 L-shaped hydraulics. Save those little stubs.


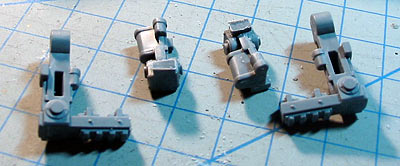
Glue the L shaped bitz inside. As you'll see, the wider rails for attaching to the tank just happen to be the right size to match up with the backs of the hydraulics. This happened totally by accident, but I'm not complaining.


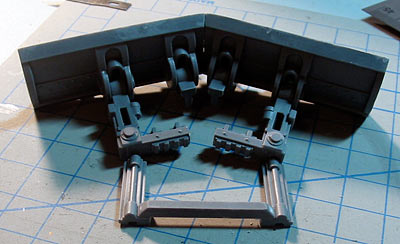
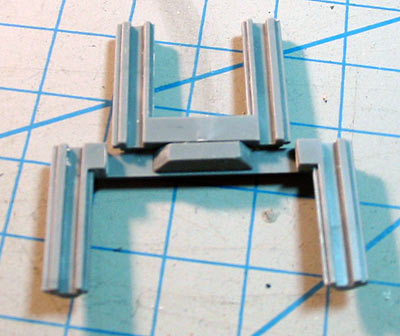
Now you want to go back to one of those little stubs that you saved and cut off one of the little round sections and file down the edges so it's smooth. Glue these to the insides of the L's and then use spare sprue pieces to attach the 2 middle hydraulics, then use green stuff to fill in the gaps.


Now back to the rails.. they're a bit too short to attach to the tank, so you can take the other thinner railds that you hopefully still have and attach them to the back with some extra sprue pieces. You can actually skip this part if you're making it for a chimera based tank, but the russ types need the extra length for it to fit right.


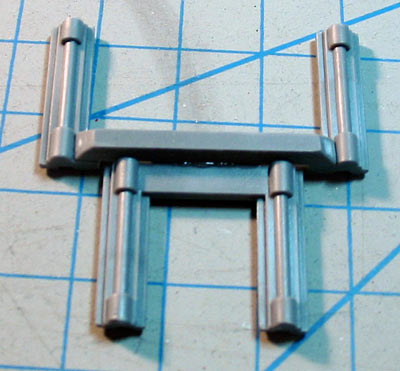
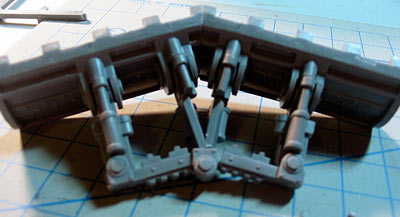
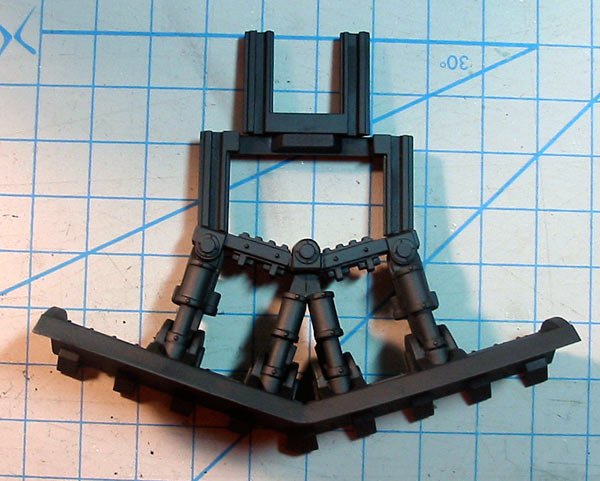
Trim the ends of the rails a bit so they match the angle of the other part, glue it together and you're done!


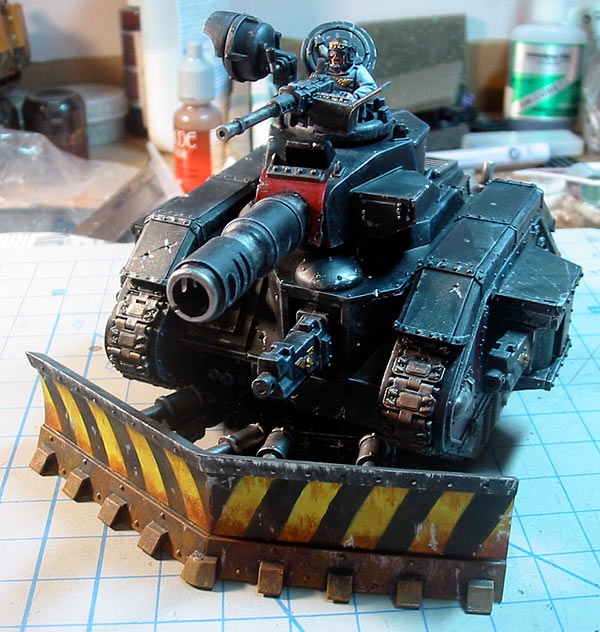
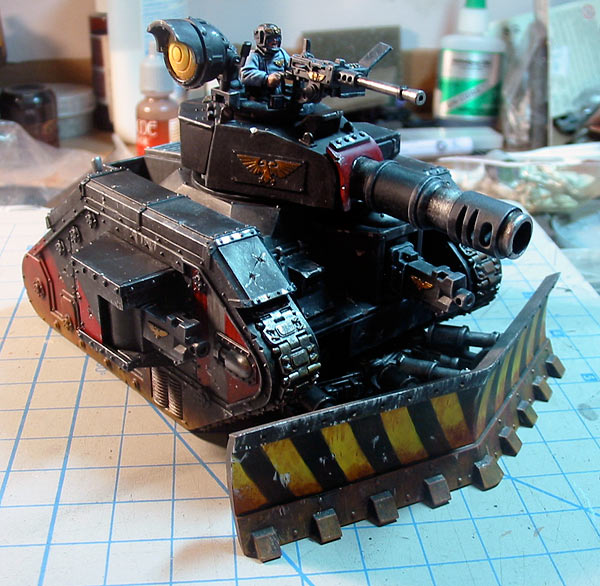
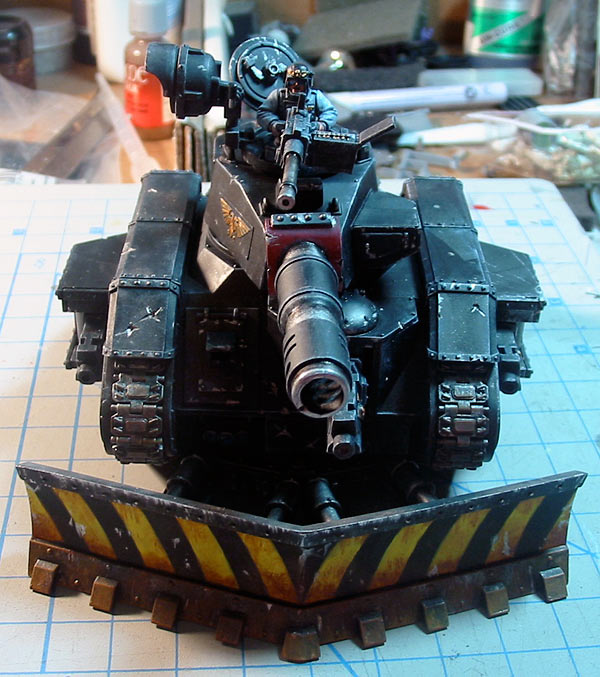
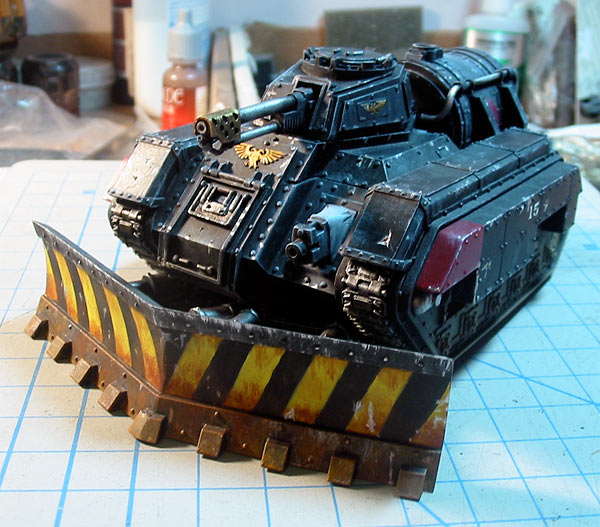
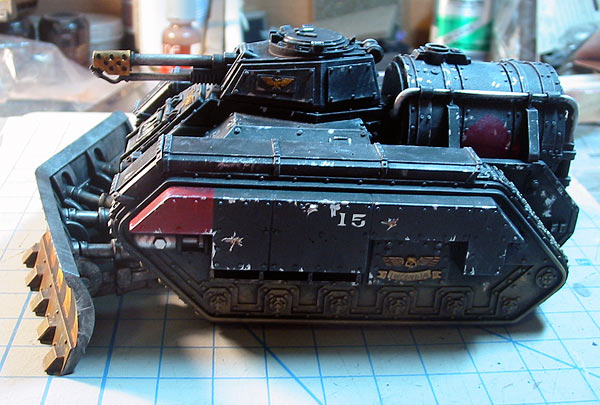
Here's some finished Russ & Hellhound pics for comparison:


Made in us
Regular Dakkanaut


South of Philadelphia

Nice. Slick stuff necros

See that? That thing just stuffed two other things into that bigger thing! What in Morrow's name is going on?"
Whats your pirate name?
http://www.fidius.org/quiz/pirate/
 
   
Made in us
Dakka Veteran


NJ

Excellent tutorial. Even I could follow those directions. Hopefully I'll be able to get a similar finish.
   
Made in us
Fixture of Dakka


North Central MA

I love it when someone take the initiative to actually try to help others do what they did. Excellent job. I really like the way you painted the blades themselves as well. You are clearly no stranger to painting armor.


Don't set your mind to one side.
-Nevermore
 
   
Made in us
Regular Dakkanaut


Hey thanks for this wonderful tutorial. Excellently explained, and I even love your paint job on the final result! And yes, it looks baaaaddaasssss on those tanks!

And God said unto Abraham, "Take this mighty bolter, my son, and smite thy enemies from afar. Fear not, Emperor protects..er, I mean, well, youknowwhatImean." 
   
Made in us
[MOD]
Madrak Ironhide


It's the Snow King!

DR:70+S+G-MB-I+Pwmhd05#+D++A+++/aWD100R++T(S)DM+++
Get your own Dakka Code!

"...he could never understand the sense of a contest in which the two adversaries agreed upon the rules." Gabriel Garcia Marquez, One Hundred Years of Solitude 
   
Made in us
Jinking Ravenwing Land Speeder Pilot


In your house, rummaging through your underwear drawer

That name again is Mr. Plow.

Nice stuff as always.

"Seriousness is the only refuge of the shallow"~Oscar Wilde 
   
Made in us
The Last Chancer Who Survived


Norristown, PA

hehe thats how I got the idea.. I saw a snow plow shaped like that and instead of being a normal person thinking, "Gee, that makes the snow go on both sides" I really thought "Gee, I'm gonna make my army men tanks just like that..."


Forum Index » Painting & Modeling
Go to: