My Razor’s Kiss biker army is still at a
WIP stage, but had to get some experience using them.
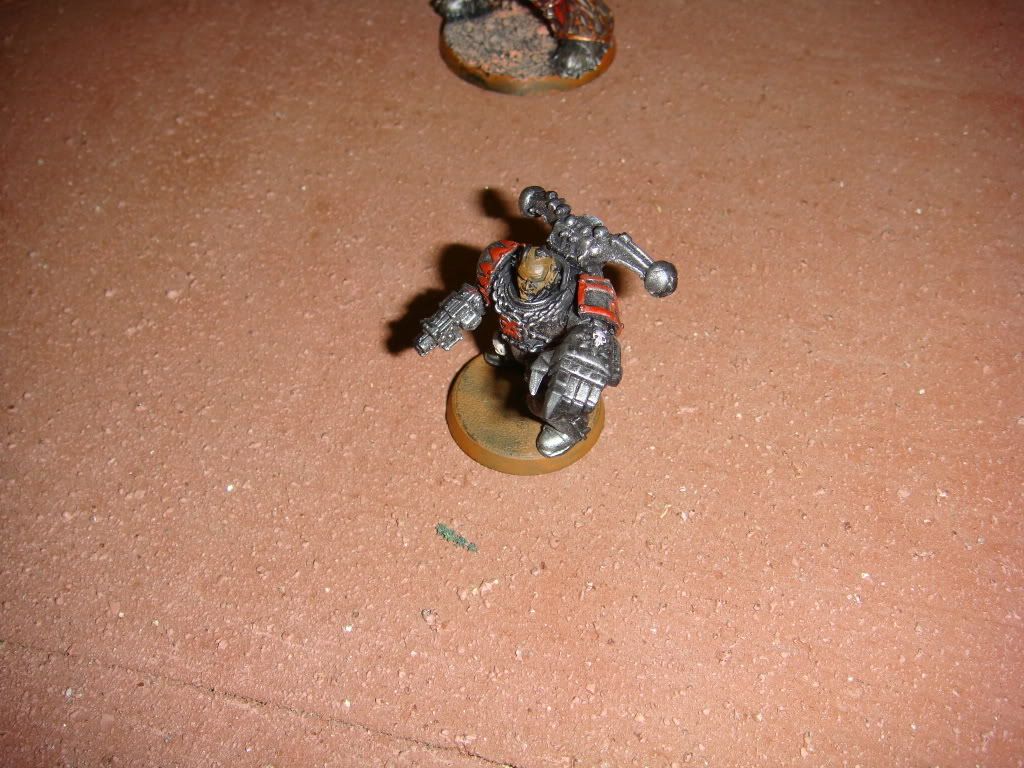
HQ-Captain, Bike, Relic Blade, Storm Shield, Digital Weapons.
T-8 Bikers, 2 Meltas, Vet + Fist, Hvy Bolter Attack Bike.
T-8 Bikers, 2 Meltas, Vet + Fist, Hvy Bolter Attack Bike.
T-8 Bikers, 2 Flamers, Vet + Fist, Hvy Bolter Attack Bike.
FA-3 Multi-Melta Attack Bikes.
FA-3 Multi-Melta Attack Bikes.
FA-3 Hvy Bolter Attack Bikes.
Fairly lean, mean, fighting machine.
It’s my normal 1500.
My opponent had a Khorne based army but painted Iron Warriors.
HQ-Daemon Prince, Wings,
MoK.
HQ-Greater Daemon.
T-8 Zerkers, Fist, Personal Icon, Rhino.
T-8 Zerkers, Fist, Personal Icon, Rhino.
T-8 Zerkers, Fist, Personal Icon, Rhino.
T-8 Zerkers, Power Weapon, Personal Icon, Rhino+Dozers.
T-8 Lesser Daemons.
Hvy- Tri-Las Pred.
This is as accurate as I could recall. It’s a pretty fighty list with a lot of scoring bodies. His
CSM army out numbered ME!!!
For simplicity, they will be called Iron Warriors…
Mission: 2 Objective Draw Fest.
Deployment: Dawn of War.
(I cheered while my opponent groaned).
We roll-off and I lose. My opponent tells me to set-up first.
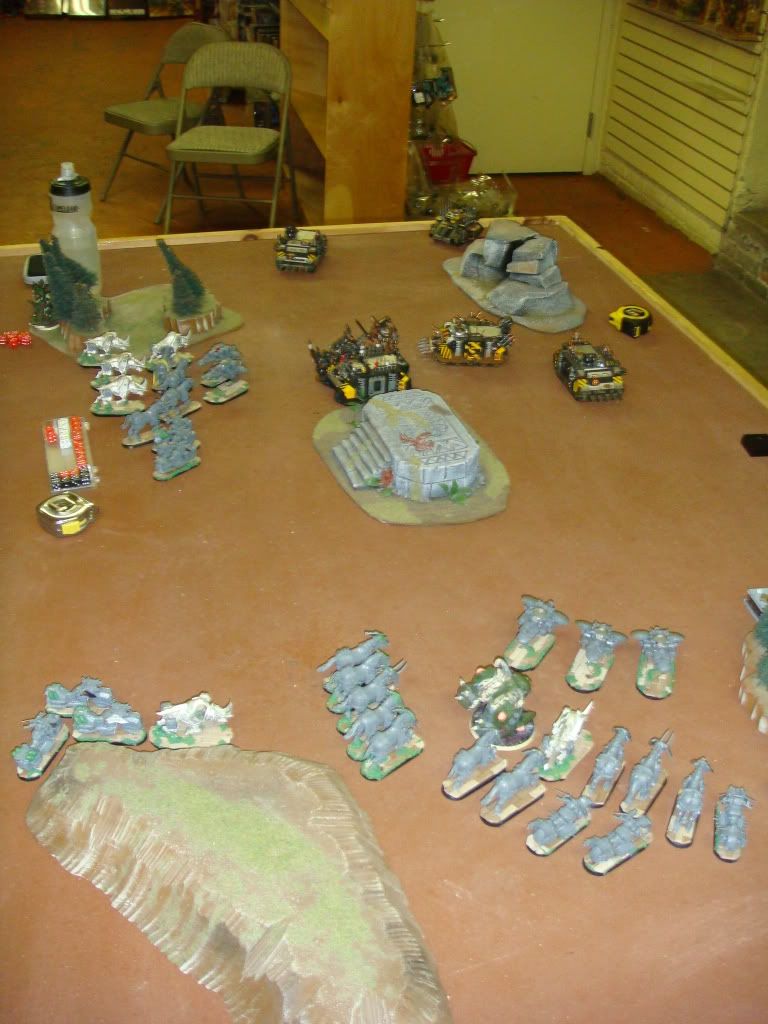
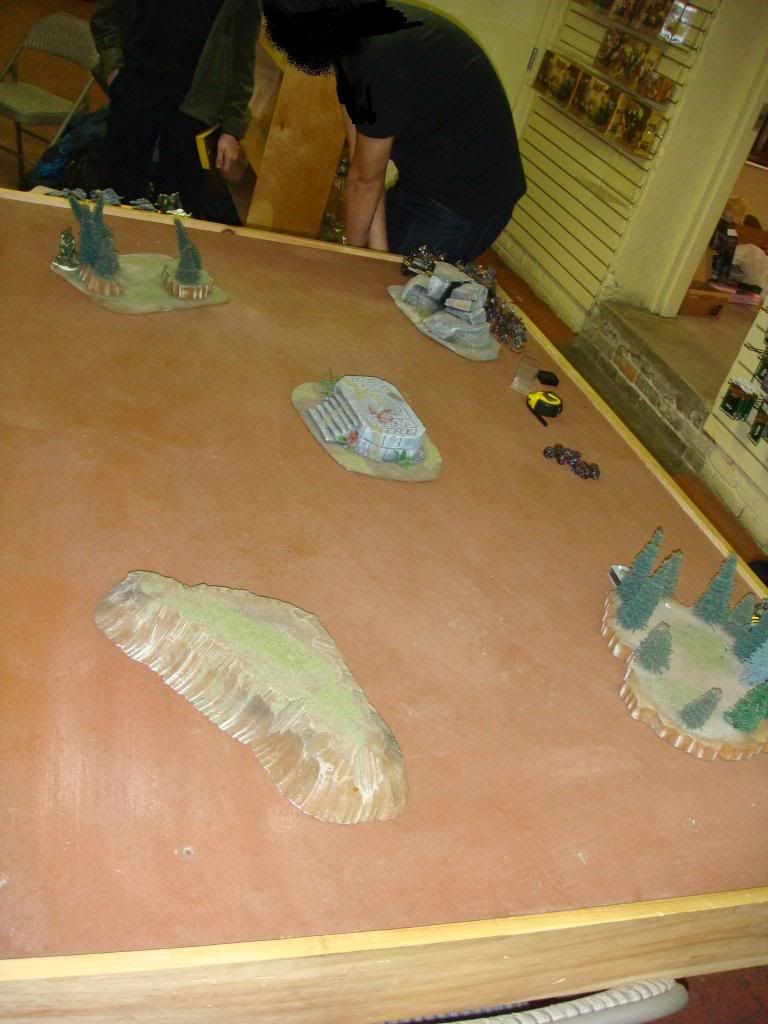 Razor’s Kiss Deployment
I deploy nothing and place nothing in reserve.
My objective is one of my plague marines on my left flank behind the forest.
Iron Warrior’s Deployment
Same as mine, he did not seize initiative.
His objective is a sort of chest/coffin next to a forest on his side of my right flank.
Night Fight in effect…though it didn’t really matter.
Razor’s Kiss Turn 1
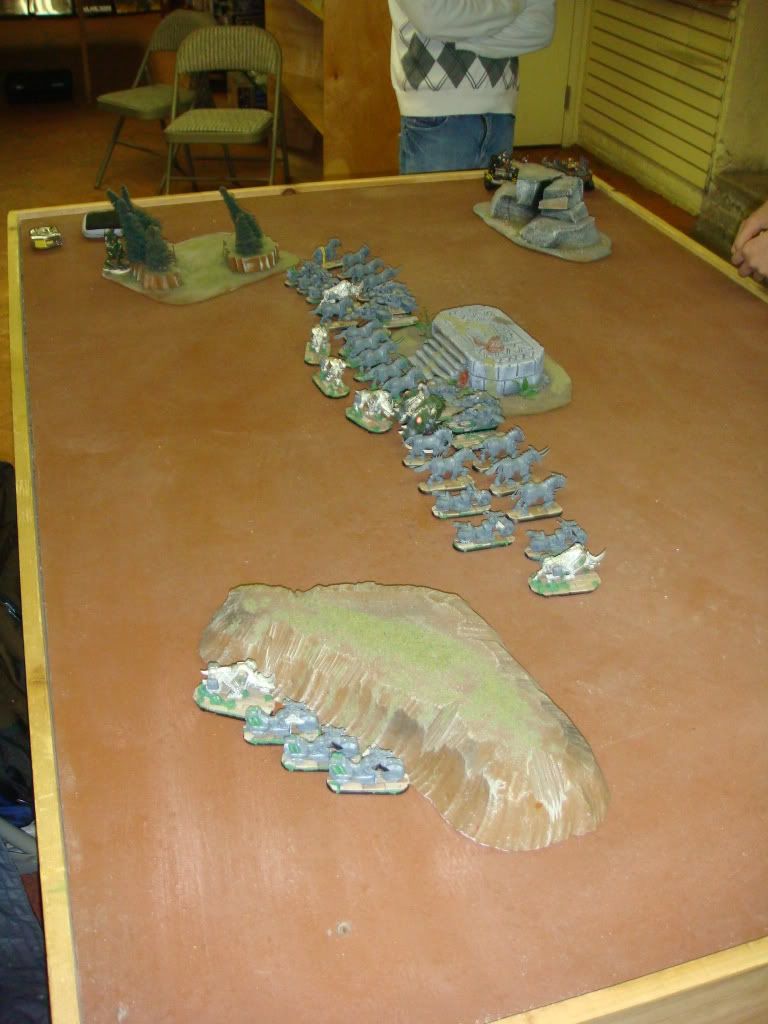
Simply, everything turbo boosts onto the board.
The melta bikers and the
MM Attack bikes take the flanks of the formation as the ‘all-comers’.
The center of the line formation has the supporting elements to react to where the Iron Warriors come in.
I decided to Combat Squad the flamer Bikers for variety.
2 Flamers and Fist will be known as the Combat Squad.
Attack bike and 3 biker Joes will be known as the Support Squad.
Though I did lean a little harder on my opponents’ objective on my right flank. The Captain and Support Squad were on that side.
With this line formation, it was kept pretty tight (as there were no blast/template weapons in my opponent’s army) and would be able to react to a castle reaction should it need to.
No Shooting or Combats.
Iron Warrrior’s Turn 1
Pred and sneaky zerkers rolls in 12” and pops smoke.
3 Zerkesr rhinos come in, in the middle 12” and smoke, a sort of box formation for the ‘real’ Daemon Prince to shelter behind.
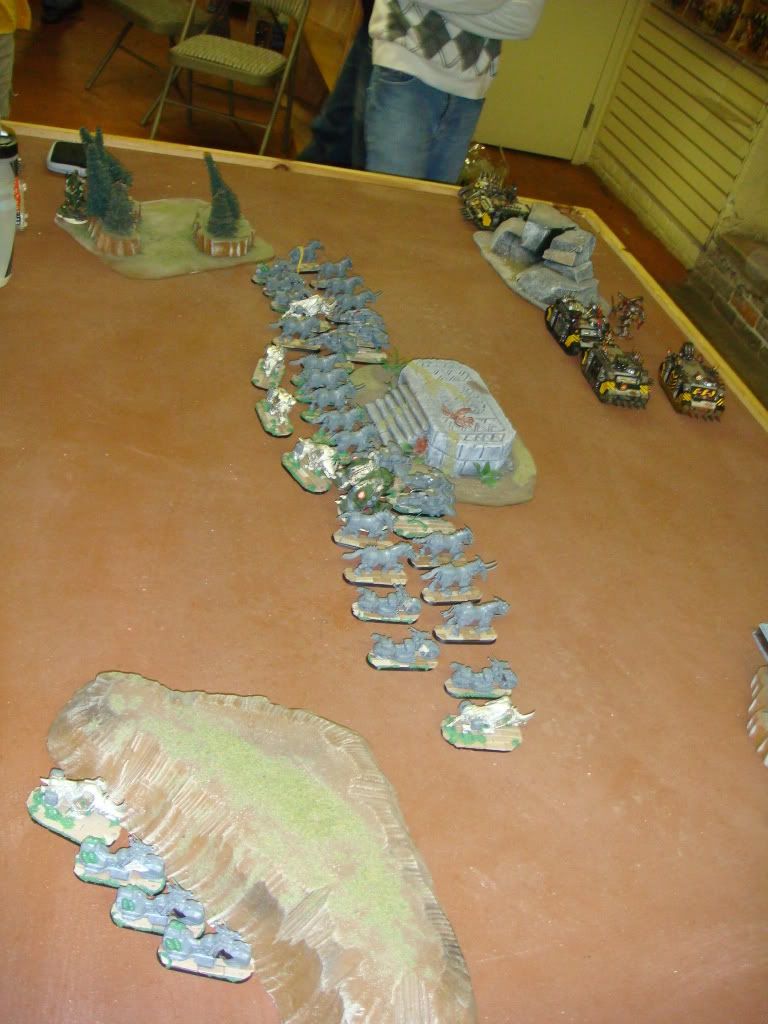
Razor’s Kiss Turn 2
My bikers split into two halves for movement.
On my left flank I have the
MM and Hvy botler Attack Bike squads and one Melta Squad slide left and a bit back to get
LoS on the rhinos.
On my rifht flank I have the rest of the units slide and a bit back to get
LoS on the leading rhino.
All I wanted was to stop the lead rhino.
80% of my fire power is dumped on the leading rhino (the corner one) and results in 2 weapon destroyed results getting though the smoke. Which means my wishes were met.
The last 20% of the fire power was thrown at the rhino in front of the Daemon Prince and resulted in a weapon destroyed result.
It is important to note here that with the lack of playing for several months, my Hitting Dice were on fire, and I believe every hvy bolter that shot at the beginning of this game all hit and each had a single glance rolled.
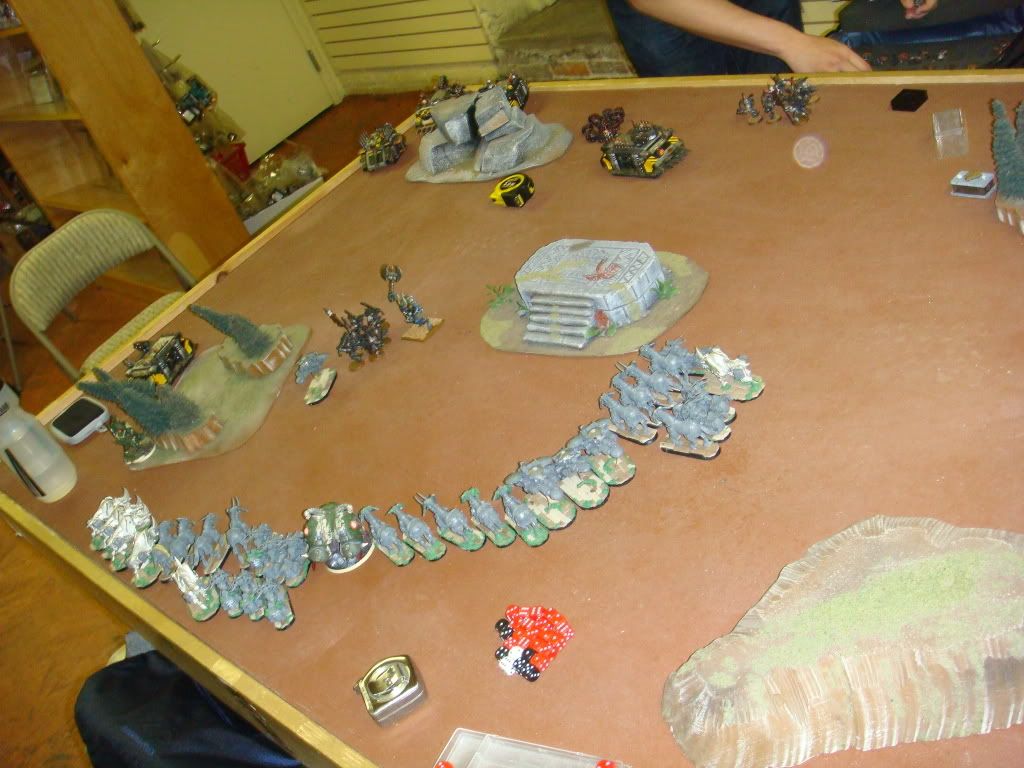
Iron Warrrior’s Turn 2
Lesser Daemons and Greater Daemon do not show up.
Immobilized Rhino w/ zerkers sit tight and roll a 5 to repair.
The rear rhino in the center moves up behind the Daemon Prince, while the
DP flies and runs to join up with the leading zerkers’ rhinos.
Surprising to me, the closest zerkers move up in their rhino, pile out and pistol the melta squad on that side of the board, and are successful in wounding the squad 4 times. The attack bike was safe, but a joe biker got shot in the eye.
My left flank Zerker Rhino powers forward, while the Tri-las pivots and opens fire on the Multi-meleta Attack bikes I’ve left out in the open.
Luckly it hit only once with the
TLLC and kills one
MM Attack bike; I make my morale test.
First blood goes to the Iron Warriors of Khorne.
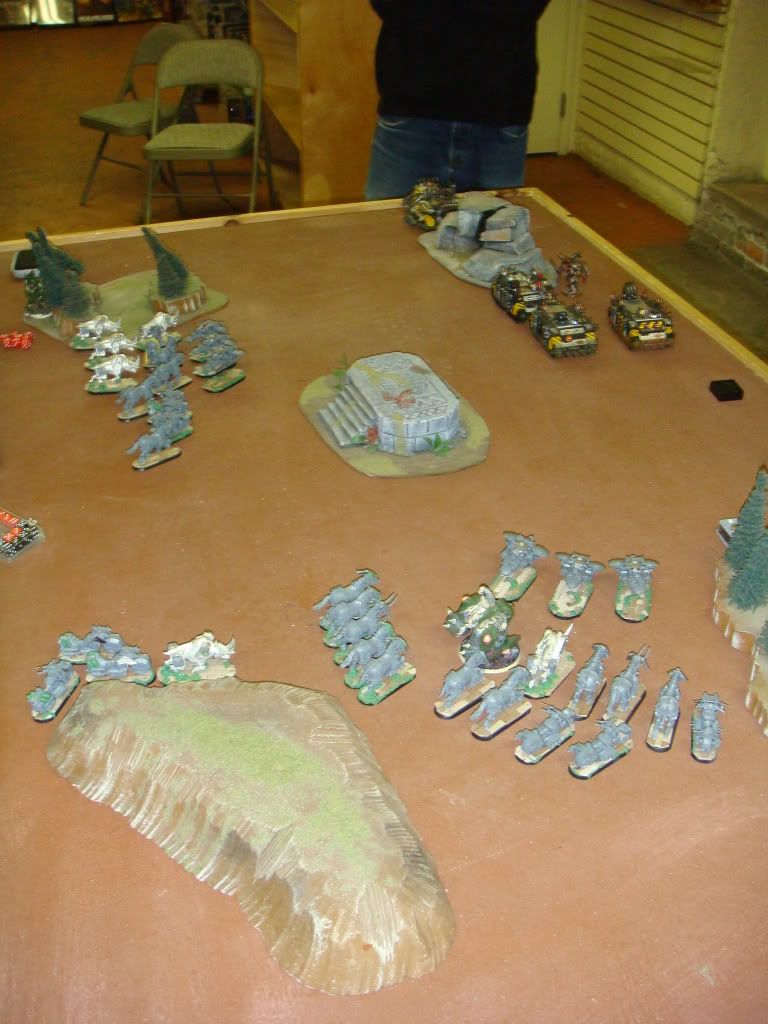
Razor’s Kiss Turn 3

Operation: MTHA (aka: Move The Hell Away.)
The bikers slide back and away from the leading zerkers and form a quarter pie firing line.
The right most Melta bike squadron took pot shots at the unmolested rhino and blew off its combi-bolter as well.
That’s so far 4 weapon destroyed results from all my shooting, heh.
The right most multi-melta attack bike squad explodes the closest rhino, wounding 2 zerkers and the prince, all making saves.
Everything opens up on the zerkers and reduces them down to 1 model after allocating/saves as they came in.
Last unit to fire was the Hvy bolter attack bike squadron at the lone Zerker Champion (a candidate for Greater Daemon Possession).
They cause 8 wounds, I mention that that is his favored gods’ number.
BAM, 8 armor saves made.
!!!!Denied!!!!
Iron Warrrior’s Turn 3

The Greater Daemon comes in through the Armor Saving Awesomeness Champion, seeing as he’s most blessed by Khorne, only to stumble through him and runs only 1”.
The princes (out of charge range) moves a total of 18” closer to my lines.
The sneaky rhino on the left flank makes it to take shelter behind the forest.
The Tri-las continues to pummel the Left most Multi-melta attack bike squadron and only kills one; I make the morale check.
The immobilized Rhino still tries to repair and only gets a 5 again.
The center rhino moves forward as well.
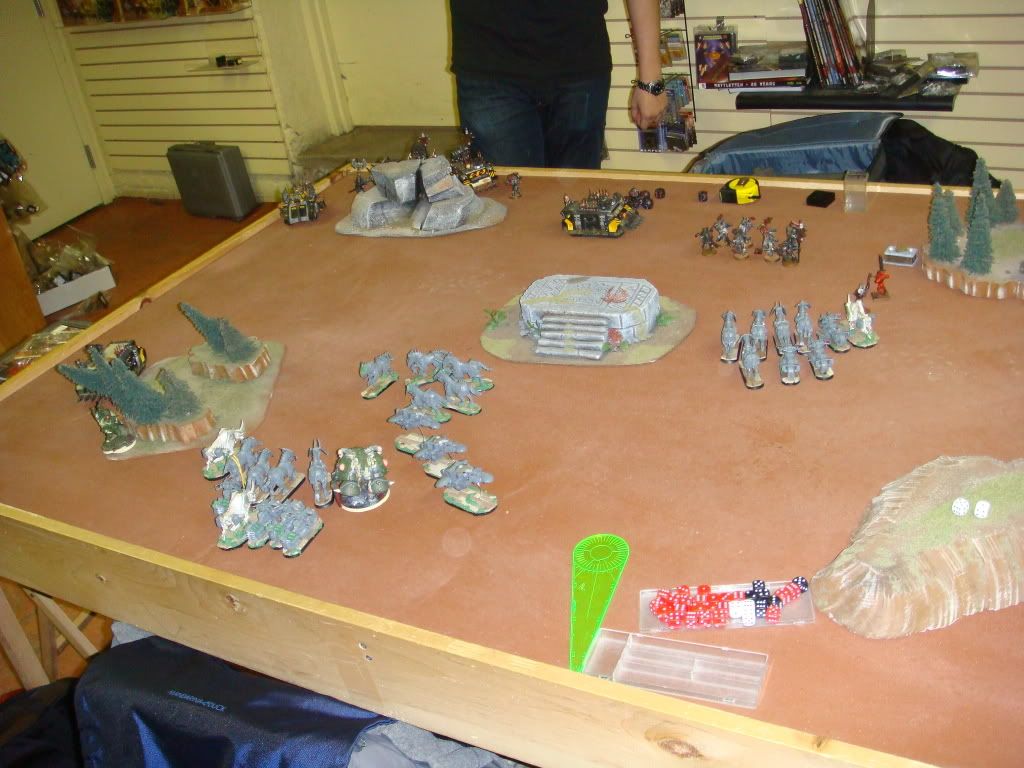
Razor’s Kiss Turn 4
Quarter Pie Firing Line Part 2.
I tighten the noose a bit.
The Hvy Bolter attack bikes inch a bit closer to the sneaky Zerkers…maybe baiting them to come out to charge them, and then I counter shoot and charge after they most likely take them out.
The last remaining
MM Attack biker moves forward as he’s expendable now. He misses his shot at the rhino though.
Everything goes text book.
Multi-Melta (>12”) explodes rhino.
Almost all available shooting goes towards the Daemon Prince to down him first and the remaining shooting takes out 1-2 Zerkers in the wreck.
Iron Warrrior’s Turn 4

The Lesser Daemons come in use the icon near the Iron Warriors’ backfield to screen the zerkers that get out of their rhino to dash over to the objective… runs are 3-4” each.
The rhino rolls another 5 to repair.
The tri-las pred opens up on the left side melta Bikers and takes out 2 bikers in that squad (not enough for a morale).
The Greater daemon moves and runs closer.
The Zerkers in the middle of the board didn’t have anyone to charge in my firing line, so moved a bit closer and charged backwards to the single multi-melta attack bike and consolidated back towards my lines.
The sneaky Zerkers near my left forest do not take the bait and sit tight.
I’m guessing since I’m paying them no attention, they would just wait to cap the objective endgame.
Razor’s Kiss Turn 5a

Note we thought this was turn 4 instead, read on and learn about it before turn 5b.
The right flank Bikers moved up and unloaded on the lesser daemons taking out 6/8.
Everything else moved in to surround the Greater Daemon and the zerkers.
The Greater Daemon was taken down in shooting, while the Combat Squad with flamers and fist had to charge in to finish the job.
Iron Warrrior’s Turn 5a
The Sneaky Zerkers wait it out (thinking this is turn 4).
The tri-las pred easily targets the Hvy botler attack bikes and wipe them all out in one volley.
On the right flank, the zerkers move up and pistol the bikers to no avail, while the lesser try to be annoying and move inbetween me and the objective.
NOTE
Why the ‘5b’. I think I fudged up the turn count/counter. I thought I was right on the turn counting, as I was counting the number of times the pred shot, which I discussed with my opponent, who suggested the actual correct turn. This occurred somewhere between turn 3-4.
What I had failed to realize that the pred spent turn 1 moving and not shooting. So we went along with it as if it was ‘normal’ when it was infact a turn behind.
So my bad there.
Razor’s Kiss Turn 5b
*Sadly no pictures for this.*
The right most melta bikers fire and charge the zerkers, after everything clears, the Zerkers are left with only their champion and I had lost some bikers too.
The remaining
MM Attack Bikes backtrack and snipe the remaining 2 lesser daemons left.
The Support Squad turbos to block off one path to my objective.
The melta squad slide over to capture my objective but not close enough to get charged if the zerkers swing around the support squad.
The combat squad (captain joins them) braves moving through Dangerous Terrain that is the forests and one biker gets killed, but are successful in getting the fist and a krak grenade to hit…which hit automatically cause he sat there.
After the smoke clears, the rhino is wrecked and some angry Zerkers disembark next to the Support Squad.
Iron Warrrior’s Turn 5b

My left flank Zerkers who were ousted from their ride move around the blocking Support Squad, shoot to no avail, and charge into them.
The Zerker joes bring down 1 Biker and wound the attack bike.
The fist steps up and kills 2 joe bikers.
The Attack Bike is left.
I fudged up a little here, I neglected to roll my morale test and went straight to no retreat and the attack bike died.
Granted I would have been testing morale on
Ld 4 and any other result would have been the same.
Anyway, the Zerkers consolidate 4-5” well into contesting range of my objective.
The Iron Warrior’s cheer as their objective of drawing the game was successful as a third party player threw the dice if the game would continue. He pulls a ‘Tauir’ and rolls a ‘1’. A second cheer and ‘victory,’ but only for a moment.
I remind him of the so easily forgotten fight near his own objective.
The last remaining Bezerker Champion near their own objective dodges attacks from the regular bikers.
It all comes down to the fists, the Champion smacks two bikers before he was crushed by the Fist wielding vet.
They consolidate 2” back into range of the Iron Warrior’s Objective.
Results:
My Objective: Contested by Zerkers and my Bikers.
His Objective: Claimed by my Bikers.
Victory for Grandfather [color=green]Nurgle! [/color]
Even with the amount of destruction dealt, the game was very, very close at the end. My opponent worked with what he had end game and was so close in pulling a Draw.
Five turn games are like that. If I had one more turn…the Captain might have saw combat, heh.
Fun Fact:
*Stuff Iron Warriors (of Khorne) Killed in Combat:
1 Multi-Melta Attack Bike.
1 Hvy Bolter Attack Bike.
6 Joe Bikers.
*Stuff Iron Warriors (of Khorne) Killed at Range:
2 Multi-Melta Attack Bikes.
3 Hvy Bolter Attack Bikes.
4 Joe Bikers.
These followers of the Blood God, killed more things with shooting than combat… I’m sure Khorne is displeased with that!!!
‘C’SM Biker Unit Run-Down.
In general, the Hvy Bolters were on fire the whole game and hitting with maybe 90% of all my shots was horrendous.
The army worked very well with the plan I stuck to.
I tried to stay together when I could, and only split up when I had to. I had a comfortable time moving around due to my opponent’s lack of blast weapons, longer ranged weapons, and a lot of board space when my opponent castes onto one side.
*Captain: Well, he was a 190 point paper weight. He did not save anyone from any pain, didn’t enter combat, didn’t put his
Ld 10 to use. The only thing he did was contribute
TL Bolter fire (and obviously unlock bikers as troops).
*Melta Bikers: The meat and potatoes. Dakka is good! Whether at >12” or <12” it’s all good. They kept at arms length and only engaged when it was to their advantedge.
*Combat Squad: They had some combat action this game and got to use their Flamers. They are great for cleaning up.
*Support Squad: They didn’t do too much. They tried to be annoying didn’t do too much in general, but their expendability was nice to have.
*MM Attack Bikes: They did their job and killed tanks, exploded two even. One Squad took a lot of damage to put down while the other ended up throwing firepower where it was needed and just cleaned up.
*Hvy Bolter Attack Bikes: They were great at pour firing where I needed it. Their end was unfortunate, but they warranted removal.
So the list played it Water, I mean HEAVY Water Style.
Maybe it wasn’t a great match up. The fast nimble shooty army vs. the clunky combatty army.
This of note:
*I have to take care of my guys more, the hvy bolter attack bikes left out in the open to be crushed in one volley by the Pred was a brain fart on my part.
*I need to keep cover on my mind more often, IE biker conga lines as opposed to tight formations I showed off here.
*Need some longer ranged stuff, this game I just accepted that the Pred was gonna pelt at me the whole game, didn’t even bother.
*Wanted some plasma cannon lovin’…
*At the end game, I should have been more aggresstive with the movement of the big melta squad to block off the Zerker’s successful attempt at contesting my objective.
I held them a bit back so as to avoid a combo charge from the zerkers, but in hind sight, I should have just turboed everything into the face of the rhino to physically provide no space for the zerkers to wrap around and take the charge.
Ballsy would have had a better chance to seal the deal as opposed to playing it safe that late in the game.
*The first ‘serious’ charge made by zerkers was Turn 5,
lol. I’m such an ass as the two charges made by Zerkers in this game were because I sent them in as sacrificial units
TO die.
*I wasn’t in dire need of a purely combat unit, hell my ‘combat unit’ of Captain + full bike squad didn’t even step up to the bat, but this prob. isn’t a good indication of my need for a combat unit.
First Impressions of my army
1. What no Khan??
2. My little pony?
3. Juggys as Attack Bikes? Nice.
4. Cool flying things, Attack Bike?
5. Why is there a Daemon Prince there?
6. What is this list again?
7. Wait “Chaos” Space Marines, explain that one more time?
*The turn mix up: was a huge goof on my part, I’ve been too rusty for table games. Too much greenstuffing and Taverning.
My Opponent’s List:
*Lack of blast like weapons: He did have a defiler, but sadly “it is in a different country.” The havoc launchers modeled were the smoke launchers in this game, and I’m assuming he would rather drive crazy fast at me with the cargo than move only 6” and shoot.
Though Havoc Launchers on Rhinos was moot as I had a lot of weapon destroyed results on almost all of the Rhinos.
*Spread out and isolated his units after he came in. That allowed me to pick at isolated targets and focus fire at my leisure. With the castled deployment, it gave me a crazy amount of board space to move around.


 i think you would of done a lot better i fonly the dice gods watched over you a bit more
  nice BR anyway
 38/15/4

 their burning of xeno's will be remembered!
  (Friend bought them back for me, making them work, statement so far half stands after a lesson learnt)
 SKAVEN


 My last game, I had to roll what felt like 20+ dangerous terrain rolls. With the amount of terrain I play with, I can't have that many bikers on the board, it would be massive trafficjams between ruins and craters
 and hellfire shells. That might be more of a meta-thing though, I'm up against plenty of T6

