Hiya guys n gals,
This is the first Tutorial ive done since i started painting few months back... so sorry if its not the best..I guess most people know how to magnetise a Predator and there are many ways to do it ...but this is how I did for those who dont know. I found it quite easy and quick to do and means your not restricted to just one set of weapons... only just finished doing this today so yet to be painted. Hope it proves useful to someone

(What you need = Magnets 5mm by 5mm and 4mm by 1mm, Plastic / super glue, green stuff, bits of sprue and a predator)
Step 1.
Assemble the main body of your predator as you would normally do. Leave the turret and sponsons unglued.
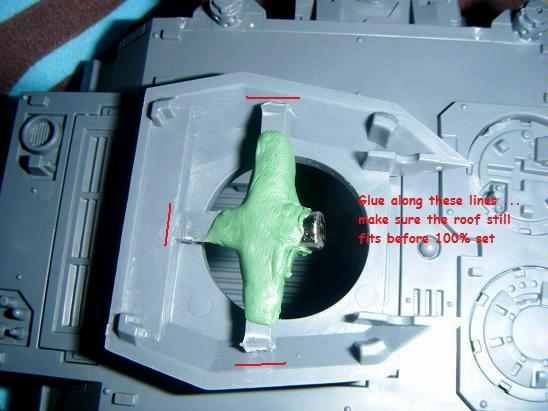
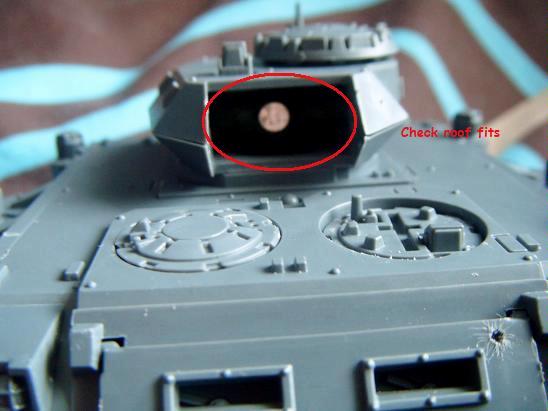
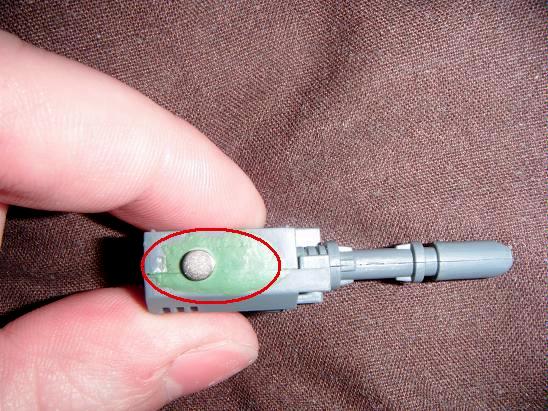
Next you need to glue a "T" shape of sprue inside the turret, i glued two bits to make the "T" shape (see pic bellow) make sure you can still attach the roof of the turret before the glue sets. Cover this sprue in Green stuff (dont need to be neat) and then insert your chosen magnet (mine was 5mm by 5mm) pointing in direction of the weapon and allow this to start setting. (I found having it at a slight angle helped to keep the weapon in place as you'll see later)
Step 2.
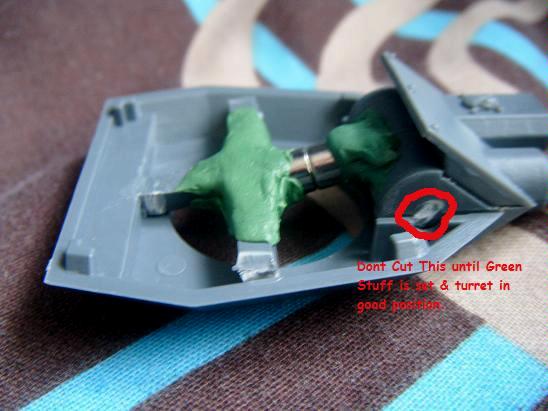
Once " T " shape has started to set then you can test fit the weapon. I found that just attaching another magnet to the set one gives a gud idea of where to green stuff/secure it to the chosen weapon, this can be bit fiddly to do (see bellow). On either side of the chosen weapon are to support "bits", dont remove these yet as they will allow your weapon to set at the angle you want.
Step 3.
Once the green stuff on the weapon is dry you can remove the weapon from the turret and it should look like this.
Step 4.
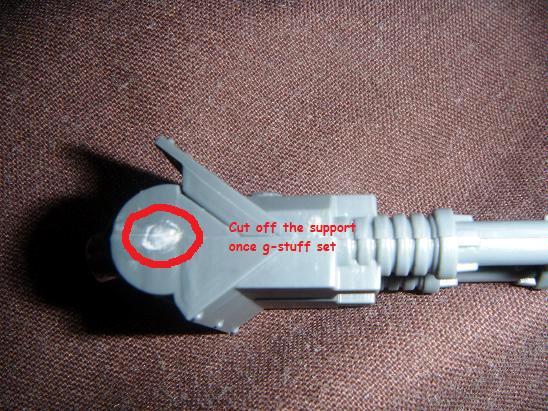
On the side of the main weapon you can now remove the support "bits" as this will allow you to pull out the weapon for easy replacing after gluing down the turret roof. (as bellow)

Thats the main turret done, just repeat the weapon allignment on your alternate weapon.
Step 5.
Now we have to tackle the side sponsons. As I mentioned earlier there are lots of ways to do this, but for me i did the following....
I glued the chosen sponson weapon together which leaves a gap into which the sponson itself would usually go. I covered this with green stuff and smoothed over and left it to dry. Then glued on a 4mm by 1mm magnet.
Step 6.
While the above sponson weapons dry we can start to tackle the main sponson holding.
I glued the main sponson body to the tank (you could also magnatise this if you wanted to change it back to a rhino & replace with doors). Then cut the sponson that leads to the weapon (the small bit of plastic that allows it to turn etc) just above the square shape. You will be left with a small bit on the top which fits into the targetter so it can sit on top.
Following this i glued a 5mm by 5mm magnet bellow to act as the new sponson. Once both are dry it should look like the picture bellow... i used a smaller magnet on the weapon itself as two 5mm magnets put it too low to the ground.

Step 7.
Repeat the above on you alternate sponson weapons ...
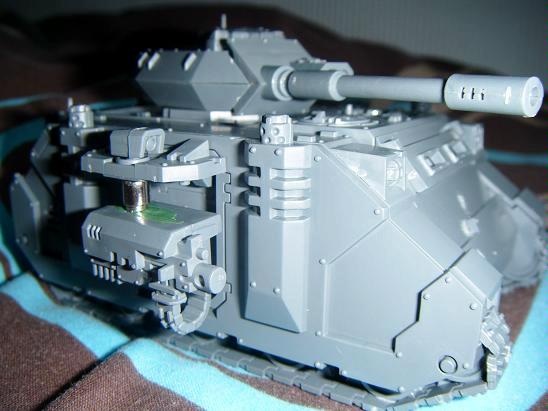
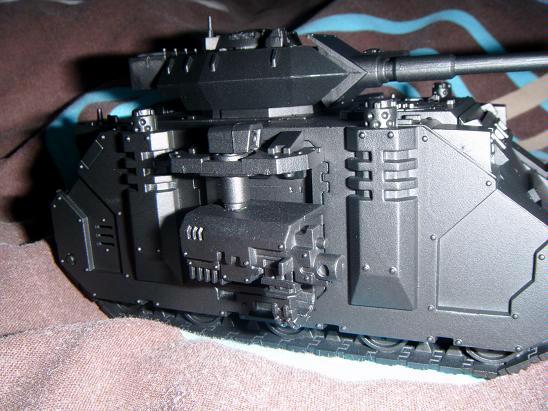
and when primed it should look ok

Hope this very quick guide helps some one out. Feel free to comment or add to this quicky guide

Cheers!!
T-M


 Death Guard Guard Blog

