| Author |
Message |
 |
|
|
|
|
Advert
|
Forum adverts like this one are shown to any user who is not logged in. Join us by filling out a tiny 3 field form and you will get your own, free, dakka user account which gives a good range of benefits to you:
- No adverts like this in the forums anymore.
- Times and dates in your local timezone.
- Full tracking of what you have read so you can skip to your first unread post, easily see what has changed since you last logged in, and easily see what is new at a glance.
- Email notifications for threads you want to watch closely.
- Being a part of the oldest wargaming community on the net.
If you are already a member then feel free to login now. |
|
 |
2011/01/31 19:48:37
Subject: The Melk 37th. A retroactive IG P&M blog.
|
|

Brigadier General
|
Finished these up a while ago, but didn't have a camera.
I'm going create the P&M blog I always wanted but forgot to have..
The goal of this army was to be:
-Completed quickly with many time saving techniques.
-Be solidly of tabletop quality.
-Be completed cheaply for roughly 25-33% of list price
-To include enough conversions to be recognizably mine.
I'll put up pictures of a section of the army every 1-4 days with notes on aqusition, painting, conversion and some of the storage/transport solutions I created along the way.
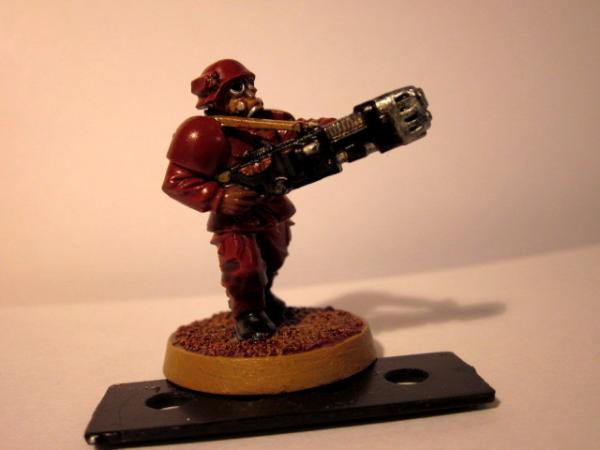
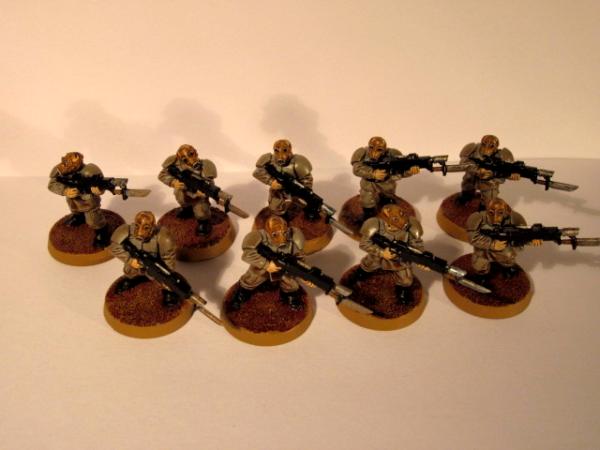
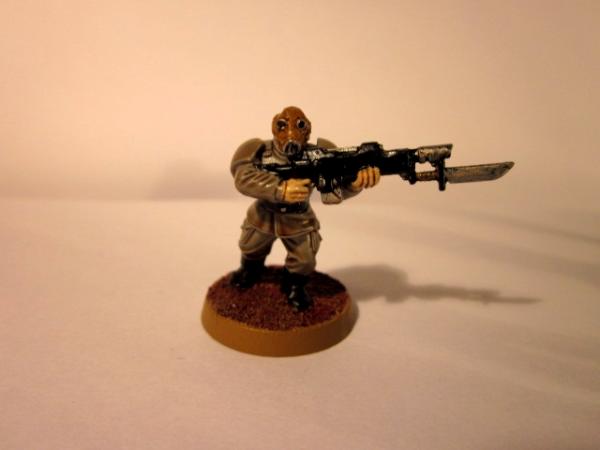
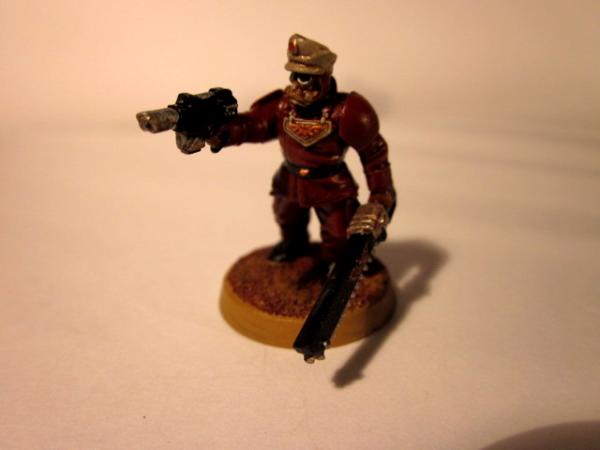
To begin, the humble imperial-flashlight-wielding guardsman
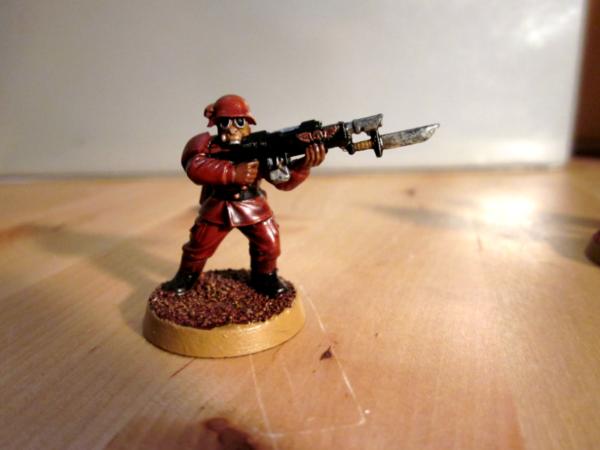
Wanting to get these done quickly, he has a prime and basecoat in-one-coat of Krylon Ruddy Brown primer followed by basic block painting. The base is panited Pumice Paint texture. and the dip is Minwax antique walnut followed by a matte spray. All of these are available at your local hardware store. The paintjob would be a touch nicer if the basecoat was a bit less dark, but speed was the priority and I like the results. The pics look more glossy than they appear in person, but there is a bit of satin shine to the figs. Definitely not a completely "flat" finish.
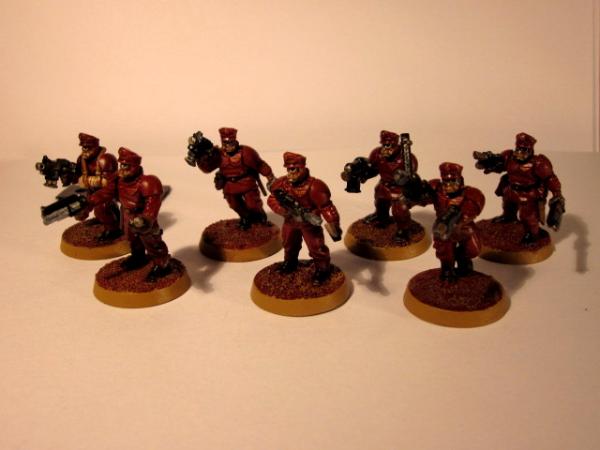
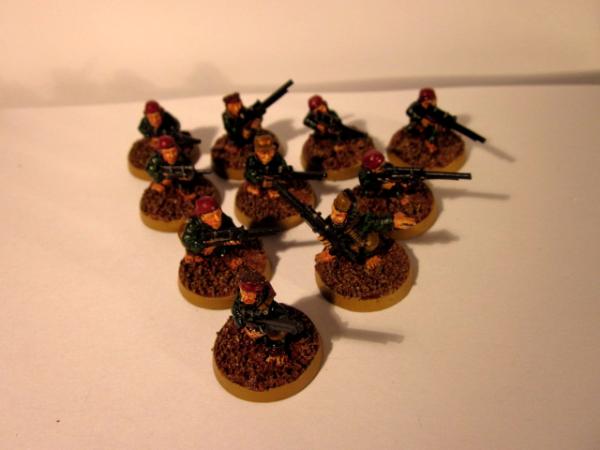
6 guardsmen from one Squad (Sgts, specials and Heavy's coming later)
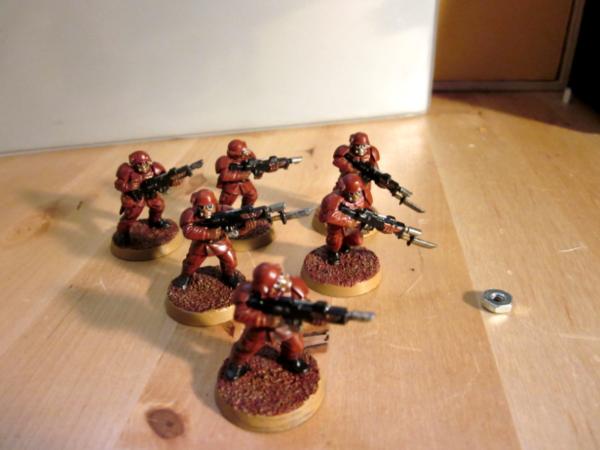
The heads are drawn from the standard and covered Kolony Milita Head sprues. Pig Iron headed guardsmen are nothing new, but are still uncommon enough in my experience that I'm very happy with the way it sets my guard apart from other guard armies.
All 42 of my lasgun toting guardsmen

Ever since I started 40k (2nd edition) I've always wanted an footslogger army, and with the proliferation of Vet IG armies, 7 squads of basic infantry seems to pass for "infantry heavy". 75 percent of this army was purchased used (thanks Bartertown and Dakka Swap) and in addition, well over half was purchased painted (usually horribly) and then stripped by me. If you're up for the mind numbing task of stripping and repairing painted plastic figures -and you make sure to buy figures painted with acrylic- a bucket of Simple Green and scrub brush can easily save you well over hundred bucks in infantry squads alone.
That's it for now. Next up special weapons and cheap plasma guns! Also, I'll post pics of a more manageable size.
|
|
This message was edited 2 times. Last update was at 2011/01/31 19:53:41
|
|
|
 |
|
2011/02/02 17:50:01
Subject: Re:The Melk 37th. A retroactive IG P&M blog.
|
|
Brigadier General
|
Part 2. Specials, Custom Plasma Guns and Seargents
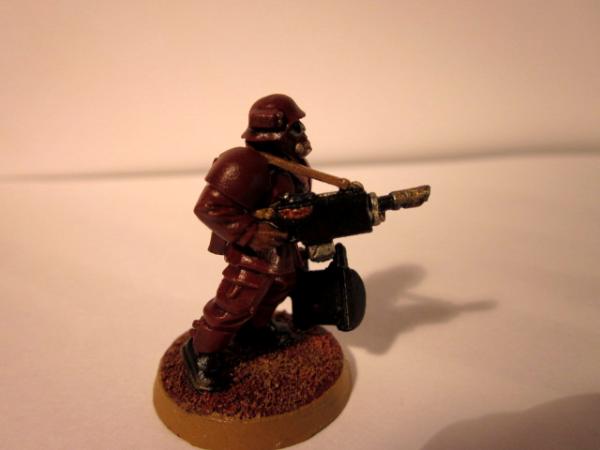
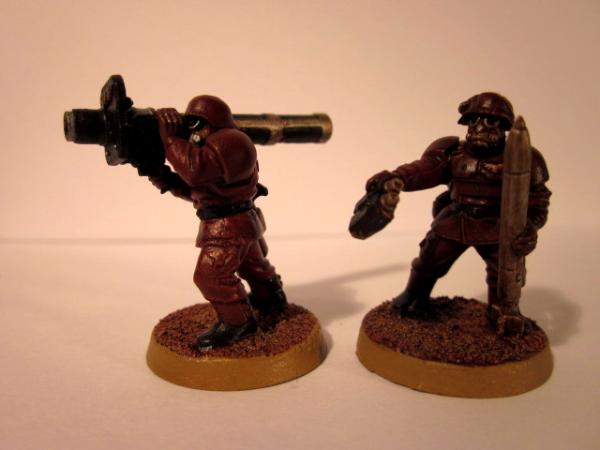
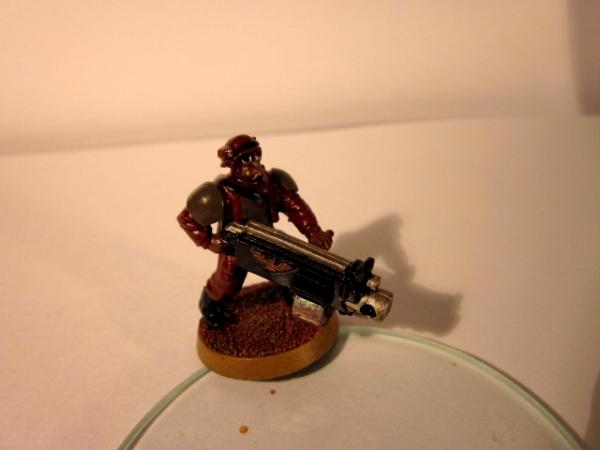
Here's a few of my special weapons troopers.
http://www.dakkadakka.com/gallery/180533-Dipped%2C%20Imperial%20Guard%2C%20Melk%2C%20Pig%20Iron.html] [/url]
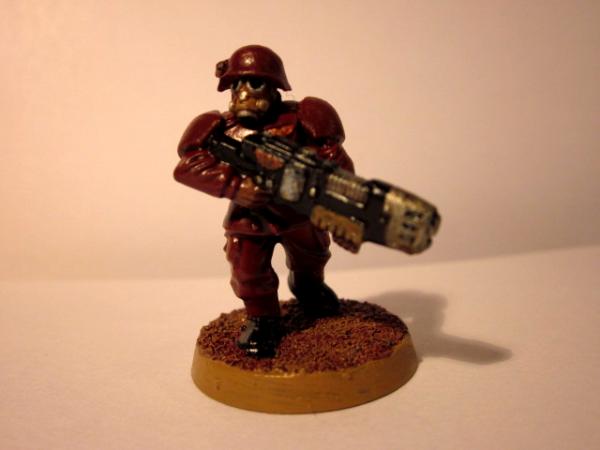
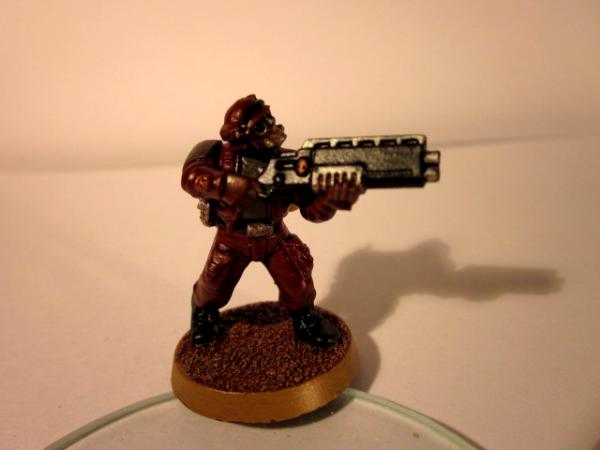
But what kind of Plasma guns are those?
They're DIY plasma guns made from flamers and plasma pistols!
I discoverd this method back when 3rd edition came out and everyone seemed to have extra space Marine plasma pistols and flamers because CC sprues came with each marine and each sprue had a Plas Pistol, bolt pistol and chainsword.
Pre painting
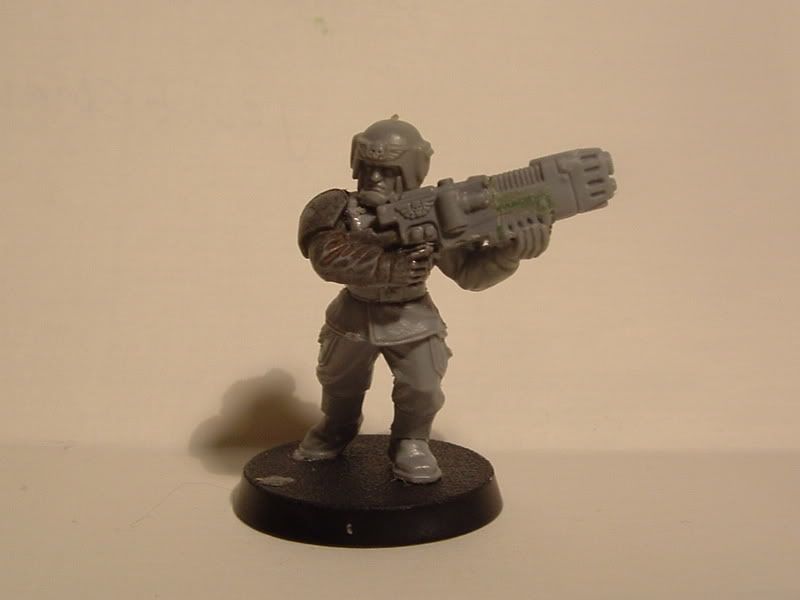
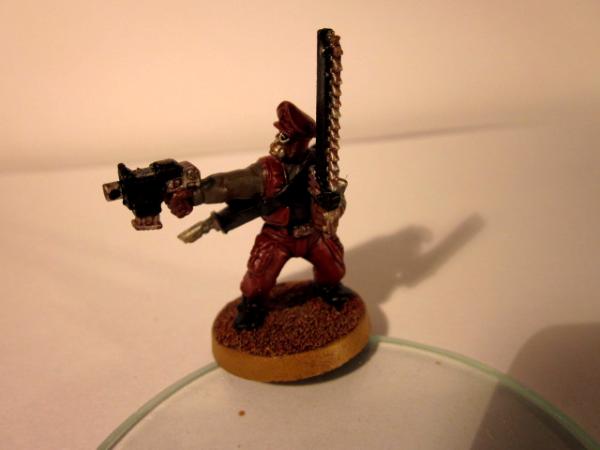
This one is a bit more recent discovery, with the Cadian flamers. I don't think it's quite as cool as the other, but I still like it. The trick with this one is finding some appropriate bit to go under the plas pistol, as the Cadian flamer doesn't have a foregrip like SM and Catachan Flamers do.
Pre painting

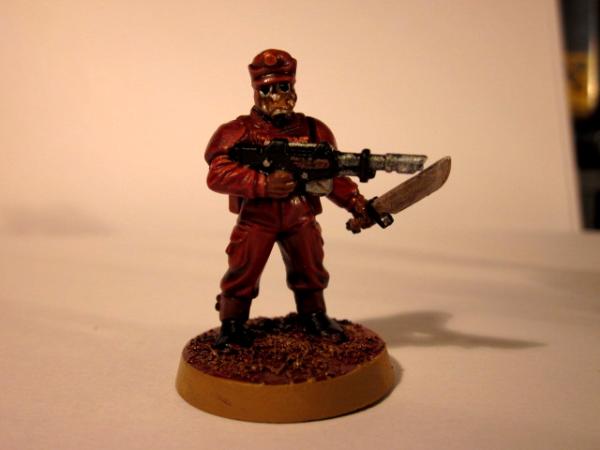
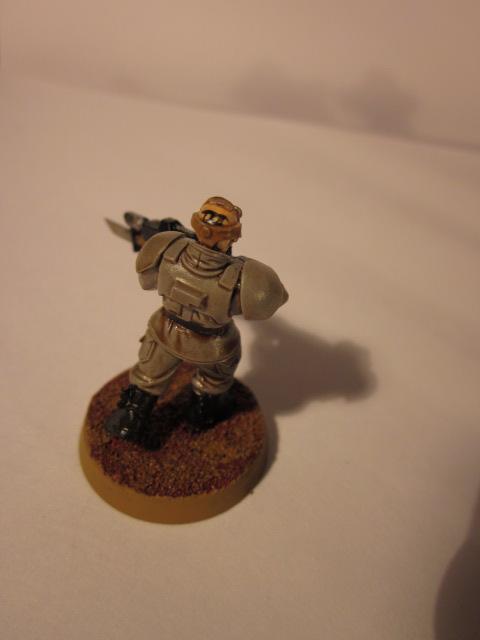
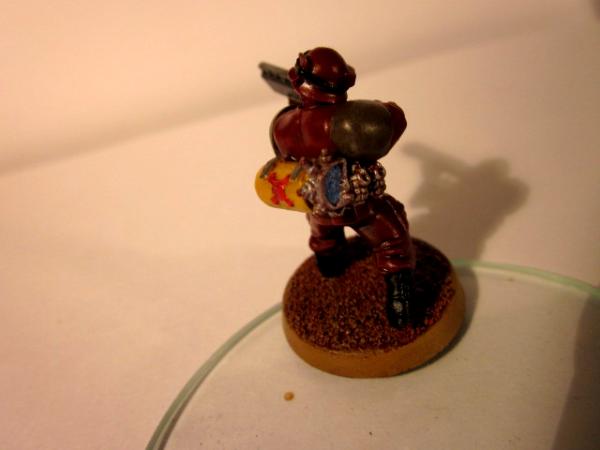
Here are my Seargents. They all have caps from the Pig Iron Kolony Command head sprue. As well as the traditional peaked officers caps, the sprue comes with the german style caps ( I forget the technical name) that you see here. I think they're the perfect thing for Sgts. Unfortunately the new edition doesn't allow lasguns for sgts, but I still like the idea of las carbines, so several of my sgts have them.
Las carbine and knife
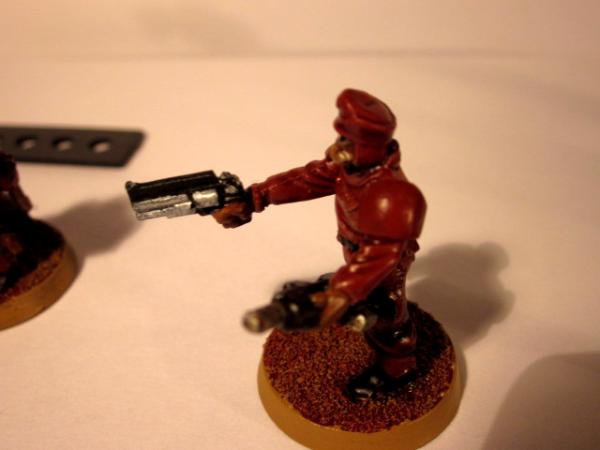
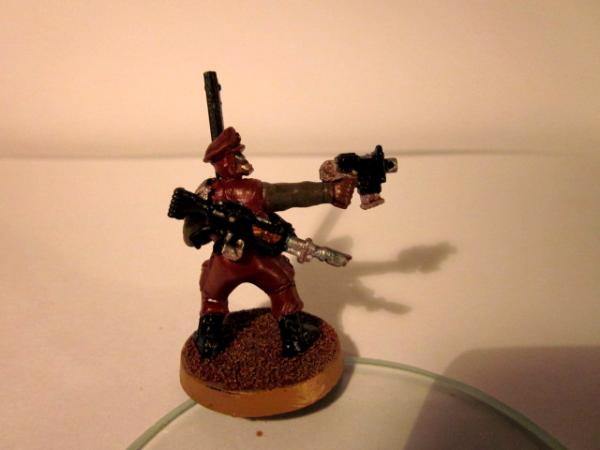
Las carbine and stub pistol. This was influenced by a picture from one of the codicies of a guardsman with a "non standard" sidearm.
More about Pig Iron heads. I was determined to have a gas masked army unlike the armies I'd seen around and not spend a fortune doing so. Pig Iron really made this project possible. I've seen many guard armies with alternate head sprues, but the fact that Pig Iron Kolony line has helmented heads covered and uncovred, officer, and seargent heads makes it possible to cover all the bases rather than just replacing every figure with the same head. Gas Masks also make painting faster!
Coming Next: Lascannons on Carriage mounts and other Heavy weapons.
|
|
This message was edited 2 times. Last update was at 2011/02/02 17:58:51
|
|
|
|
|
2011/02/03 19:13:42
Subject: Re:The Melk 37th. A retroactive IG P&M blog.
|
|
Brigadier General
|
Lascannon on Carriage mounts and other Heavy Weapons.
In keeping with the bang-for-buck object of this project I tried to really stretch the heavy weapons kits. I would have stretched even further, but a lucky trade ended me with more HW sprues than I thought.
Autocannons. Wanting to make them easier to transport, I mounted the cannon and firer on a calvary base and the loader on a separate 25mm round. Technically illegal in the new basing rules, but no real difference from previous metal Heavy weapons and no one has ever balked at it.
Firer

Loader with Autocannon armo and lascarbine made from shaved down flamer and lasrifle bits.
Missile Launcher.
Made shoulder-firable by shortening the front and lengthening the rear. At first it looked a bit long to me. Then I saw some pictures of mujahideen firing SAMs and realized it was right on.

Lascannons on Carriage mounts.
I always thought Lascannons were like the light artillery of the guard and was partiularly fond of the earlier metal versions which while on carriages, were a bit small. I'm much happier with my version. The power cables are electric bass string sections.
Front
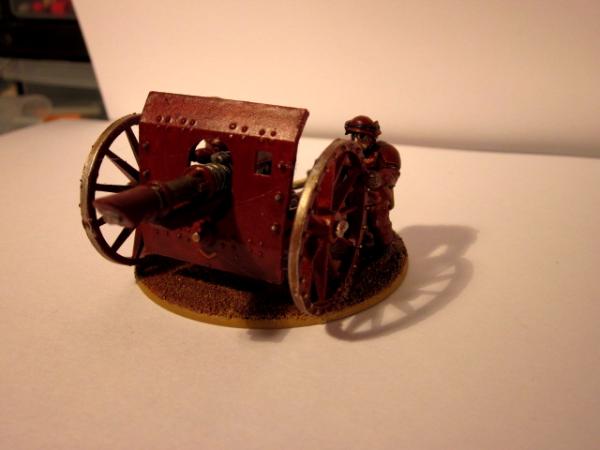
Team 1 It's hard to photograph, but the carrage mount as an elevation adjustment right above knee level that's perfect position for a guardmans hand to rest on using the partially open palmed guardsman hand.
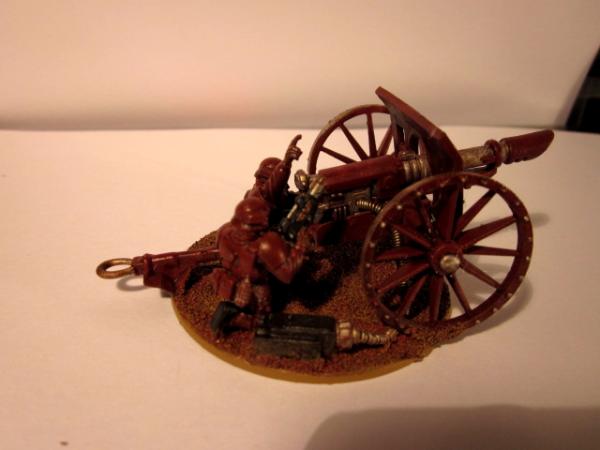
Team 2 with seargent

Team 3 Lascannon being pushed into position. Probably should have had a third guardsman picking up the back of the carriage, but the tracks get the point across.

The kind of mount I used is actually an armyman toy like this one:
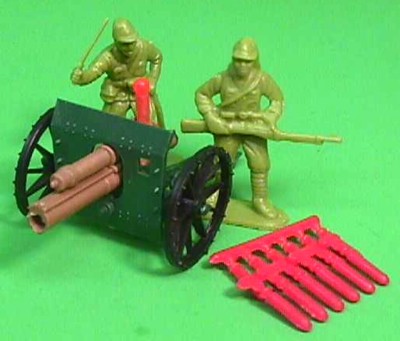
and can be found here:
http://www.toysoldiersdepot.com/store.php?seller=thedustyloft&Tsearch=cannon&pd=187837
They are very soft plastic, and must be thoroughly washed and then sprayed with a plastic specific paint like krylon "Fusion" or Rustoleum Plastic primer. Allow lots of time for the primer to completely dry before doing any painting. Also, a hot glue gun is just about the only thing that will glue this plastic. Luckily the lascannons sit in a box/trench on the mount, so the hot glue is not visible. Also a plus, the plastic is very easy to cut.
Up Next, Penal Legion and Vet Squad.
|
|
This message was edited 1 time. Last update was at 2011/02/03 19:14:54
|
|
|
|
|
2011/02/03 20:33:03
Subject: The Melk 37th. A retroactive IG P&M blog.
|
|

Legendary Dogfighter
Munich, Germany
|
Nice work, I like the old fashion las cannon.
|
Join the Imperial Guard. The pay's lousy, the battles fierce and you probably won't ever come back again. BUT you get a lasgun. 
 2500 2500  1250 1250
 9000 9000  1000 1000
 1500 1500
 5500 5500
 planned planned |
|
|
|
|
2011/02/03 20:34:58
Subject: The Melk 37th. A retroactive IG P&M blog.
|
|

Blood Angel Terminator with Lightning Claws
|
nicely done thus far.the pig iron heads look cool on gw bodies too.
|
|
|
|
|
|
2011/02/03 23:50:48
Subject: The Melk 37th. A retroactive IG P&M blog.
|
|
Rampaging Reaver Titan Princeps
|
Really liking the old Lascannons as well, I might have to steal that one!
|
"But me no buts! Our comrades get hurt. Our friends die. Falkenburg is a knight who swore an oath to serve the church and to defend the weak. He'd be the first to tell you to stop puling and start planning. Because what we are doing-at risk to ourselves-is what we have sworn to do. The West relies on us. It is a risk we take with pride. It is an oath we honour. Even when some soft southern burgher mutters about us, we know the reason he sleeps soft and comfortable, why his wife is able to complain about the price of cabbages as her most serious problem and why his children dare to throw dung and yell "Knot" when we pass. It's because we are what we are. For all our faults we stand for law and light.
Von Gherens This Rough Magic Lackey, Flint & Freer
Mekagorkalicious -Monkeytroll
2017 Model Count-71
|
|
|
|
|
2011/02/04 15:40:38
Subject: Re:The Melk 37th. A retroactive IG P&M blog.
|
|
Brigadier General
|
Thanks for the compliments folks. Now for the Crooks, Rats and Vets.
The Penal Legion is based strait off the art in the codex.
Just a basic lasgun toting guardsman with all imperial emblems removed from armor and rifle. The paint scheme is so fast simple (grey spray primer as the primer and basecoat) and shows off the dip so well, that I want to find a way to use it somewhere in the future.
I used the Pig Iron Kolony Rebel head sprue for these and moved the ID tatoo from the forehead to the back of the head. Bald heads seem really appropriate for Penal Legion
The minder is pretty straitforward with the same Sgt's cap as the other Sgt's. However the torso from the command sprue with a large emblem on a chain seemed very appropriate for the leader of a Penal unit.
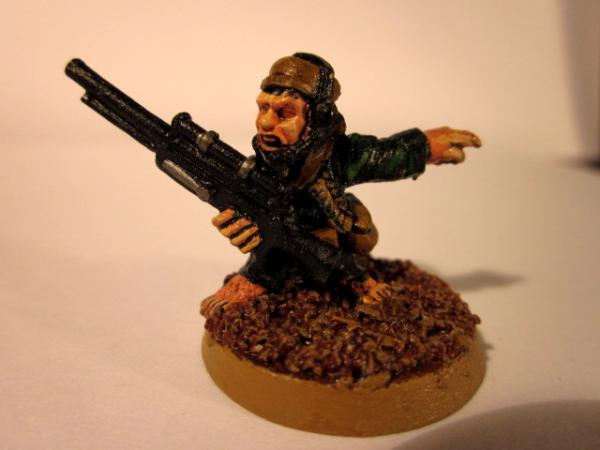
The rattlings are the only unit in this army- asside from a couple assasins that I'm undecided on- that I haven't painted my self . I bought them cheap and sight unseen. I expected to strip them and didn't think to inquire about their condition so when they arrived painted as well as I would have and based I simply touched up a few details, repainted the base and dipped them.
They're the only unit without gas masks but hobbits are hardy folk, right?
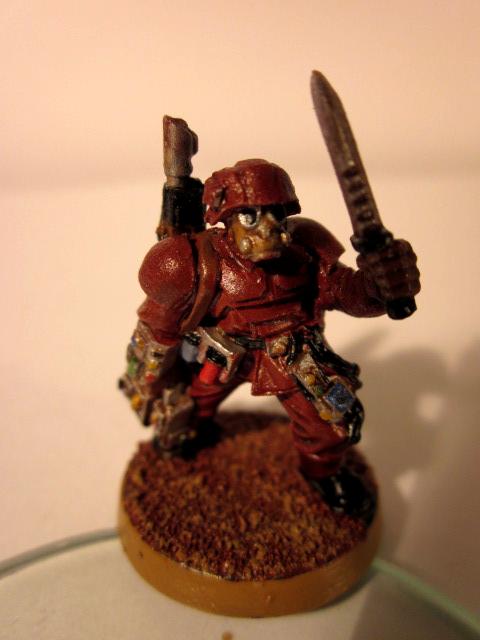
Veteran Squad.
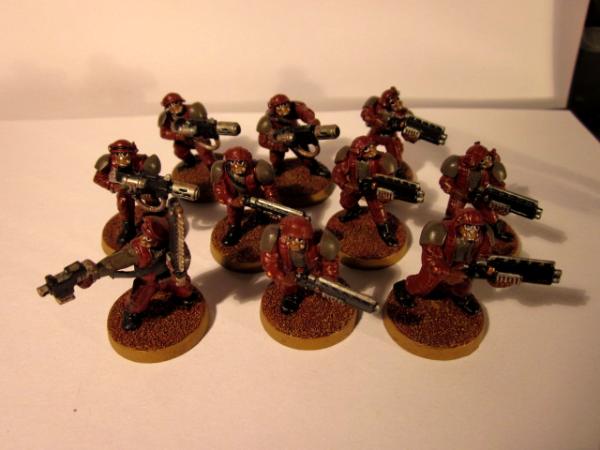
Pretty straitforward conversion with Cadian arms, Catachan torso and legs and SM scout shotguns. For most of the Scout shotguns I didn't even remove the shoulder pads, I just sanded them into the same shape as Cadian shoulder pads.
The Demo Charges are half a Flamer tank with the top of an auspex.
I'm particularly proud of the Seargent. His clothed outstreched arm is just a bare catachan arm with some of the musculature filed off, and the sword holding arm is from a Sentinel driver.
I have given him an officers cap -rather than a sgt's cap- as I imagine him to be a warrant officer or low level Lt.
I had the pieces so I made up a Sgt. Harker.
Orignally I had a HW squad of these carrying H-Bolters but they looked a bit rediculous even for 40k. However, Harker is rediculous so I modded one as him.
Hope you enjoyed these. Up next we finish of the ground punders with a look at HQ. The cheapest Lt's you'll ever see, a comissar resuced from the junk heap and the rest of Command and HQ. Also, we'll start in on the vehicles with sentinels!
|
|
This message was edited 1 time. Last update was at 2011/02/04 15:44:50
|
|
|
|
|
2011/02/04 19:03:34
Subject: The Melk 37th. A retroactive IG P&M blog.
|
|
Legendary Dogfighter
Munich, Germany
|
I think the bolter looks way too large.
|
Join the Imperial Guard. The pay's lousy, the battles fierce and you probably won't ever come back again. BUT you get a lasgun.
2500 1250
9000 1000
1500
5500
planned |
|
|
|
|
2011/02/04 22:04:39
Subject: The Melk 37th. A retroactive IG P&M blog.
|
|
Brigadier General
|
Necanor wrote:I think the bolter looks way too large.
I think you're absolutely right. That's why I took the other two guardsman-carrying-Hvy-bolters apart and turned the last one into a charachter I'll rarely -if ever- use. Here's a pic of one of the others that didn't make it. It's pretty rediculous, even for 40k.

|
|
|
|
|
|
2011/02/04 22:16:40
Subject: The Melk 37th. A retroactive IG P&M blog.
|
|
Wicked Warp Spider
|
Cool army! I also used the pig iron heads, and I die a little inside whenever I see anyone else with them, because a little of my 'uniqueness' has slipped away! Worst was some contest for IG command squads I saw online - more entrants had pig iron heads than normal GW ones!
|
 Eldar Corsairs: 4000 pts Eldar Corsairs: 4000 pts
Imperial Guard: 4000 pts
 Corregidor 700 pts Corregidor 700 pts
 Acontecimento 400 pts Acontecimento 400 pts |
|
|
|
|
2011/02/05 00:11:17
Subject: The Melk 37th. A retroactive IG P&M blog.
|
|
Brigadier General
|
Yeah, the Pig Iron heads do get around. I've seen alot of them online, but in person, I've only seen one, and that one had the Halo'ish heads. Cool look, but every unit from commander to Psykers had the same head.
Not my cup-o-tea.
Cheers for unique'ish armies!
|
|
|
|
|
|
2011/02/05 16:53:20
Subject: Re:The Melk 37th. A retroactive IG P&M blog.
|
|
Brigadier General
|
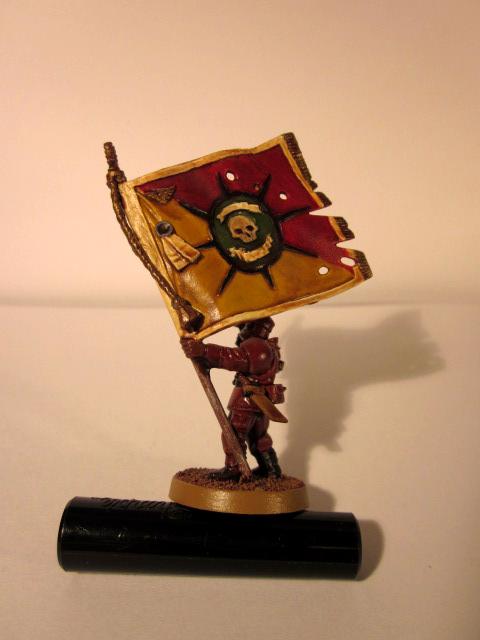
Now for Command and Sentinels.
Standard bearer
Medic. This is a good example of a salvage figure. He was rediculously cheap b/c he was missing half an arm and the end of his lasgun.
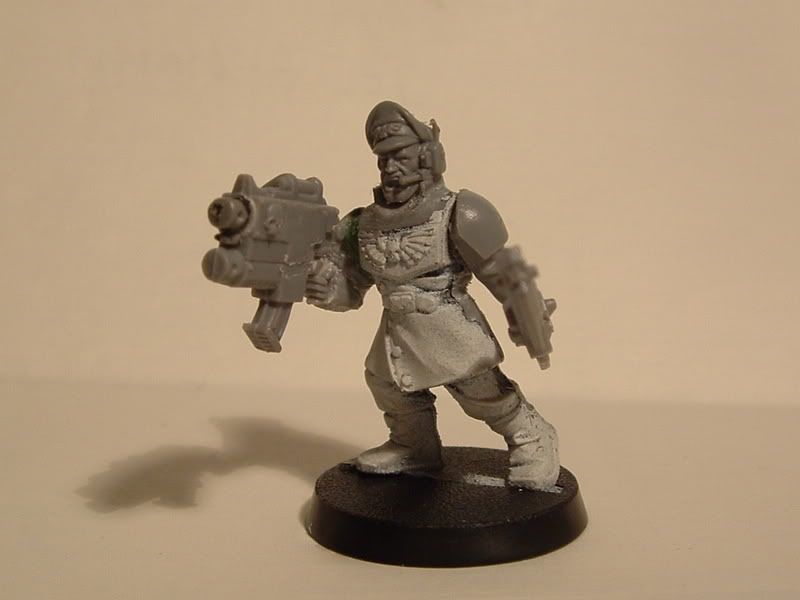
Lieutenants
These two are both conversions of Lt. Varras from the 4th Edition Battle for Mcraage. They are a bit less common now, but at the time they were practically a throw away fig.
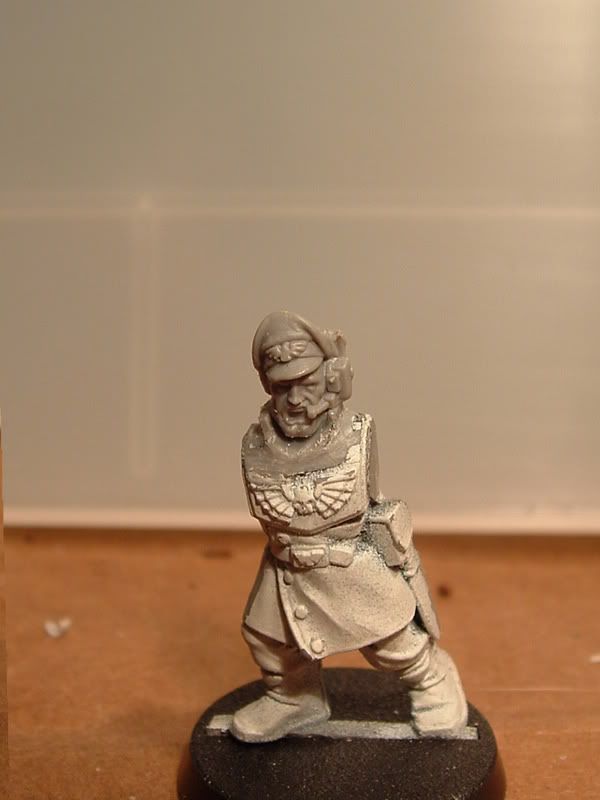
Here's what the original figure looked like
and here's a few shots of my in-progress experiments with Lt Varras figures
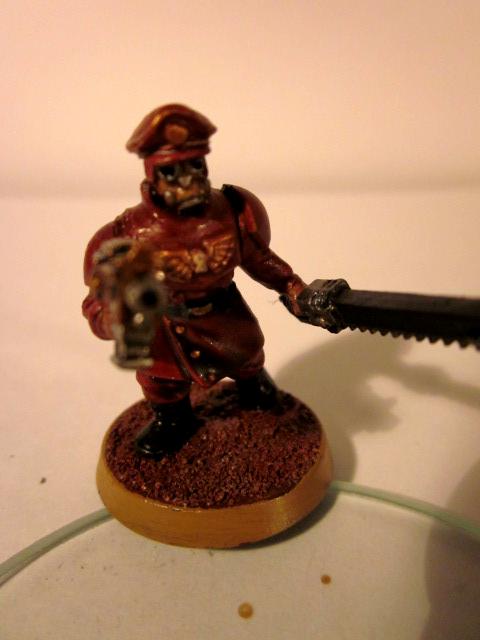
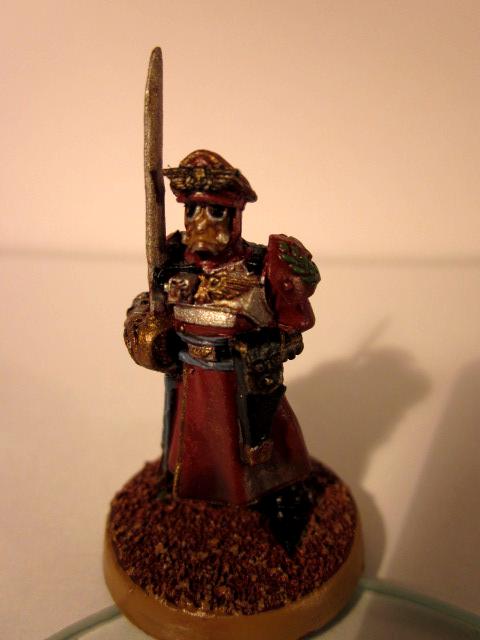
Commander. This is a mod of the metal commander with monacle. The emblem on the cap was shaved off a gun, and his sword has has been de-powered, removing all detail that indicates it was originally a power sword. He's a stand and order leader, not a CC specialist.
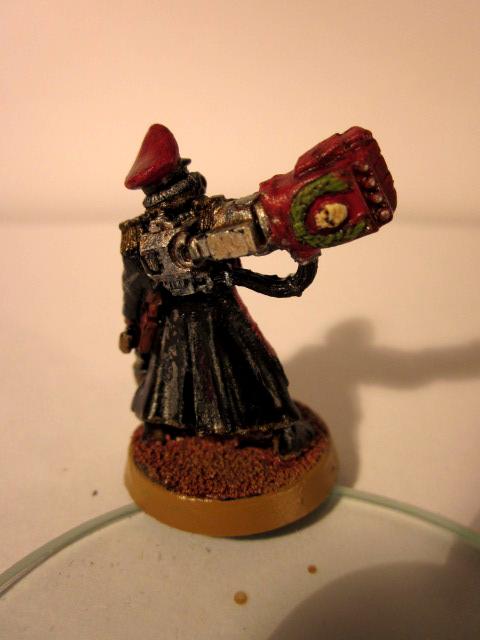
Commisar. Another salvage fig, this time a Yarrick. He came with most of his left arm gone, and missing both part of his power claw and the sword/sash piece. The head is an Imperial Seargents head from the Warzone plastics and the only non-Pig-Iron aftermarket head I used.
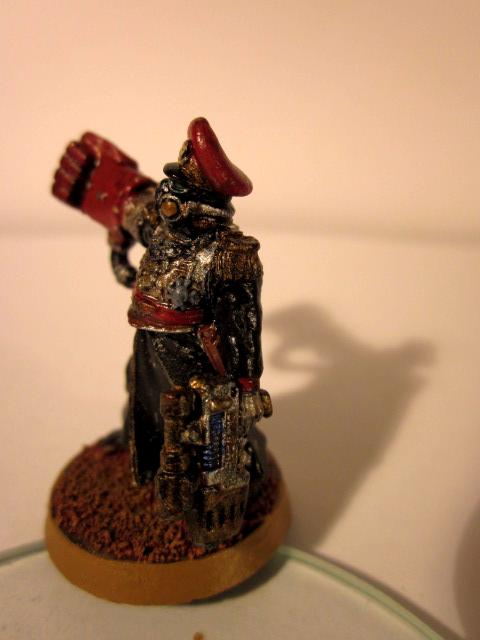
The fist is a lefty SM fist, reversed in orientation by moving the thumb to the other side. The whole figure was a nice chance to practice my less than adept Green Stuff sculpting skills, though unfotunately it also shows off my less than stellar painting skills.
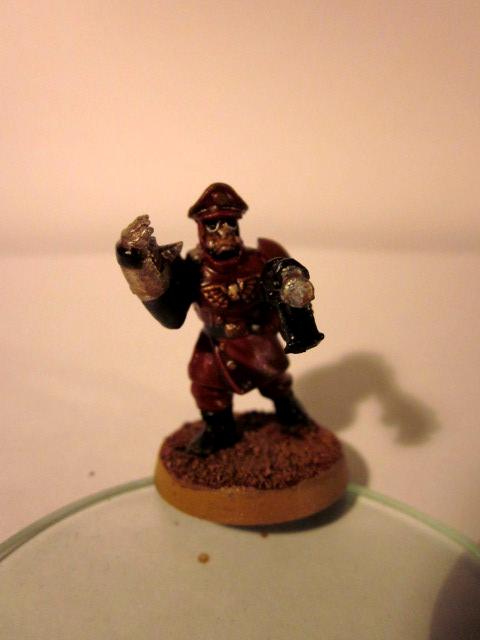
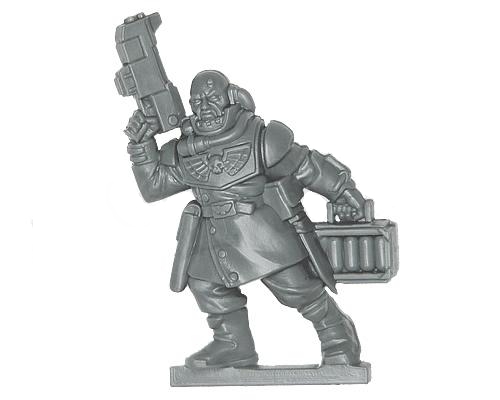
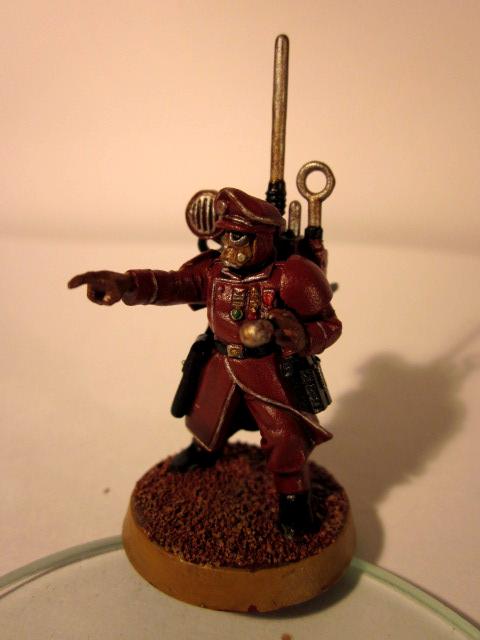
Master of Ordinance. I already had my Lt's and Commanders covered, so I used the longcoat piece and medaled chest for this figure. A really straitforward figure, and not even a conversion, just a different assemblage of parts. If it wasn't already obvious what he is, I set him appart by giving him silver trim, in contrast to the gold and brass trim of the rest of the army. He's actually my favorite foot unit in the game as he adds a bit of unpredictabilty and sometimes really delivers.
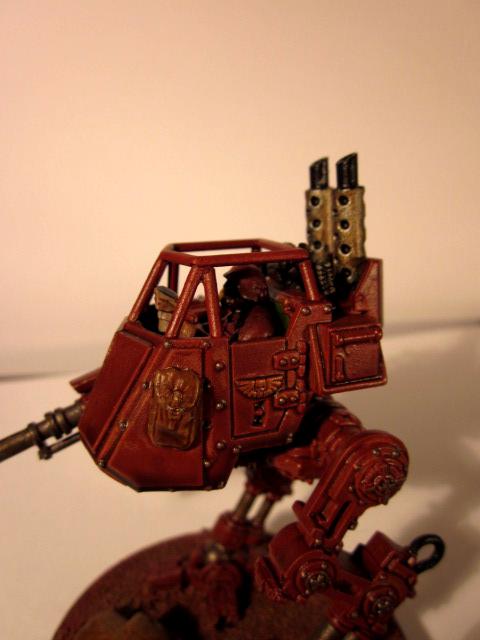
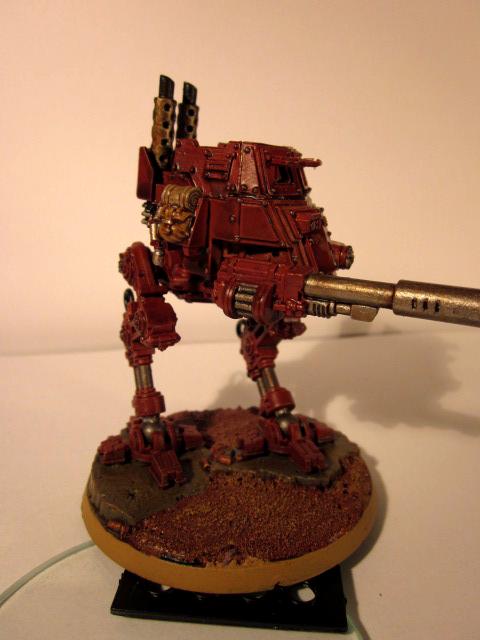
Lastly, the Sentinels. Nothing too special here, and not terribly usefull in my gunline Gurad, but they were the first unit I painted for this army. My brushed on dip (minwax antique walnut) is not quite as well done here as in later models, but it was proof enough for me that dip could work well for vehicles as well as infantry.
Sentinel 1
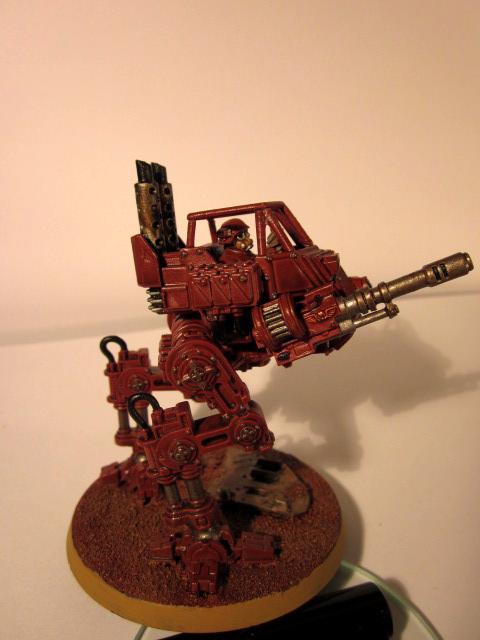
Sentinel 2
Sentinel Squad Leader. Only had two metal Sentinel autocannons, so this one is made from a mutilaser, Autocanon ammo and Autocannon barrel from a Predator kit. It seems right that the squad leader has the biggest cannon.
Well, that's it for now. Next up, Tanks!
|
|
|
|
|
|
2011/02/05 17:54:00
Subject: The Melk 37th. A retroactive IG P&M blog.
|
|
Wicked Warp Spider
|
The colours look really good on that sentinel! Something about the metal next to red maybe, but it really pops.
|
Eldar Corsairs: 4000 pts
Imperial Guard: 4000 pts
Corregidor 700 pts
Acontecimento 400 pts |
|
|
|
|
2011/02/06 15:41:29
Subject: Re:The Melk 37th. A retroactive IG P&M blog.
|
|
Brigadier General
|
Now for the tanks.
First off, a Standard Demolisher. Nothing too out of the ordinary here, except that I was able to pick up two of these at a hobbytown sale for half off the old price (19.99 each!).
The remaining four tanks are rather extreme examples of Miniature rehabilitation
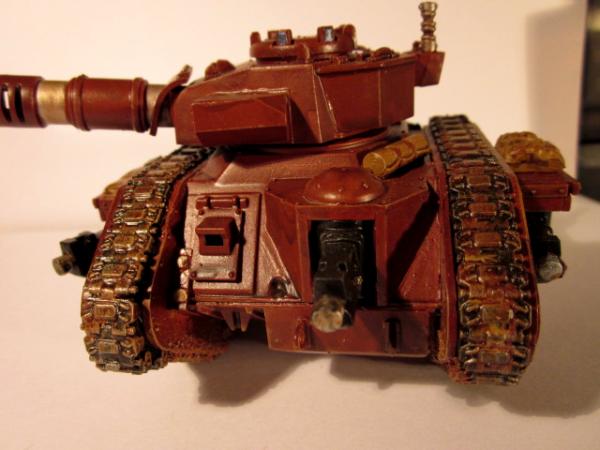
Classic Russ.
This poor tank was mercifully unpainted, but completely assembled and assembled very poorly. Lots of sawing or solventing apart of bad glue joints, sanding and filing of glue marks and rough edges and a complete dis and re-assembly of almost every part.
Several really bad joins have been hidden behind various pieces of stowage, other bits and mud.
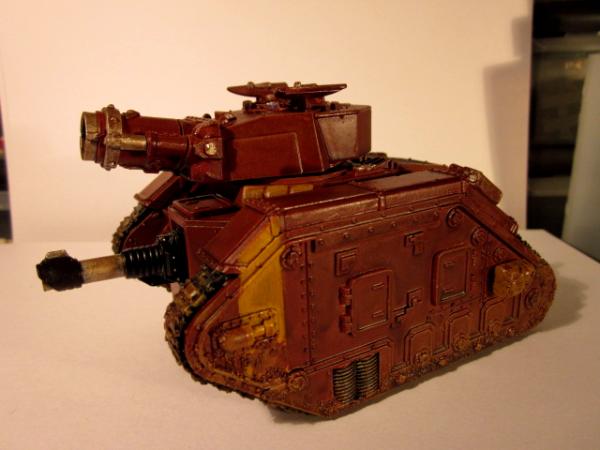
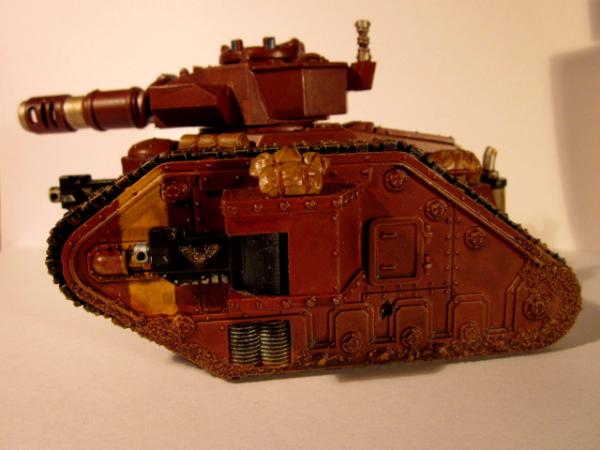
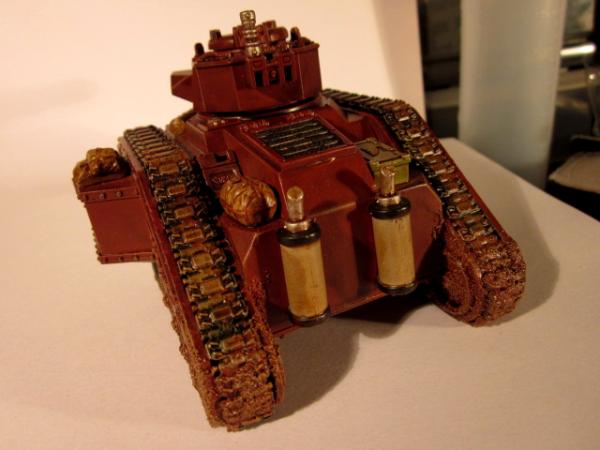
Basilisks.
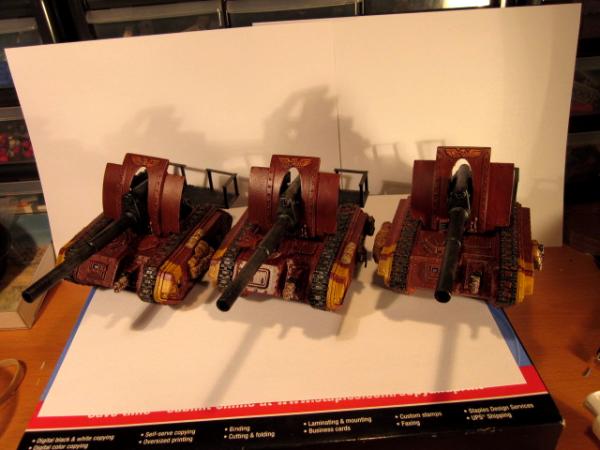
When I snapped up these three for 50 bucks, I knew they would need alot of work. They underwent a similar process as the Leman Russ without as much reassembly to the chassis, but alot more stripping of paint. These models were missing alot of bits, luckily I have a well stocked bits drawer including extra's from military model kits. With a bit of help procuring some specific parts from a friend I got to work making them whole again.
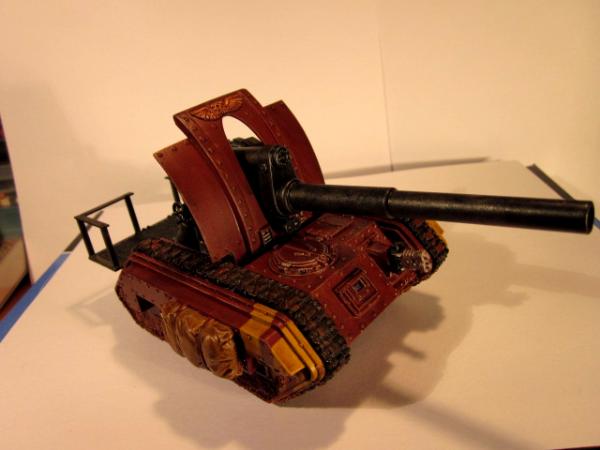
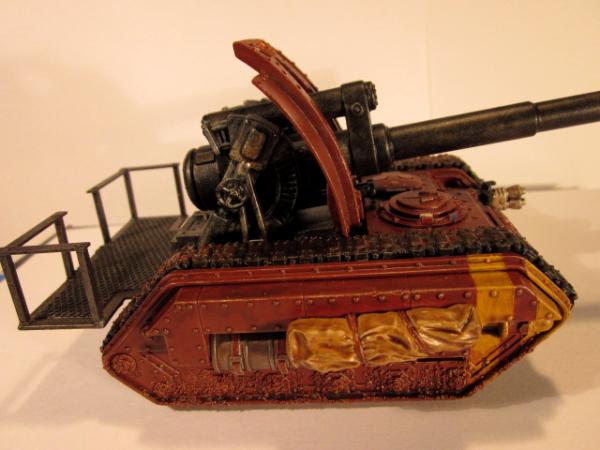
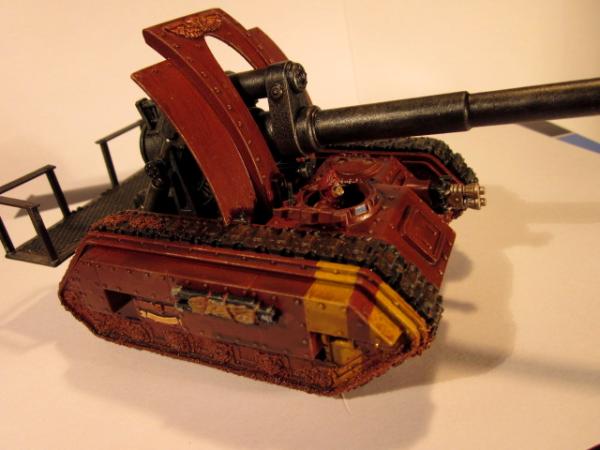
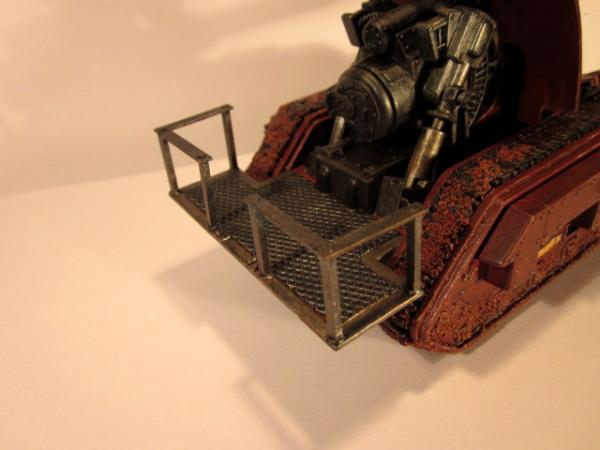
One element that was almost completely gone from all 3 was the railing around the firing platform. I rebuilt this with plastic rod and sheet, The rivets on the top are plastic drink lid material cut out with the smallest whole punch I could find at the craft store
Notes about model/miniature restoration:
Throughout this project, I really began to enjoy the process of restoring these models. I don't enjoy painting that much, but assembly and conversion has always been my favorite part of the modeling process. As well as the "good deal" part of the equasion, taking a completely crap model and reworking it into something that looks good enough on the tabletop that no one would know it was once a mess has been extremely satisfying process.
Next up: Full Army pictures and my interesting and inexpensive transporation system.
|
|
|
|
|
|
2011/02/07 14:47:34
Subject: Re:The Melk 37th. A retroactive IG P&M blog.
|
|
Brigadier General
|
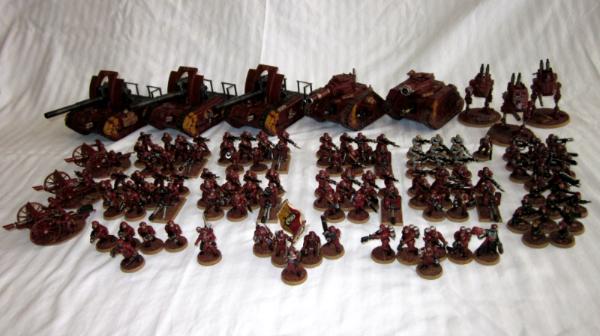
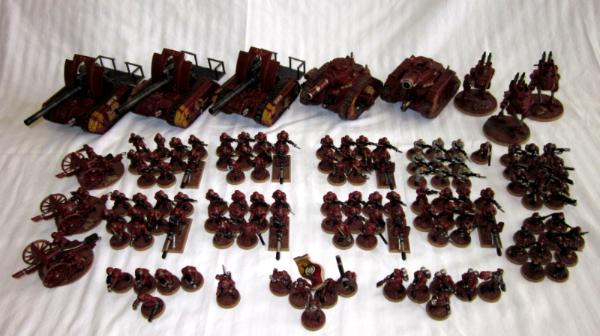
Here we are, the last installmet. The full army and it's storage system
Full Army:
Transportation
Having spent so little on this army, I didn't want to drop a bunch on a transport/storage system. However, I did want to protect the army from damage
The Tote:
A basic Legal File tote,

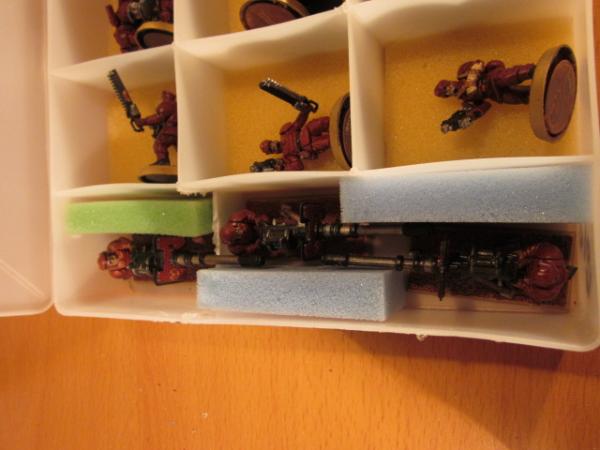
Holds standard Thread cases very well with just enough room on the side to slide in a codex.
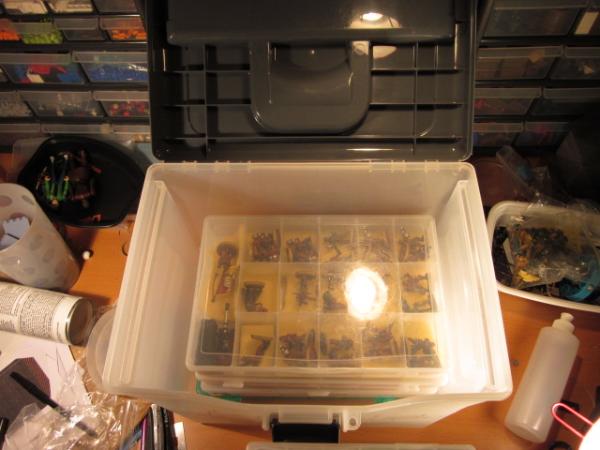
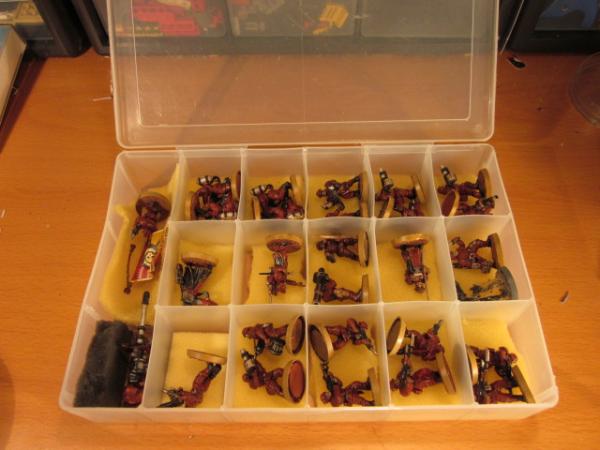
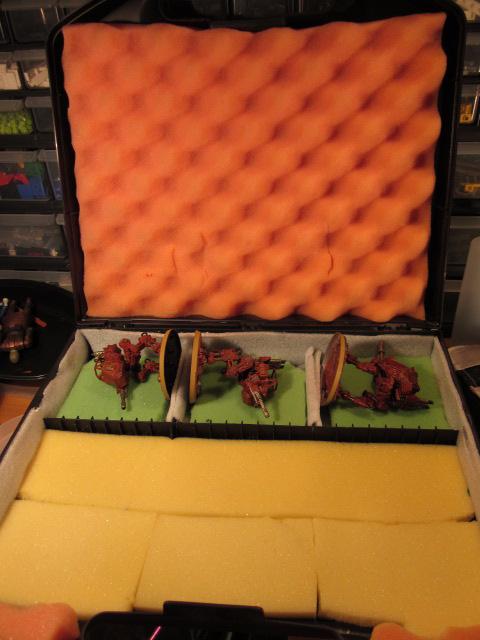
Thread cases with foam placed in the compartments hold all the figures. There is room for a bit of shifting, but between the foam, the relatively soft plastic and the poly dip coating my figures, I haven't had any scratching of the paintjobs. Most of the cases have some dividers modified for HW teams.


Now what's this?

It appears to be a modified GW box...
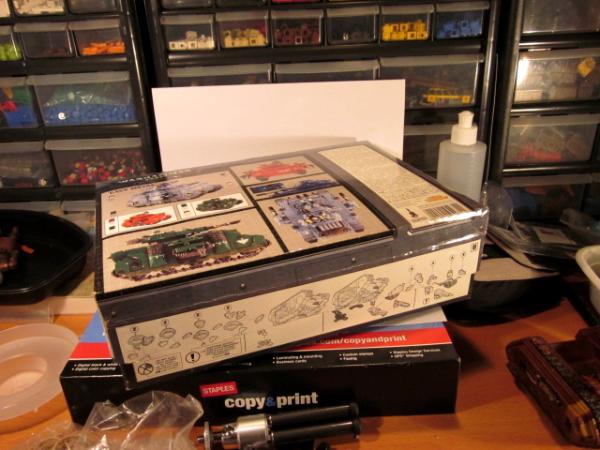
with some kind of foam art on the inside.
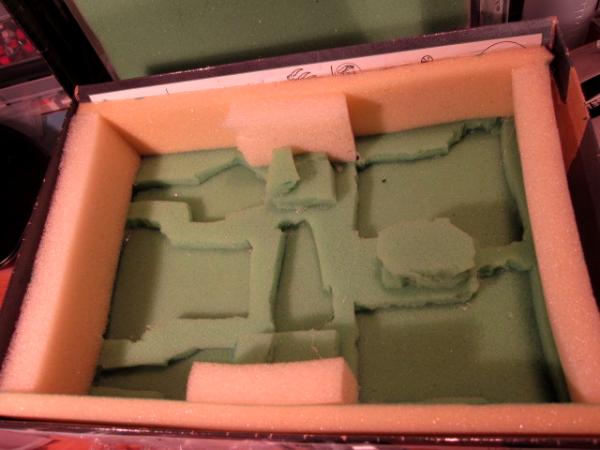
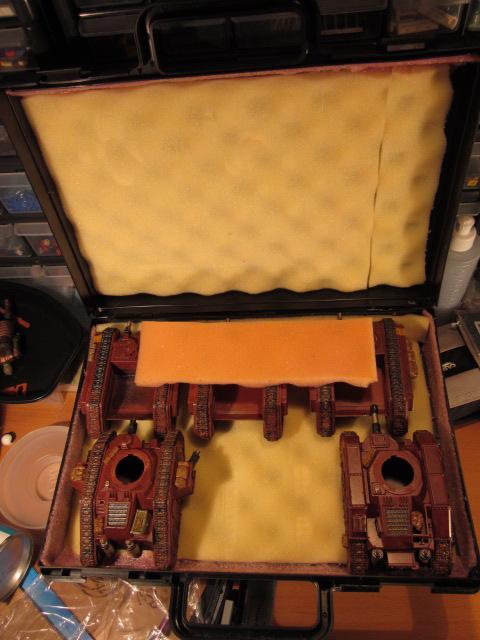
Oh, of course!
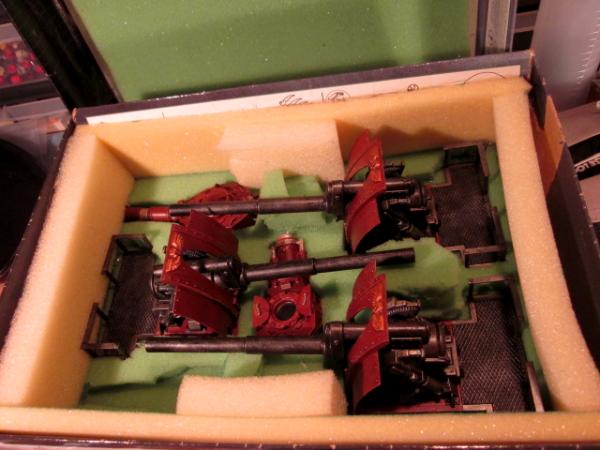
From the beginning, I knew the Bassilisks would be hell to transport, An odd size, too many fiddly railings, etc. ALso, the turrets are an awfully small bit of the Russes that makes their required storage space considerably larger. So I made the box above. It securely holds the turrets and gun platforms and slides right into my file box carrying case.
Armor boxes.
I have two boxes very much like this one

They are cassete tape totes and are very common at your local resale shop. I think I paid a dollar or two each!
Break out the cassete tape dividers (this takes some patience) and line with foam.
With a couple of tries, you can find the exact ammount of foam that holds them in place without being too tight.
 I specify Cassete totes, because they are almost exactly the correct depth for a Sentinel or Tank hull and two layers of foam (top and bottom). The tank hulls above are held perfectly in place without subdividing walls and don't touch at all, while being stored as compactly as possible. One additional piece of foam on top of the Bassilisk hulls as they are slightly shorter than the Russes.
All safe with room to expand.
That's all folks. I've still got a squad of ogryn, a valk, two Chimeras and a russ to assemble, but they are put away. For now I consider the army done.
|
|
This message was edited 1 time. Last update was at 2011/02/07 14:49:18
|
|
|
|
|
2011/05/17 14:18:21
Subject: The Melk 37th. A retroactive IG P&M blog.
|
|
Scarred Ultramarine Tyrannic War Veteran
|
Nice army!Did you use GS on the faces? 
|
|
|
|
|
|
2011/05/17 14:57:21
Subject: The Melk 37th. A retroactive IG P&M blog.
|
|
Brigadier General
|
Thanks, no greenstuff, except as a filler for the comissar to extend the neck for the Warzone head I used.
All other heads are from Pig Iron Productions. The line is particularly nice in that it has several sets (helmeted, helmeted covered, officer, rebel bareheaded and winter) that all share the same gs mask, so it's easy to make a large force that look uniform without all units (troops, officers, penal, etc) all having the same head.
|
|
|
|
|
|
2012/10/09 12:32:38
Subject: The Melk 37th. A retroactive IG P&M blog.
|
|
Bloodthirsty Bloodletter
|
Pretty nice, good use of custom heads. You said this was all done with spray and dip? I think it turned out pretty well. How long did the whole thing take you?
|
The Good: 8,000
Ultramarine, Scouts, Blood Angels, Dark Angels
The Bad: 8,000
Chaos, Daemons, Dark Eldar, Orks
      VS VS    |
|
|
|
|
2012/10/09 17:29:37
Subject: The Melk 37th. A retroactive IG P&M blog.
|
|
Brigadier General
|
Thanks!
It came together over the course of a couple years. The actual painting process is pretty fast though. It is a dip (Minwax polyshades) with the prime/basecoat being krylon ruddy brown primer and the block painting from craft paints.
One change I would make if doing it again though. I would use Tudor (Dark Tone equivalent) rather than the Antique walnut (Strong Tone equivalent) that I used. For dark colors like the ruddy brown, the Black pigments in the Tudor would have produced a stronger effect than the Antique Walnut.
|
|
|
|
|
|
|
|


