Switch Theme:

How to Paint Black And White Squares On Orks vehicles.  [RSS] Share on facebook Share on Twitter Submit to Reddit
»
Author Message
Advert


Forum adverts like this one are shown to any user who is not logged in. Join us by filling out a tiny 3 field form and you will get your own, free, dakka user account which gives a good range of benefits to you:
  • No adverts like this in the forums anymore.
  • Times and dates in your local timezone.
  • Full tracking of what you have read so you can skip to your first unread post, easily see what has changed since you last logged in, and easily see what is new at a glance.
  • Email notifications for threads you want to watch closely.
  • Being a part of the oldest wargaming community on the net.
If you are already a member then feel free to login now.


Made in gb
Sneaky Kommando


Northern Ireland

(Hobby Update) Started To Paint Black And Square On My Orks Battlewagon

I have just managed to find time for another hobby update, like any ork player being able to paint black and white Square properly always comes in very handy for any project, so below you will find a couple of useful hints and tips to get you well underway.

First thing is do not use white straight out of the pot as a base coat it's better if you use a light grey to start you off as if you just use white it can stand out like a sore thumb.


So once you've decided what areas you're going to paint its time to start filling in them squares, so make sure your black paint is thin down with a little water, as you will find it easier to apply.

As you can see it's important to apply your base coat evenly and it's even better if it's a little transparent, as it all adds to the effect of the highlight


The outline does not have to be neat in some ways a little bit rough makes it look better

So there you have it in the next stage I will show you how to highlight all the little boxes, which really does make them stand out. So make sure you try and incorporate some little black-and-white boxes into your next project, as I think you'll agree nothing Look better.

This message was edited 2 times. Last update was at 2011/06/17 23:20:01


To see more check out my blog


Armies Played  
   
Made in us
Flashy Flashgitz


Underneath your painting desk

This is exactly what I do, so I can vouch for it to others and say that it works. Nice tut.

Goldakka's Waaagh!!: 5000 pts

Take a look at my hobby progress: http://www.dakkadakka.com/dakkaforum/posts/list/395637.page


Made in us
Grey Knight Psionic Stormraven Pilot


Awesome tut! But I still like using tape and sloppily cutting out squares because I personally find it easier. Why? I honestly dont know


Made in gb
Sneaky Kommando


Northern Ireland


So I have just managed to finish Part 2 of this tutorial, and below you will find the highlighting steps in sequence for you to follow step-by-step.

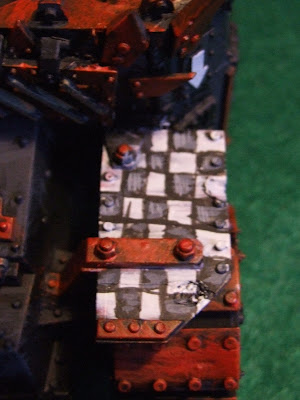
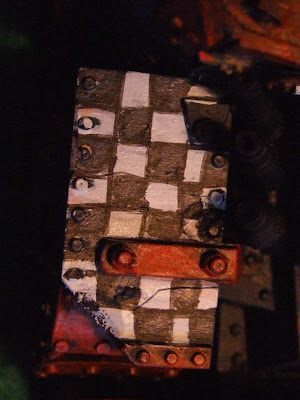
After you have completed part one this is what the areas should look like.

So next is the highlighting stage and it needs to be said is one of the most important steps to get right, failure to do so will make the boxes look terrible. So the trick is to take your time not to rush.

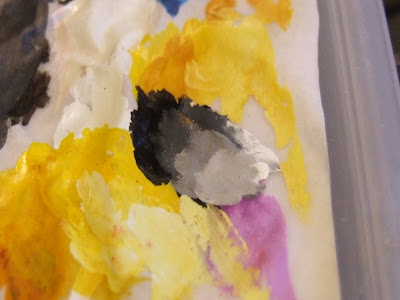
Below you will also see some pictures of the highlights themselves this will give you an idea in regards to what colour you're aiming for when you want to highlight.

Highlight 1

when it comes to applying paint just target in the middle of the Square less is more
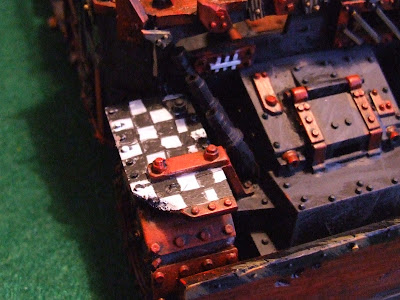
Highlight 2


Highlight 3


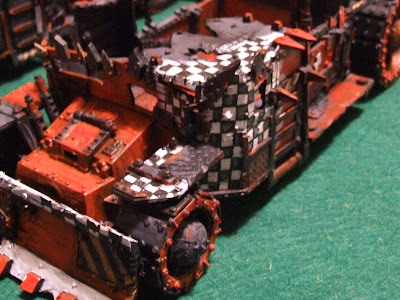
As you can see because you've taken your time and you have built the highlights slowly overall it makes them look three-dimensional.


you can see the finished result quite clearly and it really doesn't take no time at all


so there we have it job done and this technique can be used for any colour at your disposal.

To see more check out my blog


Armies Played  
   
 
Forum Index » Painting & Modeling Tutorials
Go to: