So did a quick search and couldn't find a tutorial on magnetizing the hive tyrant / swarmlord set. Couldnt find anything, either I suck at searching or there actually isnt one. Anyway decided to share the way I've done it. Here we go:
Its not terribly hard but I've got pics incase anyone is lost on the way.
You will need:
Hive tyrant/swarmlord kit (Duh)
Magnets, 2mm 3mm and 4.75mm
Drill bits of corresponding sizes
Green stuff (incase you drill too far)
Plastic cutters
Super glue.
Album link
http://imgur.com/a/s0sMR
http://imgur.com/a/pNe45
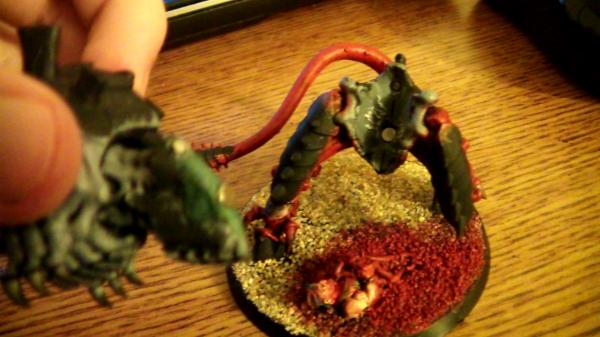
1. This first step is optional but I like to magnetize pretty much everything. Glue the legs and tail together, drill and shove a 4.75mm magnet where it will connect to the torso (see pic). You can skip the magnetization and just glue it strait to the torso but this also means you can no longer rotate the body and strike poses pewpew! In all the steps - you should ALWAYS CHECK THE MAGNET POLARITY. Also glue the magnet in, when I say shove the magnet down there - i mean with glue.

2. The next step is to glue to torso together, if you followed the first step then you will want to magnetize the bottom of the torso as well. You can use a smaller magnet or the same one. Up to you really. I prefer a stronger hold because I will be shoving wings on this guy later on... =P

P.S Be careful on this as you can easily drill to the hollow centre of the torso - if this happens do not fret, get your green stuff and fix it up!


3. Hopefully if you have been paying attention you'll have something like this. I've also shoved a 2mm magnet where the neck connects to the torso. The swarmlord has a different head to the hive tyrant, but if you don't mind using the same head for both creatures then you can just go ahead and glue it on. You can use a larger magnet such as 3mm for this part but I decided not to since the head is mostly held down due to gravity anyway.

4. This time I used plastic cutters to cut a flat surface before drilling it to place a 2mm magnet inside the neck. Do this for both the heads (or just one if you dont really care)

5. You should have this. If not post here and complain and I will see if I can help (no garantees)

6. Now the fun part - Drill 3mm holes (dont go too deep you'll go into the tyrants hollow chest). And place magnets inside, once again if you do over drill it, just shove a blob of greenstuff in there and your good to go. The upper arm was overdrilled, I did shove green stuff down there to fix it so no probs - as you can see its barely visible in the picture. REMEMBER
TO CHECK THE MAGNET POLARITY

7. Use plastic cutters to cut a flat surface on each of the arms at the angle you want to stick it onto the body- REMEMBER
TO CHECK THE MAGNET POLARITY. Drill 3mm holes into the arm and shove the magnets down there and glue em down. Do your least favorite weapons first, incase you stuff up (mine was venom cannon). That way you can get some practice in and do your favorite weapons last and they will look the best. For the barbed strangler and venom cannon, where the left arm connects into the gun, I've put 2mm magnets on the gun and the connecting tube arm as well. This is of course not necessary but it makes it snap on.

You should now have something like this:

8. NOW FOR WINGS ZOMG. Drill 4.75
mm holes on the tyrants carapace, yes i know the wings are supposed to take an arm slot but what if I want two twin link devourers on my hive tyrant? I CANT DO THAT IF MY WINGS USE THE ARMS SLOTS. So drill the holes, shove green stuff down there if you need to (I did the carapace is pretty shallow) and glue the magnets in. I used 4.75
mm magnets as you will need a pretty strong hold for wings. Let this one dry for a while as the magnets can sometimes be stronger than the super glue if not let to dry long enough.

9. Use plastic cutters again, to flatten the surface on the wings. I cut off a huge chunk for this, because you are going to be shoving a 4.75mm magnet down there so you may need to cut pretty far to get to a thick enough part of the arm / wing whatever. Once you've cut the surface at an angle you like, drill the hole, glue the magnet, use
GS if you need to and let it dry.

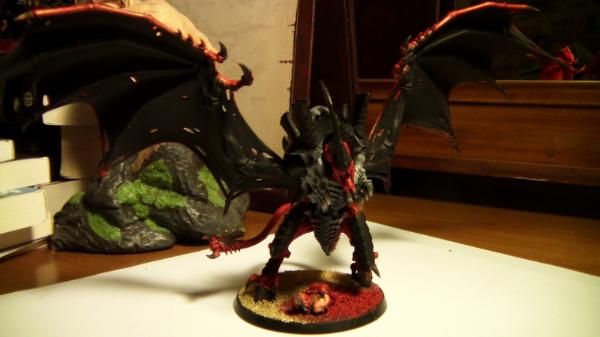
10. You should end up with something like this FLYRANT!

11. You can also magnetize the extended carapace bits to hide the magnets when you are NOT using a flyrant

12. Here is a regular tyrant with lash whip bone sword and a barbed strangler

13. Here is the swarmlord !

YEAH boi!
Hope it helps.


 2500
2500  4000
4000  4000
4000  5000
5000  5000
5000
 2500
2500 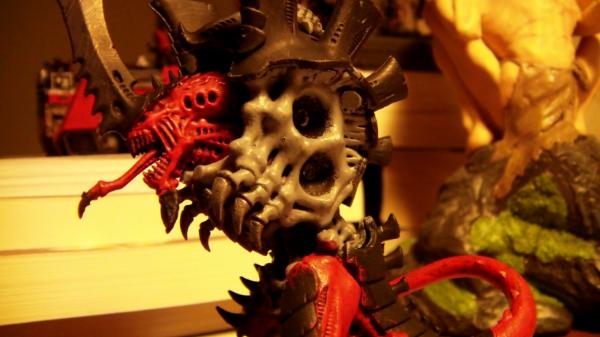


 2000 pts
  2000 pts


 Here it is now:


