So I recently bought a couple of Xwing starters, and wasn't enjoying playing on a dinner table. Problem was, I didn't want to spend money on a mat, cos I'd rather spend the money on more ships.

Decided to have a go at making my own. I wanted a standard 3'x3' mat, but I also wanted the facility to extend it to 6'x3' for bigger 'party' games. I ordered a couple of metres of felt from the seller below on Amazon. it arrived within a couple of days, and was actually far wider than the 90cm advertised. It was under £10 including postage.
http://www.amazon.co.uk/DECORATION-FABRIC-MATERIAL-ASSORTED-COLOURS/dp/B008OVQMO0/ref=sr_1_7?ie=UTF8&qid=1391535614&sr=8-7&keywords=black+felt
I had everything else I needed lying around, or in the wife's sewing box. Other things you'll need;
A tape measure.
A straight edge (I used a floorboard offcut)
Pair of scissors.
Chalk or a white pencil. (my better half had dressmaker's chalk in her sewing box)
Black thread and a needle.
A sewing machine (or a huge amount of time and patience)
An iron
A dishcloth
Some acrylic paints, including white
an old toothbrush
Pop studs/velcro/buttons or other type of fastener.
A decent amount of space to work
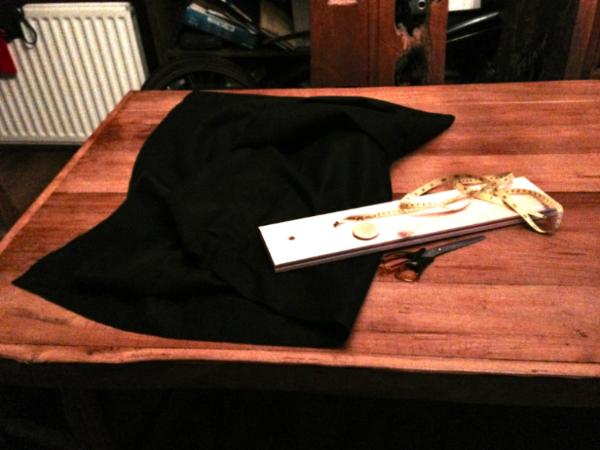
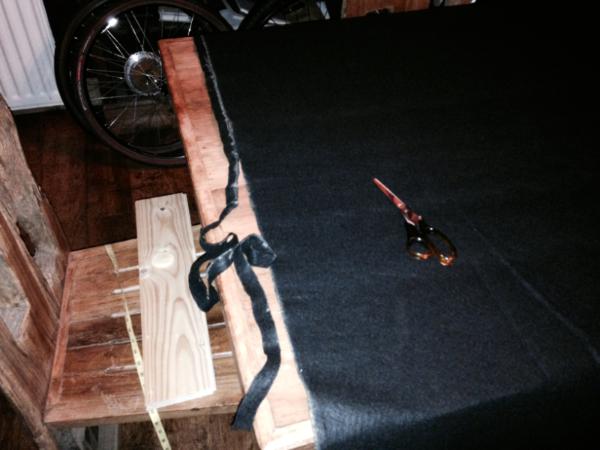
First job was to measure out and mark up your mat using chalk and a straight edge. I went for a 6'x3' mat. The cloth was probably big enough to do an 8'x4'. Measure out your dimensions, adding an inch all round for your seams. This made my 6'x3' come to 38 inches x 74 inches. Then cut it out. Use sharp scissors to get a decent edge.
Measure twice, cut once...
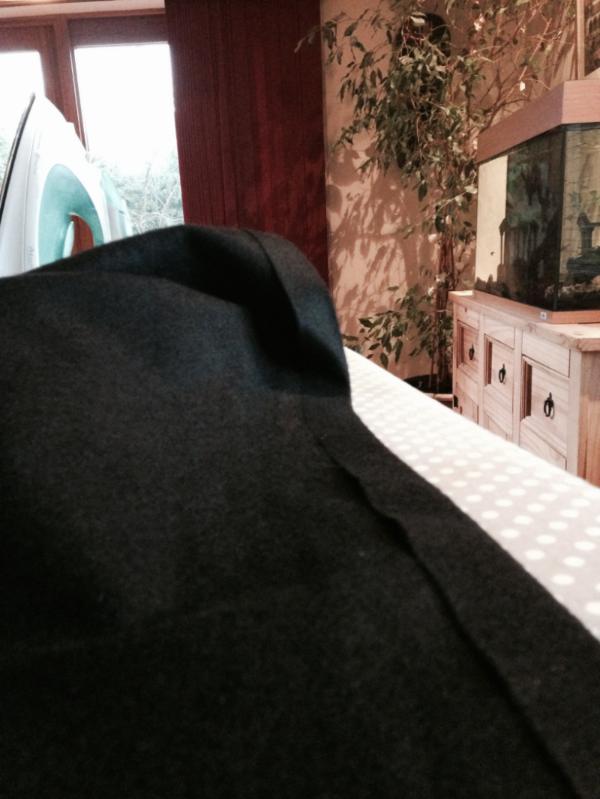
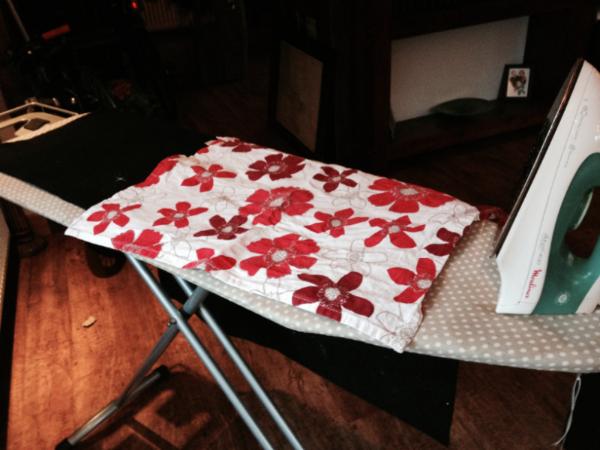
Get your steam iron set up. Felt is usually a blend of wool and acrylic fibres. Depending on the ratio of wool to acrylic, it can melt pretty easily. Get a scrap that you cut earlier to test before you ruin your mat! Start with the iron on the lowest setting, and increase the temp gradually until you are getting a decent iron without the smell of burning. Keep the iron moving, and don't let it scorch the fabric. If you've never used a sewing machine before, iron a 1" fold along the edge of a scrap of felt. Then iron a 1" fold on each long edge of your gaming mat.
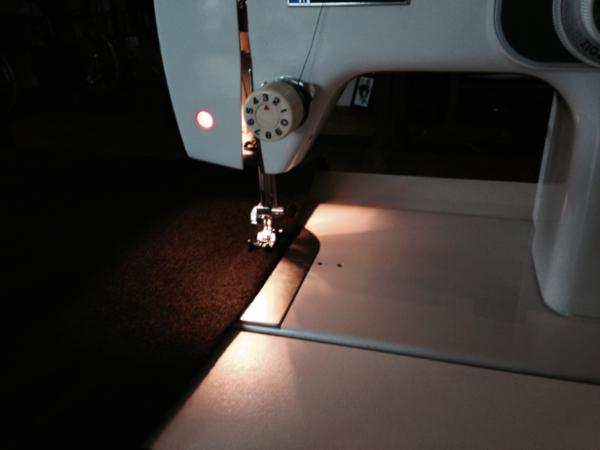
Sew along the seams, about 1/2 an inch in from the edge. Ideally, use a sewing machine for this, or it'll take you a million hours. I'd never used a sewing machine before this point, but my wife spent 5 minutes showing me how to do it, and they are pretty simple really. I practiced on a scrap a couple of times, then went for it. Just take your time, and if you cock up, ask someone who knows what they are doing to help. I managed without any dramas, so you can too.
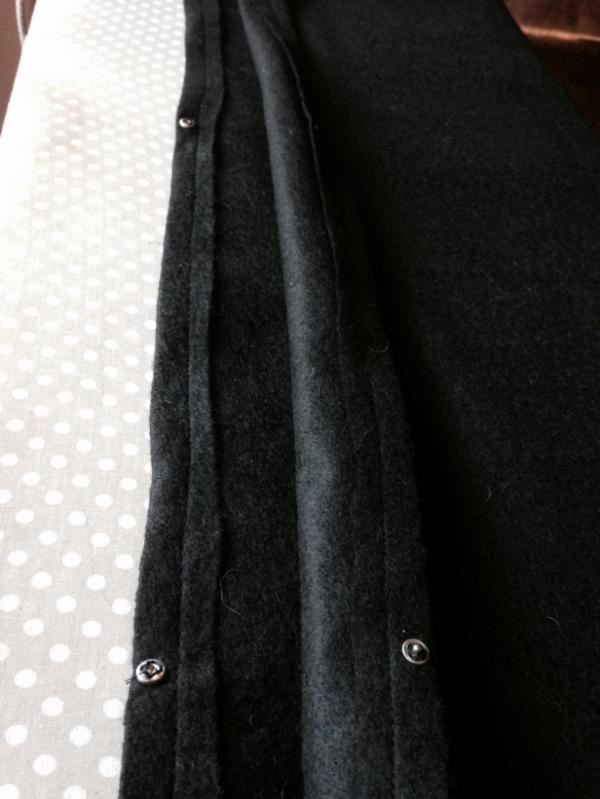
Once you've sewn the long edges, iron a 1" fold into the short edges, and sew them too.Fold the mat in half, with the seam flaps on the inside. Try and match up all the edges properly and give the mat a decent iron so it is 3'x3'. Then get your fasteners of choice. I went for metal press studs, because I'm eventually going to paint the other side for a second mat. Velcro would do the job just as easily though.
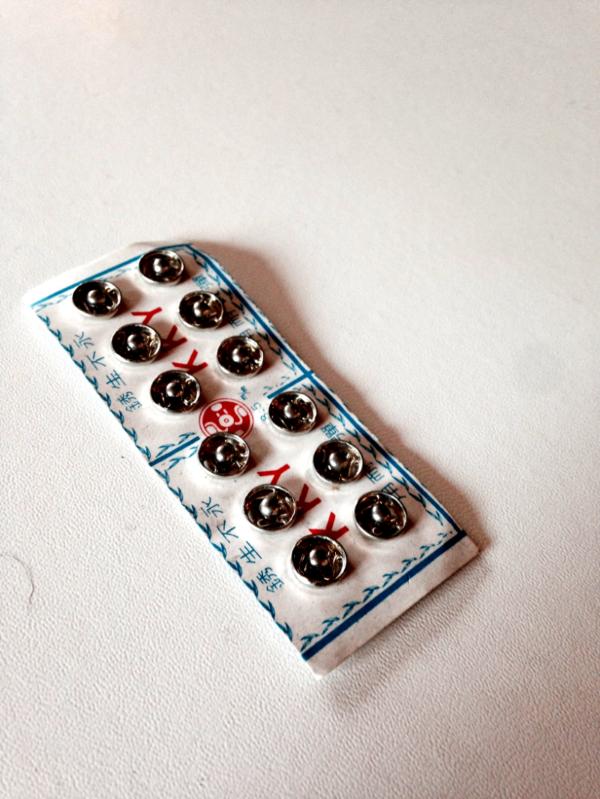
If using studs, sew them into the seam, where the fabric has been doubled up for extra strength. Try and make sure they match up perfectly, or you'll end up with ripples in the mat. This is extremely boring and time consuming. Its worth doing right though.
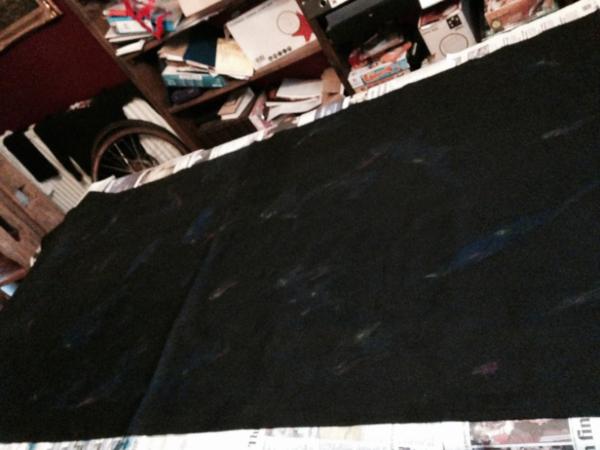
Give it another iron, then open it out again. Find a big bit of space, protect it with newspaper or whatever, and get yer paintbrushes out. Get a few colours out, water them down, and splash them about a bit. How much you use is entirely down to your preference. The idea is that the colours represent gas clouds, nebulae etc. Put on a little bit more than you think is necessary - I found that one of the final stages of the process removed a bit of the colour.
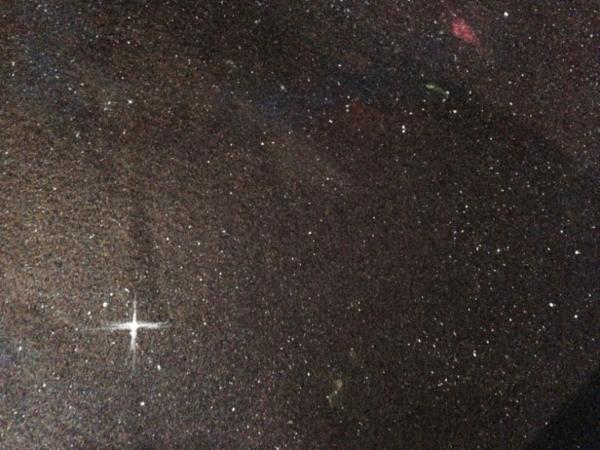
Get an old toothbrush, and some white paint. I used Vallejo Dead White. Dip the brush in, and run your finger over the bristles to 'flick' white dots over the felt. This stage is pretty messy. Build up your 'star field' slowly, trying different techniques to get different sizes of 'star'.

I found in three or four places that the 'star' had too much paint and was misshapen. I used an army painter regiment brush to tease out a bit of 'glare' to hide it, as can be seen in the next image:
Let the paint dry, then head back to your iron. You'll need a thin cloth for the next bit. The idea is to melt the acrylic paint and the acrylic fibres a little. You may want to practice on a scrap again, to ensure that you don't overdo it. I initially tried it with a hairdryer (on a scrap), and burnt right through in places. Doing this stage may seem silly, but it has a couple of worthwhile effects - it gets rid of a lot of the 'hairy' fibres that protrude from the surface and snag your ship bases etc. It also 'locks' the paint in. Just take it slowly, and make repeated passes if needed. If you don't bother with the cloth, the paint will melt, and smudge. Some of your colour will also soak into the cloth, so don't use your favourite tea towel!
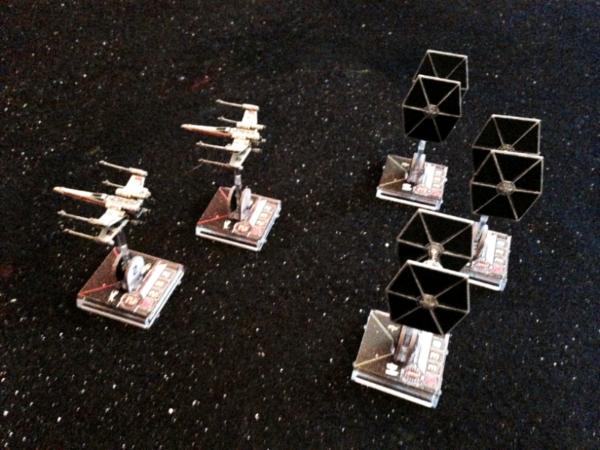
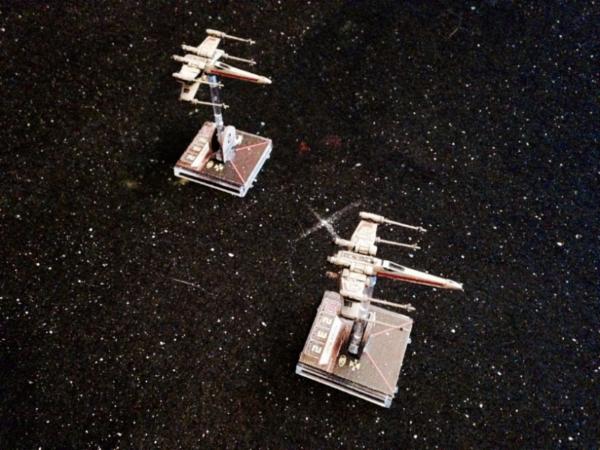
Get your ships out, and fire those proton torpedoes!
Hope this is useful to someone. I'm very pleased with my mat, and it was under a tenner.


 Tzeentch Daemons 2000pts
  Kabal of the Sundering Strike 2500pts
 Eldar Corsairs 750pts
  400pts Corregidor/Nomads
 300pts Yu Jing
 and washable for the inevitable twit that spills his drink all over it.