Hello all,
Well My friend handed me a lord of change for his army the other day and said, go to town, you have full artistic license. I love re-posing and basing in a diorama style with my monstrous creatures and such, so I'm really excited about this. I did just have a baby so this will not be happening by leaps and bounds. Instead this is largely limited to ten minutes of modeling a night. I asked Bogalubov what army he hates the most, are his semi-nemisis, he said Tau. So I'll have tzeentchy dude beating up a tau guy.
Here is the model normally posed and beautifully painted by ThatEdGuy,
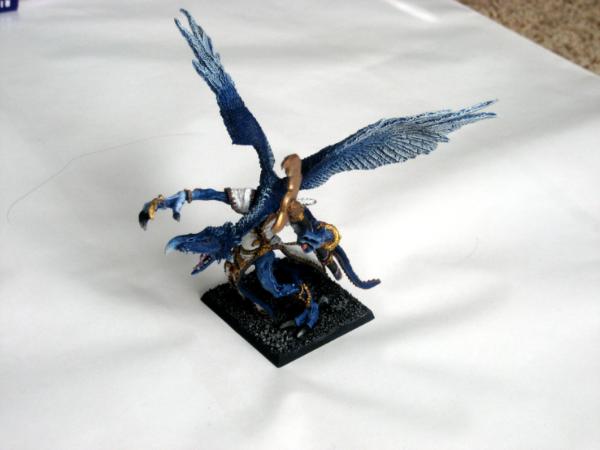
I hope he doesn't mind me using his sweet looking model as a standard pose comparison, but I couldn't find a bare bones one on here.
So the plan: I love the crackle paste I've been using on my desert basing for eldar and tyranids, so I decided to just coat the base in that. Figured I would use the normally down foot to create footprints in the paste. When Bogalubov goes to paint it later he can make it desert, mud, lava, whatever he would like.
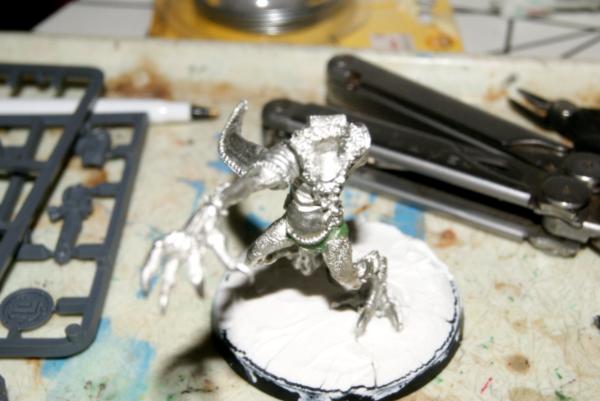
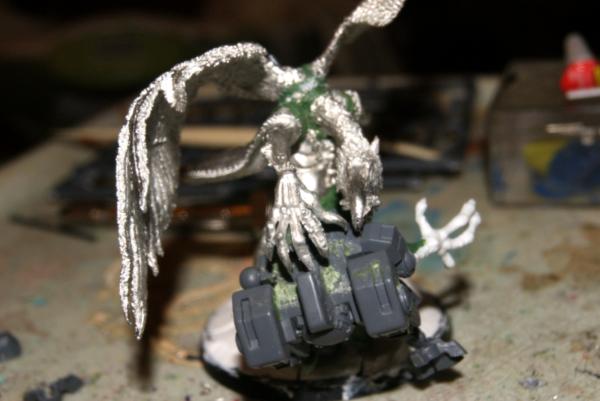
One of the big pains with this model is the intensive pinning that has to be done in order to make it stay put. It also becomes very top heavy with the wings. As basing and more structure, I'm planning on putting a crisis suite tau in the daemons right hand, dragged onto the ground and creating an additional contact point. Once I have those started I will see what the model wants to do for the wings and the trailing leg.
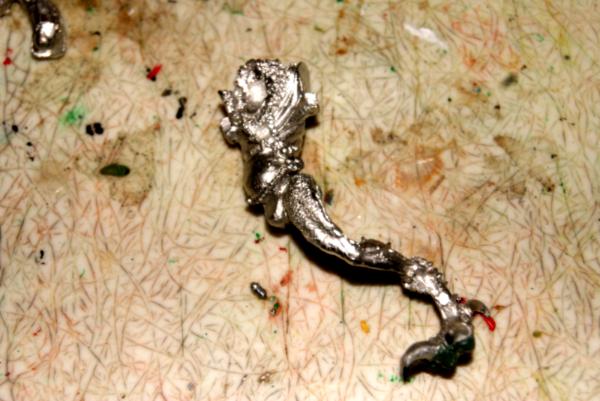
So to put the foot prints in the sand as it were, I put together the left foot and found that our daemon was a bit flat footed. Looking at bird feet, dino footprints and such, it seemed like their should be big muscle clusters and pad under each toe. So after gluing it together, I slapped on some green stuff. Filled the cracks in the foot, and bulked up a couple of nodules of footprint on the under side.
Day two I threw some crackle paste on the base, put some vegi oil on the bottom of the foot, and made my two foot prints.
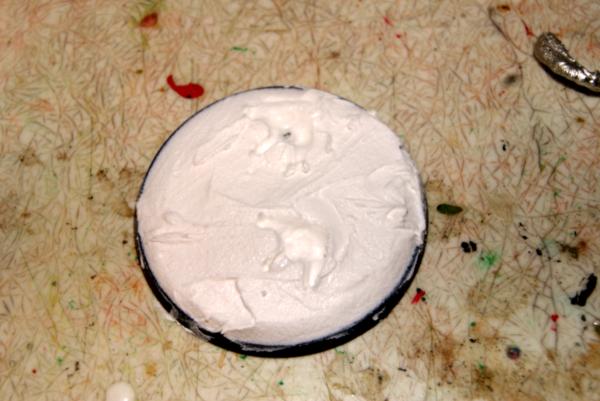
I think it came out pretty good, but we shall see after a couple of days of cracking and drying
Next day, crackle is looking good, lines are developing well.
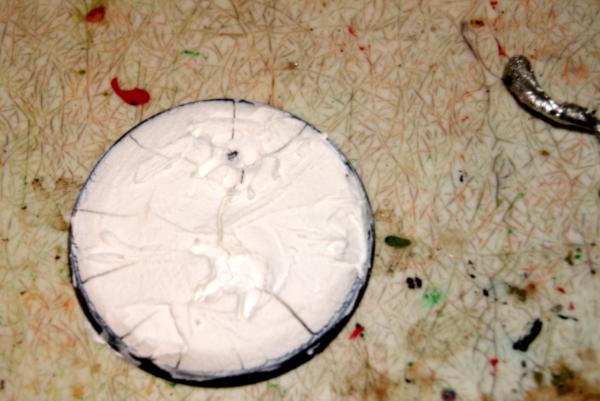
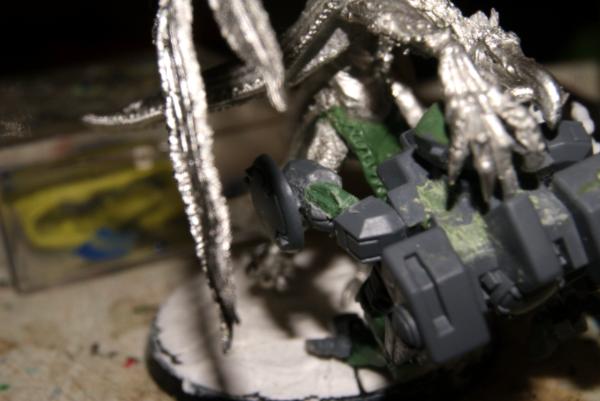
By the end of the week, the crackle paste had kicked off. I thought there might be one more good crack across the large flat section, but now it looks like the ground was cracking wherever the lord was stepping, which is pretty cool. I watered down, very light coat of varnish sets the base and will keep it from continuing to do anything. Primer and paint accomplishes the same thing.
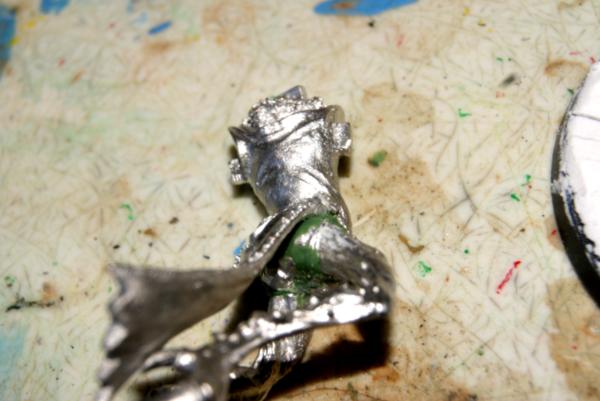
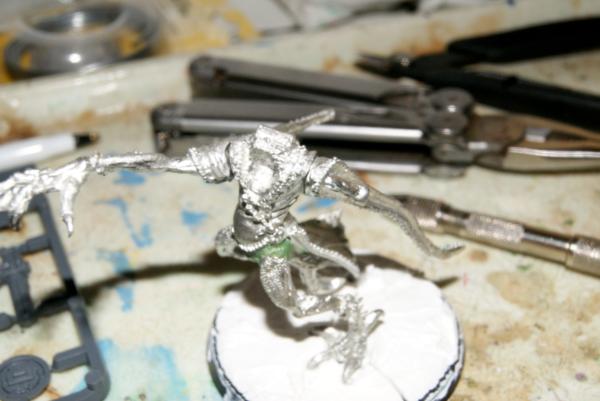
Once again, I was concerned about the top heavy nature of the model, so I double pinned the anchor leg. In the process of mocking things by just holding them together, it seemed like there was a lot of twist and lean to this leg, so I bent it a touch, both by hand for the thin parts, and then with cloth covered pliers. (if you are bending a really thick piece of metal, double up the cloth, as you can easily press a cut through and end up scarring the model anyway.
Glued the leg in, continuing the jockeying of the model to ad motion, I left touch of open space at the top of the hip. This also gives me a little access for putting a touch of green stuff down there to make it even more stable. Before gluing, in addition to the pinning, I scarred up both surfaces of the leg and hip. Made a couple of little holes for glue and green stuff to get into.
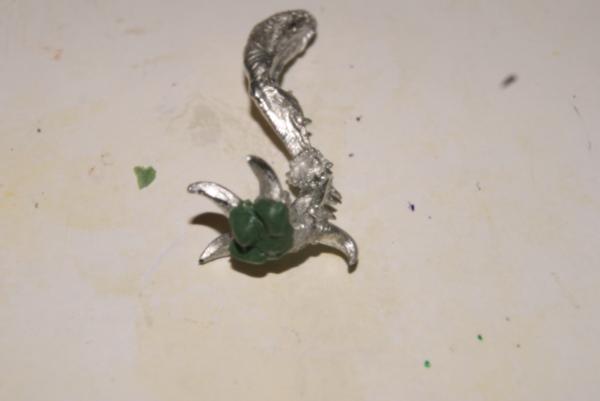
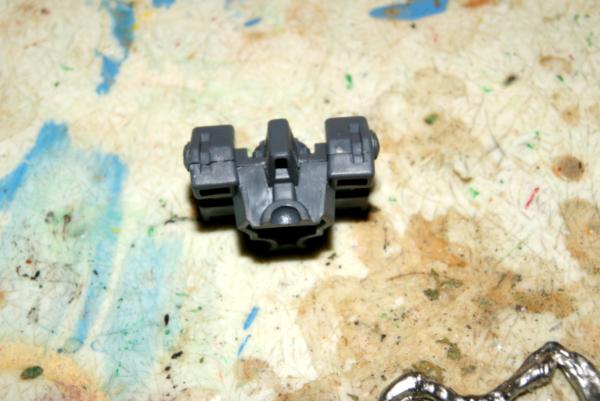
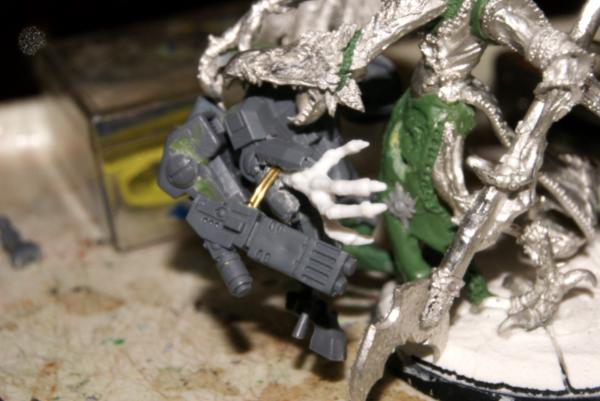
Today my tau crisis suit arrived. Yay ebays. I nipped off the chest assembly to get an idea of what this was going to look like. Started gluing the chest together and found lots of plastic depressions and space between pieces. There will need to be some green stuff added here.
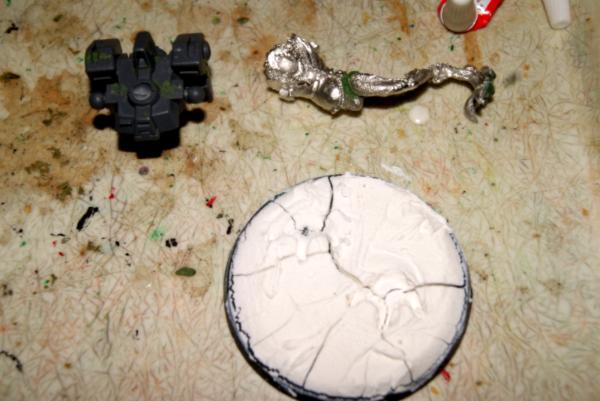
By the end of the second week, I've got the chest assembled, the anchor leg on, and green stuff in all the cracks and spots I've noticed so far. I'll go over it with file and blade to make sure everything looks clean. I like using plastic clay modeling tools for shaping the green stuff, dip them in water and it keeps the goo from sticking to the tools. (or your fingers.)
When I first assembled the torso on the crisis suit, I looked at the little jet pack parts, and considered cutting them off to re-position one, make it look like the suit was still fighting for balance. However I think it would have been best to due so before the pieces were glued together. Ah well, if I have another Tau based project I can try it then. Next up will be getting the base prepped for attaching the leg and continue on the top part of the tau. I will be wrapping the fingers of the lord of change about the space cows head soon. Woo hoo.
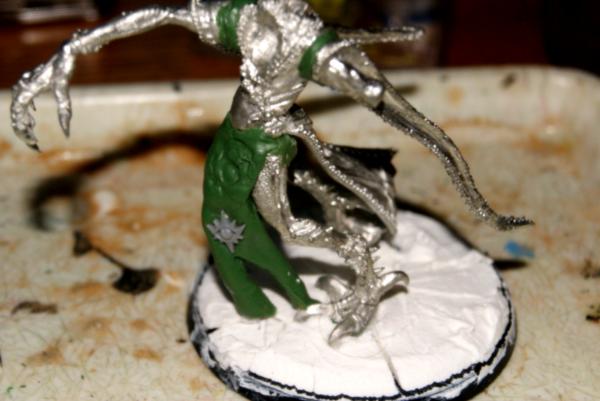
Well, it has been a couple of weeks. Not only did work get crazy, and the whole baby thing, we had a surprise move. Whee. However I did get a good amount of work in here and there on the lord. So I used more green stuff to fill in the
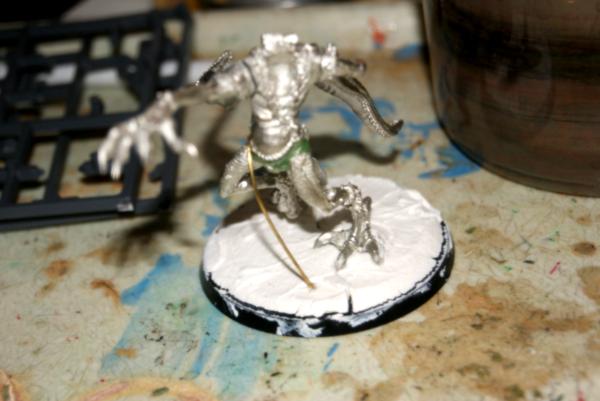
LOCs back side a little bit, and attached the rear part of the loin cloth. During the move, a bit of the crackle paste broke off of the base, so I re-pasted, and re-imprinted the second foot print.
After that I missed a picture or two, but I pinned in the first arm, which will be attached to the tau crysis suit. I used two pins in this arm, as it will once again be a large portion of the support for the model. I then bore a large hole up into the anchoring foot, and a large pin hole down into the base. I'm using 1/8" stainless steel wire to be the primary anchor, and will follow that up with green stuff underneath. This should serve both to solidify the model, and place more weight low.
Second arm was attached next, this only got a single, normal pin.
Another entertaining part of the move is I believe I lost the front loin cloth for our little bird man. For the sake of modesty and the constant search for balance. I decided to use this opportunity to send another pin into the base. I will use this as the framework to green stuff a loin cloth together. I'm going to look at the angles with the tau guy, and perhaps I can make a charred hole look where a weapon may have fired through. That would be pretty sweet.
I attached the right leg to the tau crysis suit. The plan is for the spawn leg to be breaking out of the suit. Getting in behind the knee is tough to do just with a knife.
so instead I used the small drill I use for pinning to make a number of holes to the U shape of the armor.
When the ankle and calf came off it looks a touch rough, but better then just chopping it off and cleaning up the remainder.
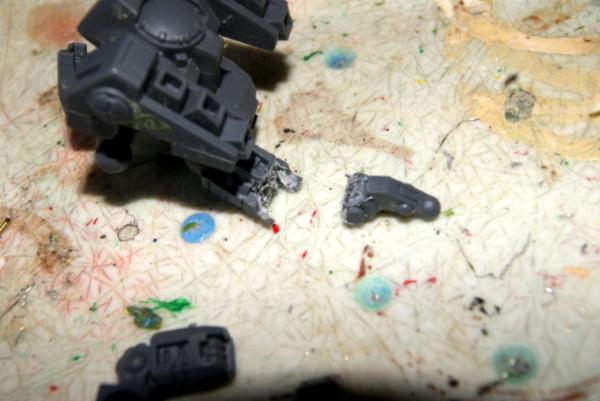
Once I cleaned up the knee I removed the top panel of the armored thigh as well. This can then be flexed out to give a more dynamic look to the leg.
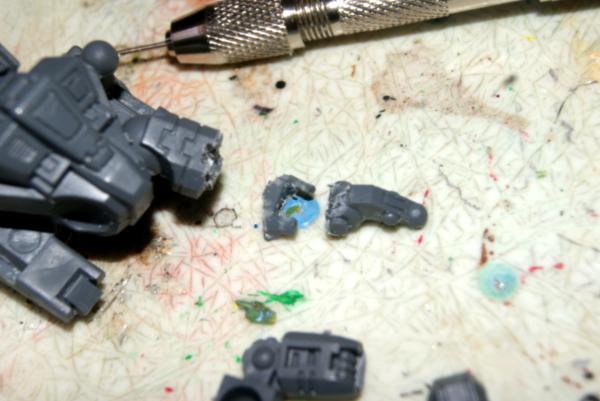
From there I drilled a large hole into the bottom of the thigh and green stuffed in a larger armature to build the new leg off of.

I didn't get a very good picture of either the process, or the finished product before it was attached to the larger miniature. The first set up of green stuff that I did was the knee joint a quarter of an inch or so below the thigh plating. I recurved it backwards similar to the way an ostrich or an emu leg looks. I made hollows on either side to represent the musculature that style of leg required. then added quad like muscles to that upper quarter inch of leg above that goes into the thigh plating.
While that was drying out I went back to the the front loin cloth on the lord himself. I added a second guide wire, and used more of the green stuff to create a skin of cloth along those two smaller wires. Once I had a good looking cloth I added a chaos icon I had found in my bits box, and tried do an impression of a chaos symbol from a defiler leg. It didn't come out perfect, but where it pressed only partially, I cut out a blast and tear into the cloth.
I removed the rectangle set from the back of the lord of change, then bored a large pin hole completely through the wing. I added another small pin at the bottom of the wing to keep it from rotating. I added green stuff where the rectangle used to attach to the wing and sent the pin all through everything. Super glue and green stuff filling in all the cracks or spaces.
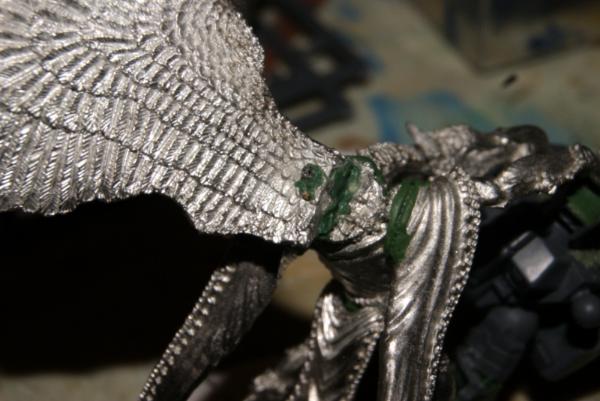
Afterwards I clipped off the extra pins that were standing up. When I have the second wing on I will come back with the dremel to clean up the pins. Then green stuff in some feathers.
Next I added the second layer of green stuff to the spawning leg. Once it had been rounded out, I pressed it into place, gluing the head of the tau into the lords head, and the green stuff being pressed into the hole bored in the base. While the green stuff was still fresh, I placed the large tau toe on the front, and a pair of little mawloc spines to be the spawning toes. Once this all went together, I let it sit and dry for awhile.
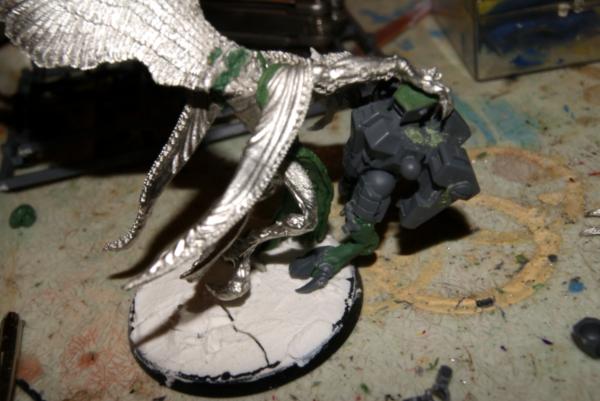
For the right arm on the tau, I cut the arm including the elbow joint and replaced it with a long bony arm I had in the bits box. I believe I came from a bones kick starter creature. The resin they used is a little floppy so I drilled a nice long pin into the arm to help stiffen it jus a touch.
I wanted to make the second wing on The Lord look more dynamic. So I tried making a similar body motion as the model was. I felt my shoulder blade pulling in the same direction as my arm. So I flexed the wing a little and then rolled it a bit to look like it would as it wrapped about the tau.
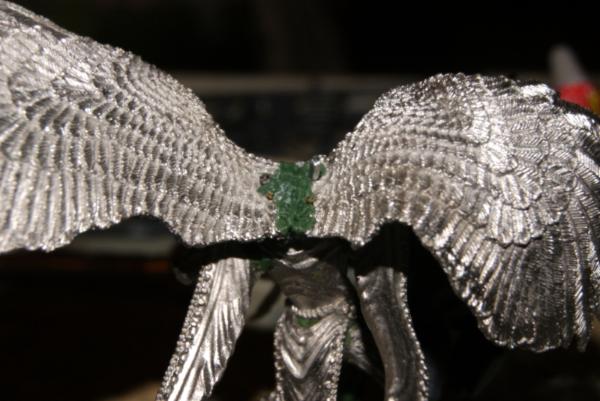
Much like the first wing I double pinned and added a good blob of green stuff. I also did a added green stuff on its back between the wings. I will come back and smooth this down with my dremel along with the pins. Then place a layer of green stuff with the feathering in it.
That is starting to look pretty cool I think.
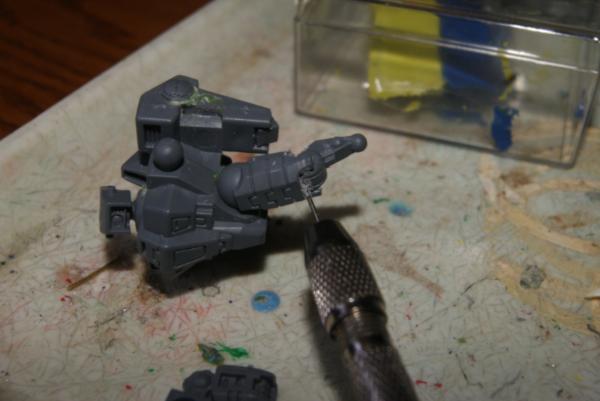
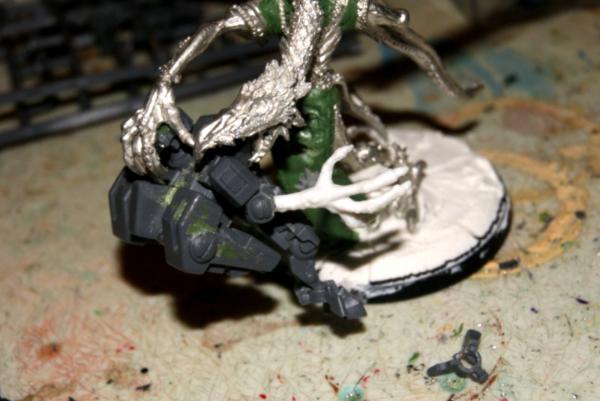
I attached the left arm of the crysis suit, initially with the fusion gun, however the way I had trimmed and reattached it looked hyper extended, also the fusion gun took up a lot of room to the interior of the model. I decided for ease of painting, and for the sake of the look to switch out for the simple little shield that he had. While I was at it, I removed the forearm from the left side and reattached it with a less hyper extended angle. A slight green stuff touch up and that side was finished.
for the spawned arm on the other side, I wanted to accentuate the action of the transformation. I was thinking I would leave the fusion gun on the ground, possibly nose down partially buried into the ground, but I played around with that look and just didn't like it. Instead I decided to attach it, as close to falling in mid air as I could. First I took the discarded right fore arm and clipped it in half. Smoothing down the edges and carving a depression into the two sides of the old fore arm, I attached them to the spawned limb, hopefully making the armor look like it was bursting apart. The fusion gun I then attached with two pins, curved to look as if it had been lost in the process of the arm coming apart.
Once the fusion gun and wires were attached, as well as the split armor. The modelling was finished. All that remained was to prime it so it was ready to paint.
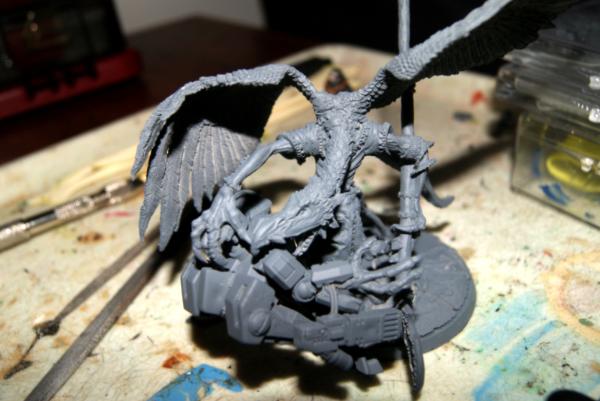
Tahdaa. Completed project, and I'm looking forward to playing against it.


