| Author |
Message |
 |
|
|
|
|
Advert
|
Forum adverts like this one are shown to any user who is not logged in. Join us by filling out a tiny 3 field form and you will get your own, free, dakka user account which gives a good range of benefits to you:
- No adverts like this in the forums anymore.
- Times and dates in your local timezone.
- Full tracking of what you have read so you can skip to your first unread post, easily see what has changed since you last logged in, and easily see what is new at a glance.
- Email notifications for threads you want to watch closely.
- Being a part of the oldest wargaming community on the net.
If you are already a member then feel free to login now. |
|
 |
2014/07/08 11:01:12
Subject: Scratch building a Gorkanaut, stage by stage with pics
|
|

Foxy Wildborne
|
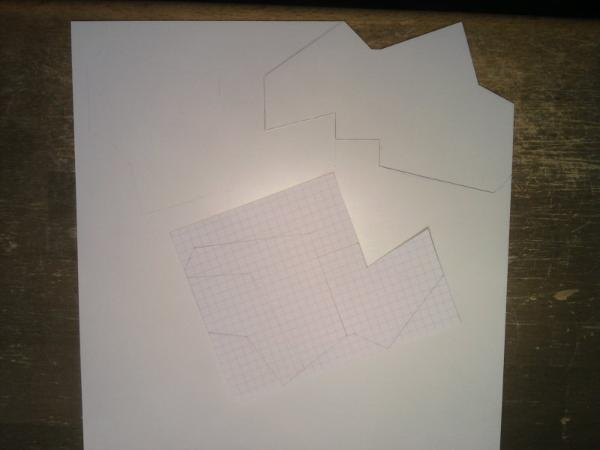
Money isn't cheap, so I'm going to save a bunch by using all this plasticard I have.
It's a good idea to figure out at least the general idea of what you're doing ahead of time. I have no clue why Dakka turned this pic upside down, it's fine on my computer.

Templates are your friends. This is the part where you can avoid your model looking like an assemblage of basic shapes by doing something a bit more interesting.
Make a little box inside for the passenger compartment. This is the stage where I admit I bought the head and legs from a bitz site, the time/money ratio is very different for articulated legs compared to a simple, boxy body.
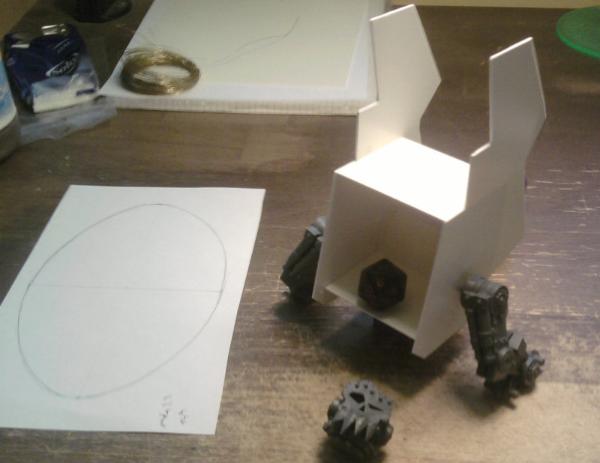
Just go around the sides and seal each facing. Now you have a box, but it's a fancy box if you did the template stage right. Use some angles that aren't 90 degrees and you're golden.

Basic hinges are really easy to do, if you don't know how they work, go look at a  door.
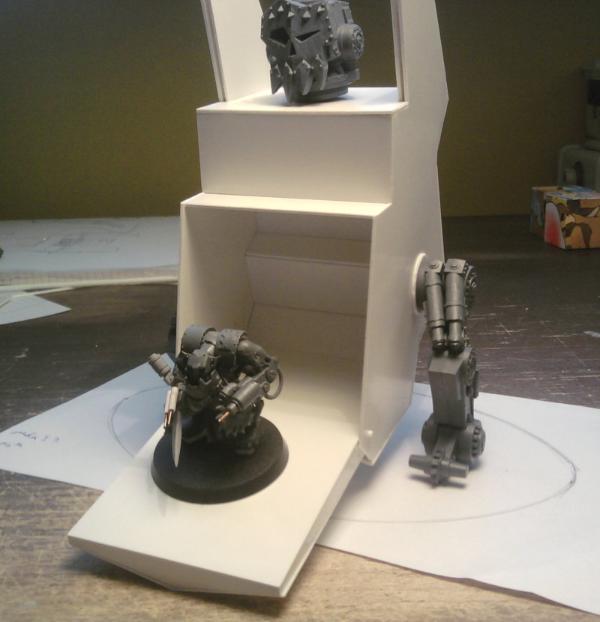
More to come tomorrow. What do you think, sirs?
|
The old meta is dead and the new meta struggles to be born. Now is the time of munchkins. |
|
|
 |
|
2014/07/08 11:05:49
Subject: Scratch building a Gorkanaut, stage by stage with pics
|
|

Dakka Veteran
|
Money isn't cheap! Looking good so far. I'm excited to see the progress.
|
\m/ |
|
|
|
|
2014/07/08 12:06:35
Subject: Scratch building a Gorkanaut, stage by stage with pics
|
|

Speedy Swiftclaw Biker
|
So far so good, what size plasticard are you using?
|
|
This message was edited 1 time. Last update was at 2014/07/08 12:08:06
 - 5000 - 5000
 - 2000 - 2000 |
|
|
|
|
2014/07/09 19:40:06
Subject: Scratch building a Gorkanaut, stage by stage with pics
|
|
Nurgle Veteran Marine with the Flu
Southern California
|
Very impressive and ambitious. Quite an inspiration! Can't wait to see more!
How did you make the crease in the front of the body compartment?
|
|
This message was edited 2 times. Last update was at 2014/07/09 19:41:29
|
|
|
|
|
2014/07/10 02:30:33
Subject: Scratch building a Gorkanaut, stage by stage with pics
|
|
Gargantuan Gargant
|
Subscribed, because I want to see how this turns out.
Looks good so far.
|
|
|
|
|
|
2014/07/10 12:55:32
Subject: Scratch building a Gorkanaut, stage by stage with pics
|
|

Been Around the Block
|
Likey likey!
|
Woohooo! |
|
|
|
|
2014/07/11 07:07:14
Subject: Scratch building a Gorkanaut, stage by stage with pics
|
|
Foxy Wildborne
|
Thanks, folks. I hope to build the arms over the weekend.
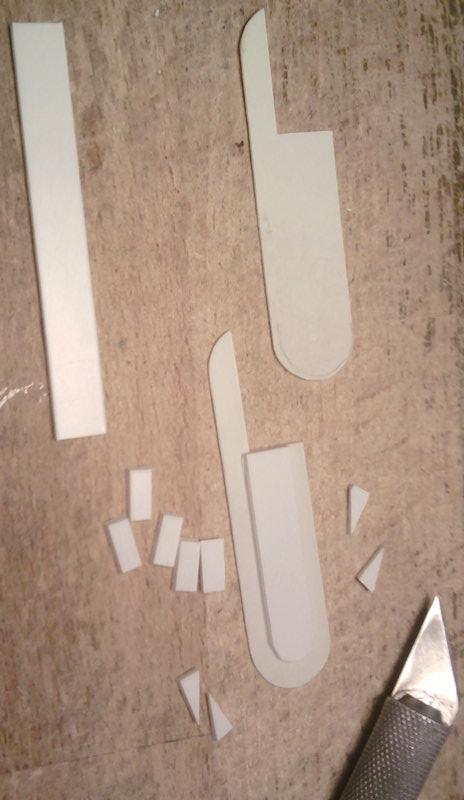
To answer the questions, I use 1mm plasticard whenever I can, it's the most convenient when cutting to exact dimensions.
The front panel is 0.5mm plasticard, because it bends well. It's a single piece, lightly scored along the middle, and just folded across two wedges (like the roof on a house).
|
The old meta is dead and the new meta struggles to be born. Now is the time of munchkins. |
|
|
|
|
2014/07/12 19:04:33
Subject: Re:Scratch building a Gorkanaut, stage by stage with pics
|
|
Foxy Wildborne
|
So for now I have this.

This part was every bit as tedious as you think it was, and probably more.
And someone tell Legoburner to stop the Gallery from randomly rotating photos 
|
The old meta is dead and the new meta struggles to be born. Now is the time of munchkins. |
|
|
|
|
2014/07/13 12:45:23
Subject: Scratch building a Gorkanaut, stage by stage with pics
|
|
Foxy Wildborne
|
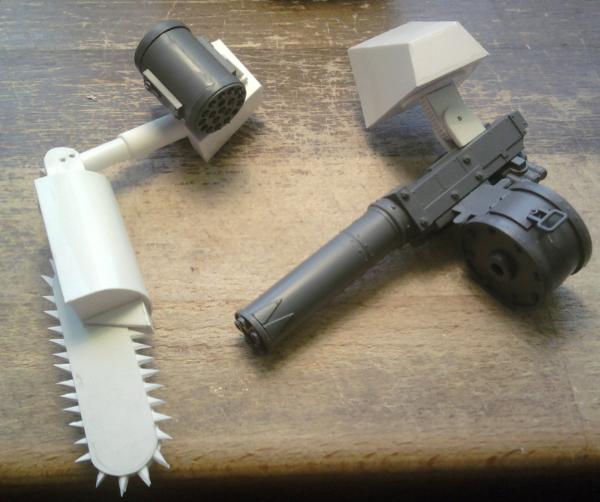
This is what I have now.
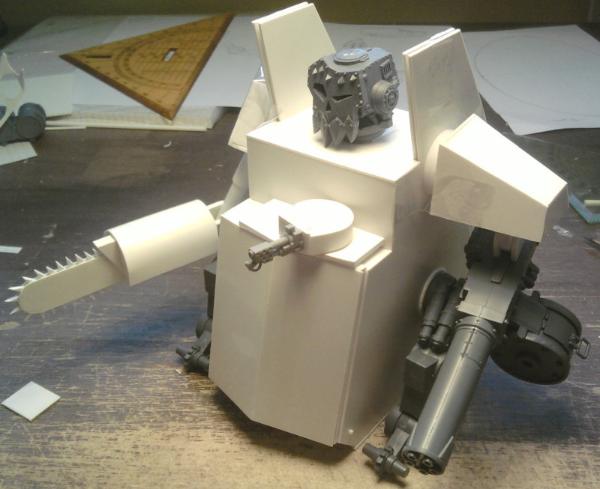
Arms up close.
|
The old meta is dead and the new meta struggles to be born. Now is the time of munchkins. |
|
|
|
|
2014/07/13 13:50:56
Subject: Scratch building a Gorkanaut, stage by stage with pics
|
|
Roarin' Runtherd
Neath, UK
|
that is amazing!! I shall be doing something similar very soon!!
|
 Gashrakk Da Flash's Split Grin Bad Moon Orks - 1,850 pts Gashrakk Da Flash's Split Grin Bad Moon Orks - 1,850 pts
 Ghazghkull's Waaagh - 6000pts Ghazghkull's Waaagh - 6000pts |
|
|
|
|
|
|