Forum adverts like this one are shown to any user who is not logged in. Join us by filling out a tiny 3 field form and you will get your own, free, dakka user account which gives a good range of benefits to you:
No adverts like this in the forums anymore.
Times and dates in your local timezone.
Full tracking of what you have read so you can skip to your first unread post, easily see what has changed since you last logged in, and easily see what is new at a glance.
Email notifications for threads you want to watch closely.
Being a part of the oldest wargaming community on the net.
If you are already a member then feel free to login now.
2014/07/18 15:11:06
Subject: League Game: 1500 Tyranids vs White Scars
First time writing a battle report, so hopefully it entertains! This was from our local league night, pitting my Tyranids against a friend's White Scars biker army. I had only fought them once before with said list and it was a team game, so my ally ended up baring the brunt of it. As such, I didn't quite know how to play against it and it was quite a good learning experience. Anyway, on to the report itself!
(also I apologize in advance for the quality of my pictures, I had to use my phone...)
Forces:
Hive Fleet Scorpius (me)
HQ: 1x Hive Tyrant with Scything Talons, Stranglethorn Cannon, Electroshock Grubs (Warlord: Night Attacker - Powers: Paroxysm, Catalyst)
HQ: 2x Tyrant Guard with Crushing Claws
ELITES: 1x Venomthrope
ELITES: 1x Venomthrope
TROOPS: 20x Hormagaunts
TROOPS: 20x Hormagaunts
TROOPS: 20x Termagants
TROOPS: 2x Warriors with Talons/Devourer, 1x with Talons/Barbed Strangler
TROOPS: 2x Warriors with Talons/Devourer, 1x with Talons/Barbed Strangler
HEAVY: 1x Tyrannofex with Rupture Cannon, Electroshock Grubs
HEAVY: 1x Tyrannofex with Rupture Cannon, Electroshock Grubs
HEAVY: 1x Exocrine
My list was created mainly to test out a few units I haven't had much chance to play with, hence it lacking most of the Tyranid standbys. In particular, I had just finished painting up the Exocrine and a second Tyrant Guard, so this was my first league game involving the two. We've also started to see more mechanized lists at the league, so I brought my Tyrannofexes out of their 6th edition retirement to get a bit of field time. The Rupture Cannon is far from ideal, but it does give them something to do while advancing into Electroshock Grub range. Sadly, the match-up was a rather poor test of their abilities, seeing as my opponent had no vehicles beyond their fliers.
White Scars:
(from memory - lost the copy of the list they gave me)
HQ: 1x Chapter Master with Artificer Armor, Powerfist, Shield Eternal, Bike (Warlord: Champion of Humanity - D3 extra points for killing a character in a challenge)
HQ: 1x Chapter Master with Artificer Armor, Powerfirst, Stormshield, Bike
TROOPS: 8x Space Marine Bikers with Grav Guns
TROOPS: 8x Space Marine Bikers with Grav Guns
TROOPS: 8x Space Marine Bikers with Grav Guns
FAST: 1x Storm Talon with Assault Cannon/Heavy Bolters
FAST: 1x Storm Talon with Assault Cannon/Heavy Bolters
HEAVY: 1x Storm Raven with TL-Assault Cannon/TL-Multi-melta
I think this is a fairly standard White Scars biker list, nothing especially unusual apart from perhaps the lack of any relics beyond the Shield Eternal. My opponent had never used either of the fliers before and was borrowing them from another marine player for the game to get a bit of a test run.
Mission: Cleanse and Control (Tactical Objectives were generated via the D66 chart in the core rulebook as neither of us had the cards handy)
Deployment: Vanguard
The league also had a special scenario in place. At the start of each player turn after turn 2, the player in question rolled a D6. The ground then “collapsed” that many inches from the player‘s short table edge, effectively turning everything behind the line into the old Lethal Terrain. Any non-Zooming Flyer or Swooping Flying Monstrous Creature in the area where the ground had collapsed was to be immediately removed as casualty and, if a Flying monster were grounded while over the collapsed area they would also be removed as a casualty (never happened). We marked the line where terrain had collapsed with some castle walls from fantasy, though the effect was overall minimal on our game.
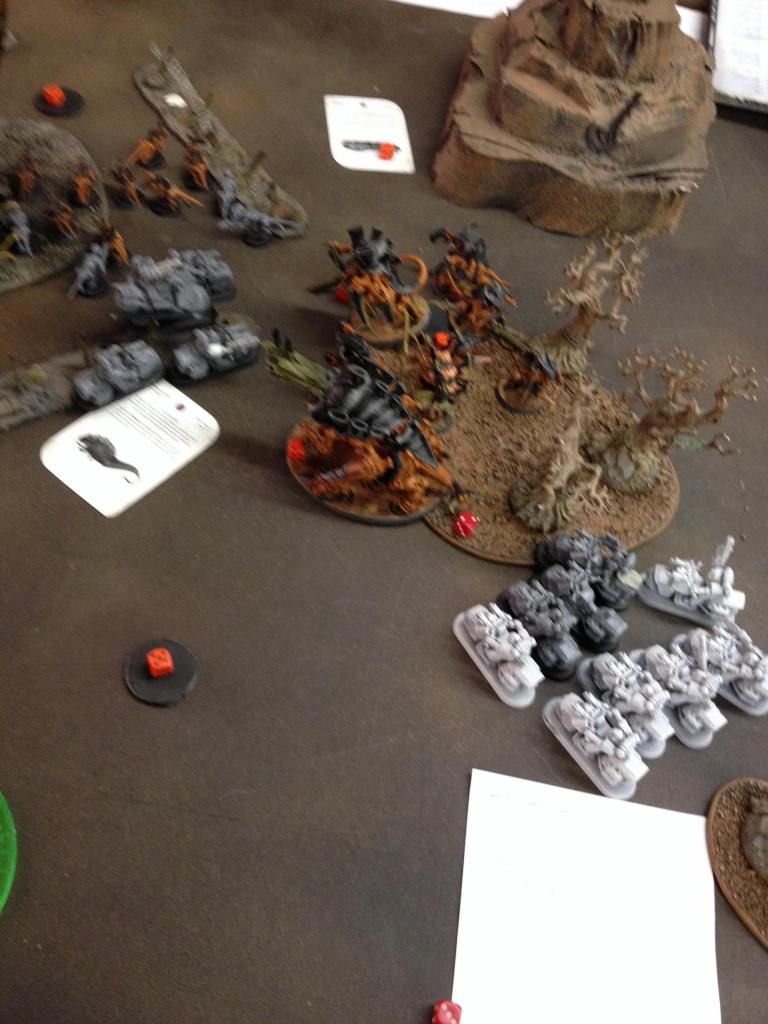
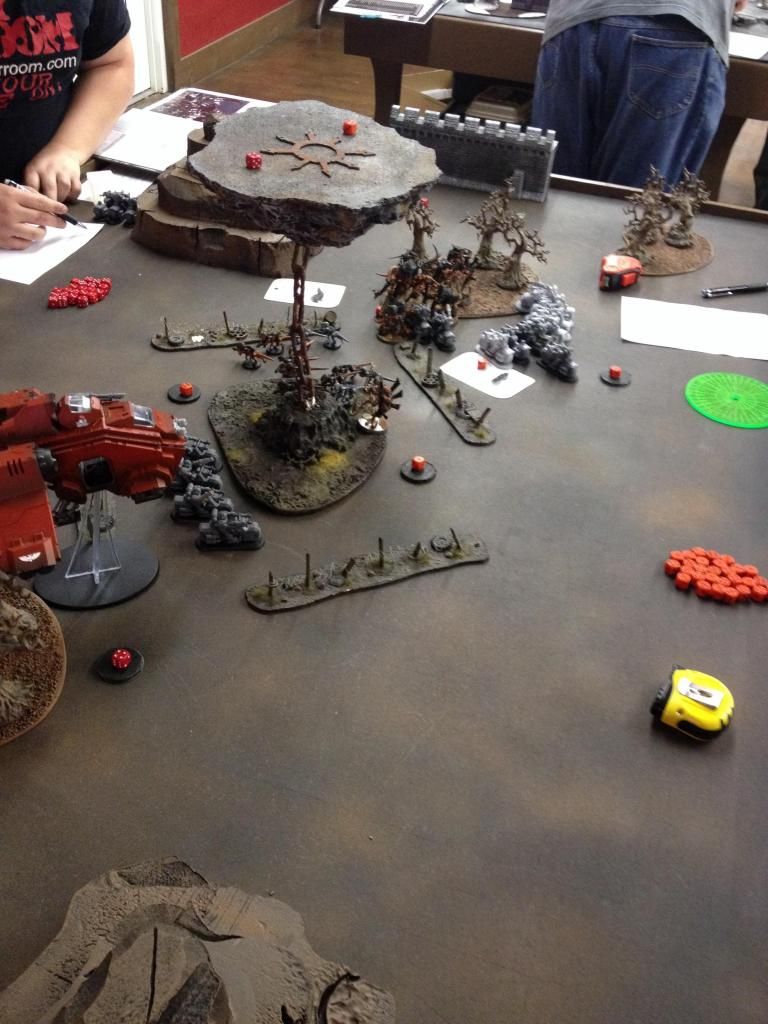
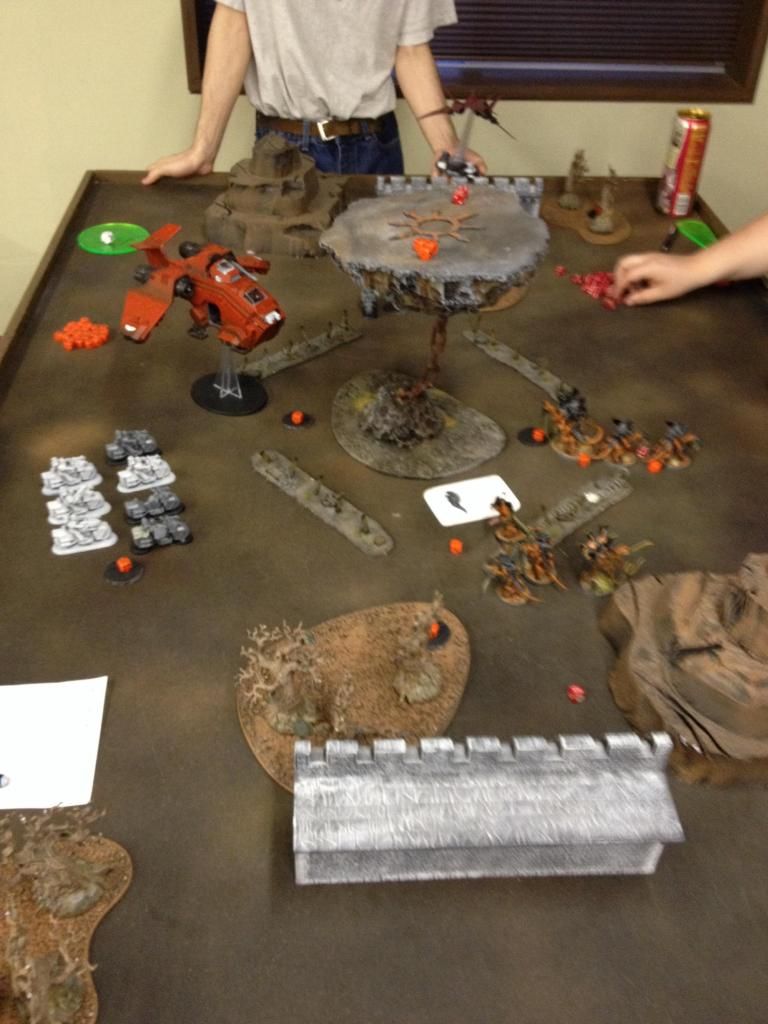
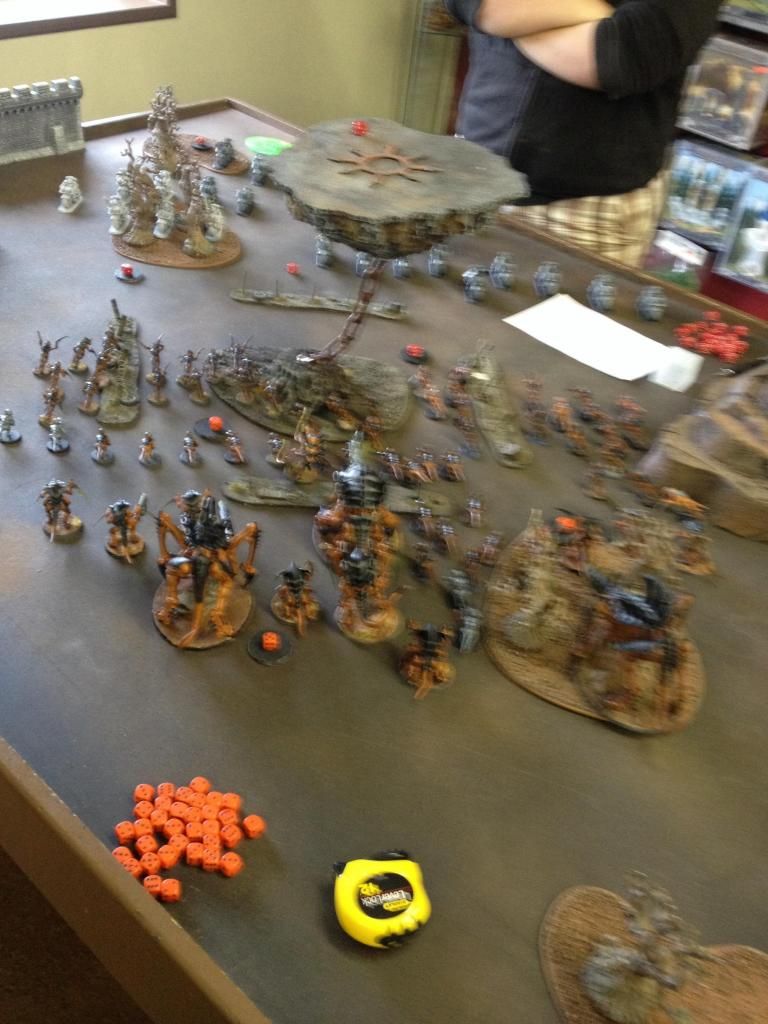
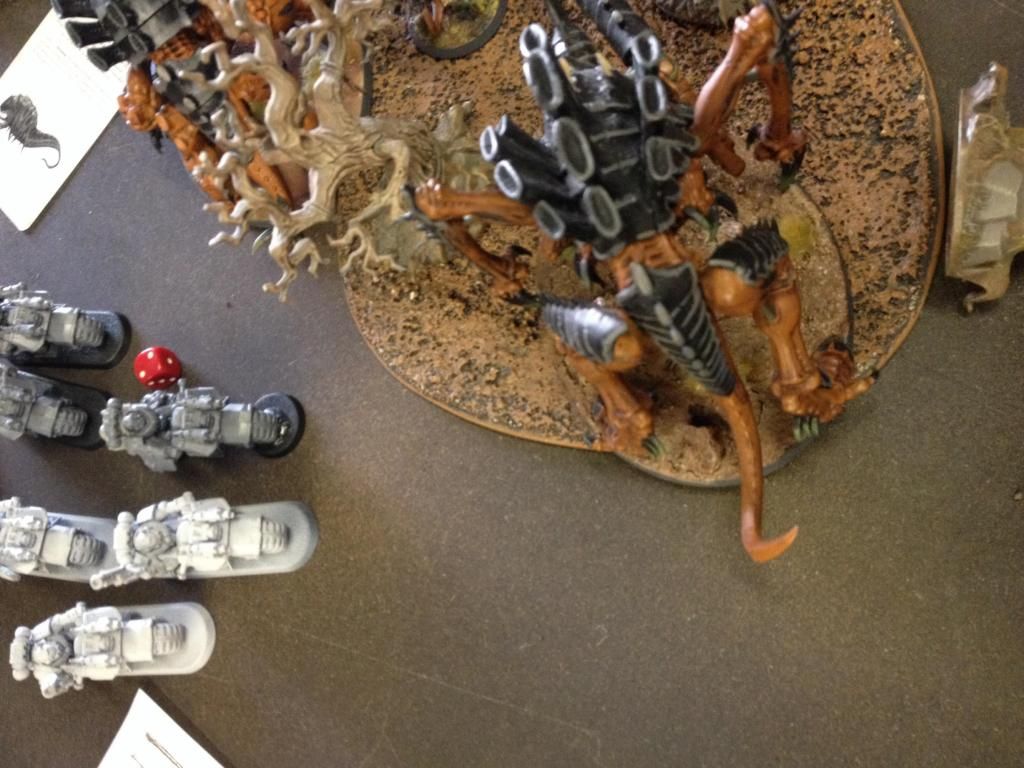
Deployment:
Spoiler:
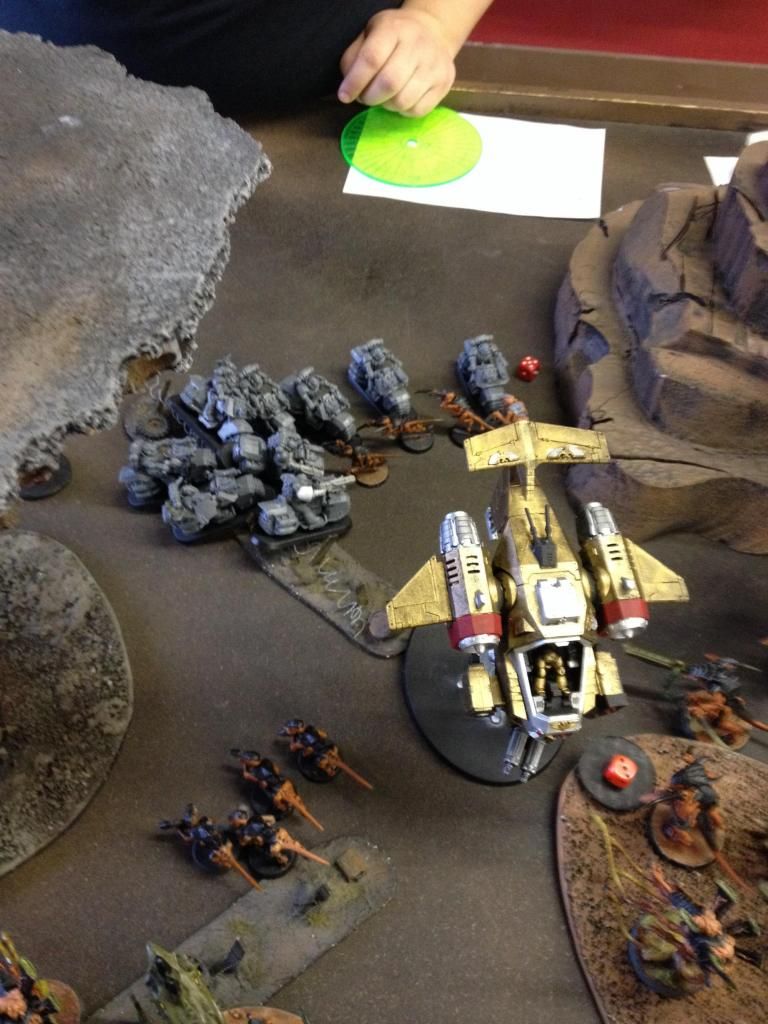
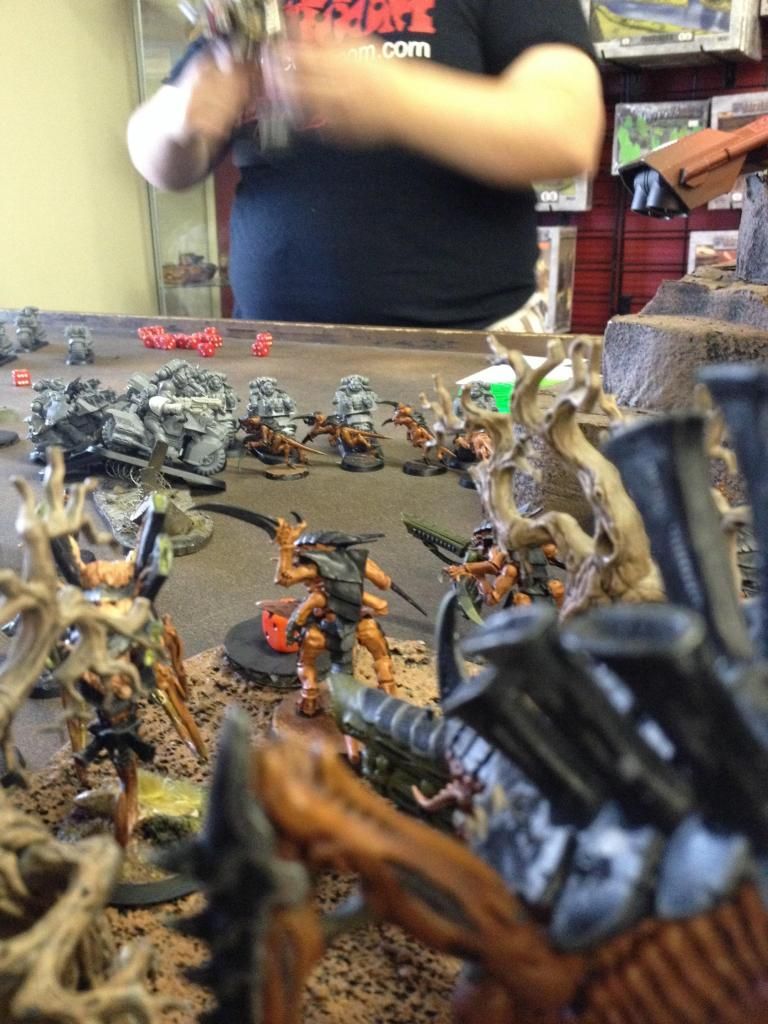
The objectives were more or less neatly placed around the center of the board, under the assumption that the edges were going to be disappearing due to the special scenario in place. Objective 6 was the one outlier, being put in the far corner. Nothing outside of the flyers was held in reserve and I elected to have night fighting first turn due to my warlord trait (didn't have any effect)
The White Scars advance! The Warlord’s unit zooms towards the closer wave of Hormagaunts while the unit without characters moves up to objective 4. The last biker with the other chapter master remains more or less where it is and spreads out to minimize the impact of the Exocrine and Strangler large blasts.
Nothing is really in range to shoot this turn and seeing as there are several large squads of gaunts my opponent elects to stay back out of charge range rather than turbo-boost.
The rearguard unit of bikers secures Objective 4.
White Scars: 1 Tyranids: 0
Tyranid Turn 1:
Spoiler:
Objectives: Secure Objective 3, Big Game Hunter, Secure Objective 4
The Hormagaunts surge up the field ahead of the main host, detecting potential prey ahead! (Unfortunately this was probably a big mistake on my part, since while the goal was to make a beeline for objective #4 and block up the way to my shooting critters, it also ended up playing into the white scar’s battle plans…)
The rest of the force advances more cautiously, hugging cover and keeping in range of the Venomthropes. Psychic Phase is fairly uneventful due to only one Warp Charge being generated. Needless to say, the Hive Tyrant successfully manifests Catalyst on himself and the Exocrine as my opponent didn‘t have enough dice to stop all of the successes.
Tyranid long-range shooting proves entirely ineffective, as Rupture Cannon shots and various forms of Stranglers bounce off 3+ armor saves. All creatures without guns and the Exocrine run. The Warriors and Venomthrope within the woods successfully secure Objective 3.
White Scars: 1 Tyranids: 1
White Scars Turn 2:
Spoiler:
Objectives: No Prisoners, Secure Objective 5, Supremacy
The special scenario's wall of death takes away 1 inch of the White Scar’s short board edge, nothing really to worry about.
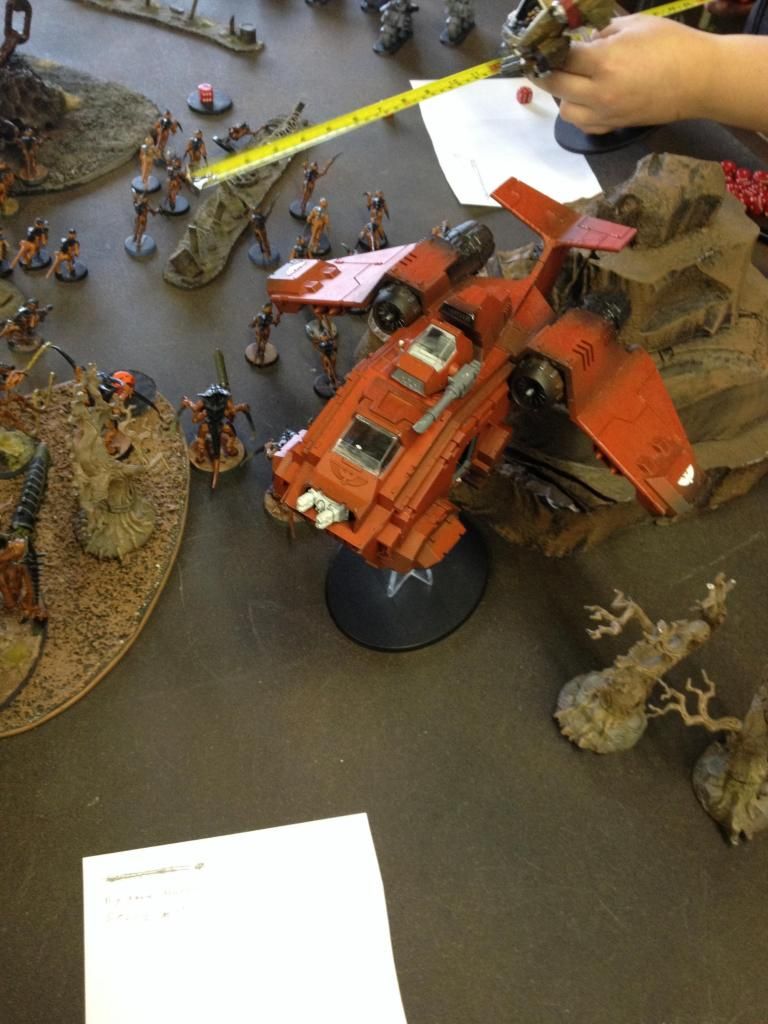
The Storm Raven and one Storm Talon come in from reserves, both making a beeline for my monstrous creatures. The non-warlord Chapter Master also breaks off from his unit and zooms over to the other, more forward biker unit. Both he and the Warlord then call down orbital strikes on the incoming hoard…
The first mildly scatters and lands atop four Hormagaunts and a trio of Termagants. The Termagants are completely vaporized by the attack, but the Hormagaunts manage to avoid damage through a combination of bad to-wound rolls and the Venomthrope’s cover.
The second shot was aimed at the Venomthrope providing cover to the Exocrine and Tyrannofex, but scatters wildly off course and atomizes a tree instead…
Shooting from the bikers proves slightly more efficient, whittling down a handful of Hormagaunt from both broods. The flyers then open fire on the Tyrannofex but completely failed to pierce its 2+ armor or the shrouded spore cloud.
To avoid getting charged in return, the bikers then charge into combat, forgoing the chance at Ascendancy in favor of protection from shooting and a chance at finishing off a unit for No Prisoners.
The first Hormagaunt brood fails to inflict any damage, instead getting crushed underneath the wheels of the vengeful marines. All but 4 are slain, unfortunately leaving the squad locked in combat and completely safe from retaliatory fire. Oops...
The other brood fairs little better, being grinded down to a minuscule 5 gaunts. However, they do manage to inflict a wound on the chapter master, earning a moral victory at least.
No tactical objectives are scored this turn.
White Scars: 1 Tyranids: 1
Tyranid Turn 2:
Spoiler:
Objectives: Big Game Hunter, Secure Objective 4, Secure Objective 3
With uncanny synchronicity, the wall of death also only advances an inch from my short edge as well…
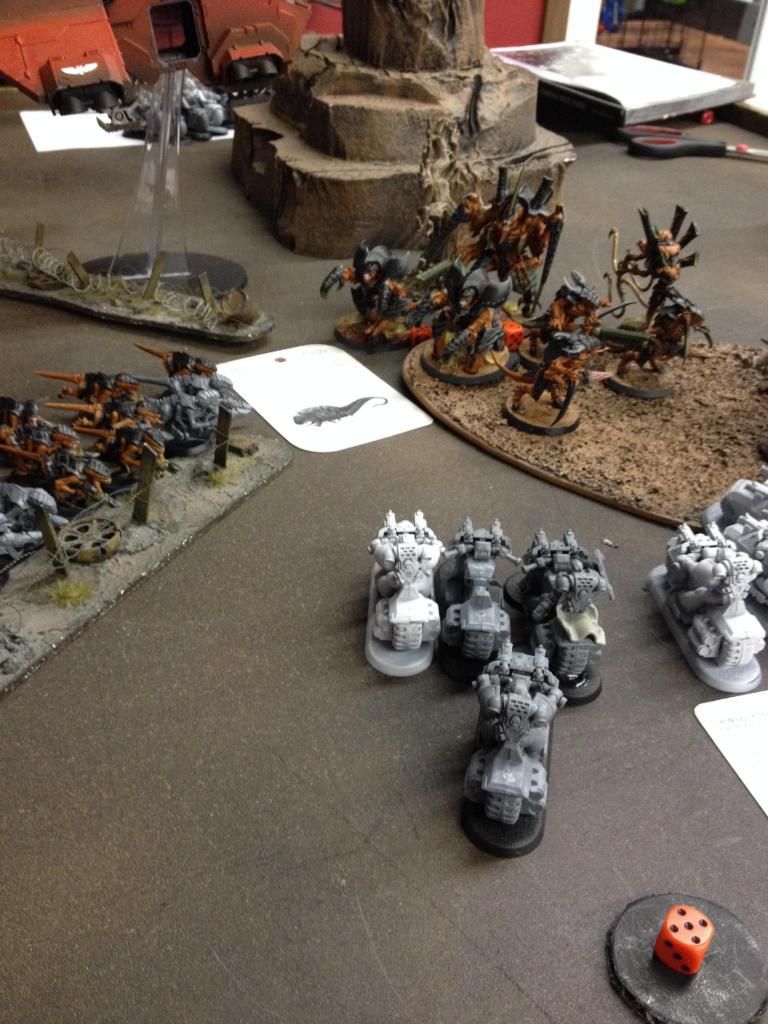
Given that my two main tarpits have been reduced to a mere handful of gaunts and being unable to really take advantage of the Exocrine’s AP2 shooting, I spend most of the movement phase shuffling units back towards cover to protect against the biker‘s grav-guns, with only the Tyrannofex and attendant Warriors breaking ranks to try to save what I can of my Hormagaunts.
Psychic phase is rather uneventful, as once again only 1 warp charge is generated. The Tyrant again throws Catalyst on the Exocrine, under the assumption that it will be target priority #1 come next turn once the bikes break from combat.
Shooting phase opens with the Exocrine opening fire on the Storm Talon (being the only viable target in range - the rest of the bikers were literally an inch out) and it fails to hit. The Tyrannofex, also lacking good targets, follows up with one hit (6), one pen (5), one immobilized (6), and my opponent rolls a 2... Crash and Burn!
The ensuing crash kills a handful of Termagants and opens a corridor towards the ongoing combat with the Hormagaunts…
Other shooting is rather limited. The furthest back Warriors fail to hurt anything with their Barbed Strangler and the Hive Tyrant elects to run back into range of the nearest Venomthrope for a bit of extra protection from grav-weaponry.
The Tyrannofex and Warriors then proceed to join the assault. The Hormagaunts manage to put another wound on the Chapter Master and the Warriors and Tyrannofex manage to take down another 3 bikes while taking no wounds in return. The Chapter Master then squashes another 3 Hormagaunts with their power fist.
The unit then passes its moral and uses Hit and Run to bail out of the fight, running past the swarm and ending up right next to my Hive Tyrant. (gulp) The rest of the Tyranids then consolidate, with the Warriors moving to provide cover for the Tyrannofex against a return volley of grav-guns.
To the north, the four remaining Hormagaunts remaining are utterly crushed under the weight of blows from the Bikes, their feeble strength being unable to do anything in return… The victorious bikes with the Warlord in tow then consolidate towards the rear-guard Tyrannofex and Exocrine.
We have a bit of a rules quandary at this point in regards to whether the Storm Talon counted for Big Game Hunter, so we asked the rest of our group and the general consensus was that it did (being a vehicle, albeit a flying one). With that and objective 3 firmly in Tyranid control, I gain 2 points this turn. I also gave my opponent First Blood for the wiped out Hormagaunts (I completely forgot about the crashed Storm Talon technically being the first casualty of the game).
The wall of death on the White Scar’s side crawls forth another 3 inches or so, not really threatening anything... yet. The last Storm Talon comes on from reserves and arrives via Hover Mode to secure Objective 6. The Storm Raven also flies off the table at this point, being unable to get a good target without dropping into hover mode.
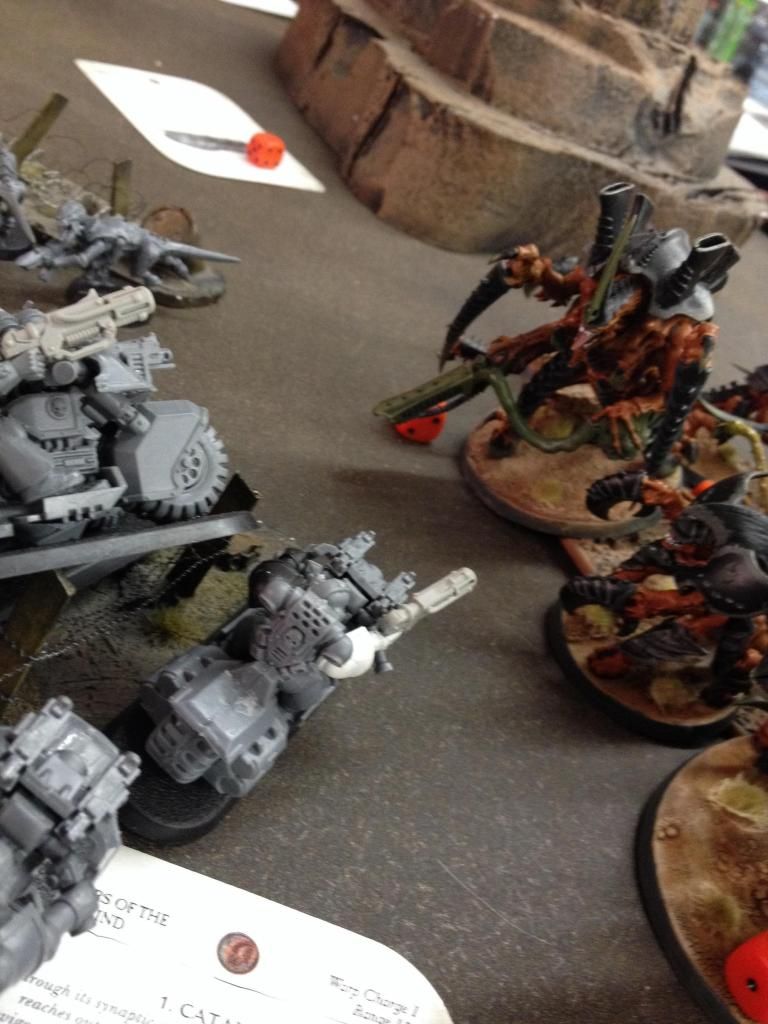
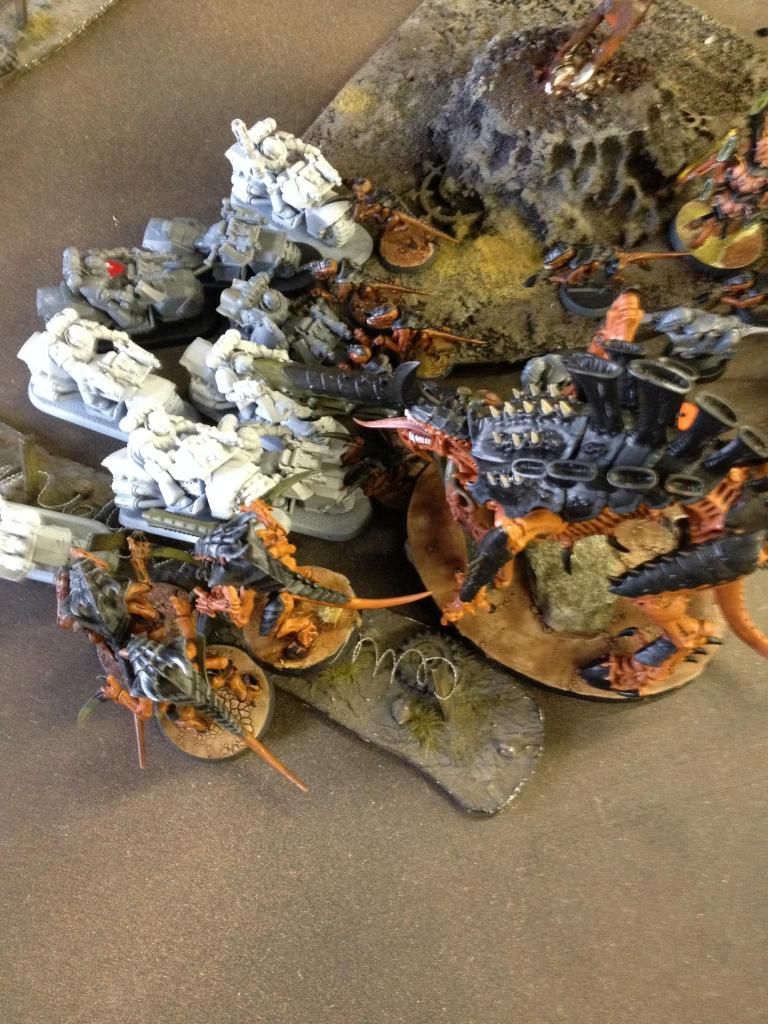
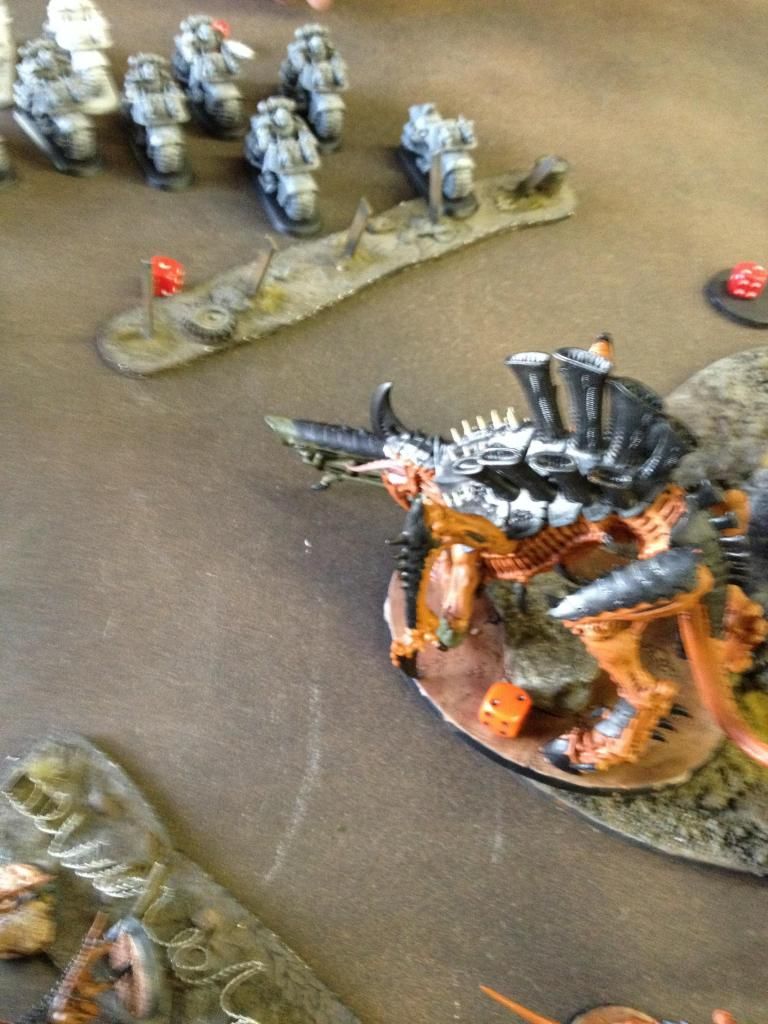
As expected, the biker squads converge on my larger monstrous creatures. The one squad left behind to grab objective 6 on the white scar side of the table zooms up to engage the Tyrannofex, bypassing my Warrior blockade.
The Warlord’s unit in turn zips to the Exocrine while the depleted unit with the wounded chapter master head for the rearguard Tyrannofex.
The squad without characters opens fire on the Tyrannofex with everything they have, but due to unlucky rolling and some very lucky 5+ cover saves they only manage to inflict 4 wounds on it. Shooting at the Exocrine fails to hurt it at all, through a combination of 3+ cover (5+ from the woods + shrouding) and Feel No Pain. The second Tyrannofex also survives the grav-onslaught, loosing only 1 wound from the barrage.
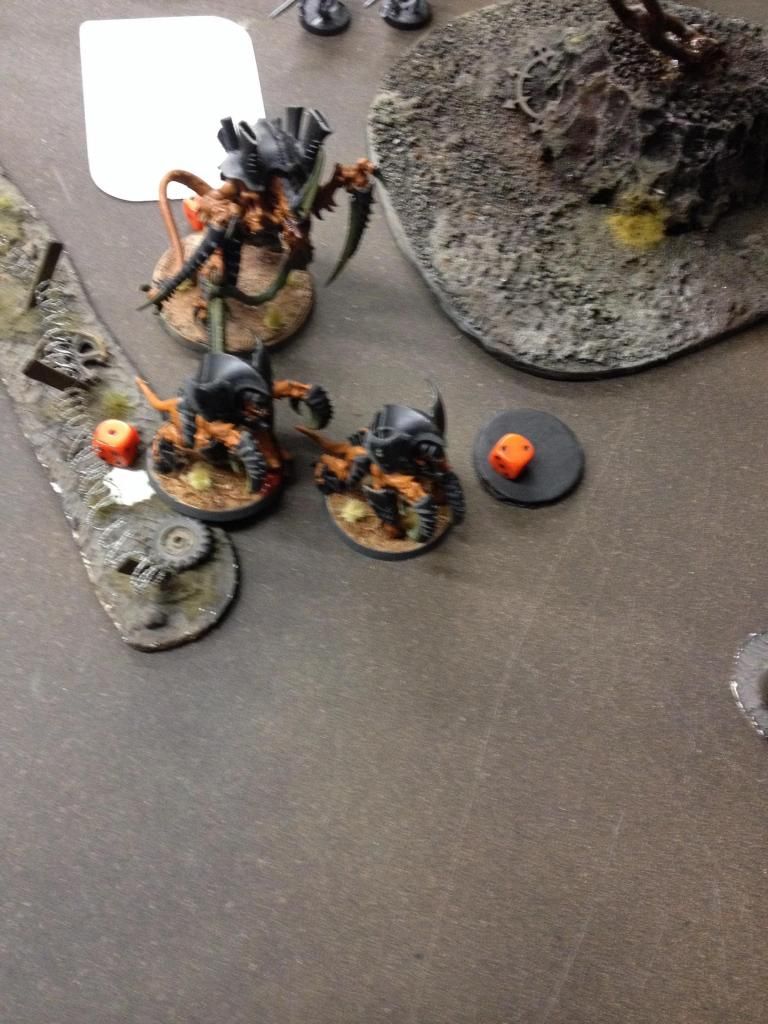
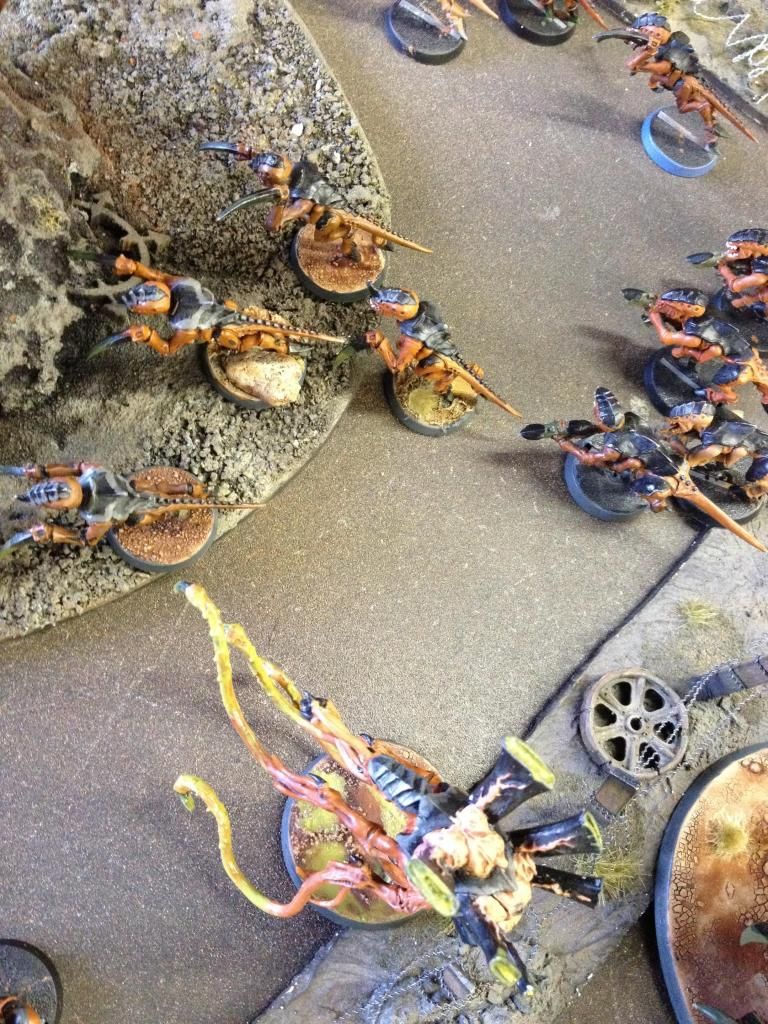
The bikers then charge. The first Tyrannofex fails to hurt anything with its Electroshock Grub wall of death, but the second causes another wound on the unlucky chapter master, leaving him with 1 wound left. The Exocrine also fails to hurt anything with its overwatch, but fortunately ends up with only the Warlord and one bike able to strike it, due to the narrow charge corridor (see picture above) and a fairly low charge roll. It ends up taking two wounds after FNP and fails to inflict any damage in return.
Despite an overwhelming amount of dice, the first Tyrannofex stands firm against the charging bikes and bounces all of the wounds inflicted upon it with its 2+ armor. It then proceeds to crush 3 bikes for their audacity. The bikes pass their moral and choose to stay locked-in.
On the other side of the table, the second Tyrannofex fails to hit any of the speedy aggressors and is overwhelmed by the volume of blows struck against it, loosing three wounds to the bikers and its last two from the chapter master's power fist. The bikers then consolidate back out of the woods.
White Scars score one point for holding objective 5 and two points from Supremacy by holding both objective 6 and objective 5 while I only hold objective 3, for a total of three points.
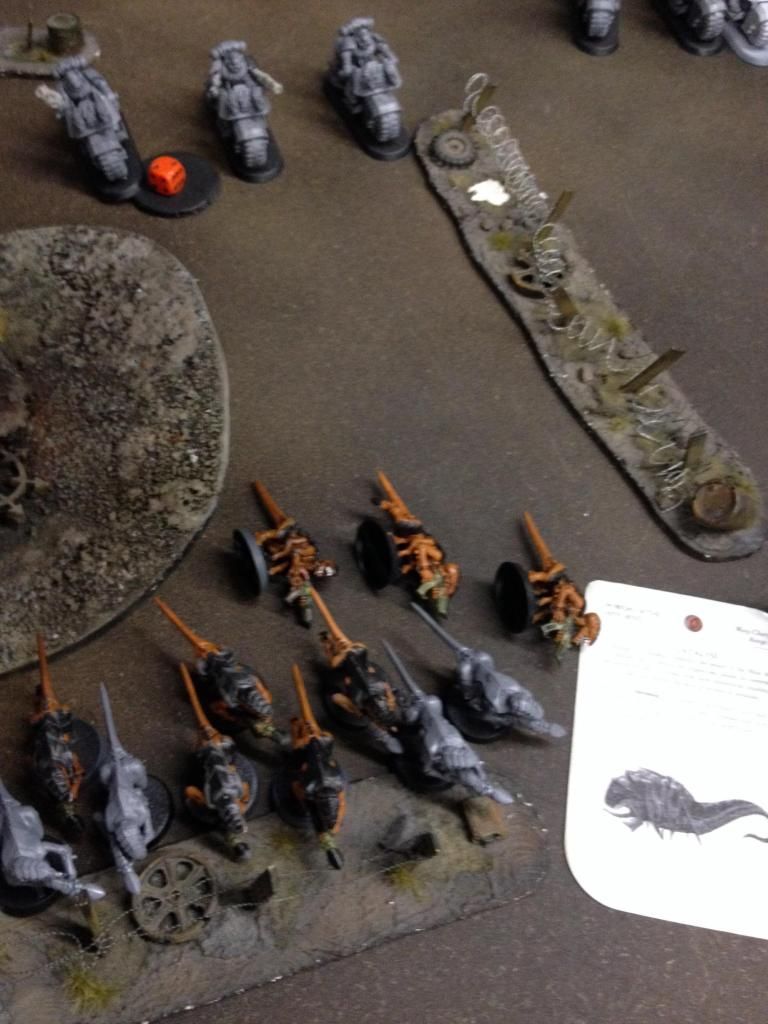
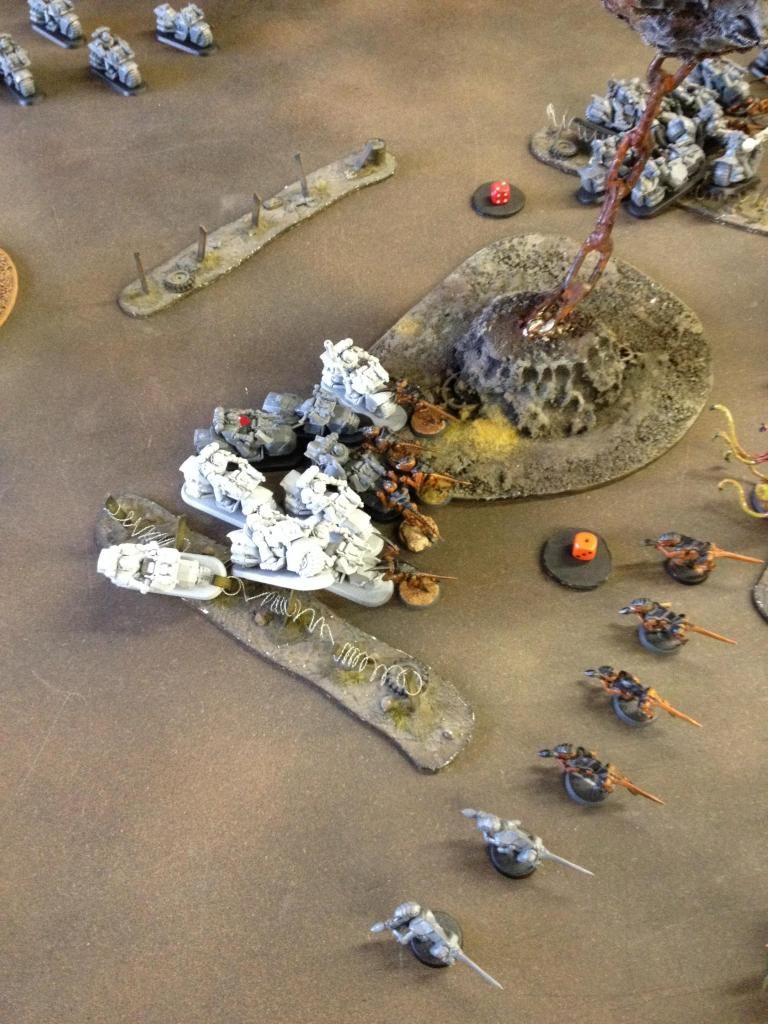
At this point I was feeling rather demoralized (hence the lack of pictures, sorry! ). The last turn really hurt and my vast swarms were all but gone with the bulk of my monsters looking like they weren’t too far behind. However, Objective 4 was extremely close to the depleted Hormagaunt brood, so drawing it again meant an easy two victory points that could help me start to catch up. Naturally, the two Hormagaunts dart towards objective 4 and make it there with movement to spare thanks to bounding leap. The Termagant brood, mostly untouched thus far, surged up towards objective #2 to clear the way for my Hive Tyrant and his guard to try to rescue the Exocrine. The Warrior Brood nearest to the Tyrannofex spread out so that it could both keep synapse coverage to the Hormagaunts and keep themselves in range of the Venomthrope. The other Warrior Brood shuffles over fully into the woods to maintain its hold on objective 3.
The Psychic Phase is again rather quick. With 5 additional warp charges being generated, the Tyrant is able to deploy both Catalyst on the Exocrine and use Paroxysm on the Warlord‘s biker unit (reducing their WS/BS by 1).
Shooting is overall rather uneventful, with the Warriors dropping a few pie plates and devourer shots on the one unengaged Bike squad, failing to inflict any damage...
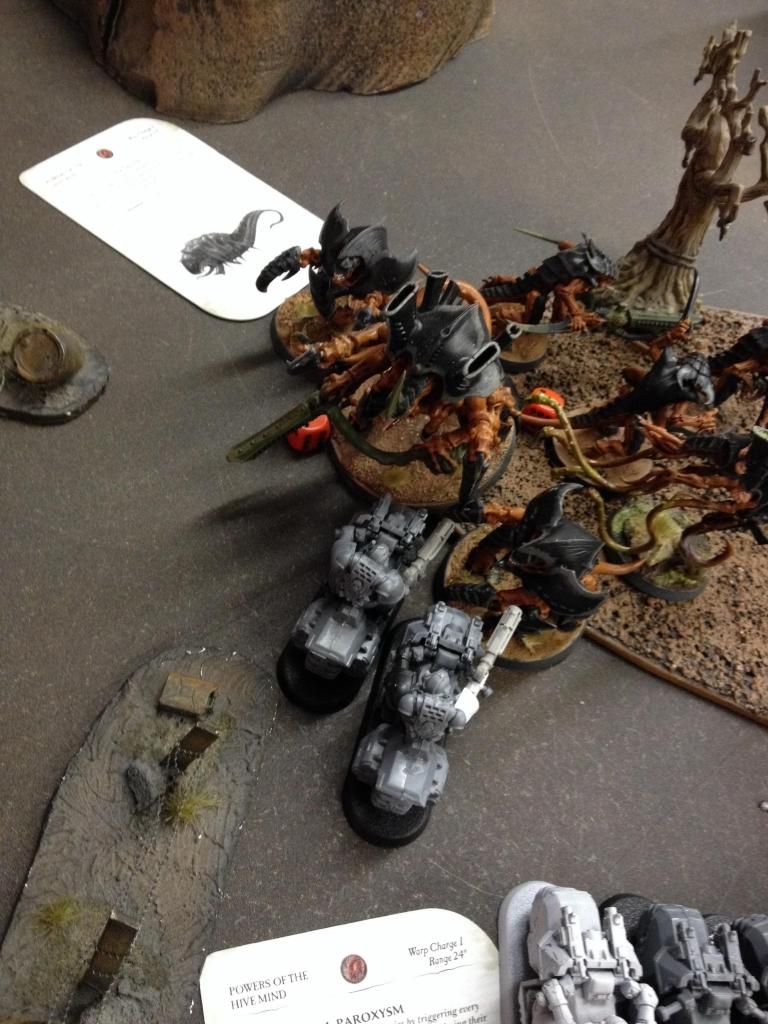
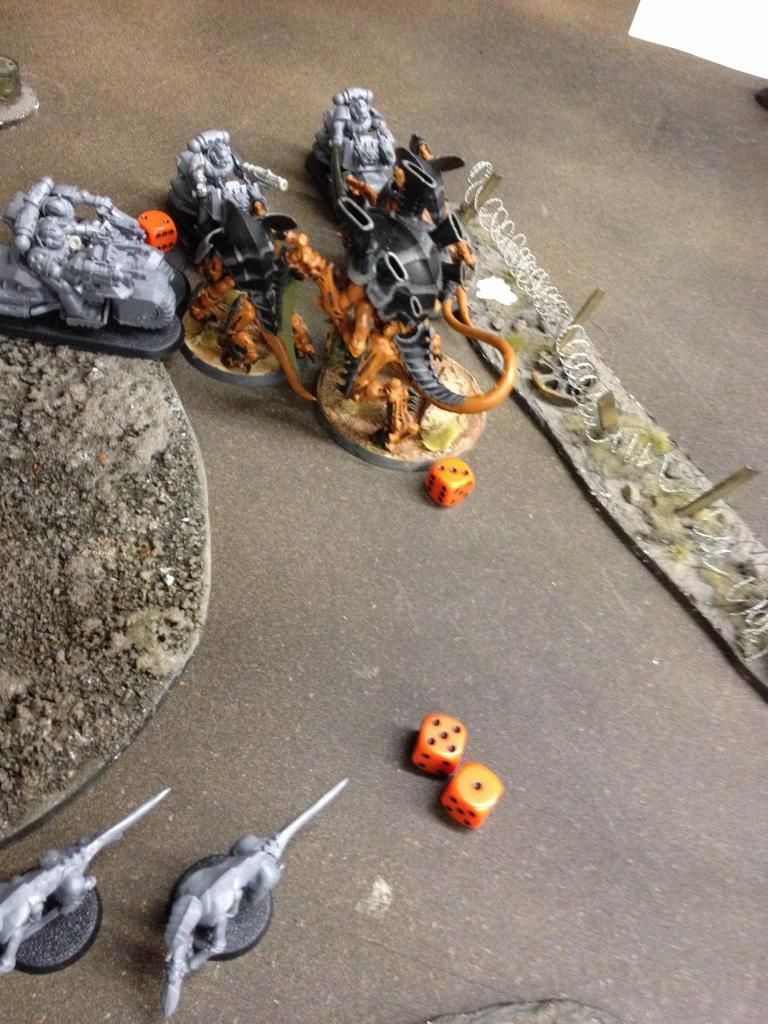
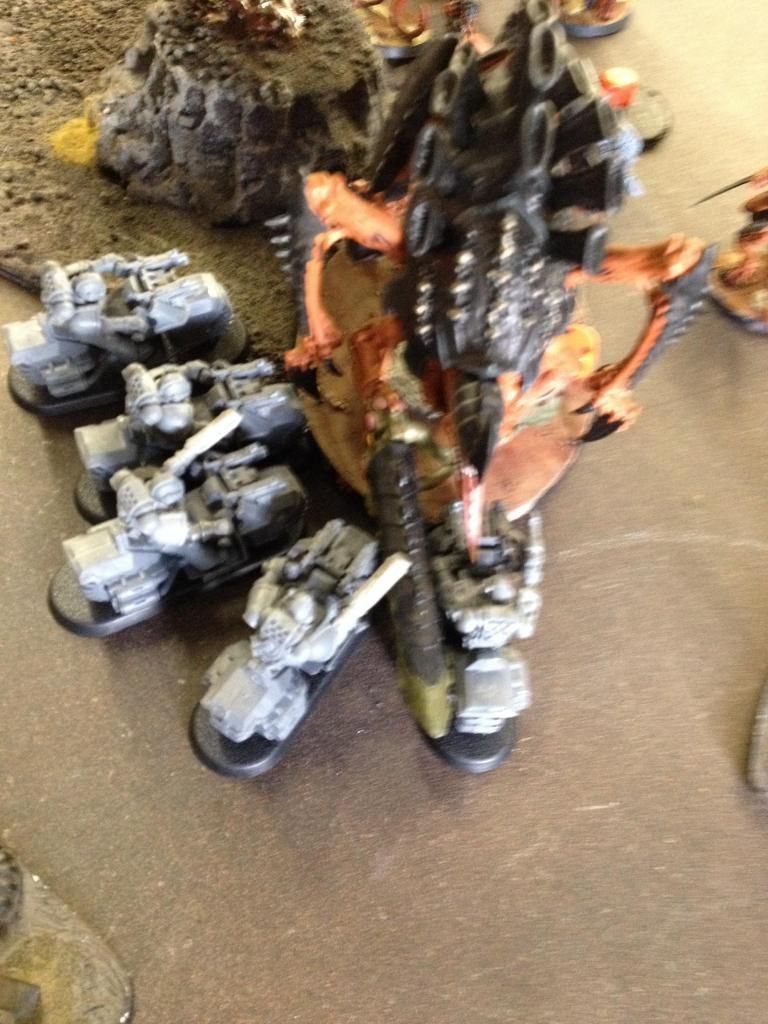
Finally, the Hive Tyrant and his guard barrel into the biker unit engaged with the Exocrine, taking advantage of the White Scar’s chained out formation to hit them right in the middle. The warlord chapter master issues a challenge and the Tyrant accepts, leading to both inflicting one wound on the other after saves. The Tyrant Guard in turn crunch up 4 bikes with their crushing claws and take no damage in return.
The bikers pass their moral and then use Hit and Run. The Tyranids then consolidate into the woods as deeply as they can to brace for the incoming storm of grav shots… Also, the Tyrannofex further up the field crushes another bikes and unsurprisingly takes no damage in return. The remaining bikers then fail their moral and safely escape the ponderous beast's attempt to catch them.
I earn two points from Objective 4 and one from Objective 3 at the end of the turn, for a total of 3 points.
White Scars: 5 Tyranids: 6
White Scars Turn 4:
Spoiler:
Objectives: Kingslayer, No Prisoners (Don‘t remember the third one)
It is here my luck starts to turn. After four turns of a very sluggish advance, the expanding area of collapsed earth surges forward 5 inches, causing it to overlap with the base of the hovering Storm Talon and removes it from play!
The biker unit that had been falling back automatically rally (pesky ATSKNF…) and wheels around to go after the Tyrannofex again. The Stormraven also returns and zooms along to join them.
Over on the other side of the table, the warlord’s unit more or less flips around and prepares to charge the Hive tyrant, in hopes of wracking up a lot of victory points in the process...
Shooting sees the last Tyrannofex drop to grav fire. With its original target dead, the Storm Raven instead turns its guns on the Warrior Brood and eradicates them. The Exocrine also takes a few shots, but only suffers a single wound (leaving it with two). My opponent elects to hold his fire against the Hive Tyrant, intent on getting the bonus D3 victory points from killing it in a challenge.
The Bikes charge again, with the Warlord going for the Hive Tyrant and the badly beat up chapter master crashing into the Exocrine. The Tyrant does nothing with its overwatch, though the Exocrine kills one bike.
Unsurprisingly, the Warlord once again challenges and once again the Tyrant accepts (better to go down swinging after all). The Tyrant swings first, scoring 4 hits and 3 wounds. The chapter master confidently picks up 3 dice and…
... three ones! The Tyrant completely eviscerates the warlord chapter master. The bikers then fail to inflict any damage and take horrific losses in turn from the enraged Tyrant Guard, leaving but two bikers standing after the fight. The bikers proceed to pass their moral, but use hit and run to flee to the other side of the table. The Tyrant and his guard elect stay put in the relative safety of the woods.
Despite this extremely lucky turn of events, the Exocrine unfortunately folds under the massive number of attacks, with the final blow being dealt by the Chapter Master’s power fist. The unit then consolidates as far away as they can from the Hive Tyrant, mostly due to shock over their warlord’s gruesomely unexpected demise.
(taken just before consolidation moves)
Both armies are looking pretty badly mauled at this point… The White Scars manage to get 3 more victory points from successfully destroying three units in one turn, though I can at least feel good about getting Slay the Warlord.
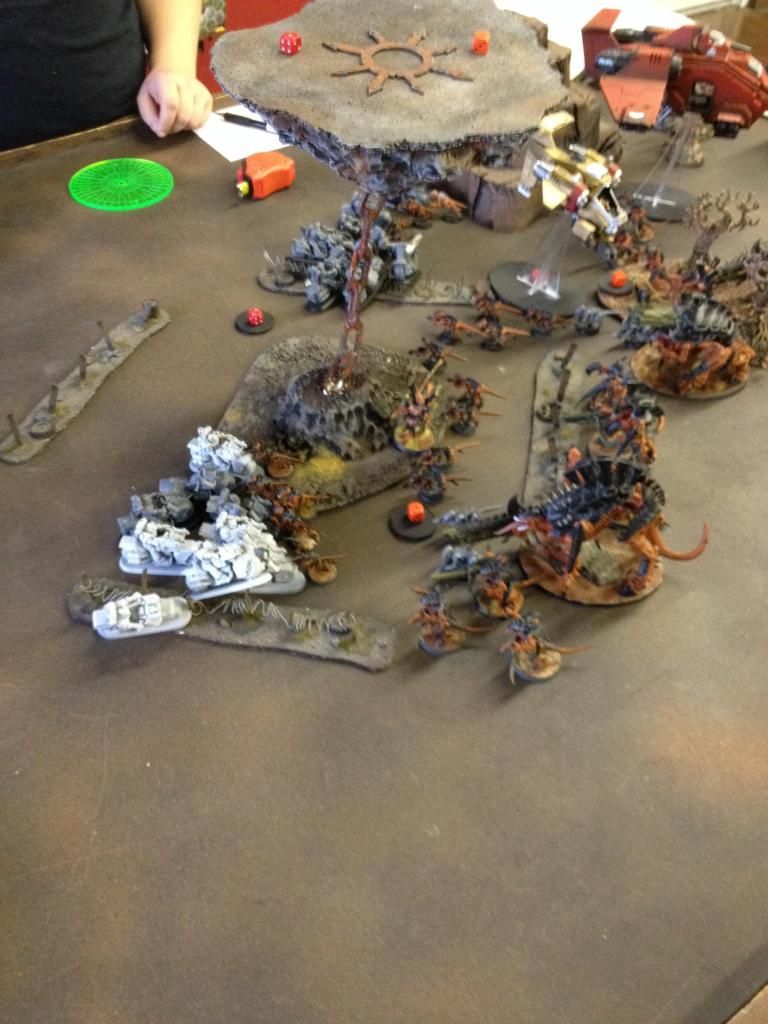
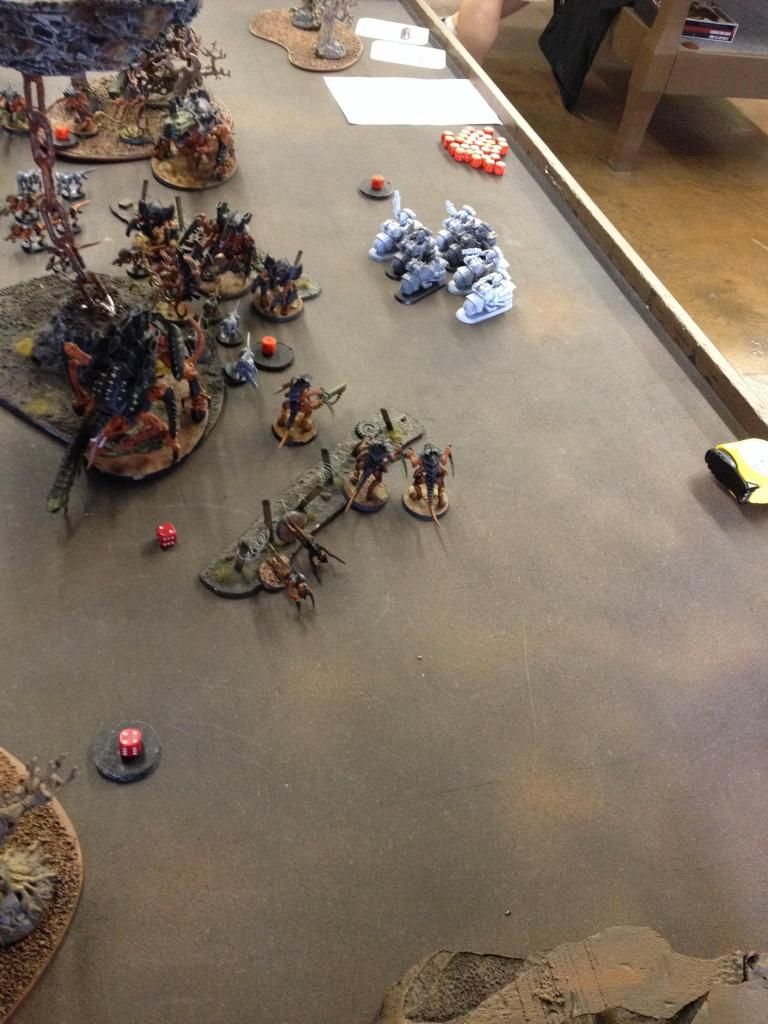
The crumbling of the world intensifies... The wall of death advances 5 inches and comes uncomfortably close to the forest my units are hiding in.
The two Hormagaunts that had been sent to capture Objective 4 unfortunately fail their instinctive behavior test and end up killing each other… Fortunately, the lone Venomthrope hiding near the center passes its test and moves for Objective 1, while the Termagants scuttle down and line themselves up behind the barbed wire and in range of the Venomthrope for a 4+ cover against shooting from the White Scars on the other side. The Warriors and Tyrant more or less stay put on top of Objective 3, content to lurk in their shrouded forest.
The Tyrant once again gets 5 extra warp charges in the psychic phase and throws catalyst out to the Termagants. It also attempts to use Paroxysm on the Storm Raven, but is denied.
Shooting phase sees three bikes break down underneath a storm of worms, beetles, and strangling vines. No assaults are made.
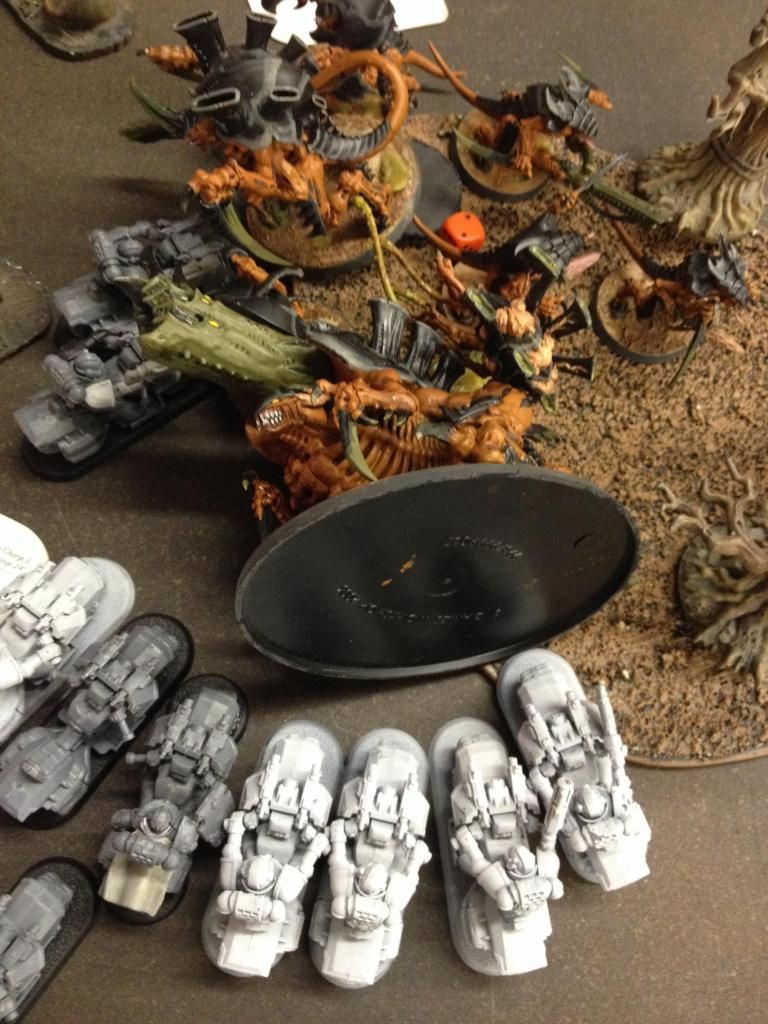
The wall of death advances another 3 inches on the White Scar's edge, but is more or less of minimal concern as there is nothing really over by that side of the table to threaten. However, it does completely overtake Objective 6, making it impossible to score.
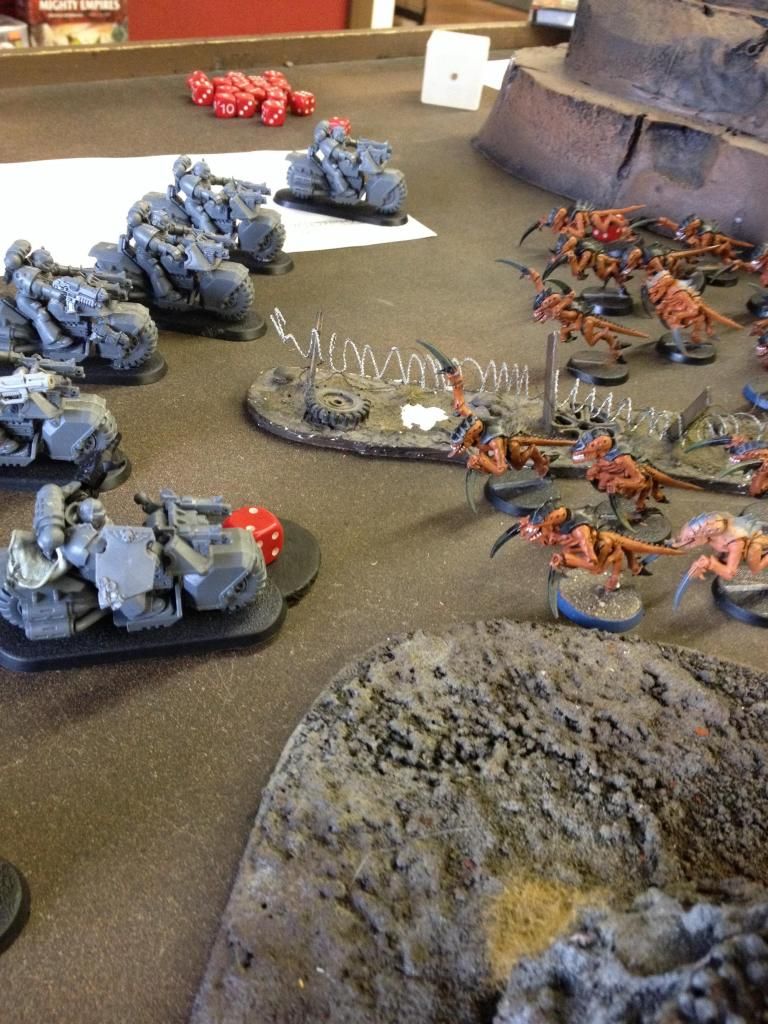
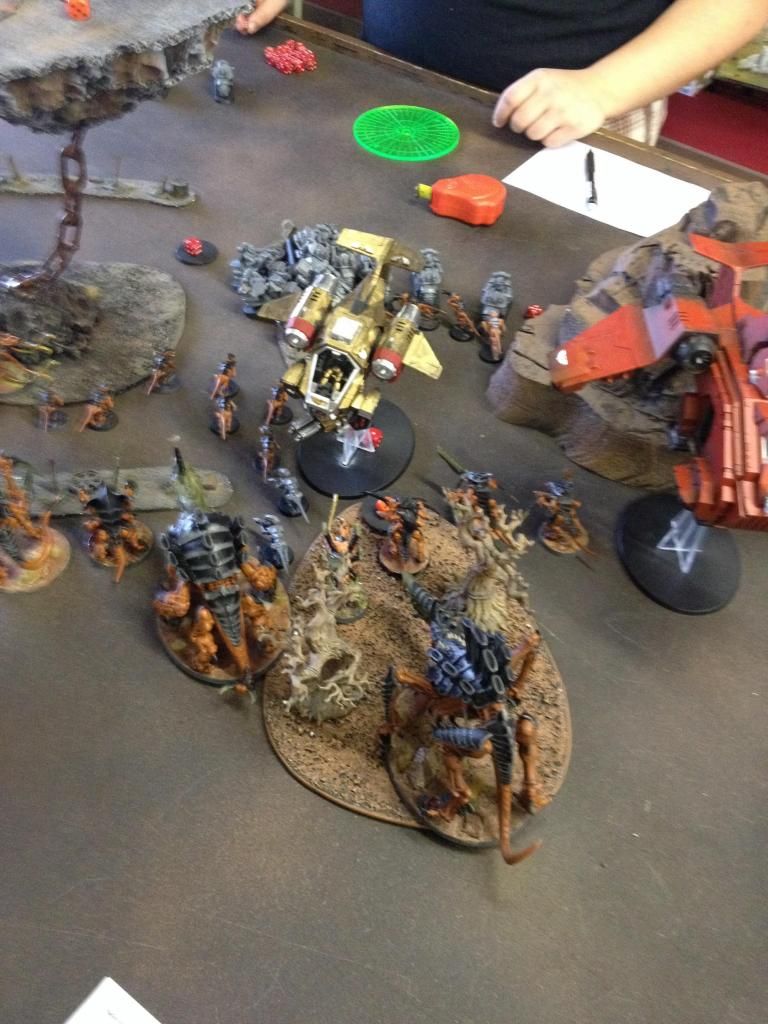
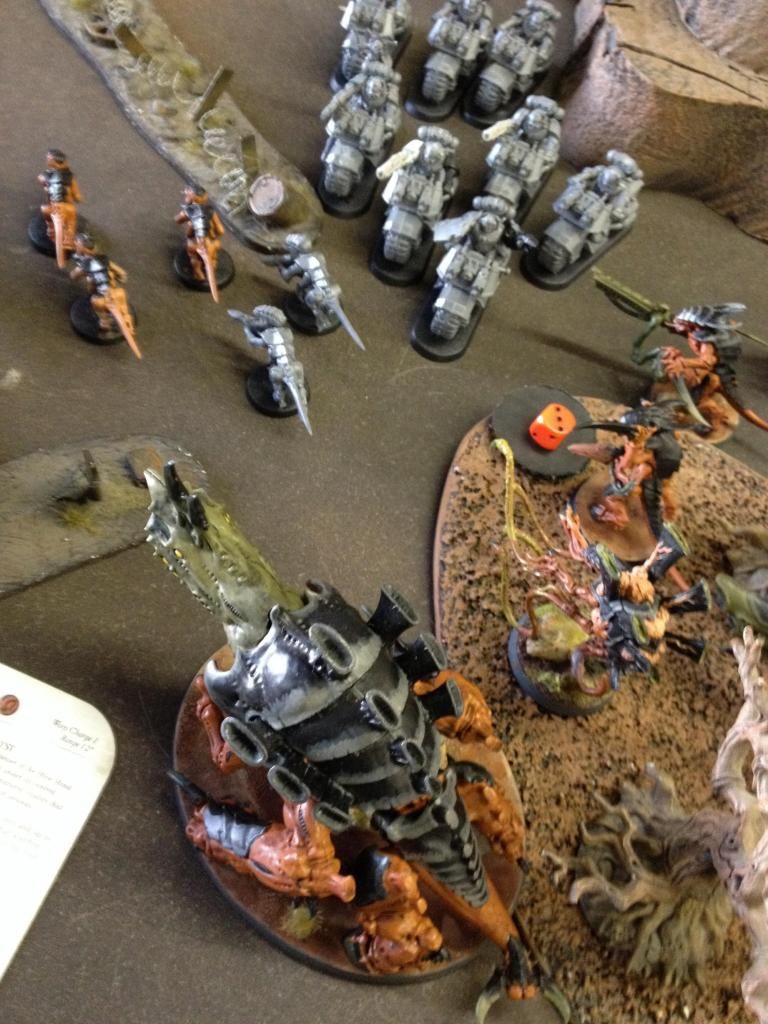
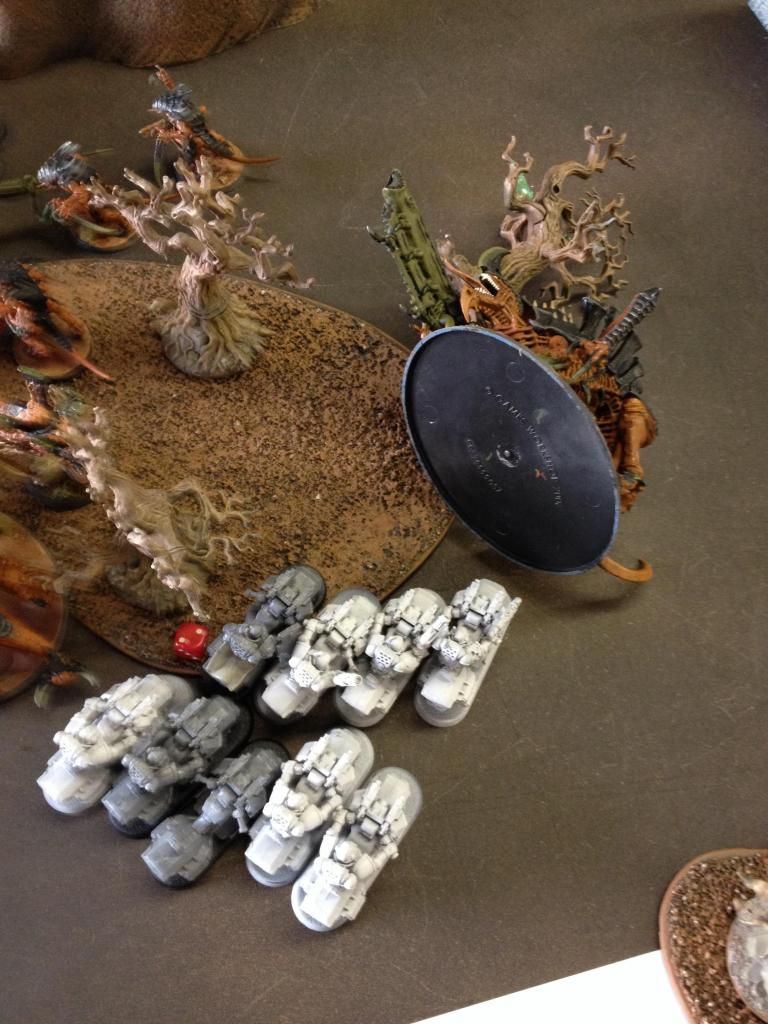
(ignore the storm raven in the above - my opponent considered sending it over to help but decided against it)
The bikers with the wounded chapter master elect to move further down and out of the Tyrant's charge range (they were still a bit fearful of it) and the Storm Raven switches to hover mode to help secure Objective 5. The remaining bikes then shuffle about, with the four-strong unit of bikers zooming up to objective 2 and the depleted unit taking their place on objective 4 (again spreading out to minimize strangler hits).
All units in range then open fire on the Termagant brood, venting their frustrations on the diminutive Tyranids. The first volley from the 4-strong bikers only kills 3 with their opening salvo, prompting the Storm Raven to unleash everything it had against the Venomthrope, unsurprisingly blowing it apart under a hail of bullets and heavy ordnance. Deprived of their protective spore shrouding, the remaining Termagants are quickly wiped out by the chapter master's unit, leaving one sole survivor.
White Scars: 10 Tyranids 10
Tyranid Turn 5:
Spoiler:
Objectives: Secure Objective #2, Behind Enemy Lines, Secure Objective #6 (discarded due to the objective in question being in lethal terrain)
The wall of death surges forward another 3 inches, bringing it at the edge of the woods. The Tyranids lurking within wisely decide to abandon their cover and shuffle towards Objective 2. The Tyrant in particular spies an opening and advances towards the bikers parked on objective 2, rolling a 5 for his movement and ending exactly 6 inches away from them...
The Psychic Phase once again generates a single warp charge, so the Tyrant freely casts Catalyst on the Warriors. The Warriors in turn lob their strangler shot at the 2-strong biker unit across the table, scoring a direct hit and killing one (though they pass their moral).
Finally, the Hive Tyrant initiates his charge against the White Scars. Overwatch sees an alarming number of grav hits and the Tyrant Guard at the front of the unit suffers a wound after cover and feel no pain. The Tyrant then rolls for his charge and...
... he barely makes it with a perfect 6!
The stunned bikers are then promptly torn apart by the Tyrant and his bodyguard, completely failing to harm either with their blows. Adrenaline rushing, the unit then consolidates 6 inches towards the White Scar table edge, putting them in range to earn Behind Enemy Lines and securing objective 2 for two more points.
We then roll to see if the game will continue to turn six and roll a 2... The game ends, earning the Tyranids Linebreaker as well for a total of 3 points.
Final Score: White Scars: 10 Tyranids 13
This message was edited 1 time. Last update was at 2014/07/18 15:16:21
2014/07/19 21:35:14
Subject: League Game: 1500 Tyranids vs White Scars
Thank you for the report! The photographs were a little blurry in places, but overall they were good. I really like the look of your army as well, both in terms of paint and for its table presence.


 ). The last turn really hurt and my vast swarms were all but gone with the bulk of my monsters looking like they weren’t too far behind. However, Objective 4 was extremely close to the depleted Hormagaunt brood, so drawing it again meant an easy two victory points that could help me start to catch up. Naturally, the two Hormagaunts dart towards objective 4 and make it there with movement to spare thanks to bounding leap. The Termagant brood, mostly untouched thus far, surged up towards objective #2 to clear the way for my Hive Tyrant and his guard to try to rescue the Exocrine. The Warrior Brood nearest to the Tyrannofex spread out so that it could both keep synapse coverage to the Hormagaunts and keep themselves in range of the Venomthrope. The other Warrior Brood shuffles over fully into the woods to maintain its hold on objective 3.