Forum adverts like this one are shown to any user who is not logged in. Join us by filling out a tiny 3 field form and you will get your own, free, dakka user account which gives a good range of benefits to you:
No adverts like this in the forums anymore.
Times and dates in your local timezone.
Full tracking of what you have read so you can skip to your first unread post, easily see what has changed since you last logged in, and easily see what is new at a glance.
Email notifications for threads you want to watch closely.
Being a part of the oldest wargaming community on the net.
If you are already a member then feel free to login now.
I'm hoping at achieve a highlighted effect on my power armour, but I don't want to just do zenithal highlighting.
How would you suggest I do the power armour highlighting? Brighter at the centre of the plates, or towards the edges?
I'm thinking of doing it in the style of how people airbrush vehicles, with the colour getting brighter as you move inward from the edges, but I don't know what that technique is called.
pre highlight your primer before you lay your armour colour. this may do most of the work for you. but i cant imagine youll be able to do tiny detailed areas without some hairybrush tekkers aswell
I'm pretty new to it all, but I find myself using a mix of lighting styles. I start with a bit of zenithal highlighting but then I also do a bit of panel lighting or colour modulation to accentuate panels and edges that I think need accentuating.
In all cases, I think the best result comes when you airbrush an initial shade/highlight but then go back over it with a hairy brush and do panel lining, edge highlighting and weathering.
One thing I don't like about those modelbrush explanations, they call zenithal "realistic" and the other 2 "unreal". But the reality is zenithal highlighting isn't realistic either, they're all just compromises because what is realistic is actually dynamic and thus unachievable. In reality what is brightest should be whatever part of the surface forms the correct angle between you, the model and the light source.
This message was edited 1 time. Last update was at 2015/03/05 02:36:25
@Allseeingskink -- I know what you mean. None of them look particularly real on the tabletop, which is my biggest grump. However, zenithal looks very real on a 2D photograph, from the right angle.
That just isn't good enough for me for two reasons: I do game with my pieces meaning they usually won't be at that magic angle, but more importantly, I can easily fill a table with 80-120 models on my side alone, and there is zero chance that they are all shaded at the same angle, and even less chance that they are all facing the right way to make the faux light line up. I guess what I'm saying is, I need my models to look great individually, but also collectively, in action.
This message was edited 1 time. Last update was at 2015/03/05 03:01:09
Yeah, that's why I use a mix of methods depending on what I think will look best for that specific panel. I think of it more as adding visual depth rather than adding actual lighting, which is typically what finescale modellers are doing when they paint tanks/aircraft/etc.
AllSeeingSkink wrote:Yeah, that's why I use a mix of methods depending on what I think will look best for that specific panel. I think of it more as adding visual depth rather than adding actual lighting, which is typically what finescale modellers are doing when they paint tanks/aircraft/etc.
I totally agree. Visual depth and contrast are what I shoot for. Things like OSL I like, because it looks good when a model is rotated; environmental lighting I don't like, because I want gaming pieces rather than a diorama.
Nyoom wrote:Talys, how do you do it to satisfy your requirements of being good individually as well as collectively?
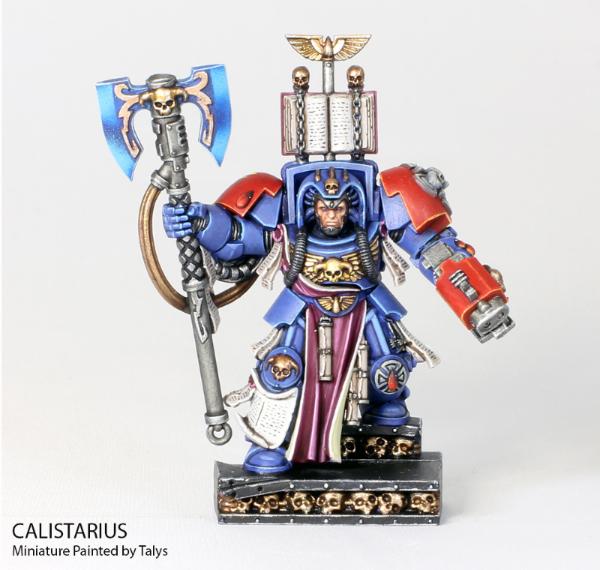
Here's my Calistarius, for example. It looks great with the rest of my Space Hulk set, viewed from any angle, and it will also do nicely in a display case between games. If you look at my gallery (a teenie tiny sample of my models), pretty much everything is painted like that -- so a Dreadnought can photograph well, but if you look at it from above or behind it's also great, and a Sybarite might look great by itself, but will look even better in its squad (or army).
Josey4u wrote: How do prime Black and White on the same model. Not being condescending. I am truly curious because I would like to use that effect.
Prime the entire model black and then use white to highlight where you want your eventual highlights to be. After the primer dries, spray your desired color over the whole model leaving the paint light enough to show through. It's pretty much a pre-shading technique. It's done in this video for the power armor:
d-usa wrote: "When the Internet sends its people, they're not sending their best. They're not sending you. They're not sending you. They're sending posters that have lots of problems, and they're bringing those problems with us. They're bringing strawmen. They're bringing spam. They're trolls. And some, I assume, are good people."
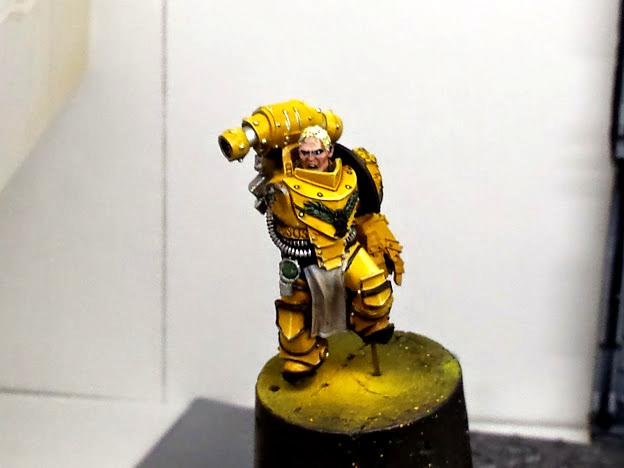
My Personal preference for power armor (yellow anyway) is to start with pure black primer, then the darkest shadow color (beige), then start 50 50 50 50 mixing with the next highest color all the way to my final golden yellow focusing on the knee caps, and anywhere that light would hit.
i also try to make the upper chest areas and shoulder pads and back packs a bit brighter to bring attention too it.
I do final highlights by hand instead of airbrush and glaze/blend them in.
Edit: Such plug. much shameless
This message was edited 2 times. Last update was at 2015/03/05 17:23:42
How do prime Black and White on the same model. Not being condescending. I am truly curious because I would like to use that effect.
I just started to airbrush my single figures and I am wanting the same look your marines there have.
Buy different colored primers for your airbrush like Vallejo rather than using a rattle can primer of one color. Prime the model using a light color like grey first (Vallejo grey is almost white) and then only prime the portions where you want a darker base coat black. This technique is called pre-shading and the key is not to put down too thick a layer of the base coat over top. I usually only do one thin coat so that the black shows through it. The two colors of primer don't go from straight black to grey either as if you do it carefully, you can get that nice fade from light to dark. This color transition will show through in your base coat.
If you don't want to buy two colors of primer, you can get the same sort of results by priming in white or grey only for the whole model. Put down your base coat of maybe a medium blue and then spray a darker blue just in the recesses. Although not true to how the light hits the armor, having a dark color beside a light creates great contrast and really stands out. If you look at the Baneblade in my gallery, you can see that the armor plates fade from a dark to light. The light portion always meets up with the edge of the next panel which is dark in sort of a dark - light - dark - light - dark pattern. The same sort of pattern can be done with your marines such as on the legs.


 Heresy World Eaters/Emperors Children