This "How To" is the first article I have written so feedback on the content, layout, style, legibility, If you want more photos etc are all welcome to help me improve since I hope to write more in the future.
This conversion project was my entry for the 2016 March Unofficial Dakka Painting Challange run by
Paradigm, I would encourage anyone of whatever skill level to enter, its good fun and there's a core of very supportive people who regularly post in the threads which does help to keep you motivated, the latest months challenge will be linked in my Signature Block

Challenge
WIP Thread
http://www.dakkadakka.com/dakkaforum/posts/list/0/682152.page
Voting
http://www.dakkadakka.com/dakkaforum/posts/list/0/685838.page
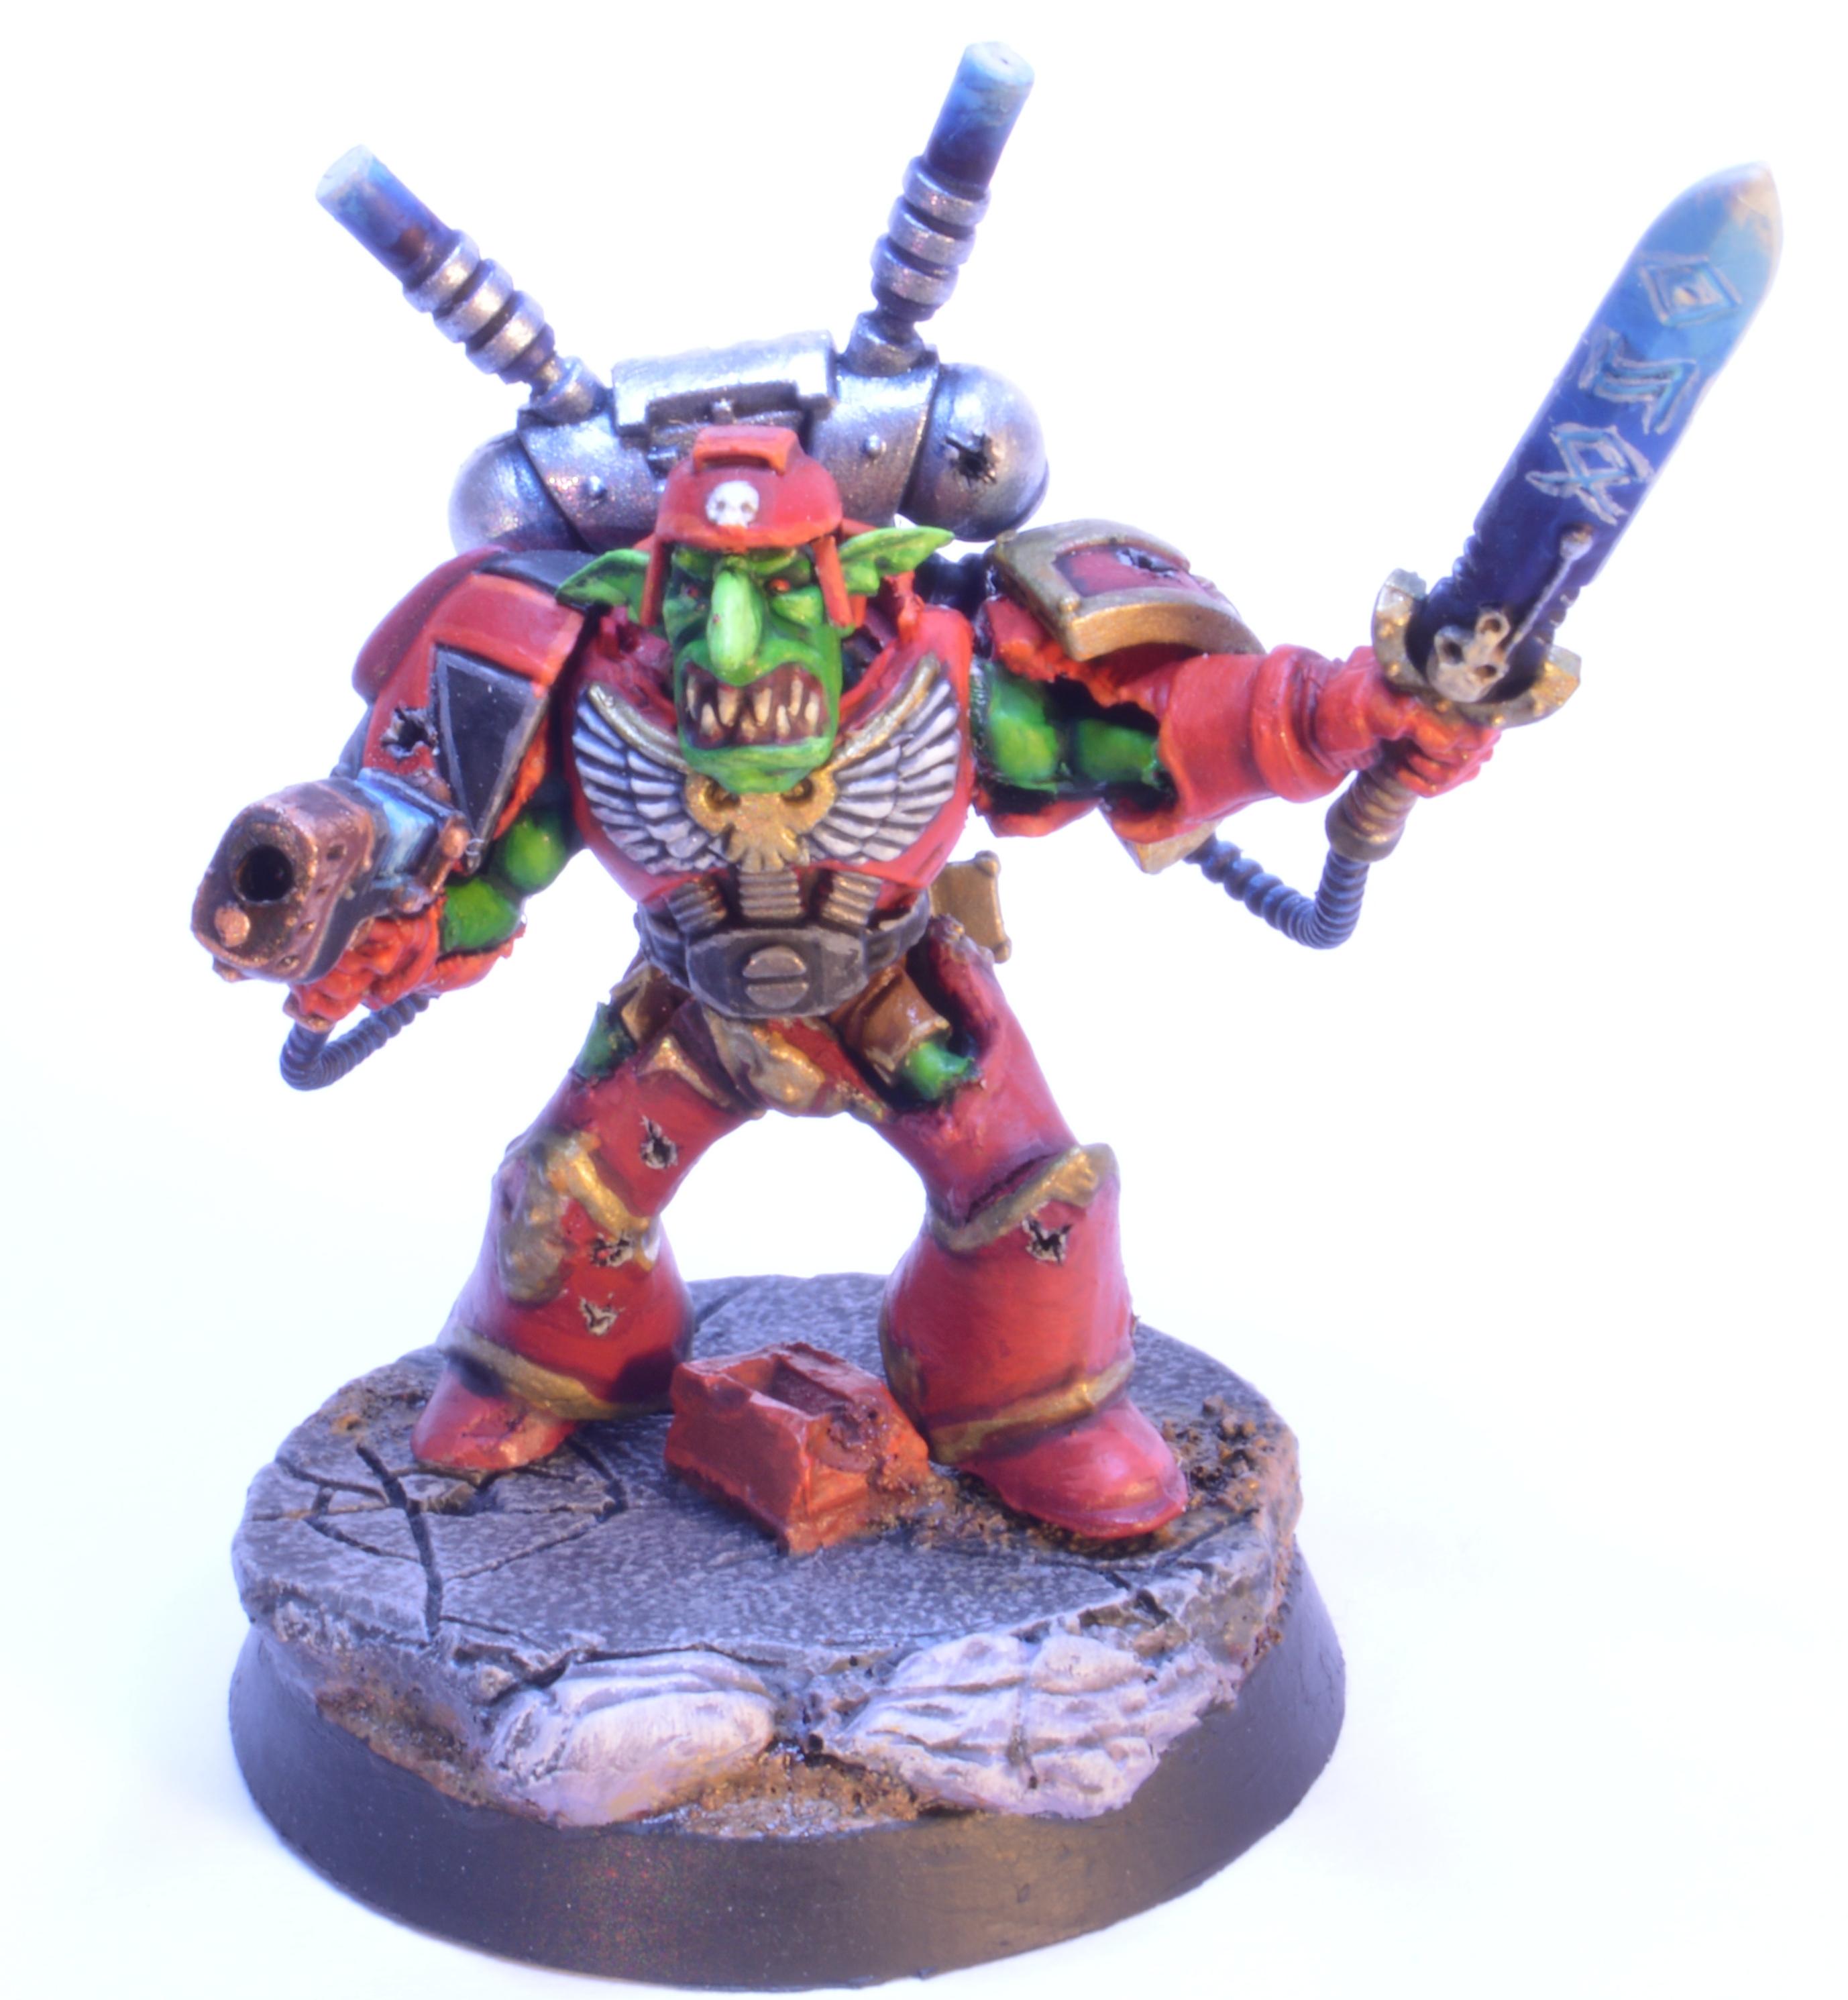
I feel the "Grot Marine" idea turned out quite well and does seem to fit together despite the difference in scale of some of the parts. Since several people have asked or commented on my Grot Marine I promised a tutorial on how to do your own. I’ll go through the basic steps but if I miss anything out I’m sure if you look at the model closely enough you can work it out. Its a fair simple conversion.
I’m putting all the images at max resolution so you can see everything as clearly as possible (and also some of the not so good bits of my painting but you’ll have to live with that)
The Finished Grot Marine
How I got there
Step 1
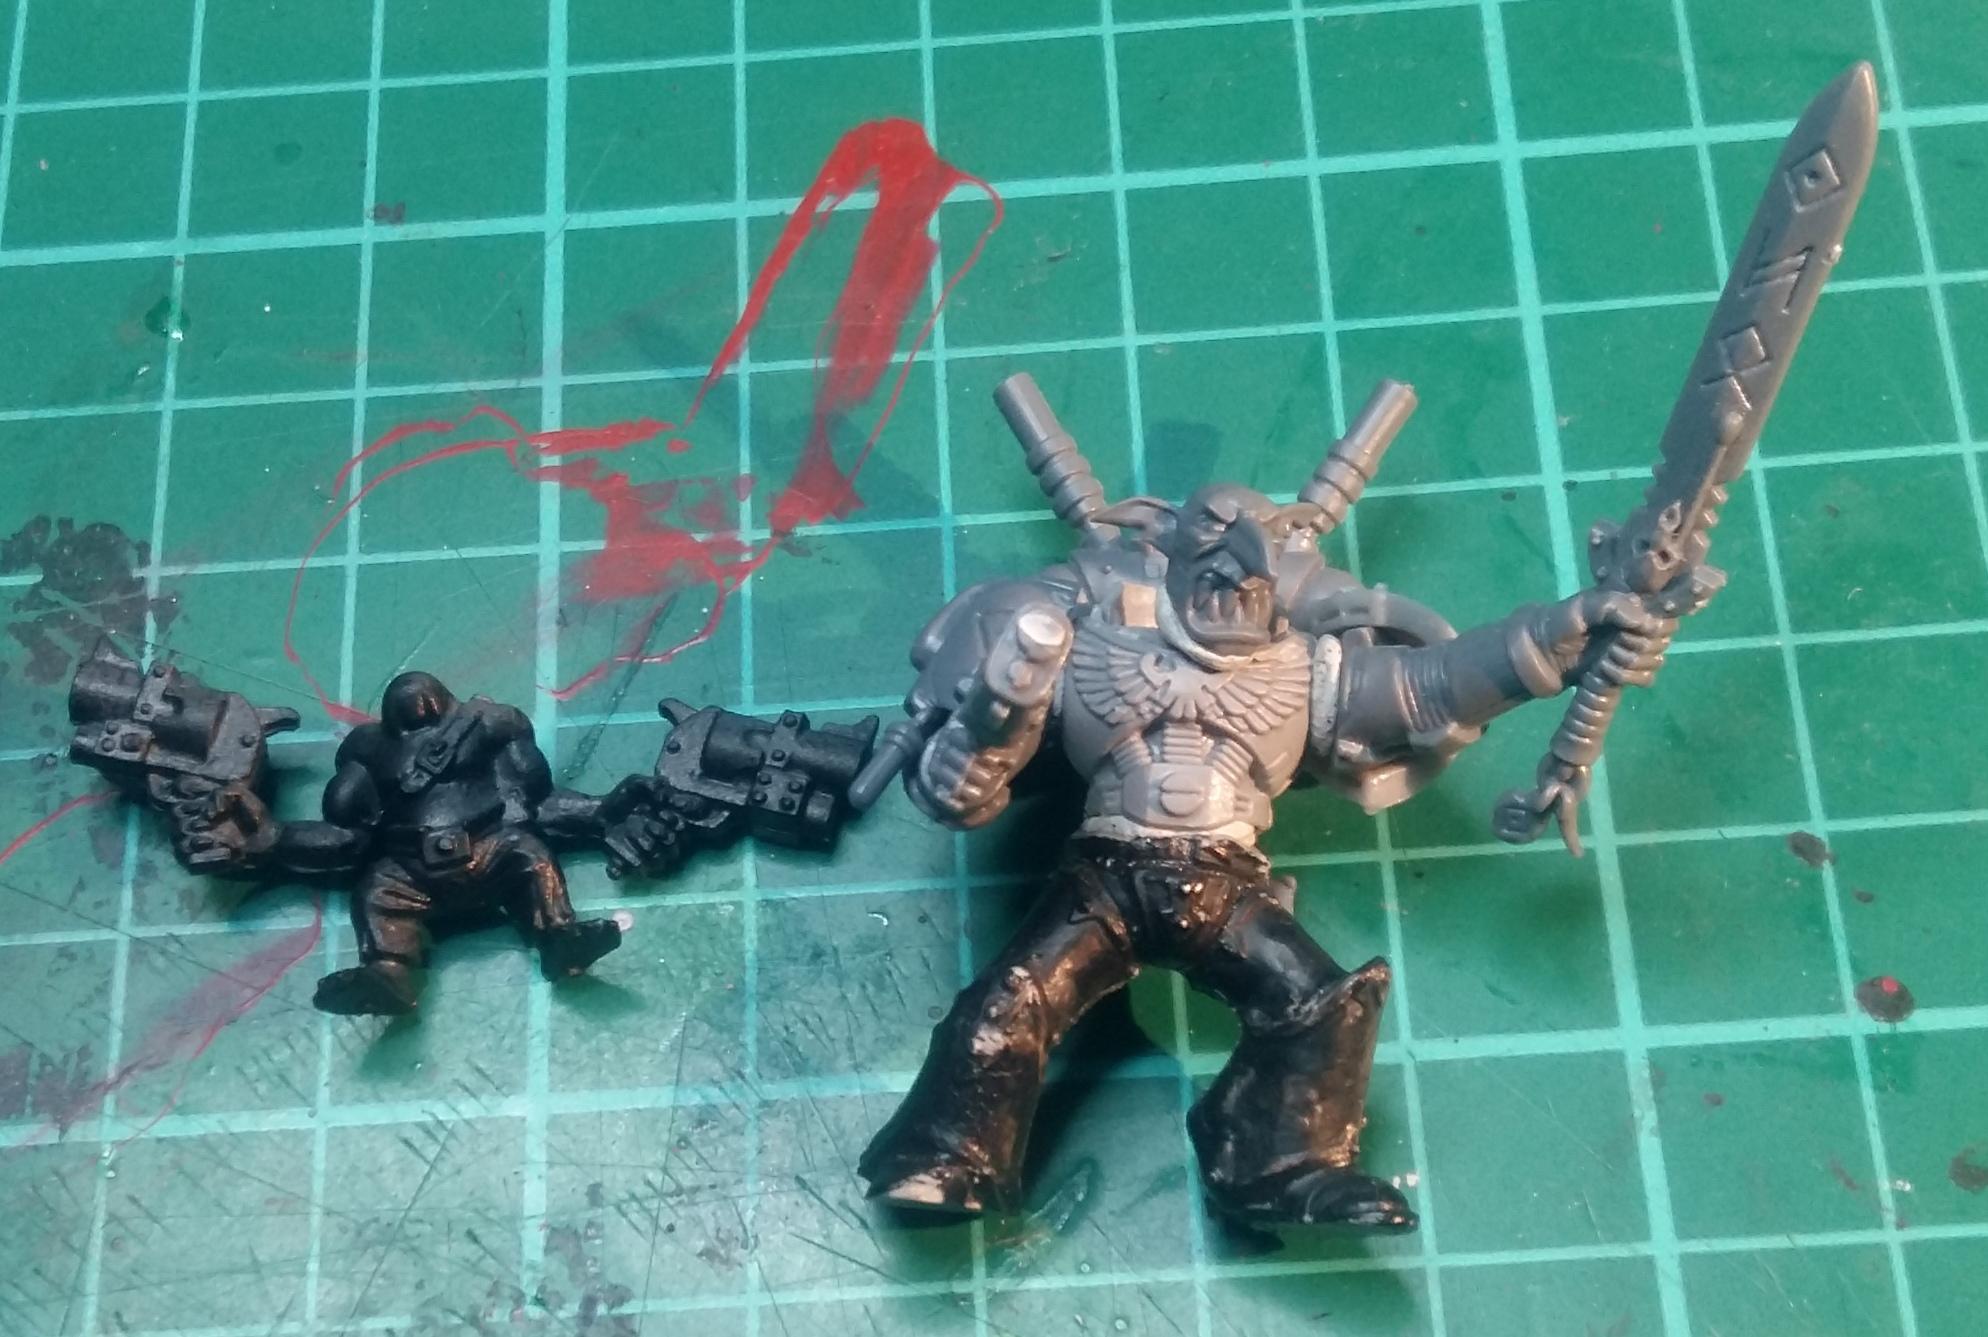
Select the Grot and the Space Marine parts you wish to combine.
This is seeming an easy and basic step but also an important one to take a bit of time over and think it through since ultimately it will determine how easy or hard your conversion between the two models is going to be. I suggest you try to find a grot and marine with similar arm positions. This limits you to certain got models and mainly close combat marines. No point is grinding out an arm to have it pressed against the chest holding a boltgun.
Parts used:
Generic
SM Torso
SM Plasma Pistol
SM Space Wolf Power Sword
Death Company Shoulder Pad
Krone Berserker Shoulder Pad
Krone Berserker Leg (regretted using this one from my bits box since it was pre primed by someone else and they had obscured a lot of the detail.)
Urban Base
SM Head
Grot Body with Arms and Legs
Grot Head
The Original Models
Step 2 - Start Chopping
With all these steps its best to do a bit, then remeasure against the parts you are combining so you know when you are getting close.
I used a combination of tools:
1. Drill + 1.2mm Drill bit for Gun barrel and bullet holes
2. Dremel (or equivalent) to grind out cavities/gaps
3. Stanley knife
4. Set of small files
A Close up Pic
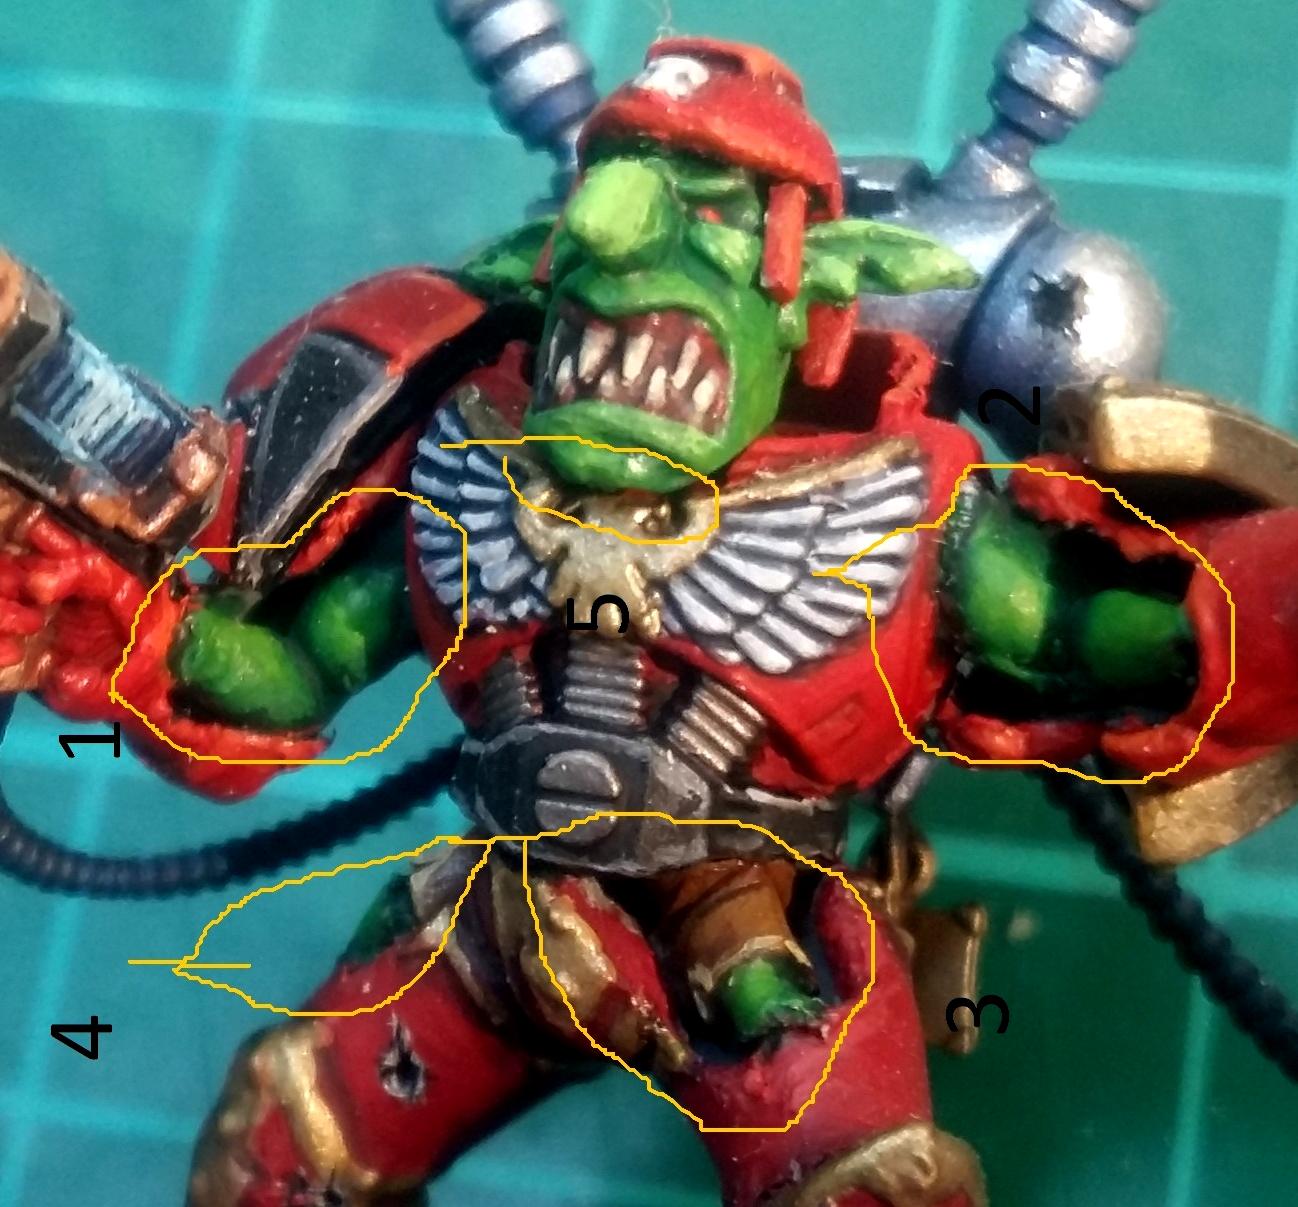
The Body
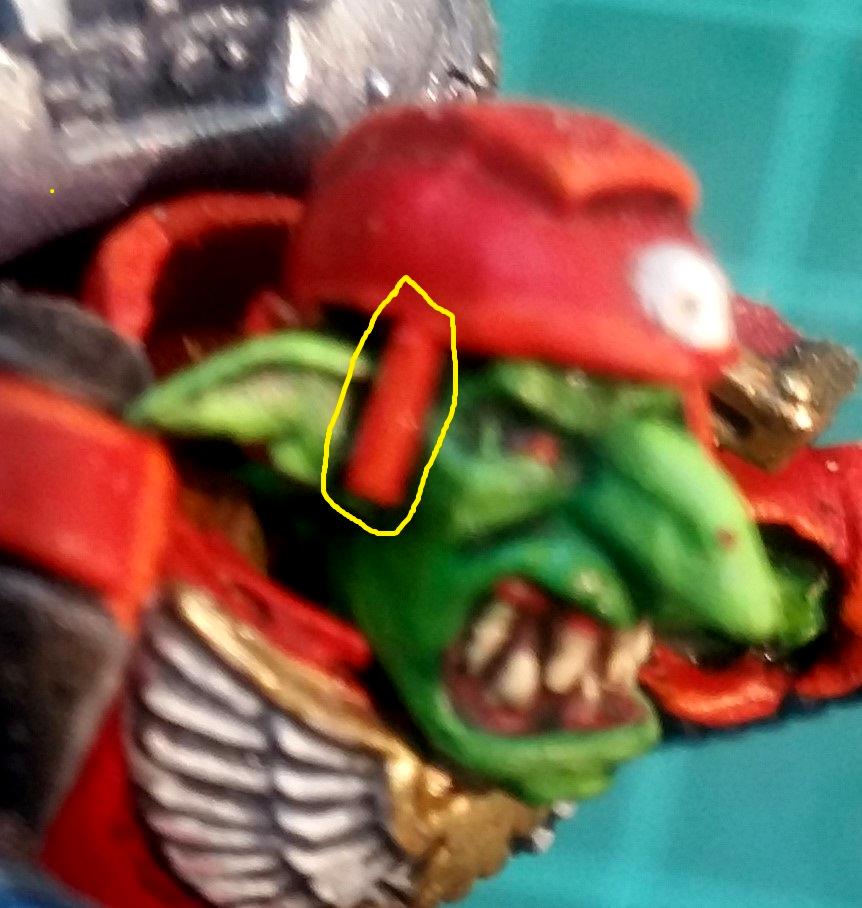
You will need to trim away most of the internal glue points and seams to create a cavity to allow the grot body (with all limbs removed) to fit inside, trim the grot body at certain pinch points. The arm joints need to be drilled out quite large, the upper straps and grot body will need to be filled until the neck sticks out far enough for the head to fit on. The neck area will need to be expanded slightly depending on how you trim the Grot Body so the neck can stick out far. To make the head fit correctly later trim the rim and chest area above the Aquila otherwise the chin will be forced upwards making your Grot Marine a Star gazer. (Circle 5).
The Arms
You are aiming to keep the Marines armour mostly in tact with roughly the front 3rd open and the inside hollowed out. Using the Dremel hollow out the first section of the arms (Circles 1 & 2). You will need to be very careful towards the end not to go through the back of the arms (though if you did I’m sure you could just paint it as battle damage). Once you get past the half way point inside the arms it will become very difficult to ensure you don't go though the sides, take it carefully and also keep trying to fit the arm in so you know which bits are the sticking points, when you are close trim the back of the arm so it fits inside the cavity you have created. The hands were to big to fit inside so they had to come off. The arm joint doesn't have to be directly on to the grot body inside the as long as it looks like it is your good. Having large arm holes in the body will help with positioning the connection to the body when the grot arm is inside the
SM arm.
The Legs
The Grot legs are very small as you would expect, having the feet stick out didn't work for me so just the leg itself is showing, same process as the arms but you have more room to play. The legs aren't really attached to the bottom of the torso but as long as they are covered by the belt you will be fine. Again when you are getting close trim the back of the Grot leg to fit it into the
SM leg trying to get it flush with the outer layer. (See circles 3 & 4 for Ref)
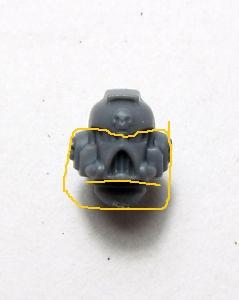
The Helmet
Take a
SM head
Cut the neck connection so you just have the Helmet.
Cut the Helmet below the top rim removing the eyes and ear pieces, leaving the raised section at the back.
Using the Dremel hollow out the head so the grot head is a close fit, trim the top of the grot head if need when you are close to a good fit as long as it doesn’t show.
Cut some thin strips of Plasticard and attach them to the sides in front of the ears for the helmet side parts. Marked up images below.
Battle Damage
Since its an Ork/Grot Looted
SM armour there's got to be a bit of battle damage, I drilled a few holes and expanded them with a knife to look like a bullet impact. There are looks of various weathering and damage elements you could add, its up to you and how you want it to look.
Weapons
I wanted to give the impression that the Mek had converted the backpack to act as a power supply for the plasma pistol and power sword. So used Greenstuff cables to connect them together. I'm not happy with the Runes on the Sword, they didn't come out who I'd hoped.
Step 3 - Start Chopping
Fill in any gaps with
GS and I did some battle damage (how else would the grot get the armour?)
Step 4 - Start Chopping
Paint however you wish
I chose to go for
BA scheme for most bits since I had been painting them recently, the legs and 1 shoulder pad is painted as from Krone berserker and the back pack is a Grey knight scheme to add a bit of contrast.
Paints Used (I have a combination of different era
GW paints you can find the different paints referenced against other eras and brands here
http://www.dakkadakka.com/wiki/en/Paint_Range_Compatibility_Chart)
P.S. Please Vote for the images if you like it