This Article was made by mwnciboo

Those who know me, know i have a bit of an OCD thing going on. Luckily I have a good income and a steady job and most important an understanding wife! So my Army projects tend to be quite intense affairs where I get everything i need and when i have a big chunk of leave I will work like a man possessed due to my love of 40k.
The one thing I have always wanted for my Bear Claws Army was A Thunderhawk gunship, for several reasons. One it is a beautiful centerpiece and can be used as an objective or on a landing pad during a game, it can be used as a Superheavy during APOC games giving me a bit of staying power against other super-heavies. Finally it will look cool on my shelf with my Army arranged around it. I cannot afford a FW thunderhawk, but I want a handsome good looking T-hawk that's fits. I found some Blogs and have pinched information from them and am now producing a Master Article detailing everything, where i got the item, how much it cost how I did it. My aim is to build a T-Hawk for under £60. (Revise this to £110 because I bought a StormRaven for parts and it has cost a fair bit more in parts and pieces than I expected, however the effects are better).
I have bought the following.
10 x A4 Sheets of Plasticard 2mm thick £6 (off Ebay)

XX x Various Parts off the Dakka Swap Shop total cost £30 ( 4 x Razorback Double Bolters, LR Doors, Sponsons, Valkyrie Parts etc.) big thanks to Fox40.
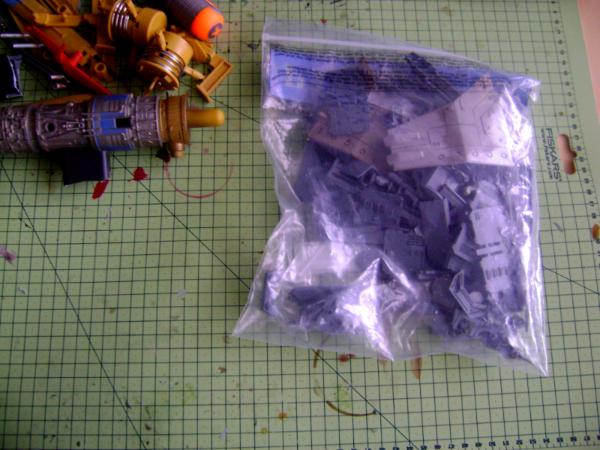
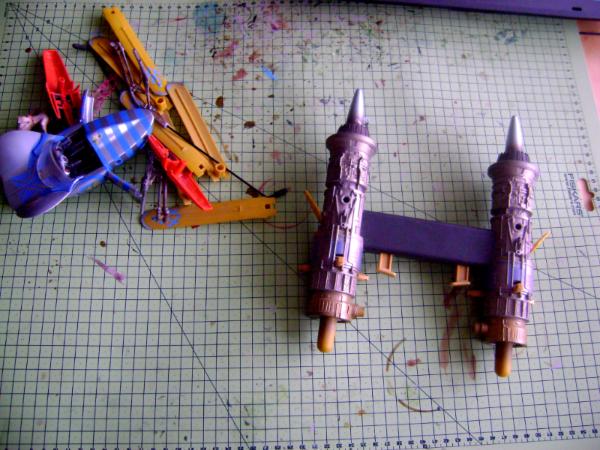
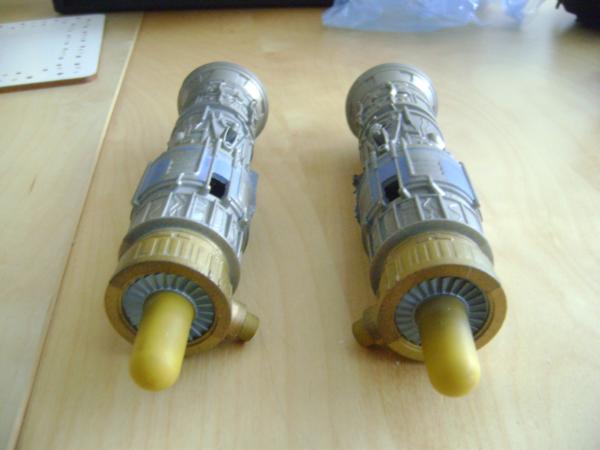
1 x Anakin Skywalker Pod Racer ( for the ENGINES they are perfectly in scale :) ) £8
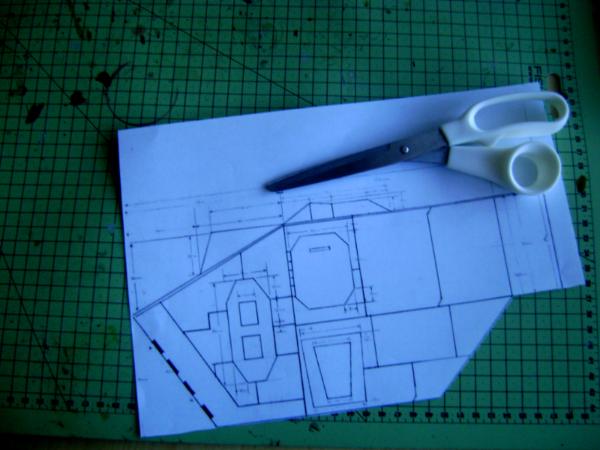
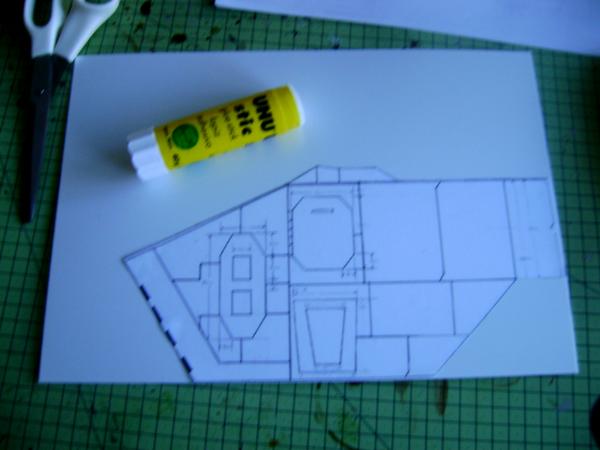
I have downloaded a set of Plans for a T-hawk available from here http://www.dakkadakka.com/gallery/images-22413-11413_Thunderhawk%20Plans.html
I have printed out the templates cut them out and then glued them onto the A4 Plasticard before then cutting them out on a scroll saw.
I will be releasing a v2 improved set (I am re-drawing them in Photoshop).
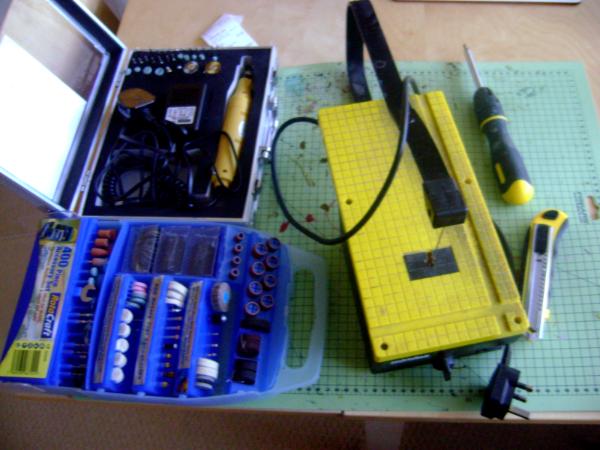
Tools I have used:- (I have bought or acquired these and use them on many projects so i don't included them in the cost!)
1. A4 Paper and a Printer (to print out the Templates)
2. A Rotoshaft Variable Drill with bits.
3. A Spiralux Scroll saw (Good for detail and cutting out Plasticard or other pieces.
So printing out the template, I have then cut out the template.
So gluing the template to the plasticard. Now it is ready to but cut out on the Scroll saw.
Working on the Engines, Got rid of all the stuff inside (i'm going to keep the pieces for terrain and Imperial Industrial elements!)
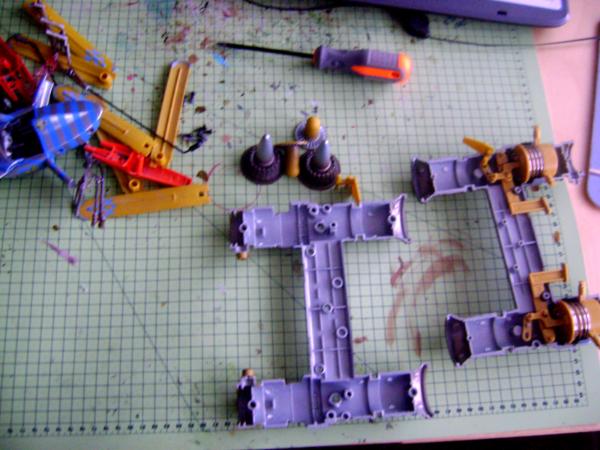
Need to reassemble, trim and sand down to clean it up.
Sawn on the Vibro-saw Cleaned, filed and ready for the Model, worked well.
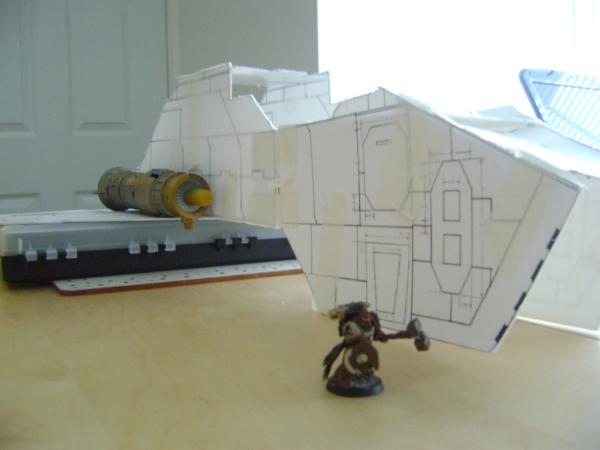
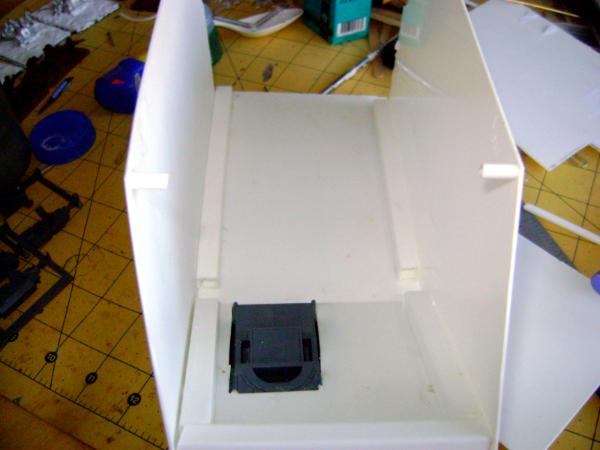
Mock up of my Main body of the T-hawk, still very embryonic but you can start to see the project coming together.

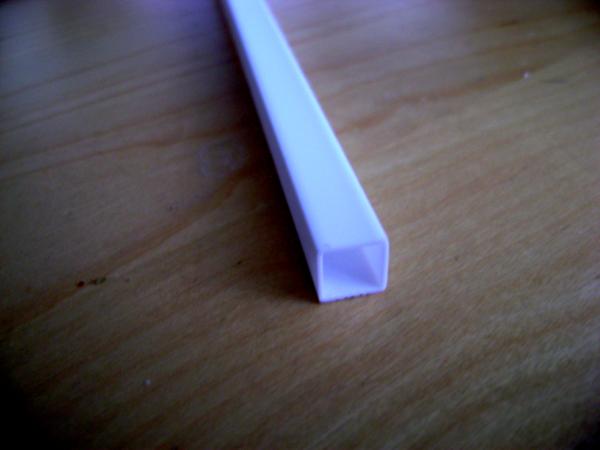
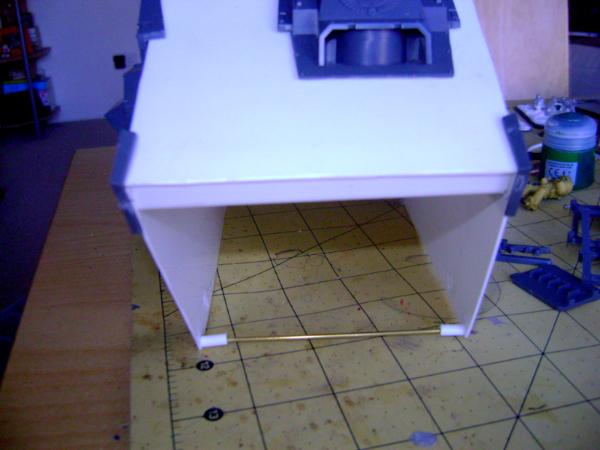
To attach elements and to give some structural integrity I am using the Square Plastic tubing at 10mm, to save money I bought Square because I can turn Square tubing into I beams and L-pieces using my saw as per the diagram below

ENGINEERING!!!!!!!!!!! LEARN FROM MY MISTAKES
Ignore the above Diagram, what you need for structural rigidity is the Square tubing complete. The L-shapes are not strong enough to hold the box structure enough. The minimum size you need for structural rigidity is 10mm, I would be tempted to say 12mm + for an even stronger build. See the picture below.
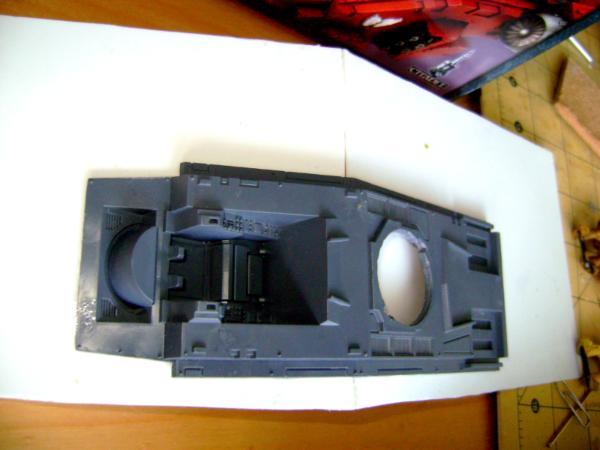
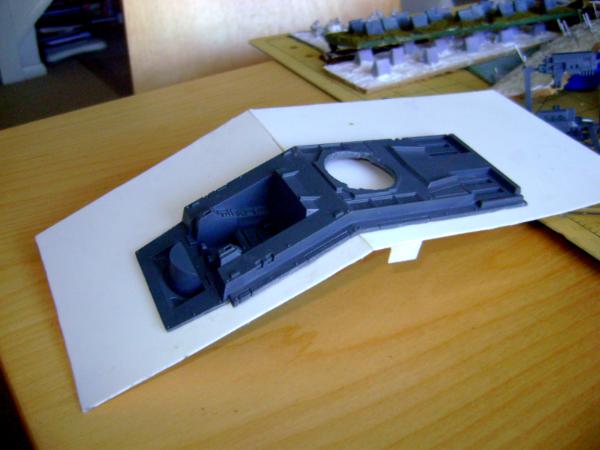
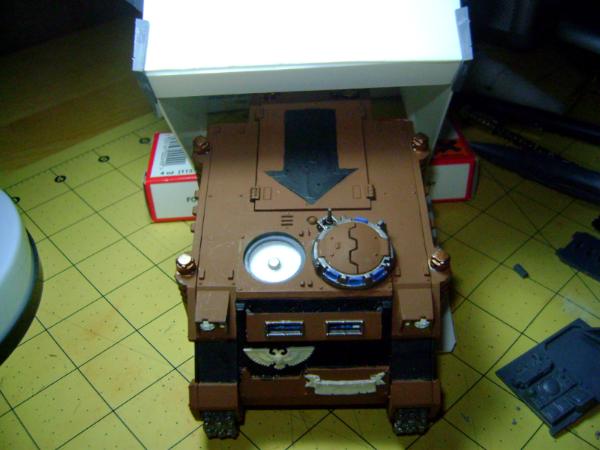
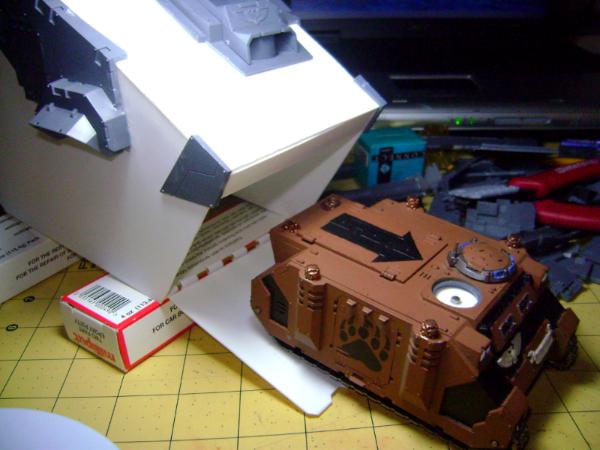
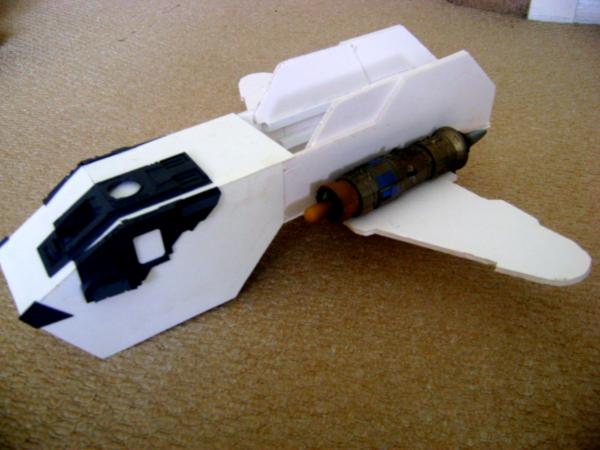
Okay, i've bought a Storm Raven... Why because the parts are superb and it gives me a fighting chance of finishing this project.
Plans are to use sections of the Stormraven to fill in details and give it the look of a professional Thunderhawk.
1. The Tail section off the Storm Raven will be used as the Tail piece.
2. The Stub-Wings will be used over the top of the Engines.
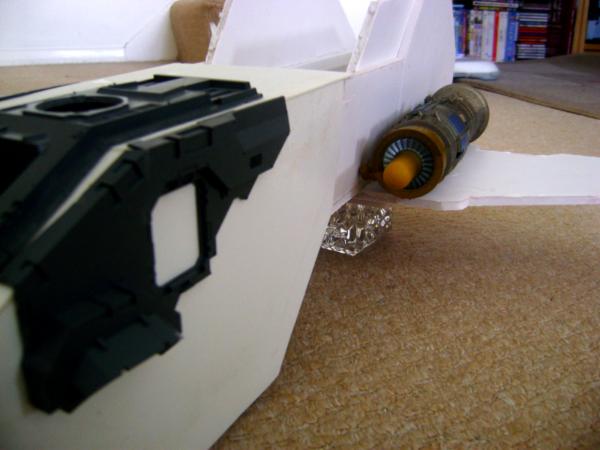
3. The Cockpit will be used as the Thunderhawk cockpit like so...This gives the glass, the detail and just how professional this will look.
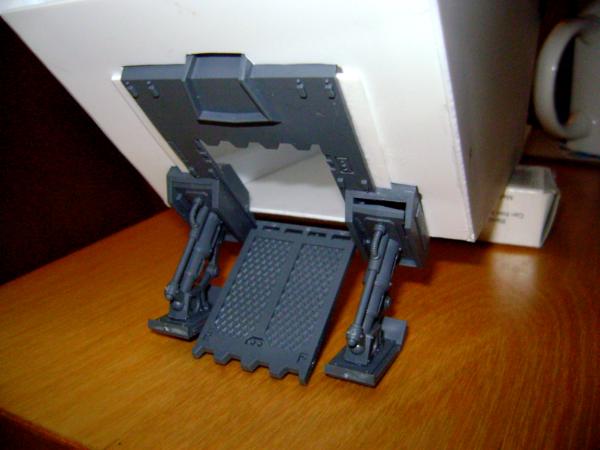
4. Landing Gear will be used on Thunderhawk, saving alot of effort.
5. Weapons Sponsons, sections doors etc will all be useful.
So all this and some of the pieces will be used to save time and effort and also to give the Thunderhawk a more professional look...
So building the box sections and reinforcing them with pieces of the stormraven gives this...
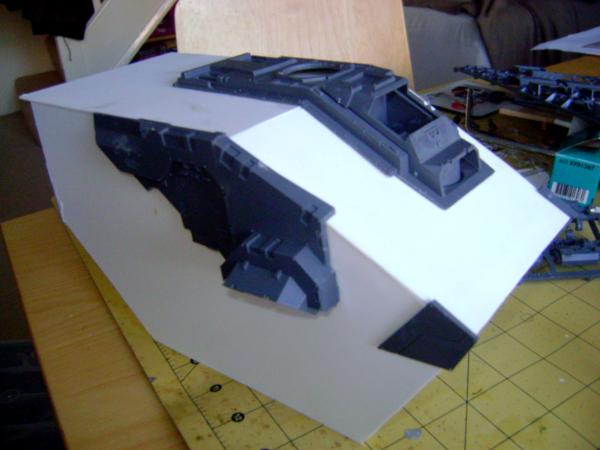
You can clearly see how I have used the Square Tubing - The Glue I have used is Gale force 9. Also how I have prepared the hinges for a forward ramp.
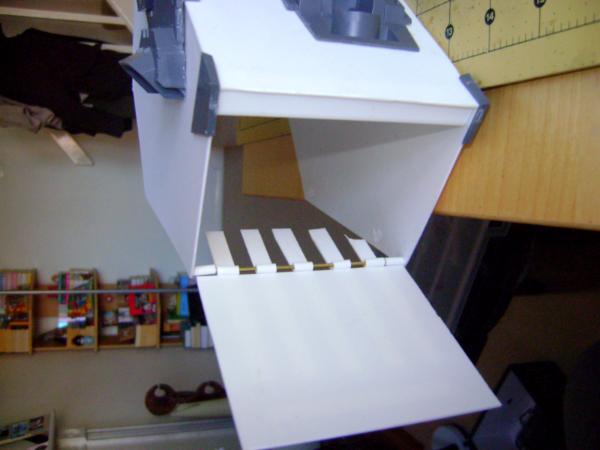
I did deliberately design my Thunder-hawk to do this..... Also fits a Predator. Imagine being on the receiving end of that delivery, shot to bits on the way in by 2 x Lascannon and 4 twin linked heavy bolters and a Turbo Laser, then a Predator Annihilator comes out to grind your bones.... My 1st Apocalypse game is going to be fun!
Always nice when a plan comes together. I'd like to see a Forge World Thunderhawk do this!
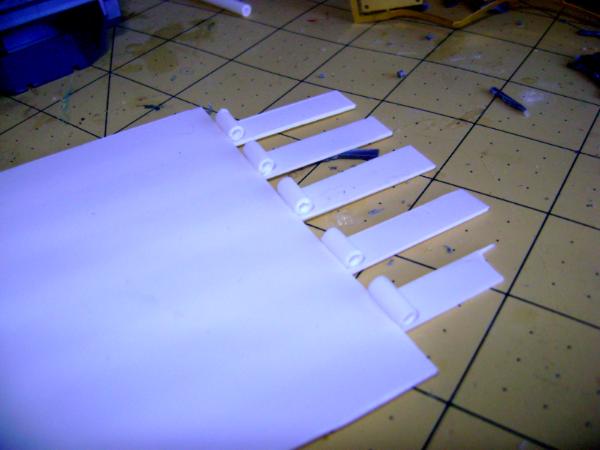
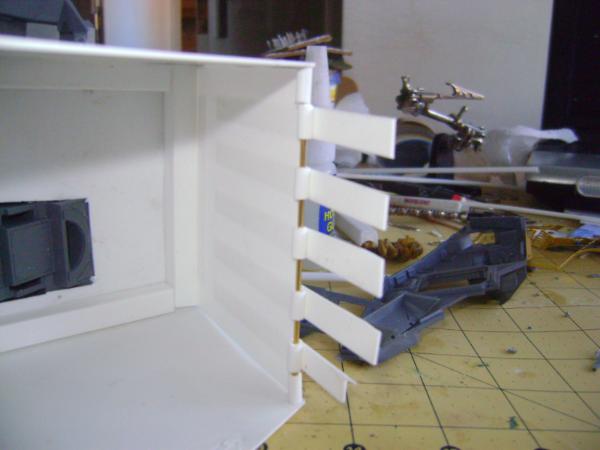
Rear section using Plasticard with the parts from the Storm Raven.
I think this is an access that a real Thunderhawk, would have as you wouldn't assault out just one single ramp. Combined with side doors it should give enough access points to allow 30 Astartes or 15 Terminators to storm out. I also think my T-Hawk will be able to hold alot of Bikers and other units.
Working on the rest of the Body and placing the Engines.
Magnetising the Door positions will allow me to have IRON HANDS doors and IMPERIAL NAVY type doors.
I will now overbuild the entire body with armour plating, using examples like A & B above to make the whole ship look more professional.