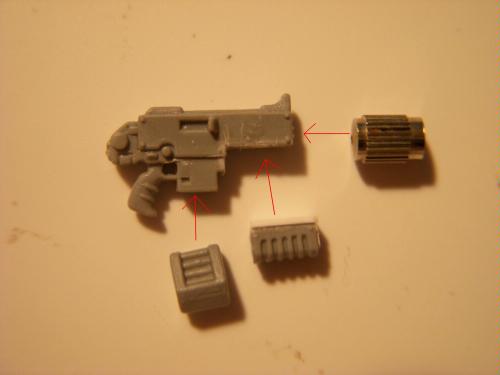
All you need is the following bits:
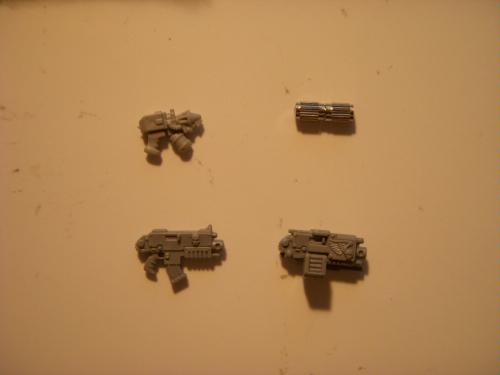
So we've got a bolter, a storm bolter from the vehicle kit, a hand flamer, and something a little odd.....let's take a closer look at that!!
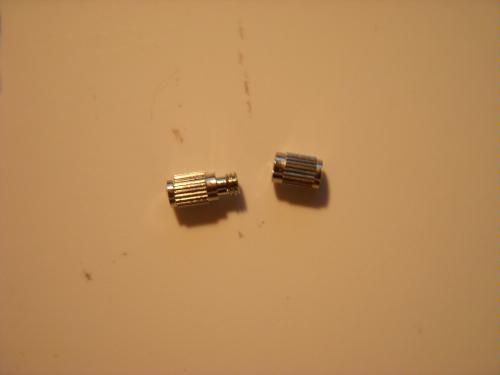
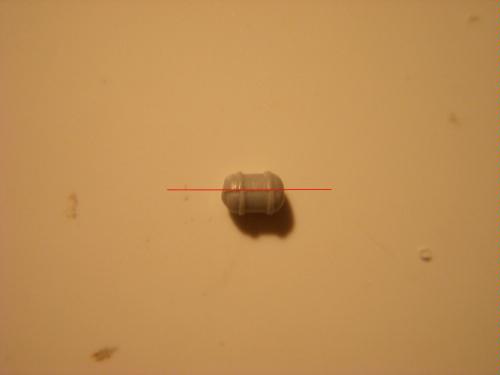
This my friend's is what makes the conversion so cheap. It's called a barrel clamp and it's used in the making of necklaces, bracelets, etc. I got a 40 pack at Michael's crafts for 5 bucks. It's a great bit and has so many uses, for this, we are only interested in the half on the right.
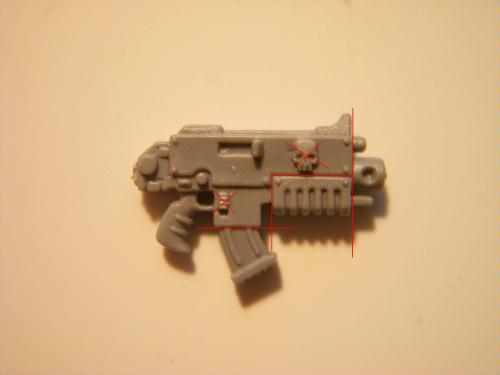
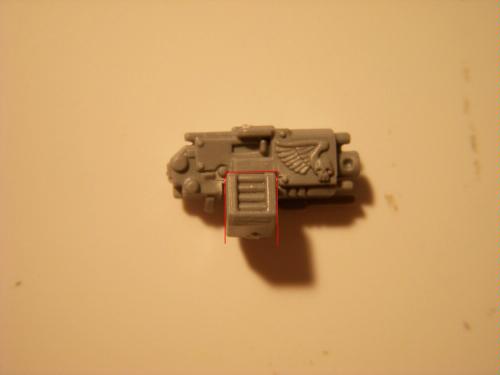
First, CAREFULLY cut the bolter where indicated and scrape off skull and buttons under the X's. I use the bolters with the skull simply because it's easier to scrape off then the winged skull and aquila. Plus if you are careful you'll have a nice plastic skull to glue on something else ;) . I say carefully because we want to keep the barrel and grip intact. I've found this conversion easiest to do with a new single edged razor rather than an x-acto. It's easier to apply even pressure from the top with it. Just line up the razor and slowly and carefully apply pressure straight down for an even and straight cut. When removing the grip, I stop several times to check the alignment of the cut, It's worth it. Then take a piece of thin plasticard and glue that to the top of the grip. It's mcuh easier to oversize and then trim it down by the way.
If you are going to leave the clip on, be careful when cutting the grip! You'll nick the corner of the clip when you are cutting the back...
Remove the drum from the storm bolter in the same way. I should note that this is really just for looks, use any kind of clip you think would look snazzy, I plan on making a couple with the Sisters vehicle storm bolter as well. Again, be careful and you'll still be left with a storm bolter, just without the drum, still a completely usable bit!
Next you want to trim down the ammo drum so it will fit around where the ammo clip on the bolter went, how far you want it to stick out is up to you, just trim a little and do a test fit, you can always trim more but you can't go back!
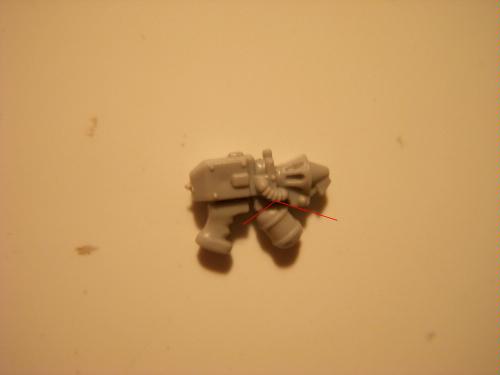
Glue the pieces onto the bolter where shown. Also, glue the barrel onto the front of the grip. I use a little green stuff to make the joins even and the back of the barrel clamp is curved a bit so the gs helps make a flat connection as well.
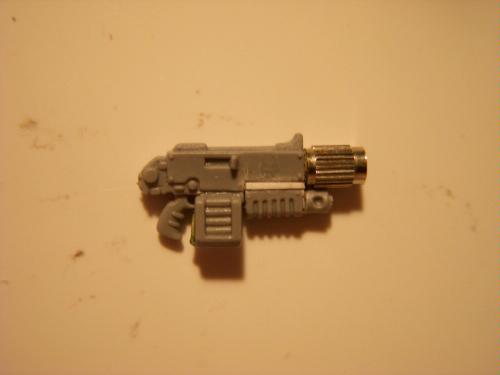
Almost done! You can see why you need to add the plasticard to the grip, the barrel and clamp just fit. But where does the juice for that melta shot come from? That's what the old 2nd ed plastic hand flamer is for!
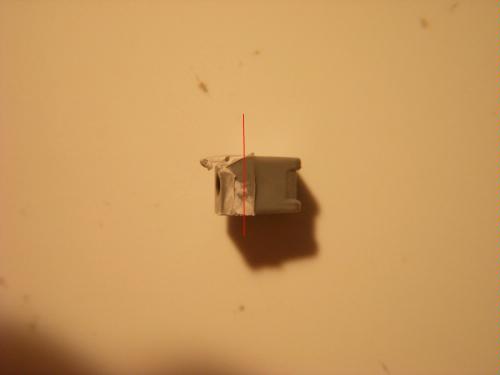
Cut the tank off the flamer.
See that mould line that splits the tank very nicely in half? Use that as a guide and carefully split the tank. I should note here that throughout this conversion, you are dealing with fiddly bitz that will fly away when you cut them off if you aren't careful. It's easy to find extra bolter barrels (who uses all the unsheathed bolt pistols from their Space marine sprues anyway?) but you wont find may extra hand flamer tanks kickin around! Always try to keep a finger on the part you are trying to cut off so it doesn't go flying. With the tank I have a pair of tweezers that are just ever so slightly smaller in width then the tank so it holds it nicely while I split it.
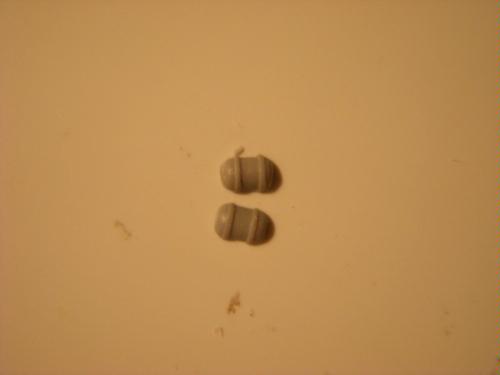
There you have it, the tanks for 2 combi-melta's from 1 bit if you are careful!
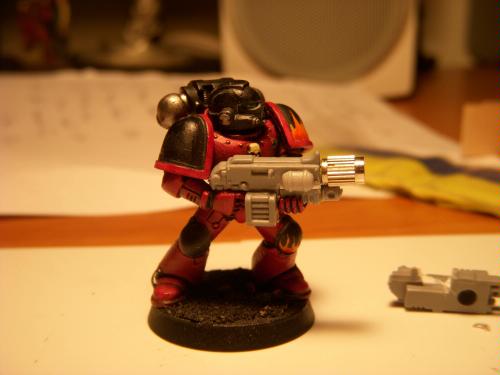
Glue it on in the position of your choice! Looks pretty good eh?!
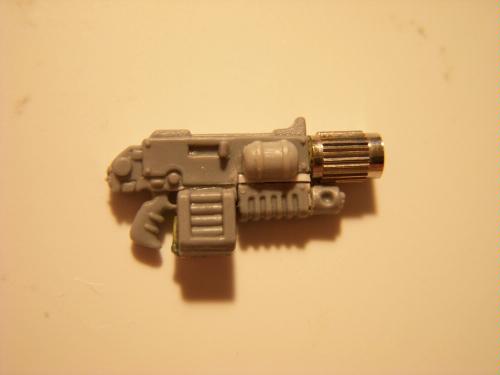
Somebody wants to kill something....