
Welcome to our first step-by-step article that will guide you through making an actual, fully finished piece of terrain in the 3T-Studios style!
For this DIY we’re going to cover the staple of wargaming terrain, the one piece of scenery that you can find on just about any table, anywhere in the world- The hill.
While there is a huge variety of hills that people have made, there is probably one dominant picture that pops into your mind right away when we talk about wargaming hills:

Here we have your basic chunk of styrofoam insulation, cut with a hot knife, stacked, painted and flocked. This style works fine when you absolutely have to get some terrain on your table, and you don’t have a lot of time to spend on it. It’s adequate looking from a distance and very easy to move troops over. But this is NOT what we’re going to make, because to me, this thing does not look like a hill.
These are hills:

In nature, hills are made by many different geological processes, such as layers of earth that crunch together, buckle, fold and erode, making sharp or random shapes that jut out of the earth. Capturing this look may be a little more time consuming, but as you’ll see, it’s not especially difficult nor expensive to add this kind of flavor to your gaming table.
The first thing we need to do is talk about our bare minimum list of supplies, many of which are probably already in your yard or house, especially if you’re a hobbyist already.

- Bases. We absolutely have to have a sturdy base to build our hills on! For this project we’re using MDF (Medium Density Fiberboard, or Tempered Hardboard) board that’s been cut with a reciprocating saw into rounded shapes and then sanded smooth on their edges. If you substitute these with anything softer or you may have issues with durability and warping.
- Filler. The easiest material to work with is lightweight spackle (AKA pollyfill,) but you could also use drywall compound or plaster.
- “Rocks.” You have a lot of options here, from natural pieces of stone you can gather outside, to construction rubble, to my personal favorite, chunks of decorative bark, available in large bags from garden centers.
- Some assorted chunks of styrofoam or insulation foam.
- Soil. By far the easiest material to acquire, it’s just dirt, sand and gravel. I use sifted “grades” when texturing my terrain
- Glue. PVA glue, or “white glue” is cheap, safe and bonds great to natural materials. A hot glue-gun would also be a helpful addition, but not critical.
- Acrylic paints, at least black, white and a couple of earth tones.
- Flock. Completely optional, this is just shredded green sponge that comes in a variety of colors and sizes from your local hobby shop.
- Some assorted model bits. Another optional ingredient, which you can use to add unique ruins, wrecks or rubble to your scenery.
- Tools: A sharp, retractable hobby knife, some sandpaper, a small spatula and an electric hot foam-cutting knife.
Now that we have everything we need, the first thing we’re going to do is throw away that hot foam-cutter.

That’s right, throw it away. If you ran out and purchased one just for this project, rest assured that your money was well spent because you just did the world a favor. These things are slow-cutting, imprecise, leave melted strands of goo everywhere and break easy.
While we’re at it, lets throw some other things away too.
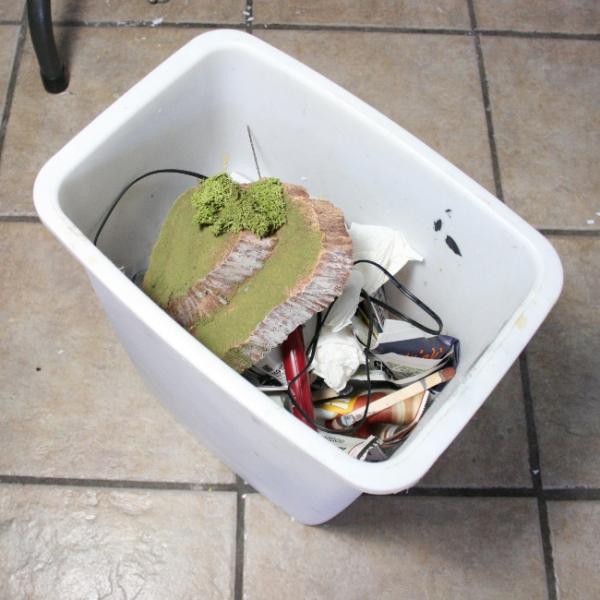
There, that’s better. Now we can get to work!
There is no right or wrong way to design your hills, but for the most natural, yet still playable designs you will want to have some smooth flat or sloped areas, along with some areas of jutting rocks and boulders.

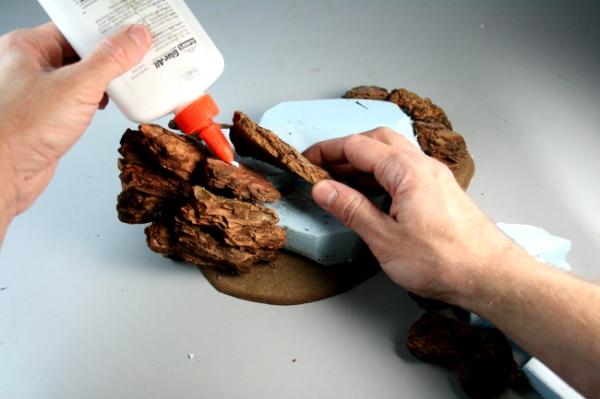
Using a hobby knife, cut some of your foam pieces to bulk out the main body of your hill, and some smaller wedge-shaped pieces to support the rocks or bark. Glue your pieces down with PVA glue, or if you’re in a hurry, you can use hot glue. You only need to hold your pieces in place at this point, the filler will also help bind everything together later.
This is the fun part where you can think of different designs for your hills, and how they can be played with in your games!
When I build hills using wood or bark, I often try to align the grain of the wood in an angular direction, to simulate strata of rock that’s buckled and pushed upwards over time. This makes a very dramatic finished hill, especially when repeated on additional terrain pieces.

Continue to shape and trim your foam, try to stuff large gaps with smaller bits of foam or wood so that you don’t have to use too much filler on the next step.

Filler basically represents the dirt and soil which your rocky outcroppings are sticking out of. Here I’m working filler into the gaps between the wood chunks. Filler is also spread evenly over the body and slopes of the hill, making nice, smooth transitions across the hill.

The same principle applies if you’re using natural stone, but be aware that stone is much heavier than wood, so you cannot use a lot of it, especially on larger hills!
The advantage to real rocks, is that you can achieve some interesting effects, such as these chunks of railroad ballast I collected near some train tracks, which appear to be rippled, melted slag from a furnace.

Again, fill out the shape of the hill and work your filler into cracks. Let your filler dry completely before moving onto the next step, sanding.

Using a fairly rough (60 – 100 grit) sandpaper, give your whole hill a good sanding, smoothing out the rough spots of filler.
WARNING: Nearly all sanded filler dust can be toxic to inhale! Please do all your sanding outside or in well-ventilated areas where the dust can be easily contained and collected. Always wear a dust-mask or respirator when sanding, and change your clothes afterwards!

Now we have several hills, smoothed and ready for detailing! At this point it would be good to make some decisions about what kind of environment you want these hills to represent. A rocky alien wasteland? Dense jungle? Rolling plains? These decisions could effect what kind of texture and accessories you’ll be applying next.

You can accessorize your hills with pieces from your bits-box, adding ruined walls, wrecked vehicles, piles of bodies, tree stumps, or anything else you can imagine, or if you prefer, just leave your hills featureless and natural.

For several of these hills, I’m placing these resin-cast burrows/fumaroles, (available soon for purchase from our website!) While it's not necessary to add bits like this to your hills, small accessories like these can completely change the atmosphere of even a simple model like a rocky hill, as you’ll see once everything is painted.

After priming my plastic bits, careful not to get primer on any exposed foam, it’s time to add texture! Use an old brush to apply watered down PVA glue over the smooth areas. If your hill is large, you may need to do this in sectors.

I start with a layer of sand I call medium grade, which has been sifted through a screen. This will be my base-texture. Allow to dry before moving to the next step.

Now using a a rougher, unsifted sand mix, apply PVA glue in areas where you can imagine rocks and builders crumbling down the hill-side. Don’t overdo it, especially if you’re going to be using a lot of flock later. Let dry again.

Additionally, as an option you may apply some patches of super-fine dust to a few different areas, especially effective for a more windswept, barren or baked-earth look.

Finally, you might want to glue down a few tiny pebbles around your rocks to really make your hill appear weathered and crumbling. Once you’re satisfied with your textures, it’s time to let everything dry completely, and move on to painting!

Give the whole hill a nice, even coat of black paint. make sure to thin your paint so you don’t obscure details. You may need to do this several times to get every nook and cranny of your rocks painted.
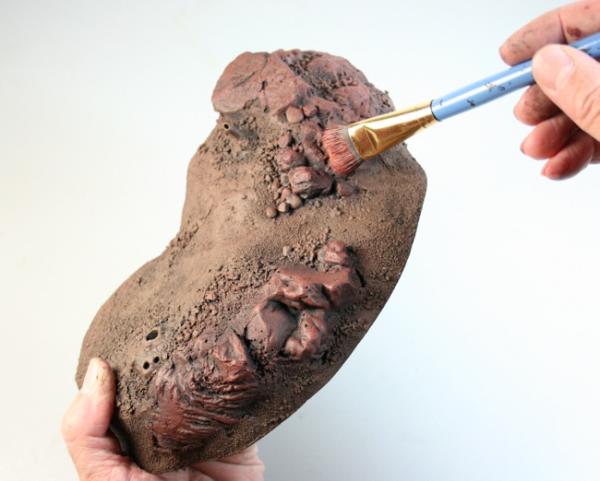
For these hills, I gave a liberal semi-dry brushing of a mixture of dark earth-tones over the ground cover, allowing black shadows to show through. There are far too many methods, color schemes and styles of painting for me to cover here, but for the most dynamic looking hills, use a slightly contrasting color for your rocky areas. Here I used a reddish iron-oxide base color for the rocks.

Dry-brush lighter and lighter tones over your hills and rocks as highlights. I brought this soil color up to a very light brown/beige, and the rocks were highlighted with a golden-brown color. Never use pure white as a highlight unless you’re painting snowy terrain, or it will look chalky and too stark!
At this point, if you’re making hills for a barren desert or mars-like alien world, you can call your hill finished and start playing! Otherwise, we’re ready to add a little foliage.

This is another area where personal preference reigns supreme. I prefer to use flock very sparingly, only to provide a little contrasting color. You can however decide that you want rolling green, pastoral hills and may want to use a lot of flock. Apply a little bit of watered PVA glue and apply and sprinkle on your flock your flock in areas you can imagine grass growing, and once dry shake off the excess. If your flocked areas appear too “patchy” you can take a toothbrush and scrub the edges of your patches to smooth them into the surrounding terrain.
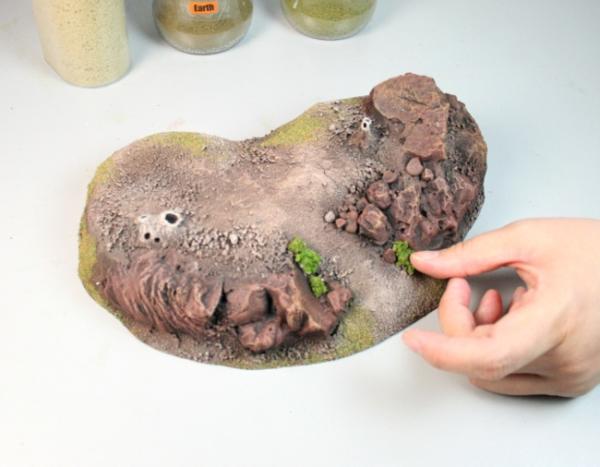
larger clumps of foliage should be placed in in areas that might offer protection from foot traffic and elements, and allow larger bushes to grow, such as between boulders or under the edges of cliffs.
Once all the PVA has dried completely, you can give your hill a light coat of matte sealing spray, and then grab your dice because it’s time to deploy!
I know some of you may be looking at these particular sample hills and saying “How can I perch my rank-and-file units on these things?” So let me take a second to reiterate, THESE TECHNIQUES ARE EASY TO MODIFY!

Here you can see the same principles I demonstrated above, with a different style of hill. Realistic mesas and flat hills can be made simply by laying your flat pieces of bark or flat rocks horizontal on top of your foam chunks before applying your filler. With simple adjustments to the way you put your ingredients together, you can still create beautiful scenery to help immerse yourself and your friends into your games, while retaining the easy-to-use functionality of the old-fashioned “step-hills.”
I hope this article has given you some ideas and inspiration for making your own dynamic landscapes, and if you do use the techniques shown here, we want to see! Please send your pictures, ideas and hints to projects@3t-studios.com and we may use your submission in a future section.
Happy terraforming!


