Forward: I have noticed, over my now 22 years of war gaming, and 2.5 years of playing Warmachine, that when discussing the “Metagame” and “Tactics”, people tend to focus on the numbers. While the numbers and stats are important to balancing the game, I think a lot of good tactical advice has been missed by leaving out the more ‘intangible’ aspects of the game. Having never been a fan of TheoryHammer or Math Machine (maybe because I am a statistics idiot), I thought I’d write an article from the point of view of a former Soldier, with a focus on maneuver, combat effectiveness, and psychology.
In addition, I am, and have always been a theme player. Rather than crunching the numbers and coming up with ‘Power Lists’, I have always simply adopted or created a cool-looking theme, and tried to make that theme work in game. I humbly submit that I have had some success with this. No national titles, or anything like that, but I win more than I lose, and have a few tournament coins in my pocket.
When Privateer Press began releasing their Force Books, with the Tier Lists, I jumped right on the wagon. This was a perfect way to focus my collecting, and come up with armies that made sense from a thematic standpoint. However, I have noticed that many people don’t really like the tier lists. They think that the trade-off is not worth the price, and that they are mainly an aesthetic choice. With this article, I hope to challenge that assumption, and bring the tiers into greater prominence. I will be starting with the Warcasters I currently own, and then hopefully expand into the rest, as my understanding grows in this game.
So, I hope you enjoy the article, and maybe even get some ideas from it. As always, if you have a better idea, or notice that I have made a mistake, let me know in my discussion thread! Thanks, and Enjoy!
I. OVERVIEW OF PROTECTORATE TACTICS IN GENERAL
This section deals with the basic tactics recommended for players of the Protectorate of Menoth. It details the overlying theme of the faction, and what to look for when composing an army list.
1. STRENGTHS
The general play style of the Protectorate is an interesting cross of all the other factions. While not a fast army like Cryx and Circle, certain choices such as the Daughters of the Flame, Amon Ad-Raza, and Exemplar Vengers can really put some fire in your boots. While not quite the masters of ranged combat like Cygnar, we can lay down more AOE’s per point than any other faction with the Deliverers, Sunburst, and Redeemers. While not quite as tough as Khador, our Bastions and buff Spells like Defender’s Ward can address this difference. So, we are kind of a jack-of -all trades sort of army.
Our true strength lies in 3 main areas, whose concepts are key to understanding how to win with this faction. These areas are: Synergy, Beneficial Attrition, and Denial. When layered in the right way, a Protectorate force can combine these into what I call the ‘Pain Onion’. More on this later.
Synergy: This is a term that is thrown around a lot in Warmahordes discussion. A lot of people use it, but not as many seem to really understand what it means. At it’s base definition, Synergy is the concept of ’the whole being greater than the sum of it’s parts.’ 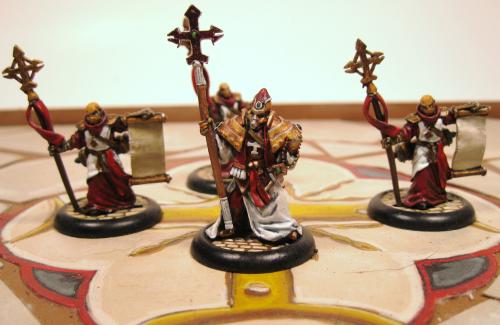
Many make the mistake of believing that synergy is only achieved when all models individually benefit from each others’ abilities/presence. Often, this is the case, but it really over-simplifies the role synergy plays. What is truly meant is that the STRATEGY benefits from how the models interrelate in a way more profound than the individual stats signify.
For instance, suppose you have a Choir of Menoth and a Crusader. The enemy is across the field from you, and you have to approach him and smash him to pieces. His first choice, of course, is to try to knock out the Crusader, because it is an infinitely greater threat to him than the weak choir. However, the choir has the ability to protect the Crusader from ranged attacks or spells as he moves forward, and then to give him a nice buff on his attack stats when he is ready to smite the Heretics. So, the dilemma for the enemy is: Who do I hit first? If he attacks the crusader first, chances are his options to hit him are limited, because of the Choir’s chants. If he hits the choir first, his shots are wasted on killing little pukes while the PS 18 crit fire causing Death Machine closes in.
As you can see, no direct benefit comes to the Choir from this, but you now have forced the enemy to make choices based on what you present him with. This is one way of seizing the initiative from him, and is but a small example of what the Protectorate is more effective than any other faction in doing.
All factions in the game rely on some synergy to make their army work effectively, but we add more layers than any.
Beneficial Attrition: Normally, when a model in your army gets hurt or killed, that is a BAD THING. Not necessarily so, with the Protectorate. We are better than perhaps any faction in the game, save Skorne, at using our own models’ destruction to our direct benefit. Case in point- Reclaimers. These little two point models can take the souls from their buddies dying around them, and convert them into focus for ‘jacks, or more power for themselves. Just by having a soul on them gives them Soulstorm, a 2-inch no-go zone for 1 wound models! Of course, beyond this, the High Reclaimer/Testament can simply turn deaths into focus, giving him a theoretically unlimited supply!
 Every single Exemplar model in our faction also has a Beneficial Attrition aspect, as well. Usually with the Exemplars, their friends dying or taking wounds simply makes them angry, not weaker!
To expand the synergy example, say that the aforementioned Crusader and Choir was followed closely by a Reclaimer. NOW the enemy has to contend with a ‘Jack that is protected, and a unit that, if killed to strip protection from the Crusader, simply gives souls to the Reclaimer, which shunts them directly back into the Crusader as focus!
You can now begin to see the PAIN ONION take shape.
Denial: The third major strength of our chosen faction is Denial. In this case, denial is the ability for our army to limit the enemy’s ability to take actions, or to make them expensive to enact. PKreoss’ spell, Lamentation, is a great example of this. By casting this spell, he effectively creates a 14” radius bubble around him on the field, within which all spells cost double! So, that nasty FOC 5 spell Goreshade has that cancels feats, now costs 10!
The Protectorate is chock full of denial spells/abilities. From the Choir’s songs, to Magic-cancelling Spells, to the Avatar’s Gaze of Menoth, to the Flameguard Cleansers CRA, there are all kinds of things we can do to take away the enemy’s options to move and attack.
To expand our example a little further, imagine the Choir, the Crusader, and the Reclaimer, all synergizing to their hearts’ content. Now, imagine that these are in an army led by High Exemplar Kreoss, who is upkeeping Lamentation. Now, the enemy is spending double to cast spells, the choir can prevent ranged attacks from targeting the ‘Jack, the Reclaimer is taking the souls of the dead choir members and throwing them back into the teeth of the enemy, and your opponent has a migraine. He absolutely has to kill the most dangerous unit (Crusader), but pretty much has to come into melee range to do it, which is what the Crusader likes, having no ranged weapons.
 The keystone of this formation, (assuming Kreoss is safe in the back), is the Reclaimer. He must be killed first, before the choir can be safely dealt with. Then, once the enemy has stripped the Crusader of his protective chants, he can safely deal with the Heavy at range…
Except at this point, there is no more range left.
The keystone of this formation, (assuming Kreoss is safe in the back), is the Reclaimer. He must be killed first, before the choir can be safely dealt with. Then, once the enemy has stripped the Crusader of his protective chants, he can safely deal with the Heavy at range…
Except at this point, there is no more range left.
THE PAIN ONION: This is a term I coined to give a name to what, exactly, our chosen force does in the field. It basically means that, in order to win against us, the enemy has to peel away so many layers that by the time he gets to the center, we have already purified him and sent his army to UrCaen. What I hope to engender in the readers of this article is a grasp of how the concepts of synergy, beneficial attrition, and denial can be used to augment our models’ inherent strengths, and win more than we lose.
2. WEAKNESSES
An army is only as good as it’s weakest element, and a good general knows the limitations brought by that element. It is realistic, and necessary, to assume the worst case will happen, and we will be caught out with our pants flapping in the breeze. There is no strategy that survives first contact with the enemy, and by attempting to understand the weaknesses and holes in our Faction, we can compensate for them with solid tactics. Later, as I discuss each list, I will put in a brief description of how I compensate for these weaknesses.
I have identified three weaknesses, much as I did for strengths, that I have observed give Menite players the most headaches over the years. I define these weaknesses as Lack of Agility, Codependance, and Lack of Simplicity.
Lack of Agility: I define agility as the ability to quickly react to changing battlefield conditions. For good examples of agile armies, look no further than Cryx and Circle. They have enough models with the speed, abilities, or spells to be pretty much anywhere they want, as needed.
Needless to say, we don’t.
Our average warjack speed is something between 4 and 5 inches, even for our Lights. Our average troop speed is a little over 5. Of course, we have exceptions to this, such as Idrians, Daughters of the Flame, and Amon Ad-Raza, but by and large, we are the slowest army in the game. (That includes Khador who, while their ’jacks are slower, have an average greater speed with their units.) We should always be aware that we can usually not outflank our enemies, and need to rely on our 2nd- greatest in the game toughness to shore up this weakness.
Codependance: This is the red-headed stepchild of Synergy. It is not so much an inherent weakness of our army, so much as a byproduct of how we tend to play. Since the Protectorate is more reliant than any other faction on the correct application of Synergy, a lot of players I know tend to misapply it. When I use the term Codependance in relation to Warmachine, I mean that models are put together in combinations that end up hurting one or the both of them, or leave wasted points. For instance, a simple example would be running the Blessing of Vengeance with any caster other than Severius. While it is still useful, a point or two of it’s cost is wasted, as it cannot use it’s Affinity with anyone else. Another example would be giving the High Reclaimer a squad of Bastions. They are still good, but with him, you really want to max out on 1 wound infantry to really power up the soul exchange. Since so many of our models have slightly different nuances in their abilities, some extra thought is recommended when constructing your list.
Lack of Simplicity: One of the great hallmarks of a good strategy is it’s simplicity. This allows a focus of intent and direction, while allowing enough leeway to react to changing battlefield conditions. Unfortunately, this is a higher challenge for Menoth players than most other factions. Where a Khador player can lean on the extreme toughness of his ‘jacks to push through, we have to add a couple of units to make ours truly shine. Where a Cygnar player can use his best-in-game ’Jack stats to offset any lack of focus, we need to always have methods to generate extra focus, or to take the pressure off our Warcaster, so he/she can fuel our slightly less skilled ‘Jacks. To say it bluntly, the Pain Onion can easily stink up the whole room, if proper attention is not paid to using it. Oftentimes, winning a game of Warmachine for a Protectorate player comes down to giving the opponent a bigger headache trying to decipher our list than we get using it. All the layered nuance, synergy, keeping track of timing, and positioning can really put brain-burn on us. The best way to counteract this is to make sure that you ‘dry-fire’ your combos before the game. That is part of what this article aims to do: take some of the guesswork out of building a solid Protectorate list, and give you that sense of satisfaction when your opponent looks at the board around turn 2-3, realizes that every move or attack he makes will hurt him as much or more as it hurts us, and starts to bleed from his ears a little bit trying to find a way to get the win.
3.BASIC RULES OF THUMB IN PLAY
Having outlined the basic strengths and weaknesses of our chosen faction, I want to finish out the introduction by briefly laying down some solid advice I have learned about our playing our faction, regardless of the Warcaster we use.
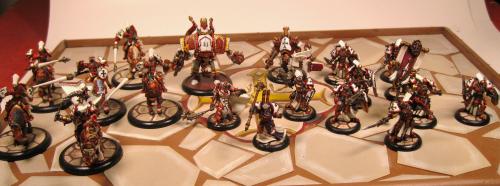
Use the Menite Blob: I can’t remember where I heard this term, but any longtime Protectorate player will tell you that the best formation for pretty much any Menite force is a concentrated “Blob” in the center of the deployment zone. Sure, you need to put units of Errants out on the flanks, or give our few fast models room to move, but mostly you want to layer your forces around your Caster. This puts a physical ‘Onion’ around him/her, as well as the Pain Onion. This is not to say that you should bunch up a lot of AOE targets, just that you should keep most of your units in range of each other, allowing the synergy to work it’s magic. Also, if your strength is evenly distributed around the blob, it makes it almost impossible for the enemy to roll up our flanks.
Go Second!: In most cases, if you have the choice of initiative, it is best to go second. Unless you have the ability to Advance Deploy heavy weapons, our slowness usually benefits from letting the enemy eat up the ground first, and letting us react to his movements. If the ‘Blob’ is properly applied, it will be VERY hard for him to outflank us. In ground-holding scenarios, this advice must be a bit more judiciously applied.
Use Upkeep Spells First Turn: This is advice that pretty much applies to any Warmachine force, but I think is especially important to us. Since our ‘Jacks require more focus than a lot of factions to make them competitive, It is important to get those high-casting-cost upkeep spells in place when you are out of the enemy’s threat range. This allows our ‘Casters to use their focus much more flexibly when the smiting begins.
Always Have at Least 2 Win Conditions: This pretty much speaks for itself. You need to have as many ways as possible to kill the enemy ‘Caster in one turn, if possible. Always present multiple threats to him from multiple angles, forcing him to move on your terms. Certain of our ’Casters are better than others at this, to be detailed below.
Now, on to the Meat of the Article. The Lists! Each list will detail one of the Casters I have played. I have chosen the most-played points limits in my experience. These are the 20 point Mangled Metal, the 35 point, and the 50 point.
Since the Faction Sourcebooks came out, I must admit I fell in love with the Tier Lists. They allowed me to theme my Protectorate forces around each caster, which I like, and have saved me a good deal of money by focusing my Purchasing on the required models for each tier. SO, without any further ado, I present the Protectorate Tier lists for my favorite casters!
II. HIGH EXEMPLAR KREOSS TIER LISTS (pKREOSS)

1. QUALITIES, GENERAL ABILITIES, AND PLAY STYLE.
Ah, Kreoss! In my opinion, the best all around ‘Caster in our faction. Usually the first Warcaster Protectorate players use (being in the Battle Box), pKreoss has a good mix of offensive capabilities, buffs for his army, and denial spells. If I were to classify him, it would be as a support ‘Caster. He has a couple of decent offensive spells in Cleansing Fire and Immolation, but he really shines in his ability to make the opponent pay out the nose to cast spells. With an above average Focus stat, and commensurate 14” control area, his Lamentation is one of the spells most hated by our opponents. When you combine this with Purification and his Dispel Ability on Spellbreaker, he can almost totally shut down magic on the opponent’s side.
Kreoss is one of the casters that really benefits from the ‘Blob’. His actual combat ability is average, with run of the mill DEF and ARM ratings. He is also pretty slow. However, when you layer your units around him, and use Defender’s Ward to reinforce your flank or a soak unit, he becomes very hard to actually get to.
The main thing to watch out for with Kreoss is his positioning, relative to your forces. It is easy to spread your forces out, especially on your Feat turn, leaving him unprotected. Given the vanilla stats I mentioned above, he is not very good at surviving a concentrated attack from the enemy. Beware of assassin casters; he will usually not fare well if they are allowed a charge lane to him.
And then, there is his feat, Menoth’s Wrath. This is one of the most straightforward feats in the game, and an almost-guaranteed win condition if you position correctly. It would not be unwise to focus a Kreoss list around 2 things: protecting him, and popping that Feat. If you add multiple attack vectors, and keep at least one charge lane open, he should be able to take out the enemy caster on his Feat turn.
At the beginning of the game, move Kreoss and his army forward at a slow but steady pace in the mutually-supporting blob. Then, when you are about to close with the enemy, spread out your attackers a bit, to force him to commit to one direction or another. After this happens, pop your feat, charge in, and Smite the Heathens!
Best Matchups: Kreoss is great against any caster that heavily relies on spells to get the job done. pDeneghra, both Asphyxiouses, pSorcha, Nemo, and Adeptus Rahn are casters that have a problem with Kreoss. Trollbloods definitely do not like him, neither do the Spell-Heavy Circle Warlocks like Mohsar the Desert Walker, or Kruegar the Stormwrath.
Worst Matchups: Other than Mirror-matches, which are ALWAYS a bad match for pretty much any Menoth Caster, Kreoss should watch out for fast and Long Range casters. Cain (both) is a problem for him, as is Morghoul, Lilyth, Strakhov, Ravyn, and Kara Sloan. Everblight, in general can really ruin his day, as can the non-spell focus casters from Circle.
2. TIER REQUIREMENT OVERVIEW
TIER 1: Kreoss is limited to taking Non-character Warjacks, the Fire of Salvation, Choirs, all Exemplar units and solos, and Vassal Mechaniks. For this, he gets FA2 on his Venger units, and they cost 1 point less.
TIER 2: Kreoss must include High Exemplar Gravus. For this, his Vengers can deploy at the same time as AD units, but only within the regular deployment zone.
TIER 3: Kreoss must include at least 2 Exemplar Errant units. For this, everything gains Pathfinder for the first turn of the game.
TIER 4: Kreoss must include at least 2 arc nodes. This allows his upkeep spells to begin the game in play, without paying the Focus cost on the first turn.
These are decent tiers. While not being fantastic, they direct your focus towards two types of unit: Vengers and Errants. Therefore, you should use these as the foundation of your strategy. Also, Kreoss always benefits from at least 1 arc node, to help wrong-foot the enemy with a threat of Fiery Death from an unexpected angle.
3. 20 point Mangled Metal List
A. Composition
High Exemplar Kreoss (+5)
Fire of Salvation (9)
Guardian (9)
Crusader (6)
Total points (19)
B. Recommended Tactics
The first thing the reader might notice, other than the Beefyness of these ‘Jacks, is that Kreoss in no way benefits from any of his Tiers. I created this list within his tier limitations, however, to keep to the spirit of this Article and Project.
This is a pretty straight forward list. It is also a quick-win list. These ‘jacks have the ability to pretty much crush any opposing ‘jacks in the game, one-on-one. The added bonus of the Guardian’s arc node is kind of a surprise; the enemy, while realizing that there is an arc node there, will most likely be focused more on killing huge masses of metal. This is where a carefully placed Immolation bolt on the enemy ‘Casters forehead catches them by surprise.
The keystone unit here is probably the Fire of Salvation. As the highest-skilled ‘Jack, and having CE Fire, to boot, he is most likely to succeed in killing the enemy caster. His Dispel Affinity is not bad either.
 Just move these boys in a wedge formation up the field, with Kreoss in the crook of the V. Put the Guardian in the center, where his Arc Node will be of greatest effect, and use the Crusader to deny any flanking attacks. Once contact is made, pop Kreoss’ feat, and charge in for the win. Or, distract the enemy with all of the fancy robots, and run Kreoss around the corner to attack the enemy caster directly. Just make sure you have plenty of focus to do this.
4. 35 Point List
A. Composition
High Exemplar Kreoss (+5)
Fire of Salvation (9)
Revenger (6)
High Exemplar Gravus (5)
5 Exemplar Vengers (11/10*)
6 Exemplar Errants (5)
Errant U.A. (2)
Errant Seneschal (2)
Vassal Mechanic (1)
Total Points (35) * Signifies Tier Discount
TIER 2
B. Recommended Tactics
This is where the bonuses provided in the tier list really start to appear. The keystone of this list is High Exemplar Gravus. He prevents all Exemplars from being knocked down or made stationary, (Including Kreoss!), and can use souls from nearby slain warriors to fuel his already sick attacks. With the best non-Warcaster weapon in the Faction, Gravus can kill pretty much anything on 2 legs with Reverence. It also gives him a huge threat radius of 13”.
 When deploying, use the Errants to deny a flank to your enemy. Cram them in woods, if at all possible. With the Seneschal and the UA, they can’t be targeted by spells, can shoot through woods, ignore concealment and cover, have pathfinder, and really disrupt enemy abilities that key off of your models dying. (CRYX) When bolstered by Defender’s Ward from Kreoss, they become a true soak unit. Oh, and by the way, they have weapon master on their swords! They become a threat that the enemy cannot ignore. Therefore, you have already stolen some momentum from his advance, as he has to stop and deal with them! Also, with Self-Sacrifice, use their deaths to your advantage. Kill off the ones that are in Gravus’ command range, first, in order to charge up his soul tokens. In addition, try to position the Fire of Salvation near them so when one dies, he gets angry, and gets a free move and attack!
Your main threat vectors in this list are Gravus, the Fire, and the Vengers. Since you can position the Vengers during Advance Deployment, use this to put them opposite the Highest-threat models on the enemy’s side. Vengers can really put a hurt on when they charge, and you want them to draw a little fire, so they can get angry and use Battle-Driven! PS 16 charges with a 13” threat radius and pathfinder are a threat no enemy can ignore. As a fallback, if they don’t kill the biggies when they charge, use them to open up lanes of attack for the Fire and Gravus.
When deploying, use the Errants to deny a flank to your enemy. Cram them in woods, if at all possible. With the Seneschal and the UA, they can’t be targeted by spells, can shoot through woods, ignore concealment and cover, have pathfinder, and really disrupt enemy abilities that key off of your models dying. (CRYX) When bolstered by Defender’s Ward from Kreoss, they become a true soak unit. Oh, and by the way, they have weapon master on their swords! They become a threat that the enemy cannot ignore. Therefore, you have already stolen some momentum from his advance, as he has to stop and deal with them! Also, with Self-Sacrifice, use their deaths to your advantage. Kill off the ones that are in Gravus’ command range, first, in order to charge up his soul tokens. In addition, try to position the Fire of Salvation near them so when one dies, he gets angry, and gets a free move and attack!
Your main threat vectors in this list are Gravus, the Fire, and the Vengers. Since you can position the Vengers during Advance Deployment, use this to put them opposite the Highest-threat models on the enemy’s side. Vengers can really put a hurt on when they charge, and you want them to draw a little fire, so they can get angry and use Battle-Driven! PS 16 charges with a 13” threat radius and pathfinder are a threat no enemy can ignore. As a fallback, if they don’t kill the biggies when they charge, use them to open up lanes of attack for the Fire and Gravus.
 The Revenger is my favorite Light ‘jack. Deploy him on the opposite flank from your Errants, so he can run ahead and Arc Node fireballs from weird angles at the enemy. This will further disrupt his plans, as he must detail something to kill it. This is harder than it seems, for as long as his shield is intact, non-reach weapons will only get one hit in against him!
 To summarize, this is a very aggressive list, designed to win in 3-5 turns, if the timing is right. Be careful in battles of attrition, for while there is plenty of Positive attrition synergy in this list, there are relatively few models to expend. Try to jam in a charge lane as quick as possible, to enable the feat turn. If the opponent has your number on that, switch to smashing his big boys, spreading him out, and attacking from more angles than he can deal with.
5. 50 pt. List

A. Composition
High Exemplar Kreoss (+5)
Fire of Salvation (9)
Revenger (6)
Revenger (6)
4 Choir of Menoth (2)
High Exemplar Gravus (5)
5 Exemplar Vengers (11/10*)
6 Exemplar Errants (5)
6 Exemplar Errants (5)
Errant U.A. (2)
Errant Seneschal (2)
Exemplar Seneschal (3)
TOTAL POINTS: 50 *Signifies Tier Discount
Tier 4
B. Recommended Tactics
This list plays pretty much like the 35 point list, but more so! Another threat vector has been added, with the Tank-Like killing ability of the Exemplar Seneschal. Also, you can now button up the enemy in 2 places with 2 Squads of Errants. However, use the non-UA squad more as a skirmishing unit, rather than a soak unit, due to the lack of pathfinder and the Sacred Standard.
With the addition of the Tier 3 universal pathfinder, you can really cram it down the opponent’s throat on turn 1! In addition, you will have more focus to play with as you get free upkeep spells turn 1. Keep Kreoss protected, and take your opponent by surprise with a friggin’ MENITE force that can be 28” up the board on the first turn!
OVERALL RECORD OF LISTS AS WRITTEN
Following is a table of how each of the Lists I have described have fared, since writing this article. I will be updating this table as I continue to play games, to see and prove whether I am right or wrong. I will attempt to play 10 games with each caster, at each level, in order to give a good round percentage of how effective they are! If you would like to try these lists, yourself, post me the results of your games, and I’ll add them to the list!
PKREOSS 20 WINS:() LOSSES()
PKREOSS 35 WINS: 2(eStryker,pVlad) LOSSES()
PKREOSS 50 WINS() LOSSES ()