This tutorial shows a step-by-step process used by JB to make a two-piece mold using Alumilite Amazing Mold Putty and Amazing Casting Resin.
The finished mold will produce resin replicas of a Imperial Guard Griffon Mortar shell that I made out of bits and styrene. Unfortunately, Forge World doesn't make these shells and I want about 18 of them.
The first few pictures illustrate the materials used to make the two-piece mold:

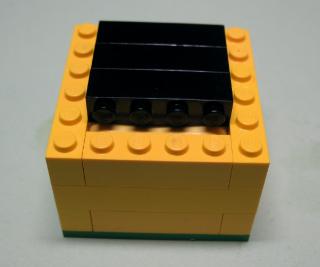
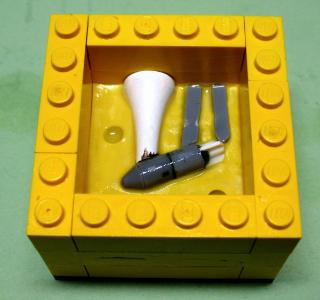
In the picture above, you can see the Lego mold frame, a Lego tamping block, a block of non-drying modelling clay, a wooden golf tee, bits of trimmed sprue, my original Griffon shell, and two small ball bearings AKA Daisy BBs (in an upside down 25mm round base to stop them from rolling off of my table).
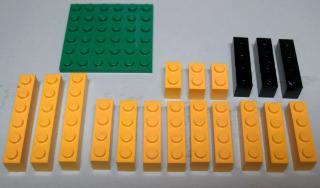
This second shot of materials better illustrates the type and quantity of Lego pieces, that I used to build my mold frame and tamping block.
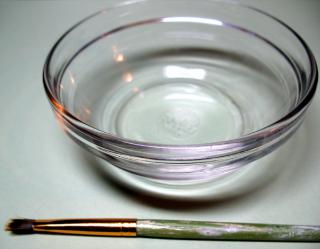
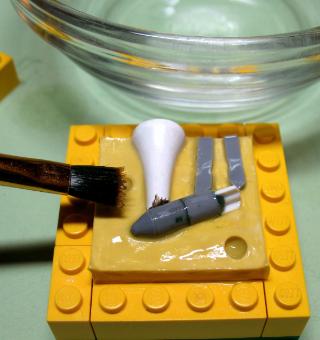
The picture above shows the bowl of light virgin olive oil and brush that I use to keep my mold putty from sticking together when I create mold side 2. You can use a mold release agent like Alumilite Universal Mold Release (UMR) if you wish.
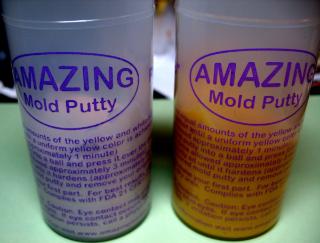
This final picture of materials for mold making shows the two components - A and B - of Alumilite's Amazing Mold Putty.
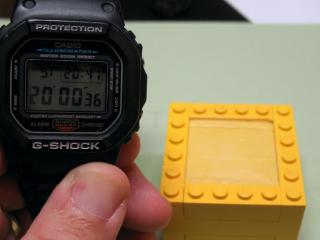
You will also need tools that will show up in later pictures: A craft knife or X-Acto blade that can cut through the golf tee, a pair of sprue cutters, a round file (optional), and a pen that can write on the tee. You will also need something like a stopwatch or clock to measure curing time (or demold time when we get around to casting).
When we do a test cast, you will need a mixing cup (paper or plastic) for the resin, a rubber band to hold the mold together, Alumilite's Amazing Casting Resin kit (which inludes the measuring cups and stirring sticks, and a nice surface to work on that will allow you to spill some resin.
Now that we've covered materials, it's time to begin making the mold.
First, we will build a nice clay base to set our originals in.
Build the Lego frame up to two levels and make a nice square piece of non-drying modelling clay that will fill about one and a half levels of the frame.
Next place the clay into the frame and use your fingers to push the clay around so that it firmly joins the sides of the frame and has a fairly level surface.
Now use the Lego tamping block (my black Lego pieces) to compact the clay even more and to make the clay nice and level.

This leaves you with a nice clay base to set pieces in.
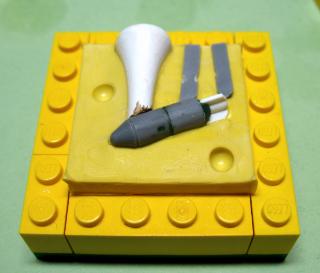
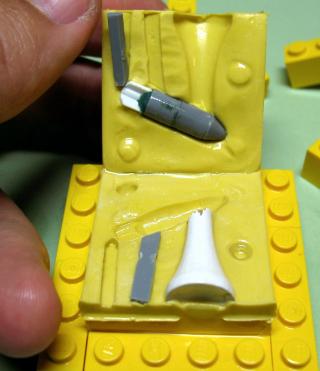
Now insert your sprue pieces to make air vent channels. I use two vents in this example. Note that they are placed at the highest points on the cast because these points are where air bubbles will become trapped in your mold. The vents open to the side that will become the top of the mold. You can lay out the pieces on top of the clay to figure out the right locations before pushing them about halfway into the clay. In this example, I pushed the shell deeper than halfway so that the tail fins would not have any gaps open underneath.
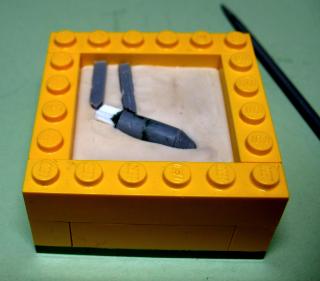
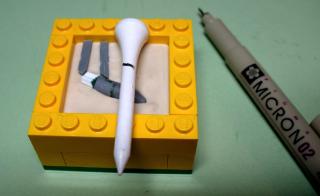
Next we need a nice large pour channel. I like to use a golf tee for this purpose as it has a nice funnel shape. It's also cheap. You can get broken tees at golf courses for free.
In this example I need a 45 degree slant on my tee so I laid it on top of the clay to measure and mark where I want to make my cut.
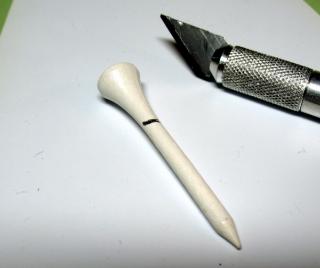
I used a heavier craft knife to make my cut. You could try to vise the tee in a miter box if you want an even more precise angle cut. I find that I need the fit close but not perfect.
Then we place the tee where we want the pour channel.

I've also added some small ball-bearings (Daisy BBs) to serve as register marks. These will help later in proper joining of the two halves of the mold for casting.
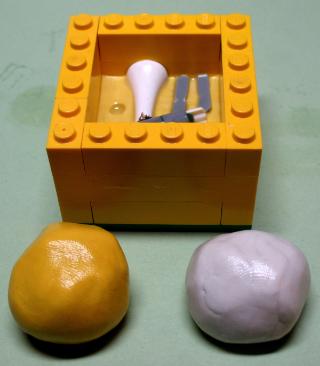
Now we are ready to make the first half of our mold. For this, we need mold putty. So we get an equal amount of component A and component B. I judge the amount visually. I suppose you could try to use a scale to measure by weight. I don't normally use a ruler. It's included to show you the approximate diameter of the balls of putty.

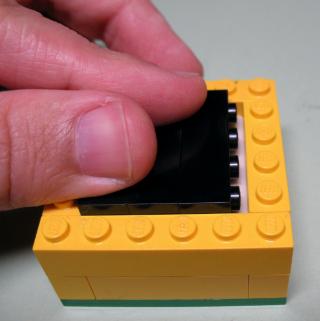
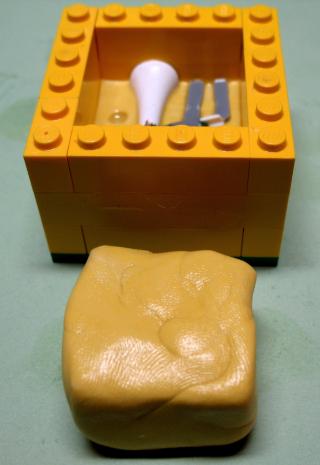
Now we build up the Lego frame to the third level and mix our putty. You need to mix it thoroughly by hand in less than a minute. Don't worry, it's easy. I shape the mixed putty into a small square that will fit into the frame.

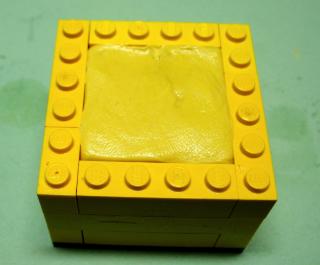
Now use your hands to push the putty down into the frame. Make sure you don't disturb your pieces set in the clay. Use your fingers to make the putty join the sides of the frame and get the putty fairly level. Then bring out the Lego tamping block and push the putty down firmly and neatly.
Now let the mold putty cure for a minimum of 20 minutes. Go to DakkaDakka and read blogs for a while. I usually let my putty cure for 30 minutes just to be sure.
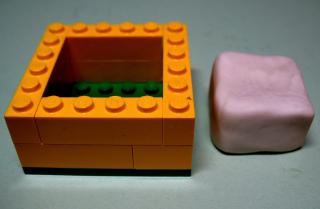
Once your putty is dry, take the Lego frame apart and separate your new mold side 1 from the modelling clay. Huzzah!

Now it's time to build the other side of the mold.
We no longer need the modelling clay so carefully remove your vent and pour channel pieces, your original model, and your register pieces (ball-bearings). Take the clay off of your Lego frame base and put your newly created mold on the base. Build the Lego mold frame one level high. Insert the vent and pour channel pieces and your original model that were in the clay into your mold. Make sure the side of the pieces fit snugly into the mold (this usually means that they face the mold just as they did when it was created). You no longer need the register pieces (ball-bearings). The new mold side will fill in the register holes and thereby make the other half of the register marks.
Now we completely cover the mold face with light virgin olive oil or an appropriate mold release. If you don't do this step, you will find that your mold sides will join together permanently. This will trap your original model in a solid block of putty. It's a bit like being swallowed by a gelatinous cube. You'll have to cut your model free. You'll gain experience points but I don't think you'll appreciate them.
Next we build our Lego mold frame up to three levels high again. Make sure your bricks are staggered so that one side doesn't just fall off.
Now we repeat the process with mold putty that we used to build the first side of our mold. First, we create the equal sized putty balls of component A and B.
We thoroughly mix the putty and make a square block that will fit inside the mold frame. The block in my example is a little too large so I removed a bit of it.
Use your fingers to get the putty to join the sides of the frame and to make the putty fairly level.
Now I use my Lego tamping block again to push the putty down firmly and neatly. You don't have to push too hard. If the sides of your Lego frame start buckling outward, you are pushing way too hard.
Now we wait again for a minimum of 20 minutes. I like to wait 30 minutes. Go read DakkaDakka again. :)

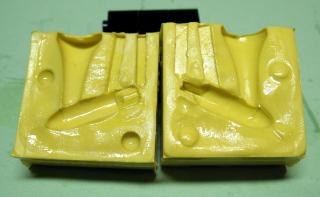
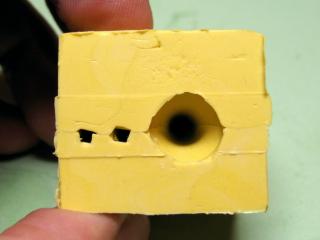
After the mold putty has cured, remove your Lego frame and separate the two halves of the mold. This is the first moment of Truth! ;)
Ahhh...sweet success! Now you can remove the vent and pour channel pieces as well as your original model.
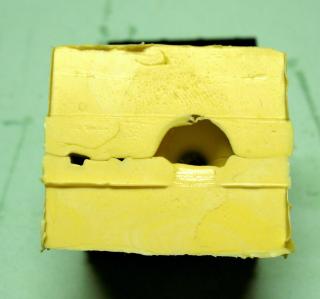
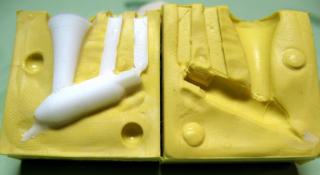
Take a good look at your completed mold and see all the places where a little putty is partially blocking your vent and pour channels. Look inside...
...and look at the top of your mold with both halves joined to see if the vent and pour channel openings are clear.
In this example, I'm not happy with the channels so I get a round file and my sprue snippers. I occasionally use the pointy tip of the round file as a scribing device to clear a small blockage. Most of the time, I use the snips to clip the blockage out. The file is more likely to tear the mold's surface. The snips do a much cleaner job as long as you are careful. Don't clip parts of your mold that aren't part of the blockages.
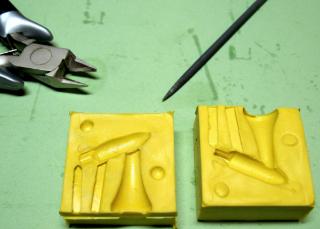
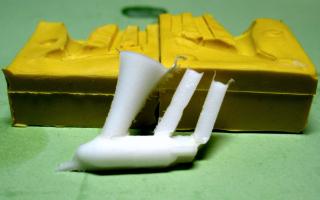
Below we see the mold after clipping. Note how much cleaner the channels are now.
Now you can wipe off the olive oil so we can do a test cast.
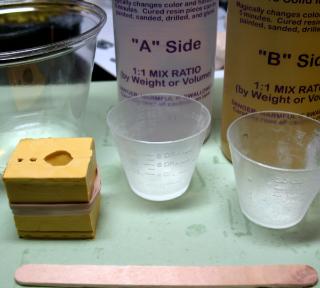
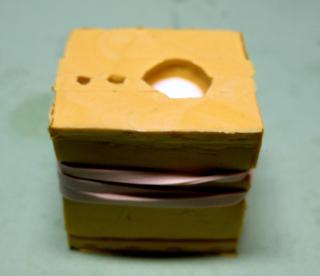
In order to do a test cast of the new mold, you'll need a good surface to work on that can handle drippy resin. I like hard plastic (free comic book dividers from a friend work nicely) or a cutting mat. You will also need casting resin. I use the Amazing Alumilite Casting Resin that is made to work with the Amazing Mold Putty. You do not need mold release if you use this type of resin with this mold putty! Get one paper or plastic cup to mix resin in. Measuring cups and stirring sticks come in the kit with the resin. Also obtain one fat rubber band (thin ones tend to bite into the sides of the mold).
Put the mold together and wrap the rubber band around the two halves of the mold. It doesn't need to be super tight. It just has to keep the mold halves firmly in contact with each other.
Now we get equal amounts of resin component A and resin component B. I labelled my mixing cups A and B respectively so that I never get the wrong component into my reusable cups. The amount I used for this example is 1 Dram of each component. The measuring cups are marked for Drams, tablespoons, CCs, MLs, and fluid ounces. One Dram of each component works for me and always leaves me with a bit extra to pour into some one-piece molds I have lying around.

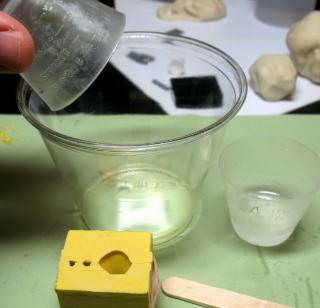
Pour each component into your clean mixing cup one after the other. Don't waste time waiting for every last drop to pour out. You don't have time to waste. The Alumilite instructions tell you give your 40 seconds for mixing and 1 minute to pour. I go faster when I have multiple molds to fill.
Use the stirring stick to mix your resin. Mix it thoroughly. It normally takes me 20 seconds. I can smell the chemical reaction (the resin components usually don't smell too strong), and I can see the mixed liquid get a little grey so that you can see the swirls. The grey swirls go away as the resin becomes well mixed and your cup looks clear again. Now you're ready to pour the resin into the mold.
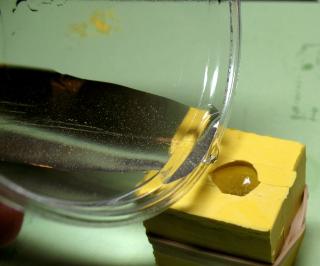
The nice round pour channel makes it easy to get the resin into the mold. Pour until you fill the pour channel. The level of fluid will drop as the resin flows into the mold. Add more resin until you see the liquid coming up the air vents in the mold. You do not need the liquid to rise to the top of the air vents! If you can see the liquid rising in the vents, you can stop adding resin to the mold. Now you should gently tap the mold to make the resin settle and get air bubbles to move out.

Now let the resin cure for about 10 minutes. If the air is very cold or humid in your work area you may wish to wait longer to allow the resin to fully cure. The instructions say that the demold time (time before you can open the mold) is 5-10 minutes. With the small pieces that I make, I find that less than 10 minutes is too soon. The pieces will be soft and will bend when you open the mold. If they continue to cure with those bends in them, you will have to live with mutated models.
Another sign of a mistake is shown in the picture below. See the resin bubbling out of the mold. This means that the resin was poorly mixed or had an improper ratio of components. It will cure into resin that has lots of large air bubbles and which is very weak.
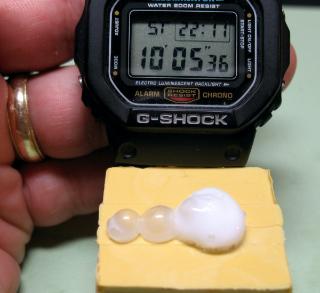
Good resin rises a bit and turns an appropriate color (white in this case) without the massive number of air bubbles. You can see this in the picture below.
After curing, we can open the mold and see if the casting is fully formed. Sometimes a mold will have recurring air bubbles which will require you to improve your vent channels. Let's look at this one.
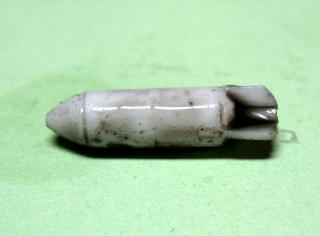
Our test cast is successful. It turns out to be a good mold with no nasty air pockets. Now we pull on the resin in the vent and pour channels to see how firm the resin is now. If it is still soft, we let the casting cure longer. Once the resin is hard, we pull the new casting out of the mold.
Since the white resin makes it difficult to see any detail. I trimmed the casting and washed it with Badab Black to make the shell more visible.
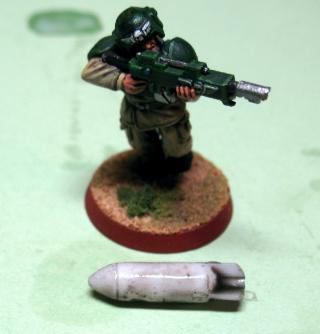
Finally, I'll show you the size of the shell in relation to one of my Cadian soldiers.
Thanks for reading. I hope this tutorial helps you to successfully experiment with creating two-piece molds that you can use for casting with resin.
This tutorial was originally posted in the DakkaDakka Painting and Modeling Tutorial section as an entry for the "Get Your Teach On" contest.
You can see the original thread here. It includes a bit of commentary on two-piece mold making and some useful links to examples of more advanced mold making.
For more information on casting, see BLACKHAND's excellent tutorial thread.
Other good casting threads:
Warfrog's Hobby Blog (three tutorials)
He posts on Dakka Dakka as theunicorn.
Sersi casts demons.
BrotherArgos casts Steel Legion.
Ambull sculpts and casts an Ambull.