posted by Panic
This is a guide to Quickly painting Craters.
I've found that a black edge looks ok both on a flocked or urban gameboard.
Get Ready!
So I got a Painting table ready- I have a 3' x 4' board that is my city fight board on one side and my messy paint-table on the other!
So i used:
- large household paint brush
- large acrilic brush
- Acrylic Paint from WHsmith black white brown and tan (you could use GW paint but it will use up alot!)
- some GW paint and inks - green brown and black inks plus red gore
- plate / paint pallet
- water glass with tiny drop of washing up liquid
Step 1 - Spray Black
I used a brown almost black quick dry spray from my local DIY shop.
you should do this in a well ventilated area, I did this outside, (so that my house didn't stink of spray...)

Get your production line ready!

Step 2 - Drybrush Dark Brown
I mixed up the art supply acrylics..
the reason for both balck and white paint here is to add grey to the mix, I found the brown a bit rich wanted to dull it down a bit.

Mix it up!

and drybrushed (the paint was slightly wet) straight onto the crater
no messing about... get invloved

and it'll look like this...

Step 3 - DryBrush Light Brown
mixing in more tan and white to the mixing plate

again drybrush.. but not drybrushing as heavy... just pick off the more raised bits.

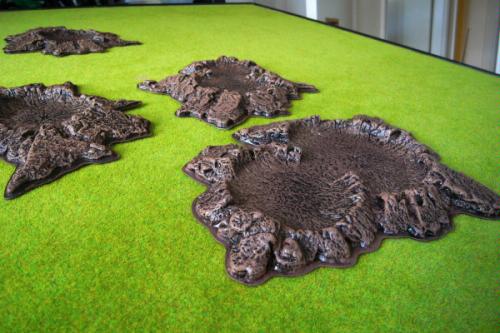
If you stopped now it'll look like this on the table... not too bad huh?
on the plus side stopping here, the crater will sort of match in on a battlefield and on a urban board...
Step 4 - washes
i mixed up a custom wash, this makes a more runny wash that will cover the area quicker.. and saves money
I mixed i fairly equal parts green ink and brown ink some black ink (not too much) and a few table sppons of water with washing up liquid and a drop of red gore (mostly this was because the mix wa looking a bit green... I could have used red ink... meh)
the ammount you see here only covered 5 craters.. So I mixed two batches and used up about a third of each pot of paint...

this took about a hour to dry... so I went and did the dishes and had a glass oof pepsi...

Step 5 - dark grey base coat
i used a mixing plate that looked like this while doing the grey parts of the urban craters.
For each painint stage once the tone was right, i tryied to keep the tone of the grey paint in the middle of the plate consistant while i painted all five craters...
I used the water with the washing up liquid in it to keep the paint easier to work with... but not too much or it gets runny...

I painted the edge s and middle of the crater black
I picked the large flat areas that looked like tarmac/ concrete ripped up by the blast and painted them dark grey.
I was pretty heavy with the paint here as i wasnted no brown showing through the middle of each grey area...

Step 6 - Medium Grey Hightlight
mixing more white into the middle of the plate i drybrushed a medium grey highlight onto the grey parts of the crater.

Step 7 - Light Grey Highlight
Mixing yet more white into the middle of the plater i drybrushed onto the edges of the grey parts of the crater.

Soo umm... yeah... that's basically it...
PM me if you have comments or need more details?
Finished - Some craters in action Battle Photos
here's some photos of the craters being used in games


In this game two chaos Rhinos were travelling along the road, the first rhino exploded leaving a crater.
this provided some cover for its surviving PlagueMarine passangers.
Next turn The Second Rhino crashed into the crater and was imobilised.
Anyways that's it hope you found it useful...
Panic