11330
Post by: Gundam-Mecha
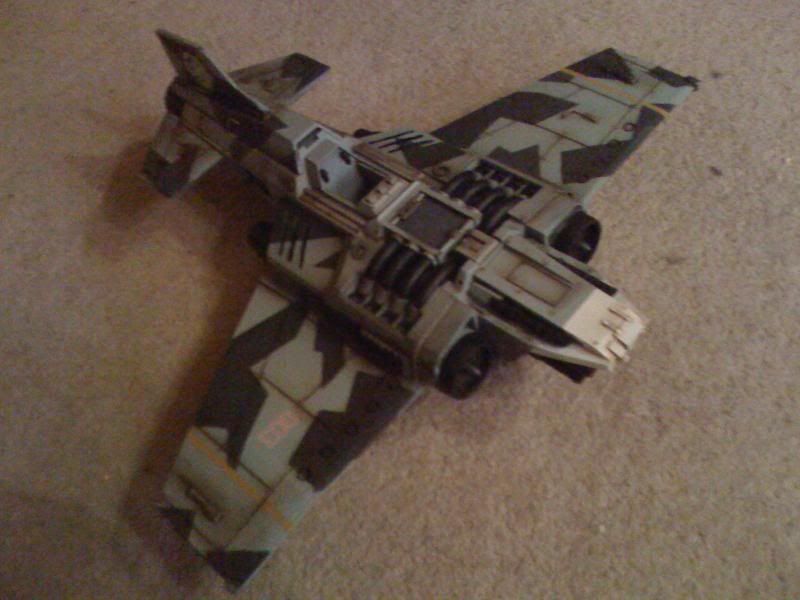
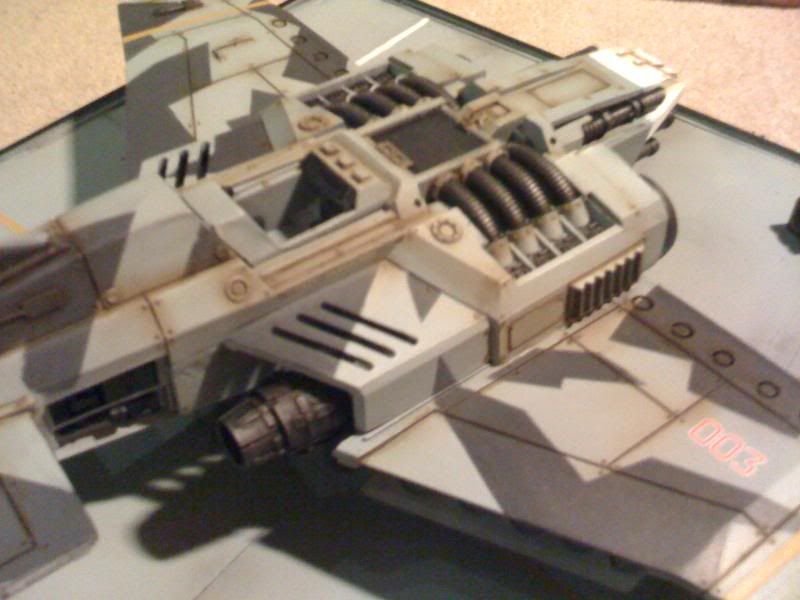
For Christmas I got a Thunderbolt as a present so I decided to really go to town on this forgeworld piece and make a full blown landing strip diorama on a nice scenic base.
Having recently purchased the Imperial Armour Modelling Masterclass book I felt inspired and decided to branch out into some new areas and techniques which I hadn't tried before. The book is fantastic actually, I'm normally sceptical of GW painting guides but as usual the forgeworld books are really a class apart.
I also spent alot of time reading books and magazines on scale modelling techniques and especially the work of Mig Jimenez, as well as a great deal of reference material, photos of modern and past military aircraft as well as deck crews and airfields.
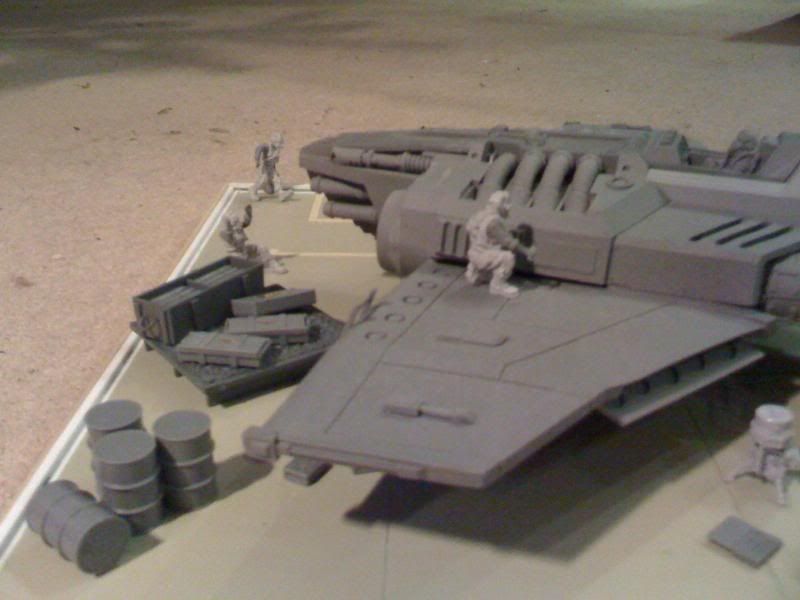
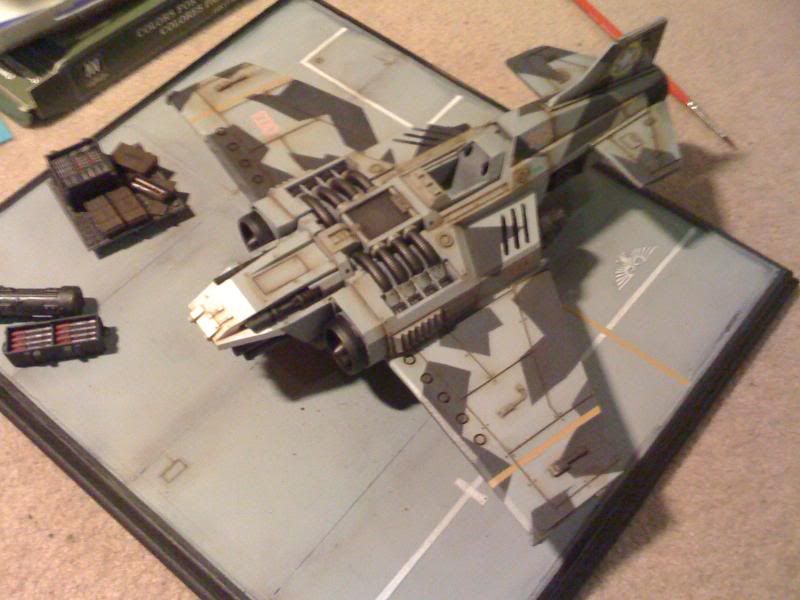
The Diorama consists of 4 main elements, the Thunderbolt fighter itself, a deck crew of four, two pilots (one seated in the fighter and one on the ground), and scenery. These were made up from GW, Forgeworld, and Tamiya kit pieces along with plasticard and scenic material from model train suppliers.
Step 1:
Washing and cleaning up all the kits. The Ground crew are made up from conversions of forgeworld Elysians and Tamiya 1:48 scale plastic military scale kits. I've also used a forgeworld Limited edition Thunderbolt pilot (available only via events), and the forgeworld Thunderbolt kit itself. So as you can imagine there was a lot of resin cleaning to be done! Some Hot water, a toothbrush, rubber gloves, and some Cif mild abrasive (jif) cleaner later the components were all sparkly fresh and ready to work with.
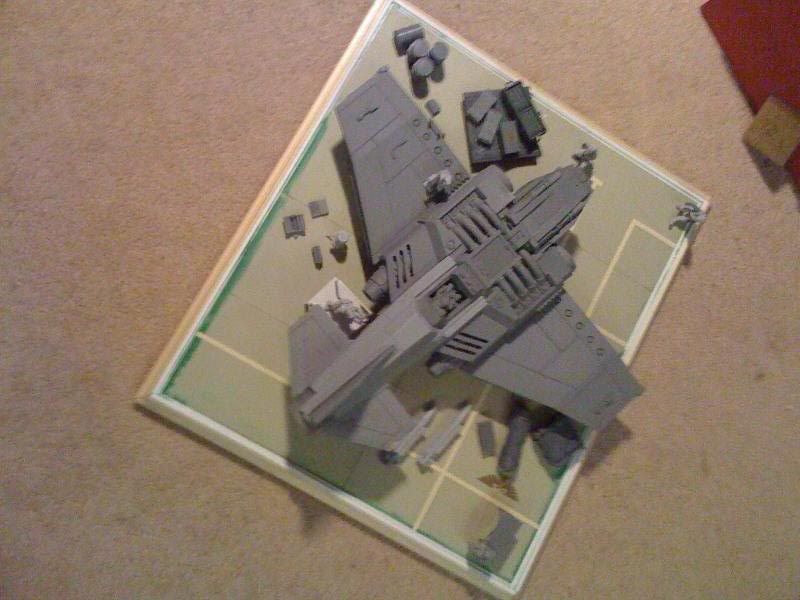

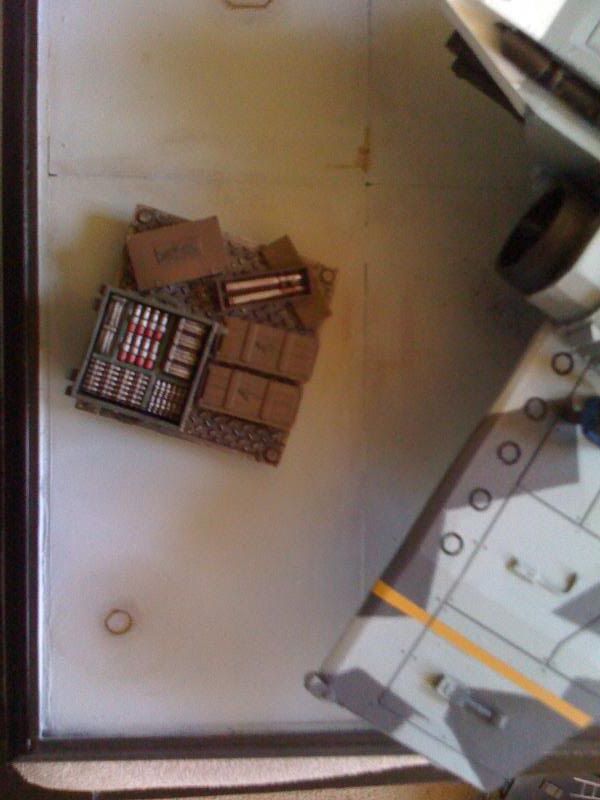
The first step was build the base, I measured both the length and wing span of the Thunderbolt prior to construction and cut an appropriately sized piece of chipboard. I then cut some beading strips from a local DIY store to size and attached these to the edges with PVA glue to give the base a nice presentable edge. You can buy ready made specialist wood bases (such as those used for trophies and via specialist model stores, however these are usually very expensive and for a fraction of the price you can produce the same effects yourself.
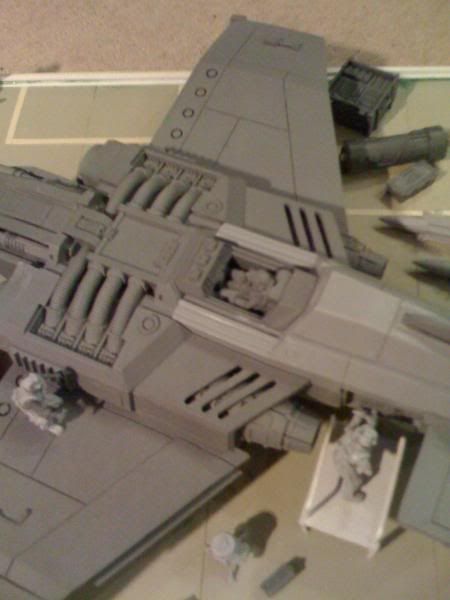
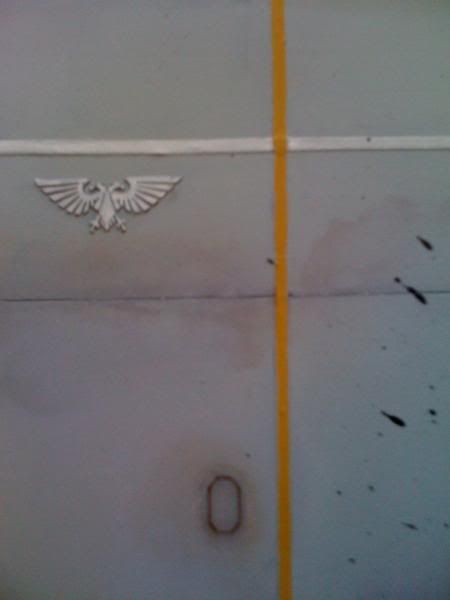
Once the basic shape was set out I placed the plasticard tiles onto to the base to make the surface, filled any gaps with pre mixed modelling filler, and used plasticard strips to tidy the edges. The tiles were textured, I picked them up from a model train supplier, they also allowed me to create a natural looking airfield tarmac effect as they were individual slabs that left gaps around the edges. This saved me having to panel scribe lines into a large sheet of plasticard and gave a nice interesting breakup pattern to work with rather than one large featureless area. Once there had dried in place I moved onto adding some surface details such as panel scribing flaps and little hatches into the floor surface and adding an Imperial Eagle (Forgeworld brass etch). I also cut thin strips of electrical tape to make the painted lines on the tarmac as they gave me a nice raised profile from the surface than painting alone lacked. Again this added detail and some variation for later painting and shading.
Close ups of the build
11330
Post by: Gundam-Mecha
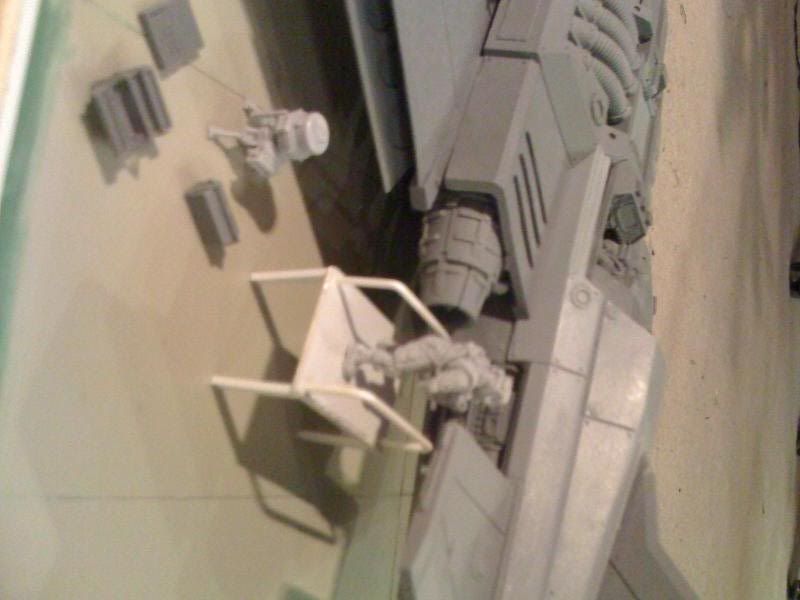
Some more close ups of the building stage:
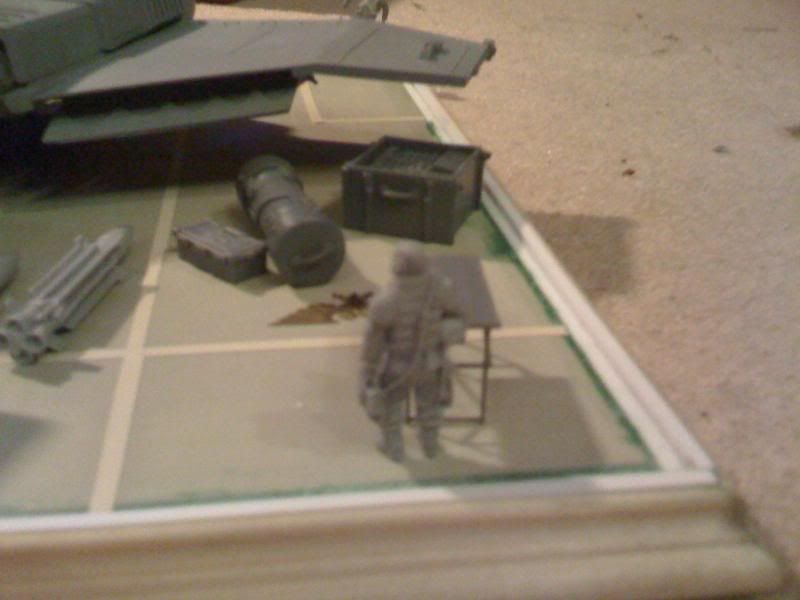

Apologies for the low quality of these photos, I didn't have my digital camera with me at the time and had to rely on my mobile phone camera. They should still be able to give an idea of the layout even if the figures are somewhat out of focus.
10339
Post by: tallmantim
Hey - that's ace!
Love it - always worth going the extra mile on special pieces.
11330
Post by: Gundam-Mecha
Thanks Tallmantim
It's just a dry run at this stage, to get a feel for the layout and try some variations. I'm painting the components seperately from the base so the final position and layout of the scenery might change a little on the finished article.
I'm actually halfway through painting now and will post some WIP painting shots shortly.
11330
Post by: Gundam-Mecha
Stage 2:
Straight into the painting! As I mentioned earlier I decided to try some new techniques on this diorama, so after experimenting recently with the GW Spray Gun I decided to go the whole hog and get myself and airbrush and a compressor.


The airbrush is a Badger 200, nothing fancy but a good solid airbrush for most uses.
The painting on the fighter itself will be a mixture of airbrushing, brush painting, pigments, dry transfers, oil washes thinned with turpentine. I really decided to try all of the various techniques explained in the Imperial Armour book and even used washes mixed from Citadel Inks and Klear floor cleaner!
Some of the paints I used included Vallejo Model Colour, Citadel Colour, Citadel Foundation, Oil paint, Artists Gouche, Citadel washes, Inks, Mig Pigments, Tamiya weathering master, Tamiya Thinner.
11330
Post by: Gundam-Mecha
First stage painting:
First off I worked on the base, after an undercoat of citadel Chaos Black spray I went at it using the airbrush to do the large areas and blend in the colours, building it up in multiple coats of grey.

I then moved onto to Thunderbolt. For this I didn't use Citadel Spray, instead I primed it with a Primer called Mr Resin. This is produced by a Japanese firm Gunzo Sangyo (or something!), and is a specialist primer for resin kits offering better solvent strength and bonding to resin than GW's standard spray.
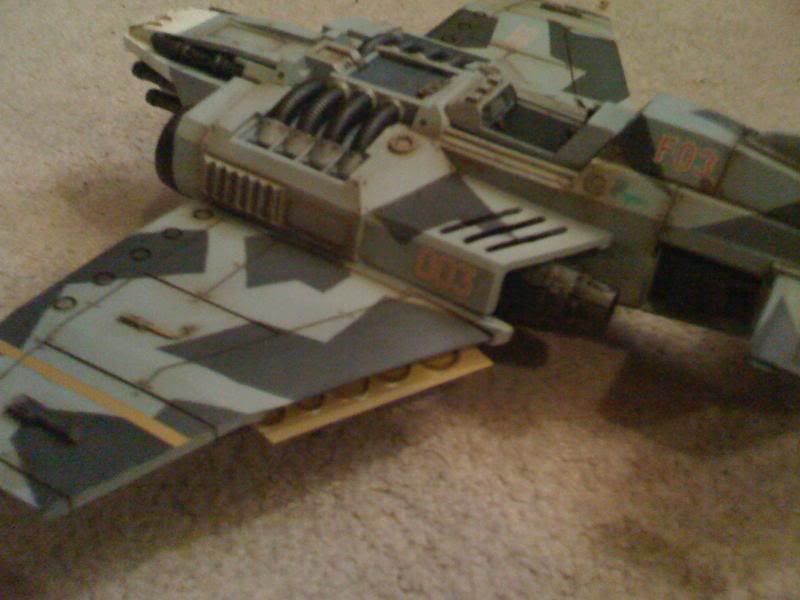
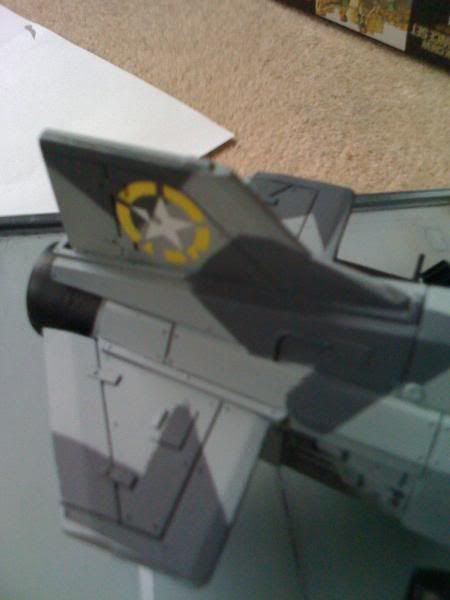
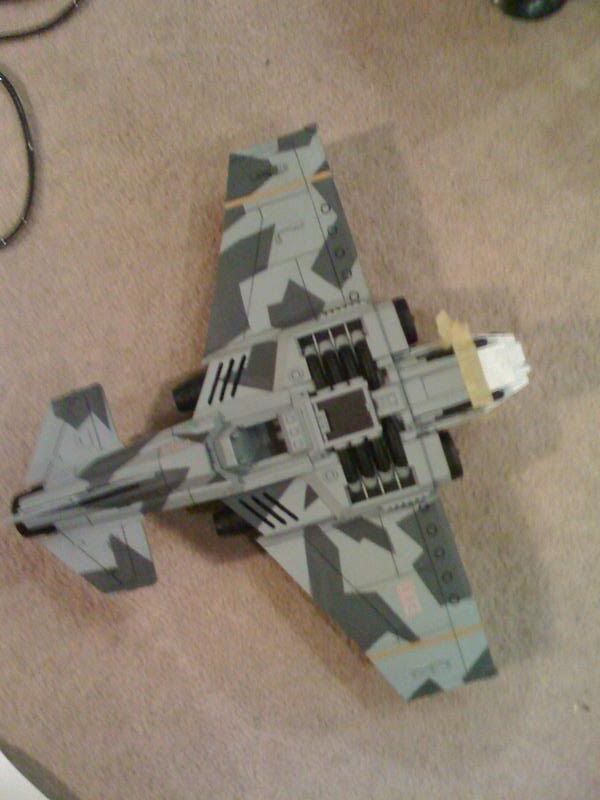
Once this was dry I covered the Thunderbolt with a coat of Adeptus Battleship Grey Foundation paint, thinned and applied with the airbrush. After the base coat had dried I moved onto the Camo pattern.

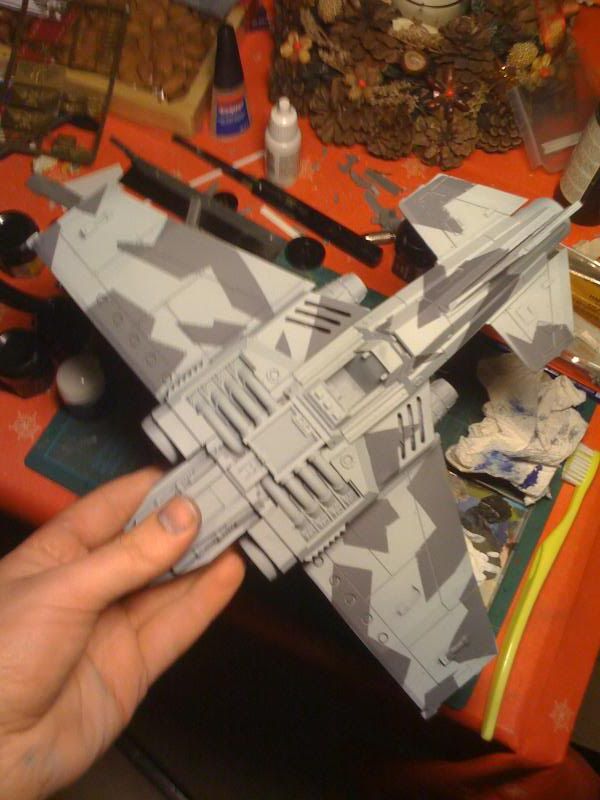

This was applied by carefully cutting peices of masking tape to the desired shape with a scapel blade and masking the areas I wanted to leave dark grey. I then once all the tape sections had been layed gave the model a coat of Astronomican Grey foundation paint thinned and airbrushed. As you can see once the paint had dried and the tape was removed it leaves you with very clear crisp camo shapes. It's a little messy at some edges where there was masking tape bleed at this stage but that will be corrected and tidied up later in further painting stages.
10890
Post by: Deff Dread red Edition
Very cool,I like it!
11330
Post by: Gundam-Mecha
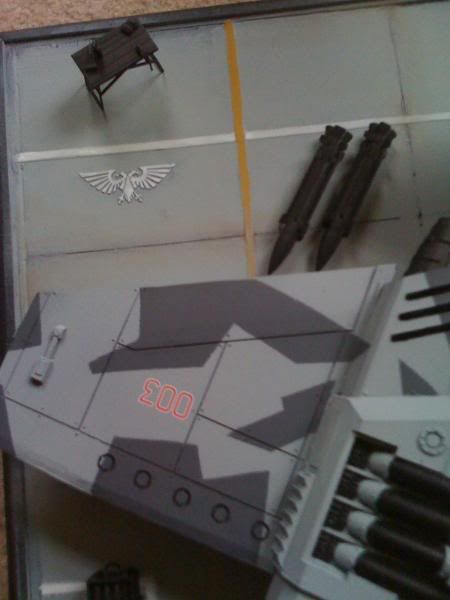
Heres a shot of the basic colours and some more work on the base.

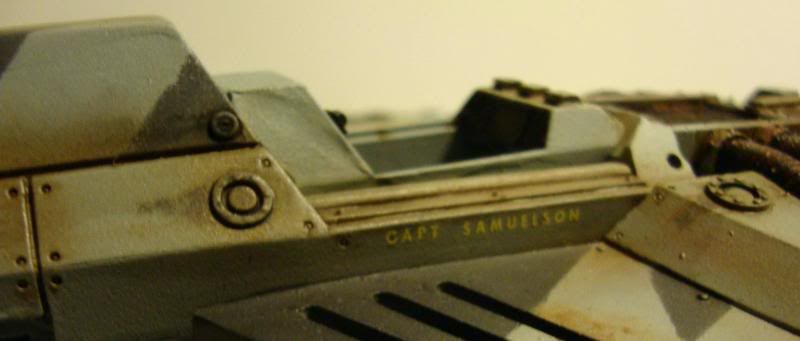
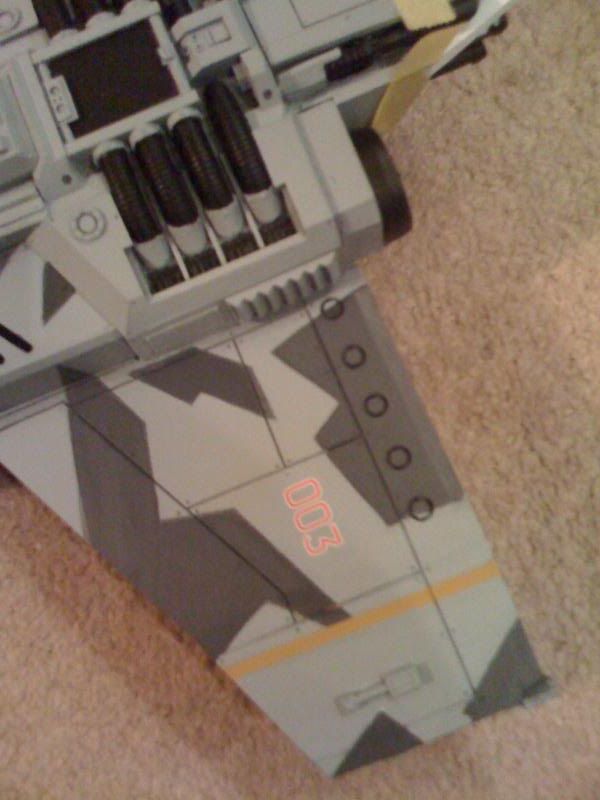
Building up on the fighter, areas of detail were picked out and dry transfers were applied for serial numbers and flight markings etc.
I used dry transfers because unlike wet ones they leave no silvering when applied, no nasty shining or obvious evidence of a transfer. The transfers I used were from Archers Dry Transfers a compnay who specialise in modern and WW2 military scale kits. It's a bit of an assortment of different generic misc WW2 logos, with ideas coming from Imperial Armour Volume one in terms of what to add and positions.


10392
Post by: Paul Atreides
o_O
That is so beautiful.
Wasn't there an old diorama made in the gw studio about the same?
11330
Post by: Gundam-Mecha
Paul Atreides wrote:O_O
:_:
That is so beautiful.
Wasn't there an old diorama made in the gw studio about the same?
Thanks Paul!
As to an old diorama I'm afraid I wouldn't know. I've never visited the studio or even Warhammer World, and I don't remember seeing any photos in a magazine or online. I based this one off different reference photos of real life airfields, but I guess the Studio could have also done something with a Thunderbolt as well.
11330
Post by: Gundam-Mecha
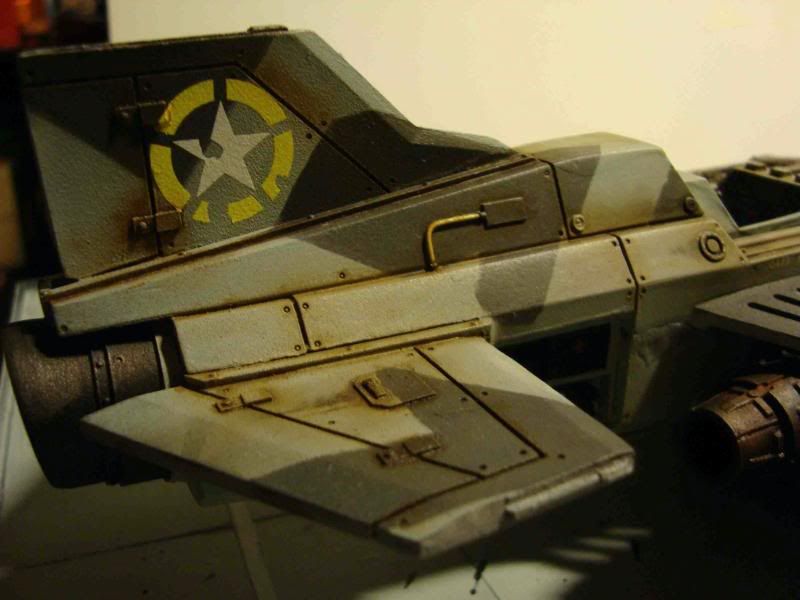
I moved on next to some more detail work on the fighter.
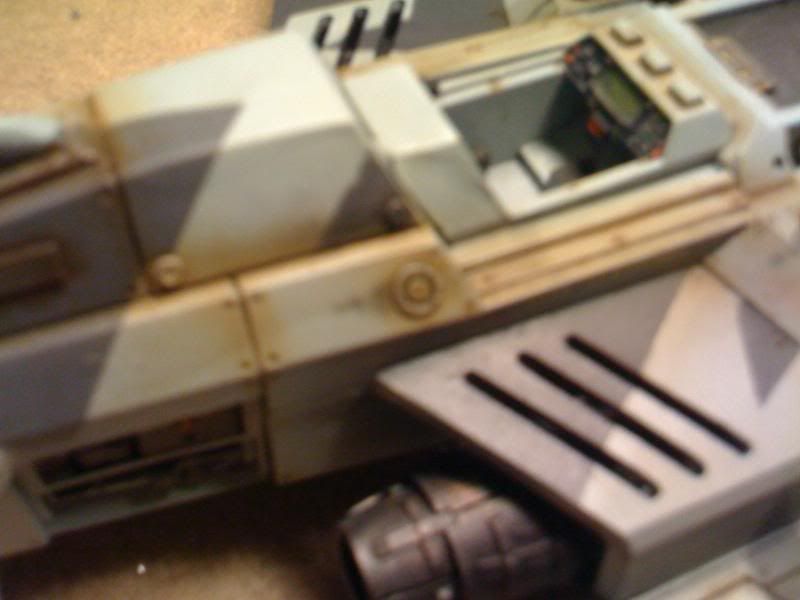
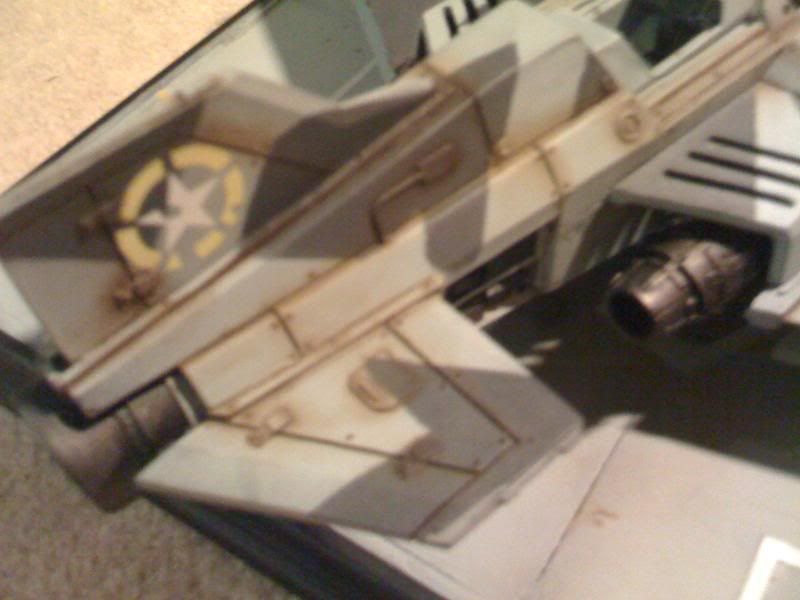
Following the examples from my reference photos I Painted the nose white and added yellow stripes to the wings to give it a bit of colour and some more authenticity.
The nose was masked off with Tamiya modelling masking tape and brush painted with Vallejo Model Colour white. The Vallejo white is a great white and coveres really nicely, however it still needed to be built up in gradual thinned layers to give a smooth and even coverage.
I also used the masking tape to mark out the yellow stripes which I then airbrushed with thinned Iyaden darksun foundation paint. The yellow foundation paints don't give great coverage so this was done in multiple light coats to get a solid colour. Once dry the tape was removed and and bleed was tidied up with a brush.
If you're going to use masking tape for model painting I definately recommend investing in some Tamiya tape, it's specifically for models and small applications and masks much better than general DIY masking tape that allows much more colour bleed into the areas where you dont want the colour to go!
11330
Post by: Gundam-Mecha
5503
Post by: SPARKEYG
Well done sir. I can't wait to see how this turns out.
11330
Post by: Gundam-Mecha
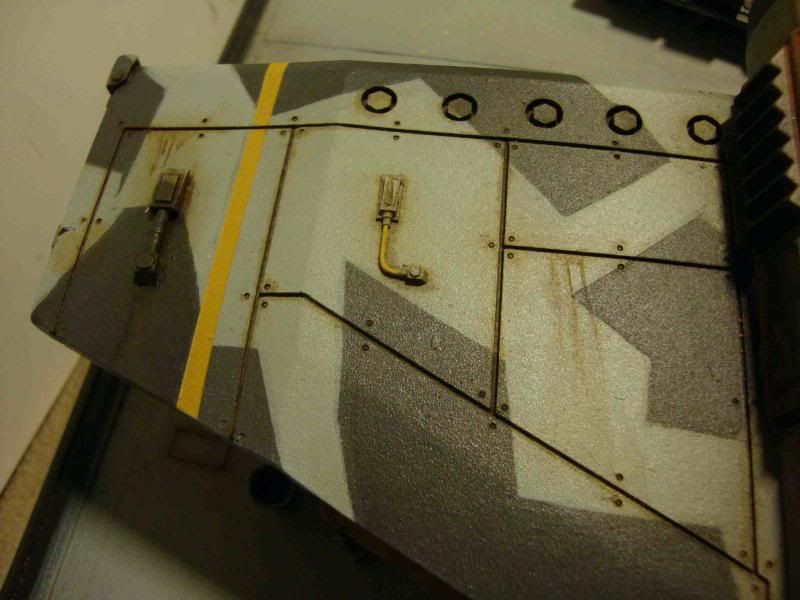
Next up I moved onto weathering the base and building up the tarmac.


The blending, shading and oil and grime were done with a mixture of Burnt Umber Oil paints thinned with Turpentine, and airbrushing. I also used a modelling wash on the etched hatches and details by a company called pro modeller. When using Turpentine make sure it's odourless or your give yourself a rotten head ache!
I used a reference picture of a tarmac airfield from a scale modelling magazine for the final effects.
9505
Post by: CaptainRavenclaw
This looks incredible...keep up the great work. I hope the ThunderBolt sees some use in a battle also!
11330
Post by: Gundam-Mecha
Thanks for all the positive feedback guys! Much appreciated!
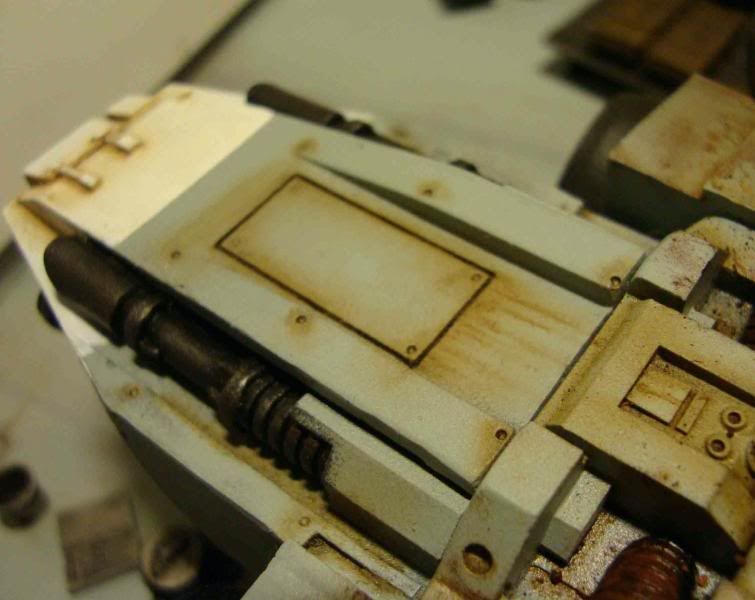
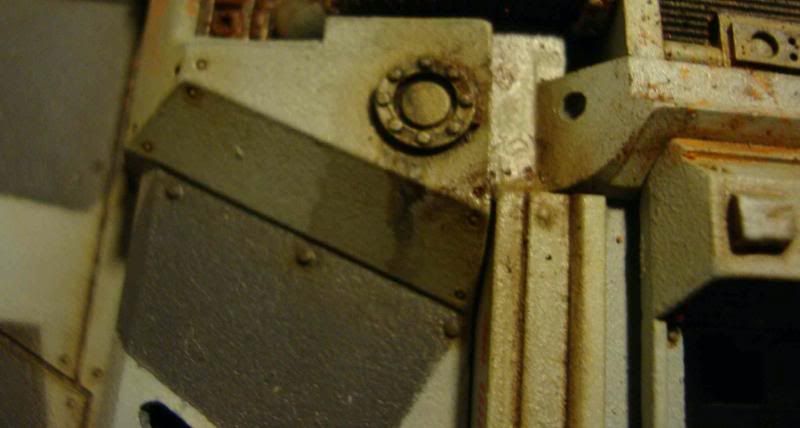
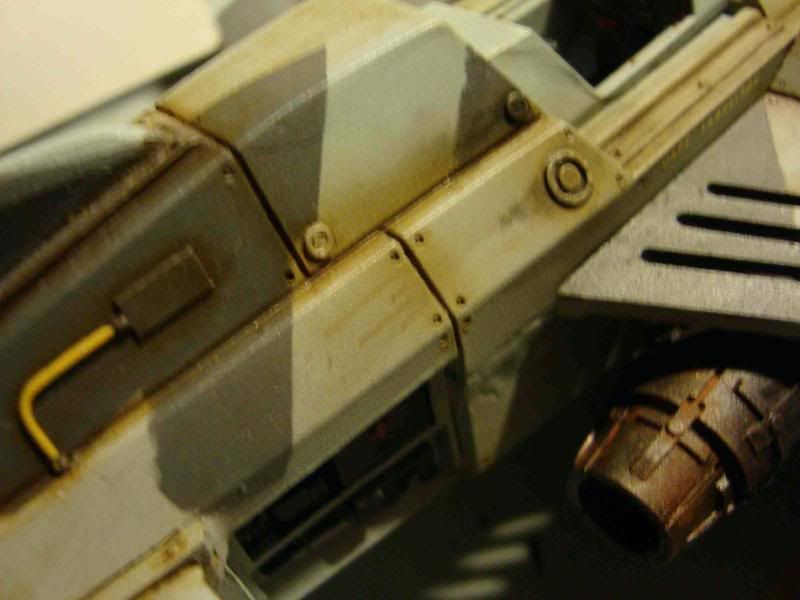
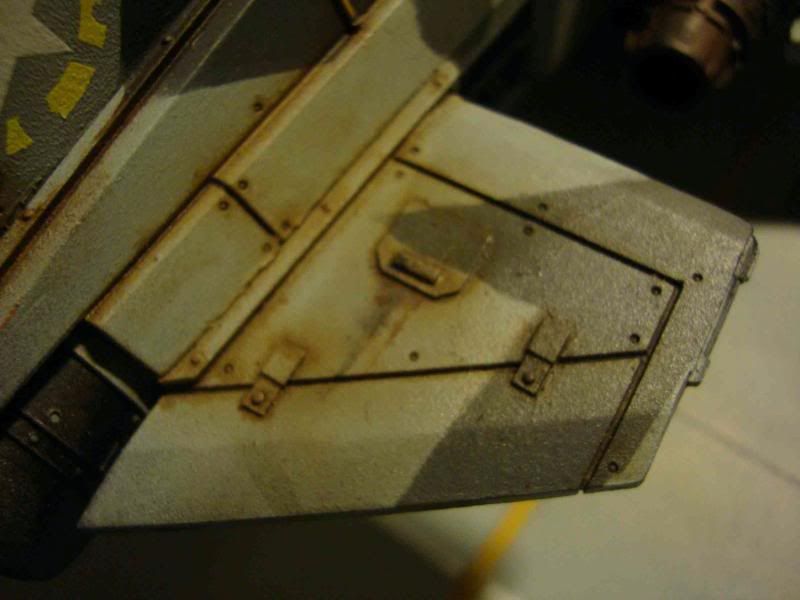
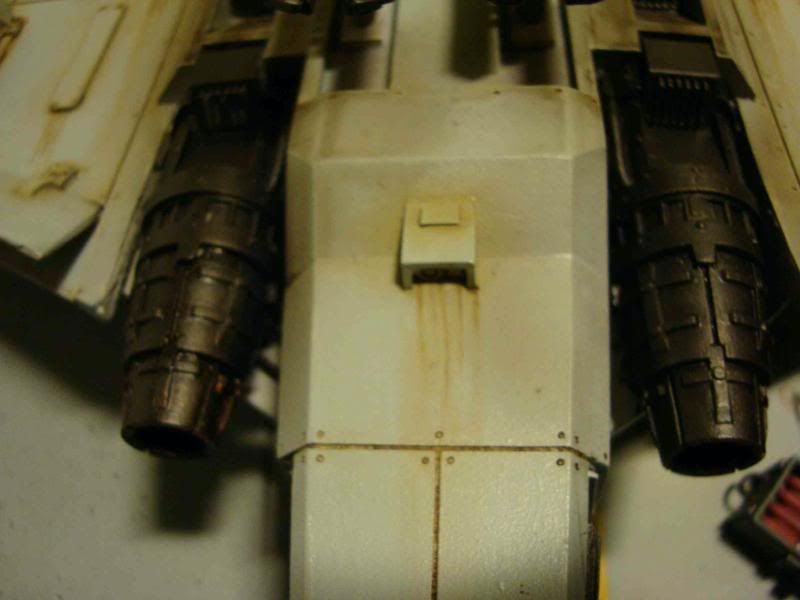
Weathering the Thunderbolt:
Now that the basic colours, and decals were added to the fighter it needed some work to take off that factory fresh look. I wanted to give the Thunderbolt the look like it was in active duty under service in the middle of a long gruelling campaign.
So like the tarmac I gave it some washes with thinned burnt umber oil paint.
The whole model was sprayed with Purity seal first (any varnish will do though)
and when dry given a wash around the panel lines, rivets and details. Once the thinner had evaporated I blended the oil paint into the surface using a small and large drybrush. The purity seal helped the blending process, and any messy areas could be tidied up with thinner or turpentine.
Close ups

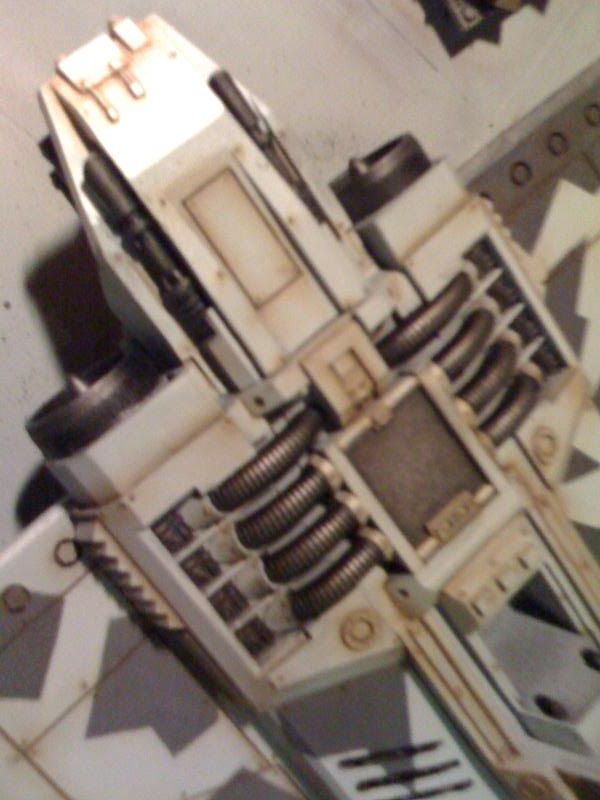

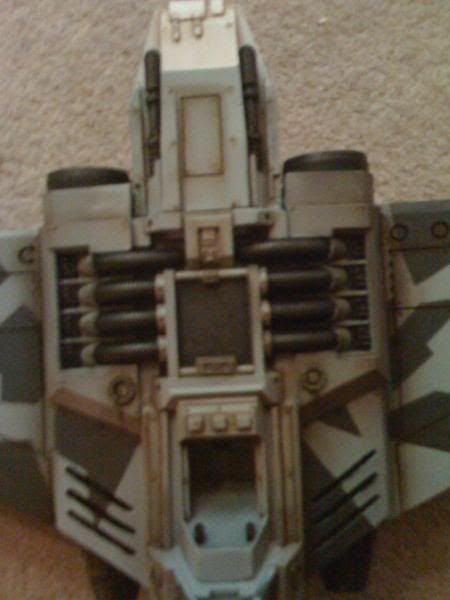
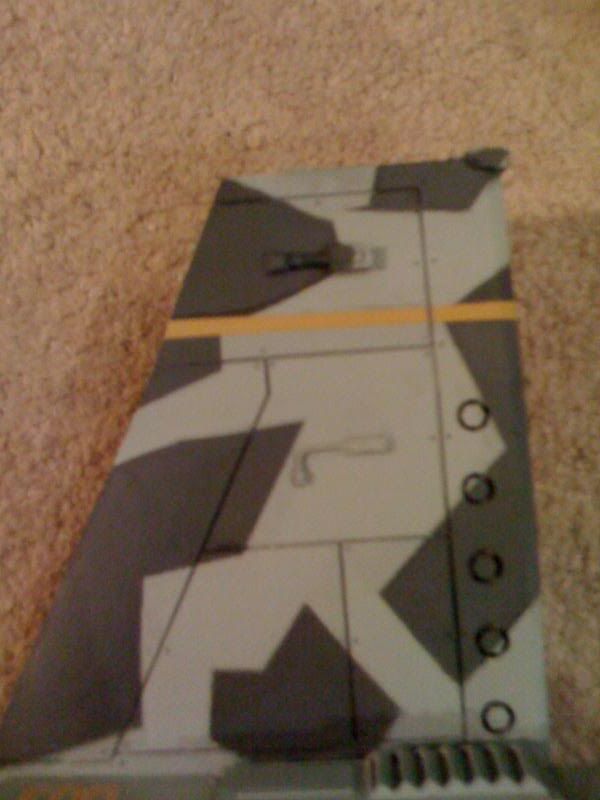
Tail fin
The silver work on the engines, jet turbines, and gun barrells was done by grinding pencil lead into a fine dust and rubbing the graphite directly onto the model with my finger.
This gives the metal a really nice metalic dirty effect thats hard to do with paint alone.
6274
Post by: porkuslime
OMG.. it looks a LOT like WW2 era photos..
that is just beautiful (in a manly manner)
-Porkuslime
105
Post by: Sarigar
Wow. This is an amazing piece. Are the groundcrew also FW models? Thanks for posting such great work.
2889
Post by: Jin
Looks absolutely stunning. Can't wait to see the completed thing.
11318
Post by: ollieholmes
I do alot of airbrushing and it is very evident you have read alot and taken it all in. She looks lovely, i hope you airbrush more models now.
As for the diorama i realy like the theme and you have kept it simple which works for me.
11330
Post by: Gundam-Mecha
Thanks guys, the ground crew are forgeworld Elysian drop troops from the lascutter team set, they have been converted with Tamiya 1:48 scale figures. The pilot standing is also forgeworld.
I'm glad you liked the WW2 vibe, that's what I was hoping to get across 
Thank you also for the compliments on the air brushing. It is my first kit using an airbrush so I'm glad it worked out I did a lot of practice on sheets of paper first!
9505
Post by: CaptainRavenclaw
Graphite grinding=pure genius
I'm gonna put some in my coffee! I hope it helps me paint as good as you!
7632
Post by: Ghost in the Darkness
Is this plane going to be removable for Gaming purposes.
844
Post by: stonefox
So which Golden Demon competition will this be placing in?
9644
Post by: Clthomps
That thing looks terrible!
Feel Free to send it my way and I will get rid of it for you 
11330
Post by: Gundam-Mecha
@ s.j.mccartney Thanks but I can't recommend it, the taste might be a little sharp
@Ghost in the darkness, the plane won't be fixed to the base as such, but I don't intend to use the thunderbolt for gaming (well not this one at least). I preferred just to make it a diorama for modeling and painting purposes.
@ stonefox actually I had just painted this for my own enjoyment, I never really thought about any competitive elements. But hey if I'm happy enough with the end result a Forgeworld best of show might be a cool idea as an entry. The issue for me with Golden Daemon is having to attend Gamesday to enter the models. To be honest Games Day doesn't really appeal to me as an event to visit. Perhaps some other comp though, or a scale model thing or something like that.
@ Clthomps totally! Thanks for the offer of support!
Today I'll be working more on the ground crew and pilots. Here are some reference photos that I'm working from (these are from a modern US aircraft carrier example).


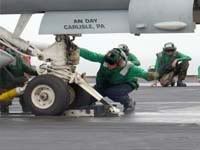
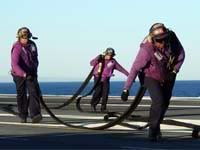
A deck crews role on the deck is identified by the colour of their jersey. Purple for aviation fuel, Green for ground support equipment, Blue for plane handlers etc. In this case it will be marked out further by the carapace and helmets.
Here also are some reference shots that I'm working on for the pilots
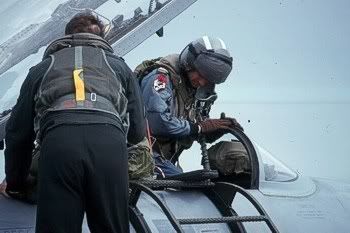

These are taken from Canadian airforce examples, but the flight suit colours are quite universal and similar in most modern airforces.
5182
Post by: SlaveToDorkness
Sweet, just awesome. It is hard to not go whole hog on FW models they are so nice!
I will definitely have to pick up that book myself.
9191
Post by: lanman
Freaking fantastic man, can't wait to see it finished.
8551
Post by: captain.gordino
I thought our airforce was largely composed of Geese.
3564
Post by: Brother Bartius
Very nice.
Lovely work so far.
Going to try that tip with the pencil lead.
Thanks.
2776
Post by: Reecius
Wow, that thing is spectacular, well done.
6854
Post by: InyokaMadoda
That's looking really fantastic and is coming together incredibly well. Keep up the superb work!
7766
Post by: Anti-Mag
Managed to track down an image of the one I'd seen before, from yesteryear. I think this was in WD 195 or 196.
Enjoy: http://www.ifelix.net/gamingblog/?cat=146
11330
Post by: Gundam-Mecha
Thanks for all the positive feedback guys!
Anti-Mag that reference photo from the studio was great, thanks for that. Thats a really old photo isn't it. Gotta love the scratch build on that. It reminds me of Mike McVey's old dioramas, I used to love those. The Eversor Assassin and the Exodite were my favourites.
Where did you dig up this old photo?
7766
Post by: Anti-Mag
Well I remembered it from when I started; I think it was in the second WD that I bought (part of the hobby that I've now abandoned). I just Googled it down until I found the best picture I could. The pictures in the magazine were great; this is obviously a quick shot taken from a convention or something similar.
By the way; I think the weathering is excellent. I've gathered a lot of resources on this element of painting, but have so far found it pretty tricky to replicate (on tanks, at any rate). I'll make sure that I'll re-read this thread the next time I give it a go.
11330
Post by: Gundam-Mecha
Thanks Anti-Mag.
The weathering is tricky, the key is not to do too much and give the techniques a go. When I first read about some of the methods I was a bit sceptical but actually if you have confidence and faith in the ideas and go for it they really pay off.
It's very important to spend as much time as you can on the weathering to get a consistent look. Cover every panel line, bolt, and rivet all in the same sitting if possible. The good thing is while you work your way around the kit the earlier parts will have the thinner already evaporating so once your done they will be ready for blending.
Make sure that you only use a little bit of burnt umber oil paint and mix it well enough with the turpentine, the finer the wash and the lighter the colour the better. It will change colour a bit once dried getting lighter but not much. Also be as neat as possible during application as you can, whilst you can tidy mistakes up later its always best to try and keep things as crisp as you can early on.
Whatever you do make sure that the thinner evaporates fully and dries out, if you try to blend the colours whilst its still wet you end up with a bit of a mess (I made that mistake myself on my test runs). If it's dried though it will blend into the background colour nice and easily.
Good luck and I hope you enjoy your own experiments on your next kit. I really enjoyed trying the methods out on mine!
11330
Post by: Gundam-Mecha
The Pilot ( WIP)
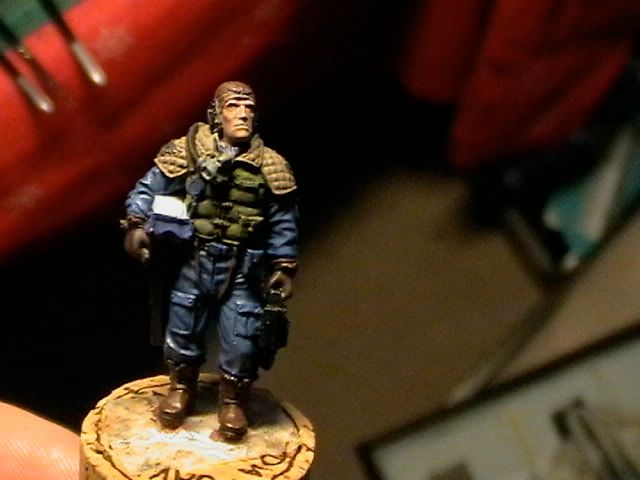
The reference example


Just a few WIP shots of the standing pilot. The camera isn't too great and the lighting wasn't very nice but it gives an overview of where things are at the moment.
Theres still a lot more to do but I'm happy with things so far.
Heres the Thunderbolt's seated pilot again a WIP
Still very bad light and a poor quality camera. I will have my proper camera back next week and take some higher quality photos then.


8551
Post by: captain.gordino
Wow, nice. That pilot is cool and you've painted him well.
9505
Post by: CaptainRavenclaw
wow, corking good job. you're flying now!
10765
Post by: Trevy the Great
Very very nice job. That paint job is absolutely exquisite!
Way to go, and I look forward to seeing these finished.
363
Post by: Red_Zeke
These look terrific. Thanks for the posts, and especially for the references so we can track your thoughts. I've learned some about airbrushing to boot.
Keep it up.
RZ
9813
Post by: LBursley
Looking at the first couple pix I was saying to myself.. "this reminds me of working on the flight line" back from my days in the navy. Also when you finally got the bird painted and back on the base I said "ok, this thing is too clean." and as I scrolled down and saw that you covered the details, with the misc on the ground and oil trails, dirt, grease build up between panels... WELL DONE SIR!
10276
Post by: GitSmack
Great diorama! I love the wear and tear on the tarmac, and your use of oil washes on the Thunderbolt is excellent. It'd be great to see a few more angles on the fuselage and engines to see how you dealt with in-flight fuel/oil run-off and grime.
Keep up with the inspired work... I can't wait to see more.
11330
Post by: Gundam-Mecha
@ S.j, Trevy, RZ Thanks guys! I'm glad your liking the progress so far. I did some more work last night on the pilots and ground crew and hope to have them finally done by this evening. I have to take little breaks because I often obsess over them. Sometimes it's hard to know when to put the paint brush down!
I found working from the reference photos really interesting and a great source for ideas. It also lets you keep an authentic look and feel to a diorama that a set mini companies colour pallette won't provide. They also helped alot for working out the layout and positioning of the Diorama.
@ LBursley, thanks very much. I was trying to get that flight line feeling as authentic as I could with a Sci-Fi setting. I had imagined that Scale Model purists might cringe and nit pick at the details, so it's great to hear that it's on track from a former Navy man! I've done some more work on the Thunderbird and I'm about 80% finished at the moment, things I have to include are the main engine cover, the hatches on the sides of the fuselage (one of which will be open while the Deck Crewman works), and of course the actual cockpit itself. I plan to model it so the canopy is partly open with the Pilot looking out and signalling to the mechanic working by the engine on the wing. I also plan to put rare earth magnets on one of the fuselage hatches so it can be easyily removed to access the internal details.
@ GitSmack I'm planning to put some photos of the underside of the hull up soon. There will be lots of weathering there also, streaks and exhaust marks from the engines, as well as oil run off. So I'll get some more angles and some close ups soon.
6091
Post by: Apone
Lovely work so far.
I have a copy of IA: Model Masterclass myself and now can't stop thinking about buying an airbrush and trying the techniques. highly recommended book.
Well done for trying them out and making them work so well sir!
10101
Post by: kharndude
wow that is very bitchin man. i would pay to build another one if i had the money, because that is the best 40k diorama i have ever seen.
5344
Post by: Shep
How have I missed this Plog???
I think the title of it is a little too short to catch my attention.
I see some fine scale modelling techniques used here. Man, you used them well. Just an overall great project.
You absolutely should enter the finished product into the golden demon. It is absolutely worthy, and i think this work needs more exposure.
great job!
11330
Post by: Gundam-Mecha
11330
Post by: Gundam-Mecha
9557
Post by: sdf boy
I have to say, as an old school planes, trains and automobile modler, I really appreciate this piece. Well done, keep it up.
6633
Post by: smiling Assassin
Gorgeous.
~sA
10101
Post by: kharndude
that looks sooooo cool, i wish my stuff turned out like that.
9388
Post by: Stretch
Weathering is incredible and realistic, I hope my stuff will get to this level soon.
9505
Post by: CaptainRavenclaw
Are you going to post any more pics of your work completed?? I hope so!
11190
Post by: mcfly
That is completely awesome.
11611
Post by: Corndoggy
This is awesome
just....awesome
I am exeedingly jealous of your weathering and painting skills. Keep it up! 
11330
Post by: Gundam-Mecha
Hi guys
Thanks for the comments and feedback.
I'm working on some more of the model this week and I hope to have update photos posted up sometime before Friday.
The next stage is finishing off the ground grew completely and the scenery.
4657
Post by: Metsuri
This is absolutely fantastic!
The Forgeworld modeling book is a great resource, I have been looking for a project in which to try the techniques from it, reading this blog has just made me want to start working on a project.
I just hope that you could get better pics, as the current just hint at the level of painting you have done.
Thanks for sharing.
11330
Post by: Gundam-Mecha
Thanks Metsuri I didn't have a decent camera before as my girlfriend took it with her on holiday. I have it back now so I will finally be able to get some higher quality photos done. More updates to come tomorrow!
7416
Post by: jabbakahut
Wow, you work is truly appreciated. Something I would strive to achieve. It's such a shame you can't get some good photos, send it to me and I'll take studio quality photos for free. I'll send it back, I promise!
9375
Post by: typhus
how much was that thing?
10392
Post by: Paul Atreides
The only thing here I could critisize would be the pics' focus. So damn beautiful, so impossible to fully appreciate...
11731
Post by: The Bringer
I'm no fan of IG, but that is just incredible!
8745
Post by: Llamahead
I really like it, it's so wonderfully understated and catches the essence of the prototype beautifully, nowhere near as brash as most 40K projects you see.
11775
Post by: Joatmon
Great work so far, however I'd like to offer one bit of insight as a current active-duty F-15 "Crew Chief", in the interest of realism. Please bear in mind these insights are from a USAF perspective, so may differ from references and information you've seen from navy aircraft carriers.
In your photos circa Feb 5th, you show what appears to be what the navy would call an aircraft handler in front of the aircraft, with his hands raised in a marshalling position. While that in itself looks sufficiently decent, there's some other aspects of the scene that clash with that marshaller's existence. For example, you show maintenance work being actively performed immediately behind the left engine - if the engine were operational, that mechanic would be long dead of either asphyxiation from the exhaust, or simply burned to a crisp.
While it's possible to taxi an aircraft on one engine (we do it all the time), the aircraft would be moving - which would prevent the maintainer from reaching that compartment with his maintenance stand, and would prevent the ladder propped against the other wing from staying in place for very long.
My conclusion (Albeit a long winded one) is that the marshaller, while well represented, is not necessary based on elements from the remains of the scene. From my experiences in the USAF at least, we only require a marshaller when the aircraft is actively moving (or about to move, unchocked with no other personnel present), which in this case yours is clearly not.
Aside from my nitpicking that detail, your scene is very coherent and I love what you've done! Keep up the great work!
11330
Post by: Gundam-Mecha
Thanks Joatmon,
I know what you mean, actually It's something I considered after I had already started the modelling. Orginally I planned it to be launching, then I decided I wanted the crew to be preping the aircraft.
I had imagined it as the Marshal still being in place after the craft had come to a stop, and still being there while the other crewmen ran to the engines etc for maintenance work and refuling etc.
Then I considered him being in a position getting ready waiting for the craft to start moving... as it's preparing to leave...
Still it's been bugging me, as since you point out it's not really correct.
What would you suggest as a possible role for that crewman? I'm no Navy expert so I'm not entirely sure what function he could have without having to completely remodel him.
Thanks to everyone else for the feedback. I total agree with the comments about the camera. It really was poor quality and the focus was a real drag! I'll put some more photos up soon.
As to price the Thunderbolt itself cost £75 from Forgeworld. The rest of the diorama is made up of Tamiya scale model components, Forgeworld Elysian parts, and regular household materials.
11775
Post by: Joatmon
Hmm. I'm not really sure where else to fit him in... unless you can find a way for him to perhaps look like he's also doing maintenance, perhaps holding something up? I don't really know. I'd hate to recommend that you remove him entirely, after already putting him together!
Question though, do you have the panels opened in such a way that they can be closed? If you can close up the aircraft and make it flight-ready, he *could* still have a use as a marshaller in sort of an alternate diorama setup... Though one additional comment in that regard - a lesson learned very early in the life of a flightline airman in the air force is to pay attention to where the exhaust of a jet will be pointed when it moves - at idle, an F-15's exhaust has enough velocity to knock a man over (if it weren't so hot he couldn't stand in it) so anything "behind" the jet that isn't bolted down will be easily blown away when the engines are running...
11330
Post by: Gundam-Mecha
6633
Post by: smiling Assassin
Gorgeous weathering, awesome stencilling -- masterpiece.
sA
11173
Post by: Krieger
if you keep that up, this has to win something, how tough is the open contest in the UK? very very tough I assume
11330
Post by: Gundam-Mecha
Thanks guys!
I'm also working on a WW2 Scale Model diorama right now as a gift for a relative, so inbetween this one I have a chance to keep busy on that while different stages dry.
The WW2 peice is a Soviet T34-76 Tank with Russian Infantry riding the Tank and running alongside it in a battlefield scene. I'm actually considering putting a blog on that up here too. It's not really Sci-Fi or 40K, but people may find it interesting all the same and all the painting techniques are universal for any models.
10339
Post by: tallmantim
Can you post a pic up?
Sounds good!
11330
Post by: Gundam-Mecha
Hi Tallmantim
I'll go one better and start a new Blog!
9154
Post by: littlewood93
This is a great diorama i especially like the weathering you did good job mate keep it up.
11330
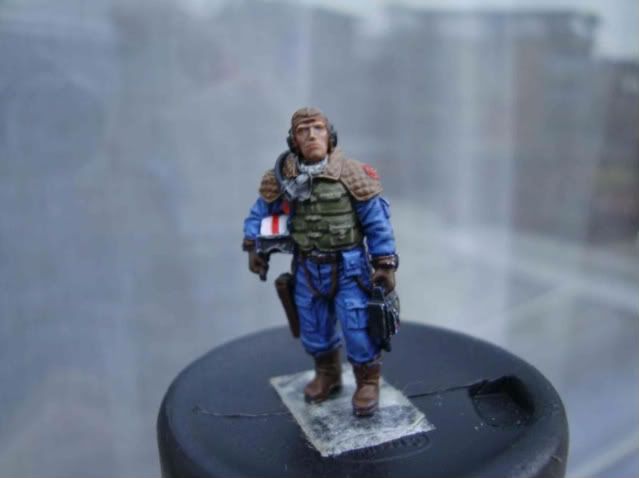
Post by: Gundam-Mecha
Just a quick update photo of the pilot:
4657
Post by: Metsuri
Those better pics really show what could be guessed to be there, it's really good looking plane. The weathering and blending of oils is really nice for the most parts. There are some rough areas showing in couple of the pics, but you can blend them in.
The pilot is also looking good, some wear coming to his gear to tie him to the rest of the scene?
Keep us posted on the progress!
10392
Post by: Paul Atreides
You inproved the focu! And it is...
Breathtaking.
207
Post by: Balance
Very nice job. Especially great work on the weathering!
It kind of looks like something from the original Star Wars trilogy with all the scorch marks.
10101
Post by: kharndude
I like the the way it looks. looks like it was made by a machine.
7416
Post by: jabbakahut
Wow, I liked it with the crappy pics, with the new ones my mind has just been blown out of my head. That is some incredible work. Inspirational even, I can't wait to begin using these more advanced FW techniques on my Reaver.
11330
Post by: Gundam-Mecha
Thanks Metsuri, Yeah I know what you mean. There are some parts especially under the engines on the underside that need more blending and tidying up.
I'm still experimenting with the techniques so it's been a real learning experience, but I feel much happier with the results as I've practiced them more. I feel already that I've learnt alot for my next project the WW2 Diorama.
@ Paul, Balance, jabbakahut thanks guys! I'll try to make it even better before its finished.
@ Kharndude, thanks I was trying to get the whole mass production feeling on the plane. So I'm glad that noticed.
10276
Post by: GitSmack
Wow! What a difference between the old camera and the new. Everything I thought might have been there in the old shots jumps right out in the new ones.
Excellent work on the stress leaks bleeding down the wings/fuselage... and the stains from the jet wash are a pretty great touch as well. They're really in scale with the model - they're strong but they don't overpower it. I feel like I'm looking at a well used aircraft instead of at a bunch of weathering techniques.
Subtle with a capital B. Keep up the good work!
722
Post by: Kanluwen
It is a gorgeous piece of work.
The only thing I would have done different was use standard uniform colors(khakis, olive drabs, etc) on the ground crew and have their role as crew marked out on the helmet.
But still.
It's gorgeous and I am jealous :(
6091
Post by: Apone
Great to see all your progress on this model and the techniques. It's still a great inspiration for newbie's to them (I've just got myself an airbrush and compressor so going to play around soon!).
Cheers
105
Post by: Sarigar
Man, the updates were worth waiting for. Your work is fantastic, especially painting in realistic details such as the beautifully rendered weathering effects. Great work again.
Thanks for keeping us updated.
9505
Post by: CaptainRavenclaw
It is beautiful. I'm off to check on the russians!!
8745
Post by: Llamahead
It's really nice can't wait to see it done. How about have the marshal gesturing to another plane out of the model?
11330
Post by: Gundam-Mecha
Thanks Llamahead, actually thats a really good suggestion too. Directing craft "off camera" so to speak might work.
I'll play around with things on that tonight.
11775
Post by: Joatmon
Another thought, now that I'm back at work and submersed in that lifestyle again - we also marshal fuel trucks using pretty much the same signals... as well as default to those signals when assisting someone move large ground equipment around the aircraft so they don't put a hole in the skin...
he could have many uses =)
(Edit: keen eyes might have noticed the change in my location flag... not my choice, or I'd leave it US... I'm sad to report that I'm actually stationed in Okinawa, Japan... was home on leave when I signed up...)
11330
Post by: Gundam-Mecha
Hi Joatmon, thanks for the suggestions much appreciated. I'll play around with some ideas.
Wow over in Japan huh? I hope things go well for you there and that you get a chance to experience the country a little. It's a fascinating place.
8745
Post by: Llamahead
Cheers glad to help.
23944
Post by: Hits_the_spot
More people need to see this, its fantastic work.
6005
Post by: Death By Monkeys
Threadromancy much? While it is fantastic work and folks need to see it, they saw it last year.
13740
Post by: Valkyrie
Death By Monkeys wrote:Threadromancy much? While it is fantastic work and folks need to see it, they saw it last year.
So? Does it matter that people have seen it last year? Work like this should be seen as much as possible, without people moaning about "threadromancy" or whatever it's called.
Briliant work, keep it up.
99
Post by: insaniak
Valkyrie wrote:So? Does it matter that people have seen it last year? Work like this should be seen as much as possible, without people moaning about "threadromancy" or whatever it's called.
http://www.dakkadakka.com/dakkaforum/posts/list/266667.page
|
|