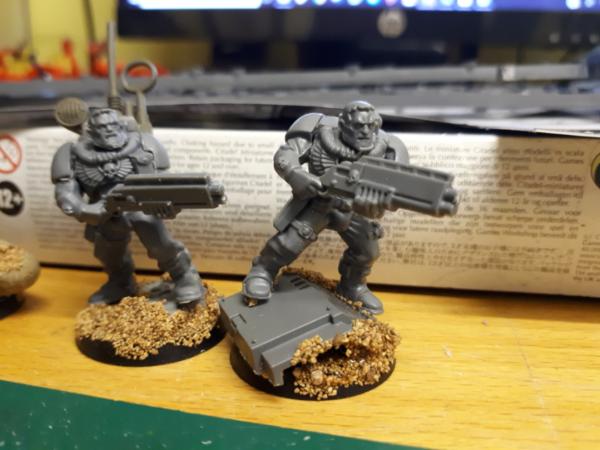
From above i am really pleased with how he came out. The blending between the colours seems to have come out well. Each one i do seems to be better My adventure into different colours with the Mantis Warrior and the 2 marines that my Neices designed, gave me a look at blending with different colours, and i have added an extra step into me shceme. Also i have decided that i definatly dont like painting multiple miniatures at once on a production line as it sucks the enjoyment out of it, and i dont't pay as much attention to each individual model. I need to treat each one as hero that deserves respect. ... So i now have to paint -
Steampunkery Barron
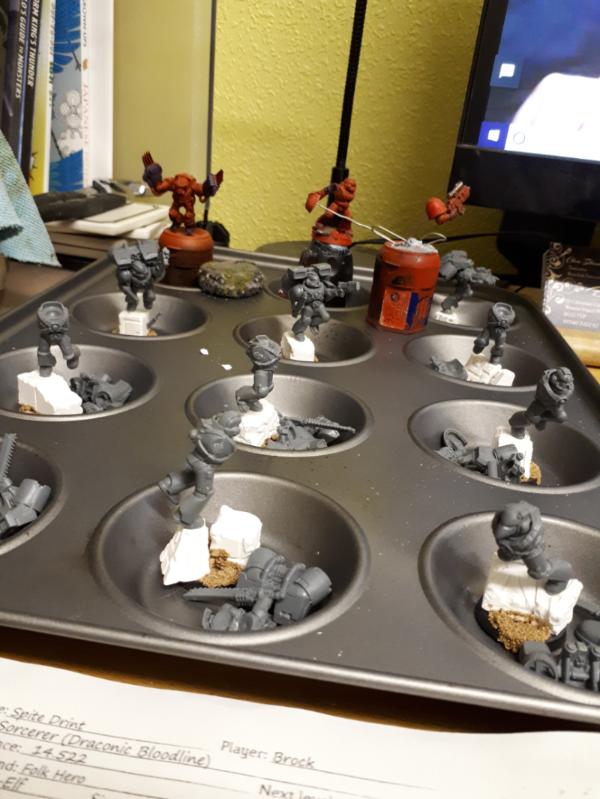
the rest of my Tactical squad (8 i think, a couple of them are heavy weapons to make it more interesting) *(I remember now Razorback)*
Assult Squad
2 x Rhino
1 x (i have had a complete mind fart and forgoten the name of the rhino with guns on top to act as a command squad transport, capacity 6) lol 1 x Stormtalon
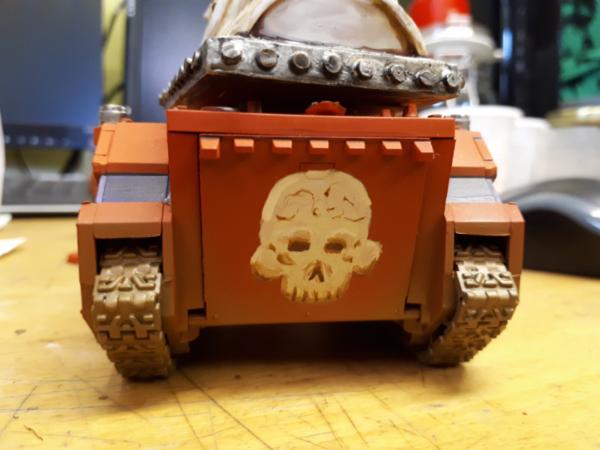
Sorry Vic, My Skull tank / Razorback has recived a base coat and will probably be the next thing i paint after the Steampunk guy is done. I am currently Black Ops 2ing on my xbox so ther eis no painting going on. Once i am fed up of being killed repeatedly, i will be back to my study with gusto
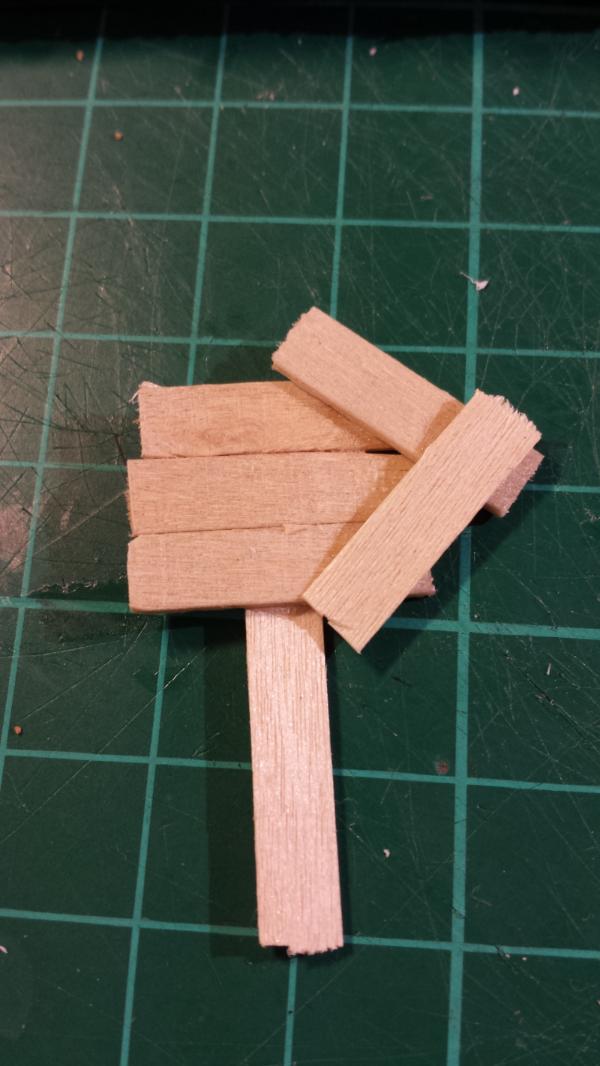
Well while sat on the phone today i thought i would do some colouring in (as you do) so i printed off this off and scrathed away while chatting to people.
I then decided to try and draw something. I normally draw fantasy, so my proportions were way off when drawing a Space Marine, even while folowing a guide
I know its not my miniatures, but i thought i might as well post this stuff some where while my evening painting is on hiatus. I am also reading the Horus heresey on my commute to work. i just happen to be shooting people on my xbox in my me time in the evenings
she looks really nice...shading looks very good... only nitpick here would be the size of her head... a bit big... and the posing of the feet... looks a bit as if she needs to visit the throne soon
Thanks Vic. It took a long time to draw it so by the end she did need a pee. The water retention must have inflated her head and given rise to the pigeon feet tee hee
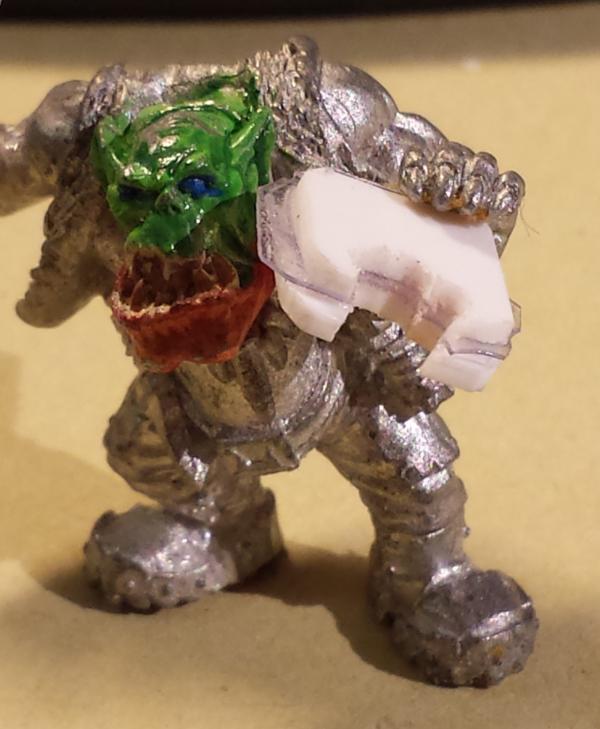
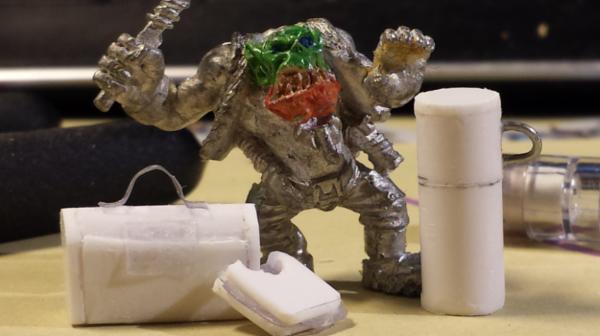
Well i finally got round to finishing my Steampunkery. The xbox has been a great lure as of late. But more recently i ahve been having the urge to put it down a bit early and go upstairs to do a bit of painting. So thank you very much rsjake for the Weapon sprue. I hope i have done them justince. And i hope that the mustache is good enough for you Vic
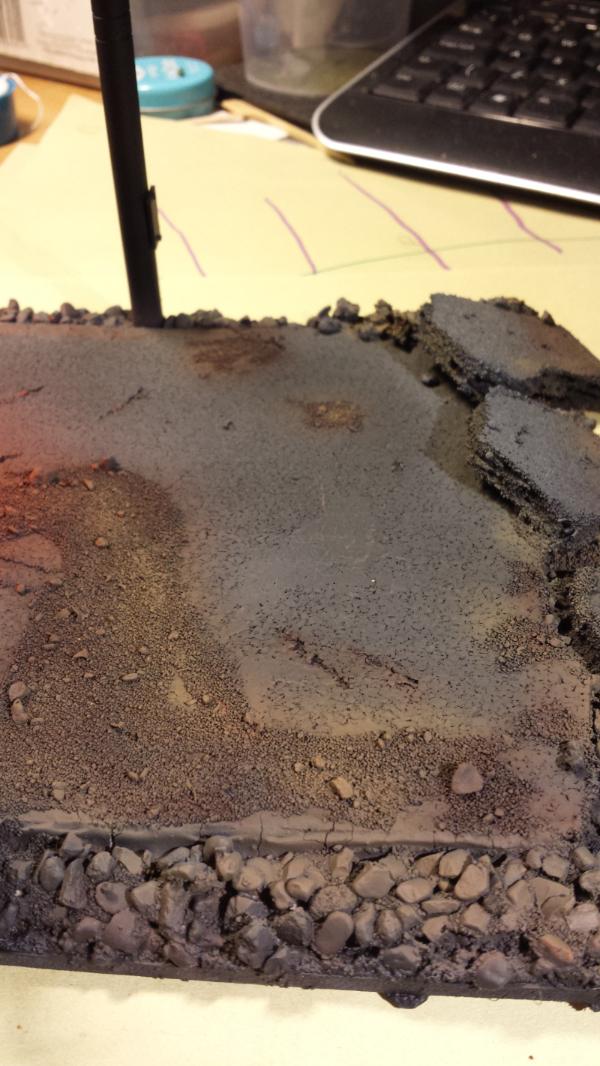
I had taken some pictures last night, but the artificial light was too harsh, and it seems that the agle of the window onto my desk gives some lovely daylight in the mornings On closer inspection on the photos, i can see that my blending is not as smooth as i had hoped, but i have been out of it for a while. But from 12-24 inches he looks awesome and as he is sat on my desk at my work just under my monitor that is just fine and dandy
Well its been a while. Lots happening at home what with moving, redecorating, working 2 jobs and my wife falling pregnant
Well to start we have had a move around, making room for a new nursery. My study became the new spare room, and i got shifted down into the converted garage. Actaully more spacious but less wall space for me to hang various geeky weaponry.
Spoiler:
Also I have some painting company in my new study, although i was more of his paintbrush tech.
Spoiler:
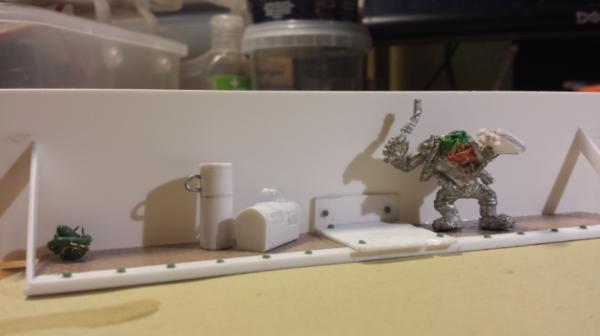
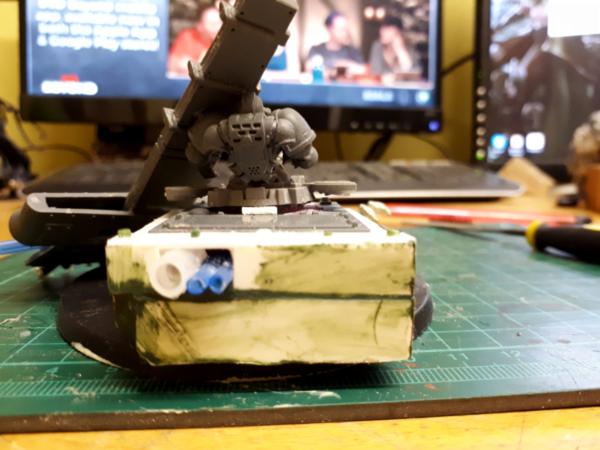
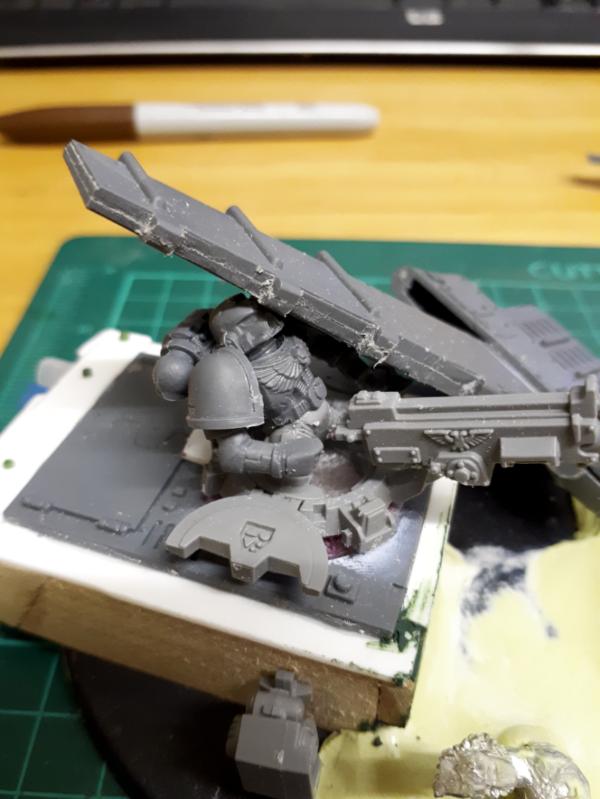
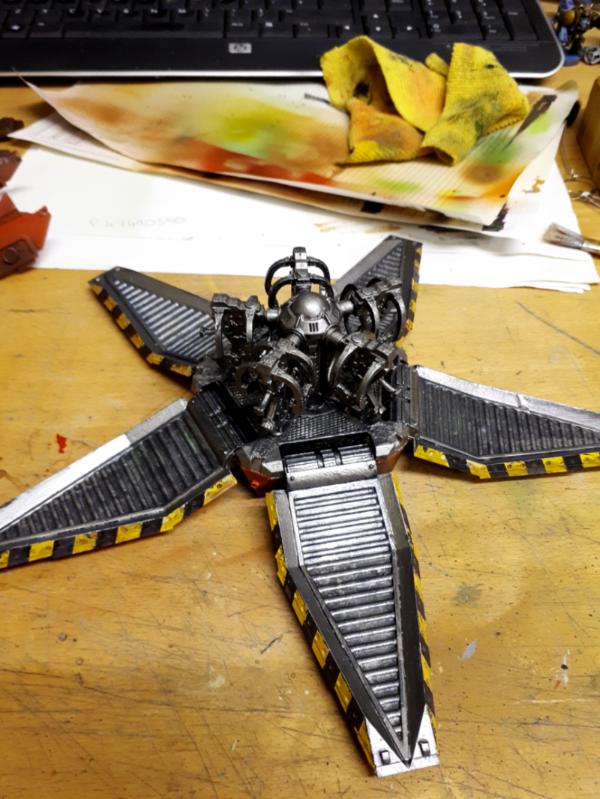
Considering when i left my old office once of the gifts from them was a Stormtallon, i have not finished it yet, so i thought I had better get on and finish that. So here are some WIP pics.
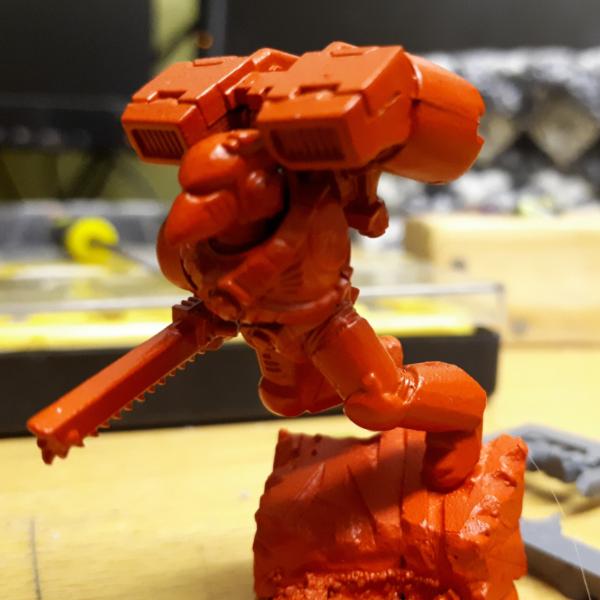
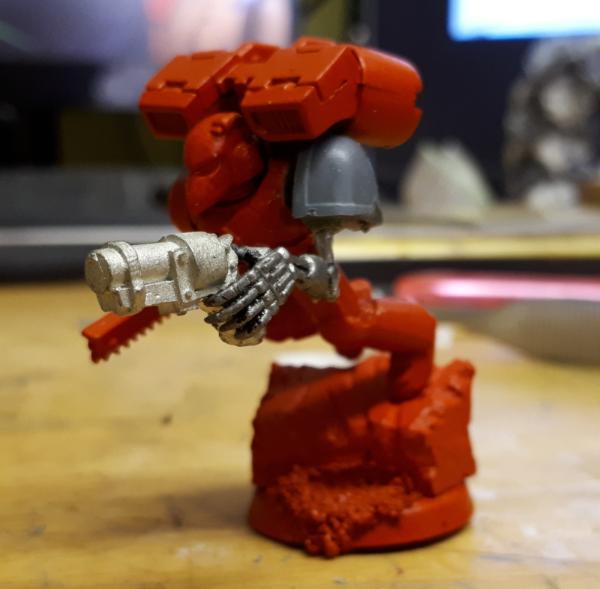
I have since been working on the highlighting of the red, and the details of the lights and the purity seals. I have highlighted the purple, but thinking overnight i think it is to stark as i have added to much white to the purple, so i will probably re do that (i'll take some photos to upload later) Hopefully after that it should be done apart from the base.
On a random note the Landlord of the club i work on the doors of at the weekend, the subject of painting came up and me painting 40k minis came up. Later he popped upstairs and came down with a box of metal Space Wolves he gave to me He has had them since he was 12, and the only stipulation is that i painted "the one with the Bird first" They needed a little bit of love first, so i was able to remove the limbs and then put them in a nice detol bath and they are now much cleaner and ready for rebuilding and some fun modification.
There was also 5 terminators, which will join my normal Marine force in my colours. But he special characters will be painted up as SW and i may do a diorama, as an asside to all the red at some point.
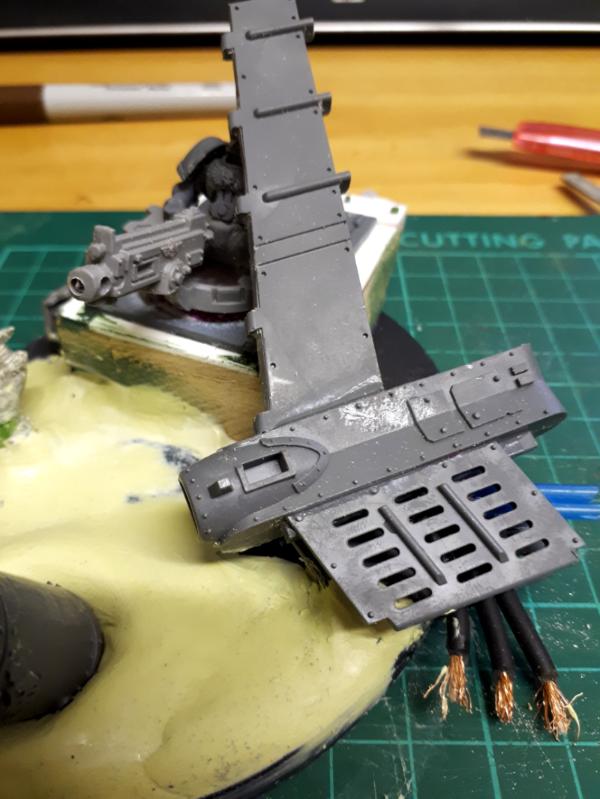
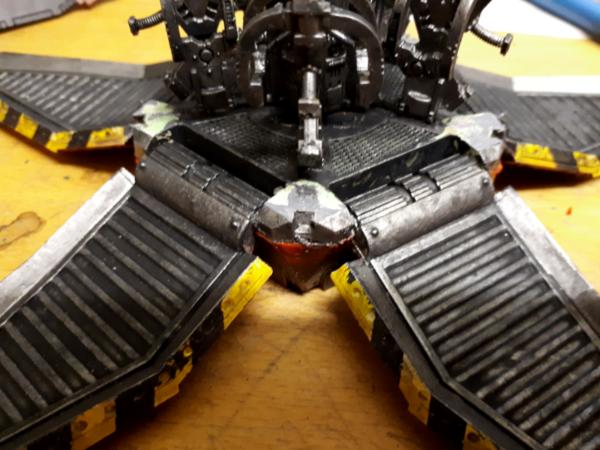
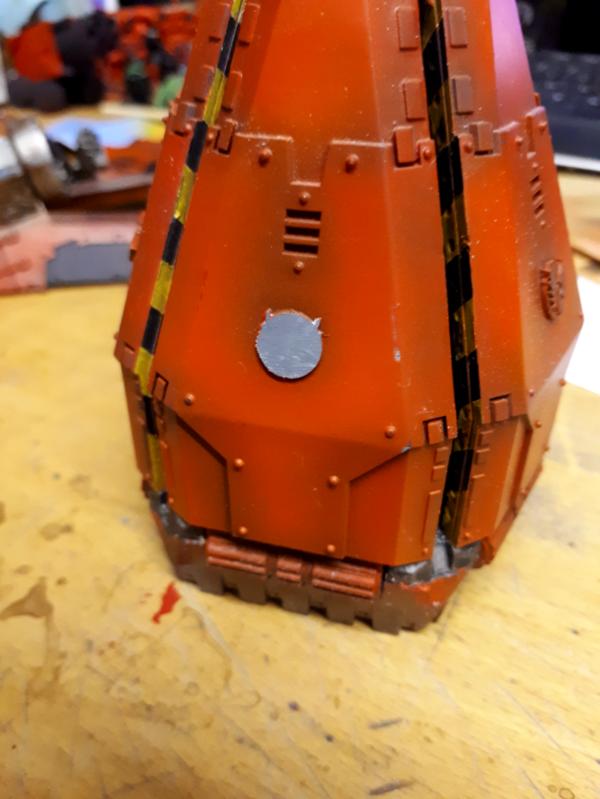
Well i finished up the Stormtallon tonight. I decided against redoing the purple, i do like it and it fits in with the purple in the rest of the squad, it is just more stark on the larger scale. The below photos don't really do it justice, the artificial light does not show any of the colour blending on the red. I will have to take some pictures in the natural light at some point (as my home made light box did not survive the move )
Spoiler:
The window in my office
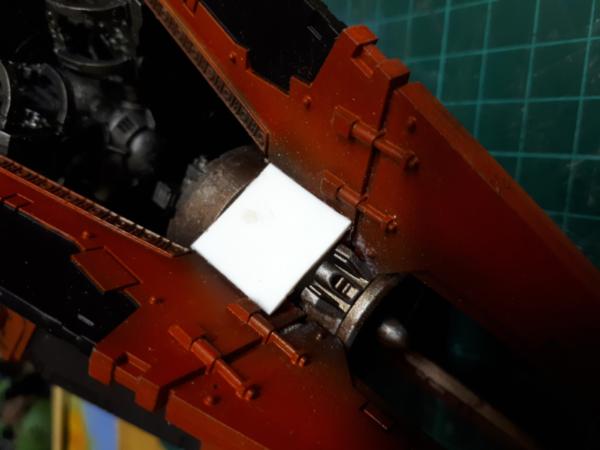
The clear plastic has not been glue yet, as i am waiting until the super glue has completely dried and there are no fumes about to frost it, then i will use some pva glue. The most trouble i had, was gluing the pilots left arm (right when looking at him) because i had glued the pod into place before i remembered to put the pilot in but with some delicate toothpick work i managed it.
I have 3 more vehicles to paint, they have had a base coat of army painter pure red, but i am thinking about getting an airbrush, so i am going to hold off on them for now. In the hope that i can improve my vehicle painting. I have plenty to keep me going until (if i do get one) then. A squad of assault marines, a second squad of tactical marines to finish, a tech marine, an un opened box of scouts, a marine on a bike (more for fun than for the army) + the new termies i just acquired, and the random SW to intersperse between them. I am going to keep away from assembly line painting as that is what i find ends up putting me off painting and i leave the hobby for a while. so i may paint a few different ones at a time, like a SW an assault and a scout. To stop the enjoyment going stale. I am going to try and personalise every model i make in some way and not jsut do it out of the box, with GS if possible. (which reminds me i need to order some more)
For now i am doing Njal Stormcaller, i have found a random ork i removed the head from and and cardboard plantpot that i cut a disk from, honestly it looks cool .. ok i'll take a photo.
Now i need to think about if i will paint it as snow or mud .... what do you think?
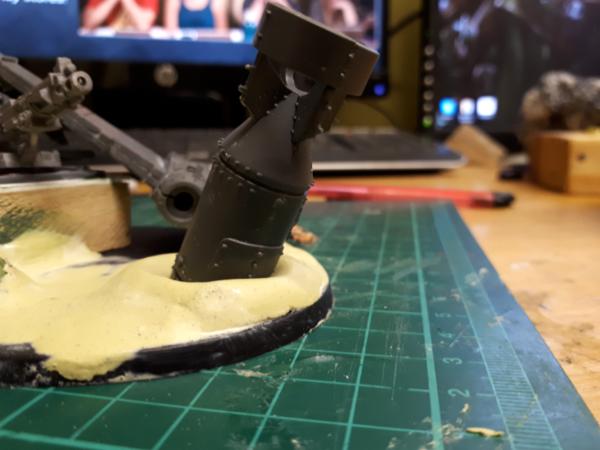
Automatically Appended Next Post: Oh btw, the weapon pods are magnatised so i can swap them out for lascannons.
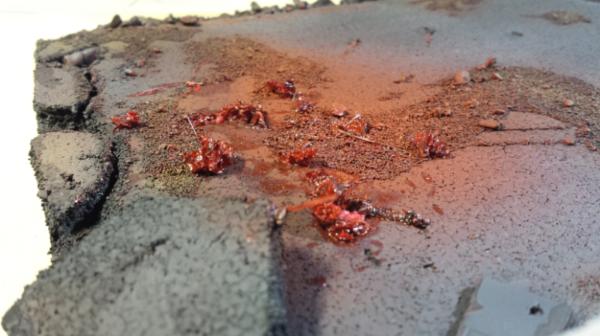
Only got a bit done last night, i did some more work on the base for my Stormtalon.
I built up the dry brushing on the stone work and the tyre, and then gave the stonework a wash of Babadab black. Gave the corpse a further coat of orange. and but some Warplock bronze on the metal and then gave that a further wash of Babadab black also. Also the intestines and the moss/bush got a wash of Babadab black.
(Also i have found an app on my phone for this style of photo that i am enjoying playing with)
Well i have defiantly decided that i should not watch a film while painting/modeling as i end up watching it too much lol. But on a side not Pacific Rim was very cool.
But i did manage to paint up the ice base for Nijal, but i forgot to take a photo. I also put a red wash over the demon corpse on my Stormtalon base. But i have decided that i don't paint well on 'rough' surfaces i am better with smooth like a SM. There was no need for a photo of what i did on the base yet.
But i did manage to get a bit of GS done on Njal and my Tech marine.
I did not like the wires/cables hanging off the back of the tech marine, so i removed them. They looked like they were just hanging there. (I'm aware what they are technically USB cables to plug into the machine spirit) But i thought it looked silly. And i did not think i could model them joining onto something with the angle that they were. I have just capped it with GSatm and once that has cured i will sculpt something in its place. And i have drilled a small hole in the back of his hand and run a gs cable along and under where his backpack will be. I then pressed the backpack into place to make sure that GS would not obscure the join later. It would have been cool to model a cable from the backpack where i had cut it off into the back of the hand, but i want to paint them separately. He is currently just standing on pins in the base and not glued on.
I was unsure as to what to with Nijal, but i am not too bad at sculpting fur and as he is a space wolf, i thought that was a safe bet. so i decided to sculpt the legs of the wolf pelt he is wearing, draping over his shoulders. I also thought i would try to do the claws as well. they look a little odd atm, but i will sculpt some further fur over the top of them once it has cured. On his back there was quite a bit of super glue that had run down the cloack that i had been unable to remove so i sculpted a bit of fur over it to cover it up.
I have work tonight and tomorrow night on the Doors of a club, so i'm unlikly to get much done, may be was was or a small amount of paint once i get in to wind down. That is unless i get some free time on Saturday during the day.
Well the weekend is over, i got some bits done but probably less than any other hobbyist But then again most hobbyists did not have to put up with being spat at and wrestling the spitter until the police arrive, or deal with drunken idiots breaking windows. Oh what fun.
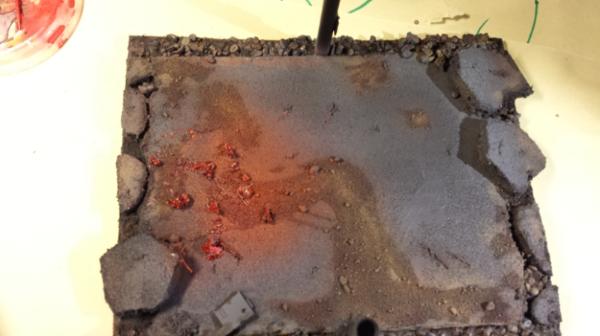
But anyway ... I managed to finish paining the base for my Stormtalon I was a little worried about the corpse, but it came out OK in the end . (the beauty of a wash) All it needs now is some static grass.
I added some plastic tube to where i had trimmed off the cables on the Techmarines backpack. Once it is dry i will probably add some more GS (or Miliput as my order arrived today) To smooth it out. I also added a purity seal to Njal's backpack, i often make them with left over GS. And one of my fav positions to put them is on the backpack i think they look great there and breaks up the colour from behind. Especially as when i do play (on that rare occasion) most of the time you are looking at the model from behind
Also i continued the fur sculpt on Njal and put some more just over the claws so it did not look like they were sat on top. I also added a little more on his back in areas i felt needed building up.
And i got round to taking a photo of the base for Njal, and my attempt at "ice" i think its quite cool for my first attempt, not sure if i should not have gone as dark for the under coats. i could do it again to lighten it up.
Excellent work on the Stormtallon, M0rdain! Also, great sculpting with the Greenstuff. I admit that I tend to stay away from the it Don't worry, you've certainly done a quite a fair amount of stuff - certainly more than myself! Sorry to hear about the weekend antics, downright disgraceful that someone would have the nerve to spit at someone else in the 21st century.
-Cosmic Thank you. Well their antics are what i am paid to put up with so the bar staff don't have to. But spitting is the thing that annoys me most, and discriminatory insults based on sexual orientation (its a LBGT bar)
I had the house to myself last night so i made the most of the TV and played some ME3 multiplayer, so not much modeling last night i'm afraid.
I had invested a hole £2.33 in a pack of milliput as my GS was running low. It handles very differently to the GS so i will need to experiment with it. I did manager to get it how i wanted in the end but it was a lot harder than i expected.
(I also noticed the mold line in this photo so i will clean that up tonight) It was much more clay like than GS, i'm going to have a look on here for any tutorials about working with Milliput.
I also gave Njal a foundation coat, but as he is just black, there is not point in uploading the photo (as you can't really see anything), and this morning i had a look at him and touched up the places that i had missed. i also pinned his feet, and slotted him into some wood, as he kept tipping over in the bluetack.
Well after another busy weekend, i have got some painting done. Bear in mind this is still a work in progress. But in general i'm not that happy. i don't like the detail on his legs it made it too hard for me to paint, and does not look smooth enough for my liking. I should have removed the them, but hey ho. Hopefully once i have done more of the detail it will look a bit better, but it will only ever be table top standard.
The grey seems to have gone on thicker than i wanted especially on the back pack. But that may actually have been some super glue over spill that i forgot about before undercoating So the actual armor is done, i just need to work on the detail on the armor and everything else. Not sure what colour i will do the actual staff yet. may just go for metallic.
But bear in mind this is my first time painting spacewolves colours, so that gives me a little leeway in its ineptness, the rest is that my skill does not live up to my minds intentions. I really should stick to models with out too much detail.
Yeah i think you are right, luckily its just a bit of fun, but we all learn from our mistakes Part of it is also not knowing how to paint the legs with the runes on. After the base coat and the wash i would normally use a blending method of highlighting, but that was tricky with the runes in the way (as i wanted the wash shadows to remain around them) I probably should have thought about it before and just removed them from the model before painting. Luckily he still looks ok/good from gaming distance so all is not lost (not that i have ever professed to be an amazing painter anyway)
Done a bit more. Progress has been a bit slow. But that's real life with 2 jobs a 3 1/2 year old and a pregnant wife. But i'm happy so all is good.
As i said before, from a distance he looks ok. Decided on the staff being metailc, and sorted out the teeth in the wolfs head, and worked on the leather on the back of the fur.
Added some detail to the raven/crow (sorry don't know the fluff)
And painted up the head on the base.
Still need to work on the actual fur. that may be my next step. (going to try and highlight up rather than drybrush, but we shall see how it looks.
Well progress has been slow, but that's my own fault as i have a habit of watching Mythbusters while a paint, so there has been too much watching and not enough painting lol.
I have made some progress on Njal, added some blood to the base, and painted the shoulderpads, (there are actually 3 different layers of colours on each pad, not that it shows in this light) Also dry brushed some mithril silver and shining gold onto the backpack.
And because i am making such sterling progress, and i have nothing else to do ... ... i was inspired to take part in the =L= Terain competition (link in my sig below) by reading Viktor von Domm's Blog. I then realised i had no plasticard at all, so i ordered some last Friday and it arrived on my desk at work today I have my plans, i just wonder if i will be able to solidify them.
The theme is elements and it has to include Fire, water, earth, metal and wood. So my plan is to create a smelter, with a fire for the wood and fire, and a container/trailer/ cart (undecided) full of ore for the earth, also molten metal pouring out into a water trough. and of course rivets. Lets see if i can actually do this?
Well i had to work later at work yesterday so did not get home as early as i would have liked. So after dinner and family time, i got into my man cave at around 22:00.
Now i have never worked with plasticard before, but after reading up a little i found out that it would be too thick to cut straight through (1mm) and i wound need to score and snap. When measuring up to mark out i decided that my plans were slightly too small so i upped the size to 100mm from 60mm. It scored and snapped really easily so i was pleased. And there was only a slight difference between the 4 sides which i shaved and trimmed down (not as smoothly as i had liked, but they can be the bottom. I then angled the edges of the sides to aprox 45 degrees, for a better join. I did the same for the trough, and then cut out a stop for the larger cube. I was not sure how i would attach the trough to the base, and i decided to use milliput as i will be adding more on top later. (the surface of the water and the pouring metal) As i had mixed up more than i needed i used some more to strengthen the corners of the larger cube too.
I did not do any more painting on Njal yet, but i have a Dungeons and Dragons session over skype tonight, so i may be able to get some more bits done while i am playing. (i normally end up fixing my sons toys that he has broken in this time
So i was sat on my Pc Skyping gmy D&D game eating sweeties, thinking about how not to die and what i could use for the top half of my smelter. As everything i had looked at so far was not the right size or shape. and then i looked at what i had in my hands, the pick and mix container. /Streetfighter "perfect" /Streetfighter.
So i trimmed it and added on a couple of bands, then raided my collection of Rivets. I decided that i should measure out there spacing rather than guess this time, and i feel that it was a good decision.
And popped it on top of the main building. Sometimes inspiration is right in front of you
So for the Earth portion of the build i wanted to have a container that was holding the raw ore for the smelter. In retrospect maybe a more rectangular shape would have been better, but I am still pleased how it came out.
This morning i came down and added some more grave/ore into the container.
I am going to add some larger lumps of ore and the fill in the gaps with further gravel, as so far it looks to refined, and i feel that the ore would be in larger lumps. I have some plaster bricks that i have left over from a previous terrain piece, that I like basing my minis on as well. I will probably take a pair of wire cutters to them to roughly round them out to look more like lumps of ore.
That was a great idea with the pick and mix container I really like how your terrain piece is coming along, especially the idea of using the elements and such, and the space marine with the chainsword looks pretty neat as well. Keep it up M0rdain!
Well i took my wire cutters to my little dental plaster bricks and chopped them up to what i thought was a reasonable looking ore/rubble look. (Dakka galery does not seem to be working atm so the following pictures will be hosted elsewhere)
I then went on to the opening for the wood fire at the bottom of the smelter. I should have really cut this out before putting the cube together, so i had to be careful when cutting it out as i did not want to slip and open up my fingers. I could have used my dremmel with a cutting disk, but my wife was in bed and i geek out in the room beneath her and the sound travels. So with some gentle scoring and a careful bend and snap i removed the needed square. I had already measured the hole to fit some cut down rhino top doors that will work well on here (not pictured.) I am beginning to wonder how i will do all of this lol. I think i will have to build and paint the fire before gluing the cube over the top. You can see the basic are I have marked out on the board for where the fire will go.
I glued a old drinks container lid into the water trough to add as a spacer then glued in a square of plasticard to work as a base for my water. I had set some Milliput aside earlier to cure a bit to make it easier to work with. But after spreading it out with the aid of a little water. it seems like i had not prepared enough. So i spread it out as far as i could and then sort of wiggled the surface to make it looked agitated (as there will be molten metal pouring into it later) I will probably sculpt some ripples onto the surface when i add more milliput later.
Not much progress as i was away over the weekend. I had been thinking about the top of the "chimney" for lack of a better word, and i did not really want to cut a big hole in it, so i decided to add some chimney pots / vents.
I then added my spout where the molten metal will pour out.
I am still thinking about the order in which i should base coat and paint i will need to paint the fire up first and the painting of the molten metal will be easier while detached from the main part of the smelter. So i think i should get spraying tonight.
But i have finished Njal, i managed to take some photo sin artificial and some natural light.
This one is a little unfocused, but i did not realise until i got to work.
I object to the ork head on the base. Set's a bad precedent. Should be something like one of those pretty-boy Blood Angels. That would be more appropriate.
Camkierhi - Thank you i do try, i have improved but I am far from perfect. There are so many others on here that put me to shame. I'm not even sure some of them are human.
speaking of which, Gitsplitta - i had an ork that was just begging to be decapitated. I was trying for variety, i have a Necron on my Dreadnaught and a Demon on my Stormtallon. i will try to have a "pretty boy" Blood Angel involved in my Ork Bomber some how.
Well i gave my fire a quick base coat of black and left it to dry overnight, (did this via brush rather than by can, as i am not sure how much i have left in my can. And i use a red for my main marines)
Then the wood got a dry brush of 2 different greys, (unsure of the names : ) Followed by some blood red, blasing orange and .. yellow. then a 50/ mix of "yellow" and skull white.
I then based some of the board with gravel. Once that is dry i will glue the rest of the model together, and mask off the "door" then hope for some nice weather to give them a nice spray of chaos black.
so... I got you into that comp?... my own fault to get me even more hard competitors that build and fight against me
the forge idea is great...! an epic terrain piece for sure... and I will take notes... something like that just screams to be made for my own needs... why haven´t I thought of that already???...
by the way...the chimney vents...from what are these made?... were did you salvage them?
Well the weather had not improved (in the small window of time in which i could spray outside in the light) but the glue has dried, so hopefully i may be able to spray tonight, but we are currently having major fog/smog. So not sure if i should. But a slight amount of uneven surface on the terrain would not be detrimental, as its not a small mini.
(in the background you can see so drawings i have done for my son from one of his favourite TV shows can any one guess what show?)
Rather than just sit watching Bones, I decided to build up another marine i had been thinking about (to paint up in a colour scheme my 3 year old son)
I need to tidy up a couple of bits and possibly add some grenades, (Also when taking these photos I realised I needed to add ridges to some of the GS) (the back pack is done just not attached in this photo. He had been sat on the side in pieces for a while rather than starting a new project. But as I was not able to work on my smelter I thought it would be a nice distraction. And it really is reinforcing how much I enjoy building the models, and harder doing the painting.
oh.... ben ten somehow is a show I never watched...and my kids too......guess it is due to the time it gets aired... so early that our telly is not on...
the marine currently looks as if he is best painted as a happy marine. the stance somehow makes me think of a heavy clad ballet version of swan lake
the forge looks good, the spot of the upturned cup tho where the cardboard meets I would add a ladder to cover up the seam...
Camkierhi - Thank you, its my first real from scratch terrain piece. And i try to make my marines look more dynamic, especially sine i am happy with my pinning and GS "flexible armour" skills. Not so sure on sculpting any other parts of armour.
monkeytroll - Thanks, my Brybrushing is getting better, i was pleased with the fire. And yes that marine was Gits inspired
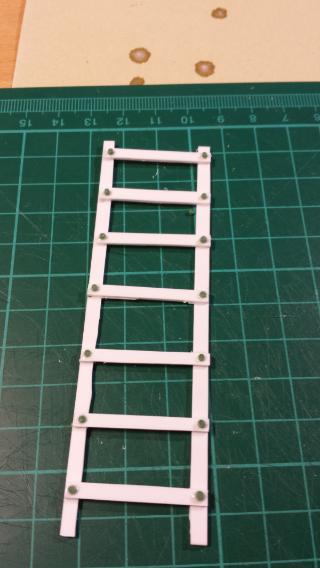
Viktor von Domm - We set a lot of the BEN 10 to record so he watches them at his leisure, but i have managed to direct him to Marvel and DC more recently. We watched Captain america: First Avenger, Thor and Iron Man 2 on Saturday a great Marvel marathon. And i took your advice and made a ladder. (one of the only things i managed to do over the weekend. Sadly i had already primed the rest, so i will prime it by brush then glue it into place.
But as my can ran out mid spray (and i don't have another black one) i had to touch up the model by hand anyway. So hopefully over the next few days i can add some colour to it. I now have to decide if i Paint up up fully metallic and the wash and dry brush in other colours, or i just go straight to dry brushing. The trouble is my Monolith i went straight to dry brushing, and looking back at it now (a few years later) it did not look that good. So i will probably just water down the metallic a bit more and go for broke. i have plans for rust 'n' stuff anyway.
It is looking great. will you go imperial, or dwarven (squat) or orky?
Oh and nip down the pound shop and buy some really cheap metallic paint, or go DIY store and get a tester pot. You will cover most of it with colour, you just want that metallic look underneath and you can always spot paint in with proper metalic afterwards. Can't believe I am trying to give tips on painting!!
Really looking forward to this build, going to be awesome.
Camkierhi - Not a bad idea thanks. Only down side is that i commute by train and there is nothing nearby. Hmm i wonder if there would be anything in Sainsburys.
...Derrr i also walk past Homebase. I will look in there.
Well i went into Homebase on my way home that day and managed to get myself a little pot of metalic paint for £1.99
The whole thing got 2 coats of the metallic paint, and then some babadab black wash. I gave my rubble some coats of brown then mixed in dark red and then some orange to make it look like iron ore. (the wash is still wet in this photo)
I painted up the water in the "plunge" pool. And the metal cooling as it plunges in. You can also see some of the other washes i have used.
Then last night i started doing some rust effects (still a WIP - using Gitsplitta's Rust tutorial)
There has been a bit of a delay in my work, as i got caught up in designing 2 new character for my new D&D campaign.
On a side note an interesting beer appeared in the pub next to my office, i may have to pop down there at lunch.
Love Smith's oatmeal stout. The biscuit beer sounds intriguing.
Nice progress on the building. The ore and plunge pool look excellent! Rust effects look great. Remember to use more than one shade, it'll help sell the illusion.
Gitsplitta wrote: Remember to use more than one shade, it'll help sell the illusion.
So far a brown and a dark reddy brown, and working my way up. I will probably work reasonably far into the orange, to add some brightness to the whole image, but it all depends on how it looks as I go along.
That beer sounds like a brain killer...nourishing but heavy...you will go down with a big smile on your lips...
Forge is looking again promising...but the metal probably would have been better looking if you have rather stippled the paint then brushed it on... Now the million brushstrokes just draw too much of my attention...
Viktor von Domm wrote: .but the metal probably would have been better looking if you have rather stippled the paint then brushed it on... Now the million brushstrokes just draw too much of my attention...
I was a bit disappointed after the first coat, but then i decided to work with it rather than against it, and make it look more like brushed metal. I am especially pleased how this came out on the chimney.
Rather like this.
Spoiler:
And that is not a blag after the fact, that is what i was thinking while painting lol.
ah...I see what you mean mordain...that brushed steel look is actually something that makes sense to me...ok^^...so I have faith and will wait how your next update turns out to be
Well it is all done now, i just need to take some good photos. I am so pleased with how it came out, its my first scratch build and also my first weathering. It has defiantly made me think about pushing myself to try different things on future projects
Well when i sat down last night, it seemed that everything I had on the go needed a wash, so once they were washed I left them to dry.
Left with plenty of hobby time I decided that now was a good a time as any to paint up the base for my Techmarine. I had decided to add in bullet holes and scratches and they had been added in the modelling process. And after how pleased i was with my =L= terrain competition, i decided to add some rust. It went on a little thick but still pleased.
For the lights I highlighted to a certain extent but did not take them to light/bright because they are meant to be broken.
I then thought about what I could do with my lovely new/old saw blade. After rummaging through my bits drawer I came across a metal Ork Warboss. It was something I acquired from a job lot, lots of excess super glue and badly painted. So using my mighty strength I pulled the model into its component parts, scrapped off some of the paint, and given him a Detol bath overnight. I started on a base for him, i decided i need to keep it reasonably flat as it will need to fit into the saw blade.
Well I bought some more spuerglue, so I should be OK for a while I put my Techmarine together, and took some photos in the morning light.
I have noticed a some bits that i need to do. Like the groin/waist block thing, i need to paint up the buttons. Probably in blue.
Looking at these pictures some of the red looks very flat, but it looks a lot better in person. Honest it does Gov.
I have done the base for my Ork Warboss, and all rusted up, as i am much happier doing rust now after the =L= competition, and thanks to Gitsplitters awesome tutorial. I still need to take a photo of the base, so sorry. Also finished up the bases on about 8 minis i had painted ages ago, but not based them. Tried some textured painting on some sandbags, and pleased how it came out. I'll try to take some photos tonight.
I really need a game to focus my painting, as i always ended up painting faster to a deadline. But I have not played in years, and all my old friends live so far away :(
Gitsplitta - Thank you, Thank you. I considered doing something more chaosy, but i could not think what would look right, so i stuck with my standard colours
Well i took a photo of the Base for the 1st Ork on the sawblade, took it at a couple of different angles and the colours look quite different.
The Ork himself is out of the Detol bath and has been having a clean up.
I was playing D&D last night so not much work got done, as it was a new campaign and getting to know my new characters.
Sunday night or was it last night ... hmm i cant remember. Well the other night i worked on the legs of my marine (colour scheme designed by my 3 year old son) It seems i ahve a habit of working on side projects rather than my standard army lol. But considering its been years since i played a game, and this is more about the fun of modelling/painting. Its not that much of a problem.
And being as it is a Wednesday, i decided to take some bits to work to clean up of flash while on the phone.
They have sat in my drawer for a while so thought i would get them prepared, as it is something i can do at work without me lugging in too much stuff. As much as i would love to paint at work it would involve me bringing in too much stuff, and not too sure how my line manager would react lol.
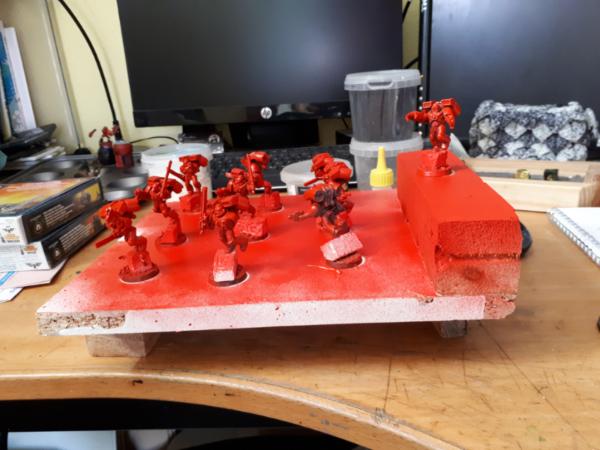
This does now add a further squad to the 2 i already have in the Q to be painted though lol. But at least the tactical squad is base coated.
Automatically Appended Next Post: A little disappointed with legs on the scouts some of the parts seem misaligned :(
I have since been in contact with GW customer services, and i have emailed them the photos, hopefully they should be sending me out replacements. Whether this is a new set of legs or a whole box of scouts who knows. Hopefully a whole box. *fingers crossed*
monkeytroll - Hopefully they sort it and send me a new pack. Ok i cleaned them up and sorted them out myself, but thats not the point. If i paid for them i expect them to be better quality. (the one and only fine cast i had was fine)
Ok a quick update on a Friday evening. Had a Skype call to my brother alst night who has been travling for the last 2 years so had a good catch up, and did some painting while talking Here is how my sons colour scheme is coming along.
Well as usual i am off to work tonight so not much will be done hobby wise. And we have guests over the weekend. So more that likely i'll see you on Tuesday.
funny, my kids would approve of such a scheme too, cause it would represent our families favourite colours... my wife red, my oldest yellow, my youngest blue, and mine is green...
it is always a bitter sweet smile I crack when I start my pc and one of the kids is around and they yell: "papa, look the pc has all our favourite colors when it starts..."
Viktor von Domm - Thank you. My blending seems to be better when i have space to work with. I do not do so well on a detailed model. I am happier going for better blending on a less busy model, and having tweaked its position to something different from the standard. My Current avatar is still my favorite.
Spoiler:
I have taken my final photos for the =L= terrain competition, making the most of the beautiful sunshine outside this weekend. I need to check the rules as to where they need to be posted, so not putting them up on here yet.
I finished of my multi coloured Marine, i decided to try out doing some cross hatching as shading, as i use it often enough in drawing. I used it mainly on the stone on the base, but also on the chainsword. And yes Gitsplitta i put some purple in there
I find that I can not highlight the "spines" of the plasma, so i tend to highlight down to one end, as though the power is lowing towards the barrel.
And for once i am quite pleased with the eyes, even though why white dot highlight ended up with the paint too thin that it flowed way to much, it actually looked all right so I left it (as it was also slightly tinted with the purple)
Also i needed to tidy up my desk a bit and i was running out of shelf space, especially with the recent terrain being made (and possibility of more if there are future competitions) So as there was some wood left over from a shelving progect in the lounge i had a long thing strip of furniture board. There was already some 2x1 on the wall (not sure why but this was originally the garage and was converted by the previous owners) So i just drilled and nailed the strip onto the 2x1 to make i nice small shelf perfect for minis.
That turned out really well M0rdian... I think you should do a full squad. You could make it interesting my shifting which colors are where on each marine... so no two were alike!
well.... I have to say...with that marine you broke every colour scheme rule there is, but in the nicest way possible
the way you did the plasma effect by the way I will hold most dear as I too have with that detail quite my own hardships...thus I really like your way of getting around that problem...and it is a totally viable way of portraying such an effect in my humble opinion
and I agree, gitsplitta has a point here, a full squad definitely has eye-opener potential!
Gitsplitta - Hmm I may do 5 of them and have them as Marines on Parole, they have to dress like that as an "office prank" for newbies after they have spent time as a scout.
monkeytroll - If I do a Sergeant I will call him Joseph and try to sculpt him a coat
Viktor von DommA squad would give me a greater break from painting red. I do have a load of tactical marines that need painting. ...
I have done a bit of work on the Ork Warlord for my rusty saw blade, i decided to try and pose him differently, and spread his arms a bit, to make it easier to paint. And added some cabling from his shoulders to the arms, and added on some shoulder pads / armour over the top. (again the trusty fruit shoot cap)
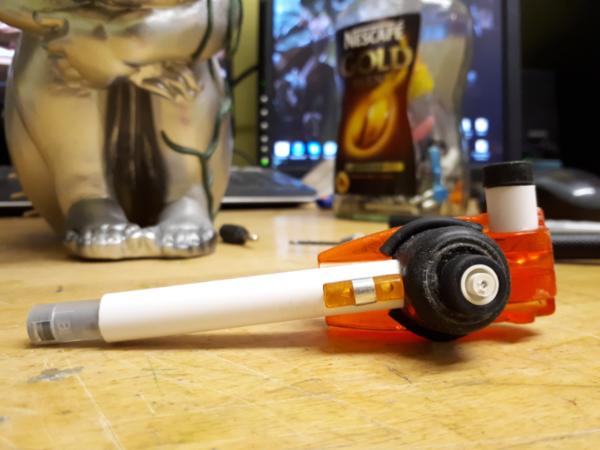
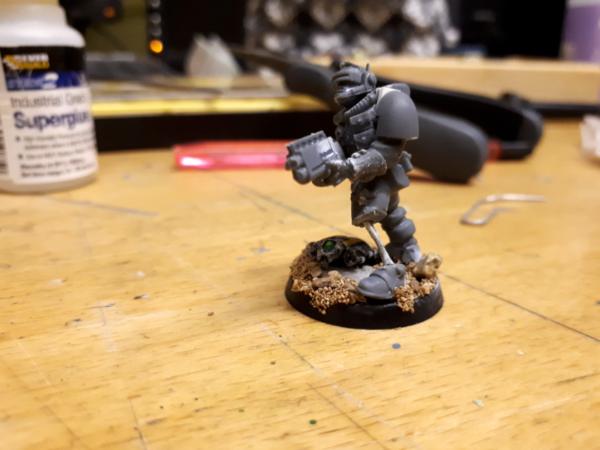
I have also been painting up one of my tactical marines that has been on my desk for ages, so i finaly put some paint on my Heavy Weapons Multi Melta Marine. He just needs his eye lenses and some static grass now, so i will get some photos of him tomorrow with paint on. But here is some old WIP shots.
And again something that has sat on my desk for a while, is a Space Marine Bike, i bought it for no other reason, than I thought it would look cool. (as I rarely play) So i thought i would have a look at it and get it ready for priming. I decided I needed to add something to it so added a bolter onto the back, for the marine to grab if he needed, and some binoculars onto the front wheel to look like additional lights. Not really any sculpting here, but then I can not think of anything else to put on.
Arggh i see mould lines on the guns, well i had better remove them, unless i risk the wrath of Dakka
also...you´re probably the first one to make a wall-ee bike...(no seriously...looks cool!)
as for that ork boss...very menacing pose... but I bet he needs a special base to have him not fall over...that pose is quite top heavy as far as I can tell...
also...you´re probably the first one to make a wall-ee bike...(no seriously...looks cool!)
Lol i had not thought that, be it does haha.
In regards to the Ork boss, I think I will add some magnets to the base so that it sticks to the saw blade.
And yeah I have a habit of having marines that dual wield, but if you are a futuristic super soldier, why cant you duel wield guns I also have this thing about going through all that trouble of painting a chest plate well and then covering it up with a gun
I totally like dual wielding too... ever seen desperado? in one scene just at the beginning banderas is dual wielding and aiming at two oponents...at either side of the building and he is at the corner IIRC...
Viktor von Domm - You are the master of Grot grilling at the moment.
Here is my finished Heavy Weapon Guy, the downside from these pictures is that some of the melta has some red showing grrrr. (base coated in red) I will have to revisit this bit.
I put the static grass on this morning, for the photos, and it seems its still a bit loose but that is fair enough.
And "Flamer Joe" as he came out of his jiffy bag (that he was put in when i moved nearly 2 years ago. :s
I definitely need to base coat some of my other minis so i can mix up what i paint to keep me enjoying it. I have the bike and my Ork Boss in the mix, but i can't start the Ork boss until after fathers day (when i have asked for a new can of black paint) I was going to base coat the bike yesterday but it was raining when i got home from work :(
Spify picture-fu there, the light is ideal currently. I see some painting errors apart from the melta issue, I say this as I think generally this model looks super but needs a few touchups here and there, backpack vents/grill and there us a small blob at the chests aquilla...
He has had his metallics and chest touched up, and will need a rewash of the metallics tonight.
I continued to work on my next Tactical marine, he has had his red and purple done, and i'm progressing through his bone.
Hmm again I can see patches on the metallics ... hmm i think I will need to pay better attention to them in the future. (i think its needs a further coat, after having thinned the paint. And me getting to impatient and wanting to continue lol)
Well i have touched up the Multi Melta guy, and now Flamer Joe is finished. This having 2 jobs, a son and a pregnant wife puts a dent in my painting time lol.
I tend to take the photos in the morning before work, and my phone is at such an angle that i can not see the pictures I have taken, so I don't always get a chance to check them. It seems in the last one it focused on the wrong point. But it does show me i need to clean up the pistol barrel, because it had been drilled.
I wonder who i will pull out of my drawer next. May not find out until Sunday though. Have a good weekend people.
Automatically Appended Next Post: Ungh, also it looks like the black on the shoulders is too thin as well.
Thanks Gitsplitta & Viktor von Domm he has received a touch up, and the next one is on the pots ready to be painted.
So pleased with the =L= Terrain competition, it was great fun and i came 3rd A proper nerdy "squee" moment. Here are my final pics.
I learnt some new things, like using plasticard and rusty weathering. So looking forward to the next one. The theme is "The Throne" as in latrine/toilet. I have been thinking about what to do, but i am going to try and keep the size down, as my son is due in the next 6 weeks, so i will ahve other tings on my mind lol.
monkeytroll - Thank you.
Gitsplitta - Hopefully if i enter enough competitions i will actually have enough terrain for a game. ... not that i have played in a few years lol.
Viktor von Domm - Thank you, i was surprised. But very pleased. The Babys nursery is ready, we have emergency bags packed, but hopefully we will be having a home birth, as long as he is the right way round
Now i just have to think about how i sculpt a mound of living poop.
Viktor von Domm - Yes plenty of reference material. Not sure if i should take photos and post on here though lol.
Camkierhi - That is a great idea Thanks
So I had D&D yesterday evening and introduced a couple of friends into it, so I was more involved , and was not able to play around while gaming So afterwards i tipped out my Jar of random crap and had a look for something to create a toilet. I need to think about a way to solidify the bowl a bit. I may use it as a frame work and smooth some milliput over it. I am also gathering up some coffee stirrers to use as the planks for the walls.
Yeah this morning I did think it was a bit large, but then i may just have to think about who uses it, maybe its for an Ork Warboss rather than a Guard grunt
Automatically Appended Next Post: Thanks to the Wetherspoons for providing me with some coffee stirrers Not sure how much i will get done as i have to pack for a Holiday, as its my Brothers Wedding this weekend and i will be away for a week. (leaving my pregnant wife at home alone :s )
Well I'm now back from a week away for my Brothers Wedding, in the lovely sunny Jersey (Channel island) I had a great time with my son, and family, but my wife had to stay behind as she was 34 weeks pregnant.
Now that i am back and my wife is less stress out about being alone and heavily pregnant, i have had time to continue to play around with my pretend toilet, and excremental.
I covered the toilet bowl so it was less likely to make a mess when used.
Exploded walls and door have taken shape
The part formed loo in place for sizing.
A day passes and i do some more work, now the toilet has taken better shape.
The excremental is taking shape.
Then the coveringof hot glue.
And some facial features. I was going to use BB's for his eyes, but i decided they were too big, and sued some beads, left over from my wife's wedding flowers. and cut the BB up into a mouth/beak of sorts.
I need to try and get as much done before my wife gives birth as possible, as after that it will be slow progress lol as i will have my own poop demon to deal with
haha that looks awesome! Even in this stage it looks slimy and pretty putrid..... in a good way! give it a brown coat and it is going to be pretty darned repulsive! haha!
Camkierhi wrote: Looking great, slightly Kellogs chicken like for some reason, not sure if that is a bad thing.
Hahah, i will probably add some more glue over the top of the eyes for a more pronounced eyebrow. which should help. I'm sure the green underneath and the yellow beak don't help the matter atm. LOL
I bet you will be able to have a bit of hobby time squeezed in your schedule once your family is grown in numbers still...
with my two kids I just had to decide between sleep and stuff I like....and I can always cut on my sleeping habits...^^
the poop demon looks amazing... shockingly amazing... the toilet is also a piece of tech and art...and I totally like the scenic approach you went for... it has a very strong comic vibe to it... your´s will be a tough constant piece....damn...
but as a german, I need to ask... what in the seven hells name does BB stand for??? enlighten me...
Created some toilet paper, sheets on a ring, rather than on a roll.
And a few scattered on the floor in front of the building.
Well i think it is all done, i just need to give him a base coat of black, but i don't get my new can of black until Fathers Day. What to do until then. Hmm maybe paint some of my Marines lol.
Great work on the excremental....although when you say he looks a bit less like a chicken now I couldn't help but think it looked like he was coming out of an egg.....
monkeytroll wrote: Great work on the excremental....although when you say he looks a bit less like a chicken now I couldn't help but think it looked like he was coming out of an egg.....
Now sombody has to make a large egg and make the Gobbledy Gooker - if anyone remembers what that is
I took your advice Viktor von Domm and covered up the Wurst.
And I gave in waiting on my can of spray paint (impatient me) and painted it up by brush. I used standard black paint from my sons paint (so probably poster paint) I decided that it would be alight on the wood and sand, and i will see how it goes on the plastic.
Put some more work into the base as still waiting on my can of spray.
Worked on the wood, and put down some base colour and a wash on the gravel. I painted between the tiles to simulate the grout. and lay down some base colour on the toilet paper.
Further progress i finished up on the gravel just need to touch up the larger stones in grey to break up the colour. Sponged on some green and grey mixture on to the wood to look like lichen. Painted in the tiles. i need to work on the weathering with some washes next, also need to work on the loo paper to make it look like newspaper/ pages .
I do need to think about gloss, as i will need it for the actual Excremental as well. But i don't have any atm. Hmmm i see a tin of Ronseal quick dry clear varnish on the shelf in the garage though.
Well I got my matt black spray for fathers day So I was able to undercoat my Excremental and my Ork warlord.
The actual excremental its self covered beautifully with 1 coat. Which is always nice. But the toilet itself has had a couple of coats of grey and one coat of bleached bone. Its going to take a few more diluted coats. The "thumb" on his left hand looks like it is not stuck down properly and the base of it is peeling off. But I think its actually a strand of the hot glue in that area.
The diluted PVA worked beautifully over the brown spillages on the base. Looks all wet and icky.
Viktor von Domm - PVA looking less suspicious but more wet poo
The excremental is coming along alright ... Ok i will take a picture ... i have been mainly working on the toilet itself, the white still seems to be very streaky and not going on smooth (unlike the brown) It did not help that it was primed in black, but i don't own a grey or white. Maybe after a wash and further coats it will smooth out.
I am with monkey... looks very good...and indeed now the spots look more convincing! and last pic look as if he is one of these TV preachers, preaching to his audience
Sorry for such a brief post last night, and that it has been a while. I have being enjoying the first few weeks of life of my new son. And i have had to be doing things in the evening that i could drop at a moments notice to go help my wife/son. So i have been playing modded Minecraft
Viktor von Domm - i have been dealing with a lot of poo lately, luckily none of it in a hug form.
Viktor von Domm The Ab is set up in my study / converted garage. so yes used inside. (currently using water to dilute my paint). My son is 6 weeks old tomorrow, but that photo was from a couple of weeks ago. Yes he does have a strong neck, and i am sure he takes great pleasure in headbutting me as well I also got Assassins creed black flag for my birthday, so many things and so little time to play lol. I have also been moved to a different venue for my door work at the weekends, and that means i am finishing between 4 and 5 am. so rather tired with that on top of a wrestles baby. Although my good wife is amazing and doing her best to cope at night with out me when she can.
Aww, dude, not to be the bearer of bad news, but buying a compressor without an air taking will give you lots of frustration later on. Those things don't hold a constant pressure decently.
But also, does your excremental have a "corn kernel beak"? It's both wonderful and horrible. Your in-progress paint job made it look like it was made of chocolate, like an easter bunny. I'm mildly nauseous now. Great job!
Meph - With restricted funds, it was the best i could get, and so far i am happy with it. I am no expert, but it is helping where i need it, (and enjoyable) and when usingit it so far it has had constant pressure when needed. (as long as my finger on the trigger is steady lol)
Warboss_Waaazag - He may have looked like chocolate but i did not want to taste him to confirm.
Red Harvest - the pressure does drop when i use it, but it drops to a lvl i am happy with anyway so, so far so good. Only done an orcs head as a testor.
the closeup shows that i mucked up his teeth a bit, but i'm happy with how his flesh went.
monkeytroll - Thanks, yes they are going well. If a little sleep deprived. Well a waste processing plant attached to him, converting into bio fuel would be handy. Not sure on what Mrs M0rdain would say though.
Well i got an honorable mention in the competition, the feed back i got was good, there were bits that i was aware of, and others that i was not, so that gives me something to work with. I have an idea on the next competition, but i need to flesh it out.
Automatically Appended Next Post: Well on to the next competition. With my time restricted, i decided to not go for anything to complicated, but saying that any build could throw up problems lol. Here is a sketch of my ideas.
Now as i don't have a water filter or any cork, i need to have a think about them stinking roads, as i do need stinking roads.
The blood should be nice and easy with my new AB, and will be perfect for the graphiti on the sign. Hopefully it will also help me with lots of other bits
Well i thought it was a long shot put i put a request on one of the local "Free to collector" groups on Facebook. Ask and you shall receive ...
Some lovely cork. Now i can try out tarmac. The question is now, how wide do i make the road, 3 lanes big enough for Rhinos, or wide enough for 2 rhinos and split into 3 lanes. ... I also need to take into consideration storing it afterwards, especially as i would like to have it on display with my other entries, so i cant have it too big. 3 lanes big enough for rhinos at 8 cm per lane is 24 cm + additional space for the sign/gantry. Probably too big to store (and i don't think i have any wood/hardboard that big to base it on. So 16cm wide road, split into 3 lanes it is then. I forgot to measure the height of the Rhino this morning, so i will have to work out the height of the sign later.
I doubt the IoM builds its roads to fit any tanks... not in that sense... civilian vehicles are your scale reference here... sadly there are no real ones out there you could use as a reference... fancy GW letting us out alone in the rain again but I like your reasoning... two fitting for rhino and split up equally for three lanes...
there is a free to collectors thing on FB???... interesting... how was the person you got that from? nice contact? I always smell a fish if someone is just giving away stuff for free and you have to go there...that´s why when my wife is up to something like that I always go with her...you never know what peeps you meet...(yeah... I am a control freak and probably most of the time quite negative in my view of humanity...)...but better safe then sorry, eh?...
as for that orky head... add a bit more red to the teeth and you can get away with it again, as it then looks as if he has bitten someone...
concerning your AB compressor... this Thursday there will be a cheap one on LIDDLE here and it will cost just 60€ which is dead cheap... for basecoat I figure enough.... but what "BAR" outtake has your compressor?...
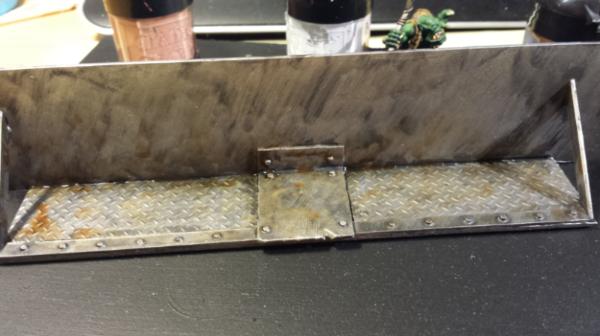
OK i have been doing some research and found an article on Dakka with kit measurements.
Which has a Rhino as L 11.5 / W 7.5 / H 5, so with my plans for a road 16cm wide will give room for 2 rhinos side by side. The lower edge will need to be at least 5 cm to let it through, But i don't think that would take into account a whirlwind, It also has the stats for a Landraider at L 17 / W 10 / H 7. So if i gave it a clearance of at least 7cm a land raider would also fit under. It would not be big enough for a Baneblade (L 22.5 / W 14 / H 11), but i think that is reasonable.
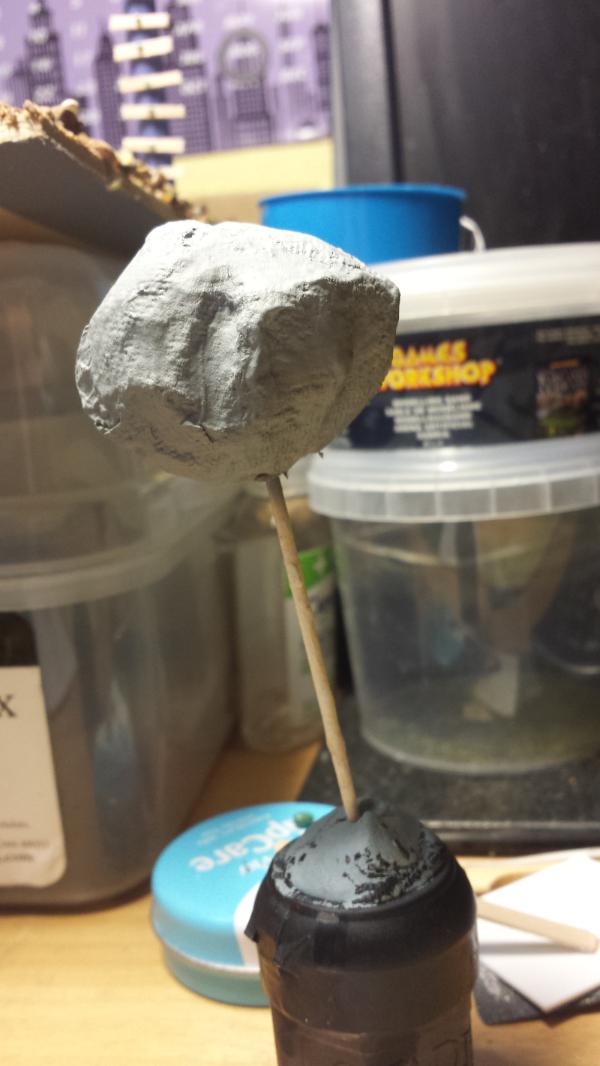
Now i am looking round my desk at work, wondering if there is anything i can make for this here. I am considering the boulder, I could at least get the basic shape out of some screwed up paper, and I could use some glue to hold it together. While i think about a final layer, maybe kitchen roll. When I was younger my mum used to make papier-mâché glue out of flour and water, sometimes this was wholemeal flower which ended up with a rougher texture. This may work well for a bouldery material. What I am worried about is that the edges of the paper will not blend in well enough and it will look like a ball of paper rather than a boulder. Sadly I don't have any foam I could carve, and I doubt I will get that in a "free to collector" group on facebook lol.
OK as i have been writing this (at work in between phone calls) i have had some responses.
Viktor von Domm - they were fine, she was probably in her 30's. There is a dedicated freecycle website where people put things up for free or ask for things for free, and there are groups on facebooks for local areas (This is one in Berlin). As well as buy and sell groups (i have got lots of xbox games from the buy and sell groups) We even got in a previous house an entire sideboard for our dining room for free (guy was moving and did not want to pay to have to move it, so i picked it up with my brother in law and his van)
The Compressor I think from the top of my head is set to 4 BAR, but when I spray drops to about 2 BAR, I can dial it down, but it did not work / feel as good. So left it as is and once I spray and it drops it then stays to stay constant at that pressure and its not to strong as to blow all my bits everywhere lol.
If you go the papier mache route for the boulder then as long as you're using strips of kitchen roll/paper for the final layer and press down on the edges it should be fine. A thick layer of paint over the top should hide any imperfections. With a bit of care you can get a pretty smooth surface using papier mache.
Indeed, tear any paper apart and leave the former edgeparts be...thusvyou get only soft new irregular edges that won't be seen...you use this technique probably already with wall tapestry..
And thanks for the FB link...that will go into the needy links
I had another thought If i create the boulder out of polystyrene, and then give a final coat of rough flour glue to create a rough exterior. ... Hmm do i even have polystyrene at home. ... time to have a look in the office
Thanks monkeytroll & Viktor von Domm if i do go that route i will smooth it out . (its probably that most of my previous stuff has been with newspaper.)
Cork board is a find. Hold on to your panties though, give me a few days to get your package together and off to you, it might help, I will try my best.
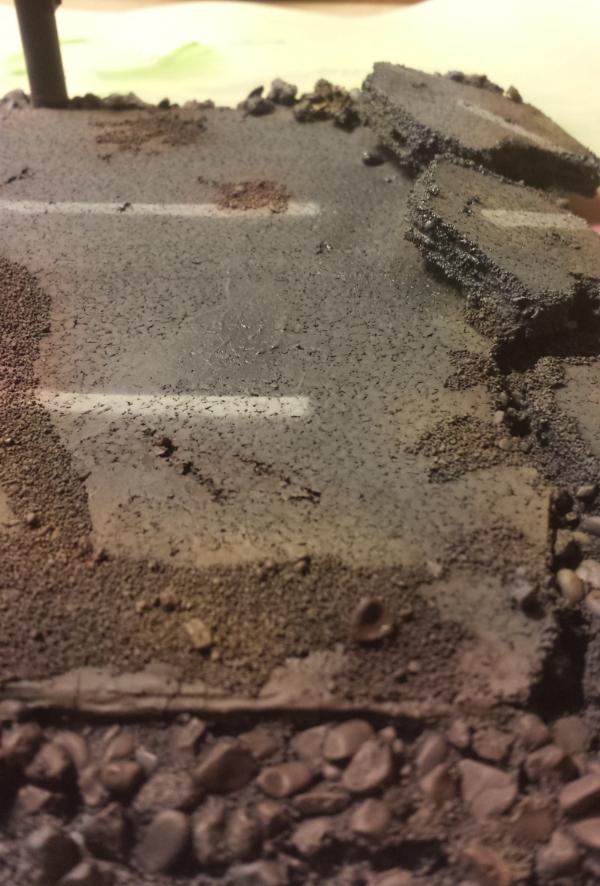
OK well I did not play Assassins Creed. I started on my tarmac.
Added some gravel in the cracks, which will be built up along the sides, so there is not such a stark difference in height. (while doing this i need to consider if i want the vertical struts for the gantry to be in place before i do this or after. it would probably took better if they are in place. But it will be easier to paint the sign/gantry if its not attached.)
Its seems that the cork board was not fully cork but corigated cardboard covered in cork. this is fine for the main surface but looks a bit odd on the sides of the chunks.
Bit blurry but you get the idea. I will probably have to add some glue to the side and the place some gravel on these edges to add to the realism.
Little bit at a time, when i have the time. As i never know what might happen
could have been a self made cork pinboard...made one with corks from winebottles years ago...
and I think just a generous mix with sand and PVA will fix the corrugated cardboard gaps...
the foam I would use for other projects if I were you... as it already reminds me strongly of concrete slabs you would see for bunkers and such things...also if you start carving that stuff painted the sandwich structure will shine through... but it is fine stuff nevertheless...
actually the foamy surface might be a real blessing... they do look decent!...and I wouldn´t have believed in a million years that that penknife would be good enough to slice foam...cool!...you must have sharpened really good!
Its a reasonably new knife, and it is sharp, but i was surprised at how well it cut the foam, it went through it like butter. I will have to do some testing.
1 un coated just undercoat spray
2 waterd down pva glue, then undercoat
3 flour glue, then undercoat
I can get that underway tonight. And build up the gravel around the road, and sort out the edges of the chunks.
We are talking about undercoating the boulders, aren't we? These are carved foam...and if you use gas powered spray, any spray then the stuff inside that keeps the color thin melts the foam...if we're talking about the ground board...then I better keep me gob shut...
Viktor von Domm - I have not base coated with my AB yet, but this may be a good instance of where i do.
Ok a bit more further progress. I have added some gravel to the edges of the tarmac pieces, so it does not look like corrugated cardboard.
So i started my test for coatings for the boulder, the one on the left is PVA, and the one on the right is flour and water with little sand.
Now i had some left over flour glue, and as it was rather thick, i thought i would use it to help smooth the transition from tarmac to gravel on the sides. Because it was so thick it was a good time to get the uprights in place for the sign/gantry. I will still have to add further to this, probably some miliput and further pva and gravel. (the back one looks at a slight angle in this pic, but subsequent to it i place a tooth pick under the side of the peg to straighten it up.)
Only a bit of a text update as i have been working over the weekend. The flour glue has dried nice and hard, but it is not as thick as when it went on. So i am going to have to do something else to improve on this. I have some gravel meant for a fish tank in the garden, this may be large enough to fill it nicely. now just to was and dry it ... i wonder if i can stick it in the oven to dry. .. More to the point i wonder if my wife will let me stick it in the oven to dry. Then i need to start thinking about creating the sign and gantry.
So i scooped up some old (by old i mean excess that i dumped in our garden when our fish tank was set up). Luckily it was pretty dry so i spread it out on an old tea towel on top of a baking sheet and put it into the still hot oven after dinner.
.... Later on ... I poured them into a handy container and entered into my man cave. So with the magic of pva glue and some sprinkling.
I added on some of my standard sand/gravel to fill in the larger gaps.
As much as i had plenty of time to "hobby", i got in grossed in watching Yogscast on youtube (minecraft videos, rather funny) So i did not make that much progress on the sign and gantry part.
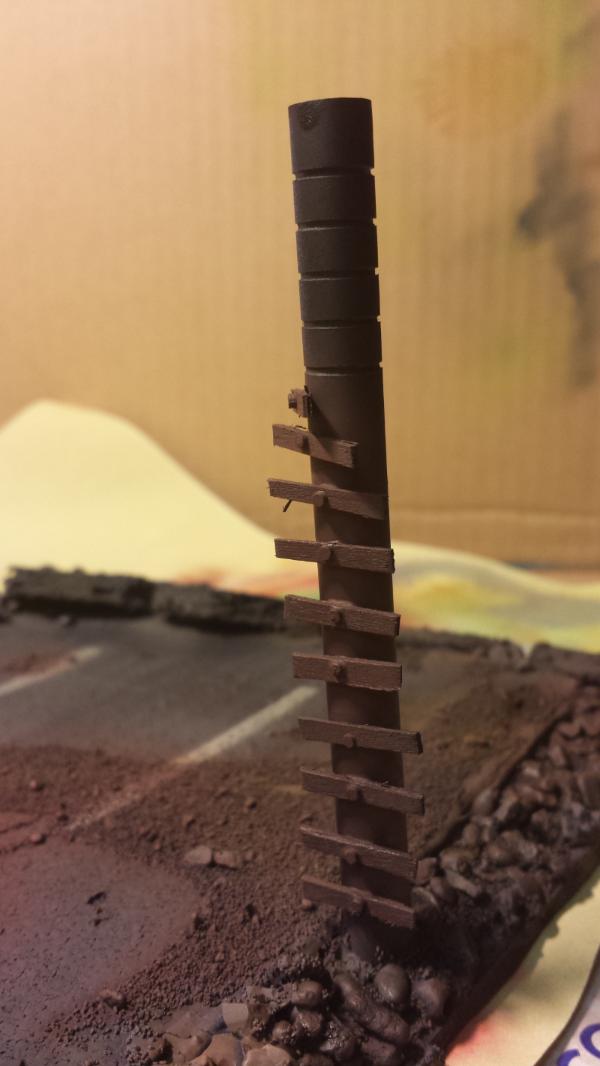
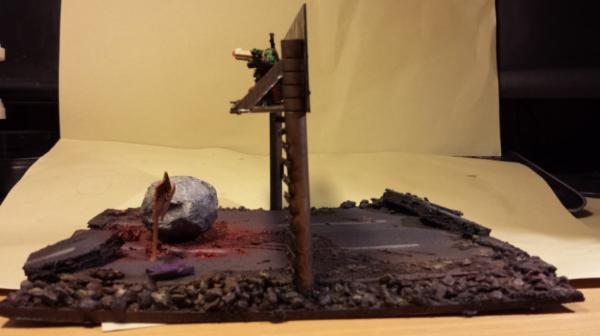
I need to put some thought into how to detail this further, (rivets obviously), i am thinking maybe some lighting for the sign and possibly some cabling. I was thinking about how the Ork got up there, so i will have to make some steps going up one of the poles. Not a ladder like i made on my smelter but something more Orky like individual odd shapes steps riveted to the pole.
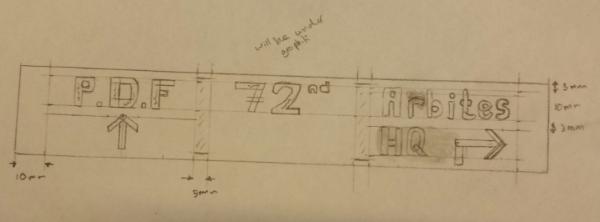
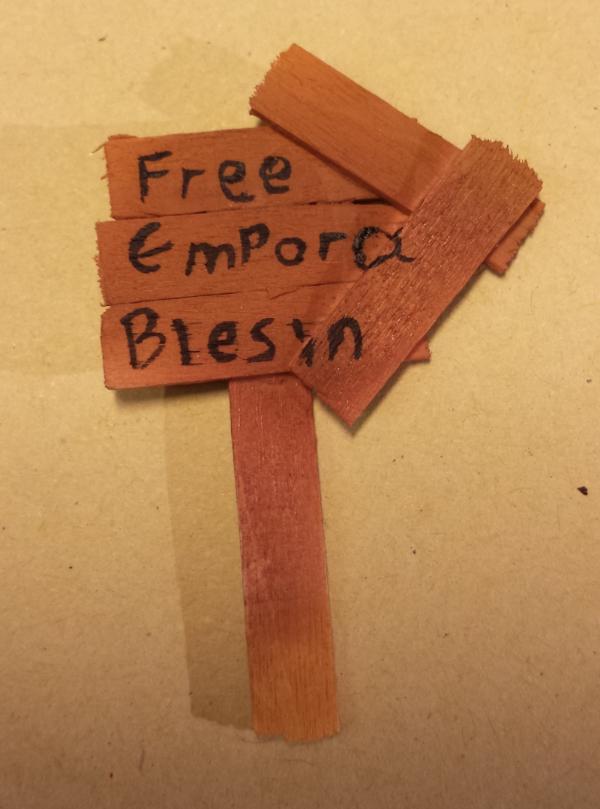
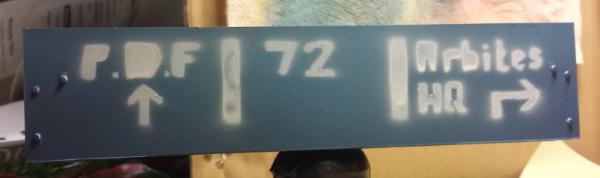
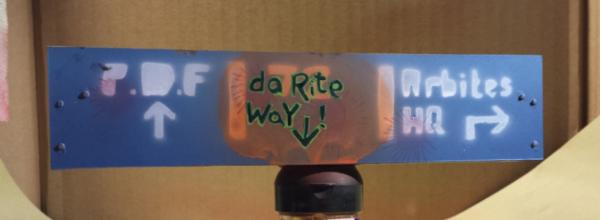
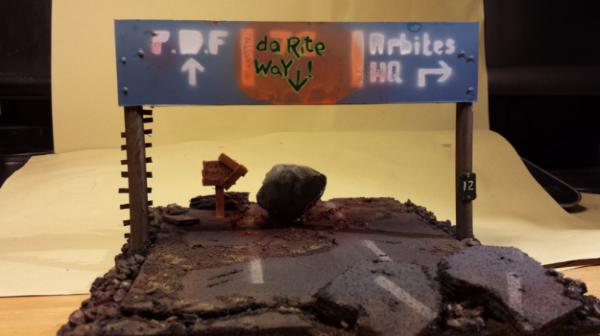
Automatically Appended Next Post: Sat at my desk chatting to people on the phone, so i thought i would draw up the template for my sign. As i plan on making good use of my new AB. The central panel will eventually have grafitti over the top of it in line with my original design. "da rite way"
As my wife was tired she went off to bed with my son at around 10pm, so i got to start my modeling early last night. But still i did not manage to get loads done lol.
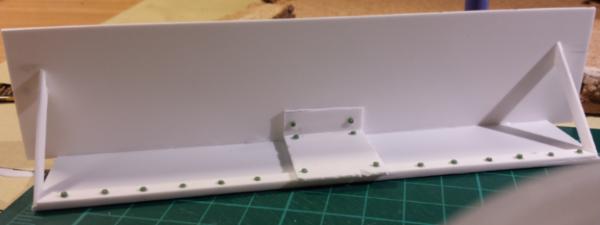
I riveted the back of the sign.
I distressed the central panel/piece which the boulder will be pushed off (Orky addition to the sign)
I riveted the front of the sign where it will be attached to the pole uprights, and where the diagonal support on the back attaches to the sign.
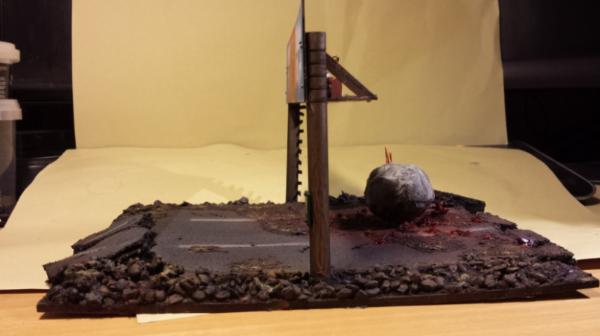
And i made the little wooden sign, i still need to add some bits to it to act as an arrow, if that does not look right, i will need it to be a bit bigger.
Ok just a short session last night as i had to finish watching the Great British Bake off Mmmm bread.
So i made some steps for the post and riveted them on.
And made the sign more pointy.
I still need to think about how to make a light for the sign, but not sure what to do. and even if i do make a light, i am not sure how to attach it on.
Added a small sign to the right hand post, withthe obligatory rivets, this will be a sort of mile marker.
Decided to paint up the sign using my AB, looking at it now i think i need to give it a wash as well, but doing that over the text will actually be good.
While i have the AB out i gave my test boulders spray, hmmmm .... not the result i was after. They both came out a bit too bubbly. The first was the PVA glue, and the second was the flour glue. I will probably have to do some actual paper mache. It looks too much like volcanic rock for my liking atm.
Hmm... an interesting look but yeh, not the look you are going for i guess! Little bit of paper around it with some pva and then a spray and you should be sorted!
Really like the cork base..... nice and simple way to get a nice texture! ... I need to get my entry "back on track"!
In regards to the cork, i think i need to rough it up a bit more so it looks like degraded tarmac. I cant dig into it too deep though because its just a thin coating on corrugated cardboard. but i can pick away at it a bit and glue on some further sand. I need to make some sort of way for the sign to be held up as well. probably going to make a small Milliput mound and press the sign into it to give a slot, and then remove the sign to let it dry, and also glue on a little rubble around it to show how it is held up. Then glue the sign in once its all painted. (so i don't have to mask it when using the AB on the base.
Well my Supply Drop from Camkierhi for "Completing your entry despite having a baby!" from the last compeitition, arrived this weekend. And what a plethra of awesomeness it was. Thank you very much. I even had to put a new shelf up in my studdy to rearange stuff to put it away
And i also i got a lovely little something for Baby Oliver (considering my nick name is Bear this is especially awesome)
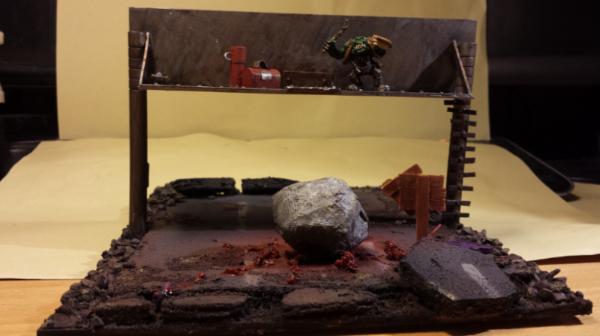
So i started making good use of my new supplies and put some textured "plate" down on the gantry part of the sign. Don't want the naughty Ork falling over in wet weather.
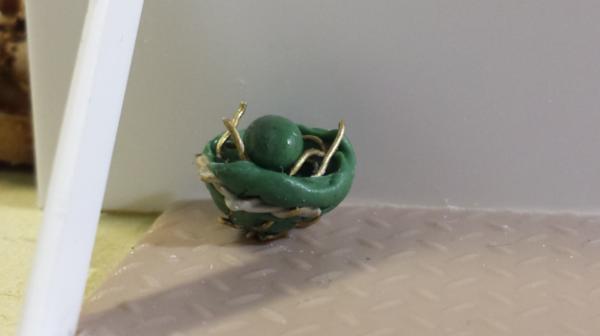
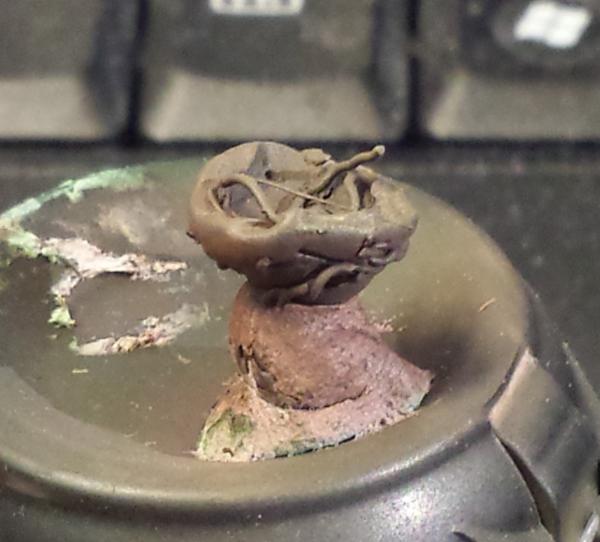
I have been thinking that i need to add more little details to my peices, and i have been thinking about what to add while working on the doors at the weekend. This is one of the things i thought about. A little birds nest with egg/eggs in.
Some other things on my evenings working that i thought about was, having a head of the recently deceased having rolled off the road into a crack. And add some more dirt / gravel to the road. As no one is likely to sweep clean a broken road. Also some detritus from a broken vehicle in the corner.
I had a dig through my collection of bits that a friend gave me from his old ebay / car boot business. And i managed to find an Ork that i feel looks appropriate to be the one in question, as he has a stick to use for levering the boulder off. I need to think about what to put in his off hand. I am thinking bottle of sandwich.
And finally my beautifully paper mached boulder
Looks much better and is drying out nicely. Also i will be able to paint straight onto this rather than having to undercoat it. which should work well with a lighter grey.
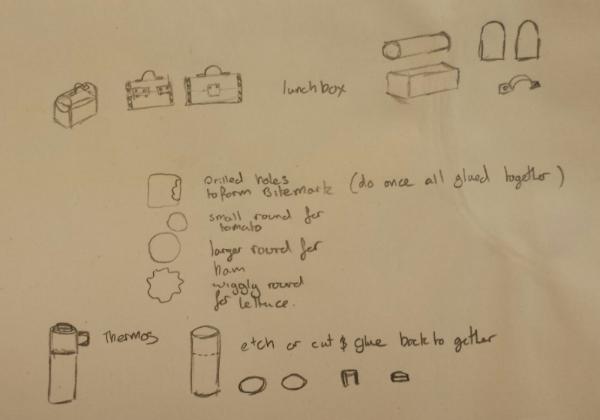
In my continuation to try to add details, rather than getting to itchy to start painting. I have been spending my non hobby time thinking about what to do, rather than staring at my desk when i sit down to "hobby". So here is my plan.
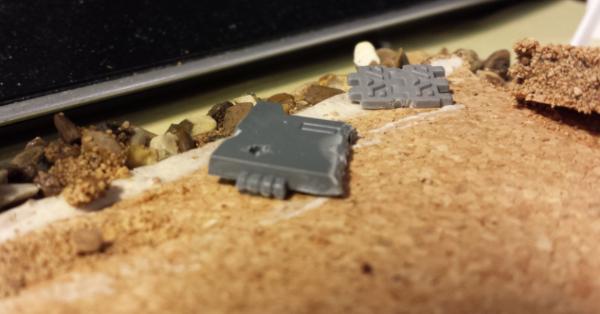
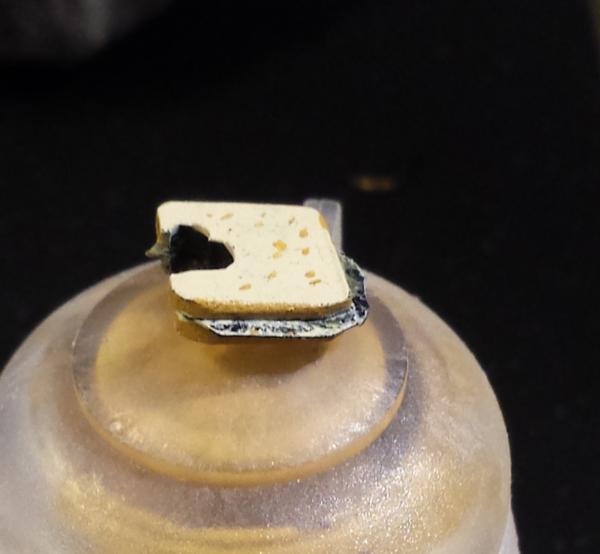
So we have a lovely ham salad sarnie. But the question is do orks like white or brown bread? Or do they in fact like blue bread, nothing like a bit of mold for flavour.
A lunch box that the sarnie had been stored in.
And if you are standing around waiting to squish the emperors finest, you need some coffee to stay awake.
Also at work i use the penknife i whittled some bones out of a coffee stirrer, as much as it passed the time, i have a feeling that they may look too flat.
After my D&D session i sat down to do some more. But i decided i need to undercoat and it was to late at night to do that then. So a quick mock up ...
and then getting my AB out to work on the grey of the boulder, there is actually 3 different grays on here, not that you can see from this photo. LOL, needs a wash and then maybe some further work (still working on my AB skilz)
So hopefully the next shots will be once i have started blocking out the color.
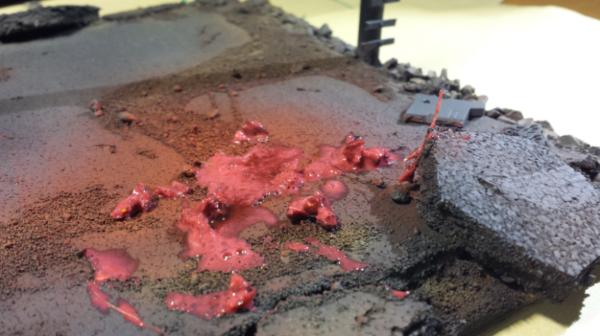
So i used my AB to lay down some colour on my terrain. This is my first real project using it. After spraying some greys in varying amounts, i then put on some browns for dust and dirt in certain areas. Then to show the atomized blood from the smushed space marine there is a spray of red.
Then i created a gore mixture by adding some pva to the left over blood red, i mixed in some random bits i could find like dried grass from the lawn mower next to me, and some snipped up packing foam, finally all mixed in will a drop or to of Baal red wash.
I then put a wash over the gravely parts.
I took a further photo of the gore this morning, its looking sufficiently gory
Now tonight before i go to my second job, i need to touch up the undercoat on a few of the pieces, ready for Sunday night when i can do some more painting.
Automatically Appended Next Post: Ah bugger i forgot the road markings .... ok that's easy to fix, i can then just do further dirt on the road, which is probably a good thing
Normally i would use a wash, but i have not done one yet as I am trying out the Airbrush. The gravel/pebbles at the side have a wash, but yeah the rest would benefit from a wash. I'm worried that using the AB to highlight over the wash would cover it all up.
Automatically Appended Next Post: On a side note i made a turtle shell for my sons fancy dress party. I only decided to make it on Saturday for Sunday. So did not have much time, i used wide masking tape rather than paper mache, and after a thin brush of paint, i was able to use the airbrush for shading (although i clogged it in the process, but it gave me a chance to take it apart for the first time) I was so proud of it. But then he decided that on Sunday outside the venue that it was the wrong colour as it should be more of a brown than a green. *grr* I can't complain too much it should have been a bit darker, but i did not have much time or paint to work with lol.
Well after seeing the great work done by my fellow contestants, i needed to get my bottom in gear and make some further progress.
I started with putting on the road markings that i had forgotten, Buy cutting out a mall stencil and AB in a bleached bone line. And then going over parts of them with a drown (areas of dirt / gravel) so it did not look like they were painted on top of said gravel. I also used a blood red wash over parts were the gore should be sitting on top of the lines. And as i had brown in the AB i gave the wooden steps a paint. (Not fussed by overspray on the base as this would add to the dirt, and on the post that is due to be painted metallic in the end anyway)
Then taking some advice i gave the whole thing a spray of a watered down black wash, i will see how it looks when dried, to see if it needs another.
My first large flat area to be painted, started dark then built up to a lighter blue mix then the lightest just on the top (although it is upside down in the picture), another handy thing i found was that i could dry the paint by just putting air through the AB, its quieter than a hairdryer and its already in my hand
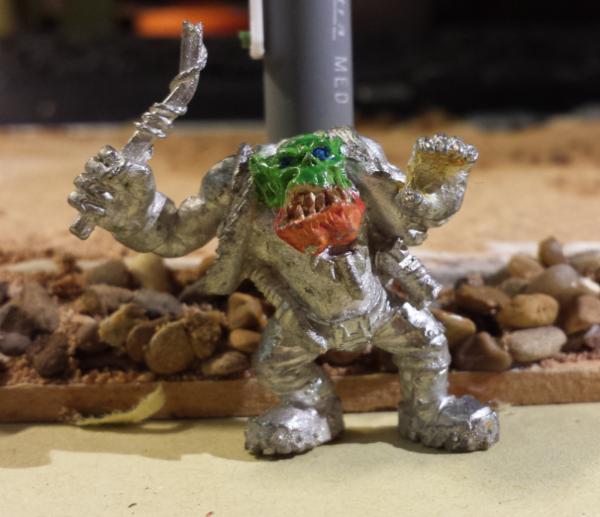
I just need to finish cutting out the stencil for the sign, and then i can spray that on. its taking shape. ... although should probably work on the ork as well. It normally takes me for ever to do a single figure, but as he is in one piece it should be easier, and the AB should help. He has lots of green flesh for me to play with.
Well i finished creating the stencil for my sign, and taped it into place. I decided to go with a skull white for the text. It went pretty well, the spraying went well enough, if anything should be improved it would be my stencil in the first place, and to spray top down rather than from an angle, but if i had paused a bit between sprays giving the layers to dry off, there would of been less running, but at least the running was within the painted area and there are no streaks. But i do think that this does make it feel like a real sign.
Gave a couple of coats to the lunch things, starting with a darker red then going for a blood red. I do find that my red does not like sticking to the undercoat, and has a habit of just running around. i am wondering if its because i thin my paint with water rather then alcohol or a proper thinner. But then the blue on the sign went on so beautifully. Now it is dry its not looking to bad, but its not super bright, i may just give it a top down highlight of an orange and then detail from there.
Actually looking at these close ups, it looks better than i remember last night, so thats always good lol. I still need to pull my finger out on the Ork though. I have D&D tongiht so not sure how much painting i will get done, but then i may also be able to get some brushwork done surreptitiously (i play over skype)
Well as much as i have good intentions to get so much done each night, last night i managed to get the Ork flesh done. And a base coat on his coat But i was wrong i have D&D tonight and not last night. But as i am still trying to catch up from the lack of sleep at the weekend, i think after tonight's geeking i will get an early night, as the late nights start again tomorrow :(
I will try and do his face during my dice rolling tonight.
Would that be real D&D or 4e D&D? Bear in mind I started with the 3 brown books... And my friends are trying to talk me into this new 5e version. Just got the PHB, so we'll see.
3.5 eddition, played over skype or google hangouts (as i moved away from my group) It has quite a heavy reliance on the Role Play Aspect, so my DM is not so keen on 4th as its more just hack and slash. We have spent an entire session just shopping and looking for info. It has sometimes been weeks before we have rolled anything but a d20lol. But its great fun, and often incredibly rude and inappropriate for younger ears. but hey that's my sense of humor Currently playing 2 different characters, a Human lvl 9 Dragon Shamen, and a Gnome lvl 9 druid whose animal companion is a bear in a top hat called sir binky. Just started this campain a few months ago, and its based in Planescape.
Well i managed to get a bit of sneaky painting done during my D&D session, until my little bundle of joy came to join me for a bit
Added some food dribble and a bit of mold onto the lunch box.
and some coffee dribble, and also some of the mold has grown up the bottom of the flask. (Looks like my thin metallics strikes again, so i need to add a second coat to the lunch bits)
Added down some more base colours onto the tipping Ork.
And with a wash. But dam my sucking at doing eyes, especially a squinty one.
Why is it that a photo never does a model justice. I am always much happier with my model before i see the photo of it :(
Well after another stressful weekend of door work, i managed to get some painting done on Sunday night. Added some more colour to the dirt, as the base was looking a bit samey. I did not want too much brown as the dust and gravel was meant to be from the same material as the road / tarmac its self.
Given some base colour to the tank hatch and the helmet, gone with purple as though it was one of my Marines. (An Assault Marine). Then put some mettalic and rust on the tank track, and some added lead bealcher the vertical poles.
Camkierhi - I will see if i have a steady enough hand to touch up under his eyes.
Striking Skulls Assault marine head painted and gore trail added to where it has rolled.
Further gore added to the underside of the boulder.
Wash added to the sign, i never like washing such large flat areas :(
Dry brushed at an angle to work over the dark wash. Then gave it a further sepia wash. with add further washes for depth of colour. Its meant to look rough, the best metal would not be used for signs
The sandwich is taking shape.
And so is the birds nest.
I seem to have misplaces the egg, so i'll have to source another one.
Well another busy weekend, and distracted by the shinyness of Robocraft on steam, means i got less done than i wanted. But the front of the sign is done.
Finally got round to taking taking some photos of the finished project. I really enjoyed this one, and it was a good test of me using the air brush. I need to work on thinning my paints or getting some proper AB paints. Either way here are the photos of "squished"
Knightley - The hardest part was probably learning to use the AB. As i am thinning my own paints and using water to do it. It was hard not to over load parts and then have the air push it to where i don't want. This was only a problem on plastic, so for the majority of the project it was fine, but on the front of the sign it was tricky. Luckily the base colour went extremely well, but the lettering and the "graffiti" was harder. I had planed on using the AB to do the lettering for the graffiti but its detail was not fine enough. i probably could of changed the needle, but i have not advanced to that yet.
Well, it has been a while, lots going on. But having met some new people at new year who are local. I have gotten back into my painting. So last night i decided to paint some pin ups on my 2 rhinos. It was good fun.
So coming back to the hobby and anew League terrain competition starts. How handy. So i sat down with my son and we had a brain storming session.
The theme is For the War Effort
By this I mean, I would like all of you to make terrain that would somehow be used to strengthen a military force, and could therefore also be a target of the opposing force. This could be a a huge martian manufactory, or just a grot sitting on a pile o' gunz. A supply cache, fuel/ammo dump, or a fort. If Fango hadn't already submitted that sweet Tyranid spawning pool for Comp #23, that would work for this, since it's creating troops. A warjack being built/repaired in a building, would work. A super weapon being unearthed, would be great too. Use your imaginations and creativity, and impress us all.
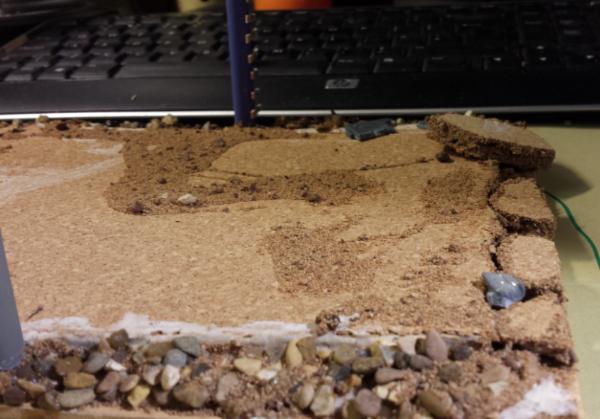
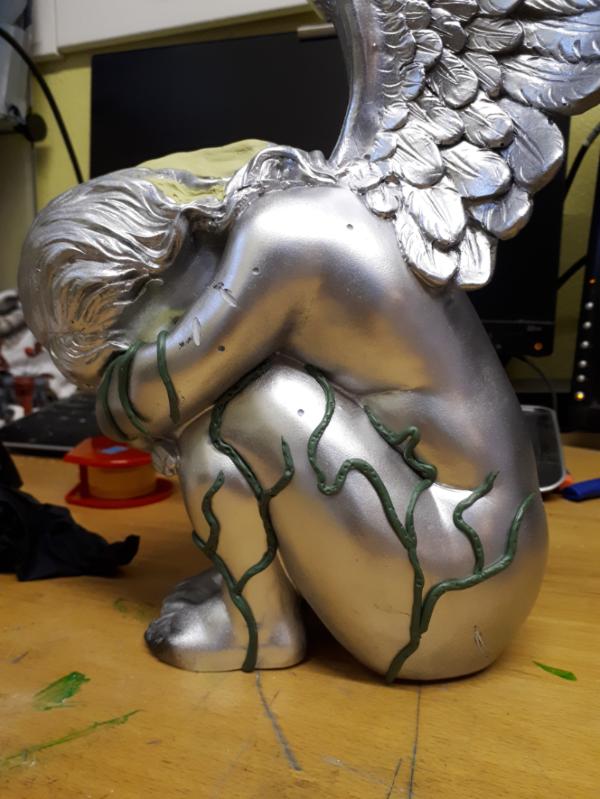
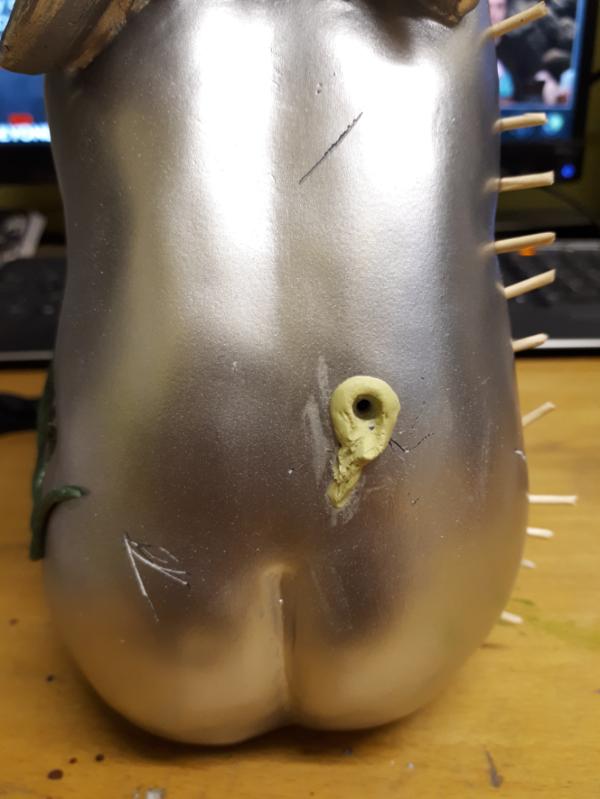
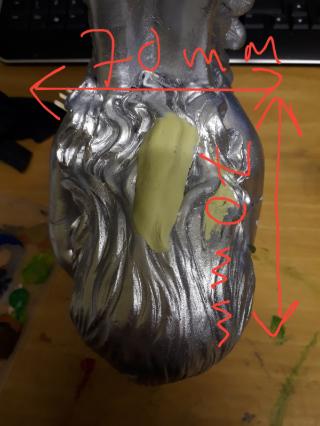
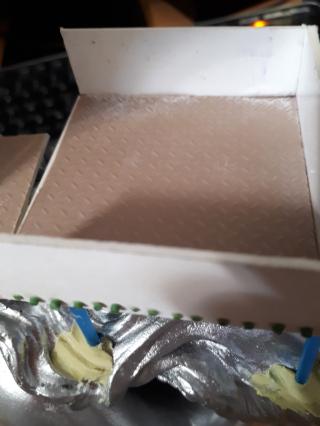
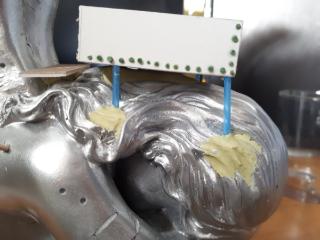
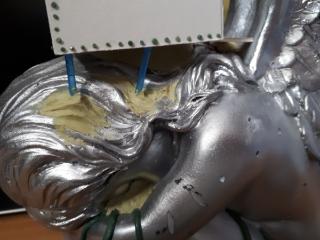
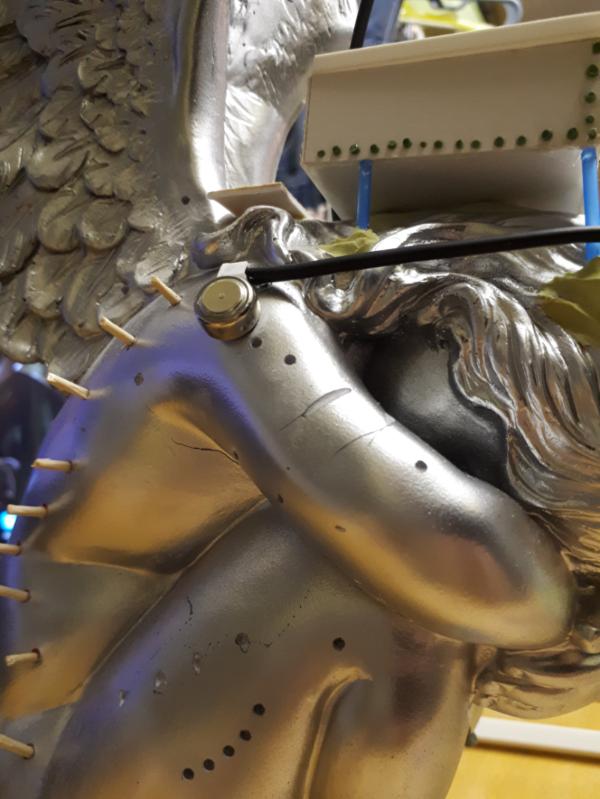
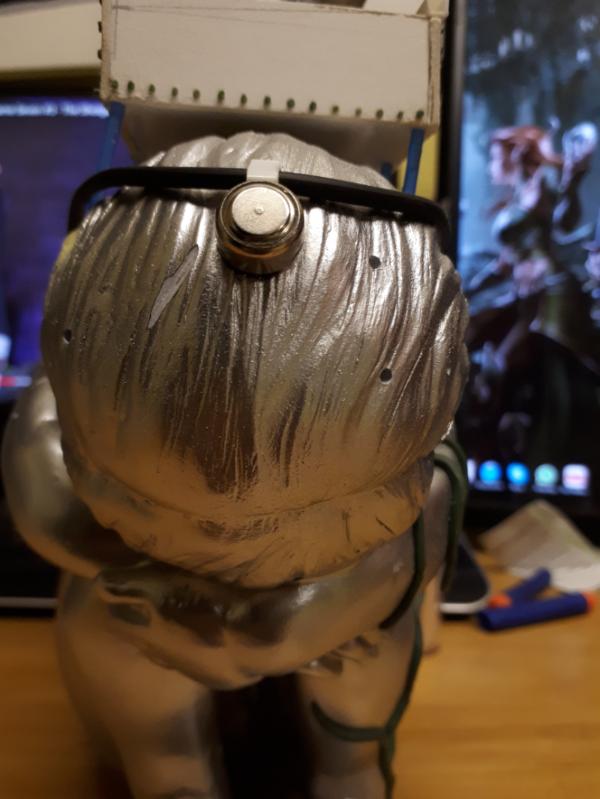
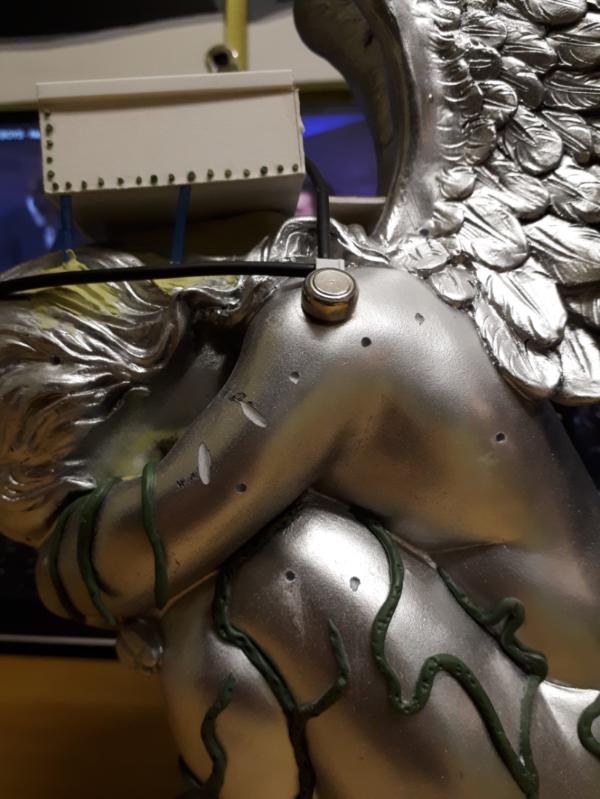
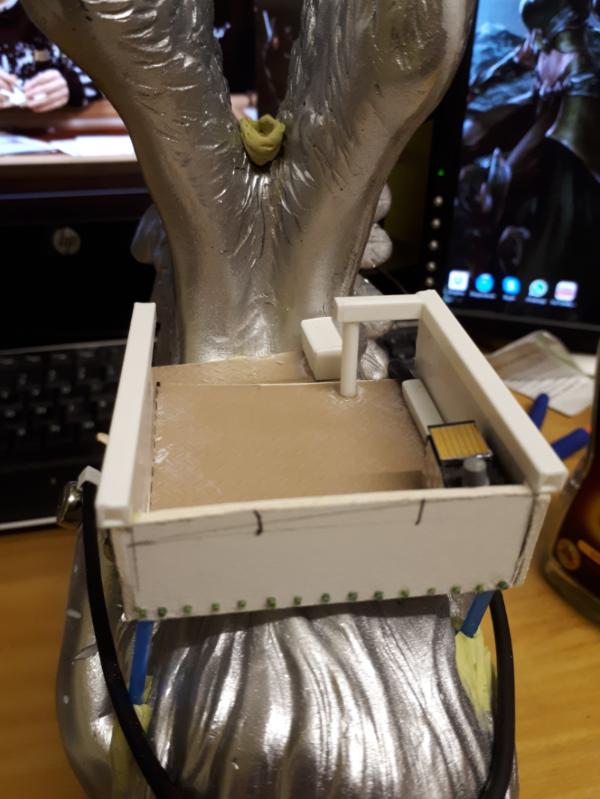
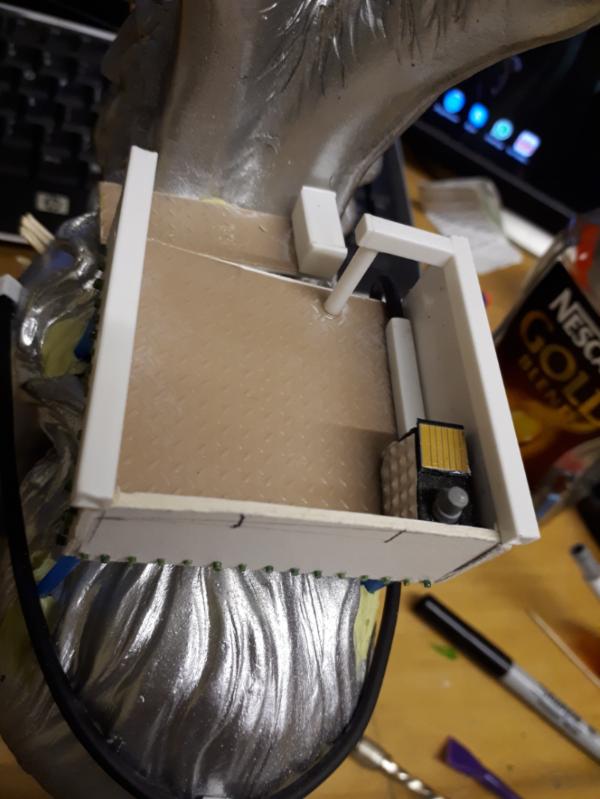
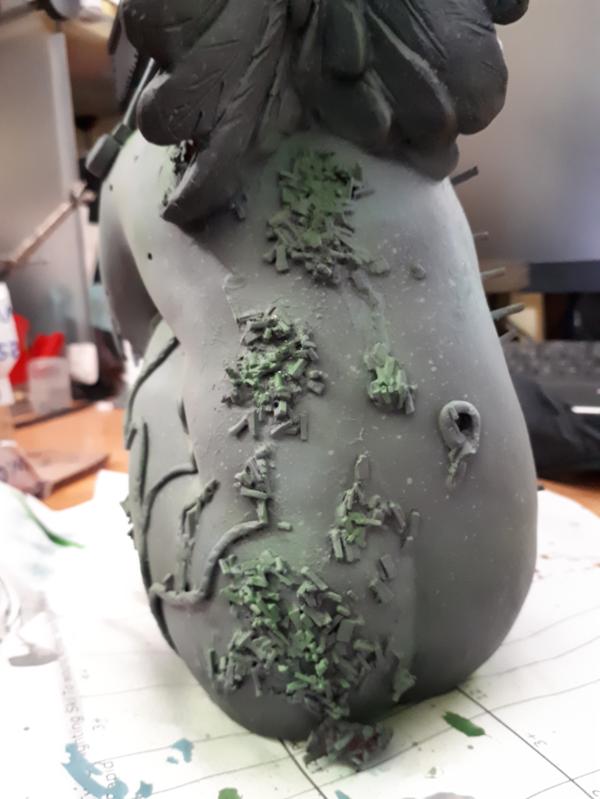
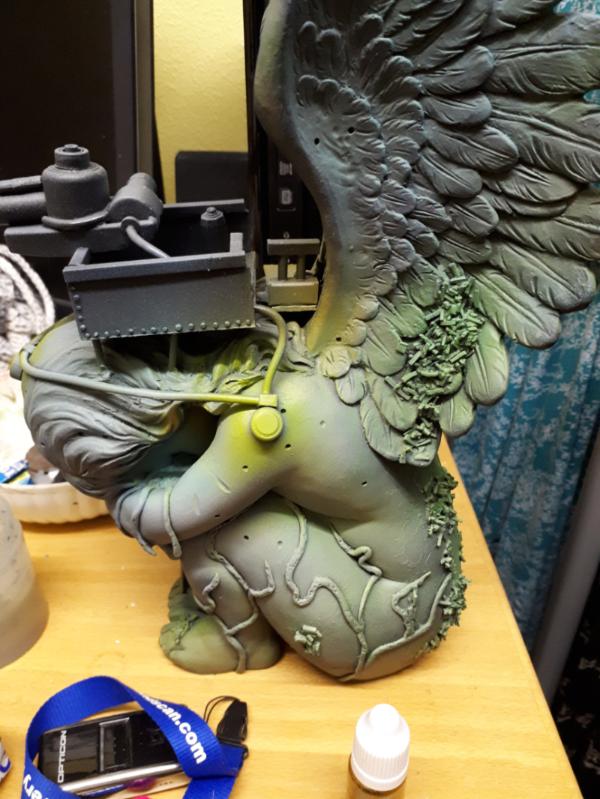
I have decided to create a gun emplacement with a good line of sight on a statue. It just so happens that my Mother in law when she moved out left a statue behind that she was going to bin, i held on to it. And this is the basis of my build.
I started, by putting some vines up one side, so that it looks like it has been there a while. i also drilled in some pullet holes and filed in some scores that look like bullet damage from a wider angle.
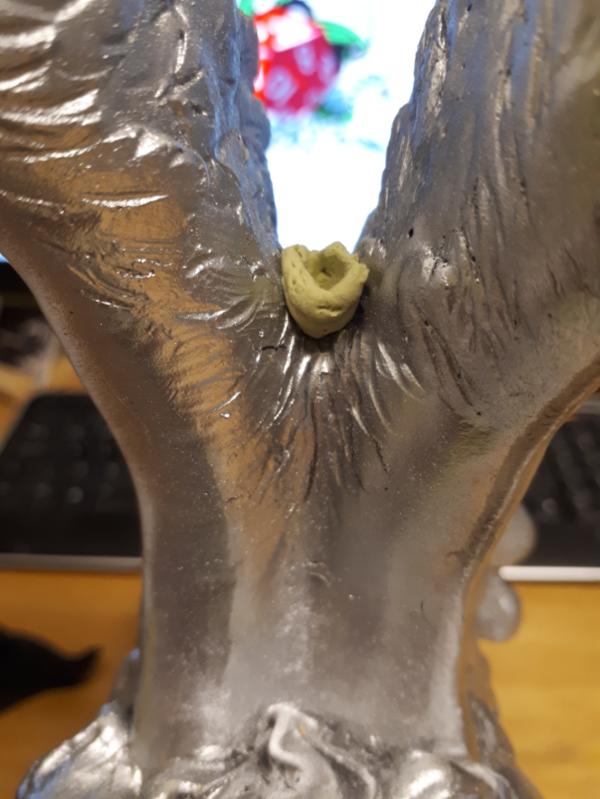
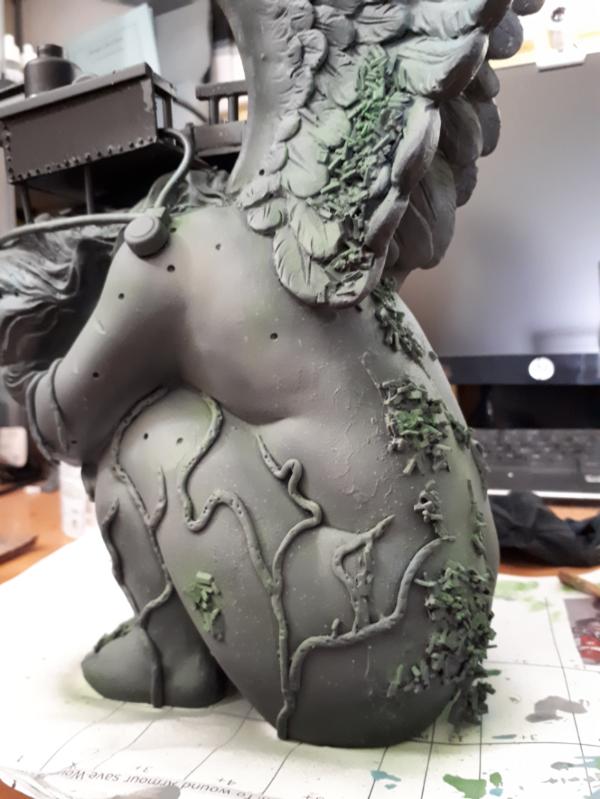
Put a little birds nest between its wings, as i plan on doing poo stains streaking down.
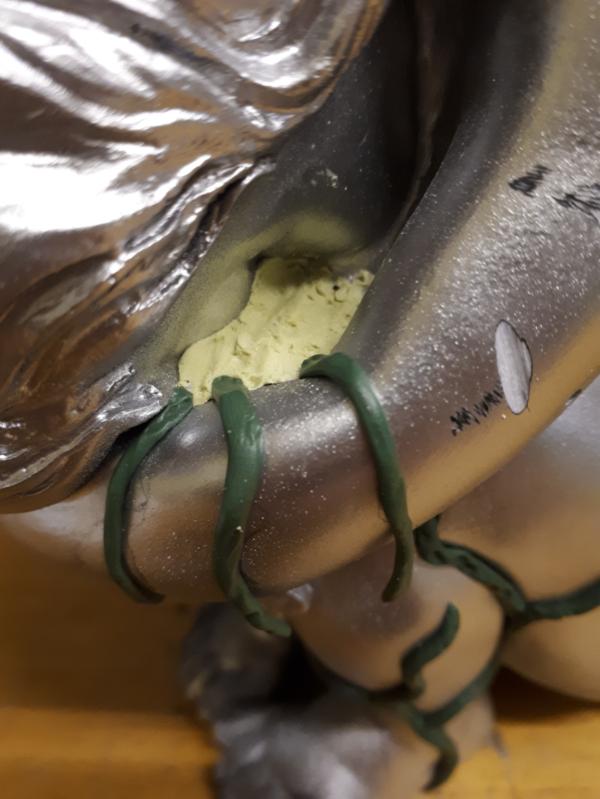
Where there is a recess / gap in her arms, i filled it with a bit of mili put, and i am going to colour some pva on top to do a kind of water effect, and again there are some plant groth / vines coming out of it.
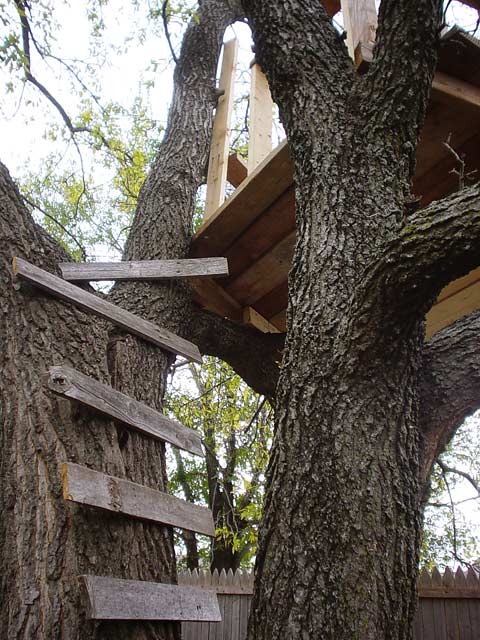
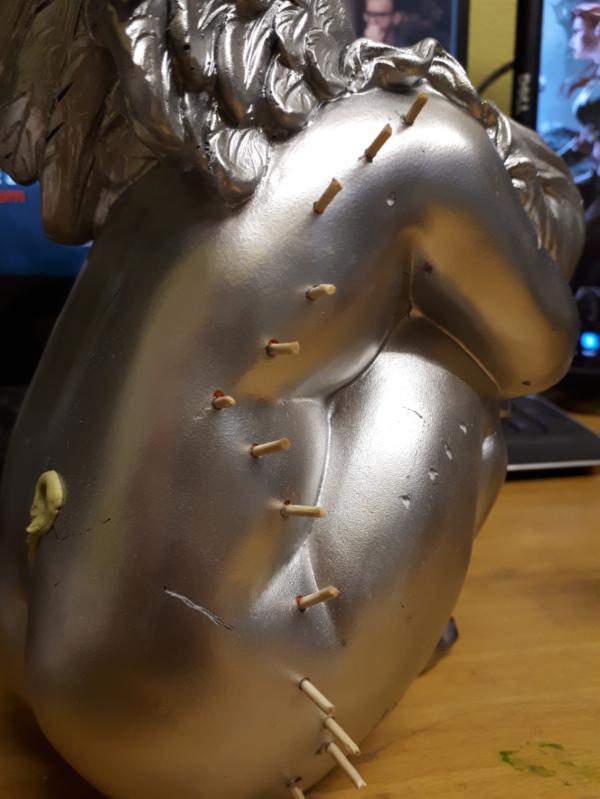
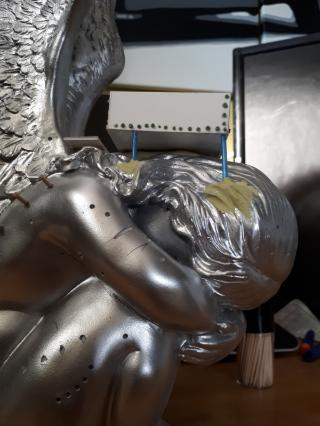
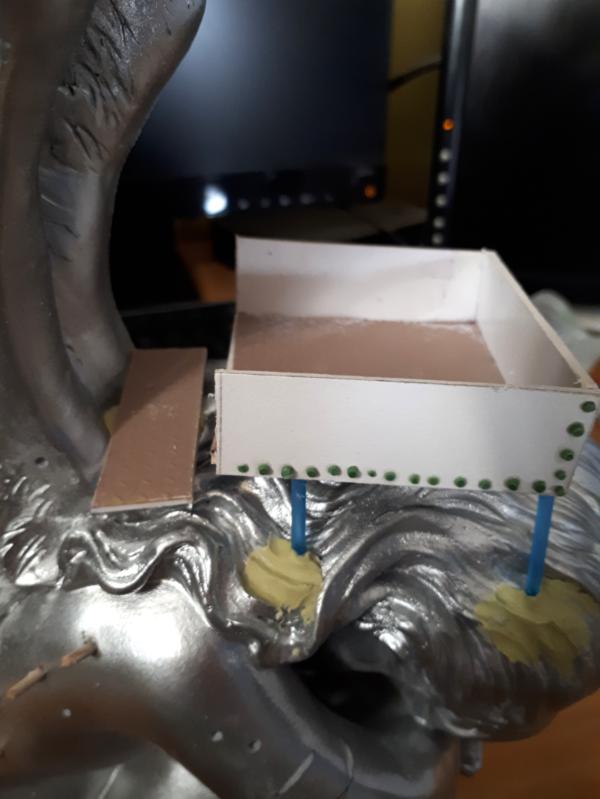
I had done a ladder on a previous build, and steps up a post, so i wanted to do a different way of getting up. originally i was thinking a knotted rope. put i decided upon pegs to climb up.
I continued the battle damage and drilled and sculpted a metla "wound"
I had some mili put left over so i filled in a hole in the hair and put a rage amount on the top to level it out ready for the platform. and some measurements to remind me of the size i need to build.
Now i just need to add the competition banner to my signature.
Well i have created platform to go ontop of the head. I could not find my plastic sheets , Grrr but i found some mounting board. The board worked reasonably well. But i did still have a stash of lots of lovely bits that i got from competing in a previous competition. So i was able to put a textured floor down. And put some edging to the walls and a small hand rail at the back.
While searching for parts to make a gun i took apart a pen and found 3 button cell batteries which i thought would be great for my lights. So using some cube tube i had and some off cuts, i made some bits of trunking for the wires and attached the "lights" directly to them, and ran the cable up onto the platform into a power supply, made from some foam, some odd textured metal part of an old SD card and the off cut from a grenade launcher.
The struts i had put in needed some more support, so i mixed up some miliput, and sculpted it like the hair around them. The day after i took a needle file to it, to smooth it up (no photo)
I have tried to pay greater attention to detail than i normally do, pushing myself. Like the small bits of conduit on the wire, rather than having it just draped on un realistically.
And here is the "Gun" i think it would add a cool dynamic to a game to have a weapon that could be taken over and used by the other side.
probably the most daring project i´ve seen...i´ve seen so often these small angels figures in shops...each time i wondered how to use them for terrain...and now you´ve done it... so much potential!
speaking of...the gun...hell yes... like the idea behind it and the scratchbuild take too...its probably LR tank maingun sized?
@vicktor thanks, ill post a comparison photo tonight if i remember. It is fun working on something this big, the painting will be interesting. hopefully i can fix / clean my airbrush
Bit of a battle report from a reduced rules skirmish i played with my 7 year old son.
Spoiler:
The table looks a bit dark, but it was lighter than that in person. Just a simple game with 5 characters each to introduce him to the concepts.
My Captain and Chaplin ganged up on his Techmarine, he was the first casualty.
My Chaplin was then taken out very swiftly in retaliation, especially with a triple 1 on an Armour save :(
We snuck around a wall to get at the Chaplin that was hiding, but kept our distance and shot at him.
His Tactical Marine spent a lot of time hiding behind a downed tank.
It ended in an epic fight atop the wall between my Captain and his Chaplin
It ended in both of us losing 7 wounds, so we called it a draw, and shared the winners cookie
He was not happy that he did not win, but we both really enjoyed ourselves, and he wants me to paint more Spacewolves for him. So i will have to intersperse his mini painting between mine, so i dont get fed up with painting red
Ok so there has been some cold weather in the west of England, and my Airbrush packed up. (not been used for a year or 2, and i have a feeling i did not clean it properly the last time i used it.)
I managed to make some process, undercoating it hanging out the back door, and i got some airbrushing done before it fully packed up.
I started off with some dawstone grey, to lighten it up, then added in a mix of a lighter blue. then a dawnsone grey and dark angles green mix (concentrating a on the lichen type stuff) Then it packed in. I think it is still too dark, but we shall see how it progress' once i get the new Airbrush.
You can see where the airbrush was starting to feth up and spit and spatter, luckilly on a terrain that is menat to be stone, this works ok.
So hopefully my paints will arrive in the next couple of days. I really feel like i should have paid for faster shipping lol.
So in the meantime, i decided to sort out my assault marines. As i was planning now to use my Airbrush, i decided to glue them together as they had kept getting mixed up.
and they got their first coat.
I'm using a brand of spray called cobra, its a lovely strong colour, but it does come out a bit thick. In future i may have to pay out a bit more for army painter or something.
While i was building i thought i should put my scouts together, as they had been sitting for years to be made. And i had received a replacement box of scouts as well from GW, because the legs were mis cast. strangely though i cant seem to find any mis cast legs, i have a feeling i fixed the one on my snipers. (extra box photos to follow)
I decided to spray these guys black, as there will be a lot less red on them, especially with the cammo cloaks. (also a few space wolves sprayed for my son)
Friday night i actually managed to get some adult time with my wife and inlaws with out the kids, which resulted in me drinking gin and home made wine. So when we got home i thought it would be a sensible idea to start building my next lot of scouts, luckily i did not get to far, as i was a lot drunker than i realised.
I continued on Saturday after a few strong coffees lol.
I chose shotguns, for no real tactical reason, apart from, i thought they would be cool. Once they are all nice and dry i will greenstuff on some cammo cloaks for them.
I did then realise that i had missed off an arm on one of my assault marines, and after discussing chapter tactics with a friend, and i decided on Iron Hands, i decided to give him an old necron arm, and a random pistol (that i think is from an orc) to be used as a bolt pistol.
I also plan on giving one of the new scouts a mechanical leg as well. lets see how that goes.
While still waiting on my paints (although they have arrived now) i continued to build my last scout. And as i am leaning towards iron hands chapter tactics and warlord trait. I thought it would be good to replace more limbs.
I had to add a bit of a spacer in at his shoulder so his arm would fit onto his hand, but as i plan on sculpting cammo cloaks on them, this will be covered up.
For some reason rather than sculpt the cloaks on them all i decided to build an objective, of a Marine trapped by part of an orc flyer that he had shot down.
I glued some "gravel" onto it last night, so once that has cured i can add some more random debris.
Most excitingly i had a game on Wednesday night, my first 8th edition game, in fact my first game since 5th edition (and i only played 1 of them) It may have lasted 6 hours and finished at gone 1 am, but i really enjoyed it. its given my a good idea of what direction i need to take my army in.
Photos in the spoiler.
Spoiler:
My Scouts making good use of a play mobile castle.
After the scouts dropped the drawbridge my razorback could get through.
Sadly my 10 man assault squad with Chaplin did rather badly
In fact i lost the game, badly. but i still ahd fun. one thing to take away from it. is that Guilliman is an arse hole lol
Well i got a bit excited with my new paints and airbrush , and put some more colour on my terrain peice, and i i am pleased with it. I also then put some colour on my assult marines, and also on the 4 minis i had prepped for my sons space wolves.
Its been a busy weekend so i have not got as much done as i would like, but a friend did drop round some old space wolves of his that he was not using, so i have boosted my sons army (all will need painting / repainting and or building) And a few of them for me. So i started kitbash / scratch building a servo harness for a new tech marine.
Tonight i should probably do some proper paint down on the gun and platform on the terrain.
Well i think i have finished my terrain for the competition, although i will probably go back and tweak it a bit more. But in the meantime i decided that my Techmarine should be on a bike, but not a real bike a scratch built walker. It may have been xenos technology at one point , but it has been cleansed by the Omnisah and is now Toootally safe.
I think it needs some more embellishments, maybe some Armour plates and defiantly some rivets, maybe a cable or 2. We shall see.
Ok i went on holiday and then had a bit of painters block. But some positive reinforcement, and that tattoo i did on my wife went well so im feeling good.
Got some new paints
Did some painting on some of my models .. Airbrushed in the red, and then the highlights, then started on the other colours by hand.
And while some was drying waiting to wash it i decided to build my Thunderfire cannon from scratch.
The cog on the back was central, but mush of slipped slightly, when i realized the super glue was cured. so i may put a handle to the left of it or something.
Well i have taken photos of my Finished scenery for the LOER competition, and managed to get my mojo back to finish painting some more of my army. Especially as i have a battle tonight, my 2nd 8th edition one!!
So i finished my Techmarine on a bike, with his cleaned and blessed re-purposed xenos technology.
I finished my Captain in Terminator Armour, which i found out yesterday is an old librarian model (oops could of done with a psyker)
And finnally my Razorback, whcih was my first conversion, but took so long to paint. The turret and weapon are both magnetized.
this freehand could have been better, i need to work on it.
I then decided to airbrush my scouts camo cloaks, these are the next main squad i am working on ... well i am also doing my assault squad urm and devastators ... i still have plenty to do.
I should probably build a light box again, or invest in a collapsing one. but that would also involve me needing more lights on my desk lol
After my last game my freind gifted me a few bits, including a drop pod. It was painted, but the inside was green, nd it was in bits. So i cave the inside a new coat of paint, and added some purple to the fins.
After closing up the doors, i found that there was a build up of paint and glue, so i had to file down the corners.
As it was a blood angels droppod, i had to file off their iconography.
Also there were a couple of small bits missing, so i am having to glue in few squares at the top, i will add some details later.
I also got 3 models, to strip and reporpose.
And my current to do list, next to my keyboard.
Automatically Appended Next Post: And my son decided yesterday he would like my old necron army, so swapped the few space wolves he had for it. He is very happy.


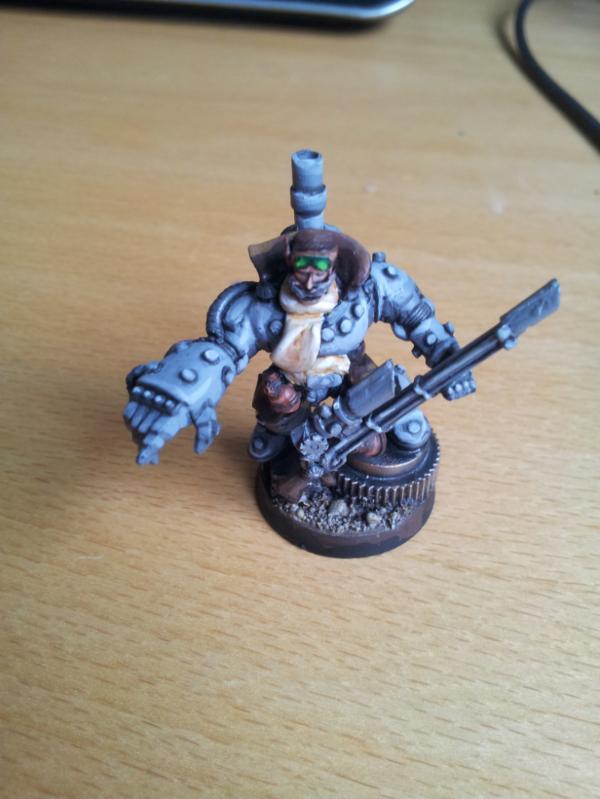


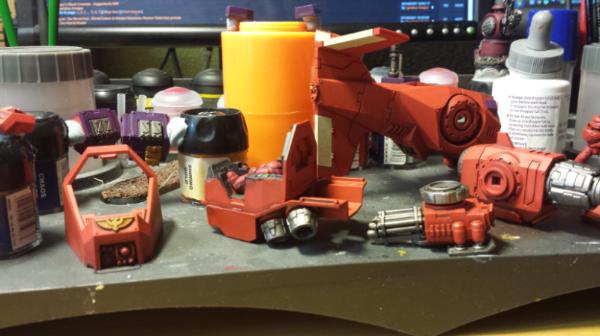
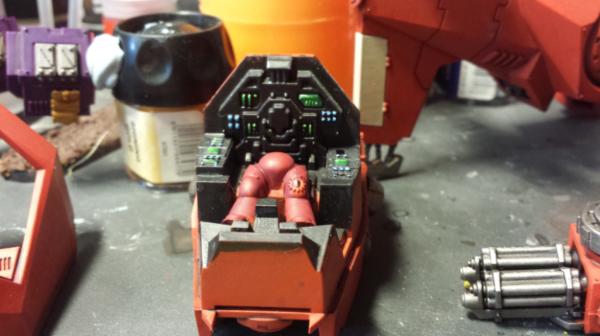
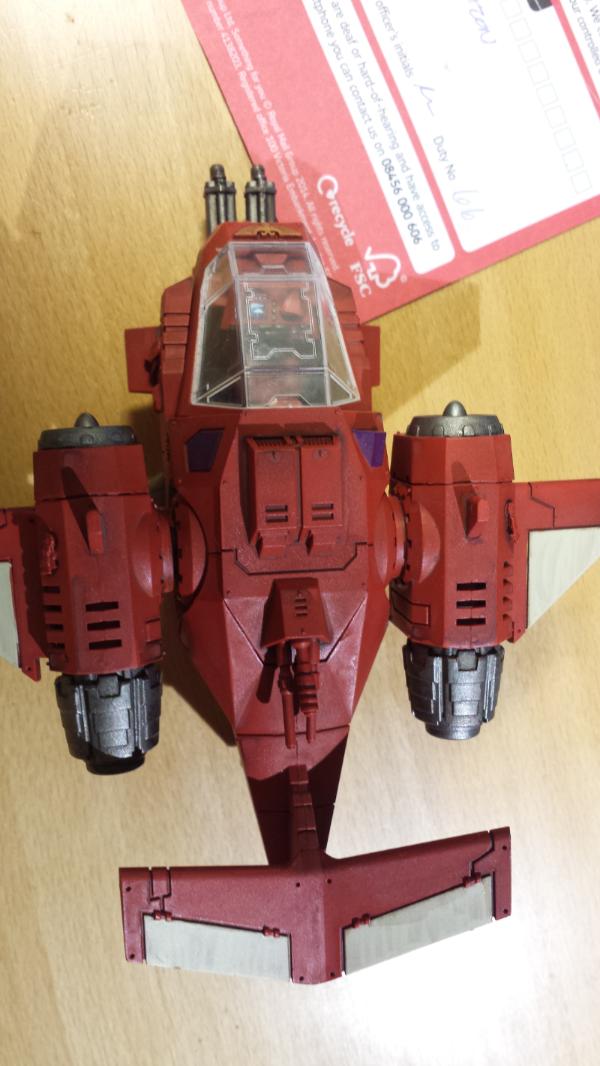

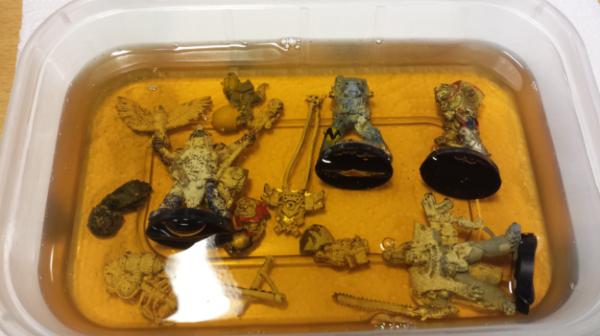
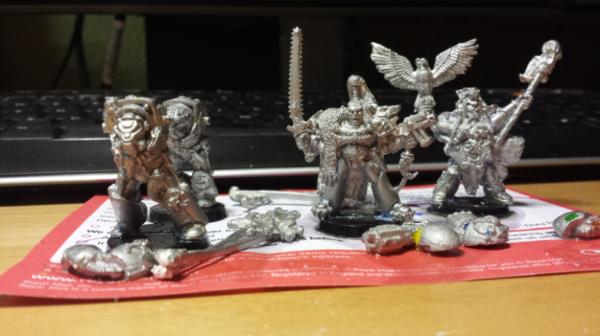
 )
)

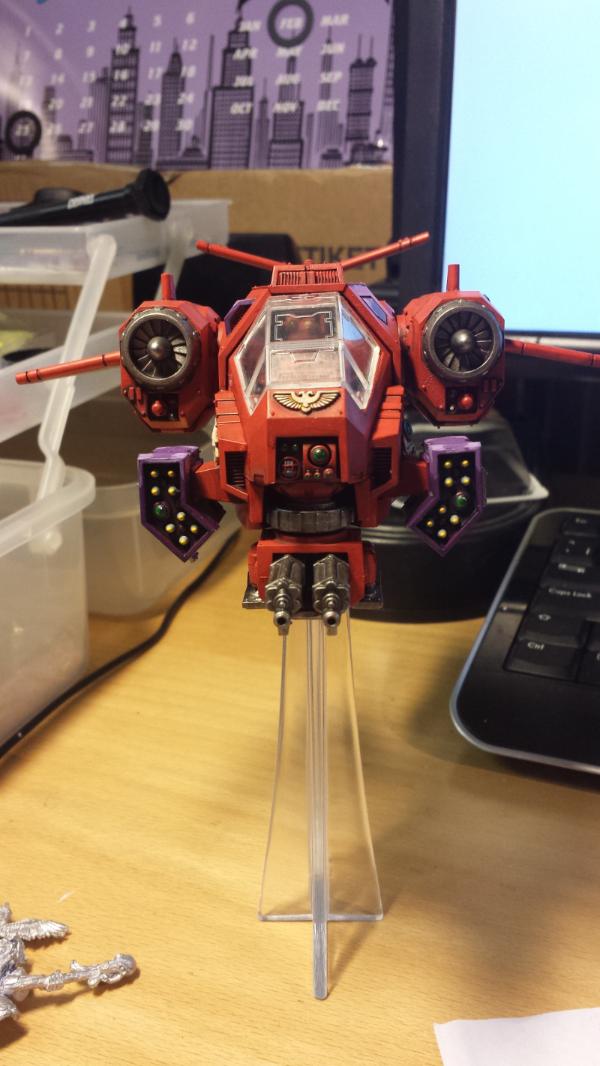
 but with some delicate toothpick work i managed it.
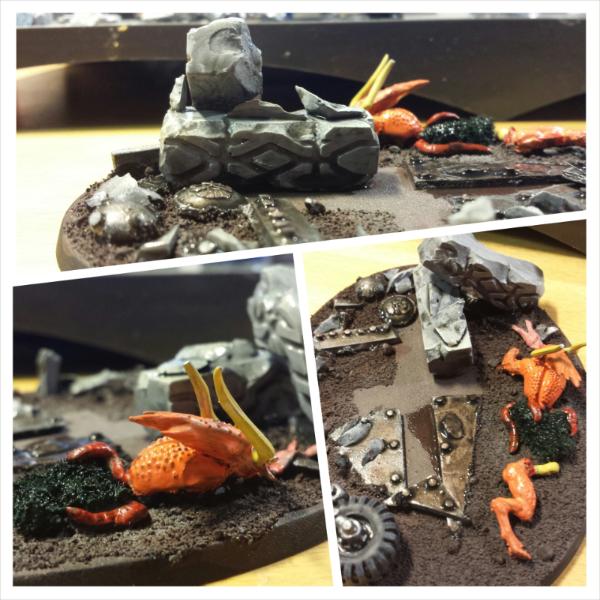

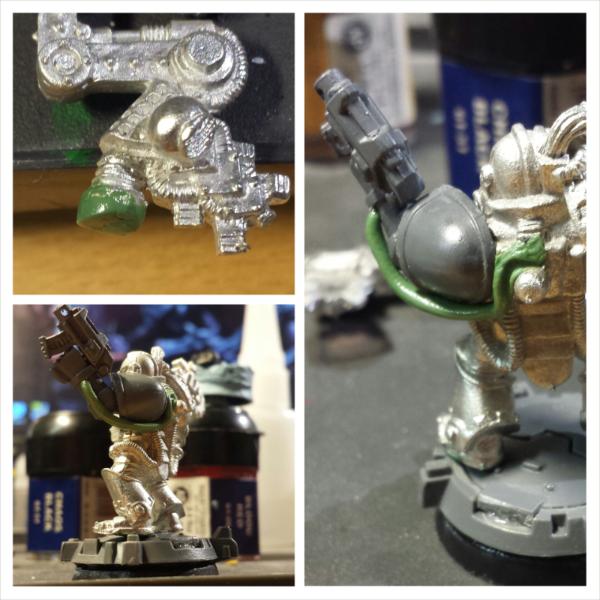

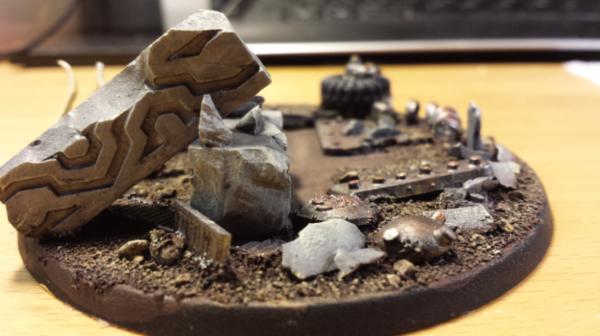
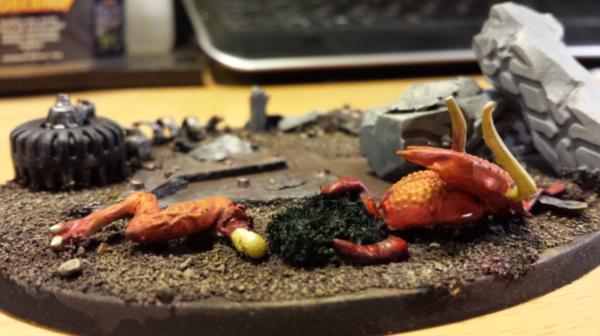
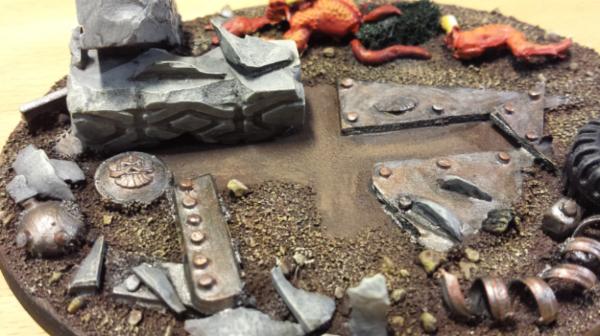
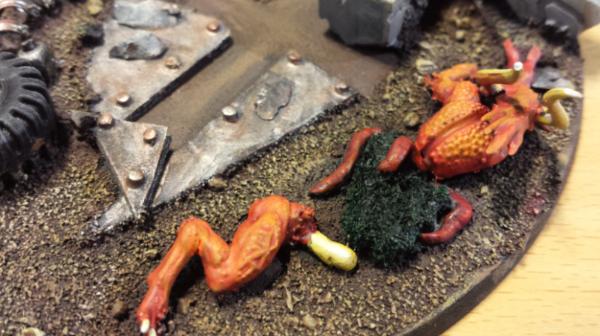
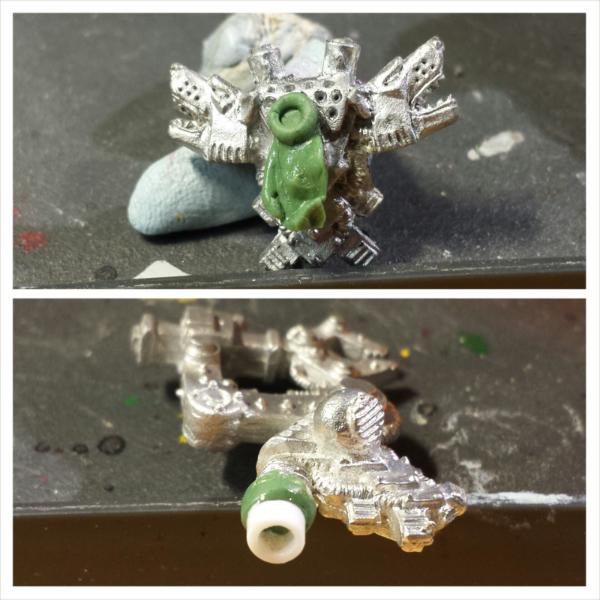

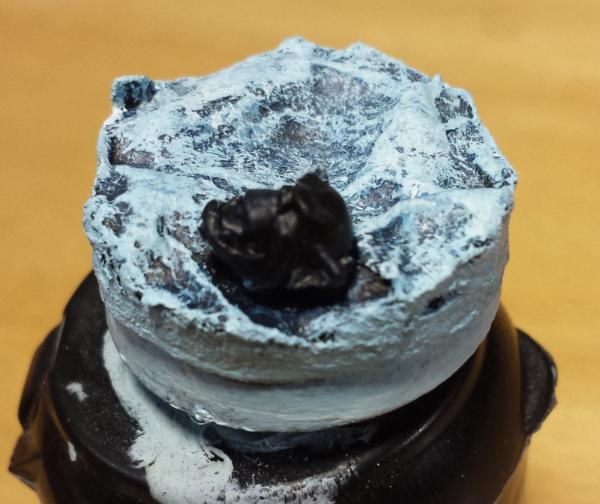
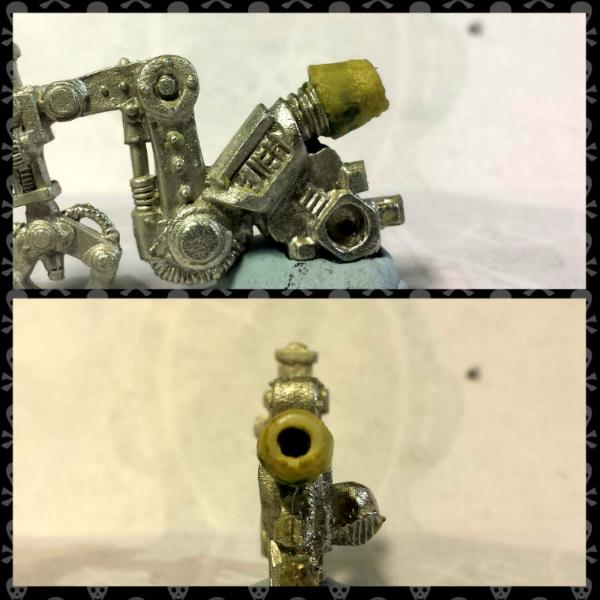
 So the actual armor is done, i just need to work on the detail on the armor and everything else. Not sure what colour i will do the actual staff yet. may just go for metallic.
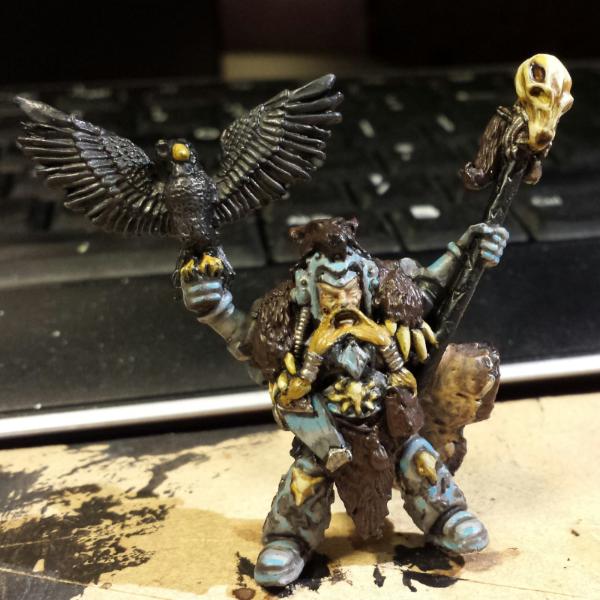
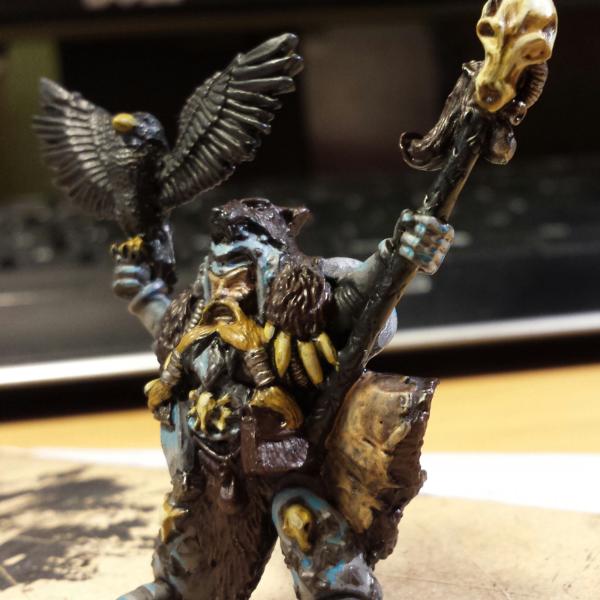
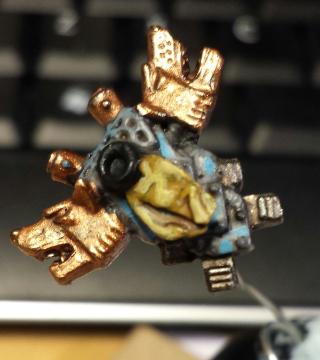
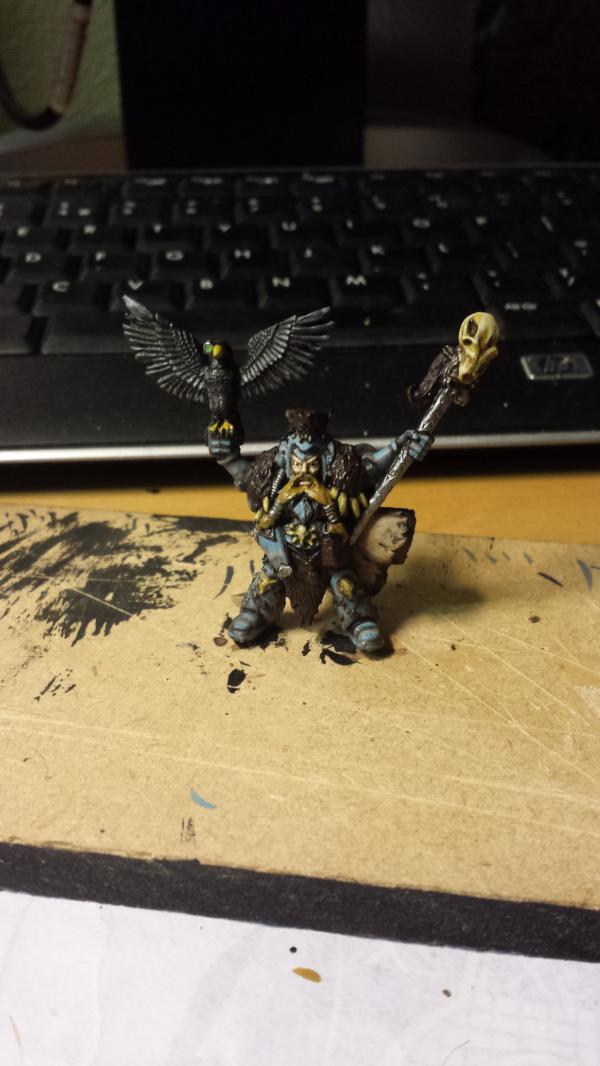
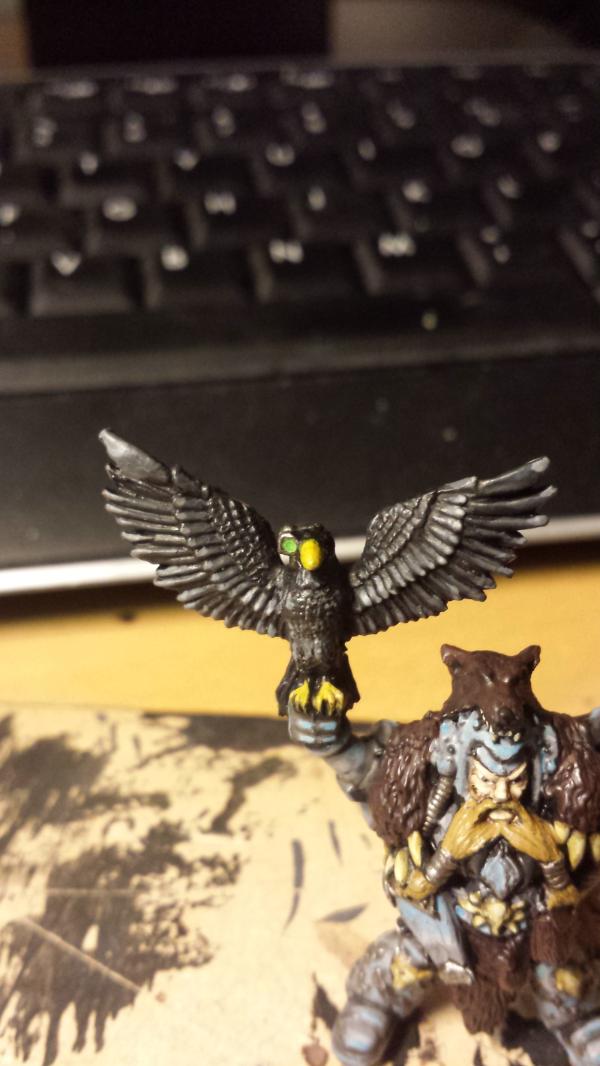
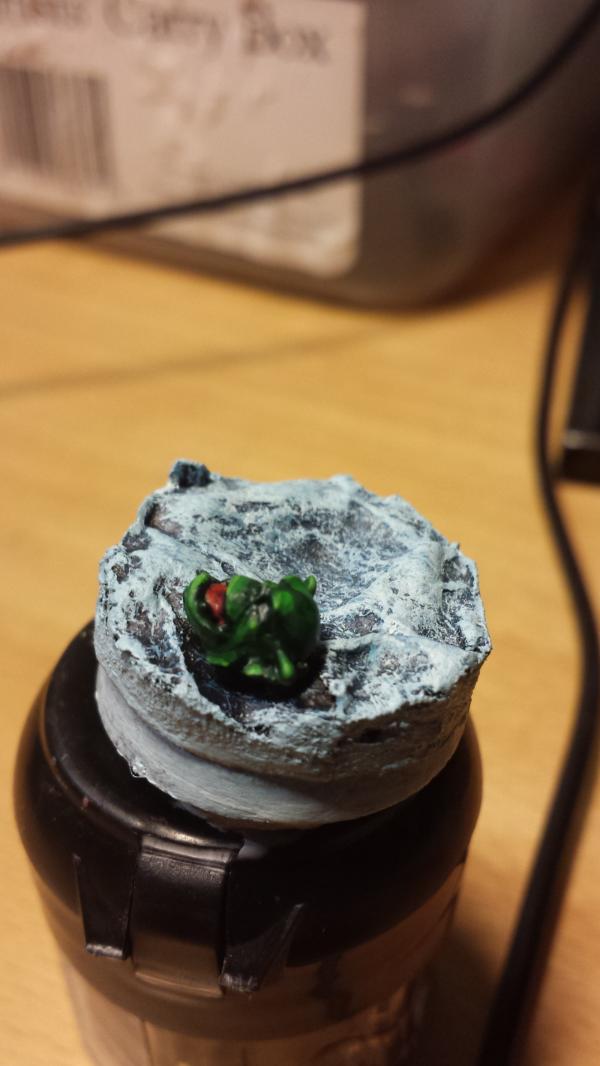
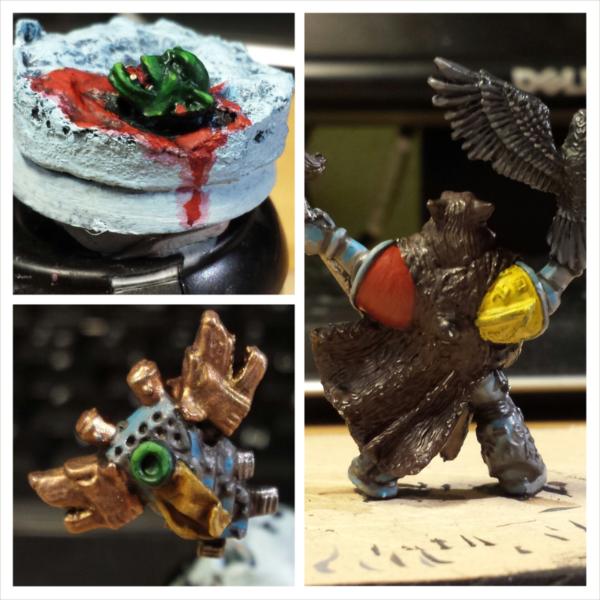

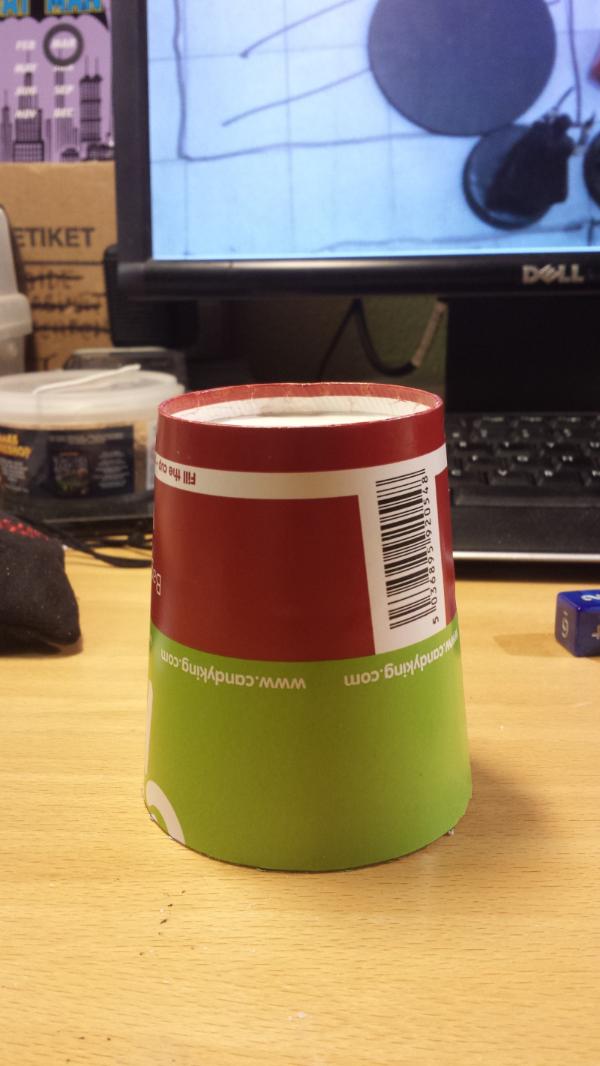
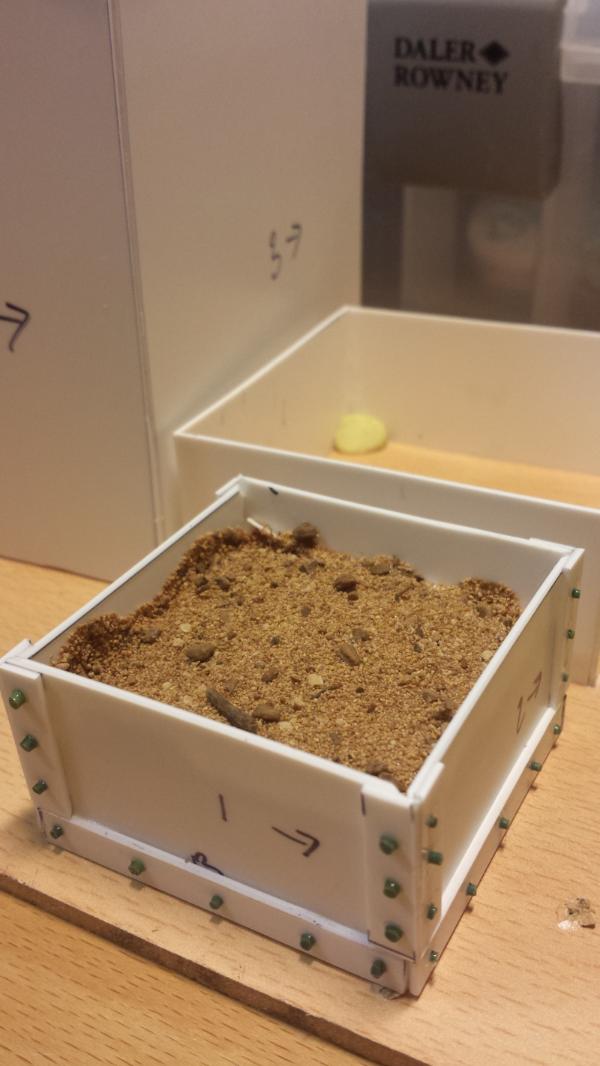
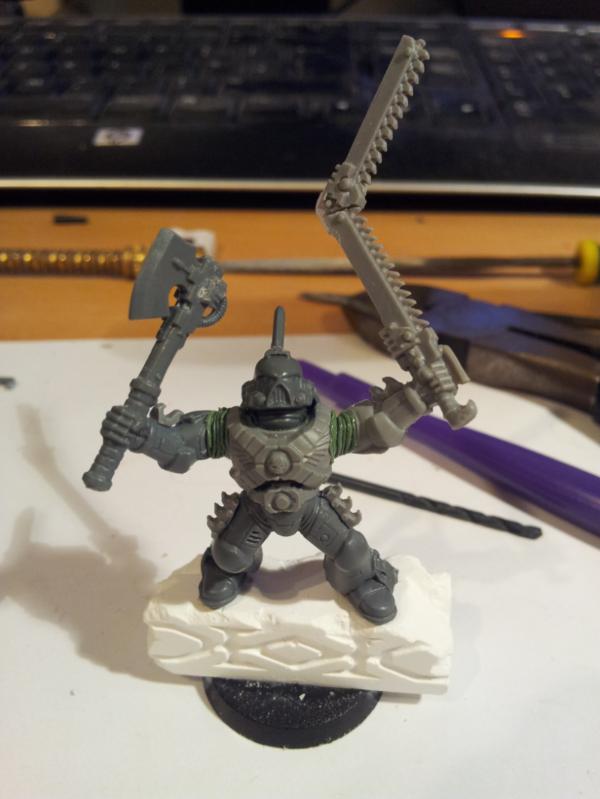


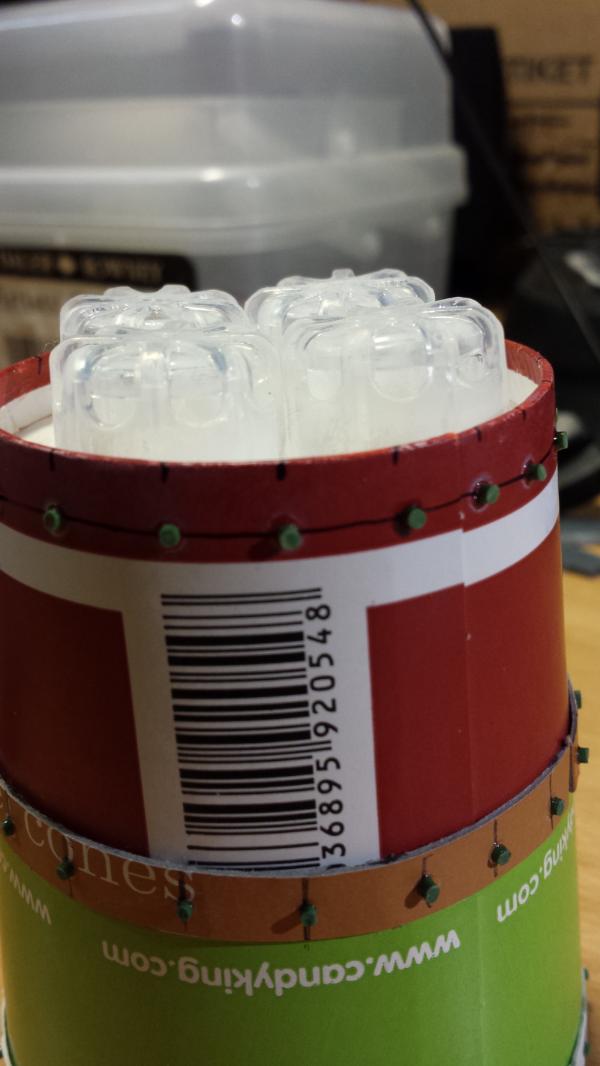
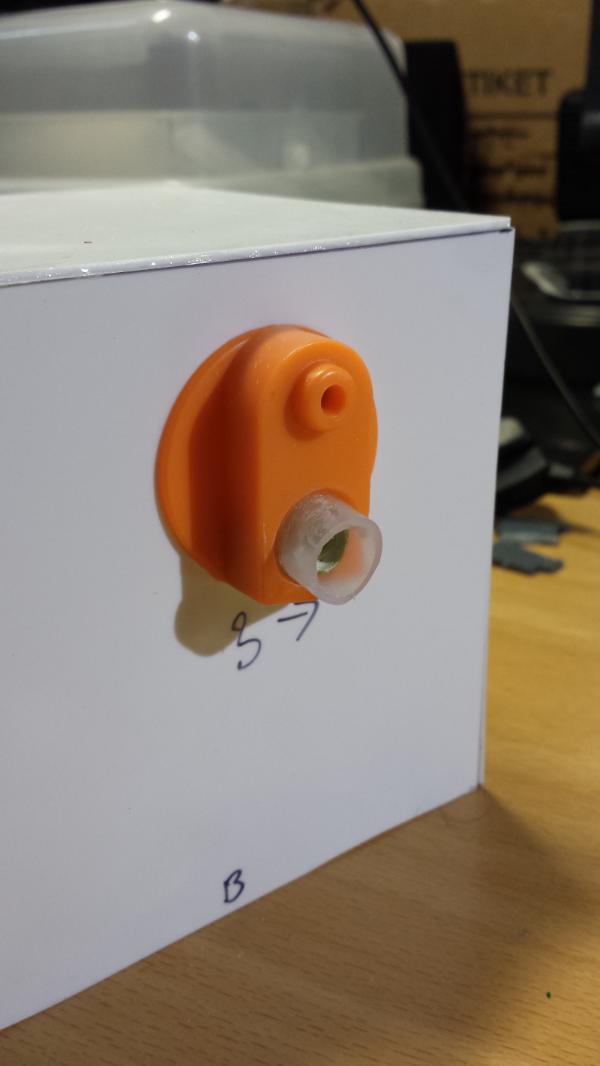
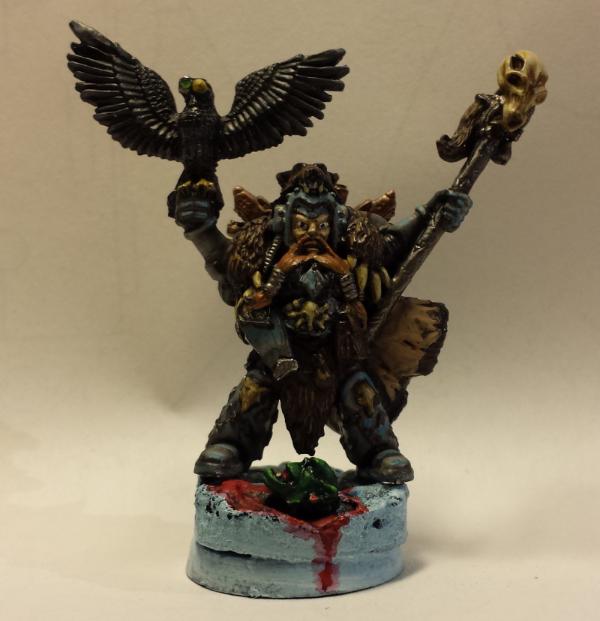
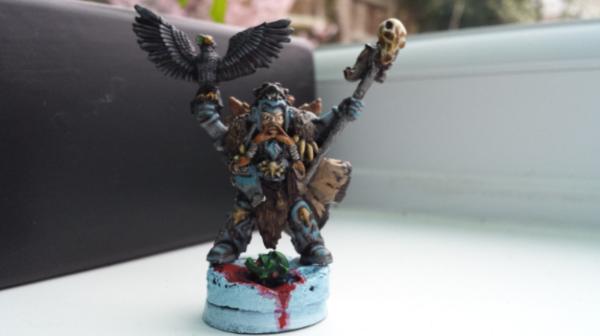
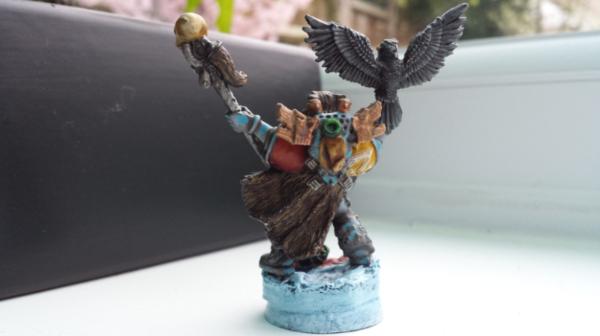
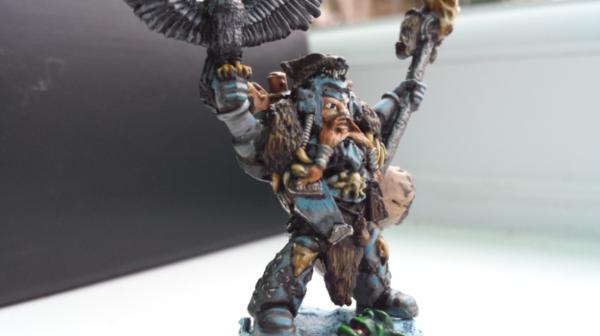
 ) Followed by some blood red, blasing orange and .. yellow. then a 50/ mix of "yellow" and skull white.

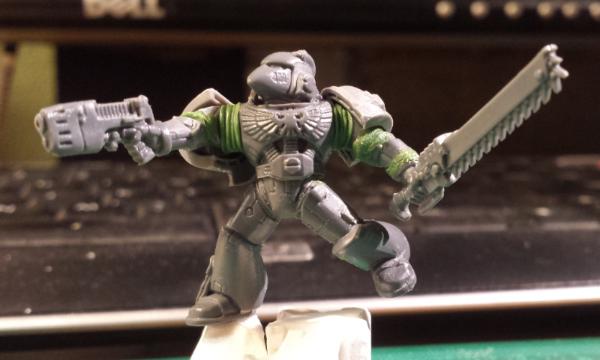
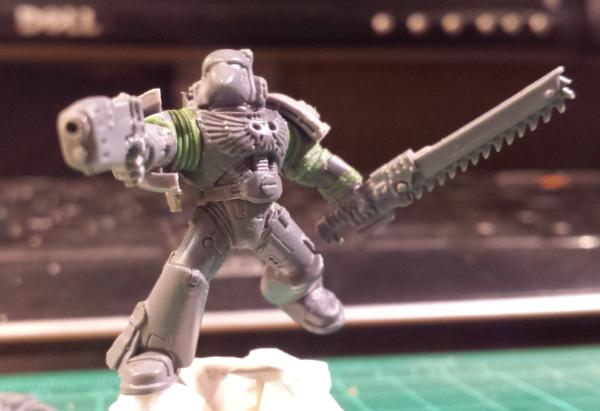


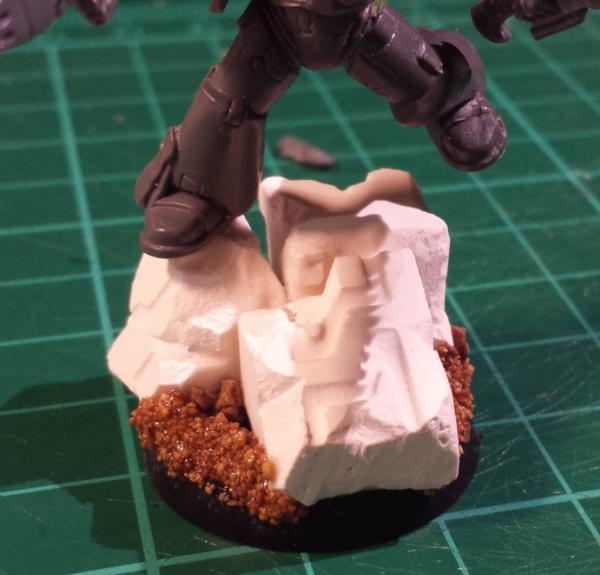
 ...guess it is due to the time it gets aired... so early that our telly is not on...
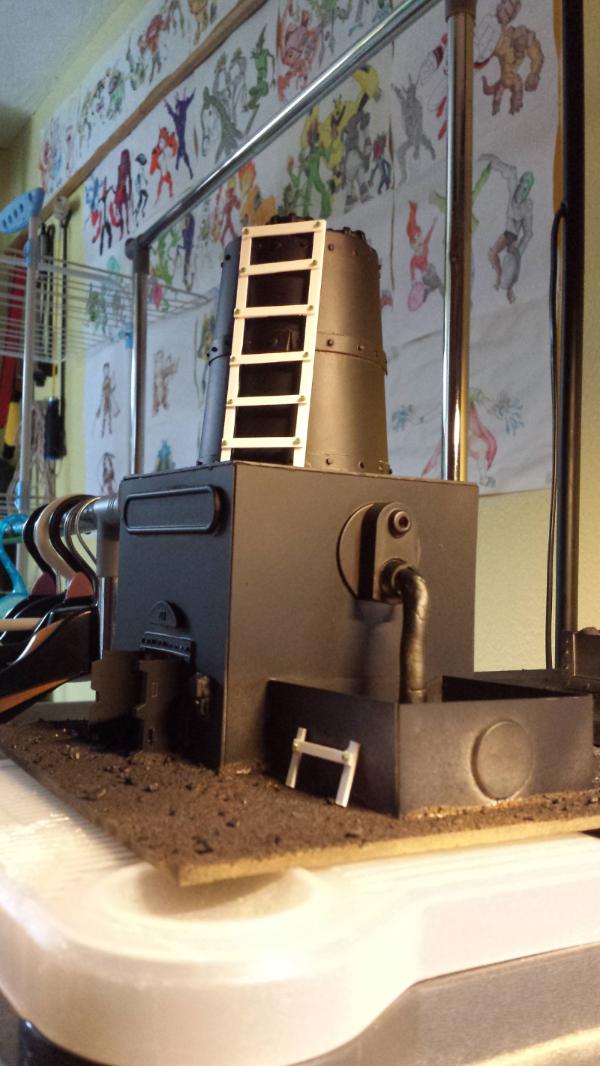
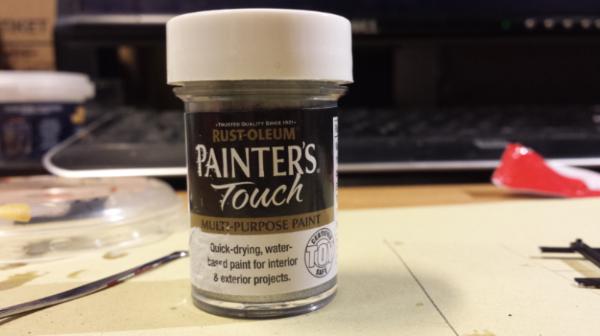


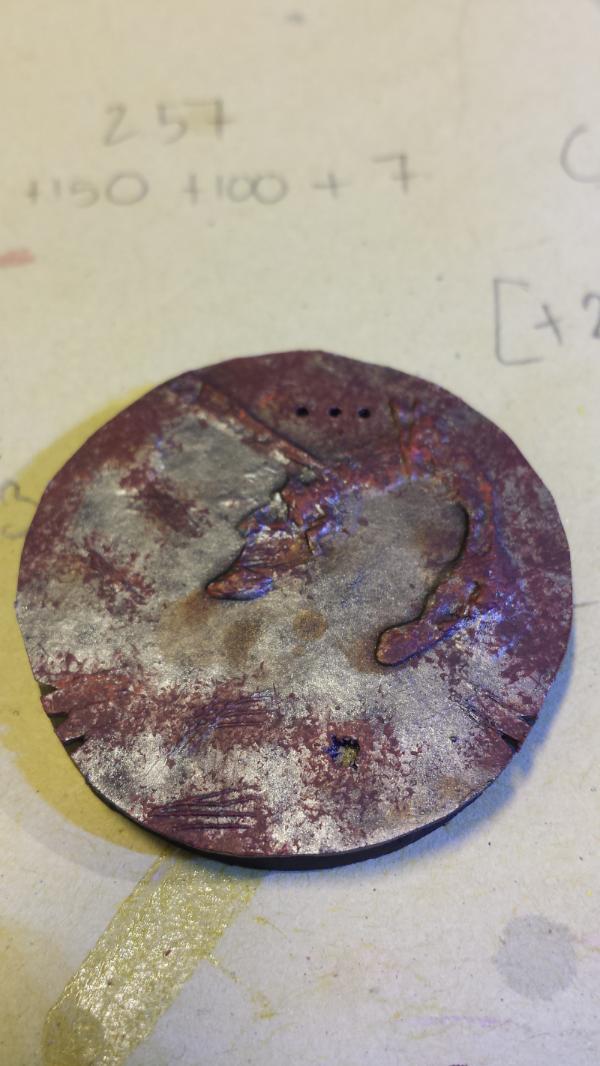
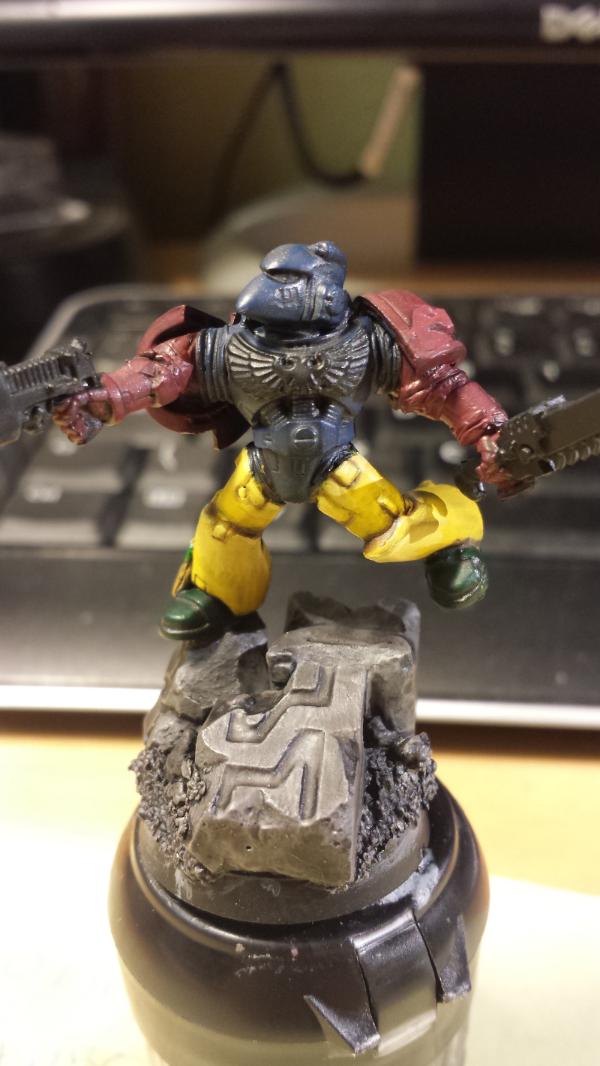

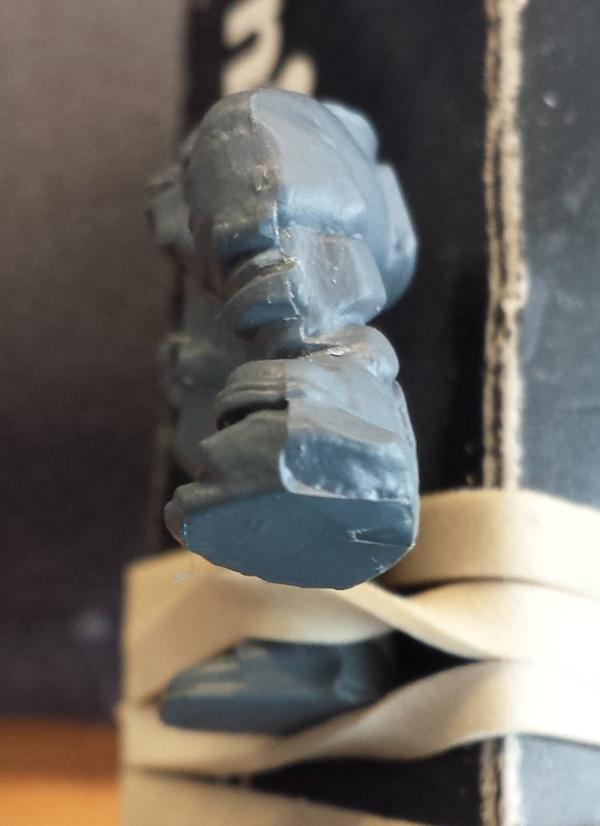
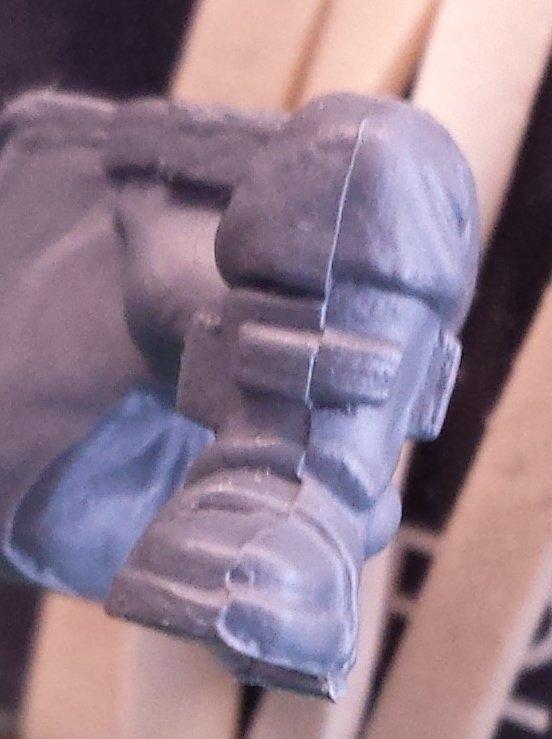
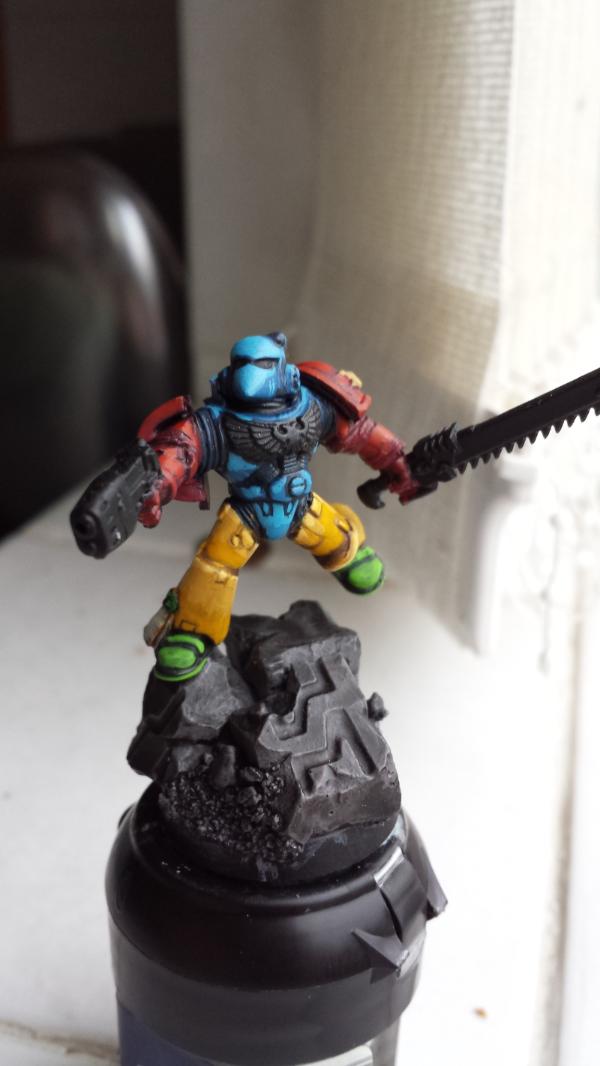
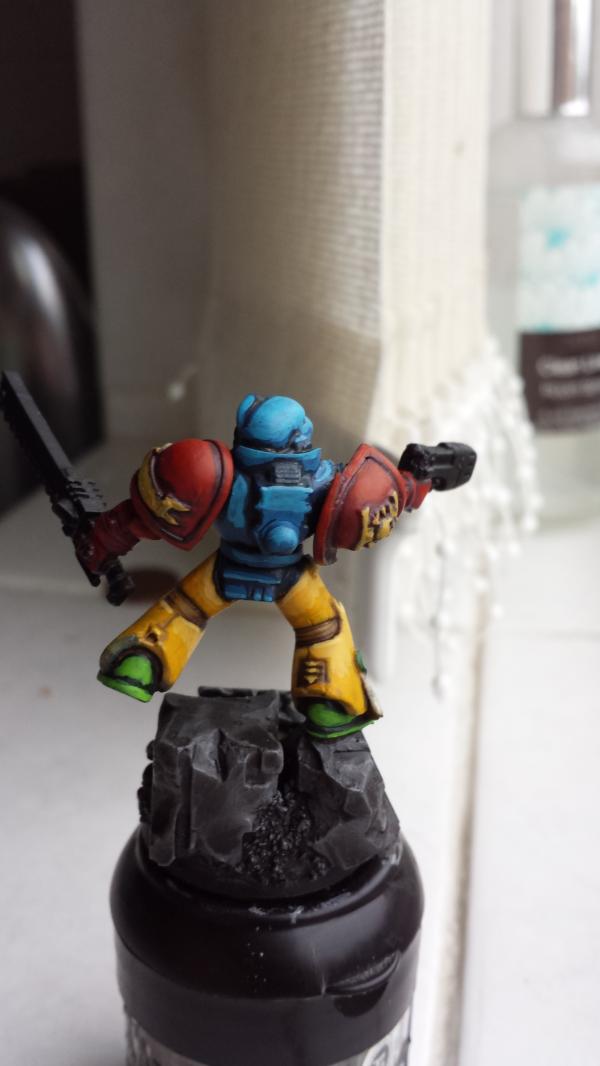
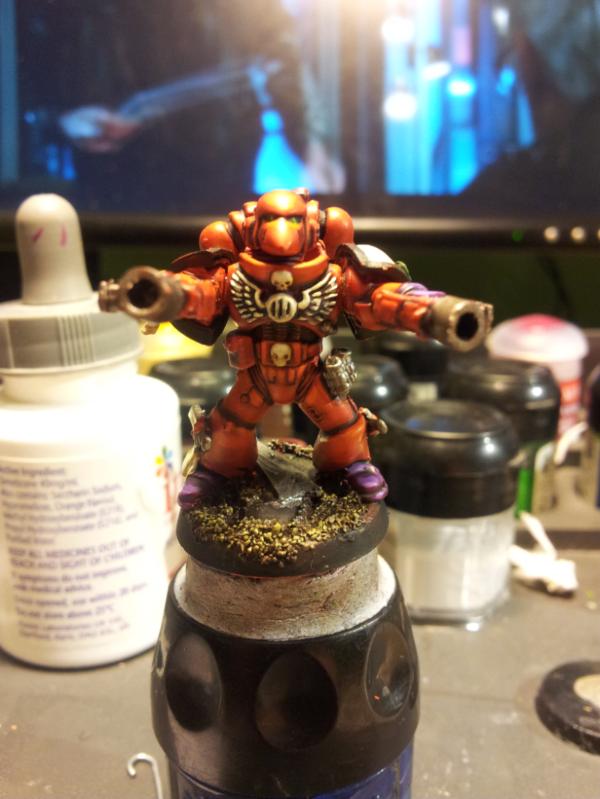


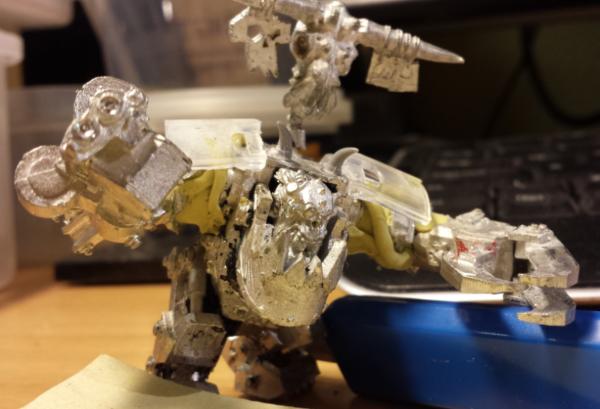
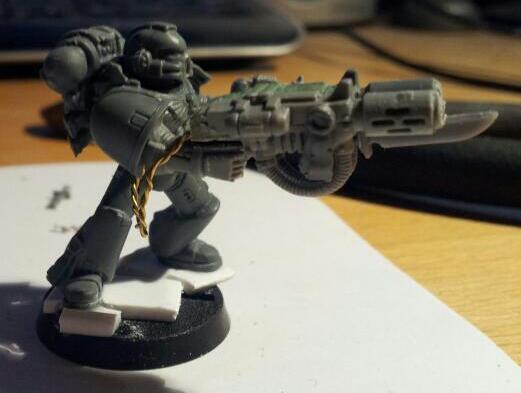
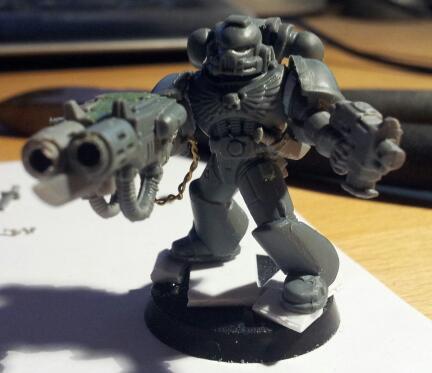
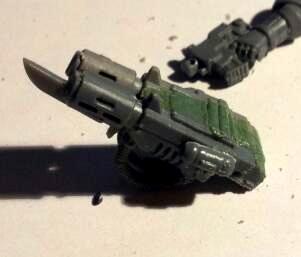
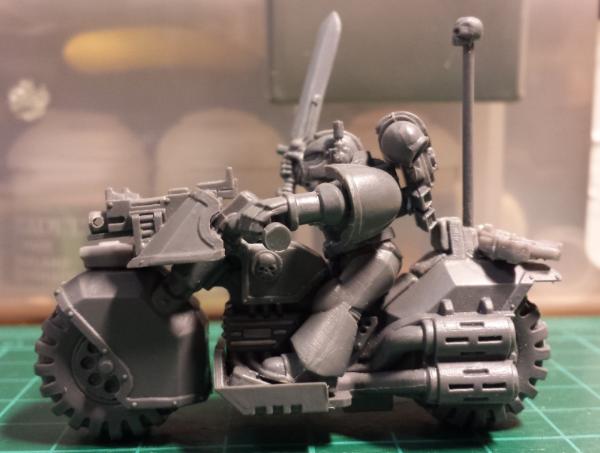
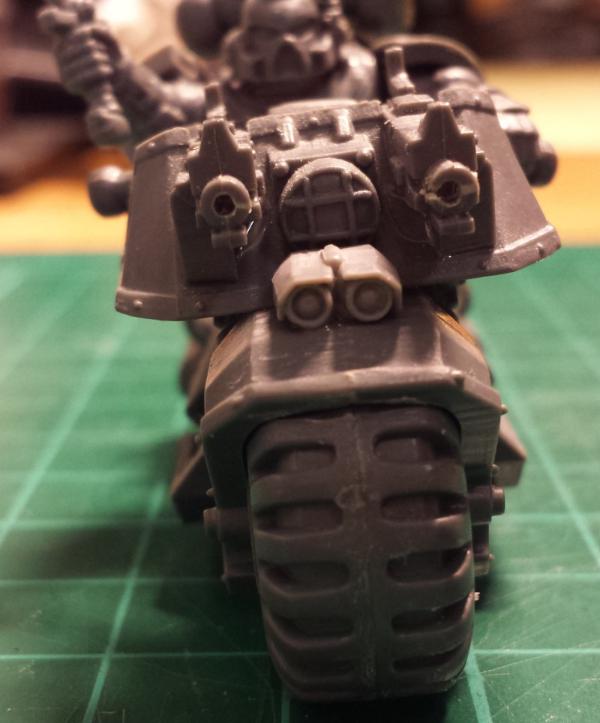
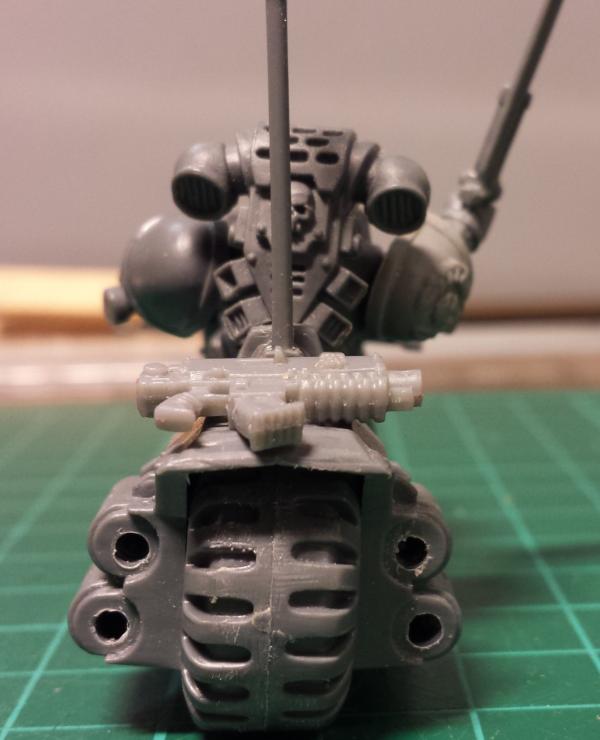
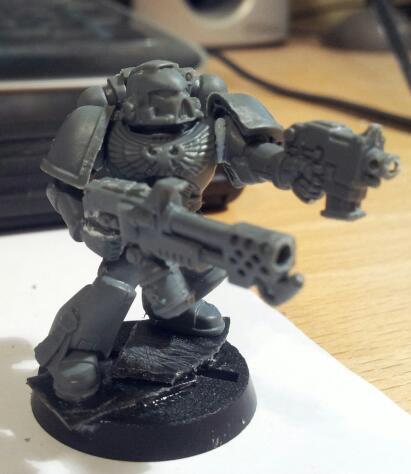
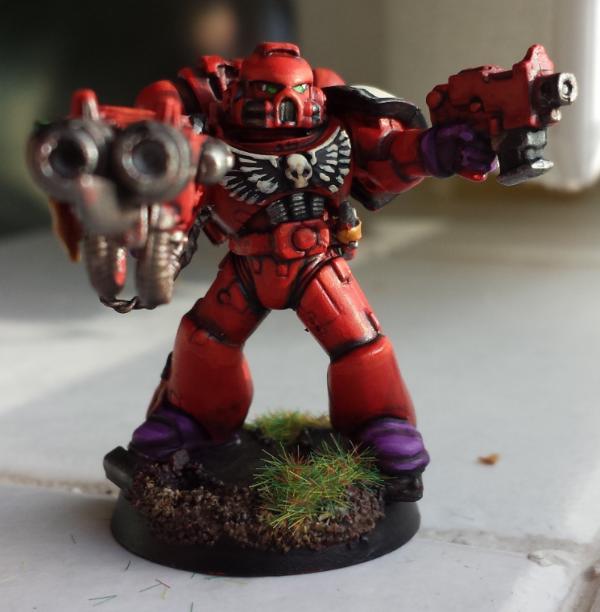
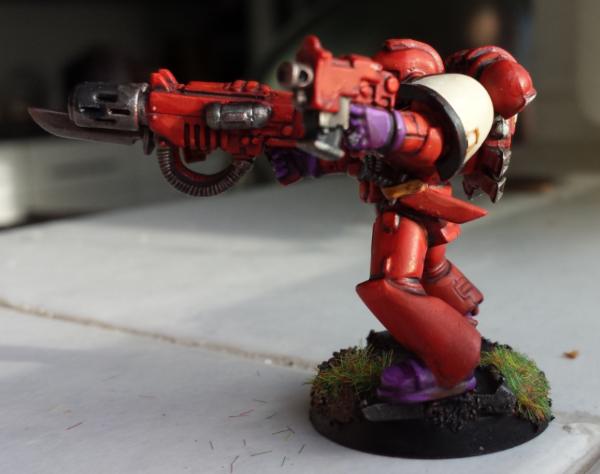
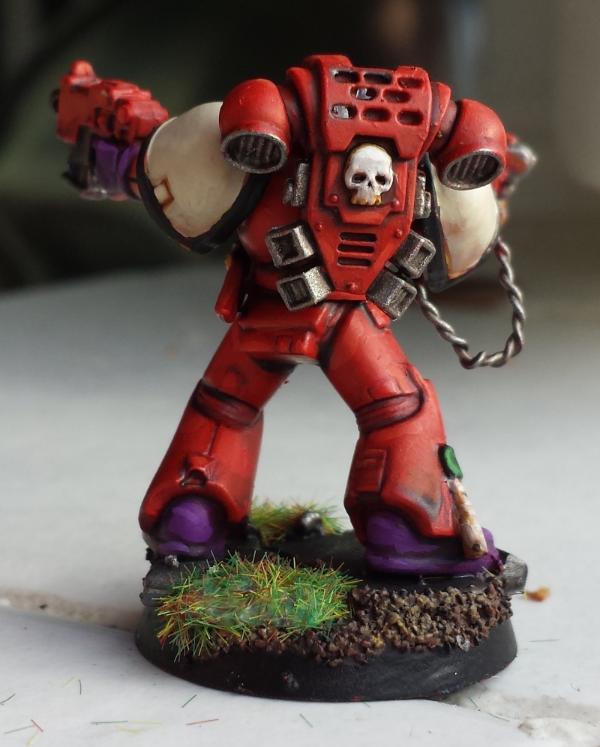
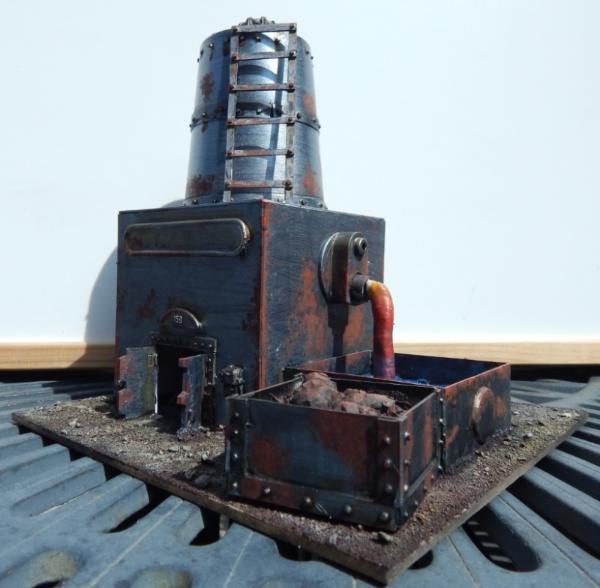
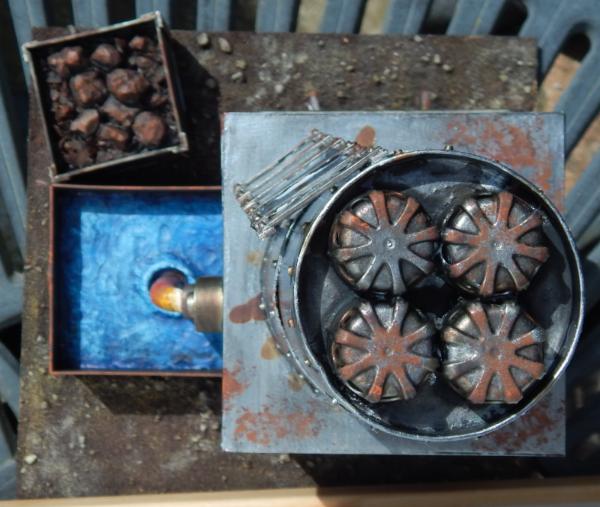
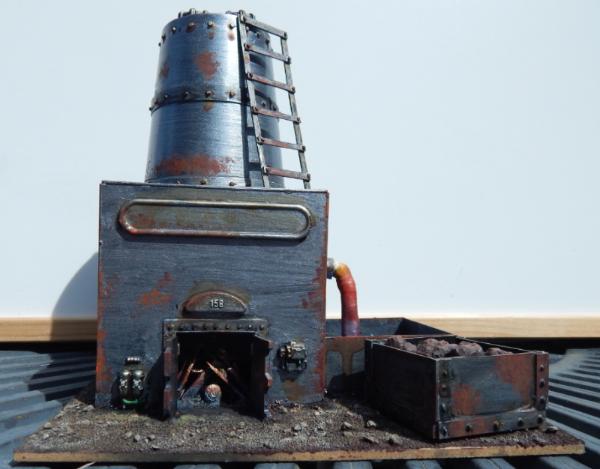
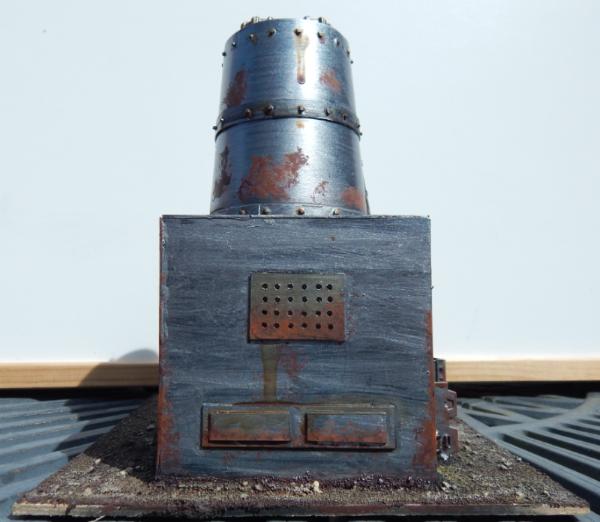
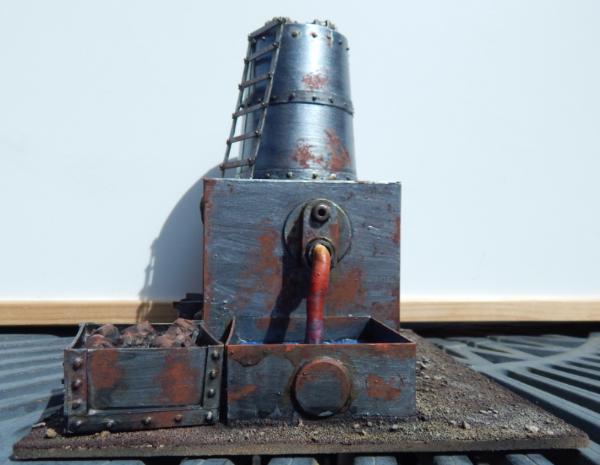
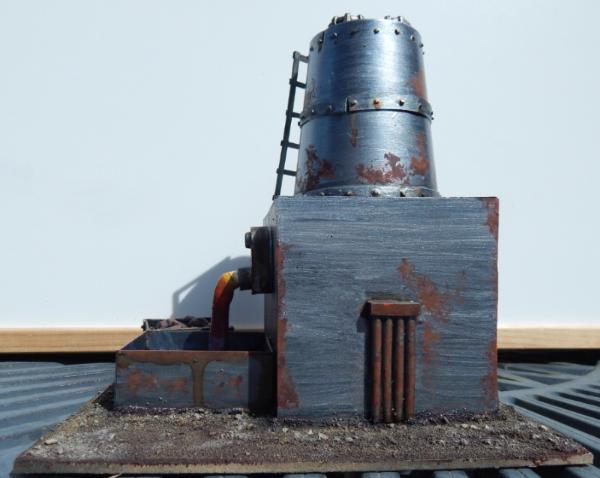
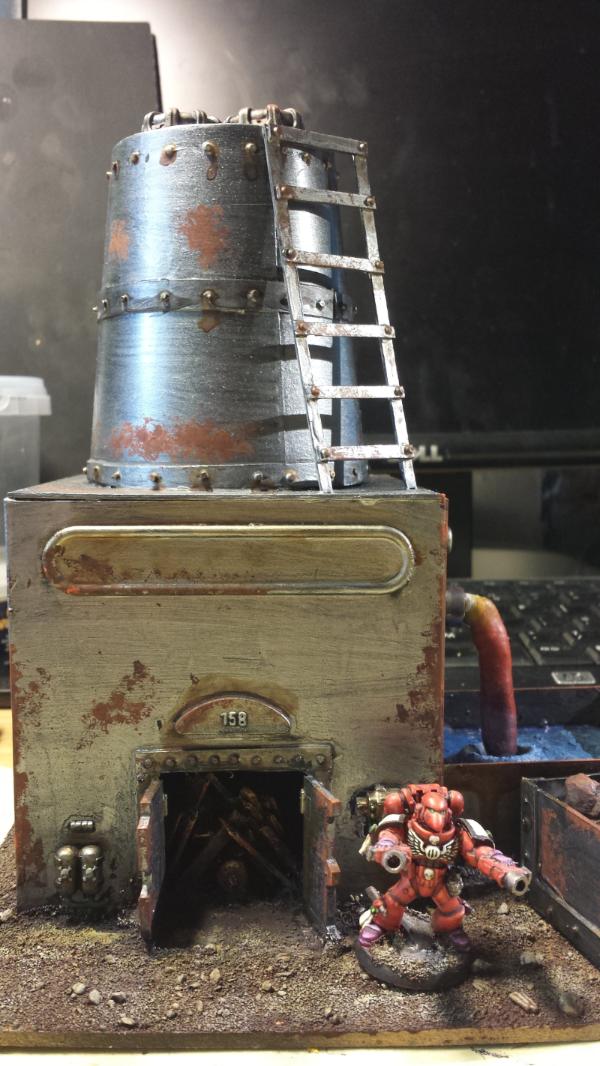
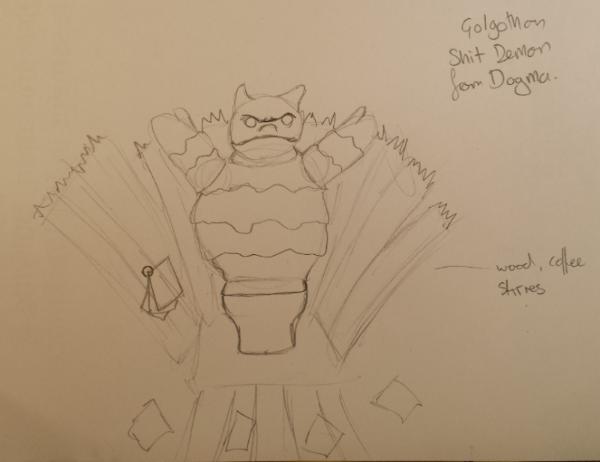


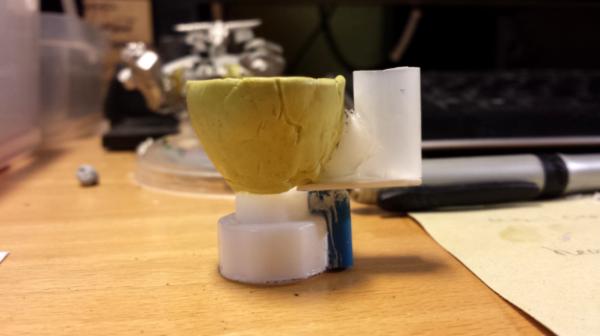
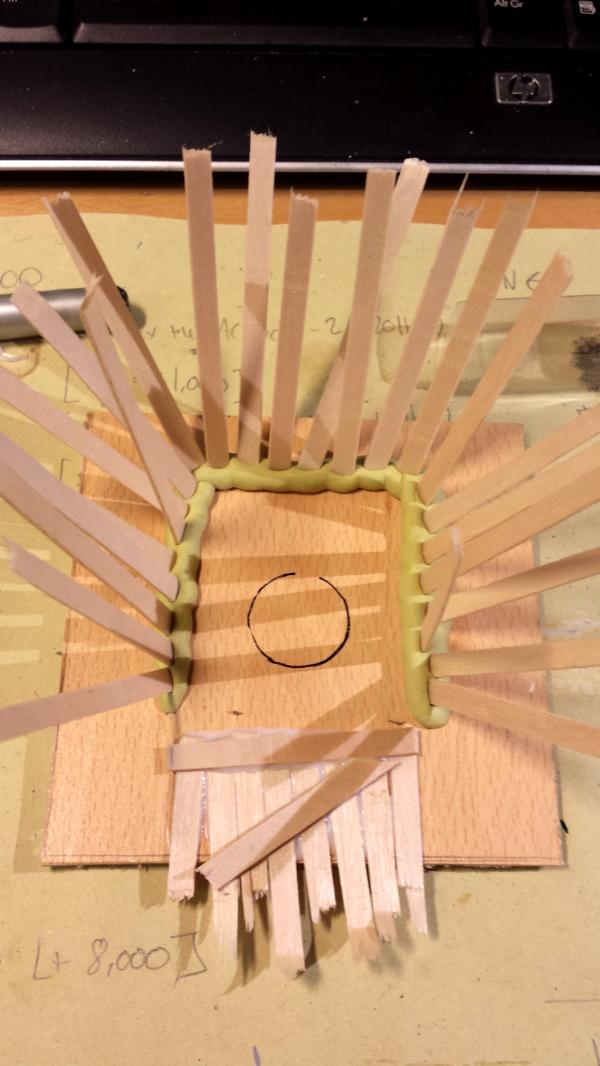
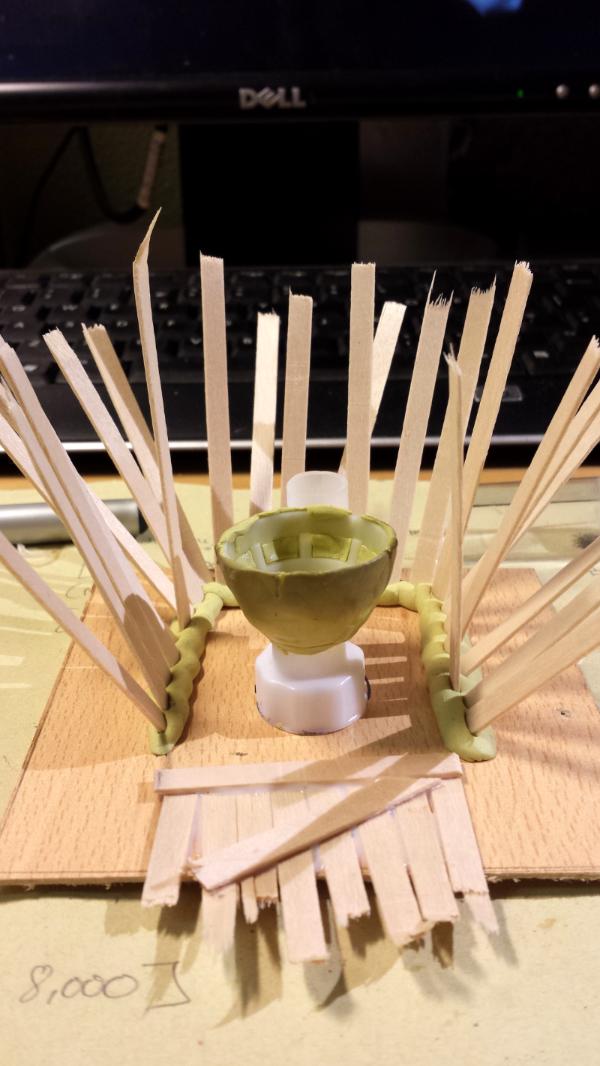
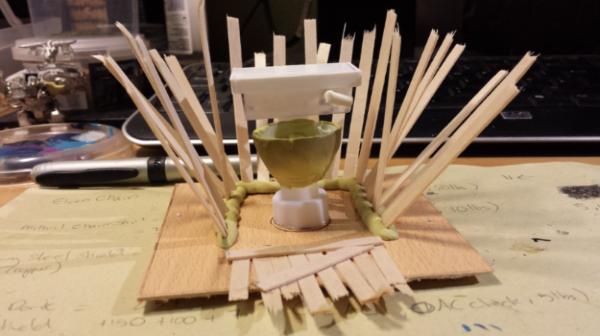

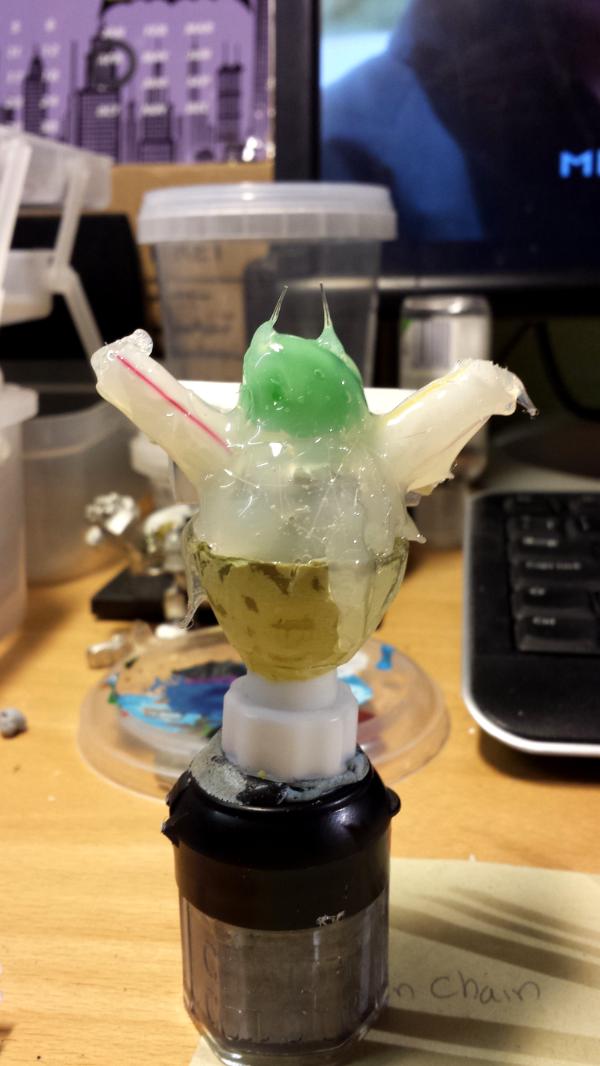
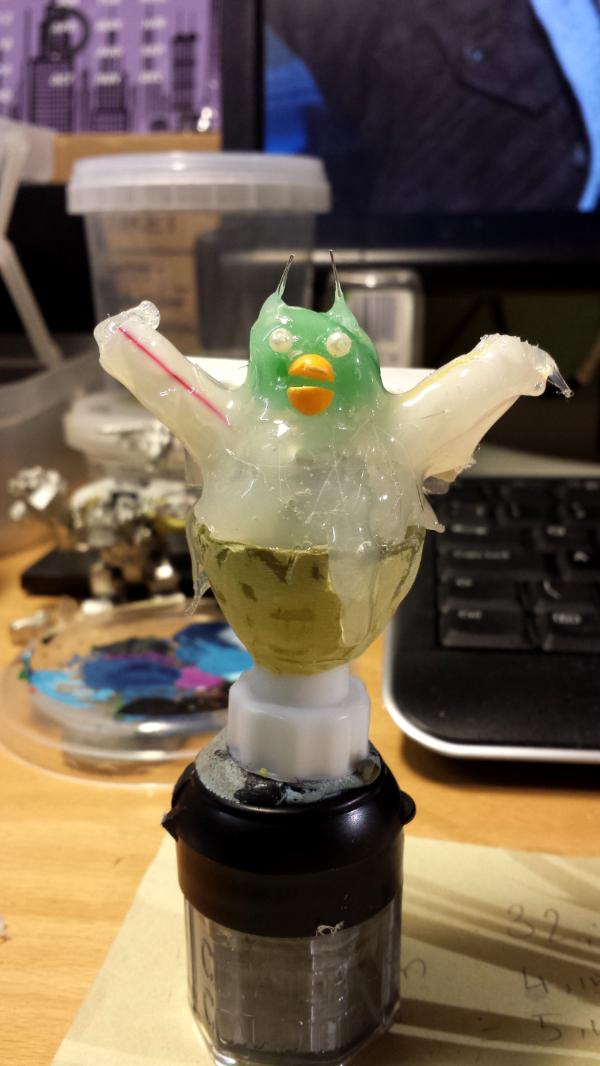
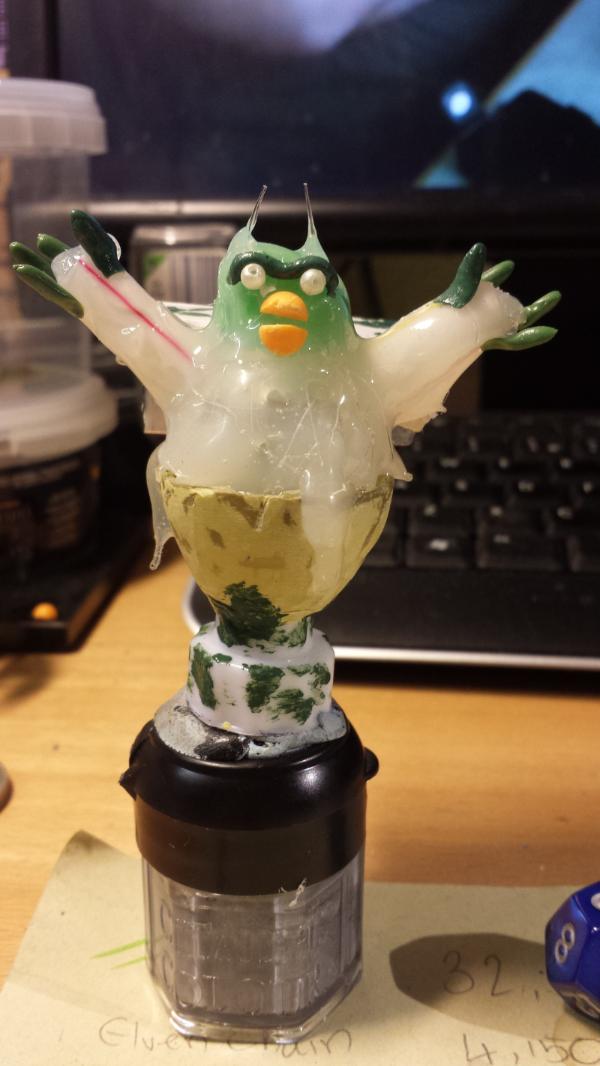
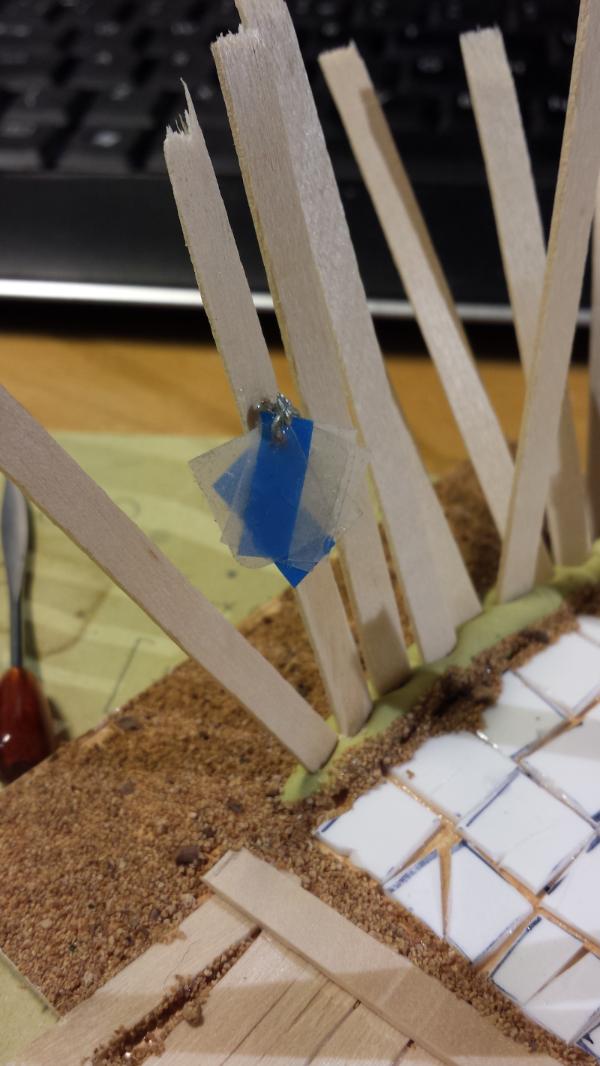

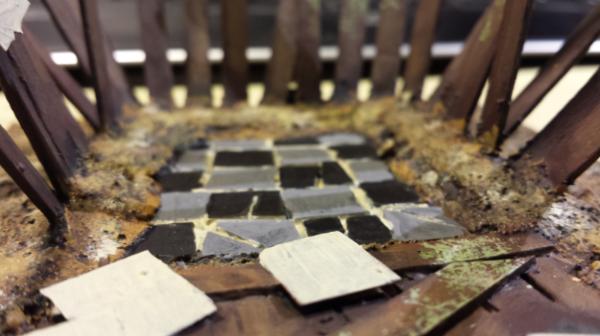
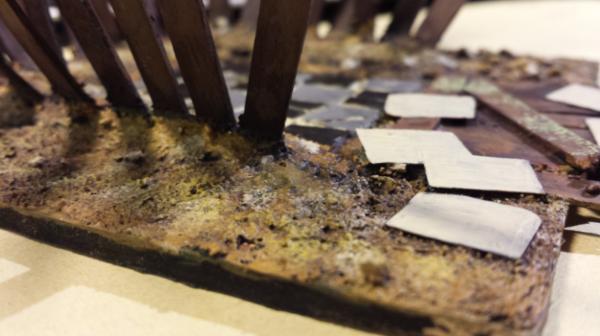
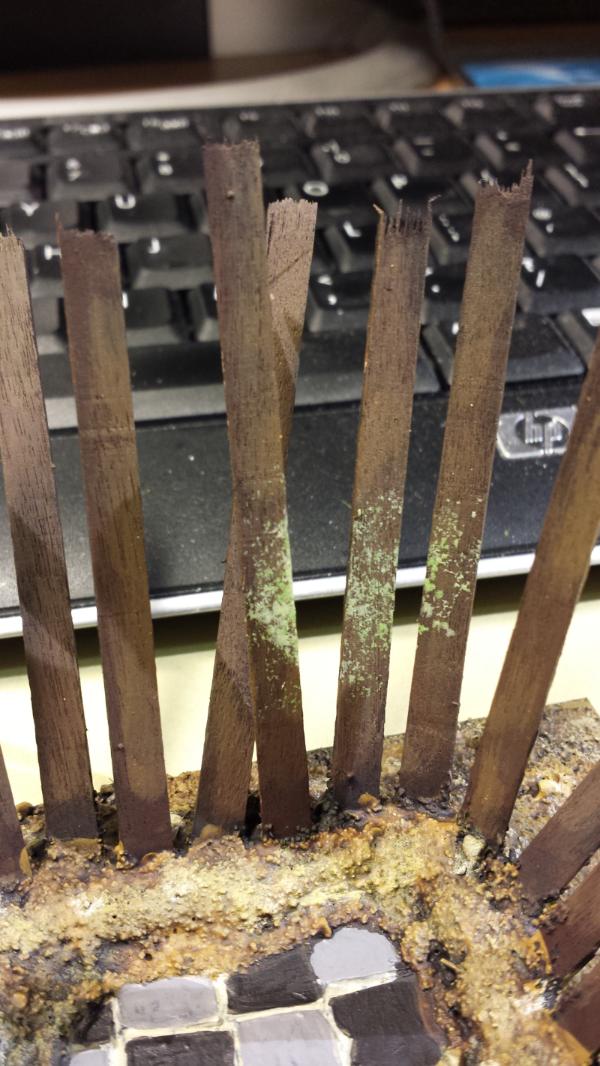
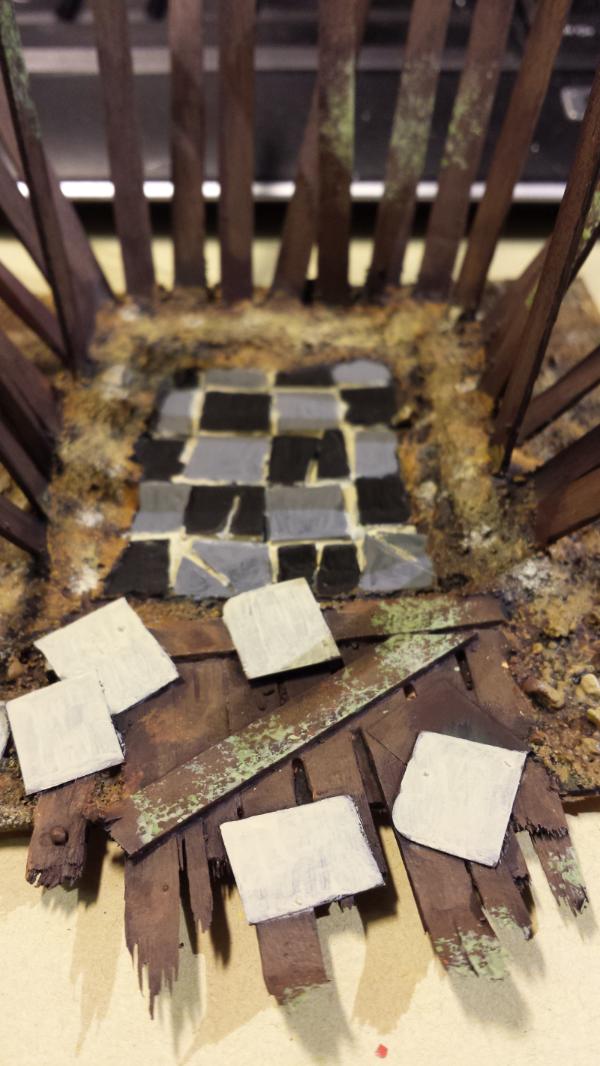


 If i create the boulder out of polystyrene, and then give a final coat of rough flour glue to create a rough exterior. ... Hmm do i even have polystyrene at home. ... time to have a look in the office