39973
Post by: Galorn
Well This shalt be the Log of my Efforts for constructing Terrain for a custom table to be used at Da BoyzGT 2011
2 Large ruins (three level, three floor. apx 20"x10"x meh" triangle)
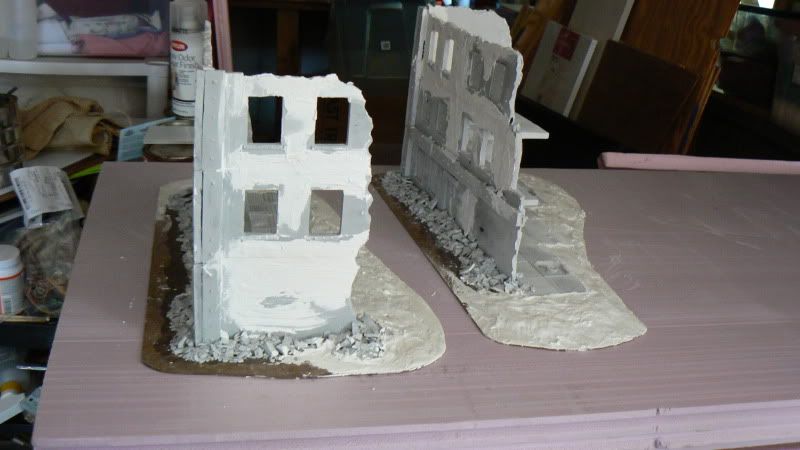
Lruin 1 (cast, Assembled, Spackled, Pre Paint Detail added, Primed, Painted, Weathered, Posterized )
Lruin 2 (cast, Assembled, Spackled, Pre Paint Detail added, Primed, Painted, Weathered, Posterized )
5 Medium Ruins (two level, two floor apx 12"x 6" triangle)
Mruin 1 (cast, Assembled, Spackled, Sanded, Pre Paint Detail added, Primed, Painted, Weathered, Posterized )
Mruin 2 (cast, Assembled, Spackled, Sanded, Pre Paint Detail added, Primed, Painted, Weathered, Posterized )
Mruin 3 (cast, Assembled, Spackled, Sanded, Pre Paint Detail added, Primed, Painted, Weathered, Posterized )
Mruin 4 (cast, Assembled, Spackled, Sanded, Pre Paint Detail added, Primed, Painted, Weathered, Posterized )
Mruin 5 (cast, Assembled, Spackled, Sanded, Pre Paint Detail added, Primed, Painted, Weathered, Posterized )
3 Small Ruins (two level, two story Apx 6" by 6" triangle)
Sruin 1 (cast, Assembled, Spackled, Sanded, Pre Paint Detail added, Primed, Painted, Weathered, Posterized )
Sruin 2 (cast, Assembled, Spackled, Sanded, Pre Paint Detail added, Primed, Painted, Weathered, Posterized )
Sruin 3 (cast, Assembled, Spackled, Sanded, Pre Paint Detail added, Primed, Painted, Weathered, Posterized )
1 Sandbag Fort
Sandbag fort
3 Barricades (cast)
Barricade 1
Barricade 2
1 Rubble pile
Rubble pile
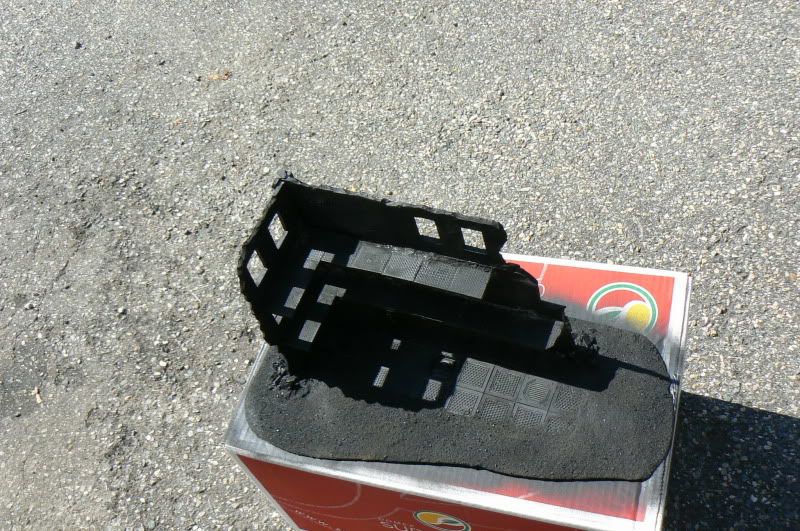
Casting in progress

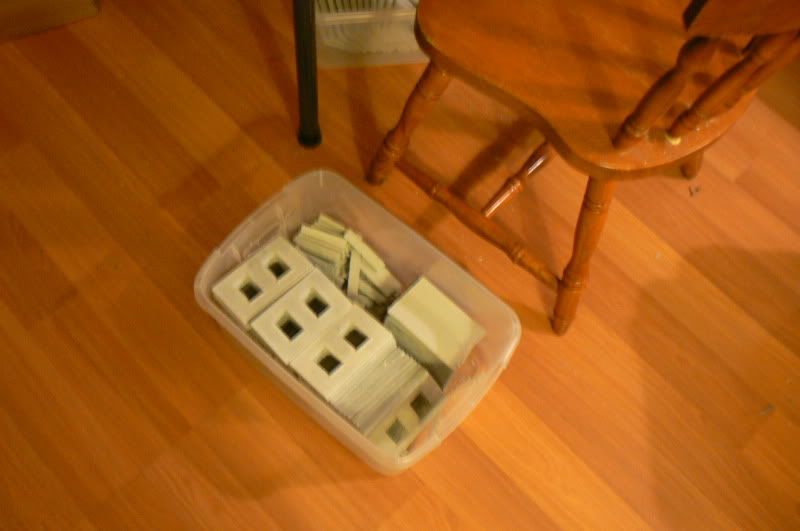
Finished components
30617
Post by: Emperors_Champion
This is looking extremely interesting. . . and a little messy! I like! 
39973
Post by: Galorn
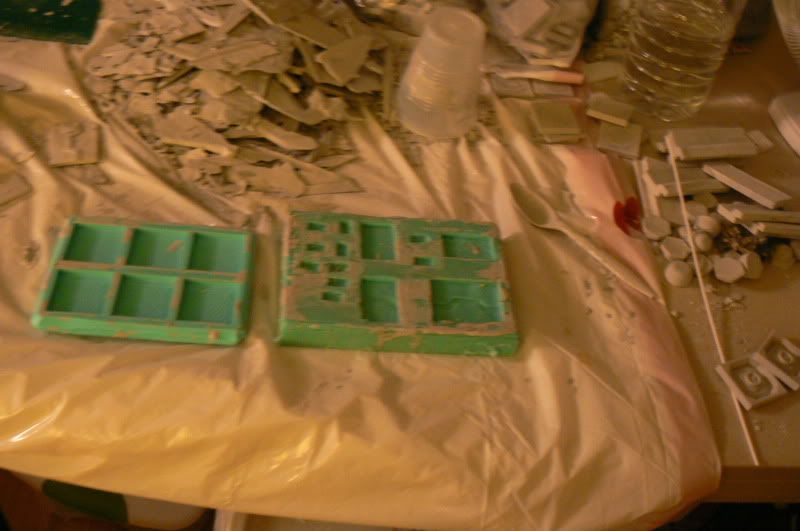
Thanks! The two smaller RTV molds are Hirst arts Molds. The two larger one I made off of master model pieces I also made  They are working really well. Automatically Appended Next Post: Edited first post to reflect List of Planned structures, and their rough sizes.
39973
Post by: Galorn
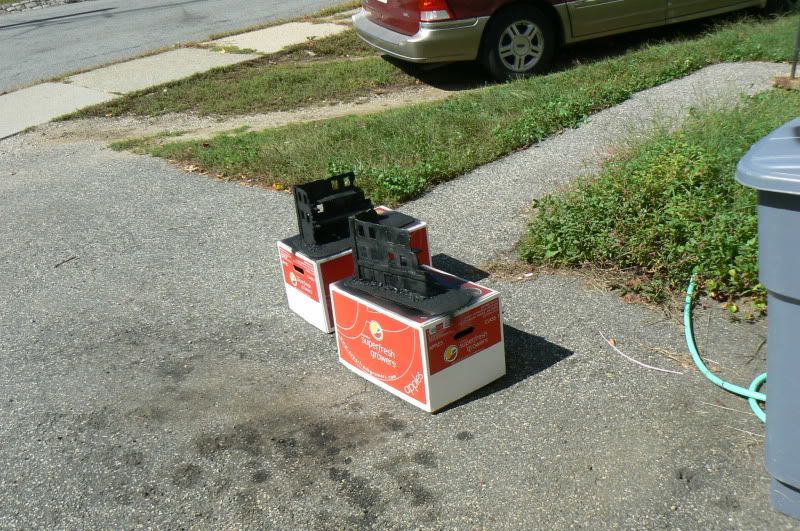
Hmm Should I build a top to put this project on as well, or Buy a Zuzzy mat... Hmm... Tomorrow will tell
(it depends on what my local Home Improvement store has to offer...)
46650
Post by: essia
Great idea making large wall sections. have fun chipping and make battle damage texture!
39973
Post by: Galorn
essia wrote:... have fun chipping and make battle damage texture!
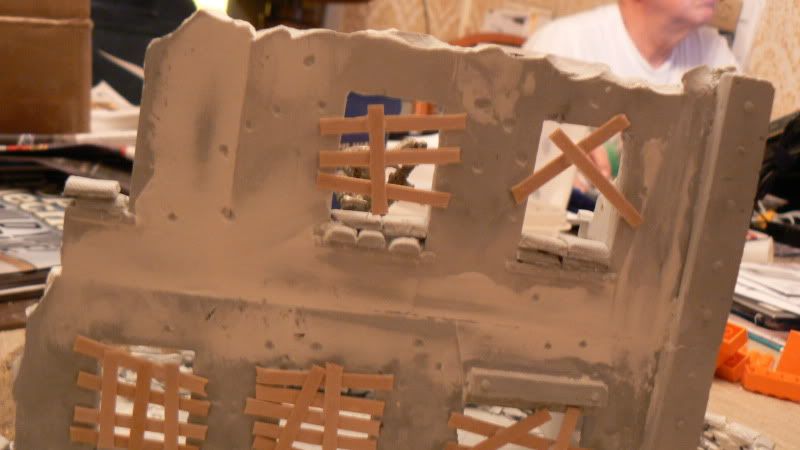
That's the best part too... (at least that's the Part I have the most fun with.) Automatically Appended Next Post: Since I took that Pic I've made two more "window" wall molds. I'll take a pic of the current setup tonight.
39973
Post by: Galorn
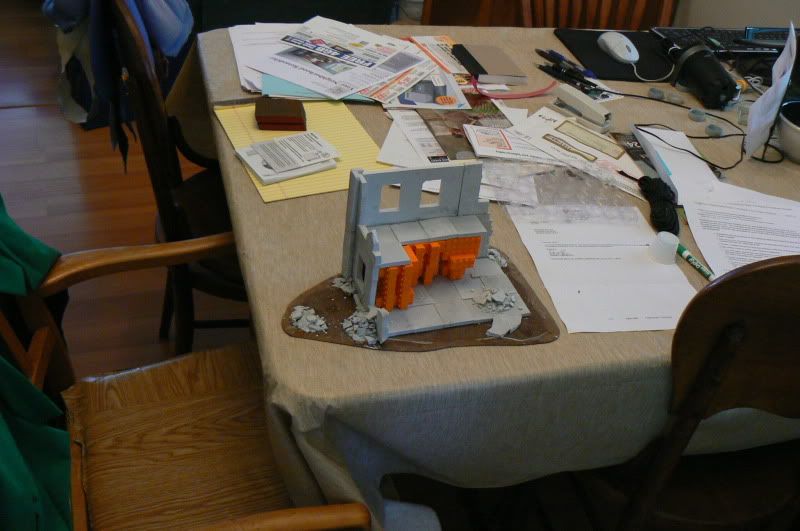
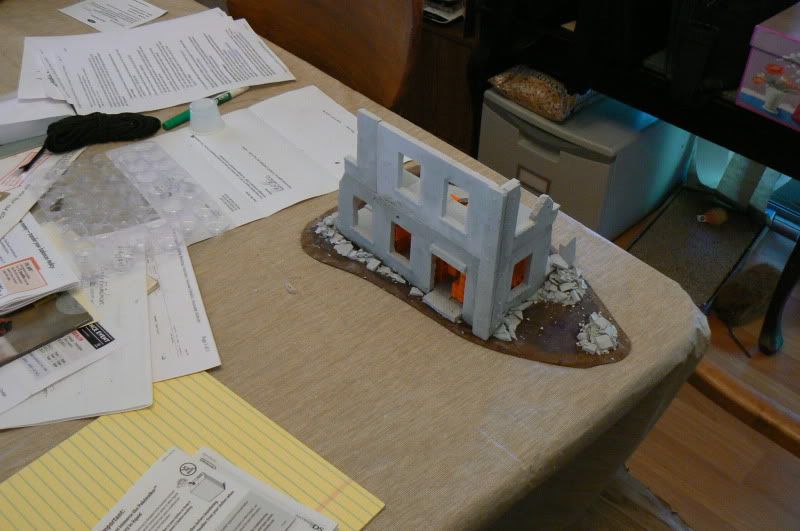
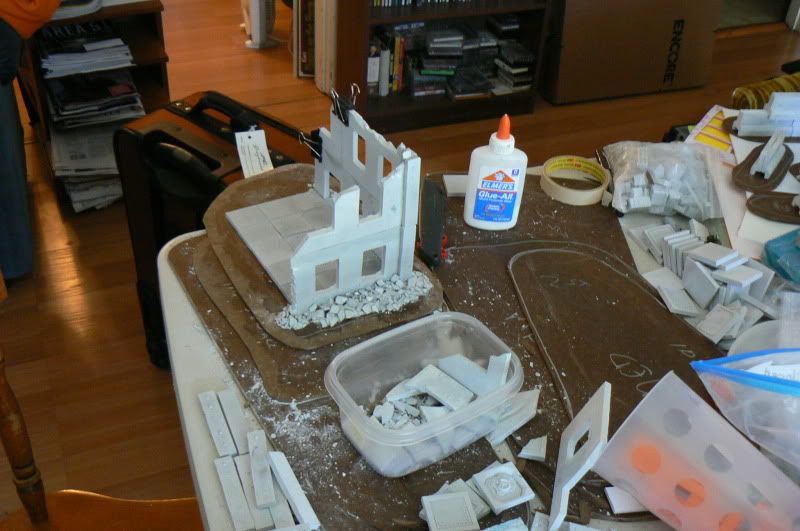
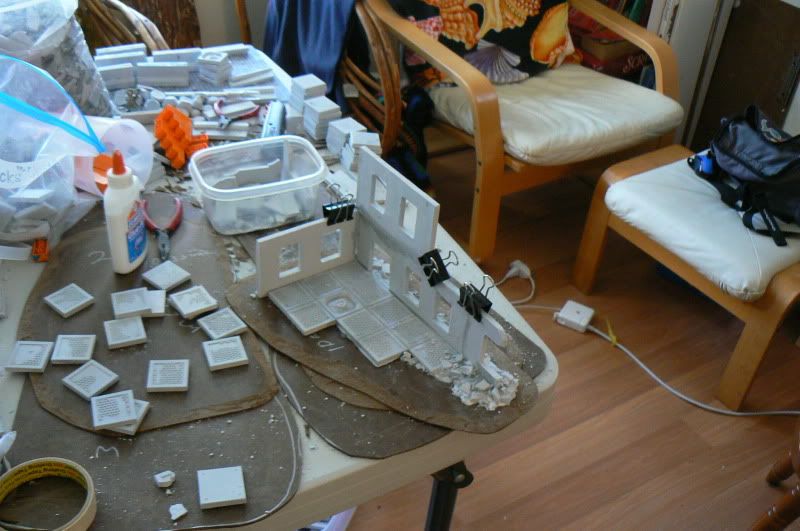
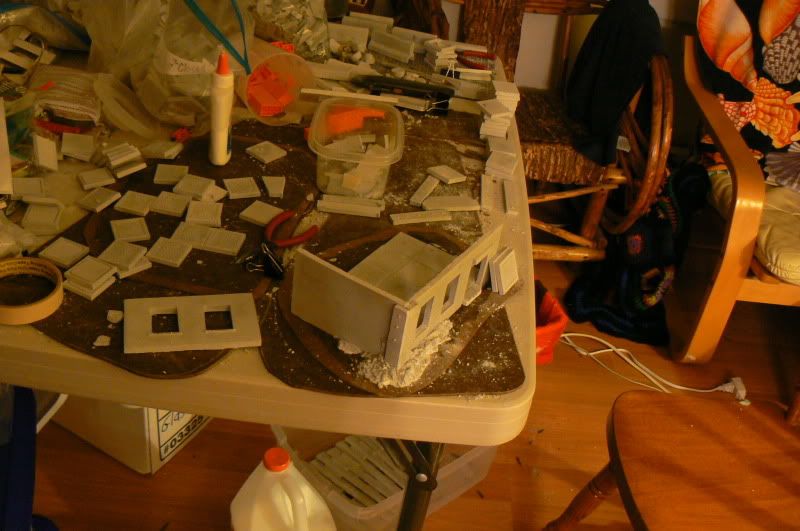
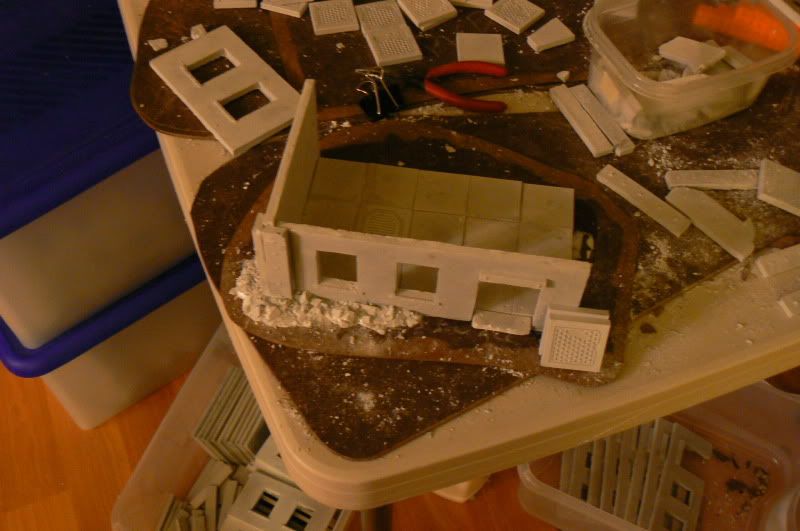
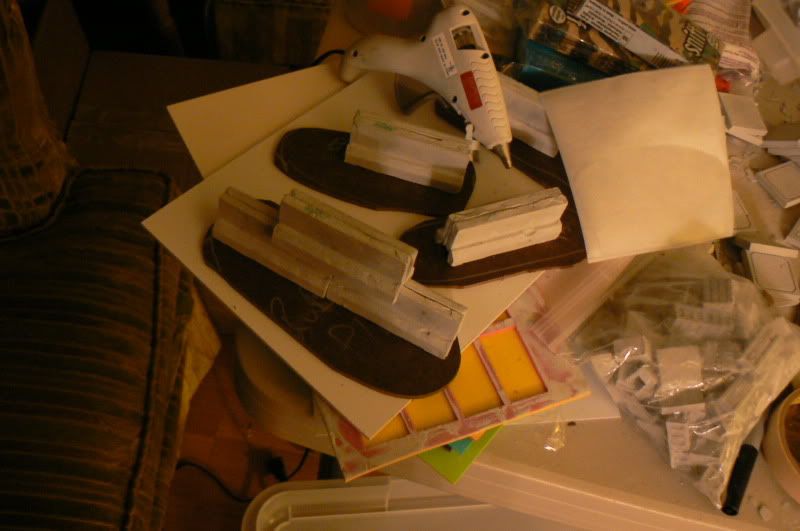
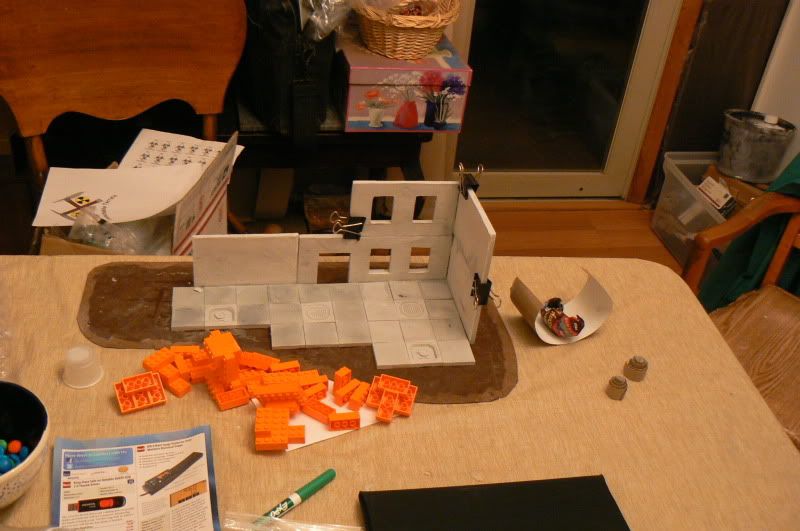
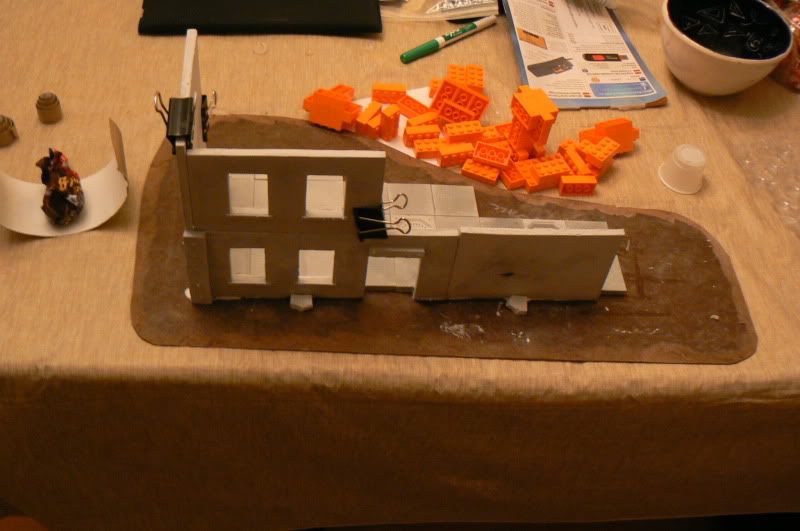
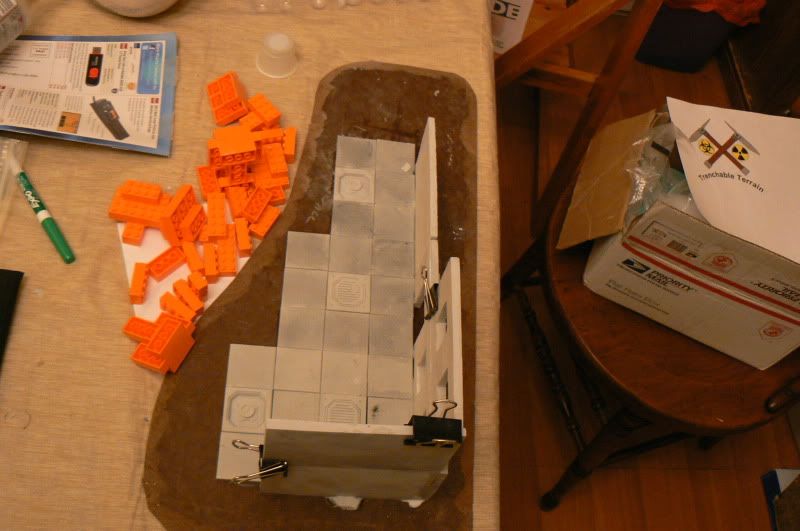
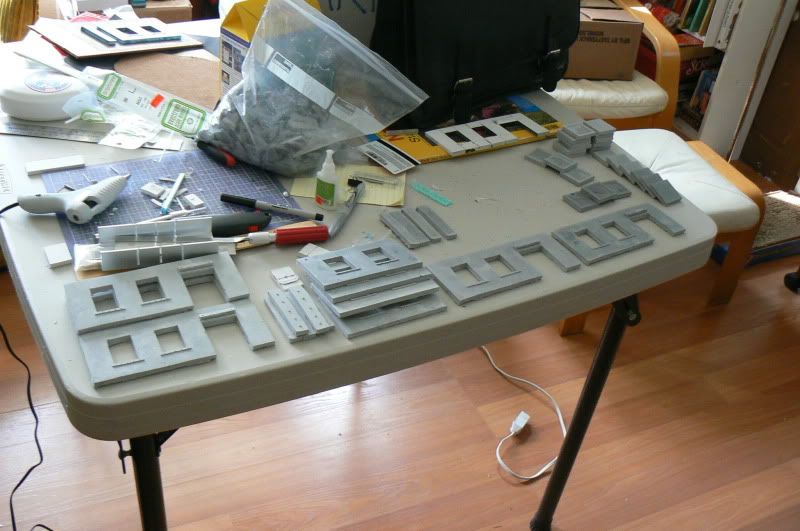
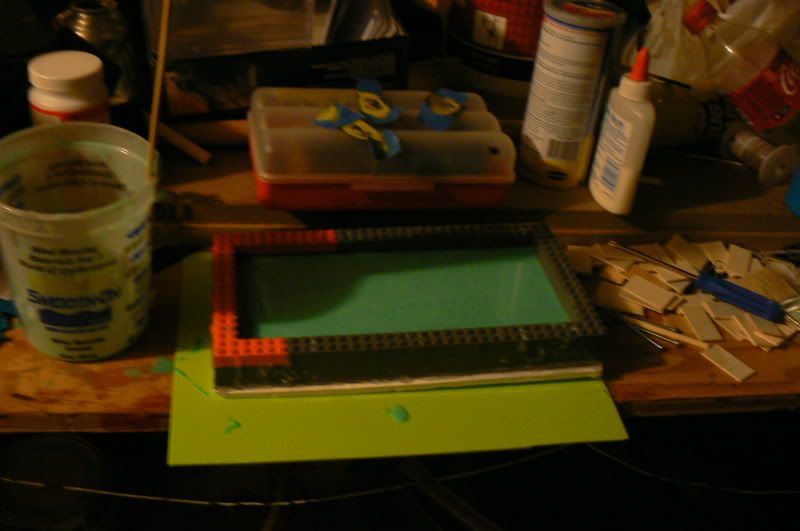
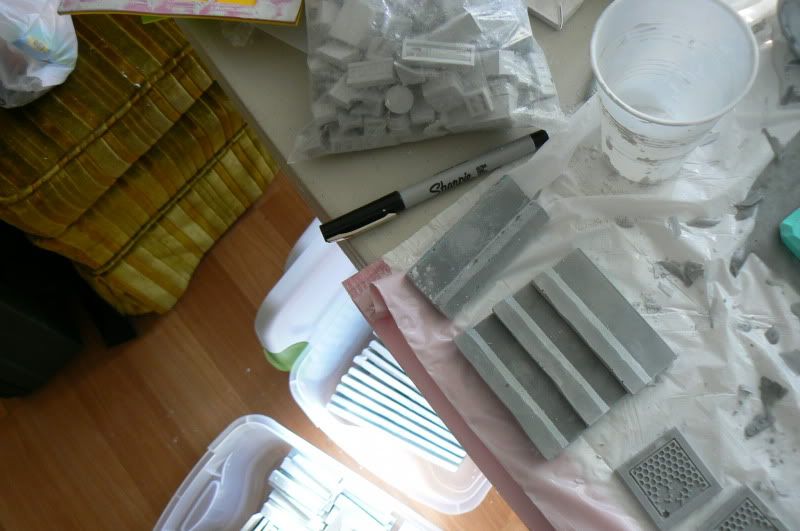
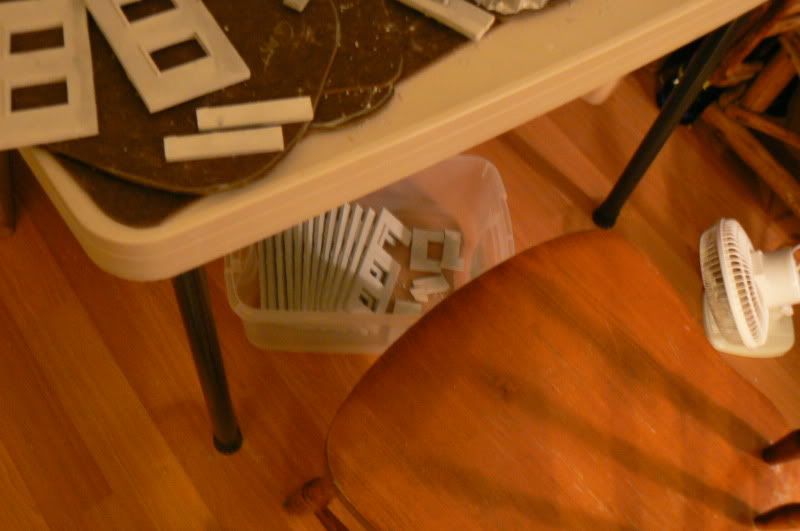
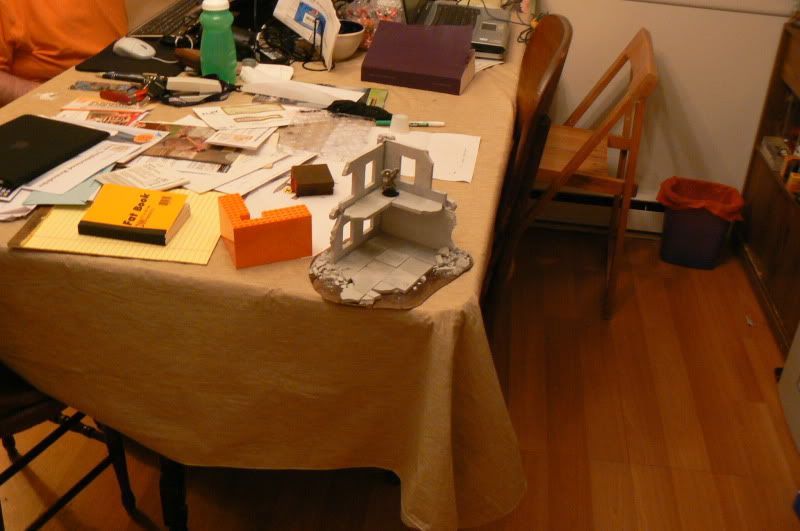
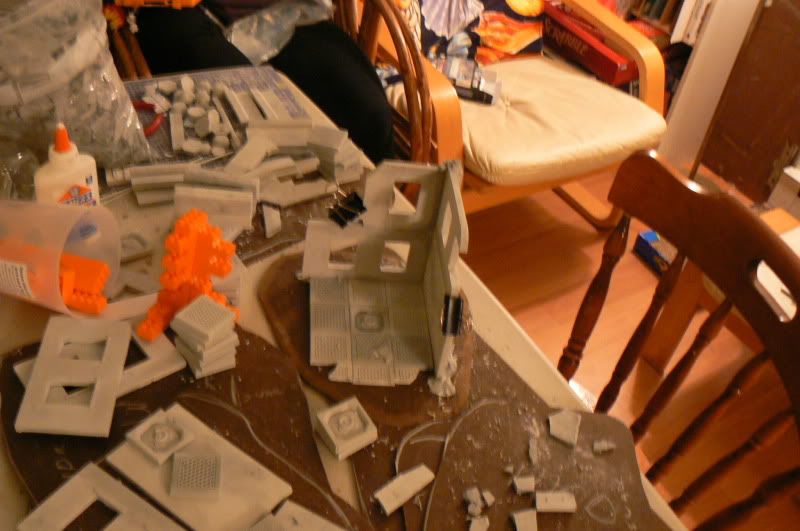
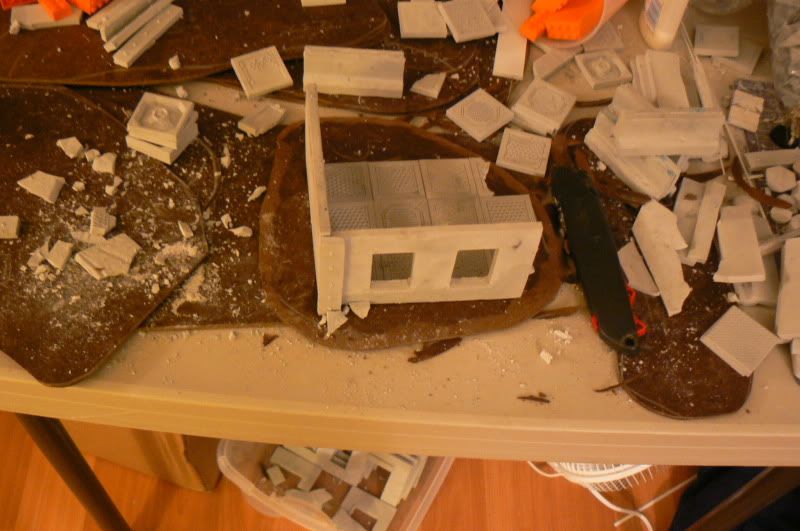
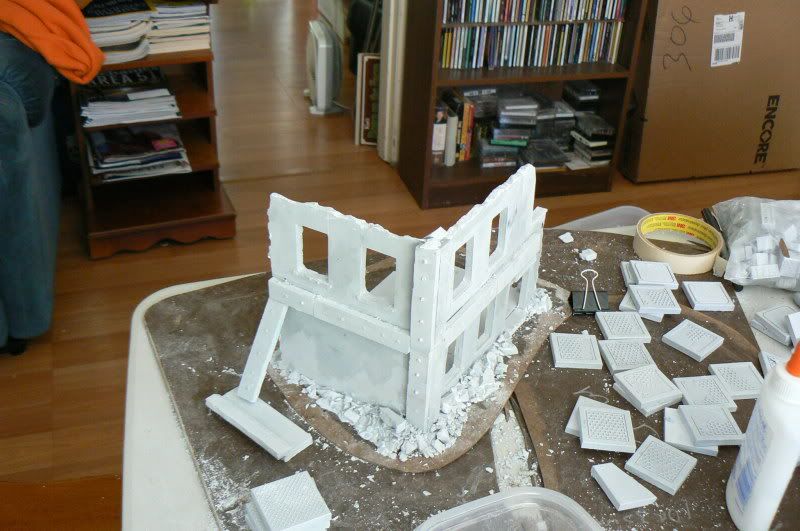
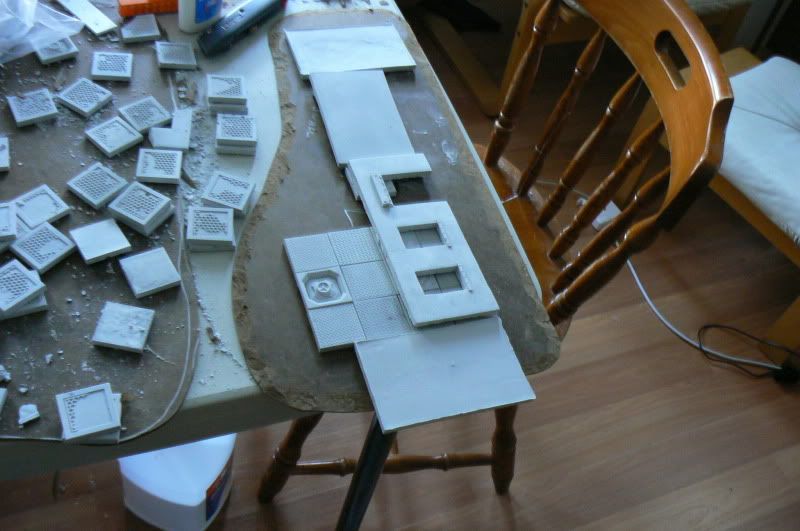
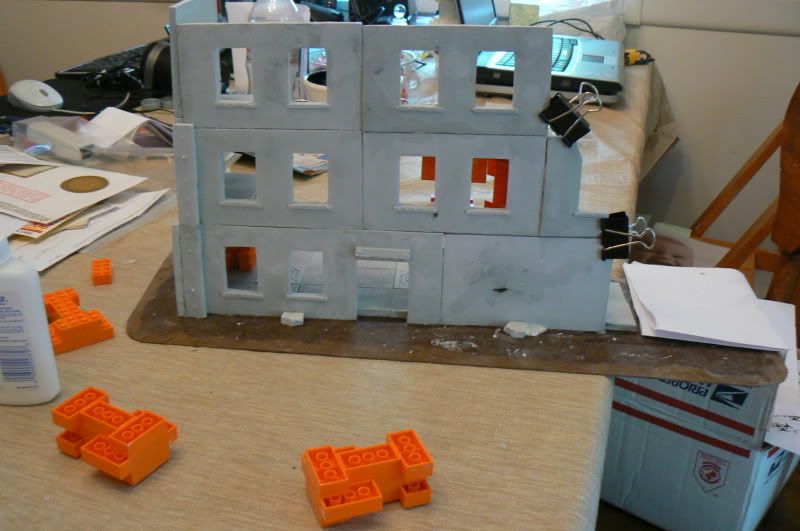
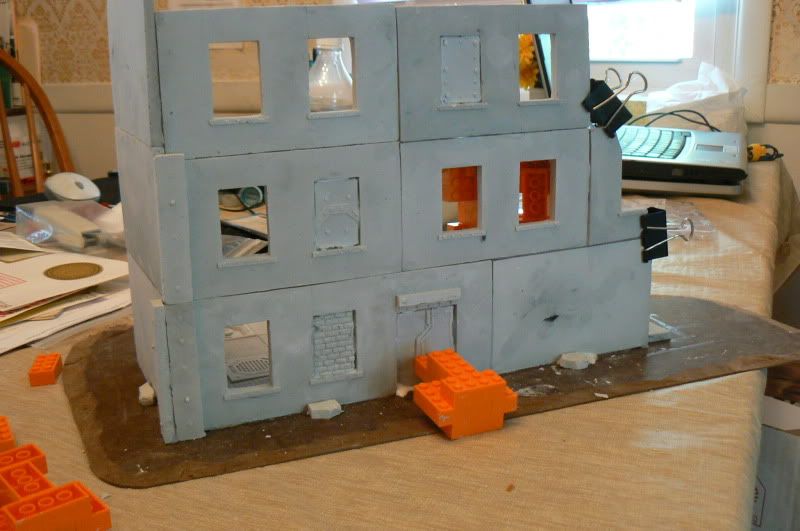
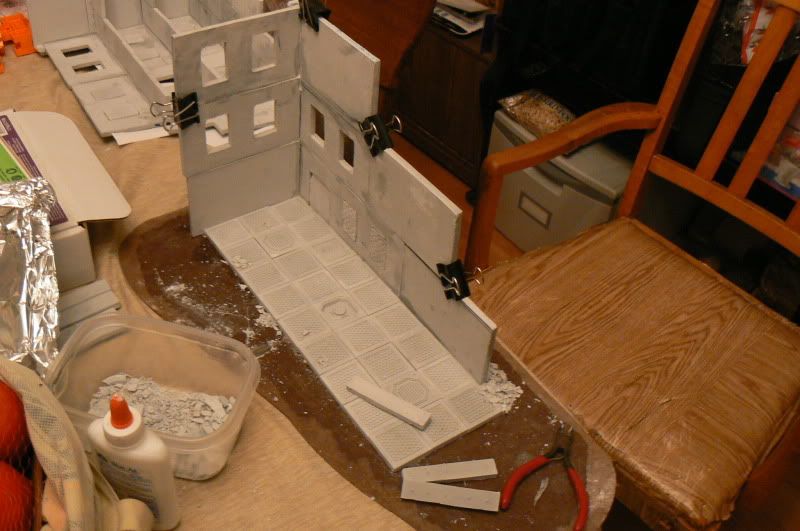
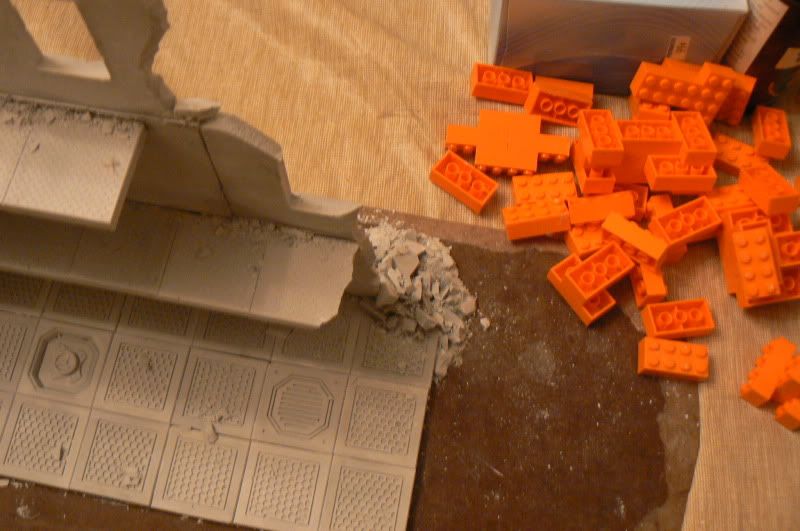
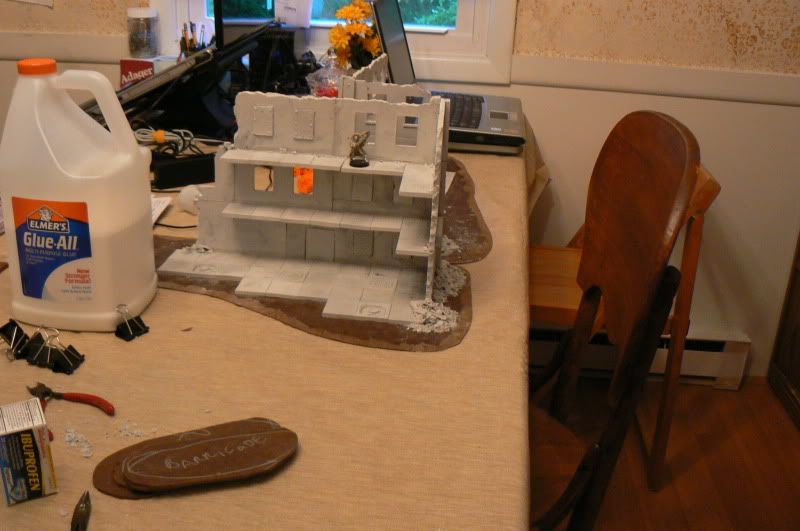
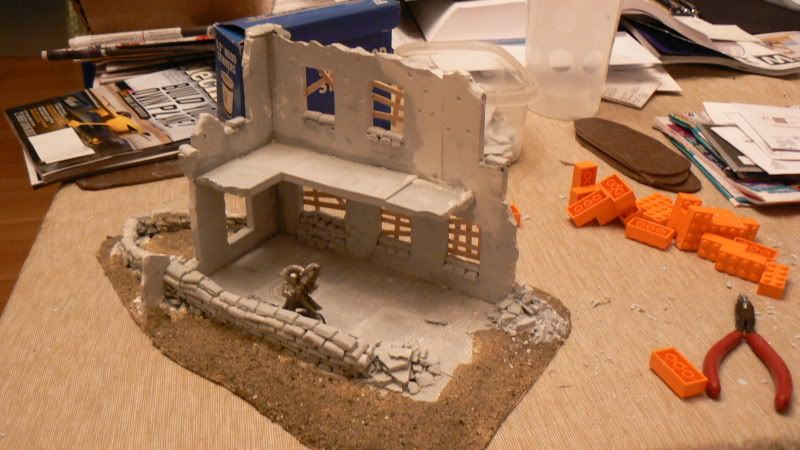
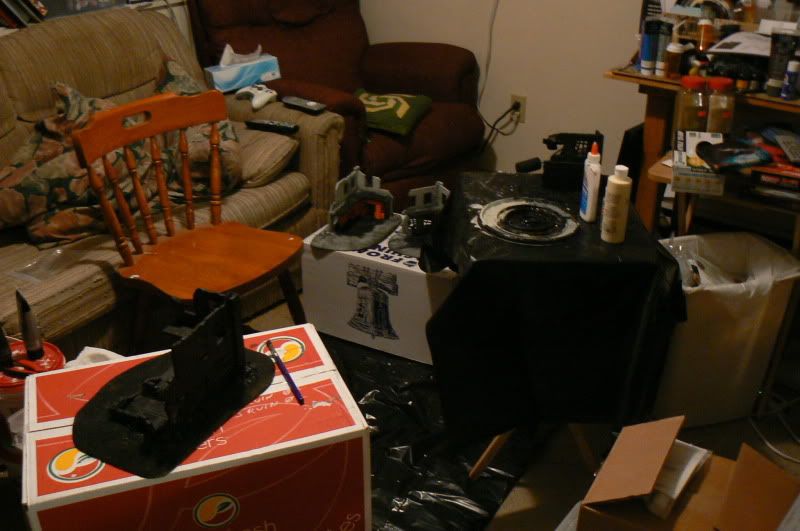
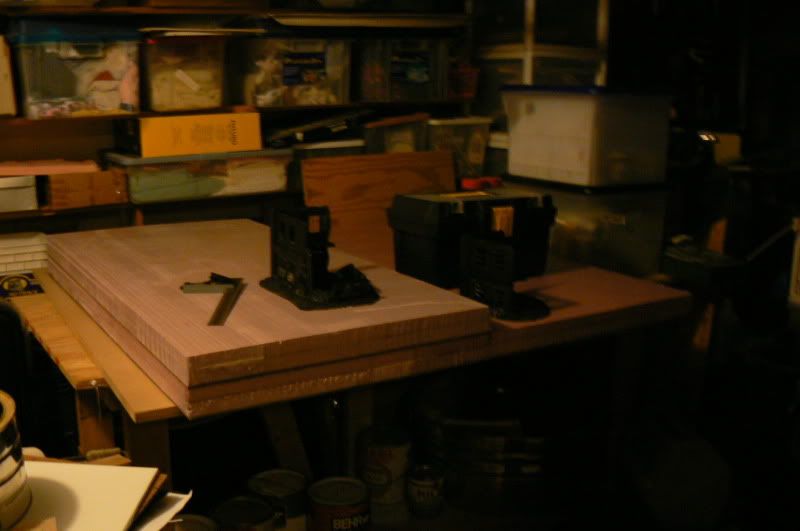
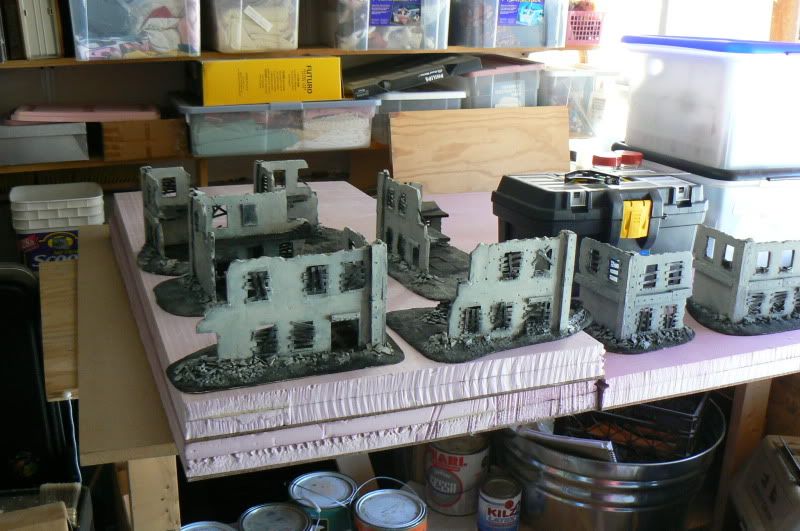
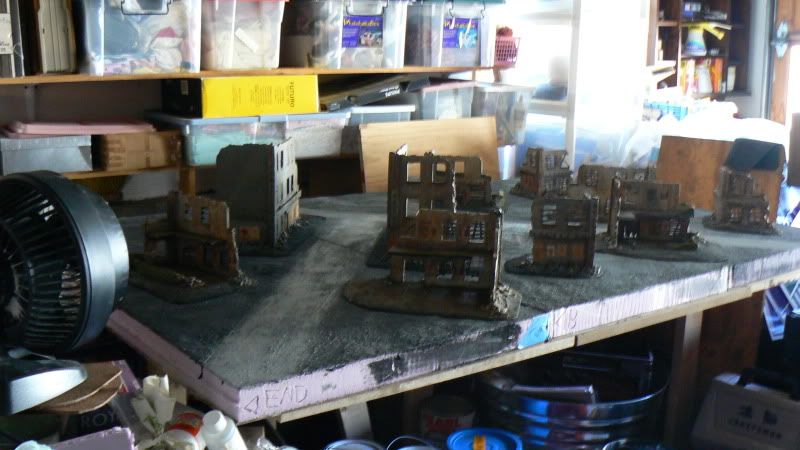
The Current Set up
Closer to the molds
Next new mold in progress (Barricades, and Small wall with no windows.)
 Automatically Appended Next Post: Automatically Appended Next Post: And I've decided to build a tabletop for this project to live upon as well ( I really must be some sort of Masochist especially as I am starting a new job this week...)
39973
Post by: Galorn
MOAR PICTURES
(of the progress to date.)
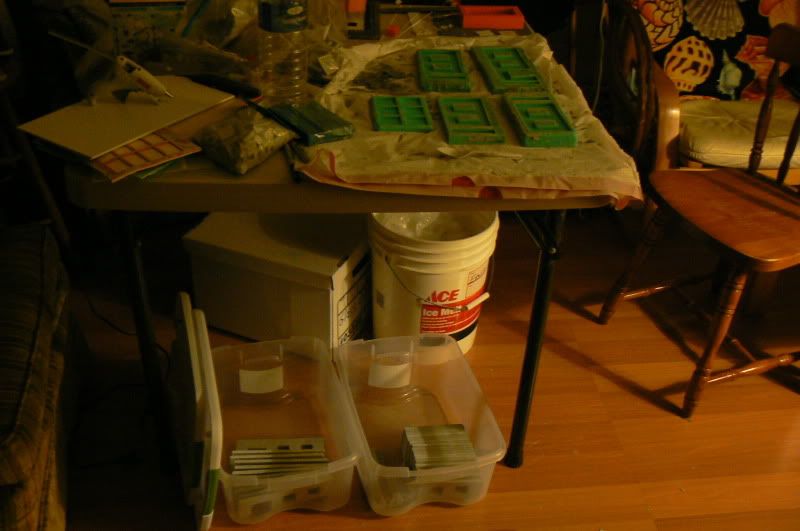
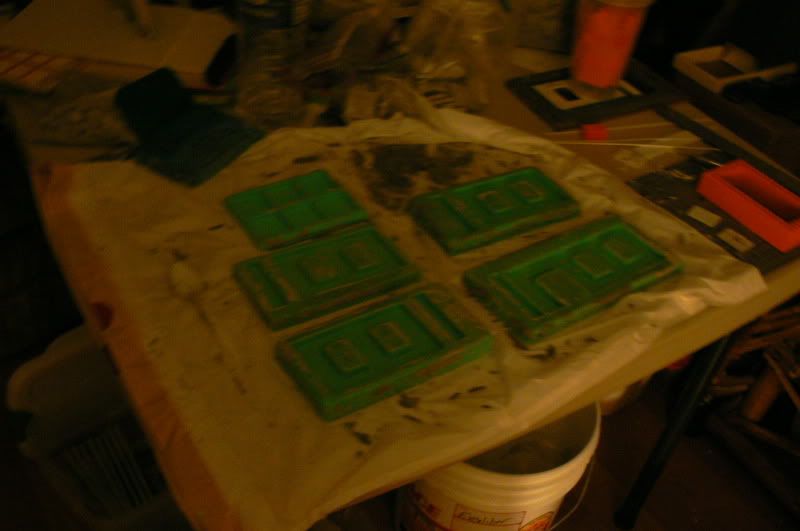
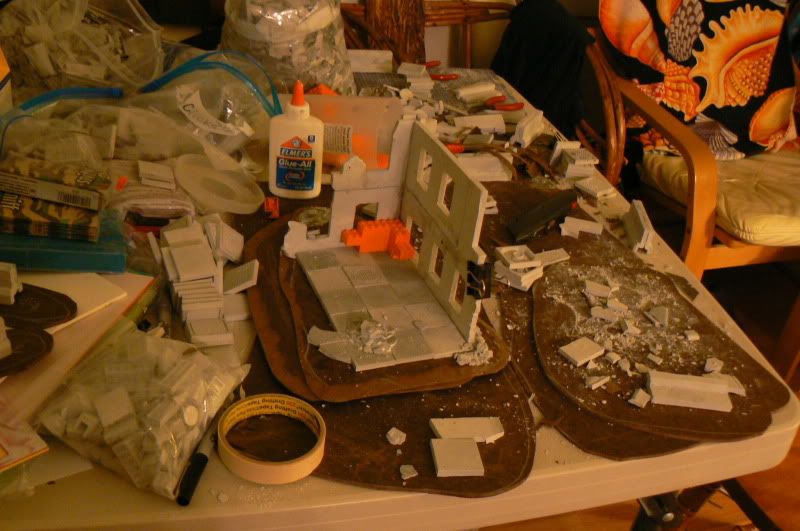
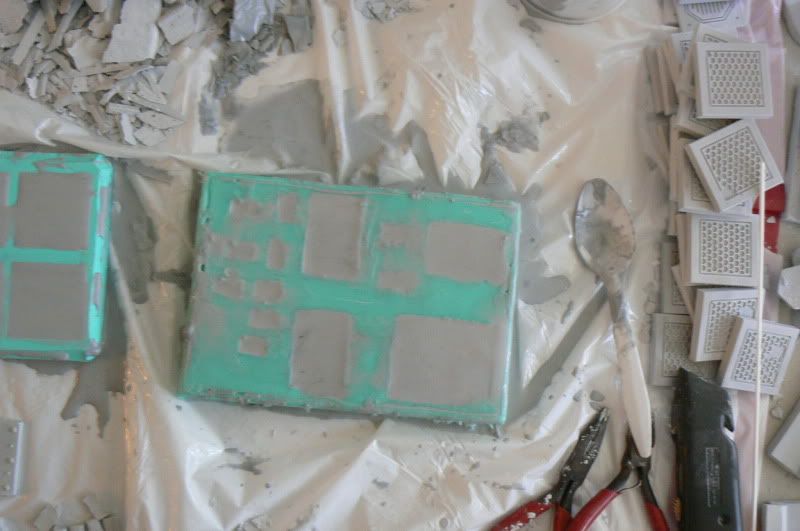
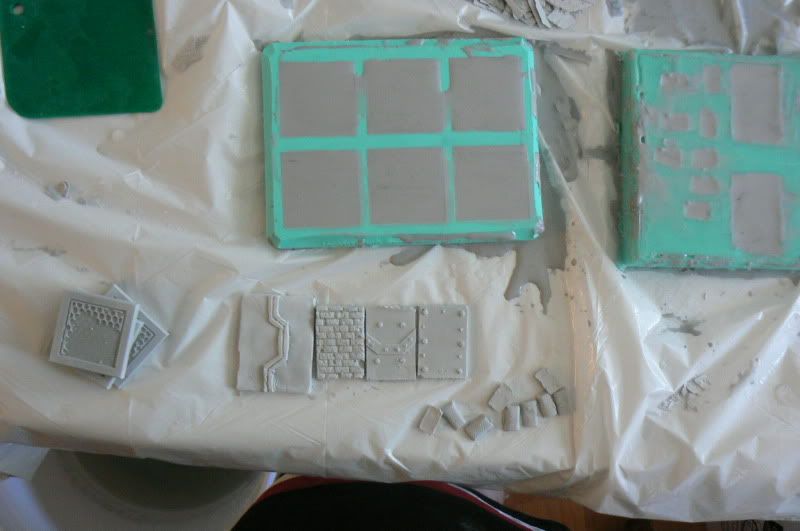
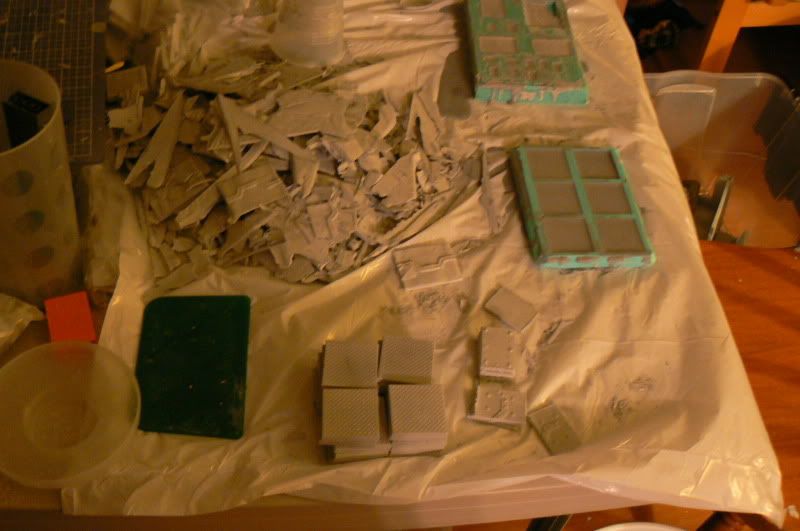
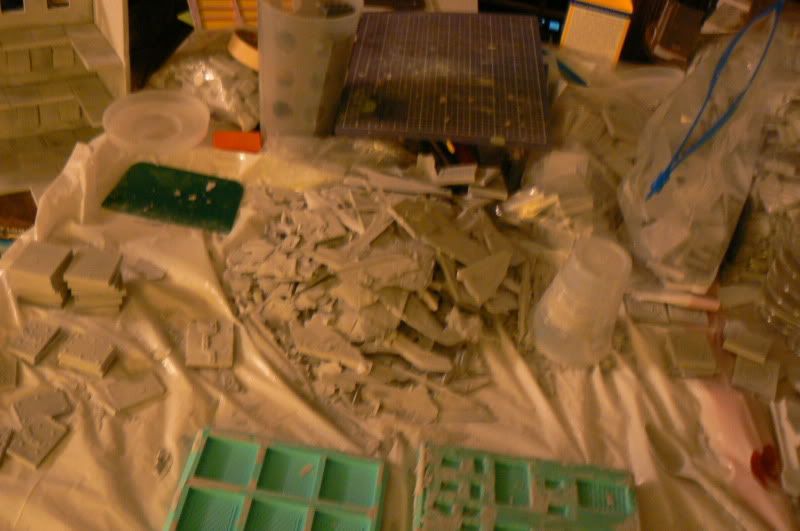
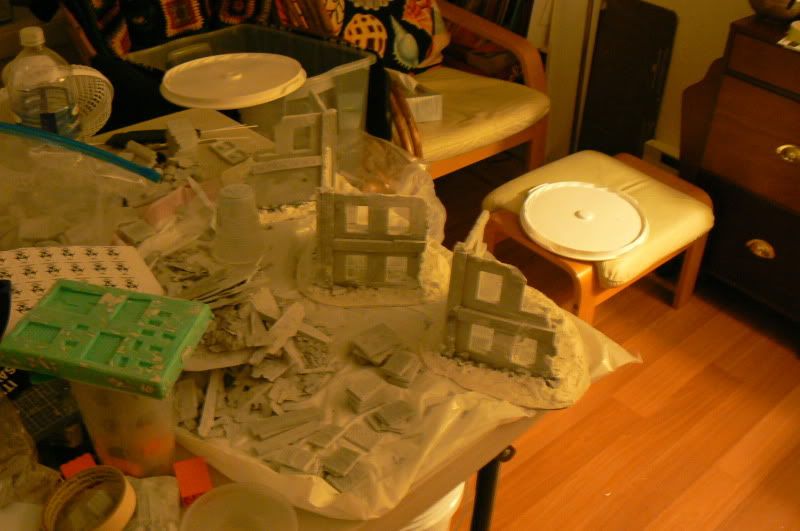
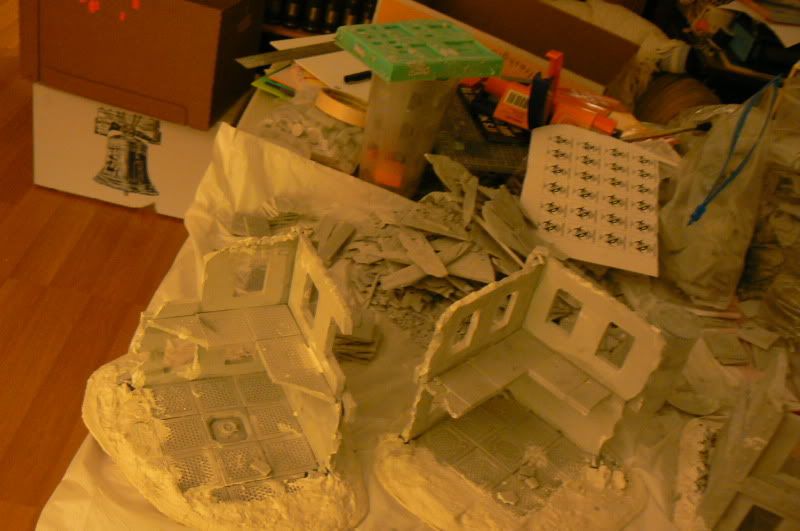
Overview of Stuff in molds
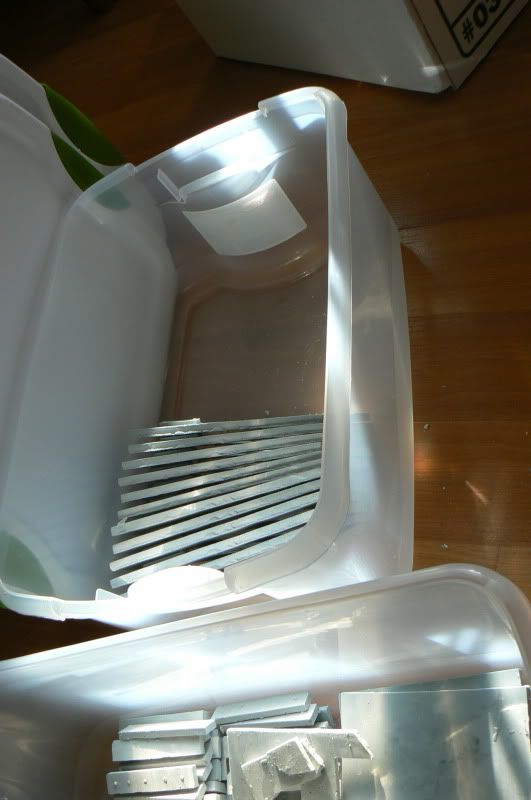
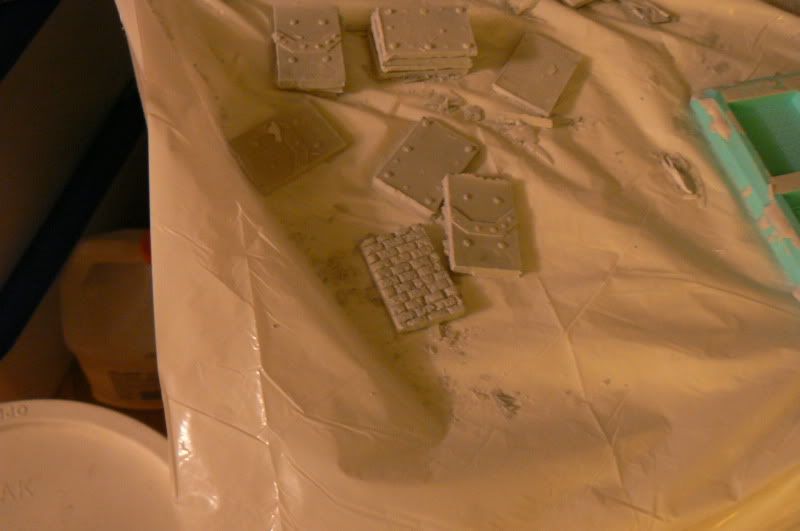
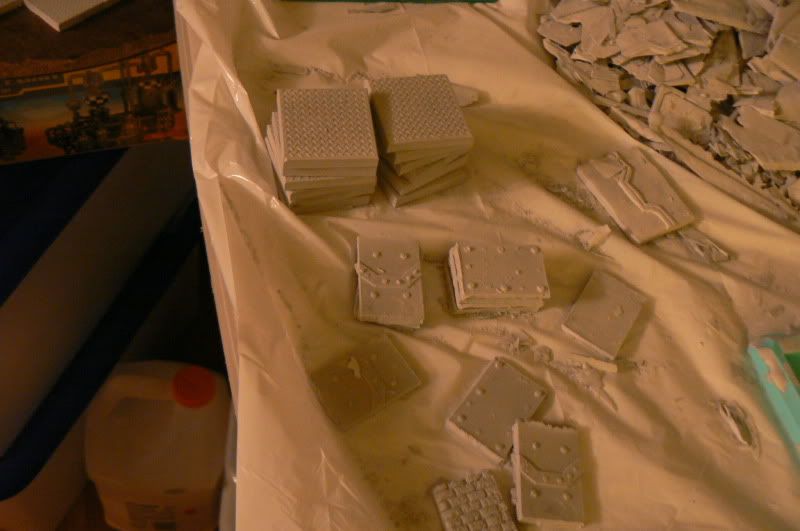
Cast building components
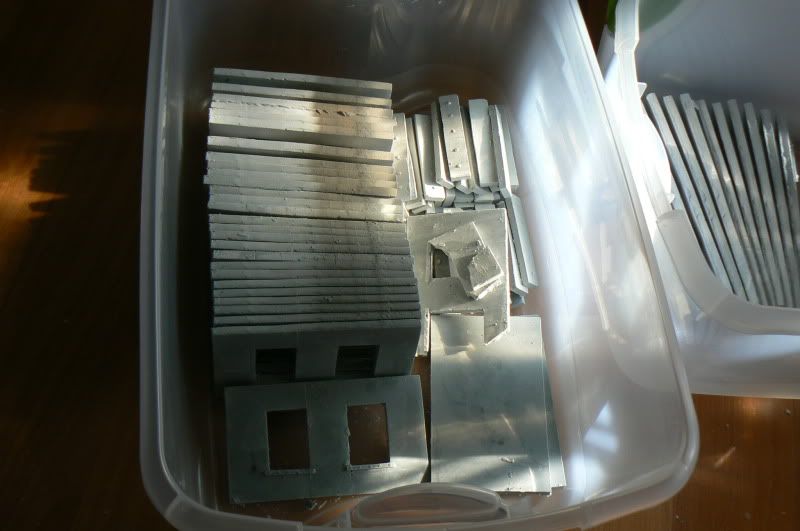
Cast Barricade components
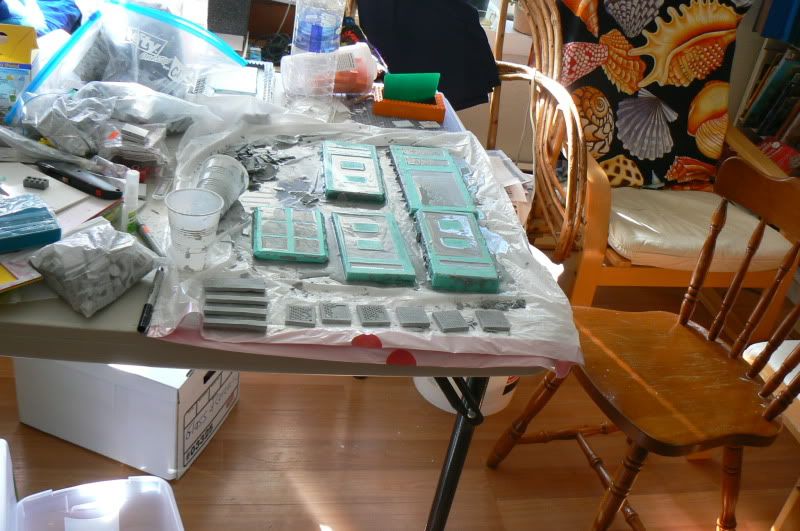
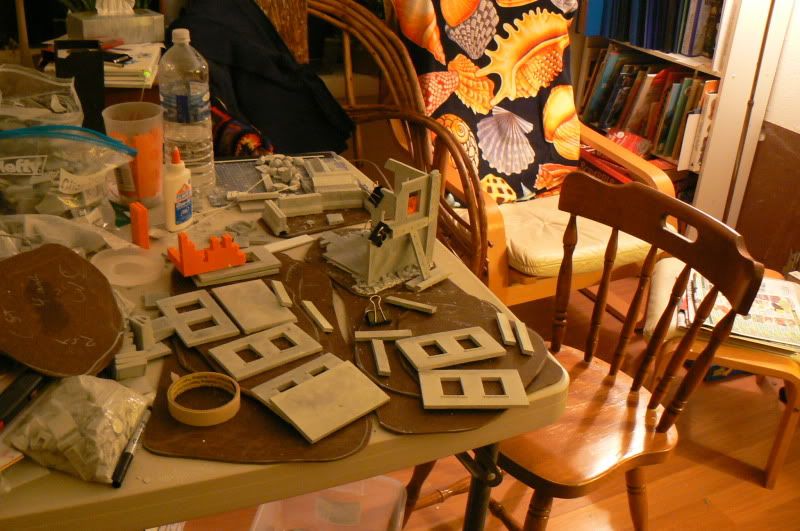
Casting progress table overview

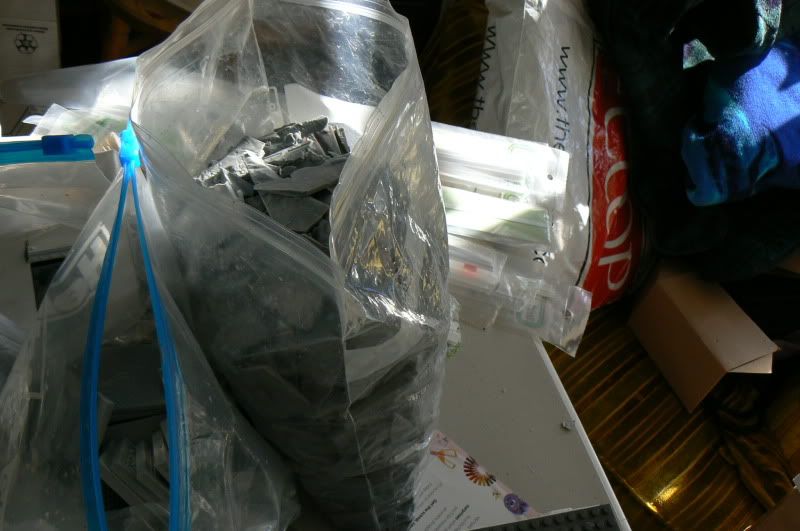
Big Bag o Rubble (left over dental stone broken up a bit)
 Automatically Appended Next Post: Automatically Appended Next Post:
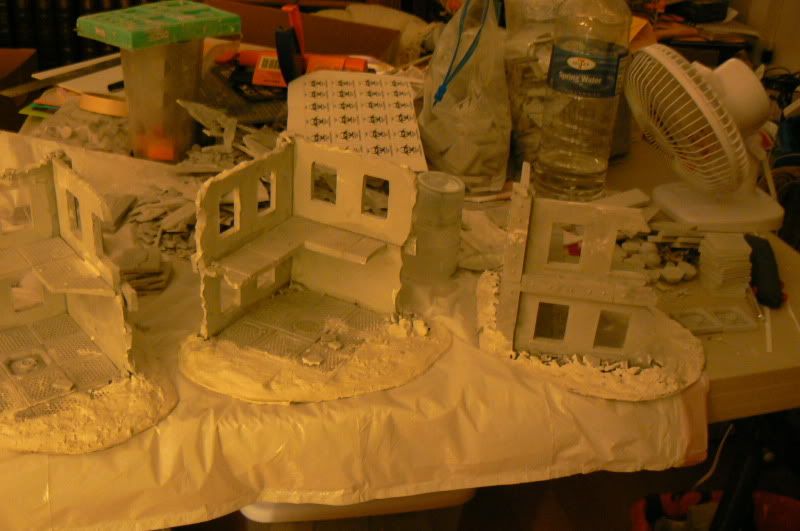
I've got about 90% of the "essential" components cast up already (enough for everything but the Large Ruins.)
for perspective
Each Large ruin uses 1 Door, and 13 Small walls (windows, or non windows)
Each Medium Ruin Uses 1 Door and 5 Small walls (windows, or non windows)
Each Small Ruin uses 4 Small walls (windows, or non windows)
Each Barricade is 2 pieces (one cast worth, from the mold with them in it)
The Rubble pile is a pile of excess dental stone on foam (easy as hell to do)
The "sandbag fort" will be either molded then cast Sandbags, or Sculpey sandbags. Automatically Appended Next Post: Each building is going to be based, and I will be making a fairly generic table top to put them on (with some "improvised" trench lines of course )
The List of Components I have cast right now is
Door segment: 12
Swall w/2 windows: 41
Spacer Bar (join cover): 53
Barricade (half): 12
Swall W/o windows: 6
the rough footprint of all the buildings I have planned is roughly 2ft x4ft (ie. 33% of the table is planned to be terrain)
39973
Post by: Galorn
All essential components have been cast. (I'm going to cast a few more sets of stuff to give me some additional options when assembling the assorted ruins.)
39973
Post by: Galorn
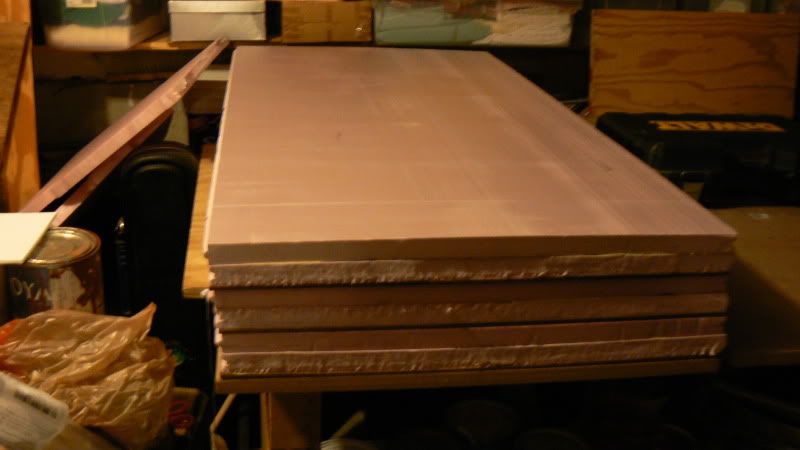
Bases for all terrain pieces have been cut. now for assembly.
30617
Post by: Emperors_Champion
Good progress! How long does that stuff take to cure? Is it rock 'ard?
39973
Post by: Galorn
Emperors_Champion wrote:Good progress! How long does that stuff take to cure? Is it rock 'ard?
It takes between 25-35 mins to set enough to de-mold and a similar amount of time to "cure" fully (your times may be slightly different due to your local humidity) It sets to a near Ceramic hardness. Has exceptional compressive strength but only Moderate Shear strength. It works great for making terrain tho , and is one of the recommended products for casting HirstArts tiles out of.
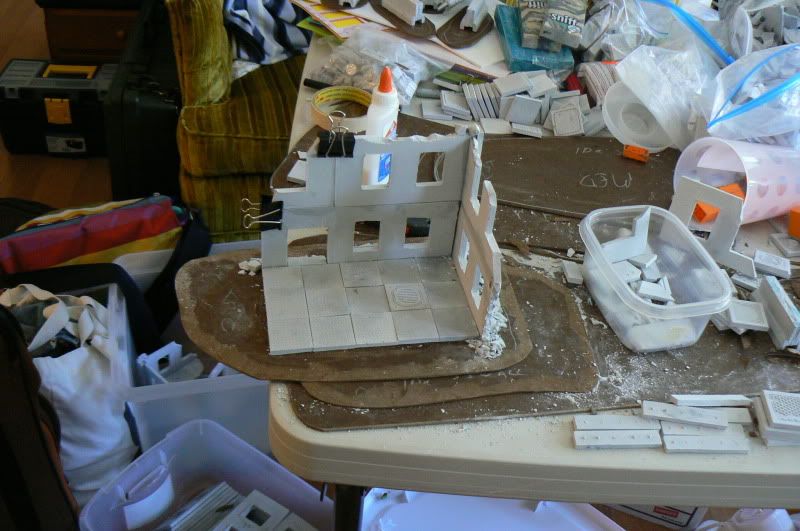
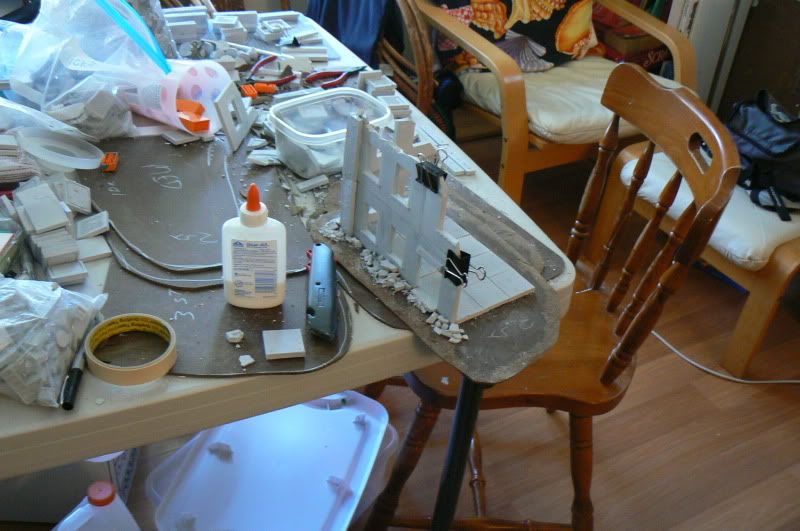
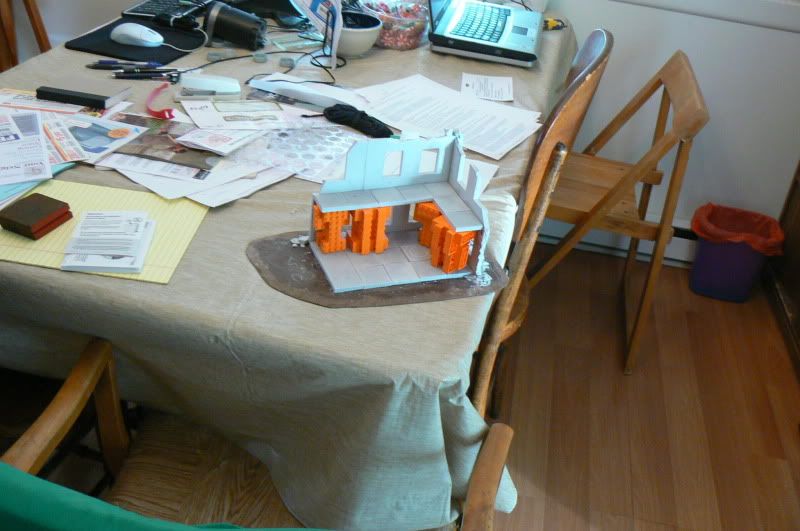
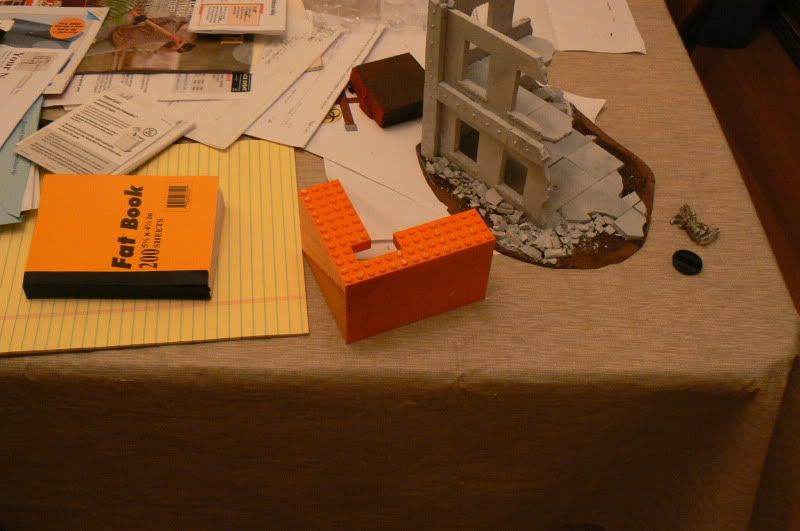
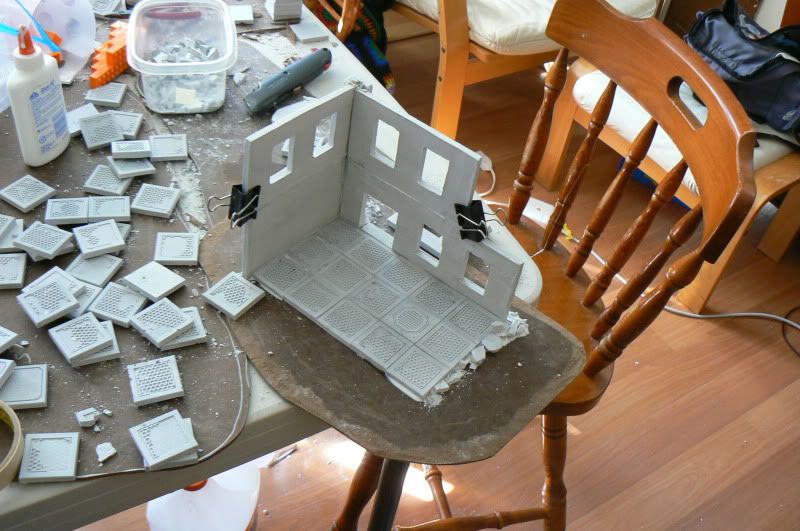
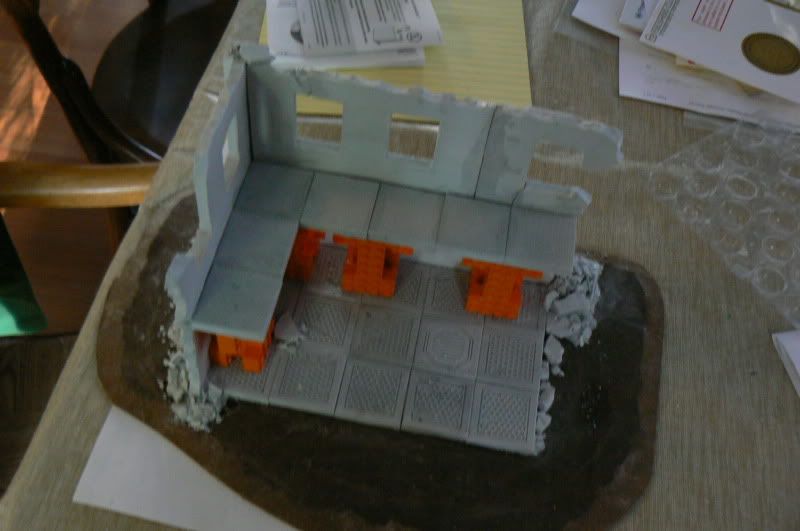
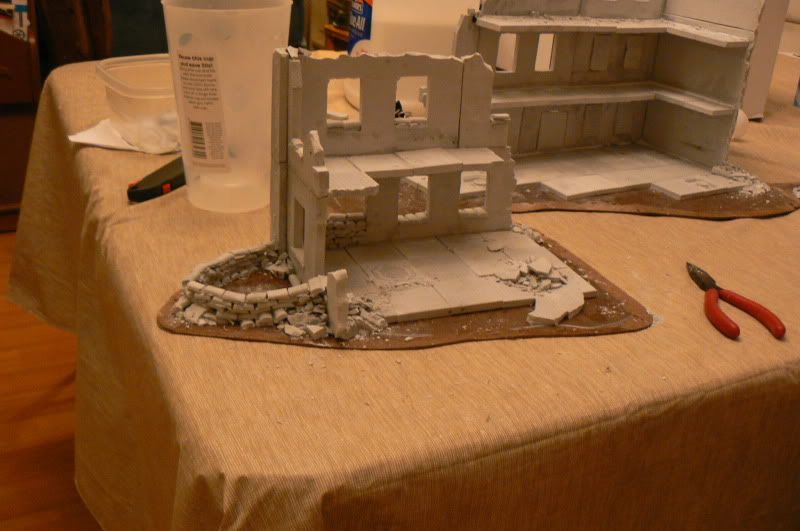
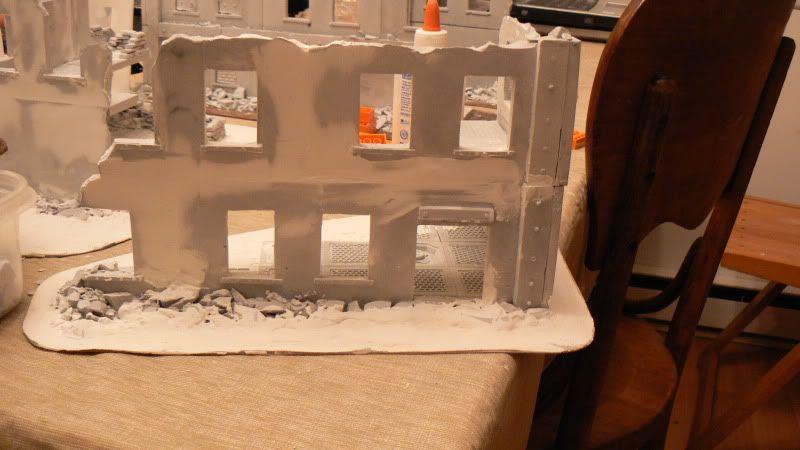
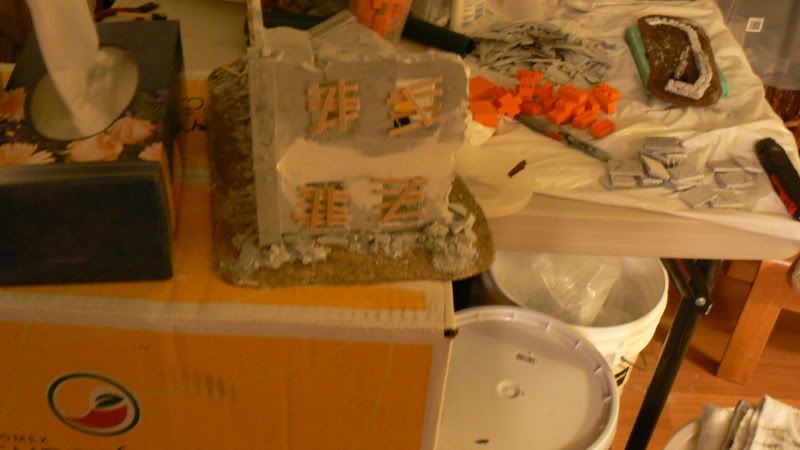
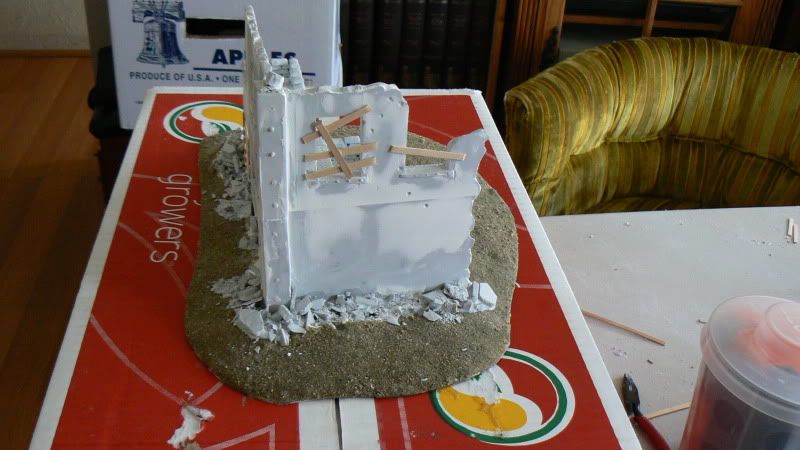
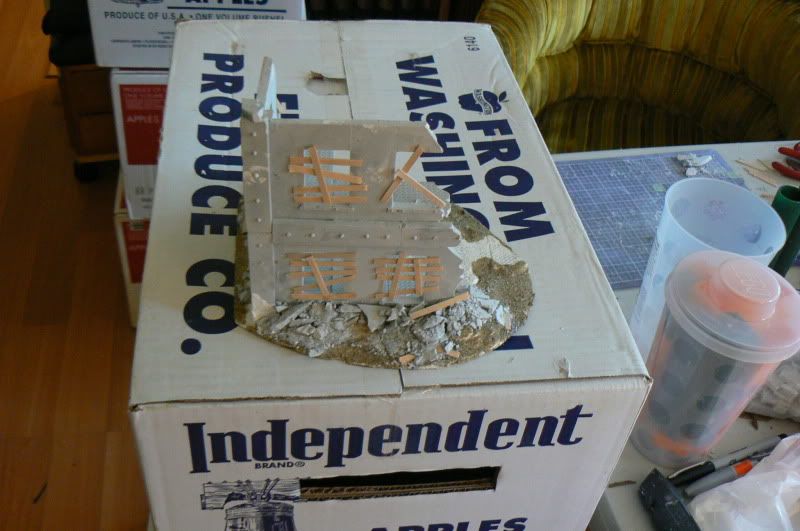
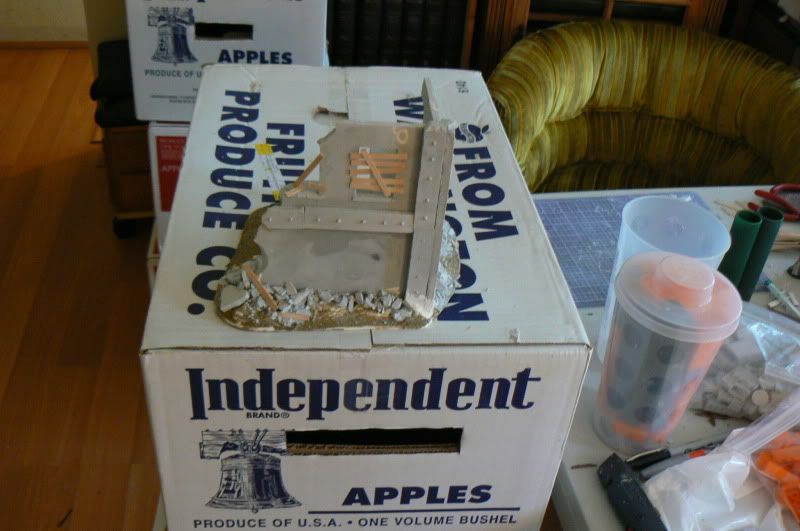
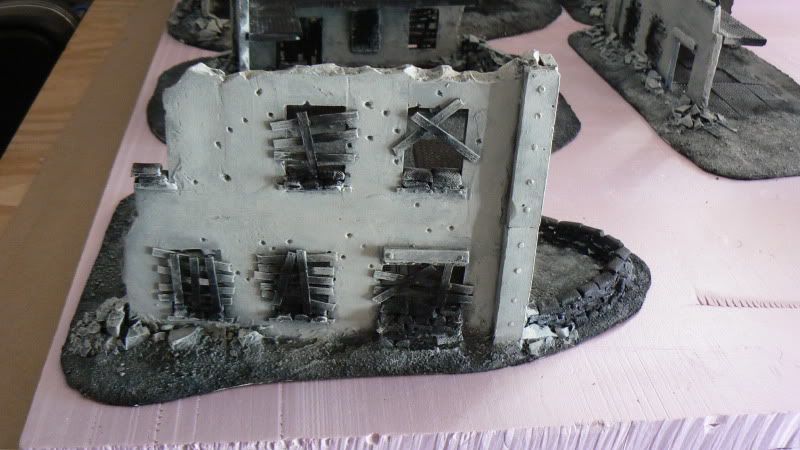
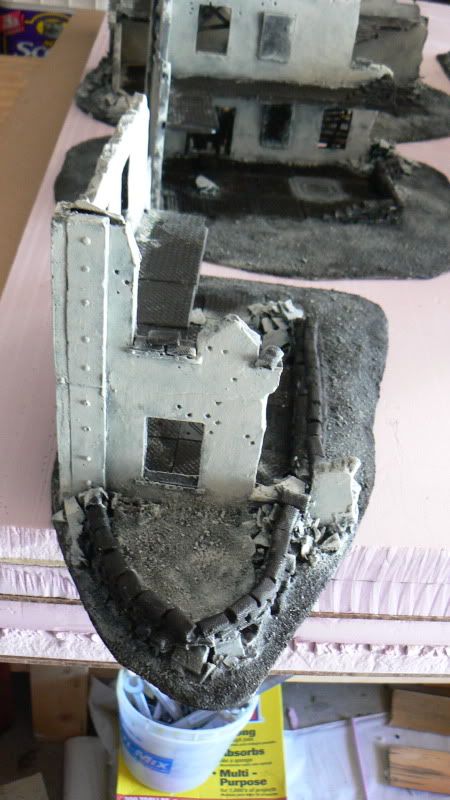
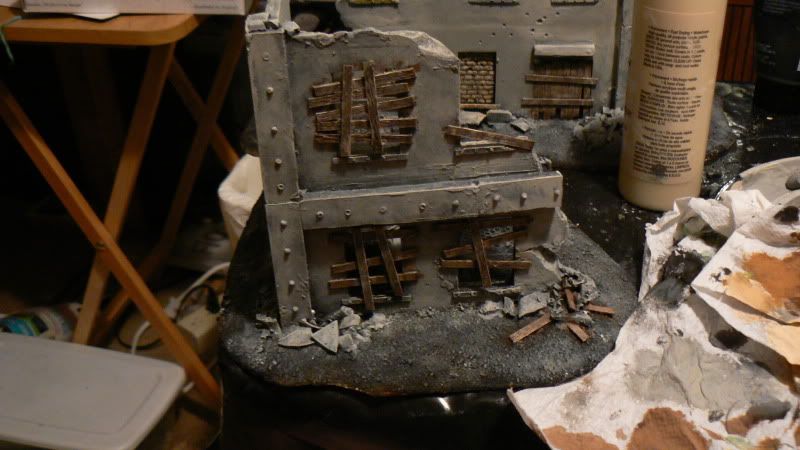
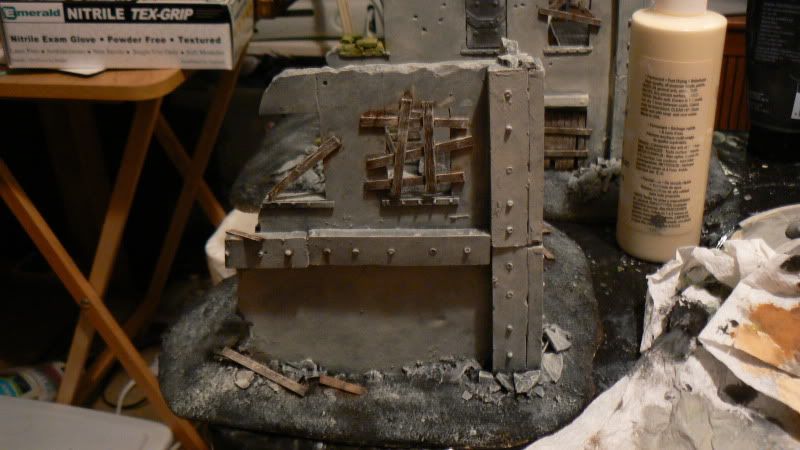
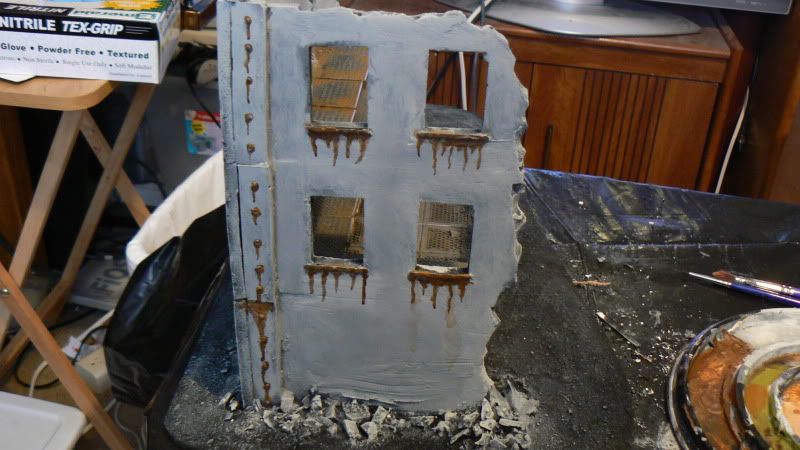
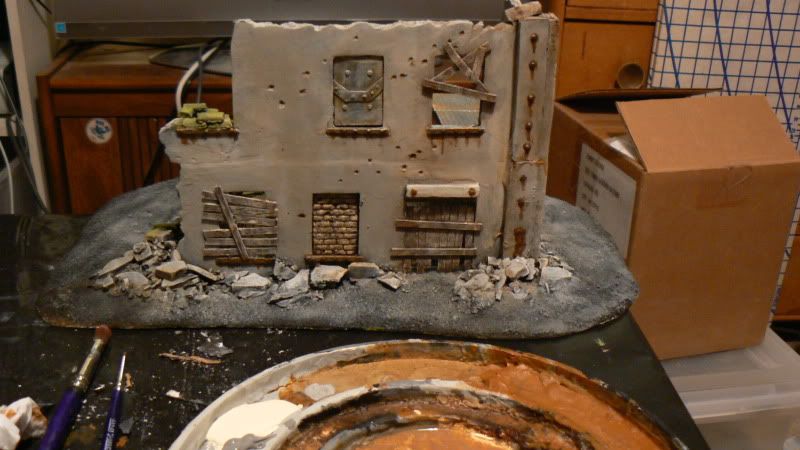
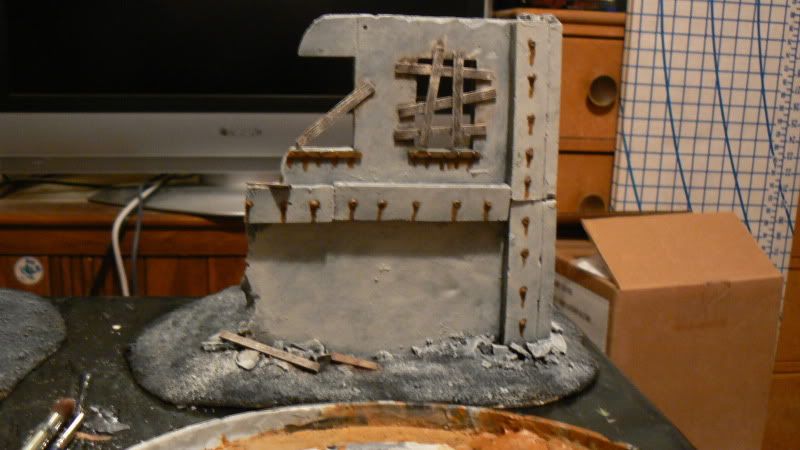
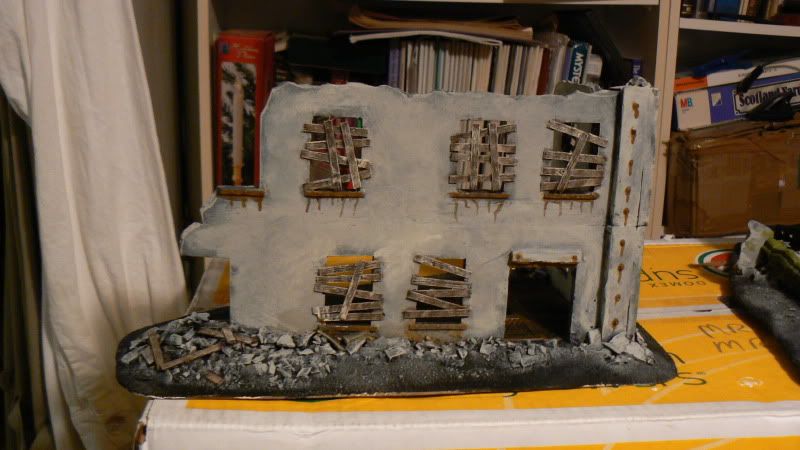
Now On to the Piccy goodness for the day.
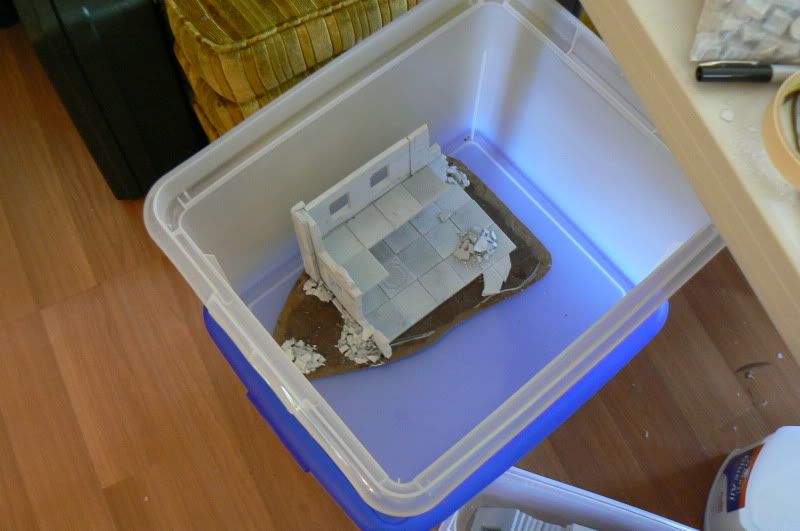
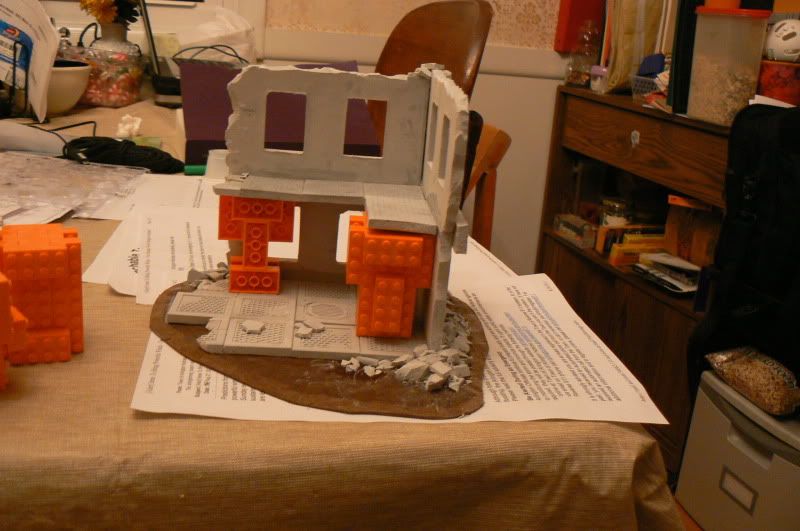
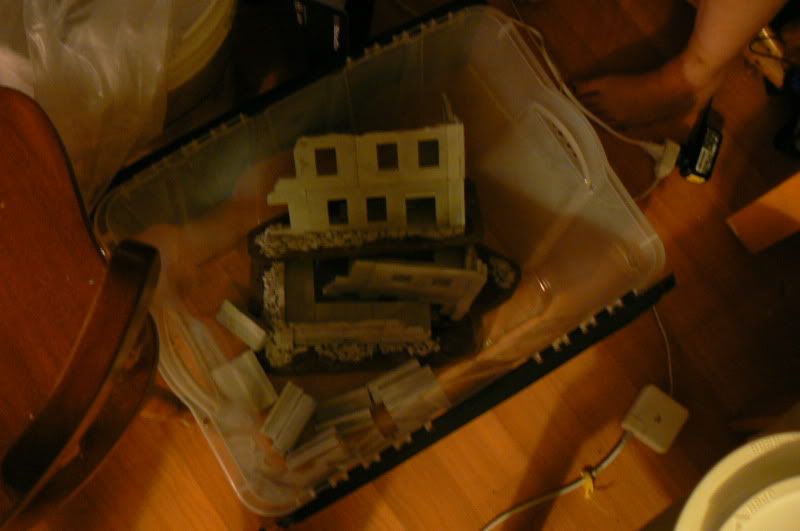
Teaser Pic of the First small ruin in progress.
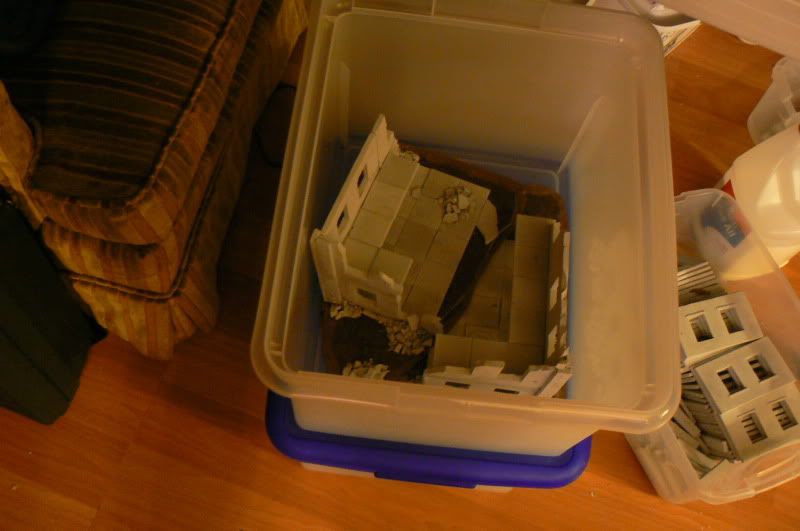
Bin of Finished wall components
Bin of Door segements, and Busted window walls.
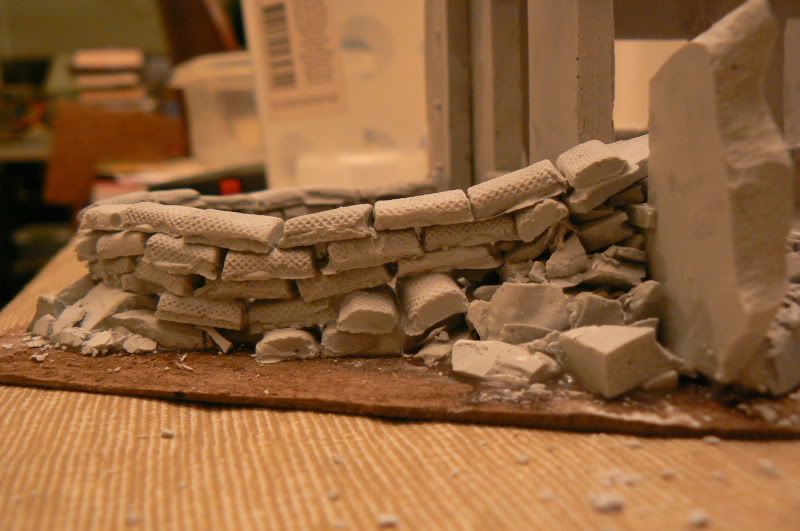
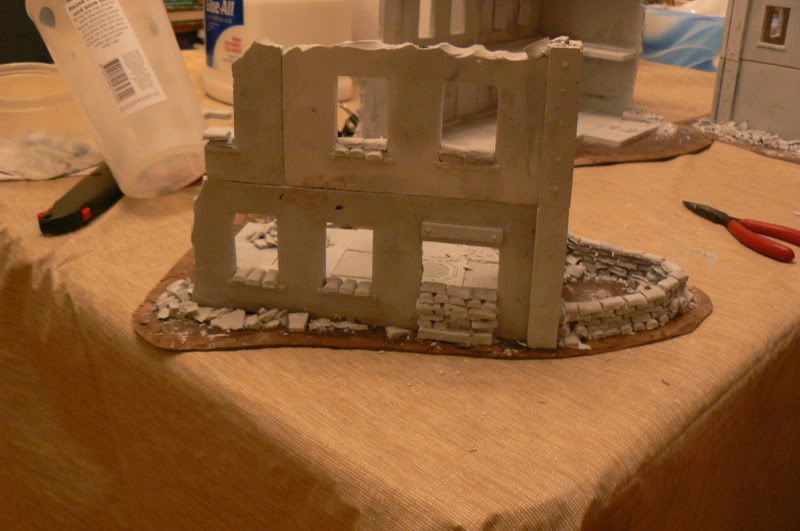
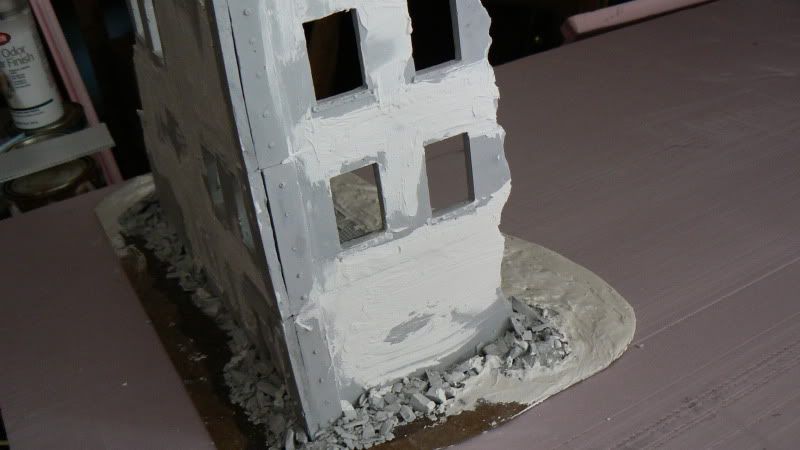
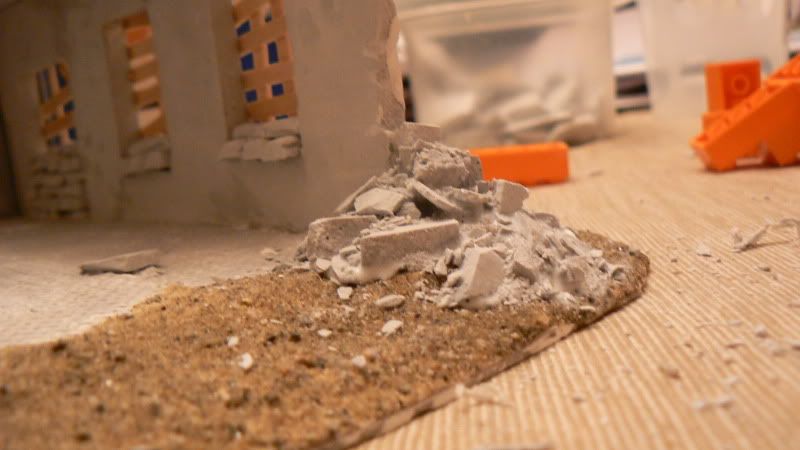
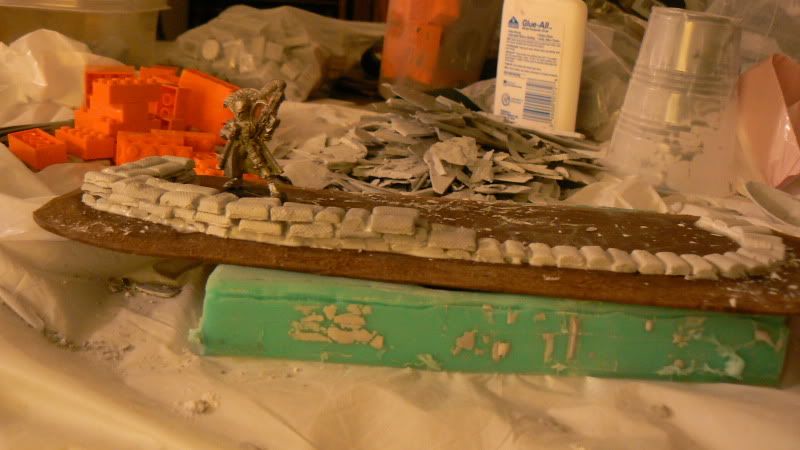
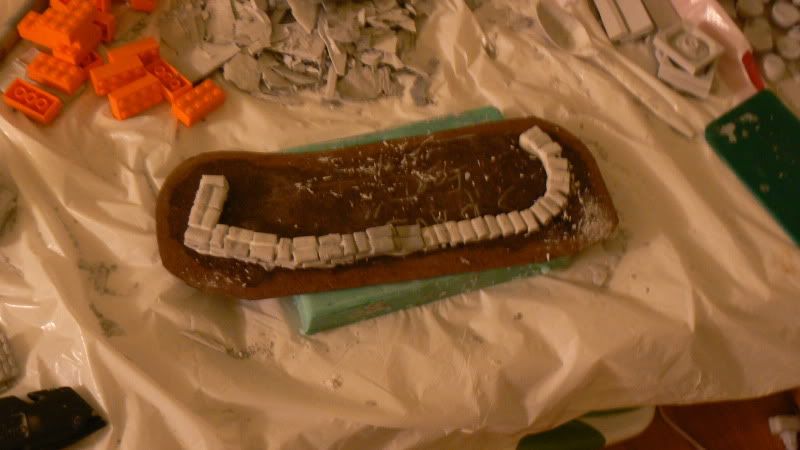
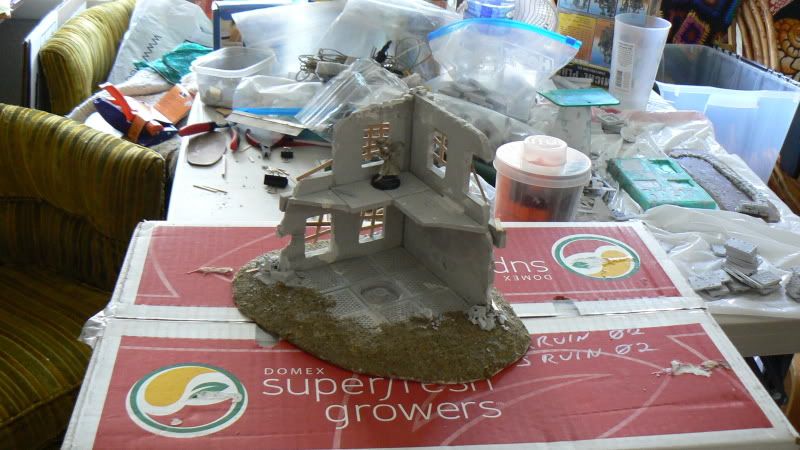
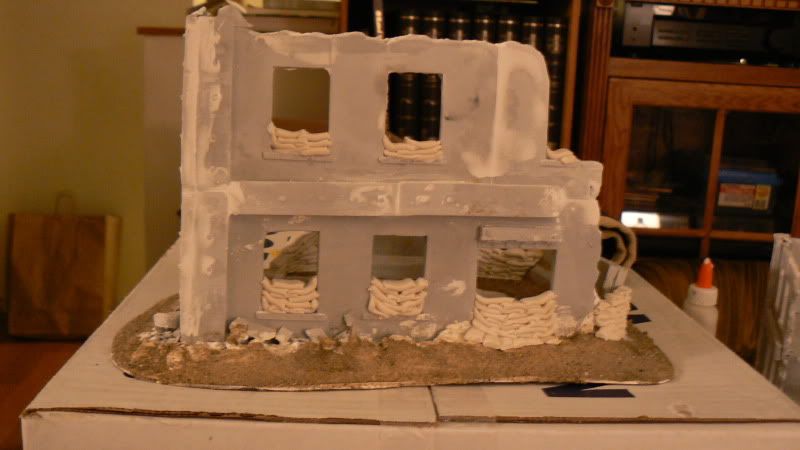
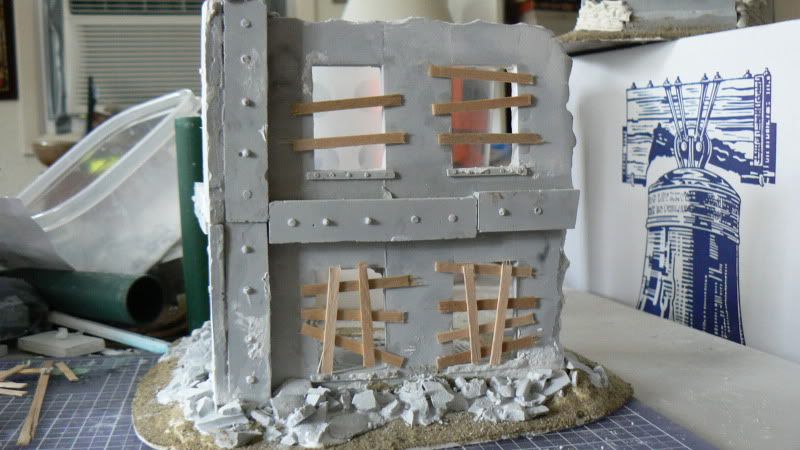
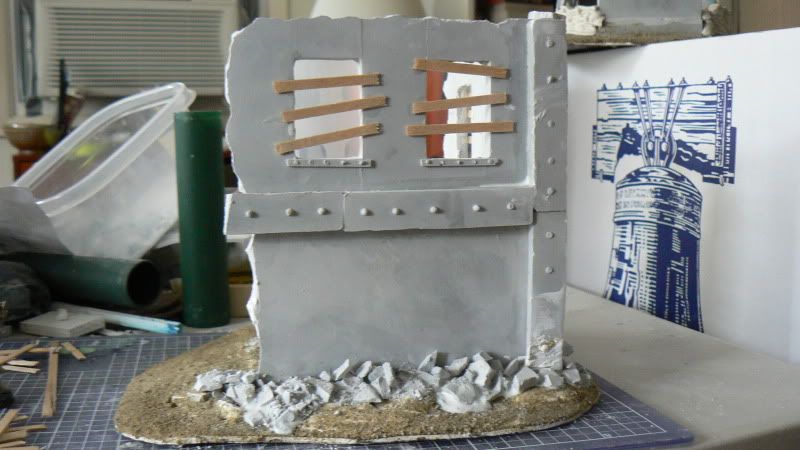
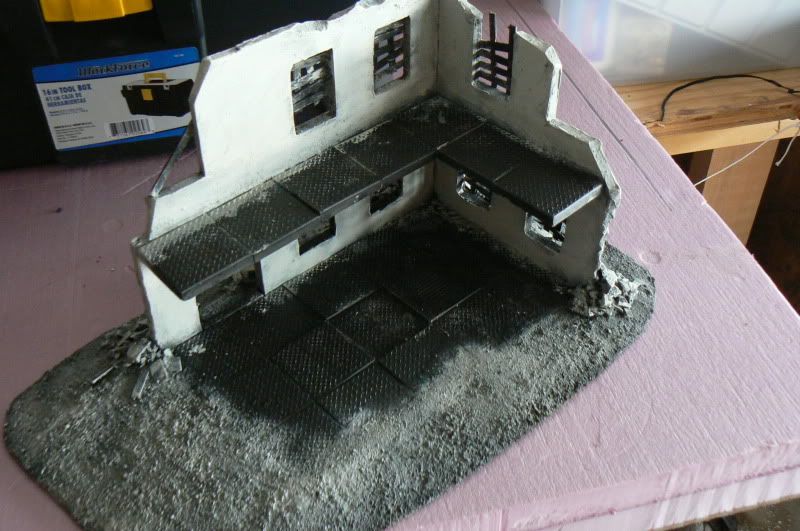
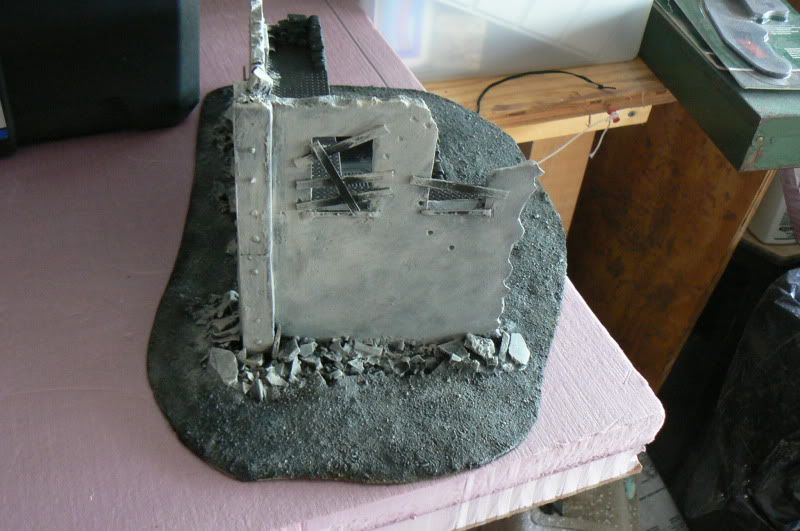
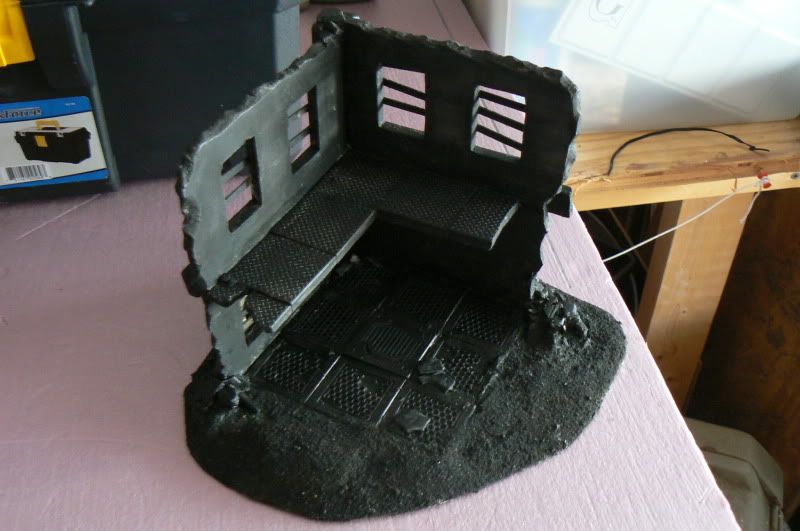
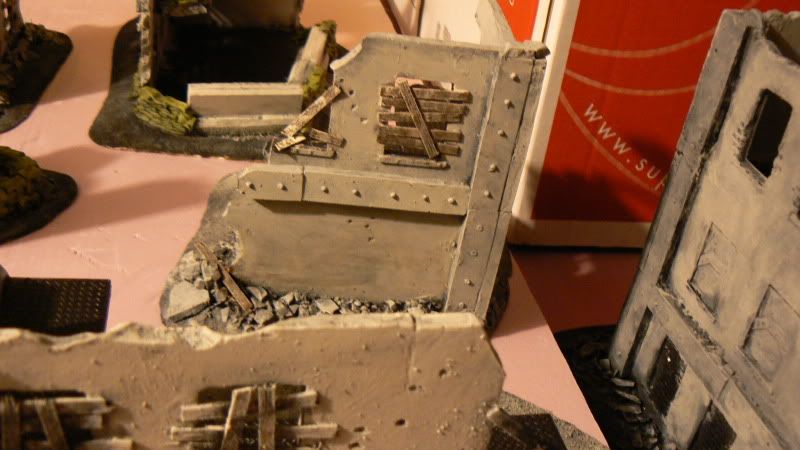
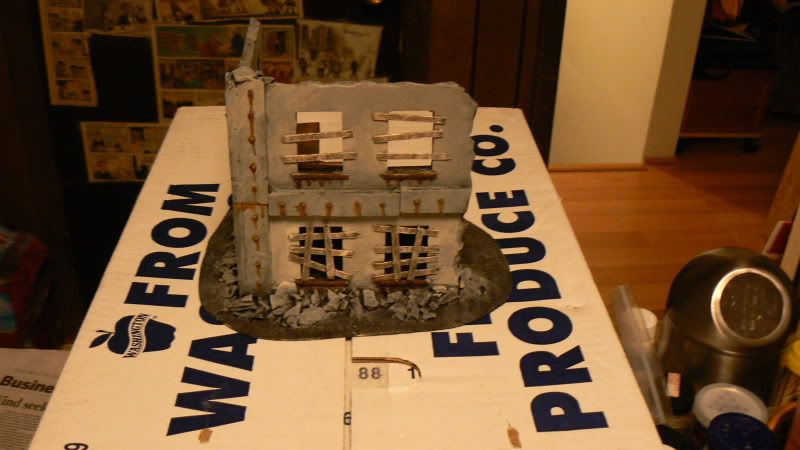
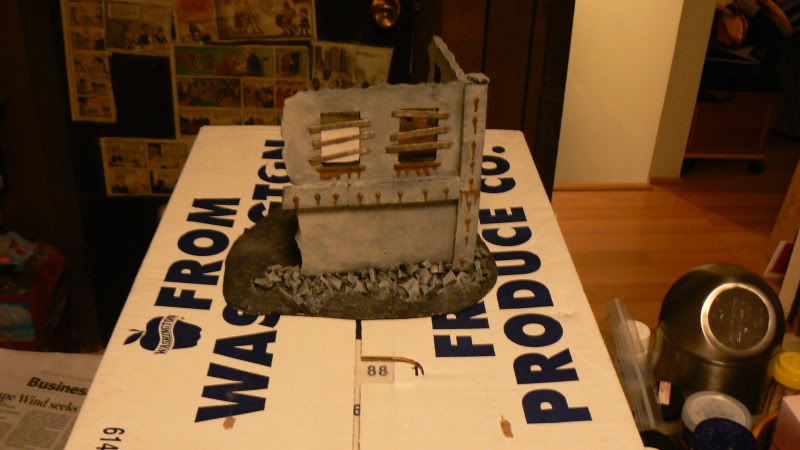
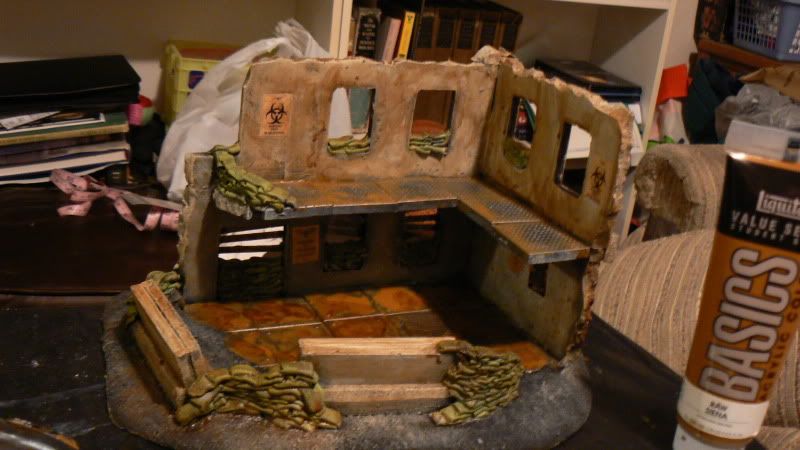
Sruin 1 Right exterior Overview (rubble-ing in progess)
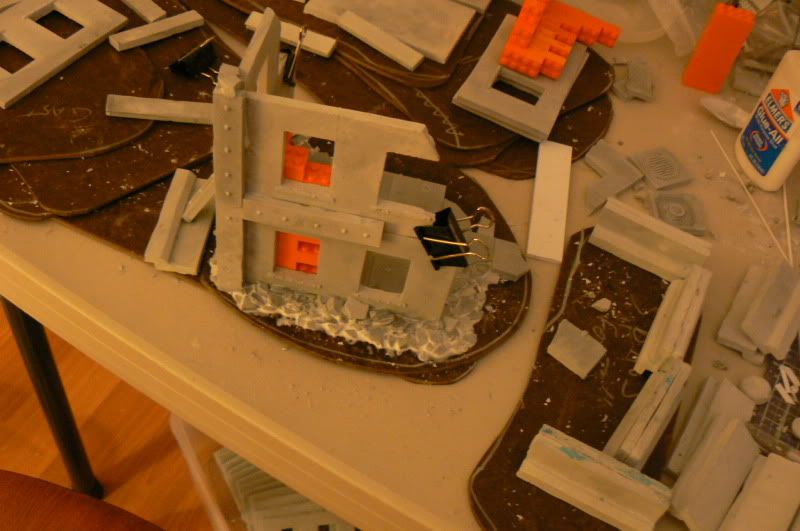
Sruin 1 Right rear side overview
Sruin 1 Flashy Pics
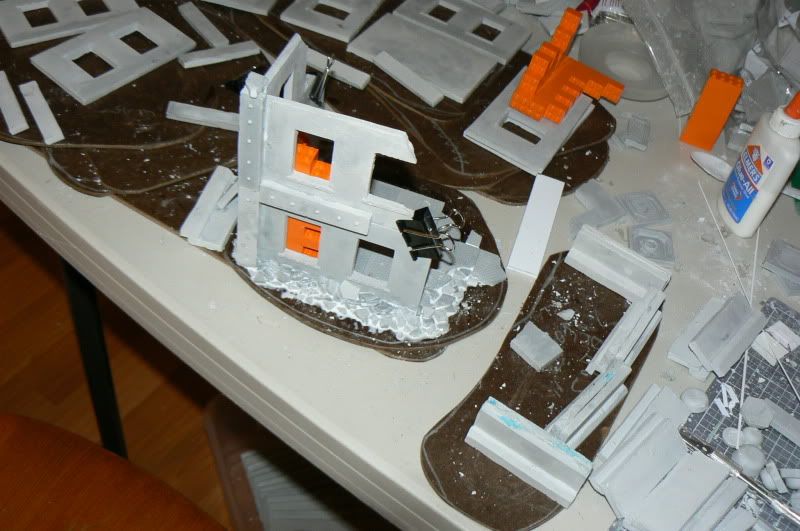
Sruin 1 Far view Left rear(ish) YOu can see a potential layout for the beginnings of the "sandbag fort)
4250
Post by: Smashotron
This is really coming together nicely! Great job and keep up the good work, man.
39973
Post by: Galorn
Smashotron wrote:This is really coming together nicely! Great job and keep up the good work, man.
Thanks I shall... I will be getting more done tomorrow after I get home from Work.
39973
Post by: Galorn
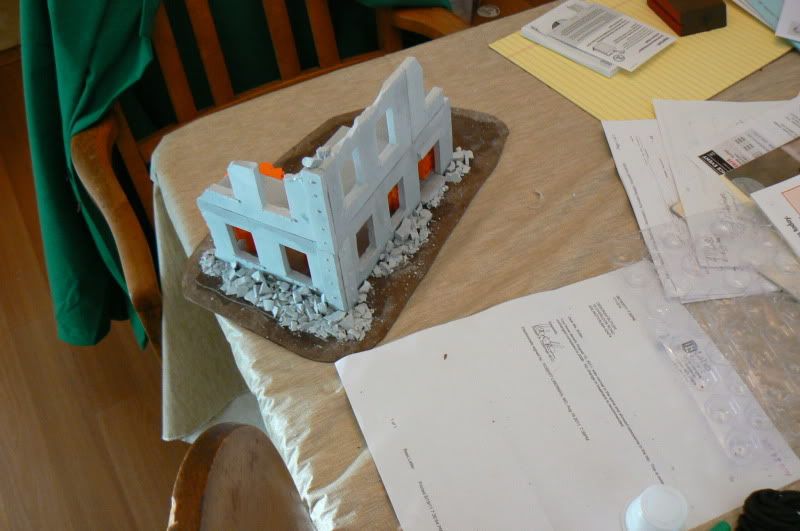
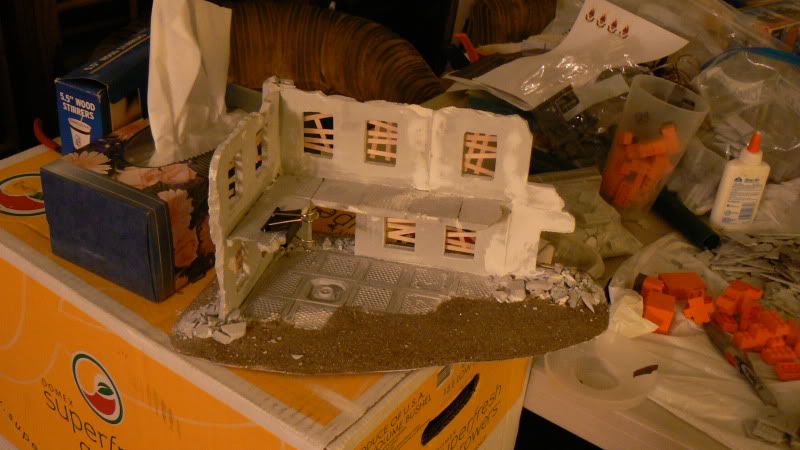
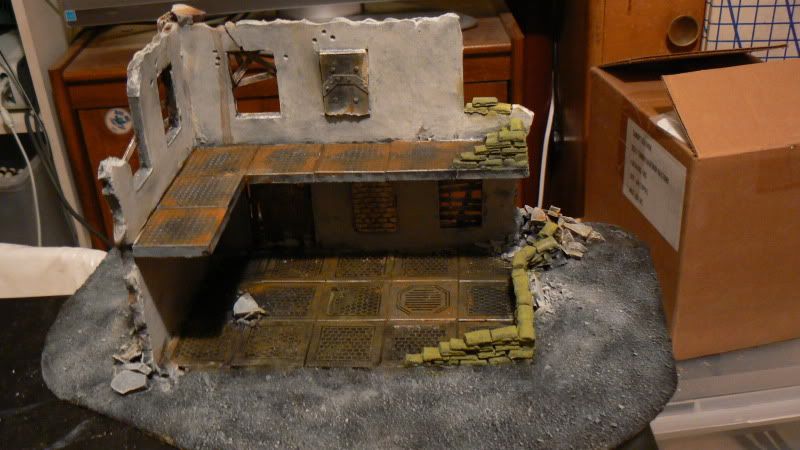
Well here's this evenings progress
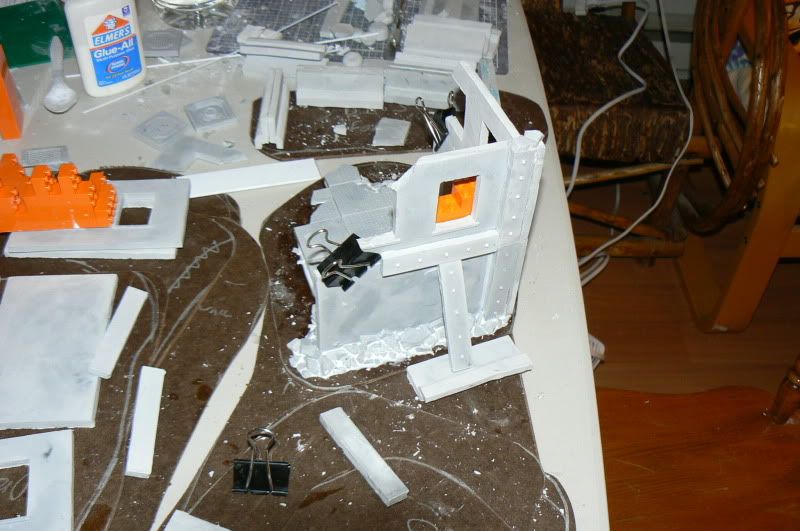
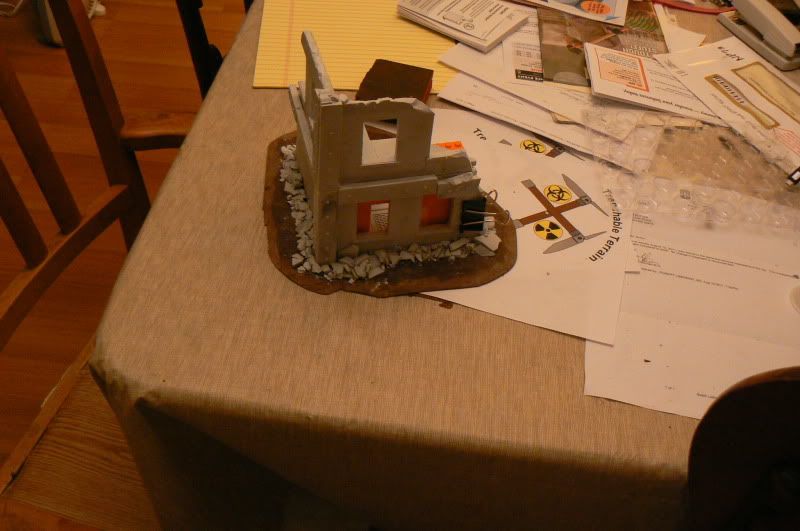
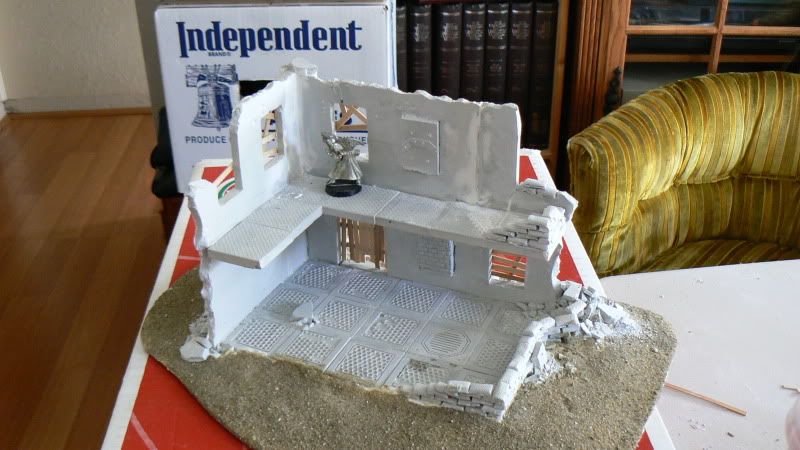
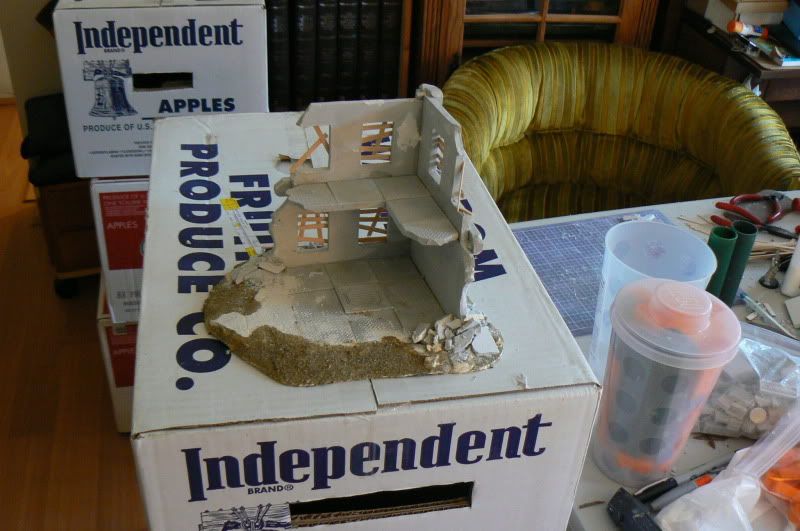
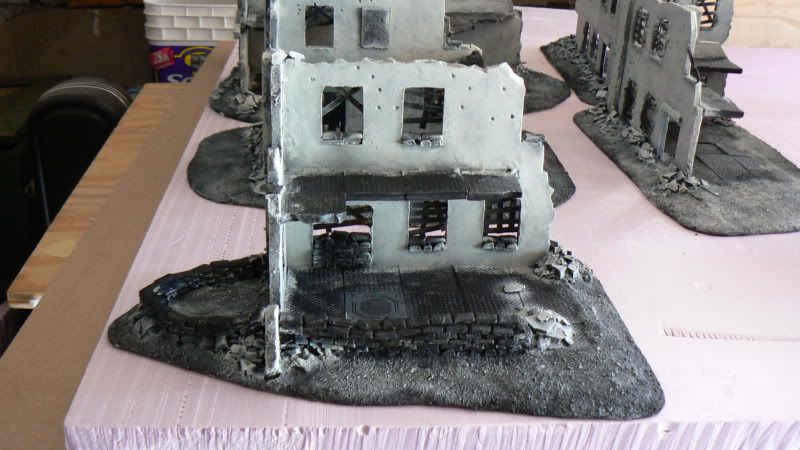
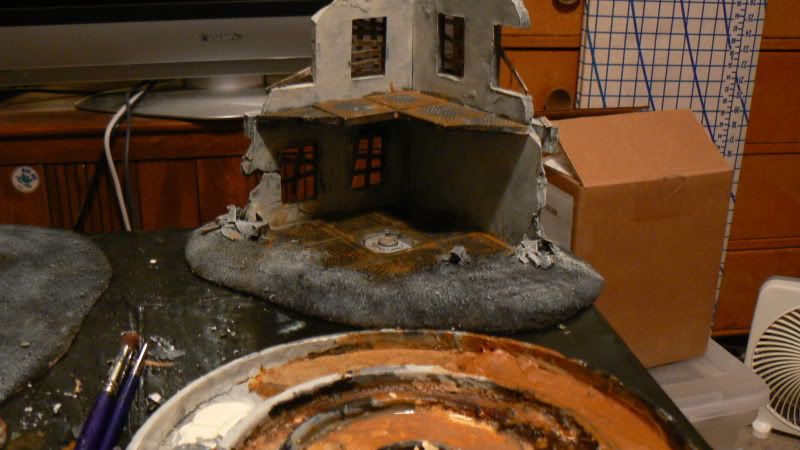
On to The Pics
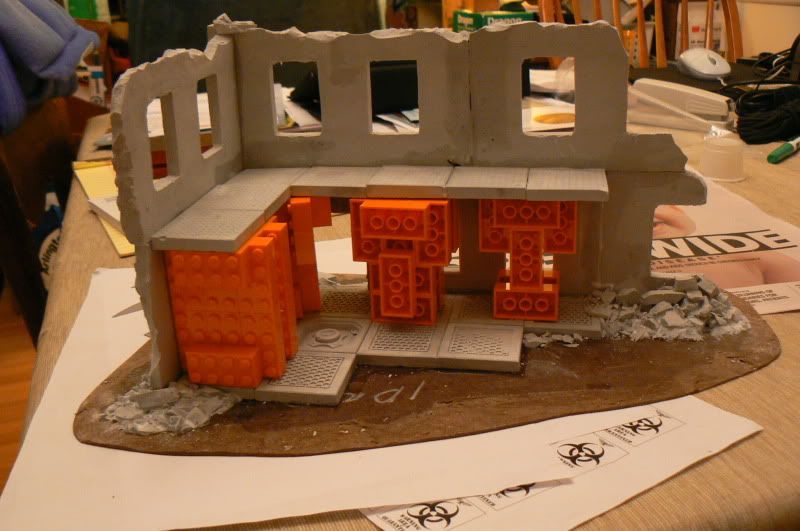
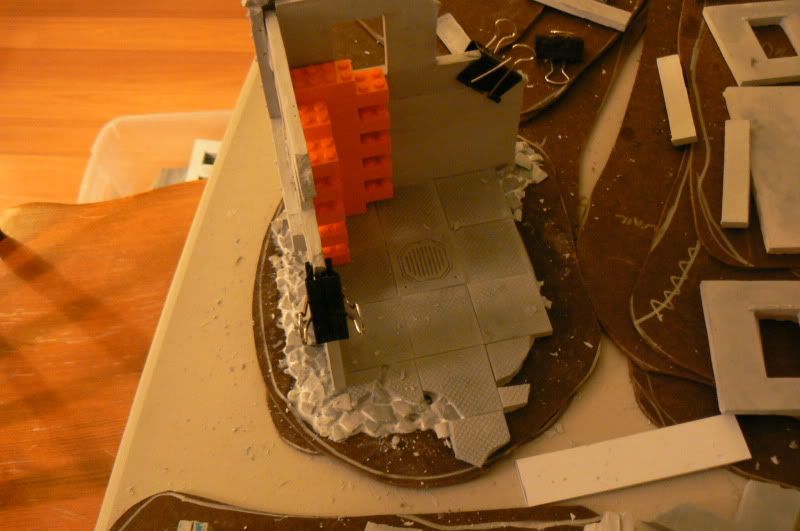
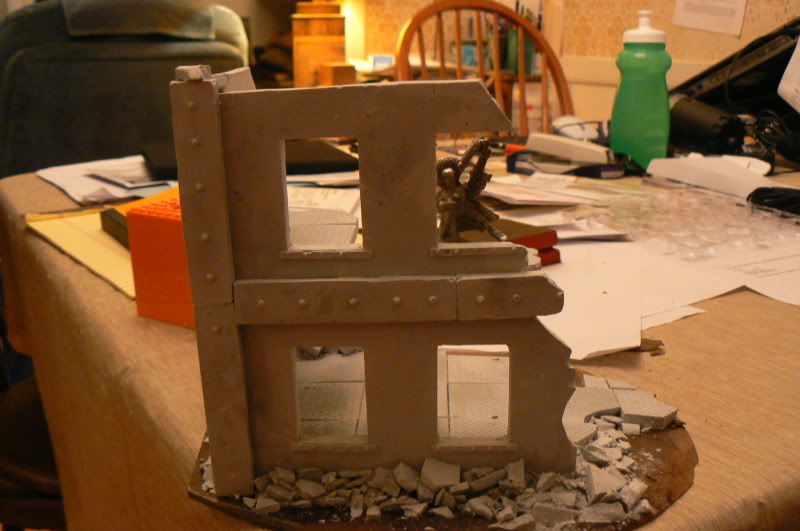
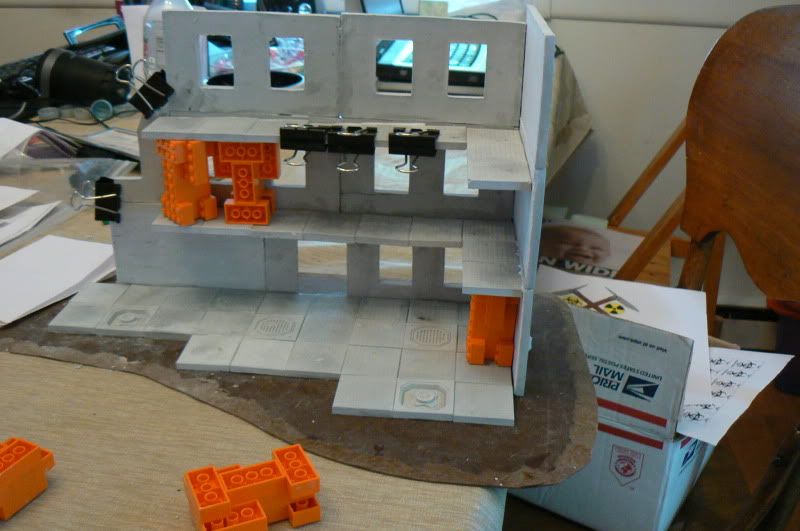
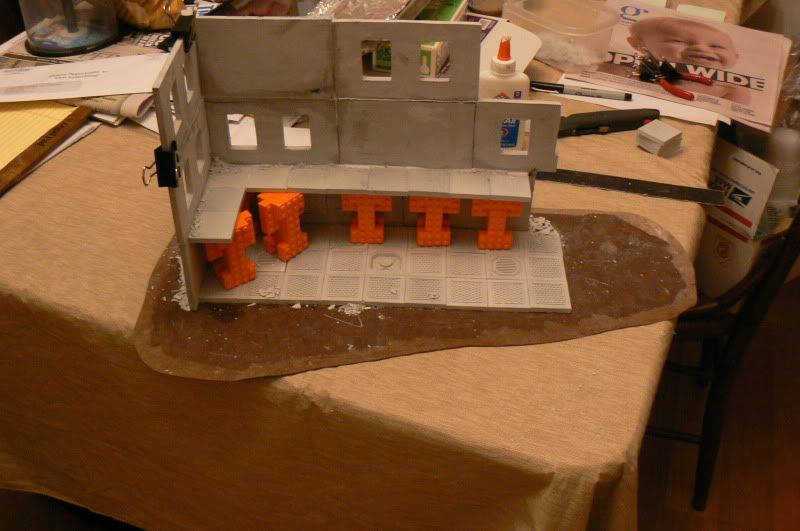
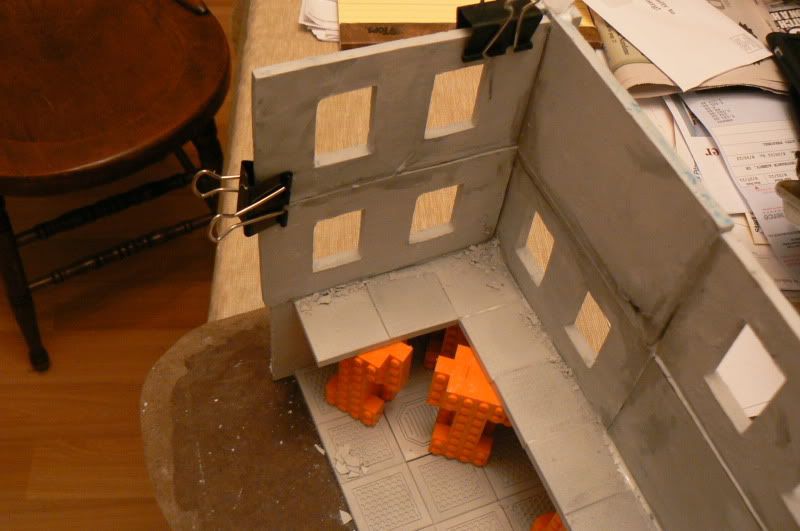
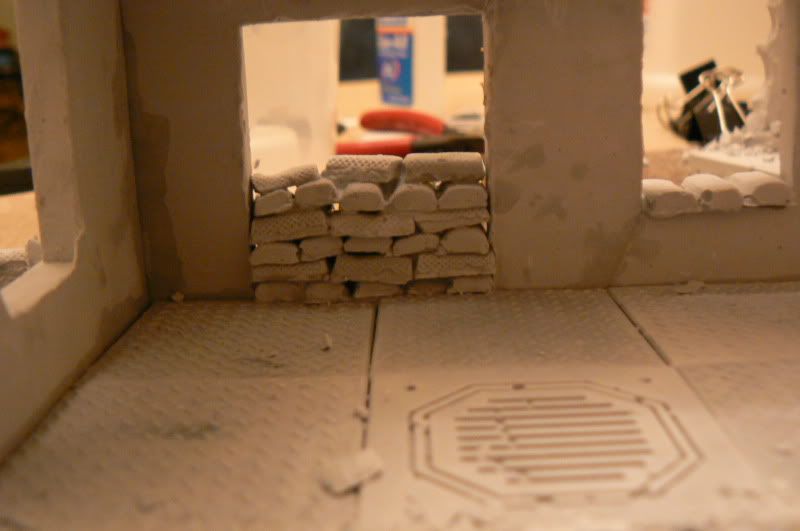
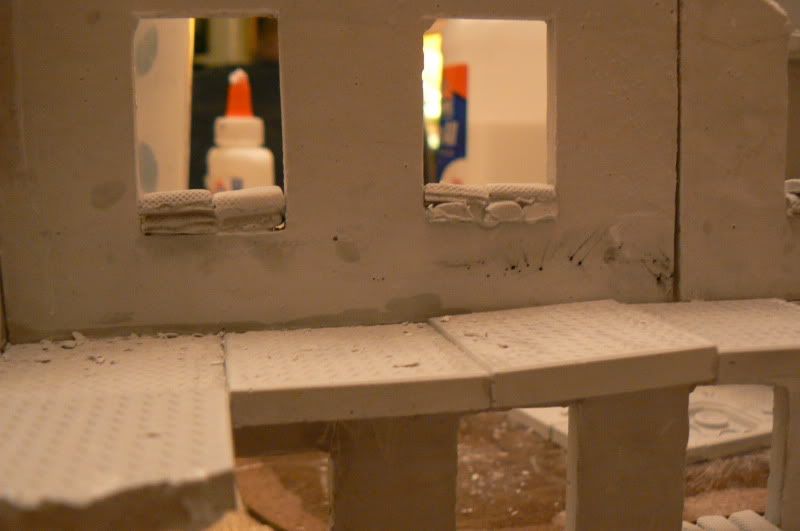
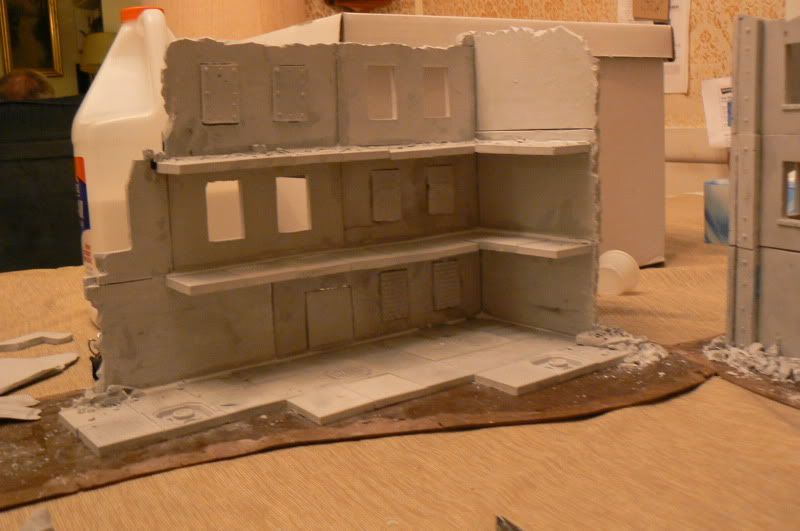
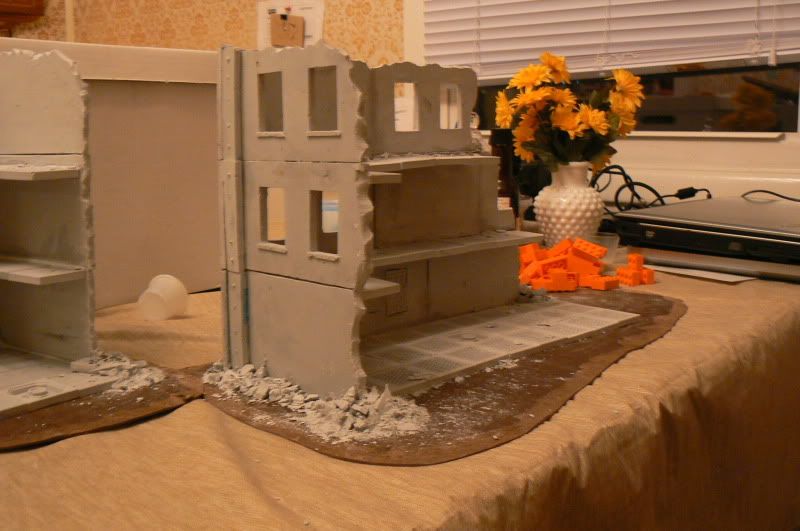
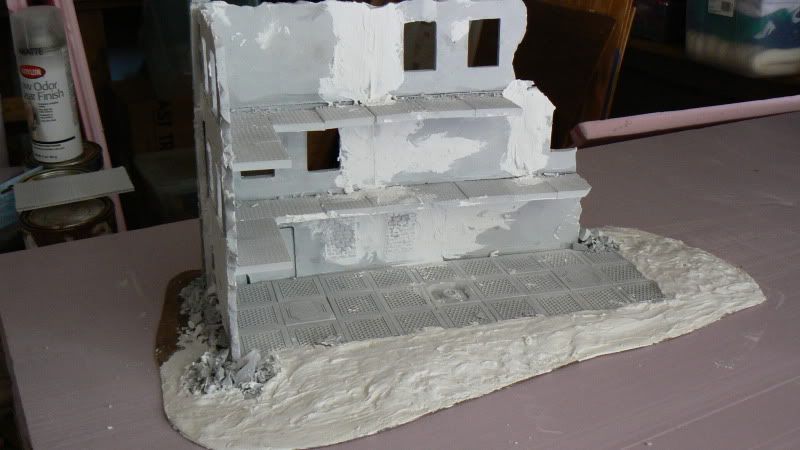
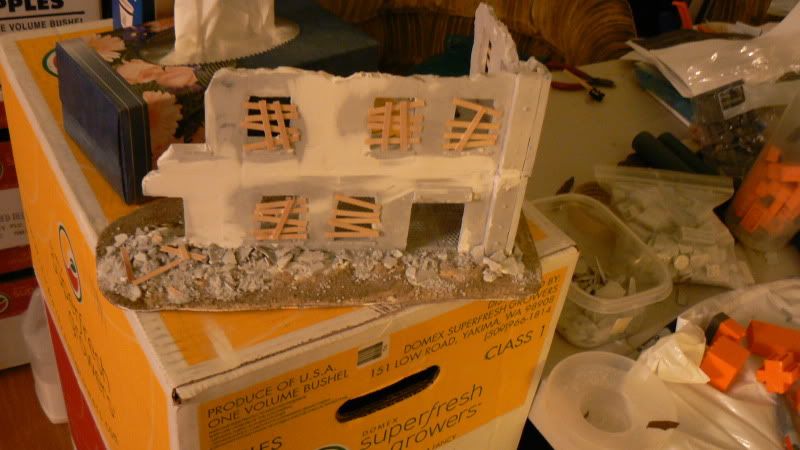
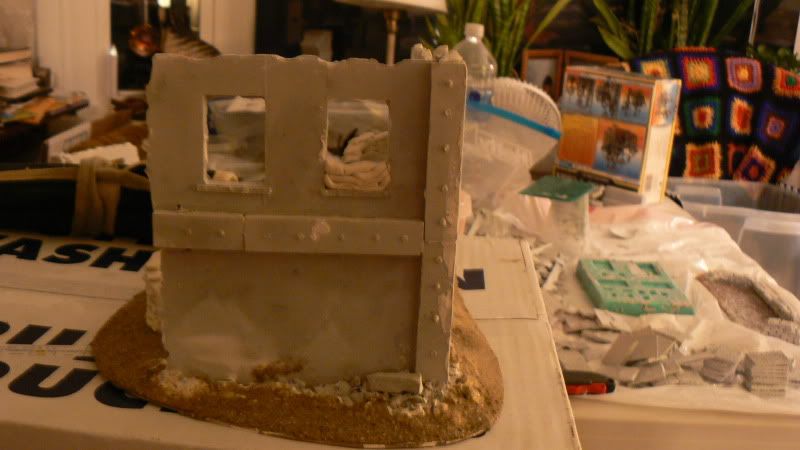
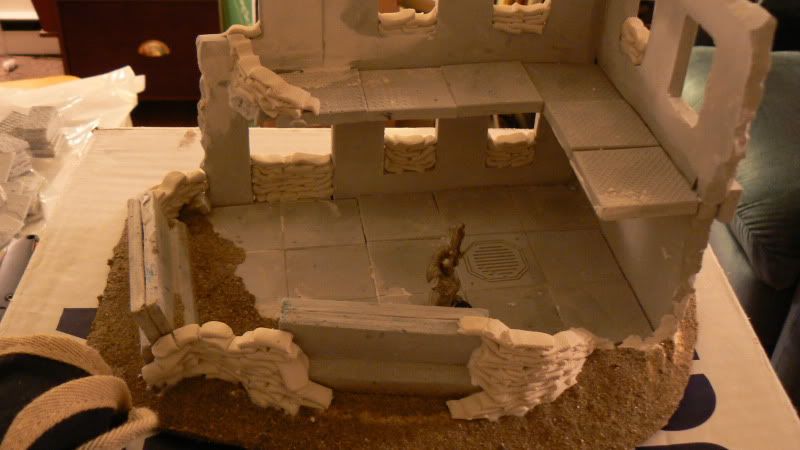
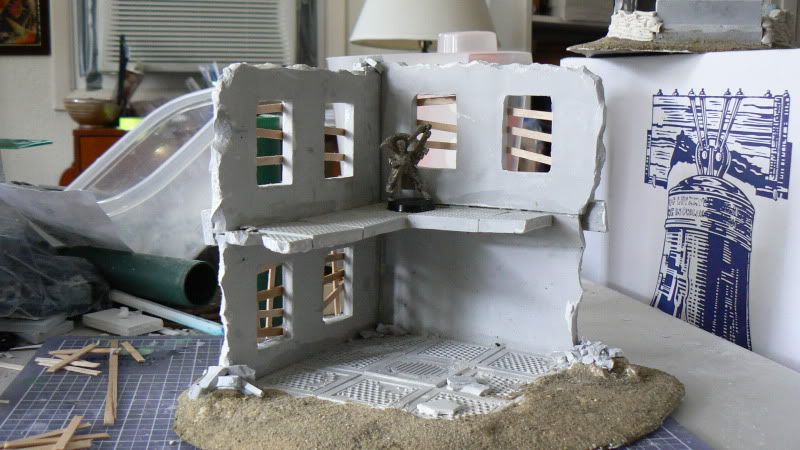
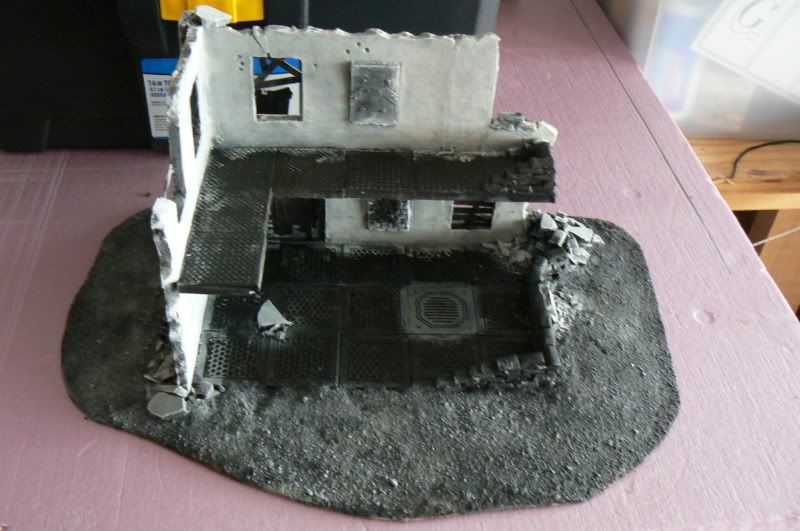
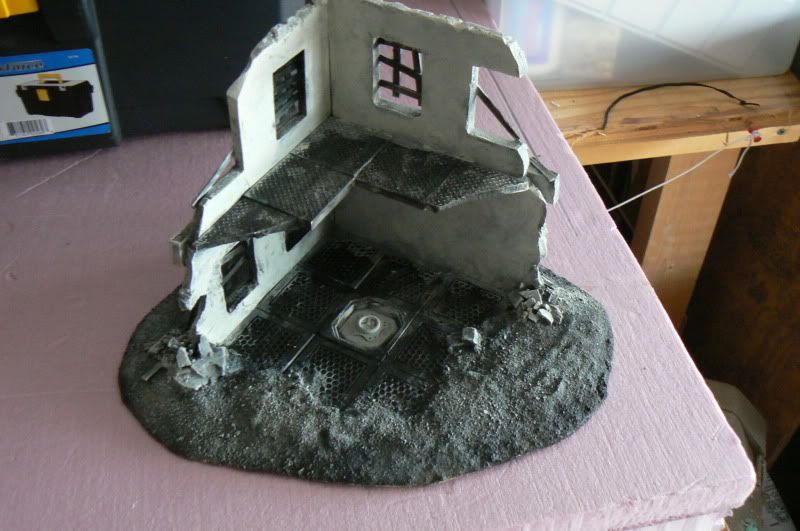
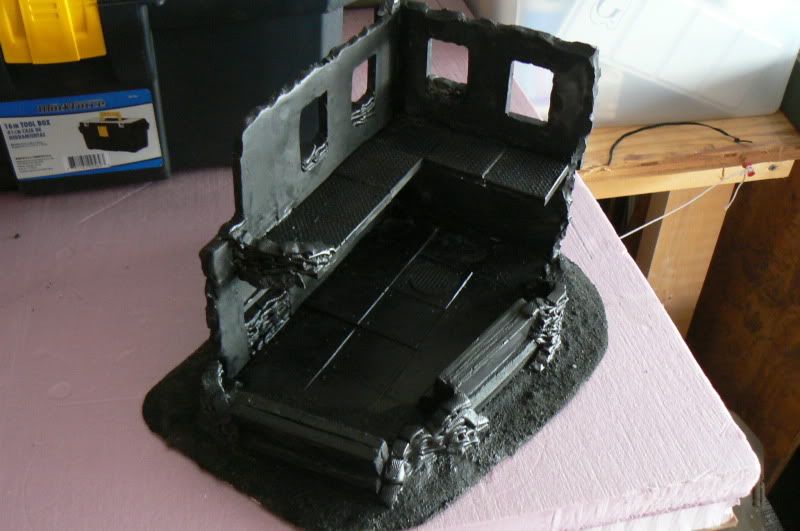
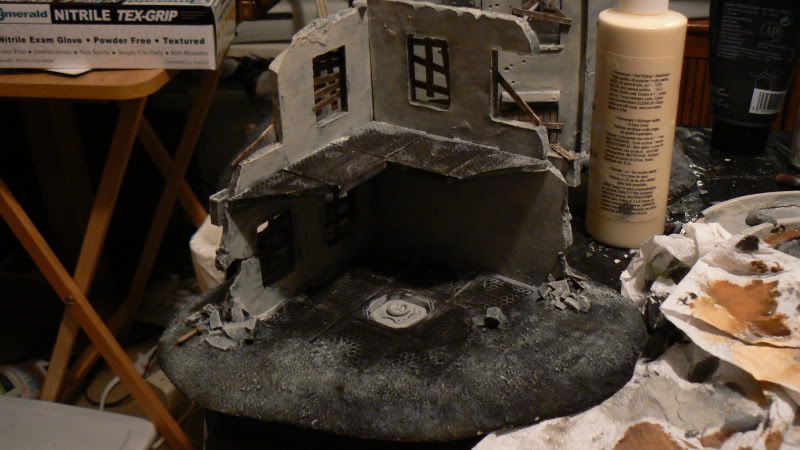
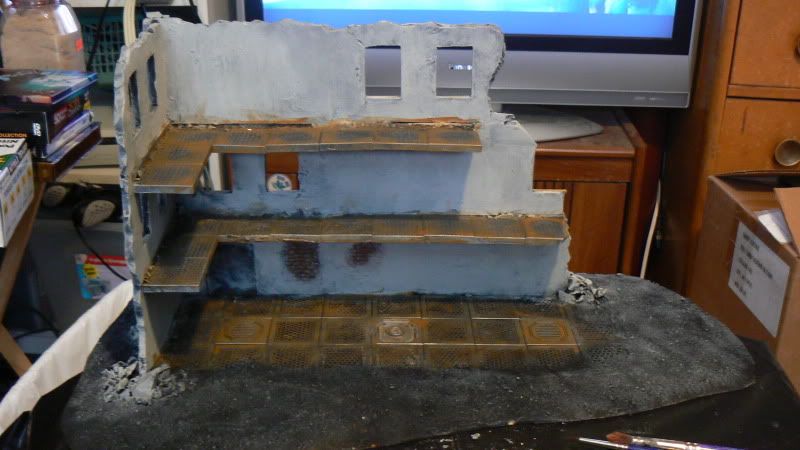
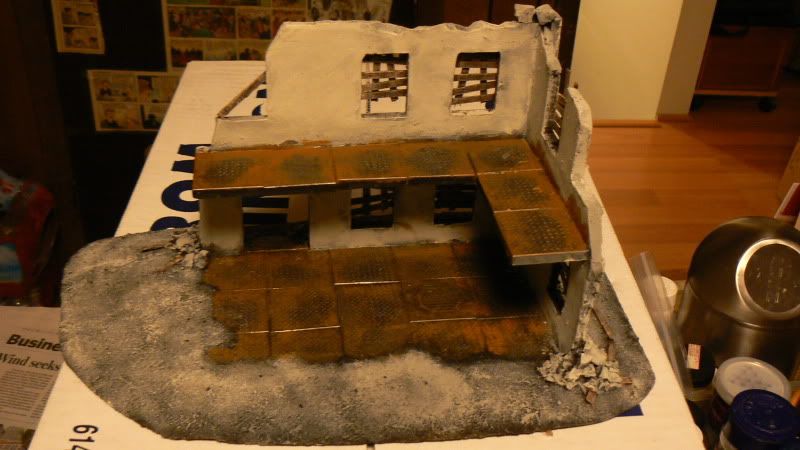
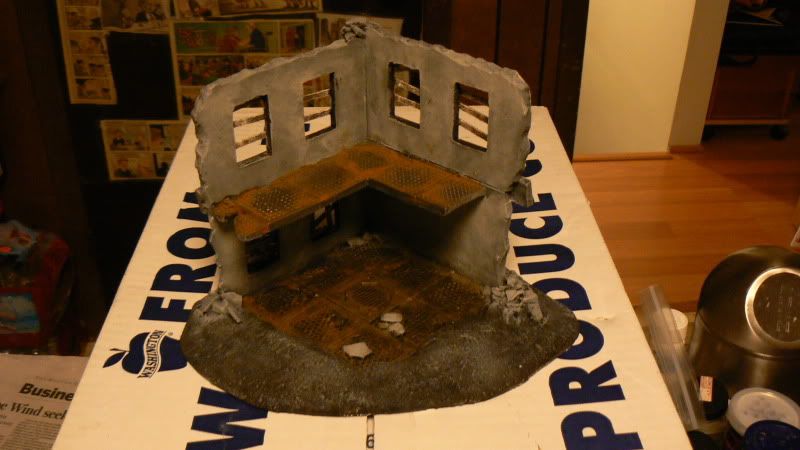
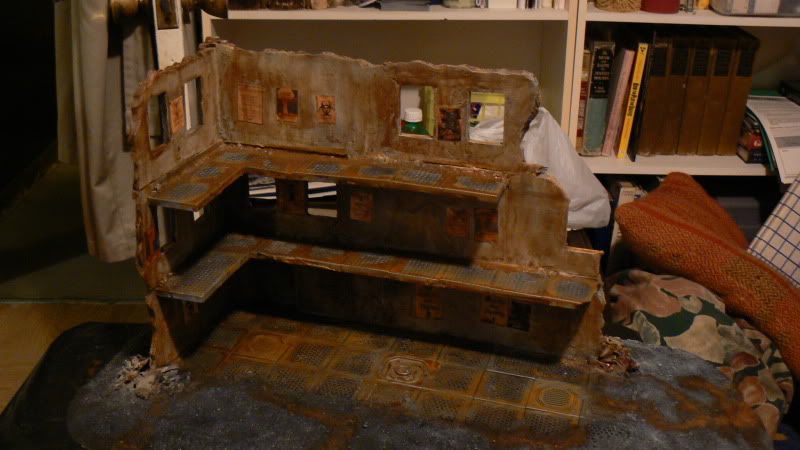
Sruin 1 Overview (with 2nd floor)
Sruin 1 Closeup (with Scale mini. Internet cookies to anyone who IDs the model )
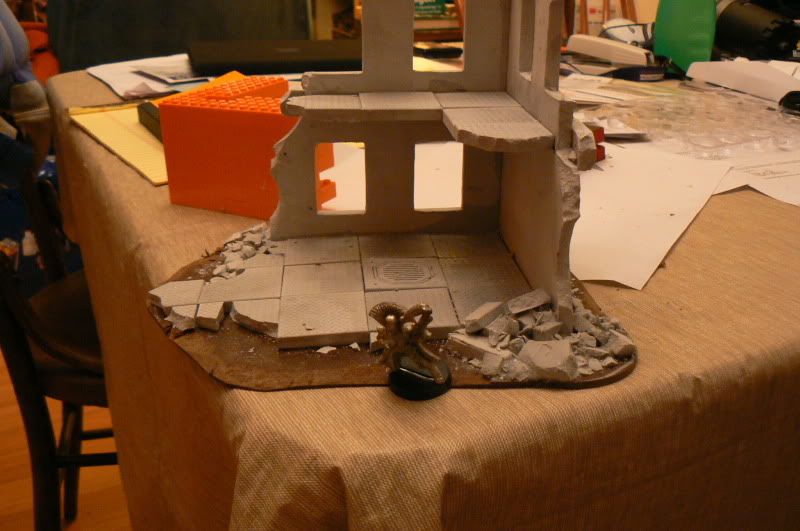
Sruin 1 (size of window)
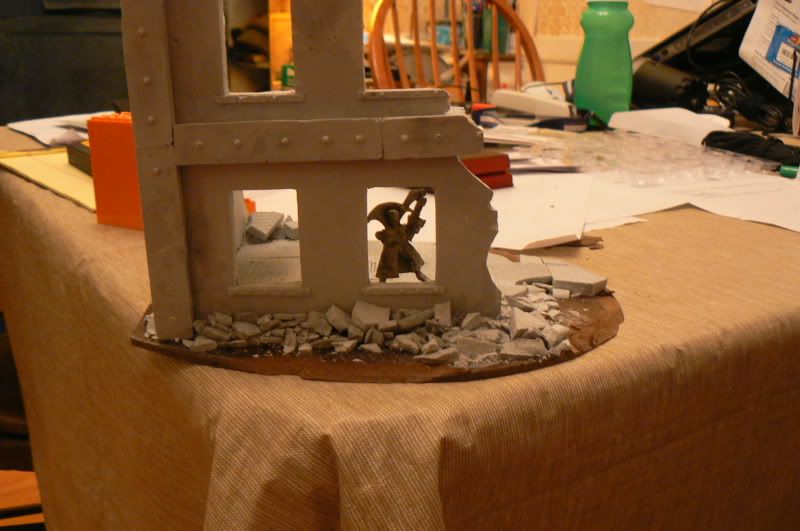
Sruin 1 (size of window/floor height)
Sruin2 assembly in progress
Floor Height jig (I do so love Legos...)
39973
Post by: Galorn
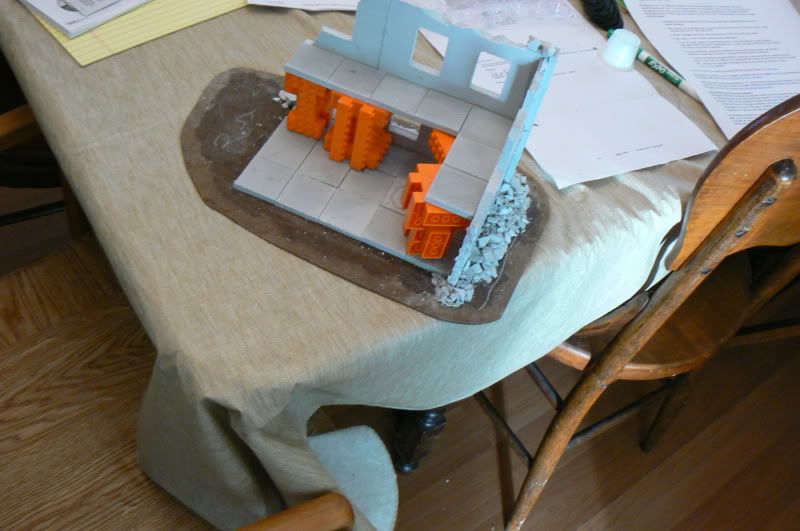
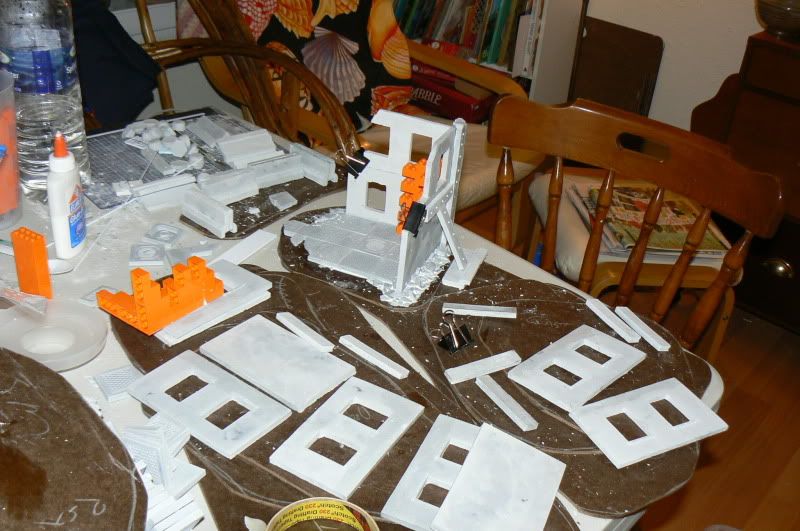
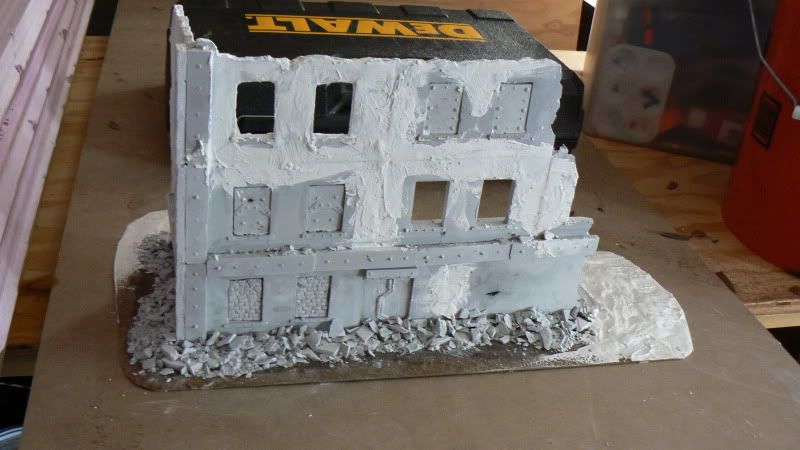
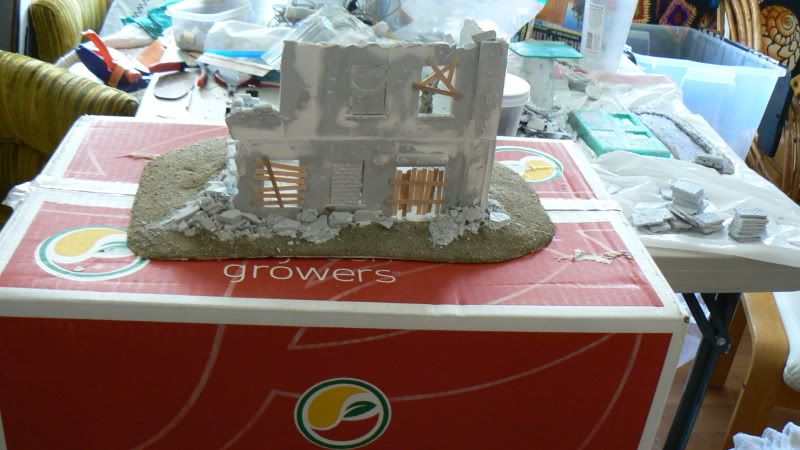
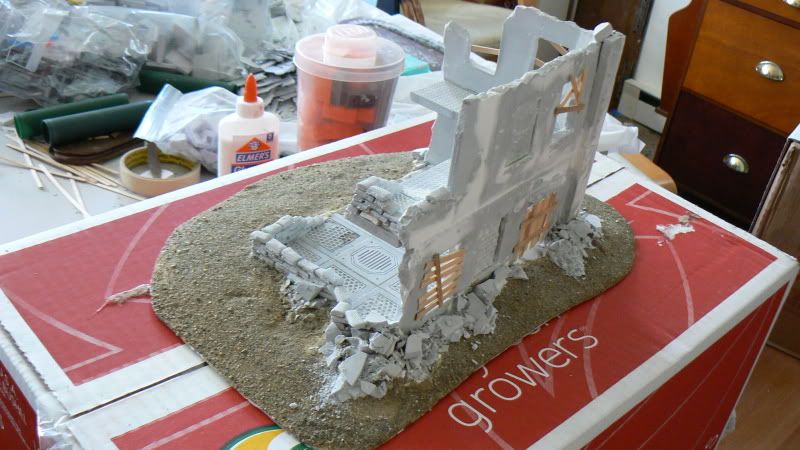
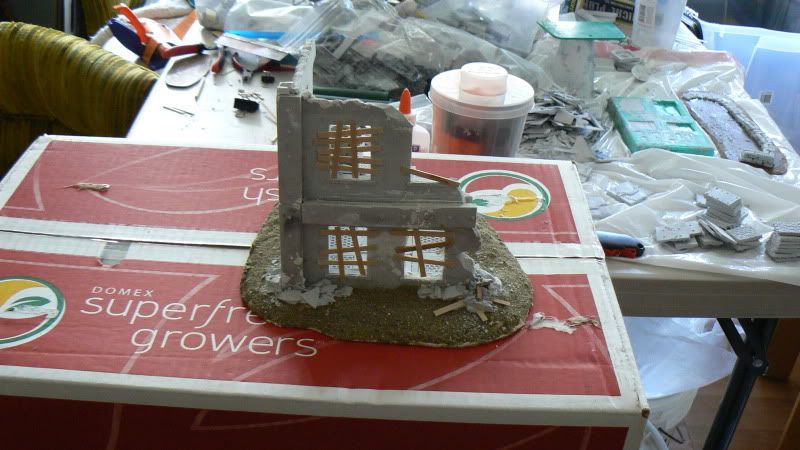
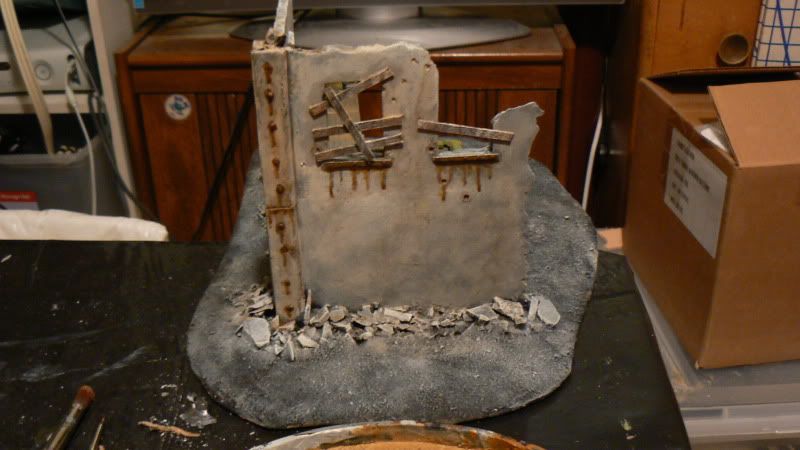
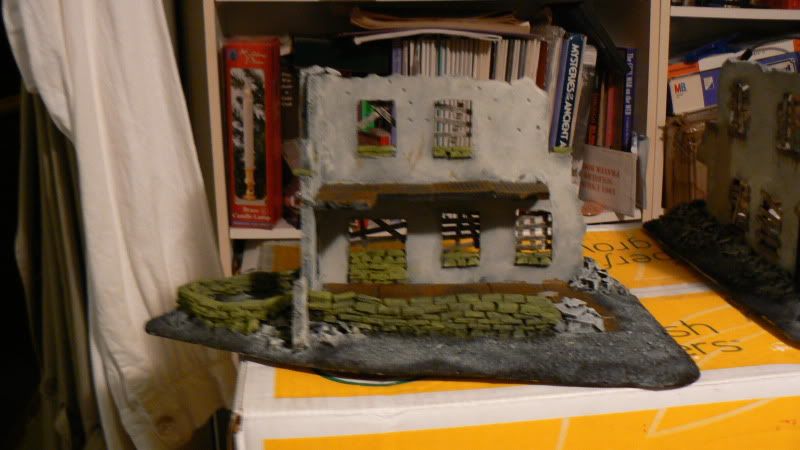
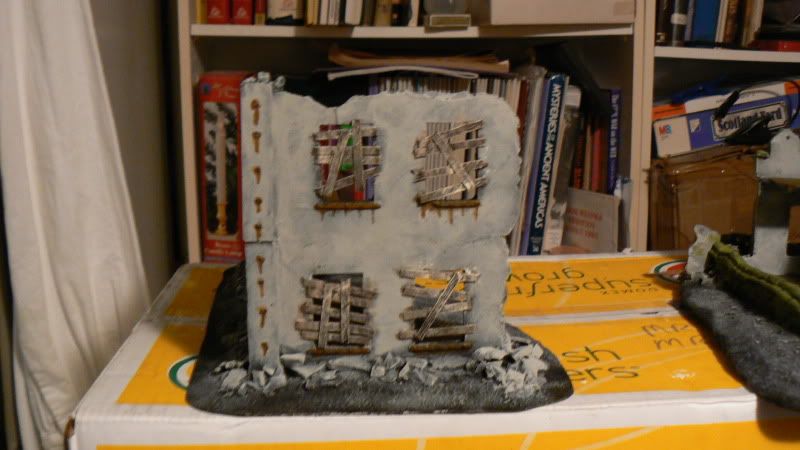
Pics of the day's progress.
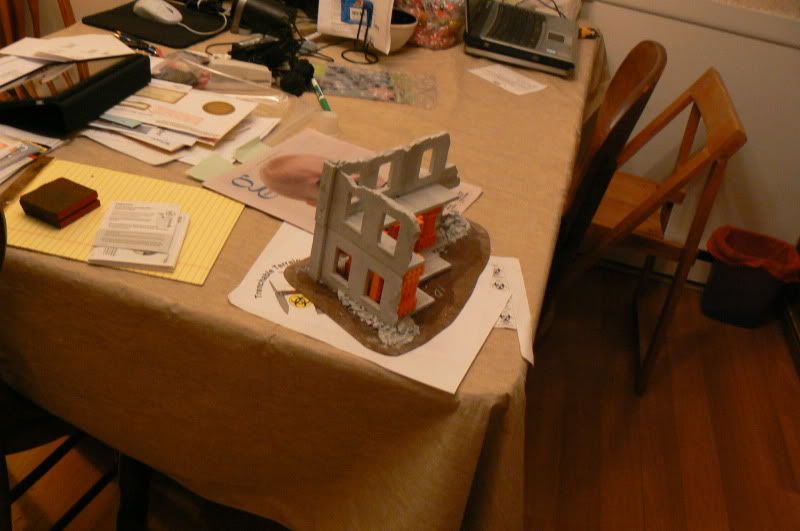
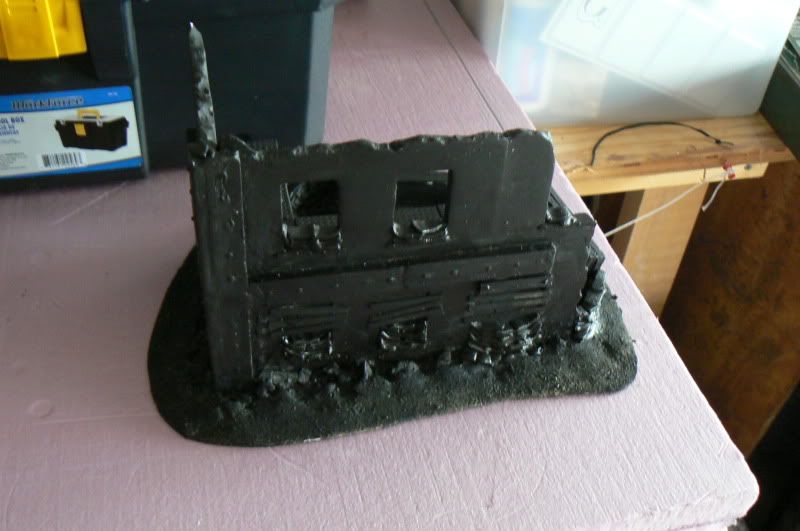
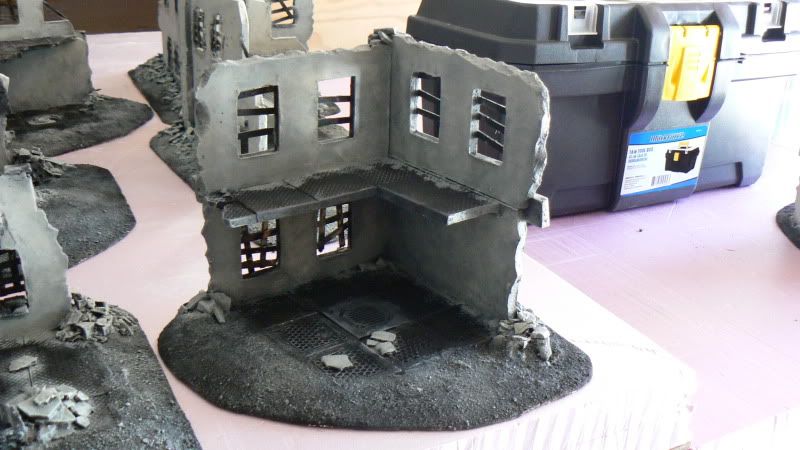
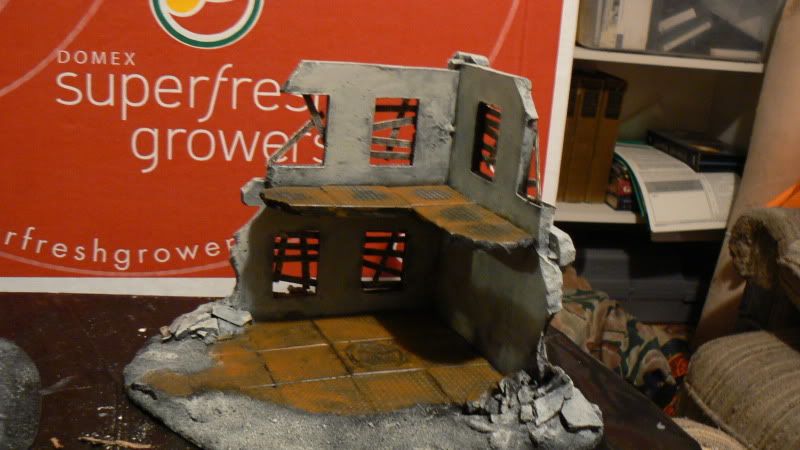
Sruin 2 Overview (2nd floor added)
Sruin 3 in progress
39358
Post by: Paranoia_Agent
Looking very good, keep it up.
15776
Post by: Space Marine
This seems to be very interesting, I'm looking forward to seeing this finished.
46488
Post by: Phantom
Is the model a death jester? Otherwise, great terrain building, but how big is the table?
39973
Post by: Galorn
Space Marine wrote:This seems to be very interesting, I'm looking forward to seeing this finished.
Thanks. It will be Awesome (if I can keep up this rate of work)
Phantom wrote:Is the model a death jester? Otherwise, great terrain building, but how big is the table?
It is not an Eldar Mini, its is an IG mini from 3rd ed. Thanks, The table will be a 6' by 4' standard 40k size table (apx 33% is allotted for the ruins as mobile terrain.)
Paranoia_Agent wrote:Looking very good, keep it up.
Thanks I shall.
Automatically Appended Next Post: Well I got some more stuff done today.
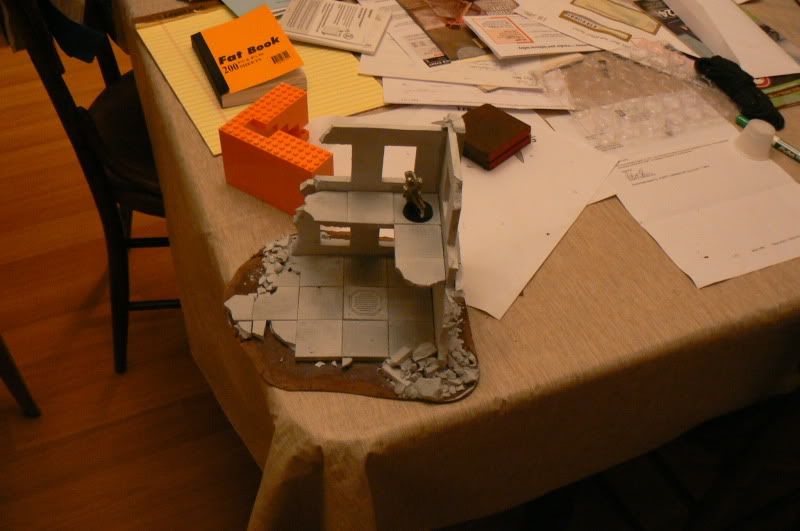
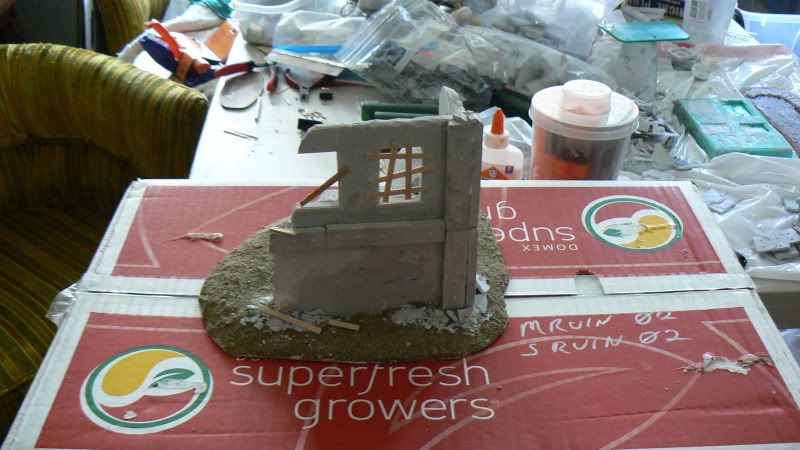
On to the Pics
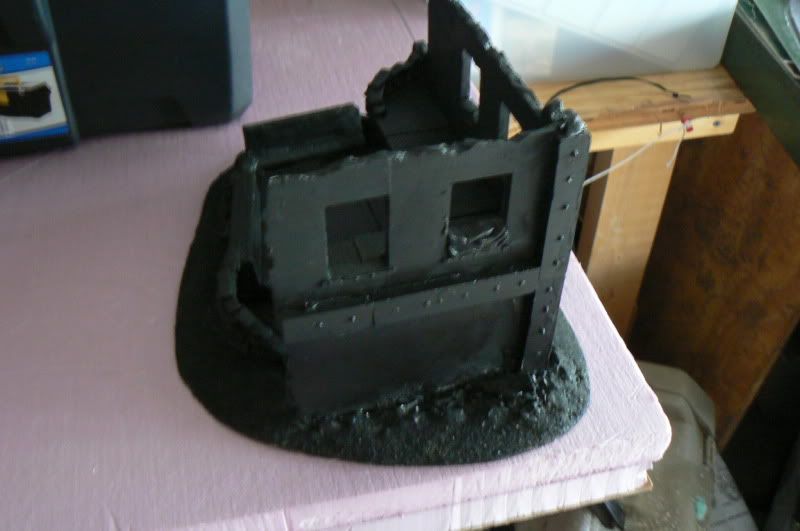
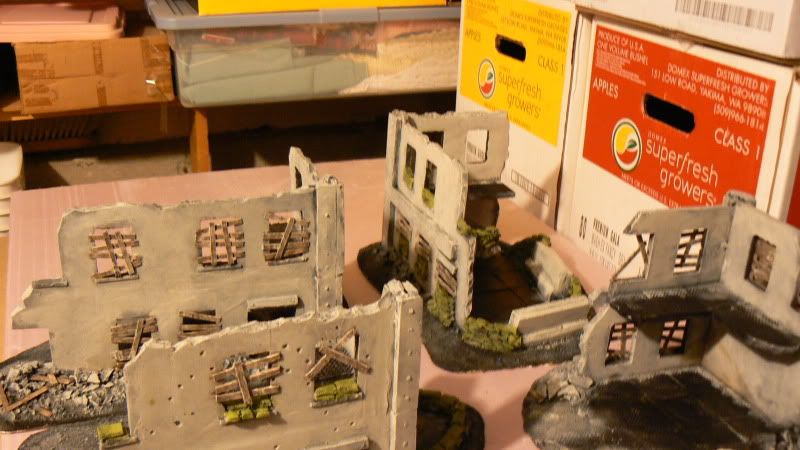
Sruin 3 Overview


The three Small ruins (and un used components)

Mruin 1 In progress
39973
Post by: Galorn
On to the Progress today so far. (have to stop and let things dry.  )
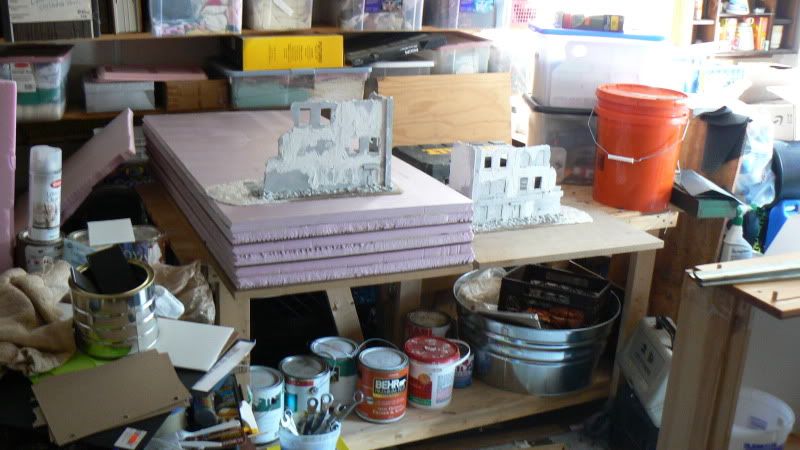
This is the Game plan for the Layout at Da Boyz
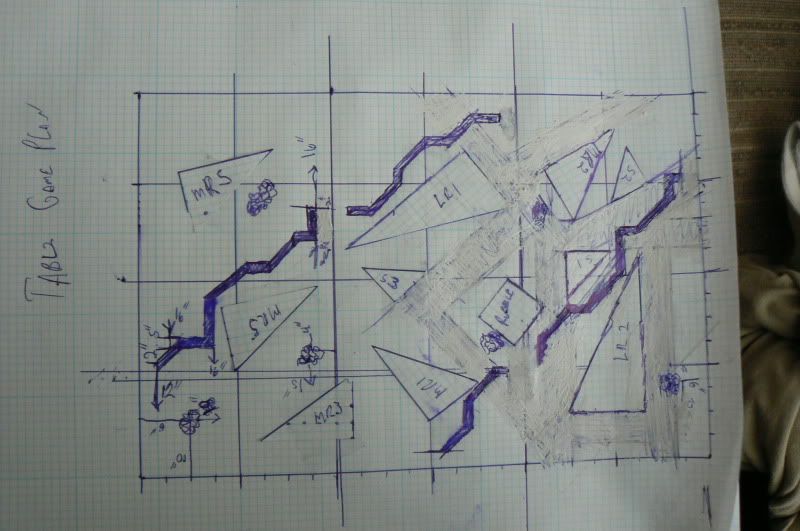
Materials for the tabletop...


Mruin 4 (adding exterior details
Mruin 4 (adding 2nd Floor)

Mruin 5 (empty MDF base)

Mruin 5 (adding 2nd story)

39973
Post by: Galorn
Progress to date.
Mruin 5 (adding 2nd floor)
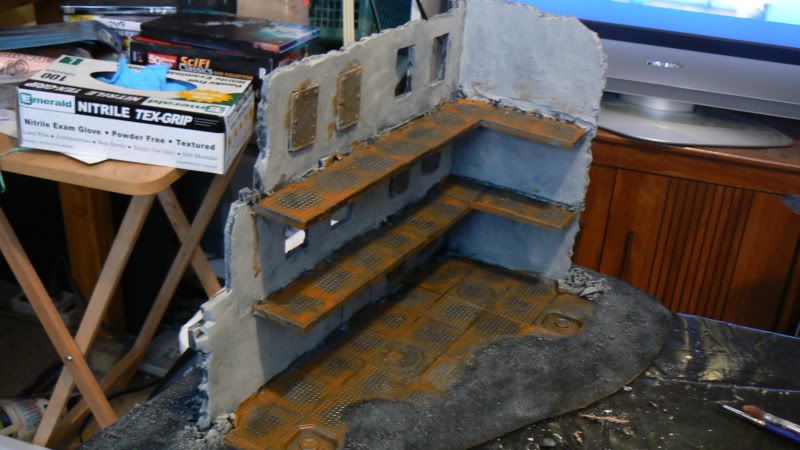
Lruin 1 In progress (need more floor tiles...)
39973
Post by: Galorn
This mornings Progress.
Lruin 1 (adding 2nd and 3rd floors)

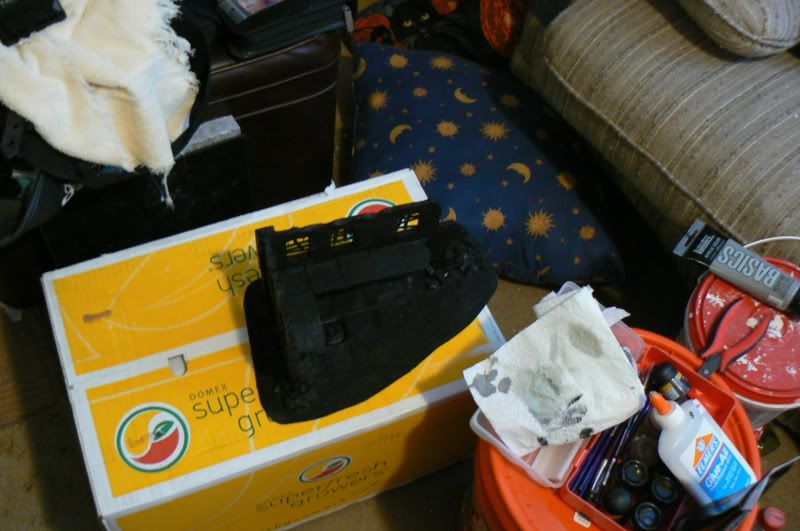
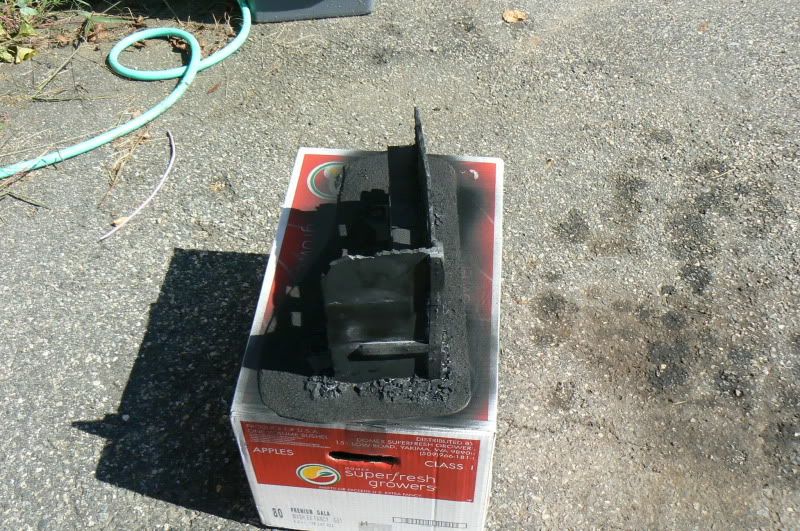
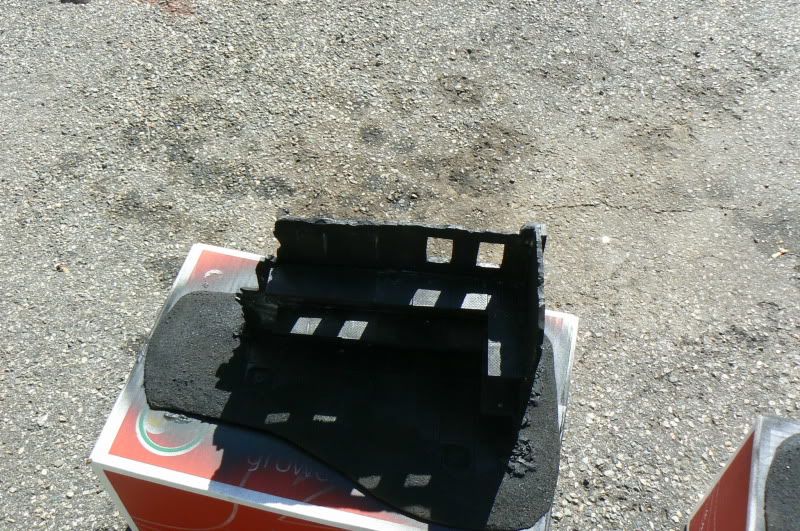
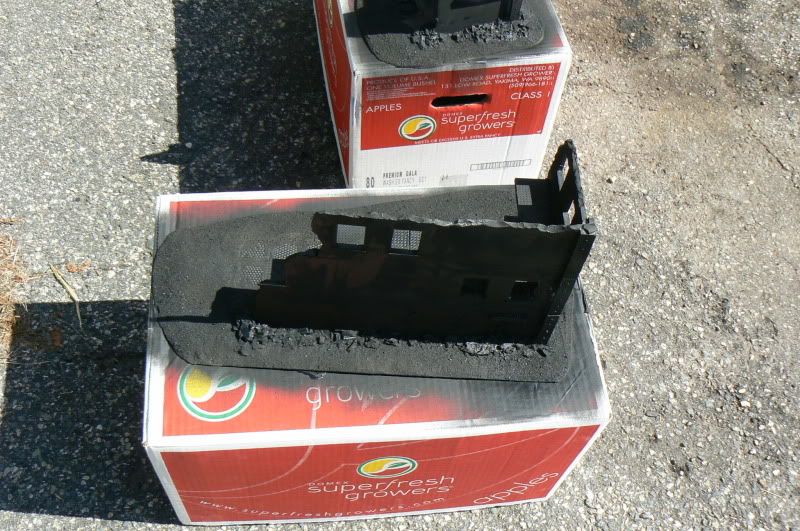
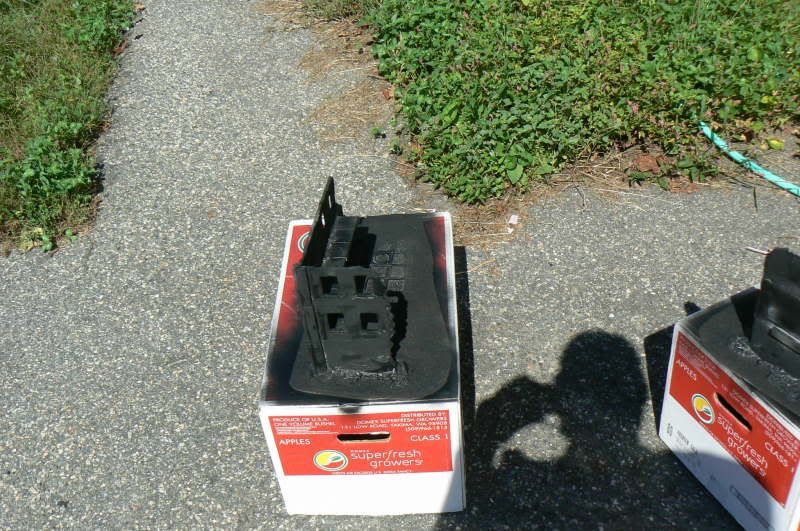
New Mold in Action
Aaaaaand What It makes
Parts from new mold Being added to Lruin 1
39973
Post by: Galorn
Pics of Today's progress.
Lruin 2 (adding 3rd story)

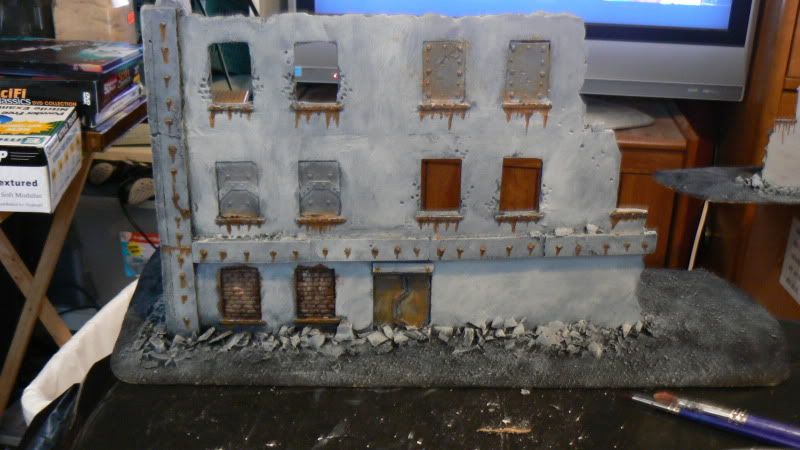
Lruin 1 adding backs to the window fill panels
Closer pics (of Lruin1 window fill panel backings)
Floor Tiles for Lruin2 (and other stuff)
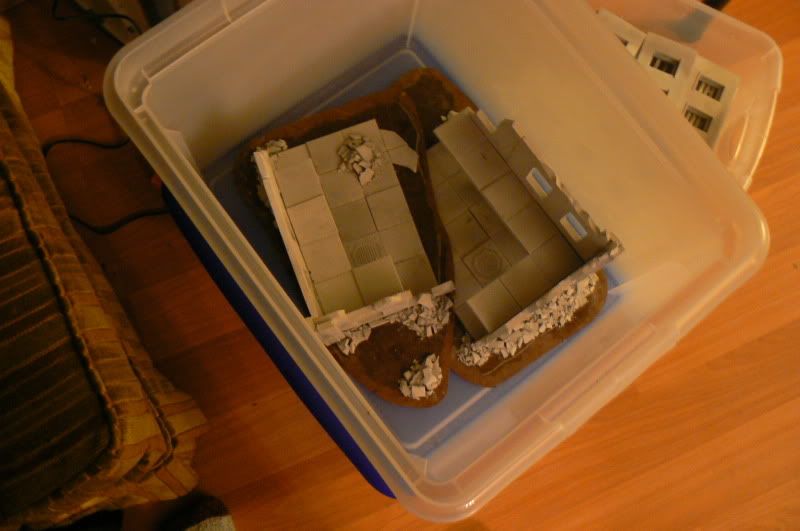
Mruins in a bin (waiting for next stage... Spackle)
26618
Post by: Two Spartan
WOW nice work man! looks like your gonna be able to pump out tons of terrain much quicker n easier with your moulds! But because they're still scratch built they wont look like the same building 20 times, just the same type of construction. Tiles also really good idea just so impressed, keep it up man!
now you have to find a way of painting them easily
43840
Post by: Deathshead420
Very interested in this as me and the misses were thinking about this very thing..very subscribed 
edited for spolling. 
24082
Post by: Flying Pooo
This looks promising. Subscribed!
39973
Post by: Galorn
Two Spartan wrote:WOW nice work man! looks like your gonna be able to pump out tons of terrain much quicker n easier with your moulds! But because they're still scratch built they wont look like the same building 20 times, just the same type of construction. Tiles also really good idea just so impressed, keep it up man!
now you have to find a way of painting them easily
You would be suprised at how easily they will drybrush/ then wash up. 
Deathshead420 wrote:Very interested in this as me and the misses were thinking about this very thing..very subscribed
edited for spolling.
Thanks If you want some sets of Building components let me know...
Flying Pooo wrote:This looks promising. Subscribed!
Thanks
I should have some progress pics up in a few mins. (I just got home from work and need to unwind.)
Automatically Appended Next Post: And heeeres the Pics of Lruin 2 with the first floor being added.

The molds I made for sandbags, window fill, and a door..
some leftover dental stone... hmmmm Moar Rubble!!!
Window fill inserts. (two back to back make one window fill)
Bases for Barricades.... and a Rubble Pile...

24082
Post by: Flying Pooo
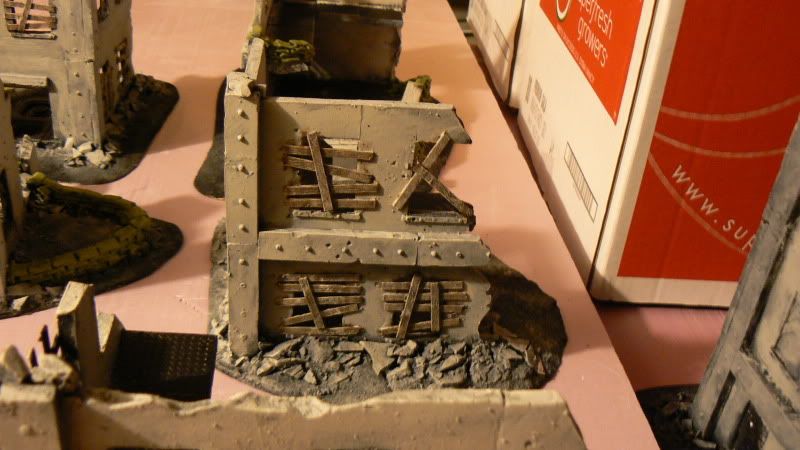
I really like your work so far. Your buildings look great. However you could Improve the look of your ruined buildings and make them look AWESOME by making them look more ruined and war torn. Right now they look too straight edged and intact to be very convincing ruins.
If you use real life examples of ruined buildings as reference and inspiration you will be able to make more convincing ruined buildings.
Here are some examples.


I look forward to seeing more of your ruins.
39973
Post by: Galorn
[EDIT] WOOT PAGE TWO yippie!!!! [/EDIT]
Nice Reference Pics. I will be using them... Bwahahahaha
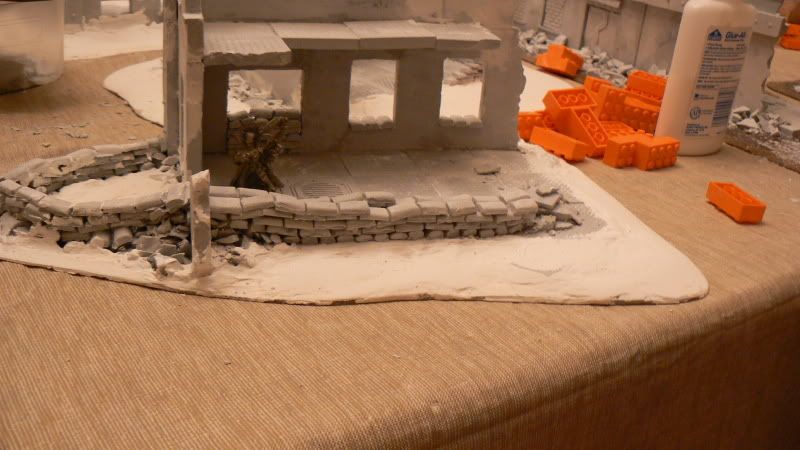
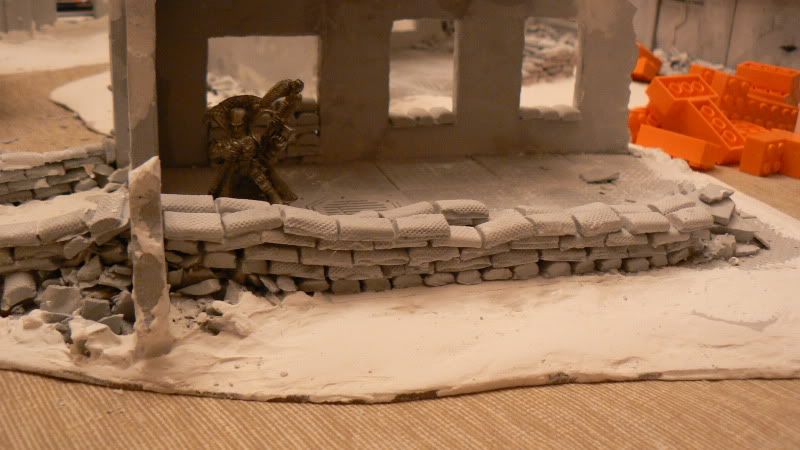
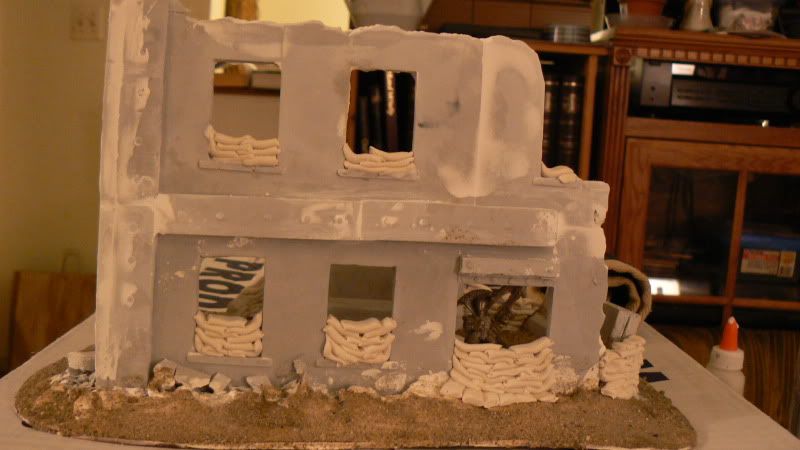
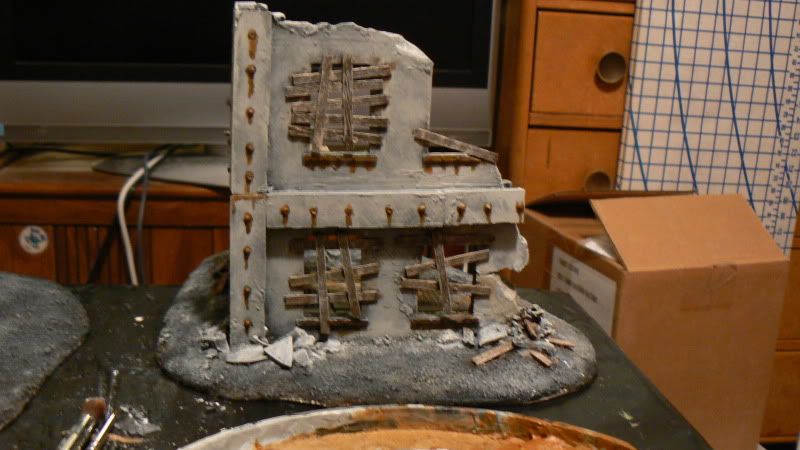
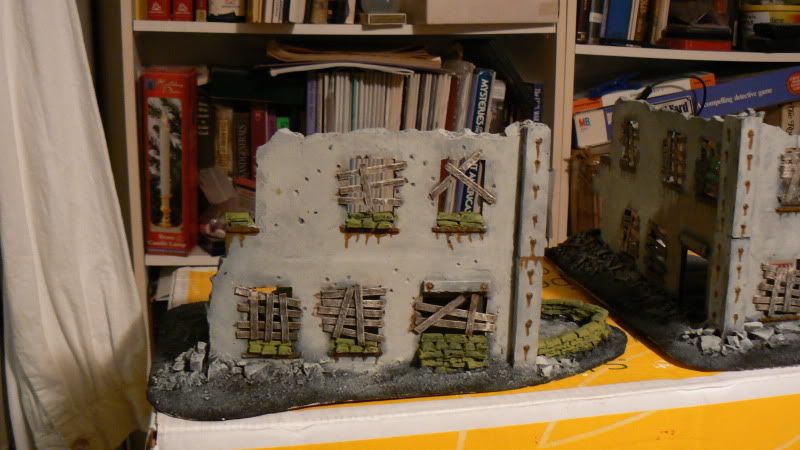
Anyhoo On to the Pics from today.
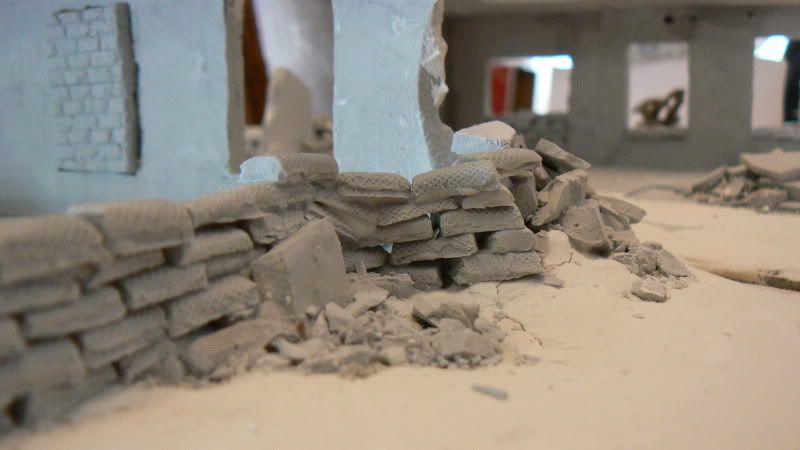
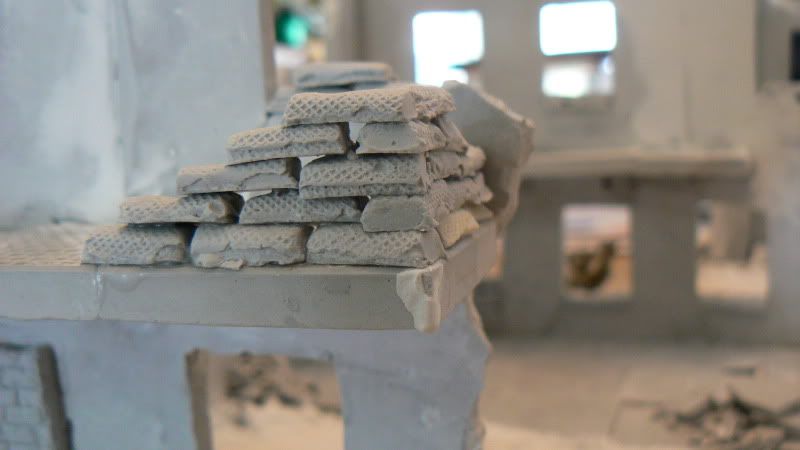
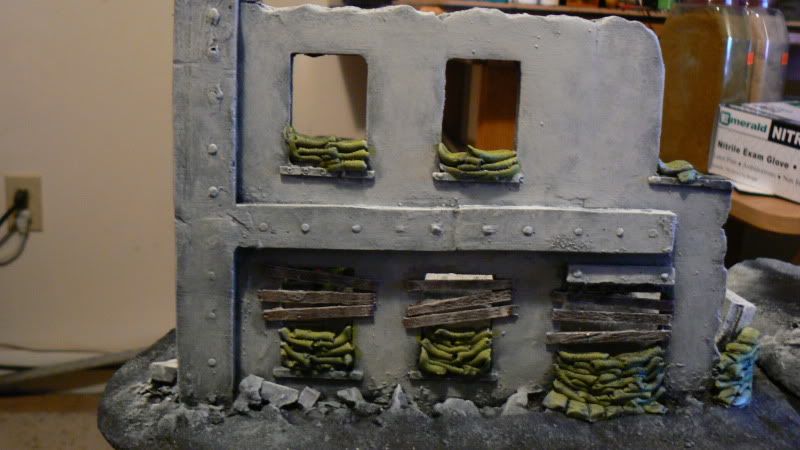
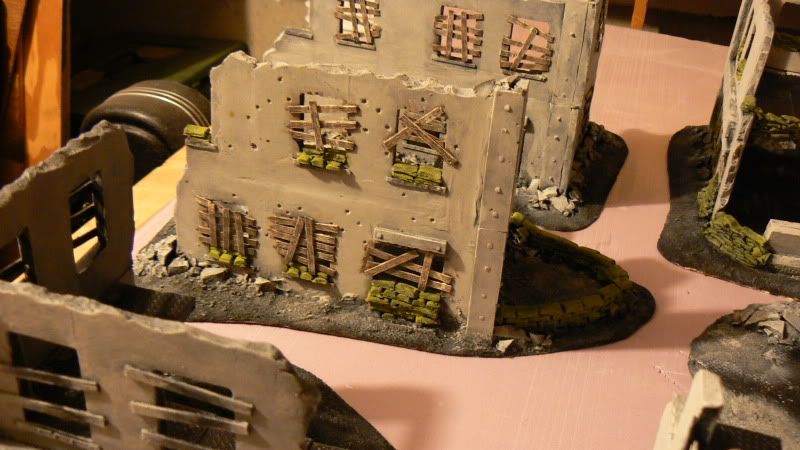
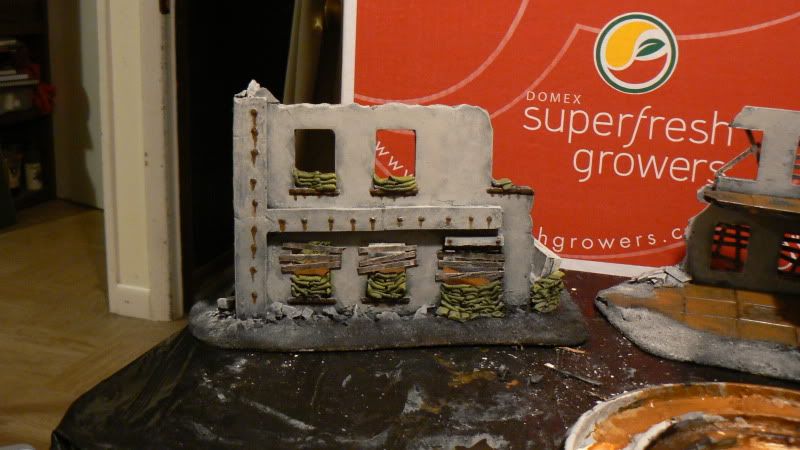
Mruin 1 (adding sandbag stuff)
Overview
Closeup on sandbag revetment (back)
Closeup on sandbag revetment (rear of doorway)
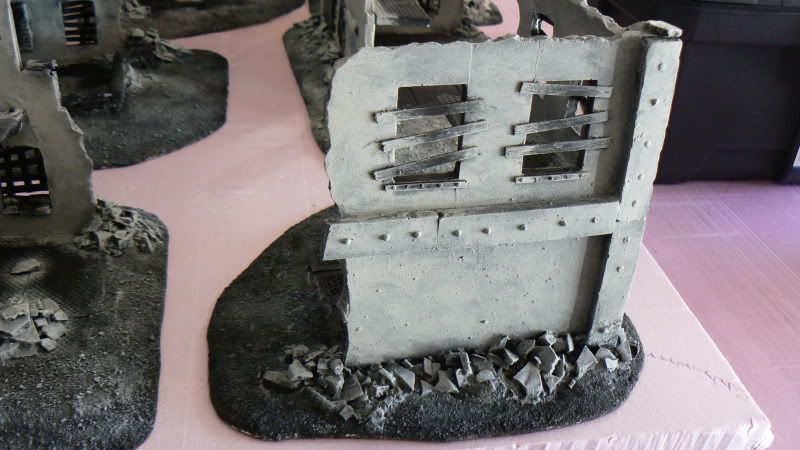
Upper windows.
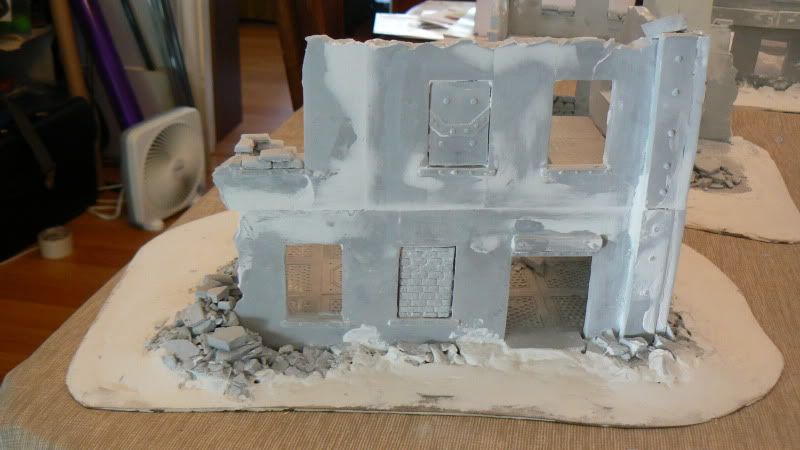
Front overview
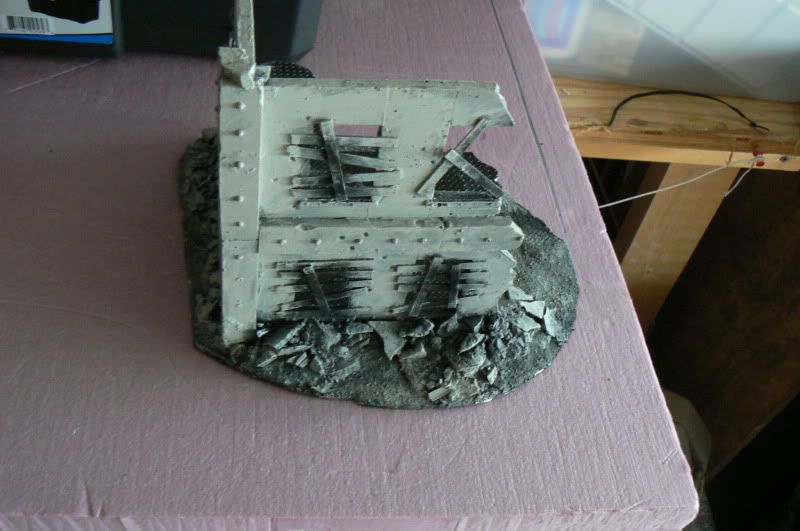
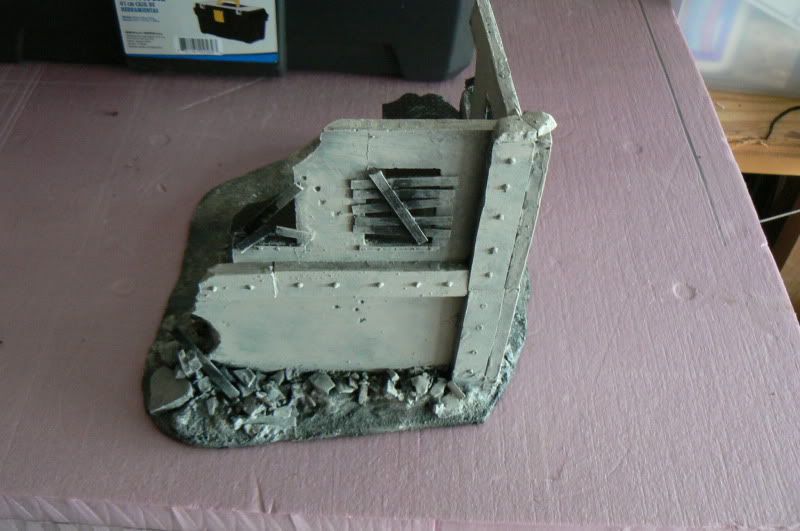
Lruin 1 (Chipped up)
Lruin2 (Chipped Up)
Closeup of Lruin 2 Rubble piles at ends of walls
24082
Post by: Flying Pooo
These ruins are getting better, I really like them. The sandbag one looks awesome.
Keep up the good work!
43840
Post by: Deathshead420
They look great i agree.
39973
Post by: Galorn
Flying Pooo wrote:These ruins are getting better, I really like them. The sandbag one looks awesome.
Keep up the good work!
Thanks. I shal endeavor to do so.
Deathshead420 wrote: They look great i agree.
Thanks
well I've lost a day to Space Marine... But I'll get cracking on these again tomorrow.
48281
Post by: Eggs
Awesome work. Subscribed!
43225
Post by: Nightfall
this is a GREAT Tat, i'll be keeping an eye on this blog for some time!
33786
Post by: TTG BUNKER
Looking very nice! Keep up the good work! Remember to prime those with latex paint to prevent the stone from soaking up all your expensive GW/Vallejo paints.
39973
Post by: Galorn
Eggs wrote:Awesome work. Subscribed!
Thanks
Nightfall wrote:this is a GREAT Tat, i'll be keeping an eye on this blog for some time!
Thanks
TTG BUNKER wrote:Looking very nice! Keep up the good work! Remember to prime those with latex paint to prevent the stone from soaking up all your expensive GW/Vallejo paints.
Thanks. GW/Vallejo paints for massive amounts of terrain? that's just crazy talk. for my terrain productions i generally use thinned Liquitex, and "craft" acrylic (ala Apple barrel, ceramcoat, etc)
3309
Post by: Flinty
Wow... you're like some kind of civil engineering beast
Really nice work.
39973
Post by: Galorn
Flinty wrote:Wow... you're like some kind of civil engineering beast
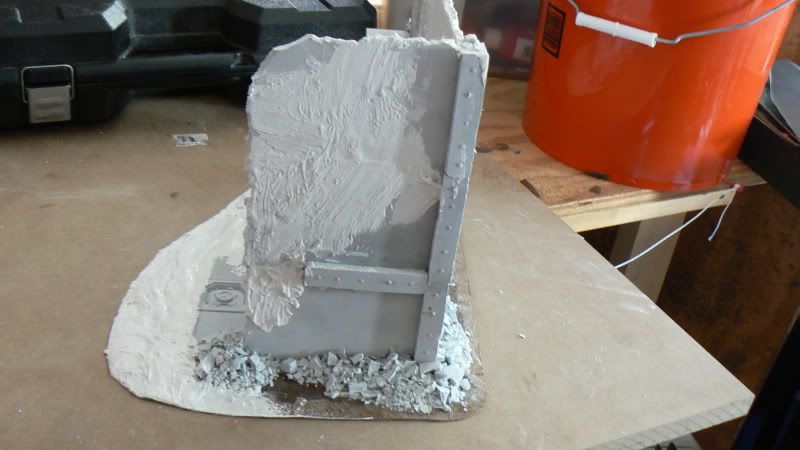
Really nice work.
Thanks, the "modern brutal/ Stalinist" look really works well for 40k stuff (geometric angles are your friend...)
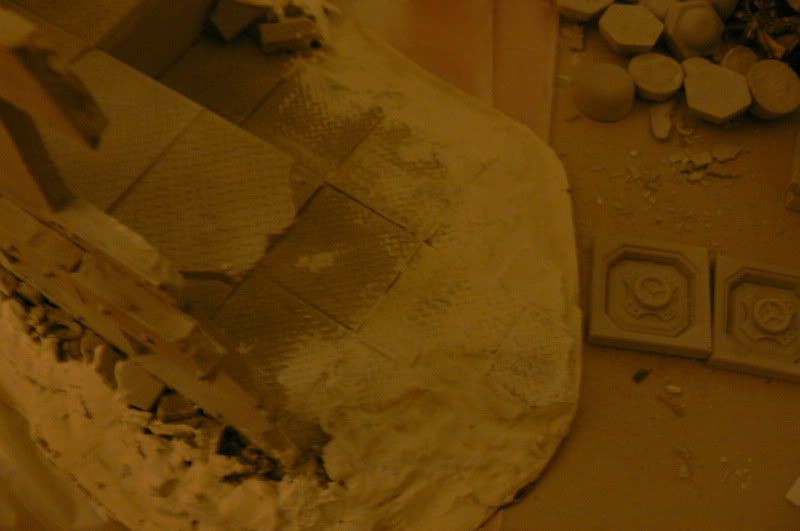
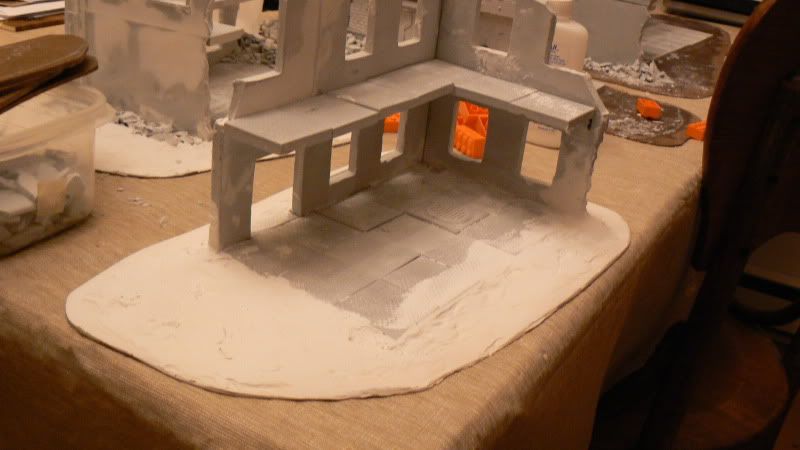
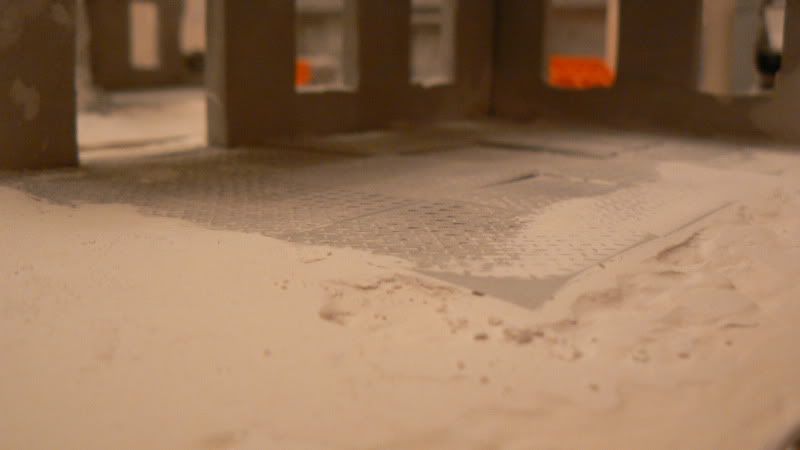
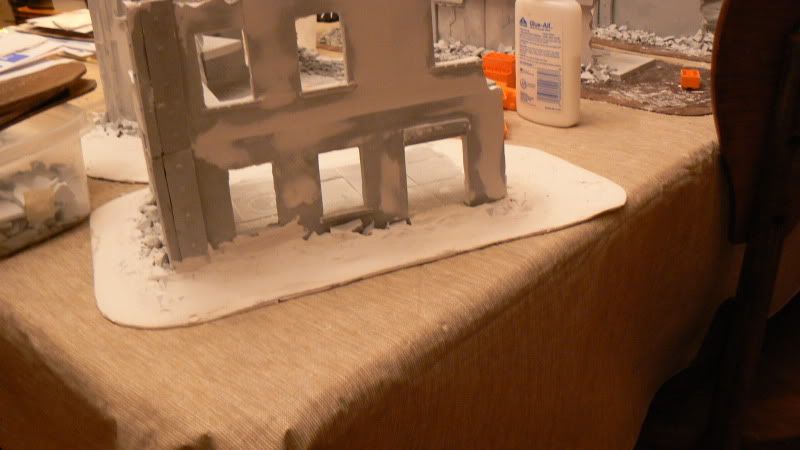
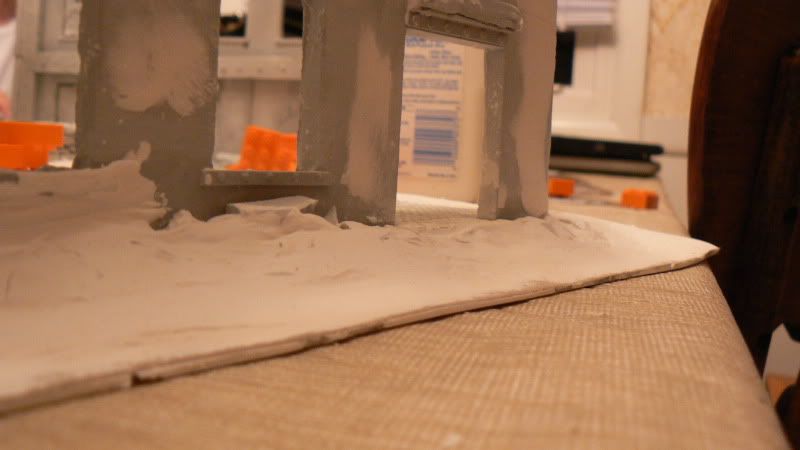
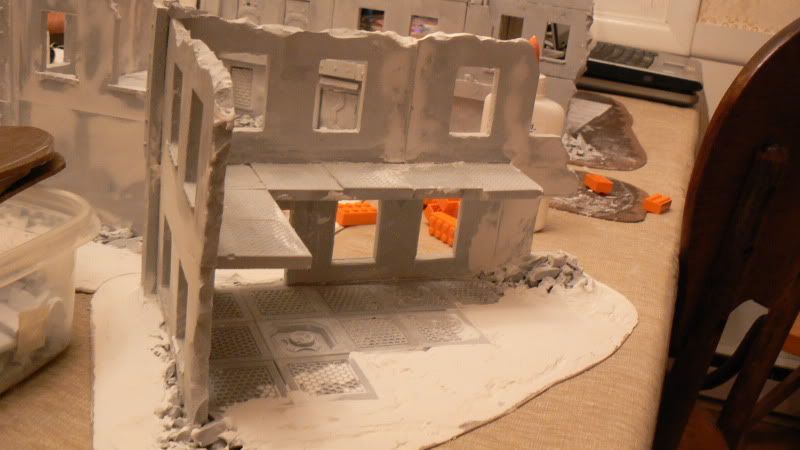
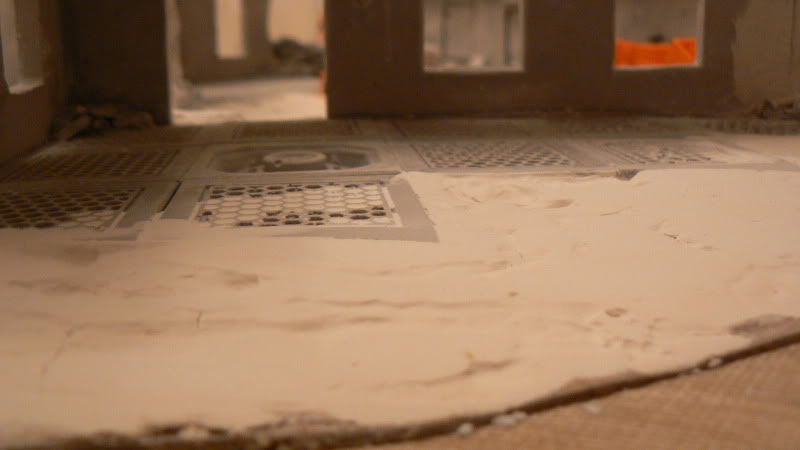
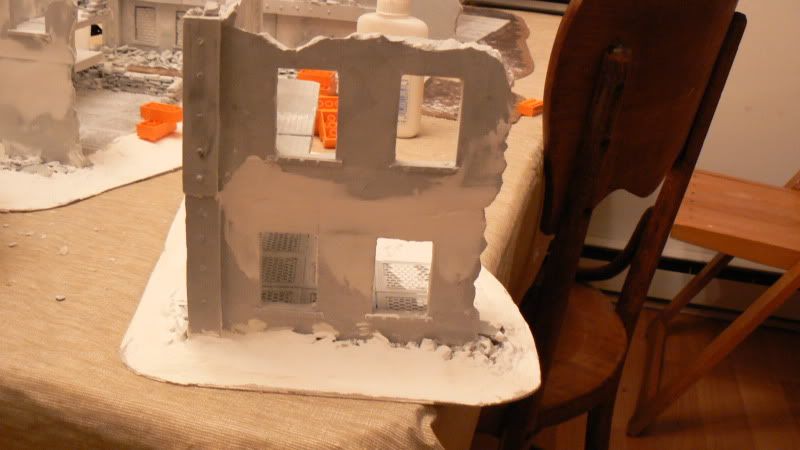
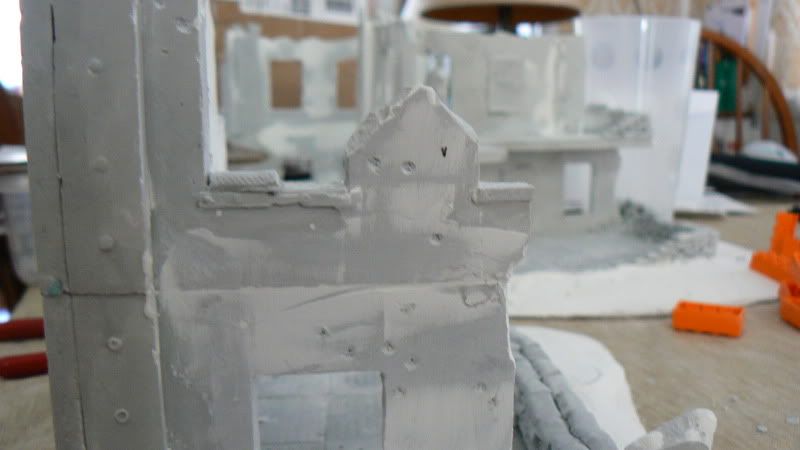
Anyway I've begun spackilng the ruins to blend the tiles into the MDF bases, and help hide some of the join lines for the larger ruins, (at least it will after I sand the excess spackle off...). I apologize for the poor pic quality but I need to get to bed so don't have time to retake em now (I'll do that when I get home from work tomorrow)
the three Small ruins (overview)
Sruin 1 Spackling
20956
Post by: Empchild
Sam you really are very talented, shot me a email later as I have some gifts for you.
39973
Post by: Galorn
Empchild wrote:Sam you really are very talented, shot me a email later as I have some gifts for you.
will do. as a matter of fact... done.
43840
Post by: Deathshead420
Gonna treat yourself to a new airbrush?
I think you need to, gonna be the only way to do them justice.
17738
Post by: Briancj
Man, now I want to play in DA BOYZ, just to play on this table.
--Brian, Wakefield, MA
39973
Post by: Galorn
Deathshead420 wrote:Gonna treat yourself to a new airbrush?
I think you need to, gonna be the only way to do them justice.
Seriously considering it anyway. at the minimum I'll be borrowing one from a club member to paint these.
Briancj wrote:Man, now I want to play in DA BOYZ, just to play on this table.
--Brian, Wakefield, MA
Heh. You might have fun at Day Boyz at that, but I'll try and bring this stuff to the Bunker (if I'm ever off on a sunday...)
17738
Post by: Briancj
I haven't been able to make it to DA BUNKAH in awhile, either.
Need any help?
39973
Post by: Galorn
Briancj wrote:I haven't been able to make it to DA BUNKAH in awhile, either.
Need any help?
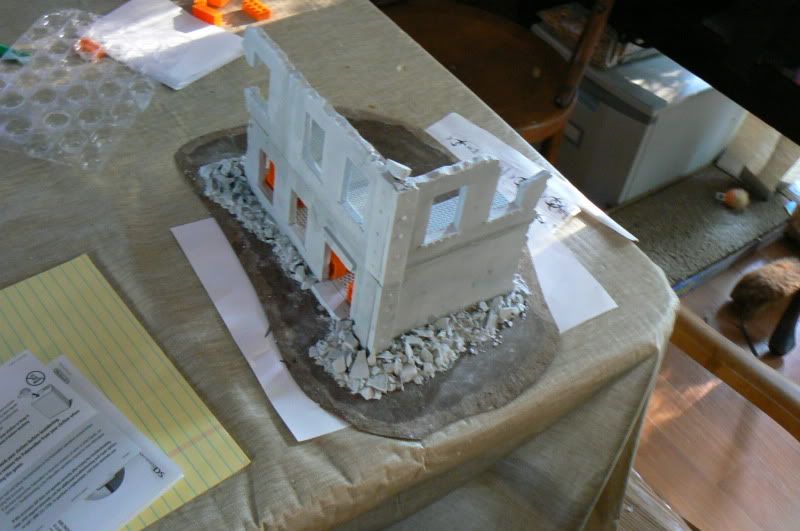
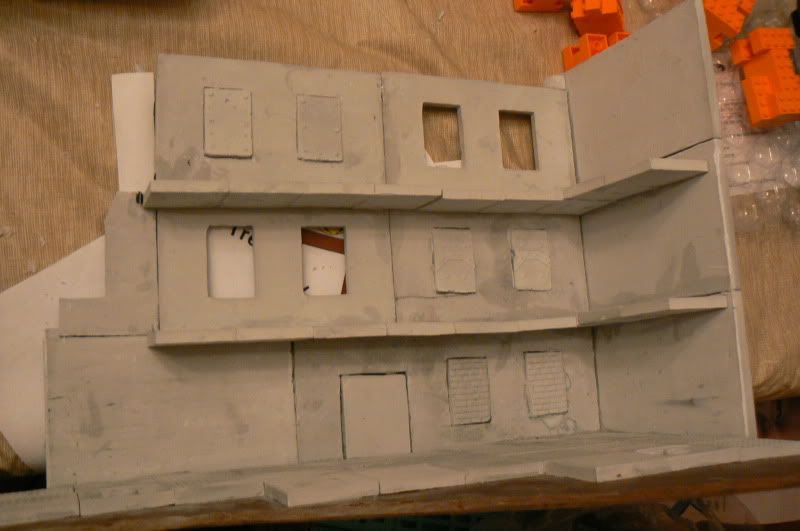
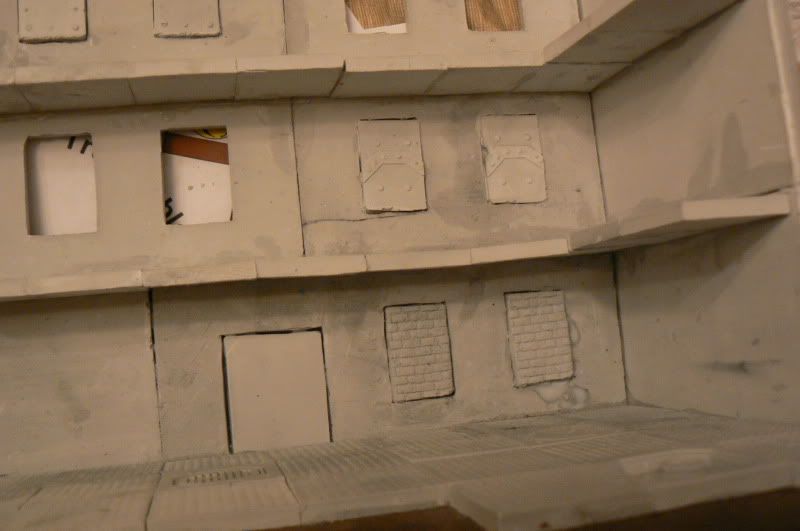
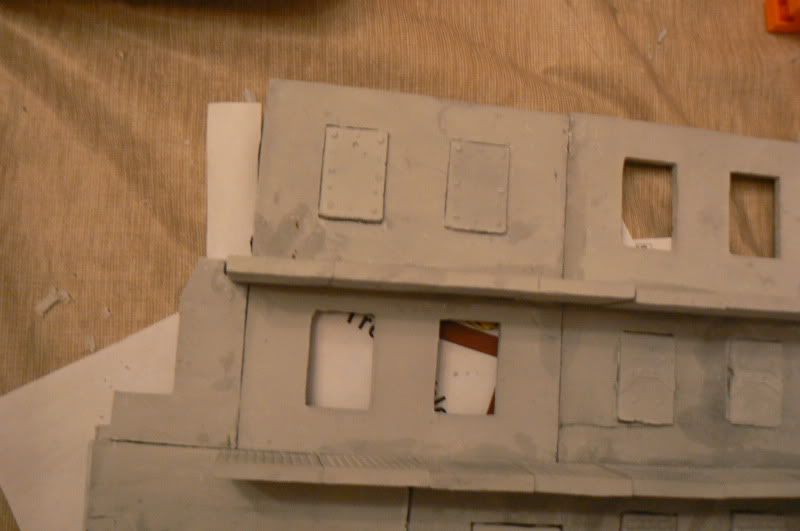
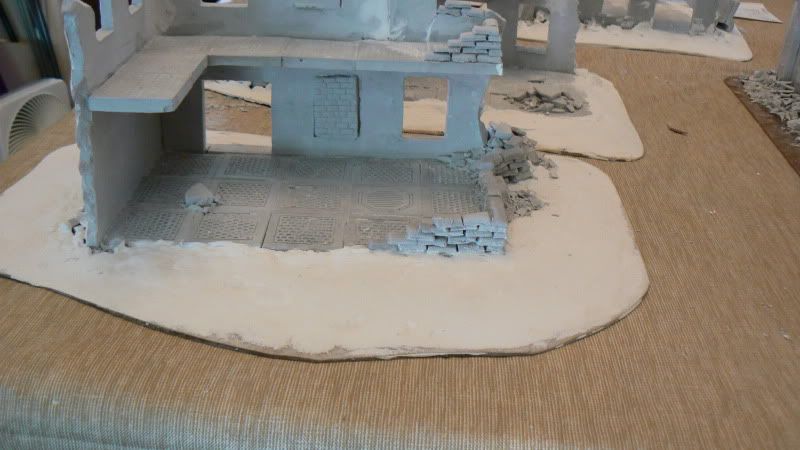
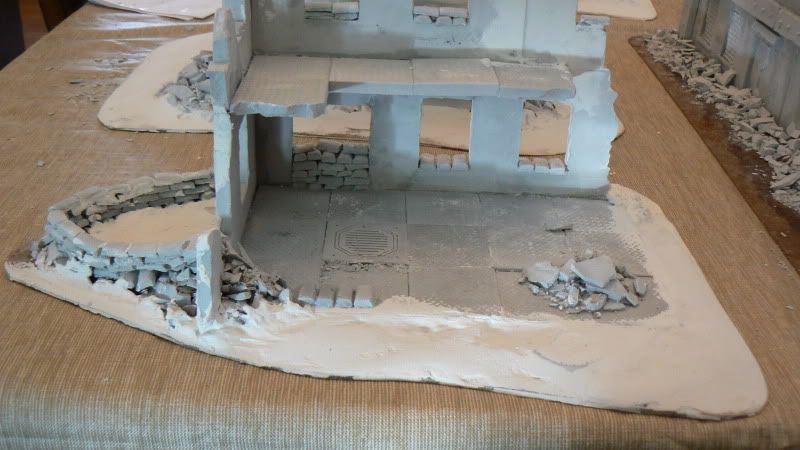
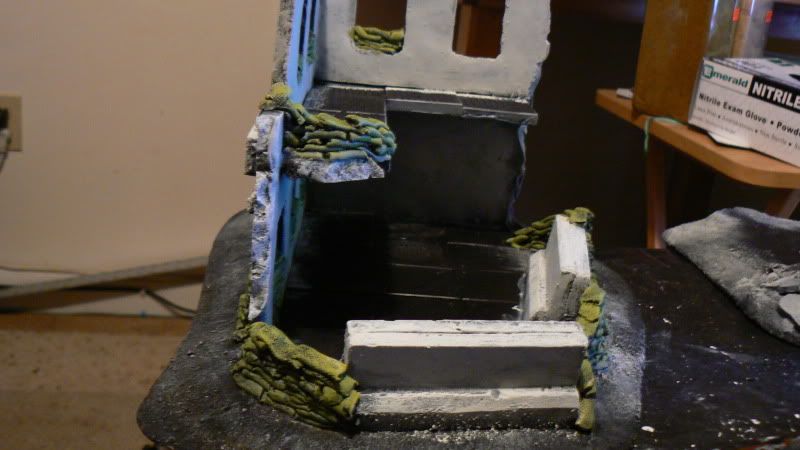
Not at the moment but thanks for asking. Automatically Appended Next Post: Pics of spackling of small ruins.

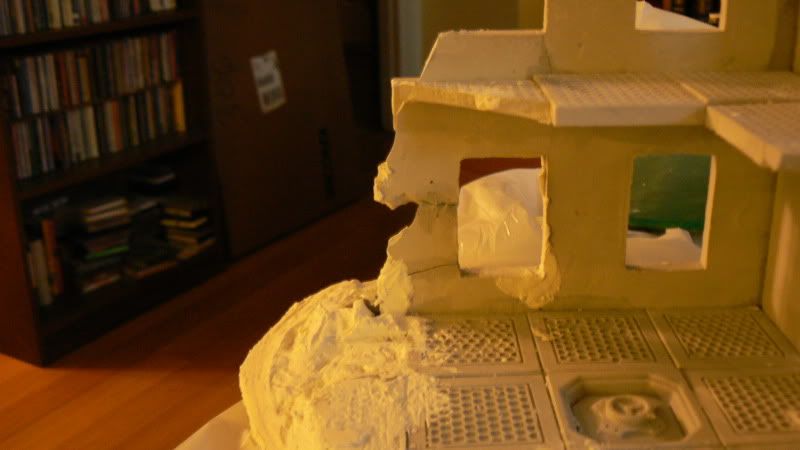
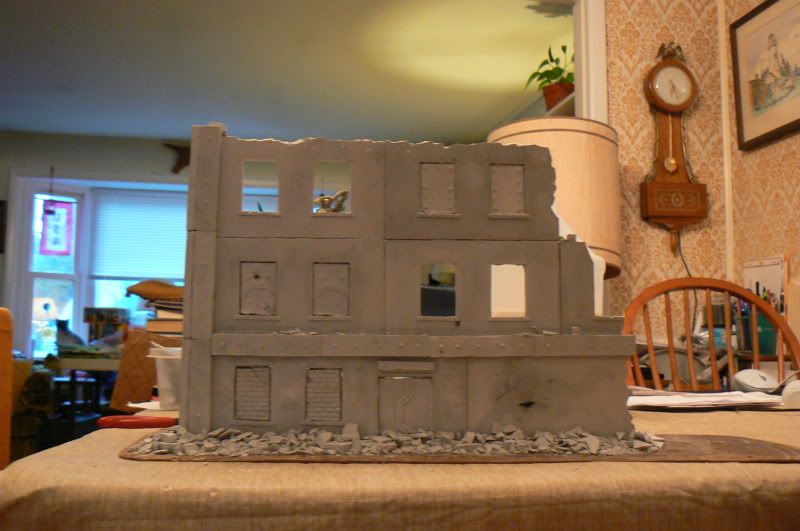
Mini for Scale pic of LRuin 1
Other side of the wall (Valk/SR view)
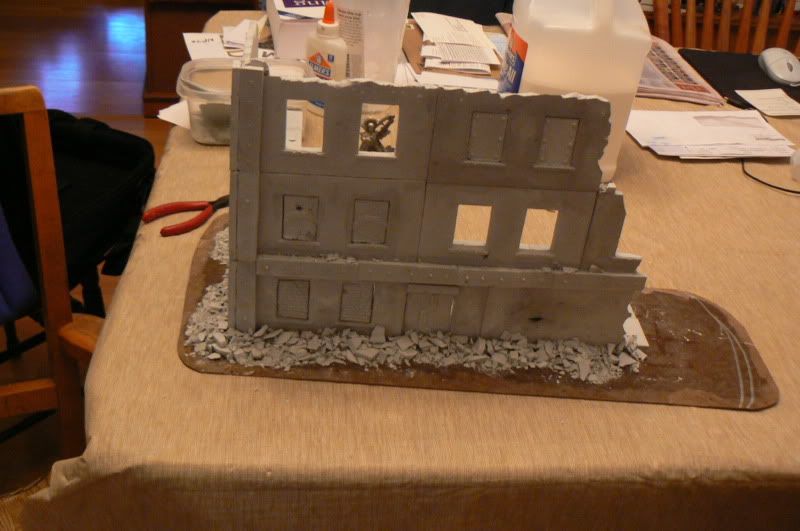
Street level.
24082
Post by: Flying Pooo
I am really liking these new ruins you're just pumping off the assembly line. So much awesome progress so quickly. Keep up the good work!
39973
Post by: Galorn
Flying Pooo wrote:I am really liking these new ruins you're just pumping off the assembly line. So much awesome progress so quickly. Keep up the good work!
Thanks.
Ive finished sanding down spackle on three of the five Medium ruins. and for a hoot I took some "action" pics using some old IG minis (old as in painted and un-used for some time not old model wise) and my Necromunda gang.
On to the Pics.
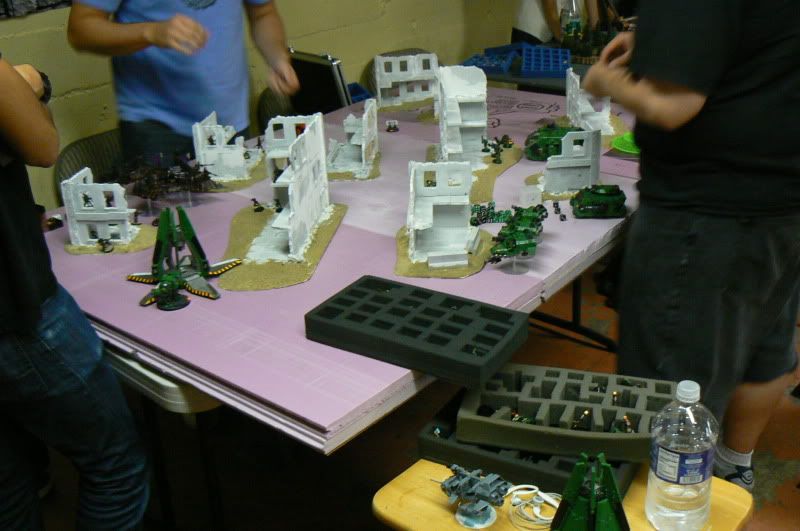
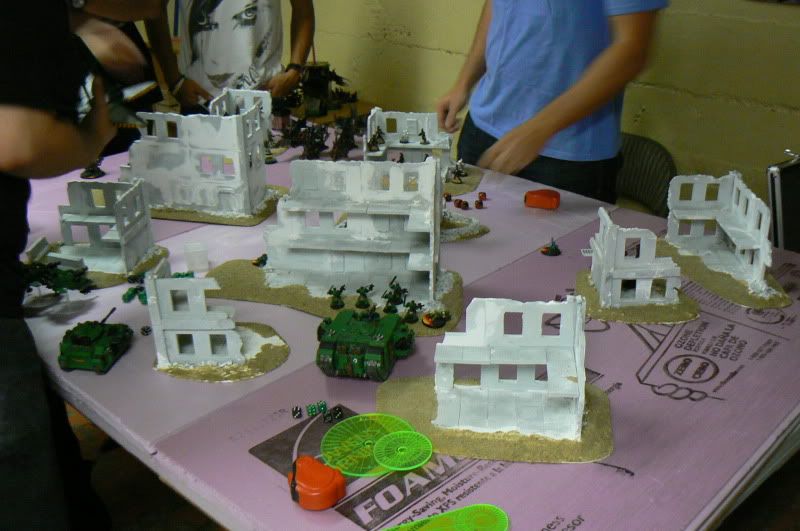
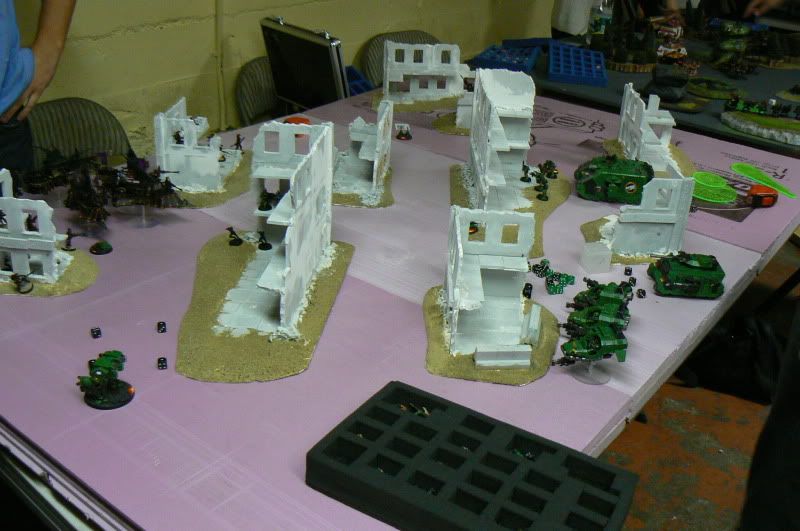
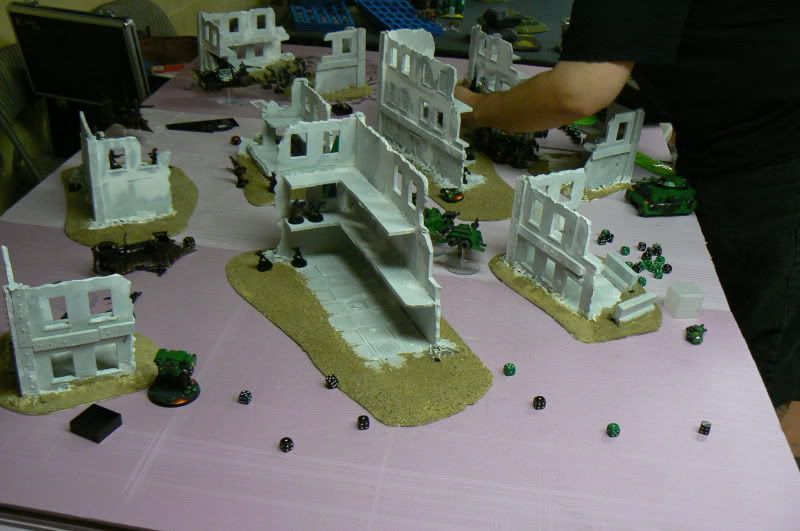
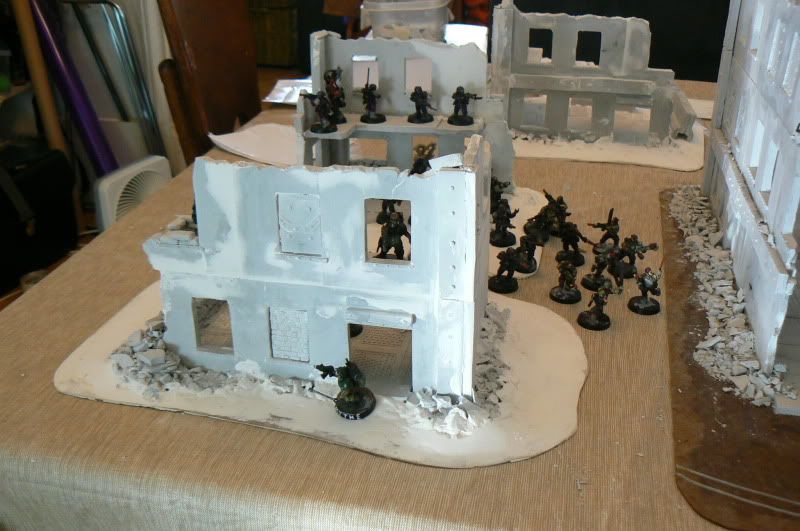
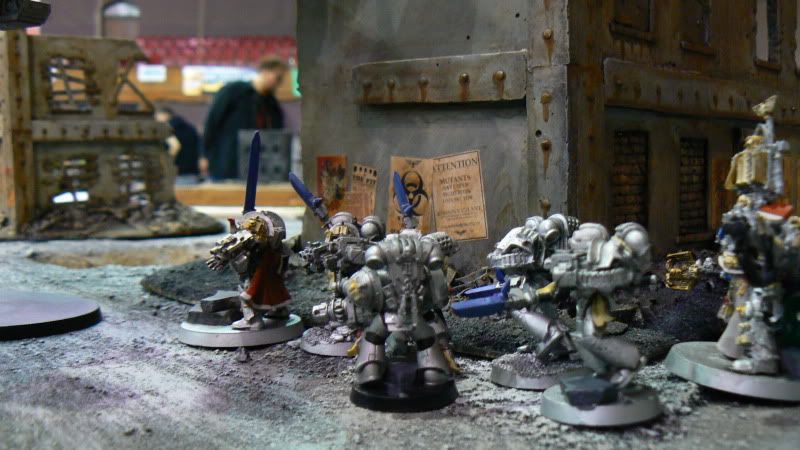
+++Begin Action Photos
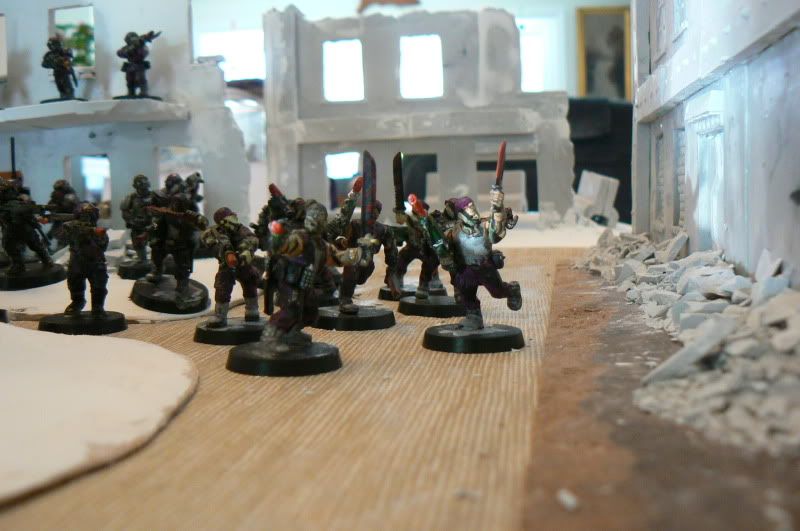
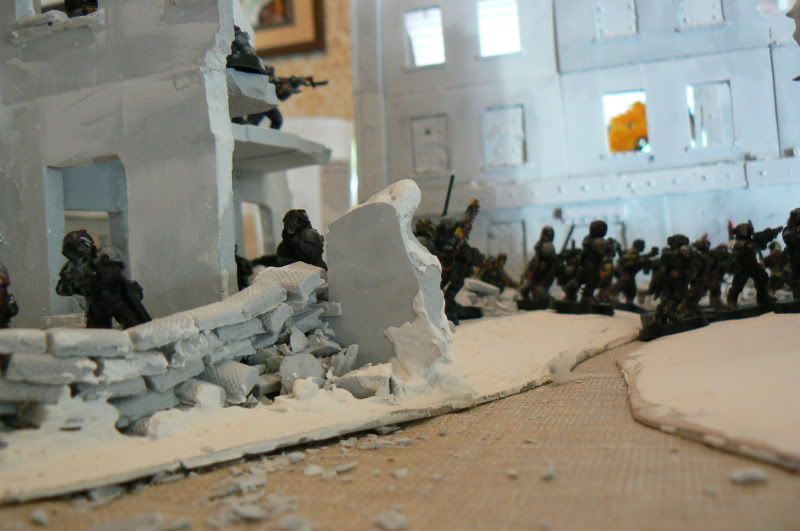
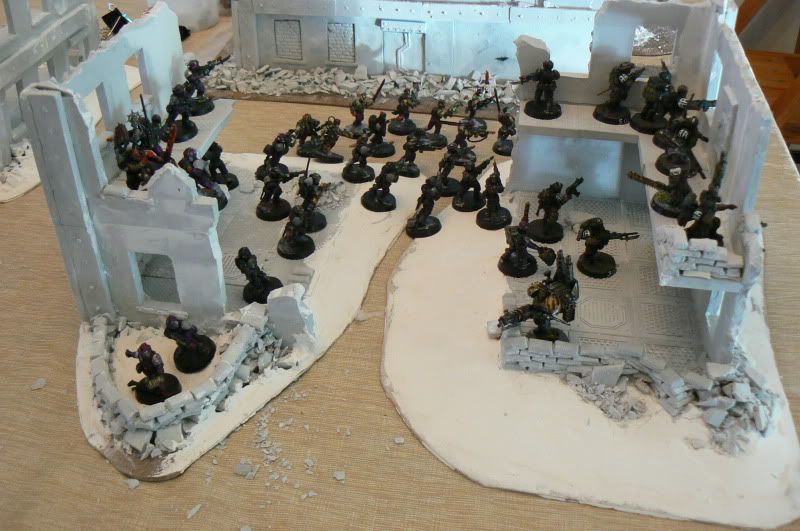
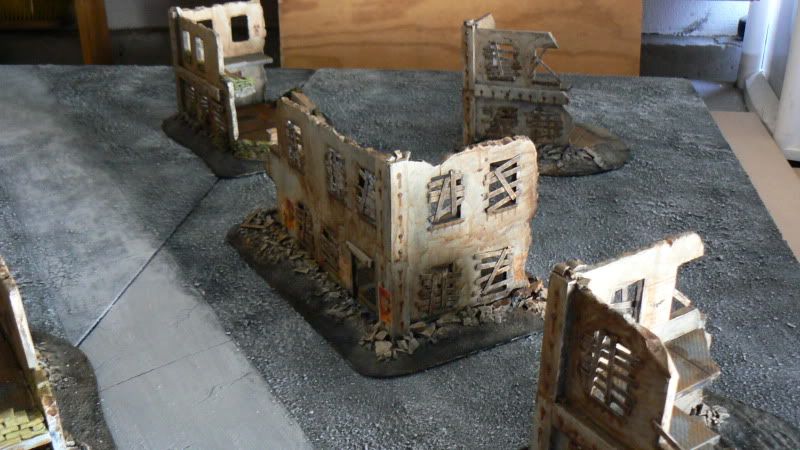
1st Prandia (squad A Plt1 1 Legio Prandia rgt) Guardsman, accompanying Inquisitor "BoB" and his retinue of 82nd Necromunda "Absolute Aholes" occupy a pair of fortified ruins as the remnants of the 23rd catachan rgt charge down a street to clear a ruin during the battle for San Lorenzo on Ultima Macharia.
South overview (Pic from Surveillance drone +++Classified by Inquisition+++)
Street level view of the charge of the remnants of the Catachan 23rd.
Gun servitor "Brick" of the 82nd Necromunda takes a covering position in the forward of the two fortified ruins.
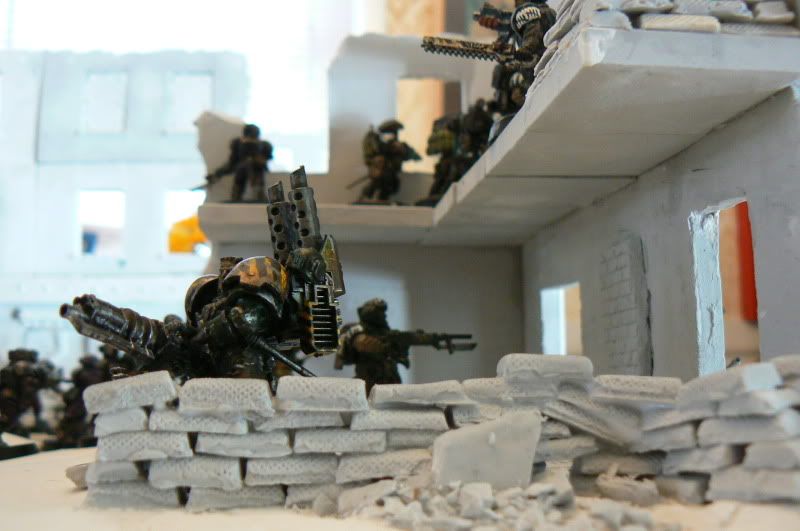
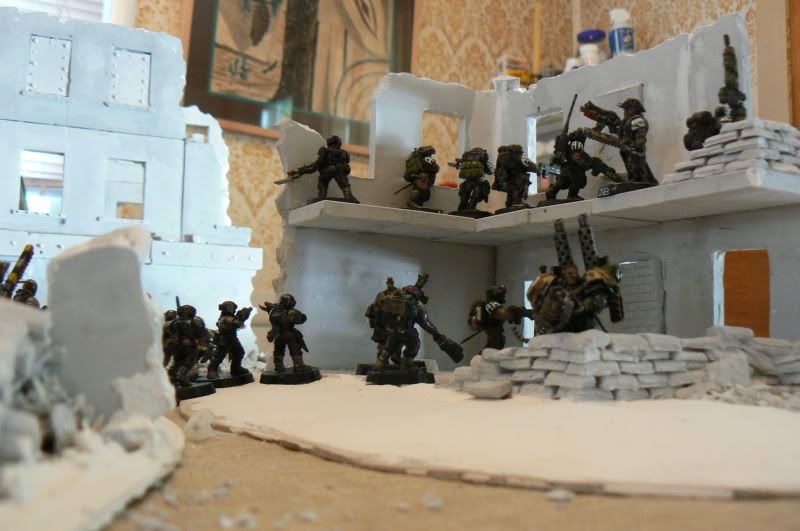
The 82nd Necromunda takes positions in the second story of the forward ruin, as Inquisitor Bob Directs the placement of the 1st Prandian Legionares.
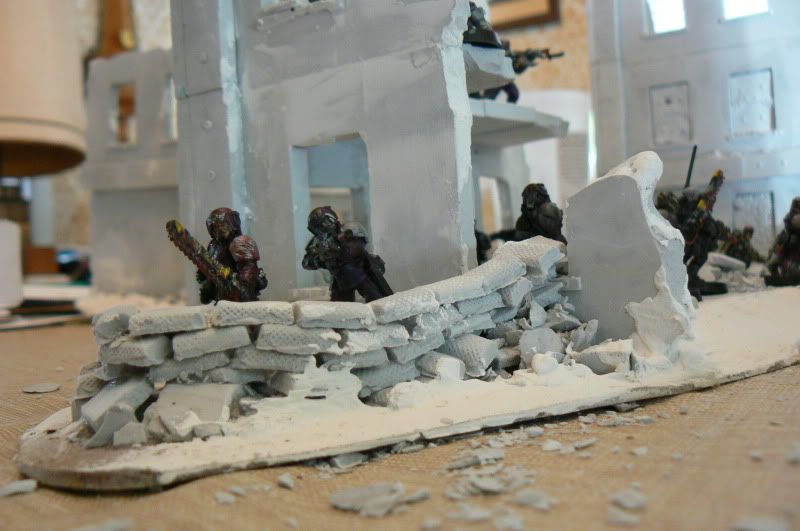
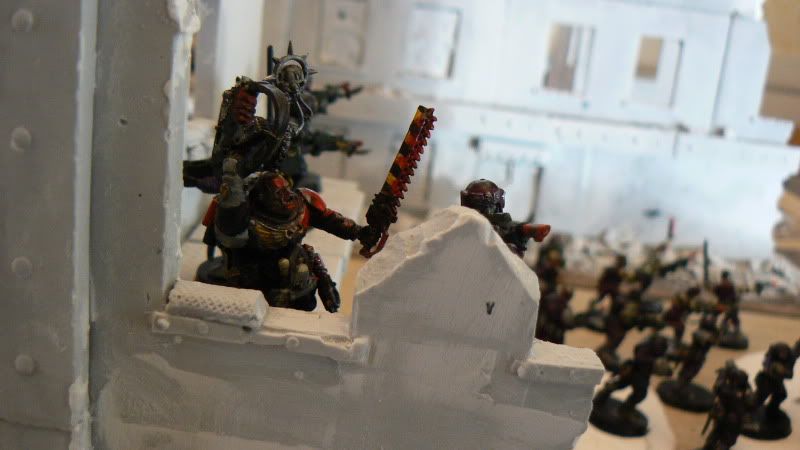
two legionnaires of the 1st Prandia take position in a sandbag revetment and engage traitor forces.
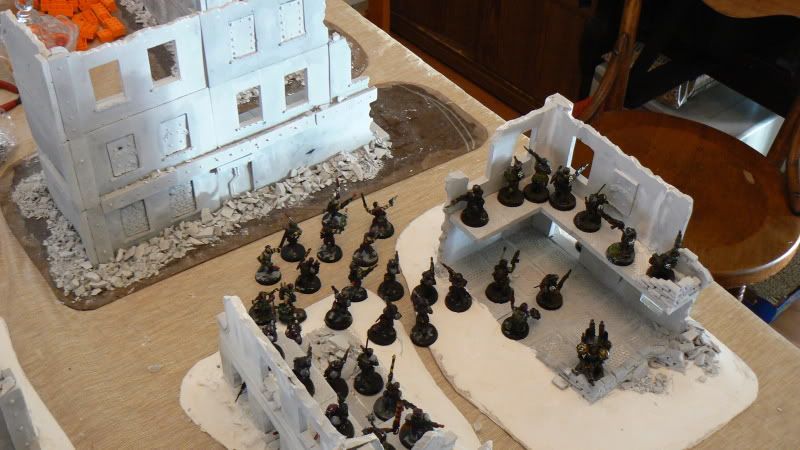
Meanwhile elelments of the 1st Prandia move to give covering fire to the 23rd Catachan and give support to the 82nd Necromunda troopers.
Western Overview (Pic from Surveillance drone +++Classified by Inquisition+++)
Lt Walter Maxwell Shouts Orders to his Legionaries as the Battle rages.
Legionnaires of the 1st Prandia take covering positions against any Traitor forces trying to outflank the Imperial attack.

Northern Overview (Pic from Surveillance drone +++Classified by Inquisition+++)
+++End Action Photos
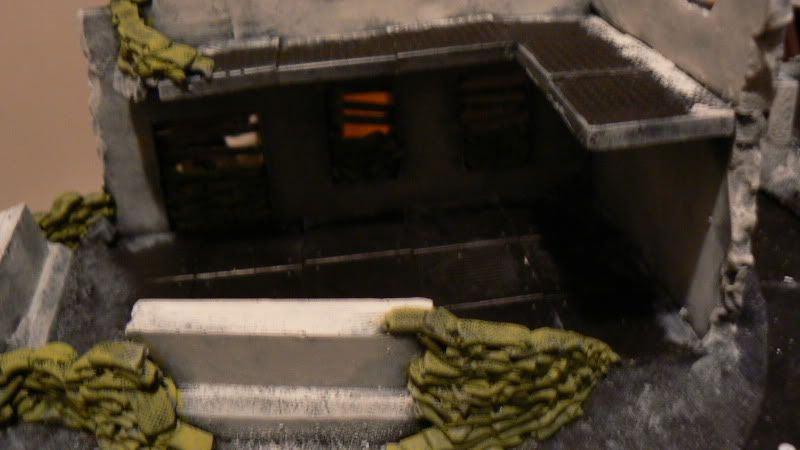
"normal" pics
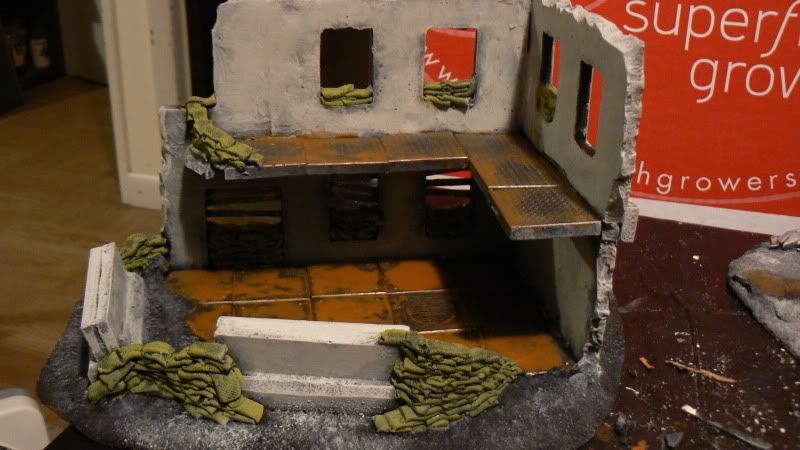
Mruin 5 Spackled (adding Sandbags in progress) overview of sandbags
Close up of lower sandbag revetment
Closeup of upper sandbag revetment
Front of Mruin 5
Mruin 1 Spackled (adding Sandbags in progress) overview of sandbags
24082
Post by: Flying Pooo
Great progress and awesome ruins as usual. Your minis are just as great as your ruins. I really like the assault cannon guy.
39973
Post by: Galorn
Flying Pooo wrote:Great progress and awesome ruins as usual. Your minis are just as great as your ruins. I really like the assault cannon guy.
Thats the "heavy" for my necromunda gang.
37519
Post by: bigfish
These ruins are top notch and great scale wise, keep up the great work
5729
Post by: InquisitorMack
Gonna treat yourself to a new airbrush?
I think you need to, gonna be the only way to do them justice.
+1
S, this stuff is awesome!!! Quality & quantity!!!
39973
Post by: Galorn
InquisitorMack wrote:Gonna treat yourself to a new airbrush?
I think you need to, gonna be the only way to do them justice.
+1
S, this stuff is awesome!!! Quality & quantity!!!
Thanks G. Toss me a PM with your addy and I'll bounce you a set of the casts. (door and 4 windows, 8 joiner bars)
bigfish wrote:These ruins are top notch and great scale wise, keep up the great work
Thanks, I shall.
Finished sanding down the spackle on the last two Medium Ruins. I'll get Pics up tonight after I get home from Work.
39973
Post by: Galorn
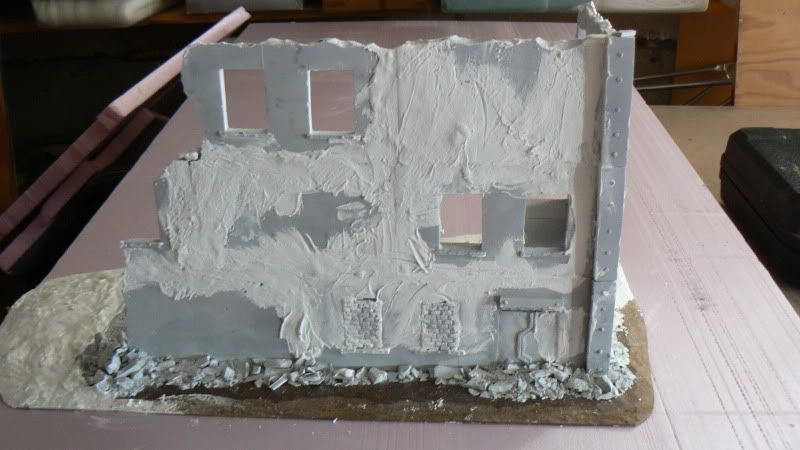
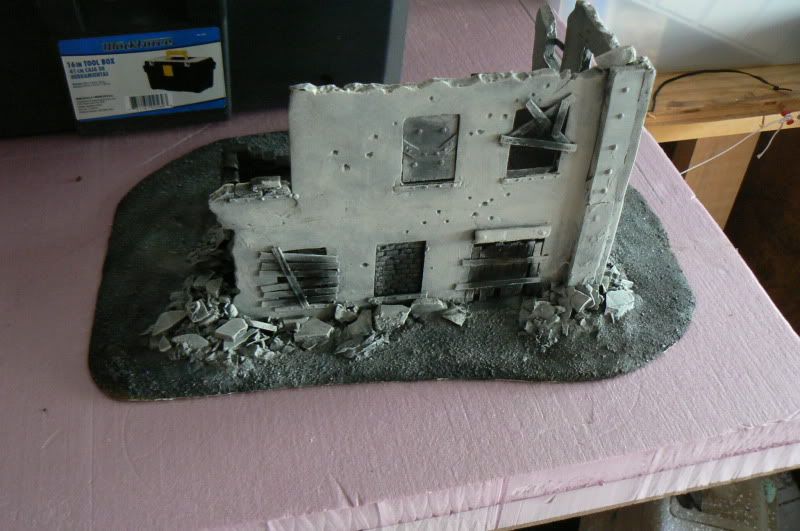
Pics as promised of the last two Medium ruins (sanded down spackle)
Mruin 2 (spackle) overview
Spackle close up
Mruin 2 (Spackle) facade
Mruin 2 Front Spackle closeup
Mruin 3 (Spackle) overview
Spackle close up
Mruin 3 Side Facade
Mruin 3 Facade
39973
Post by: Galorn
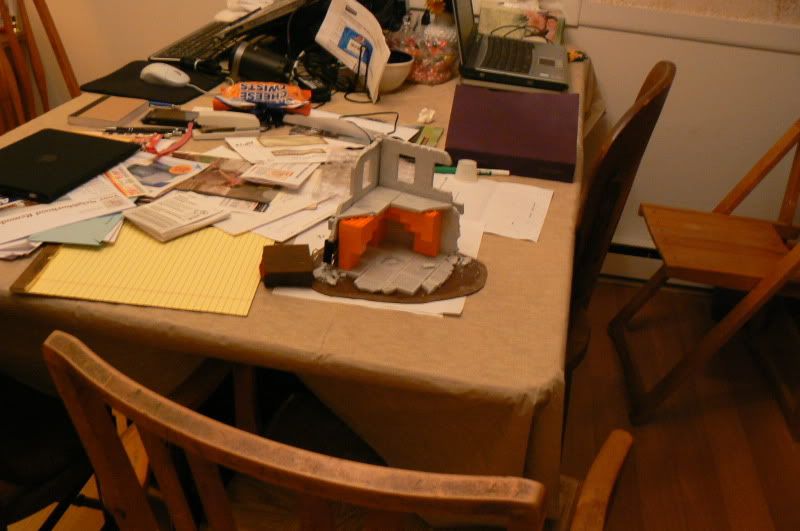
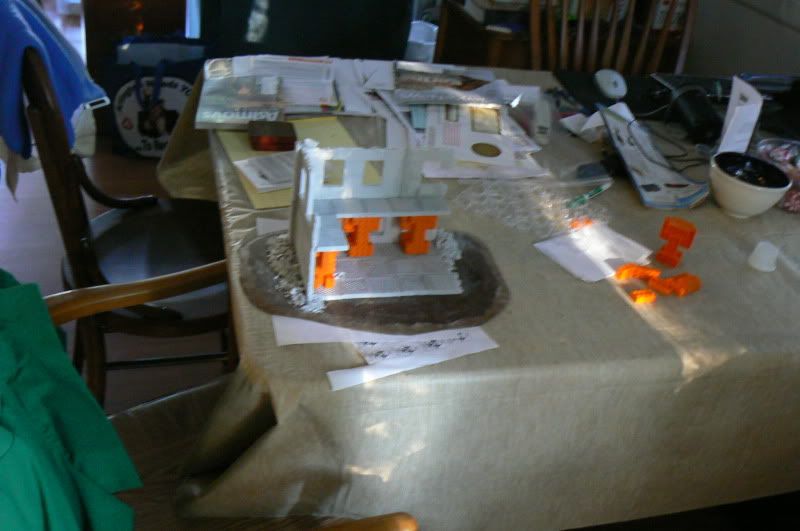
On to the next set of visual stimuli. In less high fa-looting wordage Picture time.
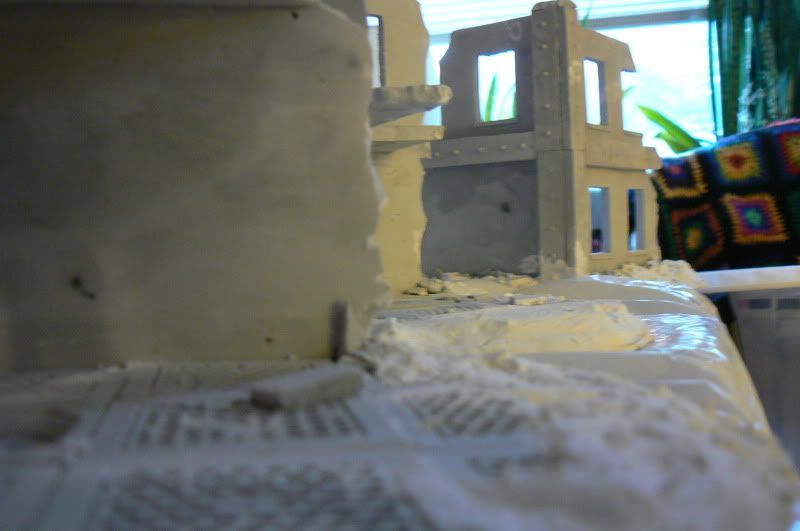
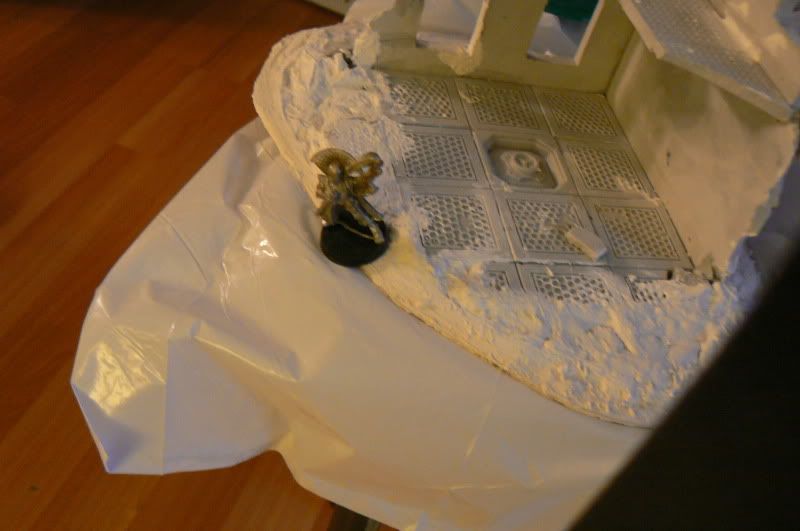
Mruin 1 Sandbagging status overview with psyker bob for scale.
Closer...
Mini Eye view
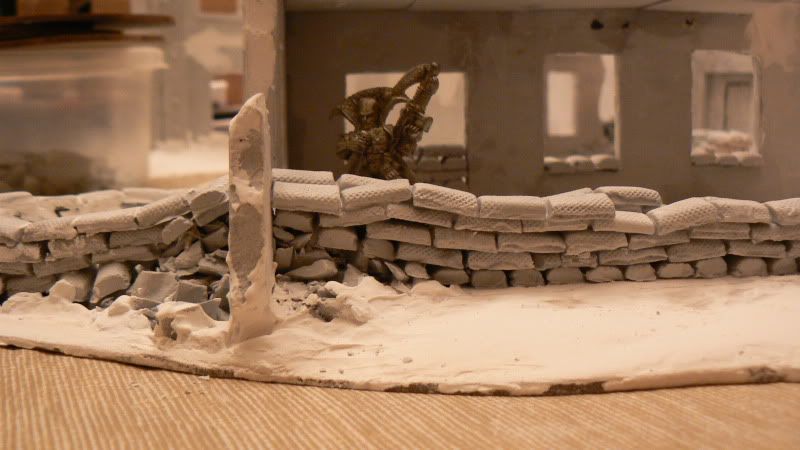
Table top status... (Waiting on time off/weather to put ruins on it and then sketch out what features I want to build into it...)
24082
Post by: Flying Pooo
More great progress on your ruins. They are scaled perfectly.
When will we see them painted?
I can't wait until then, they should look awesome painted.
39973
Post by: Galorn
Flying Pooo wrote:More great progress on your ruins. They are scaled perfectly.
When will we see them painted?
I can't wait until then, they should look awesome painted.
Thanks,
There is a fair amount of things to do yet. Specifically, I need to add sand to their bases, weapon hits, a first round of paint, detailing (posters, crates/ etc), followed by a second round of paint (touchup) and then weather em.
I'll be starting the sanding process later this week.
On to the Pics for today.
I've added some Weapon hits to Mruin 1
(front View)

(side view)
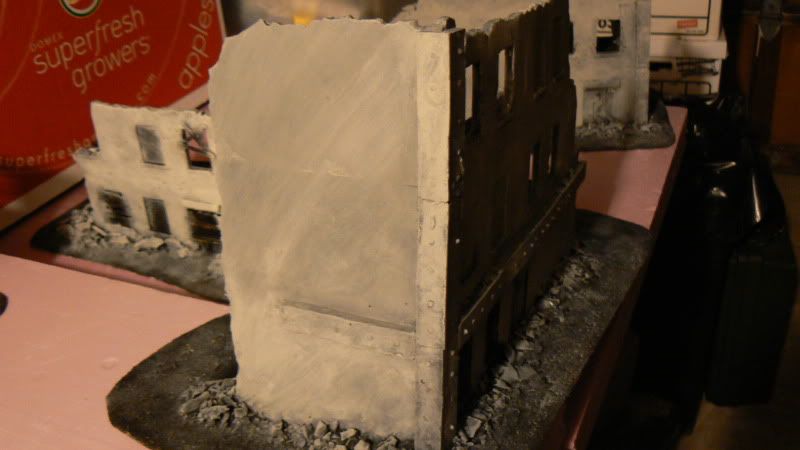
I've added Spackle to the two Large Ruins. (I need to sand the spackle down, am waiting for it to dry... Darn drying time always making my things take longer grumble...)
Lruin 2 (unsanded) Spackle
Front
Side
Rear
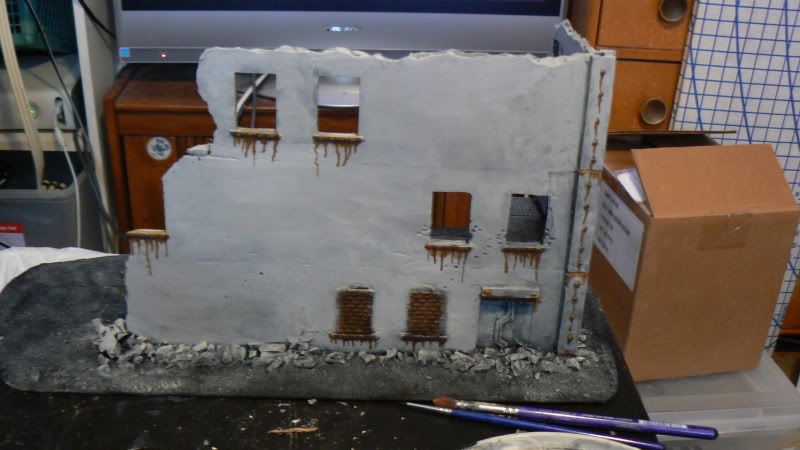
Lruin 1 (unsanded) Spackle
Front
Side
Rear

And to get an Idea of how big they are here are the wo Large Ruins next to each other on a 2'x4' Table section. they almost reach the midpoint of the section.
 Automatically Appended Next Post: Automatically Appended Next Post: Pics for the evening... Then off to bed. Working in the morning...
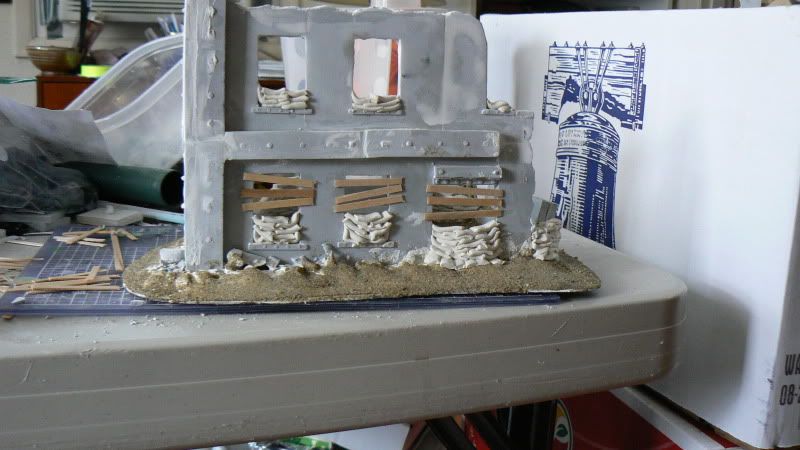
Mruin 1 (sanded, adding Boards) pre paint detailing.
Overview (rear)
Sandbag wall closeup (with Psyker Bob)

Re rubbling a bit
Overview (front)
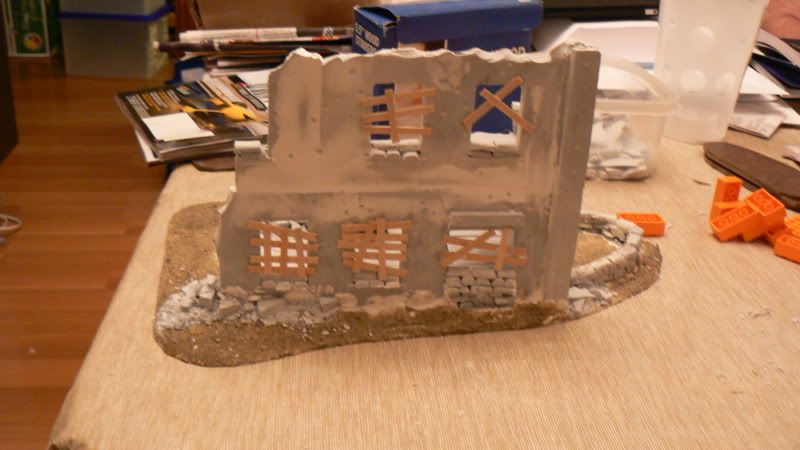
Psyker bob in a boarded window
39973
Post by: Galorn
Progress is made...
On to the Pics
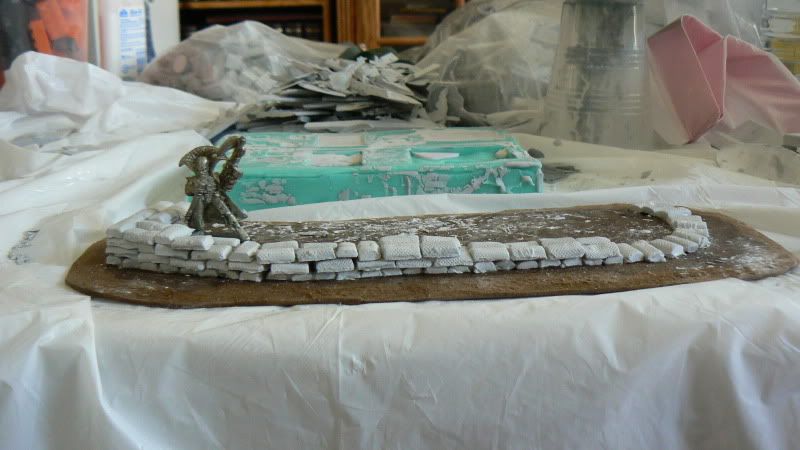
Beginning to add sandbags to the "sandbag fort"
Overview (with Psyker bob for Scale)
Overhead view (no bob)
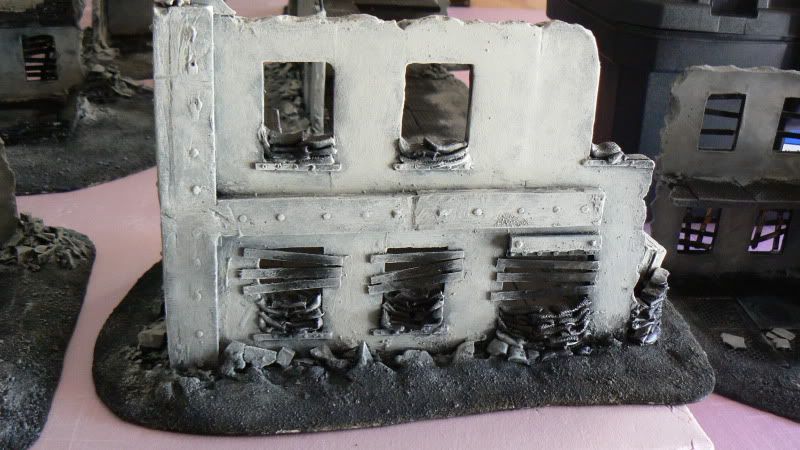
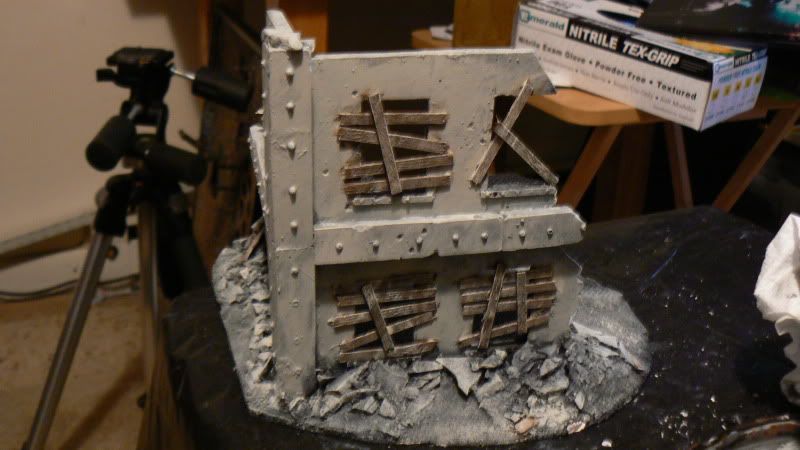
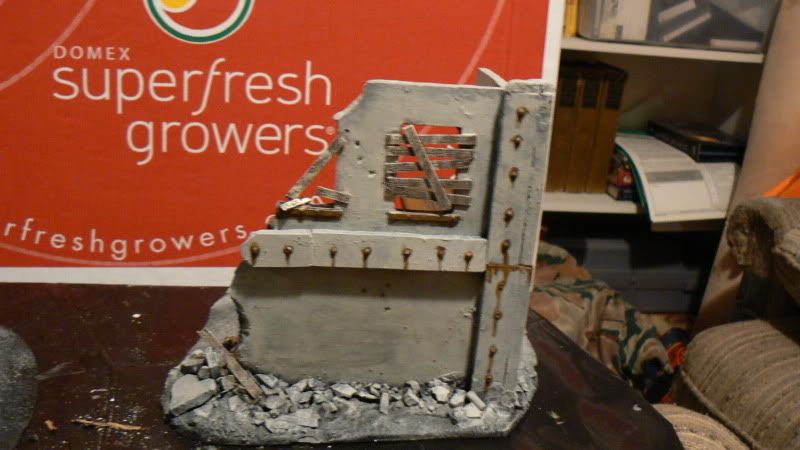
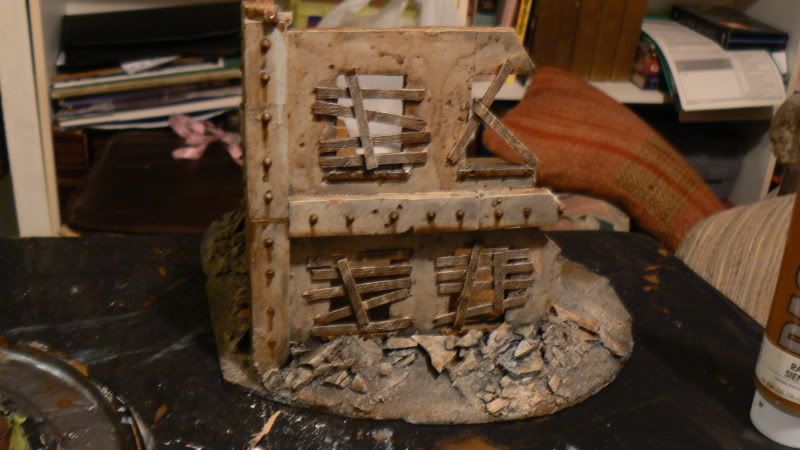
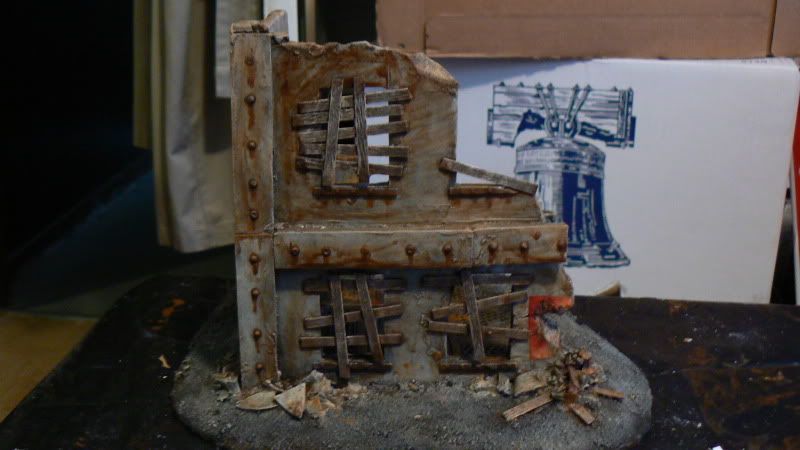
Mruin 3 (adding Boards and re Rubbling)
Front
Side
Rear
24082
Post by: Flying Pooo
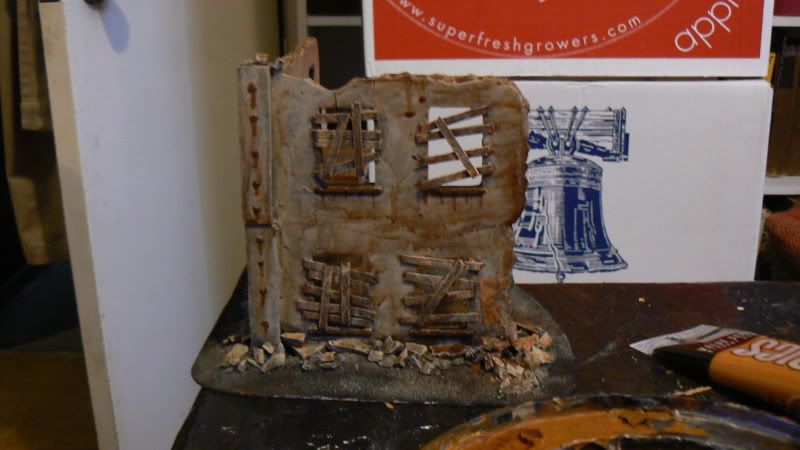
I really like the ruin with the barred windows. Great job!
39973
Post by: Galorn
Flying Pooo wrote:I really like the ruin with the barred windows. Great job!
Thanks.
On to Pics from Before I head out to work today.
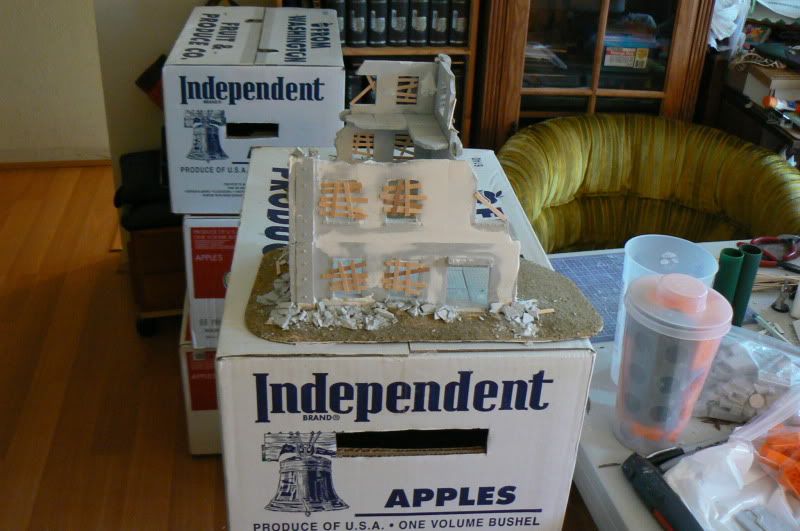
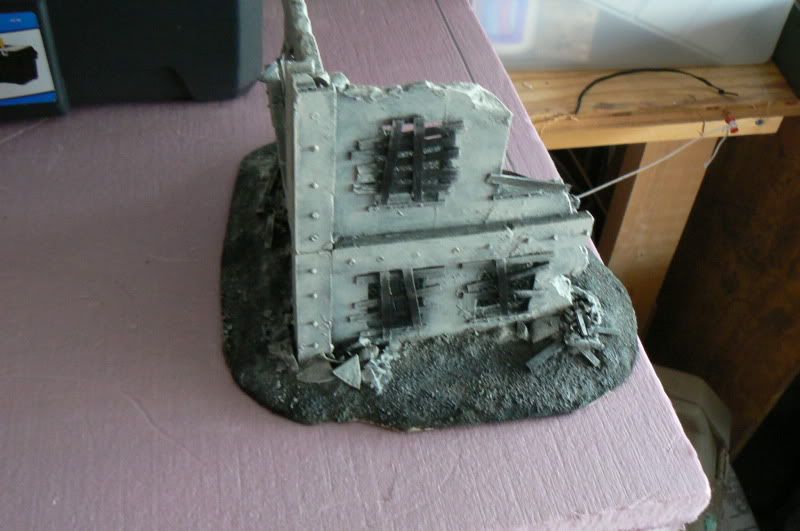
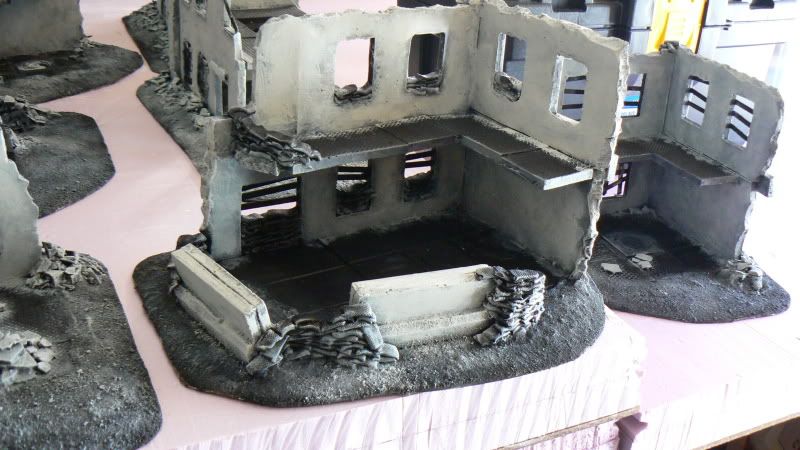
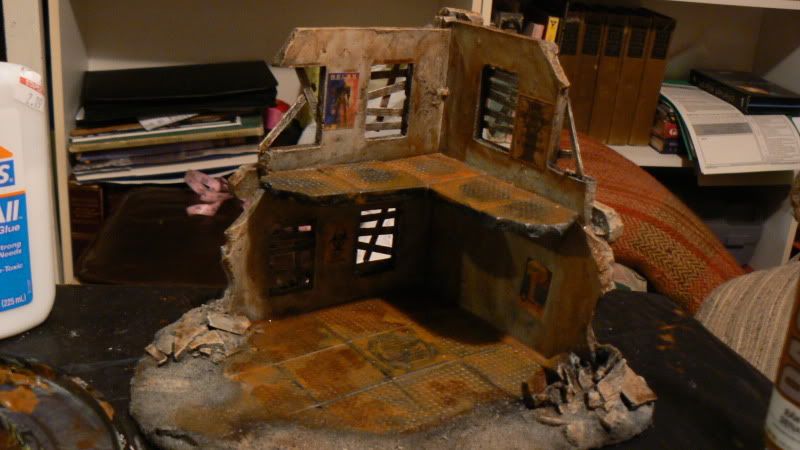
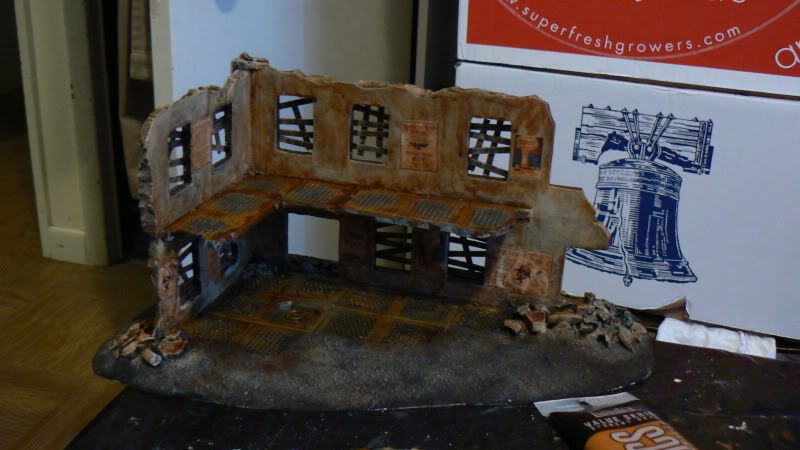
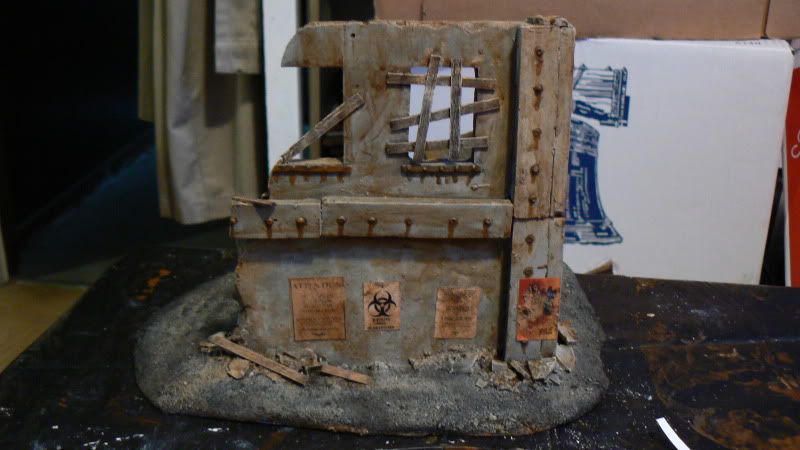
Mruin 04 (adding Prepaint Detail)
Front
Side (Left)
Side (Right)
Rear
SRuin 02 (adding Prepaint Detail)
Front
Side
Rear
"Sandbag Fort"
Overview

Front
37519
Post by: bigfish
really liking the boarded windows thing, fots in really well
39973
Post by: Galorn
bigfish wrote:really liking the boarded windows thing, fots in really well
Thanks. I've gotten some more stuff done tonight but Pics will have to wait for morning and its bevy of light. Until then I leave folks with this a Link to "man who arranges the blocks" a "complete" history of the USSR to the tune of the song from Tetris (mostly)
man who arranges the blocks Automatically Appended Next Post: Pictures as promised last night.
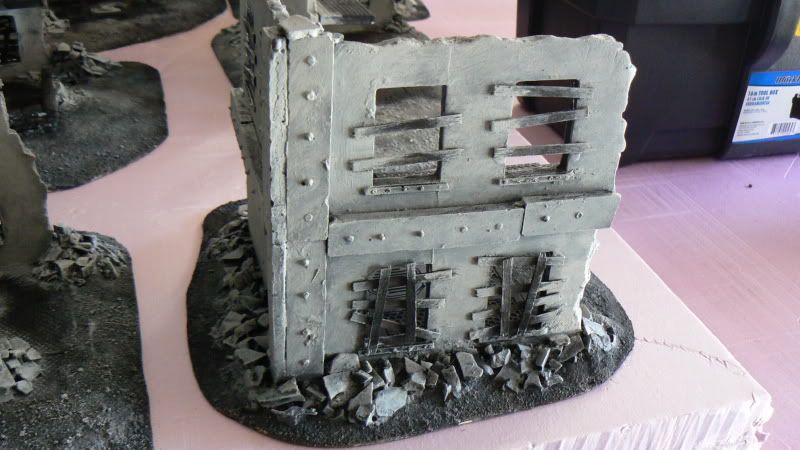
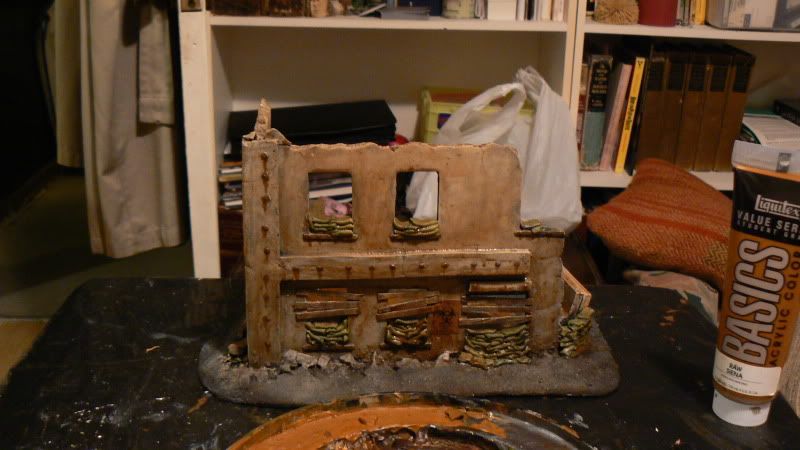
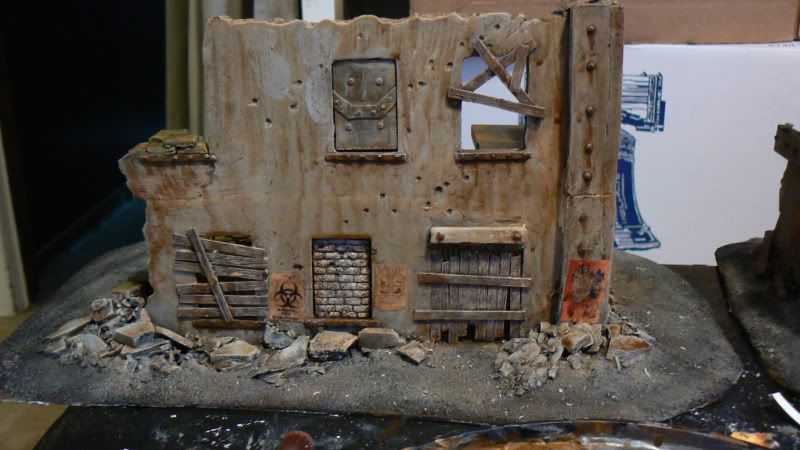
Mruin 2 (adding pre paint details)
Front
Side
Rear

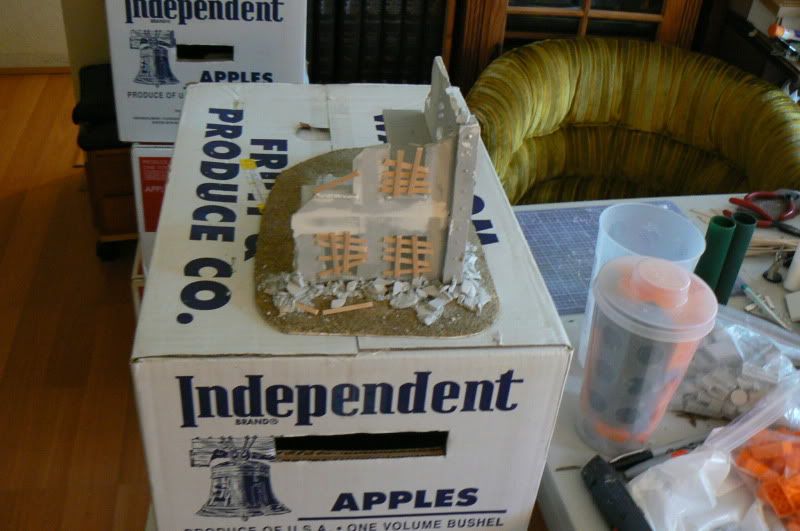
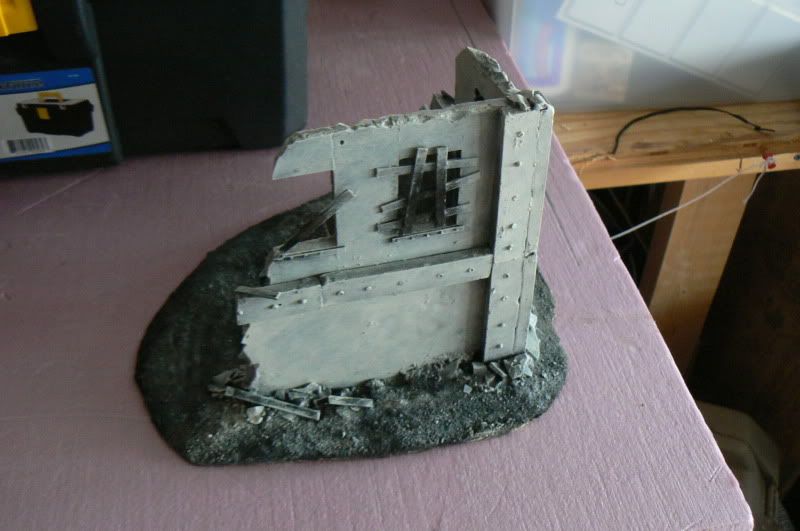
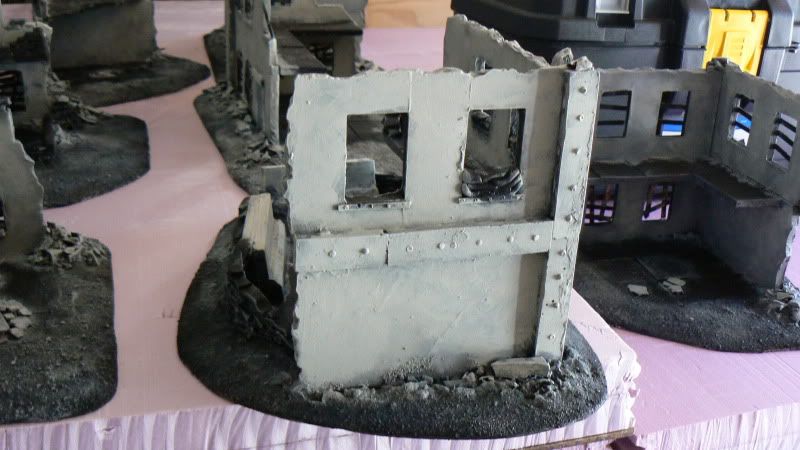
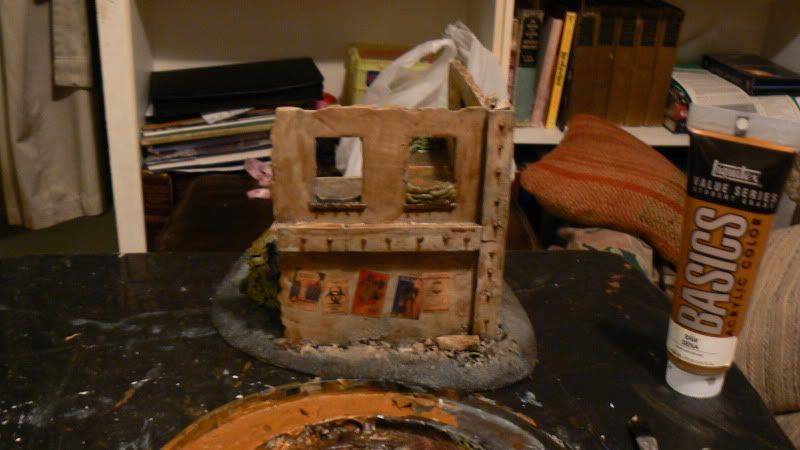
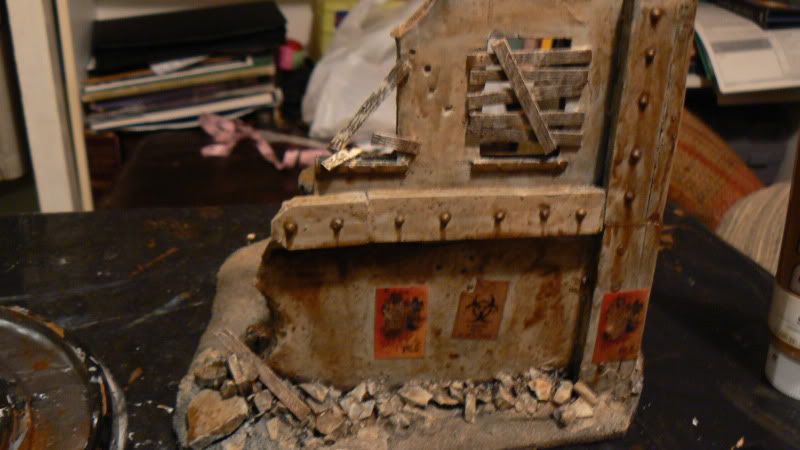
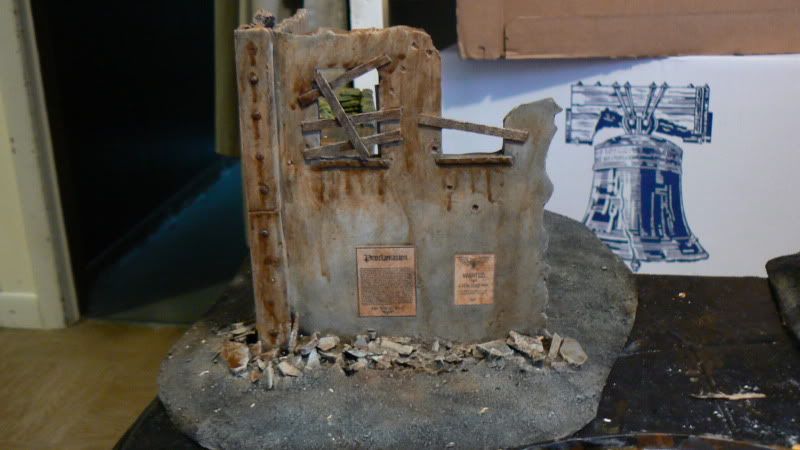
Sruin 3 (adding pre paint details)
Front
Side
Rear
24082
Post by: Flying Pooo
Nice! The debris and rubble is perfectly proportioned so that the ruin does not OTT damage and rubble or to little. All in all really great work. Keep it up!
47708
Post by: Zebra88
Awesome work...
I'm waiting for hirst arts mold to be shipped too:-)
keep up the good work
Zebr@88
38276
Post by: M0rdain
I love the sand bags and the rubble, they add a great feel to an already awesome peice.
31521
Post by: soncka
Looks great. I wish I had the energy and motivation to do this kind of thing.
36711
Post by: Depraved
Looking great! Love Hirst-Arts molds
39973
Post by: Galorn
Flying Pooo wrote:Nice! The debris and rubble is perfectly proportioned so that the ruin does not OTT damage and rubble or to little. All in all really great work. Keep it up!
Thanks. I'm in the home stretch. I just have to add pre paint detail to the two large ruins, one more Medium Ruin and One more Small ruin. Then the tabletop...
Zebra88 wrote:Awesome work...
I'm waiting for hirst arts mold to be shipped too:-)
keep up the good work
Zebr@88
Thanks.
M0rdain wrote:I love the sand bags and the rubble, they add a great feel to an already awesome peice.
Thanks
soncka wrote:Looks great. I wish I had the energy and motivation to do this kind of thing.
Plan on time more than anything else (lack of motivation, and etc just require a longer time committment, plan on working in like 10-15 min chunks "til its done")
Depraved wrote:Looking great! Love Hirst-Arts molds
Thanks. They make for really easy floors. Automatically Appended Next Post: Here's todays Progress
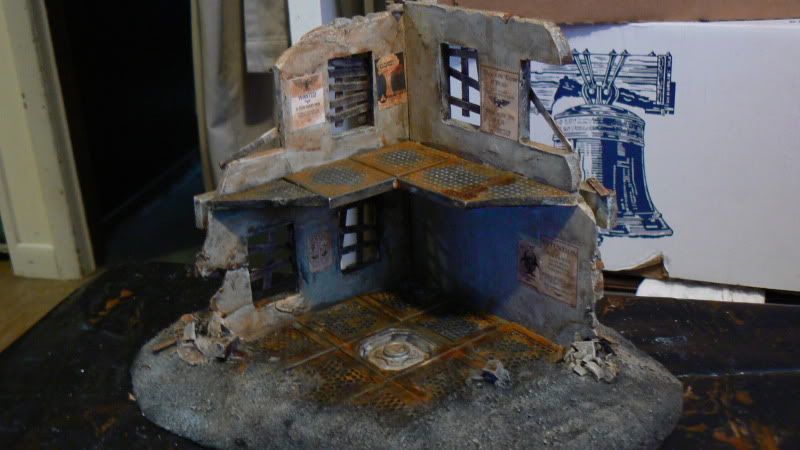
Mruin 05 (adding prepaint detail)
Front (with bob)
Front (without Bob)
Side
Rear
24082
Post by: Flying Pooo
I like those Jersey Barriers and sandbags. They give the ruin so much character.
39973
Post by: Galorn
Flying Pooo wrote:I like those Jersey Barriers and sandbags. They give the ruin so much character.
Thanks
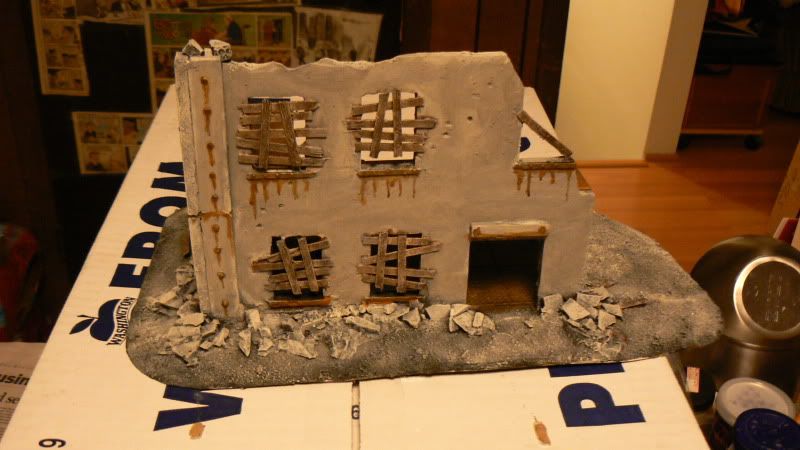
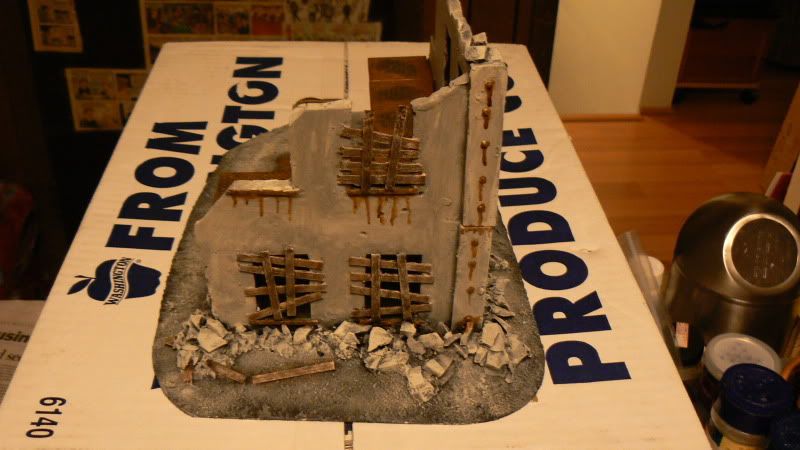
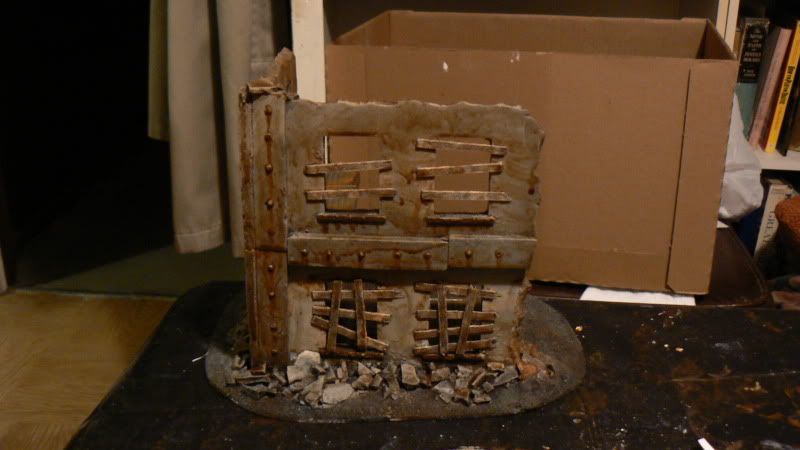
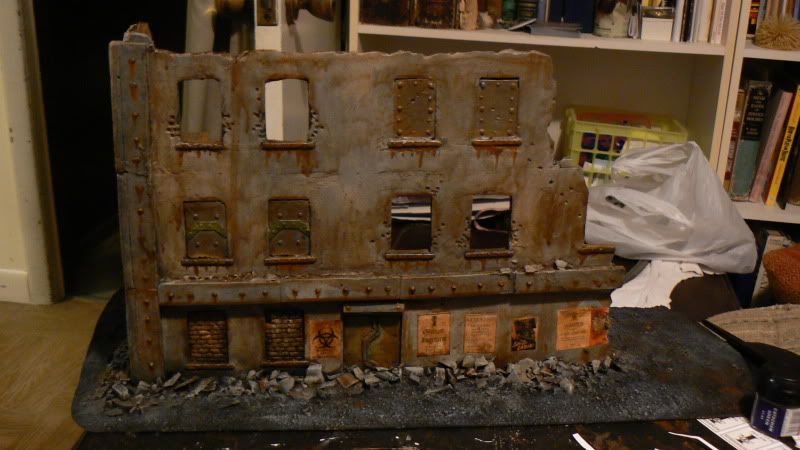
Here's last nights Progress.
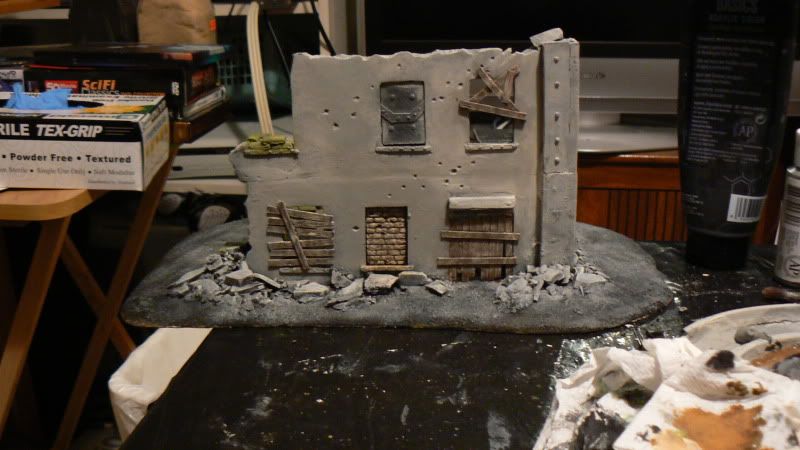
Mruin 05 Pre Paint details
Front
Rear (with Bob)

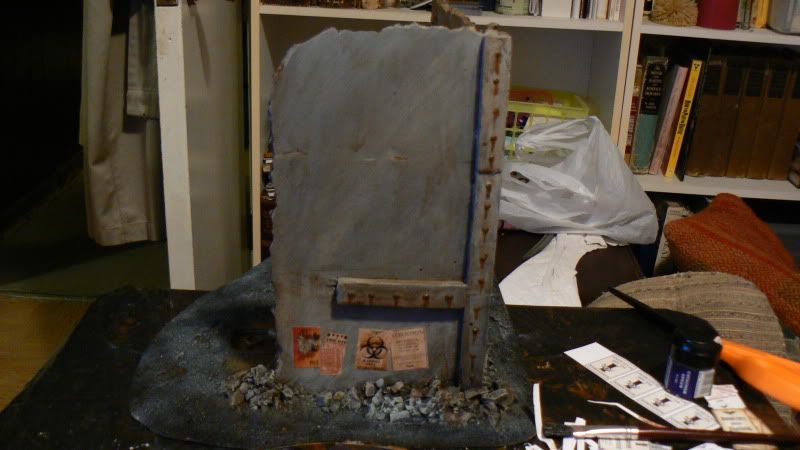
Sruin 03 Pre Paint detail
Front
Side
Rear (with Bob)
Now ON TO PAINT!!!!
37231
Post by: d-usa
Awesome ruins, and I really love the mold setup you have. That does make it easy to get a lot of terrain put together that still looks great.
Love the modular window inserts as well, wonderful.
Consider many of these ideas implemented in my future table...
39973
Post by: Galorn
d-usa wrote:Awesome ruins, and I really love the mold setup you have. That does make it easy to get a lot of terrain put together that still looks great.
Love the modular window inserts as well, wonderful.
Consider many of these ideas implemented in my future table...
Thanks.
Now on to other things.
Painting HAS BEGUN (DUN DUN DUHHHHHH)

Pics of today's progress,
Overview of 2Mruins, and 2 Sruins
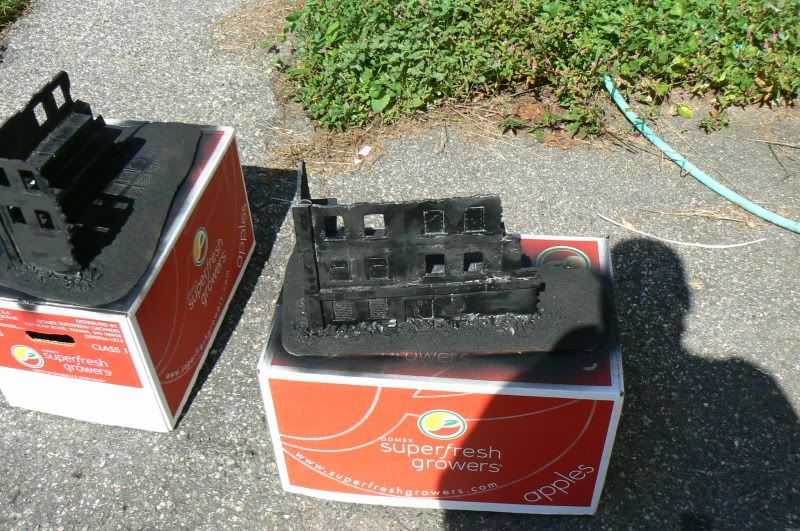
Primed but a wee bit damp
2776
Post by: Reecius
Looking great!
33145
Post by: Rabid Ferret
Really enjoying what I see so far. I love terrain articles/blogs and I wish I would see more of them. I am excited to see it complete.
9191
Post by: lanman
nice. I've been working with hirst arts product for a long while and what you have done for yourself here is fantastic i am gonna have to try something similar
Something i do that helps allot is mix black paint with my water it really darkens the final product and makes chips less apparent
39973
Post by: Galorn
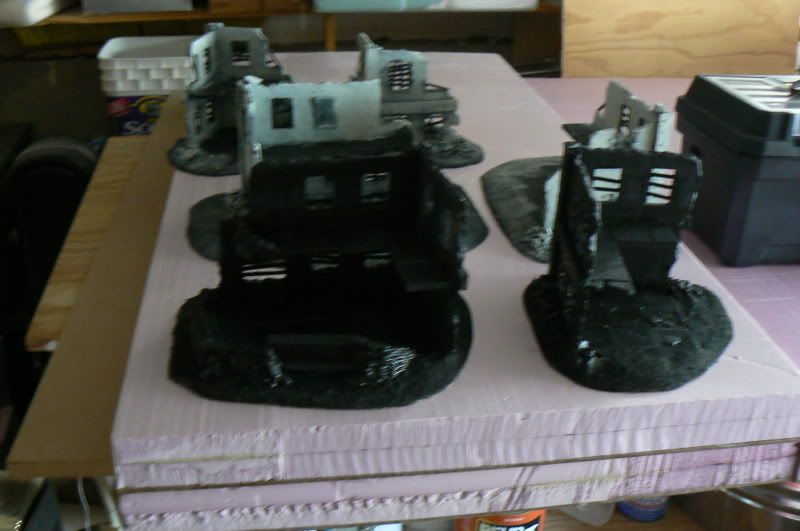
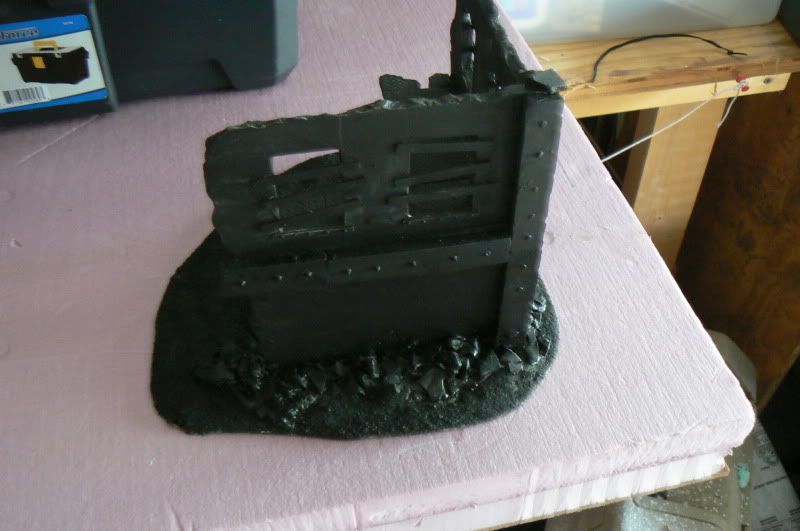
Heres the Progress from Last night.
All medium, and small ruins have been primed.
2 medium Ruins, and 2 Small Ruins have had the walls and bases drybrushed to the "final" pre weathering gray.
On to The Pics
Mruin 01 (primed) overview
Mruin 02 (Walls painted)
Front
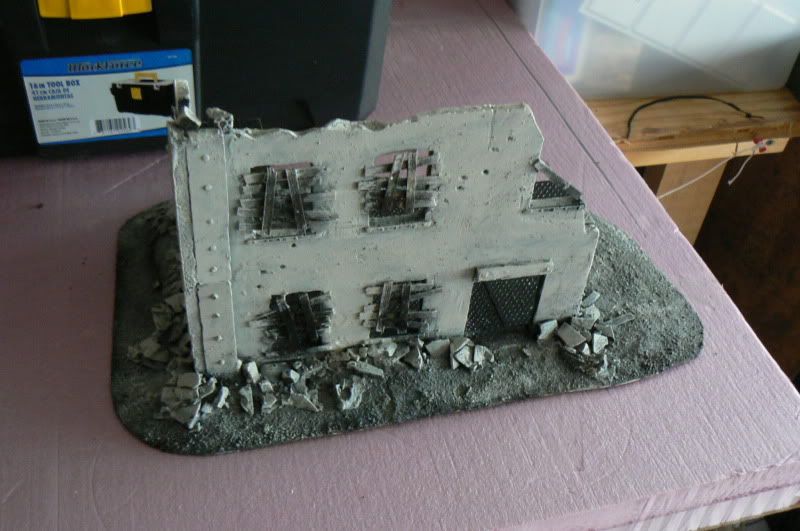
Side
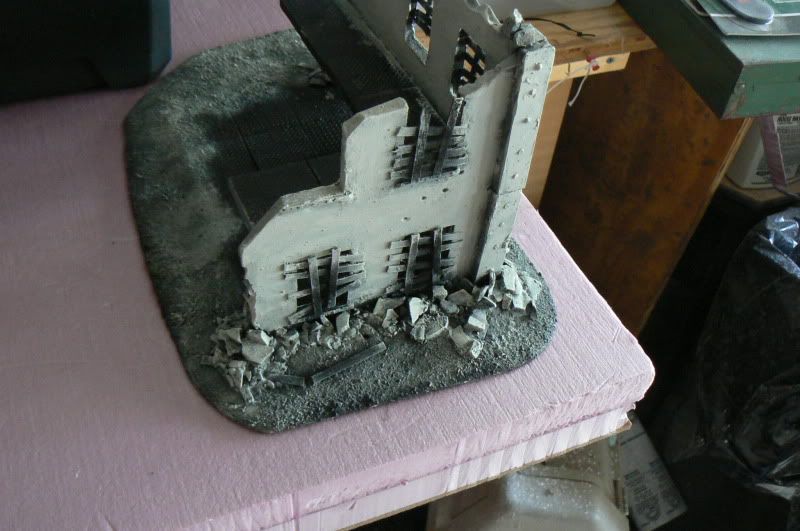
Rear
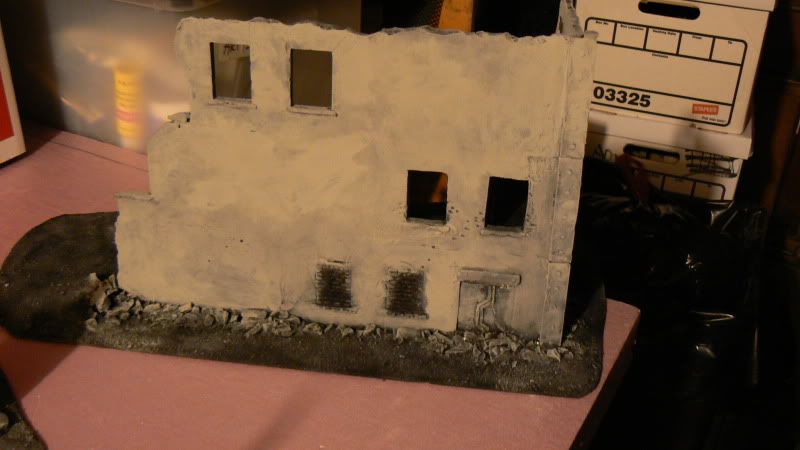
Mruin 03 (primed) overview
The rest (Mruins 02,04,05 Sruins 01,02,03) WIP as of 09/25/2011
Mruin 04 (Walls painted)
Front
Side
Rear
Sruin 02 (walls painted)
Front
Side
Rear
Sruin 01 (walls painted)
Front
Side
Rear

Sruin 03 (Primed)
Front

Side
Rear
Mruin 05 (primed)
Front
Side
Rear
39973
Post by: Galorn
Heres the progress up to.... Now.
Pics
Overall (concrete done) Ruins
Mruin 01 (concrete done)
Front
Side
Rear
Mruin 05 (concrete done)
Front
Side
Rear
Sruin 03 (concrete done)
Front
Side
Rear
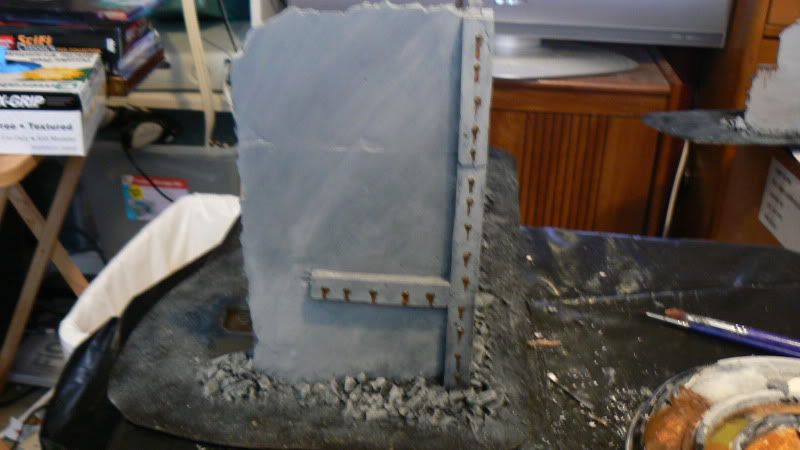
Large Ruins (primed)
LRuin 01
Front
Side
Rear
Lruin 02
Front
Side
Rear
24082
Post by: Flying Pooo
They're coming along nicely!
39973
Post by: Galorn
Flying Pooo wrote:They're coming along nicely!
Thanks
On to Pics of today's Progress
Mruin 05
Front
Side
Rear
Sruin 02
Front
Lruin 01
Front

Side
Lruin 02
Front
17738
Post by: Briancj
Today WAS a great day for spraypainting!
Looking good!
--Brian
20749
Post by: dwanthony
Ambitious project..... and excellent results! the pics look great.
39973
Post by: Galorn
Briancj wrote:Today WAS a great day for spraypainting!
Looking good!
--Brian
Thanks
dwanthony wrote:Ambitious project..... and excellent results! the pics look great.
Thanks
39973
Post by: Galorn
Pics of the Progress to date
Mruin 04
Front
Side

Rear

Sruin 02
Front
Side
Rear
Other Stuff
New Mold in progress. (what it contains is a special surprise for my opponents at Da Boyz GT 2011)
15776
Post by: Space Marine
Those ruins have come along massively since last time I checked and I knew they would look great with paint! Also,I can't wait to find out what the surprise is.
39973
Post by: Galorn
Pics of Last nights Progress
LRuin 01 (Painted)
Front
Side
Rear
Lruin 02 (Painted)
Front
Side
Rear
25278
Post by: Maj.Winters
I love this project so far. Very well done and a great use of casting. The one thing I could say is that the rust drippings on the front of the buildings seem a little intense and overpowering. But just my opinion. Other than that they look amazing!
39973
Post by: Galorn
Maj.Winters wrote:I love this project so far. Very well done and a great use of casting. The one thing I could say is that the rust drippings on the front of the buildings seem a little intense and overpowering. But just my opinion. Other than that they look amazing!
Thanks. the rust streaking will probably get toned back a hair before I do the weathering.
Any way on to today's progress. (Took maybe an Hour, then I went off to a political function with my Mother...)
Mruin 02
Front
Side
Rear
SRuin 03
Front
Side
Rear
24082
Post by: Flying Pooo
Your ruins look great painted. That rust effect is awesome!
39973
Post by: Galorn
Flying Pooo wrote:Your ruins look great painted. That rust effect is awesome!
Thanks
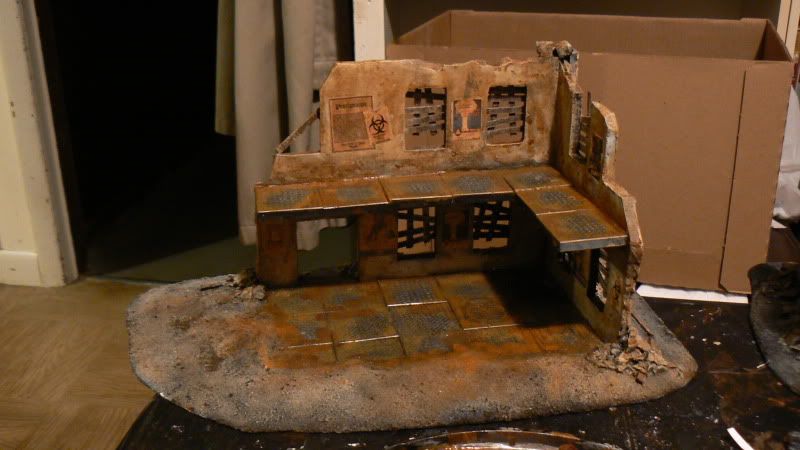
On to the Pics of Yesterday Evenings Progress
MRuin 04(Metals)
Front
Side
Rear
Sruin 02(Metals)
Front
Side
Rear
24082
Post by: Flying Pooo
This just keeps getting better!
You're going to have one awesome table with all this great terrain.
37519
Post by: bigfish
The most finished one is EpiC!!!! loving the sand bags and the stained walls
39973
Post by: Galorn
Flying Pooo wrote:This just keeps getting better!
You're going to have one awesome table with all this great terrain.
That's the idea anyway.
bigfish wrote:The most finished one is EpiC!!!! loving the sand bags and the stained walls
Thanks. The Ruins are all Painted, now I just need to add posters, weathering, the table to put them on... before the end of next week.... DOOOOOOOOOOOM.
I'll get pics of the ruins up this evening.
Automatically Appended Next Post: Sorry about the Delay. Here is today's progress.
Mruin 01
Front
Side

Rear
Mruin 03
Front
Side
Mruin 05
Front
Side

Rear
Sruin 02
Front

Side
Rear
31262
Post by: talons 58
I just found this thread and have read it twice so far! Great job! 
39973
Post by: Galorn
talons 58 wrote:I just found this thread and have read it twice so far! Great job!
Thanks
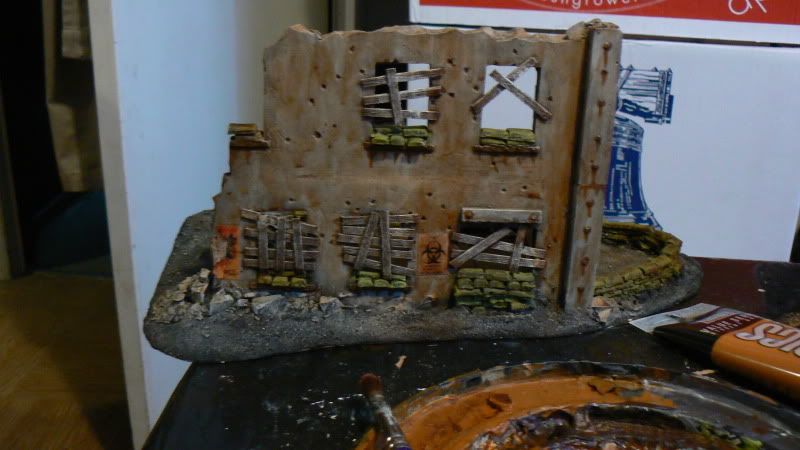
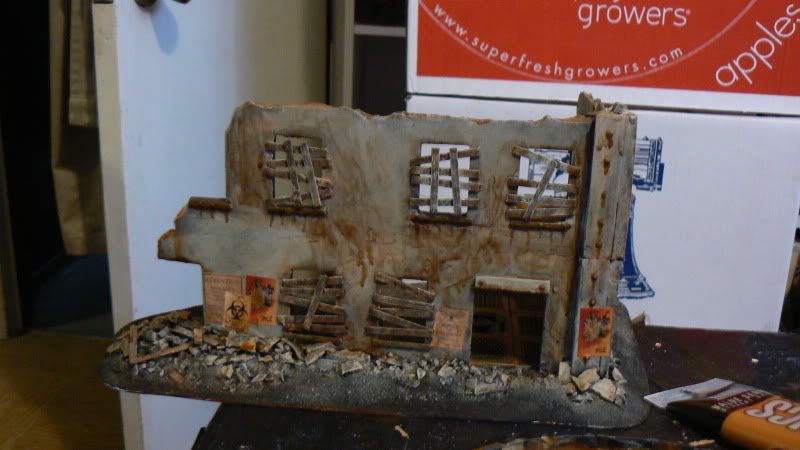
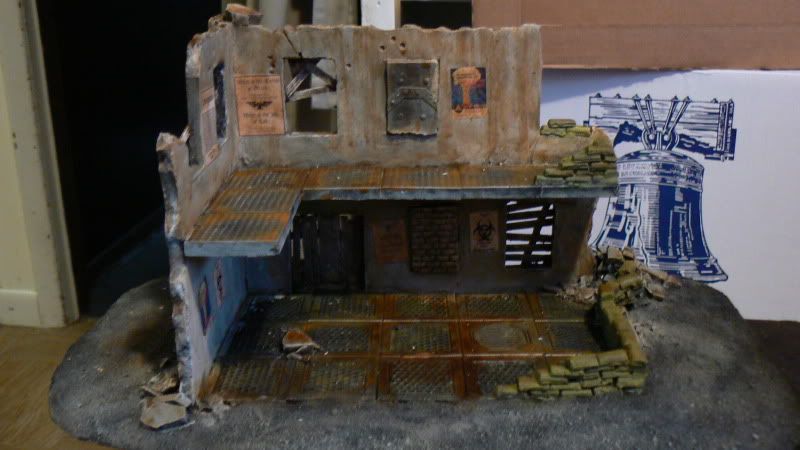
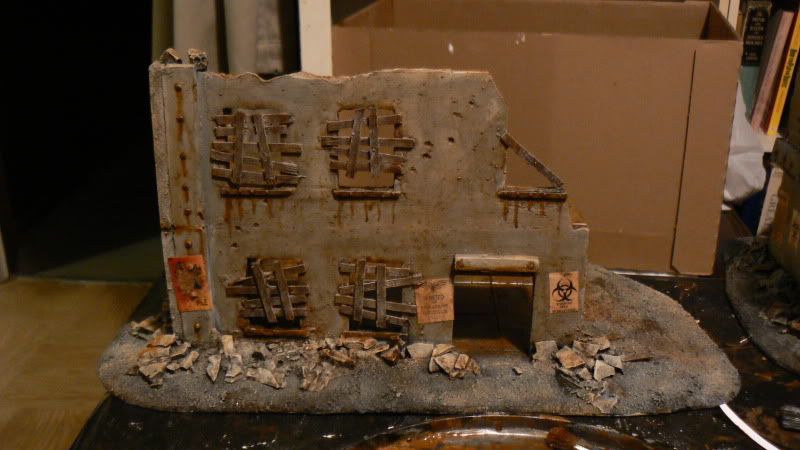
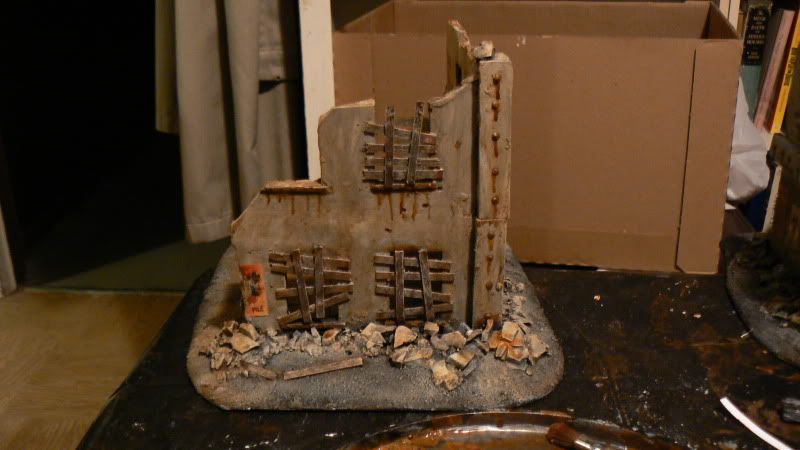
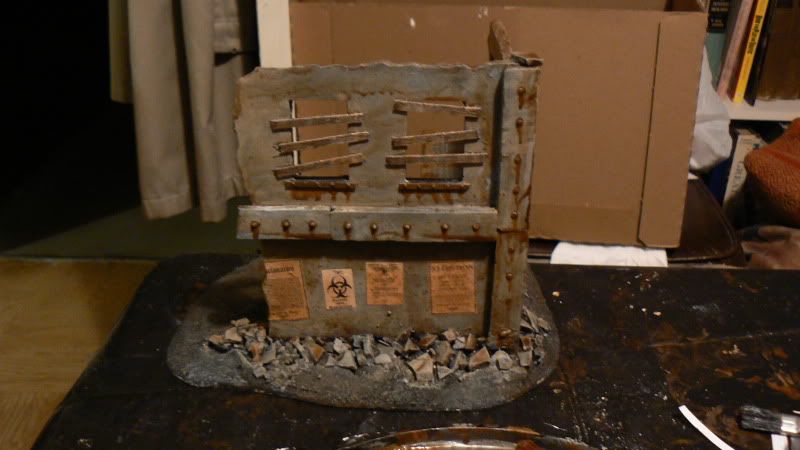
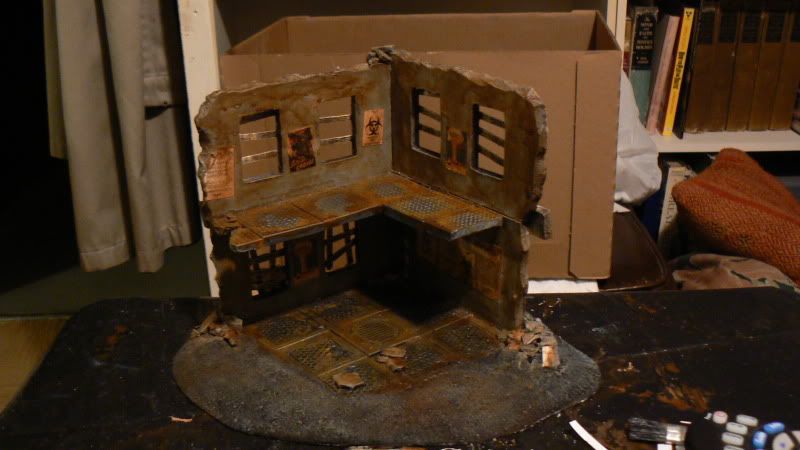
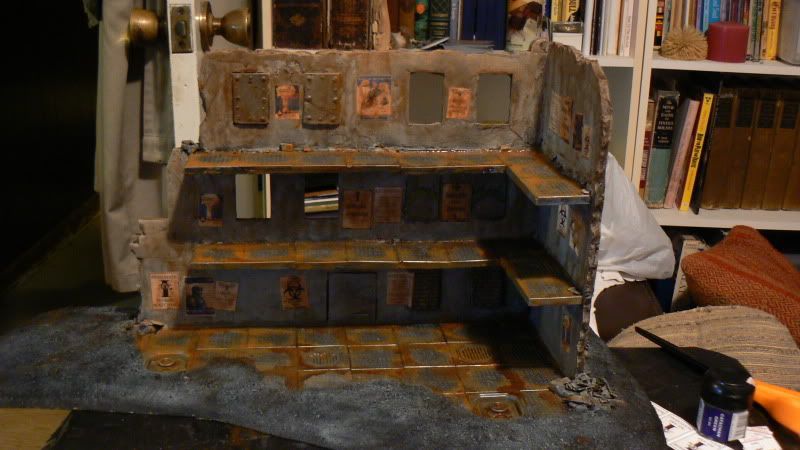
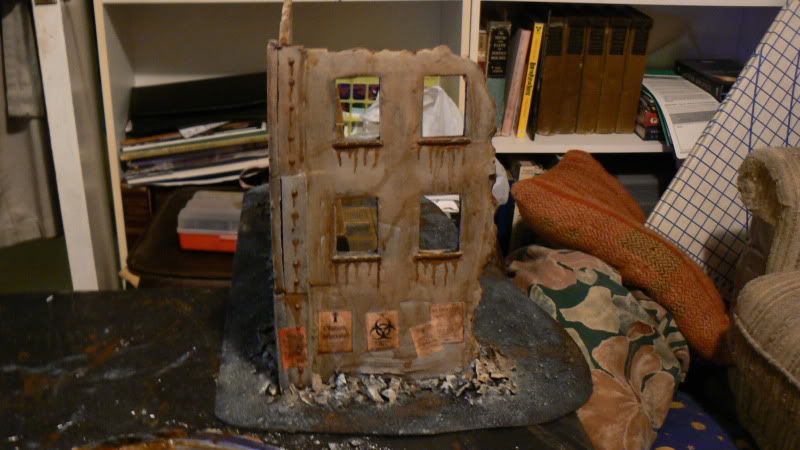
Ive just Postered and weathered (no ground veg yet...) Sruin 02, and Mruin 05
On to the Pics
Mruin 05
Front
Side
Closeup of Posters

Rear
Sruin 02
Front
Side
Rear(EDIT: Gah Wrong Pic)
31553
Post by: LordWynne
Real nice and great looking, I would be afraid to do all that in plaster as my terrain gets tossed around abit. I tend to use 5mm foam board and looks well so-so lol.
43840
Post by: Deathshead420
Wow! Really good job on the painting.
1o/1o
The rust is really well done, and the rubble looks sick too.
24082
Post by: Flying Pooo
It's amazing how the added weathering and the posters can make your ruins look so much better (which I thought would be very difficult to do).
37519
Post by: bigfish
looking so good with the posters on there as well
39973
Post by: Galorn
bigfish wrote:looking so good with the posters on there as well
Thanks
Flying Pooo wrote:It's amazing how the added weathering and the posters can make your ruins look so much better (which I thought would be very difficult to do).
Thanks
Deathshead420 wrote:Wow! Really good job on the painting.
1o/1o
The rust is really well done, and the rubble looks sick too.
Thanks
LordWynne wrote:Real nice and great looking, I would be afraid to do all that in plaster as my terrain gets tossed around abit. I tend to use 5mm foam board and looks well so-so lol.
Thanks. The material I'm using is much stronger than Plaster, as far as using foamboard goes... So does Bugbait (on Warseer, and other places) mostly you need to edge it to hide the foam edge and do something to keep it from warping.
Anyway On to the Pics of Last nights work. There would have been two more ruins but I got distracted by coverage of Occupy Boston.
Mruin 01
Front
Side
Rear
Mruin 03
Front
Side
Rear
36711
Post by: Depraved
Looking great! Posters are great! I love adding posters to my terrain pieces. I like how you you executed this project.
39973
Post by: Galorn
Depraved wrote:Looking great! Posters are great! I love adding posters to my terrain pieces. I like how you you executed this project.
Thanks.
Had a mishap with the tabletop... Will shortly be running out to a Home Despot or similar to do a last attempt to end run things. Bleh. On to todays progress so far.
Pics.
Mruin 02,
Front
Side
Rear
Sruin 01
Front
Side
Rear
 Automatically Appended Next Post: Automatically Appended Next Post: Last of the not LRuins is now weathered
Pics of tonights progress
Mruin 04
Front
Side
Rear
Sruin 01
Front
Side
Rear
39973
Post by: Galorn
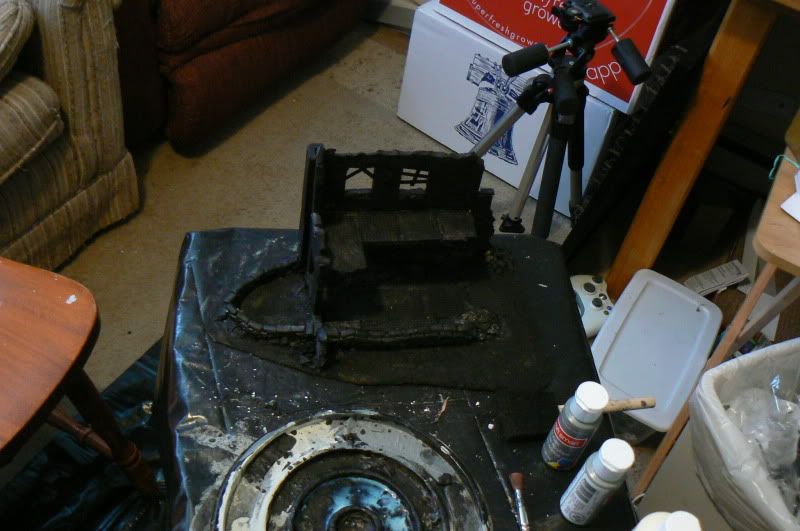
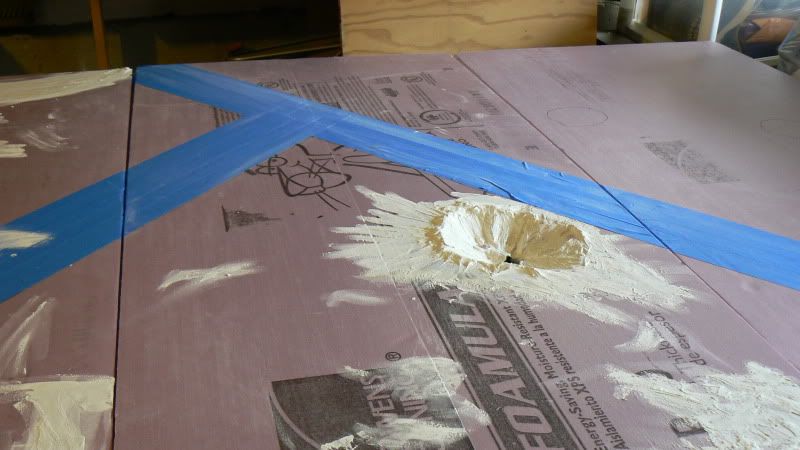
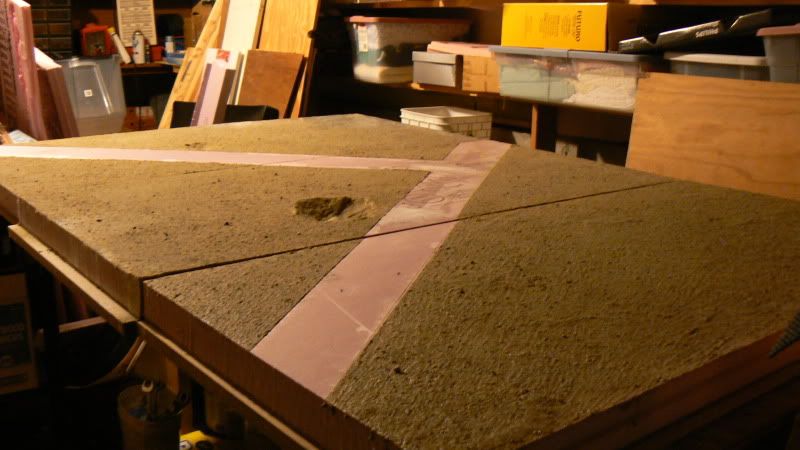
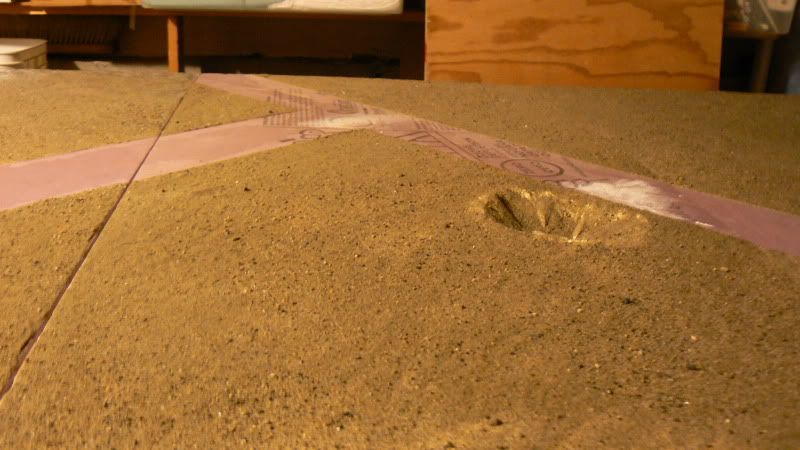
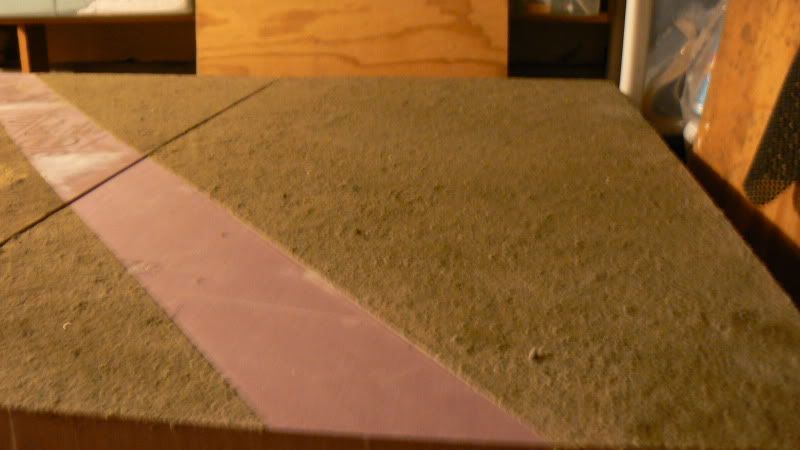
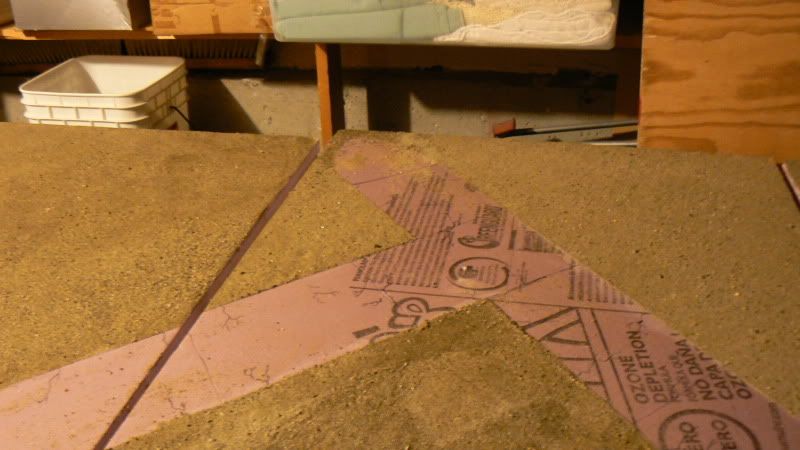
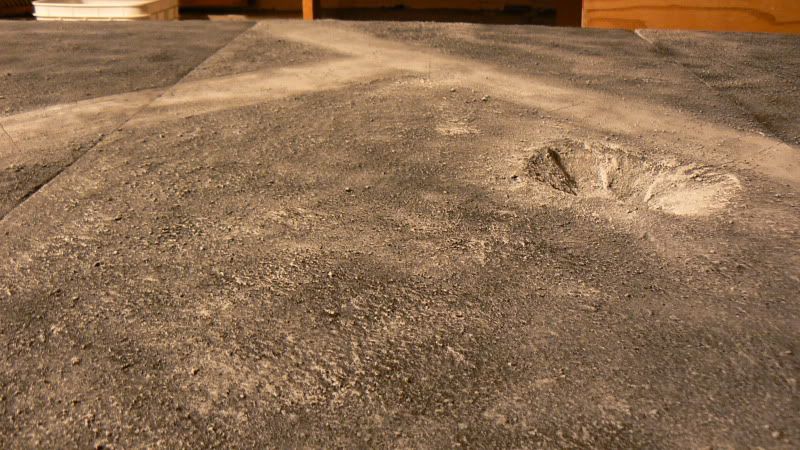
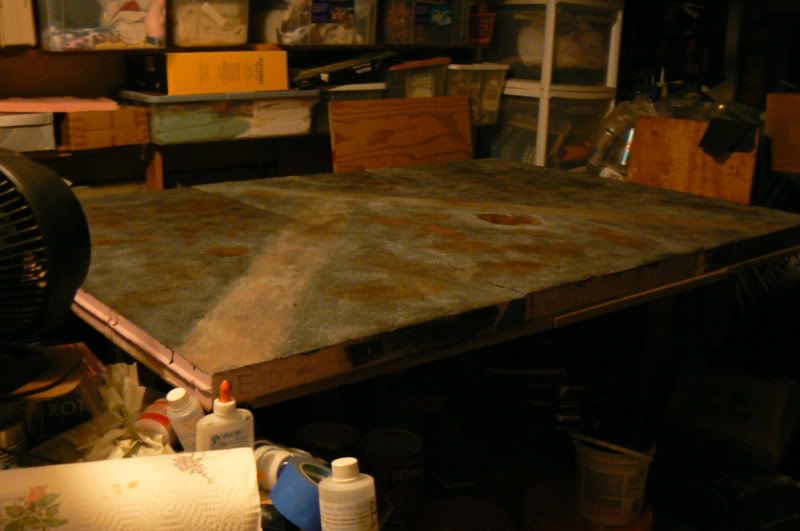
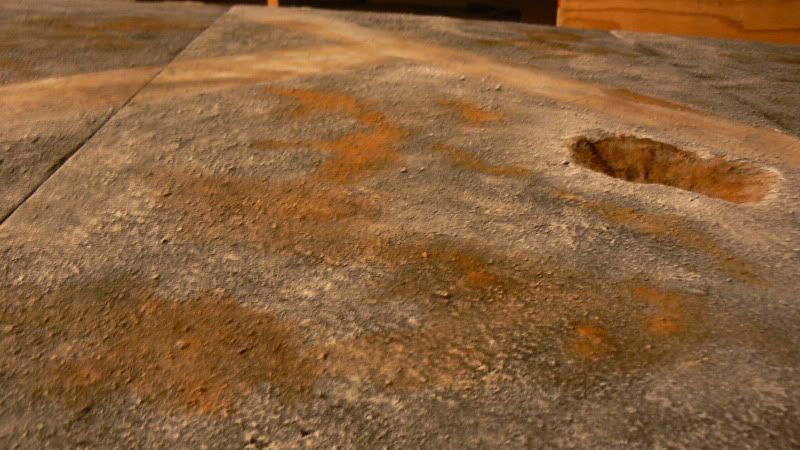
So my Last Shot at a 3d tabletop (not just a painted/textured surface) WORKED! Woot! I will have a top to put the ruins on after all. Due in part to time constraints it won't have all the things on it I had intended initially, but they can be added (relatively easily) later.
On to the Pics
The blue masking tape is denoting where I will be adding in roads.
1st segment (spackling)
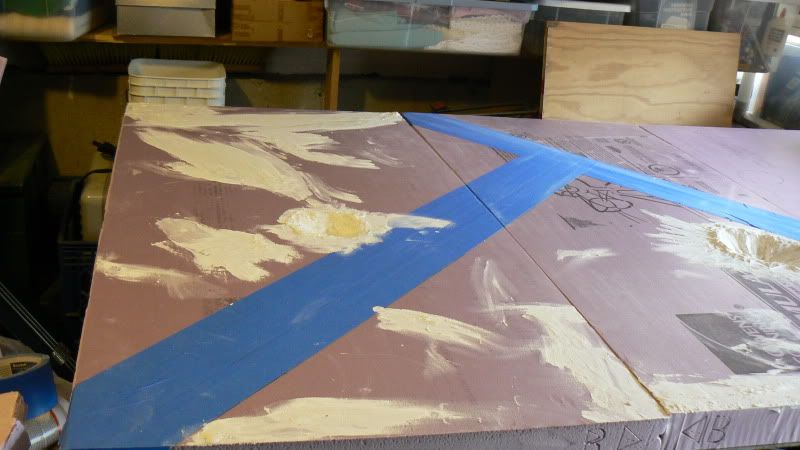
2nd Segment(spackling)
3rd segment(spackling)
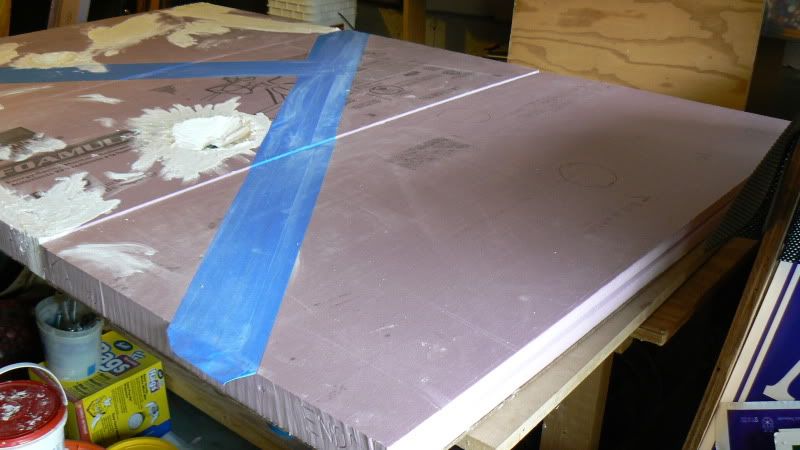
Closeup of the Big crater(spackling)
 Automatically Appended Next Post: Automatically Appended Next Post: Well the Last of the Ruins are now weathered. That's right folks all that's left is the top to put it on
On to The Pics
Lruin 01
Front
Side
Rear
Lruin 02
Front

Side
Rear
39973
Post by: Galorn
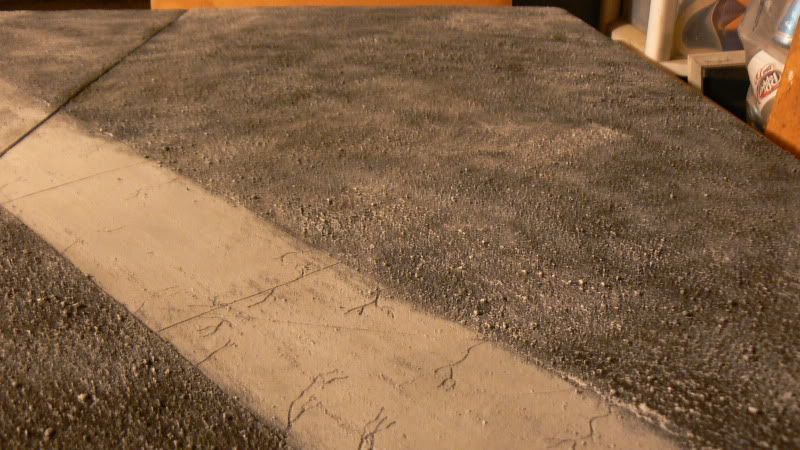
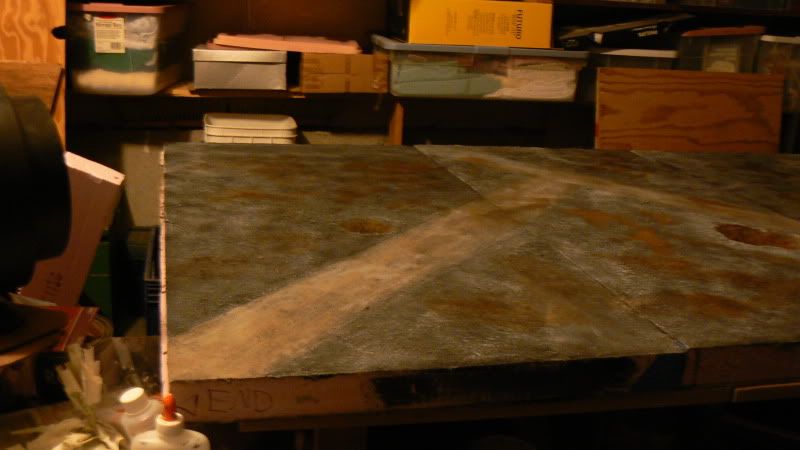
Well I've got the Tabletop sanded (sand gluing in progress waiting on glue to dry...)
Ive started to scribe in Roadway Panels and cracks but those will have to wait for the next round of Pics...
On to the Pics of sand and drying glue... Wheee... 
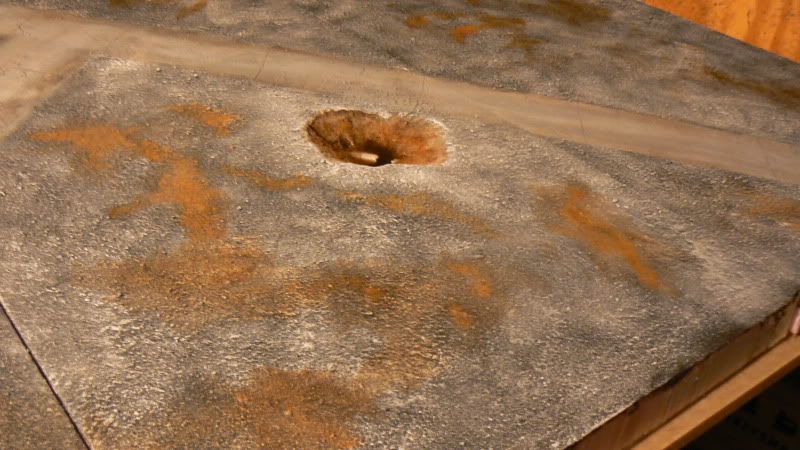
Overview
Segment 1
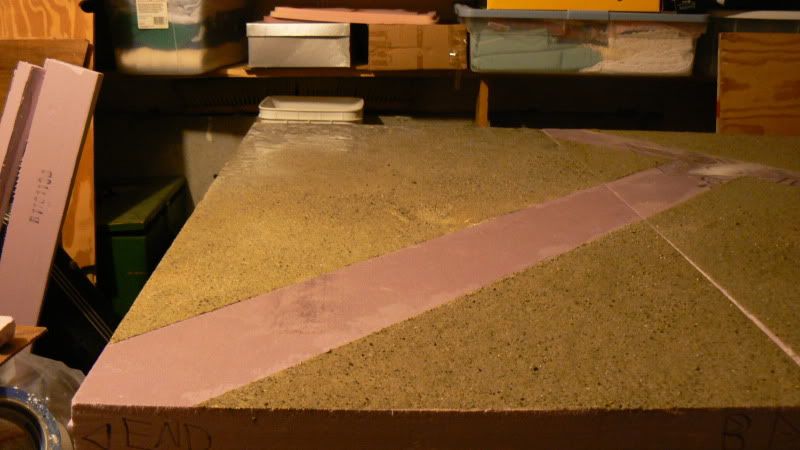
Segment 2
Segment 3
24082
Post by: Flying Pooo
This is going to be one awesome table!
9804
Post by: Ultrafool
Just epic man, makes me want to build my own table
39973
Post by: Galorn
Flying Pooo wrote:This is going to be one awesome table!
Yep. That's The Idea.
Ultrafool wrote:Just epic man, makes me want to build my own table
Thanks, You should (best Ahnould voice) "DOOOO EEEET. Dooo eeet NOW."
Table needs to be DONE in apx five days... (of which I'll have apx 1-2 hrs to work on it tomorrow, and an unknown amount of time next week (depends on my work schedule, any day I'm working probably no more than 1-2 hrs available to work on it unless I have the following day off.) It will be getting loaded into my van on next Thurs for travel...
the GT is Da Boyz GT 2011 in Rochester NY.
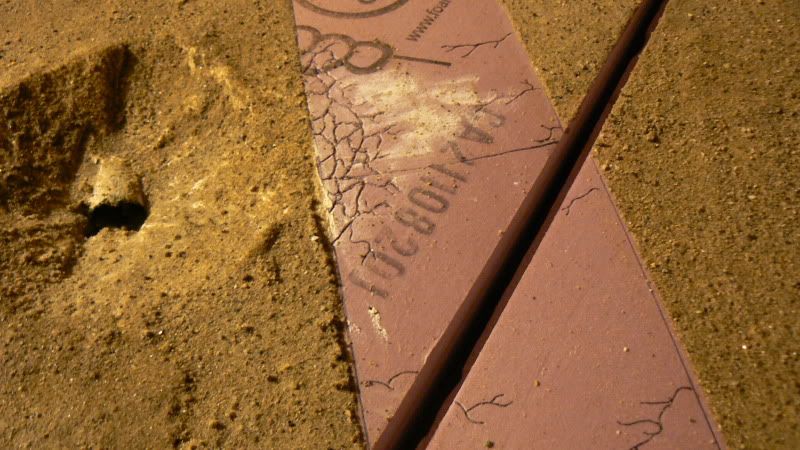
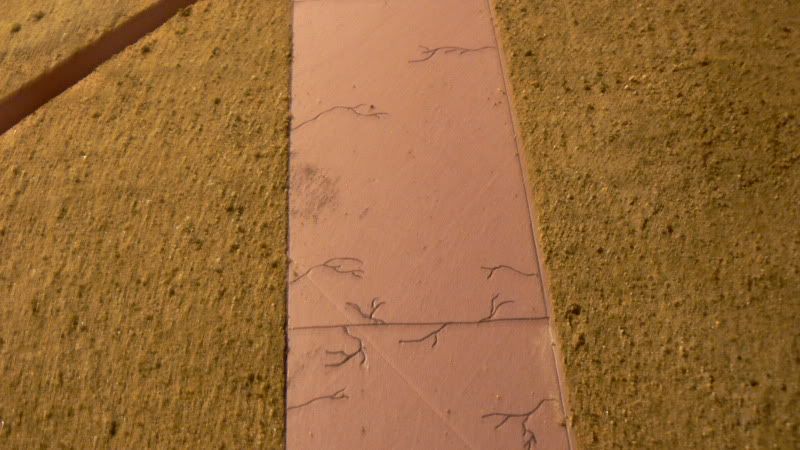
Automatically Appended Next Post: Pics of the Scribed in "cracks" in the roadways, as well as the "panel " separators

24082
Post by: Flying Pooo
Those cracks in the roadway look great!
Are you also going to make small shell crater impacts and add lots of debris to the road? Because that would look awesome.
I Hope you don't have to compromise the aesthetics of this project to finish it in time.
36892
Post by: Wazzdig Dagga
Those ruins look great! nice job.
37231
Post by: d-usa
The posters add an awesome touch, and I love the cracks in the road. I got some pink foam in the garage that has been glued on wood and has been waiting for me to do something with it for a few months now. I really need to get working on that.
39973
Post by: Galorn
Flying Pooo wrote:Those cracks in the roadway look great!
Are you also going to make small shell crater impacts and add lots of debris to the road? Because that would look awesome.
I Hope you don't have to compromise the aesthetics of this project to finish it in time.
Maybe later, but I dont really have much time to get it done... 
Wazzdig Dagga wrote:Those ruins look great! nice job.
Thanks
d-usa wrote:The posters add an awesome touch, and I love the cracks in the road. I got some pink foam in the garage that has been glued on wood and has been waiting for me to do something with it for a few months now. I really need to get working on that.
Thanks. Do it. you know you can make it awesome.
17244
Post by: The Good Green
Looking good. Great buildings. That table is gonna by fantastic!
20956
Post by: Empchild
Excellent work on this Galorn!!! For those interested btw galorn does sell terrain and has made his own small company for it so if you want some great terrain pm him. It's a shamless plug for him but it's some great work.
39973
Post by: Galorn
The Good Green wrote:Looking good. Great buildings. That table is gonna by fantastic!
Thanks. I sure hope so that was the idea after all.
Empchild wrote:Excellent work on this Galorn!!! For those interested btw galorn does sell terrain and has made his own small company for it so if you want some great terrain pm him. It's a shamless plug for him but it's some great work.
Thanks for the plug. Empchild has a really Kickass Bitz biz that has supplied some really neat stuff I'll be using in the future.
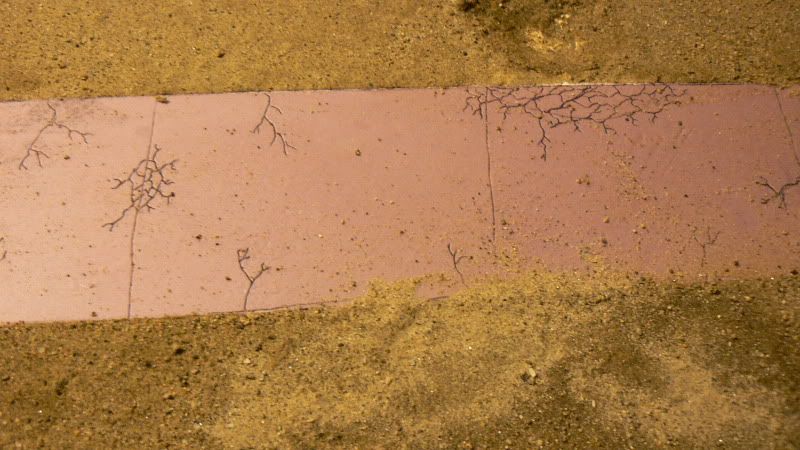
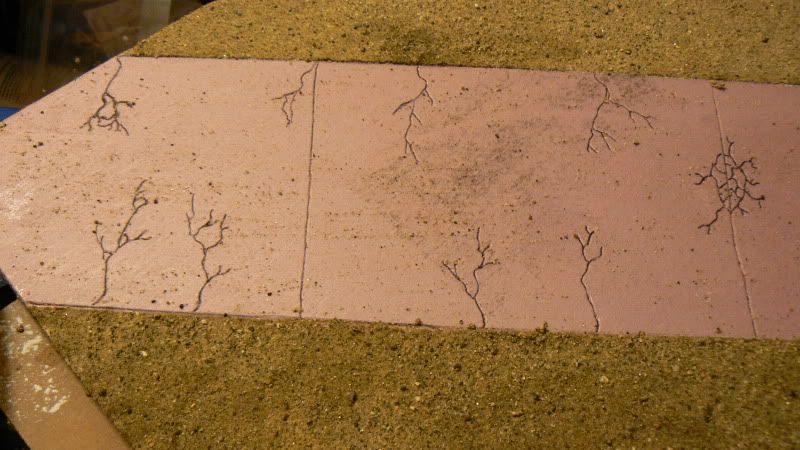
Anyway on to The Pics of Progress
Overview
Segment 1

Segment 2
Segment 3
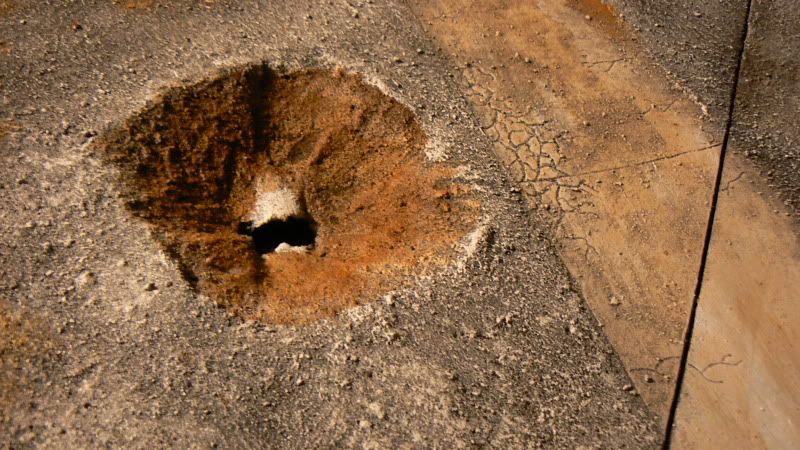
Closeup of some cracks
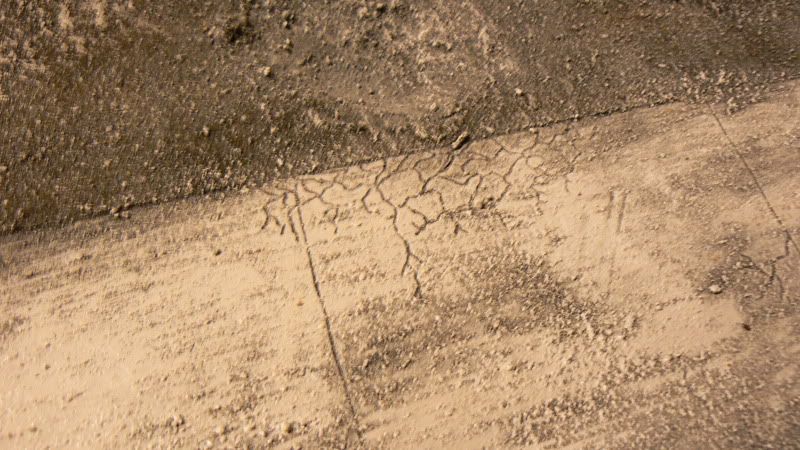
Closeup of the Big crater

24082
Post by: Flying Pooo
Looking good!
39973
Post by: Galorn
Flying Pooo wrote:Looking good!
Thanks Pooo
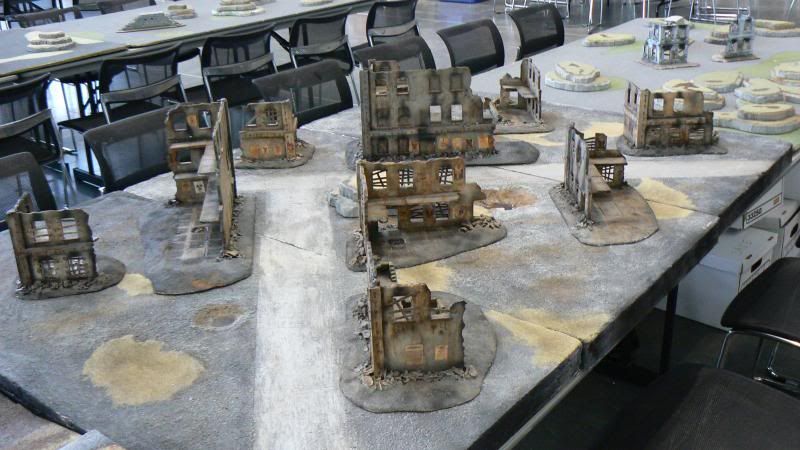
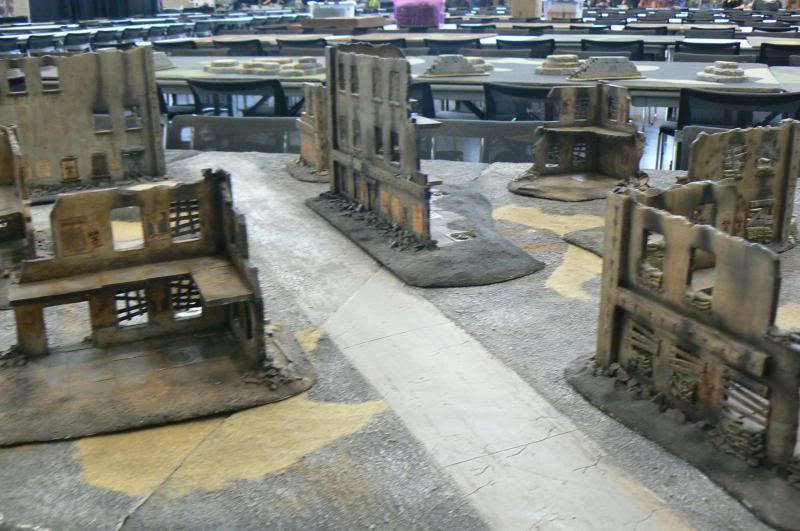
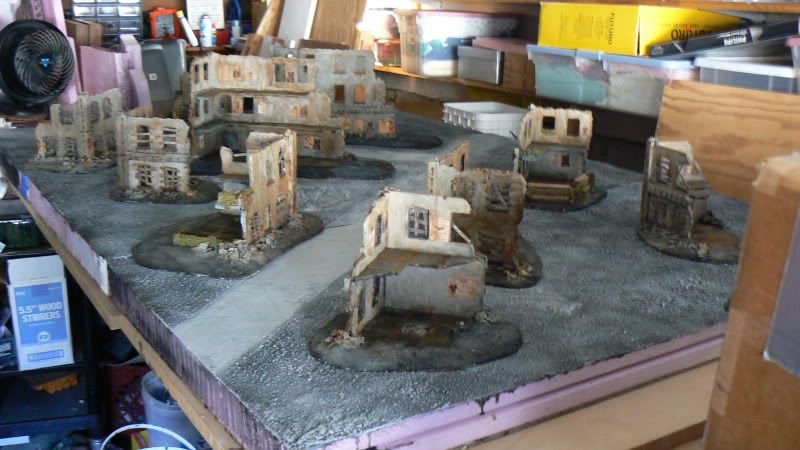
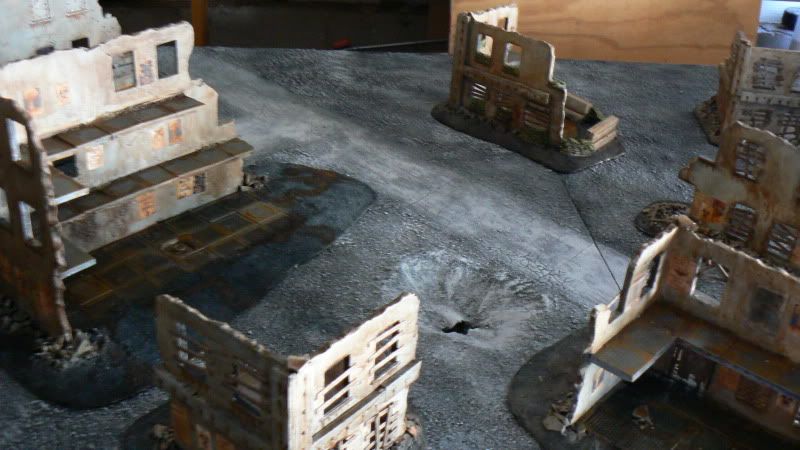
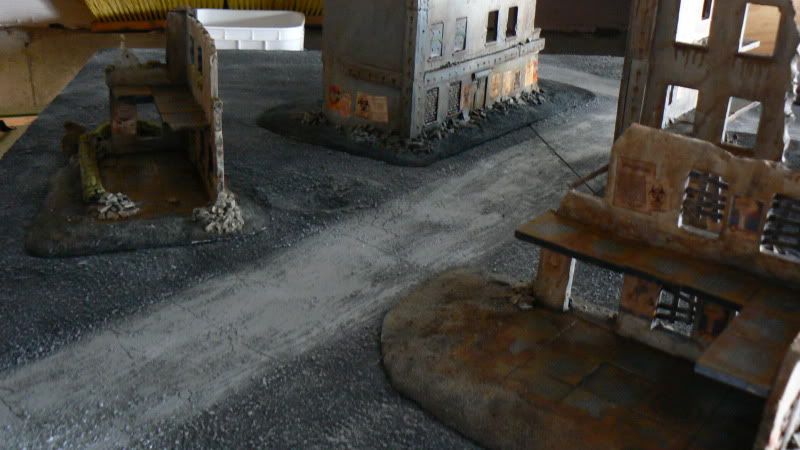
Here are some Pics of all of the ruins set up on the 99% finished tabletop. (I need to add weathering washes, and some waterFX to the Large Crater to keep it from being a dice eater.)
so without further ado...
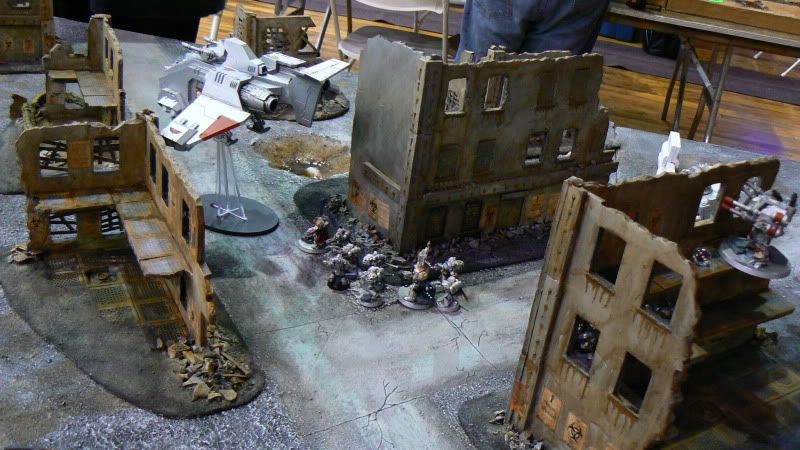
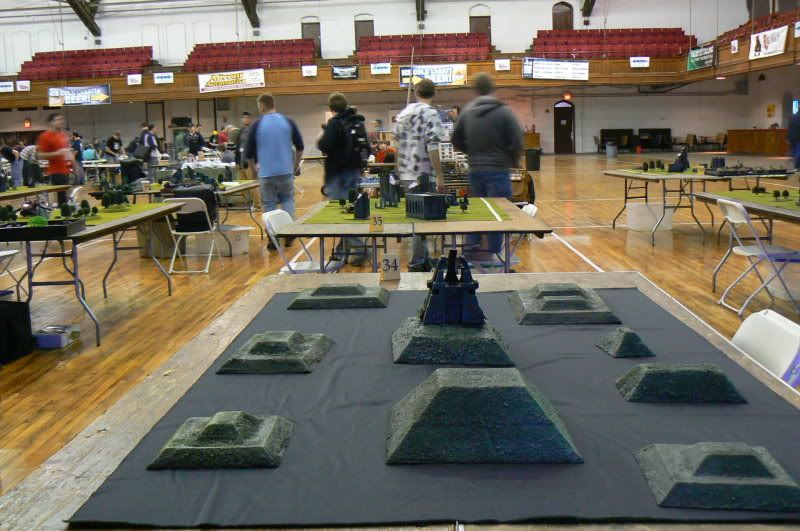
Raven Sector San Lorenzo
+++Incoming Transmission+++
+++Surveillance flight 4587358.245.589+++
Raven sector appears clear of enemy forces at this time. The sector's defendors are currently responding to a a threat from (Classified Sigma Six Alpha) Sector.
Pic captures follow.
Raven sector South on approach.
Gavin Way South

Servitor Feed Gavin way South

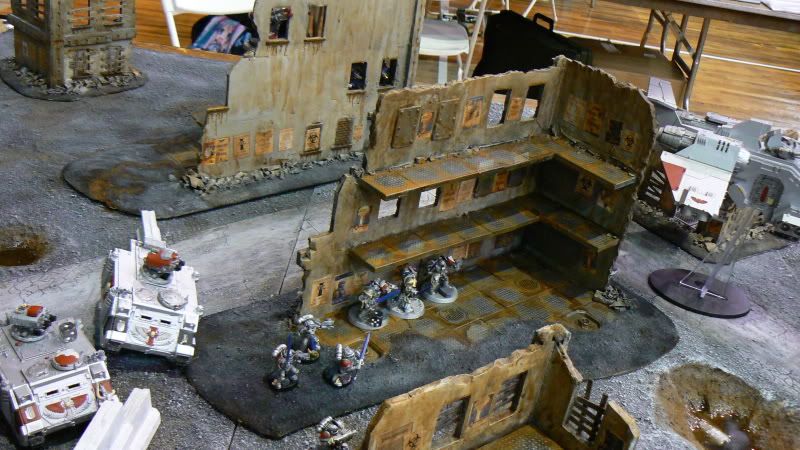
Raven Sector Over flight
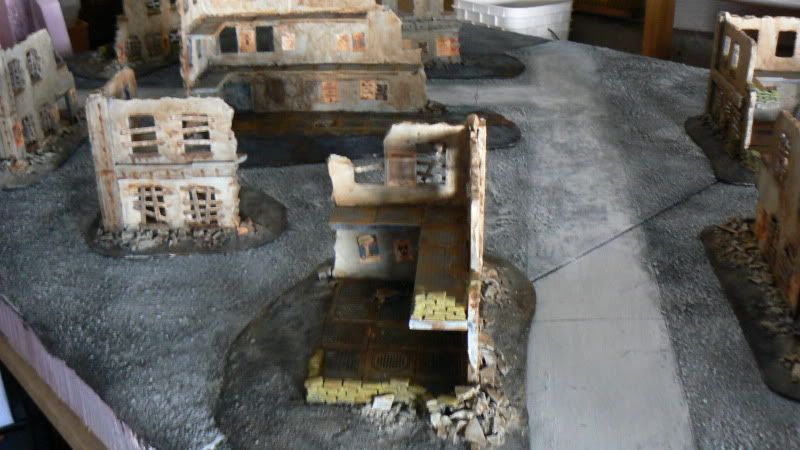
Raven Sector Sewer Breech located.
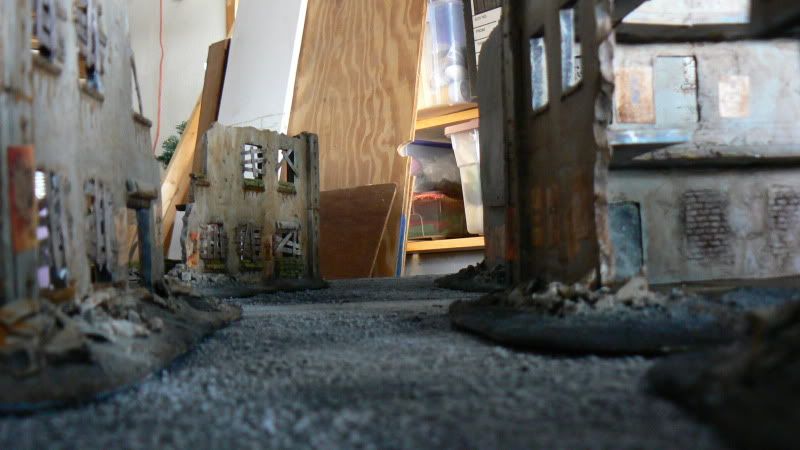
Raven Sector Servitor feed alley 1258547
Via Lorenzo
Raven Sector North on departure
+++ End Transmission+++
10667
Post by: Fifty
Awesome Sauce.
24082
Post by: Flying Pooo
It's awesome to see it all come together. They look awesome!
Great job man!
39973
Post by: Galorn
Fifty wrote:Awesome Sauce.
Thanks.
Flying Pooo wrote:It's awesome to see it all come together. They look awesome!
Great job man!
Thanks.
I've added some weathering washes to the tabletop. After those dry I need to do a light drybrush of the roadway and add waterfx to the large crater. After that the Tabletop is done. I'll get pics up tomorrow after I get out of work.
39973
Post by: Galorn
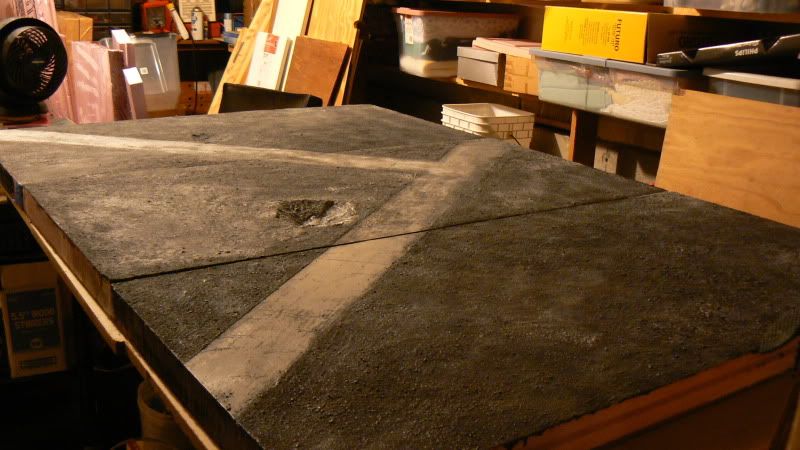
Here are the Pics.
Overview
Section 1
Section 2
Section 3

Large Crater.
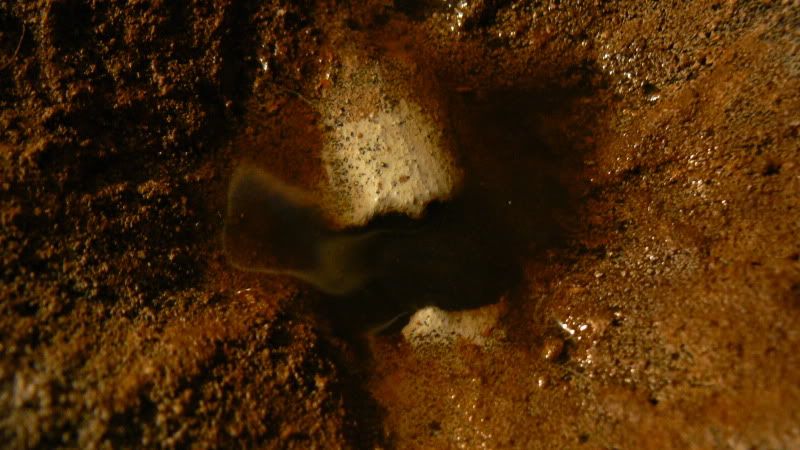
I've added water FX It's fairly cold here so I'll check on em in the morning to see if the water FX has begun to set. I'll post Pics If it has otherwise sorry folks will be waiting for a bit...
17738
Post by: Briancj
I can't wait to see armies play out on this table!
39973
Post by: Galorn
Briancj wrote:I can't wait to see armies play out on this table!
Me Either.
Got out of work at 7pm... Got home 7:15pm got distracted... Just took Pics. Am Posting now.
Big Crater With WaterFX (Magic water made by Unreal Scenics)
Overview

Long shot Overview
Closeup
Different Angle

Small Crater With WaterFX (Magic water made by Unreal Scenics)

16379
Post by: baneofmorgoth
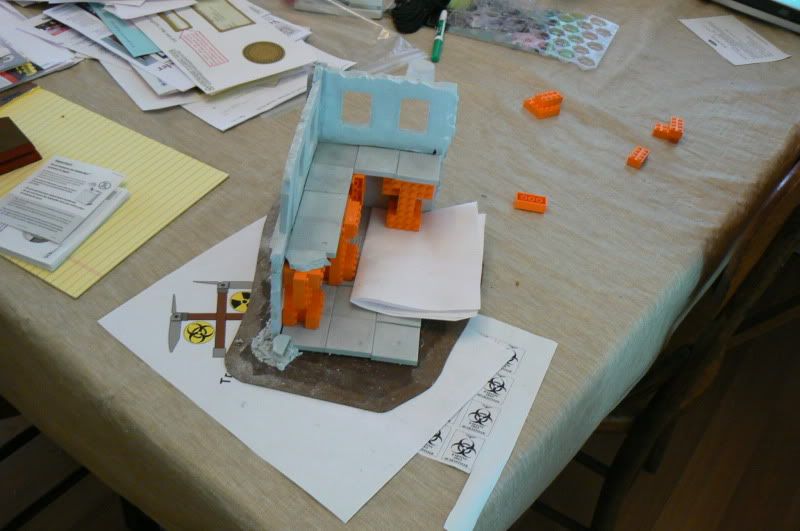
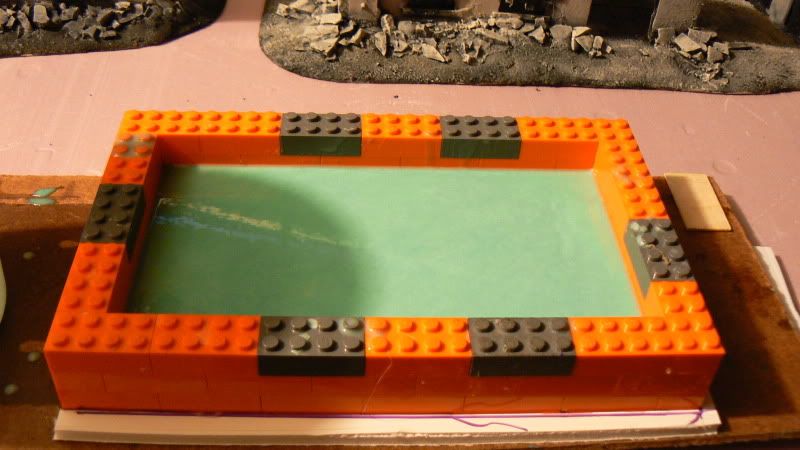
Galorn wrote:The Current Set up
Closer to the molds
Next new mold in progress (Barricades, and Small wall with no windows.)
Automatically Appended Next Post:
And I've decided to build a tabletop for this project to live upon as well ( I really must be some sort of Masochist especially as I am starting a new job this week...)
Dude, are those...Legos? 
17738
Post by: Briancj
Lego Bricks are some of the BEST mold form materials out there. You can build almost any size and shape, and they are water-tight.
27967
Post by: AfroCelt
sorry if this is already posted, but what products are your molds made of? I'm on the smooth-on website, and wondering if thats the OOMOO (doesn't need a scale) or one of the mold max lines.
<--has a few hirst art molds and is making a large scale project. Casting sections all at once is HUGE.
39973
Post by: Galorn
Briancj wrote:Lego Bricks are some of the BEST mold form materials out there. You can build almost any size and shape, and they are water-tight.
Yep
AfroCelt wrote:sorry if this is already posted, but what products are your molds made of? I'm on the smooth-on website, and wondering if thats the OOMOO (doesn't need a scale) or one of the mold max lines.
<--has a few hirst art molds and is making a large scale project. Casting sections all at once is HUGE.
It's a product called "Mold Star 15" Automatically Appended Next Post: I only got a few Pics of Models on the table. I'll get those up tonight or tomorrow.
The GT was... Okay. there were some SNAFU and FUBAR things that caused a snowball effect of holding up the start of a few things but, on the whole I had fun.
39973
Post by: Galorn
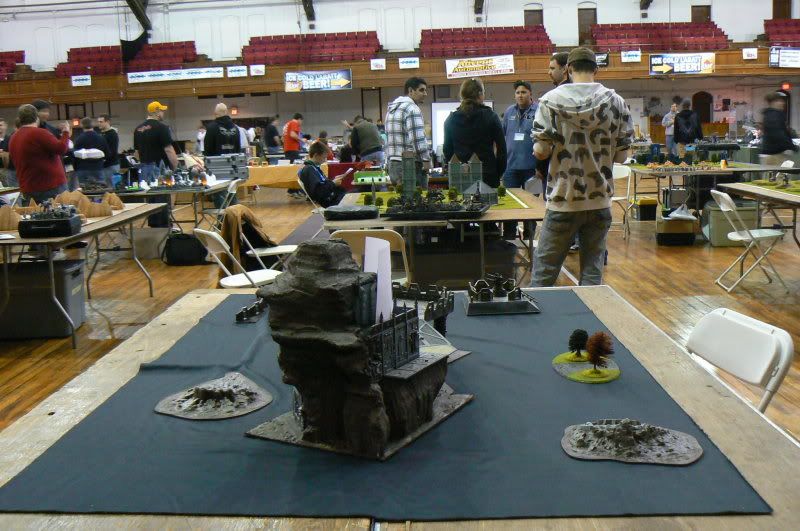
Pics of the "Raven sector" table in use.

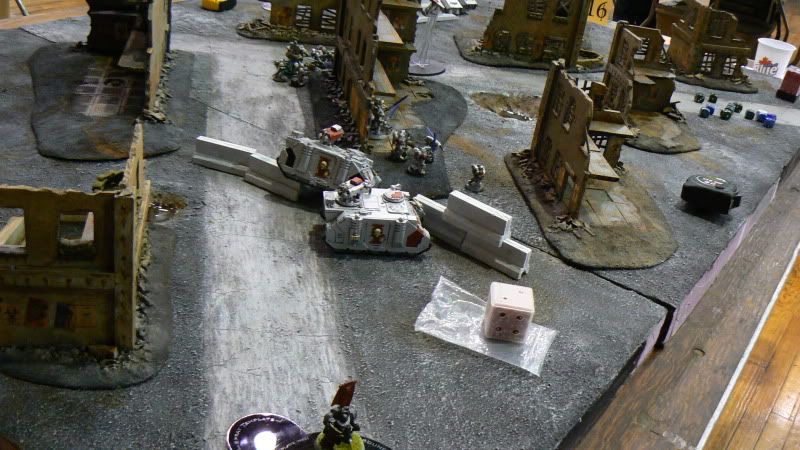
Aaaaaandd here is a Pic of a table that just needs to well to be kind. Die. (really I think it should be burned but that's just me...)
Thankfully I didn't end up on this table, I ended up on THIS one (which was actually worse.) It LOOKED cool. (crappy GW vacuform craters aside) but played Awful.
 Automatically Appended Next Post:
 San Lorenzo Raven Sector Will be in residence at Tabletop Arena hobbies and games in Lowell Ma for the immediate future. Swing by and Check it out...
48594
Post by: dsteingass
Stunning!
17738
Post by: Briancj
Congrats on your table win!
--B.
39973
Post by: Galorn
Briancj wrote:Congrats on your table win!
--B.
Thanks. Automatically Appended Next Post: dsteingass wrote:Stunning!
Thanks
40490
Post by: HAZZER
LOove the buildings man they looks good!
HAZZER
46192
Post by: mxwllmdr
This was beautiful, but all that resin is very expensive. How many gallon units did you go through? And how much Mold Star? I really want to get and use some of those types of products but the money just isn't there.
I am hoping for my table that I will be able to replicate a lot of the same look with a modicum of financial expenditure on Styrene and square tubing for framing. Although, that broken edge concrete look is absolutely amazing.
39973
Post by: Galorn
HAZZER wrote:LOove the buildings man they looks good!
HAZZER
Thanks.
mxwllmdr wrote: This was beautiful, but all that resin is very expensive. How many gallon units did you go through? And how much Mold Star? I really want to get and use some of those types of products but the money just isn't there.
I am hoping for my table that I will be able to replicate a lot of the same look with a modicum of financial expenditure on Styrene and square tubing for framing. Although, that broken edge concrete look is absolutely amazing.
The mold making silicone is kinda expensive but totally worth it (I have a Smooth on products dealership near me so I didn't need to spend money on shipping.)
I used around 60-70$ worth of Moldstar 15 for ALL of the molds for this project.
http://www.reynoldsam.com/Mold-Star%3D-15,-1/c1306/index.html?catdepth=1
As far as how much the resin cost... I didn't use resin. I used a Gypsum based product (dental stone) called "excalibur" It costs around 40$ per 50 pound box. (I used around a box to cast everything)
46192
Post by: mxwllmdr
My dentist actually recommended that, alginate he called it. he said a five pound bucket was cheap.
My wife is nixing the Mold Star purchase at the moment, but I am hoping she will come around. There is so much I want to do with casting.
48594
Post by: dsteingass
Me too! I really want to start casting.
39973
Post by: Galorn
mxwllmdr wrote: My dentist actually recommended that, alginate he called it. he said a five pound bucket was cheap.
My wife is nixing the Mold Star purchase at the moment, but I am hoping she will come around. There is so much I want to do with casting.
Are you military at Ft Leonard wood? I think that Reynolds has a military discount. call em and ask.
dsteingass wrote:Me too! I really want to start casting.
Where are you located man? PM me I might have some goodies I could send you to "enjoy"
46192
Post by: mxwllmdr
Who is Reynolds?
39973
Post by: Galorn
mxwllmdr wrote:Who is Reynolds?
the folks I got my RTV silicone from. (a Distributor for smooth on) Link to their webstore folows
http://www.reynoldsam.com/Mold-Star%3D-15,-1/c1306/index.html?catdepth=1
46192
Post by: mxwllmdr
Yeah, okay, thats where I got my price quotes from. I just didn't read the whole website because the wife didn't approve the expenditure.
Yet.......
39973
Post by: Galorn
mxwllmdr wrote:Yeah, okay, thats where I got my price quotes from. I just didn't read the whole website because the wife didn't approve the expenditure.
Yet.......
Heh I recommend the "trial" pack to start with (relatively cheap) and gives about a half gallon size volume (800ML) of RTV silicone.
24297
Post by: Viktor von Domm
mate i just have been led here by dave...that work of yours is verging on the epic...i am totally lost...and it is bringing up old memoreis,fond ones from playing the old fallout games...the ruins just look so beautiful... i am torn between the bricked up window/doorway and the barred windows...these are so sweet looking!
many thanks for sharing this stuff...
and i have to see if that dentist stuff could be something for me here in germany too...i heard quite often it is just the thing to be using...
i hate to say it but for the most part i just had to massivly scroll through your many pics... so i have to ask you...how do you glue those differnt mold products together? what glue are you using?
i hope this thread will be updated soon!
cheers and thanks for the sweet stuff...vik
39973
Post by: Galorn
Viktor von Domm wrote:mate i just have been led here by dave...that work of yours is verging on the epic...i am totally lost...and it is bringing up old memoreis,fond ones from playing the old fallout games...the ruins just look so beautiful... i am torn between the bricked up window/doorway and the barred windows...these are so sweet looking!
many thanks for sharing this stuff...
and i have to see if that dentist stuff could be something for me here in germany too...i heard quite often it is just the thing to be using...
i hate to say it but for the most part i just had to massivly scroll through your many pics... so i have to ask you...how do you glue those differnt mold products together? what glue are you using?
i hope this thread will be updated soon!
cheers and thanks for the sweet stuff...vik
Thats the best part... Primary adhesive is... Elmers PVA glue. Cast using Excalibur brand dental stone.
39783
Post by: theunicorn
@ Galorn, dsteingass just linked to this thread, I am a huge resin casting fan. I love the terrain you did. Question, how durable is the excaliber dental plaster? I have a small bag of it that was given to me when I bought a bag full of molds from Hirst arts at a Dragon Con back in the day. I never tried it out. Also do you have a blog other than here on dakka?
24297
Post by: Viktor von Domm
thanks galorn!
12271
Post by: JB

Wow, fantastic thread!

39973
Post by: Galorn
theunicorn wrote:@ Galorn, dsteingass just linked to this thread, I am a huge resin casting fan. I love the terrain you did. Question, how durable is the excaliber dental plaster? I have a small bag of it that was given to me when I bought a bag full of molds from Hirst arts at a Dragon Con back in the day. I never tried it out. Also do you have a blog other than here on dakka?
It's pretty tough stuff. not as tough as resin. (especially in very thin pieces) but for walls and similar things its plenty tough for casual gamer use.
JB wrote:
Wow, fantastic thread!
Thanks
49668
Post by: A1rebirth
This is an awsome table! i hope to one day own somthing like this. It looks like somthing straight out of a zombie movie haha
Did you custom make all the posters and news papers? I want to make some for my model bases
are they printed on anything special or just normal paper?
39973
Post by: Galorn
A1rebirth wrote:This is an awsome table! i hope to one day own somthing like this. It looks like somthing straight out of a zombie movie haha
Did you custom make all the posters and news papers? I want to make some for my model bases
are they printed on anything special or just normal paper?
Thanks. That was the goal actually. Posters I made using a combo of Open Office, and WS Word. They were printed on standard Laser printer paper then cut out and glued on with a 50/50 elmers water mix.
32169
Post by: Rogue Wolves
nice work gallorn, looks great on your table and im sure this molds legacy will transfer to daves table as well... *cough cough* you wouldnt happen to be selling any molds would you?
39973
Post by: Galorn
Rogue Wolves wrote:nice work gallorn, looks great on your table and im sure this molds legacy will transfer to daves table as well... *cough cough* you wouldnt happen to be selling any molds would you?
Possibly. PM sent.
32169
Post by: Rogue Wolves
grrraawrrl (cat growl) good on you sir
52538
Post by: Molotovsoda
truely inspiring table, well done! I'll look to this thread for inspiration for when my club gets their act together
24703
Post by: Norn King
Just read through this blog, pure inspiration!
39973
Post by: Galorn
Molotovsoda wrote:truely inspiring table, well done! I'll look to this thread for inspiration for when my club gets their act together
Thanks. If you have any Questions feel free to ask.
Norn King wrote:Just read through this blog, pure inspiration!
Thanks.
33786
Post by: TTG BUNKER
Really enjoyed this thread mate! Nicely done!
39973
Post by: Galorn
TTG BUNKER wrote:Really enjoyed this thread mate! Nicely done!
Thanks.
If anyone has any questions feel free to ask em.
28415
Post by: lone dirty dog
Galorn wrote:TTG BUNKER wrote:Really enjoyed this thread mate! Nicely done!
Thanks.
If anyone has any questions feel free to ask em.
How tall is the statue of liberty
24297
Post by: Viktor von Domm
39973
Post by: Galorn
At a guess as tall as a warlord titan. But wikipedia probably has a more accurate description.
24297
Post by: Viktor von Domm
28415
Post by: lone dirty dog
Viktor von Domm wrote:
42?
How old is my grandma
Google that VIK
24297
Post by: Viktor von Domm
well i can ask her...she is sitting on my lap...
28415
Post by: lone dirty dog
Viktor von Domm wrote:well i can ask her...she is sitting on my lap...
I hope not she has been dead for 19 years 
24297
Post by: Viktor von Domm
ohoh...that´s what you get for having a shot at the dark...
28415
Post by: lone dirty dog
Viktor von Domm wrote:ohoh...that´s what you get for having a shot at the dark...
Never shoot in the dark you don't know what you might hit
24297
Post by: Viktor von Domm
seems i hit myself...wait for it...with a bullet to the knee...
28415
Post by: lone dirty dog
Viktor von Domm wrote:seems i hit myself...wait for it...with a bullet to the knee...
That really is stupid LOL the knee how is that even possible ……..
24297
Post by: Viktor von Domm
28415
Post by: lone dirty dog
Viktor von Domm wrote:
Answered
24297
Post by: Viktor von Domm
see?! couldn´t help it^^
28415
Post by: lone dirty dog
Indeed
32169
Post by: Rogue Wolves
vik vik vik... no
24297
Post by: Viktor von Domm
by the way RW just noticed that pimp chain on your avatar... lol...
and of course the catpirate too...
32169
Post by: Rogue Wolves
its not a pimp chain! well it could be.. the model has the jump pack straps so i just changed the colors to match (:
Automatically Appended Next Post:
took me a while to notice buuuuuuuuuuuuuuuuuuuuuuuuuuuuuuuuuuuuuuuuuuuuuuuuuuuuuuuuuut im glad you noticed that second thing!!
24297
Post by: Viktor von Domm
well i am all for noticing things... i am a checker^^
39973
Post by: Galorn
Rogue Wolves wrote:its not a pimp chain! well it could be.. the model has the jump pack straps so i just changed the colors to match (:
Automatically Appended Next Post:
took me a while to notice buuuuuuuuuuuuuuuuuuuuuuuuuuuuuuuuuuuuuuuuuuuuuuuuuuuuuuuuuut im glad you noticed that second thing!!
Viktor von Domm wrote:well i am all for noticing things... i am a checker^^
aaaaand now the chain is gone...
32169
Post by: Rogue Wolves
or is it?
24297
Post by: Viktor von Domm
lol...
32169
Post by: Rogue Wolves
holy crap vik, you have over 10,000 more posts then me! wow your one talkative german arnt ya
24297
Post by: Viktor von Domm
yup... tho many of my posts are in fact oneliners^^
39973
Post by: Galorn
Viktor von Domm wrote:yup... tho many of my posts are in fact oneliners^^
zing...
28415
Post by: lone dirty dog
Galorn wrote:Viktor von Domm wrote:yup... tho many of my posts are in fact oneliners^^
zing...
He is on another thread 
24297
Post by: Viktor von Domm
hurhurhur... *coughsseewhatyoudidtherecoughhs*
28415
Post by: lone dirty dog
Viktor von Domm wrote:hurhurhur... *coughsseewhatyoudidtherecoughhs*
You liked it though didn't you
24297
Post by: Viktor von Domm
hmmmm.... a bit
63044
Post by: _Apollo_
Amazing terrain! I have to ask how long did each step take my brother and I have wanted to make a winter city looking somewhat like this do you do commissions or sell components like walls?
39973
Post by: Galorn
Thanks _Apollo_ wrote:I have to ask how long did each step take my brother and I have wanted to make a winter city looking somewhat like this
apx 35mins for the panels to cure, then gluing, then painting... Soo a while. (total of aproximately 6 hrs per ruin (although if you are making a bunch the time overlaps as it mostly consists of waiting for things to dry...)
[quote=_Apollo_ 391231 4684839 nulldo you do commissions or sell components like walls?
Sure do.
63044
Post by: _Apollo_
How many components would I need for a medium ruin?
48594
Post by: dsteingass
Galorn's basic wall can be spammed, or broken up for any size ruin you'd ever want.
39973
Post by: Galorn
Hmm 7 or so without a doorway panel, 6 with. (EDIT) Sorry I went back and checked my notes... 5 with doorway, 6 without.
24297
Post by: Viktor von Domm
yup... that is very cool looking...and desolate...
oh, and...welcome back mister!
got a question tho... what would the table measurements be in meters? i am atm secretly building a table (modular) too... and for referrence i would like to know... thanks in advance!
cheers, vik
39973
Post by: Galorn
 Viktor von Domm wrote: Viktor von Domm wrote:yup... that is very cool looking...and desolate...
oh, and...welcome back mister!
got a question tho... what would the table measurements be in meters? i am atm secretly building a table (modular) too... and for referrence i would like to know... thanks in advance!
cheers, vik
well in imperial measurements its 4ft by 6ft in three 2ft by 4ft panels. since a meter is roughly 3ft. three 2/3 Meter by 1and 1/3 meter panels.
24297
Post by: Viktor von Domm
my current plans are a bit smaller... i have boards of 40cm to 40cm each... and atm six of these... thats around 16 inches to 16 inches... making the board atm 30 inches to 47 inches...
would you think this is playable or is it way too small?
and thanks for the first answer mate!
39973
Post by: Galorn
Viktor von Domm wrote:my current plans are a bit smaller... i have boards of 40cm to 40cm each... and atm six of these... thats around 16 inches to 16 inches... making the board atm 30 inches to 47 inches...
would you think this is playable or is it way too small?
and thanks for the first answer mate!
That would be a bit tight for "full points games" For something like Killteam it could work really well. Most 40k tables are a minimum or 4ft by 4 ft (or 1.3M by 1.3m)
24297
Post by: Viktor von Domm
hmmm.... then i better check on my resources... seems i have to fiddle something extra to the current set up^^
thanks mate!
39973
Post by: Galorn
Viktor von Domm wrote:hmmm.... then i better check on my resources... seems i have to fiddle something extra to the current set up^^
thanks mate!
yep for 40k 4ft by 4ft gets cramped at around 500points...
74822
Post by: CommandPoint
This is some really great scenery, and a really great project.
I really like what you did with the window and door frames, lots of great utility and variety.
The whole process is fantastic and has got me thinking about trying my hand at casting buildings and other small urban terrain.
I'd love to know how you made the road barriers (Jersey blocks?). I can see they come in two parts but I am having trouble working out the process
39973
Post by: Galorn
 CommandPoint wrote: CommandPoint wrote:This is some really great scenery, and a really great project.
I really like what you did with the window and door frames, lots of great utility and variety.
The whole process is fantastic and has got me thinking about trying my hand at casting buildings and other small urban terrain.
I'd love to know how you made the road barriers (Jersey blocks?). I can see they come in two parts but I am having trouble working out the process
Thanks man, Casting up stuff is pretty straight forward if a little messy.
The jersy barriers are effectively made from two blocks shaped like the Z blocks from tetris glued back to back.
74822
Post by: CommandPoint
Hey Galorn, thanks for the response about the Jersey barriers. I've gone back through the pics and seen their ~ "shape", but I can't figure out how you'd cast that shape... It's making my brain hurt :( How easy are these buildings to store? I'm about to start making some MDF buildings that I've got and I'd like to mount them on bases and embellish them with rubble etc, but that will obviously make each one harder to store. I'm seriously thinking about getting one of those Hirst Arts floor tile molds too, a really simple and effective way to get uniform floor for all your buildings. Plus it'll give me the push I need to start delving in to casting
39973
Post by: Galorn
CommandPoint wrote:Hey Galorn, thanks for the response about the Jersey barriers.
I've gone back through the pics and seen their ~ "shape", but I can't figure out how you'd cast that shape...
It's making my brain hurt :(
How easy are these buildings to store?
I'm about to start making some MDF buildings that I've got and I'd like to mount them on bases and embellish them with rubble etc, but that will obviously make each one harder to store.
I'm seriously thinking about getting one of those Hirst Arts floor tile molds too, a really simple and effective way to get uniform floor for all your buildings.
Plus it'll give me the push I need to start delving in to casting
The jersey barrier like bits are made from two parts each shaped kind of like the z component from tetris.
They are as easy to store as any other mounted ruin is. The Hirst arts floor tile molds are super easy to use too.
|
|