60913
Post by: Largo39
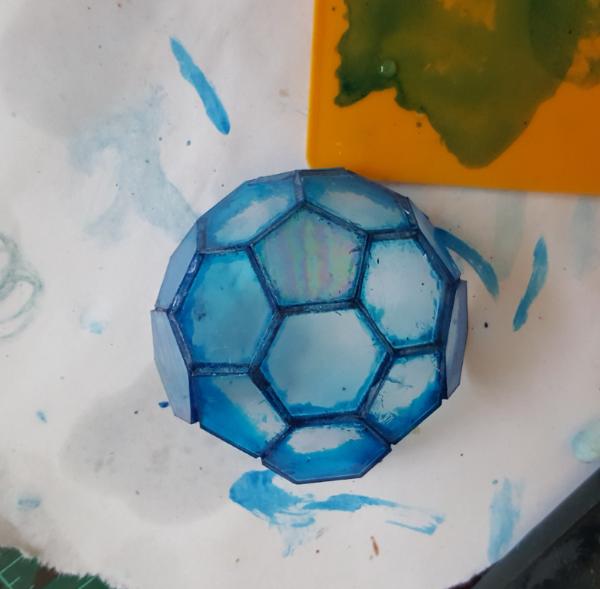
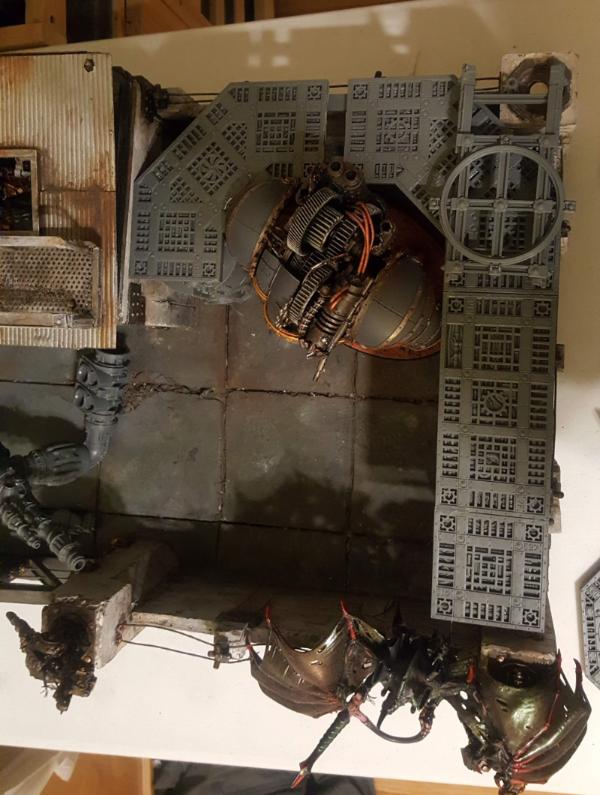
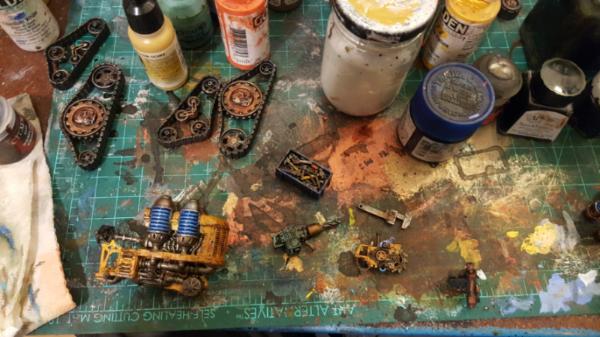
Thanks! We have more work on the lightning model.
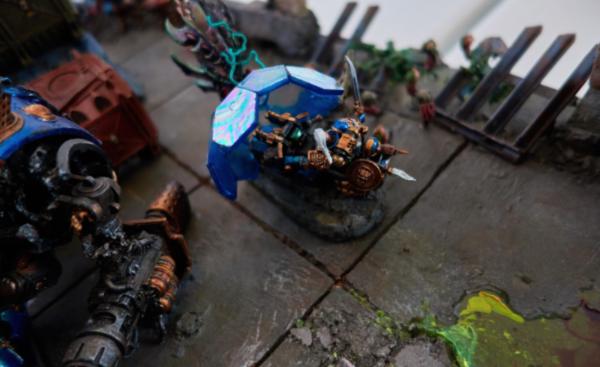
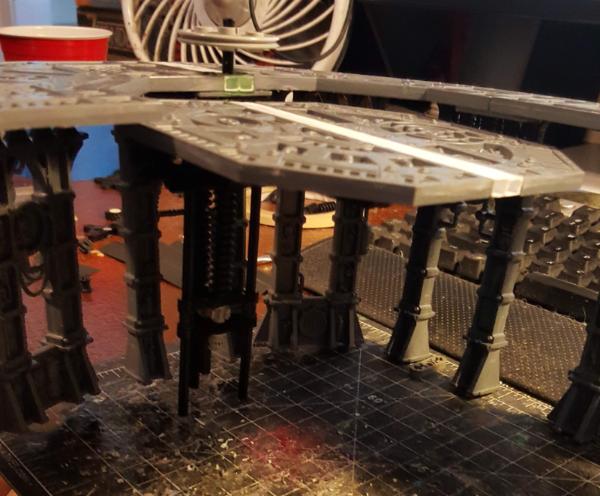
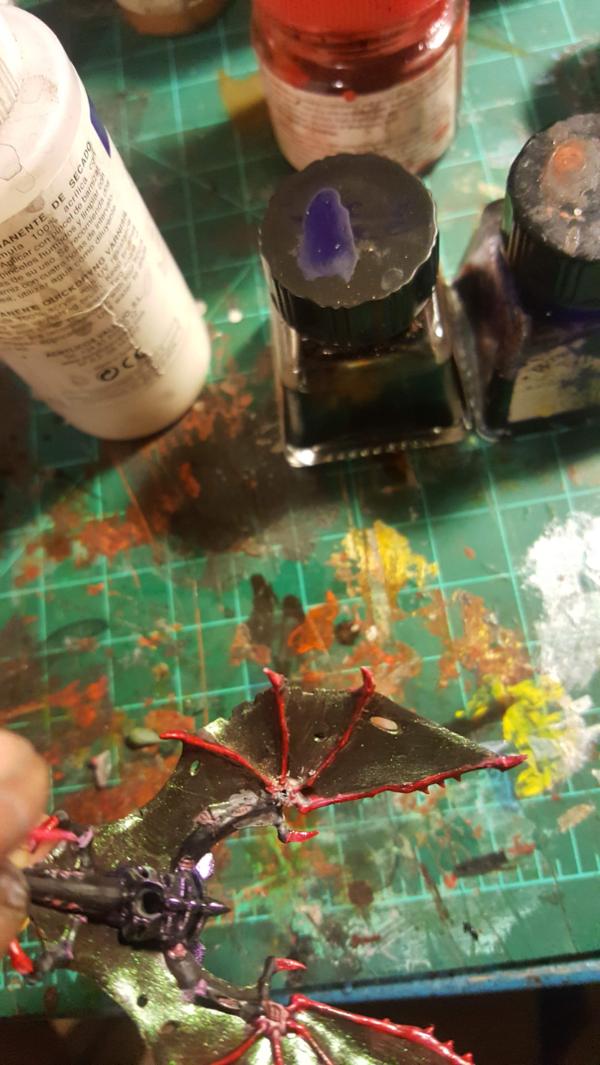
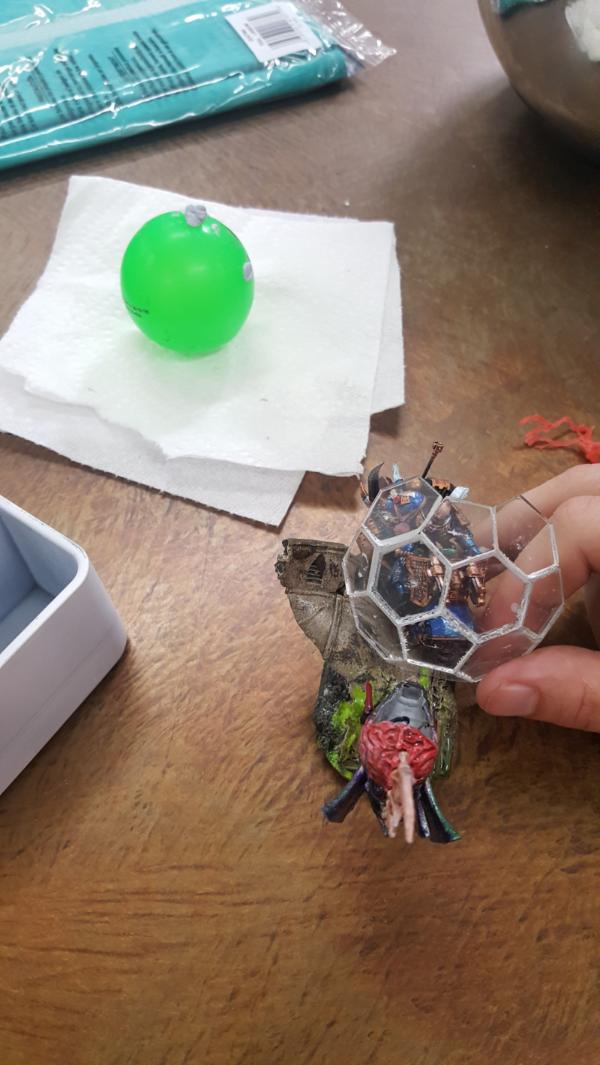
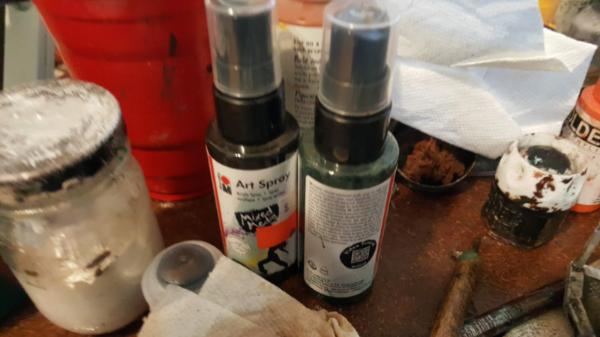
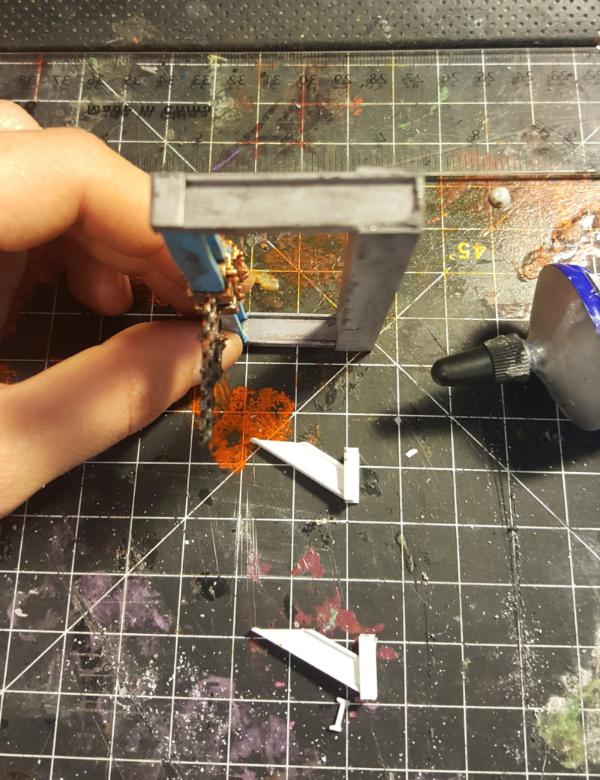
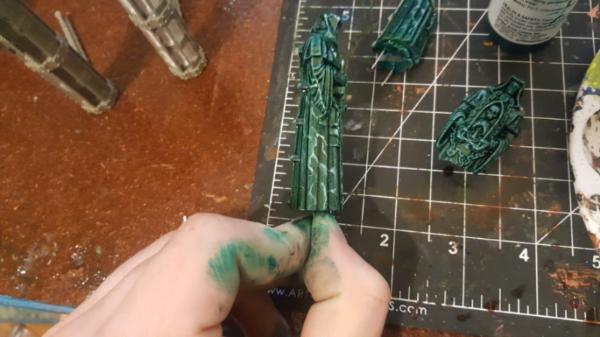
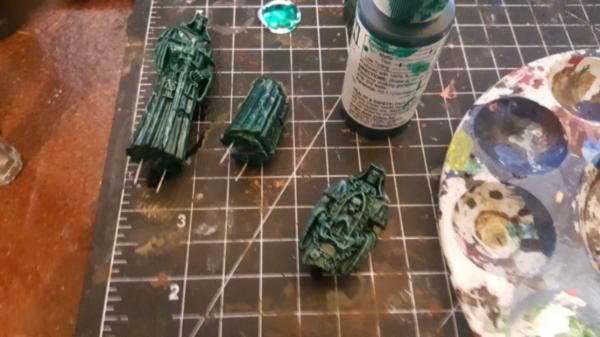
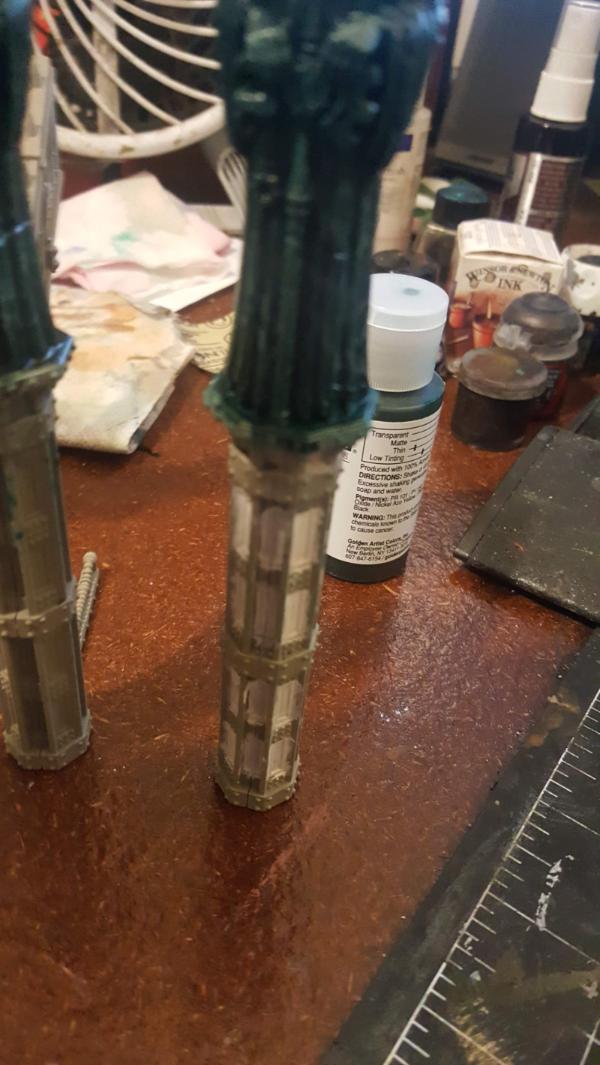
One of the things I realized is that the wire itself is pretty.. stiff. Originally I bought the "brightest" version of the cool neon el wire I'm using in order to get maximum effect. I figure I can just strip the acrylic protective coating around the wire/phosphor and bend it into place.

but even then it's still very stuff, so the only way to get it into the tubes was to make it a half tube and press the wire into it. If I angle it right you wont really see the "seams" in the tube from the main direction youd be looking at it:
And with that the model is now basically ready to go! Next up is modelling up my display cart real quick and the back to work on the shiel before I head off to home where I can get this stuff 3d printed up!
60913
Post by: Largo39
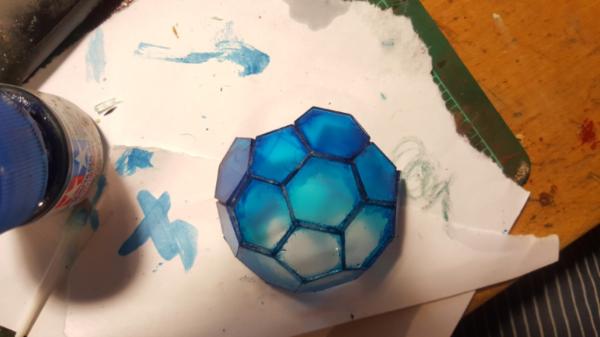
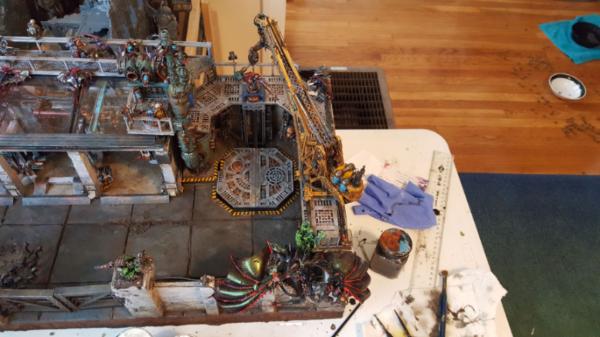
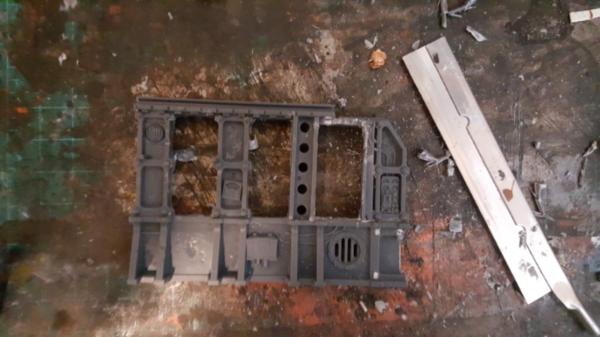
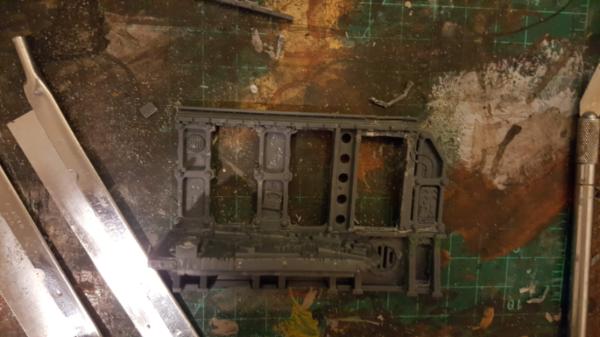
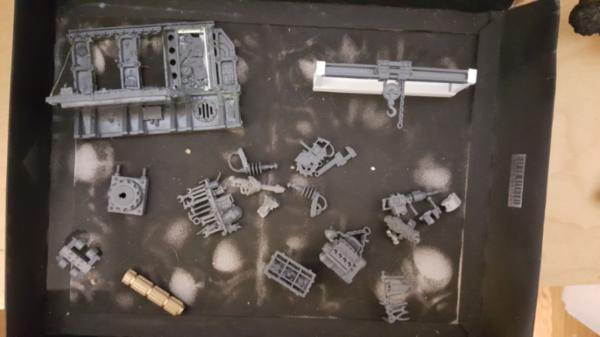
Alright, time to finally start putting this all together. We're at the maker space and ready to work!
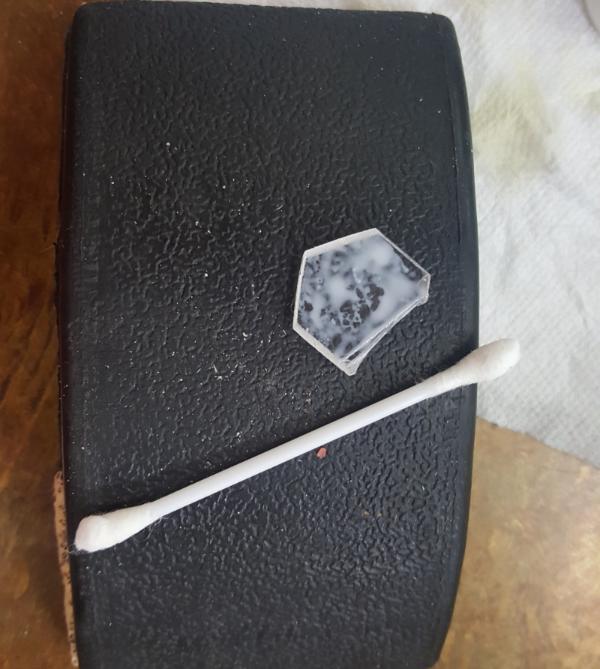
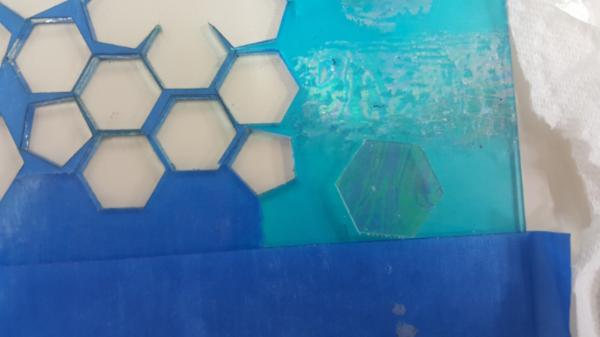
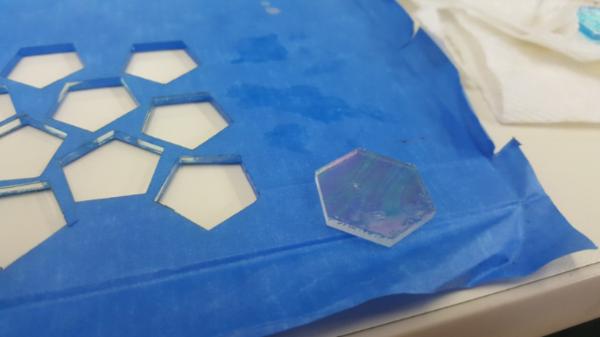
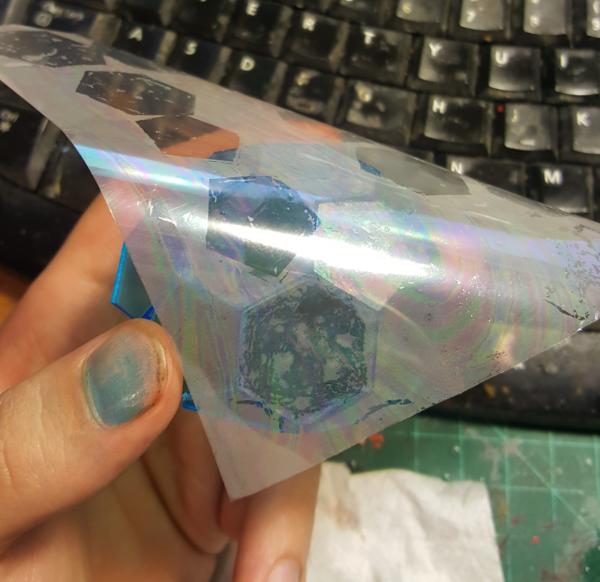
First up I finally have a much, much better application of the foil:
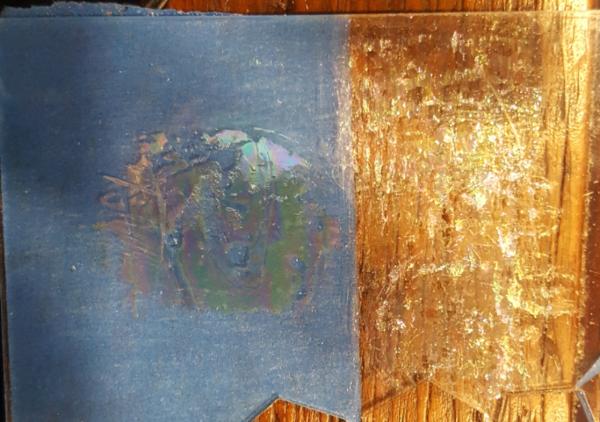
so now it's time to start testing on the hexagons directly. I need to figure out what the best method is to apply it (brush, q-tip, etc) and then thats all ready to go.
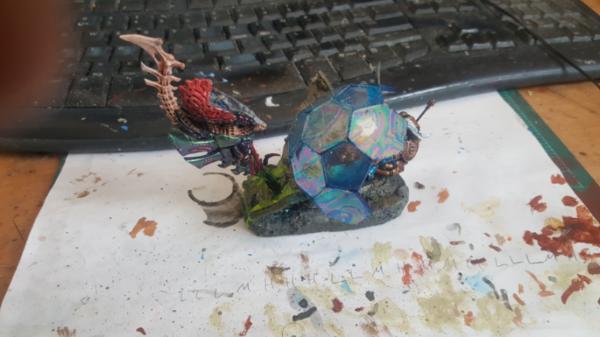
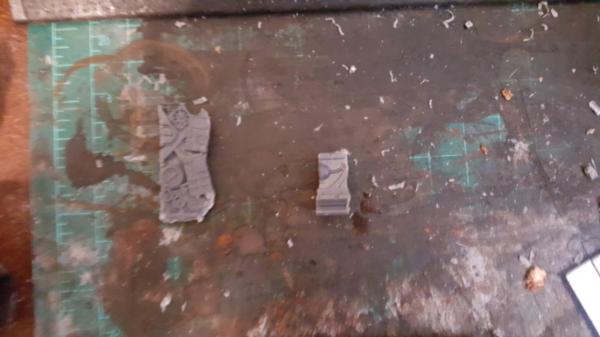
Next up is the first 3d print of the lightning!
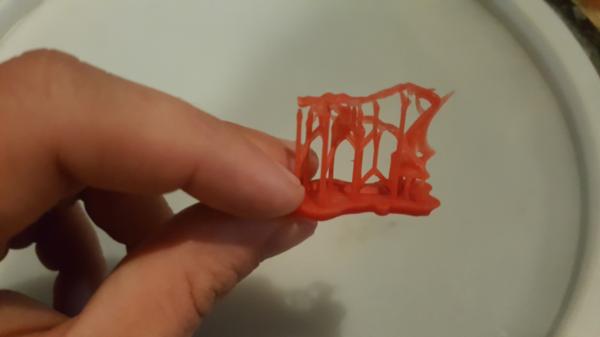
Very exciting! also very thing.. verrryy thin. Worryingly thin. So I decided to go back into the 3d model and try to bulk up areas but, more importantly, just make it even easier to insert the wire in. Hopefully its enough...
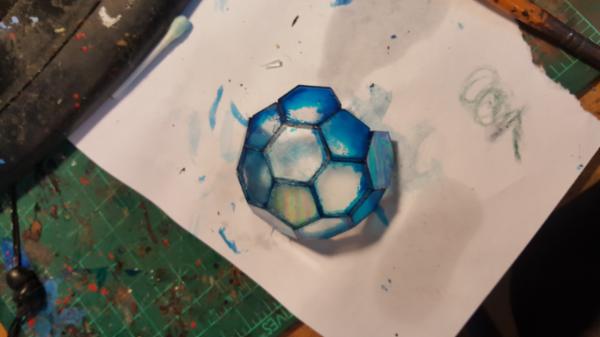
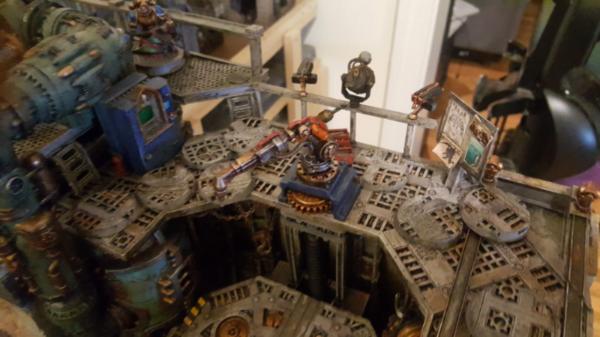
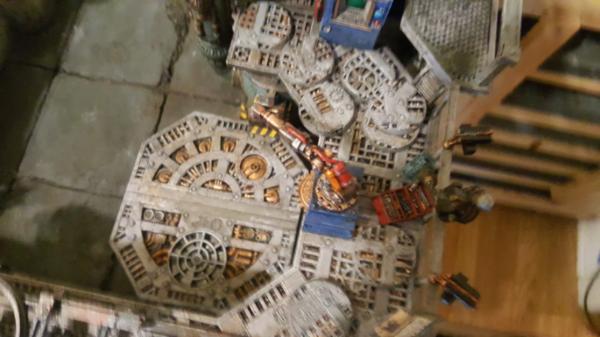
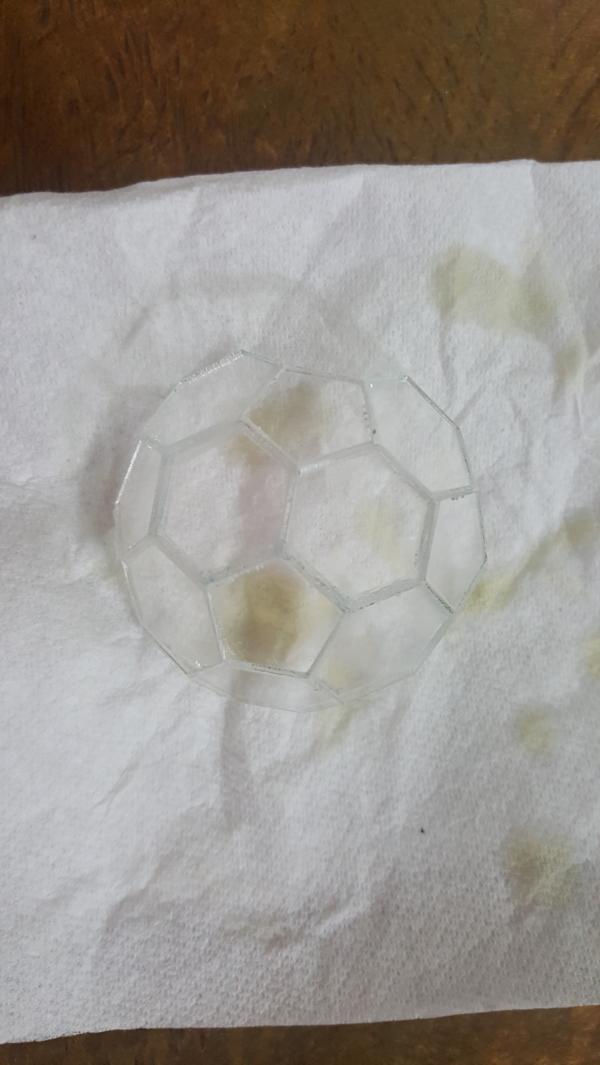
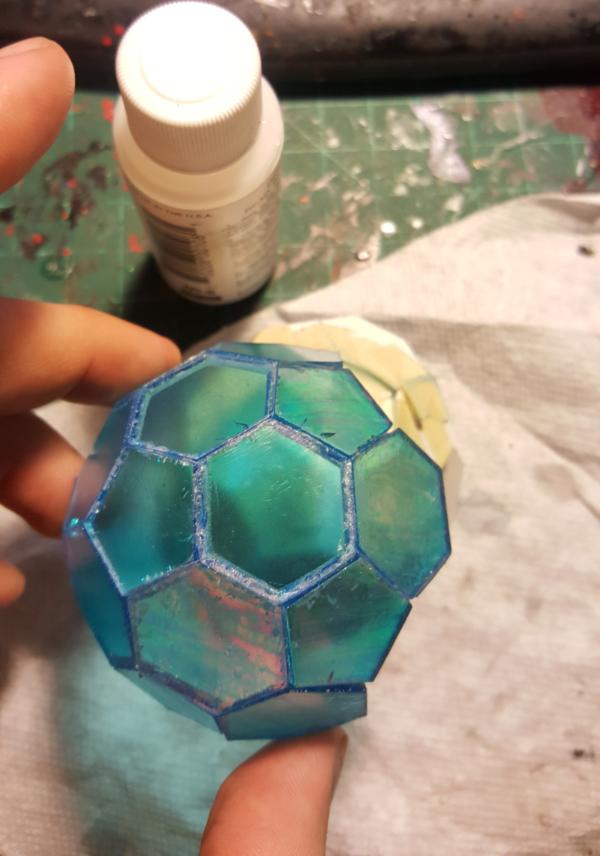
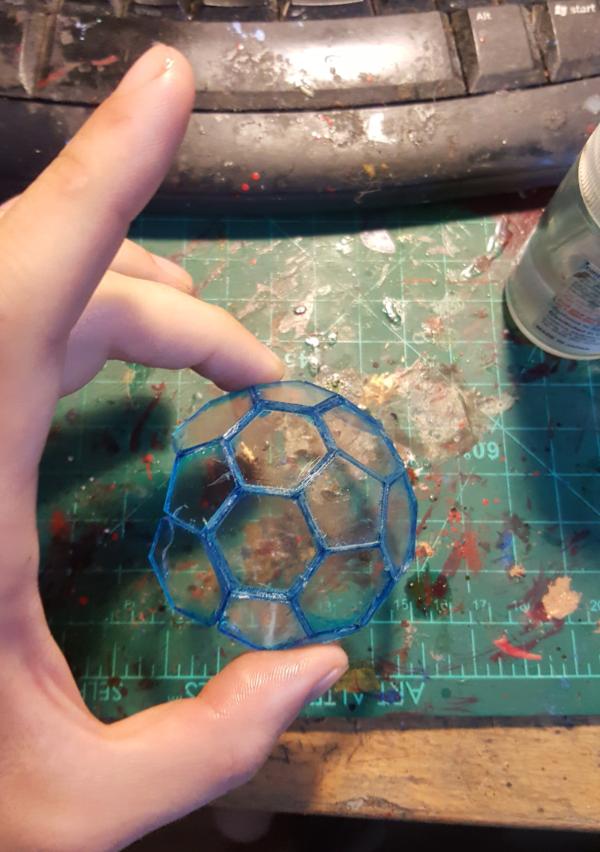
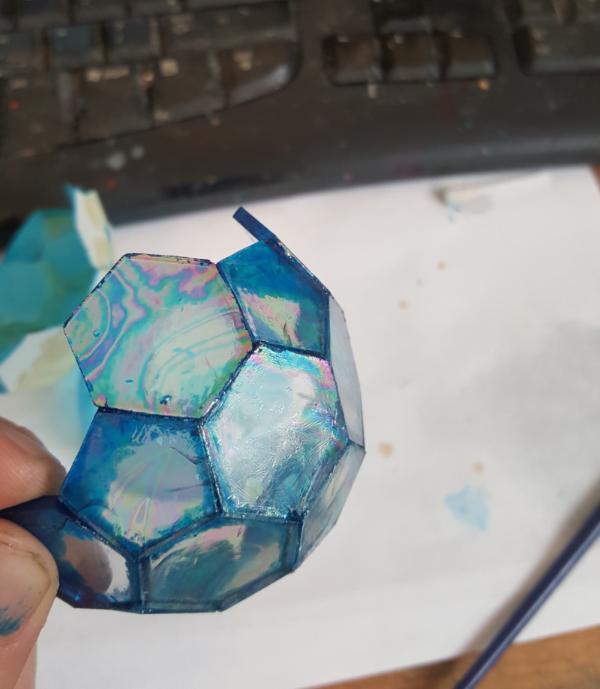
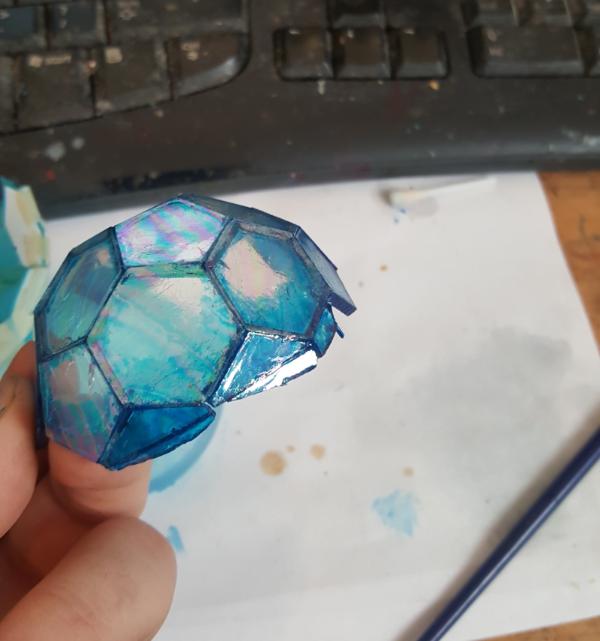
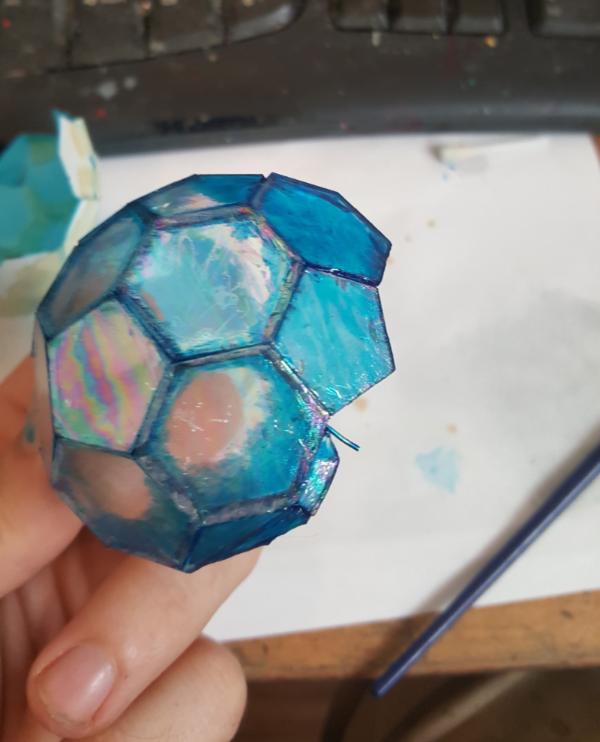
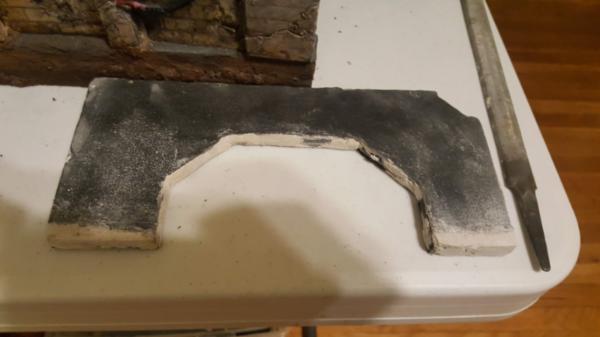
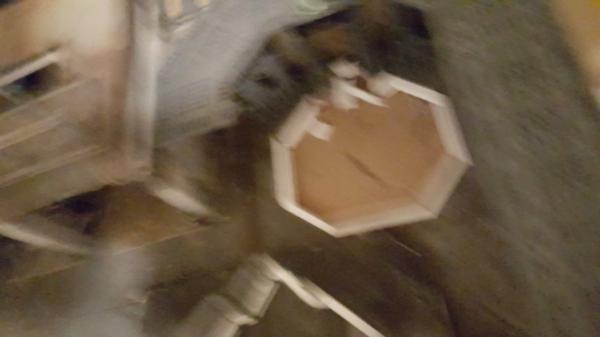
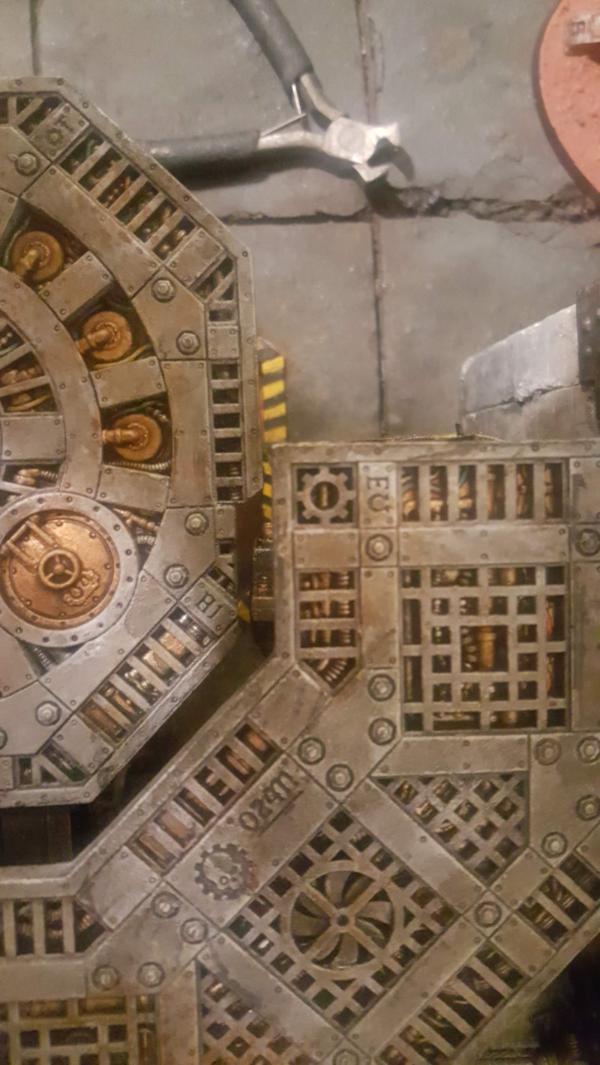
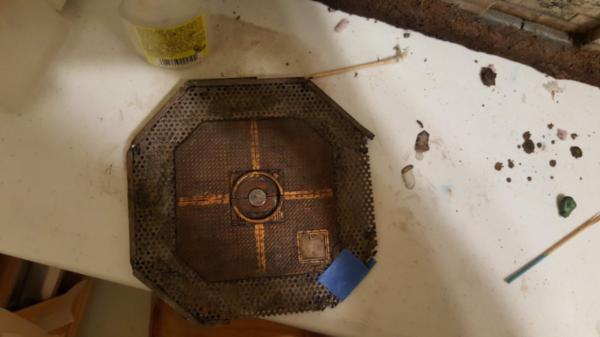
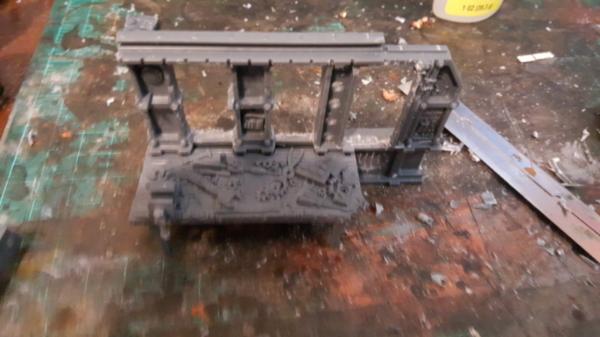
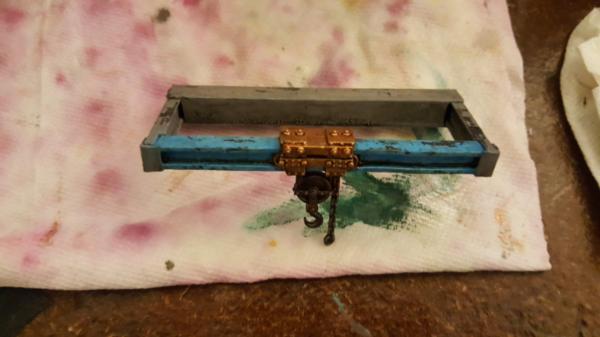
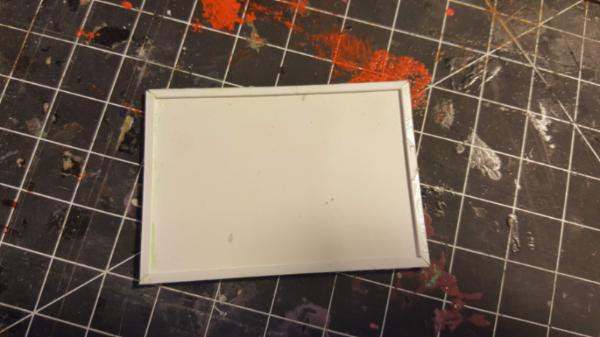
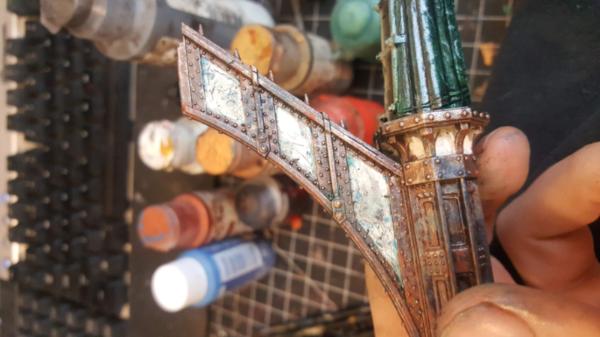
Finally we have a completed shield!
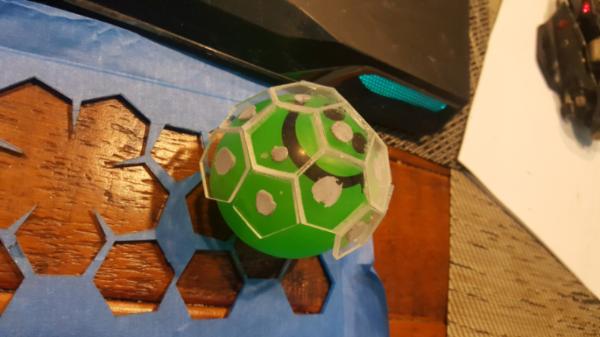
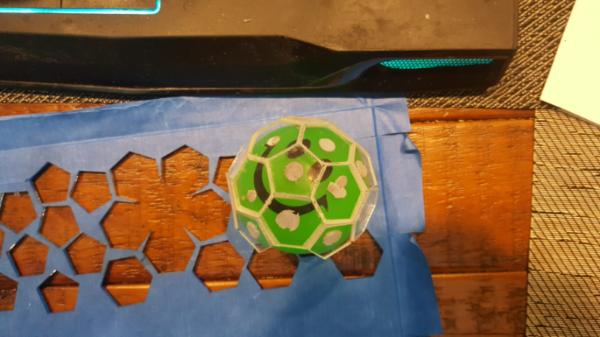
I had to switch to a ball to get it to go around but otherwise it's in good shape! Now I just need to wait and let the glue set fo rthe shield. One trick to this glue is that the longer it goes the better it sets (it needs 24 hours to be at 80% strength, weeks for full) so I figure give it a couple days before I pull it off.
60913
Post by: Largo39
Okay so more work on figuring out how to apply the foil. I know I need a lot of fluid but HOW you apply it also matters. First I tried Q-tip
As you can see I couldnt really ever get it to stop pooling.
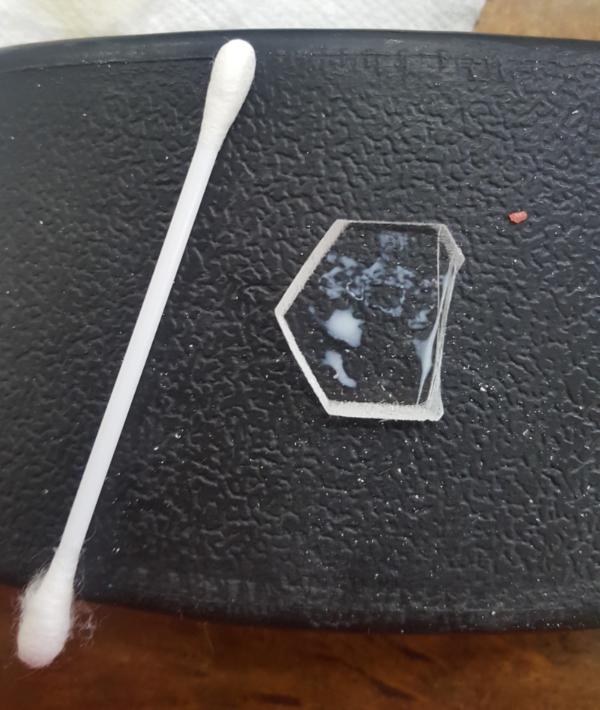
Next I tried a spongy thing, with the idea that maybe with small enough holes it will stop pooling but that didnt really work. You'd get like one pass of sponge and further touching of the sponge to the fluid would then immediatly drain it and not be good.

Finally I tried a slightly angled flat brush (pictured above behind the sponge). Just a ton of fluid, basically flatly applied. I can use the tip of the angle to add "drops" of fluid to any areas that need it.
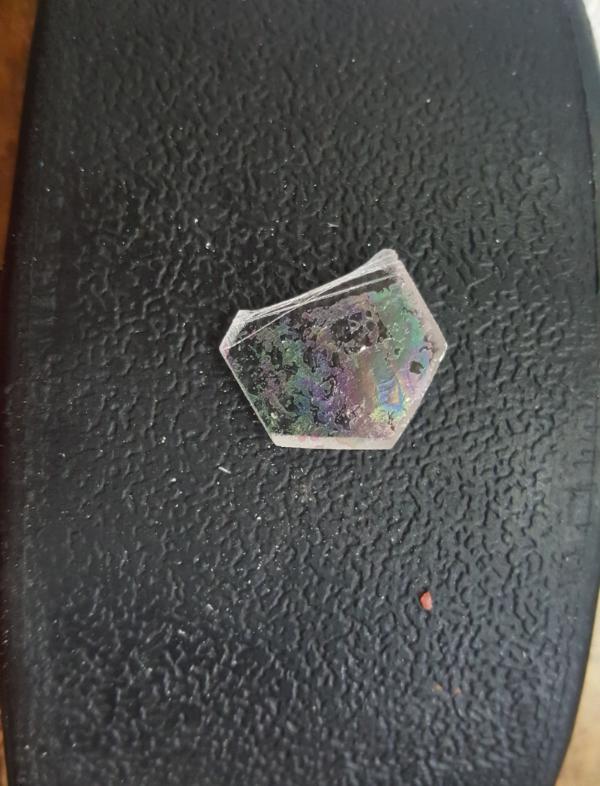
Much better:
and with that we finally have a clean transfer!
FINALLY.
60913
Post by: Largo39
So, its been a few days, time to take the shield off its stand and check it out! First step was cleaning the thing:
Not actually an easy process. Any sort of stain, even from water, will be captured when I put on the glue for the foil. So I need it to be as clean as can be for it to remain maximally transparent. Alcohol doesnt really clean off reside though, so finally I settled on Goo Gone spray.
Its VERY good at residue (like the residue from tape/blu tac/etc) but itself can leave a bit behind. So after using Goo Gone I typically use any sort of windex equivelent to get all remaining residue off and have a clean surface. All while holding it on the edges so that my fingerprints dont leave a mark.
... This technique will come in very very handy later ( le sigh)
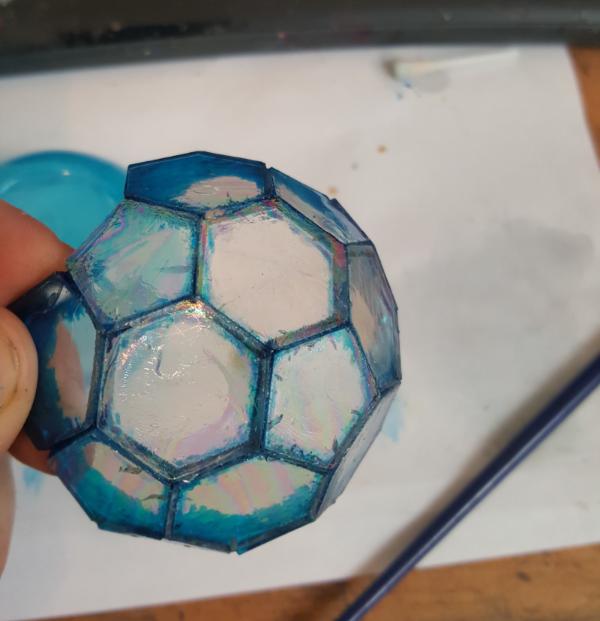
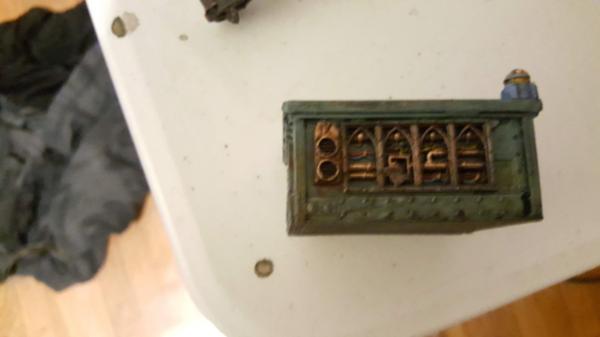
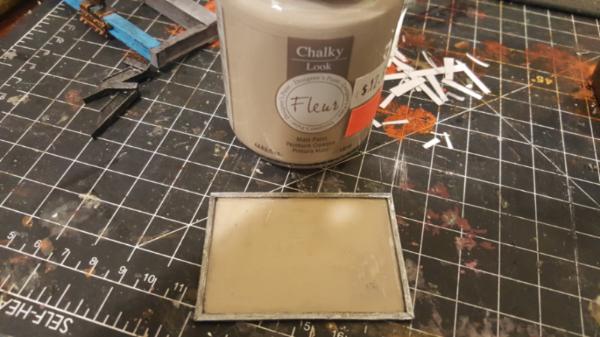
Anyhoo the shield looks great, so now to start figuring out how blue to make it and spray the blue on there!
33919
Post by: Moltar
Wow. That looks obnoxious 
Also looks like it's paying off and the lightning looks legit.
60913
Post by: Largo39
It does, in the end, but there are bumps in the way.
Anyhoo, back to the plot...
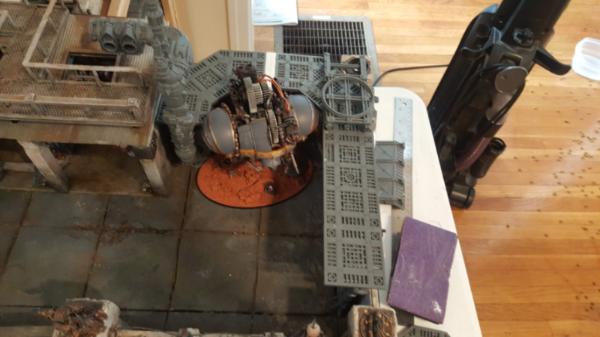
So we've hit the end of my trip home to madly work on all my projects. I did a 3d test of the lightning which seems like it might work, so I kicked off a clear resin version to use. I was hoping to more than one in case some breaks but,.. in the end only 1 could be managed. No pressure!
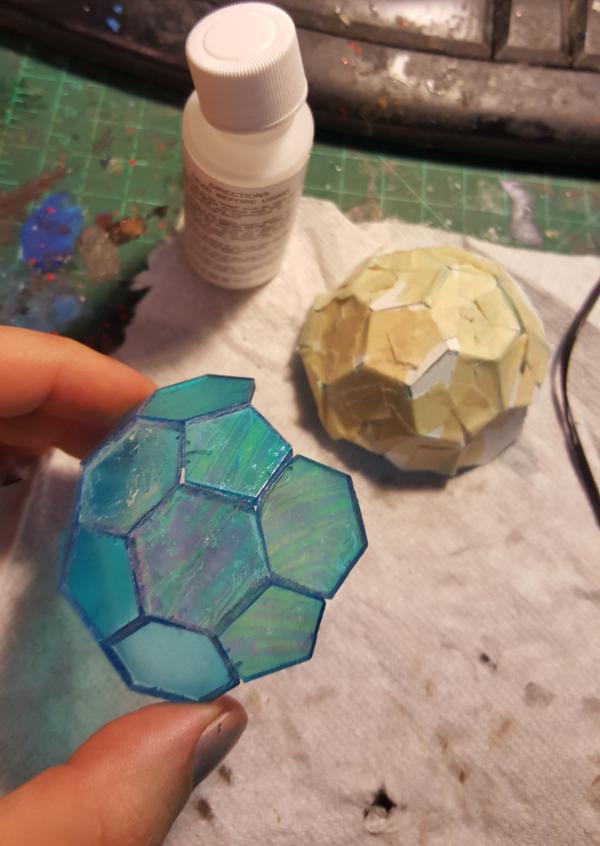
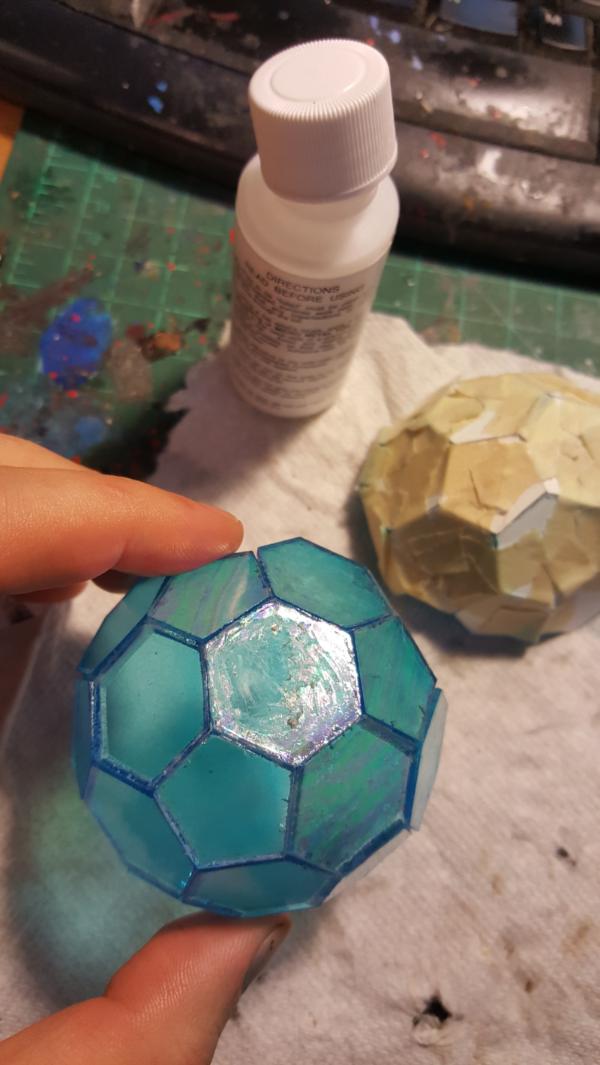
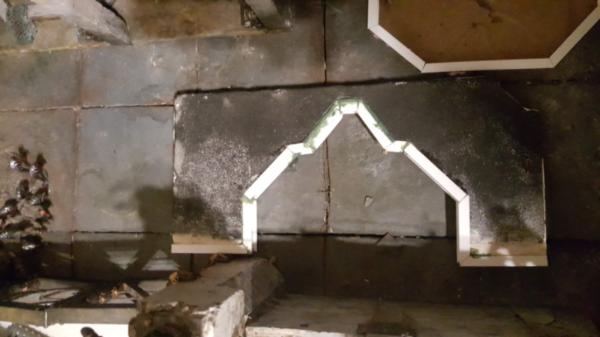
I made good progress on the shield, completing the shell shape and cleaning it all of goo.
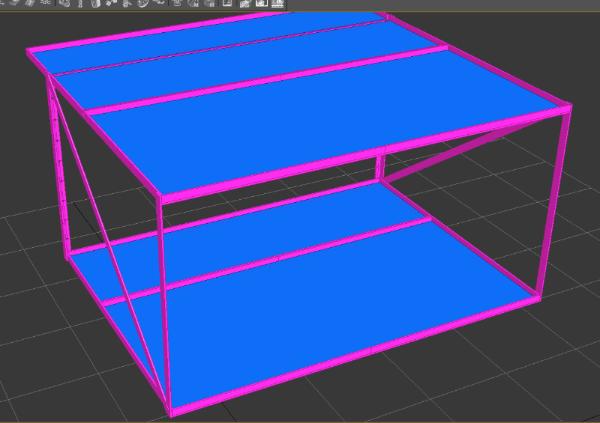
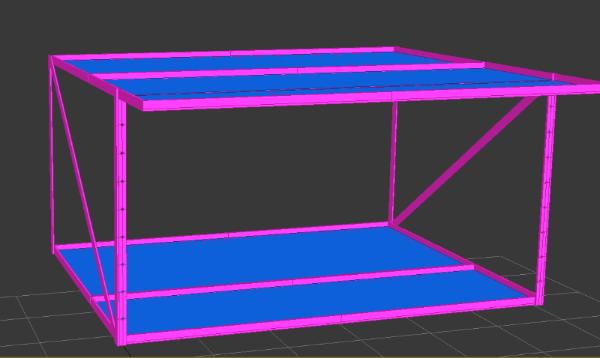
Finally there was the matter of the cart. Time was short so I wouldnt end up getting the time to do any welding BUT i did at least learn a bit about how welding works, which was the goal of the cart to begin with. So its something that I can flesh out with a class later to learn a new skill. What I could do, however, was cut all the pieces for the cart.
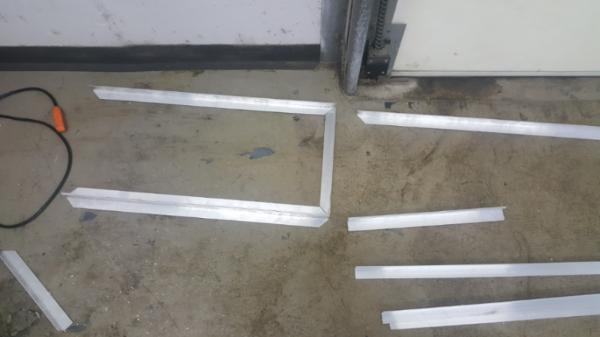
Making sure you get the cut right on the right bevel of the corner bracket.. lotta mental gymnastics.
Anyhoo another things that happened was I re-discovered an old project. I cant recall if i wrote about it here but basically there was this video about custom made vertical shelves that Adam Savage (Mythbusters) made that was cool and I thought it would be an interesting kickstarter idea. The kickstarter bit fizzled a bit, i had too much to do at the time (and still do have a lot) BUT i did get a first pass at a design done. The basic premise was to use acrylic sheets and have a modular design with lots of holes pre-drilled, so you make some basic set of shelve designs for various hobby types (painting, tools, soldering, etc) and mix and match what you want. Ideall you can "stack" each shelf on top of each other for maximum modularity.
I never got to test the stacking idea BUT i did get to lasercut a prototype:
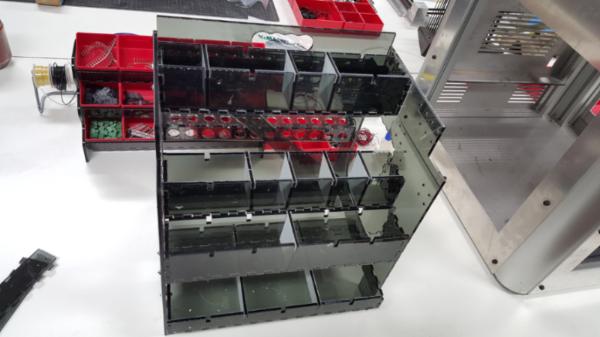
Now since I had flown down originally.. no way of bringing that back and shipping wasnt something I was interested in, too busy for other things to worry about trying to ship a build thing very carefully. BUT since this time I drove down.. I can drive it back! Sure the kickstarter part is on a backburner but MAN do i need to re-organize my space.
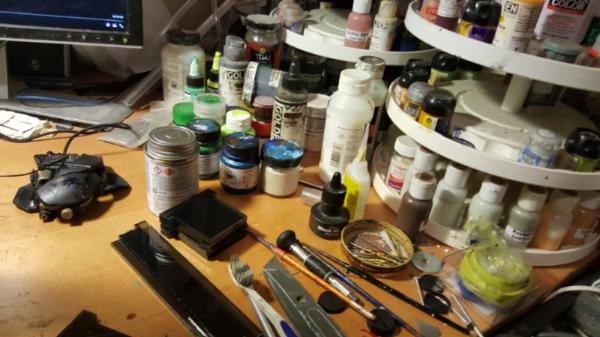
I have random collections of paint "groups" everywhere (liek my "blue" effect or my "dark metal" effect)
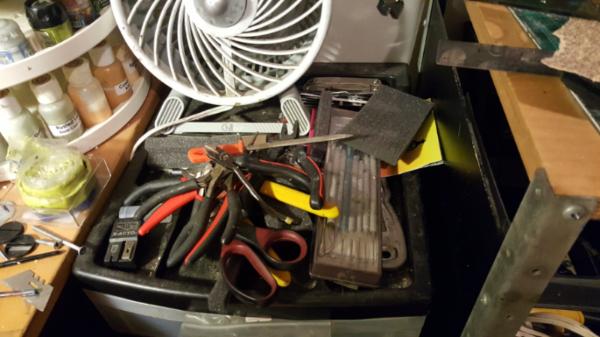
Unahpyp piles of tools:
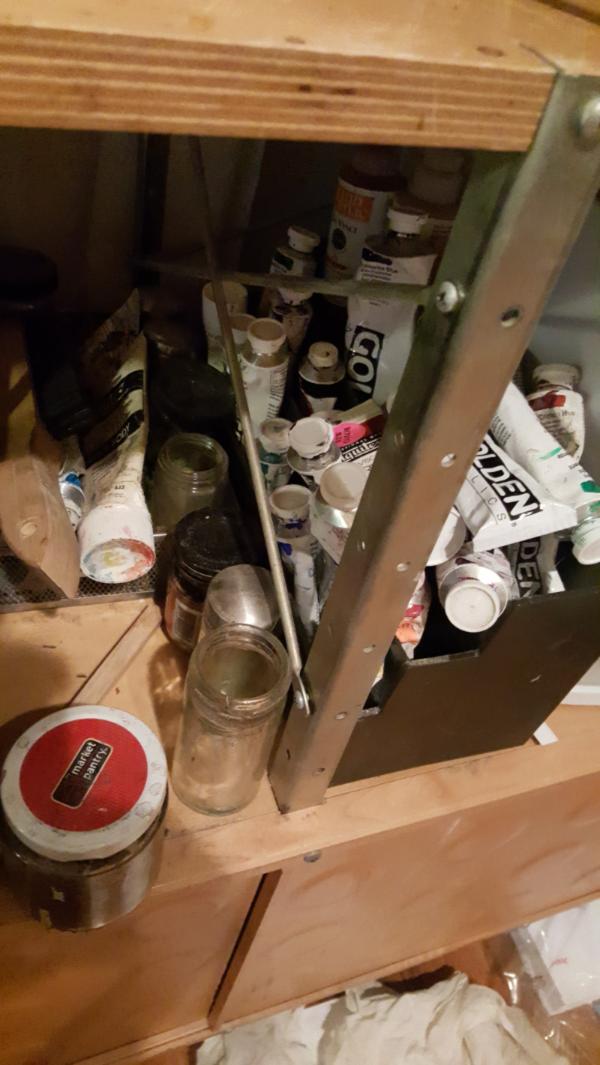
and difficult to reach acrylic tubes:
and this is the more organized its been in a while...
60913
Post by: Largo39
Sorry about the delay. Socal open was a thing.
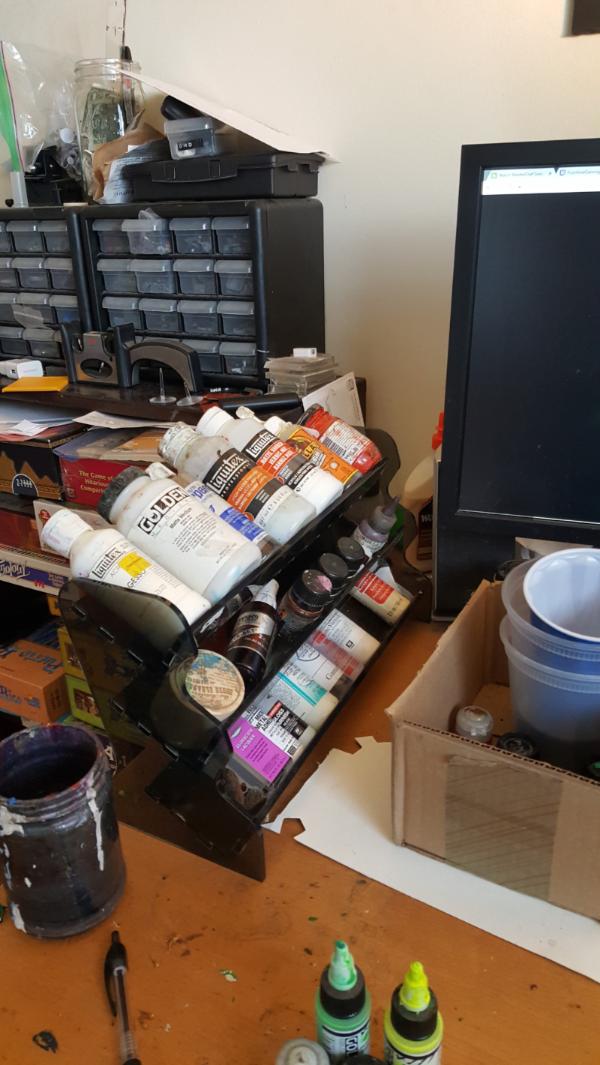
Anyways, here is the result from my organization. Honestly I'm surprised at how WELL it works, adding on pegs/magnets to the side really opened up the possibilities I hadnt thought of. I may have to revisit the kickstarter thing at a later date if more people want these things.
60913
Post by: Largo39
Thus begins our tale of woe (well, it ends happy, but man it took a while to get there): the final coloring of the shield.
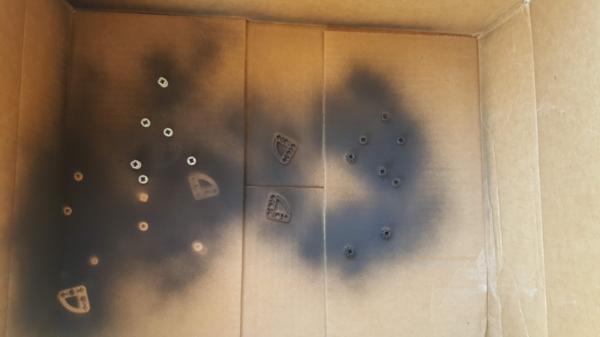
First up was primering. Just to be extra careful I decided to primer something else first, to start testing out my methods for this. A fatal flaw though I would determine later is that I primered in what Im guessing was an ever so slightly warm and humid day? Either way the primer went.. spottier, clumpy.
Which you can see in the closeup:

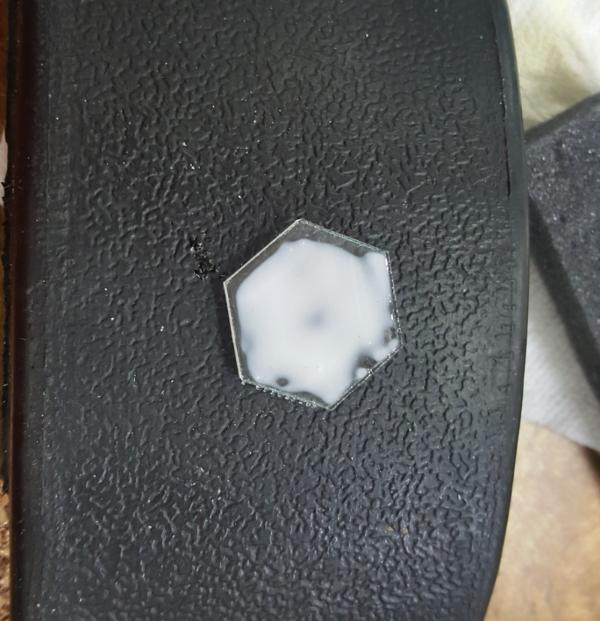
So when I primered the shield it, too, was clumpier. Not.. too bad, but it wasnt a happy start. Still I had to press on, so next was putting on the foil.
Things were going.. okay.. until I stuck oin the foil backwards. So the way it works is that there are 2 sides. one "foil" side and one thats the plastic sheet holding it onto something. If you put it foil down on the tacky glue everything is fine. But if you put it down PLASTIC side well... it doesnt come off. So it RUINS the tacky glue layer and blisters it, so you basically have to clean off and redo the whole square. Thank goodness for goo gone..
So I got most of the panels done, even after re-doing one, and it.. was way too blue. Just.. too blue. You couldnt really see past the panels. Also the edges/corners of every hexagon were stubbornly still clear so ideally id very carefully stick some very runny blue in there to color it. But I couldnt do that now I had all the panels done..
I decided to try and rub some of the blue off, to clear out the middle so to speak. So I flipped it over and started scraping it off with a q-tip and more goo-gone. It took some effort but it worked. Then.. I flipped it back over. The constant rubbing on the center hexagon (which I had foiled) caused it to "crack" slightly with a craquelure effect. It was no longer shiny and pretty. To fix that I tried adding a gloss coat to everything. But that ALSO caused the same effect due to (im guessing) refraction effects due to varying thickenss in the gloss coat.
At this point I had a few blistered panels, and a faded effect in the middle. So.. i decided to just start over, all over. Full redo. Sigh. This was basically an ENTIRE day to redo so it sucked but.. it was the right decision. Too many compromises had been made and it was time to reset and do it better the second time. So first I used alcohol to break the gloss coat, and then goo gone to break the foil/foil glue. Finally cleaning off the blue in the back.
The process of cleaning off the blue revealed the look I want much more. Dark blue edges and blue at the edges of the shield but clear in the middle. Still, I couldnt just stop because there was a lot of mistakes in there, but it was nice to see what I needed to do.
Finally, back to square one (mostly):
60913
Post by: Largo39
Just more work on the shield! The key lesson here was to leave one square near the middle free, so I could always use it to hold tightly if i need to scrape or adjust the blue. Also holding the shield well helps when angling it to fit on the foil sheet well.
Sadly there are still some "scratches" in the foil from when I used the back of a brush to rub some of the areas not sticking away but.. not much i can do about that. No way i'm doing this a third time..
I also added a couple of bits on the bottom so the shield touched the ground. It sucks that you can see the edges there but, tbh, you cant tell when its on there, you just see that the shield goes all the way down.
In v2 I also went ahead and drilled in holes for pins because, well, i realized there was no easy way to glue this down and it needed to be ON there since its the primary way i carry the model (IE: on edge of the shield)

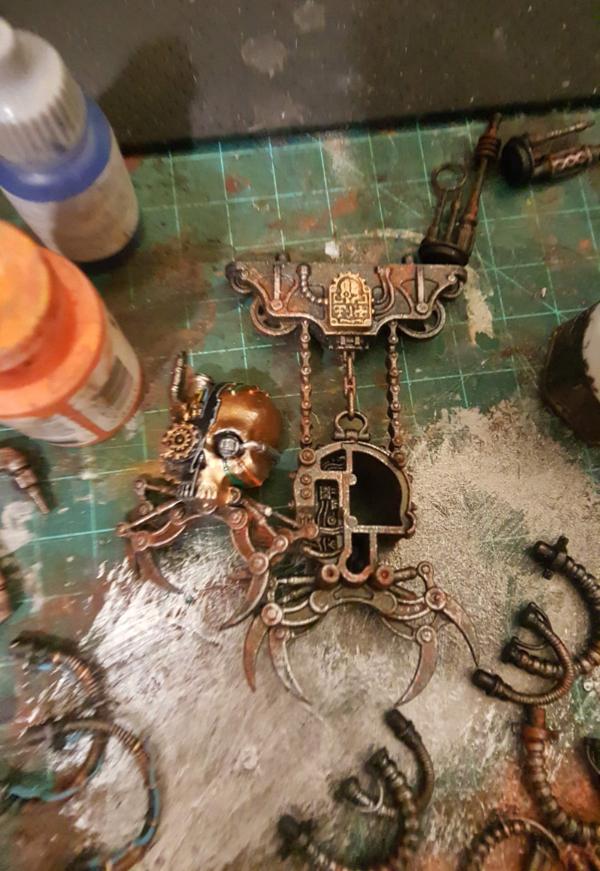
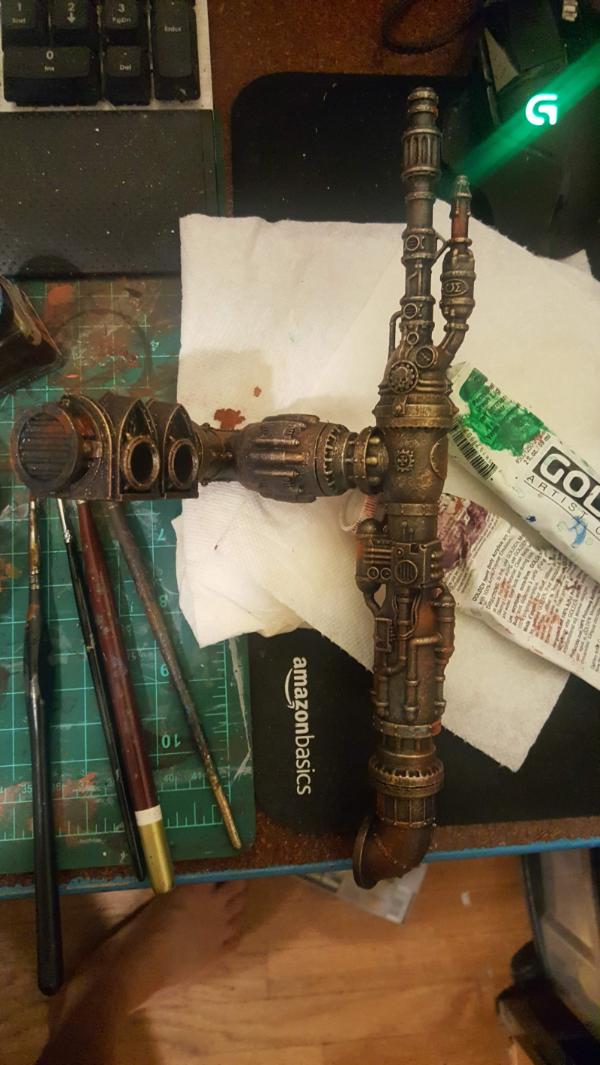
60913
Post by: Largo39
Now, finally, is woe. Sigh.
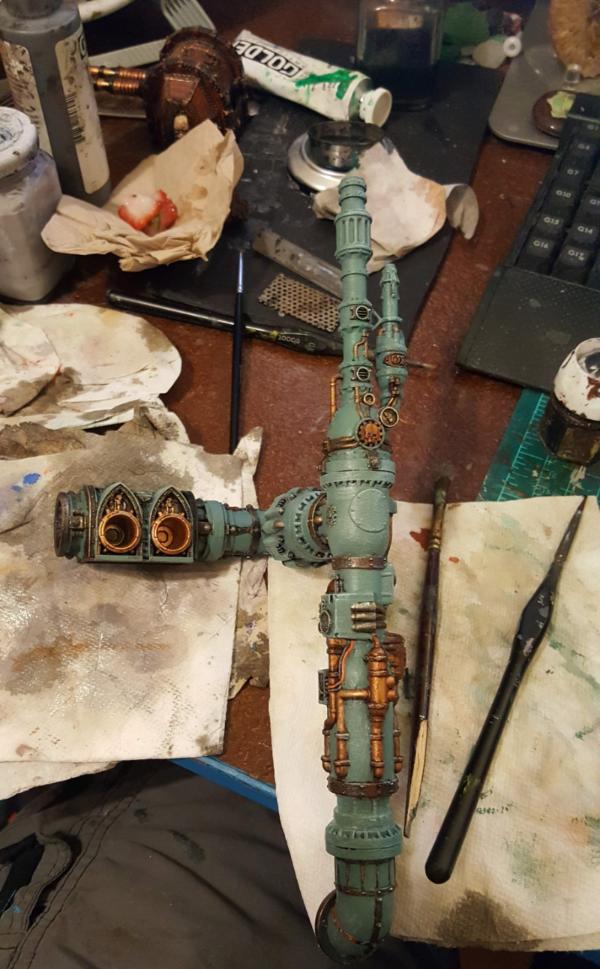
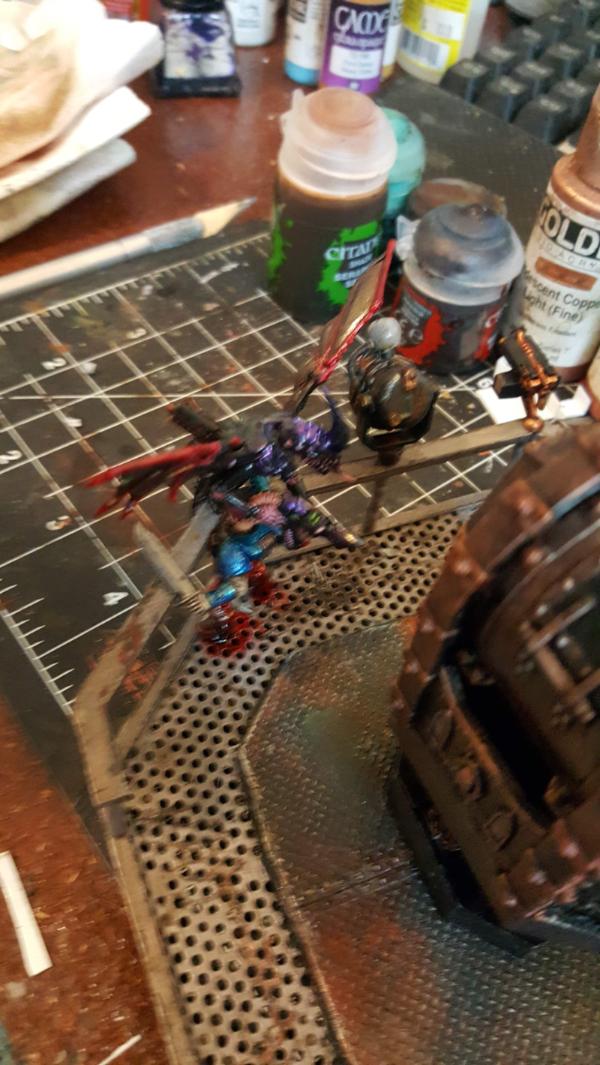
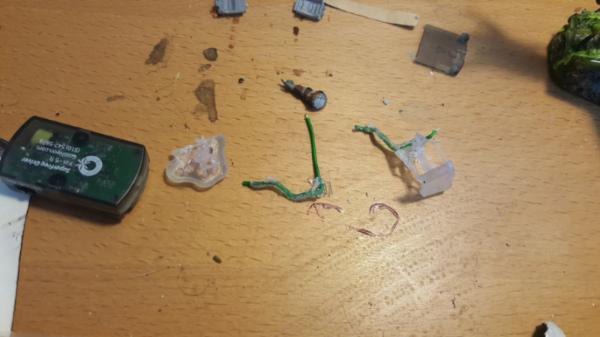
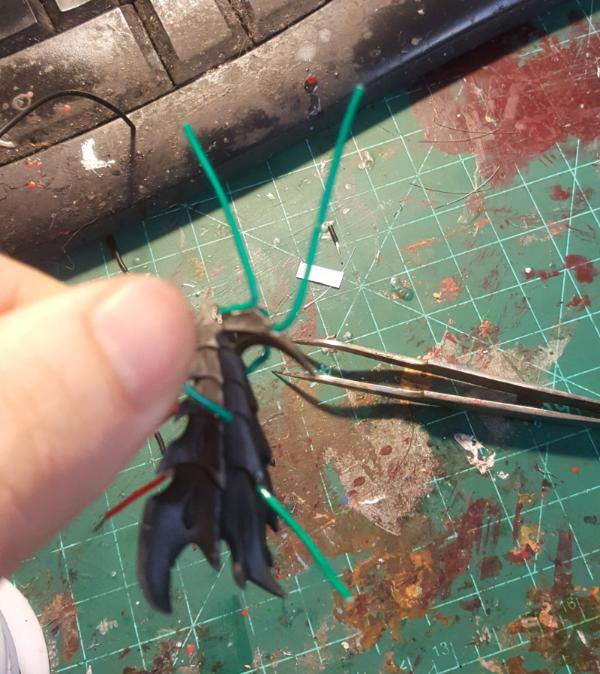
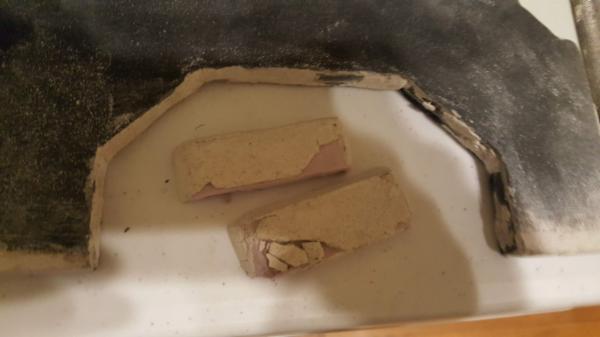
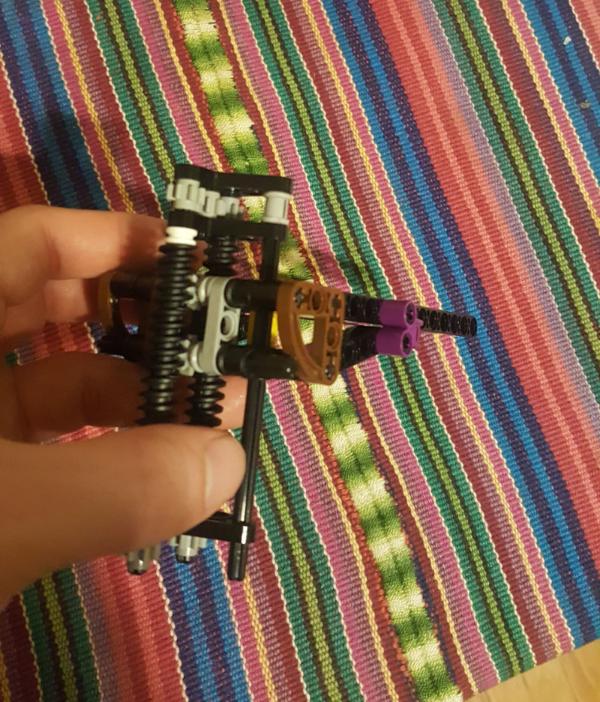
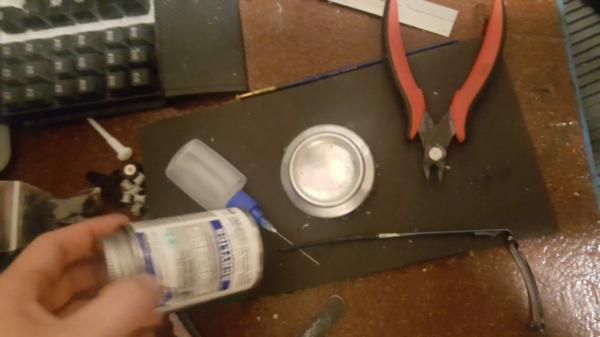
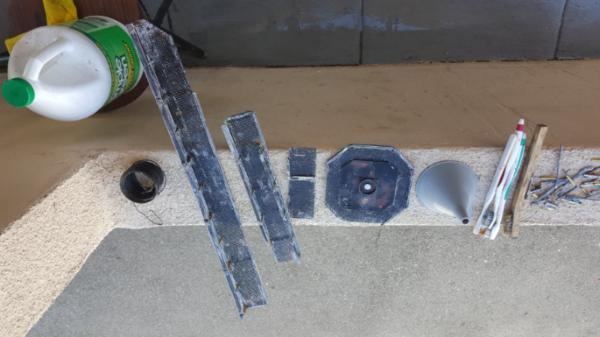
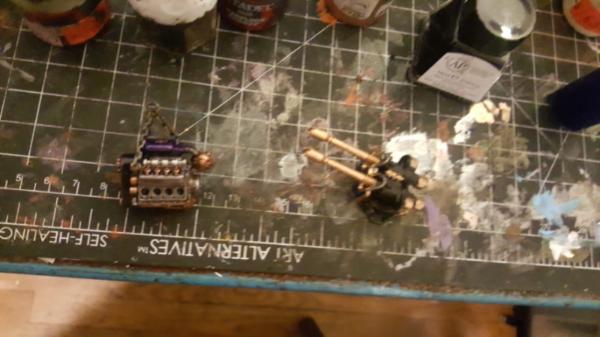
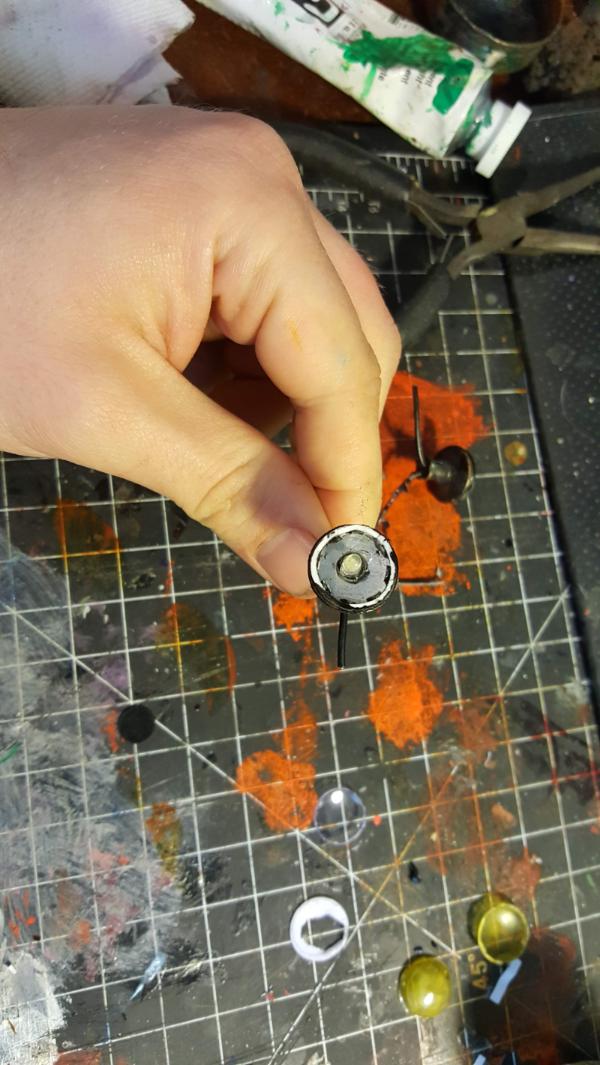
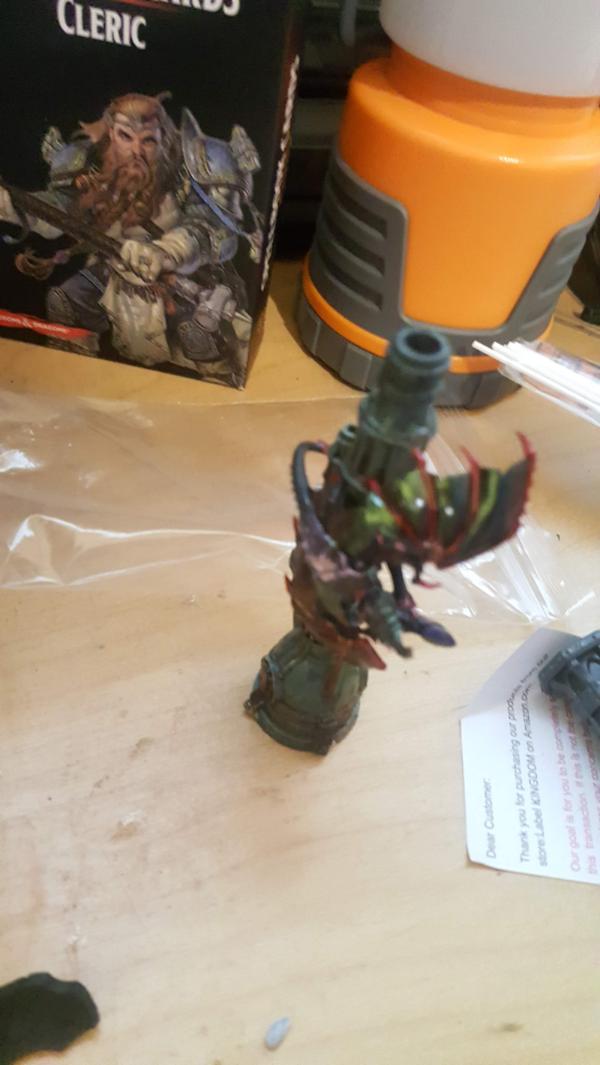
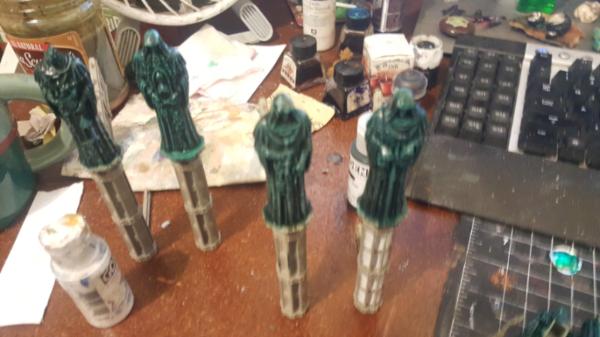
Okay, so, first step. The original EL wire I got was 2.3mm "super bright" wire from coolneon. Now, the trick is that my tubes are.. only 1.2 mm. HOWEVER, while the EL wire is thick the CORE of the wire is not, its more like 1mm. So I figured I would strip the wire and just thread the core into my 3d printed lightning bolts.
2 Problems:
1: stripping it is REALLY HARD. Basically you have to strip it WITHOUT breaking the core phosphor layer. And unlike normal wire sheathing it is.. really really on there. So even when I did strip it there were definitely cracks and breaks in hte phosphor, which were then compounded when i tried to bend it tightly.
2. the 1mm thick core wire doesnt bend well, at all. It's crazy stiff and basically impossible to bend in tight spaces like my lightning bolts.
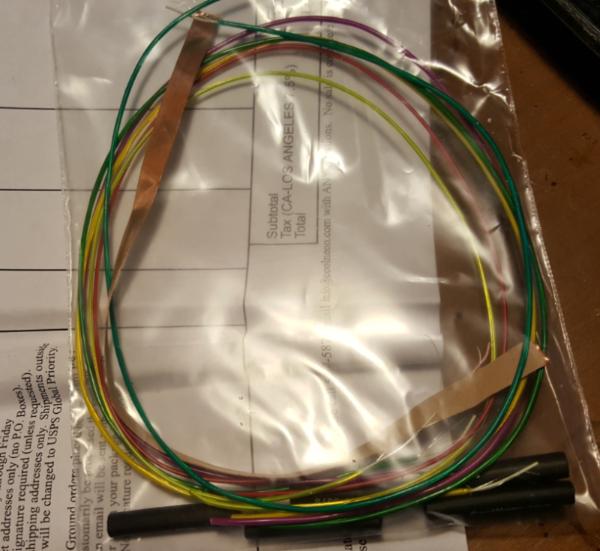
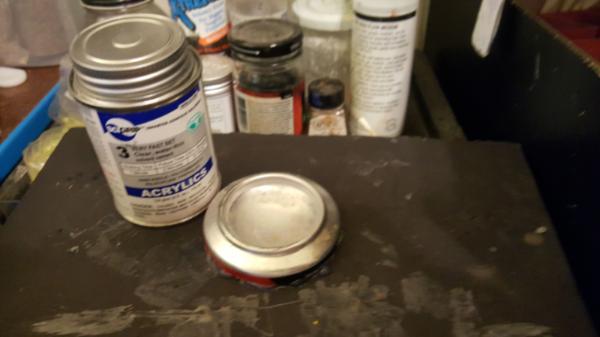
So, that figured out, I went to the angel wire version from cool-neon, which is only 1.2mm WITH the sheathing. It owuld mean I have to change colors but since its like a $1 per foot I just bought one of each color to test what I liked.
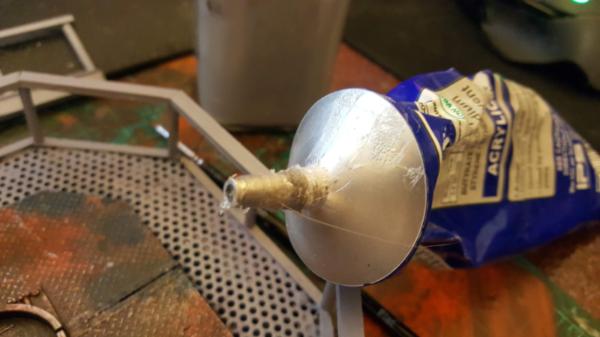
Its much more bendy and still bright enough, so that was happy. Next step was actually fitting it into the model:
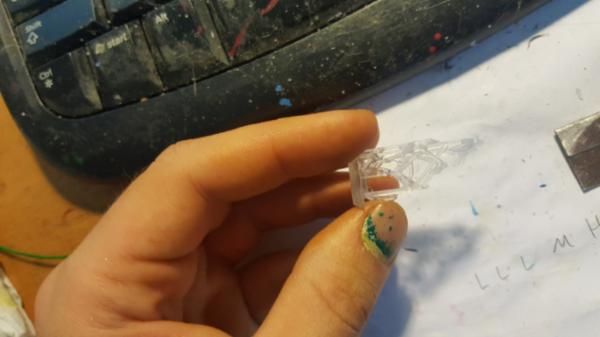
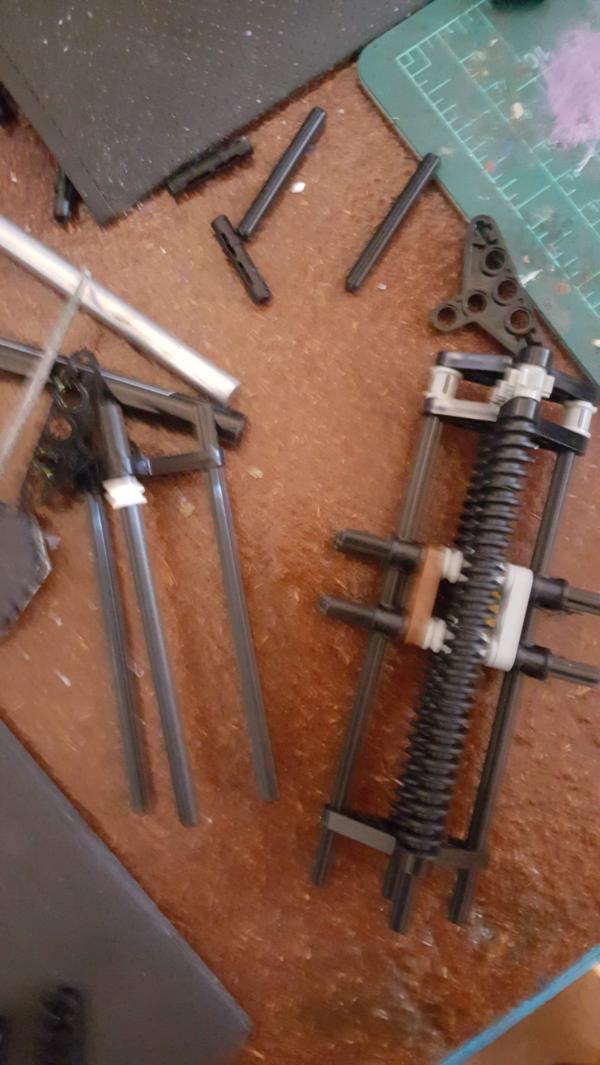
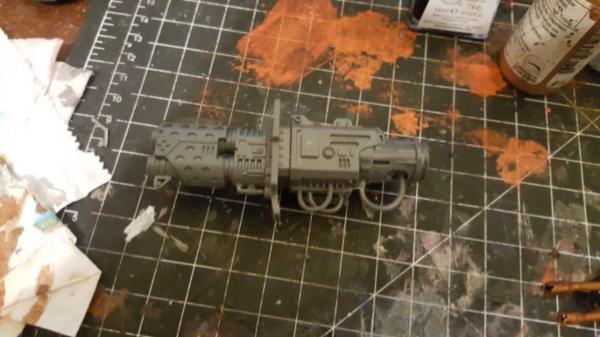
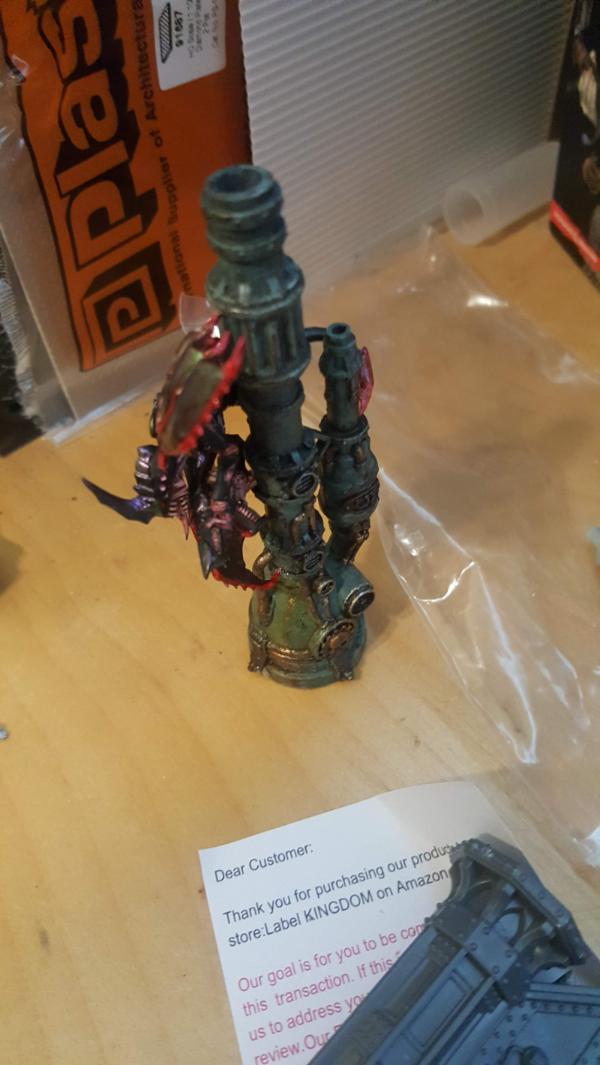
Now here is where we run into the woe. So, 3d printing. In order to get the clear resin the way to print it is the "clear liquid" method, where you have a pool of liquid that is hardened at points. So you are pulling the model out of the liquid (I cant remember the official name of this type of printing but yeah) layer by layer.
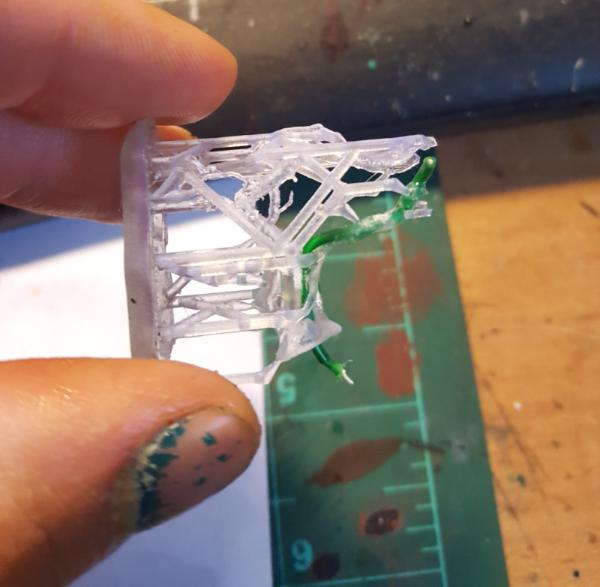
The downside is that the liquid doesnt QUITE harden fast enough for 1.2mm tubes, it tends to collapse on one of the axis. So if you are pulling up, for example, you want your tubes to be aligned vertically so when it sags down a bit it doesnt collapse the tube. However, since my tubes were going along all 3 axis... no matter what I do one of the tubes was going to be collapsed.
We oriented the model, therefore, so that the tubes within the horn would be the onest o collapse on the basis that I could just drill them out again. This worked for the first hidden tube but the second... more or less just cracked in multiple places. Turns out that the resin is SUPER brittle from drilling and yeah, just.. broke everywhere. Fitting the tubes around the wire worked relatively well but I just could not get the second wire in there.
SO yeah, everything pretty much broke:
60913
Post by: Largo39
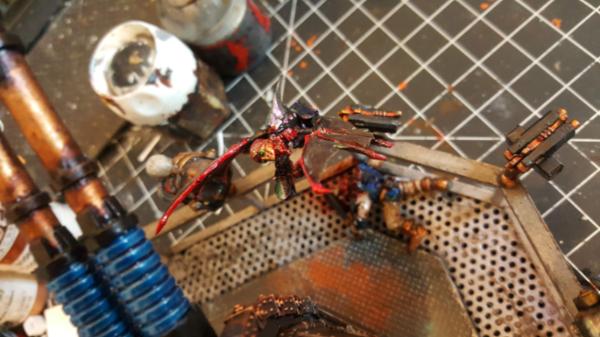
So, after the failure of the 3d model the new plan was this:
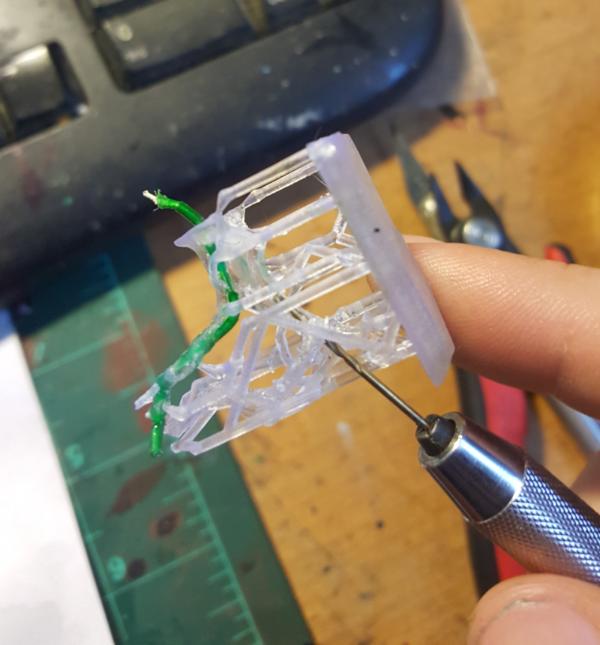
Take the existing horn headpiece i had and carefully drill out the horn to just directly put in the wire. THen bend the wire into lightning bolt shapes and, later on (after Socal) add some 3d printed tubes directly to the wire as needed. Basically the way I approached this at first was to fit the wire around the 3d model. Which failed.
Approach 2 is to fit the model around the wire. so once I have a shape of wire nailed down and glued down to the shield I could go back later and model up new tubes/detailing to wrap around it. Until then I would have squiggly EL wire that lit up which looked decently close. In theory anyways.
But first.. an interlude about EL wire. EL wire is actually 2 wires. The first is a "core" with a phosphor coating (which is what lights up) and then there are teeeeennny tiiiiineeey "angel" wires which wrap around the core. The whole thing is then wrapped in the sheath. Unlike normal wire EL wire is lit with Alternating Current. In this instance the circuit (i'm told) doesnt really need to change from DC in terms of voltage in parallel rules and so forth. What IS important, however, is that there is a MINIMUM length any given segment of EL wire needs to be in. If you dont match that minimum length your wire risks "burning out". The rated minimum length for my EL wire power source is 1 inch.
In reality its more like 1.25 inches.
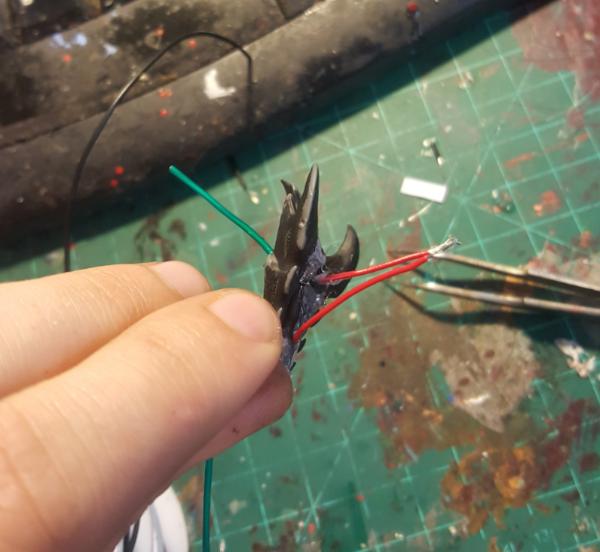
So, I drilled out my holes into the horn and..a ctually did a pretty good job.
But they were relatively delicate so I went ahead and glued down the wire into the holes to really secure it. I also figured as I add wires down I shoudl test the whole thing to make sure its working nice and happy. So I tested the pair that I had already done, they were at the length (at the time) of 1 inch.. all going okay.. oh wait, what was that?
Yeah.. the wire burned out. Too short. Of course at the time I didnt know what burn out was, it just sorta faded out. But further attempts at lighting it and it just would look all "crackly" and be at 10% brightness that it normally is. So not only had I lost wire but basically the entire headpiece as well since it was glued down and the wire would be difficult to get out even normally (very tight fit).
So.. commence screaming. Sigh. Well, time to ebay another neurothrope head and do this all over again!
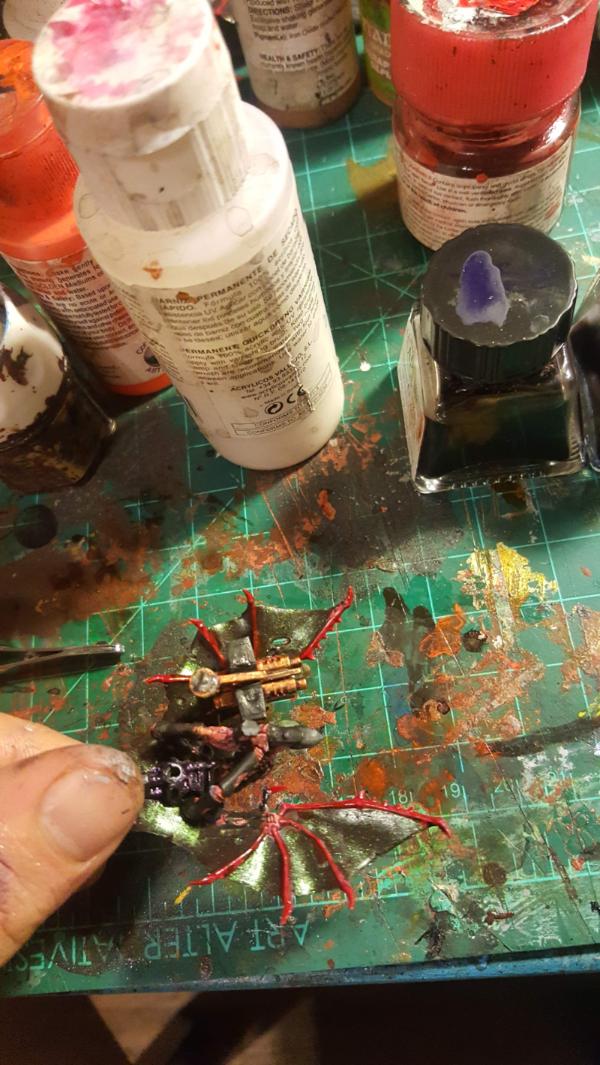
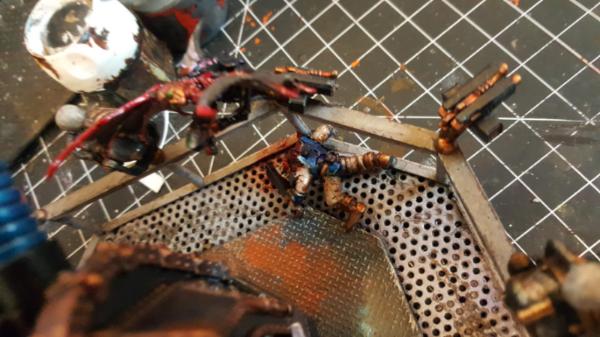
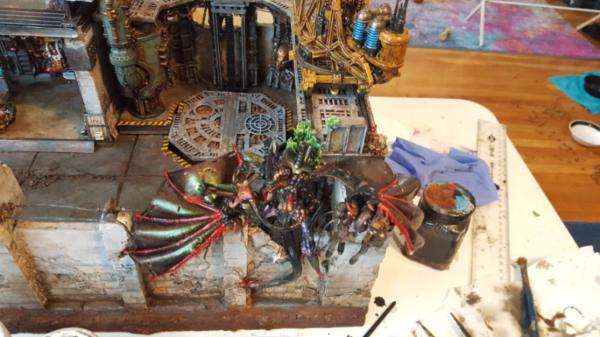
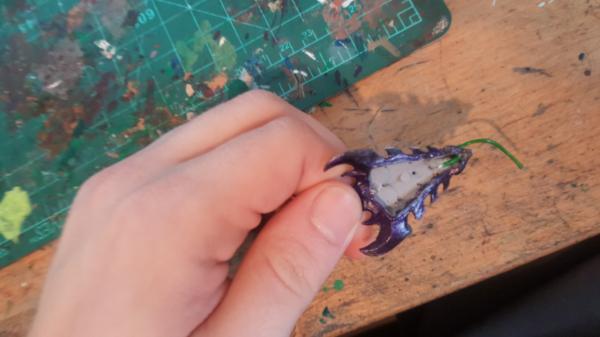
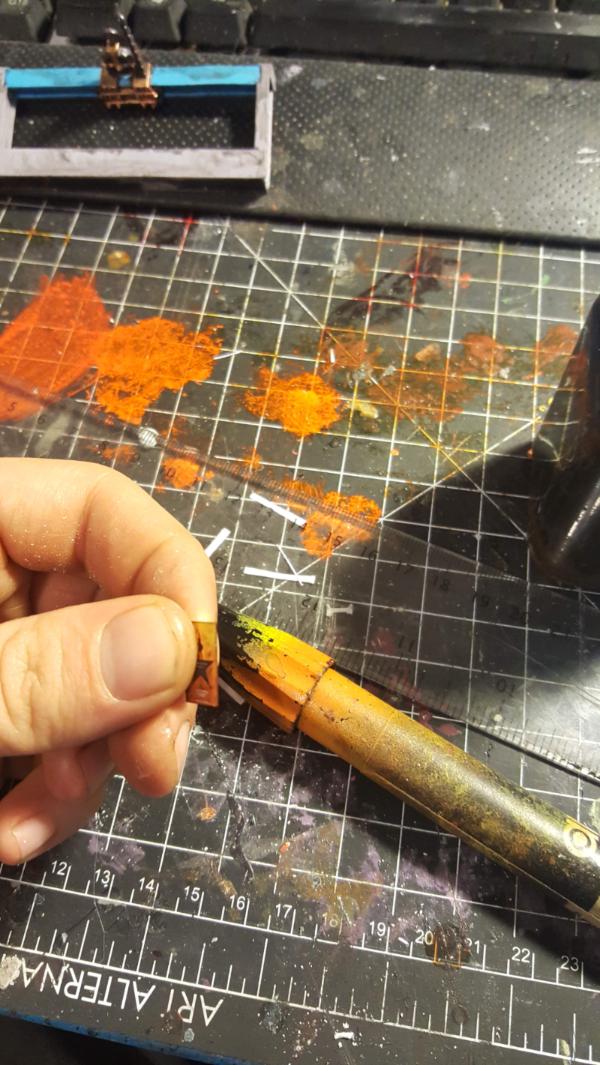
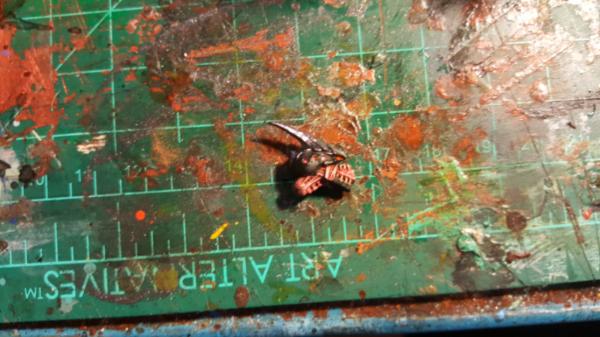
A few days later and we can re-start with a new color of green wire! this time i made SURE each length was up to par. Downside is it made stuffing it all into the head much, mcuh more difficult, and I have a shrot somewhere that I have to tap to get one of the wires to light up buuttt.. it works.
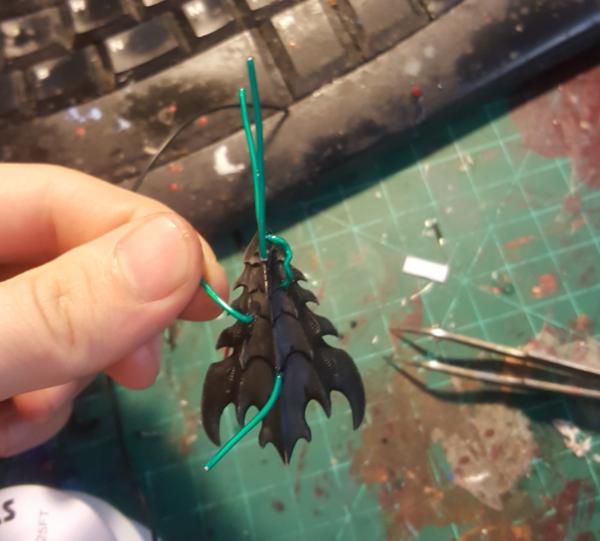
After the bending:
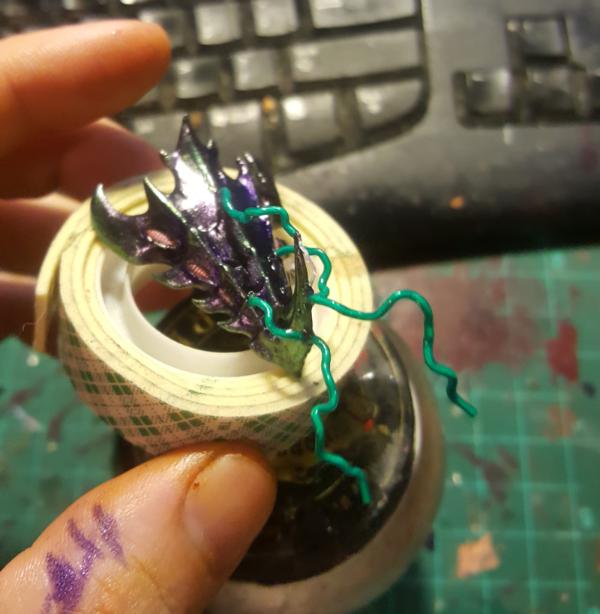
I have to say just bending the wire crisply doesnt look too bad, i may just leave it like this for the final lightning look.
116025
Post by: Dynas
Awesome warp blast/forcefield effects
60913
Post by: Largo39
Thanks! I'm happy with how it turned out. Ill have more pics soon I just had to tweak the brightness a bit.
8330
Post by: kestral
That is a truly impressive level of persistence to get the effect you wanted!
60913
Post by: Largo39
Thanks! Yeah when I get an concept for these things I really want to get at least one example out of it. Otherwise I cant purge out that "what if feeling" and its.. really irritating having that feeling stick around for months/years at a time.
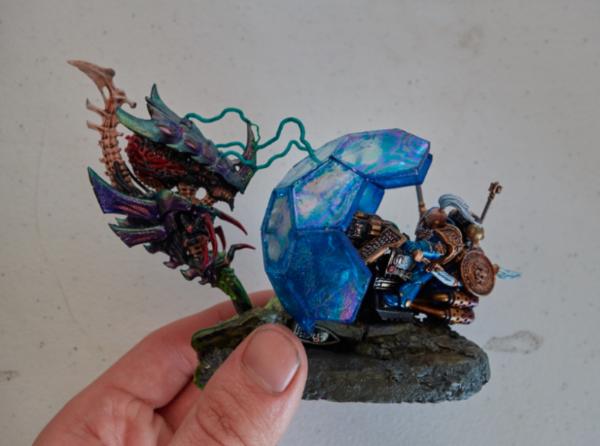
I still have a dream of my own 3d printed tron bikes (with EL wire of course) in 28mm sizing to use as whatever bikers I could need. Thats going on 3 years now?
Originally I was going to do this shield effect for a knight, with the explosion/fireball hitting the void shield equivelent they have. But as I've refined what I wanted it made more sense to do it here since it could be more of that star that way (and I already did my flamethrower effect which quenched the need to do any more fire related stuff)
60913
Post by: Largo39
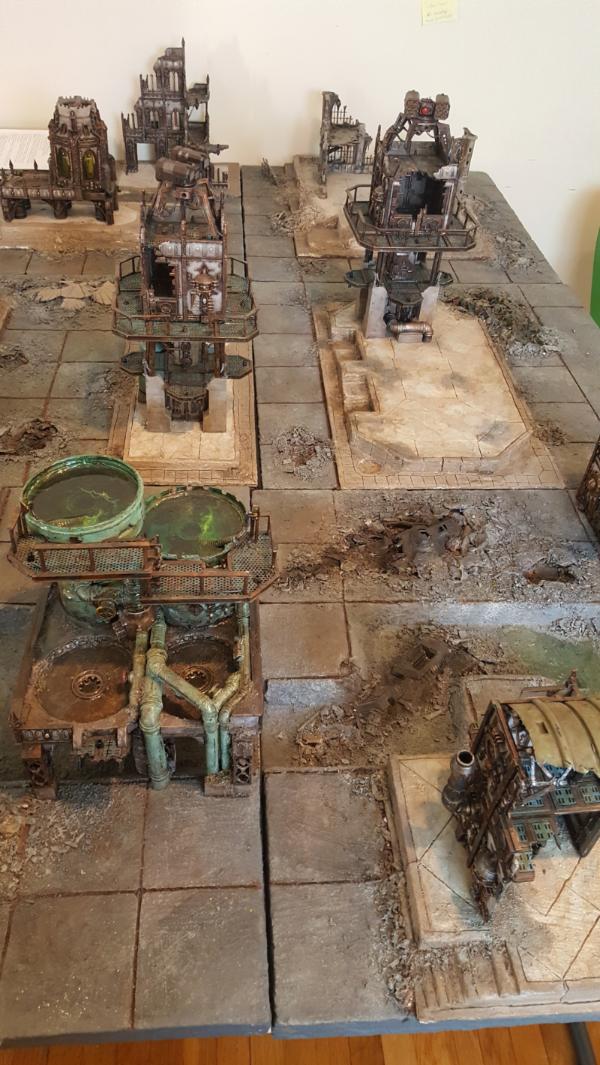
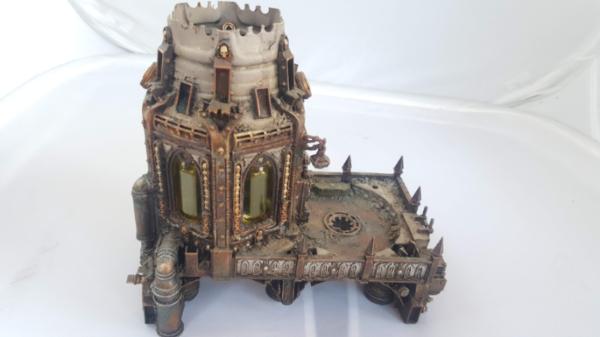
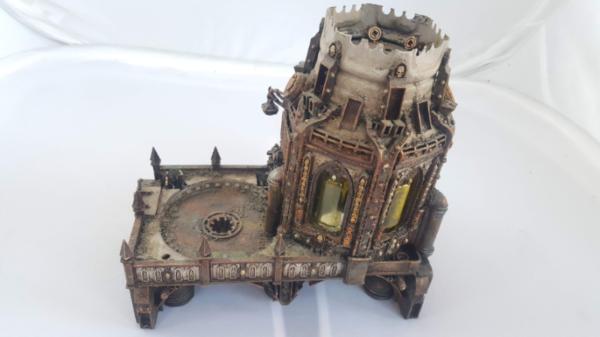
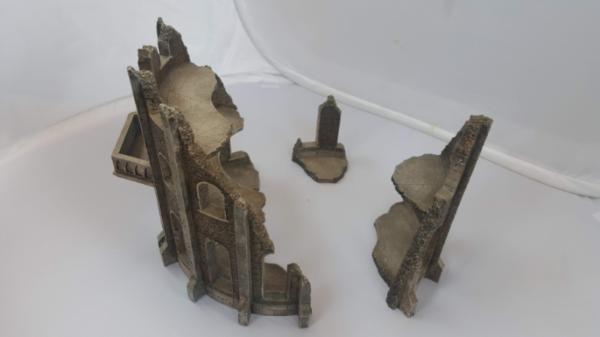
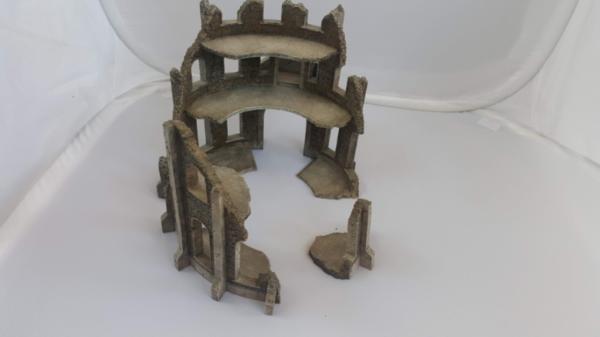
Hello! I'm back, well, eventually I am anyways. I'm back mostly because the new sector imperialis ruins are AMAZING and i want ALL OF THEM.
Sadly, im out of room, so! it's time to sell some things first. Im starting here because, well, you guys have actually seen this whole journey through so if there is any you want you get first crack at it. Here is the first batch of what I want to get rid of. More to follow once I.. get slightly better pictures of them than what I have. PM me if interested/offers.
These are from an existing kit but are a very heavy resin and feel stone-like. They're also have a footprint of about a foot so.. just too much room for me really given that I already HAVE lots of big things but would make a good centerpiece that wont shift around.
99
Post by: insaniak
Doesn't hurt to have a few different 'big' pieces so that you're not always using the same ones 
60913
Post by: Largo39
I mean.. yes but I want NEW big pieces. City big pieces with statues.
More importantly though is the fact that the colesium, while an excellent terrain piece, doesnt really have attachment points for my bridge network system. That is one of the key pieces of modularity that make my terrain flexible for both 40k and kill team/dnd/etc. Thus I kind of want EVERY building to at least have a few attachment points so I can really go to town with bridges between them.
22192
Post by: whalemusic360
If i wasn't out of hobby funds I'd totally be looking at picking up some of these.
60913
Post by: Largo39
Noooooo there is always more room for hobby funds!
120033
Post by: Excommunicatus
So... I clicked on this thread at 4.27 a.m. because I'm currently making three small terrain pieces (out of cork and rocks, mostly) and thought maybe I might get some tips and tricks.
I'm leaving this comment nearly seven hours later, disappointed that a standard 6x4 board is too small to build a St. Paul's sized cathedral on.
This thread is magnificent. Game raised.
60913
Post by: Largo39
Thanks! It's been a long journey with many breaks buutt this thread definitely helps keep the motivation up to keep trying new things.
The good news is that there will be new posts soonish! All the items sold and I bought myself some galvanic cranes and knight docks and imperalis terrain.
So we'll get this party started again with new fun times. When in doubt, add more bits to my terrain board? I also want to actually finish painting the 2x2 tiles too...
60913
Post by: Largo39
Hello again! So stuff sold! basically nearly everything "spare" that I was either okay to get rid of or had no use for is now gone. Look at how much room i have!
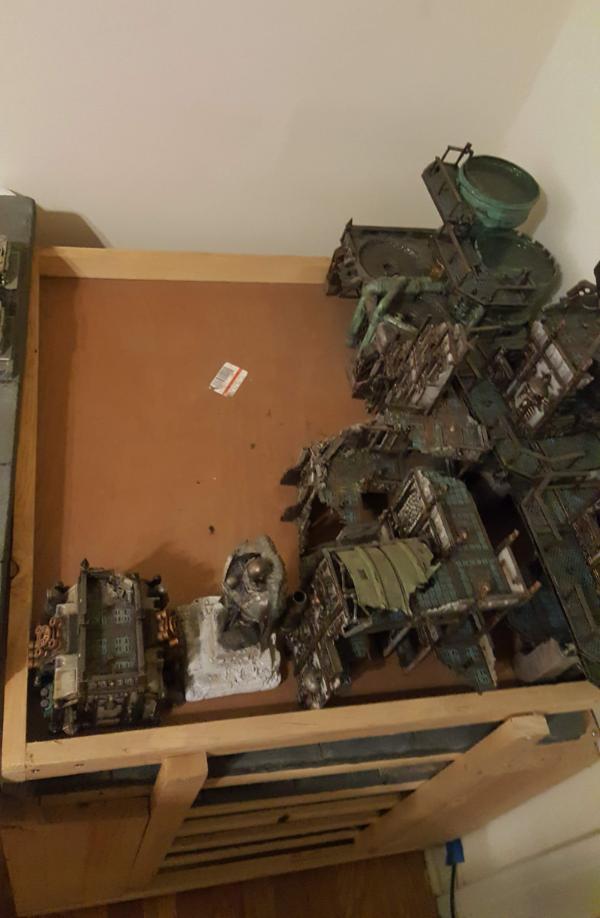
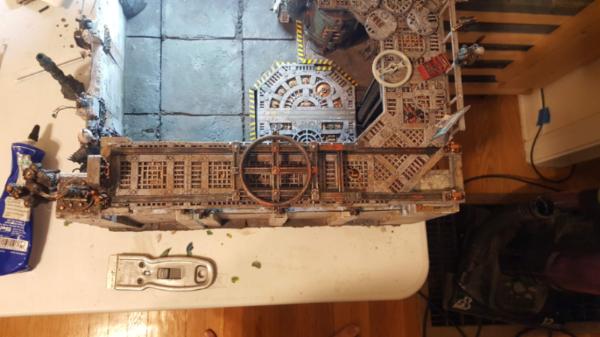
and the reason for all this room.. NEW STUFF! I really really love all the new terrain bits GW has made and wanted to paint it up with all the statutes to really bring together everything on the city tile.
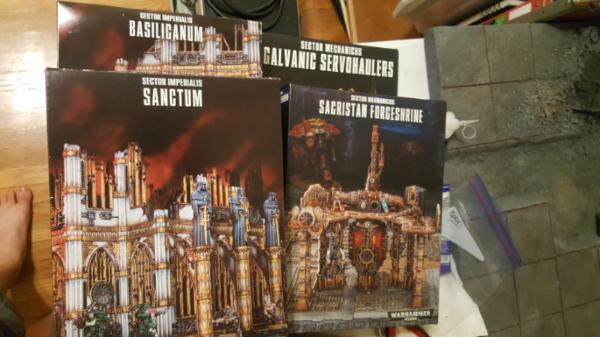
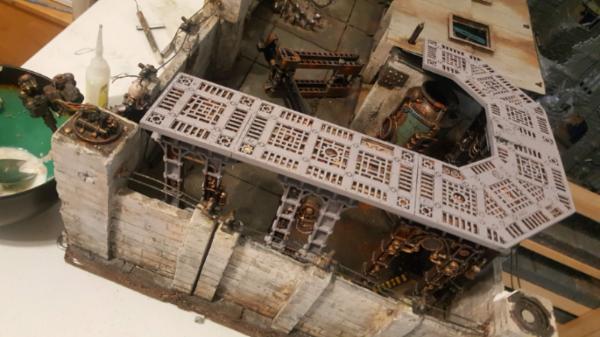
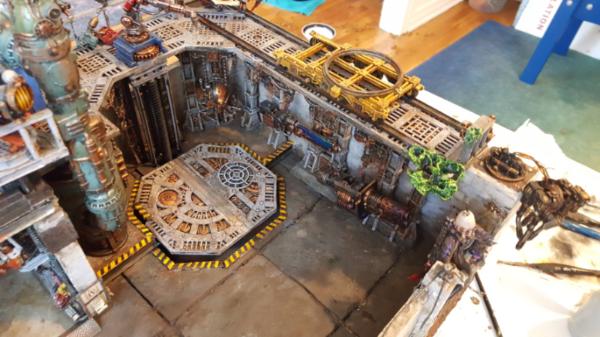
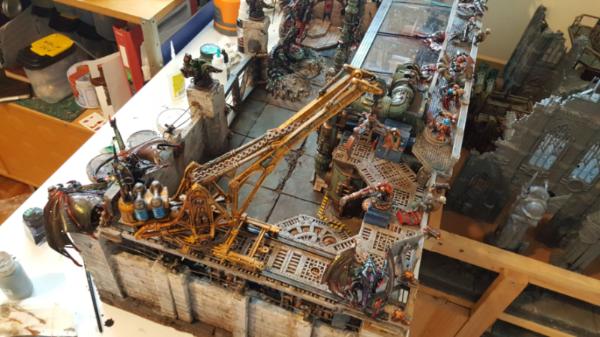
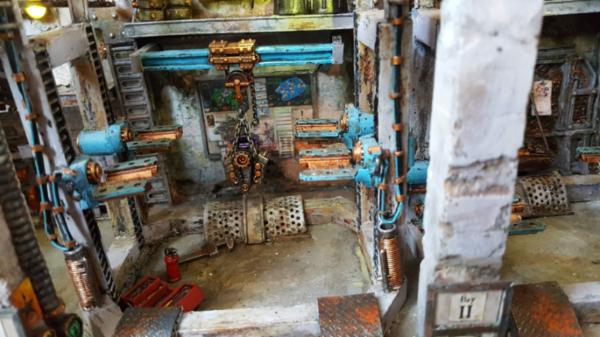
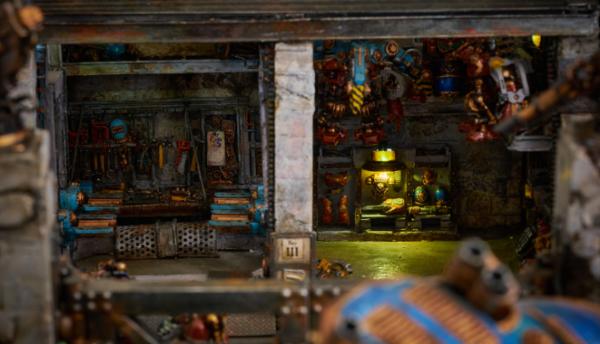
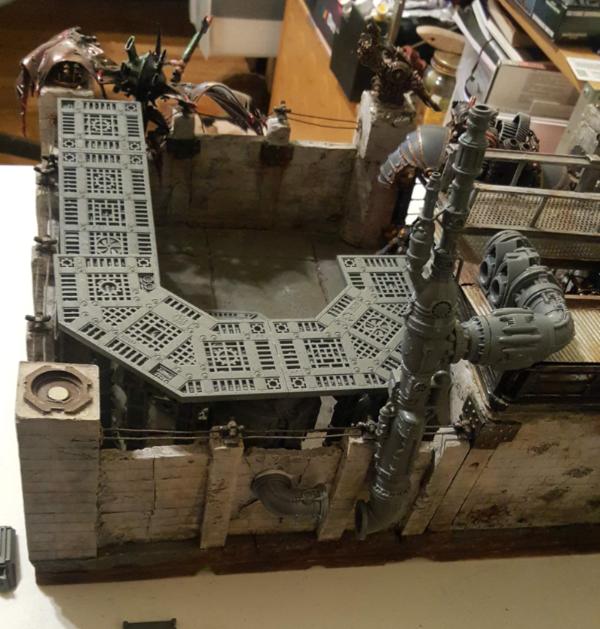
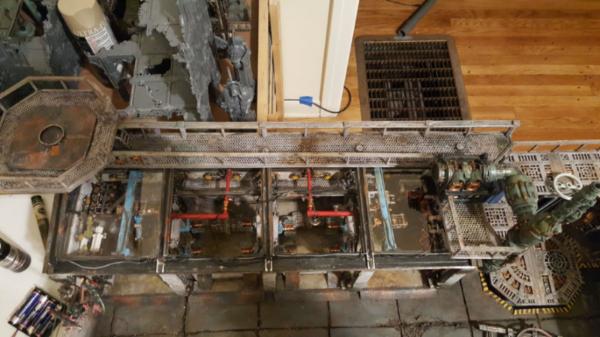
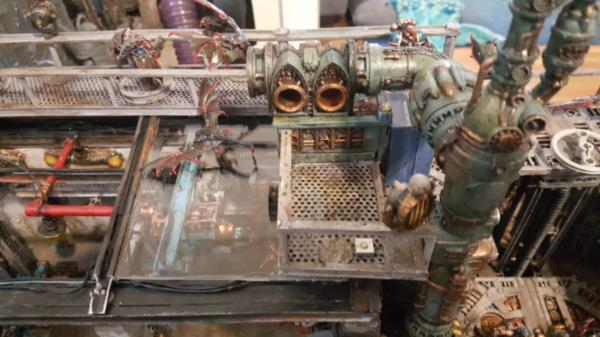
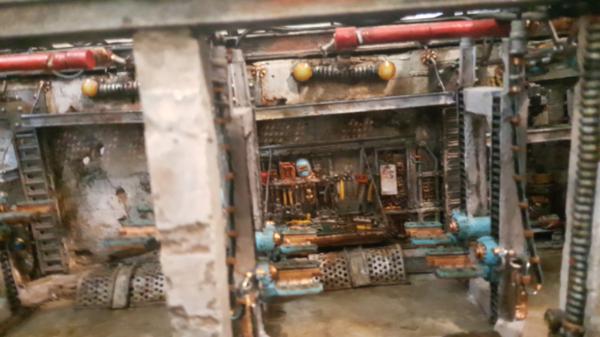
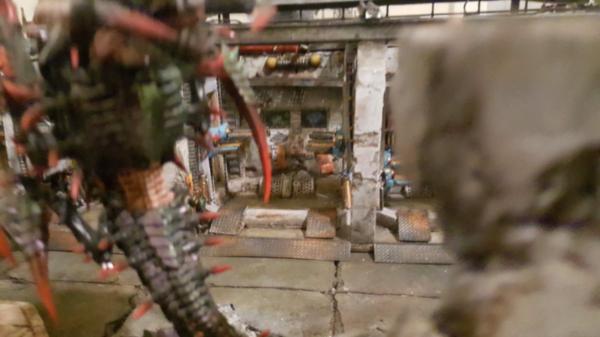
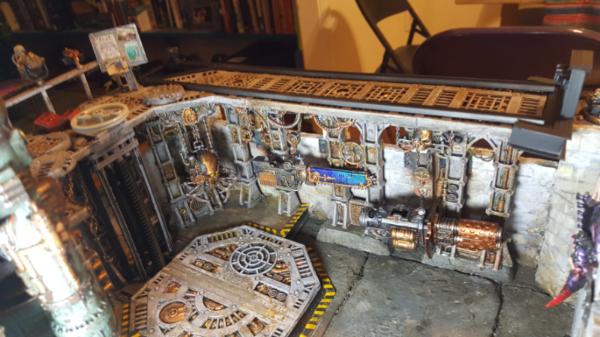
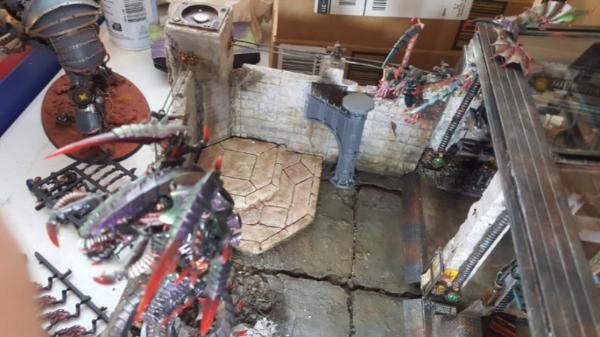
Also that forgeshrine (with an added awesome GIANT CRANE?!?!?!) is a perfect fit for.... el garage. This is the current state of it:
It's a good state, no argument there, but there is that.. big blank space where the sicaran is. It bugs me. Originally I wanted to make some kind of barracks there buuut I couldnt really think of a design that was reasonably time-efficient and would look decent from this angle. The alternate idea was some kind of giant knight area which would service the knight now fallen on the ground but that would also have taken a ton of work. Enter the new forgeshrine which looks to be a perfect fit and great way to fill out that area (and give me new base types to boot for more variety on my scions/scouts)
The other thing that bugs me about the garage is, well, its really hard to see inside. I took this setup to Socal last year and one thing I noticed was that people had a hard time really getting a sense of the garage interior when it was all setup and put together. There is so much detail there hidden away by the roof/walkway that it might be worth revisting to see if, now that I have something else to connect the walkway to, i cant clean up that area and make it a bit more open. It would also be nice to finally add my gargoyles, heavy bolters, and searchlights to the walkway so it looks like the bloody battlefield mess everything else is.
60913
Post by: Largo39
So, now im trying to figure out placement. The good news is that the forgeshrine fits very well in my little nook!
The bad news is twofold:
1. it sticks out relatively far from the wall when the exhaust pipe is in the back, this is bad because i wanted this thing to be RIGHT up against the wall so I can maximize total walkway distance on the side. My plan is to combine the forgeshrine with the giant crane on rails to explain just how knights get repaired and also show how supplies are moved around the base. So I want to maximize the distance there.
Furthermore sticking it center in the middle is.. kinda boring. I dont need this to match the original layout THAT closely.
2. I tried moving it to the corner but that blocked the door and also looks wierd:
You can see the issue here, there is a big gap near the wall even with just the cylinder which means im losing out on distance for the side walkway:
So yeah, not sure yet there what to do.
One other thing, I've switched glues around a bit for this project. Normally I just use like superglue and move on (zap a gap, gorilla, etc) but one thing i've noticed with the buildings/other large plastic structures gluesd that way is that, while sturdy in compression, they can easily crack under tension (like if you pick up the building wrong) or if you suddenly "drop" the building or otherwise "shock" it somehow. So i wanted to experiment with some other glues. I already used this brand for my acrylics (weld-on) but after watching an adam savage video I bought a couple more of their types (each # is a different consistency/plastic type):
https://www.eplastics.com/Plastic/plexiglass_glue/ips3-4oz?gclid=EAIaIQobChMIotT7x46v3gIVhPhkCh1-fAkcEAQYBSABEgINB_D_BwE
I went with #3 and #16, which handle the same plastics but 3 is super liquid and 16 is "thicker" and theoretically stronger.
Both have their pros and cons
pros:
1. THEY WORK ON STYRENE (the white plastic card i always use) . super glue does NOT and was the primary reason why my walkways have wire through them, because i just could NOT glue it well.
2. they do seem to weld the plastics together strongly once set (they set fast after a minute or so, and then more strongly as time goes on)
cons:
they are fiddly as hell. the #3 is so liquid it can squirt everywhere and is similar to my acrylic experience. It just takes real skill and luck to get it all to work.
#16 almost instantly gets cloudy/a film over it when it interacts with air, so the tube clogs CONSTANTLY and is a real pain to glue something down (since once you unclog it comes squirting out from the pressure)
60913
Post by: Largo39
So when I left off I was still trying to figure out how to place the forgeshrine to maximize my space.... and im still doing that.
The problem was twofold, the pipe setup in the back and also the fact that the cylindrical forge part has a larger diameter than the platforms which cramps how much total length i get for them.
I could potentially live with the second problem, but not the first. I started to consider more exotic locations like so:
but that would have been a TON of work (you just KNOW i would have to drill through the wall to get an actual pipe in there..) and is a definite breakage risk when im carrying/moving this to events by being "off" the tile. I ended up with something of a epiphany and decided instead to move the forge to the side. I had to cut off some legs I had already glued to do it buttttt it looks a LOT better.
Furthermore having the pipes there lets me use both sides, since there is a control panel on the other side which is traditionally hidden in the "standard" arrangment. I would need to re-do some of my walkways but it would look great and could connect everything together. There was just one more problem...
A knight doesnt actually fit well in that gap! i borrowed a knight from a friend to test and.. yeah.. doesnt really fit. I already had the thought of potentially having a rising platform so this setup could handle "bigger" knights (like the new plastic beefcake castellan) and adjust itself but even then the width was just nooooot nearly enough for even this guy. Sigh. So now to widen the thing.
not perfect, but much better, especially when I rise stuff up.
All together now:
60913
Post by: Largo39
So with the sizing and placement of the forgeshrine done it was time to put it all together (minus the forge part, too much detail to do with the big lump)
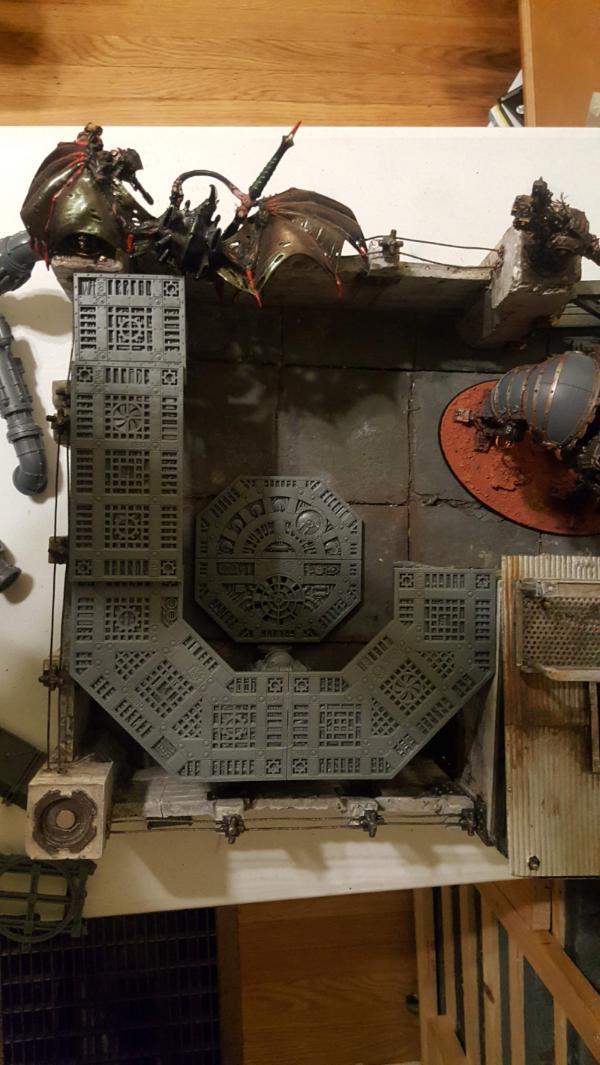
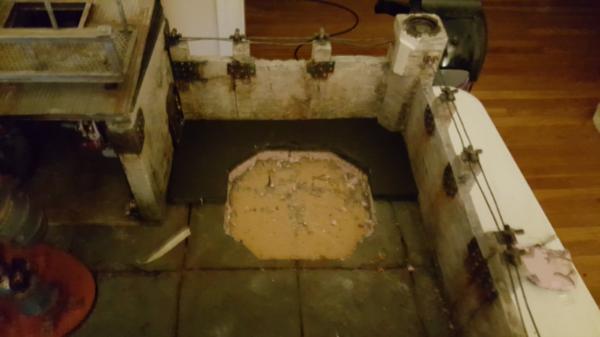
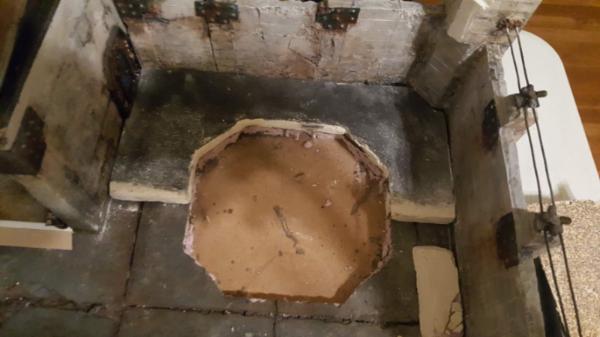
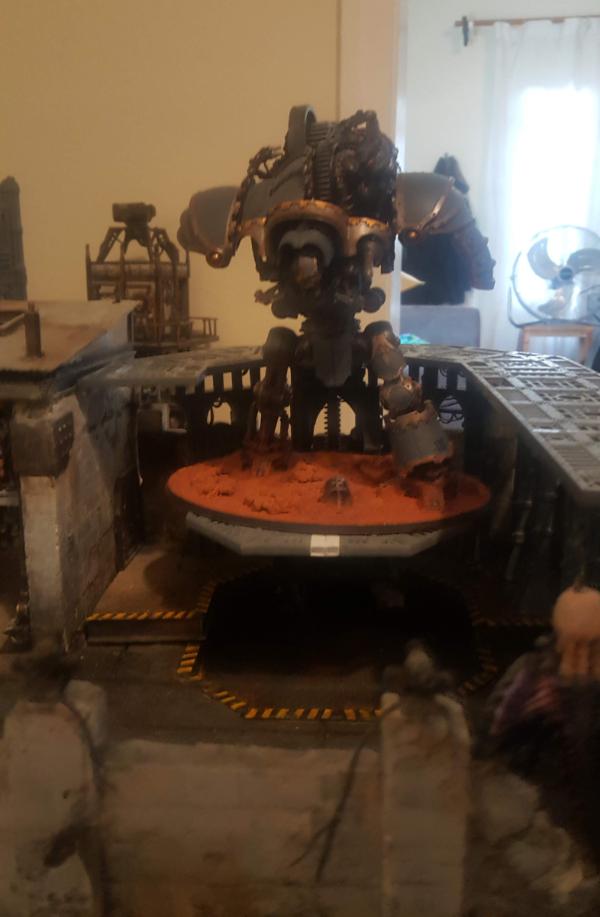
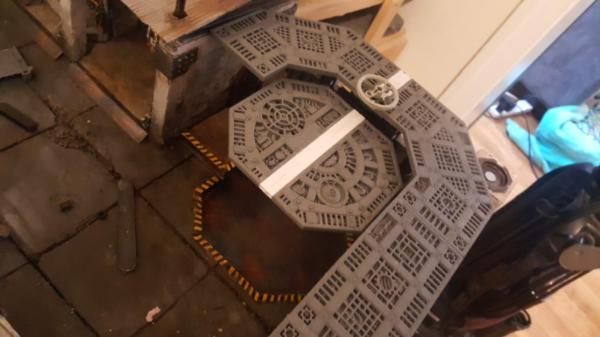
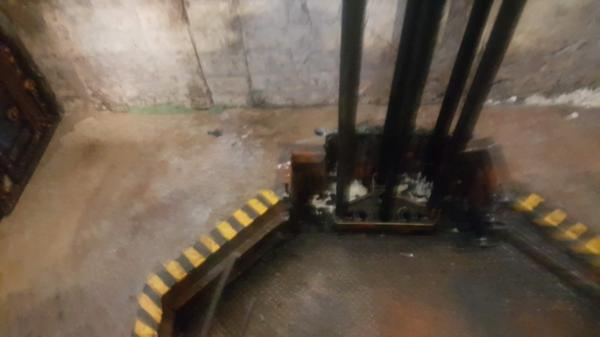
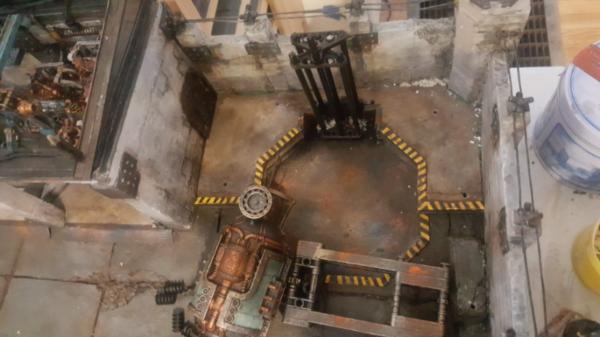
Next up was making a basement. The idea is to make the octagon center a giant lift so knights can go up and down as needed to fit (and look cool). Obviously that structure would be in my default of lego, which means there would some kind of "arm" carrying the octagonal platform. Since I want this to be as flush as possible with the ground that means I need to dig into my tile a place for that arm. It seemed to make the most sense if that hole would be the same shape as the octagon.
To line it up I cut and hotglued some straight foam lines down from my octagon cutout so I could (hopefully) line it up well.
dir away good sir!

next was elevating up the whole forgeshrine assembly a bit. in the forgeshrine main picture they show it "raised up" a bit to fit the knight better, and since the door to the garage is raised up anyways.. it seemed like a good idea to just add a half inch riser or so for everything.
Everything fits!
20895
Post by: karimabuseer
Not sure how this doesn't have more views...phenomenal stuff!
60913
Post by: Largo39
thanks! Honestly the views dont matter so much as the blog just helps me stay focused/motivated on the project. Still, tell others about it mostly because there are so many lessons (IE: mistakes) made that its a shame if anyone else made them too.
20609
Post by: Tyranid Horde
I don't know why I didn't spot this sooner, there's some really cool stuff going on in this thread.
Subbed!
60913
Post by: Largo39
Thanks! It's been quite a journey, a lot of techniques explored.
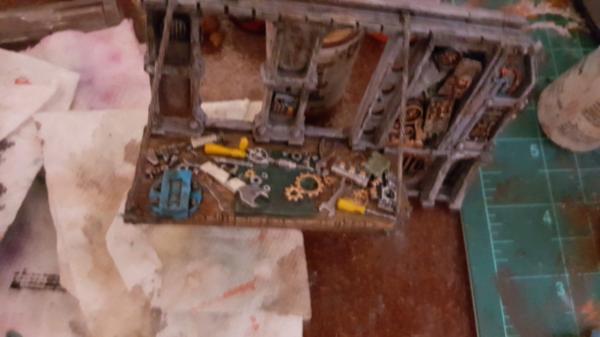
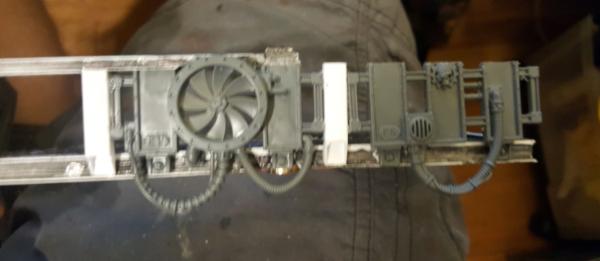
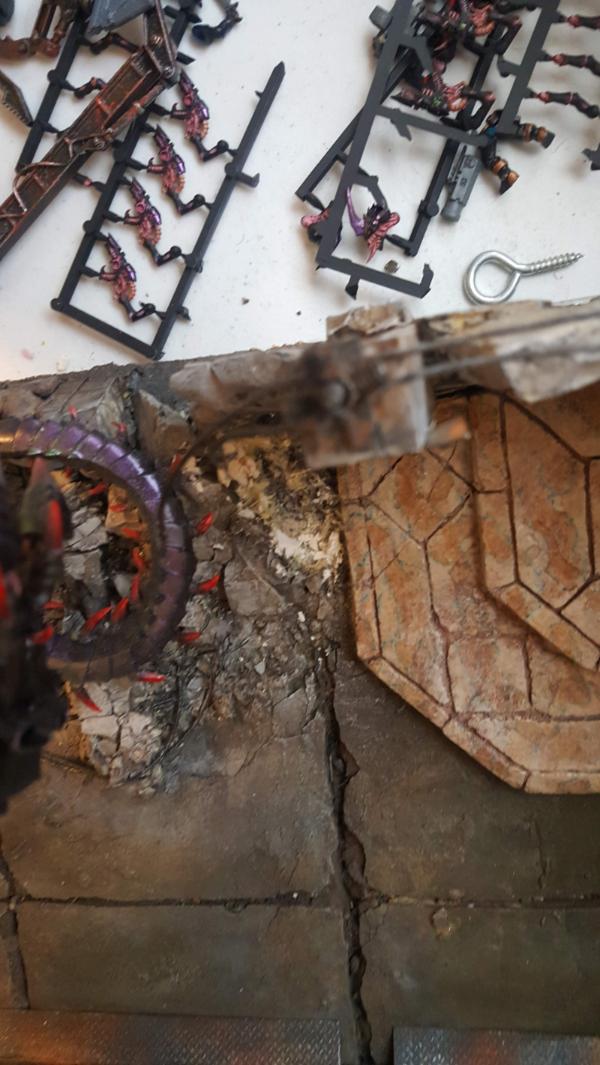
Anyhoo back to an old favorite: foamcoat! just the best stuff annd.. im very nearly out of it. I also have very few uses of it left so i figured I would, instead of rebuying (and waiting) for a whole nother set of foamcoat/boost/sand I would just start cutting off pre-made stuff i had from testing and gluing it on. That would give me "thickness" and then I could on top of that do a single thin smoothing layer.

I also needed some lift blocks to put the "crane" part of my walkway on so there we go:

now one thing I've learned about foamcoat: it doesnt really corner well. In the end your corners can never really be super sharp. Instead of killing myself worrying about that for this I figured I would just add some i-beams and make a nice clean edge that way. Sort of like a giant "bumper" any errant knight pilots might kick instead of the concrete.
Finally I start working on figuring out the lego lift mechanism. Some progress but a lot to figure out:
60913
Post by: Largo39
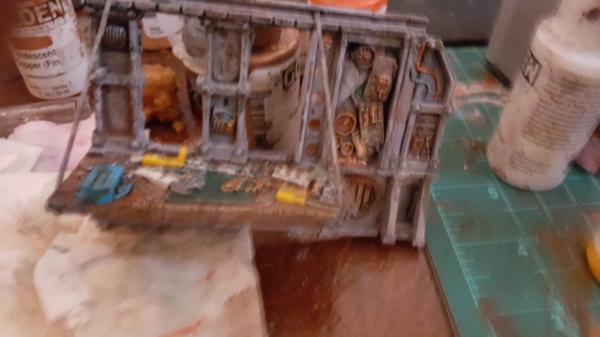
So work continues, first finishing up the foam coating of my stuff:
hey it fits! yay!
And now to actually add some ramps for the garage. This is hopefully thel ast push here for detail so I really want to clean up everything as neat as i can. I found some high resolution plasticard with metal texture and it makes for a great ramp/small platform.

120033
Post by: Excommunicatus
This is all just hugely inspirational stuff.
60913
Post by: Largo39
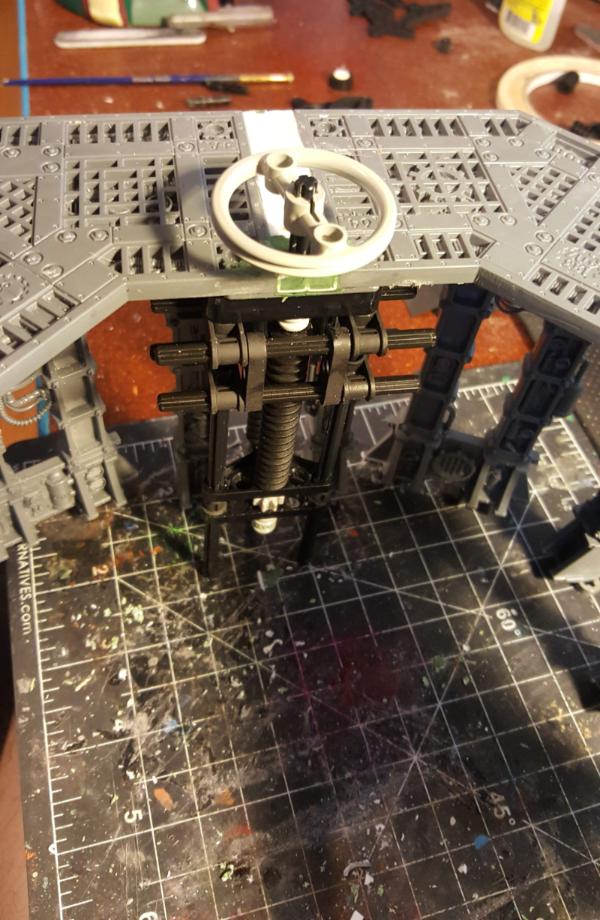
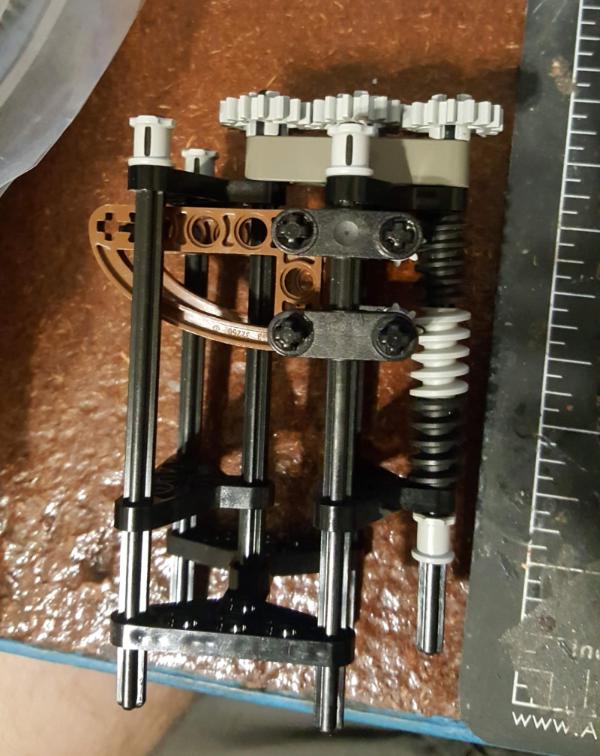
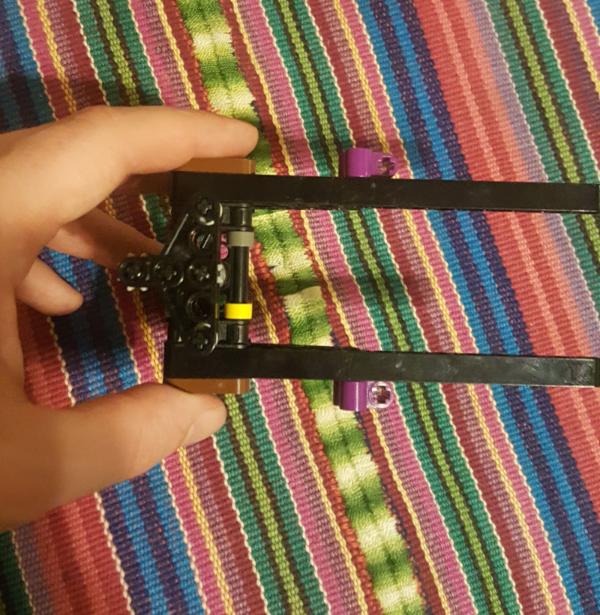
Time to figure out the lego lift!
This is something I had to figure out basically next in order to plan where and how everything goes. Key is that this one lift has to be able to hold up a knight AND not move when "idle". Thus the key to this are the worm gears which are great for both points. I oped for 2 sets of parallel gears for now. They.. mostly work? occasionally it seems to "bind" for reasons im not quite sure, but adding the spacers seems to have help at least for this test.
Next up is to buy longer axles and more worm gears (and i mean LONG axles, 10ish inches and then cut it down) and test it on the full height.

60913
Post by: Largo39
So, first up I got some longer axles (5 inch) thinking they would be long enough. Hint: they arnt! but its okay, because its still a good second test:
It still works though one thing I've noticed is that gets "stuck" occasionally and binds, especially if stuff gets pushed a bit tight. So we'll see how it handles weight but still so far so good. I also started priming some of my legos. I decided for this project to change primers because, well, I havent been happy with the one I use (some cheapo one from a car store). It comes off too easily, especially on legos where it doesnt really hold at all. I did some research and this stuff with the "fusion" technology seems like it might be better:
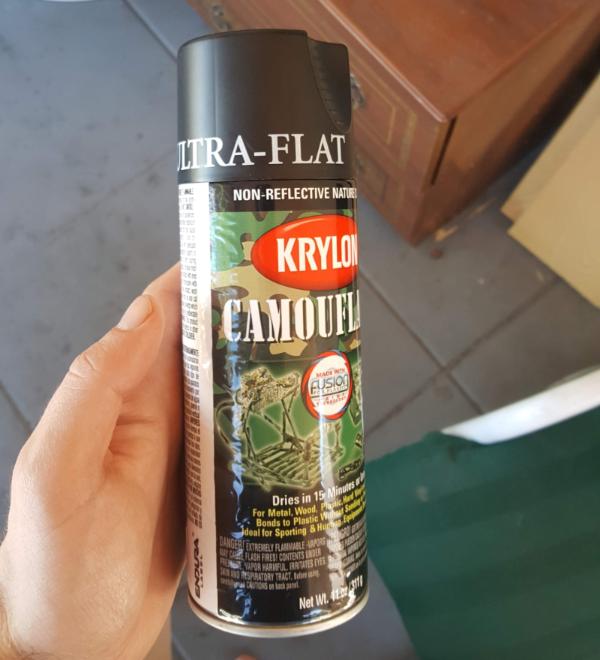
I tried it and.. it held a LOT better, and is super duper flat so paints well. Color me satisfied!
Next up is a bit more about glues, as previously mentioend I am using 2 new ones: a super thin one that melts the plastics together and a thicker one with a stronger bond. Both have their pros and cons.
The thin one a way of working is you pour some in a cup and literally brush it on. Since it only affects plastic/acrylic it doesnt kill your brush and you can get very neat joints. (this tip from Adam Savage's youtube link about modelling)
It works well but DAMN does it evaporate fast. A small puddle of the stuff will go in a few seconds so you either need a LOT of this or you know exactly where to brush on. So that kinda stinks. The dropper method also works but is also fiddly. The joint holds quickly but it can be a bit weaker in the end I've noticed. So it's great to "place" something and then later if it breaks off you use the stronger stuff on it afterwords.
Speaking of which the stronger stuff is this (hey you get a sneak peek of the future!)
It works well, holds VERY well but also clouds up REALLY FAST. The opening to the liquid will block itself within a few seconds which.. sucks because you have to poke it out EVERY time. If you try squeeze the tube to burst it will basically explode with glue. Its very.. viscous and likes to flow into itself. kinda frustrating to just have mass spillage over and over.
Still, its strong and does bind the white plastic with GW plastic.
Anyhoo, moving on from glues I started working on the edge cleanup for my floor. The part near where the lift mechanism will be is a bit of an unknown but i wanted to get something down and I just may have to cut it out later.
blurry but you get the idea.
60913
Post by: Largo39
So I got in longer (10 inch) axles and cut them down and with that came full tests and a few revelations:
so to make this work i dug holes into the board as well so I had multiple anchor points. It gets a bit tricky to line up everything but it works and.... it didnt quite work.
The first revelation was that my first platform prototype:
was too bendy. Just a single lego beam is not enough to support the weight. So i needed to double down and make it more rigid:

the second revelation was, of course, my "back" area was no longer big enough to go all the way down, which i wanted. So time to carve away:
The final revelation was that, when i did it all together, it bound a LOT. basically the 2 shafts of worm gears arnt QUITE aligned with each other. So what would happen in my small scale tests is that they would shift ever so slightly to account fo reach other and thus work "fine". But once i removed that slack installing everything it would bind at about midway up or down.
So.. I decided to just go with 1 worm gear shaft and add a few more supports in the back (the lego bits with holes where more axels will eventually go) to further keep everything sturdy:

the end results, though it took a while, are well worth it!!
68634
Post by: Ilgoth
Drop your day job and keep building this for me until it's done.
I know, I am not asking much!
60913
Post by: Largo39
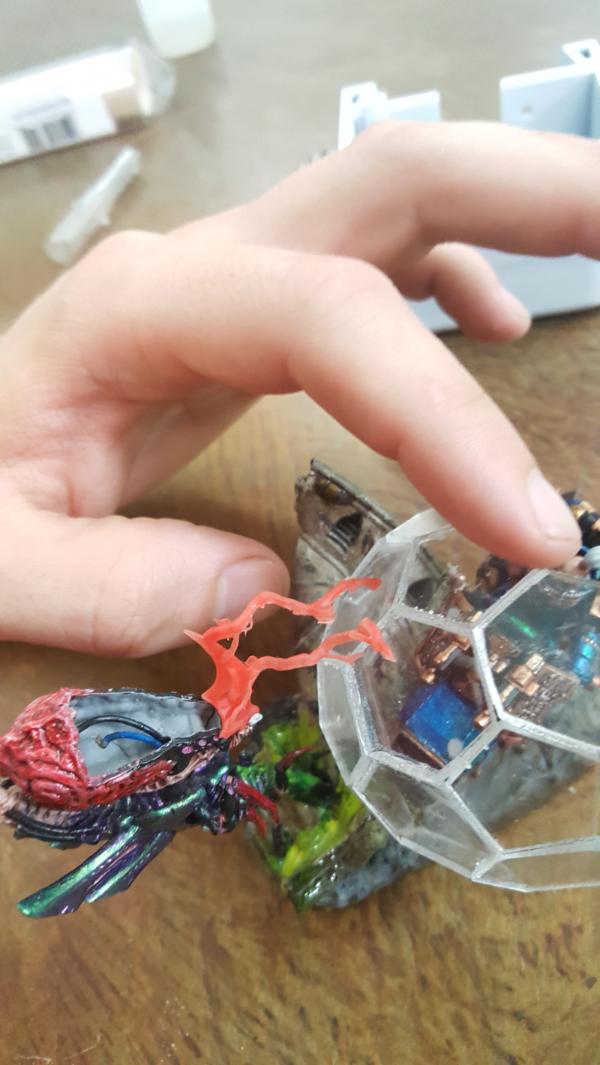
Another pic of the knight! It makes me so happy. It really works well and you can even lift it with the knight on it. I wouldnt.. suggest doing that, but its doable! Definitely couldnt hold a sicaran or a fire raptor (anything solid resin really) but knights are no problem.
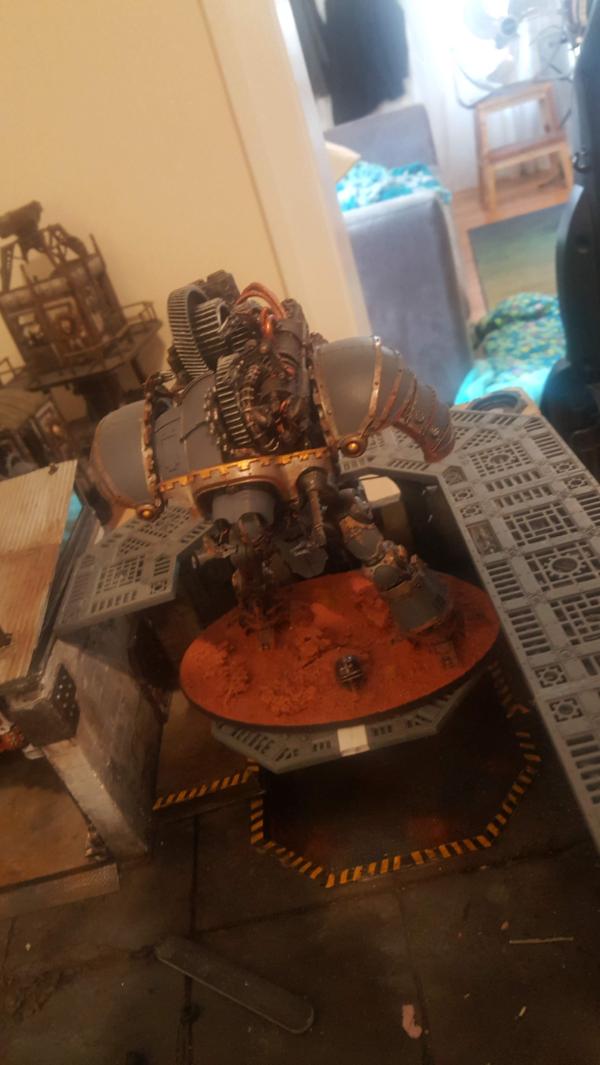
About the "max height" that it will go up:
Next up is painting really. First up my dark metal basecoat with detailing. Soo.. many.. defails. Sigh.
98217
Post by: Skinflint Games
This is awesome
60913
Post by: Largo39
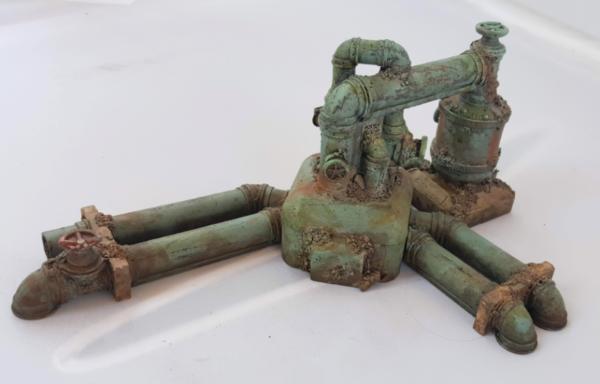
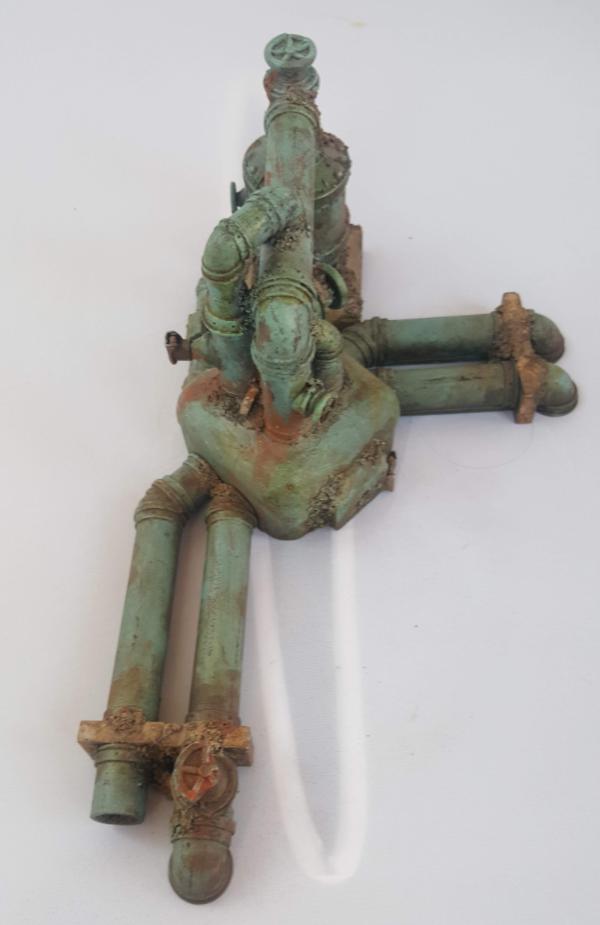
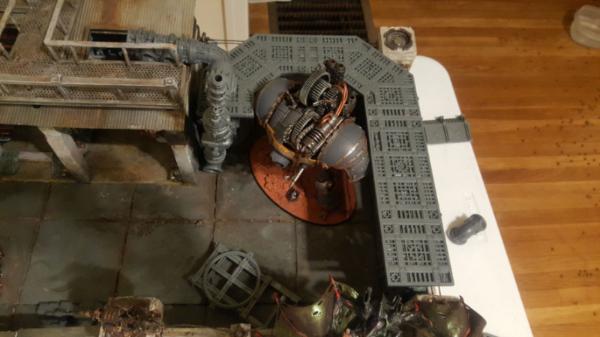
Took a bit of a break from the monotony of painting of all the mechanicus walkways to paint up my generator. Pretty happy with my industrial green.
60913
Post by: Largo39
wash time!
Also I cut out a bigger hole for the lift mechanism and finished it off.
Leaving us with a full on test of everything in place! yay!

60913
Post by: Largo39
It's installed! Phew, this one was a big piece to get right. There are a lot of inbetween pictures you arnt seeing but the basic way it went was this:
first I glued down the lift to the bottom. Most of my axels went "into" the wood so that way when i got out my gorilla expanding glue it would have something to really bite into. Obviosuly I had to be careful not to glue down the axle that spins but everything else could get really firmly in there.
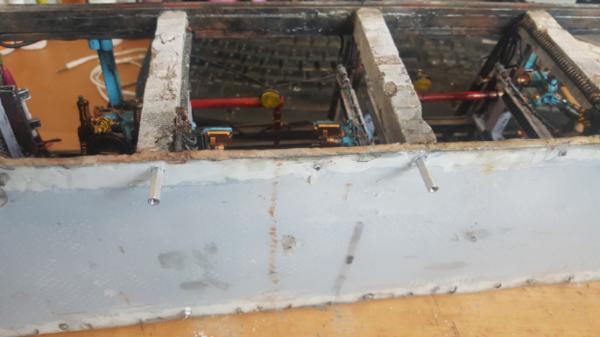
Next up was making a TON of pins, at least 1 per "leg" of the walkway to keep it sturdy. The holes I drilled into the board/foam I made a bit bigger so i had wiggle room since there were a LOT of things that had to line up (6 axles for the lift INTO the walkway and then 10 or so pins FROM the walkway into the ground)
I did a lot of tests to make sure it would work and then glued it down. One consequence of this was my walkway, in certain areas, ever so slightly floats off the ground. One thing I noticed was that the whole structure had a slight "curve" to it that would need to be smashed down. But since I made pins for everyhing that last "smash" at the end didnt quite reach so a few areas ever so slightly float. Fortunately i have a ton of green stuff so i can just fill in those gaps and move on, they are pretty tough to see.
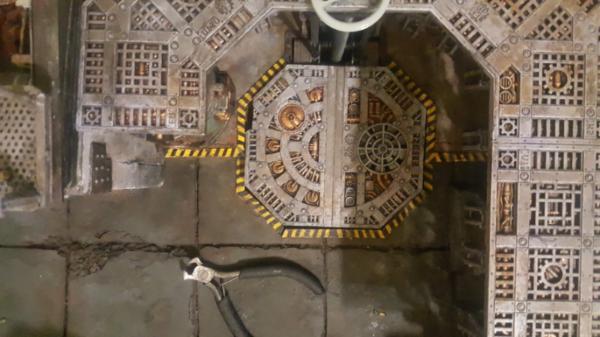
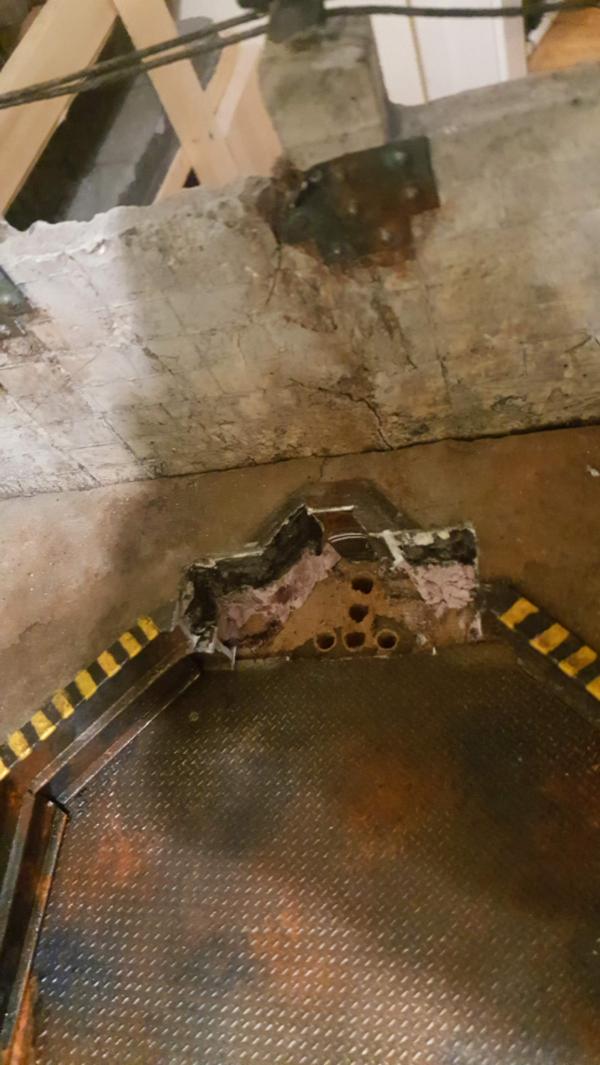
One thing you are going to notice is the slight "cut" i had to make in my octagon. Turns out the generator sticks out juuuusttt enough to necessitate that. Instead of slicing the generator down a bit i figured I would just cut the octagon. Not pictures is my putting another hazard cover over that cut to make it more "official"
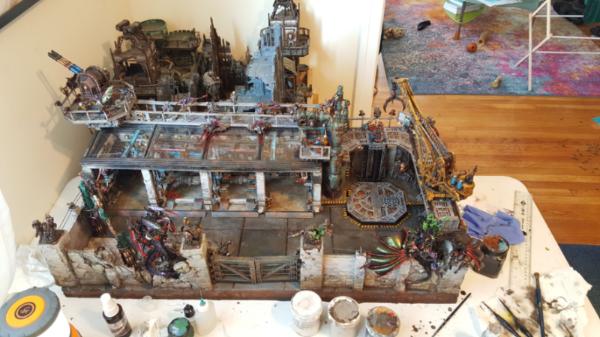
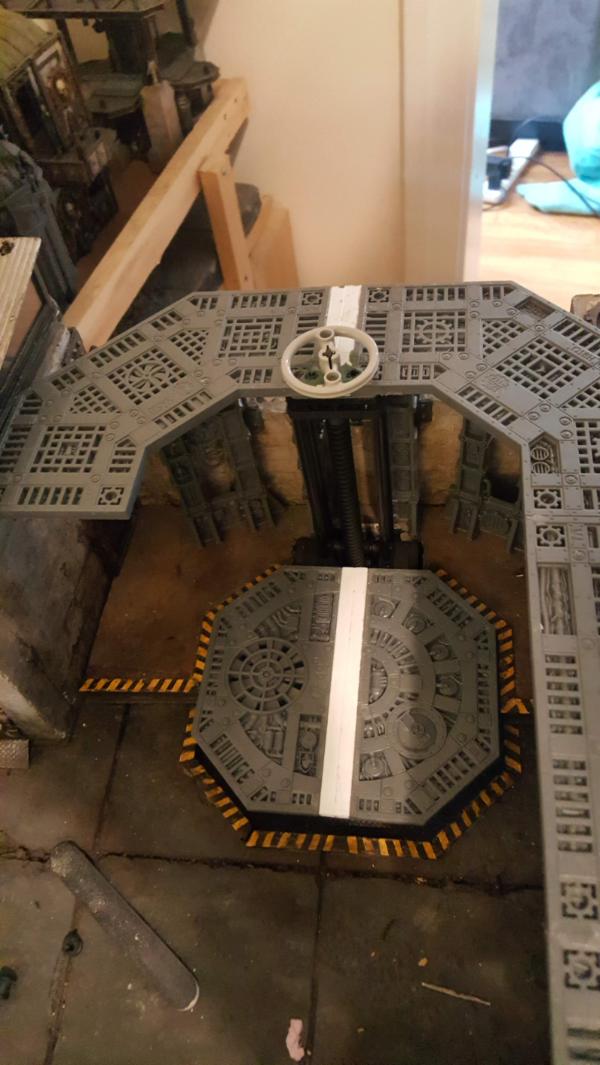
So finally we have a wide shot1
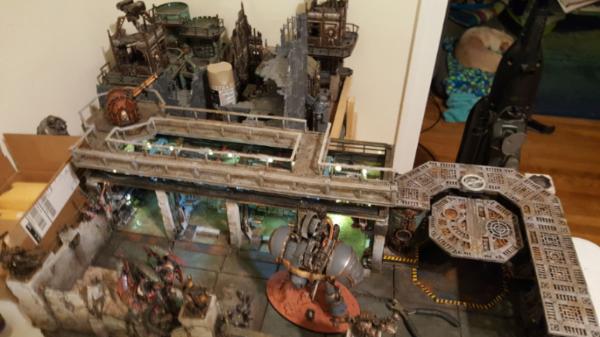
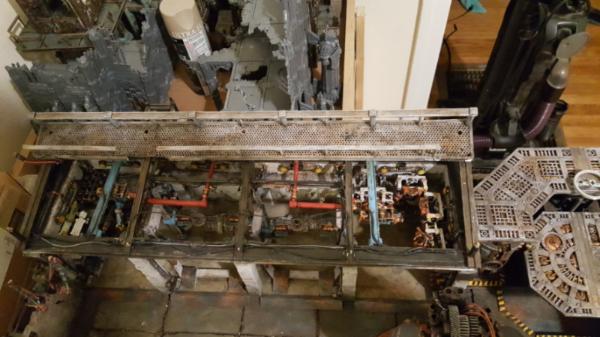
SO HAPPY. Well, mostly. See this is ALREADY with me just taking off the roof and.. you really still cant see inside the garage. Given that I'm about to add a ton MORE detail in there its just.. not gonna work. At a certain point form needs to win over function and here is that case. Since I have to modify the walkway anyways for my new exhaust pipes I think it's time to start over completely and re-do the whole thing. A bit extreme but ultimtely a good step to make. Remember my commentary about willingness to iterate and do it again? This is where that comes into play. It sucks, it will be a pain to strip it, but it will look better to just start over. Especially now that I know abotu the plastic glue and I can get some extra room to place marins for "free" by putting the railing directly on the plastic ibeam instead of wiring it into the metal.
60913
Post by: Largo39
So, time to rethink the metal walkways. As previously mentioned we started here:
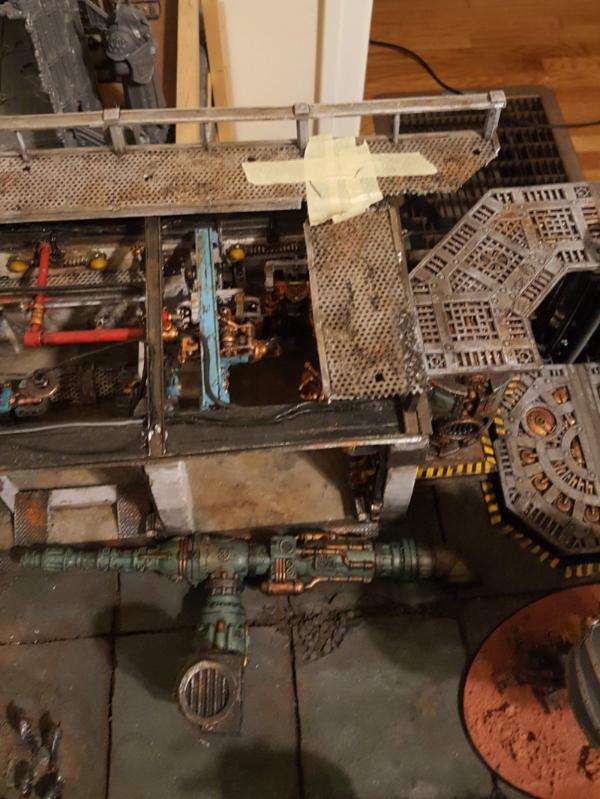
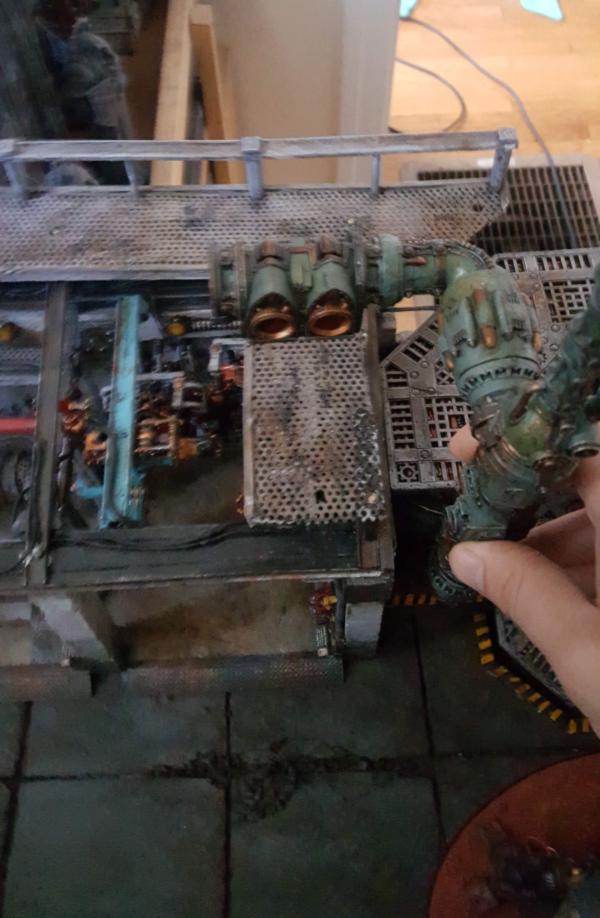
I also know that my exhaust pipes will look like this:
and finally that the main endpiece actually has detail on both "ends". So there are the plasma coil thingies on one end and a computer terminal on the other. So it would make sense for somehow both ends of that to be reachable. Now one trick is that i could potentially have 2 entry points onto the walkway from my mechanicus walkway, so i dont necessarily need to link both sides of the terminal via the metal walkway. This leads me to a design more like this:
where the terminal would go in the middle of the piece that sticks out. I also want the octagon to be raised up and detachable so i can hide my battery pack underneath it. (and also put this on my shelf easier)
GIven that design its time to dissassemble! We're going for a full redo here so nothing is sacred!
This left me with a straight piece. Look at how more visible the garage innards are now. I might even offset my walkway from the edge just to further help things.
120033
Post by: Excommunicatus
Yeah, that's so much clearer.
One step back, two steps forward.
60913
Post by: Largo39
For sure. When you see it and you get mad at yourself because it's so obvious why didnt you do this before... yeah that's a good sign that you are on the right path lol. On the flip side, had I done before I would have also glued down my clear ceiling before and thus prevented the addition of all the new shiny bits I've gotten from the ork workshop sooo thre are plus sides.
Anyways im still working out and cutting to get the walkway that intersects the control panel:
With that I have enough design done to need to strip everything so I can start gluing on the new finishing bits. This then becomes one of the harder problems I've faced on this project: how on earth do i strip this thing? The main "walkway" is about 22 inches long. I tried a trashbag but it IMMEDIATELY started leaking (lost... quite a bit of simple green too as a result)
My biggest cooking tray lost as well..
Finally I had an old poster tube and just.. kinda hoped the green stuff wouldnt eat through the cardboard too fast?
At least the smaller pieces stripped okay...
120033
Post by: Excommunicatus
If you know how big the bases are and you know how big the area you want to fit them in is, don't you just need to figure out spacing to be able to know how many you'll need?
What am I missing?
60913
Post by: Largo39
You know me, I want them to exactly line up with the walkway underneath them
60913
Post by: Largo39
So with the stripping done I can move back to building the walkway. Although painting the fiddly bits is also important I really want to get all the big pieces in "place" before I start worrying abotu where that stuff will go and how it will look.
My hacky strip setup lol. I wasted so much simple green..
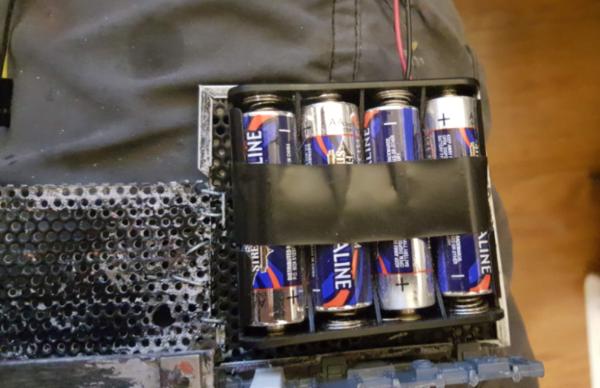
I started first with the battery area, since that would require the most "development". Since I had so many of those wlkway walls from my forge I figured I'd use those. I kind of hate the walls because of the pointy top but you cut that off and its not so bad. Its a bit wierd with the gear-skull there so high up but oh well, cant really be helped.
One realization is that, given the height, I could change the battery pack itself to be "double thick" instead of a single layer of batteries. However i wanted to make sure this at least configuration worked because I could instead just add more batteries (if i want any more LEDs) instead and thus have 2 rows of 4)
60913
Post by: Largo39
So, building for me is hard, especially mechanical building. Unlike pro greeblers/adam savage/etc, any time I try to just add "greebling" to something and move on it never looks right to me. I always need some kind of structure and physical basis for it to work for me. Having rules has helped me make stuff im happy with but it definitely takes longer than a pro. Every once in a while though I get into a groove where I just KNOW what goes where. I know in my head all my relevent available bits and their sizing and can thus imagine the final piece. Its a fun groove and ususally when I get the most done after a few hours of puttering trying to remember what I have bits wise.
The downside of grooves, however, is occasionally you forget the original design requirements.
In this instance, the entire reason why I'm making the octagon seperate in the first place is because I need the walkway to be A: permenent and B: avoid this beam on my shelf
since it digs "into" the octagon at that point. Now, with the new walkway hanging over the side a bit doing something like this...
still wont work. Sigh. At least I caught it semi-early but still, DAMMIT. Time to start a-cutting
I guess my battery will have to hide somewhere else whilst its on the shelf. Bleh, still, this works at least.
So yes, grooves are fun, but still measure twice.
60913
Post by: Largo39
more progress on the walkways:
I also started on another key point, the actual window sills. The idea is basically just abig slab of acrylic over it, no frames no nothing. Nothing to block the view of the garage or get smudged/tarnished by glue. So I need some kind of "sill" to set them in. so they can more or less just plop down and be done (with some glue on the edge)
I started adding "S" shaped beams so i get an "edge" for each opening that the acrylic could rest on.
I also added some more ibeam thickness in the back because the walkway covers all that up anyways so might as well:
All together now the new design! It's so much better.
60913
Post by: Largo39
Ahh fake holidays. Perfect for.. more progress! yay!
First up the giant skull crane of awesome doom is done and installed, along with some of the other detail cabling:
I also got a basic box down for the underside of the exhaust "system". I made it a bit bigger than necessary so you could conceivable have some place to sdtand and operate the console on the back. To construct it i just used bits from my grab bag of "what do i have left?". So some old mechanicus stuff from the original city terrain mixed in with the ubiquitous white plastic goodness and some flooring.
68634
Post by: Ilgoth
Enjoy the paint work on the pipeline.
Cant wait to see it finished.
60913
Post by: Largo39
Thanks!
Work continues. First up I went ahead and cut-out my windows in thick acrylic so they would jsut allf it and I could figure out at what stag to put them on relative to the walkway. I realized I should probably permenenlty install at least the outer 2 windows since their interiors are already done and they overlap most with the walkway. So we'll go with that, still they look nice and should be a good anti-dust layer.
I also got some straight line plastic to "finish" the area on the bottom of the window and clean up seeing all the now visible cables hidden there before.
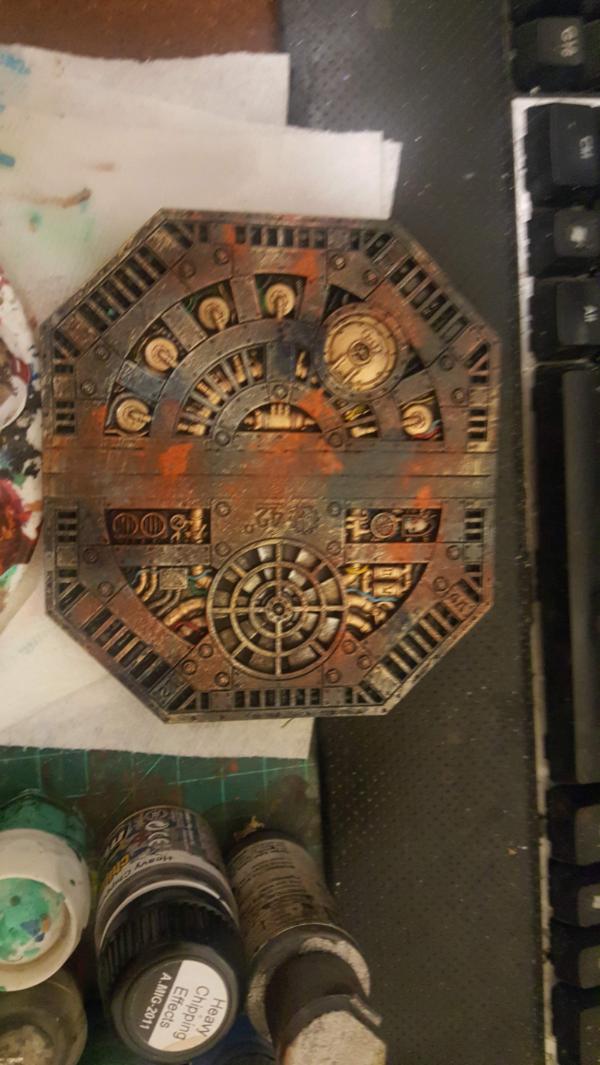
Next up is painting the walkway. One thing I forgot to mention is I covered up the previous holes with an octagonal "patch" of material so it looks semi-realistic.
as always, dark metal base...
60913
Post by: Largo39
Walkways are done. I tried a new technique as part of my general wash regime, using these spray bottle washes:
Turns out pretty cool! its a fun way to add color. Its VERY saturated so you have to sponge it back but still not a bad way to add random to something.
and the battery pack still works great too. It's all coming together:
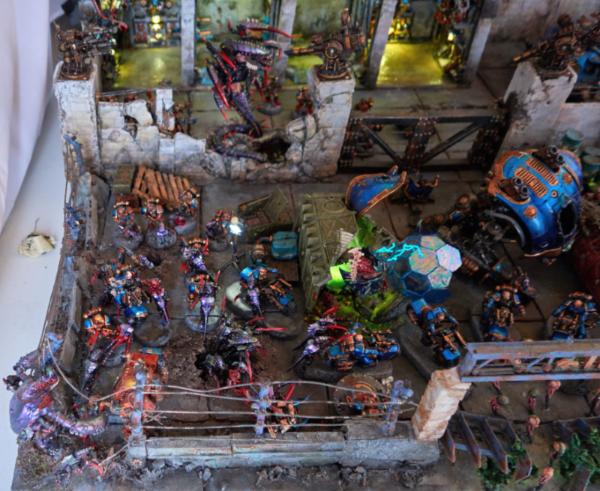
next up is adding the guns/spotlights and such details TO the walkway so i can begin to figure out where all the based marines/scouts will go and thus the nids attacking them.
60913
Post by: Largo39
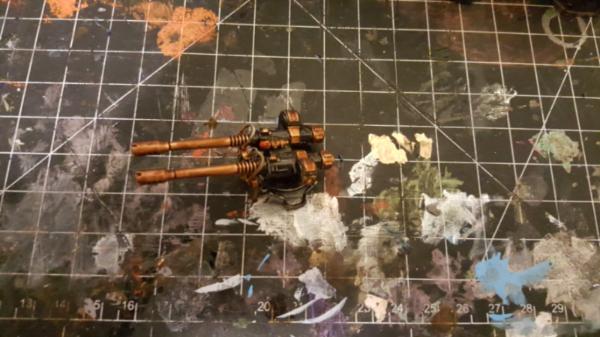
So, with all the big "pieces" now done and laid out. It's time to start all the detail bits. First up are some fairly straightforward ones: bolter turrets and spotlights!
I have like.. 8 of each so I figure i just liberally sprinkle them all over my walkways and they are fairly straightforward to paint too.
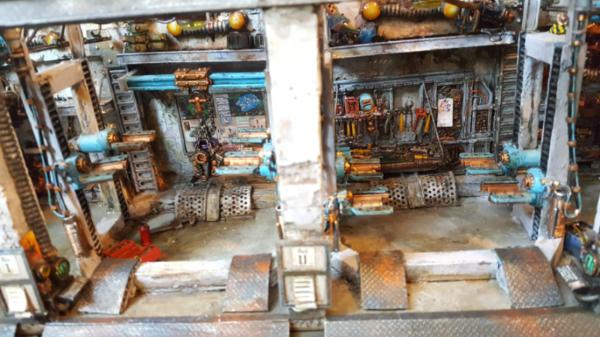
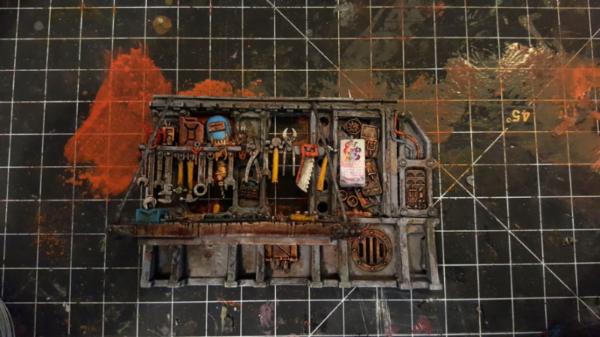
While I work on that it's also time to start working on the workshop table. Basically I'm using the one from the mekboy workshop almost intact. I just need to shave off a few of the more obvious orky bits in the middle of each i-beam (cloth and such)
This took.. way too much time (several hours) to do because I wanted to preserve those details as much as possible. Some of them werent bad, just need to be moved a bit.
60913
Post by: Largo39
So first up I finished off modelling the table and.. a few other things:
Boy thats.. a lot to paint. Sigh. Anyways I started with some of the easier stuff:
I should explain this too, this is the original mek crane which carries the engine block. However I wanted it to stick out a bit since there really isnt anything to "hang" it off of in the garage, so I figure I just make it an independent rail. However as I paint it I realize it would need some supports, you would never just have something that heavy cantilevered out without a little diagonal cross bracing.
I also painted up my box:
And installed it all, along with my bolter turrets and spotlights:
You can also see me start to think about where the gargoyles will go and how they will attack.
Finalyl we have another fun addition: lego turrets! So since i've been moving away from orange anyways I really wanted to repaint the big turret. It didnt really scale well so it would be nice to redo. However one thing I noticed was the gun was so low to the ground the barrel wouldnt A: reasonably actually clear the fence around my octagon and B: tended to prevent placement of any models there. Although I moved the fence out a bit which helped B some, it would still be nice to raise the whole thing up a bit so it looked more realistic. Enter lego turrets! Might as well have some cool gears right? I might try to print a 3d "edge" to wrap the lego beams but yeah its super fun now.
8330
Post by: kestral
Beautiful work as always - I particularly like your grey green pipes with the copper fittings.
Lego is always great!
60913
Post by: Largo39
So with the workshop table done there was onnneee more thing I wanted to add: a poster!
Posters and other prints are one of the last sort of techniques I wanted to try. A while ago I had found this youtube video of a super realistic modeller and how he did posters where he use thicker paper to print it on and split the paper in half to "erode" the poster edge appropriately and.. it looked amazing but a lot of work so it was something I wanted to get to "later.
Well today is that later but of course, couldnt re-find the video. So instead I found a GW video where they did posters a bit more quickly: find it, scale it, print it out, and use PVA glue on the back of it to stick it on a wall and then another coat of PVA glue to seal it (and while its pva'd you can bend it around a bit without it tearing to add wrinkles and such) This seemed.. more my speed, especially since I could already tell I would want a lot of these everywhere (including on my city tiles).
First steps was to find images to make as posters and GW has that covered as well: the regimental standard website! https://regimental-standard.com/
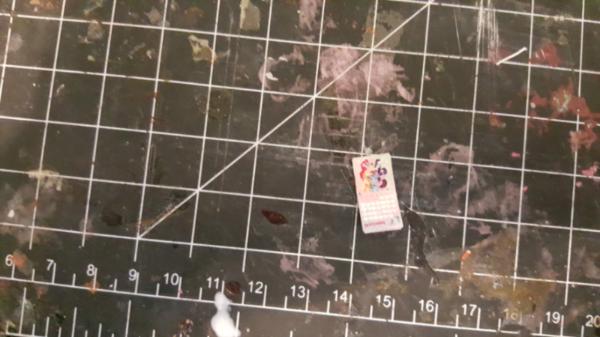
Nearly every post has an image inside it and many of those look very poster-like, completed with fading and wrinkles and such in the image. It's perfect. So I did an initial scour of about half of it (its a lot of posts) to get an initial set of images. My other sources are those famous "how they work" posters of the imperial tanks and finally My Little Pony. MLP and 40k has a long amusing history so I figured i would continue it by giving the hard working marines, tech priests, and guardsman a lovely MLP calendar to keep time by.
I took those images, scaled them down and voila! made stuff.
Now scale is an interesting question here. You want the images to be big enough so you have a chance at seeing/recognizing them from a distance, but they also have to.. you know.. work and not be comically large. I settled on about 1 CM wide for a "normal" sized poster (or like the calendar and such), since thats still something like 2 feet wide at scale. Still it works pretty well printed out.
Next up was cutting them out. For the calender I wanted to acutally hasve it look like a real one with some thickness so I glued the months together so it felt a bit better and I could get that "spread" of sheets on the bottom:
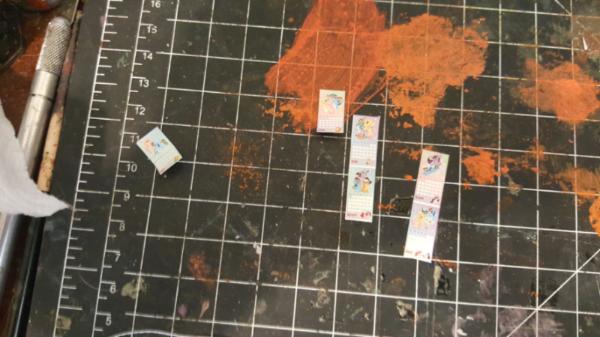
and finally installed:
overall im super happy with it. The scale of the "hook" is huge but thats literally the smallest bit I have a driver for so thats that. Now to make a whole bunch more posters and put them places...
53743
Post by: King Thor
Your attention to detail is amazing. Love what you are doing here!
518
Post by: Kid_Kyoto
Love the posters.
We also have a ton in the Dakka gallery both real and 40k search for poster sometime.
60913
Post by: Largo39
Wow, great call, didnt even think to search dakka. There are some great ones there. Automatically Appended Next Post: First up I installed the work-table. Yay!
It looks great, im super happy, and its a really nice amount of detail. Next up is finishing off the engine crane by adding some needed braces. It's awkward to add it to something already painted buuuttt meh:
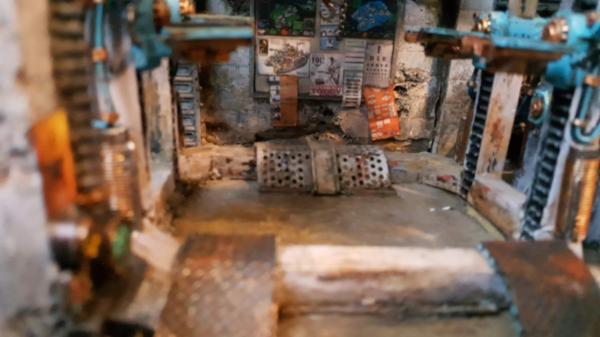
I also think I want something "behind" the crane. having details on all these walls is really helping fill out the garage and since I have all these cool posters maybe I make a big "cork board" that everyone would put them on.
to paint the interior i want something netural so I thought I would try some new paint on it. My local art store was having this stuff on super discount (like 3 bucks for the whole bottle) and apparently its made from eggshells to be SUPER matte. So far so.. good really, its very matte. As a "city" color/base color/undercoat for stone or something it should work actually really well. I got another cream color for my marble basecoats too.
More cutting out of posters to start spattering on walls and such. Some little guardsman (or maybe secretly a marine?) really liked hamilton...
and finally we have an example of when scale.. well.. fails. This thing would be like 7 feet hi and 3 feet wide. Kinda odd.
Actually just putting posters on the pillar is a bit problematic, it looks a touch odd just slapped on there. Hopefully smaller ones work better.
60913
Post by: Largo39
More poster work! lets fill up that corkboard I made.
overall its a really simple technique and it looks really nice tbh, even the "cruder" way of just cutting and gluing it on. One thing I was doing was painting or sharpie-ing the edges to remove the super white edge of the paper from the cutline. Just helps a bit on realism. A small wash also works which you'll hear about.. later
a slightly better picture on black:
I also finished adding in my supports
which means it's time to install! it pops pretty well and works even at a moderate distance so im super happy with it. Always good when the detail you add feels visible/something someone might notice instead of being the kind thats hidden away but you have to paint it anyways because you are OCD.

60913
Post by: Largo39
more views of my corkboard!
anyhoo so i wanted to add some more posters around the tile, to give it flavor. I figured first I would start with the columns since they are a natural area where you'd put stuff like that. Unfortunately that only.. kind of worked.
up close they dont look bad but far away you really cant tell whats going on. Having the "frame" of the corkboard really helps seperate it out from the wall. Otheriwise it either pops too much (the bright white over the darker bottom area of the column) or starts to blend in too much (the top)
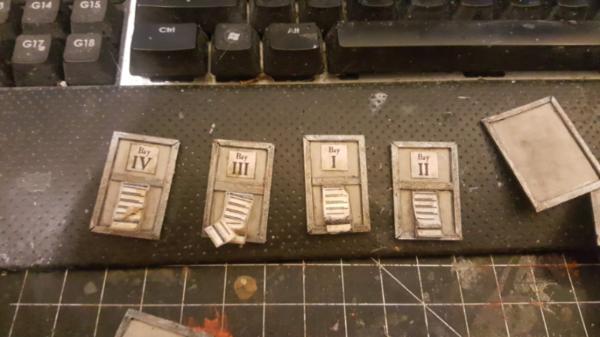
I also realized that I kind of wanted some sort of sign or thing for each garage bay. Finally if i made little corkboards for each bay then i could hide the joint between the computers and the columns and the fact that the computers stick out a bit.
So thats what is next:
I'm also thinking i might make like a "work order sheet" or somethign since the calendar turned out so well. Something based off of this guy:
60913
Post by: Largo39
So to recap the poster drama:
- I liked my big posterboard a LOT
- I didn't like my posters raw on the pillars
- I wanted some kind of "I, II, III, IV" for each pillar, maybe with some kind of work order sheet.
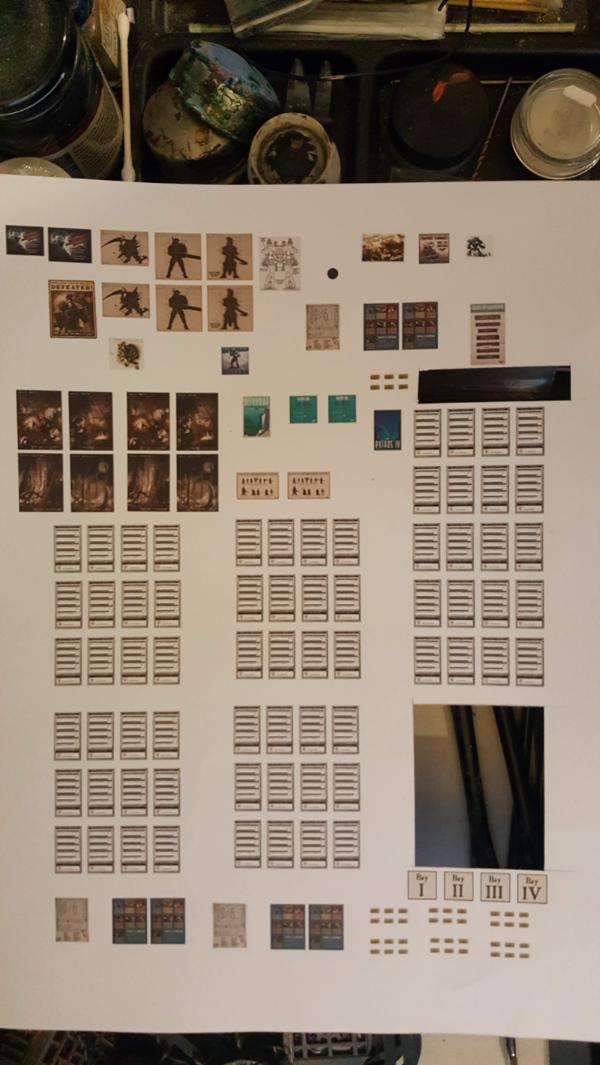
Given that first up i needed to go through the REST of that blog and get all the remaining images. After that I figured i would convert an existing 40k roster sheet into a work order type dealio (final worksheet not pictured cause I put some names on it for lawls but you get the idea)
giving me this:
and then just start cutting and sticking them on. Whereas before I was using a sharpie/dark marker to darken my edges I found that for this it didn twork as well so I started using a darkish wash instead. It cut the whites nicely and gave me more of a stained look.
For the "torn" sheet I actually had to put superglue in there to really set it. PVA wasnt quite enough.
Then it was about the rest of the poster boards which i'll put up on both tiles:

51170
Post by: sockwithaticket
Just magnificent attention to detail and it's really well executed.
120033
Post by: Excommunicatus
Brilliant stuff.
Needs propaganda.
60913
Post by: Largo39
Just keep painting.. just keep painting...
anyways, the "top" shelves int he middle, the ones I added my engine crane/poster/workbench underneath are a bit bare:
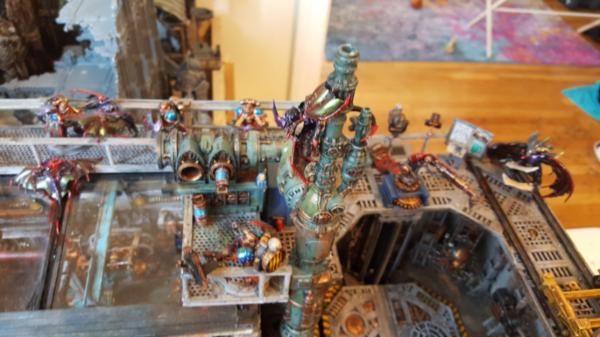
Sure there is the light there but it doesnt make sense to have a shelf that holds.. nothing. So I found a few more spare knight and other bits and just painted them up to throw up there. Adds a bit of "feel" detail without really blocking the light to anything important. I also finished painting the engine up too so I can hang it:
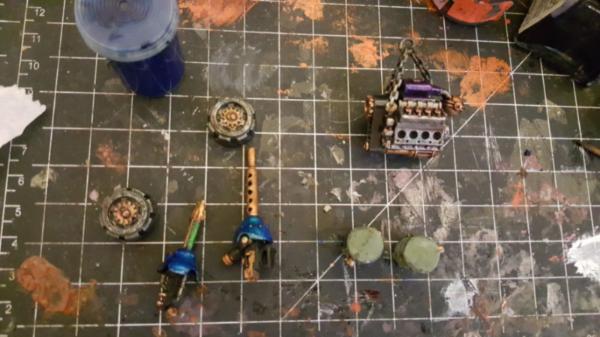
I also realized something else I could do: spare knight arms! I have a fair amount of room "underneath" my mechanicum area where the crane track will be as well as a few spare hooks from my mechanicus bits so it would be fun to hang some spare knight "arms" there.
60913
Post by: Largo39
So before I glue down my last 2 roof panes I wanted to clean up my lanterns. I had kind of kludged them together before and there was a definite seam between the covering the the metal the attached too:
(holy crap old pictures!)
(back to now..)
so I just added a ring of plastic and now everything holds together a lot better:
I also installed all my bits and filled in those shelves:
Huzzah roof glued down! With that the back walls of the garage are done.
60913
Post by: Largo39
Do be do. Next up we have some greebling/tool boxes to place in various locations. I still need to paint them but its fun to have:
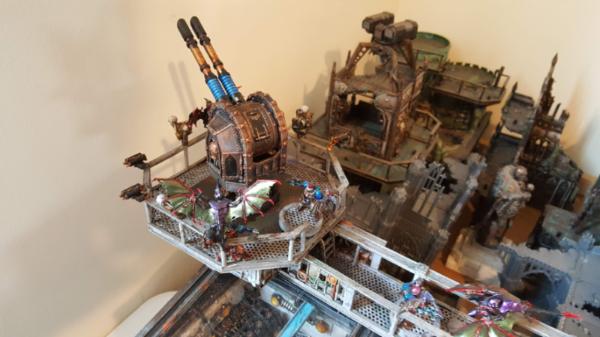
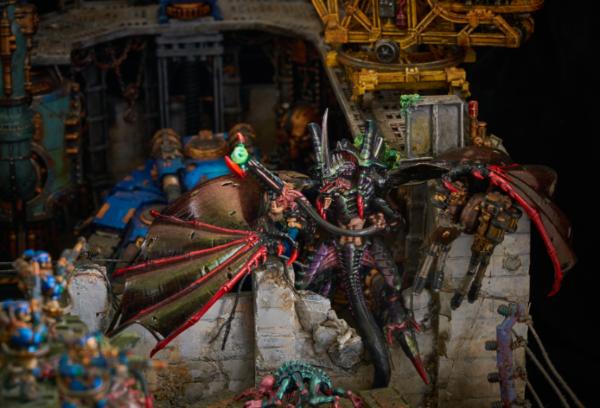
We also have planning for the gargoyles. Originally the idea was to have 2 on the octagon, 2ish attacking on the walkway, 1-2 corpses on the glass and then another one attacking the guys on the mech walkway. But then i realized i could use my tower to have one attack in a cool wayl...
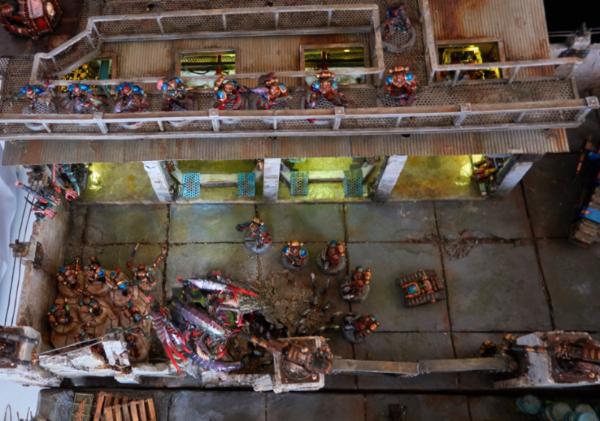
so yeah we'll see. Maybe i attack the mech walkway with something else later.
I also finished painting a set of 15 bases! I realized that the base kit is 2 sprues x 2. So I really only needed to paint 1 set of the 32 mm bases to figure out placement, which is a lot more reasonable and exactly what i did!
Looks like i will only end up getting at most 12-13 on there total with the crane but still, not bad and they line up pretty well.
this lets me start finaly working on the train tracks:L
60913
Post by: Largo39
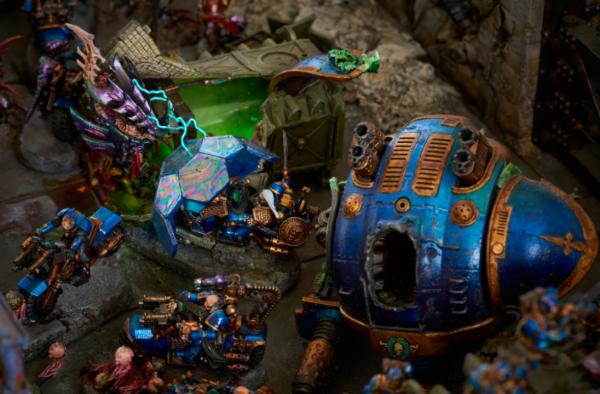
So with that end of the railway figured out it was time to work on the other end which buts up against the flyrant. I was out of those "stopper" bits as well so I would need to think of something new. Thankfully there was a natural piece on the train cart sled thing which was raised up so I could go a bit more vertical with it and better differentiate the two sides.
Its not symmetrical because i dont have 2 of the terminator locator beacons, also I knew that side would need to be acidified to slag anyways so I can potentailly get a second later and melt it and stick it on then.
A quick better lit view of the underisde:
and we're off to spraying:
Finally I re- did the base placement given the new track. I also realized i need to do it with the sled/crane in mind. Originally I hoped i could be flexible with where it went but realistically it needs to be locked down so all the marines/scouts/scions fit where they fit.
60913
Post by: Largo39
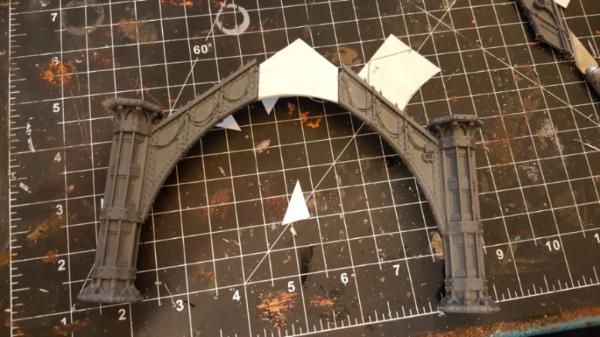
so, the rail is now primered its time to.. paint more greebling. First though building is fun so I started thinking about arches. I want to spruce up my marble area and make it more shrine-like so that it's something to look at and see tucked away in its little corner. The best way to do that is make a big shiny archway that stands out. Thankfully with the new kits I can do just that pretty well:
I just need to re-buy those arch bits again because i still want them in my terrain as well. I also started clearing away rubble from that area so i could actually PLACe the columns
Next up is back to painting. This time tool boxes, tools and starting the crane work:
Finally I started painting up the dark metal of the rail:
60913
Post by: Largo39
So first up I finished painting my tool boxes and went ahead and placed them:
So thats done. Next up is melting and gooifying the platform nearest to the flyrant. I forgot to take a picture of the green but yeah I make it grteen after too (you'll see it eventually). Basically I just took my sacrifical soldering iron for this prupose and just shoved it in there and waited for it to goo up.
Finally I started trying to figure out what to replace my giant "wheel of death" with to raise the platform. I realized that lego has these slippable gears to prevent damage which is perfect to prevent overscrewing when you reach either the top of bottom, so that seemed ideal.
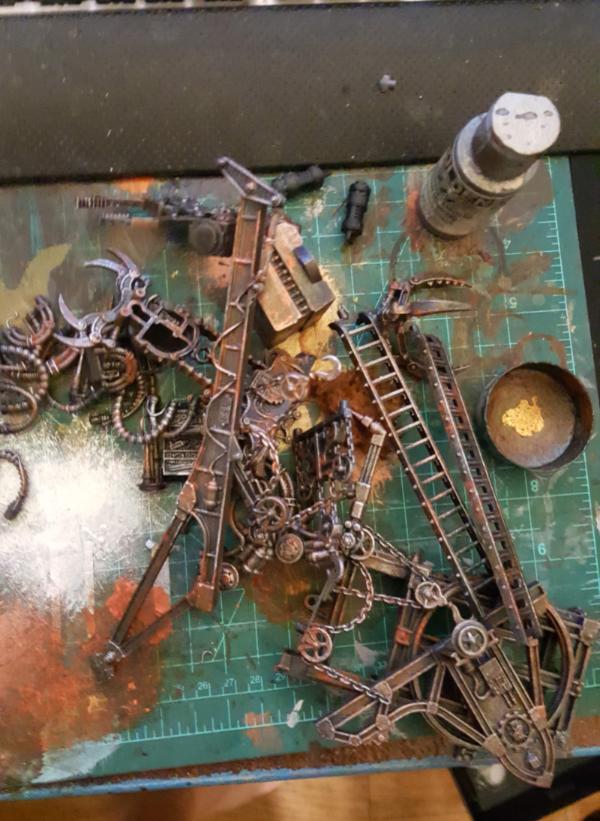
But I still had one other problem. if you look back at my original pile of stuff there are these 2 welding arms (on the left hand side) that are lovely from the mechanicus/crane boxes
They are a great bit but suffer 2 flaws:
1. the tip of the welder is the same height as the base. In other words, if you just had this on the ground it would be welding the floor. (the idea I guess was that since it hangs over the knight bay you dont.. care that its like this? its really.. really annoying)
2. you cant really re-pose it. There are cables and such thit cross over the joints that would be a pain to remake and repose.
I really wanted to put one on my platform but couldnt figure out where. Anywhere I have it hanging over the edge could prevent knight placement, and i cant just have it weld the ground either. Then I had a brainwave that maybe i put it on TOP of this gear magnetized to swivel! It's a perfect solution but now I just need to make some kind of box for it...
120621
Post by: LordMcAllister
Wow, such a gorgeus project! So many lovely details! Great job!
60913
Post by: Largo39
Thanks!
So i made the box! huzzah!

Really happy with this, solves a lot of problems and gives a good center point for the crane:
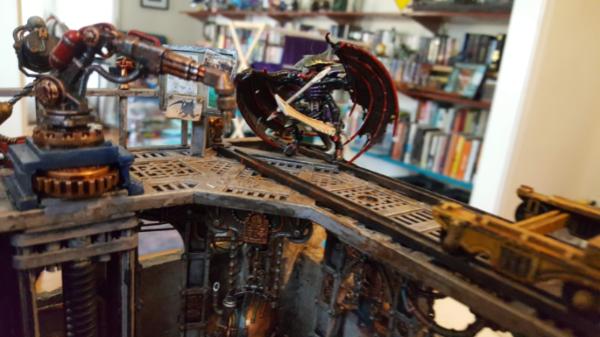
Next up I started to try and think about how to place the gargoyle ON the pipe and what all I might need to (carefully) bend to make it work:
60913
Post by: Largo39
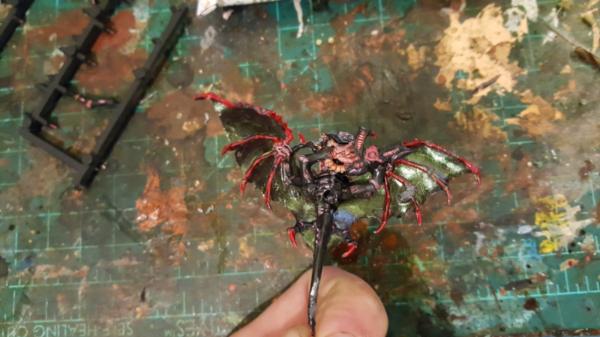
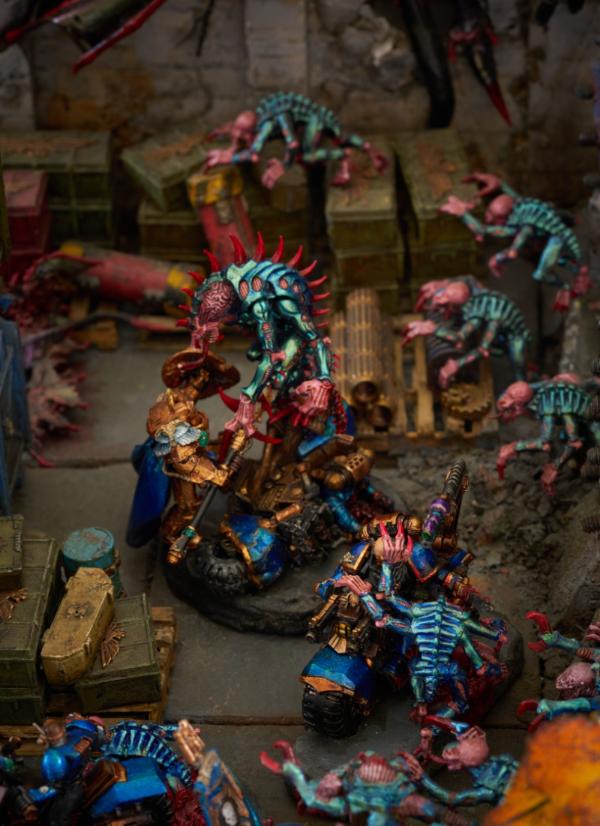
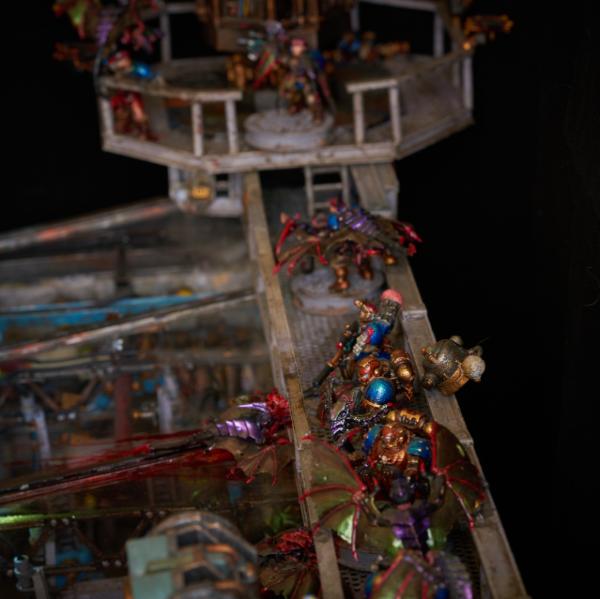
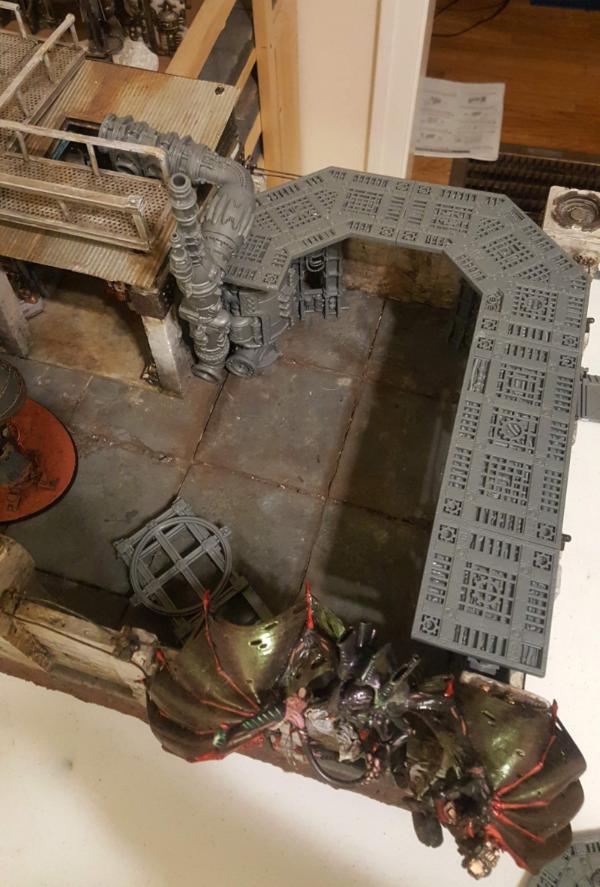
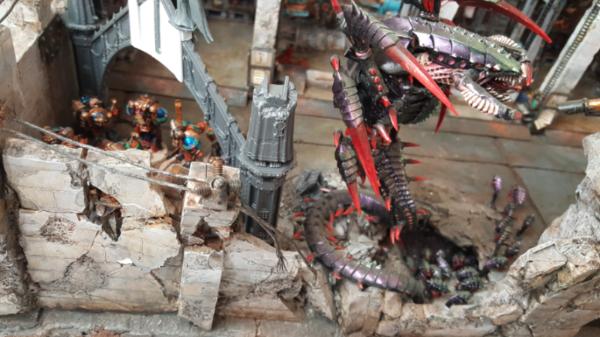
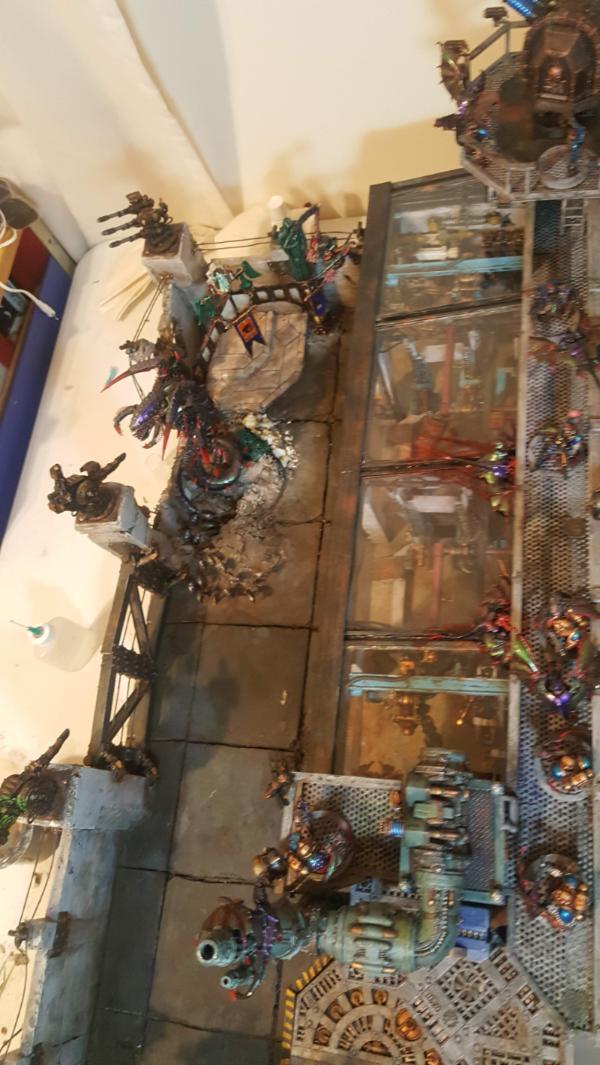
More gargoyle work, this time the 2 attacking the gun platform octagon directly. I figure in this case the nids are winning so they'll have killed 2 scouts. One ripped a scouts head off and the other stabbed him with his tail.
So first up I need to make room for a scout head in a gargoyle's mouth:
and then mount the two gargoyles:

60913
Post by: Largo39
Hello again and happy new year! Took a bit of a break to do holiday family things but we're back to finish these dioramas off.
Out with the old (borrowed) knight and in with the new borrowed knight: a castellan.
This is m ore likely the knight I would actually build in the future, so I wanted to see how it (and it's guns) would work on the lift. As you'll see the answer is: yes but, as suspected, with a custom base.
without the crane there are some positions that work fine with the crazy base:
with the crane things get tighter as I cant go too high to run into the crane but cant go troo low to hit the base issues
you can see the base issue here:
so yeah, just need a custom base and this will be gravy. Still, looks cool even when not in an ideal position.
Also continued to work on my octagon setup by making some scout corpses:
8330
Post by: kestral
Off the charts! Making the gargoyle look like it was crawling around the smokestack by bending the wings was great. Where did you get all the tiny tools for the work bench?
60913
Post by: Largo39
Thanks! I was worried a bit about bending it because it can start to melt/shrink the wing-claws easily but it managed to work out okay.
the work bench/tools all came from the new mekboy workshop kit:
https://www.games-workshop.com/en-US/Ork-Mek-Workshop-2018
I just sawed off (or didnt add) the more obviously orky bits but otherwise used the bench whole.
60913
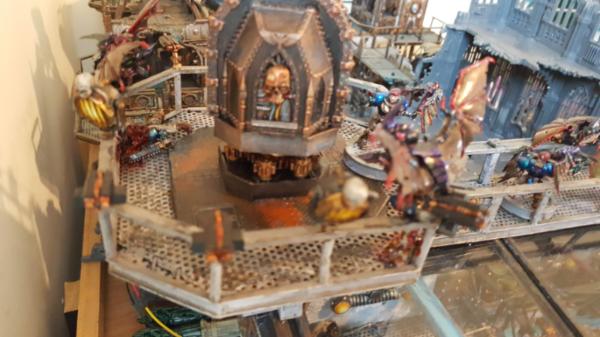
Post by: Largo39
With the corpses done and my knight lift mechanicus area also done its time to get to the last "big" area to add detail in: the shrine.
There are 2 main pieces I want to add. An "archway" built from the new imperialis sanctum kit that I got and built already (not painted yet, dont worry that will be in ze blog... eventually. Painting those things is.. a chore and I dun wanna just yet)
https://www.games-workshop.com/en-US/Sector-Imperialis-Sanctum-2018
the second is some kind of tablet of comandments or something so there is something behind my marble floor. I might ponder having it light up too but we'll see. First thing is the arch. As it stands my idea was basically something like this:
https://www.dakkadakka.com/gallery/988152-.html
https://www.dakkadakka.com/gallery/988151-.html
which would work but I would need to make a "middle". Time for ze plasticard!
after that it was time for more details and to throw in allllll the fancy bits i had left...
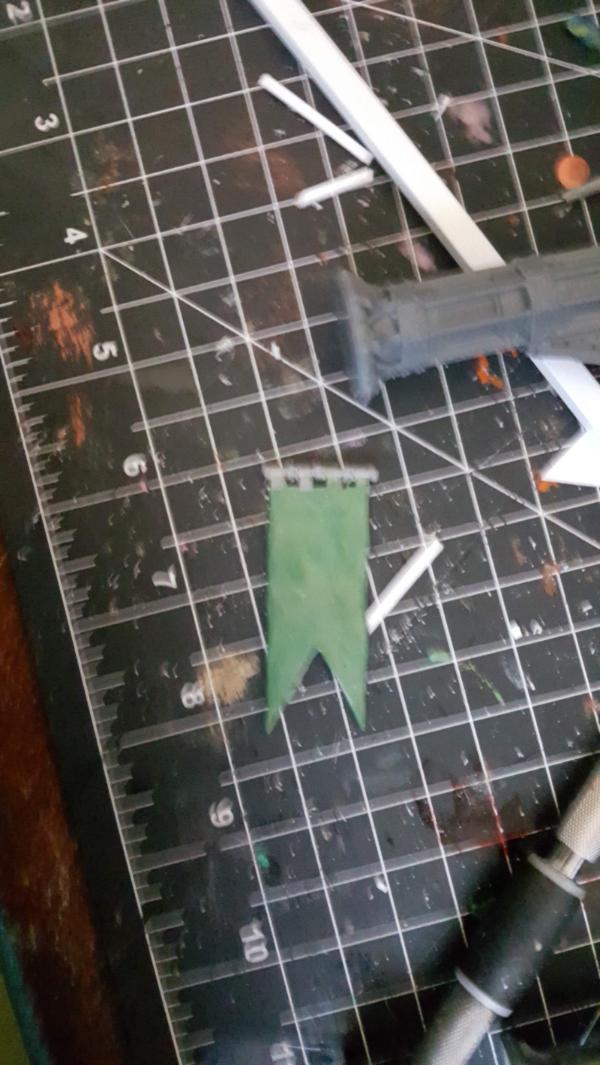
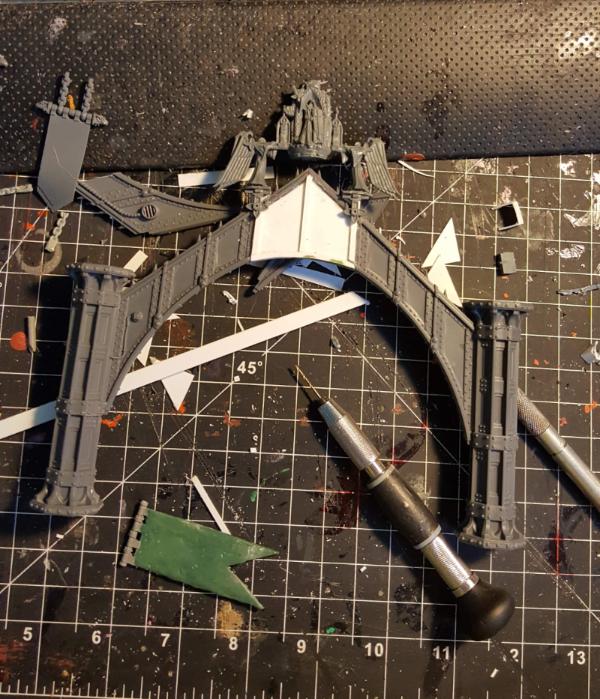
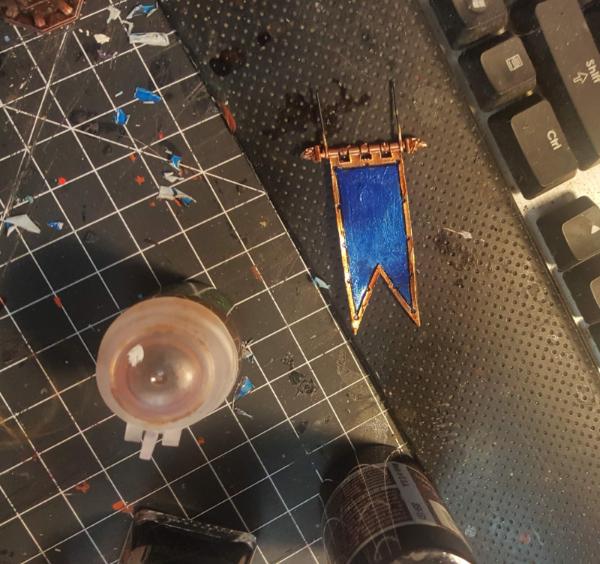
I also started working on "flags". I had always considered making this blue/orange combo something more official but i had been lazy up until now. No more! it was time to pick an army and make insignia. First up is having some flags ready to go. I had a bunch from various knight bits but they were weak resin things so I added some green stuff to the back to make it a bit more durable.
60913
Post by: Largo39
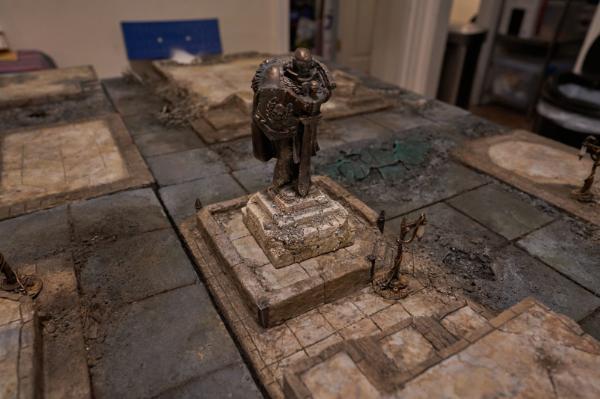
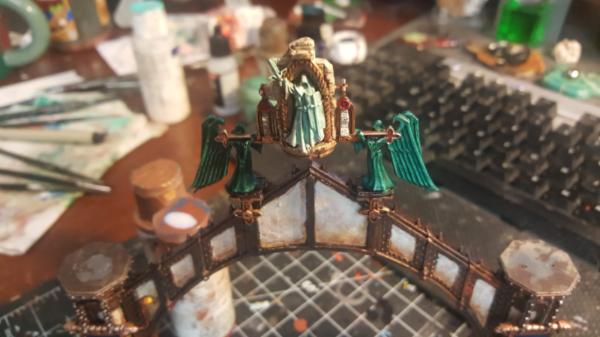
so with the main archway built its' time to figure out statue orientation.
Here's the problem: the shrine faces, in essence, backwards. Though this makes sense from a design/space usage perspective for a builder it isss.. a bit unforunate. So the question is whether its worth it to try and turn the states to face "forward" even though that isnt correct (they would face out from the shrine)
The natural orientation:
the "face the wall" orientation:
and.. yeah im just going with the natural orientation. you wont see as much detail viewing from the front buuut when this is on a cart i want people to walk around it anyways so that shall be enough. I might add some extra incentive to look over there but making stuff light up but we'll see.
60913
Post by: Largo39
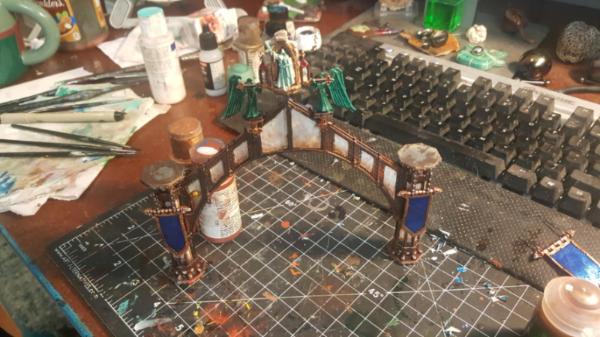
So with the "logical but slightly unfortunate for normal viewing" orientation of my statues decided it was time to paint them. Time to experiment with green marble! I started with my statues/pillars that were from the scenery set so I could practice and figure out the technique before I moved onto the archway.
I got a whole bunch of new golden acrylic paints including a better set of greens, so it was nice to use super saturated paints instead of GW's which.. well split a lot. good colors, but man they split. Overall I'm pretty happy with how it turned out, just lots of washes and drybrushing to slowly get that look.
I also started painting the pillars. The idea is to match my existing city scheme of tin bitz-dark bronzy framing with a creamy white stone in the middle

but of course, my original whites for that style were GW paints and had split and gone bad so I wanted something more stable. Also that style takes a while for me because here are the steps:
black primer -> tin bitz -> lots of copper/brass/bronze drybrushing and then sponging on the rusty greens/blues/orange.
finally paint the inner areas creamy using many many coats
spend a while going back and forth on mistakes. cleaning up creamy bits that got tin bitz on them and tin bitz areas that got creamy.. forever basically until i give up.
the last step is the most costly, and the "painting the inner areas creamy" also sucks because it takes so many coats to get there the odds of mistakes are high. So i have a new plan:
creamier primer -> paint the inner bits creamy -> coat in blue liquid mask -> do all the normal tin bitz painting -> peel off mask.
the theory being that reduces the "oops my brush slipped" loop that takes the bulk of the time. We'll see how well it works, it did alright for the crane but these are many many small panels.
60913
Post by: Largo39
So with the success of painting the green statues i was confident to at least start painting the archway itself:

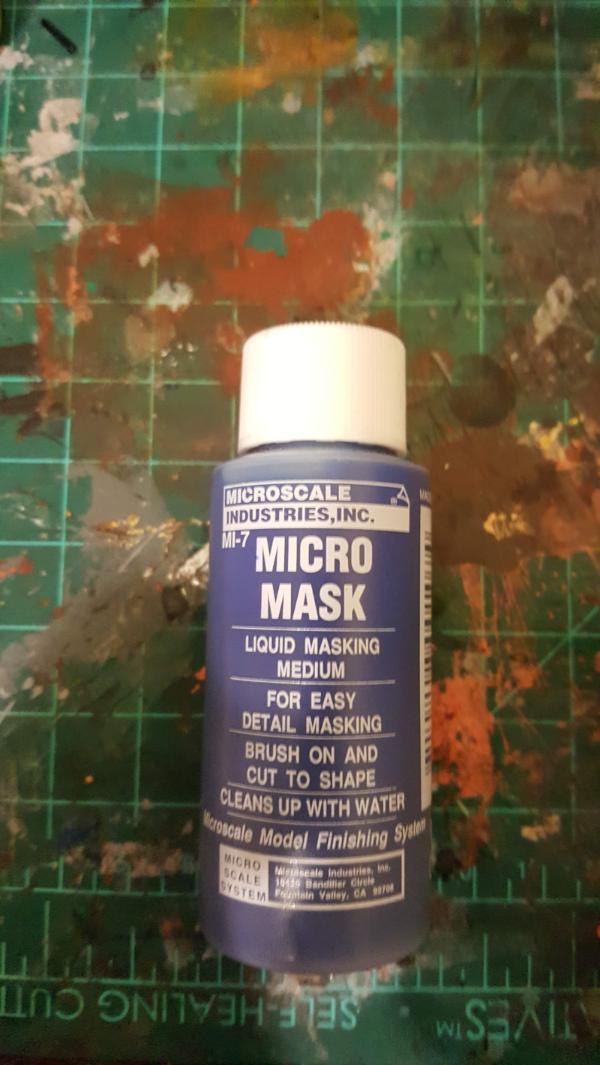
then I went back to the statues to try out the liquid masking technique. I dont have any pictures of the results on there but the main initial result i got from my test was to make it very thick. Just 1 layer of liquid mask would often break.
However what i didnt test was.. the full process, just a few squares. So i figured that was enough and I really wanted to get the arch done so i just masked it up and went!
big mistake.
So here's the problem with the mask, its really hard to peel off. Normally its on a convex surface so you can find a corner and gently peel it. But since all these panels are inset.. you kinda have to dig at it to try and get it up. This leads to....
Scratches of doom! and flecks of blue mask everywhere! and yeah generally just a disaster. It didnt work at all. Almost every panel had a great big scratch in it as i tried to get the mask off:
and just.. bleh. Baiscally I spent a bunch of time doing a bunch of layers of mask to avoid touchup work and.. have just as much touchup work to do now anyways. D'oh. Oh well, lesson learned I guess. While I was slowly cleaning all that up I also started painting my flags:
60913
Post by: Largo39
So there was painting, and sweat and tears, and lots of cursing and cleaning off bits of liquid mask buuut I finished the arch!
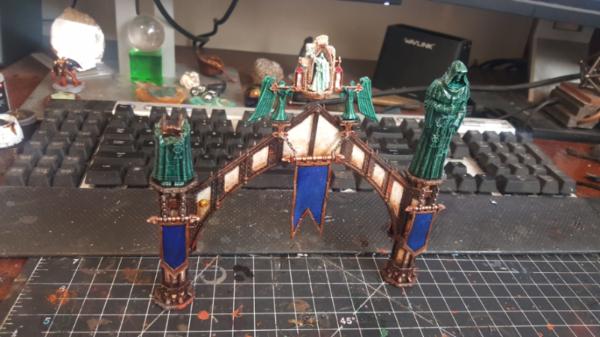
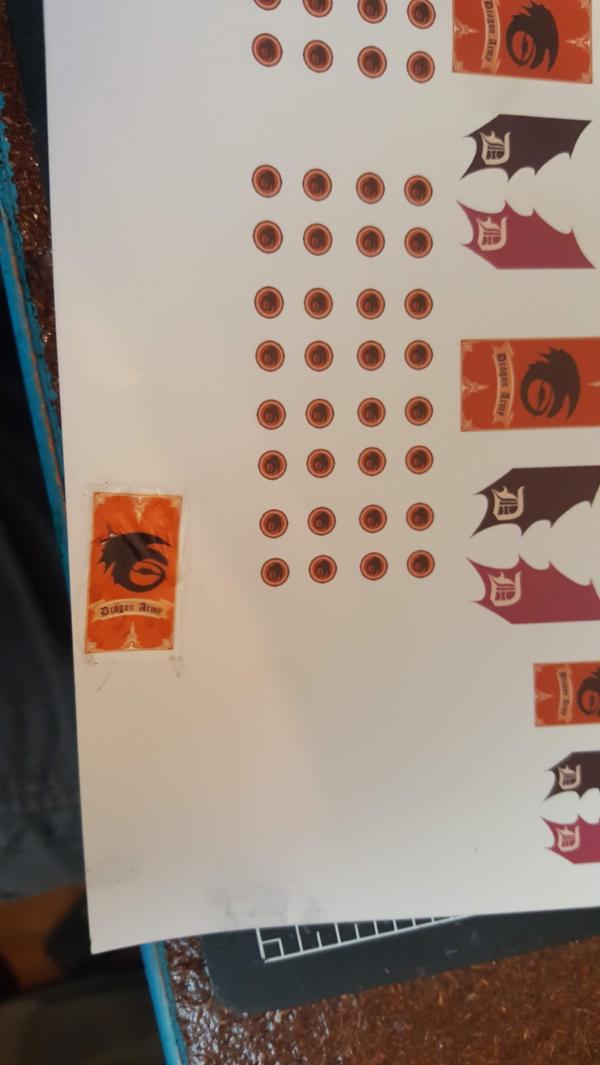
Next is.. yeah I really need something on those flags. I've been putting off my army insignia for a while so time to finally figure it all out. I always had in the back of my mind a how to train your dragon reference (i worked on both the sequel and the upcoming hidden world) and am also a fan of enders game so "dragon army" seemed to fit all around. Still i needed all fancy edging and stuff. Thankfull the internet is a magical place and I found a "book of scrolls" from the 19earlies that had been scanned and is lovely for that kind of fine detail work. A few hours later and I have a not a bad flag:
(the blue will obviously just be my blue in the back but i wanted it for scale)

60913
Post by: Largo39
So I finished the flags for my Dragon Army. I have 3 total flags on my arch, so I figure I do one central one and then one of each of the tail wings on the 2 side flags to match toothless. Any vehicles could also have one of the wing things per "side" to be all nice and matchey. On top of that i made a bunch of shoulder insignias to hopefully make all that nifty too when i eventually get around to putting them on my units.
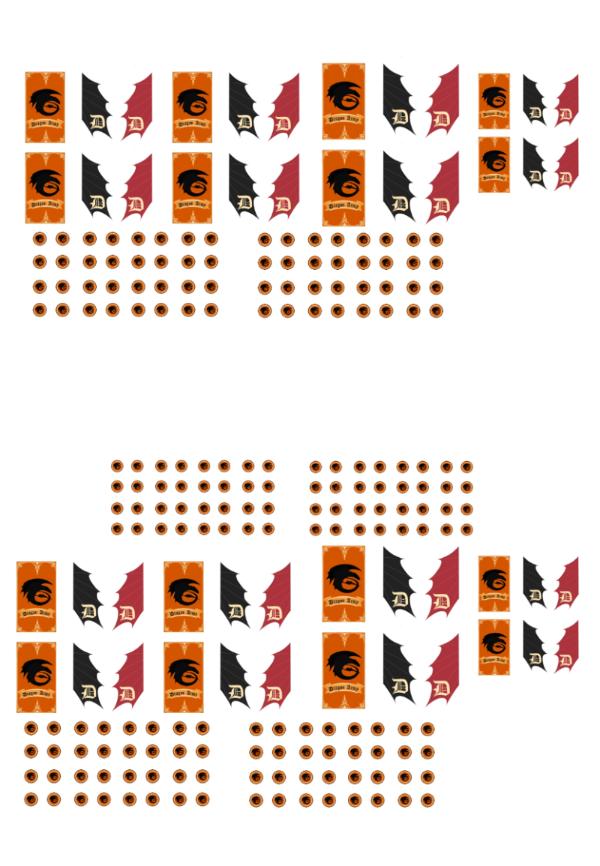
I also got some clear transfer paper, so all was good.
https://www.amazon.com/Hayes-Paper-Waterslide-Water-Slide-Transparent-x/dp/B077TMFVL9
Wait... takes an inkjet printer? hmm. Suddenly... a problem appeared. Inkjet printing doesn't really EXIST anymore commercially. My works has nice fancy printers, yes, but all laserjet. The one plotter it has my paper was (by like a couple of mm, i think it was cut ever so slightly off) too small for. I did have this printer that I picked up for cheap from our company's version of craigslist butt.. well lets just say it printed in all the colors OTHER than cyan/magenta/yellow. It's theoretically a very nice 8ish year old printer, but yeah, you'd get very lovely purple and green images and thats about it. I was about ready to give up on the thing tbh, so I didnt really want it to be my ONLY option.
But it totally was my only option. I went to about 3 different print shops in my area, none of them had inket printers. Those that had plotters that might theoretically work but weren't willing to try them on my custom decal paper.
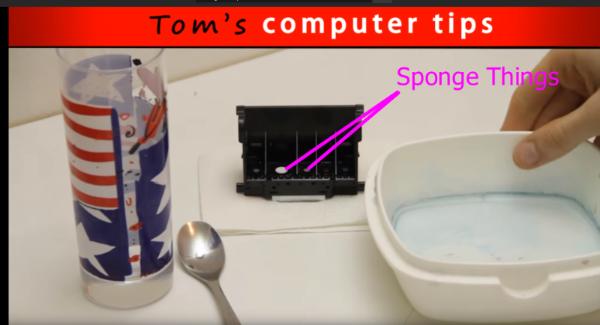
Fine, time to work on the printer. Now you guys get a sudden foray into the world of printers, not that you need it but if you ever want to do your own decals suddenly this stuff might be relevent. So the first potential reason why the printer wasnt printing CMY was that the print head is clogged. Basically there is a print head with different ink cartridges attached. At the bottom of each cartridge is a spongy thing which feeds into the sprayer. Spongey thing gets too much ink in it: clog. Of course the spongy things are all attached to the head directly so you cant just take them out and clean them, you have to clean the whole head. So you take out all the ink cartridges, take off the head directly and very very carefully start cleaning it.
I took that image from a very (very) helpful tutorial here:
https://www.youtube.com/watch?v=pEkKGBUSwNg
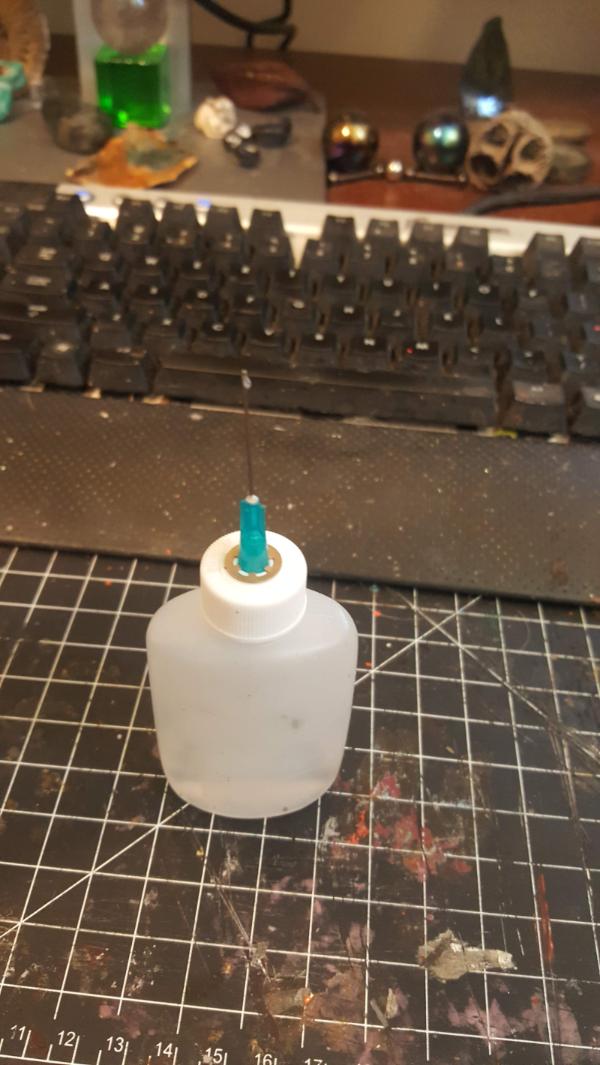
Now one thing I have that this guy doesnt is a few extra water bottles with super fine tips. The reason is because every time I get one of the fast set acrylic/plastic bonding glues it comes with a couple of those bottles. Normally you put in some glue (not too much, they are so thin that even the <1 mm hole in the tip is enough to evaporate it all away in a few minutes) and go, but I just put in water. The benefit is that i can JET the water right on the sponge thing and get a more effective cleaning thats more targeted and gets less things wet. (if you get the electronc leads wet then everything goes sad and print heads are, apparently, a bajillion dollars to replace/ie might as well get a new printer)
Anyways, so I cleaned the head (there was a lot in the sponge things for C/M and Y so that was encouraging, much more than for the other colors), let it dry, put it all back and... no bueno. STILL no color for those colors. At this point is was REALLY REALLY ready to give up and chuck it out the door. But.. i had no other way to print my army transfers. So I kept digging tutorials and help things on ze internets and found that there is another potentiall clog area: the "purge unit".
Yeah I didnt know what the hell it was either, but apparently when printed excess ink can occur and it has to go SOMEWHERE, thus the "purge" unit. It basically sucks away the excess ink and dumps it into, well, sponges that absorb it. 2 things can happen with said unit:
1. the sponges can get super clogged and full (seriously, its just a sponge at the bottom of the printer, yyou basically just get a pool of ink down there. You'd think they'd at least make it something you can more easily remove and clean)
2. The hoses connecting the suckers to the mechanism can get unplugged. This can happen if the printer gets jiggled (aha.... i did have to lug this thing quite a bit when i bought it..)
Okay great, how do you check all that. Well basically you take the ENTIRE printer apart.
https://www.printerknowledge.com/threads/removal-of-top-cover-from-pro-9500.9961/
That was my tutorial page. It's.. insane. It was one of those moves where you mess up and the printer is effectively junked, and you only know AFTER you've spent a day doing this. But, well, at this point the printer had only cost me like 50 bucks and it was either that or recycle it, sooo.. might as well learn more about how printers work and take it apart even if i dont get it back together again correctly. So that's what I did. When i finally took out the purge unit, hey look MORE spongey things!
(taken from the tutorial but its basically the same thing, i just wasnt taking pictures while doing this lol)
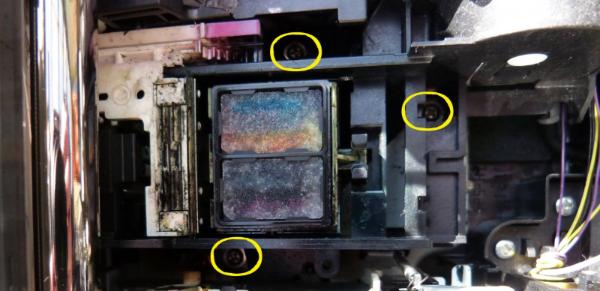
and even more below it (so those are like the spongey things at the start of the process. then there are the hoses which suck it into some drain sponges that sit on the bottom of the case), and a pool of ink AND a hose was disconnected. Granted, that hose could have also been me as i took this all apart but still, there was a lot to clean up and fix.
So I cleaned it all up, put it all back together, annd.... amazingly, it worked.
Honestly, one of the top 10 moments for me in terms of hackery/experimentation. Mostly because i had NO CLUE what i was doing and so felt EXTRA lost and uncomfortable. There have been a lot of experiments throughout this journey but mostly of them were either: not too time consuming if i got it wrong, something i vaguely knew where i was going with it, or i already had a few extras as backup if it failed. With this tho that was it, i wasnt going to buy a $300 printer just to print a single page of decals. I dint know of any online service to print it for me and everything local wouldnt do it. So to say that it was a relief when it all worked was.. well an understatement of the century.
120033
Post by: Excommunicatus
That was a rollercoaster.
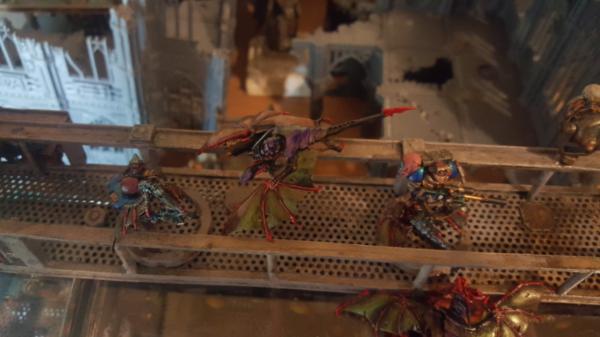
The shrine is amazing, your decals look great but I think my favourite new thing is the blood smears from the Gargoyles.
They really sell the fact that the winged-[Expletive Deleted] are coming right at you.
Brilliant, brilliant stuff, you madman.
60913
Post by: Largo39
Thanks! Yeah im super happy with how the streaks turned out too, it definitely added some dynamism to everything in a unique way. I need to take some pictures of the "flying attack at" gargoyles too, im happy with how they are posed (you'll see soon) whilst remaining sturdy.
anyways sorry for the lack of updates, last couple of days have been.. busy at work, but soon there shall be the conclusion to the flag drama!
Lets just say there were some lessons learned with custom transparent water slide paper...
60913
Post by: Largo39
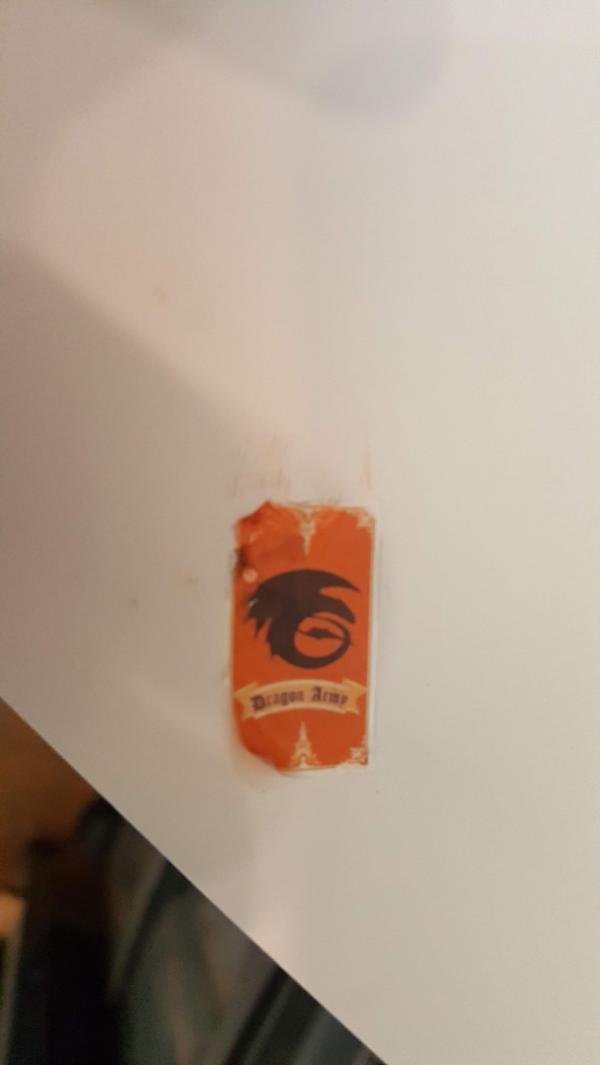
With the sheet printed it was time to start transferring!
Easy peasy right? Well.. so one thing I had read in the instructrions was to get some clear acrylic spray and do a couple of coats over the transfer. However i hadn't managed to find that in any of my local crafts stores (seriously, Michaels was out of all krylon sprays when i went, craft store inventory is getting kinda bleh now in the age of amazon) and I didnt want to wait around another couple of days for another amazon box.
So I figured that, since it was probably more a "protective' measure than anything I could do the transfer and then do a couple of coats of super gloss acrylic paint instead and do it all at once. Same thing right?

Nope. Turns out the spray is HUGELY important to the print dye not running when you actually do the transfer. I tried hard to JUST wet the back page and not get the sheet wet at all but even then there is still some smudge:
Better: but still smudgey and also crinkles REALLY fast. you basically get one shot at sliding it on and thats it. otherwise you start smudging.
So i was frustrated and was like "fine, okay fine, ill get the krylon and wait a few days, see what that does"
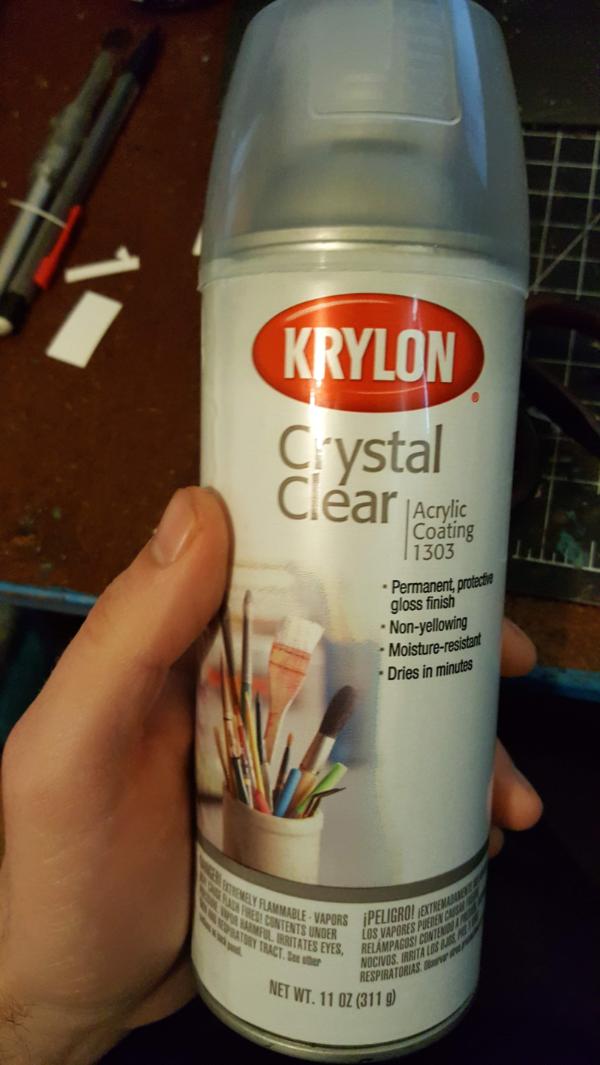
few days later and:
perfect first try. Lesson here? always follow the instructions.
60913
Post by: Largo39
So, figured out the spray was needed so now can transfer cleanly. Did my first wing flag annddd
Wait, what? Oh right. printing. D'oh. So this is something I should have thought about before, of course, but my nativity with transfers became super clear here. Basically printers cant print white, thus "bright" things are basically just relying on the white of the paper + transparent colors. So there are two ways to fix this
1. white decal transfer paper. You print on white instead of transparent and voila, you can transfer away. Downside is now you have to precisely cut away your transfer otherwise you will have white "edges" to the wings and things. Probably not a good idea for a complicated shape though a square flag would work fine.
2. you paint everything underneath the decal white. This will mean I have to repaint the blue on the edges of the wings, but this is (presumably) a bit easier to do than cutting it away.
I went with 2 and voila works great now:
Now i ended up with a touch of a blue "halo" around everything but honestly it kinda helped pop the wings at least so its not a terrible result.
60913
Post by: Largo39
Decals done and time to install. Also to add some more rubble for the broken statue.
I painted up the rubble to settle it in but dont have a picture of that.
Anyhoo with that this tile is basically done.. for now. I still want to add something in that corner, but I need to figure out/utilize some laser cutters first (my plan is to make some "commandments" that light up, so you get some more lights to draw people around the tile to look at the marble area more and make it more a destination to look at. )
Ill post some "final ish for now" pics and then after that there is some work on the other tile to have it synch up a bit better by adding some more rubble and rubble'd bases.
12188
Post by: Coldsnap
Love this one, where are the fancy bitz on top from?
60913
Post by: Largo39
Yeah! The arch turned out better than I could have thought.
The top piece is from the dark angels dark shroud:
https://www.games-workshop.com/en-US/Dark-Angels-Ravenwing-Darkshroud
Good luck finding individual bits for it though, I want some bits from the dark talon sinc they are also good "shrine" pieces but alas no luck.
Also sorry about the delay peeps! I was hoping there would be a shortish interlude while my friend got their lasercutter working but its taken a bit more time than expected soooo we're on pause for now until thats all figured out. The main remaining task left is to build some kind of "shrine", in this case glowing 8th edition commandments. After that its time for a last round of decently lit pictures hopefully.
60913
Post by: Largo39
Aloha! I'm back! At least for a bit. I have a bit of a vacation coming up in which i get a few days to just chill, and one of the things Im thinking of doing is finally (Finally!!!) finishing off the game board tiles. You know, the things that started all this and the same things i never quite got around to finishing off. The last "big" picture I have of them is, what, this?
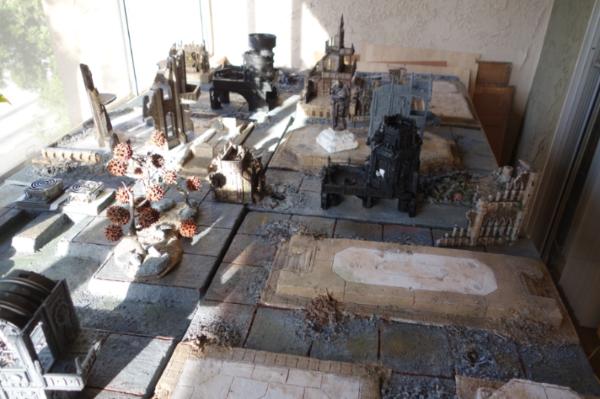
Now the reason I want to finish these off is beccaauuse, well, I want to sell them. Ideally to one of you lot. There is no way I can ship the damn things though so Im hoping anyone interested in is in reasonable driving distance of Los Angeles (within a few hours). The reason why I want to lose them is I'm just not really playing 40k anymore. I still like painting tho, and want to do so when I clear out some of my other projects, but that kinda means clearing out the backlog and getting every scrap of space left. Even the 2x2 cube of space they currently occupy is driving me nuts. Their other use was for DnD and other such miniature games but my board game time has also gone down, and my dnd group is very much in flux and up in the air. Soo, as a result, time to try and give them to someone who will use them.
But, of course, it's me, so i cant leave them unfinished as they are! I still need a river, and nid corruption, that water plant! So that's the plan, get all that done and, in the process, hopefully find someone who wants them. Price wise i'd be happy to get just even close to their equivalent cost in forgeworld realm of battle tiles (which are unpainted). I figure that once they are done they'll be worth that at least.
I also want to finally finish that shrine and work on my ability to actually take pictures of all this stuff, so hopefully there shall me more regular updates once the tiles are done.
60913
Post by: Largo39
General note: if you are interested in purchasing these tiles PM me! Given that shipping would cost a fortune lets stick with people within driving (~5-6 hours) range of Los Angeles unless you are willing to pay a LOT for shipping.
Hello again! I'm back and ready to do this thing! I finished the first part of my vacation and now its stay-cation time for abouuutttt a week or so, which should be just enough time to finish these things. I figured I would start with the least "completed" tiles first: the two river tiles. Now I currently dont have plans to actually put in the liquid for the river itself, as that would be like 60-80 bucks of fluid to get the full experience, which doesnt really make sense for something I'm planning on selling (at best) or just going back into storage (at worst). Now if there ends up being interested parties and they want the fluid thats a whoooole different ball of wax, but for now there will be no liquid. So first up is this tile:
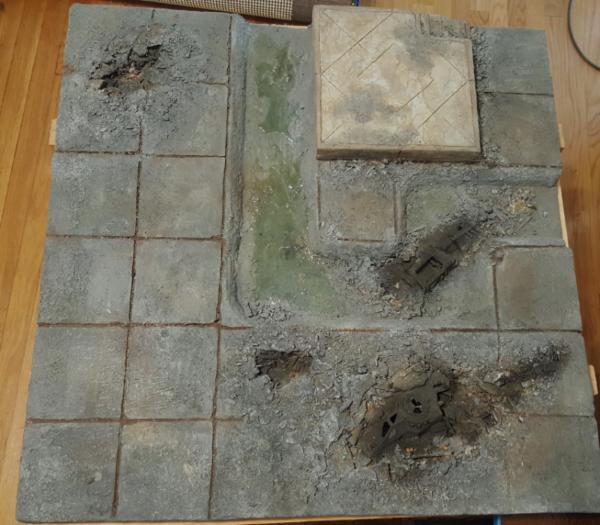
Now there are a number of things to do here. First up the crashed plane, of course, needs to be painted. But before even that I need to scrape off some of the sand/grit I had added to it. Since doing all this i've definitely learned to tone WAYYY down on how much grit i put on this stuff, as it tends to get everywhere and thus makes the entire paintjob look "dirty", not just the grit part. Ideally what I'd do in the future is paint the model normally, THEN add pre-colored grit and go from there (AKA: use powders). For this tho, just gotta scrape it off and re-primer. Fortunately I had the brainstorm of using paper to just crinkle around it to find the "edge" of the crater and thus only primer where i needed.
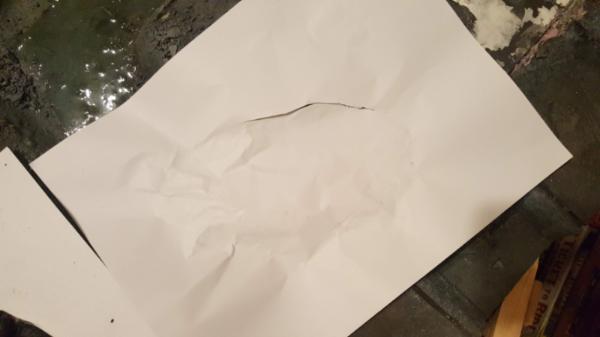
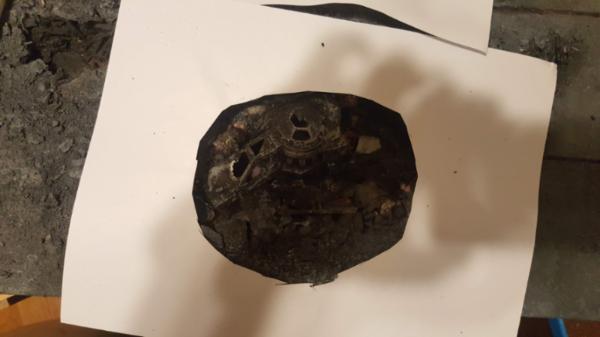
Next is the 8" x 8" detail "foundation" thats on there.
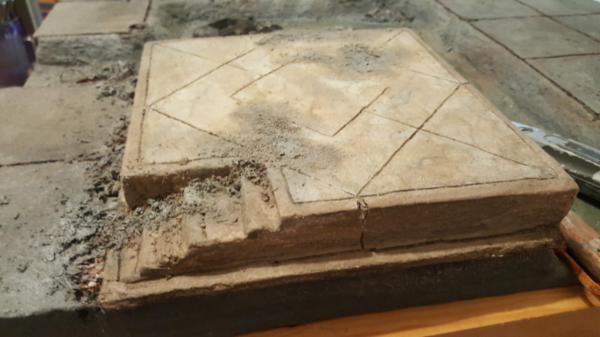
Despite being nearly done paint wise (just needs some darkening in the crevices), there's still a problem. Being alongside the river i would expect a bit more detail of it having like pylons or something going into the rivered to feel like it "belongs" there a bit better. Even more crucially though is the fact that in terms of playable surface for warhammer 40k its... really in the way. I did actually play one game with the full table, but we were trying to do the full " LVO frontline gaming" type ITC board setup. And for those tables there is, typically a piece of BIG mongo terrain smack dab in the center which is pushing 12x12 in footprint in size. Because of thise littke block of 8x8 there arnt actually any places on this full set of tiles to PUT such a piece. There are a couple of other big tiles with a big foundation on them but 12x12 looks kind of awkward on them and also makes it quite high which could be bad. So, given all that, I think the best bet is to just take this 8x8 chunk off the tile and make it more generic and usable. It's still painted pretty on the top, so I'm not going to wreck it, just remove it from this tile.
So a lot of huffing and puffing later (the glue HELD) voila: its gone. Of course I gotta clean up those edges so time to add some detail back in there.
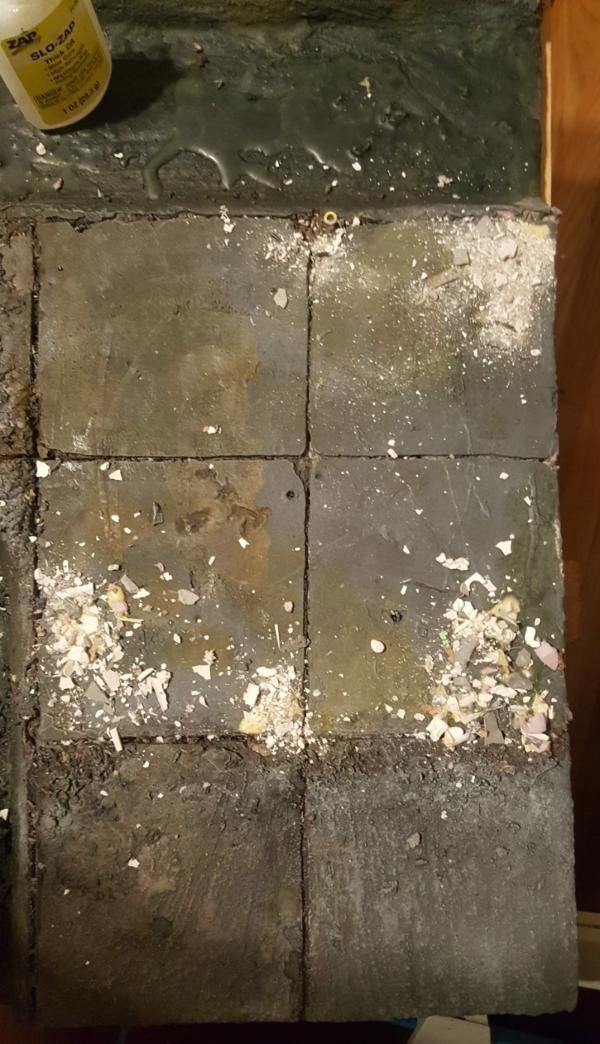
60913
Post by: Largo39
So work continues, in all the usual ways really. Strip the plane bits to black, add a undercoat of rust/ raw steel colors, add chip paint, add an overcolor thats fairly army neutral. I went with my "industrial blue" color i mixed up a while ago when making those cargo crates. It's a good color because its bright, fairly neutral, and looks good when dirty/chipped/etc.
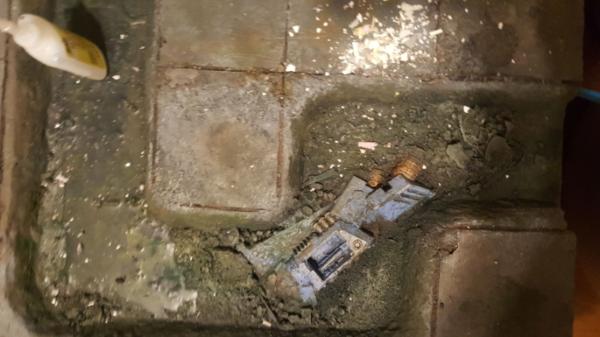
Despite not doing liquid I did want to at least make the river area look like it had seen a lot of liquid and be somewhat greenish blue.
I also added some orange to my debris trail. I originally started with it just being dark but that looked a bit bleh so I figured an ember type burning debris effect might look nice and pop a bit.
and soon enough we're done with the tile! Next up is the other river.
60913
Post by: Largo39
Next up iss.. the water plant tile. which i REALLY dont have a good picture of. So just sort of imagine this with SOME paint on the board/crashed bit?
kinda dropped the ball there.. but yeah. It's not quite that unpainted but the water plant area definitely was so lets work on that first!
its very wierd when empty
scrapey scrapey:

then bluey bluey

60913
Post by: Largo39
annddd the second plane bit is done. Huzzah done plane bits:
Next is painting up my water plant and console. I've abandoned the whole battery thing to make the fans spin, as that took waaayy too much power, so now its just about making it purty.
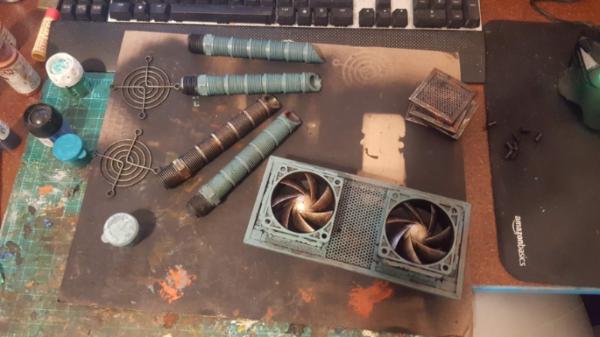
Now I wasnt happy with the grill/walkway color. Previously on my buildings I made it more of a blue/green color to "stand out" more in terms of placement and being purty. But for this that seemed much, but having it all the water green was wierd too. Then I remembered my grey i used for the garage tile walkways and went with that. Much better
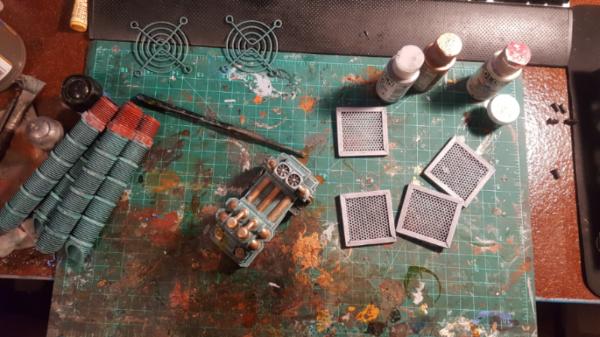
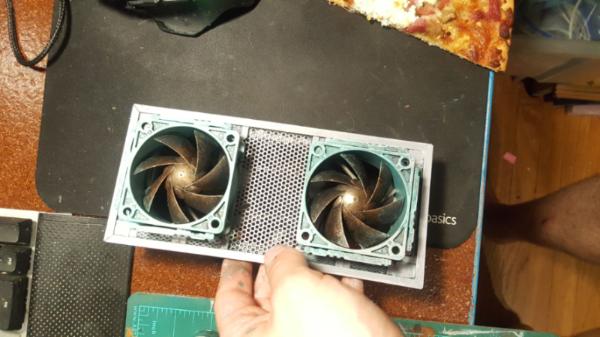
I also added a finishing edge of plastic all around in order to clean it all up and unify everything. More lessons from all those walkways
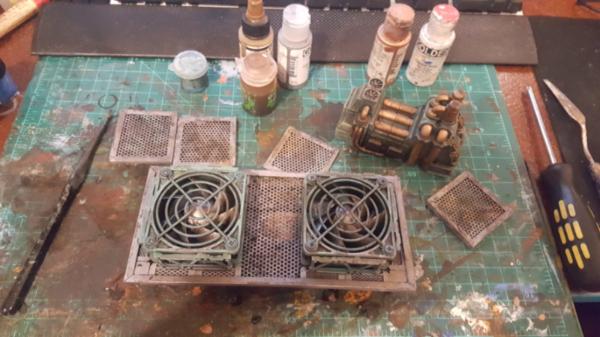
60913
Post by: Largo39
Yeah... im a slacker. but in my defense, borderlands 3 came out so i got somewhat sidetracked on updates.
Second fun fact, you know when I was making these tiles I wasnt aware of gorilla glue? Specifically the expanding foam one? It is, BY FAR, the best and easiest way to do all these debris piles. Elmers glue, for the record, is worthless (because it's water soluable so when you do any kind of heavy washing.. which is required.. everything starts to flake off after). Just put down a bunch of gorilla glue down, get it super wet, wait for it to start bubbling, and then coat it in your debris and push down. Holds like a champ.
Sigh. On the one hand learning is good, on the other its frustrating when you go back because as I paint all this I definitely just pull little flecks out of debris with each stroke. I used a whole bottle of superglue on these tiles just to try and de-wiggle bits of crater coming off after i drybrushed all this. There has been a heavy use of a vacumn to constantly suck out loose debris. Still, there was a lot there so it looks great regardless but I wish I had known earlier. Anyhoo, the tile is done.
First up I gorilla'd down all the water plant bits:
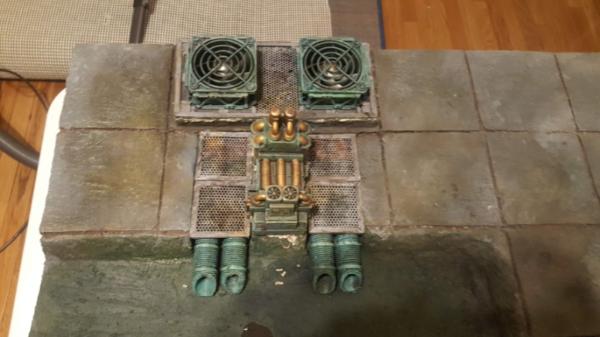
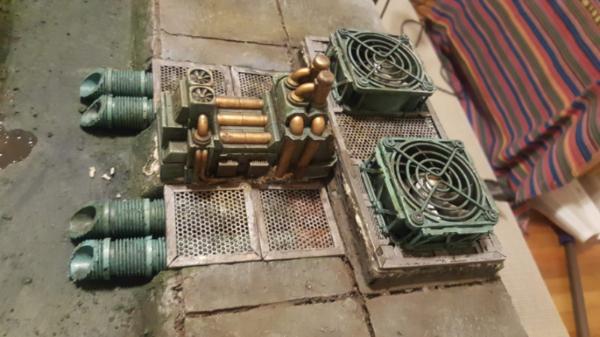
the leakage of which I painted to look oozier
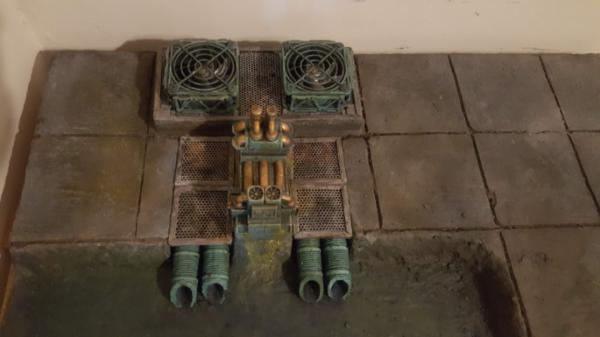
crashed plane is also done:
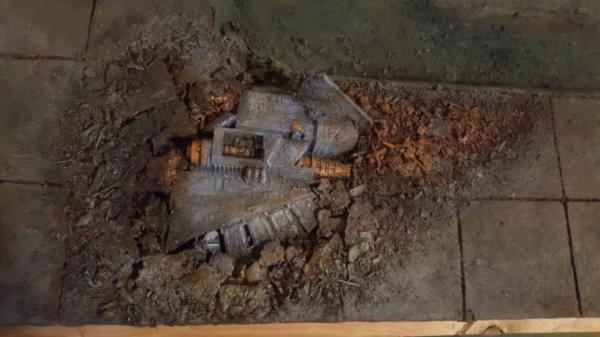
and thus the tile joins the completed stack:
60913
Post by: Largo39
Alright, now that the more behind tiles are done (except, as mentioned, for water. But that only comes into play if there is anyone here actually interested in all this) its time to paint some marble!
Now one interesting thing abotu this tile is the statue base.
So, like with the first tile, it is kind of in the way of stuff. The statue itself can easily go on ANY other of the bases, but you CANT put any other buildings on this. So its not ITC/ 40k friendly. It's also.. VERY far behind and looks kinda crappy if I'm honest. there are these detail reliefs on the side but they got somewhat covered up by the casting process and so probably wont turn out amazingly well now.
Thus it seems like something I could just get.. rid of. Now, I could leave the space open but i dont think that partciular 8 inch square will open up a lot of "big building" opportunities for the ITC because its not surrounded by much more free space. HOWEVER, what i CAN do is replace it with my already painted 8x8 tile which DOES handle small-medium buildings well, thus giving me some re-use there and making that corner still detailed and cool. I can also cut off some of the edge detail on the 8x8 to clean it up even more and get rid of some of its curvy carved lins.
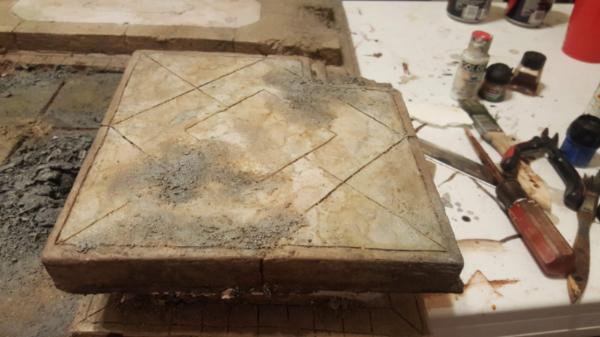
SO, i did all that. Took out the old, put in the new, added debris around the edges. Next up was painting the other 2 marble pieces. Now the full suite of marble paints I had has long ago since died but I can generally make it up in the aggregate with some close enough inks and cream colorss.
The first step, as always, is a sponge blot wash of brown/orange/red/yellow inks, with very washed out colors. The goal is to produce nice fractal like edges where the blue fine lines will eventually go.
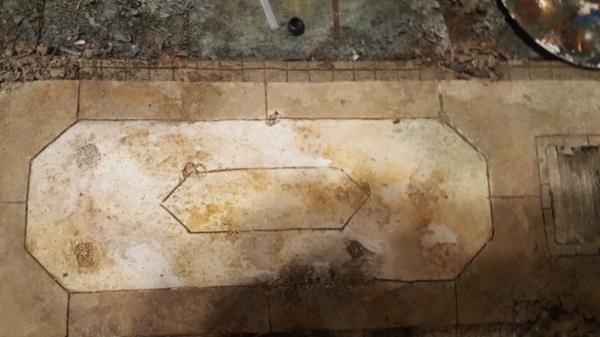
then you put in those blue lines. THe goal is to have them all in similar "directions" since marble seems to grow sorta tree like in that all the branches generally point in the same direction.
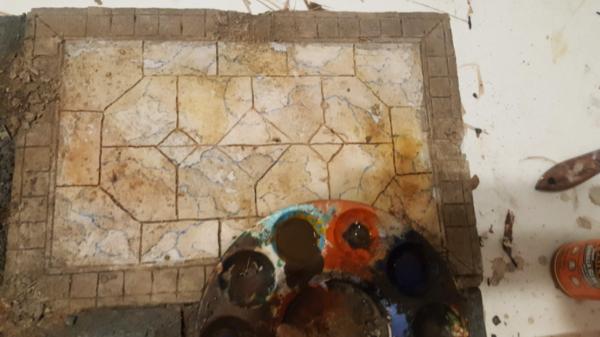
and thus the tile progresses!
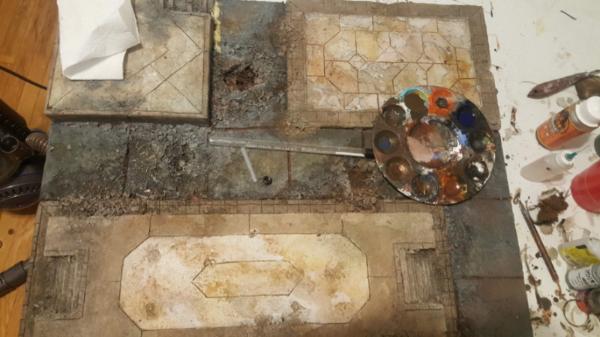
60913
Post by: Largo39
Once the blue lines are all painted the last step is to blotch BACK on some more cream color in order to tamp down all the colors and make everything a bit more uniform and "deep". Marble, in the end, is fairly subtle, especially at a distance, so this kinda helps make it too interesting.
As always, you wish your lines were tighter and smaller buuut oh well. After the cream blotch pass you just put on some gloss!

Also an example of the gorilla glue technique in action. Just let it bubble then coat in debris.
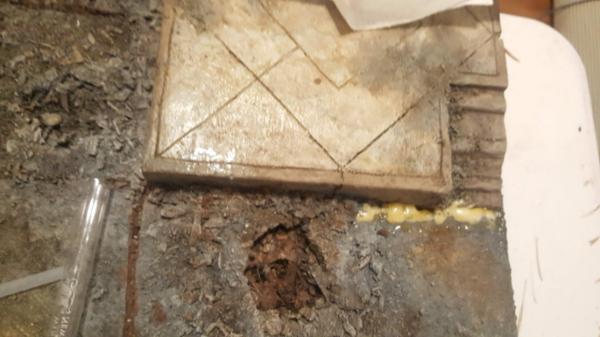
and thus it becomes done!
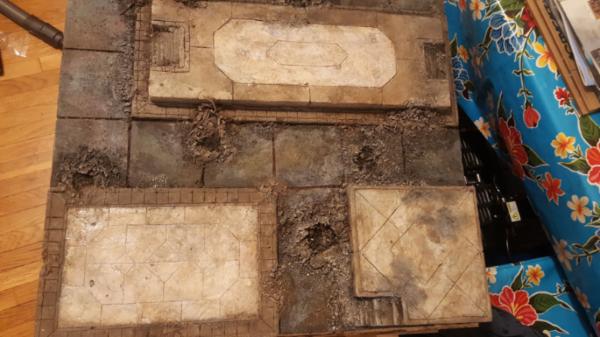
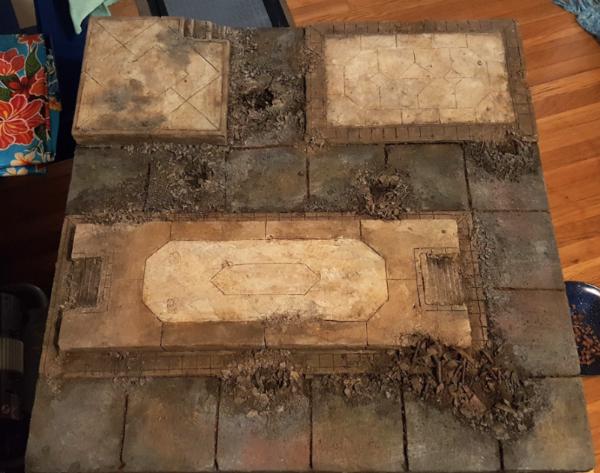
60913
Post by: Largo39
So, the next tile to work on is this guy:
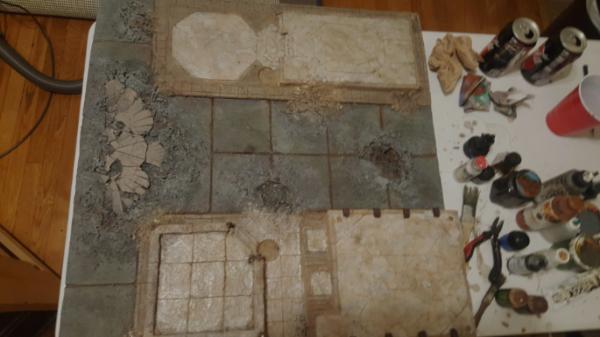
now this tile is actually in pretty good shape. ALl the marble is painted and it just needs some washes and such. But, as always, there is something I want to fix. The tin bitz metal details I added to the sides/top of the raised foundation.
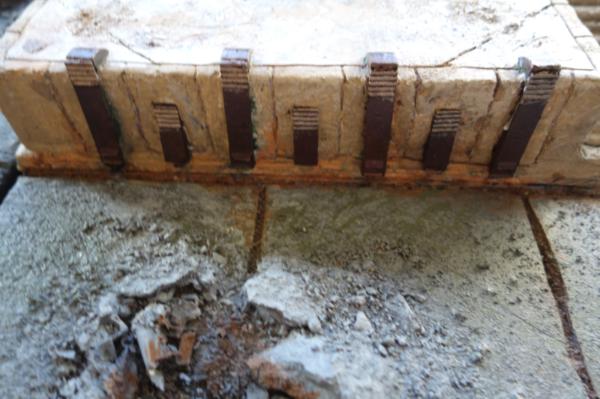
there are 2 problems with them. First is, as always, the fact that the little nubs on top block building placement. You cant place a building that goes RIGHT on the edge which, as it turns out, I have. So thats annoying and unecessary. Second, and more crucially though, is the fact that they were mounted BEFORE i knew about gorilla glue and thus using super glue. Super glue which.. doesnt stick to the kind of plastic they are, at all. I basically kinda just put enough there to kinda stick it on by force but not with any real attachment, so they come off VERY easily. They also CHIP super easily because primer doesnt stick either.
Given all that its time to cut waayyy back on how many there are and remov all the ones that reach over the lip.
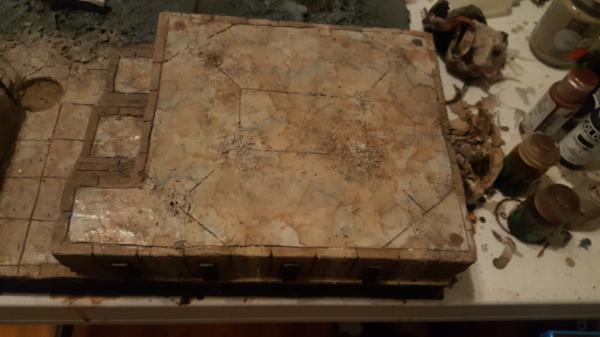
But i want to put SOMETHING there so.. hey look at whats the right height?
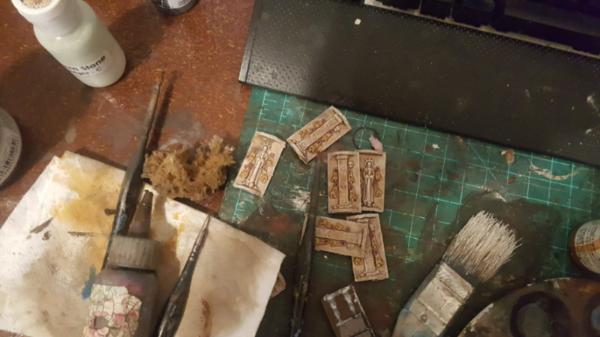
Yep, they came back! they are a perfect height and if i sand off the back a bit would fit there nicely.
I also want to show an example of the wash process and the benefits of it. I had previously done light washing on these tiles before, but not NEARLY to this extent. My technique also changed a bit doing these tiles. On thing I had been struggling with for these debris piles were peaks of white/unpainted material buried in there that I could never quite reach with either normal paint or wash. What I started doing for this was getting a dropper bottle, filling it with wash, and basically just SOAKING the entire area with it. That way the whites and such all go away and I dont lose brush hairs/sanity trying to dab brushes into every little nook. Made the process a lot easier and looks great.
Before:
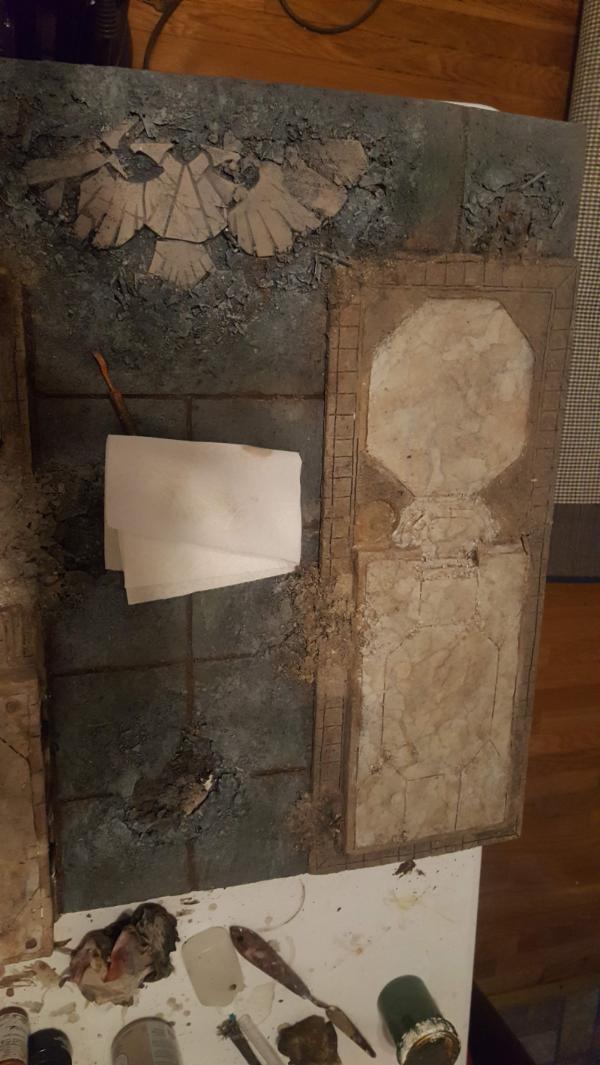
After:
you can also start to see me greening up the cracked giant stone aquila. I was going to make it cream marble but liked my green technique from the other statues I did for the display tile so switched to that. More on that in a bit.
60913
Post by: Largo39
So the washes were applied to the other side:

and you can also see the green aquila now. I think its a nice improvement and makes it less distracting than a brighter marble would have been.
I also installed the wall details. The edges arnt as clean as id like them to be but they still are an improvement to the previous chipping bits.
for a final look at the tile!
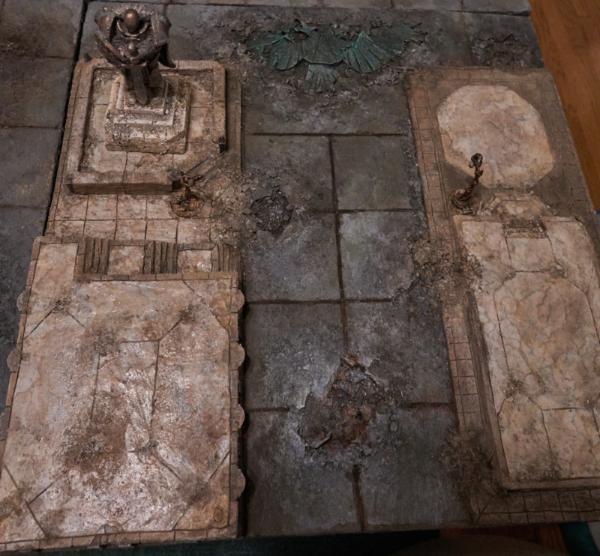
60913
Post by: Largo39
Starting to rn out of tiles here, its quite exciting. Mostly because im soo ready to be done vacuming up little debris bits lol. Defintely wish I had known more about gorilla glue when making these.
Still, they look good with all the washes and marbling, so its still been a good short project session doing all this. Anyhoo we're finally at das MEGA tile to marble.
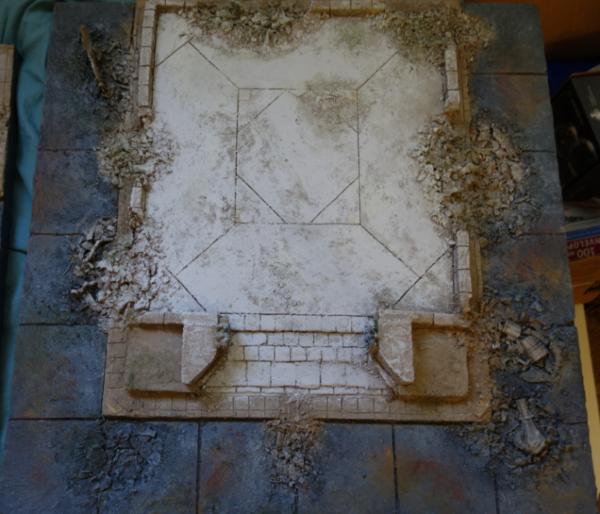
and things proceeded basically as normal
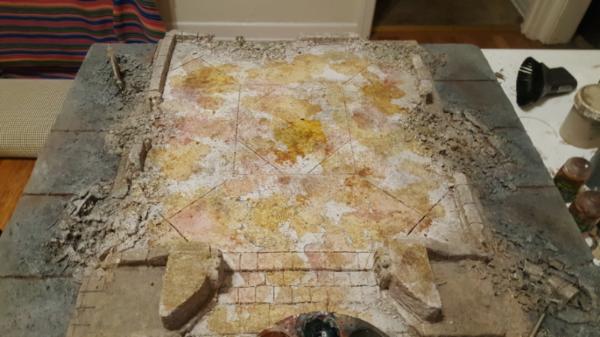
the end result is.. hrm, interesting though. It works, and im reasonably happy with it, but its odd. Its SO much marble in one place that at a distance it's borderline too busy, but up close the detail is also somewhat low too. The other marbles have hit that balance a lot better but here its just a touch off, but then im also not really sure how i could have done it better because both sides of the spectrum are at their limit.
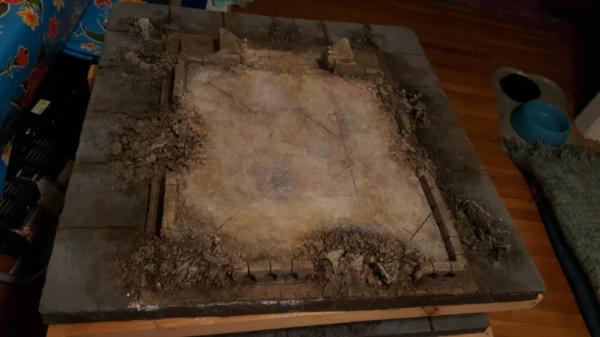
i've also worked to fill in various holes and cracks in the tile.
60913
Post by: Largo39
Sooo... got a bit distracted by borderlands 3 but the tile is done?
60913
Post by: Largo39
finally we move onto our last tile! wahoo!
Now for this the big thing is, again, to do some washes, but also to paint out the tyranid infestation/attack area.
First up though is a wash. Now as do tile after tile of washes (and burn through it) i've learned quite a bit about what I like. There is a particular spray bottle of inky wash that works, but if you dont have it then a custom mixture of Higgens Black Magic (super concentrated and dark, works wonders for this stuff. Couple of drops make a cup of wash) and Golden Acrylic Raw Umber High Flow (or other suitably dark brown, but i like raw umber).
Basically you want the wash to be MOSTLY black/dark but not quite full black otherwise it grey's everything out and you still want some warmth to it. The end result really helps make the stone look old.
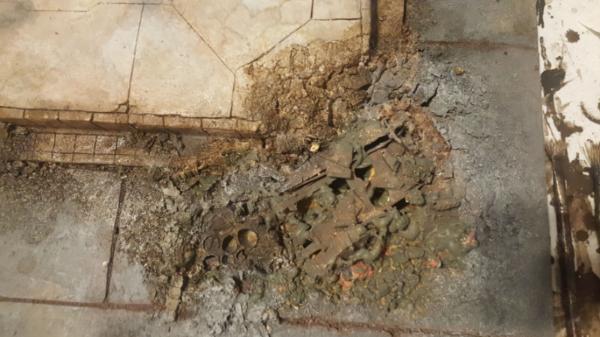
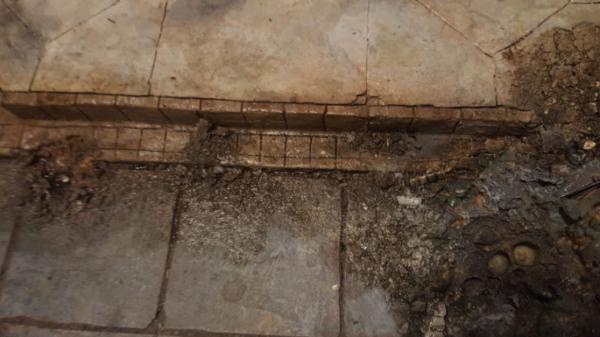
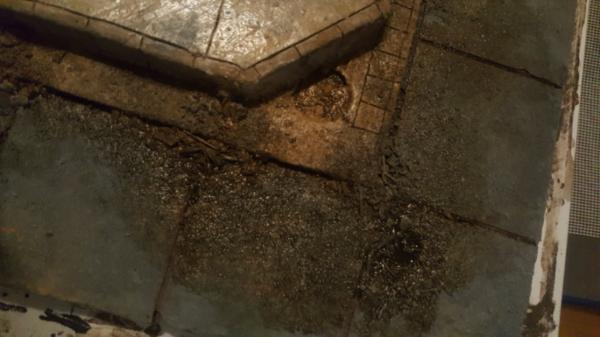
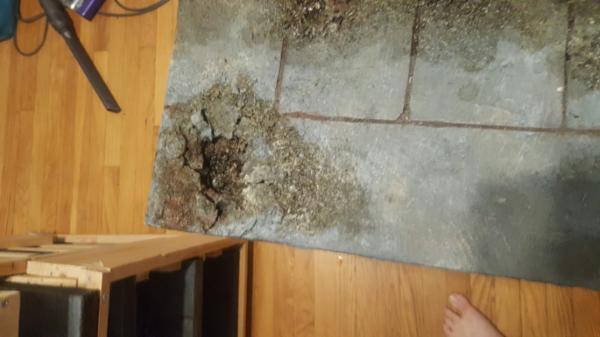
and then we're starting on painting up the nid area:

60913
Post by: Largo39
Finishing up basecoating:

and then we wash! Make everything look all melty and broken
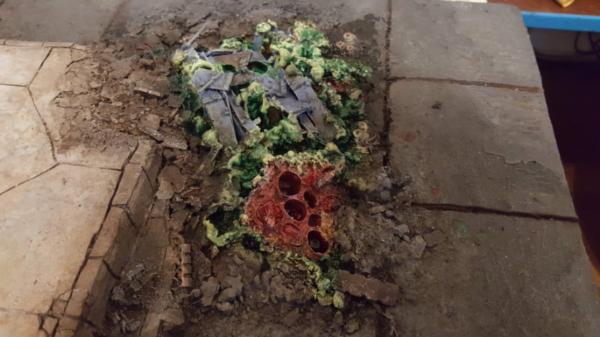
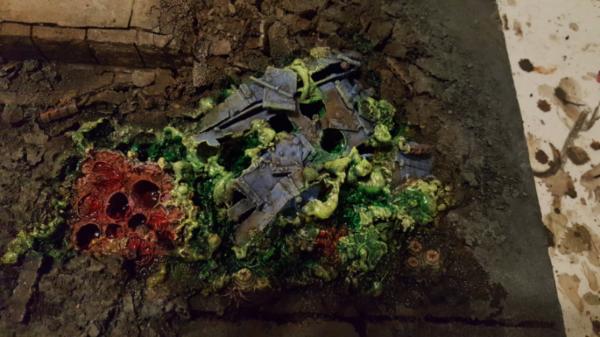
huzzah done!

60913
Post by: Largo39
Tiles done, time to finish a few of the extras I had meant to be part of the tile setup. My latnerns and my statue.
First up is adding a bit of debris to the lanterns:
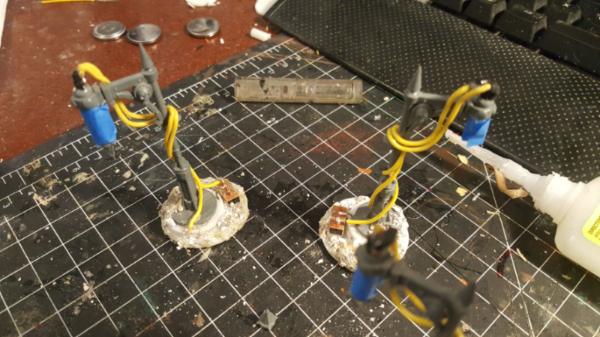
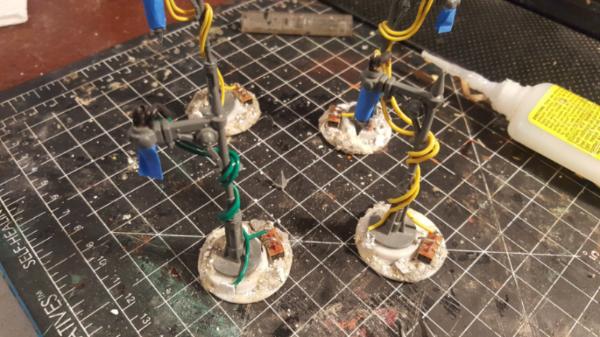
then painting them:
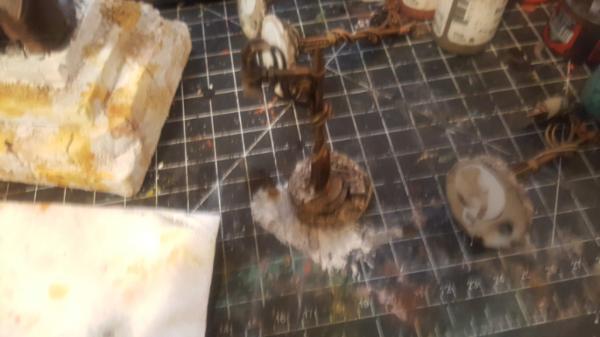
we also have my marble pass for the statue:
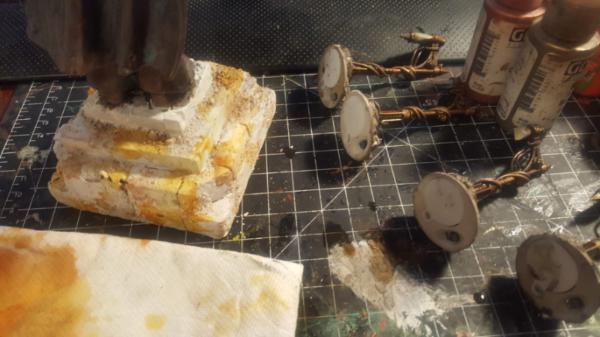
60913
Post by: Largo39
Sorry for the long delays guys, been busy at work and also going to lots of places on ze weekend. Anyhoo we have the wrap up of the statue and lights:
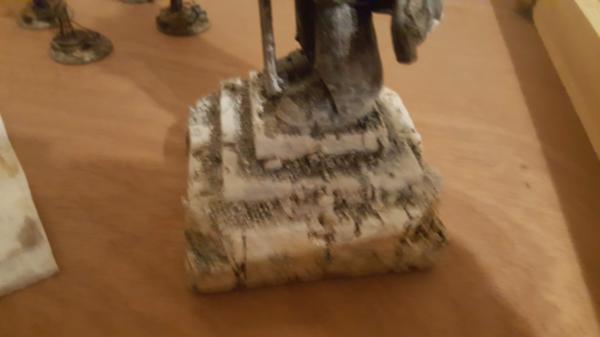
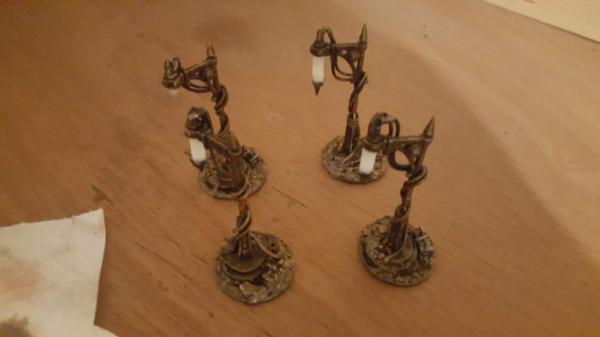
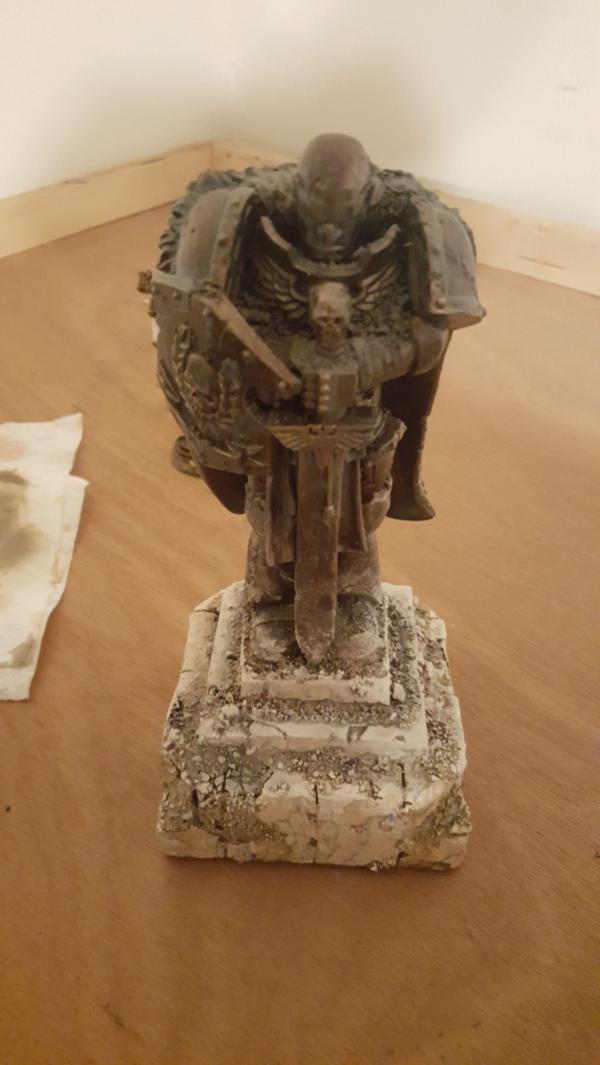
next up are just final shots of the tiles!
60913
Post by: Largo39
Huzzah, the terrain tiles are done! Also anyone in the southern california/vegas/etc area want to buy them (for cheaper than the equivelent in forgeworld tiles?)
Here is the first patch of photos i processed all purty. In the end up happy with how they turned out, just wish I had more of a use for them. The new SM rules are awfully tempting but still too many other hobbies to do right now (like lasercutting?)


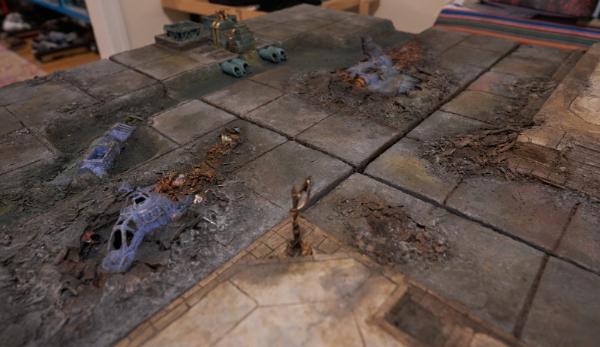
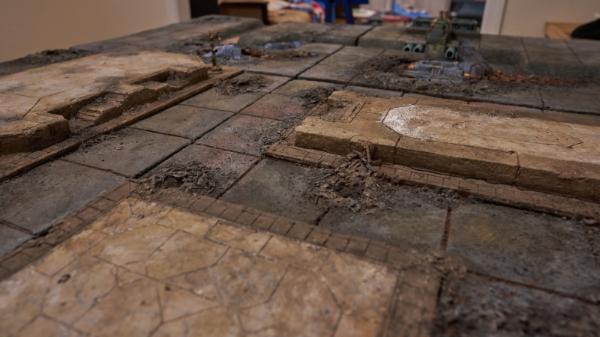
1124
Post by: Captain Brown
Largo39,
That is quite the diorama.
Exalted.
Cheers,
CB
60913
Post by: Largo39
Thanks! It's been quite a long road but the end result was definitely worth it.
|
|