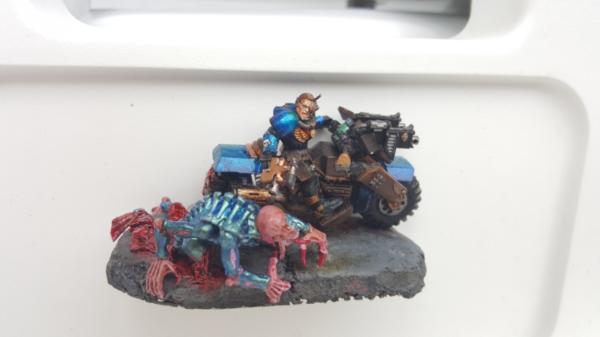
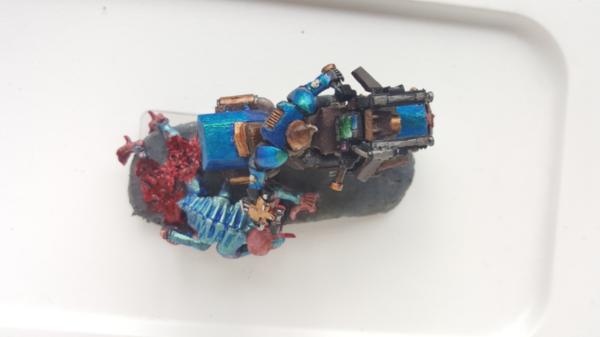
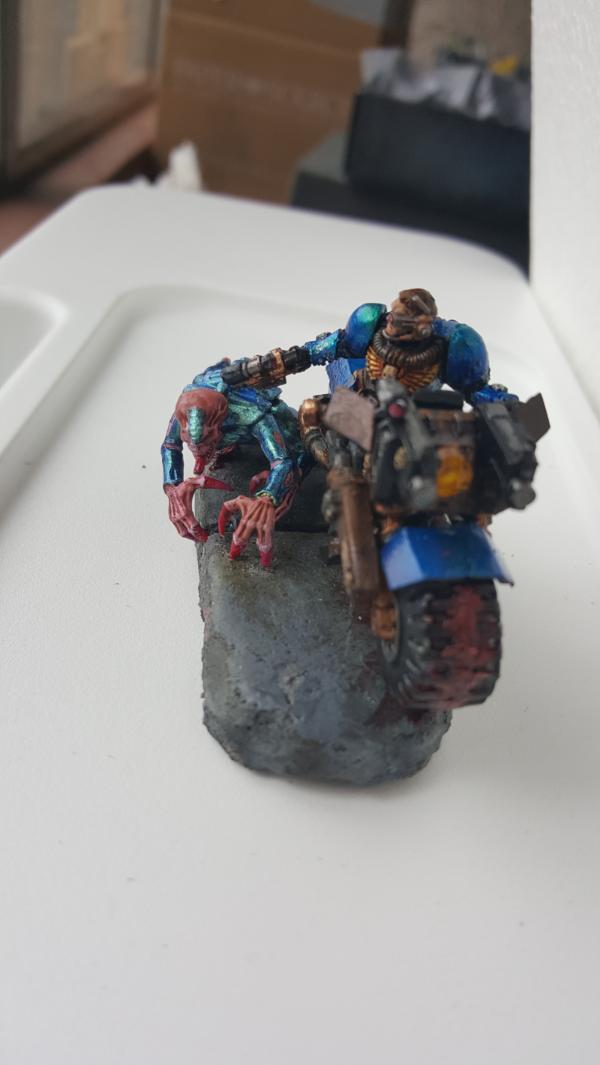
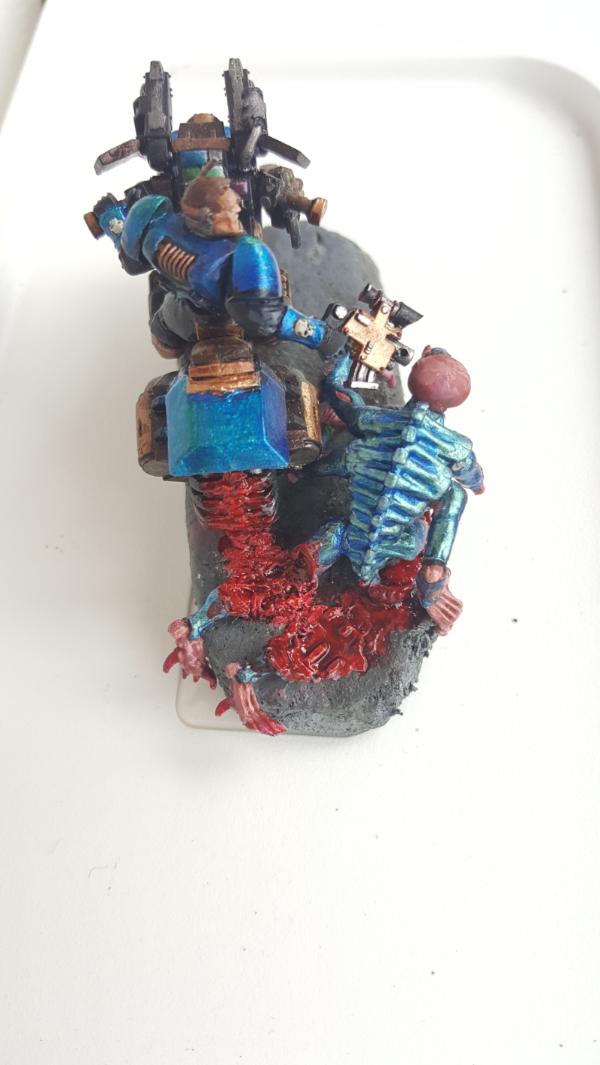
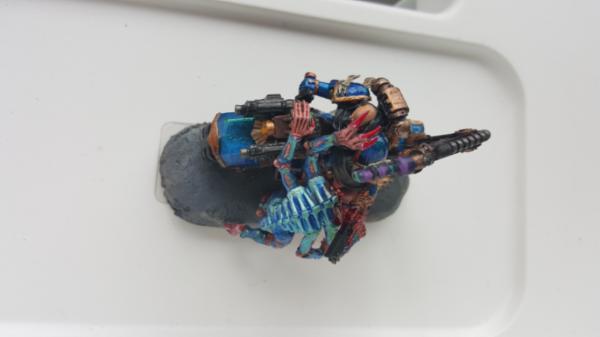
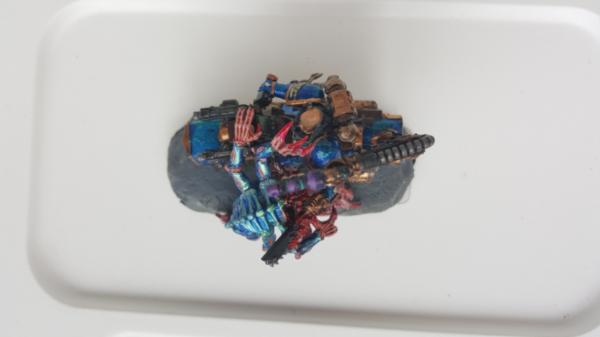
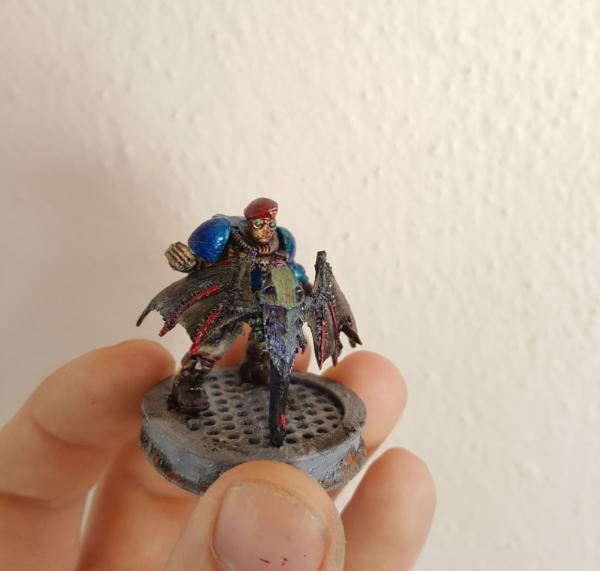
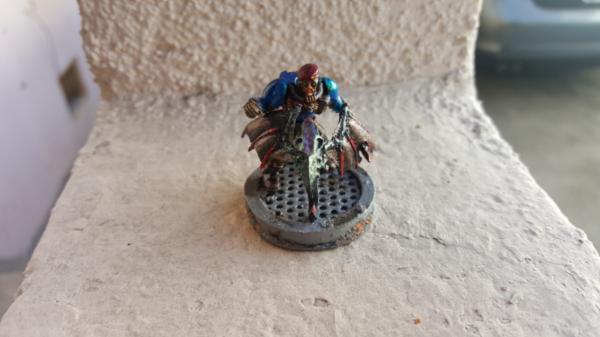
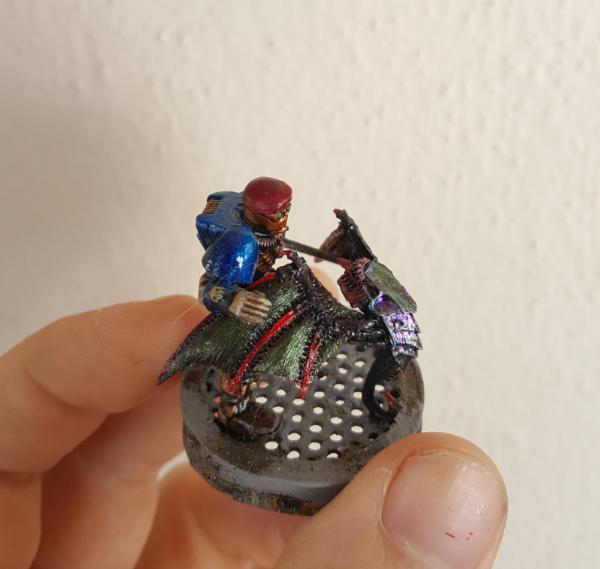
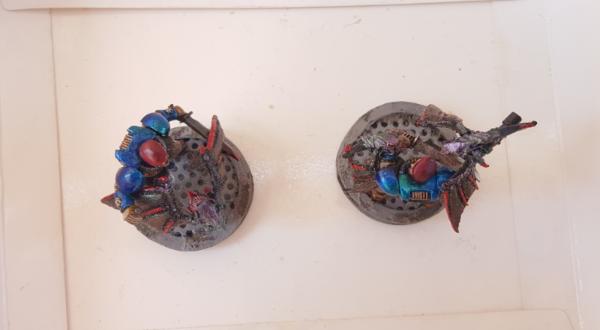
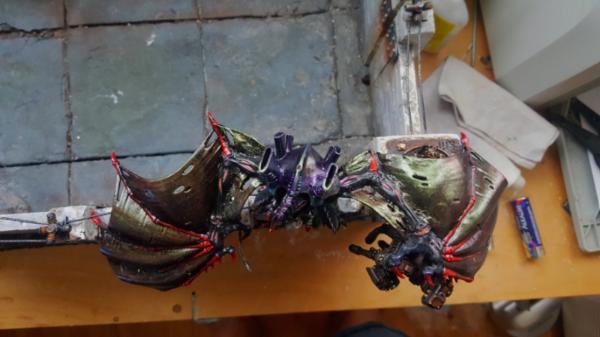
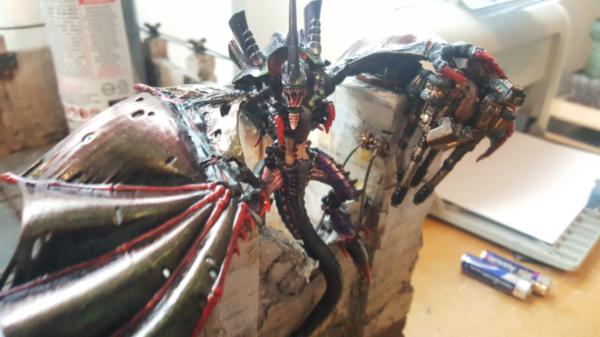
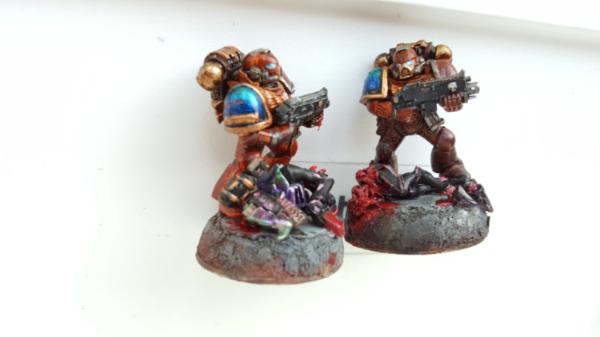
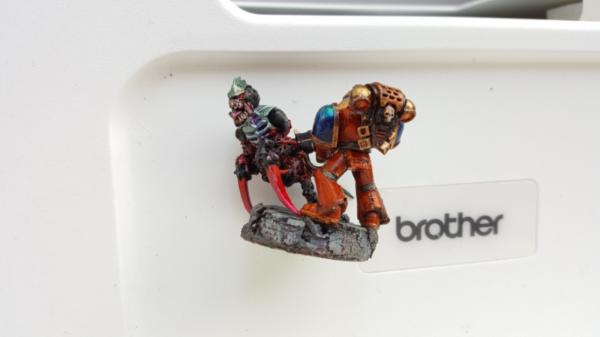
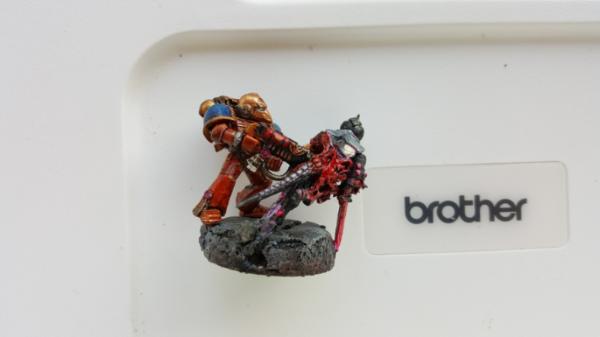
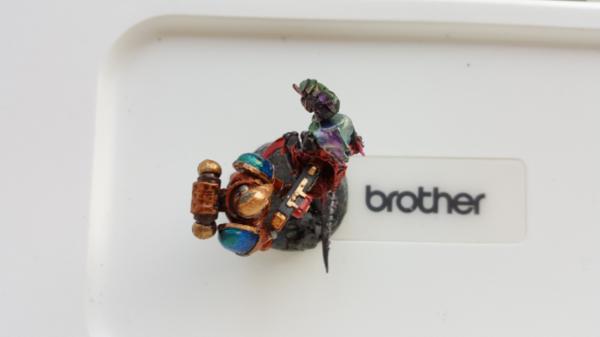
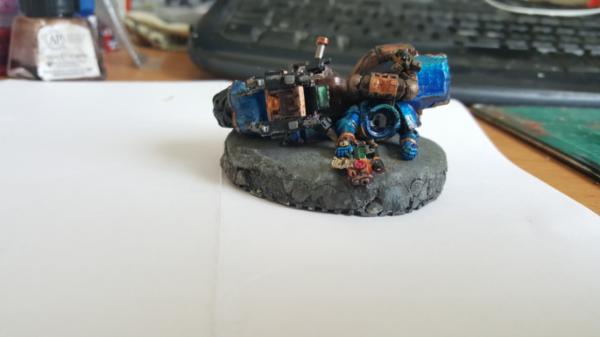
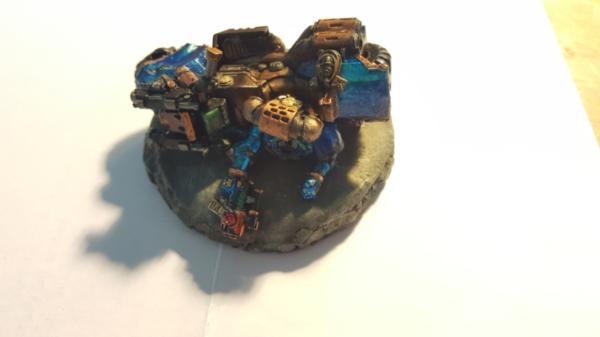
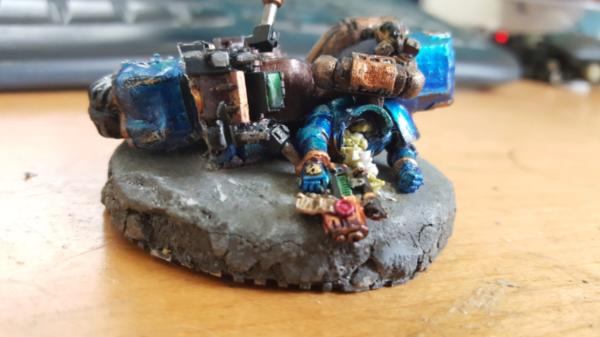
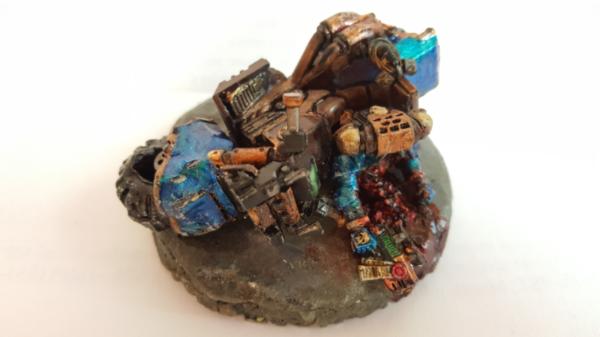
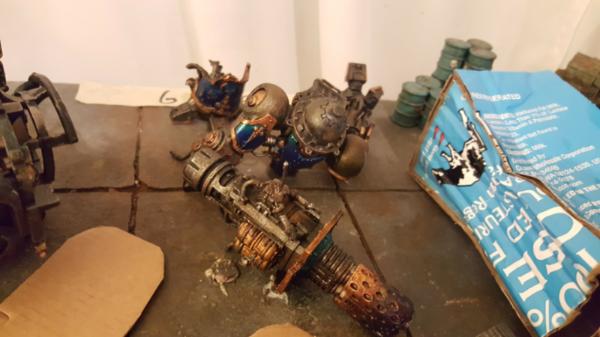
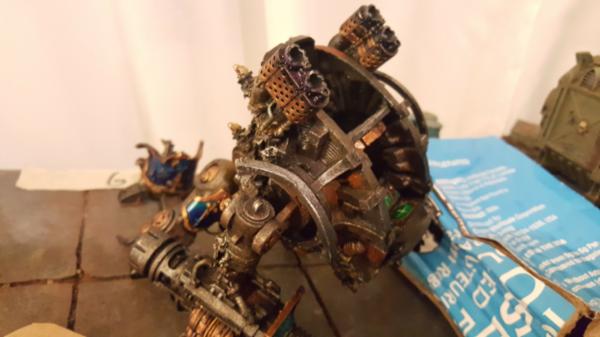
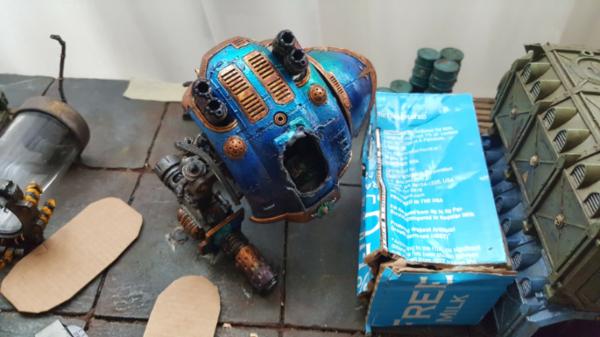
60913
Post by: Largo39
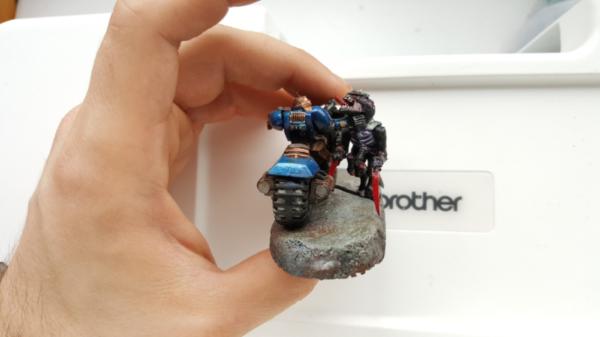
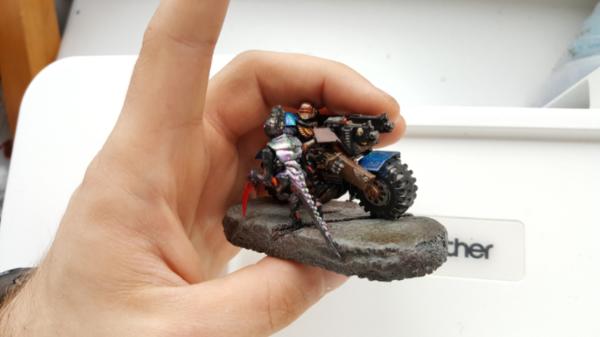
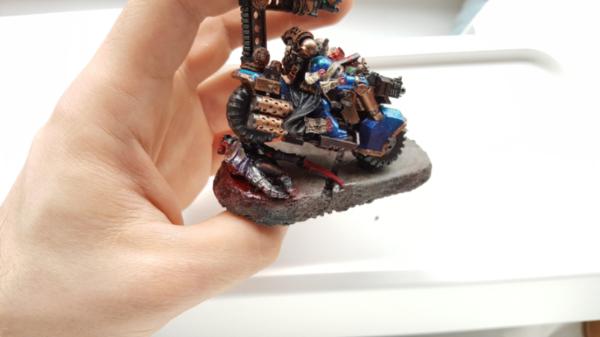
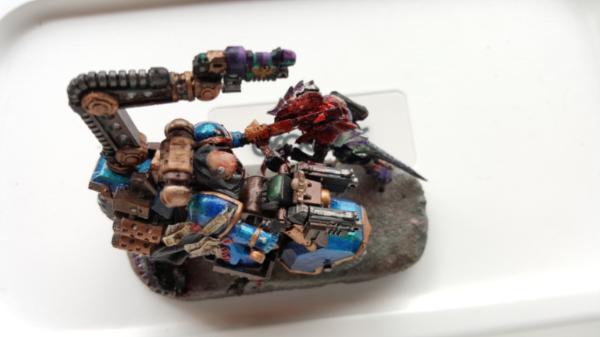
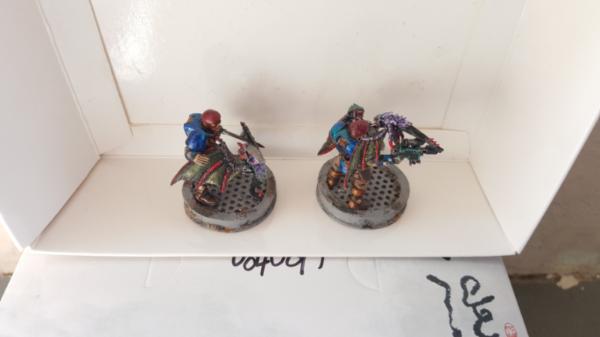
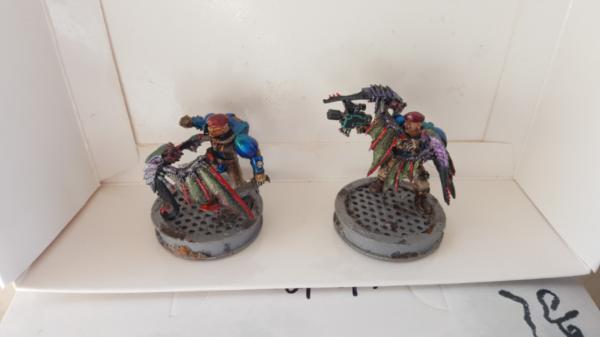
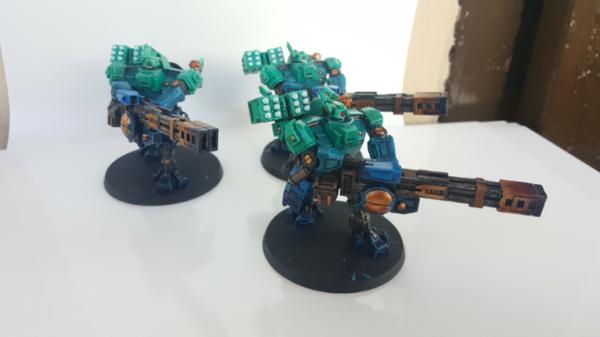
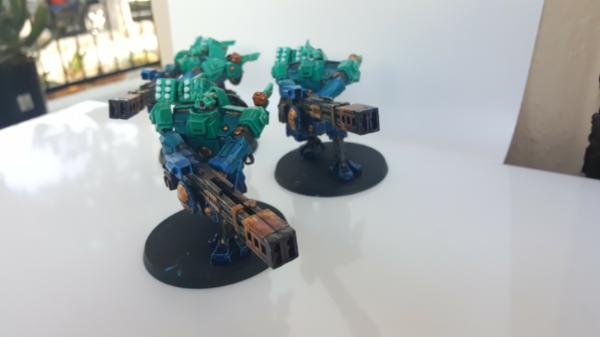
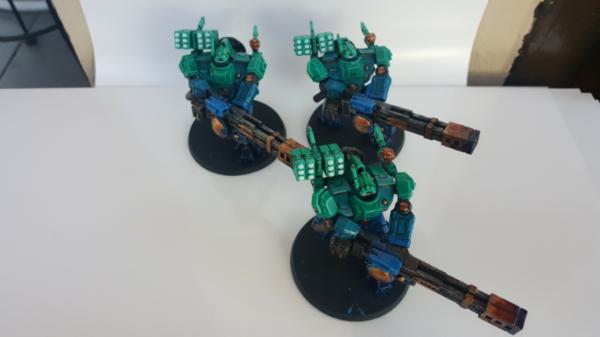
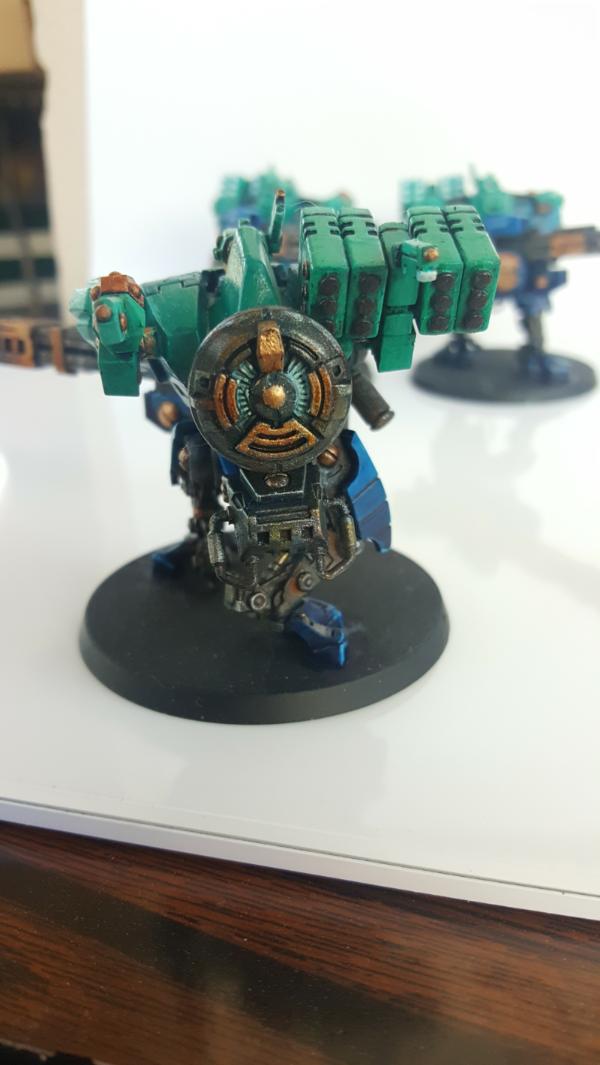
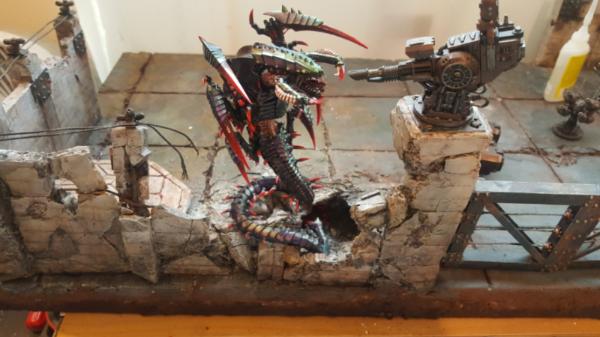
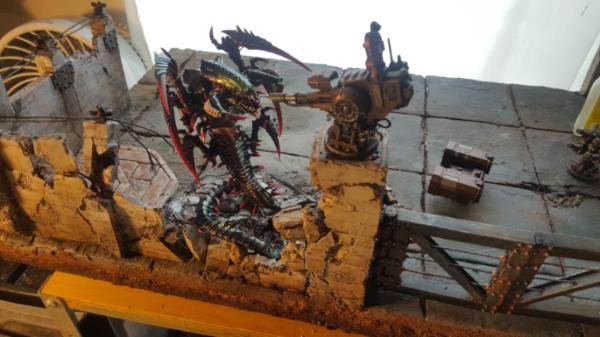
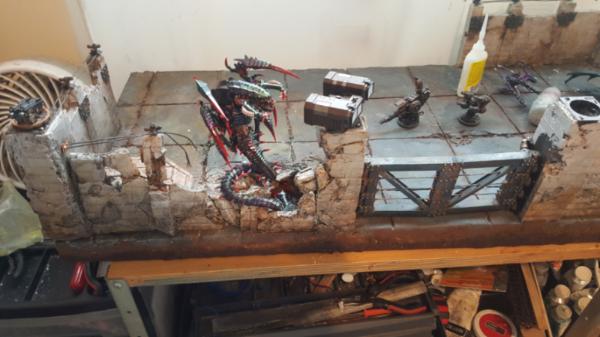
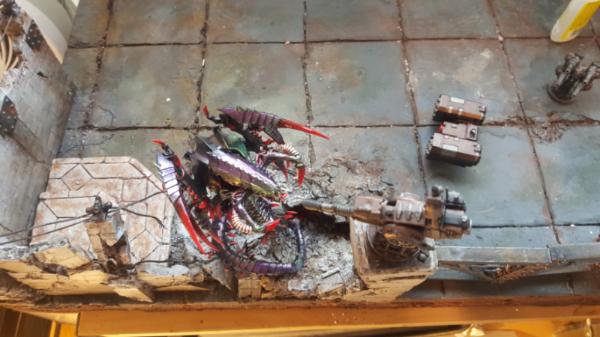
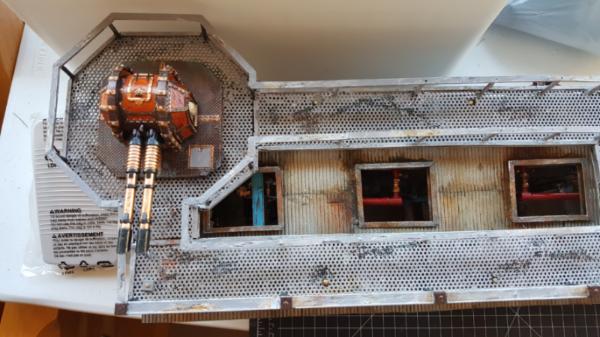
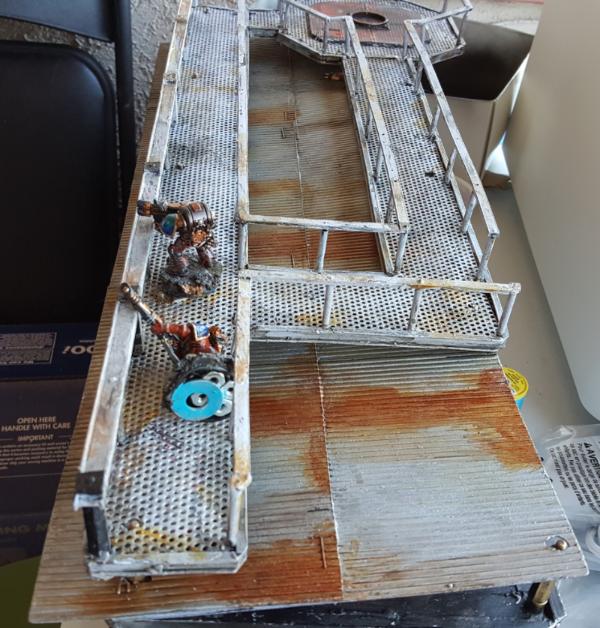
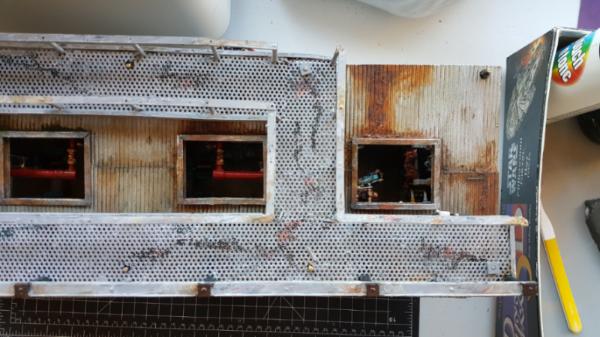
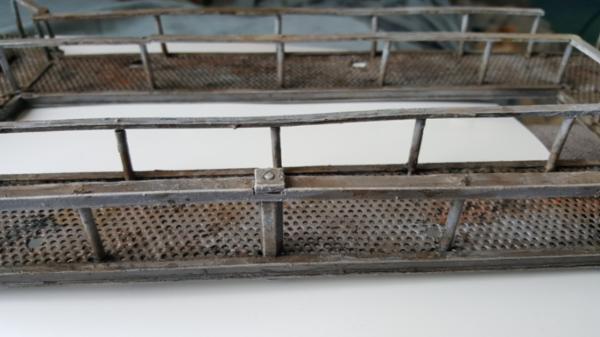
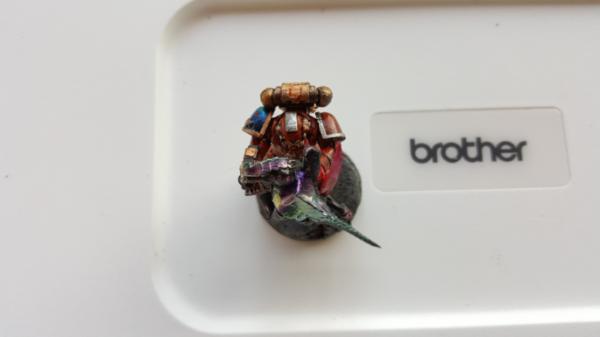
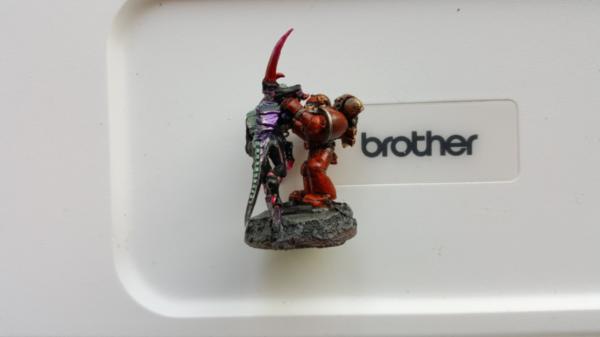
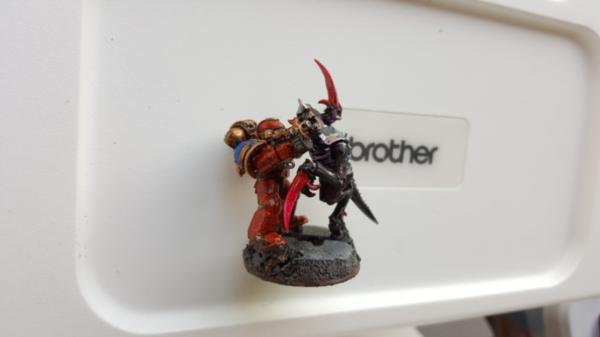
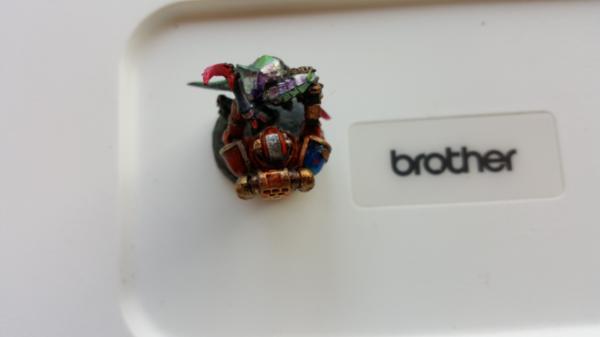
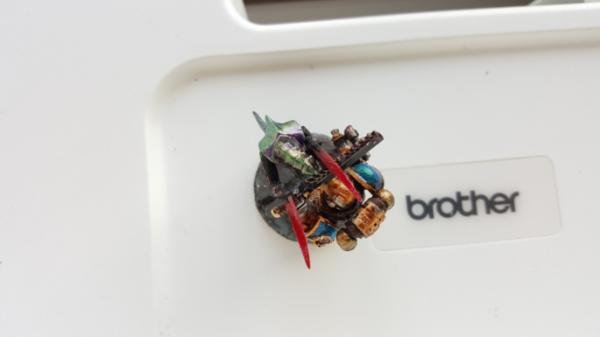
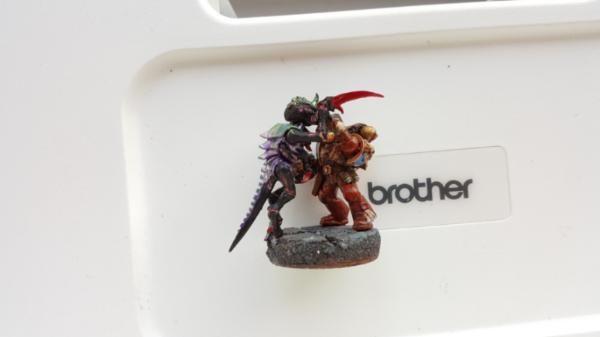
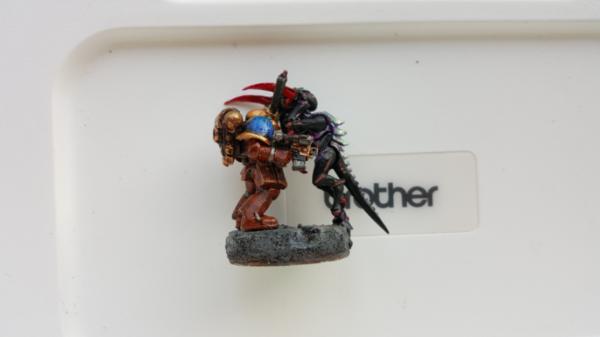
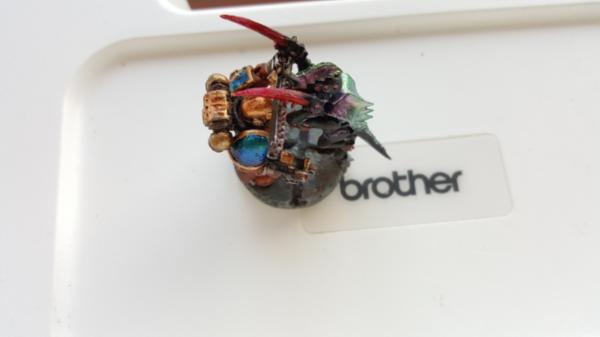
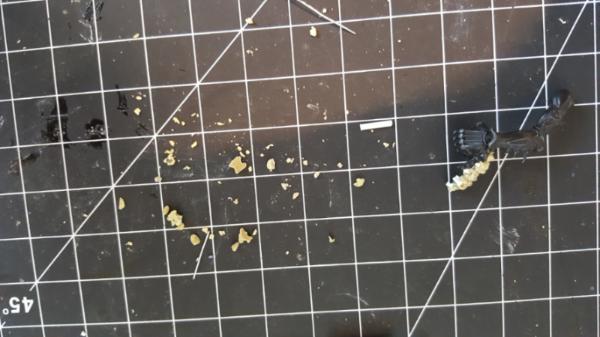
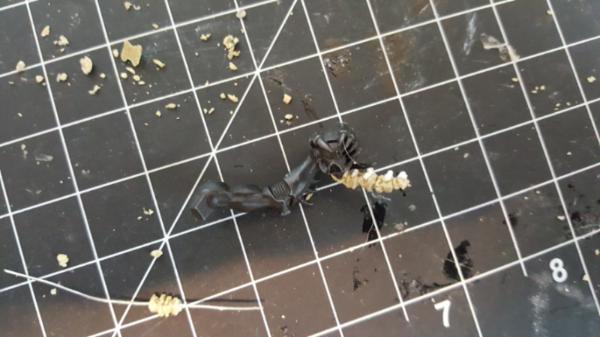
Missed a few pictures:
102107
Post by: LancsHotpot
Love the look of the models, the bases give them loads of character!
60913
Post by: Largo39
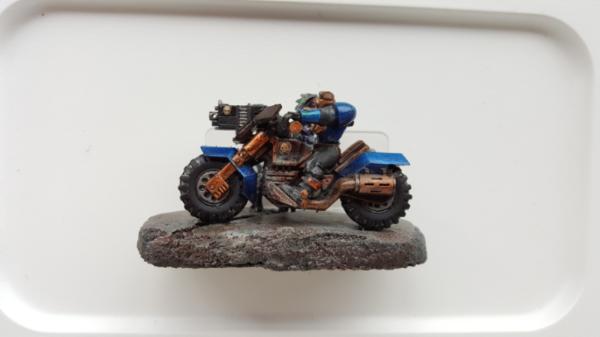
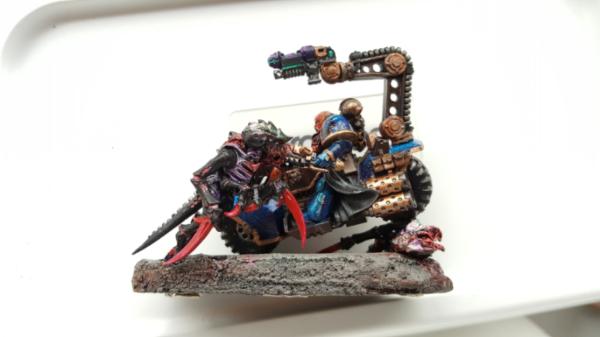
Thanks! Yeah while the original set of marine bases were fun, I have to say that these bike ones have really made me happy, they've added a lot of dynacism to this setup and now that I have a good guts setup too its been fun really digging into the models with my soldering iron and making big bloody wounds.
60913
Post by: Largo39
Bit of amish mash today, but had a mish mash kind of weekend.
Basically the goal was to prep a friend begin his own blog with a titan tile:
 http://www.dakkadakka.com/dakkaforum/posts/list/0/690356.page#8644073
So I've been giving him some of my bigger foam chunks, and on sunday we also did the planning and cutting of the dig site.
Anyways, since he will also be using foam coat, i figured id go through any and all last coatings i wanted to do and give him any remaining that i had (which, as it turns out, is zero, i used it all perfectyl! lol), so hence the mish mash.
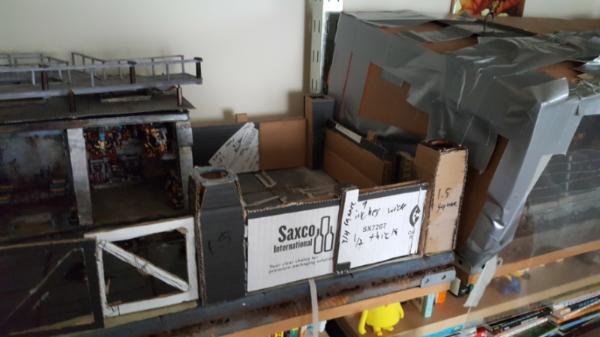
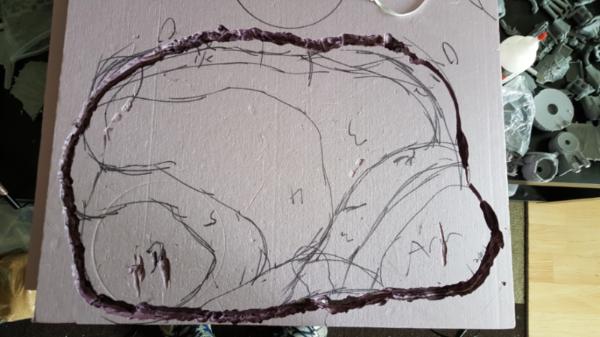
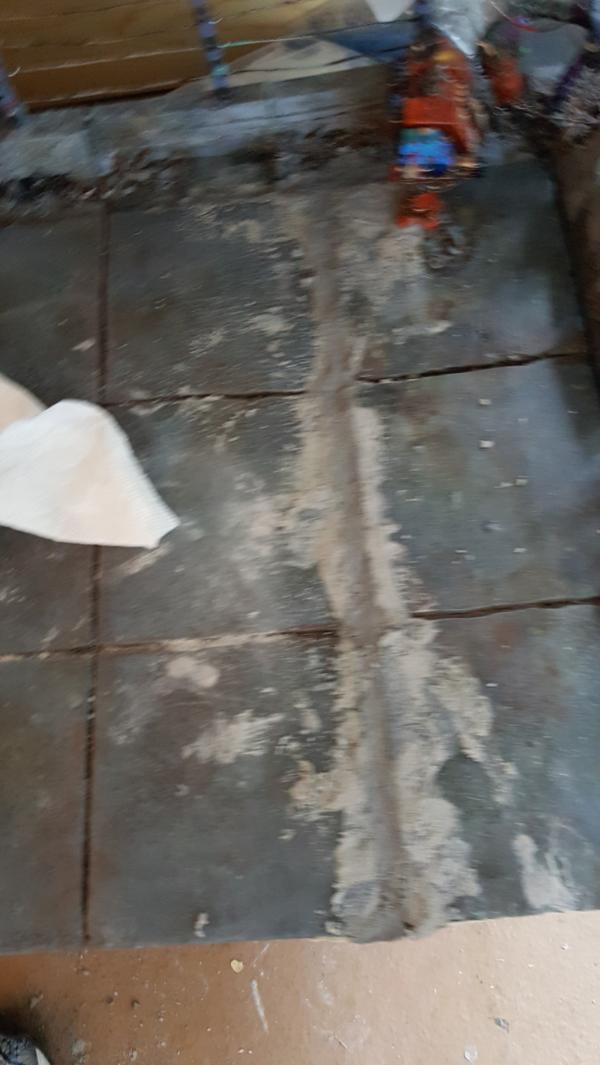
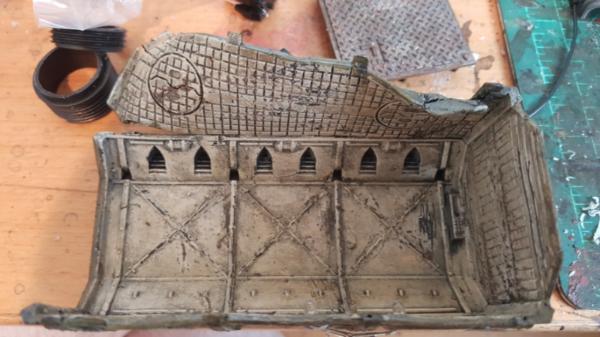
First up is filling in cracks. So as I look to making expanding my display board with a fuel/garage depot cousin, i wanted to go ahead and permenently install the tiles in my shelves. While having tiles that i could pull out was a neat idea, now that im fully on display, i need to just have it all permenent so i can add more fun details later. Since i didnt have the foamcoat to keep my half tiles and make new ones for the shelves. (nor wanted to spend the time), i just glued and screwed them down. There were, however, some cracks:
and things that needed to be sanded down:
So foamcoat to the rescue, more specifically a more watery form of it to fill in the cracks so i can re-cut them straighter:
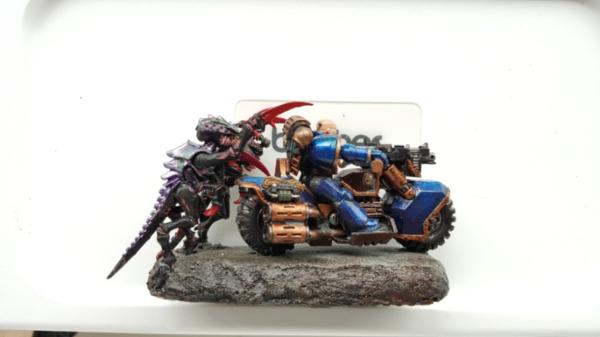
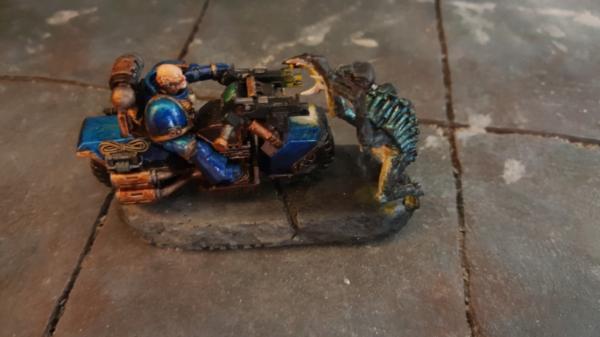
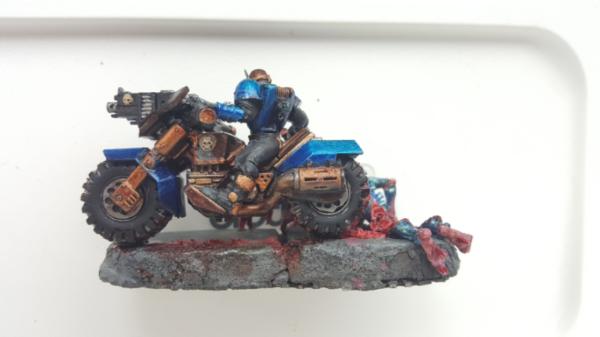
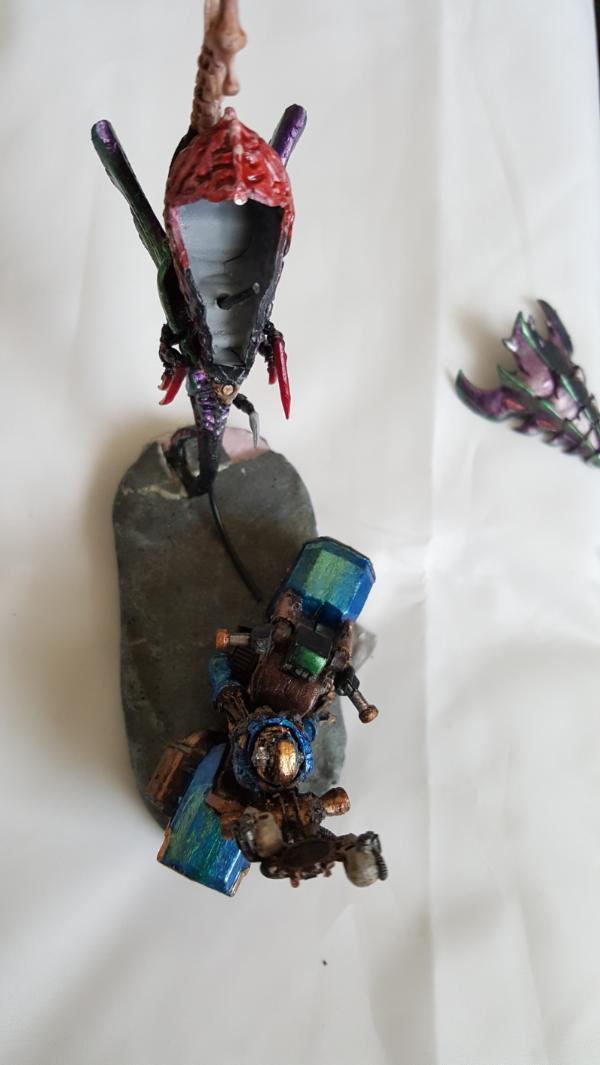
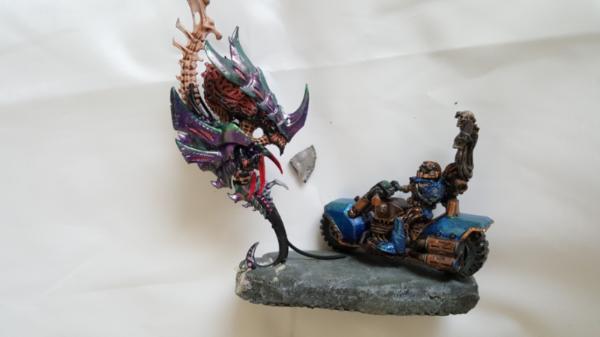
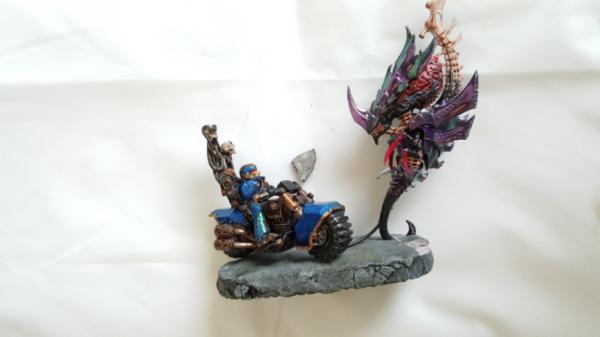
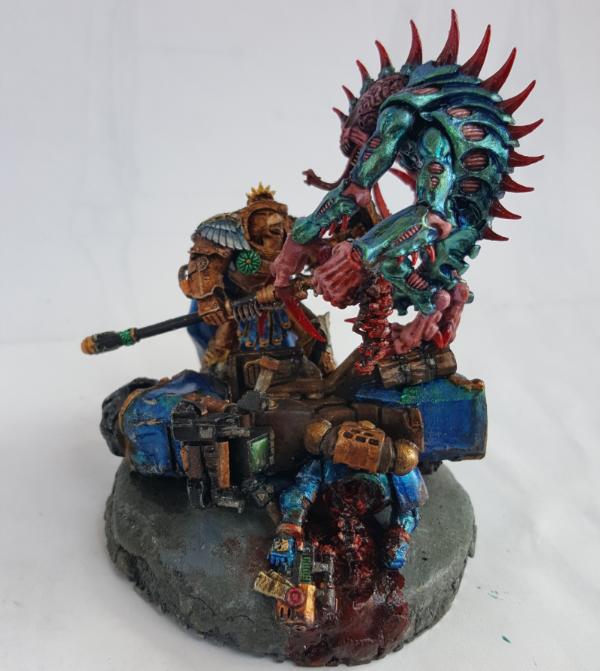
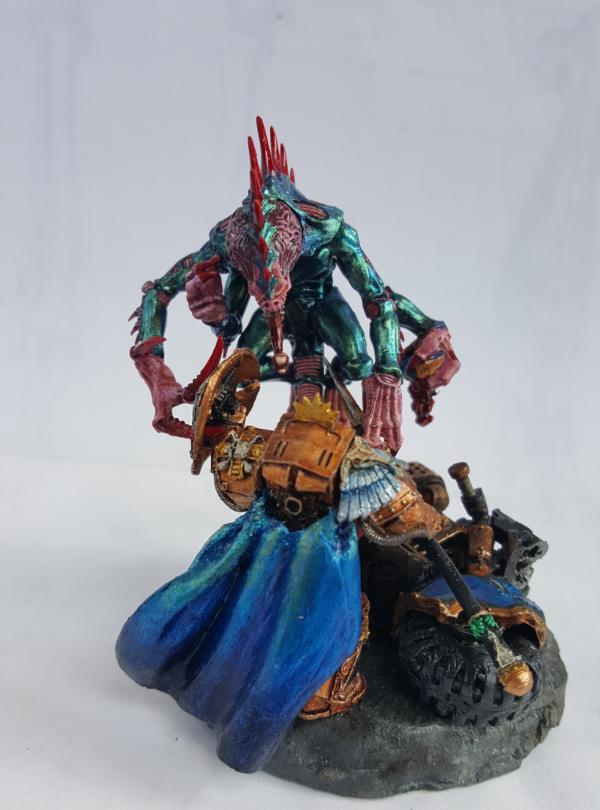
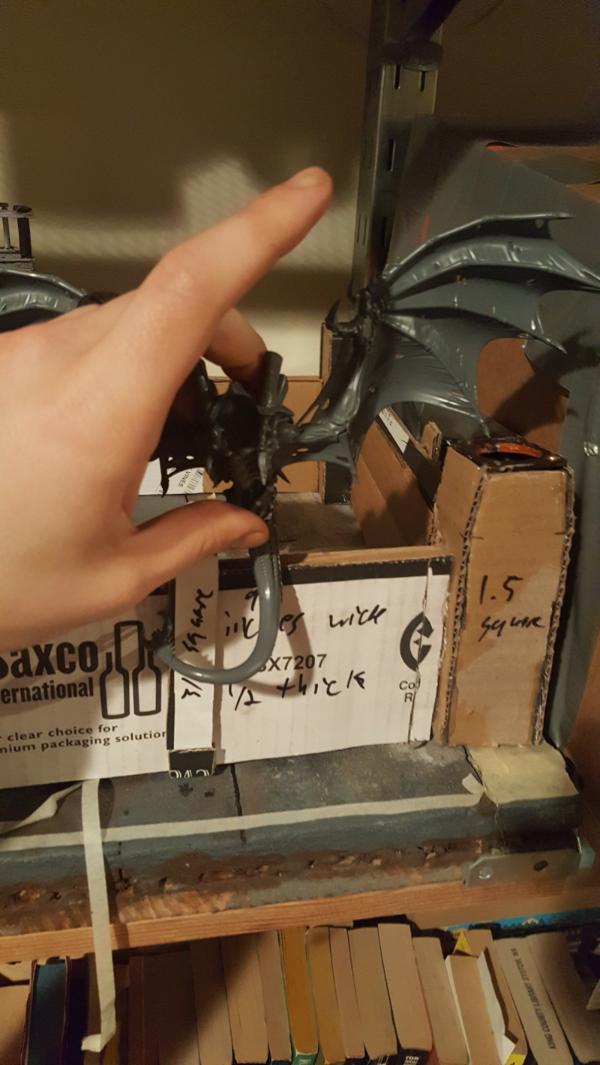
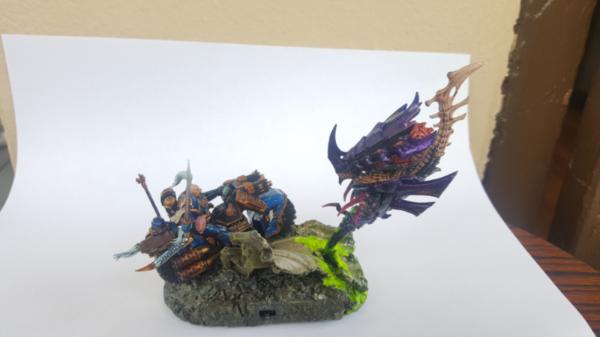
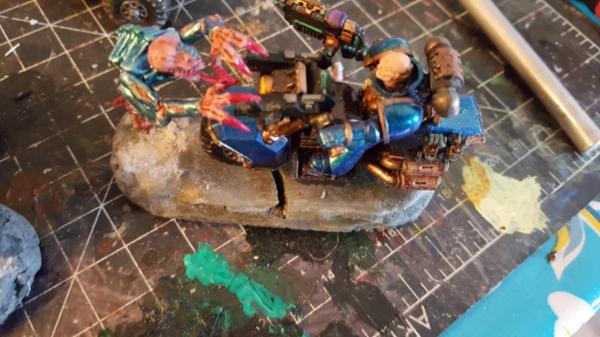
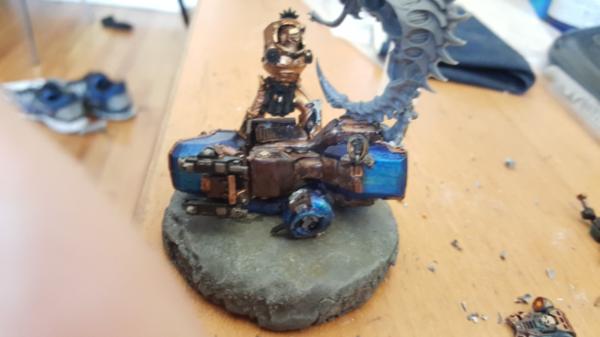
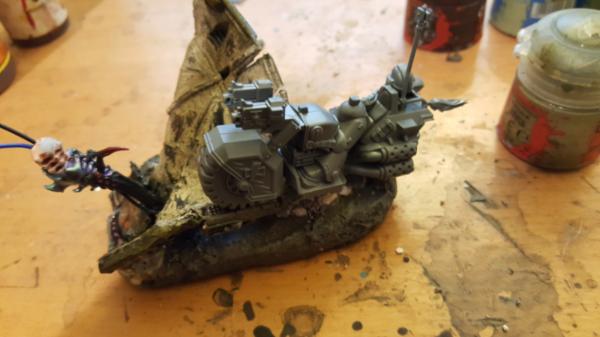
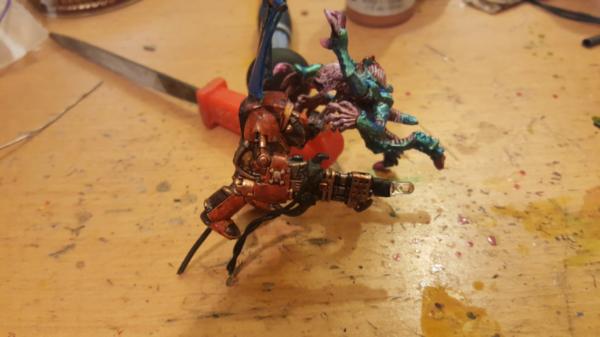
I also needed some bigger display bases for Khan. So there are 2 khans i plan on making, one on the bike (already done) fighting a neurothrope (not done) that is currently lightning bolt attacking him (gonna be funnnnn to do), thats on a 40mm "bike base"
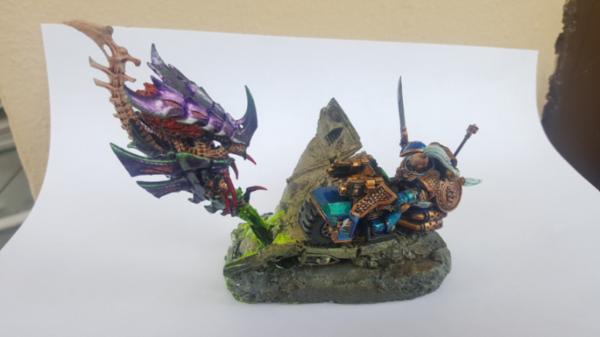
second we have a ground khan fighting a tyranid patriarch, that will be on a 60mm base
I also wanted 2 more bike bases so id have, after i finish the genestealer bike set, a total of 4 remaining unused bike bases. I plan on eventually using them for some black knights/apothecary in case i decide to play around with that.
60913
Post by: Largo39
Whew, so these have been in decent shape for a few days but its tough to find a good time to take pictures (IE: morning, when the lighting is the best).
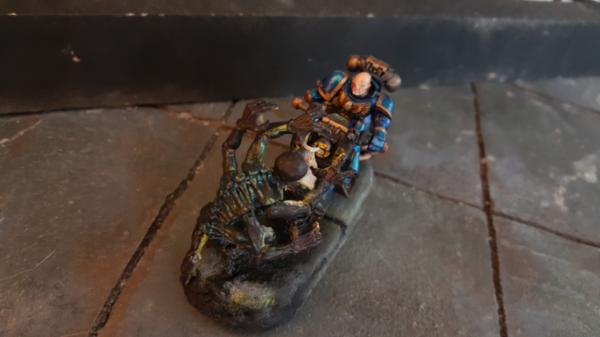
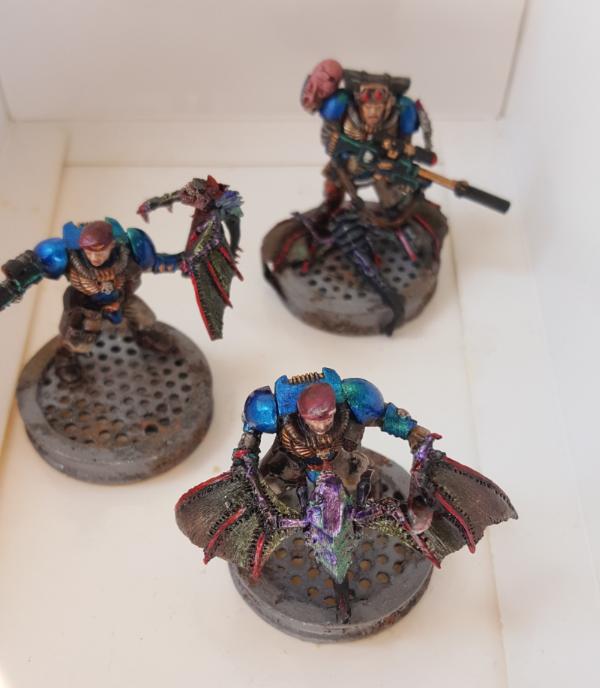
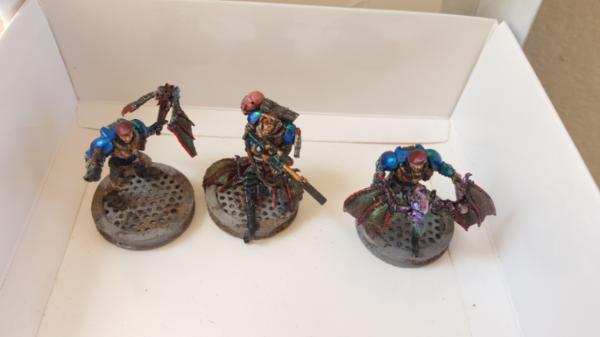
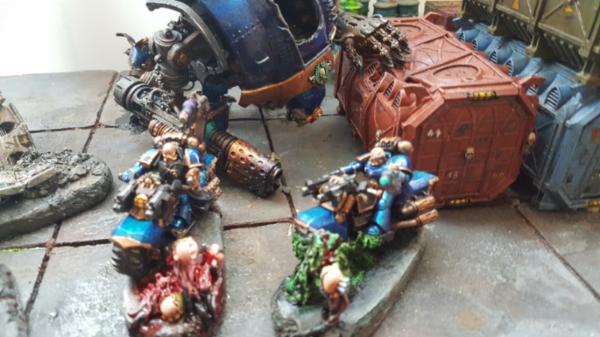
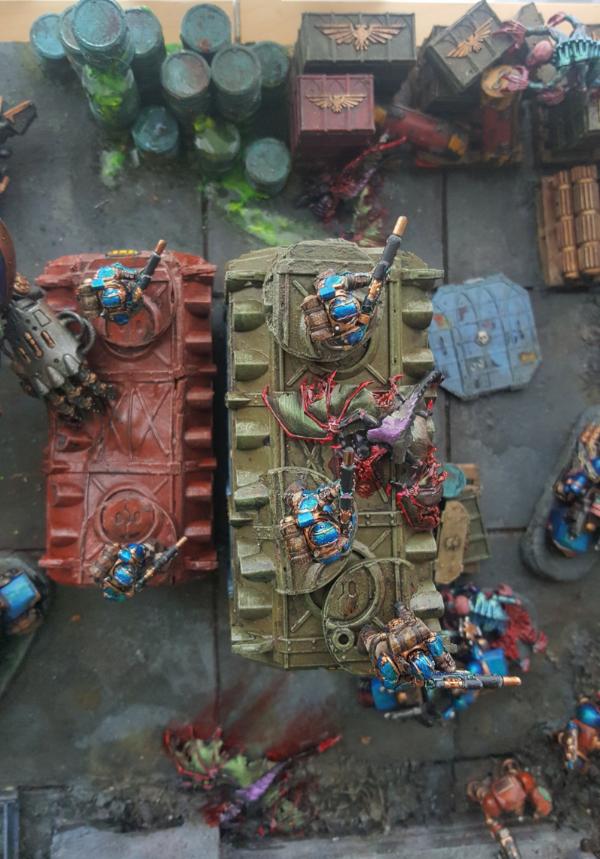
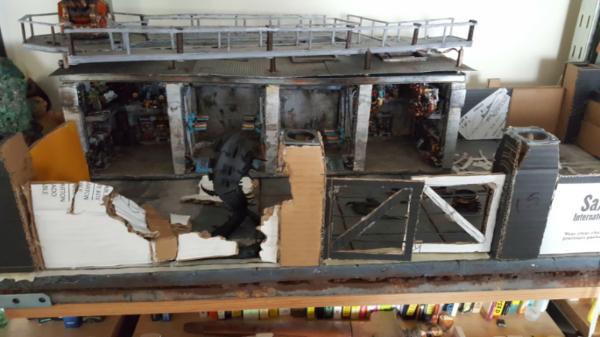
Either way I'm barreelly managing to stay track of 1 set of bases per week, which will end once i finish up the stealers bases, but hey its b een a good productive ride up until then. Either way we have marines in direct CC with gaunts!
No more gaunts popping up out of the ground or anything like that, just full on close combat. there are 2 reasons for this:
1. I now have a 10 man marine unit thats thematically similar (gaunt bases) but still easily distinguishable, very handy.
2. I wanted to see how it'd look andhad a good idea for it? And i didnt know what else to do with this last base set.
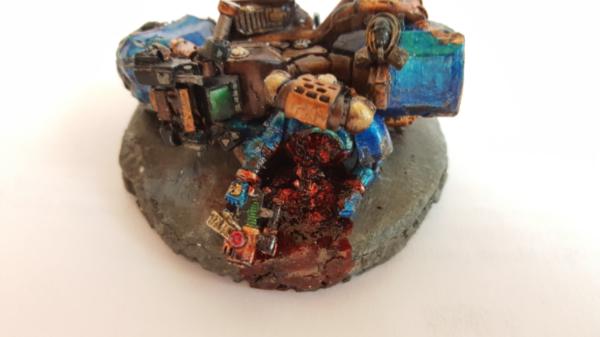
First up, the flunkies, bringin up the rear, but hey, still dealt with their gaunt first...

Next up with have the mid melta shot. Lotta fun melting the crap out of this gaunt as it's innards get blown out. Took a lot of time though to make the hole big enough so that the melta gun (which is still magnetized) can be swapped out for other guns. It's not perfect, but it looks great and should work for the tabletop okay.

Next up, the yoga pose: you really get a sense of the two tone effect in these picture stoo, im happy.
Finally we have the sarge holding on:
60913
Post by: Largo39
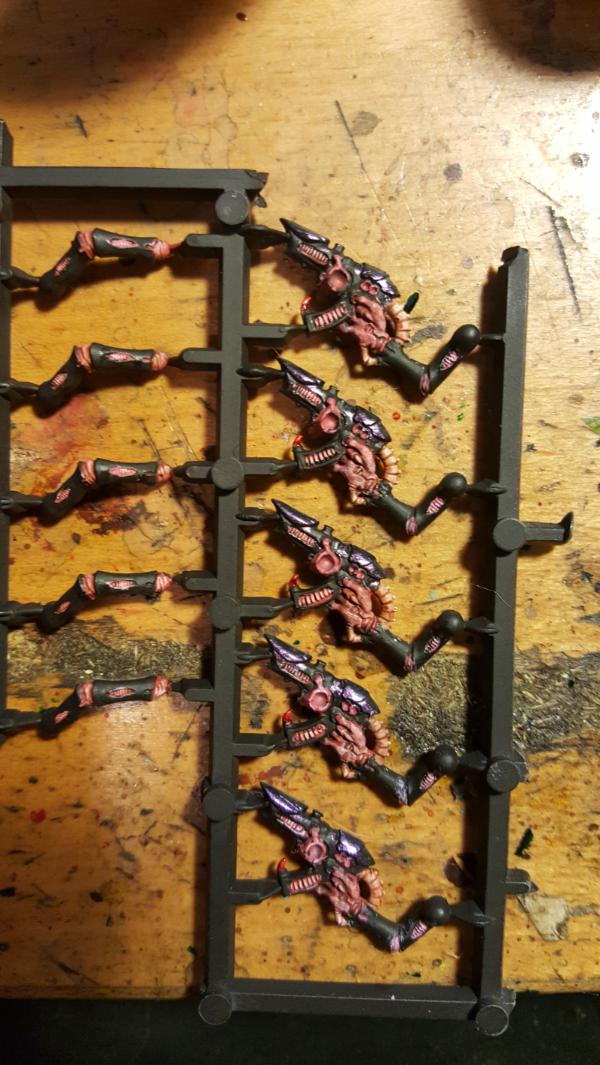
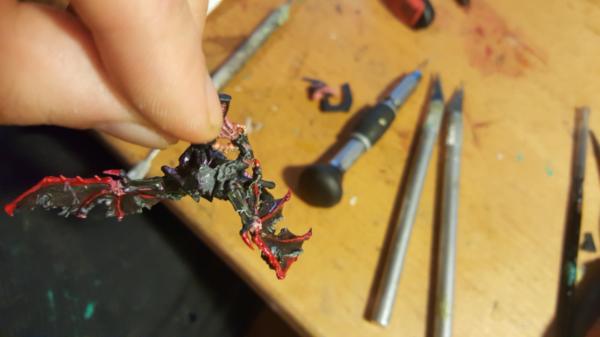
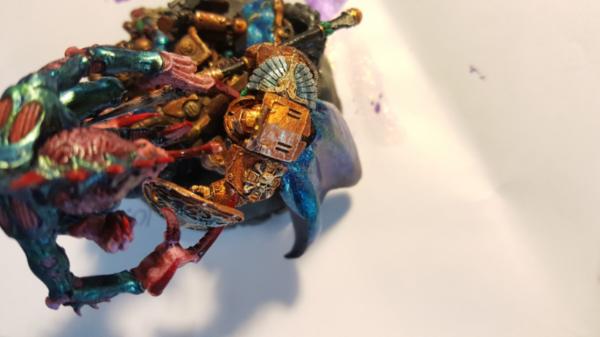
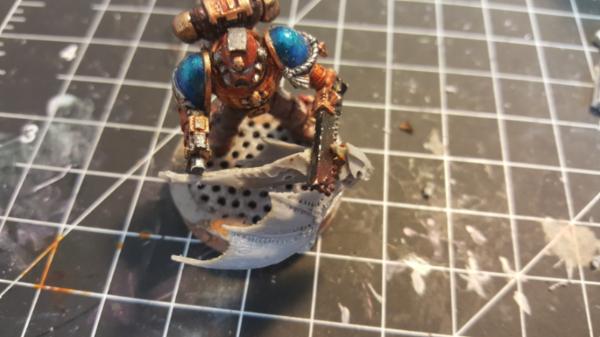
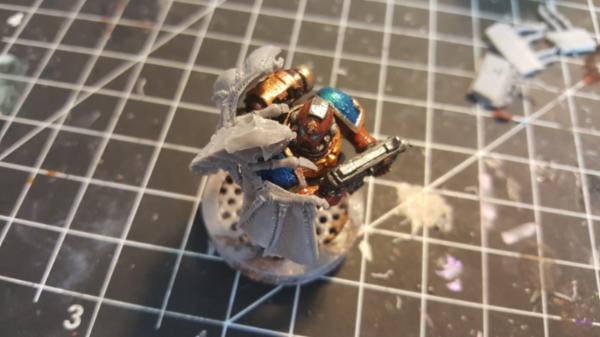
Workin on me some genestealer bases. Definitely takes aw hile to figure out the pose. Its one of those things where you are trying to minimize any overhang, but still leave room for a proper pose, as you acn see by my discolored patches.. it ends up with lots of holes in the base as i figure it out. THankfully because of the wire mesh backing its still easy to really secure the stealer/bike, and given the foamcoat it's easy to fix that too.
The goal of this one is to hit that "deer in headlights" kind of look. so there will be some OSl experimentation
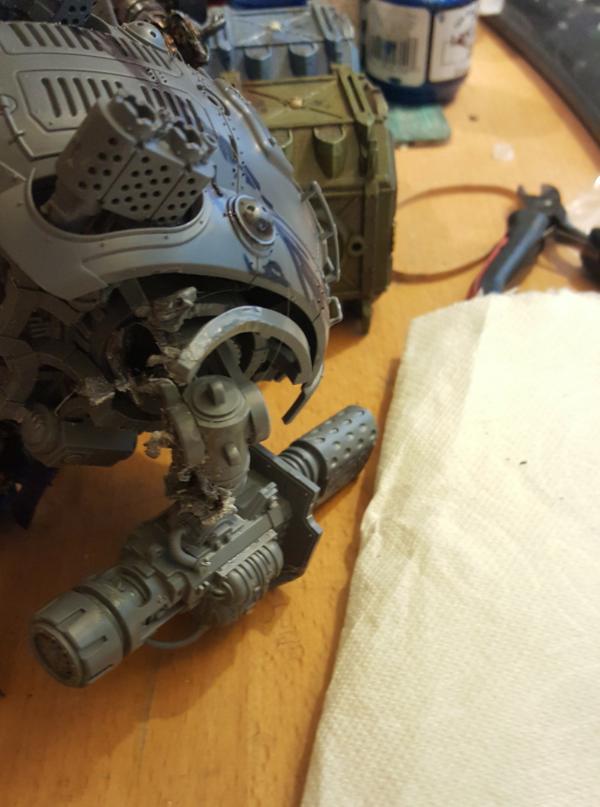
off with his head!
roadkill. Gonna melt most of the legs and see if i cant make some tire impressions.
60913
Post by: Largo39
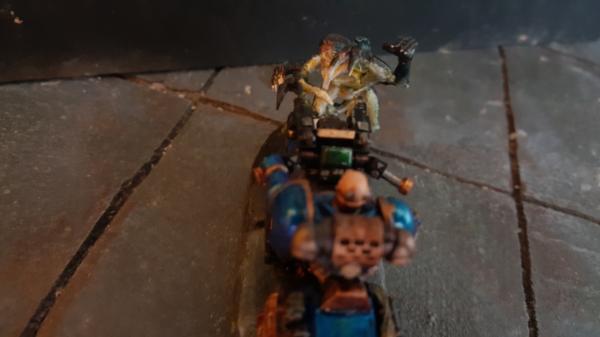
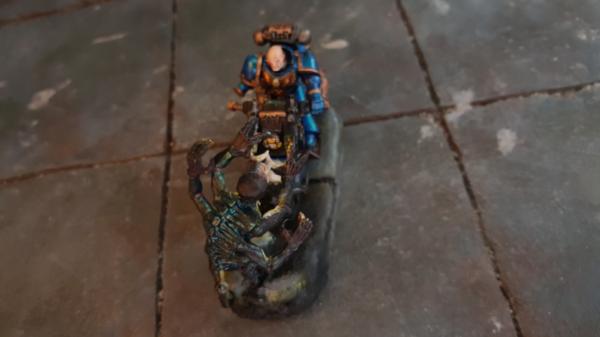
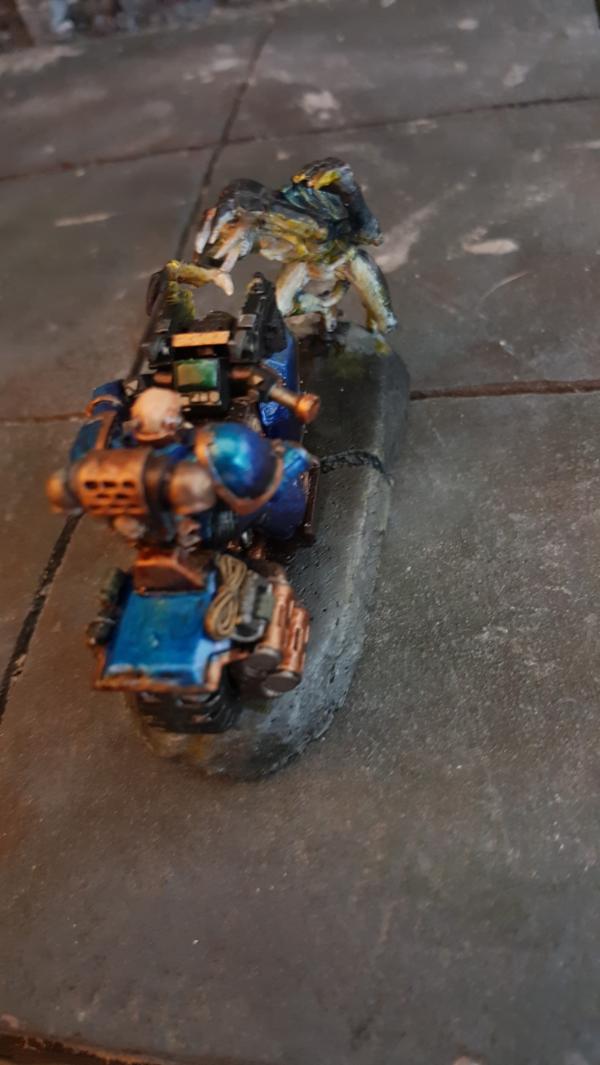
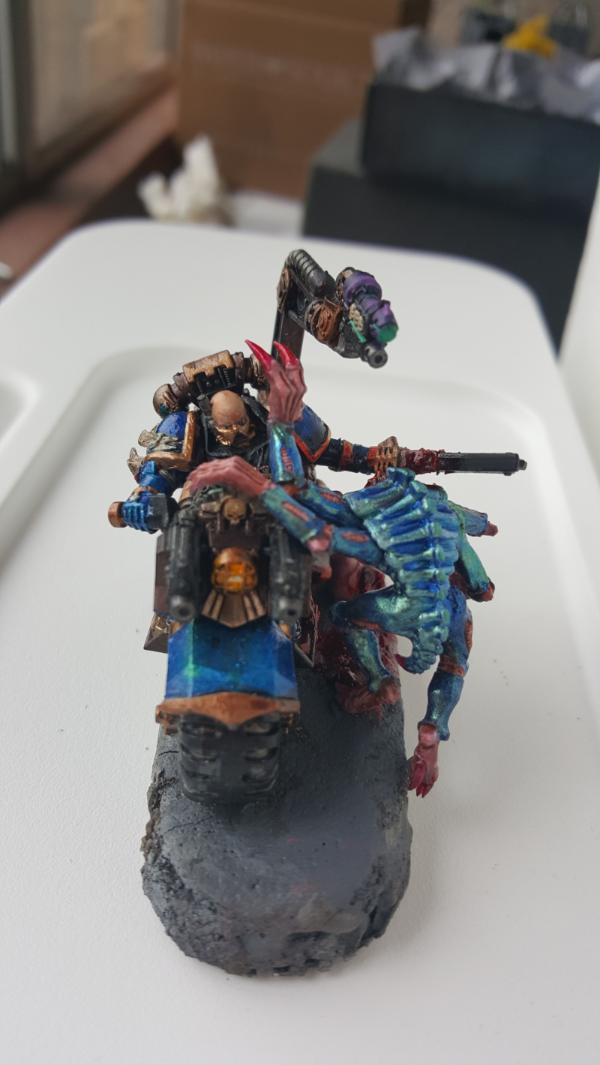
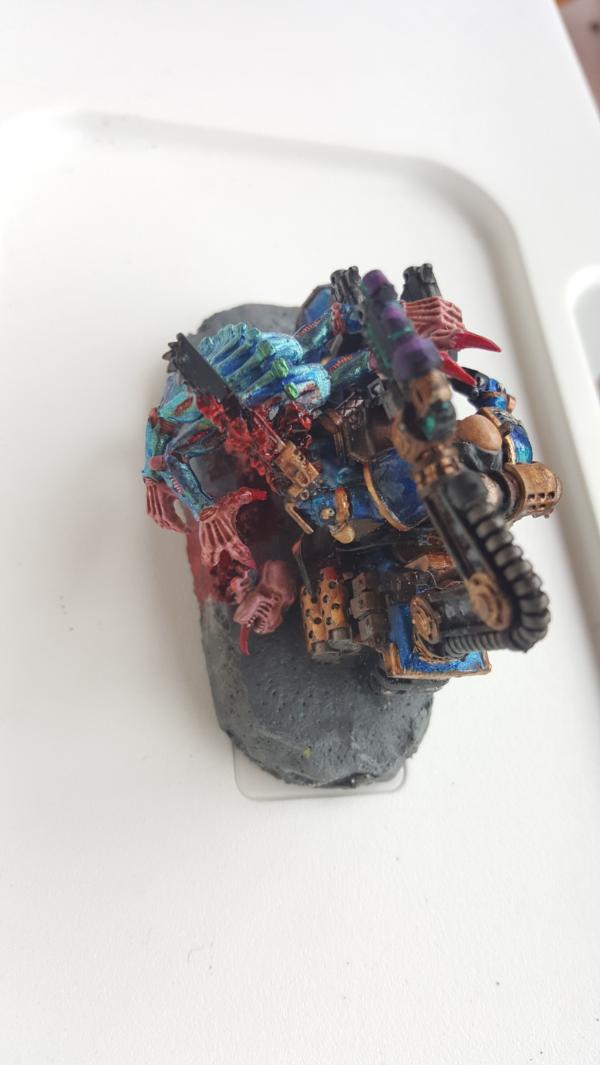
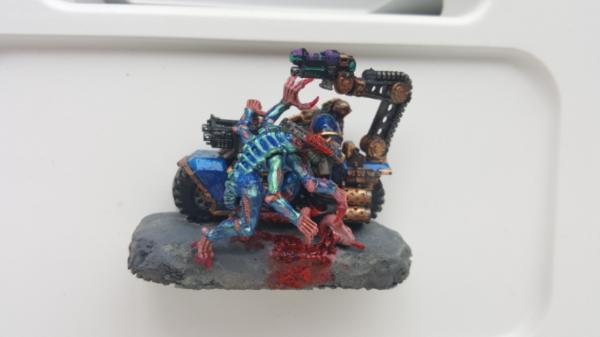
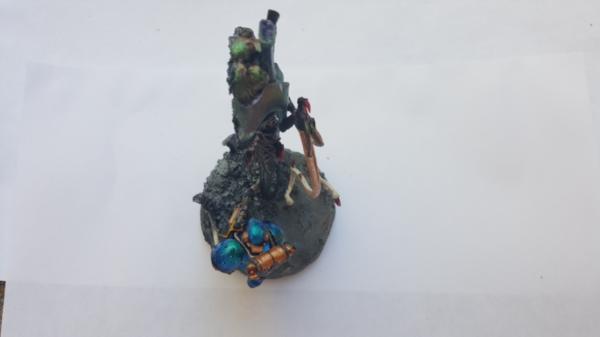
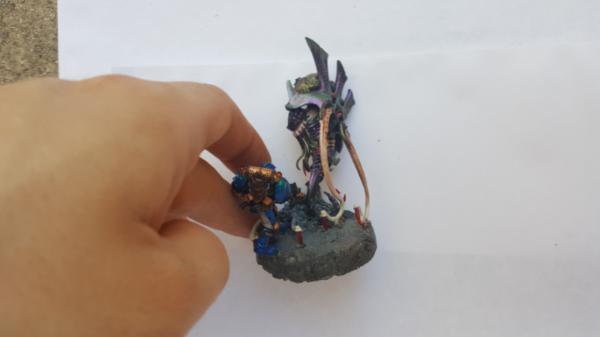
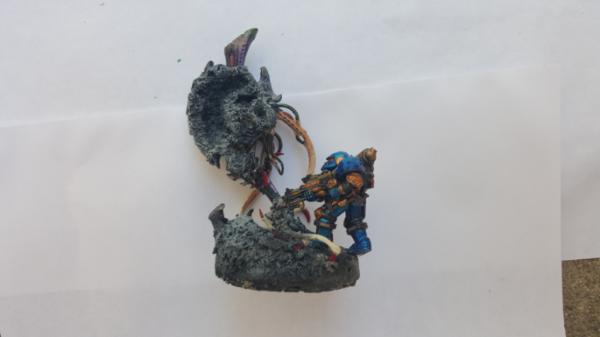
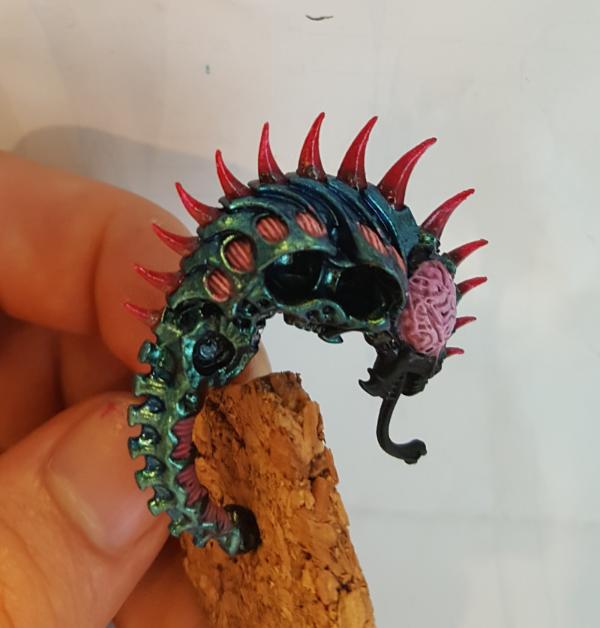
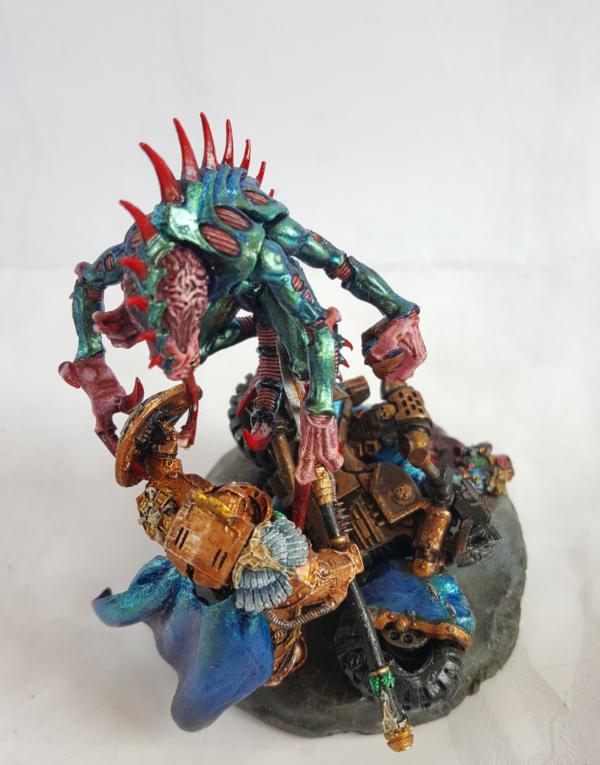
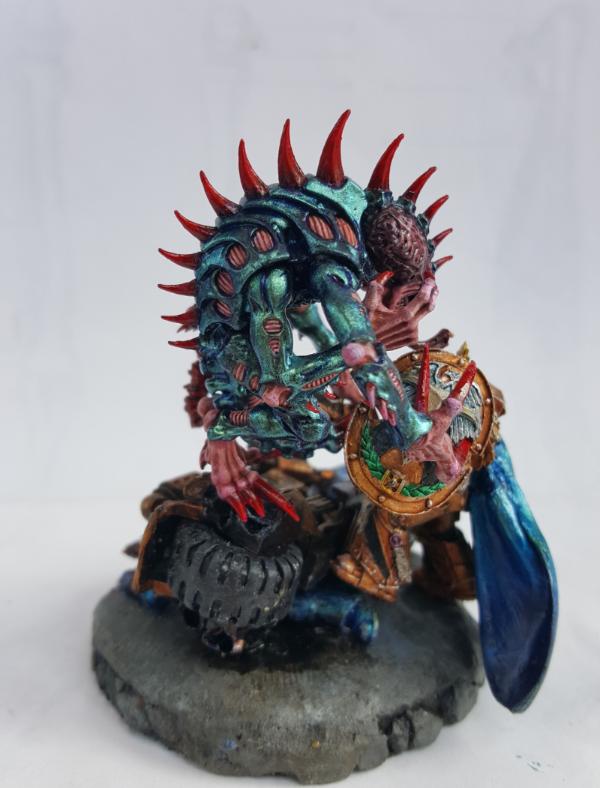
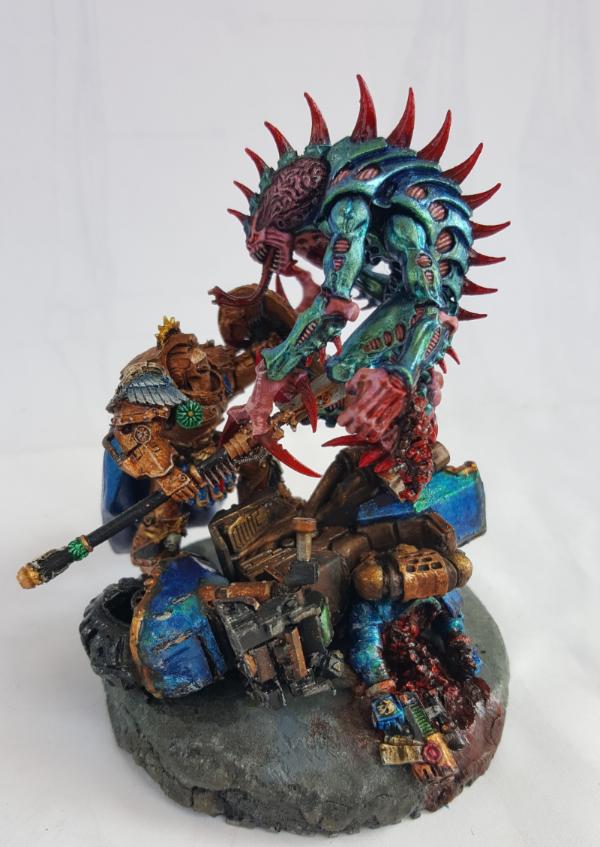
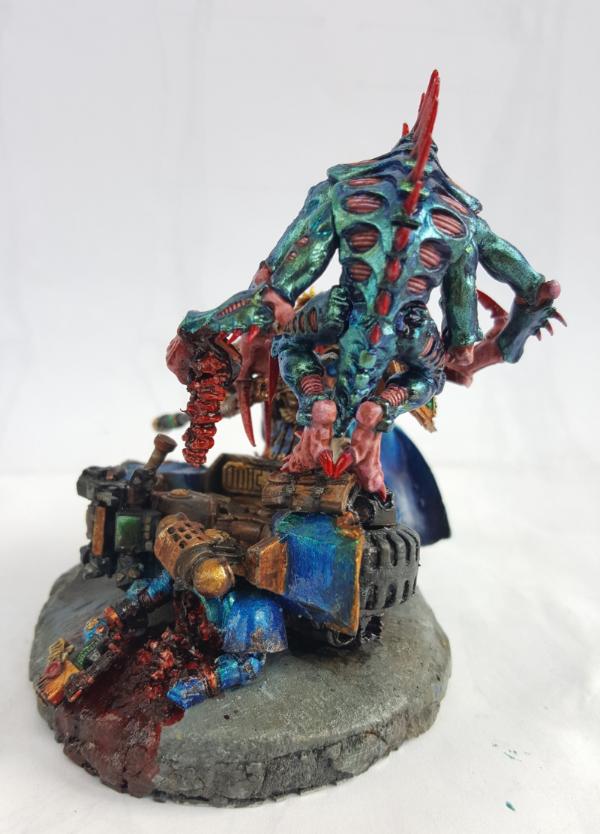
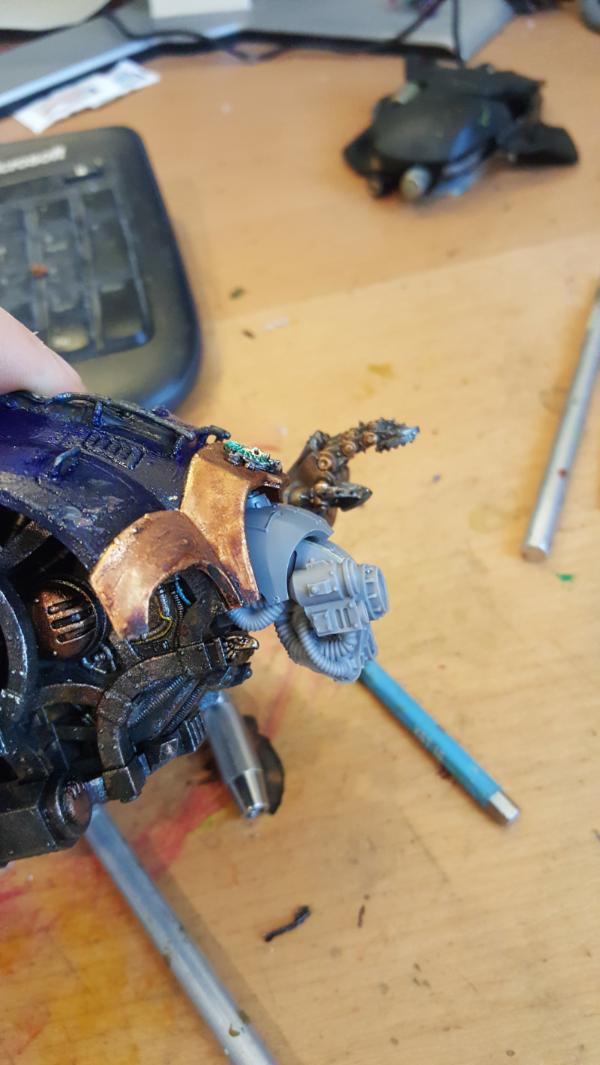
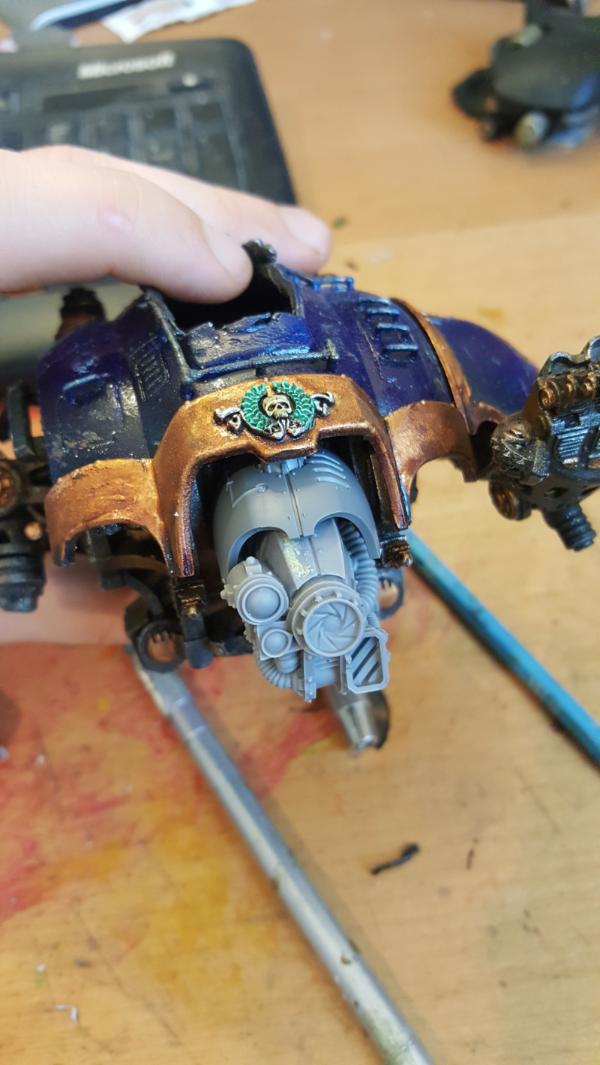
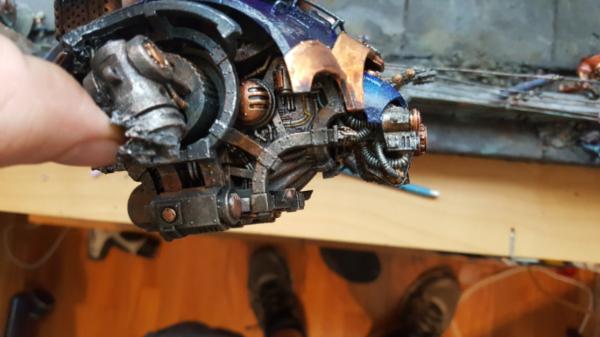
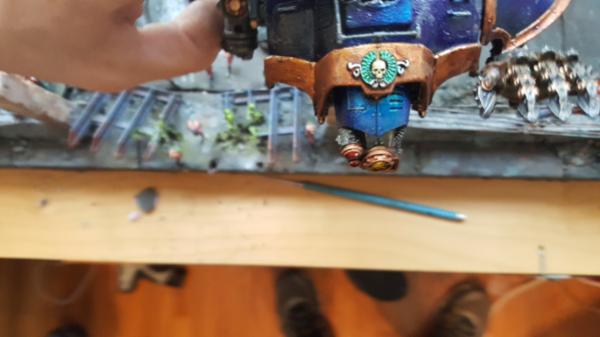
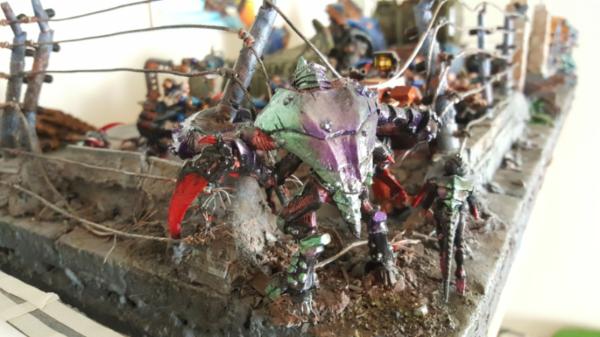
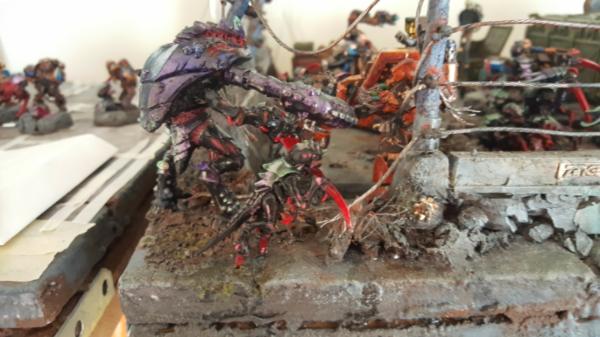
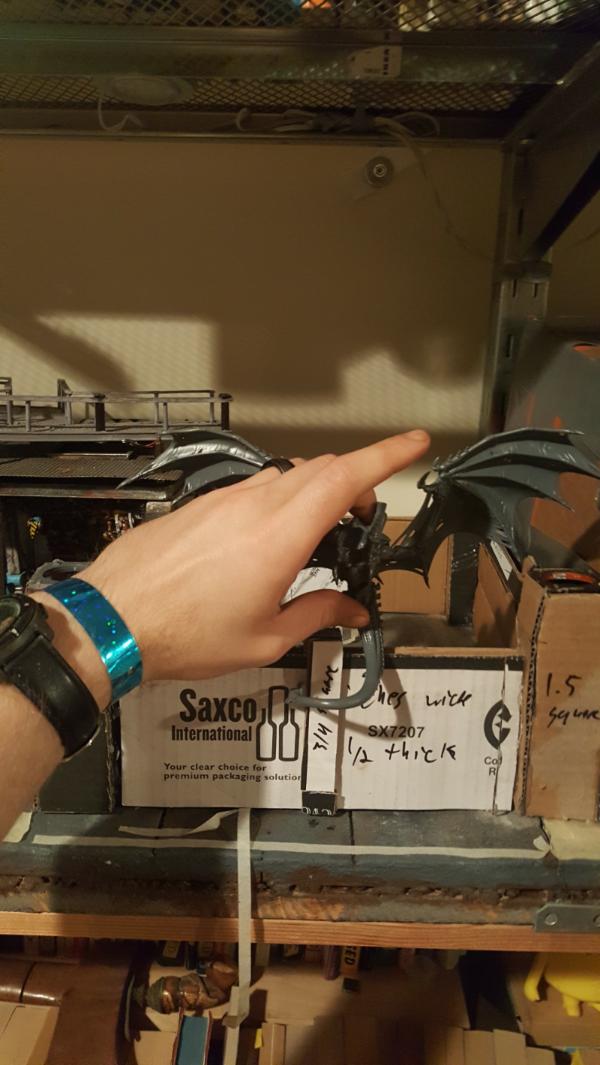
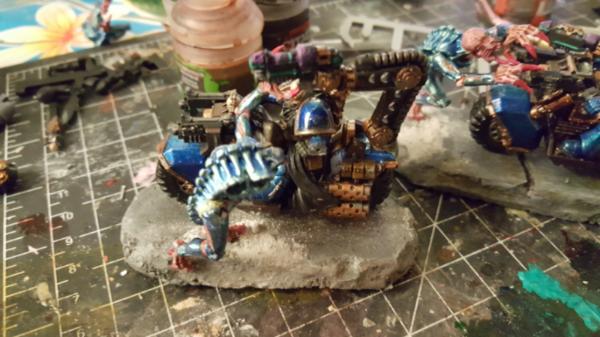
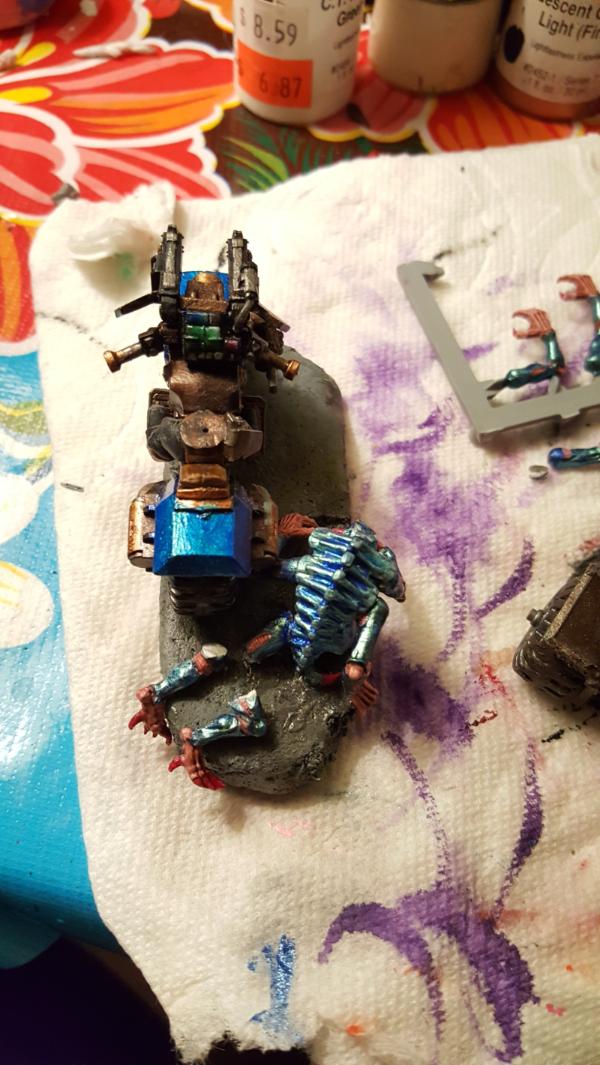
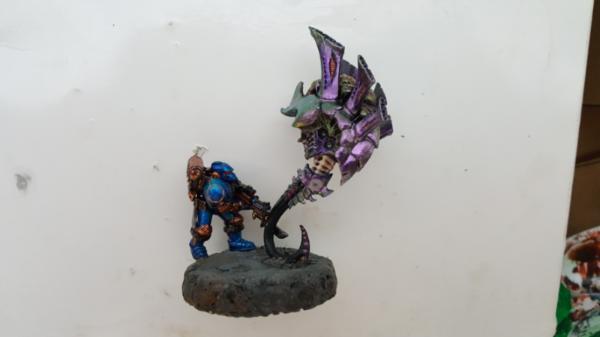
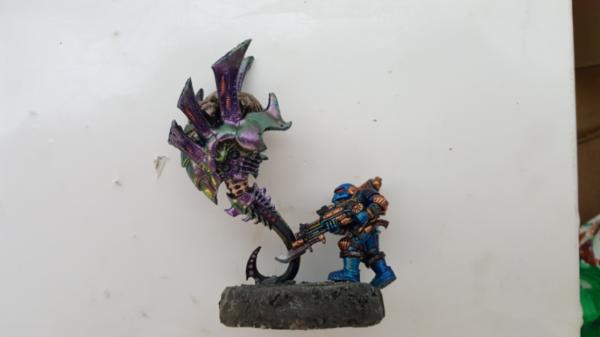
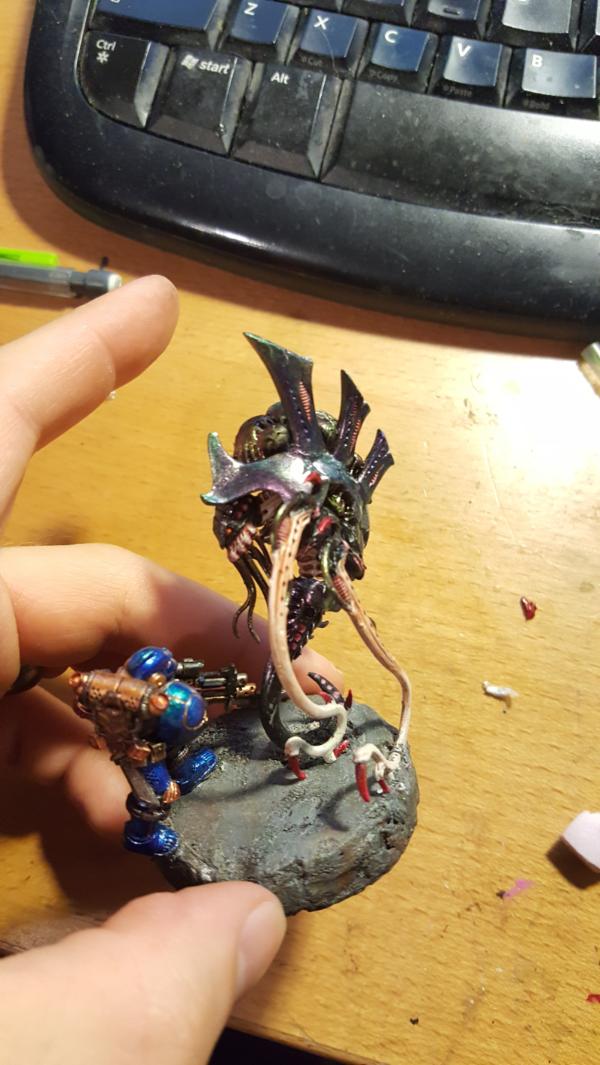
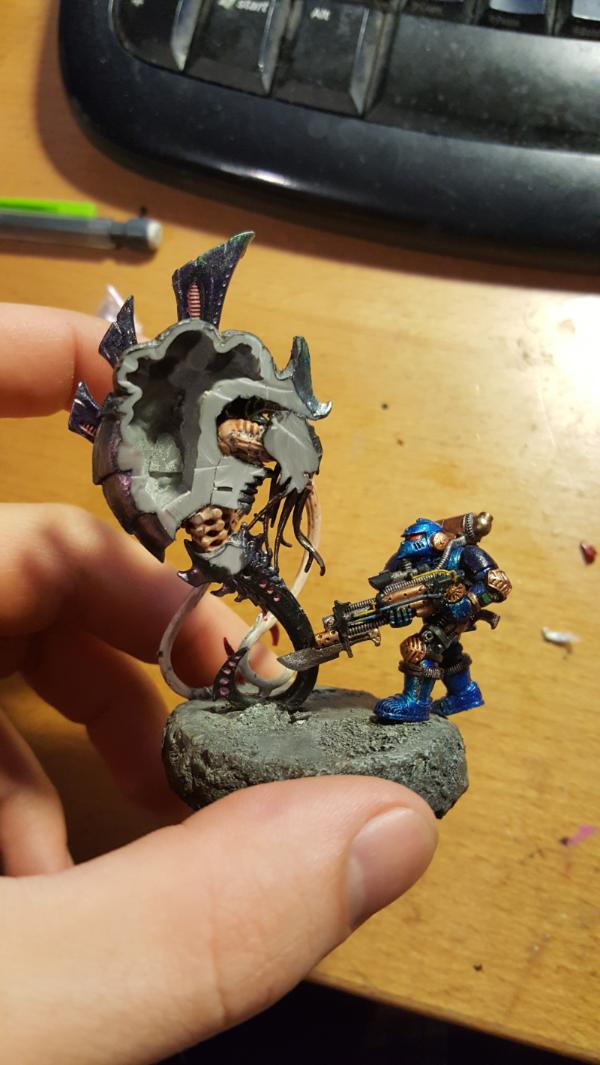
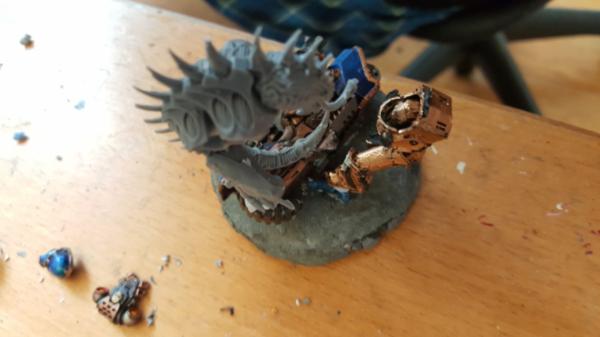
Hey look it's time for another base. More specifically one of the main 2 khan/hero bases. Since it's my el capitan, I figure he gets something bigger. In thise case the bike khan is fighting a neurothrope thats mid psychic attacking him! should be.. interesting to try and do.
FIrst up we have the neurothrope, which, conviently, has a really big head.
I mean just look at that gap! perfect for batteries and LEDs and things. So there are 2 parts to my lighting scheme. First I want the crown to light up (you can see holes in it that i drilled out) and I want it to be shooting off an EL wire lit lightning bolt which I plan to 3d print.
all the pieces:
In order to get all this lighting to work I need a place to put my wires. EL wire is somewhat unique in that it needs an Inverter to work, as it runs on AC power. As such the size requirements of the base for EL wire are a bit bigger than just a penny battery, so I need to hide it in the base somehow. For now thow I need a cabling running from my head to the base, so I gotta hide it in the stalk. Let me tell you drilling through 1.5 or so inches of resin in a straight line such that it mostly worked took.. a good hour. Each bit slightly bigger than the last and you'd have to every few turns pull it all out to get out the filings. Any wrong move and the whole thing would snap. Ugh.
Next up painting; Pretty standard now for my nids, nothing too different: I wanted to keep the spine more bone colored than making it purple. I had the spine for the vivisected warrior that way and it really helps the contrast.
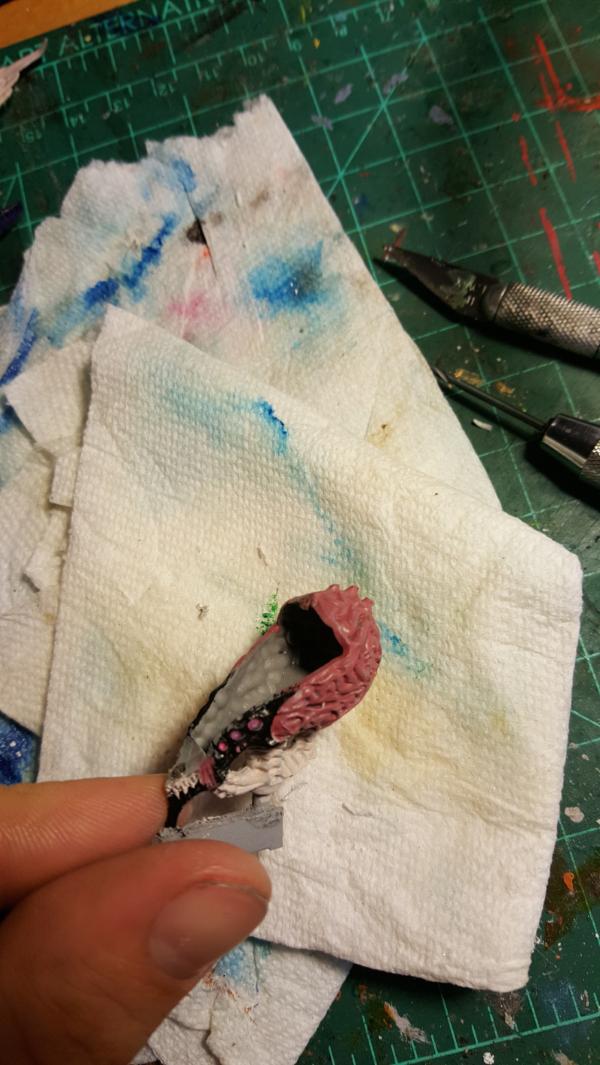
and finally where i'm at. I added some smoke/red to the brains just to make them look juicier.
60913
Post by: Largo39
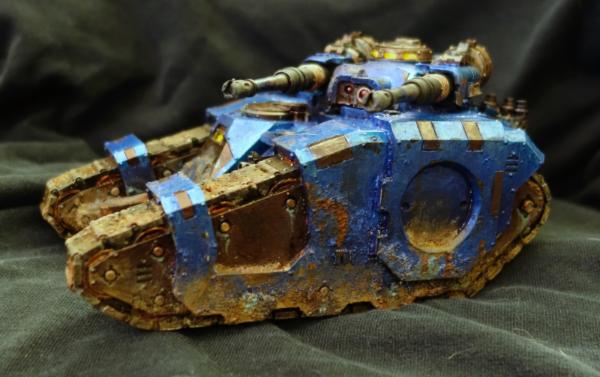
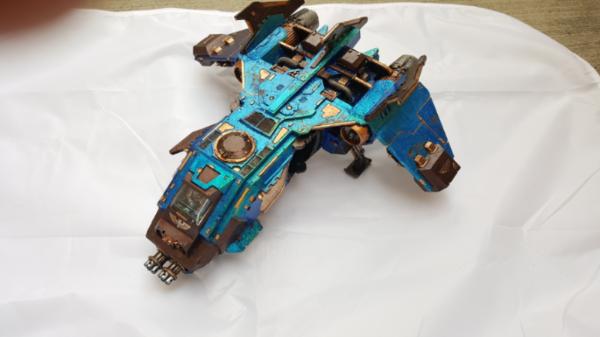
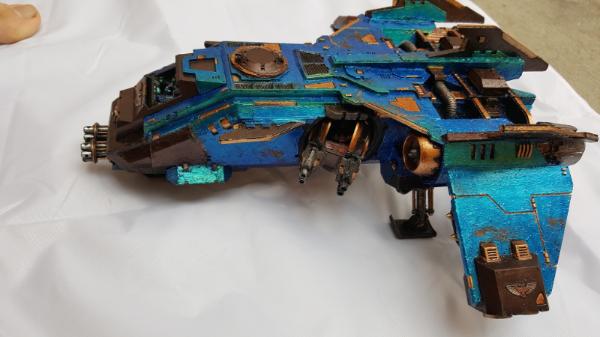
Okay, fireraptor time. So this was the other big thing that I wanted to just finish off on my plate. This is also somewhat a story of woe.
Basically as we all know I like to add chipping, sometimes (most of the time) too much of it. I really like the blue effect and when youg et little orange chips on it it can really work well. So for the fire raptor I decided to really sell it, but the problem is the best way to get the little chips is with bits of sand that you flake off. This is expectially true for resin because if you try to use a razorblade or whatnot to pull off the paint it will likely just pull off ALL the paint (including the primer) and not just the blue. Resin sucks.
Thus sand/salt embedded in the chipping fluid gives you something to chip at and makes for more relaiable chipping. Unfortuantely sometimes it either gets VERY firmly embedded, or comes off immediatly. So in this instanced I erred on the side of way too much sand and.. none of it came off w. Suddently I went from a moderate to heavy chipping to sand in every crevace and it just.. didnt look good. It looked crazy dirty and wierd and I got sad and moved on without finishing it.
Instead of redoing it (i was mostly done when i stopped), which, in retrospect, i probably SHOULD have done. I decided to flowly over time clean off the sand and get back to a more normal state, then repainted the bits that were raw/chipped off the primer, and this is the result. In the end, not bad. Not perfect, not gonna win any awards, but good enough to be done and move on. There will always be some grit to it, but, its a LOT better than it was. 10% of the amount of original sand.

61618
Post by: Desubot
How did you do the blue? it looks fantastic.
60913
Post by: Largo39
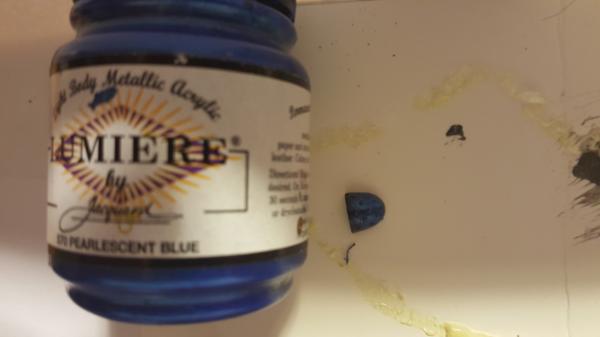
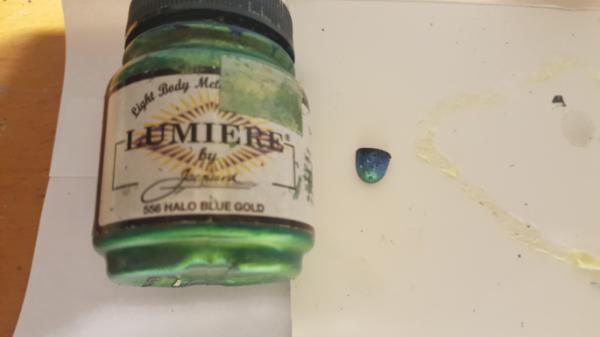
I shall make a tutorial of this process, but basically it involves my favorite color of all time
Phthalo Blue (either shade but in this instanced green shade)
This, along with Dioxazine Purple, Viridian Green, and Phthalo Green, are probably the most striking and ethereal colors out there. They have a richness to them that's quite unlike any other color on the spectrum and are, crtiically, not fully opaque so even in tube form they are more of a tint than a full on base color.
Thus the general idea is to gradiate from black -> phthalo blue -> lumiere pearlescent blue -> intereference blue/intereference blue-green -> lumiere halo blue gold on the model. There is a short version (whats listed), and a longer version that first starts with some base colors and then on top adds the intereference/pearlescent tones. But the short version should work to keep you sane. I'm just insane.
Anyhoo once you have the gradiation you basically bring it all back down to blue with a nice coat of Tamiya Clear Blue. BIG HUGE NOTE. Those new "gem" colors that GW just released would also likely be good candidates for this as well. As (assuming they are a gem affect) I would imagine that they are like the "inks" they used to have and have a similar consistency to tamiya.
Baiscally the Tamiya Clear X (blue, red, green, oj, yellow) are thicker acoholo based acrylics that tint and dry shiny. So you get a really nice layered look where the green is shining through but still colored blue.
52201
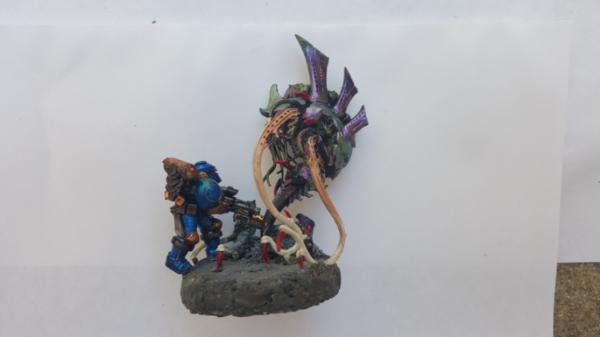
Post by: evildrcheese
Awesome looking fire raptor.
Cool little diorama with the Librarian and neurothrope too.
EDC
60913
Post by: Largo39
Thanks!
Dont worry, the diorama aint done yet  This is jsut stage one. I have.. plans to make it more epic
60913
Post by: Largo39
So the librarian/neurothrope diorama has been put on hold for now, but I did get in my 30th anniversary marine so its time to start working on that.
Unfortuantely I didnt want this diorama to be on a 60mm base, just a 50, so the question is... how do you cut down a (really thick) foamcoat base to size? very.. very slowly. With lots ofl ittle holes
Unfortunately I dont hae pics of the next steps cause I'm a dumb dumb, but basically I had to rebuild the side walls with the bits i cut off, so lots of gluing and pinning of the sides, and then sanding it all down to get it back to being smoothed. Took a little bit but worked out well in the end:
And thats all for now! I'm doing a spurt to finish off this particular base so lots of updates soon.
60913
Post by: Largo39
More progress:

60913
Post by: Largo39
Almost there. Im saving the shoulderpad for last so I can make a blue paint tutorial.
61618
Post by: Desubot
Wow that looks really good.
was this also the various lumiere pearls and interference paints?
60913
Post by: Largo39
Indeed! There shall be a tutorial about the blue shortly. The nids I can do... one later when i paint up the primarch.
60913
Post by: Largo39
Oh hey this is coming along nicely...
WAIT WHAT ARE YOU DOING?
SAWWING SOUNDDSSS
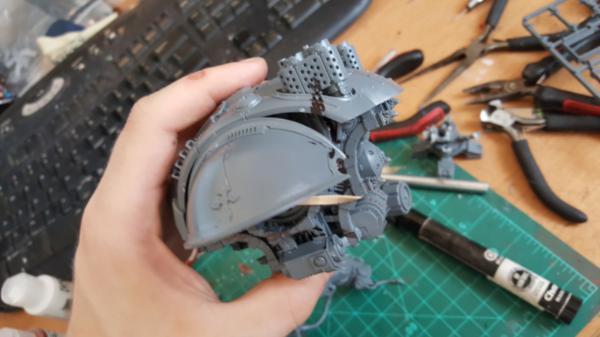
So anyways, why did i cut my pretty venomthrope in half? cause it's a 30th anniversary marin! and 30th anniversary marines are broken as all get out and have the "disentegrator" gun. So I figured id disintegrate this venomthrope. Since the marine is in stand down position, the venom is just.. sitting there, seemingly perfeclty normal and terrifying, until you realize that the pile of ash on the other side is where half its face was.
Thats the idea anyways, step 1 is sawing it in half. This worked pretty well with a dremel. Downside is that dust got allll over my lvoely paint job. Le sigh. Next time cover with plastic ya? still, after lots of spraying with water the marine is clean at least, and while certain crevaces of the venom never got fully dust free a light coat of ink fixed it right up. Now to figure out a good ash effect...
60913
Post by: Largo39
So, experiments in ash commenced and were.. satisfactory!
So the first thing I tried was MDF dust. You run a file over some MDF bits you have lying around and pretty soon you get this nice fine powder that seems like it would be good for ash. The problem? its hairy, and looks hairy, so that was out.
Instead I went back to my old standby of Foamcoat scraps with the knowledge I got from it from my acid base: putting a soldering iron makes it crumble.
Foamcoat, in brief reference, is a plaster like material that coats pink foam. I use it for everything, it's my base material for my terrain/bases/etc. very solid and realistic.
https://hotwirefoamfactory.com/025_All_Purp_FoamCoat.html
Okay with that out of the way lets MAKE IT HOT.
Step 1: get some scrap foamcoat. If you are a true believer like me/have made any big terrain piece you will have lots of leftover scrap bits (the bit on the left, the bit on the right is what we are converting it to)
Step 1a: Make sure to have pink foam on the back your scrap. This is actually pretty important. When foam is subjucated to high heat it shrinks and becomes this sticky blobby goo that, when it cools, hardens into something more like plastic. This is PERFECT at holding your ash together JUST long enough to glue it down onto something like Gorilla glue. Just putting down a layer of glue and scattering foamcoat bits over it works okay but you dont get that cracked lookt hat you do here.

Step 2: Take soldering iron, make it at your hottest temperature. Just kinda press it ont your scrap.
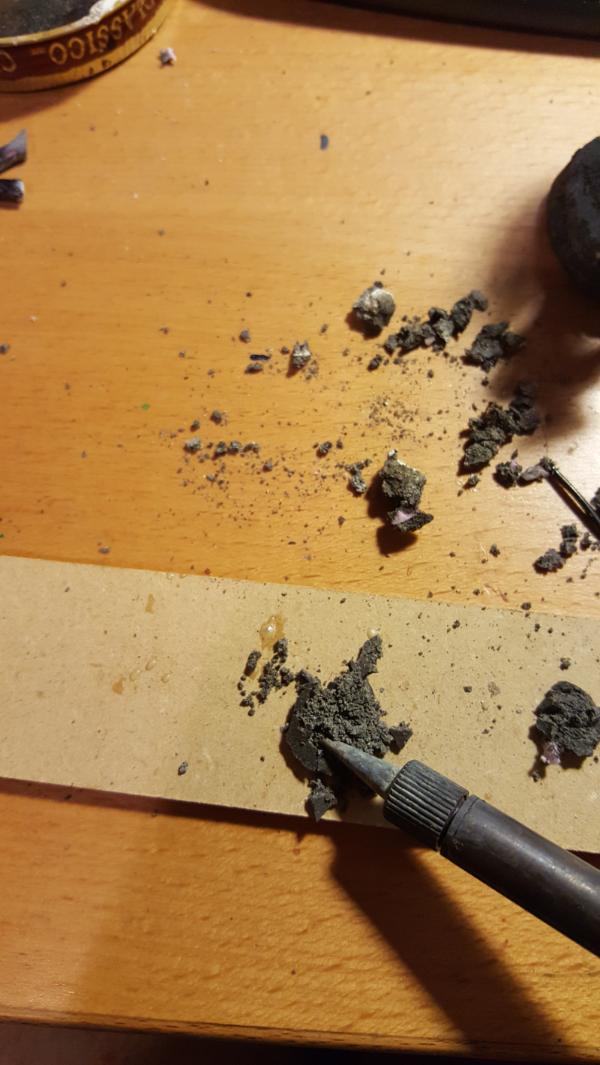
Step 3: Wait. Within.. a few seconds (or longer for really thick pices) the coat will fail and you can press through. you are now in prime "ash" stage and you kinda just press it down in the area and watch it crumble/crack/etc. ALl that fun stuff.
Step 4: wait to cool and then paint! Woo! Ill explain that next but first a WIP of it coming together:
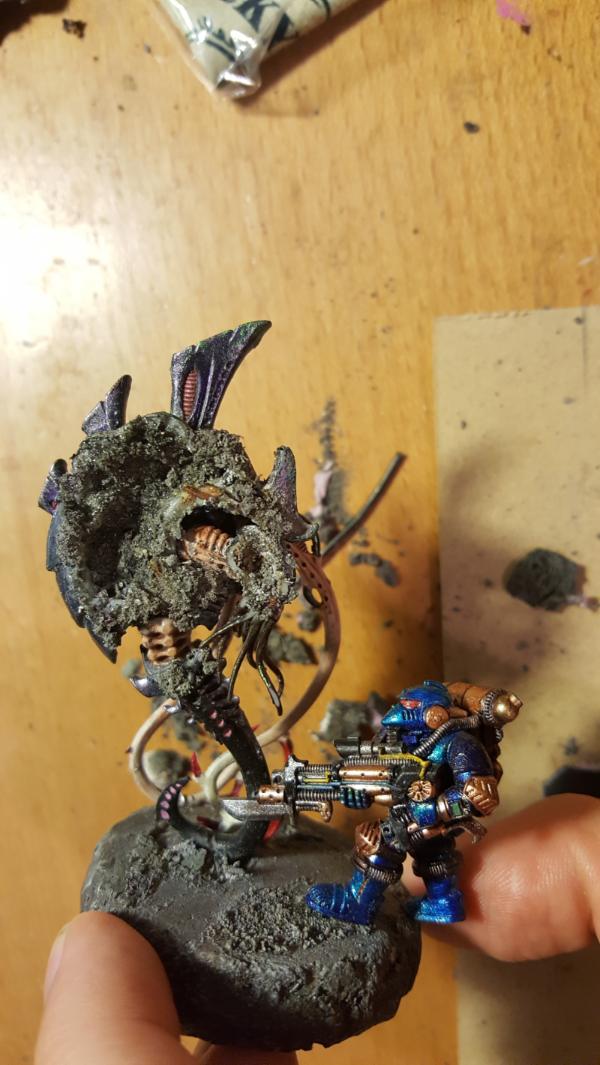
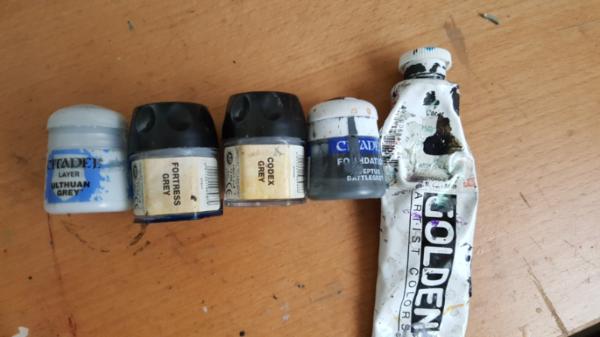
Now to paint it. These are the colors I used, pretty straightforward greys though the lighest is just ever so slightly blue, looked really good and vibrant. But yeah, pretty much as you expect. Start with black and then drybrush your way up tot he top. One interesting wrinkle is that I used (not pictured) a semi-gloss coating over the tops of the ash piles. This helped sort of meld it goether and reduced a bit of the contrast from the black to the bright grey and also gae it a touch of sheen, which charcoal at least definitely has.
60913
Post by: Largo39
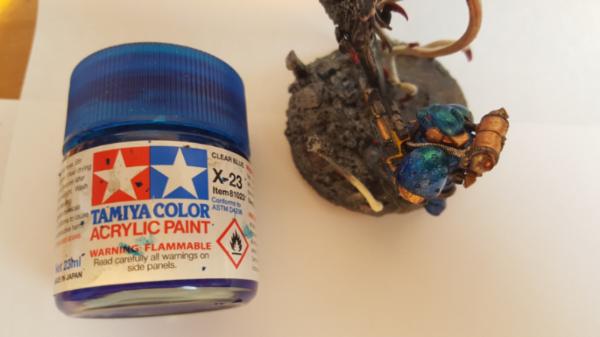
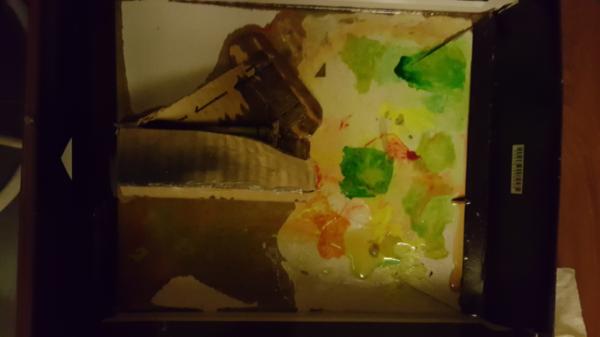
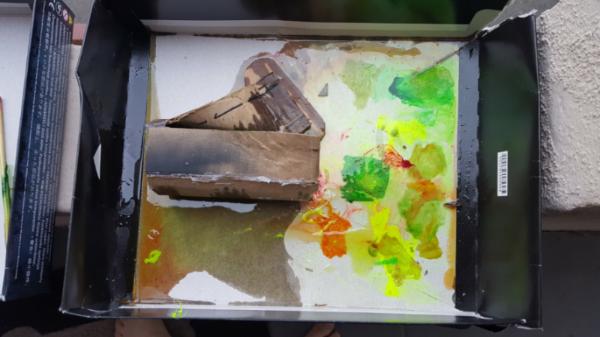
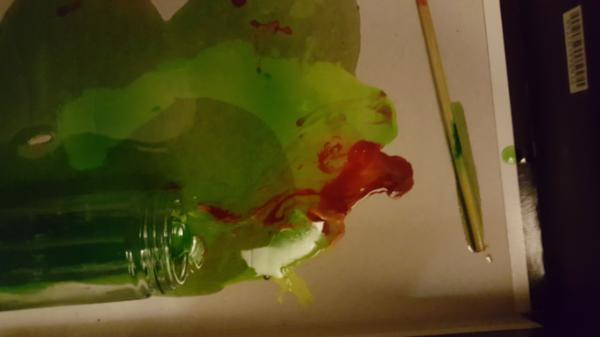
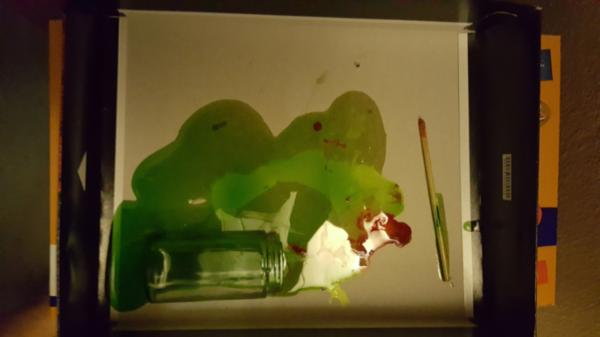
Lets talk blue paint tutorials!
Now this is the newer method thats abit shorter than before. It produces about the same effect and requires much fewer passes, so I am just going to show this method. Originally I did the gradient in flat paints, then added iridescent paint on top but that takes a whiiileee. lol.
Anywoo, paint is shown next to the progress to help really illuminate what I'm using. The point is to make the green "highlight point" at wherever you expect your light to be, so that means edges or the corner of a shoulderpad, etc. It helps to be consistent across the model as that sells that you are getting a consistence "green" response so to speak.
First up, black primer, and pthalo blue (the base color this is all based around)

Then lumiere blue. A really pretty iridescent blue look, just looks.. awesome.
A recent addition, but I add a bit of blue-green 2 ton paine early to build up brightness, should help with the shimmer look.
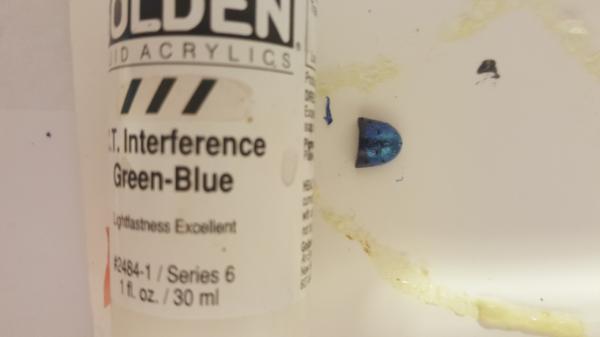
My standbys, mix them together to make turqoise
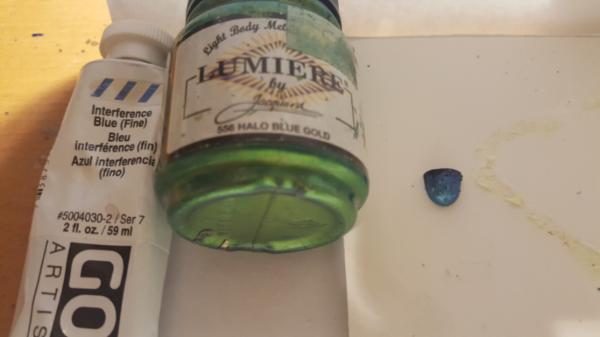
Finally the green highlight.
And now we tone it all back and get it darker and add in that extra depth. I used to use an blue ink wash with gloss on top, but this clear blue does the job in one go so its my new tool. It's thicker though that you expec tso some watering (with alcohol) helps. You can spray this on too with enough thinner.
60913
Post by: Largo39
So normally there would be a bit of a break as I figure out my next big base setup, but last night everything just clicked and I got started right away!
Anyhoo the plan was to have my "ground" khan be the Moloc model from the Ivanus Enkomi and Asterion Moloc pair. I've already painted up ivanus model earlier, and they are both excellent, so that seemed a natural fit.
The question, of course, was who to face him against? It needed ot be someone pretty big but not too big as the Neurothrope battle is still top dog, and any other power levels would get too big for the base (i kept it to 60mm), so I went with the patriarch genestealer. But his pose only really works when he is standing on something tall, and the sewer pipe, while cool, doesnt quite fit in the area i plan to place the model (but dont worry, you will see them soon, too cool!).
http://www.belloflostsouls.net/wp-content/uploads/2016/02/Genestealer-Patriarch.png
https://www.forgeworld.co.uk/en-FR/Asterion-Moloc-and-Ivanus-Enkomi-of-the-Minotaurs
Furthermore any dirorama has to account for the fact that moloc himself is ALSO standing on something so yeah. hrm. The original lan was for each to be standing on a pile of corpses (terminators/stealers/etc) but that seemed a bit lame and very time consuming for an effect that coul dbe visually very.. distracting. Then I realized that the patriarch model has in his hand a space marine head
and it all clicked! he crashed one of the bikes attacking his genestealers and ripped off the dude's head! and moloc is wading in to fight him off. It works, bikes are tall enough, and it fits the narrative really well. Bikes going to the rescue of the terminators/ramming stealers, patriarch takes out one of the bikes, moloc/khan moves in vs the patriarch.
So here is the beginnings of the posing. You can see the height matches up pretty well, so I'm pleased about that.
the marine, pinned, will be desperatly reaching for his weapon before he lost his head.
Moloc/khan is standing on his foot to get in range of the patriarch! Kinda cold.
60913
Post by: Largo39
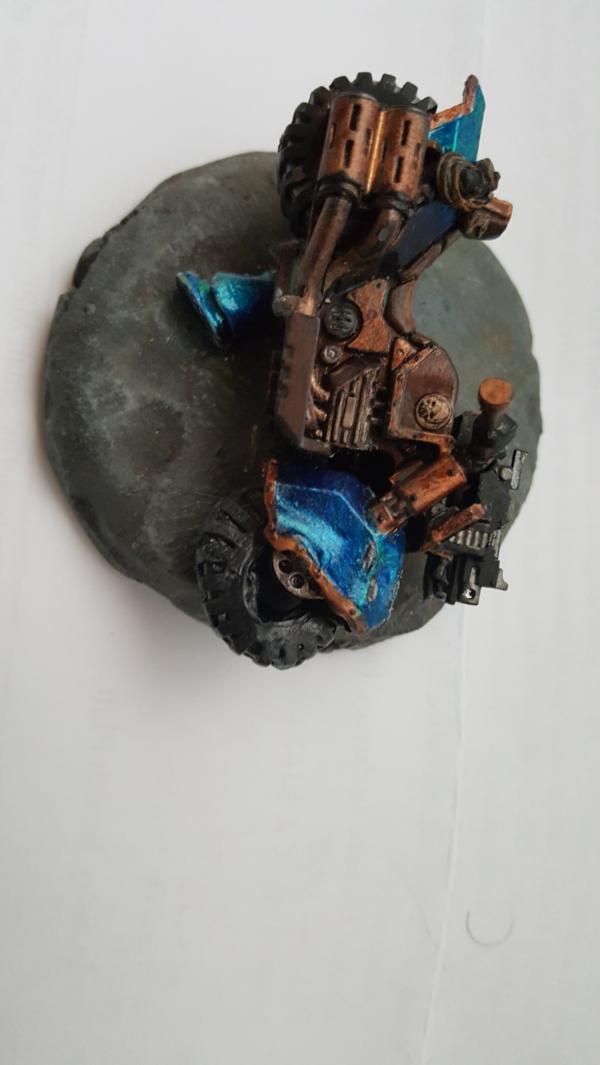
Busy week but had a little time to start working on the bike pose. Basically I needed to melt/carve out the underside to leave room for the legs, but also still not LOOK like it was carved. I think it worked pretty well, i cheated a bit and embedded part of the less visible leg into the base, so its harder to tell. I'll show a side shot later to illustrated. Either way you hardly notice.
Im pretty happy with how the crumpling turned out. Basically I used my trusty soldering iron in the wheel well and sorta just waved it around but not quiite touching the plastic for 30 seconds or so. That made it nice and pliable and easy to crush. The tire was a bit more directly melted but also turned out well. I might tighten it up to the axel a bit more (its not glued down yet) but we'll see. The shape of it is really nice though, looks like rubber messed up.
60913
Post by: Largo39
more work, slow but getting there. So far I'm not entirely enthused with the TL bolters in front, i might have giant claw marks in there just to add some more damage.
60913
Post by: Largo39
Spine time!
I also decided I wanted the claw damage so i cut off part of the bolters. I still need ao add a third clawmark on the left and make the one on the right bigger but it works pretty well i think.
94668
Post by: Strohkopf
The terrain is so awesome, so I can't say anyhting... very unexpected use of lego for me, nice trick! Awaiting for further works!!!
60913
Post by: Largo39
thanks!
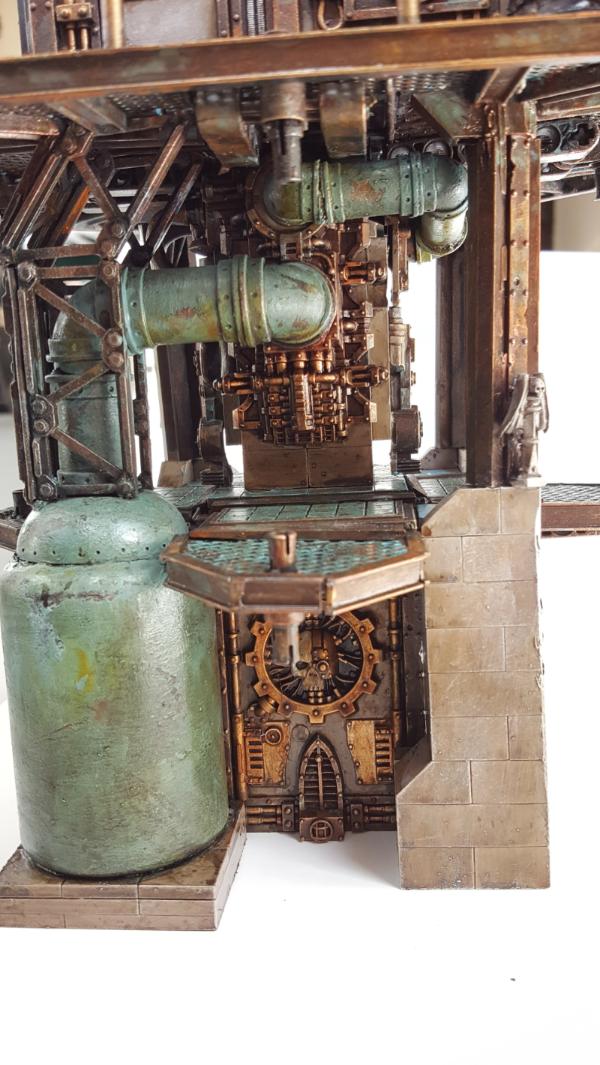
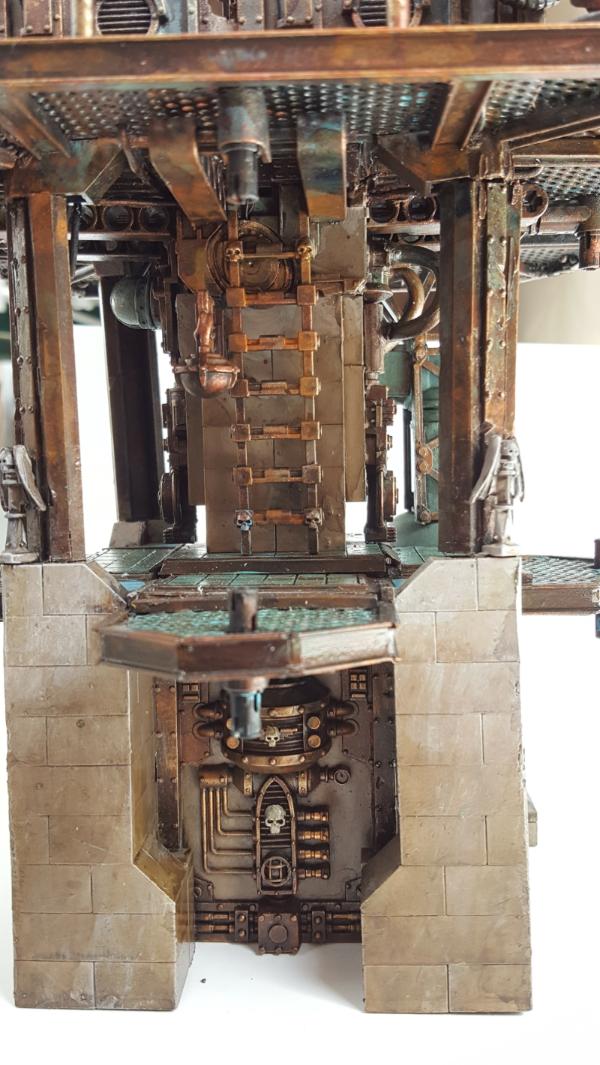
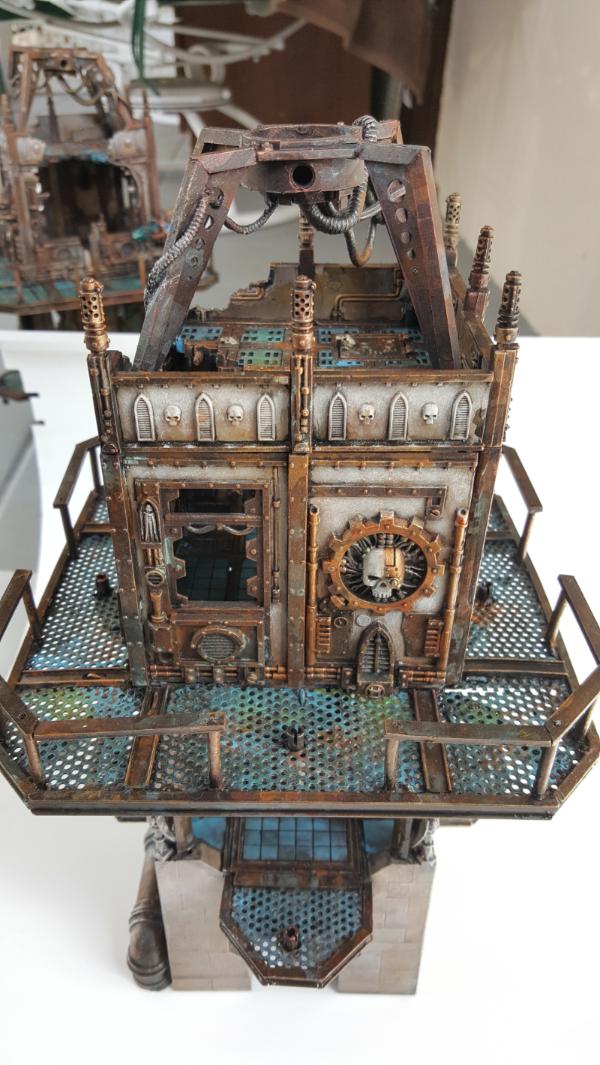
Yeah lego has become somewhat invaluable at both roughing out a building design and for the casting process. Actually USING it in terrain is also neat though it's not necessarily cheaper if you are going for esoteric lego pieces. But its hard to argue with the fact that it's super strong and doesnt need to be cleaned.
60913
Post by: Largo39
I think he's dead jim
60913
Post by: Largo39


WOrking on Moloc! Pretty far along, but ran into a few snags. The first was getting the cape to stick on in any sort of sturdy way. I ended up adding a couple of pins straight into the body itself relatively well hidden, but that ended up havintg the cap be lower than normal, so I extended it a bit to make it all work.
60913
Post by: Largo39
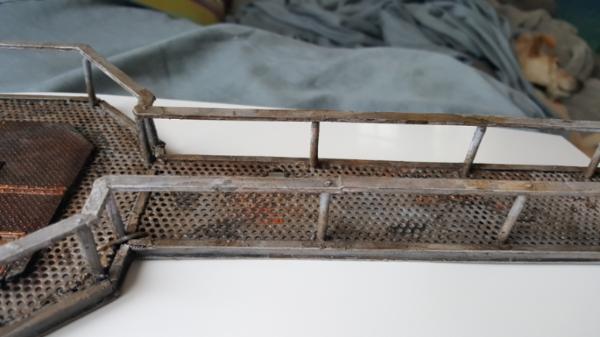
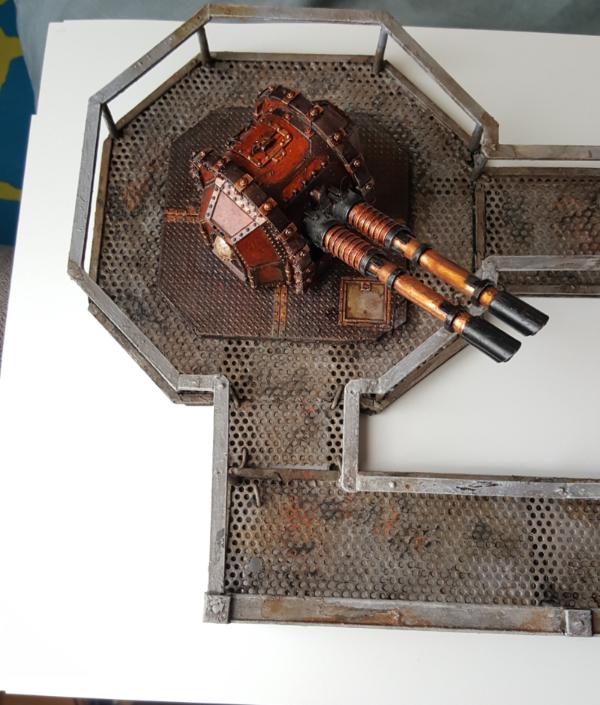
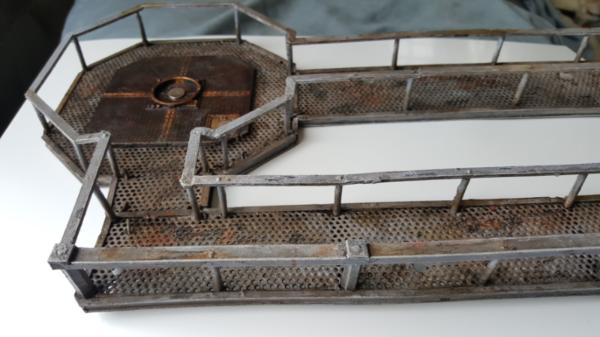
Gah! it helps actually finish the post. Whoops. ANyways so there was a bit of a gap while I wated for my genestealer patriarch to ship so I decided to try my hand at making some of the walkway bases.
and not bad!
Now the basic idea is to get a pot of boiling saltwater, let the ibeam soak in for a bit, and bend it around something. I started by bending it around my 32mm metal bases I had stacked together
But when the base was all done i didnt think how big it would get...
The size I need it to be..
Oh well, its a "hero" walkway base. Anyways after you do the initial bend you still have to worry about the ends, and this is where it gets really tricky, becuase getting those final ends to curve even a little bit takes a lot of force without snapping the plastic. poking holes in it to use wire to pull it together helps a ton
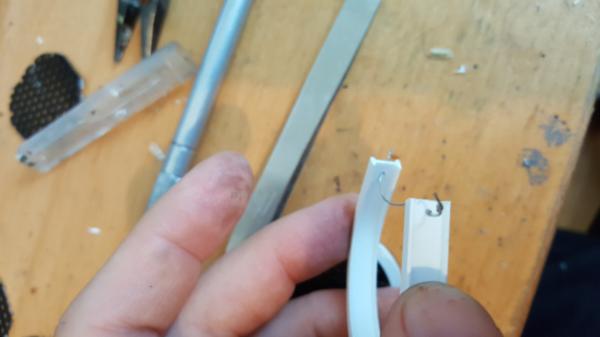
but doesnt give the curve. I tried "heating" it while it was wrapped around the discs and using clamps to forcibly curve it but the force of the clamps ended up warping the plastic as much as it curved the ends, so that wasnt a good solution. So Finally i just got as close as i could and hoped green stuff/selective snapping would get me the rest of the way. My current process:
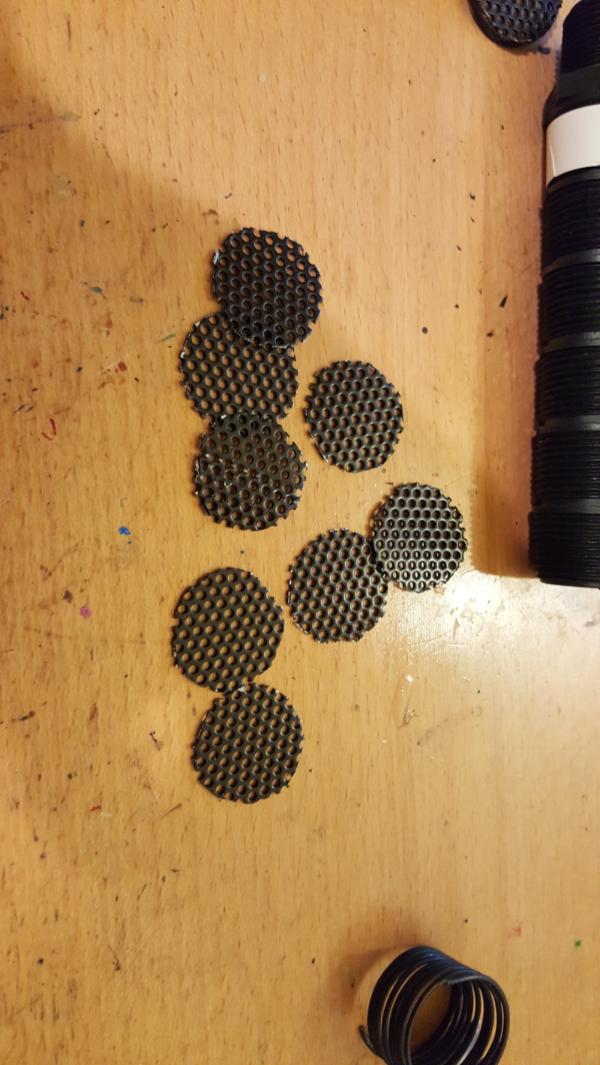
CUt out lots of discs
Make some loops of thick wire and stack 2 under my walkway discs
Do an initial bend around the big discs and then wrap it around its final companion and tie the wire:
Dip that in boiling water so when you cut the wire it doesnt immediatly spring back. Then while its heated very carefully bend the ends a bit with pliers. Score the inside of the ibeam prettttyy heavily and use gorilla glue (NOT superglue, no where NEAR strong enough, you need that expansion) and re-wwrap the ibeam around it, with more wire tied together.
91711
Post by: Novasetri
Cool idea for the bases. Never considered boiling plasticard! Sorry if you mentioned it previously but what are those discs from?
60913
Post by: Largo39
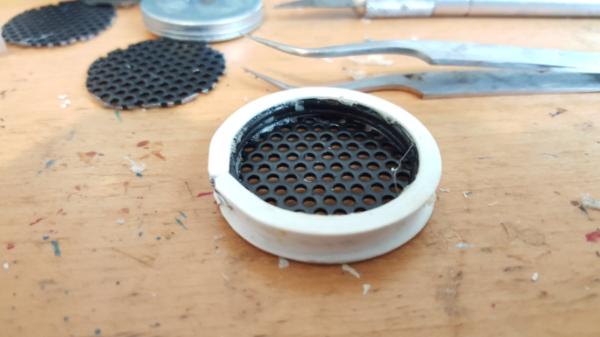
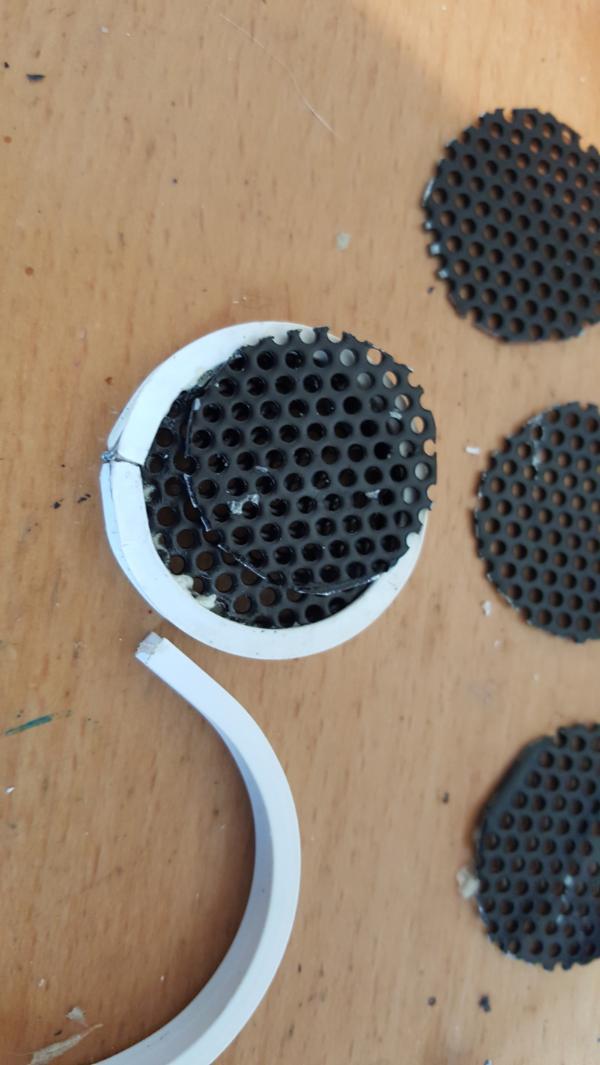
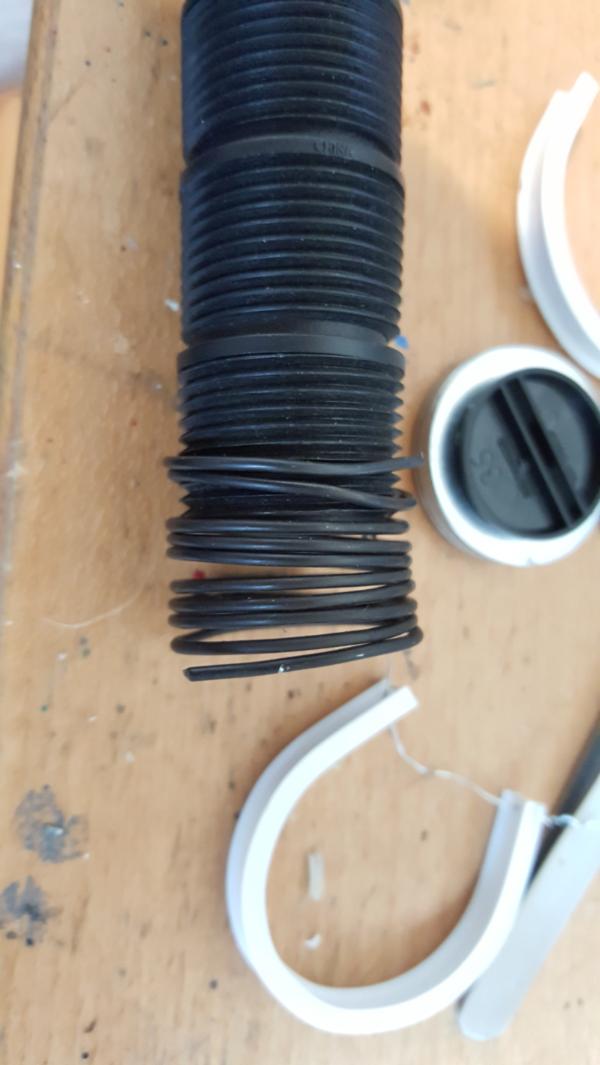
So the nickle washers are from home depot/general hardware store and are exactly 32mm in size (or whatever the new marine base size is)
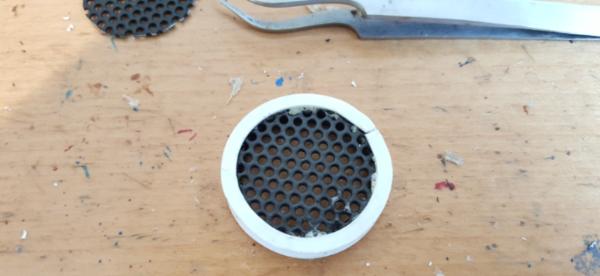
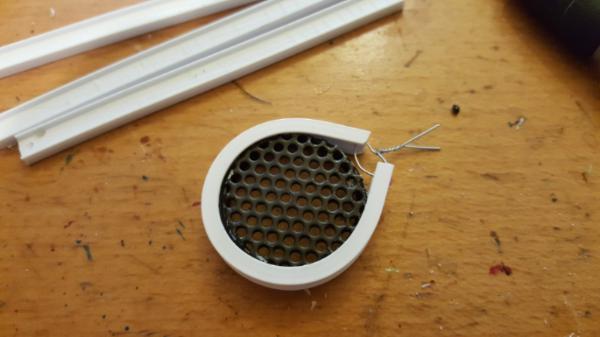
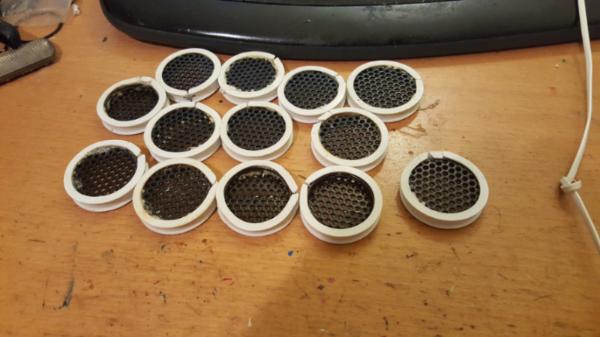
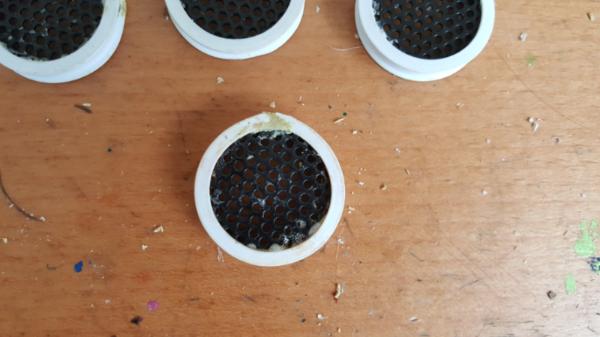
The walkway mesh is from large speaker grilles I found at a junk shop.
60913
Post by: Largo39
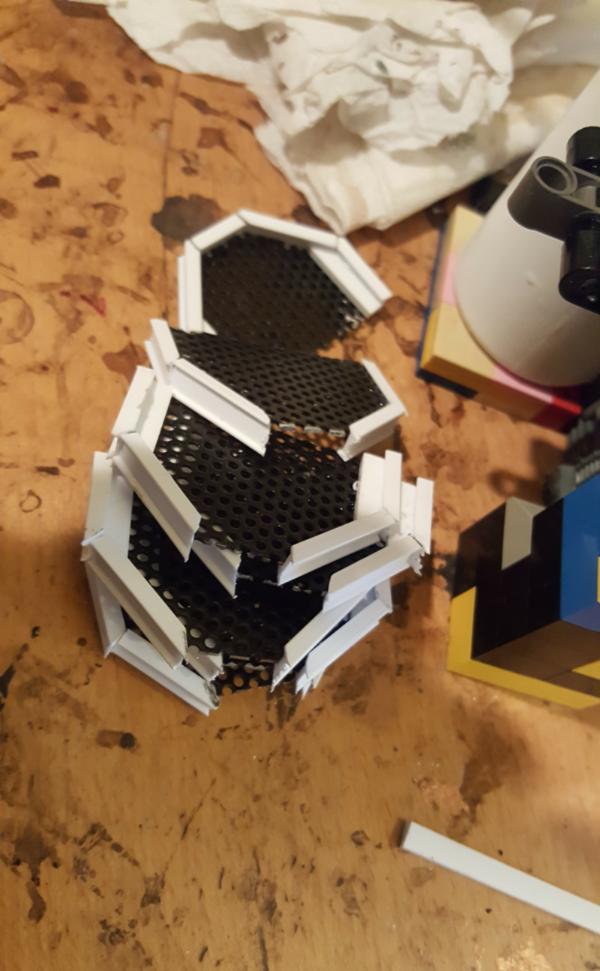
Do be do be do. Working on walkways:
First up some green stuff to round them out:

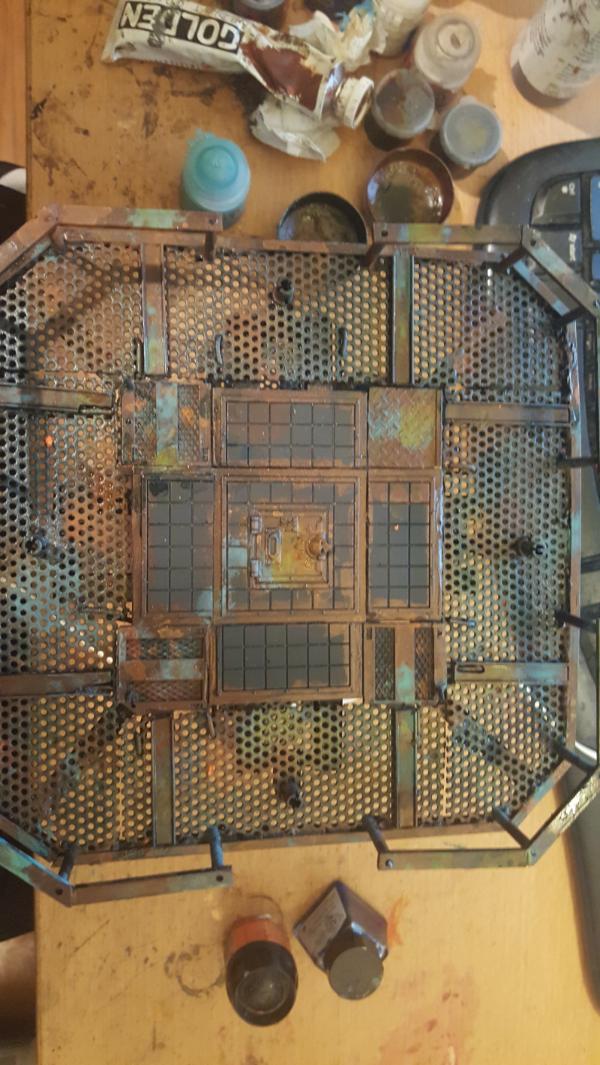
Undercoat rust/metal pass:
A paint chipping coat that doesnt need a pictureee
Top Coat pass:
52201
Post by: evildrcheese
Excellent work. Those bases look great.
EDC
60913
Post by: Largo39
HUzzah he's mounted up! the brains got a bit dark but forgunately i can alcohol most of it off. Still, aside from that it's all coming together nicely
52201
Post by: evildrcheese
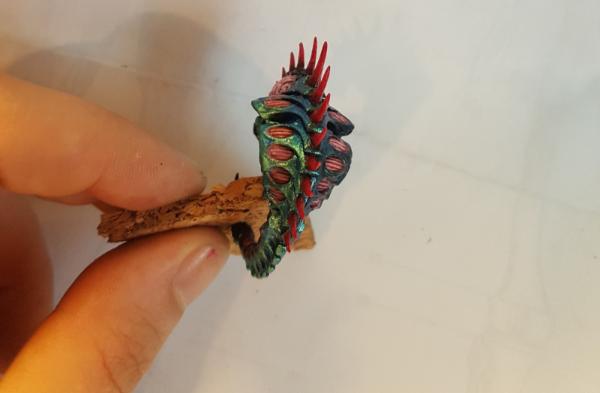
Patriarch looks awesome, I really like the shiny green, like a beatle carapace
EDC
60913
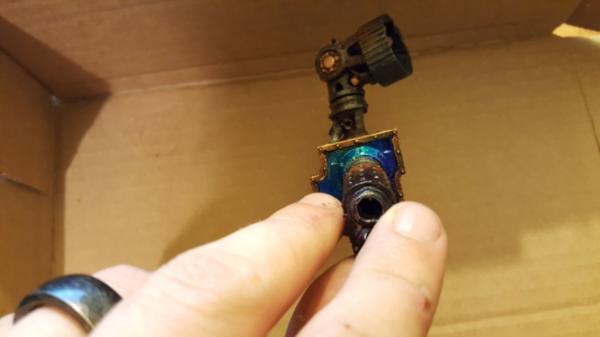
Post by: Largo39
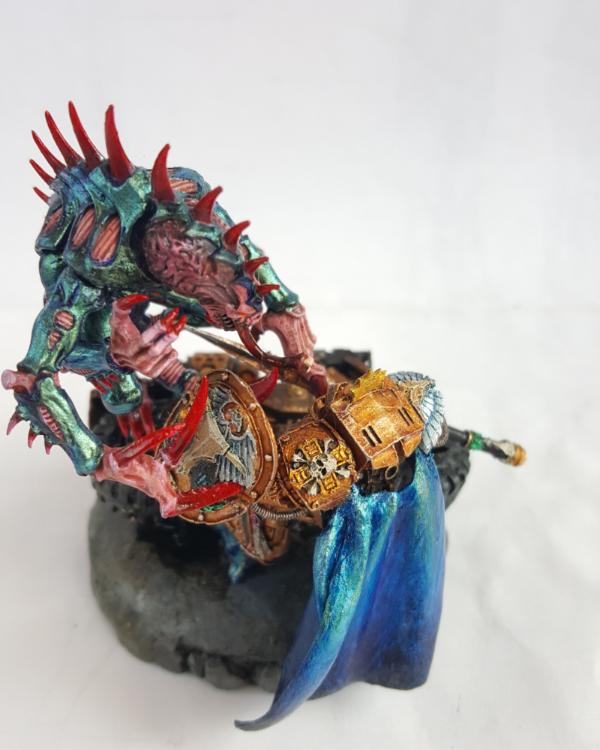
So a odd picture but interesting. Getting the arm and shield to link up was.. interesting. I needed them touching, to explain all the action, but i had to glue them down almost simultaneously so they could, together, be interlocked while also being pinned into their respective sockets.
Took a bit, and definitely scraped a bit off that claw, but it seems tow ork pretty well now. Just one of those things where painting beforehand was clearly crucial to ever get this amoutn of detail, but on the flip side it gets tricky figuring out how its all going to model together.
52201
Post by: evildrcheese
Nice work with the pose, looks like you've pulled off the desired effect. More pics from different angles?
EDC
60913
Post by: Largo39
I will once i get the last arm done! This one is trickier because it's the one that the head is attached too. Unlike my preivous spines I cant really hide half of it, so I have to figure out how to build the whole thing out. So far it's been tricky but there will be a post about it soon
60913
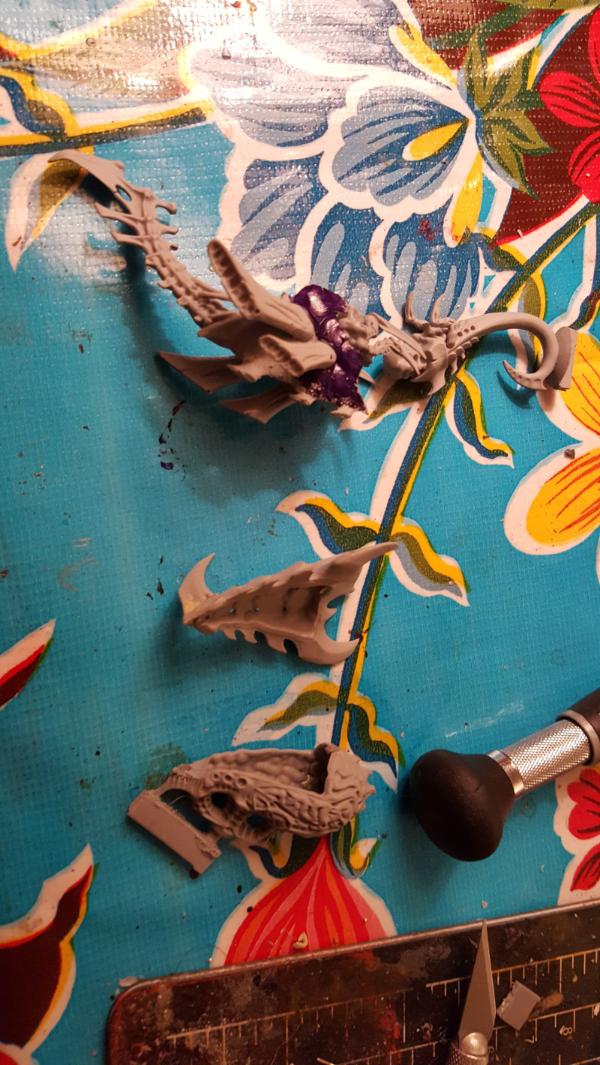
Post by: Largo39
SO, spines. Ive done a few now but as previously mentioned only really half of one technically. To make aw hole spine it seemed like id need to be more fully round and then add the bits sticking out.
However the only thing close i had were 2 of these
and it made.. that
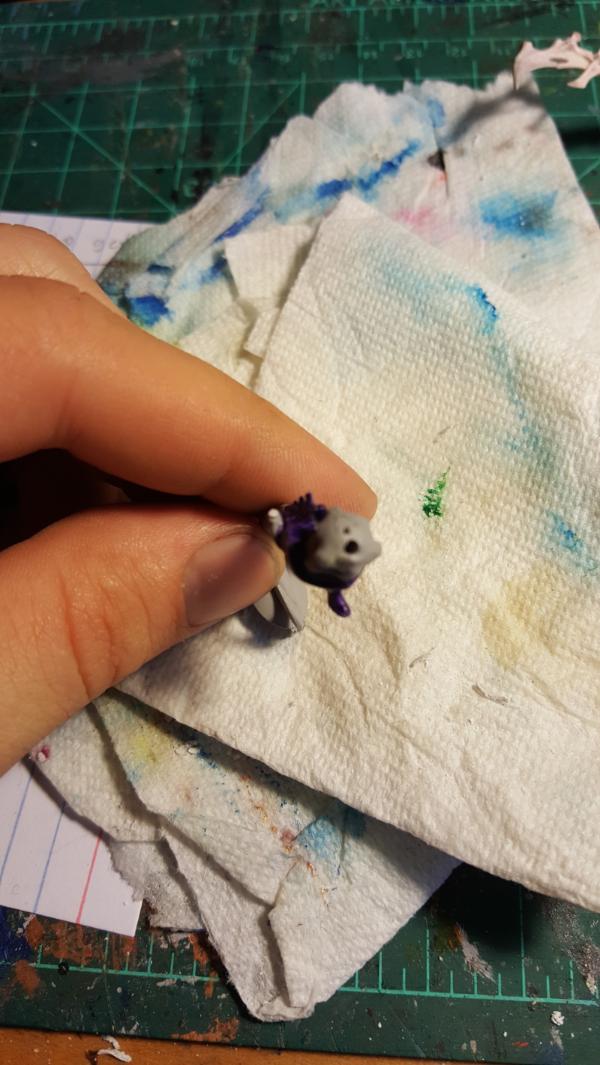
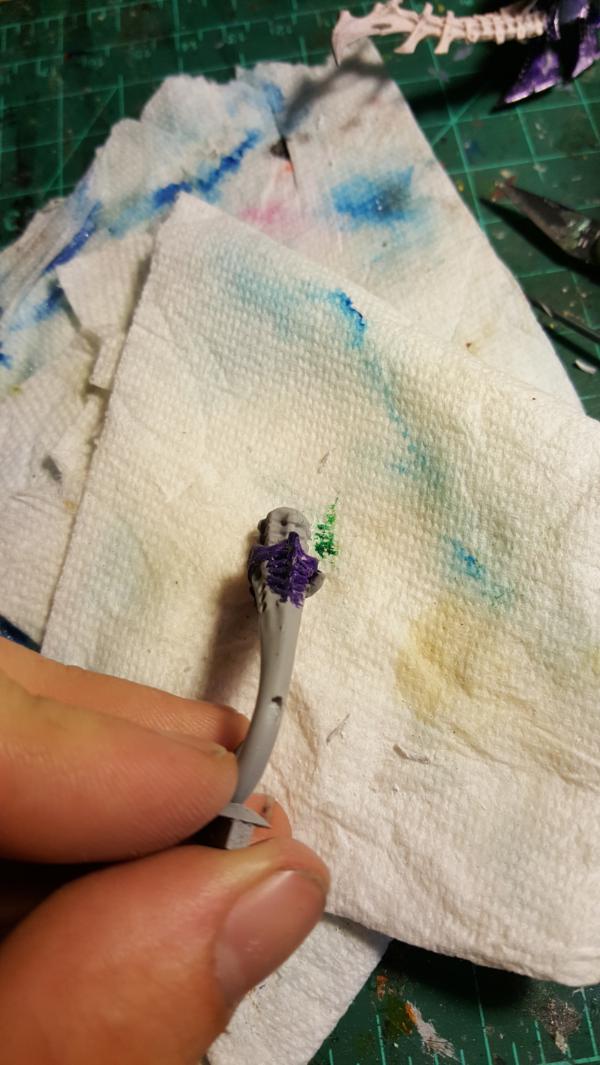
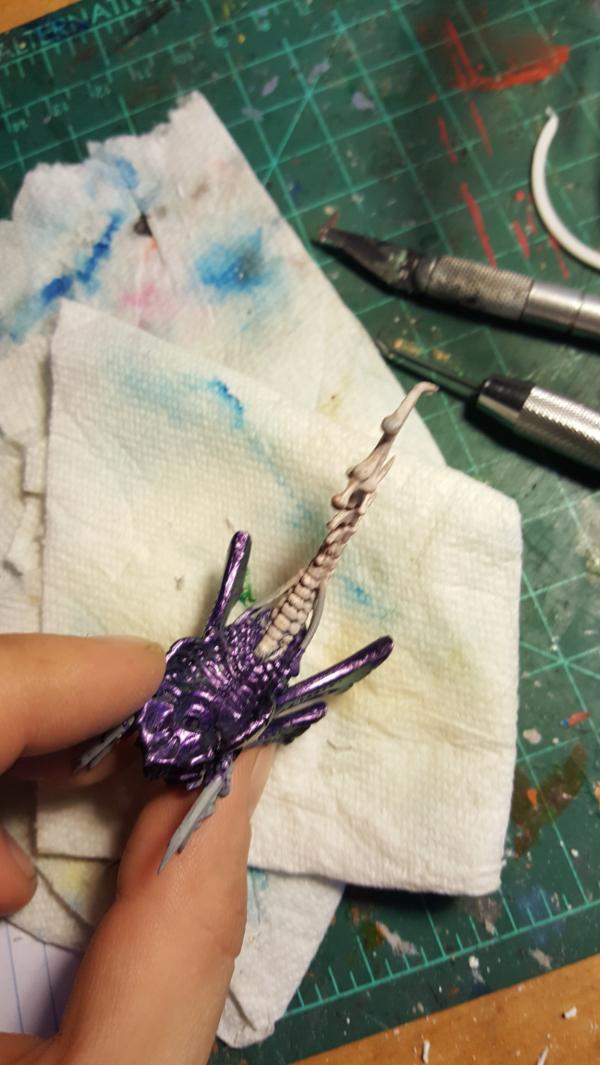
which, is both too long and too thick. Not a fun result. So I figured instead id start with 2 halves again and glue together like before, but they didnt line up so that was bunk. finally i did 1 half and then just built the other half on top of it directly, with spaces in between my vertebrae to give me room to work witht he tools. Then I cut them from each other and restrung the oens that were completed:
so i started with this:
then added green stuff to the flat side every odd vertebrae, shaped it, ripped off the unfinished halfs, and scrunched them together.
lots of little bits later:
and not bad!
I figure with all the gore and blood still attached itll look just fine. So there we go, final arm ready to paint and finishing up this project!
60913
Post by: Largo39
So there will be another delay in pictures of the completed primarch piece because, well, i saw some grey dust on it that i wanted to get rid of. I just cant get rid of it all! its annoying, i guess they are drill shavings from when I pinned it all together? either way I wanted to take another pass and cleaning that off and retake my pics.
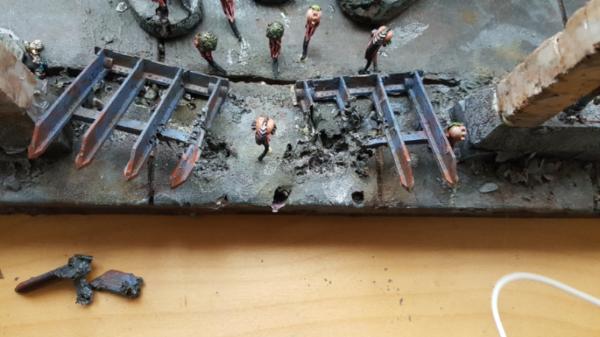
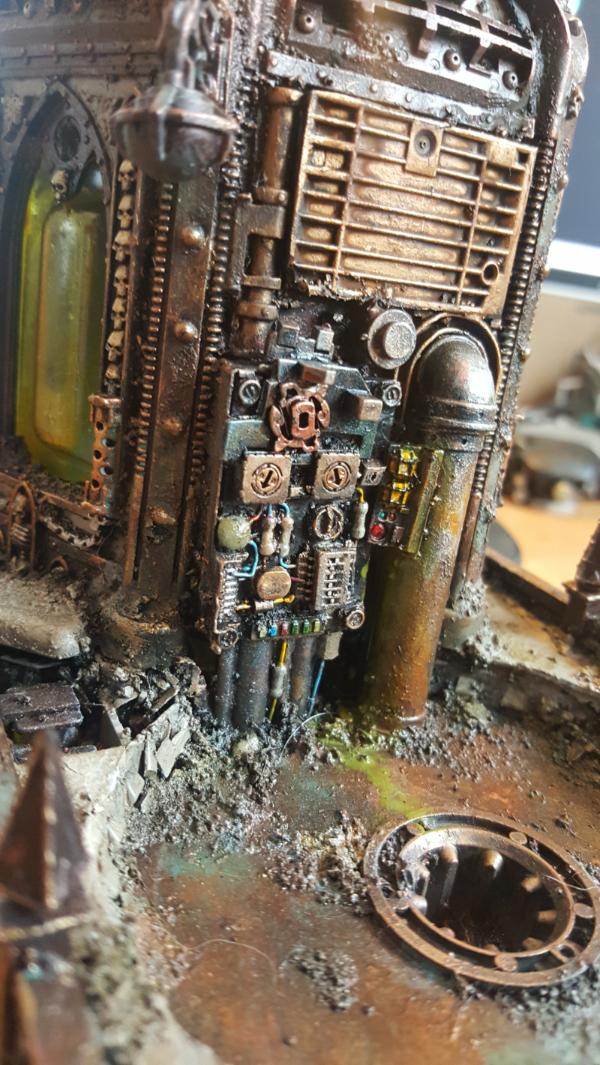
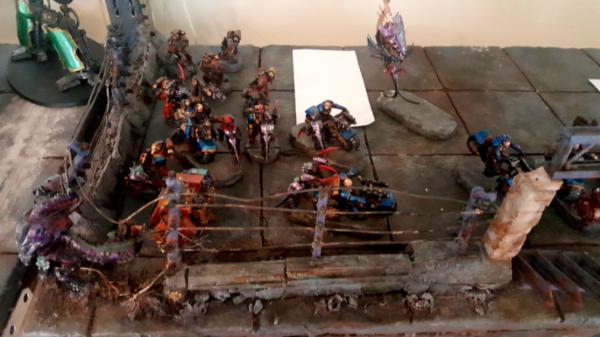
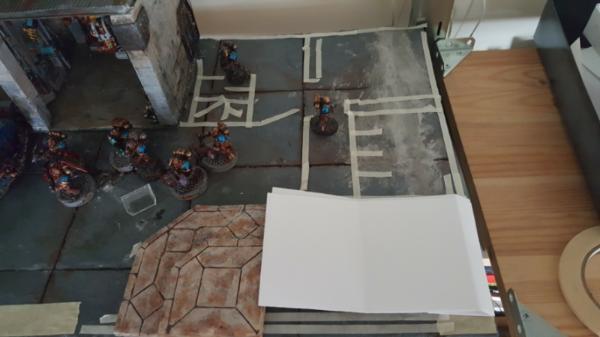
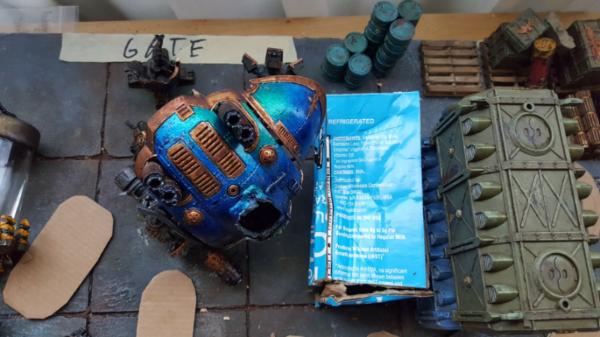
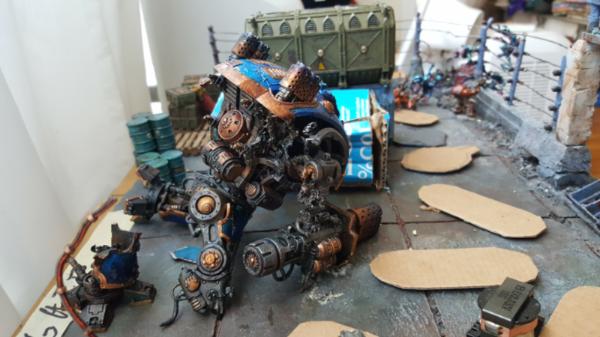
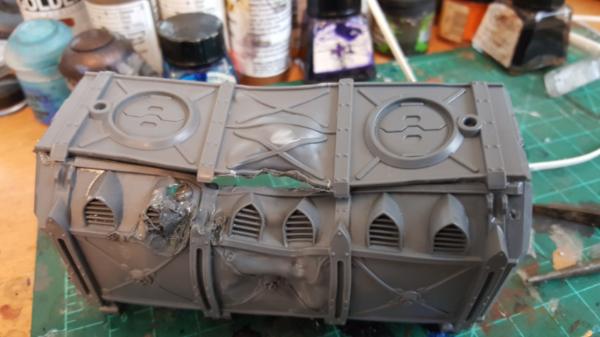
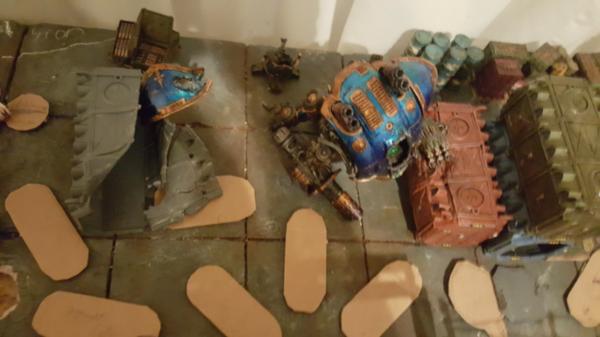
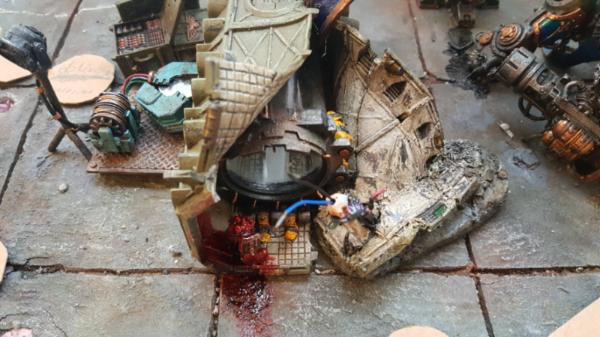
In the mean time this morning I decide to actually lay out the Zinge/entrance tile with all the bases i've built up. The paper squares are my guesstimate as to the size of the munistorium armour containers (i said 3x6). The idea is to have this area be the resupply/staging area for the larger base behind it. So its connected to the garage (walled) which is tile 2 and said garage tile has entrances to further in the base which isnt shown. Anyways so that means some containers! It'll give the tile some height and sell it better insteado f having it blank. I figure i also have pallets of supplies scattered in the back corners where the stealers are moving in to hide. Furthermore the Neurothrope/khan battle is it having burst out of a bio container it was being kept in, so it got loose and detailing the interior of that container should be fun.
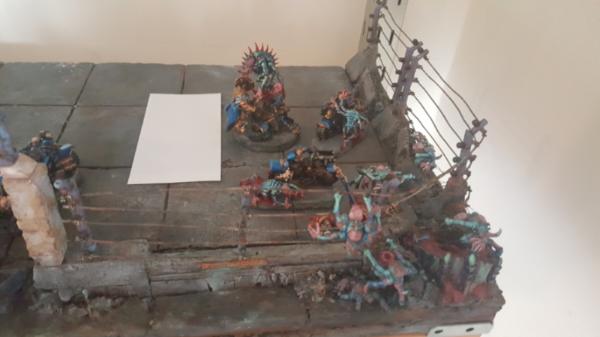
you can see on this left side that the holes where gaunts would be popping otu of the ground form quite naturally and convincingly. So ill crater out those areas and make them into dig eruption sites, gives me a way to add more of the swarm feel without needing room on the edge. Story wise now its the gaunts, unable to penetrate the fence, are relying on the fex or tunnels to get in but hit the bulk of resistance. The stealers on the other side are cutting the fence and swarming into an area with less resistance, being led by the primarch.
60913
Post by: Largo39
So still no pics of th efinal patriarch, that will probably wait till the weekend when I can wait around for optimal lighting conditions. Until then im working on my scouts using the new platform bases.
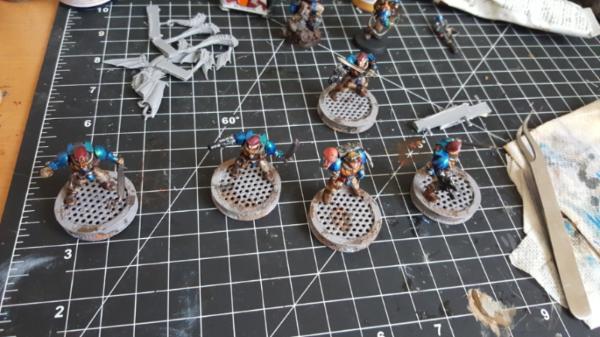
60913
Post by: Largo39
Working on getting them posed, since the resin resists the heat so mucu better than plastic its pretty easy to heat it up and bend it without deforming it, nifty! If you go too far with heat it mostly just snaps, which is easily fixable.
Id prefer it be conssitent with plastic of course, but, still useful to know.


60913
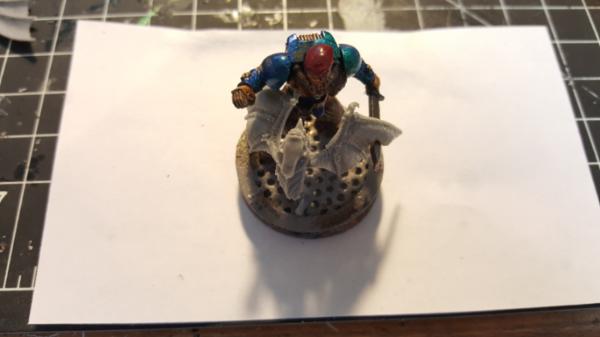
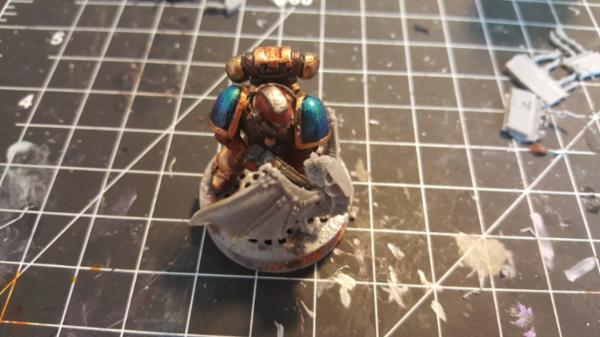
Post by: Largo39
Scouts are coming along but first i figured id post some of the marines: After all there is a dev squad thats going to be up there too! makes sense that the guys NOT firing the big guns would be also fighting skyslashers.

60913
Post by: Largo39
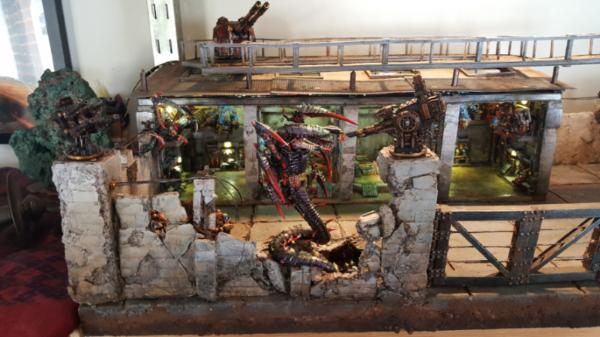
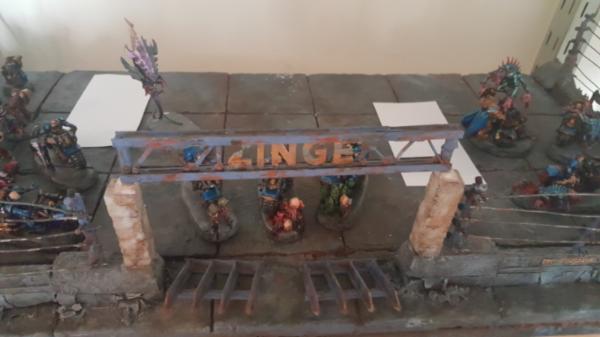
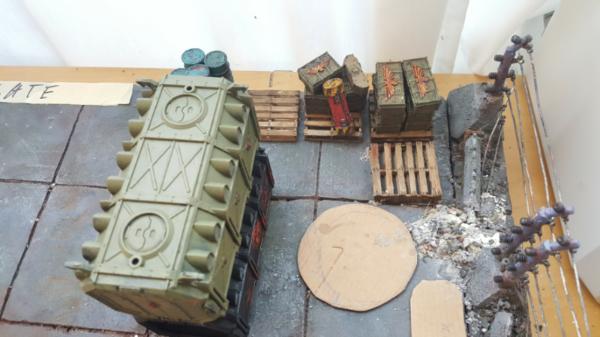
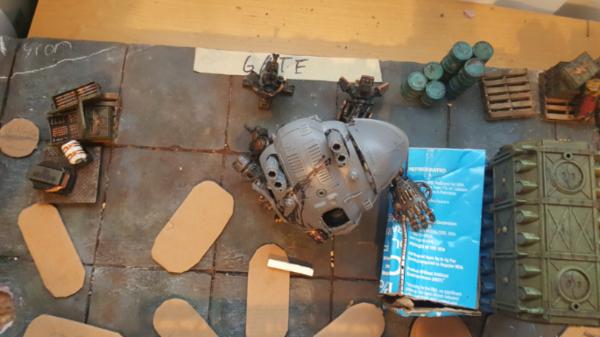
So I managed to get some vacation time nad have been working furiously! I have the marines vs skyslasher bases in pretty good shape and will have pics tomm. But first its time for some terrain work! So as previously mentioned I wanted to spruce up this tile:
So more nids attacking, and also more "stuff". As this is is the outer area of my base it would make sense for various supplies/crates/etc to be laying around. There are 3 key things I wanted to add:
1. Pallets of ammo boxes and the like and shipping crates on the right stealer side
2. A seperate shipping "biohazard" crate which formerly contained the neurothrope that broke out. So inside would be one of those clear cylindrical bio-containment units somehow broken. Possibly messing with liquid spilling out of it too.
3. A middle Imperial Knight that was wrecked/crashed against some of the right side shipping crates. THe idea being if (hopefully) there are any future plastic primarchs (COME ON GW LETS DO THISSSS) he would be on said wreckage fighting a big bad of the stealer world (probably a swarmlord)
4. On the left side collapse tunnels with gaunst/warriors pouring out, providing the source of all of the gaunt bases for my marins and bikes.
To make this all work out I actually wnet ahed and posed everything, trying to nail down the layout. I really want this to fit properly so I dont want to take any chances trying to fix something after the fact.
Note that the mawloc wont actually be there, I was just guesstimating the rubble radius of his attack on the other tile (my plan is to have him take out an entire wall, freeing up visual space to see the innards of the garage so that isnt lost)
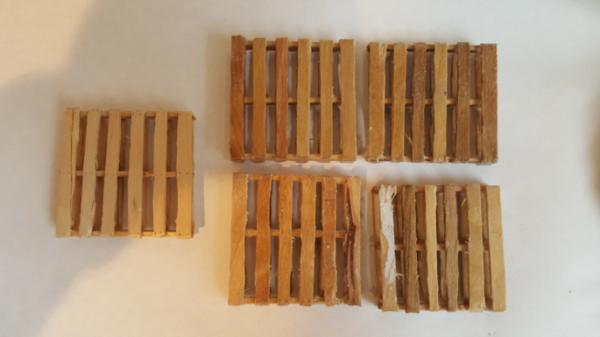
Thats a lot of stuff! So first up was making the wooden pallets:
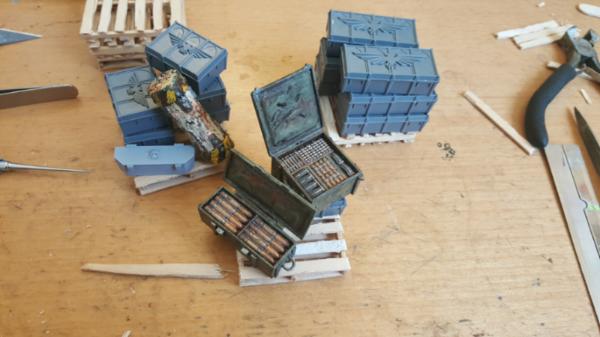
Pretty straightforward, just get your standard popsicle stick (which is what, 2-3/8 wide?) cut it planks of the right length (about 2 inches?) and then cut each plank in half. I used my straight line nippy cutters and it worked pretty well. A big problem is the popsicle sticks do split not necessarily along the straight line you wanted them too. So often I had to go back with my xacto knight and carve the planks I cut a bit straighter, but its mostly covered up so its not a *huge* deal.
I needed 6 pallets so that was a lot of cutting and fixing but assembly is easy, just lay them out, super glue them up, and then add wood glue dabs at your joints after the fact. The superglue sucks at actually holding the wood down, it generally just breaks right off. But its good enough to get the structure in place, and then as pieces break off or get loose you just add dabs of wood glue and let it set.
60913
Post by: Largo39
Next up is painting! Now oen thing I did before painting after they were assembled was take my smallest/most needle like tool and poke nail spots in the pallet. It looks great! until you paint it.. then the water of the paint causes the wood to expand and fill in the holes. So do it after you paint the first coat (it doesnt seem to expand much after the first pass) and not before, otherwise ull hae to re-do work.
Anyways I figured id start by trying this "aging" technique ive heard of where you combine backing soda and water and just dunk the pallets into it. When i first did it was like WOAH THIS IS PERFECT:
(the one on the left is raw, right 4 are drying)
and then it dried...
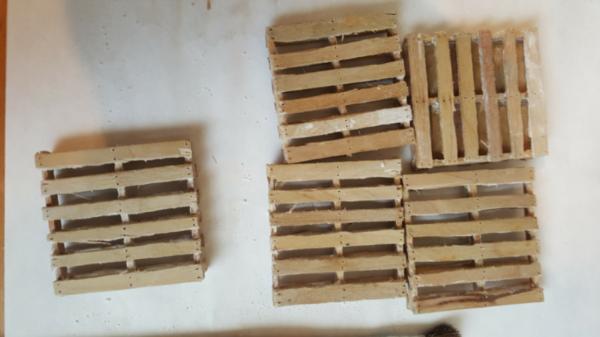
d'oh! yeah one theme is that the wood dries and gets a LOT lighter than while wet. They still looked slightly aged from the treatment and took the curse off the raw wood look, but not enough. So I started just directly using washes and such to darken it further, which was magnified again because its tough to know how far to go when while wet it either looks perfect or waayyy too dark but dry its back to a lighter form.
final result was something like this:
60913
Post by: Largo39
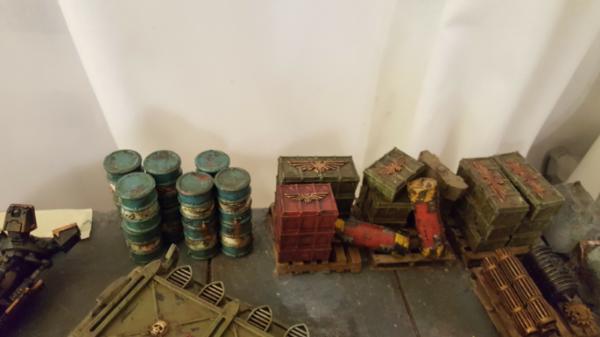
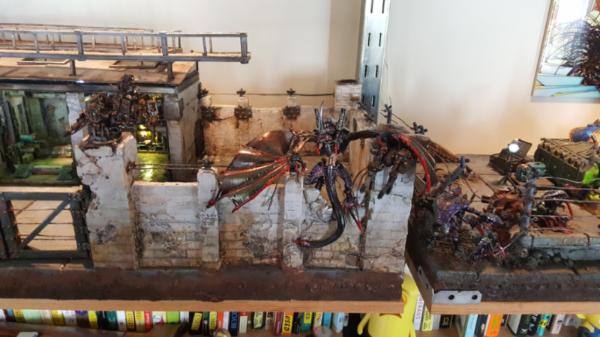
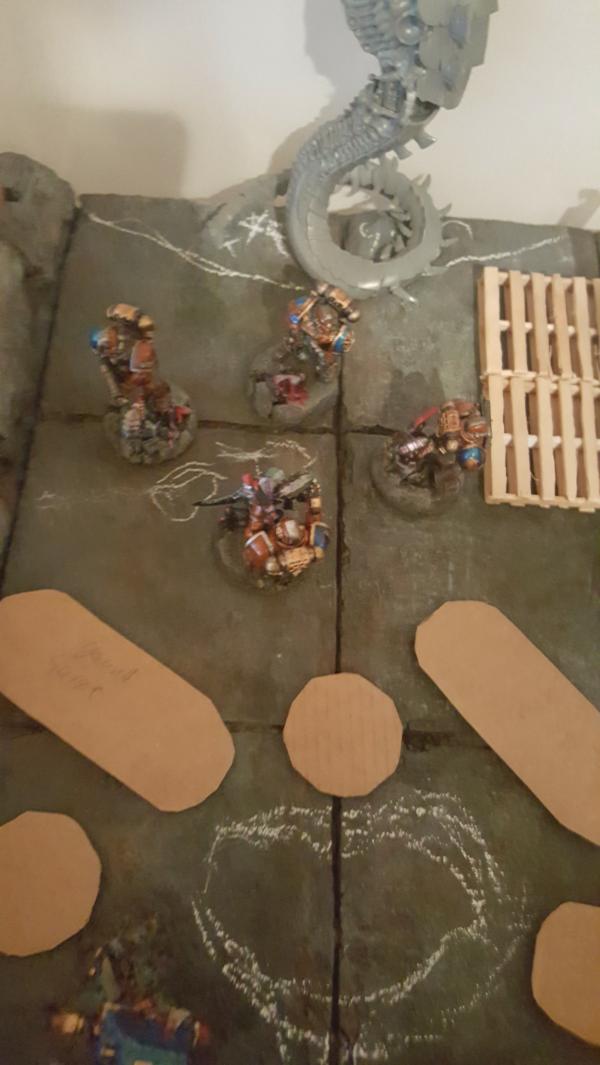
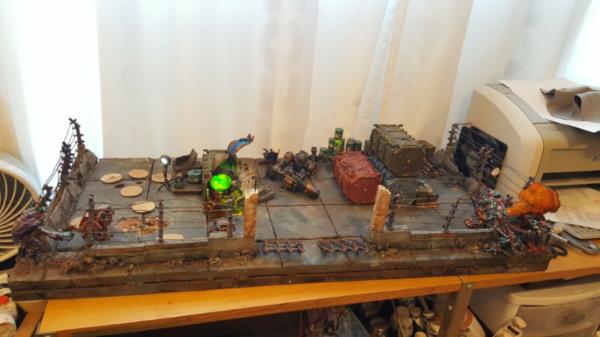
So some of the pics previously hinted at it but here it is: the tile has an initial layout!
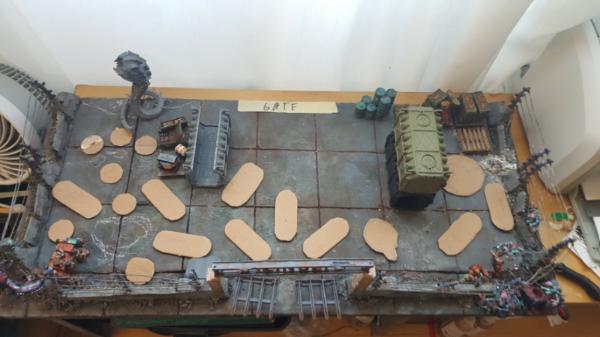
Every marine and bike is in there, woot.
We also have some of the barrels and ammo boxes painted and pinned into the tile on their pallets. Forms a natural looking barrier to prevent models from falling off the edge and is helping to make that area a bit more stealer claustrophobic
We also have my pondering whether or not I want to double up on the shipping containers. 1 lone stack of 2 just seems.. off. The bio container on the left side makes sense, as youd want it isolated, but hte other guys need company.
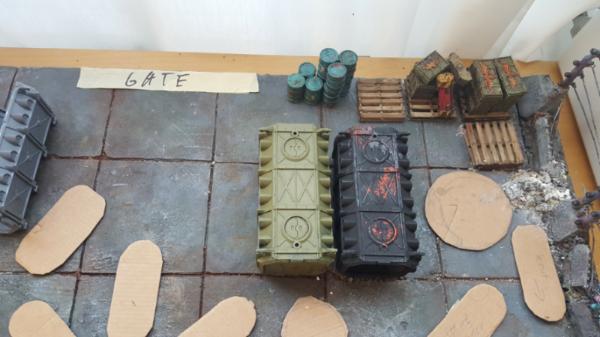
And then the left side! Im trying to figure out what to do with the metal platform, those are good bits for generators so it seems a shame not to use them, but now? powering the bio container? maybe? i dunno yet.
The white is the pit where warriors/gaunts are pouring out.
60913
Post by: Largo39
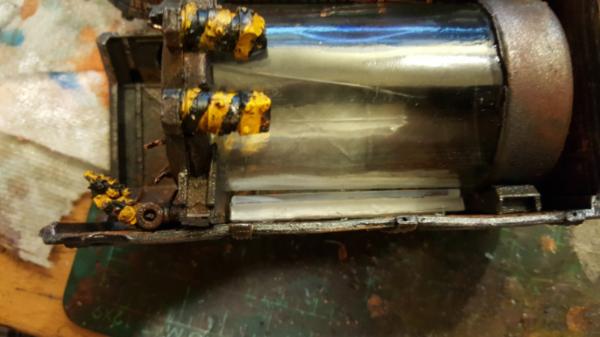
next up painting my shupping containers!
Pretty standard, undercoat thats dark metal/slightly rusty followed by chipping fluid followed by overcoat. then the aging wash also is when i chip stuff off.
Im adding decals though which is fun! i want to add a few more like number and such but I needed to move on to other things before I get sucked into decal world (i figure the containers might be a good opportunity to test out posters too)
you can see the giant pints i have running up these things, as I expect them to get knocked around a bit over time and i want them really firmly in the board.
60913
Post by: Largo39
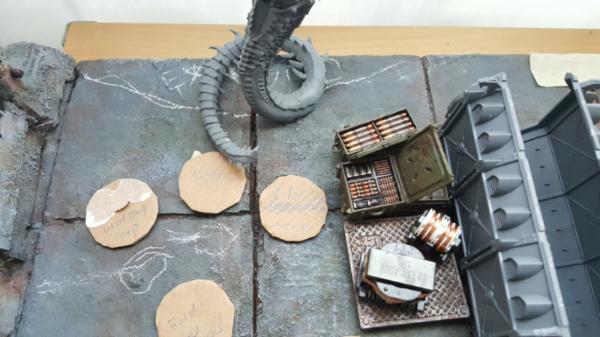
So first up, time to dig underground.
Here's the problem: On the right side with the terminators I really want to try experimenting with el wire and making a lit flame thrower effect. Its a natural inclusion there and will be a good tutorial for future flamethrower effects that have less room. So I figure I hid the battery/transformer in my crate and hide the wires underground to the marine. Easy peasy
The trick is making the HOLE underground. First I punched a hole below the crate, no problem. I made a smaller hole below the marine I can alter fill with rubble and cover up, to connect them i started by just taking wire and trying to force it through the foam.
This worked.. for about 2 inches. After which point the density of foam built up in front of the wire was too much to be safe/not wreck things. So I figured, okay, heat the wire! I started by trying to apply the soldering iron directly to the wire while itw as in the hole and.. the heat dissapated too fast, not enough contact. So instead I took the wire and basically had it touch the entire length of the soldering iron so the whole wire got hot at once, then quickly jammed it in the hole to melt foam before it cooled down. Repeat for.. ugh, an hour? and voila! digging underground:
Voila! Not bad. I was pretty happy. Now for the lesson in ovens.
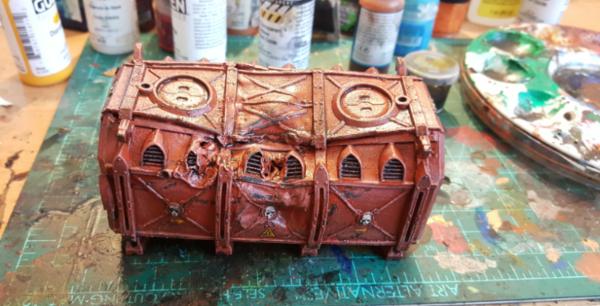
Okay so for the crate that the neurothrope breaks out ( SL) I wanted about half ot it blown off/around/etc. General feeling of lots of bent metal as this neurothrope, PISSED, breaks out. The cover of the container holdeing him is blown off into a psyker trying to contain him and the crate end is also just trashed. So I figure, okay, I partially build this container and stick it in the oven at a low temperature. I know plastic melts theoretically at 450 and water boils/softens it at 260 or whatever, so 250 and voila, it'll be pliable for a bit and i can bend the ends that are weaker and arnt glued.
as soon as it barely gets to 250 well.. this happened:
I've never quite ruined something before so completely, but boy did i now. It just.. shrank. nothing usable, nothing I can bend back into shape just a shriveled little mess. Sigh, well, now im out of crates, as is my local store so now I need to do something else while i wait a while for a new shipmant...
52201
Post by: evildrcheese
Awesome looking diorama, your wooden pallets looks great, did you build them yourself?
Ii think the melted container looks cool, like the metal of the container has been bent out if shape by some psychic force, I'm sure you could use it for something.
EDC
60913
Post by: Largo39
Yep built the containers myself. nott oo difficult, just a lot of cutting popsicles in half.
Yeah im not going to toss the scrap plastic, its just not what I need right now for the neurothrope bursting out diorama.
60913
Post by: Largo39
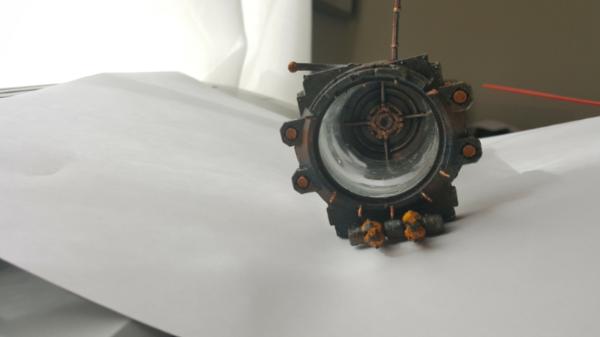
So, as I wait for my store to get more munitorum armoured crates its time to work on something else. First up is the bio containment unit that formerly contained the neurothrope.
The most important piece to this is the container itself. I need it to be clear (as they always are) and as wide as it will get and still fit within a crate. But it cant be too long as I want about 1/3rd of the crate left over for electronics and things.
This turned out to be a tricky one, as most plastic bottles were too small. Anything the right size (like a pill bottle) wasnt clear. The only thing I had was a spice bottle made out of glass that was correct, but it didnt seem like it would be a good idea to cut glass. Half a day of searching later and yeah, still the only option. So cutting glass we go!
Few thoughts:
1. its tough. Basicalyly you get a glass cutter or some other very sharp thing and draw a straight line all the way around the glass. This was probably the trickiest part, because the glass is so smooth it slips often and any slips means it cracks down the slip instead of the line, not fun.
2. have more than 1 bottle tot ry this one. I totally botched the first one, but the second attempt was much better and by the 3rd I had something I was happy with.
3. once you cut the glass get 2 pots ready. One with salt to boil, the other with ice. basically you just dip the bottle up to the line of your cut in one for abit, then dunk in the other for a while. Do that back and forth untily ou hear it crack and pull off the excess glass.
4. The good news is that if you have leftover jaggies or other chunks of glass you can use pliers to just crush it directly, its pretty brittle on on the edge.
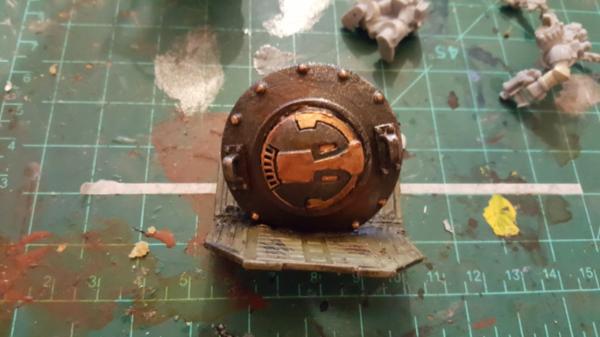
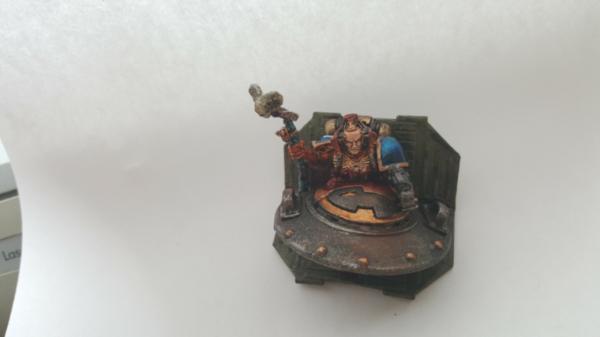
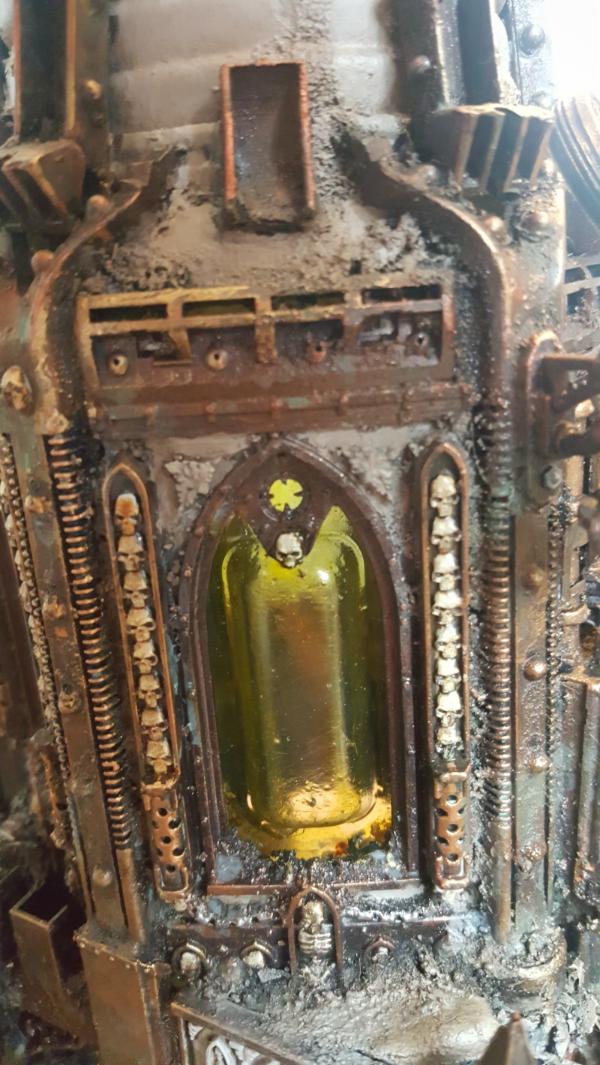
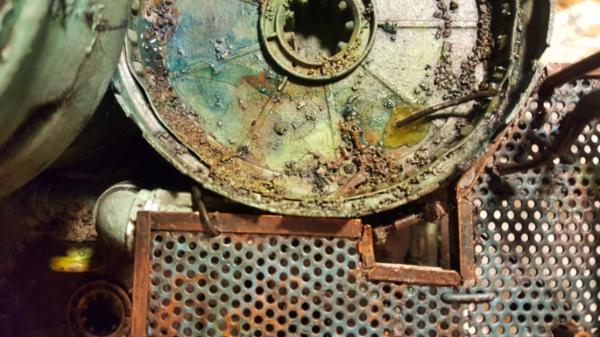
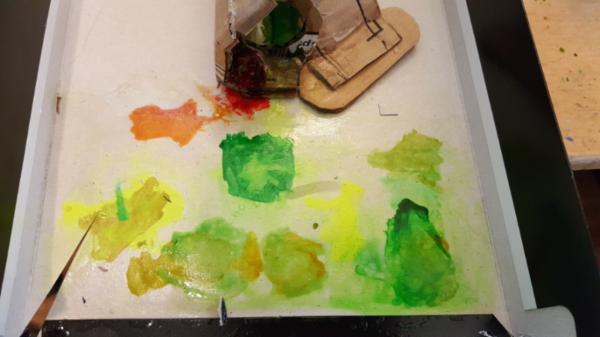
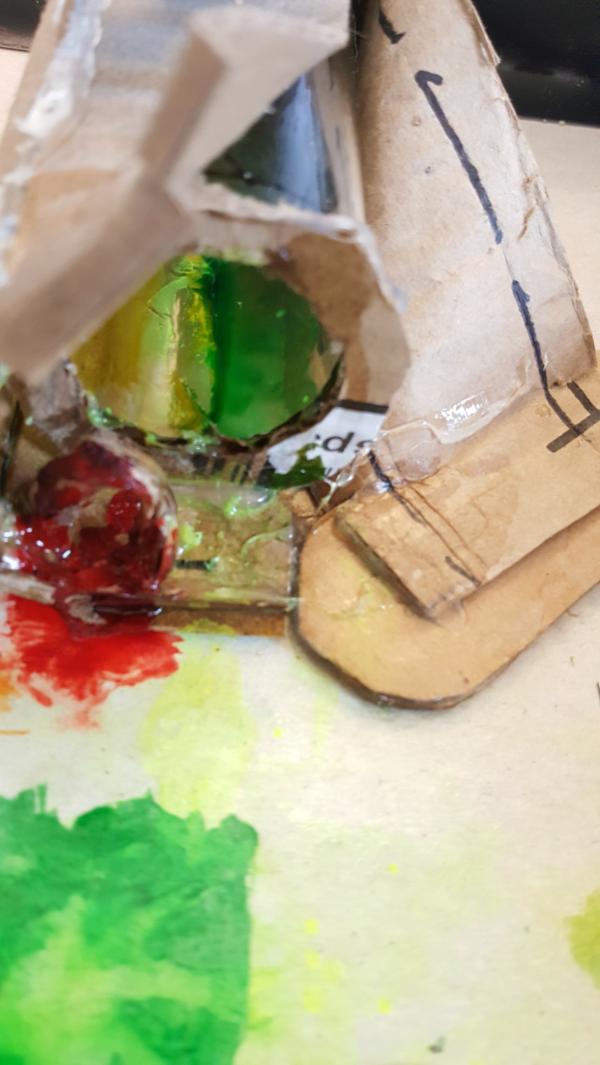
Next up the rest o the day was figuring out the apparatus around containment, and thankfully the lid of my bottle (spice bottle) was semi-convex and perfect as an endcap, and I had some plastic laying around which also made a nice front faceplate, after that it was just filling in detail! Design wise im happy with the result, basically the idea is that the front coverplate was designed to only be removed once the creature was safely in it's new laboratory, so it just screws in directly to the frame, with even more clamps on the bottom to hold it on. The neurothrope was.. angry.


85400
Post by: Mad..
Wow.... this thread is awesome, not sure how I have missed it for this long 
Great work in here and some awesome ideas and great use of day to day stuff.
Definitely going to be following this moving forward, loving your work!
60913
Post by: Largo39
Thanks!
Few things today;
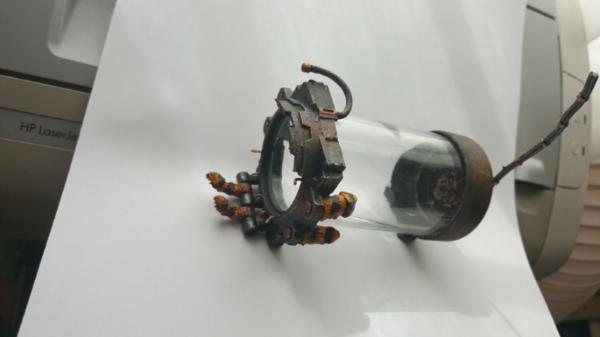
First up is deisning the coverplate of the bio-containment unit. More specifically, designing how it was blown off. The idea being that the neurothrope bursts out the door which is blown off which such speed it cuts the librarian guarding the neuromancer in half and also blows open the crate. So thats waht this is:
all ready for priming!
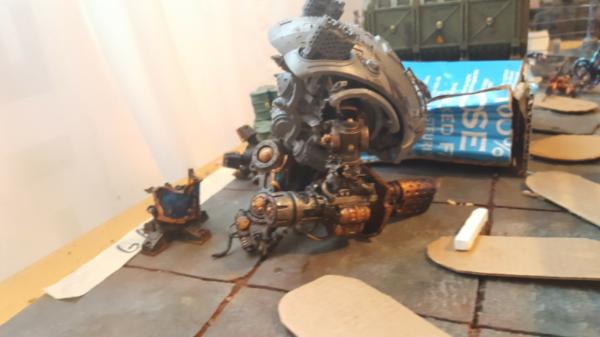
And we also have the beginnings of my crashed knight. Figuring out pose and how his left hand/arm will be crashed against a crate and so forth. This is one where the lack of leg poseability bit me in the butt, but i made do by basically accepting it and working with the result. So the left leg, which is more extended, is basically posed as is, just further back on the hip than normal. I plan on cutting and reposing the toes and fixing cables as needed but thats it.
The right leg is where it gets tricky, as there is no easy way to repose, so i think im just going to cut it off. The idea being the right leg got blown off mid stride and that's what caused the knight to brace itself with its arms.
60913
Post by: Largo39
More work posing!
First up we have more final looks for the legs:
I had to make a new piston out of scratch due to bits stealing for the garage, but yeah. I also went ahead and cut and bent in the toes. The green stuff filling is a bit crude, im finding the green stuff I use just.. isnt as good as GW's. Its some other 2 part which gets really chalky and crumbly, doesnt quite hold together (milliput I guess is what it's called? I didnt realize there was such a variety..) .
http://www.bananaking.net/cento/workshop/conv_green.htm#whitestuff
But, to be honest, the distance away you'll be looking at it and how dark it'll be it'll be good enough.
Blowing up the leg was fun. Basically the idea is that upon walking out the knight was struck from behind by a flyrant, which crippled it, and thent he swarmlord leapt to the top to finish the job by scissoring the driver.
We also have some work figuring out where the hands go:
this is where its getting tricky as the left hand position greatly determies the twist of the knight overall, but is itself determind by how crumpled the crate ends up being. Ugh
Im also trying to figure out the cut for all this to make it a base.
It's not going very well. I have one chance at this and i dont even know the angle needed given how much I have to hold together, let alone how big a theoretical plastic primarch + swarmlord is. Ugh.
100928
Post by: Alaricuk
Loving the colour tones on those busted knight parts,,, very nicely done
60913
Post by: Largo39
Thanks! Worked on some of the leg armour plates too, pretty exciting!

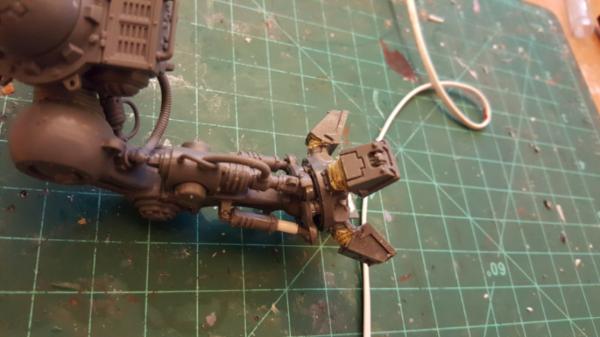
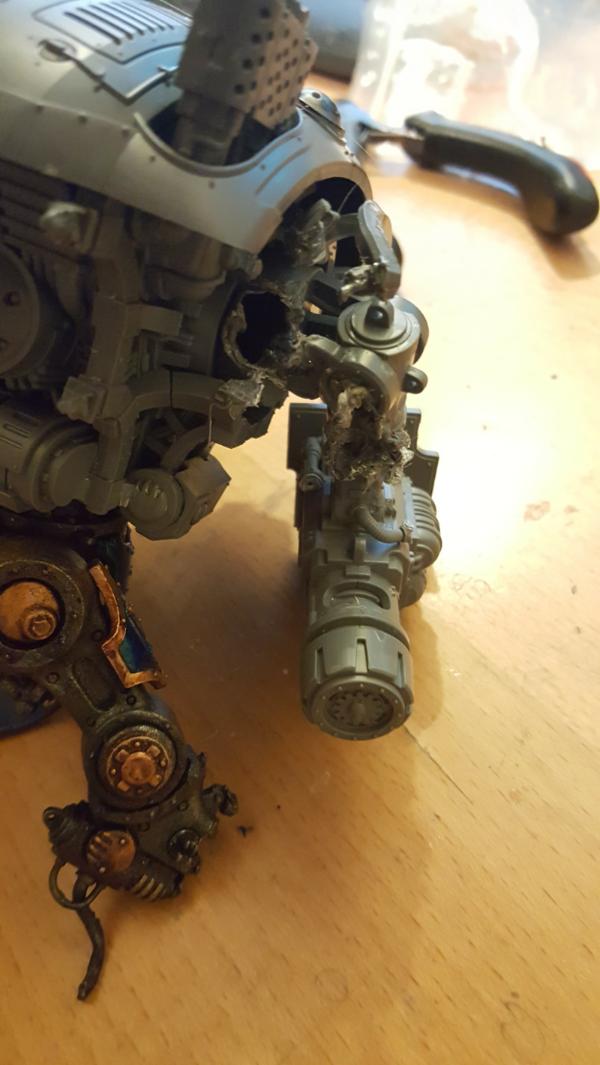
Then it was time to work on the right arm/shoulder keepign the knight upright. The base idea is the right shoulder gets blown off and is what strikes the bio container, freeing the neurothrope. Also it means more of the under structure gets exposed which is the prettiest part of knights. So we need to make a convining melted twisted arm thats still "intact" but not really functional. Hello soldering iron time!
I really like that the melted bits twist around, happy with how that turned out.
Hm, this area feels a bit too clean though, the explosion isnt big enough, something to think about:
Testing out it being supported:
The shoulder hole:
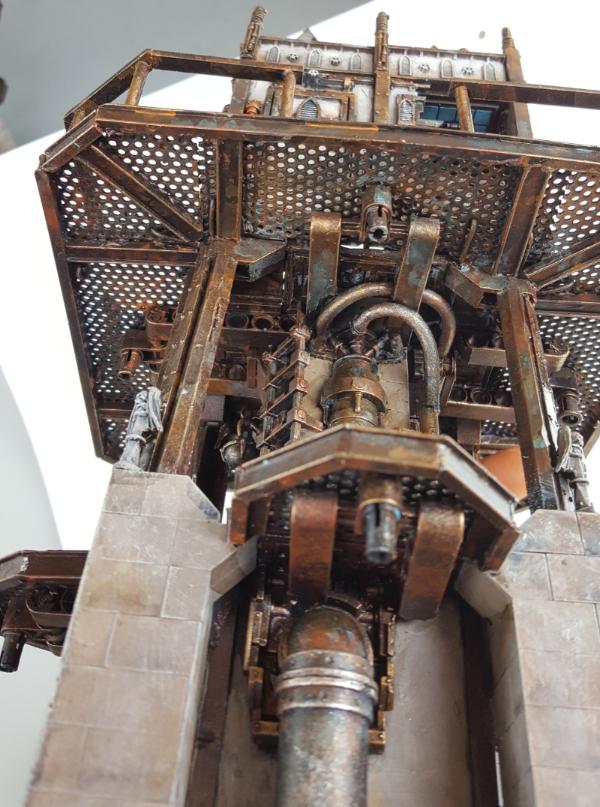
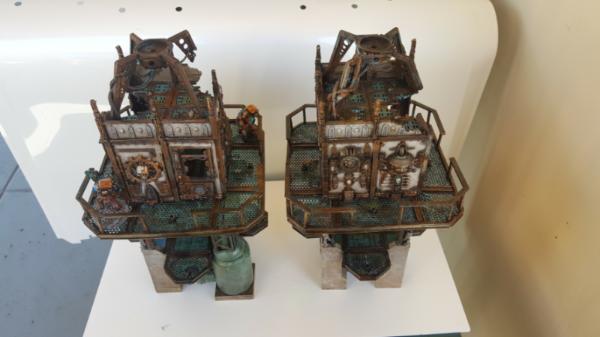
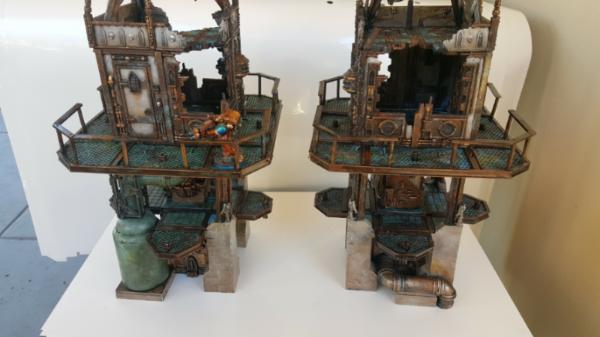
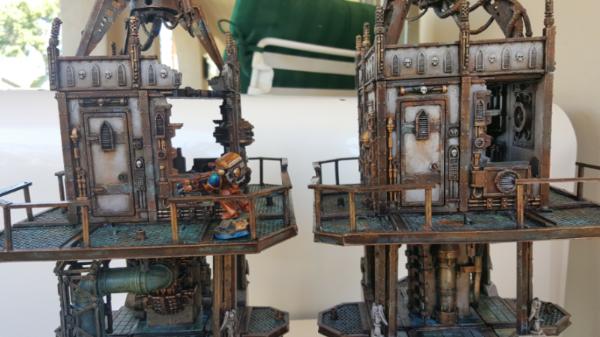
I also had a apostrophe about the other tile design. I've been struggling a lot with what to pair with the garage. Original it was to be the flak tower I modelled but thats just wayyy too bulky, no way that would comfortably fit with the garage. Next was a more subdued oil/gas refinery and containment area with walkways connecting the garage to a radar dish. But then as far as base design goes its wierd. We have this supply depot tile we're making in front which leads to.. just a garage? Do I need a gate embedded in the walls to simulated "more base"? I dunno, it was gelling.
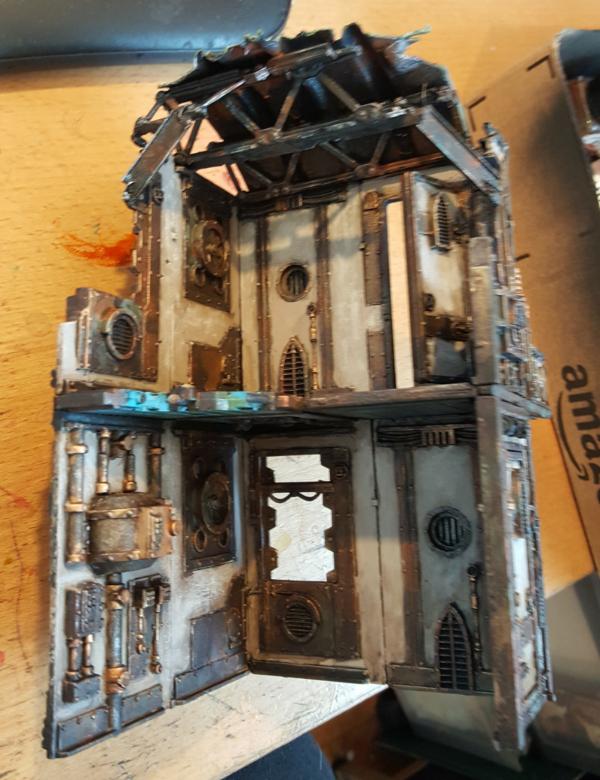
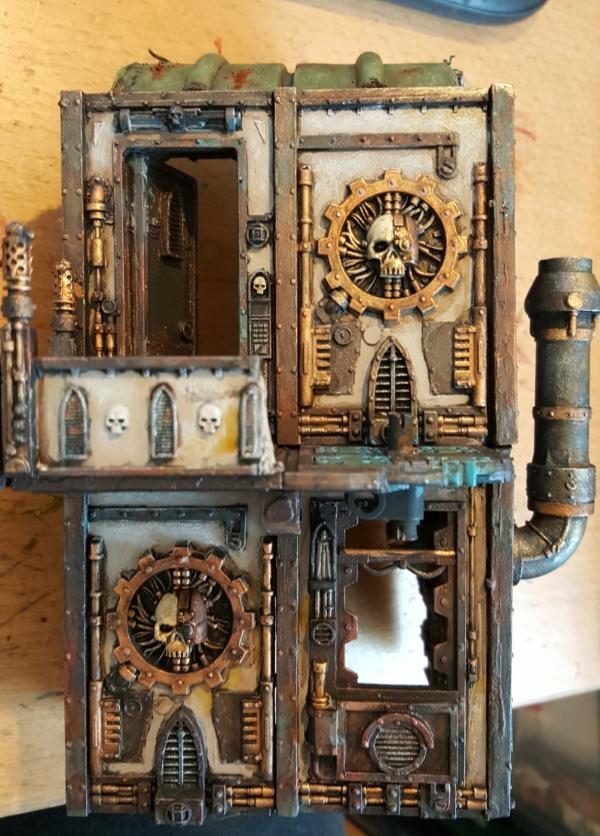
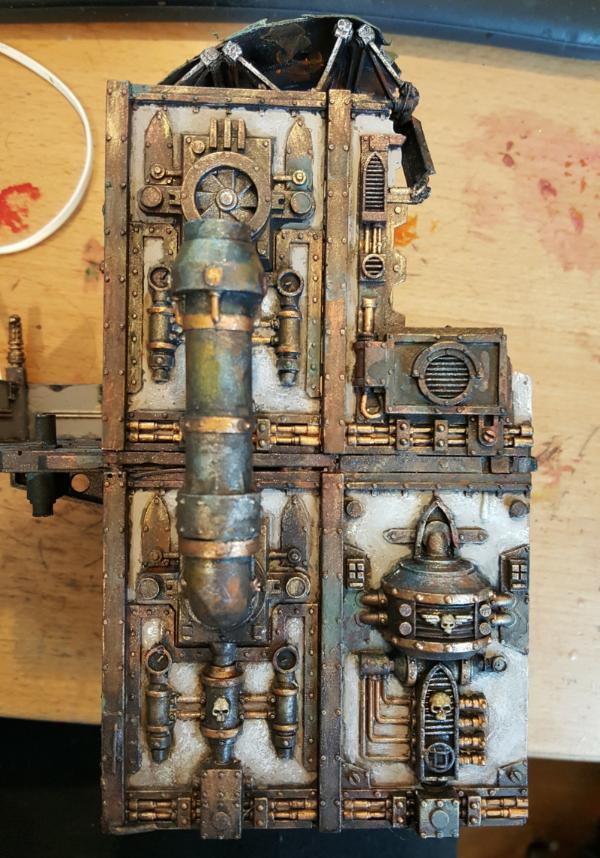
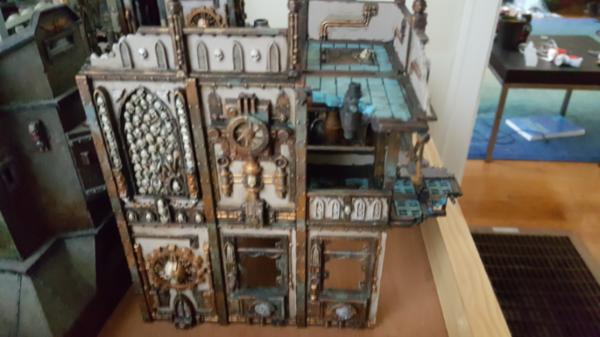
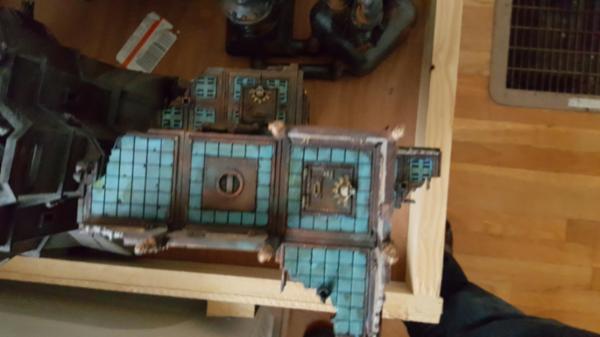
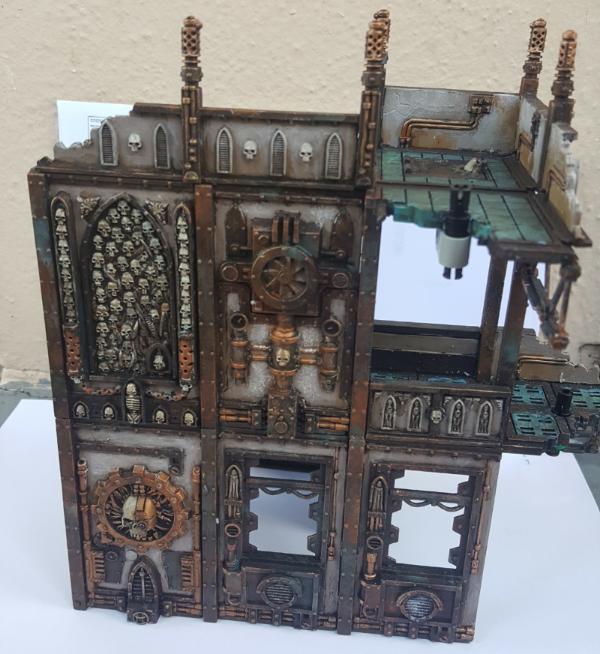
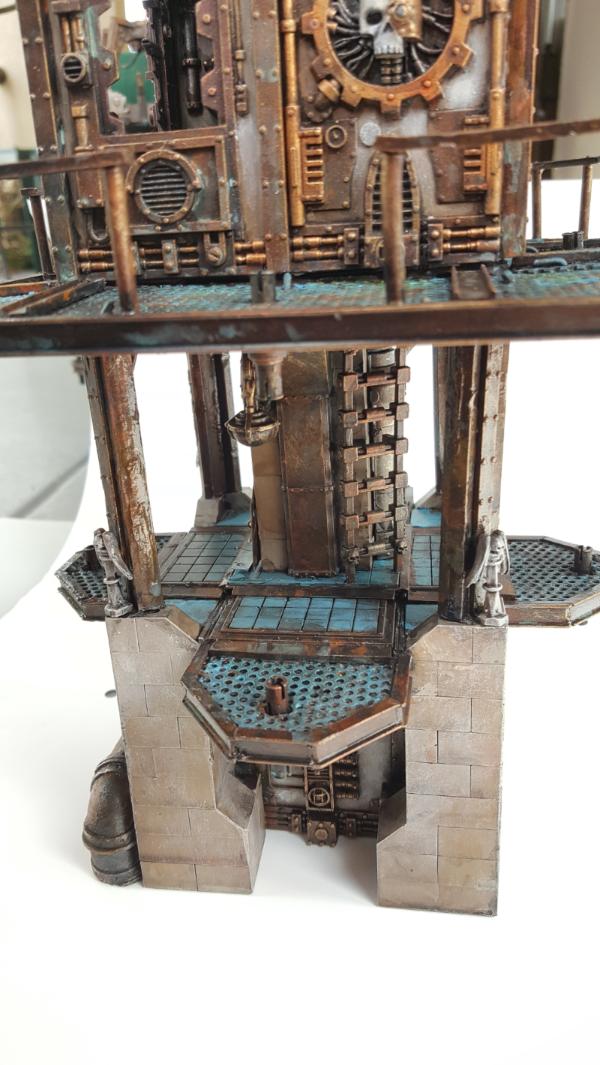
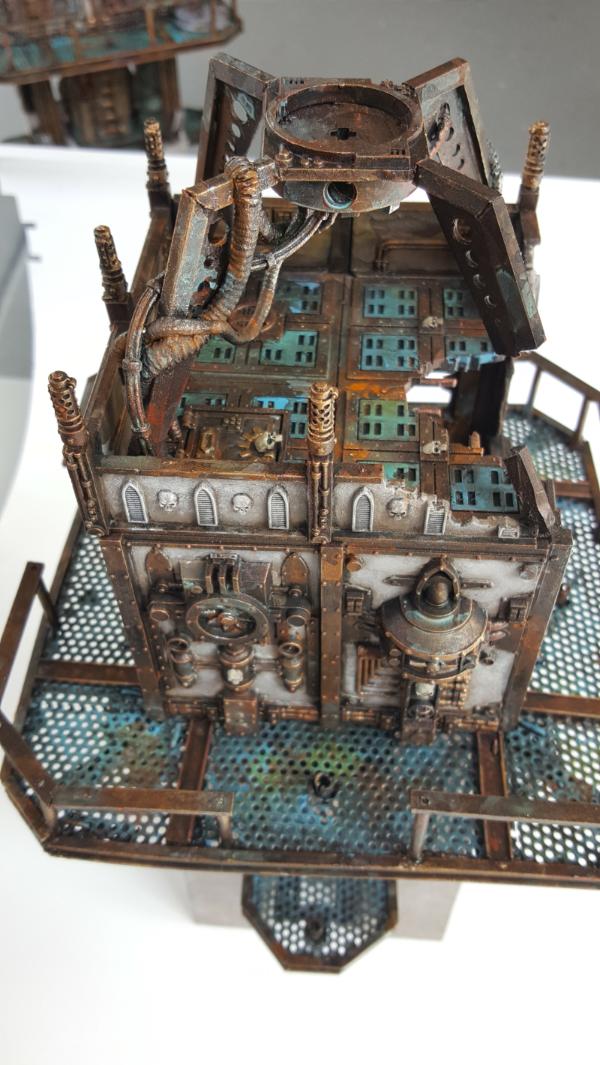
Finally though I just had this idea Which i think will work nicely. It allows for marble stairs for at least some of my pretty veterans, but also makes sense. Welcome to my new base design!
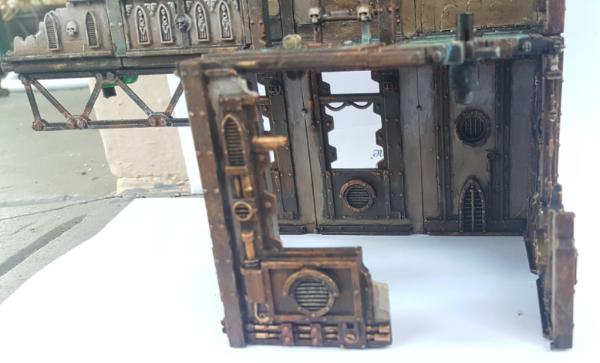
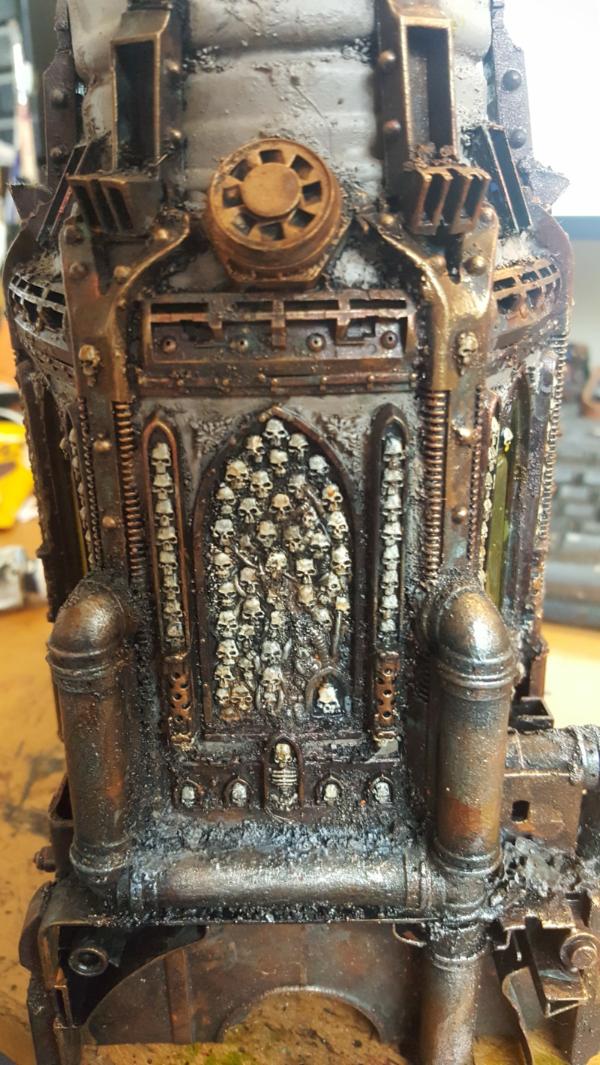
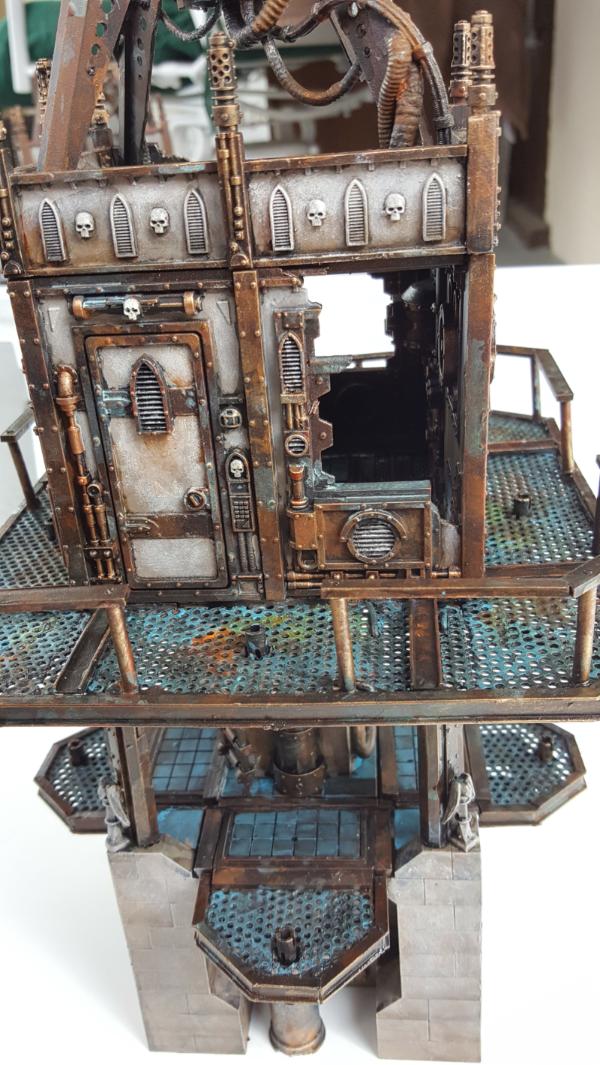
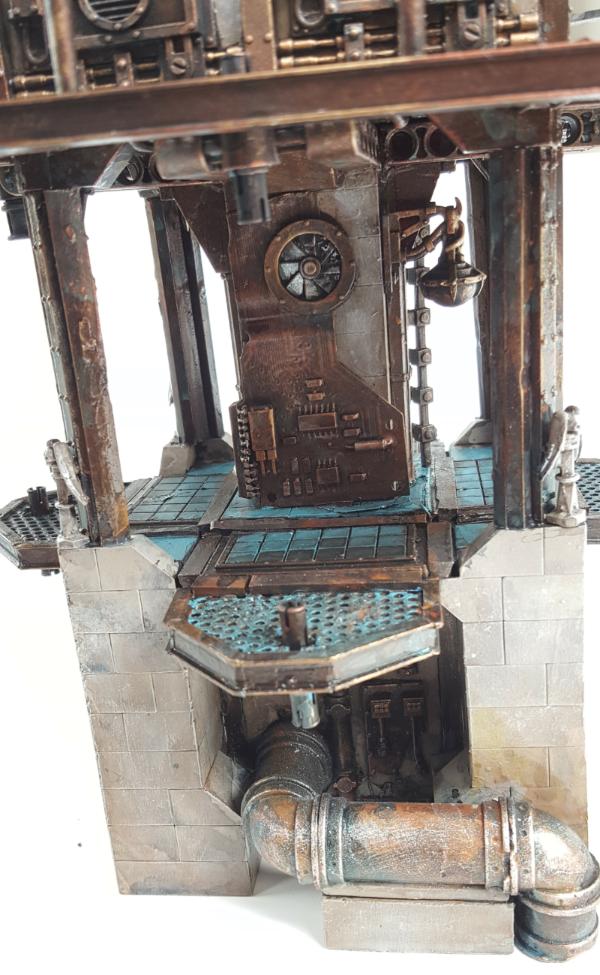
So first the white area is a small church. I figure i make something of a more traditional classic gothic church, Very imperial, very old, something that he marines would keep around as part of emperor worship. It'll only be about 4 inches wide but thats enough and makes sense if you see the marines schedule (no free time! lol). The marble steps outside would probably have to be remade, but thats okay. Ill just be left with a smaller marble steps that handles 5 vetereans and these bigger variety that handle 10.
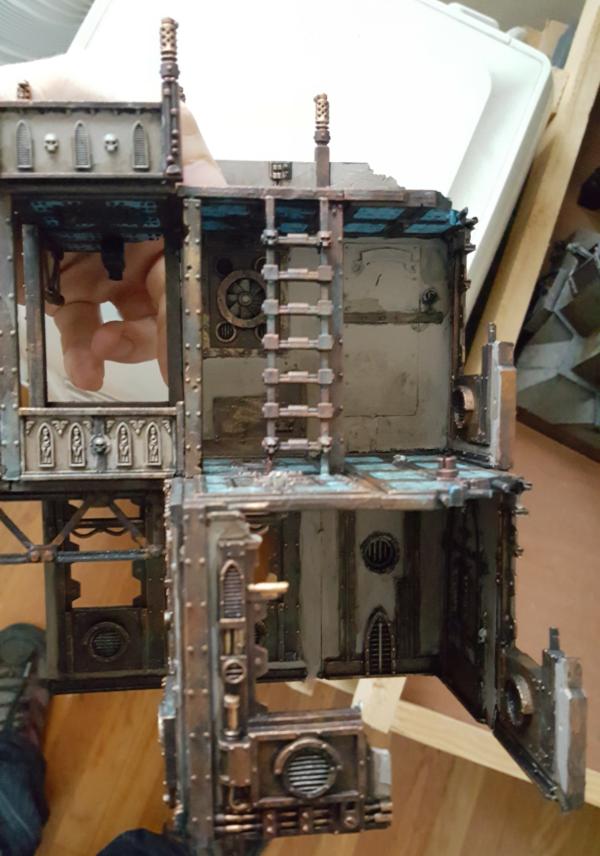
THen we have the marine barracks, I figure I can comfortably fit in 2 stories with a third half story thats above the garage. The stories will be tall but thats okay, bottom floor is designed as you see, stairway, the back corner is the medical area, and the area adjacent to the church is a firiing range. The goal with this design i sto have both back walls be cutaways, so you can leave them off and see/play with the entire innards of the base, so the only "ianccessable" area is the stairway, but everywhere else could be something thats usable. Hence the more open design.
The second floor then is the main kitchen/sleeping area and I plan on being just one big open room, again for above.
Finally the half third floor, with radar dish on top, will be the captains quarters and general war room.
tyhere's a lot to do, but i think the idea is solid and gives me a third terrain type (barracks roof/lots of pipes/concrete/etc) from which to make bases for snipers/devastators/etc. Then we also get a nice visual of the flyrant landing on the church steeple and yeah, should be fun. More importantly though it all seems to fit okay and actually seems like a small but functioning barracks. on the second floor I think i can get upwards of 18 beds reasonably stacked and sized to marines and that seems about right for a base this size.
20ish marines, 40 if need be in 2 shifts. Not bad.
60913
Post by: Largo39
So now that I have my crushable proxy and arms done I can check to see how my pose is working out for realz and start to create pin points for the legs and so forth.
The answer is.. seems to be working well! The crate will end up a little off from the others but given the amount of force it takes to crumple one of these i thinki thats okay haha.
I'm also trying to work out the interior and figure out amongst my bit piles what to do, I need a chair, console and backing at minimum. The question is how much to care abou tthe side walls and whether ot close them off or not or have gears or something. Dunno. I also, again, have to consider the cut through all this and keep that in mind. Maybe its better to wait until after I cut it in half? ugh.
60913
Post by: Largo39
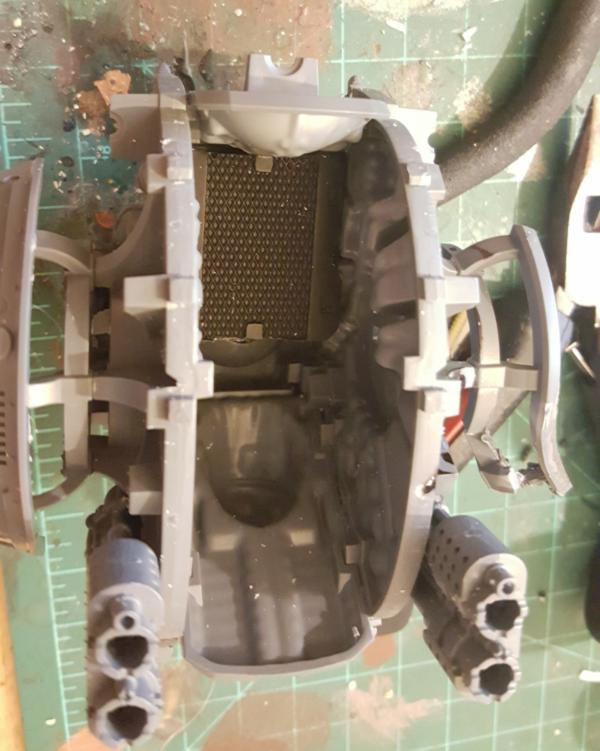
More work on the interior. I decided not to add sidewalls and just let it be more bare in there, you wont really see the lumps/curves from casting and lets me make the console bigger, which is cool.
Nice big console, all the buttons!
basic chair:
and a backplate behind the chair, this turned out fun:
I also decided to wreck the knight some more, my explosion wasnt big enough! it now feels much weightier and more crippled.
62835
Post by: IGtR=
Madness! But brillliant
60913
Post by: Largo39
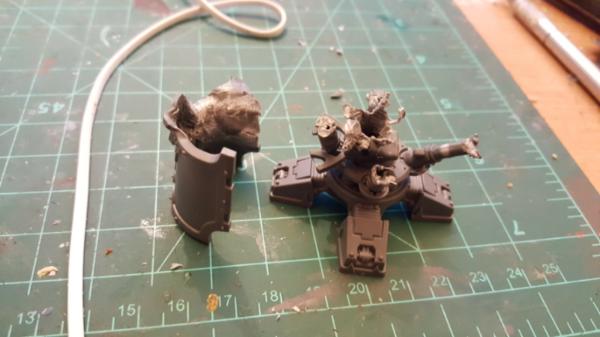
So, the knight. I've been struggling a lot with how to cut the torso to make the knight base. I did all this work painting/posing the arms and pinnin them down just to more precisely figure out the cut, but even still i didnt have anything 100%. Given that I only get 1 shot at it... I was nervous.
But then came the real problem realization. I dont and wont for a while, know how BIG to make the base. I know how big a swarmlord is, sure, but I dont know how big the (rumoured) plastic primarch will be,a nd I wouldnt be surprised if the 2 of them together took up the WHOLE top of the knight, at which point why am I cutting it?
So I realized 2 things. First there are 2 main things to account for:
the primarh cant be permenently pinned as it should be playable
for painting competitions I want the full setup (kinight + primarch + swarmlord), BUT painting competitions dont really have a height maximum for scenic stuff.
Thus my realization: just have the ENTIRE knight torso be the base. Then I just need another hip which I embed into something heavy and cut the exploded arm so it slides in properly. The left/hand arm I can have leaning on something specific to the base and voila, im done. It's big, but thats fine, and WAY less risk in cutting. Then when I want to play with the primarch seperatly he just is pinned in without glue or magnetized and just has his own base thats more normal. This is a bit of a reversal from my general base tendencies but you're only ever going to see him all together on the board, all together in whatever painting competition I can try this in, or on the table briefly, so its okay to not be par tof a knight for that third case because its relatively rare.
So these parts will just always be on the ground:
and the torso just slots right in:
Much better. also its painted! Now I can paint up the shoulder/cover and attach the left arm!
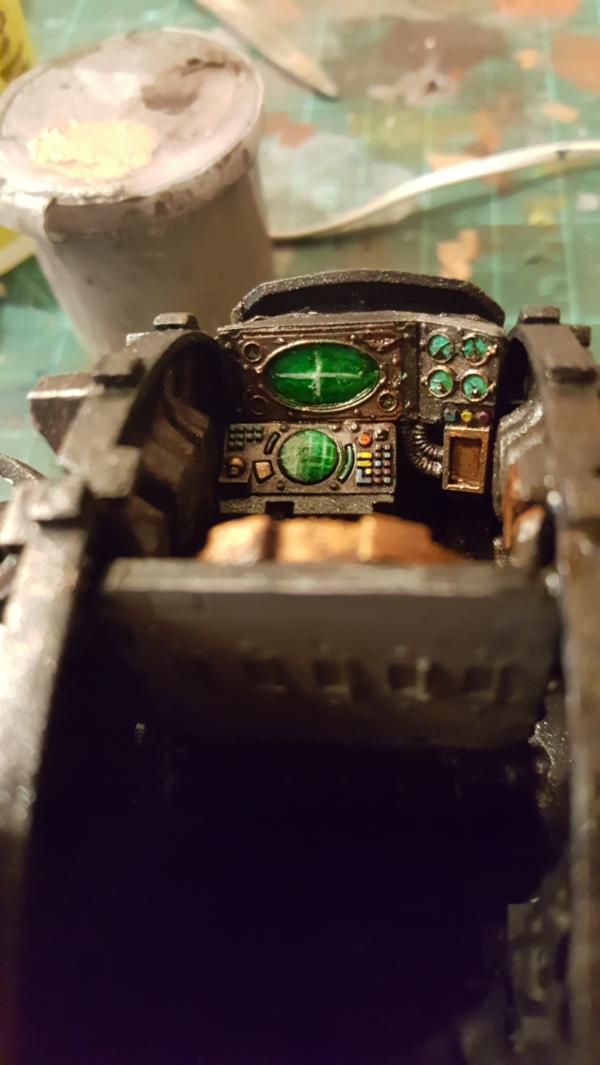
Also the cockpit is done:
60913
Post by: Largo39
It lives! Now to get the arm on! once i .. get MY DARN CRATES IN. ARGH ARGH. still waiting....
anyhoo, super pleased with the results though, the blue worked great on such a large surface.
60913
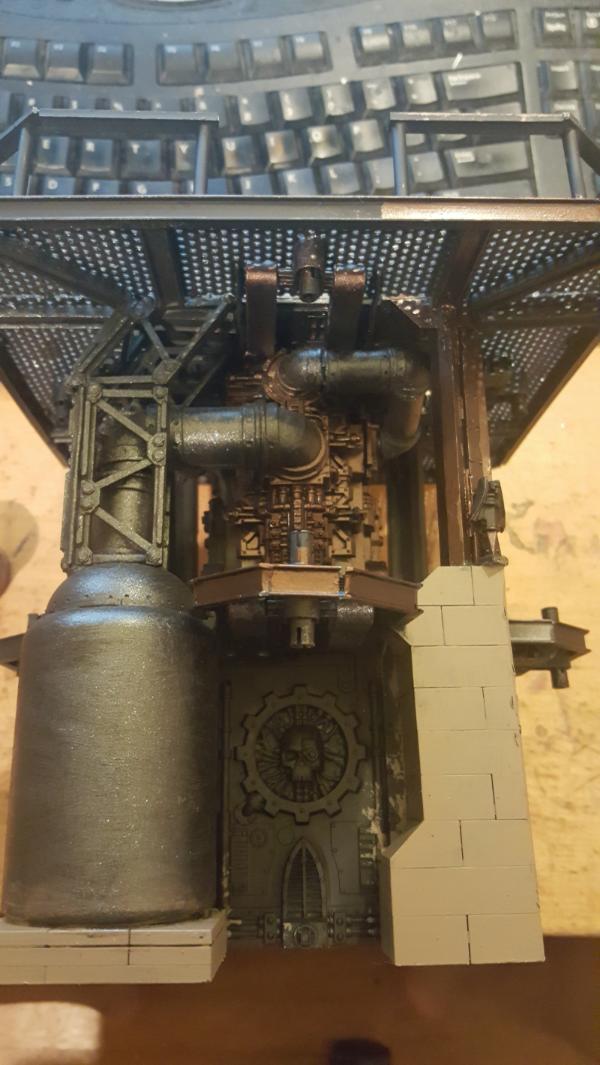
Post by: Largo39
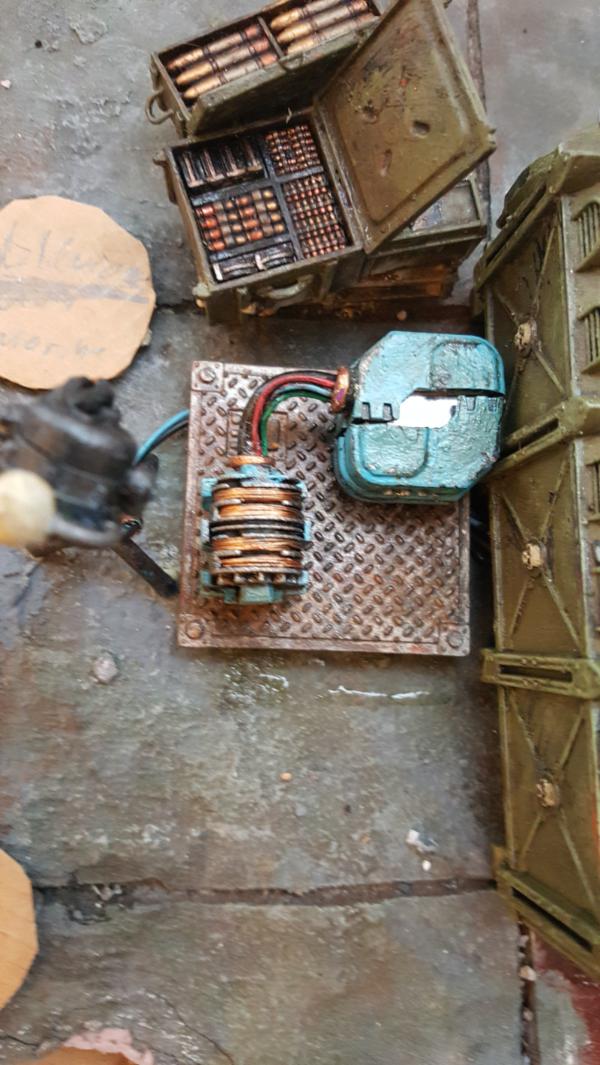
So still waiting on my second crate set to come in, so I figured id make a spotlight for my metal platform, also might as well put an LED in there too. I may not have it light up, but it would be good to atl east have the option to.
FIrst step was cutting out the "glass" in the existing spotlight bit, this proved tricky as it's pretty thick, so i ended up drilling it out. This meant I had to remake the bars which I did with wire and i think it works reasonably well.
I then inserted some frosted plastic to have a real lens

And added my lightbulb! all pretty straightforward. The coloring is my normal dark metal just to have it be there and pretty but not something to pay TOO close attention too. I want this spotlight to be more of that "filler" detail that you appreciate but dont need to look at tooo closely. Otherwise u'll see the shrink wrap coming out the back
One thing not pictured is i added some tinfoil to behind the LED in an attempt to make this thing as bright as possible. One thing i've been nociting is that in full light the LEDs can get lost. Which thats not bad, it just means I want to do everything possible to put out as much light, so I can then filter it down later as needed when I see it all together.
60913
Post by: Largo39
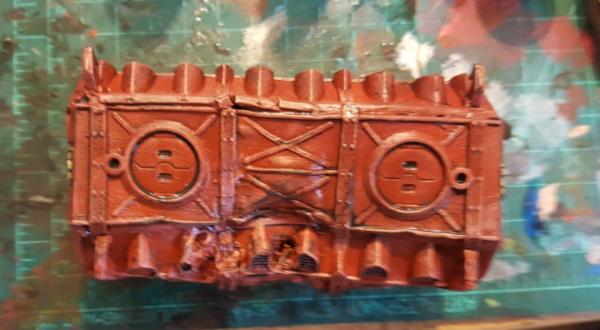
So my armoured crates FINALLY came in, yay! time to break one!
First up it's time to pose out my remaining ammo crates and bits and get a final detritus layout:

Okay now that thats done its crumple time!
So we've learned from the oven experience: no ovens. The problem is that the soldering iron isnt really good at heating large areas. So my new solution: boiling salt water!
i get to more easily control which side is bending and how long to keep it in there. For the crumpled crate, since the corner is what's crumpling, I figure'd id do it on a per-side bases. So I started with the verticle side crumpling and then glued on the roof and started bending it down. It worked.. reasonably well?

Even then though getting that joint to line up will take some more work. As the verticle side crumpled it also crumpled in the horizotnal axis so the roof plate no longer lines up. Bleh, tricky.
Still, with finageling and lots of soldering "welding" I managed to get them aligned and crumpled. Putting the back on took some work too and I had to crack the plastic to get it all to fit.
95173
Post by: ROTTEN_FACTORY
Looks really great ! The ideas and painting are awesome . I will definitely follow this thread.
60913
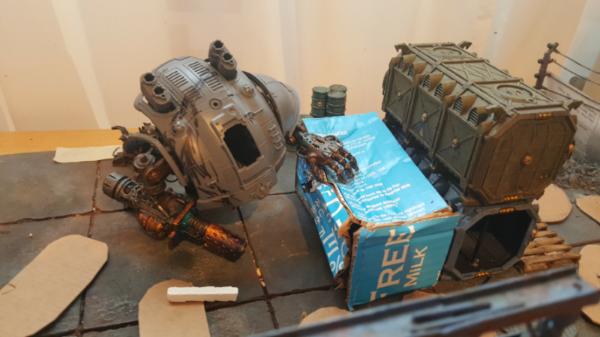
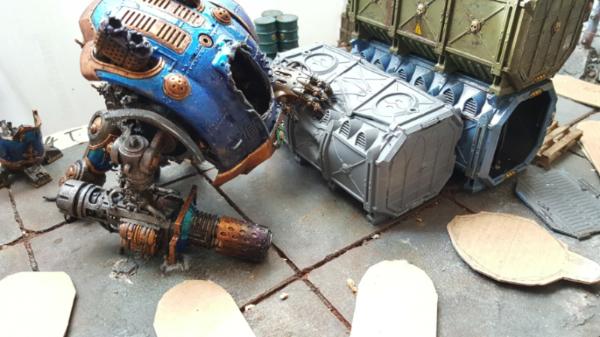
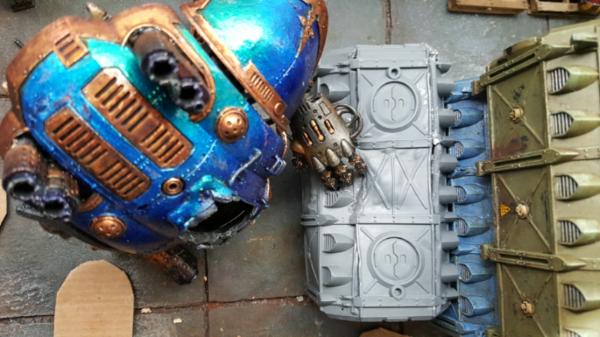
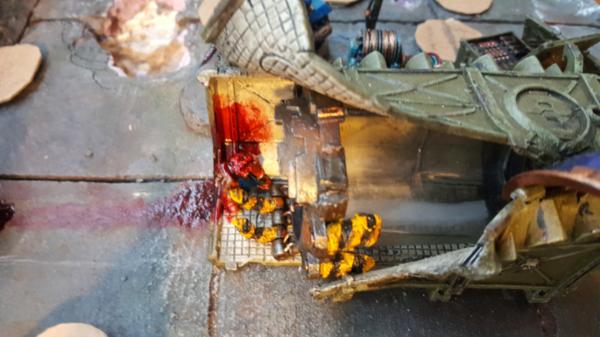
Post by: Largo39
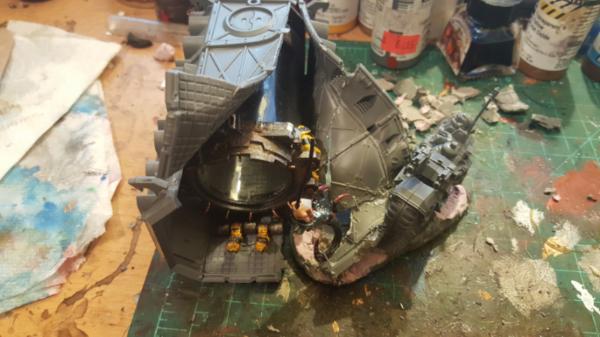
So next up we have the armoured container for the bio-containment unit. This one we explode and I also wanted to have the neurothrope vs khan base involved in that explosion, so we need to have wahtever warped metal I have line up between them.
Turned out that was tricky.
First up was bending it at all. The plan of attack was to glue firmly the left side of the container pretty well,m as that would warp all together. Then the back cover and right side would be more lightly glued, as I would need to potentially take off both in order to get the container in there/paint the insides.
But i still wanted them glued down somewhat to make bending more reliable and easier. Then I once again got my pot of boiling salt water and dipped the exploded end in there and sloowllly bent.
Fun fact, holding something over boiling steam hurts, ugh, lot of boiling vapor.
FIrst results were not bad:
but then it came to actually figuring out hwot he base works. What I really want is something like this:
with the bike/khan going up the ramp to face the newly escaped neurothrope. Problem is is that the bend of the curve is the wrong way, so thats.. ugh. Furthermore that piece of plastic cracked in 2 places so jsut keeping it together was tough. I tried superglue.. nada, I tried "welding" it with plastic to remake it into 1 solid piece.. nada. Not fun.
I thought "screw it" maybe I just flip it around and say F it all.

The bike is now on a ramp but.. ugh, the neurothrope is turning around? and its kinda impacting my knight diorama since its tall thing (knight) next to tall thing (neurothrope). Dunno, kinda stuck right now.
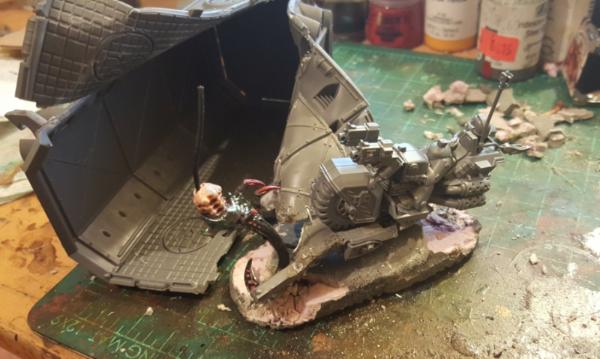
60913
Post by: Largo39
So, in the end, I just oculdnt accept the bike/neurothrope facing the wrong way. So I went back to the drawing board with this. THe first thing I did was pin the damn ramp to itself, to make posing all this easier.
I can cover it up with green stuff but man did that make this a smoother process.
Next up I dug out the other end of the base and bent a few more things around and managed to get it ramp like.
It took some pins of the plastic into the tile (not permenent ones, still gotta paint all this) but it does work and lines up better. AND the bike works! Phew, toughie.

Still working on a final bike pose but hey, i have options.
85400
Post by: Mad..
You've been busy!
Stunning work on the knight and the container it has stumbled onto, is really effective, and I'm liking what you are up to with the exploded container... thoroughly enjoying reading through your updates as there is some awesome work and fantastic ideas in here!
52201
Post by: evildrcheese
Looking good. The wrecked nice on the damaged container look super cool. The way you've done the damage looks perfect.
EDC
60913
Post by: Largo39
Thanks all! It's taken a while but the results are coming in! I'm pretty happy.
Now I just need to stop thinking of new things that would look cool. Sigh. As you'll see later today once I upload everything I got a little distracted making things glow... Automatically Appended Next Post: Okay so, today is an example of when your mind goes "wouldnt it be cool if" and the rest of you goes "crap, now I have to do it"
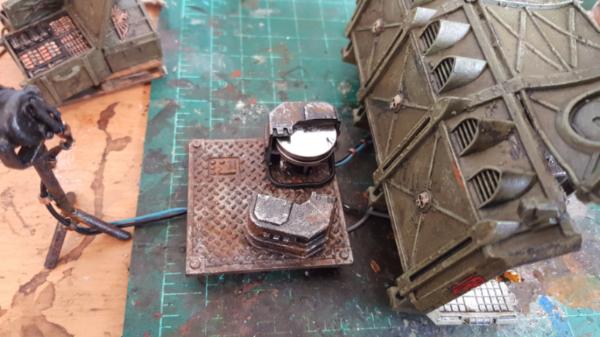
So the idea was to make the bio-containment unit light up. I figured a nice glow effect would really sell any remaining liquid in it and also help highlight some of the details in there. I also had 3 LEDs left and it's 2 per loop so I figured id hook up my spotlight as well and get it all working.
Sigh.
First up was making the light strip. I had 3 LEDs but, as with the garage lights, I want to diffuse them a bit. I also wanted to try adding a reflector behind the light to see if I can brighten it more/lose less light. Its always easier to tint something on top than it is to make it brighter, so I figured id start bright and work from there.
Next I eed a container for the batteries. The LEDS under the bio container I can easily bury, but the battery holder needs to be exposed so I can more easily swap it out, that implies some kind of box.
First up I figured i'd start with 2032 penny battery holders and maybe wrap it in a pipe or something:
but after an hour or so of fiddling I couldnt really think of something that would make it easy to remove the batterys, and be sturdy, and be relatively fixed. So I scrapped the holders and realized I had a lot of knight bits. Digging around I discovered that the "ammo" covers for one of the random knight guns perfectly holds penny batteries.
So thats where I ended things for the day, figuring that out and also painting up the interior of the container. I wanted it to be bright so you'd get more light bouncing around and it would be more contrast to the darker container.
95173
Post by: ROTTEN_FACTORY
WOW great updates . The damaged container looks great.
I'm curious how the bio container will look like in the end .
60913
Post by: Largo39
So here's a fun challenge. Paint something while its on a string. its really wierd.
Here was the problem: I had to set up the circuit first before I painted the battery holder. As I knew Id be fiddling with it a lot as I made the circuit and so it would almost certainly start to rub off the paint. But then i have to paint/do touchups on all 3 things (battery holder/spotlight/exploded container) all at once. I did it, it jsut.. was very awkward. Especially since as I was soldering wires I wanted at least some to have my copper tube spacers on there too....
Anyways first up was the circuit:
You can see the idea of the battery holder. I havent figured out what to do about the square gap when they are both closed but it looks so nice im not too worried, I can figure that out later:
Finally painted up and blue. I figured blue because all my fuel sources so far are blue so it seemed to line up.
Next up to make sure it lights and glue it all down.
95187
Post by: b-tone
The damaged container is a very cool idea, and perfect realization. Waiting to see where it all goes!
60913
Post by: Largo39
Haha, you and me both! so much left to do. Automatically Appended Next Post: IT LIVES. Its also very bright too! Surprisingly actually.. too bright. Which is good! because once i get the bio-liquid in there spilling out (did i mention I'm doing that too? yeah, im nuts. But i mean, if it burst out of that thing, wheres all the liquid? oozing out thats all im saying. To glue it down I just used a crap ton of gorilla glue and made a big hole underneath it so the wires would go down. Pretty straightforward and yep, its in there.
It also works well off:
I need to paint up the generator thing on the side but yah, im happy.
60913
Post by: Largo39
Sorry for the late update, busy weeekend of things! Mostly playing with fire and water! you'll see later in the week.
Anyways first up is working on a small generator to append to my little fuel reserve/battery holder. I also had to paint up the poor librarians legs, still standing after his sudden bisection.
I also needed a power/fuel line cable so I whipped this up. Its not actually painted yet, but I just wanted to shwo you what i've been using lately as primer for this sort of thing. Basically with these particular plastics.. nothing really holds. So I just use some tamiya smoke as an undercoat and it seems to hold slightlly betterthan actual primer (I guess because its an alcohol based acrylic? dunno). Its a fast way to start getting paint on it at least.
60913
Post by: Largo39
So at this point I'm mostly waiting on EL wire for my flame effect and my shipment of Magic Water to come in for my water effect. Also im still unsure how its all going to work regardless. So I figured I'd do something that i know WILL work and add hero effects aroudn the board to sell things a bit better.
Effects such assss blood streaks:
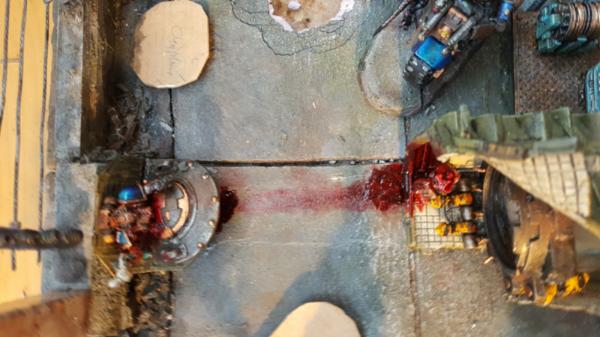
Leaking oil for the leg:
And leaking waste for my barrels.
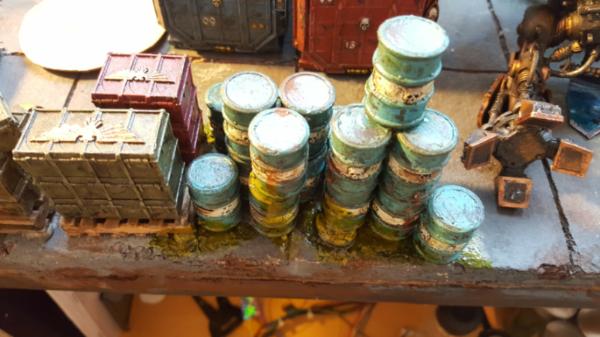
60913
Post by: Largo39
Time to rip apart a base! Wait, what? Yeah. Ergh.
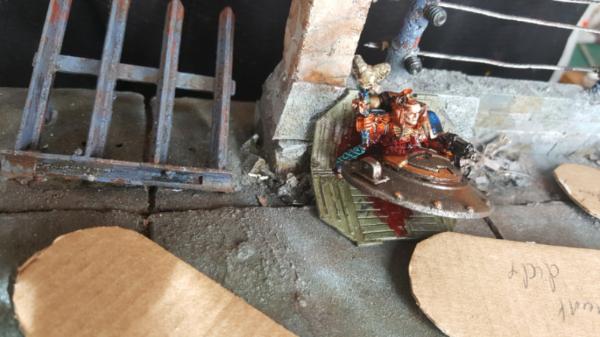
So as i run out of things to do stalling for water I realized i should actually finish the khan/neurothrope base so it too can get wet, as there would definitely be fluid spilling onto it after the pour.
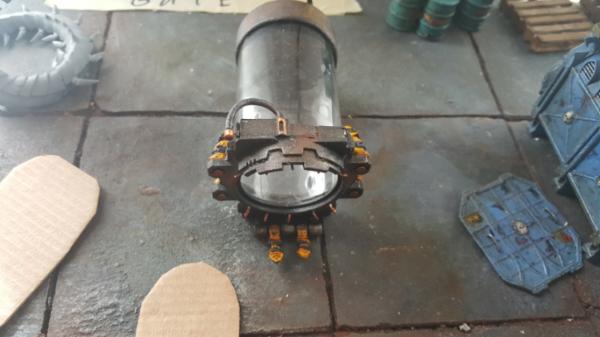
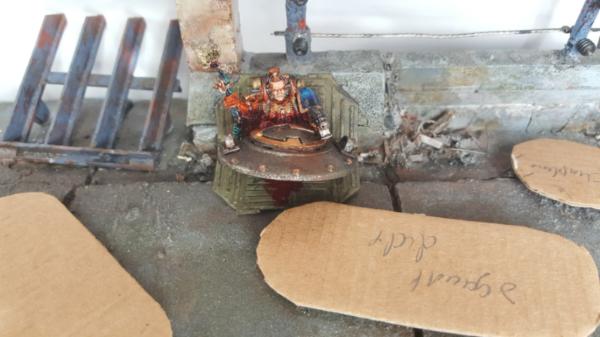
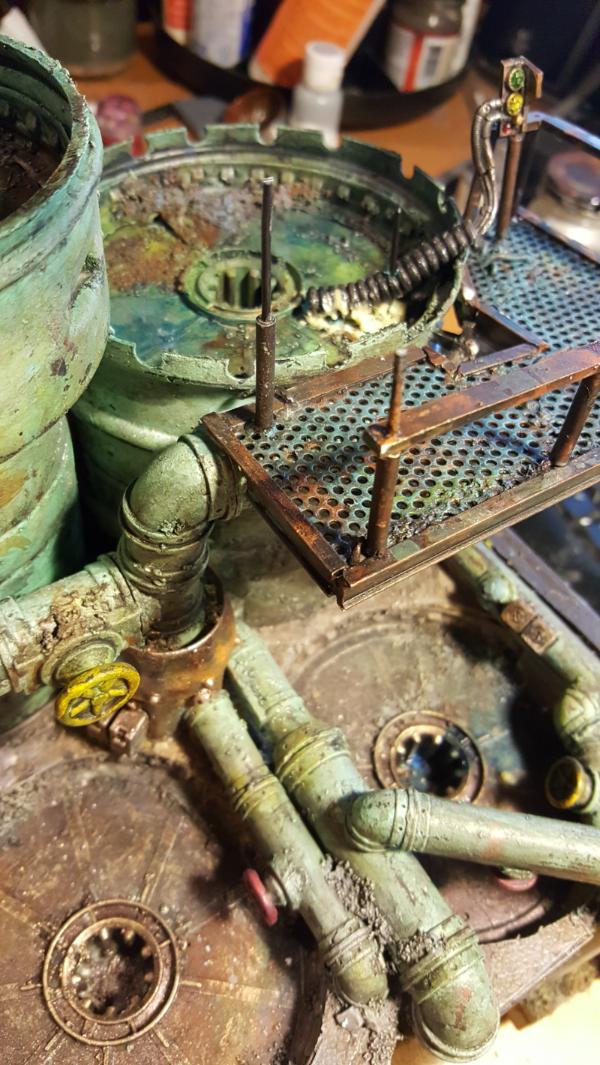
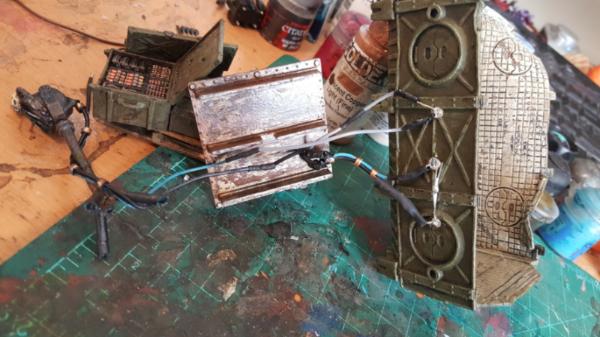
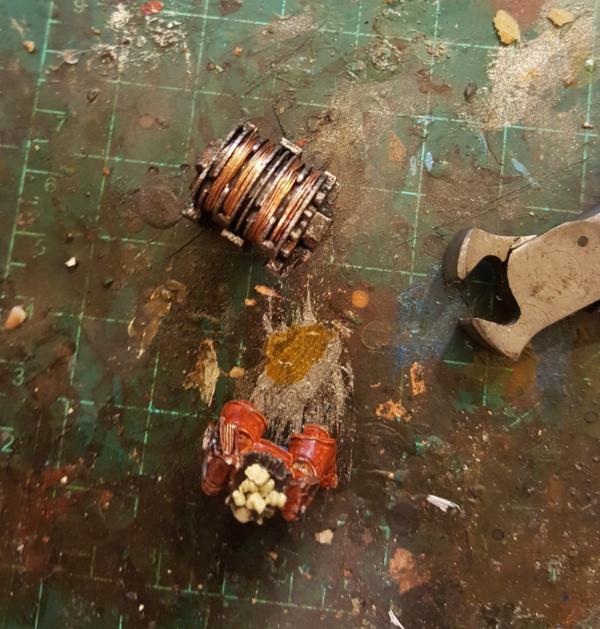
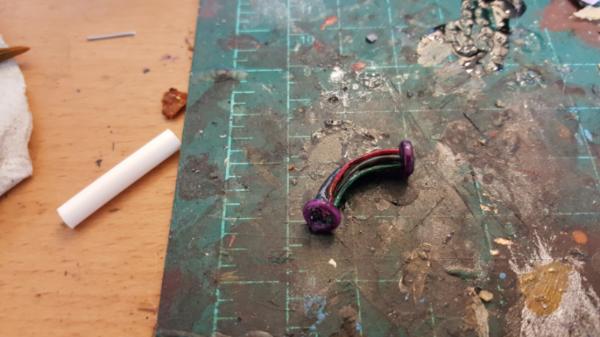
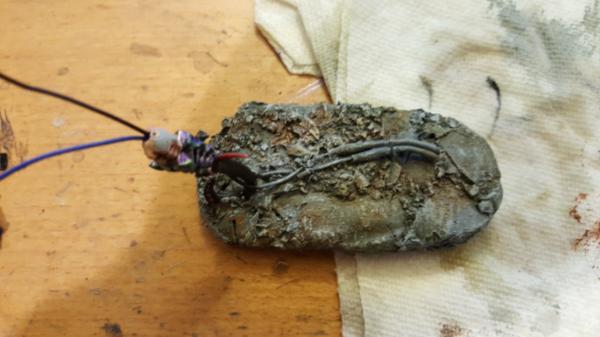
This guy:
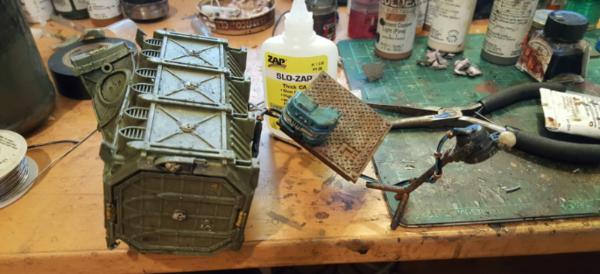
But in order to do that I had to do a little prep work for that future project: embed the EL wire controller in the base. EL wire, for those who dont know, is a bendable glowing wire.
https://www.google.com/search?q=el+wire&safe=off&source=lnms&tbm=isch&sa=X&ved=0ahUKEwiYgOzewI3QAhUpslQKHfcgDYUQ_AUICSgC&biw=1881&bih=1038#imgrc=YEUBssHJG0K6fM%3A
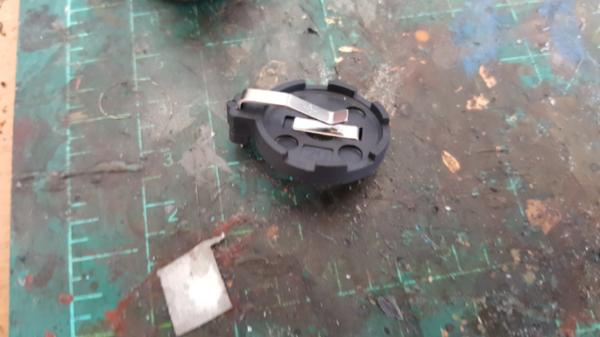
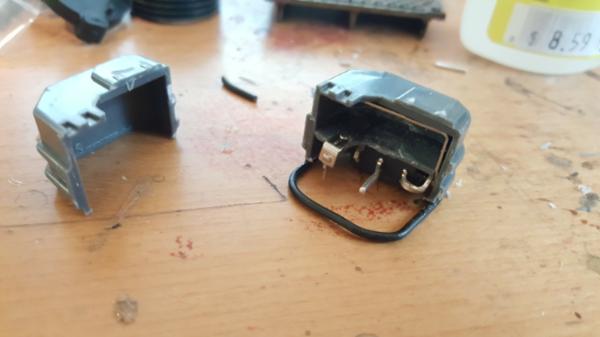
It's not necessarily hugely bright but you can solder staright with it and it glows and is very thin. So the plan is to have the neurothrope having a glowing lightning effect hitting a shield of khan. A shield made out of shimmery acrylic and the lightning I 3d print. Its something i'll get to in.. a while. But I need the base done now! Ugh. so I need to at the very least embed the controller and hook up those cables I have running out the neurothrope. ( EL wire runs on AC current, not DC like most things, so you cant just use batteries but need batteries + transformer and stuf, I get mine from cool-neon).
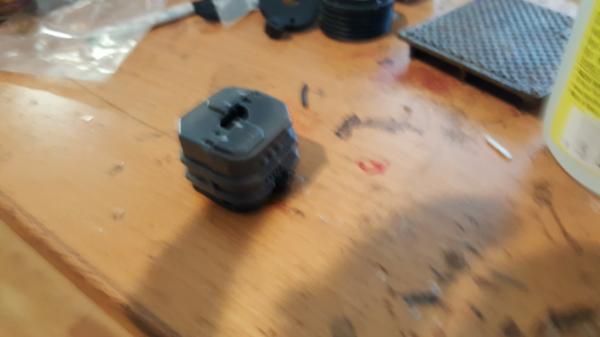
The controller looks like this:

Note that the batteries have a bit of a lip there, turns out it's actually tough gettnig them out unless you have a corner free to use something thin and pokey to essentially pull them out. Something I have to keep in mind.
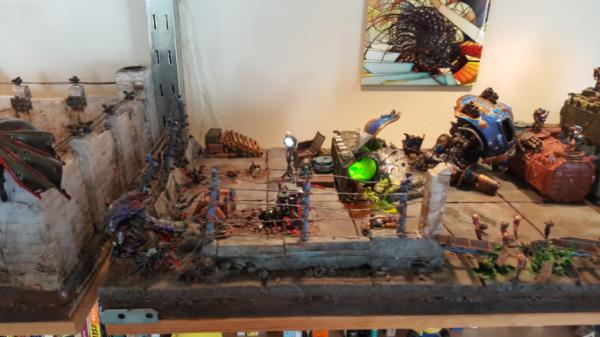
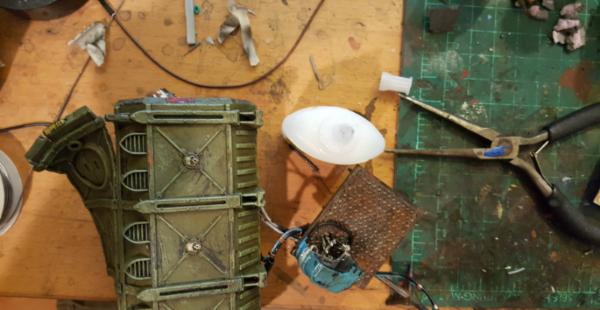
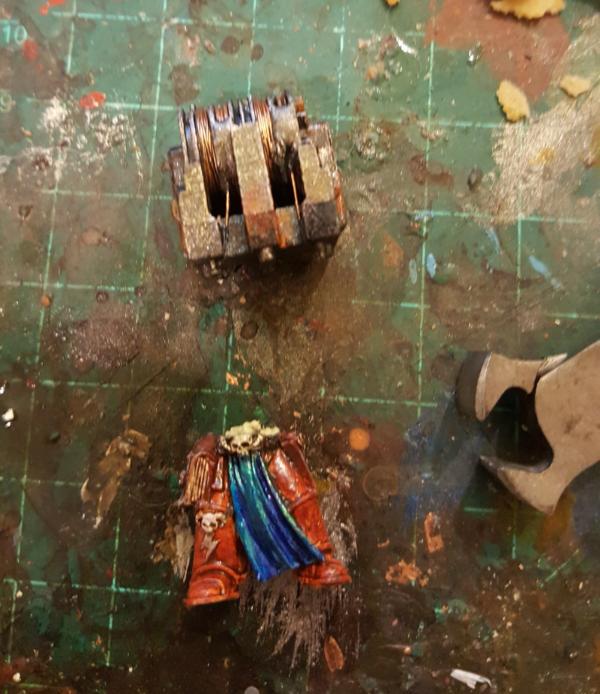
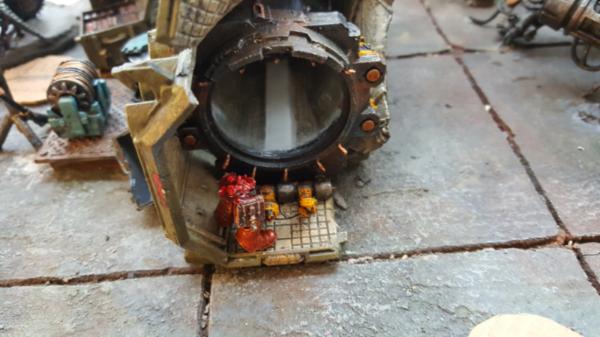
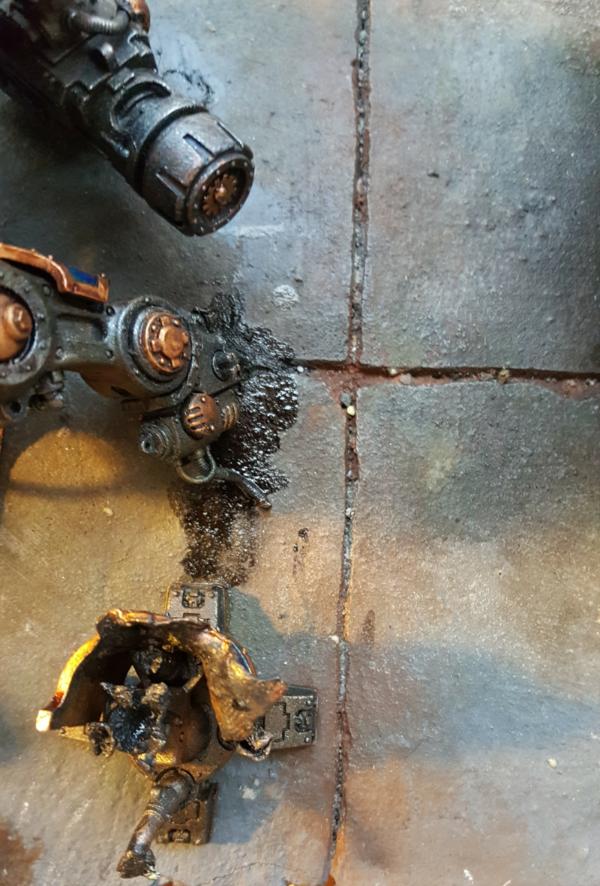
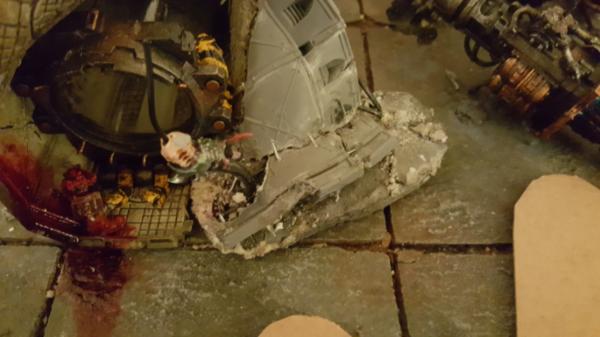
First up was well, finding a spot to PUT this thing, ideally on the side thats covered up by the diagonal shard of armoured crate. So we get this:

Note the corner on the lower right side of the image. That corner must remain generally free of debris so I can still get out the batteries. I also onyl cut into the wire just enough so the batteries could get out, as I wanted to glue as much as I could of the controller down onto the mesh to make it nice and strong.
But then I had to rip up even MORE for the cable jutting out and just.. yeah. lol. Lot to repair. So how best to rebuild this base? Well again I come back to my expanding gorrila glue. it just holds super well, super stong and fills the volume. DOwnside is crazy sticky fingers afterwords but hey, worth it. So I just covered everything in glue and as it expanded pressed in various chunks of base I had ripped off.
And then occasionally pat it back down to keep the original rounded shape.
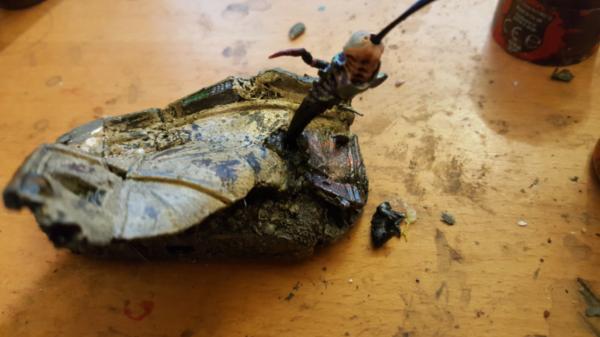
More importantly I left in the pin wires I had installed to test the diagonal armoured crate shard so after things were dry it still fit and worked well:
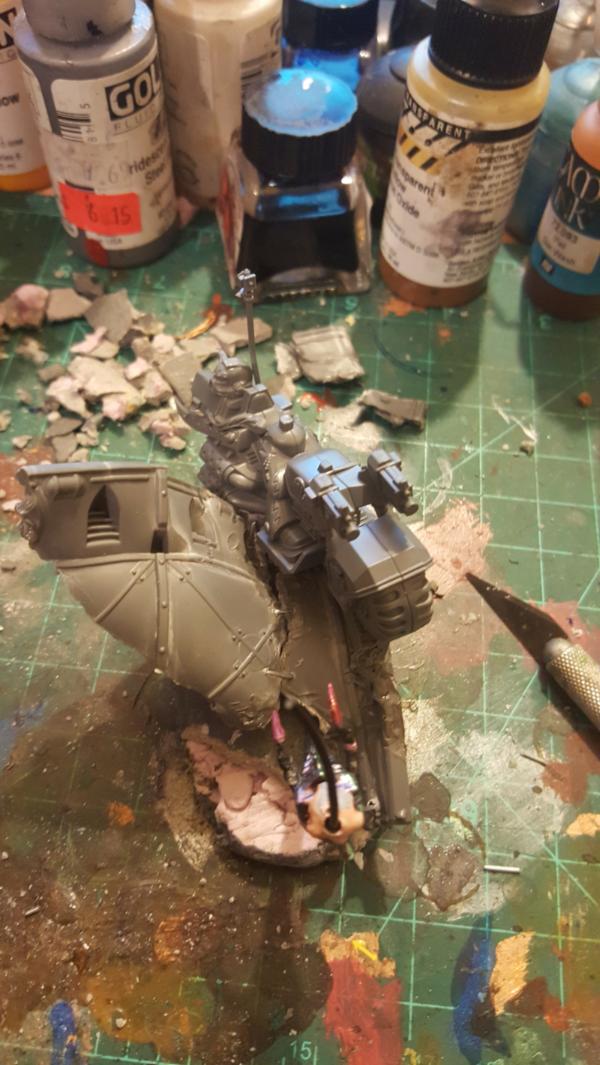
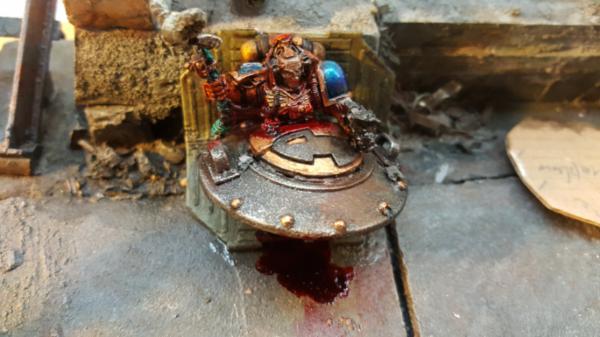
60913
Post by: Largo39
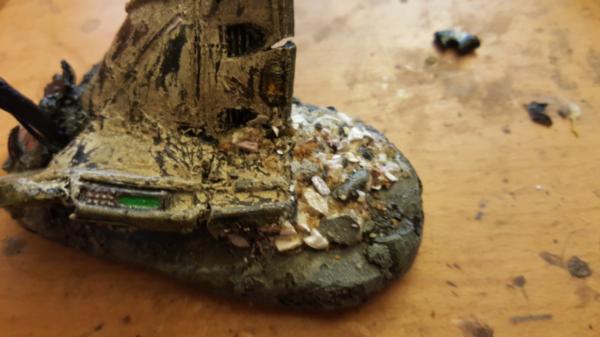
Now that everything dried, time to paint it up. First everything below:
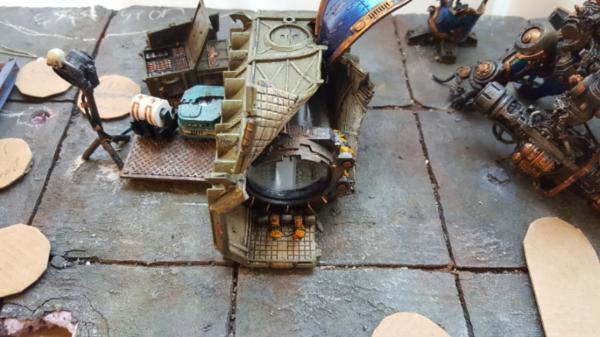
Then I painted up the shard and glued it down
And added yet more rubble to cover up the remaining bits of visible wires:
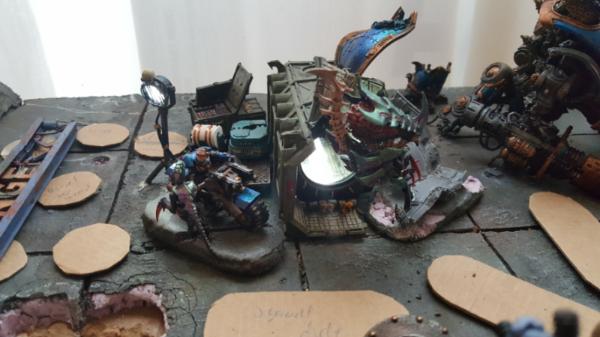
Bike still fits well!
All together!
60913
Post by: Largo39
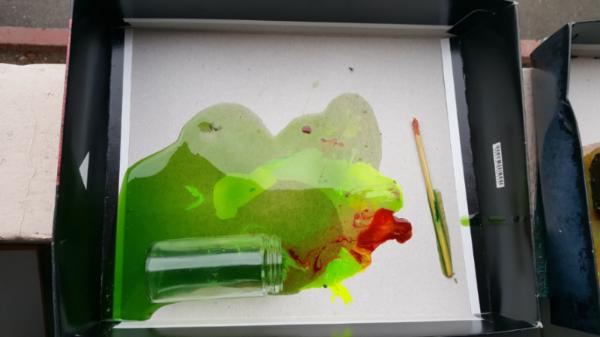
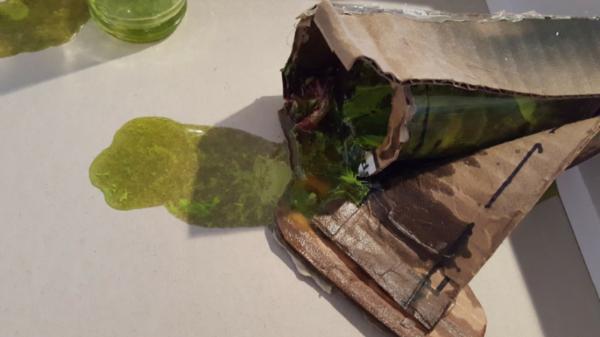
So shipmants finally came in and its time to play with flamethrowers and magic water! I'm completely terrified! These are 2 techniques that I REALLY dont know much about so I feel even more than ususal out of my depth. But thats what experimenting is for and why I bought 18 oz of magic water. Lets begin.
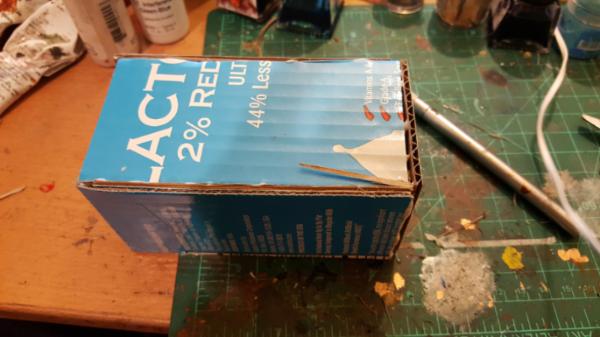
First up is a basic test. Now I wanted to make it fairly realistic so I decided id start by making a cardboard version of my exploded container. Complete with dead guy legs!

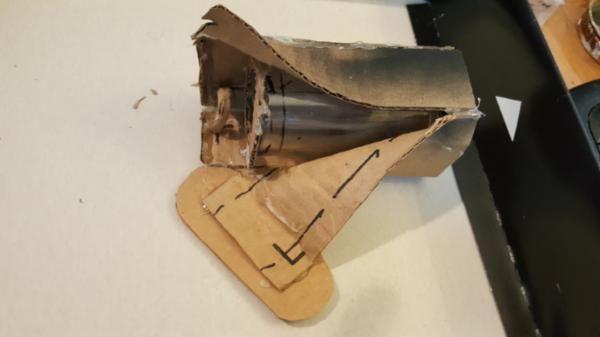
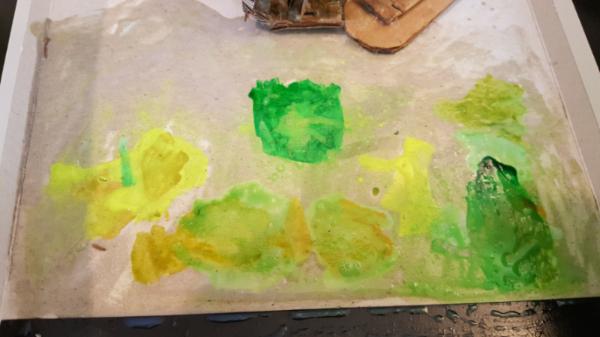
I also wanted to play with any "under colors" i mightw ant to do so I did some swatches of my tamiya green/yellow/blood etc to see how the water would interact over it. I then realized that since the carboard is so porus I might want to coat it in a layer of clear gloss just to make it more sealed like how the tile would be.
This had the side effects of making the cardboard wrinkle, so I had to cutout relief slits (BEST IDEA EVER. Wait...) to get it to sit back down again. after all, this is a test of how much the liquid spreads out so having dips wont exactly be a fair test!
I added some blood to my dude and played with under-glass colors to help tint it up:
and now we're ready for water!
60913
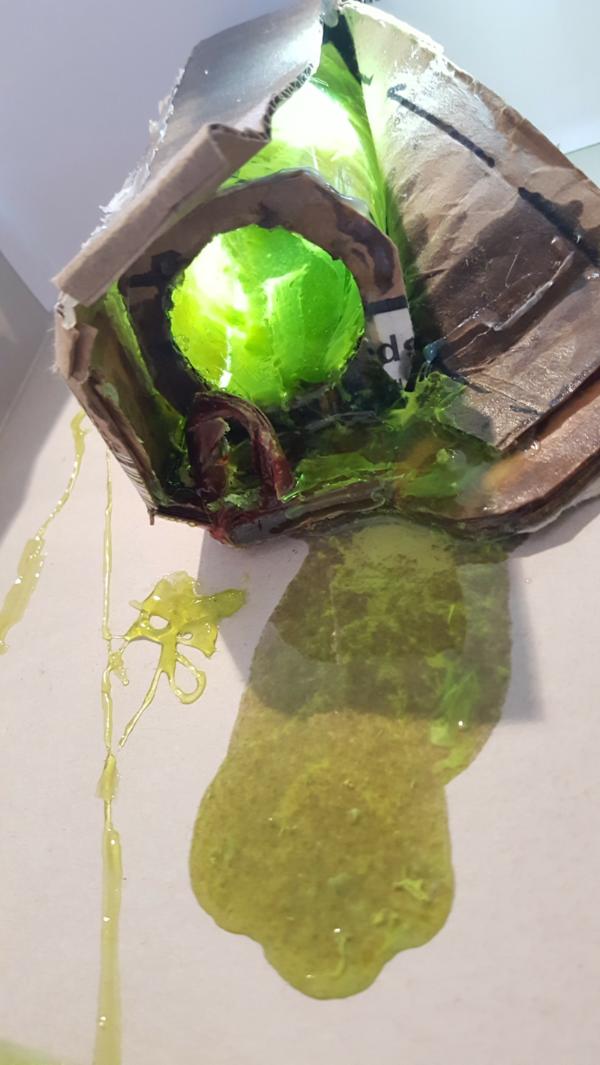
Post by: Largo39
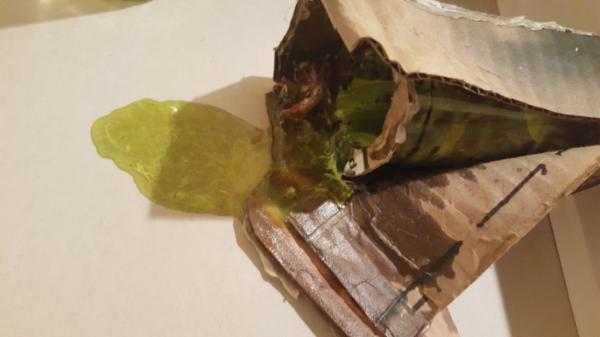
Man it's spreading fast...
You know those slits I made to have the cardboard lay flat? yeah.. yeah it made it there and started to leak out:
Result overnight:
Whoops, so clearly just mix and pour aint gonna work, unless I want to get my whole board slightly damp and thats about it. Quick, time for antoher test!
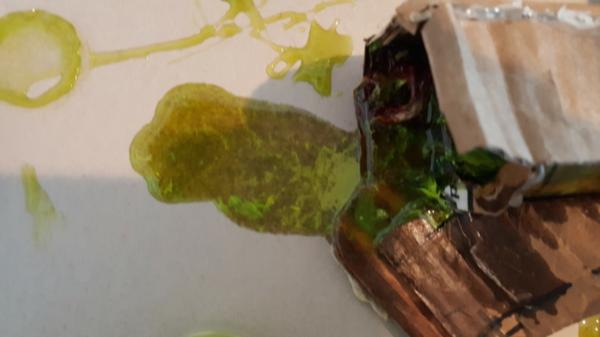
This next batch I mixed up in the bottle as before but let it sit for a few hours before pouring. I also wanted to see what adding still wet droplets of blood and flourescent paint to it to see if it would get and maintain swirl patterns.
Seemed promising at first, it did move, but more slowly.
After a few hours:
Overnight:
So letting it sit IS defintiely better, BUT i need to do it for a LOT longer, its still spreading too far out. Still its encouraging that the blood swirl didnt get watered down/spread out over time.
60913
Post by: Largo39
Pardon the brief delay, politics got in the way.
Anyhoo so while my second test was encouraging it still really flowed out too much. So I did one final test reusing the first tests bottle/crate mockup with a 7 hour (!!) delay.
In other words I mix it up in a jar, let that jar sit for 7 hours, pour it into the containment vessel and then make it level so the liquid slowly oozes out. Now 7 hours is a lot, this stuff is basically set after 12-15 hours or so, the remaining 10-15 hours it's just sticky as hell and slowly drying (and probably outgassing), BUT it worked.
The initial flow after making it all level:
Great oozing going on, the flourecent paint is a good cotnrast:

Few hours later, nothing has moved! I also experimented adding some late flourescent paint too, seeme to work ok. One trick seems to be putting it on there and using compressed air to blow it around and get the driblle look without having to worry about flow from the liquid doing it for you. Very handy.
I even upended remnents of the jar to see what it'd do, i took some 12 hour old magic water and swirled it around on the paper just to see if it would smooth out rough spots and it did! So even as it nears setting it'll still settle slightly but not much, which is good if i end up with any wierd holes/patches/etc when i add my flourescent paint dribbles and disturb the water with air/sticks/etc.
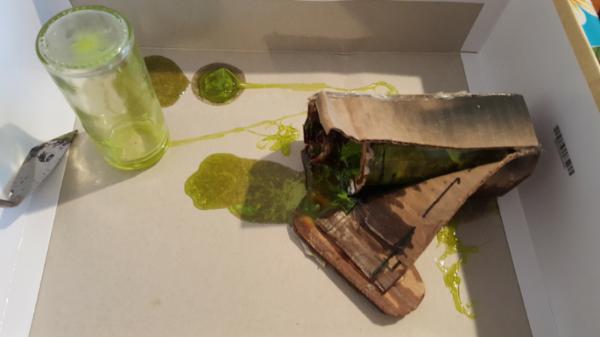
Lights up pretty well too:
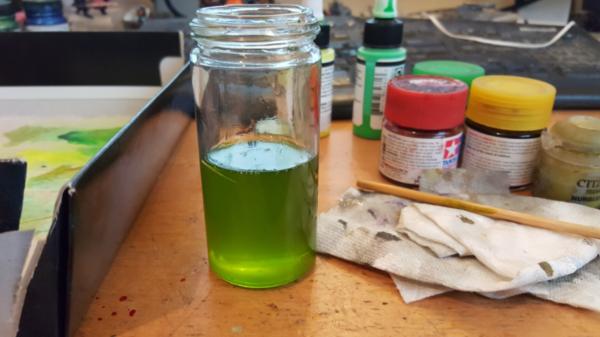
ALl in all I now feel like I have all the tools I need to do this for realz, and that it'll work out well to boot! Im much more excited about this now, the tests were crucial.
60913
Post by: Largo39
So its finally time for the real water pour. Things learned:
- Mix it and let it sit for 6-7 hours
- When pouring it into the bio-containmer also add a few droplets of flourescent paint to start that swirly process
- Remember that compressed air will kickstart a swirly pattern without really affecting the water underneath
- The water smoothes out even late in the game, so last minute changes will still settle.
And off I went! I did all the things and... it slowly started creeping out. But it was TOO slow. Instead of 7 hours due to getting home from work later it ended up being more like 9 and it was molasses.
I panicked slightly and then decided to mix up a second batch and layer it on. Even though this theoretically would have been too fluid, because of the fact that it was mixed in the same jar as old stuff
AND the slowly creeping 9 hour old stuff is super sticky it pretty much just clung to it and didnt spread out crazy far. So it all worked out.
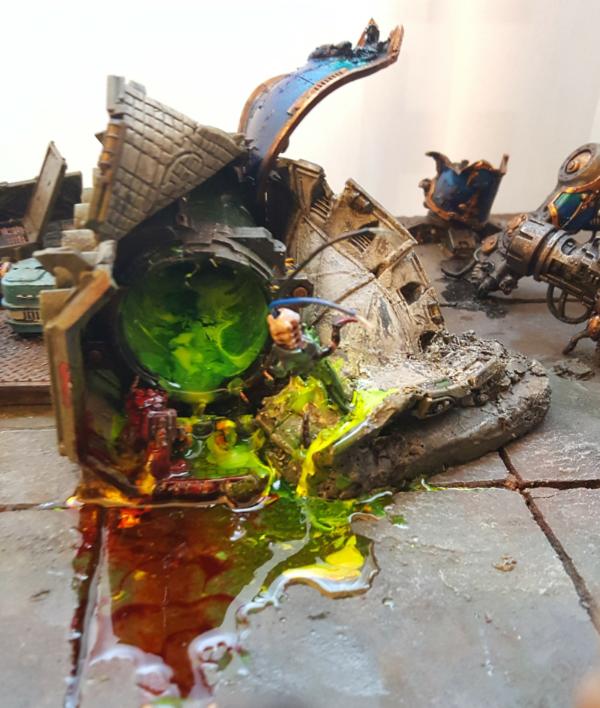
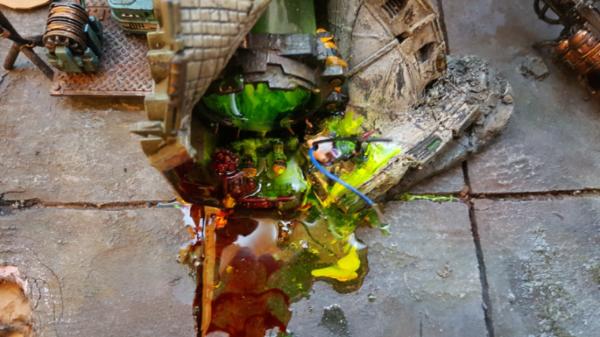
Needless to say im super happy with the result! Looks great, oozes detail, and looks like there is flow.
60913
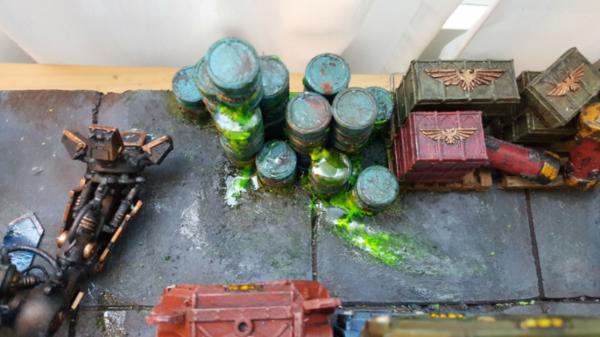
Post by: Largo39
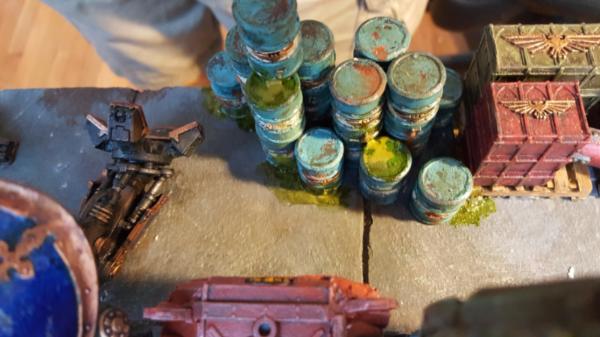
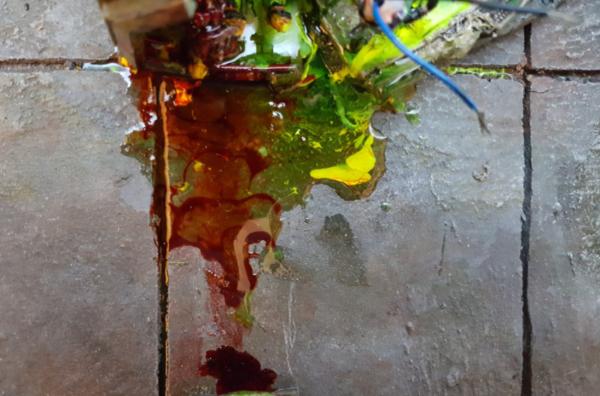
So i dropped the ball a bit in updating this weekend but as followup I had some leftover liquid ready to go so I figured id spruce up my barrels even a bit more. The idea being they are containing the liquid for the bio-container and are, themselves, leaking. Now I went ab it.. ah.. crazy at first. Mostly cause it was late and I had a lot of excess to use:
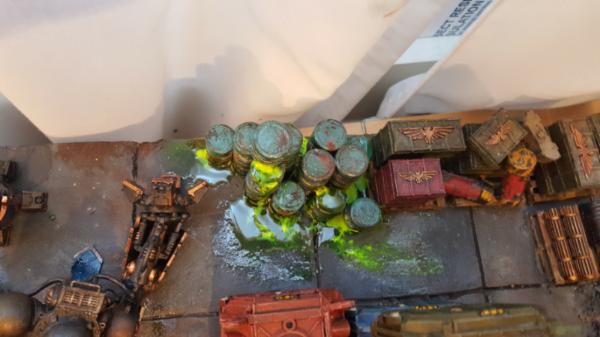
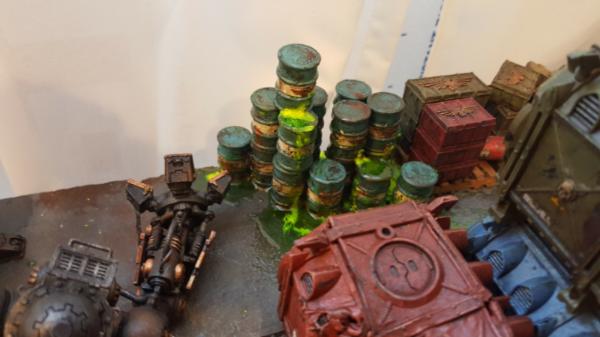

But then the morning after I went "yeah.. too much" and, turns out, scraped it off fairly easily! Pretty good thing to learn actually, even 20ish hours on it still comes off relatively well, sort of like.. hm.. stuff jello? Either way it worked well and i toned it back to a more reasonable oozing down the sizes look without nearly as much pooling. One thing I might try for in the future is adding tire tracks, I really like that "whisked" streak and it would be really nice to get some wheels and stuff to show the motion of the bikes as they move through the puddles. Just got to figure out the best way of doing that, I dont have any free bike tires handy to run through a mixture.
106439
Post by: Ynneadwraith
I've been watching this come together and I must say I'm in awe. Really really impressive stuff
62835
Post by: IGtR=
Loving all of this so far.
The gak coming out of the barrels looks like its been wiped away by a cleaner... in the grim darkness of 40k there is still cleaning duty!!
60913
Post by: Largo39
Very sloppy cleaning duty
95173
Post by: ROTTEN_FACTORY
 Epic ! The end result is very realistic.
60913
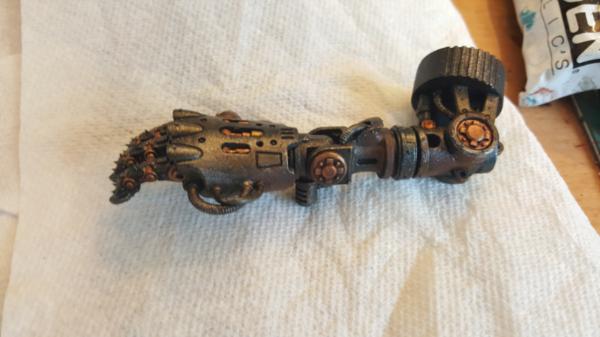
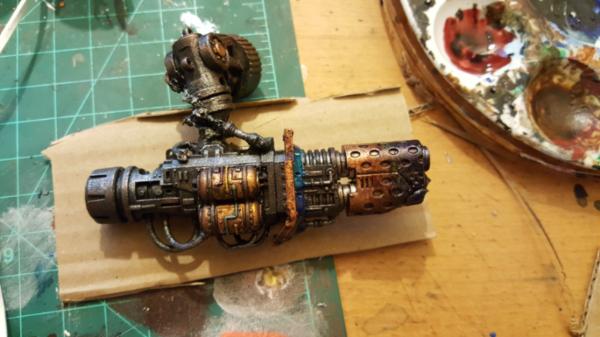
Post by: Largo39
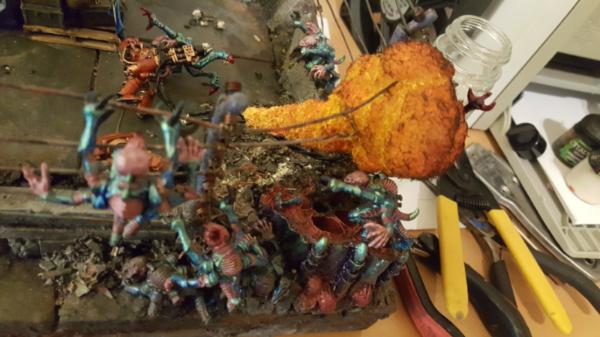
Thanks! Im quite pleased. Now for my next "i have no idea what im doing" trick! Making a flamethrower flame effect.
So I've always wanted to do one of these, because it could look really cool (and I want jump marins in the sky flaming down enemies below bases), but i've never before found a good technique for it.
Most of the time now it's either cotton balls and spray paint which looks okay or a plastic casted form which.. dont look as good. But the cotton balls dont quite have that life to them.
Then I found this guys post:
http://www.onesixthwarriors.com/forum/sixth-scale-action-figure-news-reviews-discussion/728891-wwii-marine-flamethrower.html
Which looks AMAZING, so then its like "well how do I make that!". So, lets figure it out.
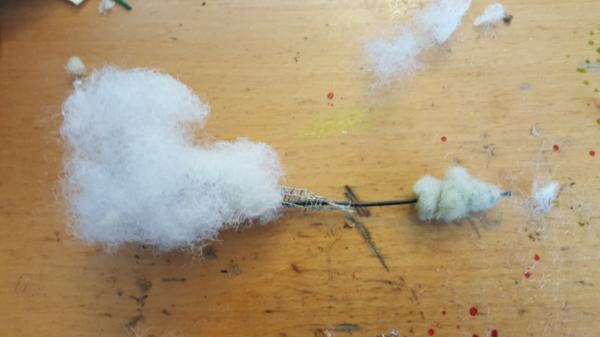
THere isnt much in the way of tutorial from the thread but I did gather that the key ingredient, instead of cotton balls, is poly fill pillow filler:
https://www.amazon.com/Fairfield-Poly-Fil-Premium-Polyester-12-Ounce/dp/B000YZ7G44/
Secondly there is a wire mesh underneath for structure and, as always, spray paint to paint it. Finally the piece de resistance are lights INSIDE the flame to light it up. Now I figure I might get a more realistic effect if I can use EL wire instead because I want light all throughout the flame and not just at the end.
So i got some fine mesh from my hardware store made a little bent/bubbly cone out of it and started spiral wrapping the polyfill around it to get it to hold on:
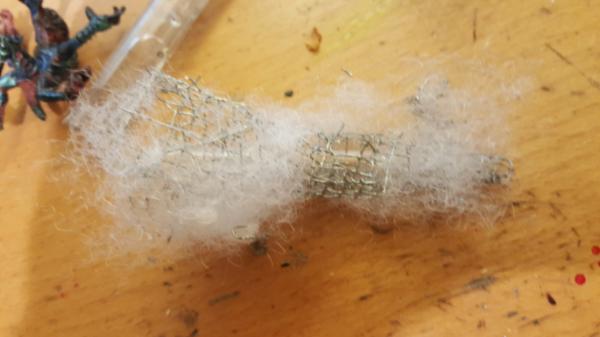
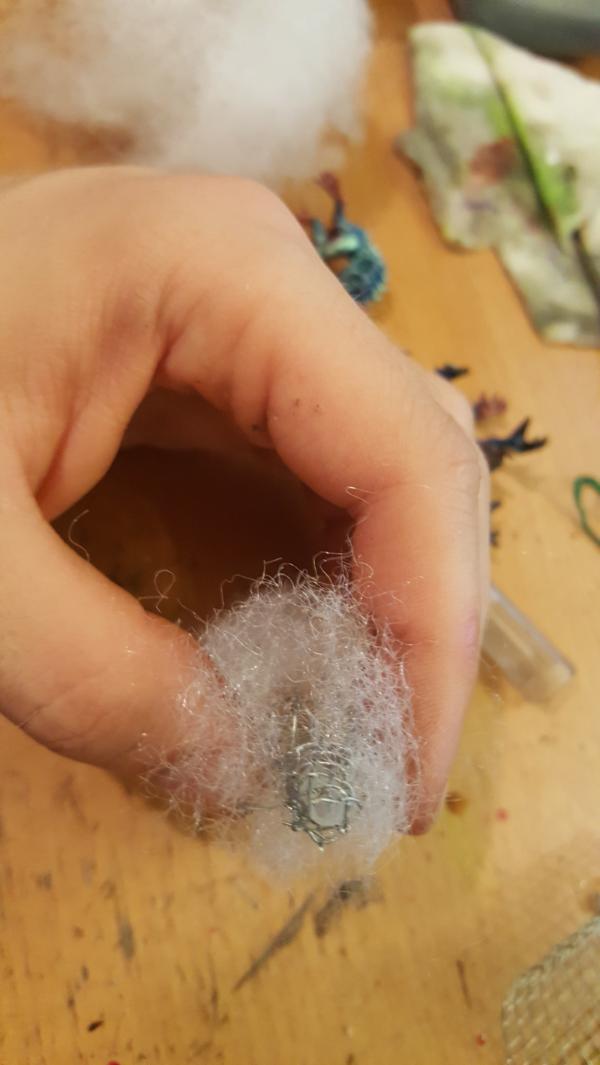
Note the tube down the middle. This was to make sure I have a clear passage way to eventually put in the EL wire. Otherwise it could get tangled in the mesh cone and not look as good.
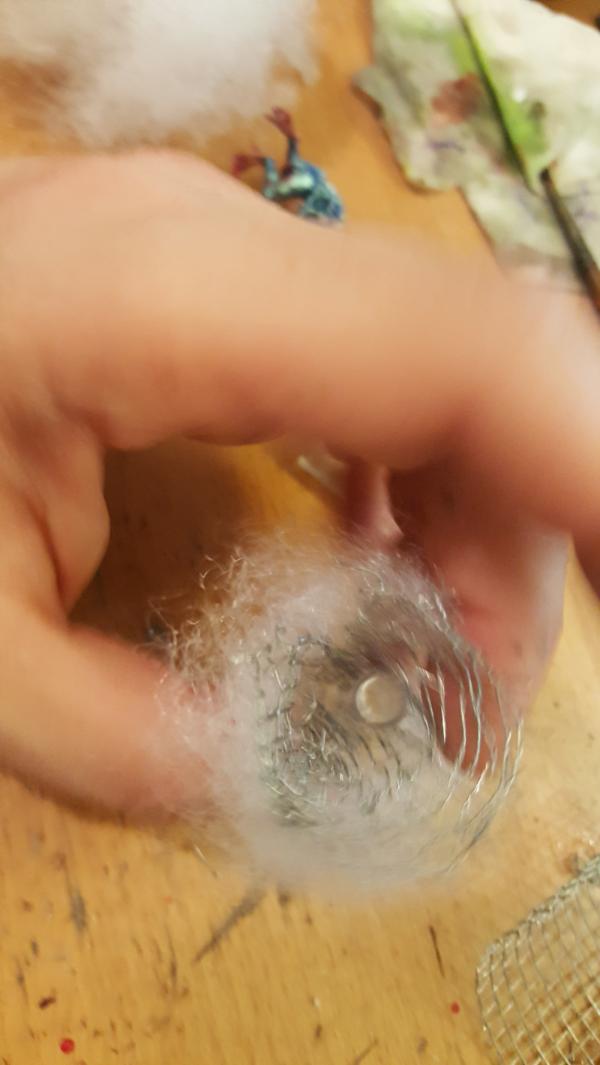
And I just kept wrapping around and got this!
It's pretty big though, I need a smaller mesh next time.. hrm.

And it lights! But.. not very brightly though. That doesnt seem like it'll penetrate after all the spray is on..
Furthermore, after re-checking back with the reference picture it doesnt.. have that puffy nature that the other modeller got. Its more like a flame cloud than thrower, and its just very.. thin, still, lets see how it spray paints. First I need to let the glue to dry.
60913
Post by: Largo39
So I switched techniques because after a test spray paint it really wasnt working well:

Bleh. So a bit of a break but I went ahead and added an LED (very carefully) to the terminator:
Which, as I think about it later, I didnt really need to do but you'll see why later. Either way it worked and looks pretty good.
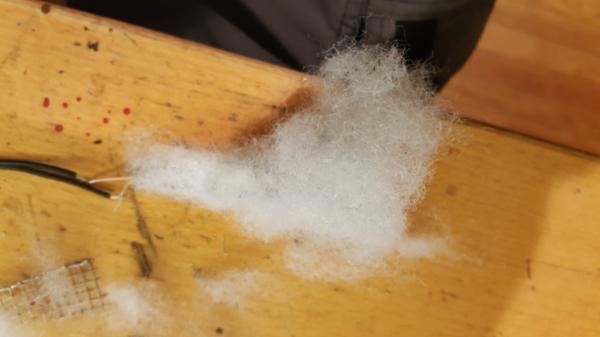
Next up was making a new mesh and one thats a bit smaller:

The big one was switching techniques. Before I was wrapping it around the mesh but that just looked.. wispy. So Instead I started balling it up. Then using VERY sharp small scissors I would cut holes in the balls to make donuts and feed that to the mesh:
Already thats looking cloudier and more full.
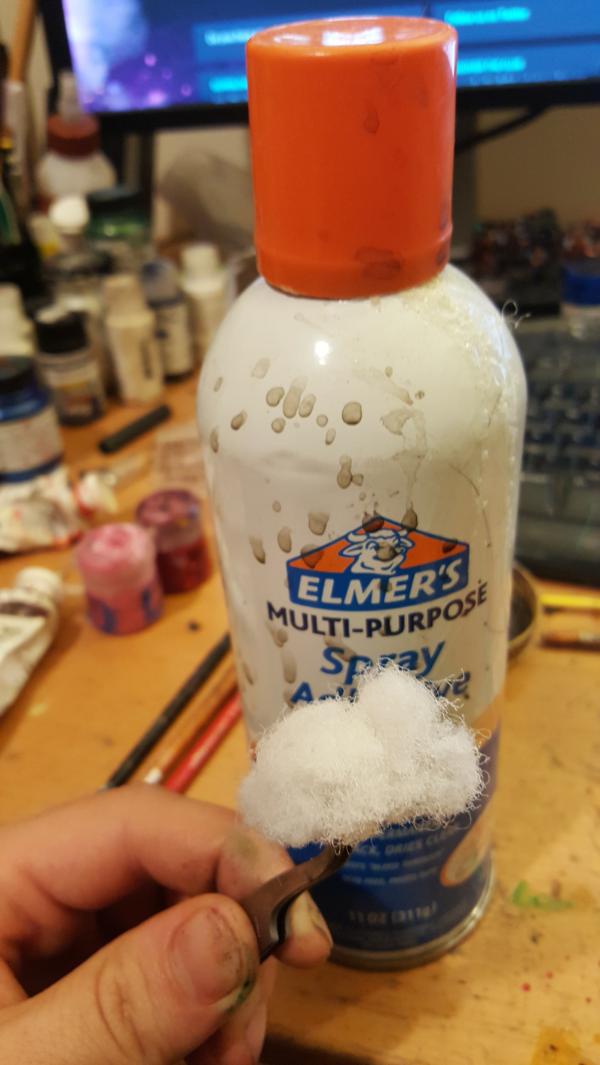
Obviously as you get further up the cone you cant make donuts anymore so I started using my favorite adhesive to glue it down. This stuff ALSO adds thickness and bulk to the fibers as it is somewhat opaque and makes things a globbier, so keep that in mind. Spray some but not all over or ull get too opaque.
Now the piece your seeing is actually a cap piece because well, i made a lot of progress and am running the tutorial backwards, but basically once I had the cone filled with balls (and ususally pry them apart a bit to make them more interesting) I would cut down the width of the fire with scissors and also use scissors to accentuate the crevases. This thing ends up being super large so scissor work is key to making it more manageable and thinning it out where needed.
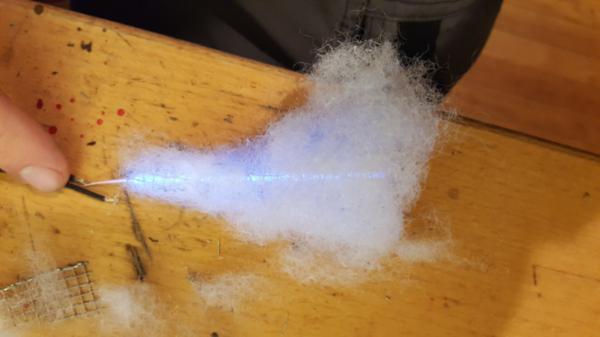
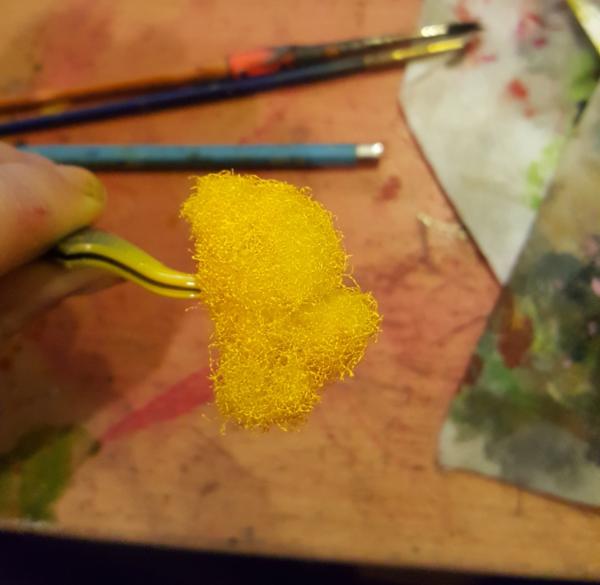
Then you paint. I used a nice slightly warm yellow as a base:
And then orange on the "leading" edge or edge facing out. inner edges you want still yellow as the core of the fire is super hot and as you billow out it cools.
I think used these for my darks and just use a drybrush, again only on the orange/outer facing side.
 Automatically Appended Next Post:
 A preview of the result:
60913
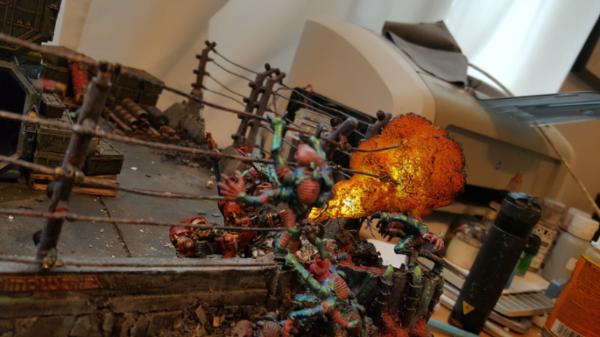
Post by: Largo39
SO! the story of fire. Basically a LOT of snipping, as previous mentioned. While the ball technique got me in a good starting place, the scissors were invaluable at just trimming it down and also making sure the crevases were well defined. Defintely start with a smaller than you think youll need mesh!
Anyhoo, so first up I made the structure, and then it was time to add the end LED. For reasons of tiredness I thought both LEDs would need to be on very clearly defined seperate circuits. Basically here was the problem, instead of the normal 2 penny batteries I've been doing for everything else I did just 1. Which means 3v instead of 6v which means only a single LED per circuit instead of 2 leds per circuit. But I kept forgetting that so whenver i'd test Id have both LEDs "in series" with each other (positive of 1 led was hooked up tot he negative of the other) which failed to light. Therefore I thought "okay just have one on either end and hide the wires" which is what I ended up doing.
Of course I could still have had them connected to each other by just doing positive->positive, which makes 2 circuits of 1 LED each, but again, tired. So thats why we have wires coming out the back. However, in the end its probably for the best because it REALLY helped lock this thing down. The 2 points of attachment did great for relieving the stress on my LED flamethrower, so its all good. Anyhoo to anchor the end wires I just used superglue, turns out it works rather well with this stuff. It seems to keep its shape, doesnt dissolve and just gets hard. Very handy.
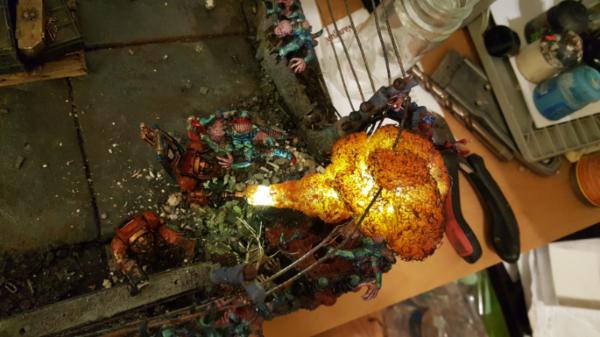
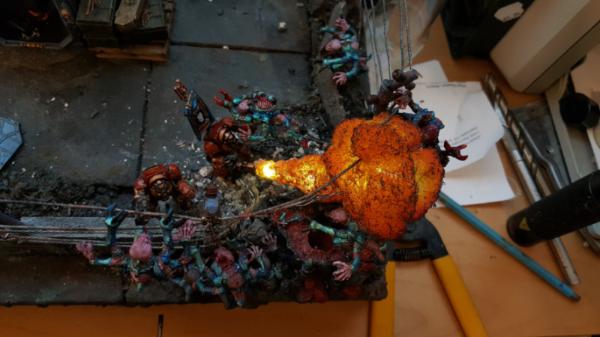
A quick test and it lights! and is looking gooood
So it was time to isntall. Note the new rubble, to cover my wire sins I just added yet more rubble in the area, pretty straightforward and using the gorrila glue has really made that an easier process. There is still the dreaded problem of loose rubble but its much more manageable than before.
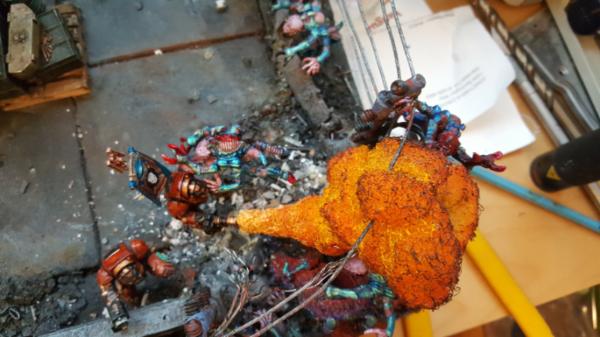
After installation I lit it up and it was great! but.. missing some light. The beginning of the flame was SUPER bright, as it should (maybe a touch TOO bright but its easy to patch that), and the end of it was also nice and bilowy lit, but the middle was missing it. I thought my LED at the beginning would bleed more into the middle sections as well but it just never made it there. So it was emergency adding light time. This is where the "single strand of leds" I realize I could do came in handy because I just attached it in parallel to my end light:
and shoved it down the middle. The only trick was carreeeffullly trying to solder those joints, because I knew if the soldering iron even breathed on this stuff it would start to shrivel and melt. I'm still not entirely certain the solder actually cemented the joints but we'll see in time!
I also took a bit to "burn" the genestealers

What I had before (charcoal with white/orange) wasnt really working, so I thought id try for a more realistic burn victim look. I didnt really know what it would look like AS you were burning and.. not something I wanged to search for on google, so I just assumed it was black and bloody like it how it ends up. Basically just sponged on reds, pinks, and charcoal blacks and did a blood pass over it. Looks, surprisingly realistic actually, i was pretty happy for how little time it took.
Now pics of it all lit up! Its going to be hard to get the full sense of it in picture form because the exposure will always be off, but it looks great and looks very realisitc, so im happy.
2326
Post by: shasolenzabi
very nice work on leaking green goo and flame-blast effect! that LED in the painted wool adds that flame-glow!

60913
Post by: Largo39
Thanks! Yeah the LEDs really are what make it special and look realistic, im really happy with how it turned out, it definitely was a challenge.
2326
Post by: shasolenzabi
Largo39 wrote:Thanks! Yeah the LEDs really are what make it special and look realistic, im really happy with how it turned out, it definitely was a challenge.
Now it will only get easier, and you will make even better effects!
45385
Post by: Tim 121RVC
Man, this is so cool! I've gotta try that myself one day.....
99084
Post by: D4V1D0
This is frankly, amazing! Are you planning to do a few overview shots of the project?
It would be awesome to see everything in one big image
13225
Post by: Bottle
Wow, the heavy flamer looks so so cool
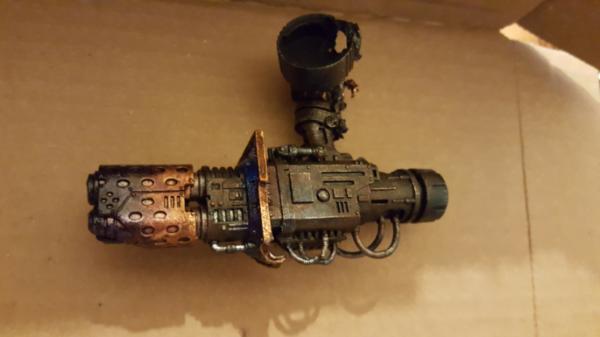
42839
Post by: stonned_astartes
wicked flamer.
60913
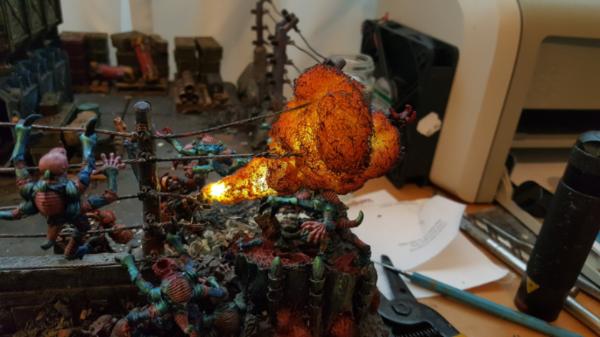
Post by: Largo39
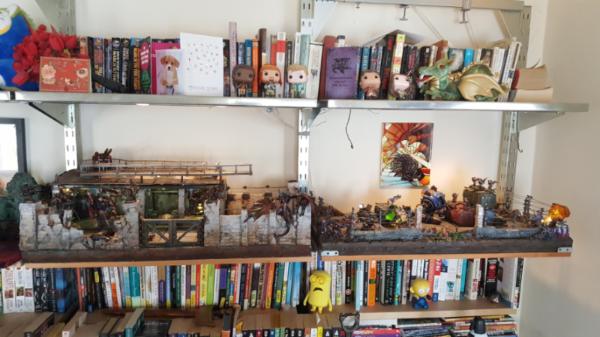
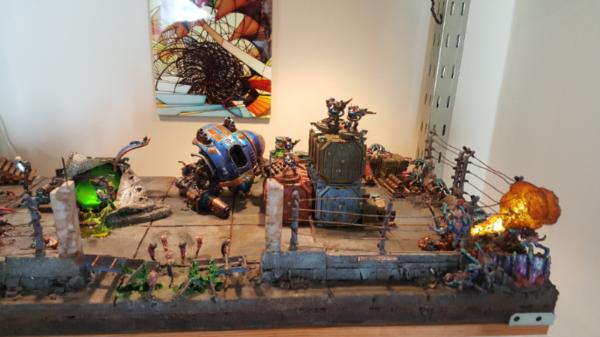
Thanks all! Here is an old (sigh, should have put on the knight) pic that shows the progress! Also i should have turned ON the flamethrower for this pic but hey we're gettin gthere. More pics to come
103442
Post by: LostCarcosa25
Largo, your blog is absolutely astounding! Your terrain is mindboggling, and the way in which you transform normal models into centerpieces is phenomenal. I am definitely a subscriber, and cannot wait to see what comes next!
-LostCarcosa 
52201
Post by: evildrcheese
Wow, what a great read, both the toxic waste and flamethrower effect look really amazing.
EDC
60913
Post by: Largo39
Thanks! next up is a small breather and a few small details like the knight head and so forth that finally came in.
60913
Post by: Largo39
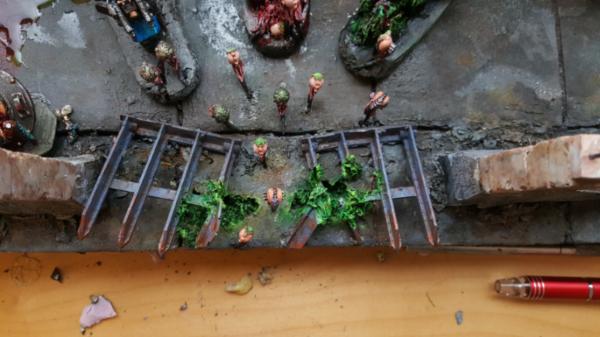
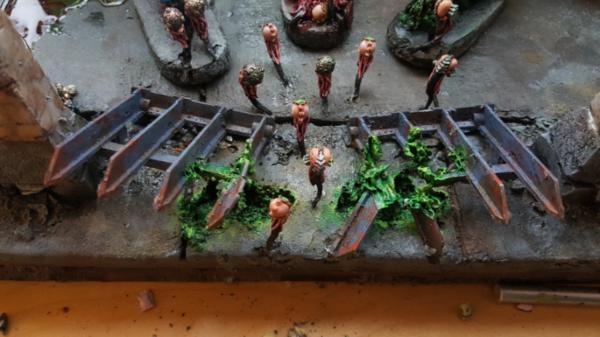
hey look its all acidy! I want to add some slimy acid goo coming from out the spore mine, just to really illustrated that it caused this spray, but for that I need to wait on UHU. Apparently, very specifcally, international UHU. American UHU just doesnt cut it. So that will be in a few weeks. But still, yay invasion!
60913
Post by: Largo39
Next up ist he right side and adding all my remaining (pretty) genestealers. Older genestealers, while on the board already, can stay few in number. Just.. yeah, not quite as pretty. And having fixed arm poses is lame.
So I had 5ish remaining and wanted to add a breakout of stealers behind the broodlord. Let mass painting begin! (ugh)
The paints required:
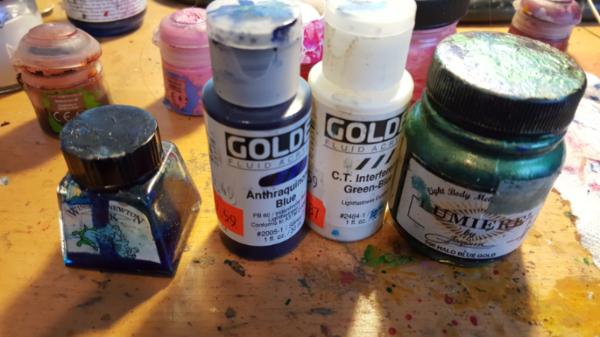
so these stealers will be different in color (a touch) than the original batch attacking the front. mostly because i like the darker slightly greener stealer look better that the broodlord exemplifies. I figure if people notice I just say that the ones are part of his particular brood. easy peasy.
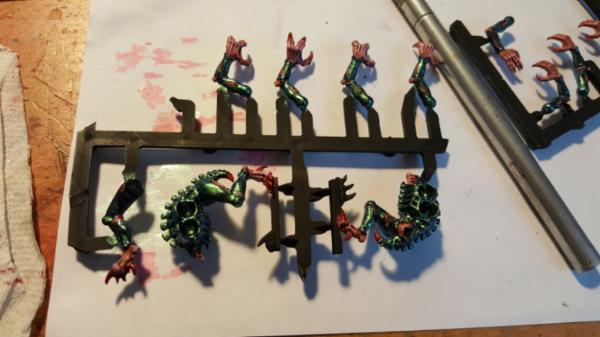
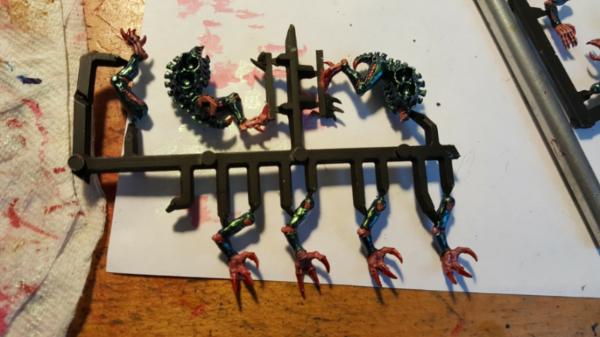
I also wanted to go back and re-do some of my previous buildings. Now that im much more comfortable painting industrial colors and so forth it.. was time to repaint the VSGs. Given both the success/easy of dark metal and the fat that the shipping containres also turned out well its just time to do a redo on them. Im also giving one to one of my friends so I wanted to paint it up prettier for him to use on his future board endeavours
As reference this is what we started with:
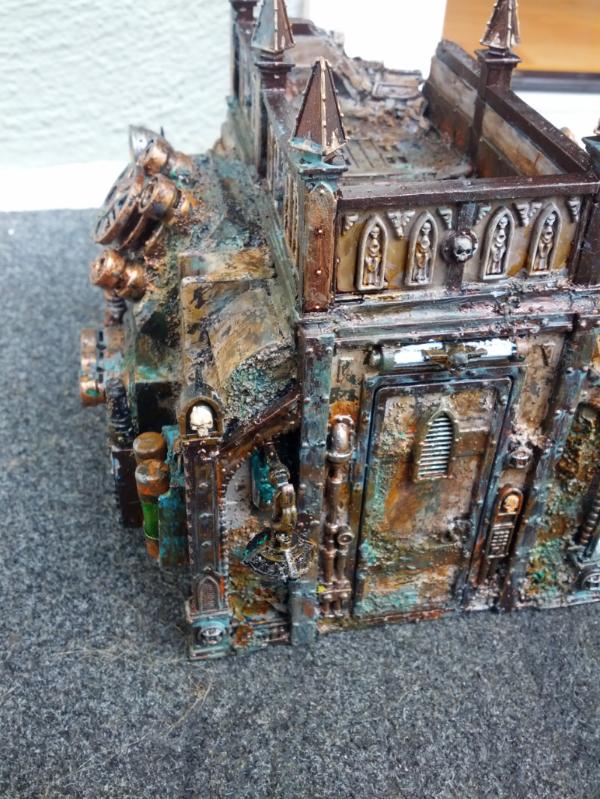
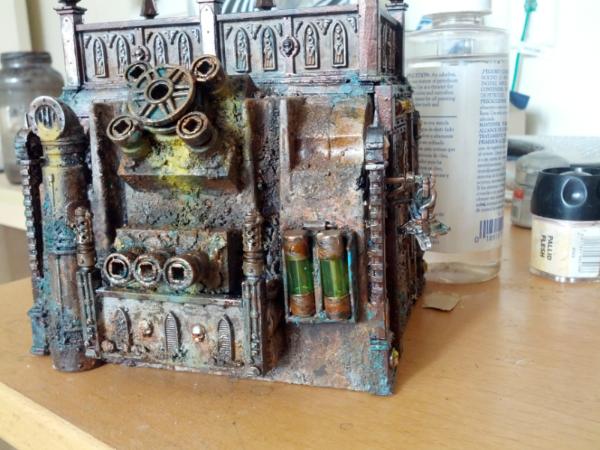
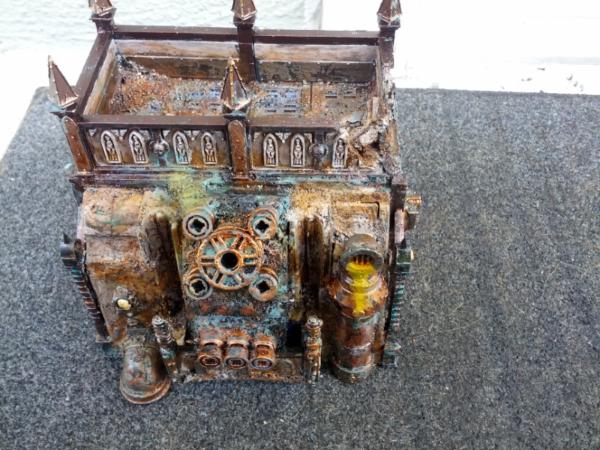
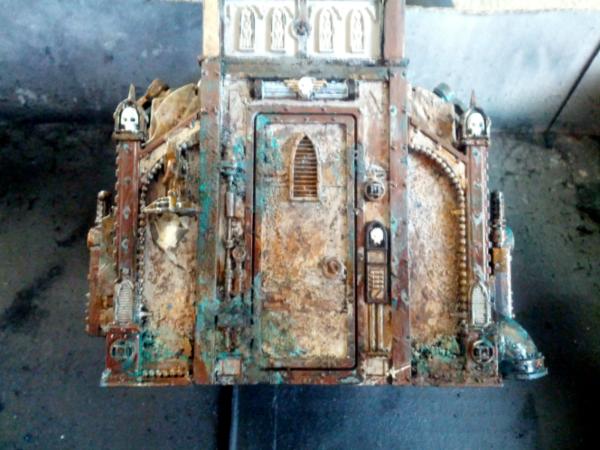
First up will be stripping them. Because of all the nooks and crannies using the purple stuff is no bueno, as it is caustic and there is no way I wont get some on my fingers. So I bought a gallon of simple green and dunked it in that, we'll see what happens.
60913
Post by: Largo39
So I submerged the first one in simple green, waited 24 hours and scraped it all off.
Few things learned:
It DOESNT affect super glue. Yay! I was really worried the whole thing would fall apart which is why I only did one at a time, so I'd have the other as reference.
It DOES, however, completely dissolve the dental plaster stuff I had cast. So some of my pipe fittings got melted. Ugh, still i have some spares after the broodlord so thats okay.

For the second one i just ripped them off beforehand:
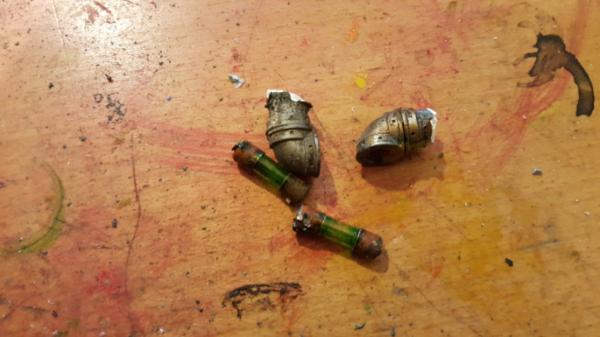
The bits you get scraping this off are perfect rubble scrap, keep it!
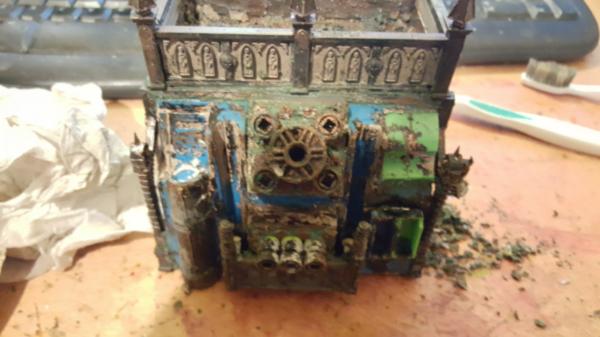

60913
Post by: Largo39
Just chugging away, showed the first couple of panels to my friend and he was a fan, so now its just finishing it off.
Its certainly nice and contrasty without blowing out, exactly how the knight turned out as well. I still think tho I like it for actual robots/mechanicals more than for buildings, so ill probably still cover up mine and chip instead. Still its useful to see how it would look more raw. The trick for me is I still really like that tin bit + creamy look, but I want some of the texture and colors that i get out of the dark metal. So Ill have to see what i get starting with a redder dark metal and how that works out.
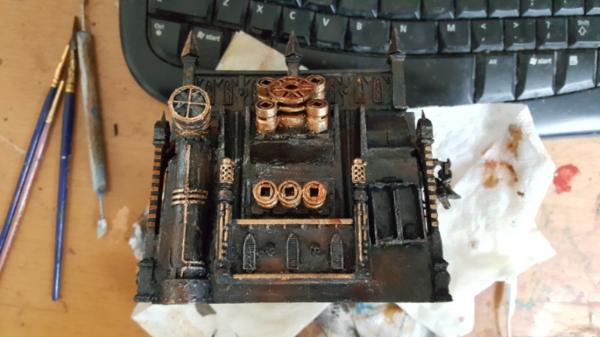
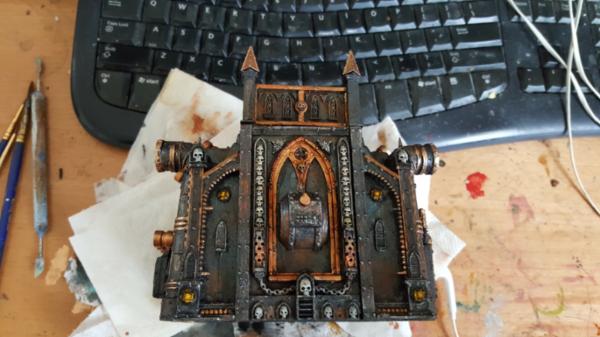
Also stripped the other one and am covering it up to prepare for primer
60913
Post by: Largo39
The stealers flanking around the side are done! overally im happy with them, really starting to reinforce the idea that the battle.. aint going so well, stuff is breaking through. Now the right side is basically done as well!
All tahts left is the UHU for my acid mine in the center (which just came in! time to experiment soon) and gaunts/warriors breaking into the left (ugh)
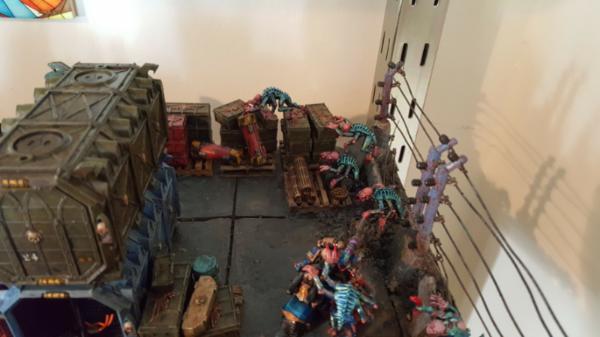

60913
Post by: Largo39
SO I didnt do much painting over the holidays, but I had a free day yesterday and decided to get as far on the second VSG as i could. There are still some finishing touches. THe blue is a bit strong, the fuses need to be repainted..etc, but I figured id show the WIP.
One thing I did was blended my dark metal technique into something redder for the pillars. One of the things I struggled with with the oriogina tin bitz + cream scheme is how smooth the tin bitz was, but adding the vidris effect and just that got TOO dirty. Switching to red dark metal (tin bitz + micaeus iron oxide and then instead of pearl for highlights I used bronze) seems to work a lot better for getting that high detail but low contrast look.
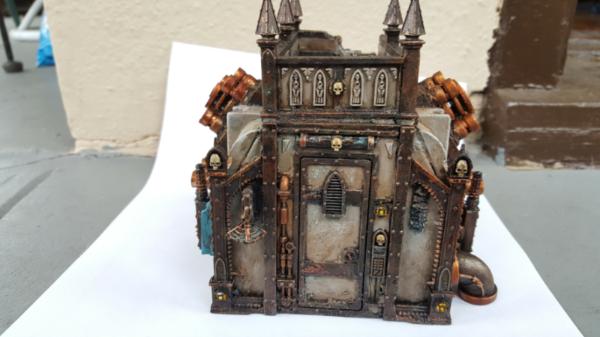
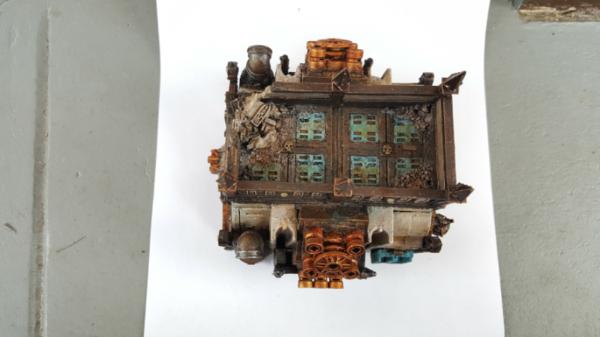
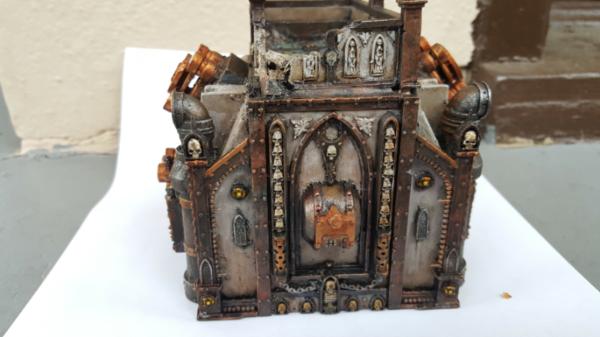
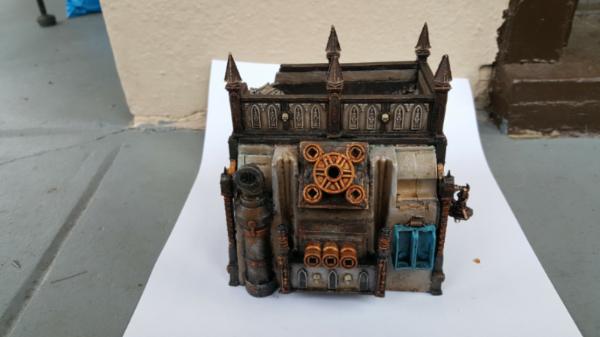
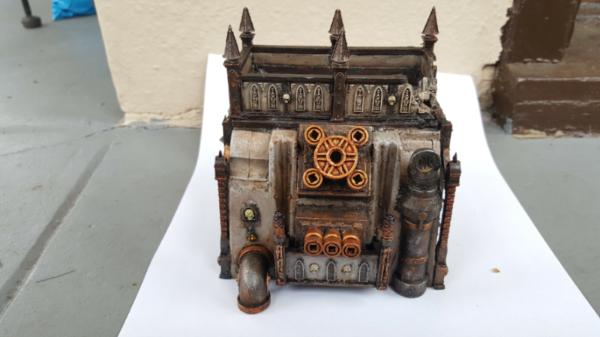
60913
Post by: Largo39
Hello! This is unexpected. For reasons that are complicated I managed to snag a few weeks of free time to work on stuff. The one caveat being that the work space isnt my normal one and so not really good for painting fine details (bike khan) or building stuff.
So, given that, I decided to paint the remainder of my buildings in my fully developed tin-bitz dark metal method and creamy stone. I never, ever thought I'd get around to actually painting these things for YEARS, so this is super exciting! Technically all this happened a few weeks ago so this will be int he past tense, but lately with the blog i've found it easier to build up a few weeks of content (and pictures) and then do my updates that way.
Now I'll have a general tutorial but here is broadly how each building goes down painting wise:
they take about.. 10-15 hours to get to.. 85% done. Thats the level im painting these at because I just dont have time to do any more. My goal is to get every building painted rather than have 3 of them REALLY finalized.
So that means no lights (they take forever, and im still not fully happy with how they turn out) and definitely still areas that could be cleaned up, but thats okay.
Most of the reason why it takes so long is due to the number of GW panels, so the actual time to paint was fairly consistent. My smaller buildings had more panels so took about as long as the bigger stuff. The only excpetion were the towers but we'll get to those later
Anyhoo, first up was painting up the remaining hormagaunts on the sprue. Pretty straightfoward and boring, but I need them for my bursting out of the hole on the left side. One that i.. have not yet fully thought out (no good movie reference for that one I can think of, starship troopers hides it under other stuff).
Next up is my first building, one of my smaller ones. This is post dark red coat and working/worked on the base coat to my creamy stone.
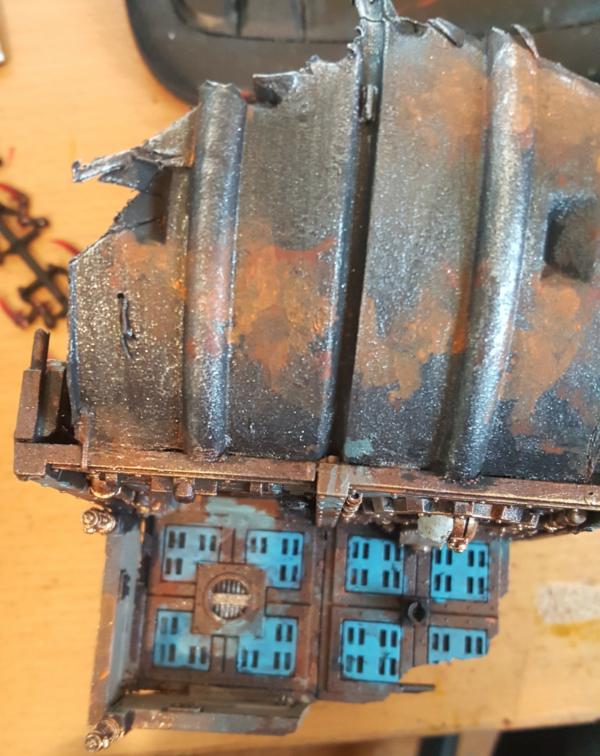

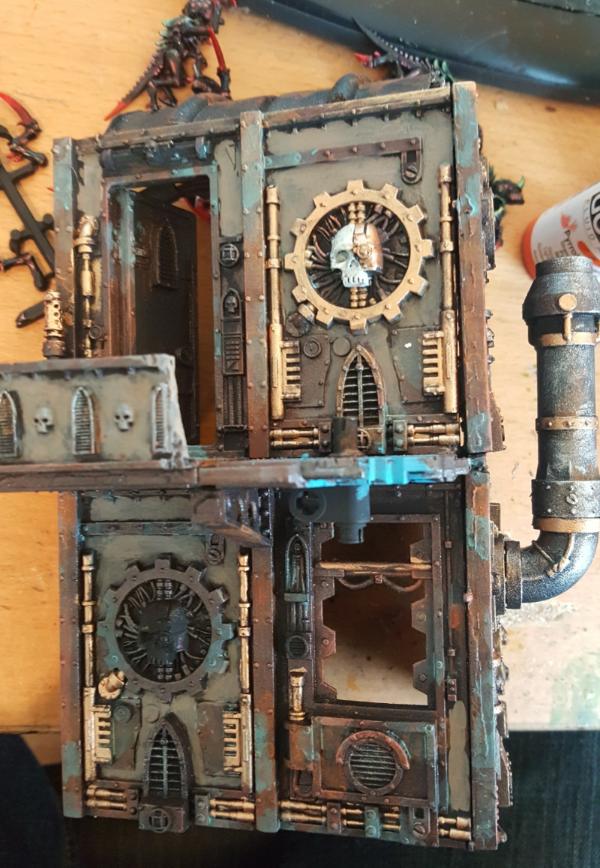
8330
Post by: kestral
Nice use of blue!
60913
Post by: Largo39
Thanks! It doesnt end up quite that bright in the end after the washes, but its a nice contrast to the cream/dark-bitz metal.
I also thought it was important to highlight all the walkable areas of the terrain. It's pretty detail rich so being able to see where models go seemed like a good idea.
109531
Post by: The Turnip Master
Looks great! I really like the little exhaust pipes on the balcony.
62835
Post by: IGtR=
Love it. Your skills continue to inspire
60913
Post by: Largo39
Next up is the generator bldg! This one is tricky because there is no real "floor", so nothing to clearly deliminate as being blue. Painting the narrow areas around circular depression blue seemed like it would look wierd. But the circle being blue just looks like I'm trying to do some wierd water thing, so I think i'll just make it dark and scratch having blue floors anywhere on this piece, it just doesnt really work.
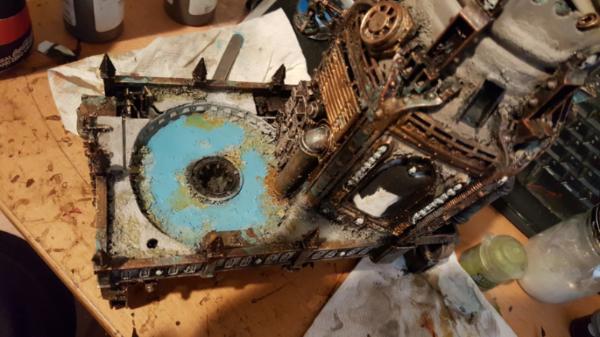
60913
Post by: Largo39
So, now I've covered all the small/buildings in paint, its time to move onto the big boys that needed more work, the water tower complex and the bridge towers. Remember these guys? And that whole bridge system I was working on? lets finish it.
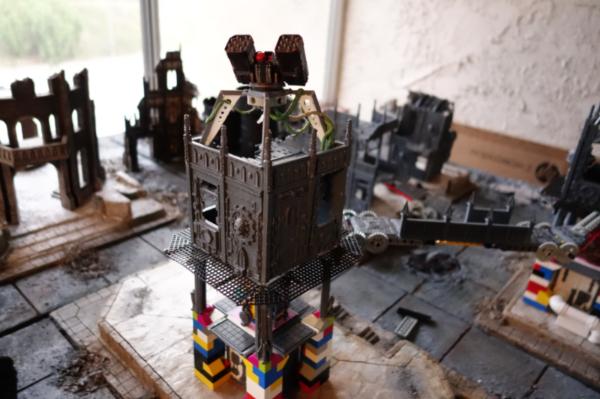
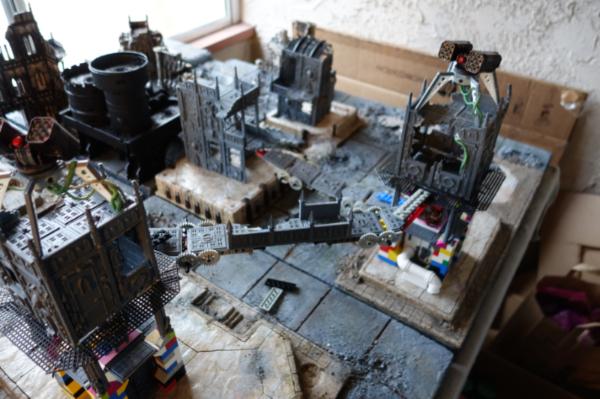
First up is the towers and their walkways. Basically the walkways suck, it was was made of this plastic mesh which didnt stick and was a total mess. Now that I've built metal mesh walkways for the garage..
its time to do that instead. First up is removing the old mesh, which pretty much just meant pull gently
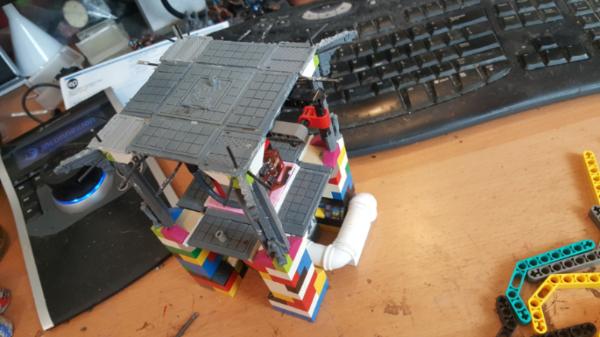
Key to the bridge system was having legos sticking out with the pin attach point all-ready to go. The idea being id drill a hole in the mesh and run the pin through it. There was 1 i did as a test but now i need 3 more for each tower. So time to cut up a lot of these to length:
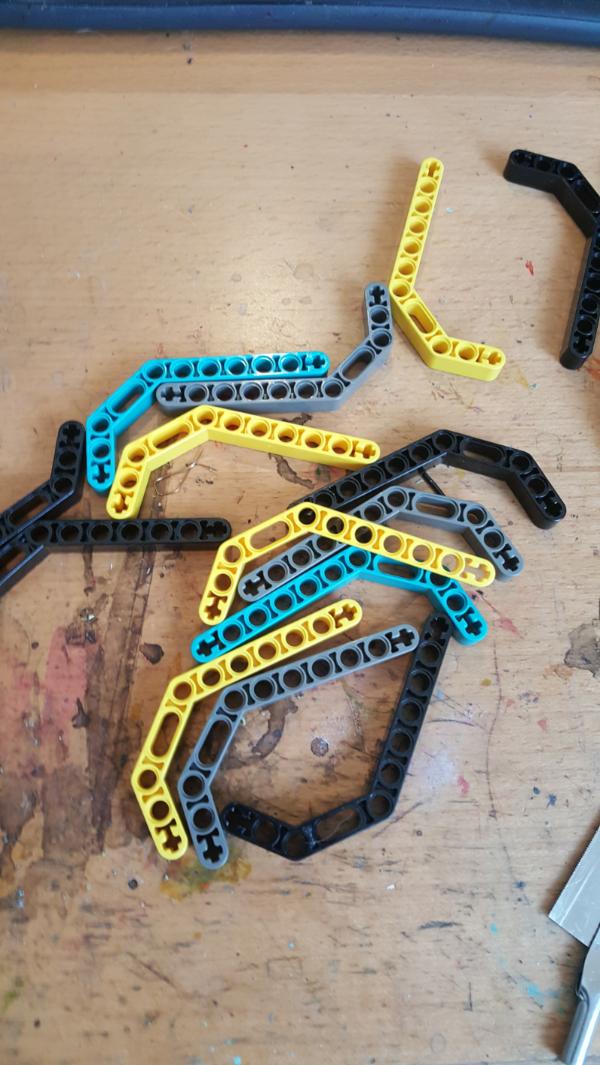
And glue them down. Now since these plastics dont react as well to superglue I decided to try out plastizap, theoretically zap-a-gaps superglue version more meant for plastics. It seems to work.. better? Im trying not to accelerate it so typically what I did was have the plastic-zap for the broad connection and then "spot weld" normal superglue with accelerator to hold it together while it drys. They are sturdy on there at least so something worked...
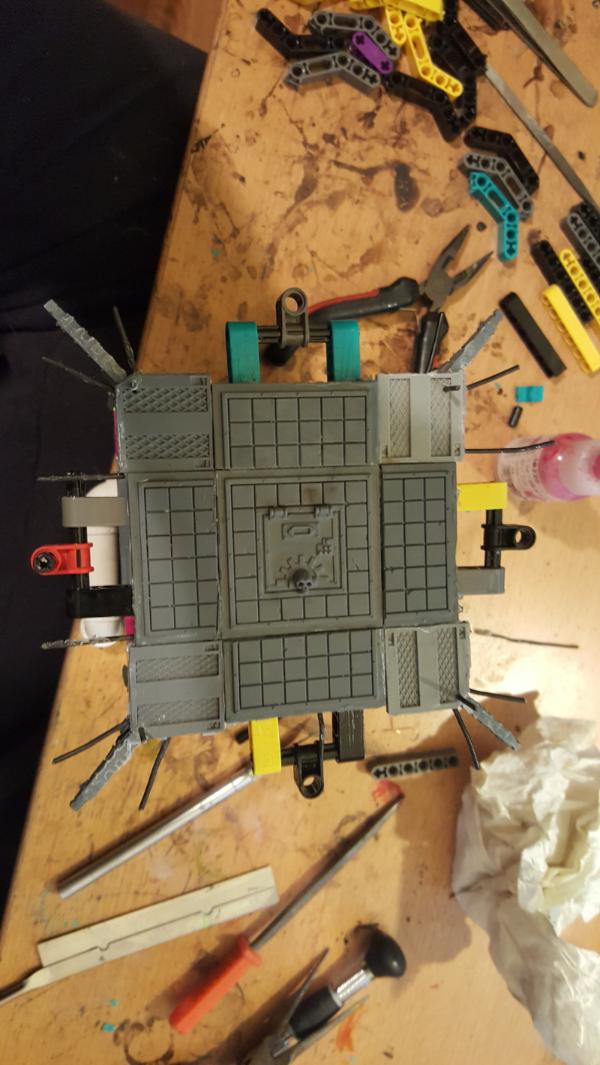
76303
Post by: Warboss_Waaazag
You used needle point mesh i assume? They sell it mostly in squares at craft stores and it has a waxy feel to it, right? If you soak those in warm, soapy water overnight, it helps to cut down on the waxiness that prevents it from sticking to things. What you've got going on now looks promising and less complicated or time-consuming, though.
60913
Post by: Largo39
Hmm, i didnt realize that about the needlepoint (I think I was using that), so thanks for the tip! I might use it for building gratings later on for other projects.
However the speaker mesh remains superior for walkways mostly because it looks better (circular holes) and is metal and this sturdier/stiffer. It's still very time consuming, mostly to get the ibeam edge all around it. You'll see soon!
These are the walkways I'm referring to:
60913
Post by: Largo39
Do be do, work continues. One thing to note is that I didnt make these walkways QUITE as big as the ones for the garage, because I didnt need to have railings on both sides. Even still they end up at like 1.5 inches all the way around, these towers are getting a size upgrade!
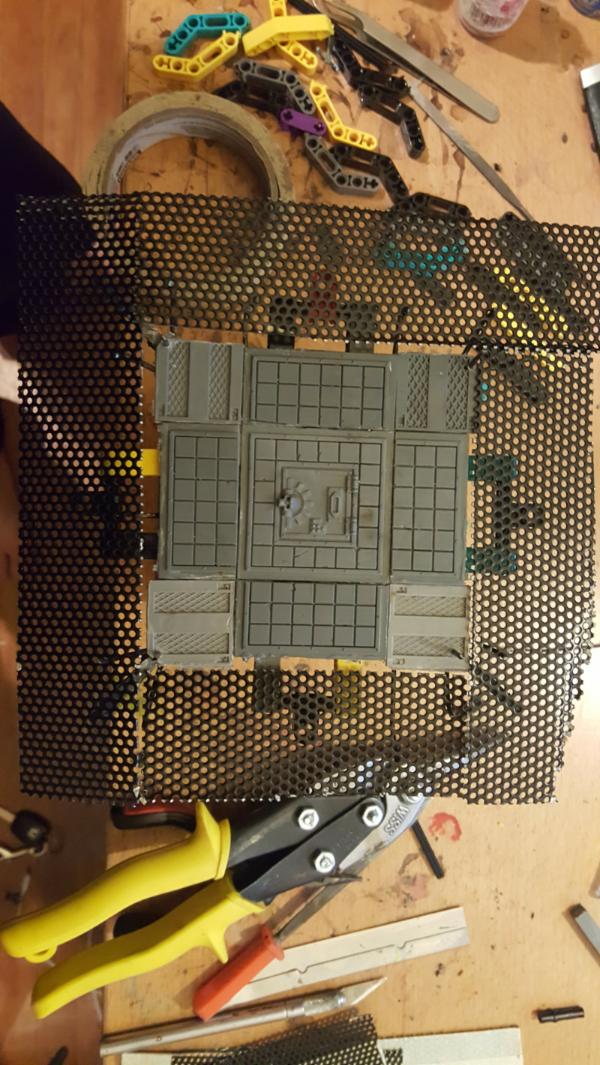
I always use tape now. Helps keep my cuts straighter and, more importantly, cuts down on metal shards from the shears as they get caught int he tape.
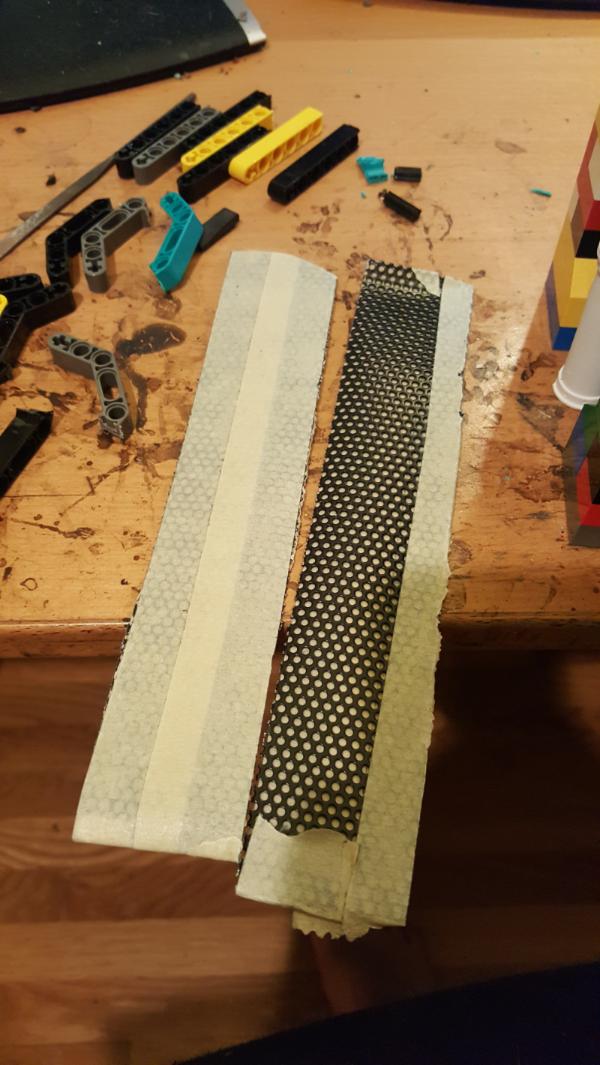
Putting in the posts. Its key to have the wire the same thickness as the perforation, makes the posts much more rigid. I also loop it back around through a second hole to really tie it down tot he mesh. It's visually messier but the sturdiness is worth it.
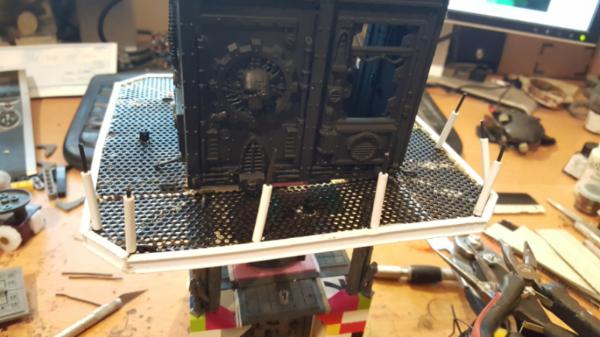
60913
Post by: Largo39
Yay my walkways are done! they look great, fit my 30mm+ base sizes for my dudes and so I'm very happy. Except...
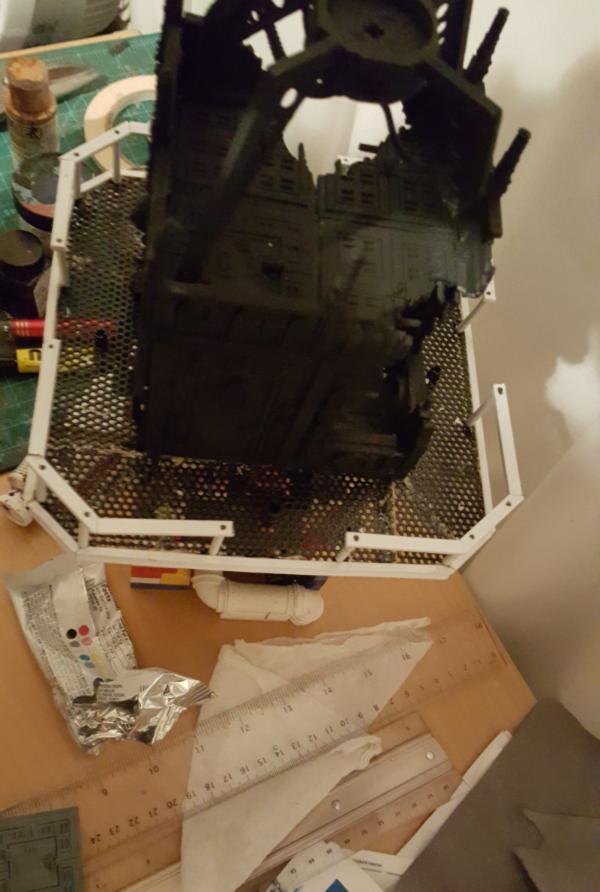
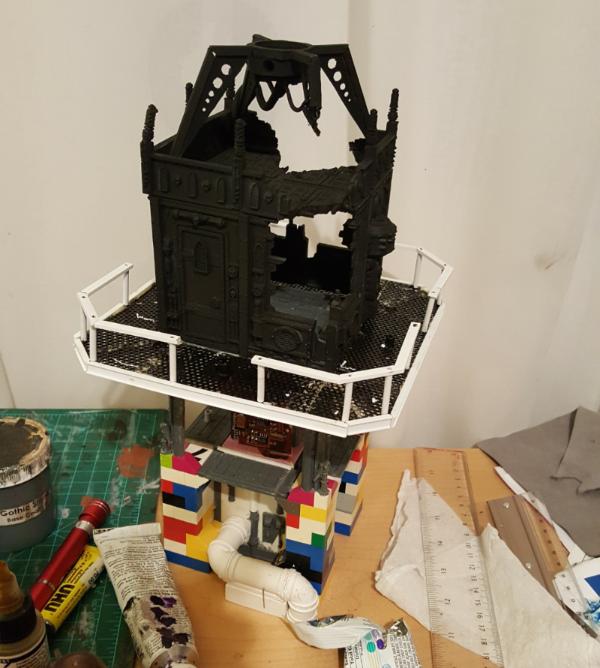
The first level of platforms, which were ALSO supposed to be bridge-points now look.. really small.
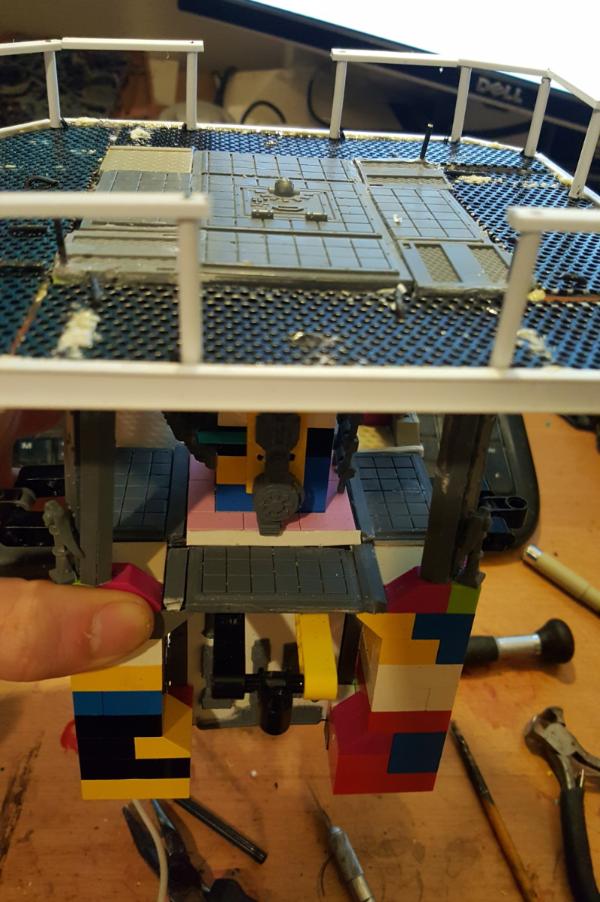
Which is confirmed when i try to squeeze dudes on it, for it to get blocked by the pin and not really look good or remotely be stable for game use:
How on earth would I secure those pins? there is no angle for me to drill in a hole in the plastic to really secure the pin down, so it would just pop off at the first sign of a struggle. Ugh.. Im going to need more platforms somehow...
60913
Post by: Largo39
So, with the unfortunate revelation that the lower levels of my towers needs work its.. time to figure it out.
I cant just make another walkway level, that would make this thing WAY too big and also (more importantly), too difficult to hold and move around. It cant be anything with a railing because that would just make it even more difficult to shove models down there.
So the solution is a small platform that juts out to be flush with the platform above. I figure if I make it trapezoidal then it'll naturally lend itself to off-angle bridge attachments which look good
(as in: bridges will probably only really attach to the walkway points either dead on or 90 degrees to it. Thus having trapezoidal platorms below means Ill have bridges attaching to those at 45 degrees instead, which should add some variety)
First up was extended out so I could test out the platforms at all:

Then chopping up yet more mesh (IM RUNNING OUT?!?!??! HOW?!?!?!). I need 8, 4 per tower.
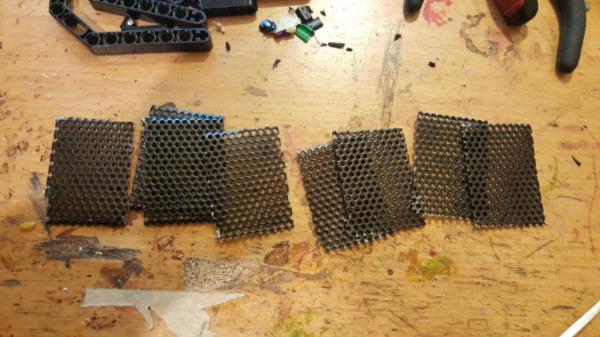
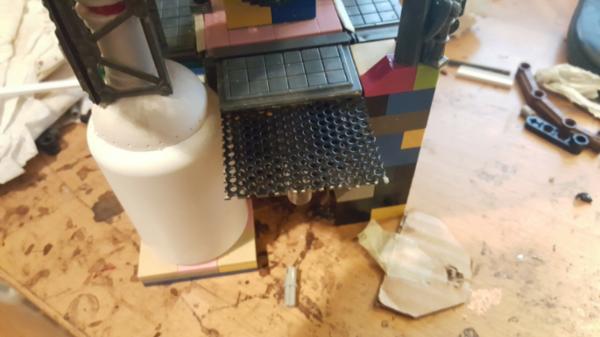
And a cardboard test of my trapezoid.
60913
Post by: Largo39
Seperately from the slog of making platforms
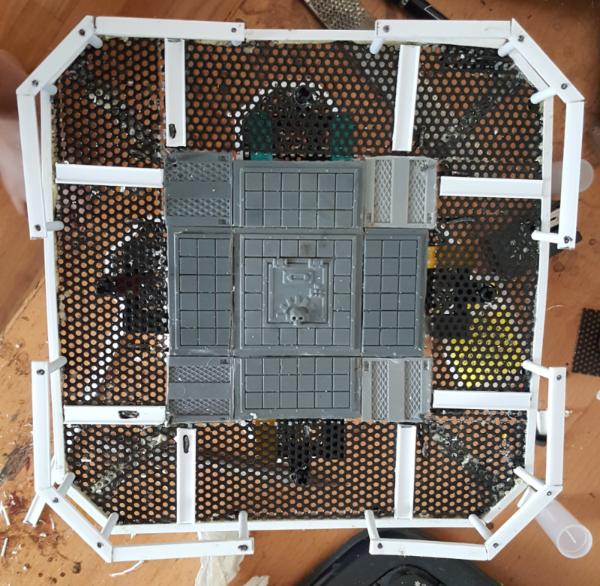
I started working on painting the tops of the towers. These being high detail density GW stuff I figure I work on them seperately while they are still unglued from the tower to make painting easier.
First up is the base layer:
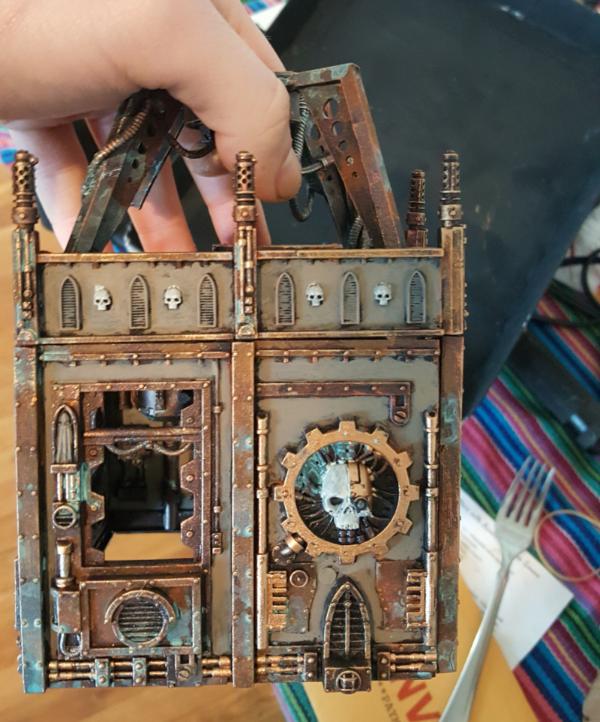
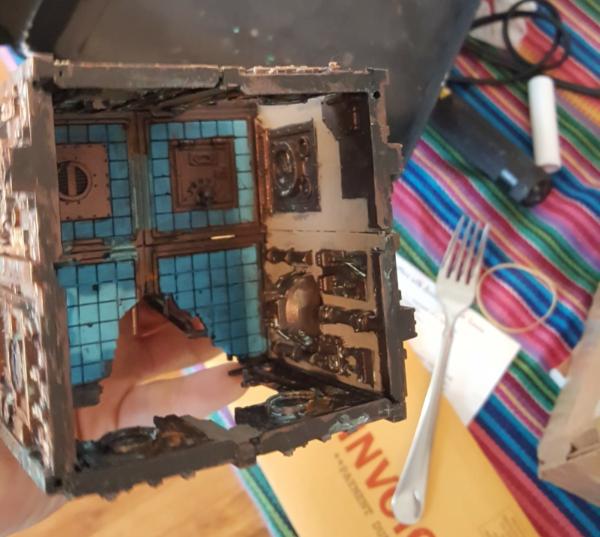
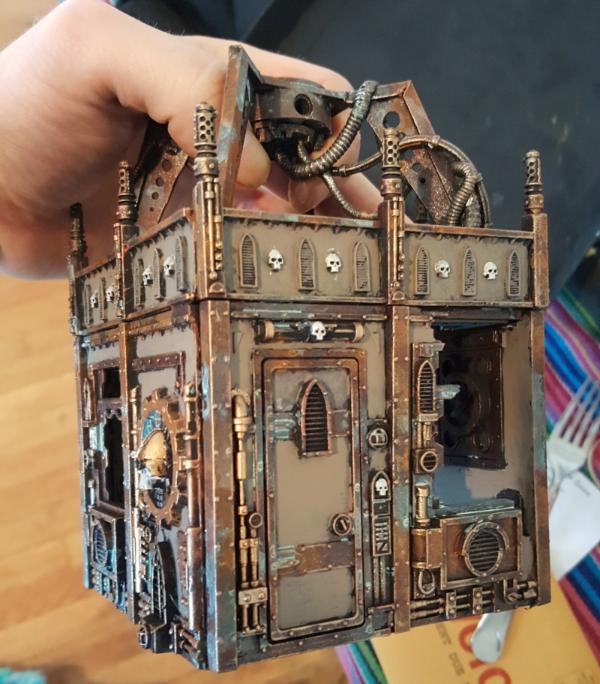
And the first "big picture" shot of it all together with the new platforms and walkways! Muh happier and all my models fit on it very nicely.
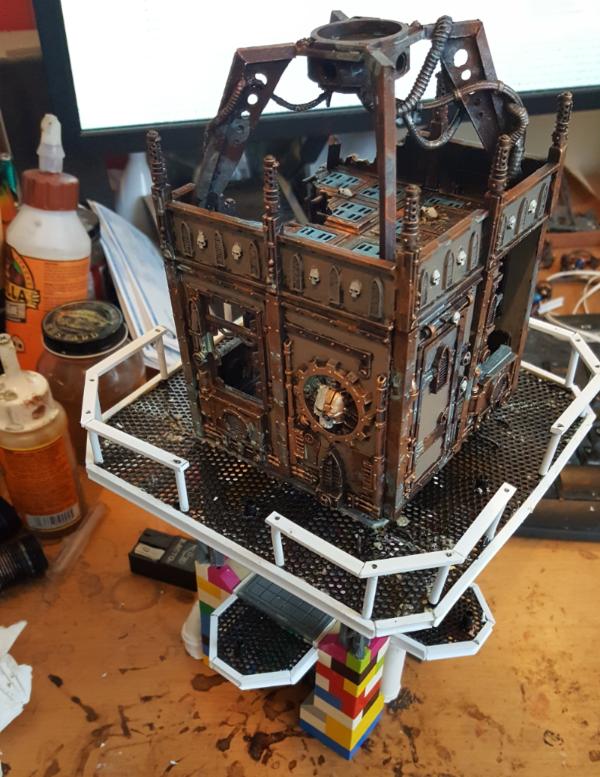
76303
Post by: Warboss_Waaazag
Nice paint job! It's great and grungy so far. Awesome.
60913
Post by: Largo39
Thanks! Now some more work added and after a wash.
Note: I realize these pictures arnt neessarily contiguous between the towers, so dont be confused, these are pictures of my "stages" of painting on EITHER of the 2 towers. Sorry about that but I dont always remember to take the picture immediatly.
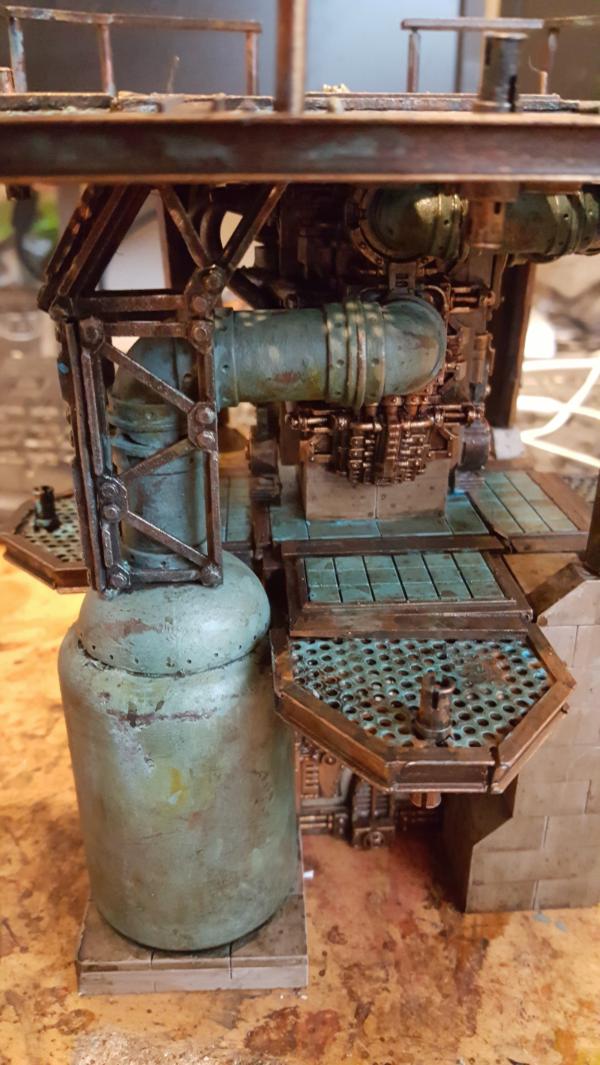
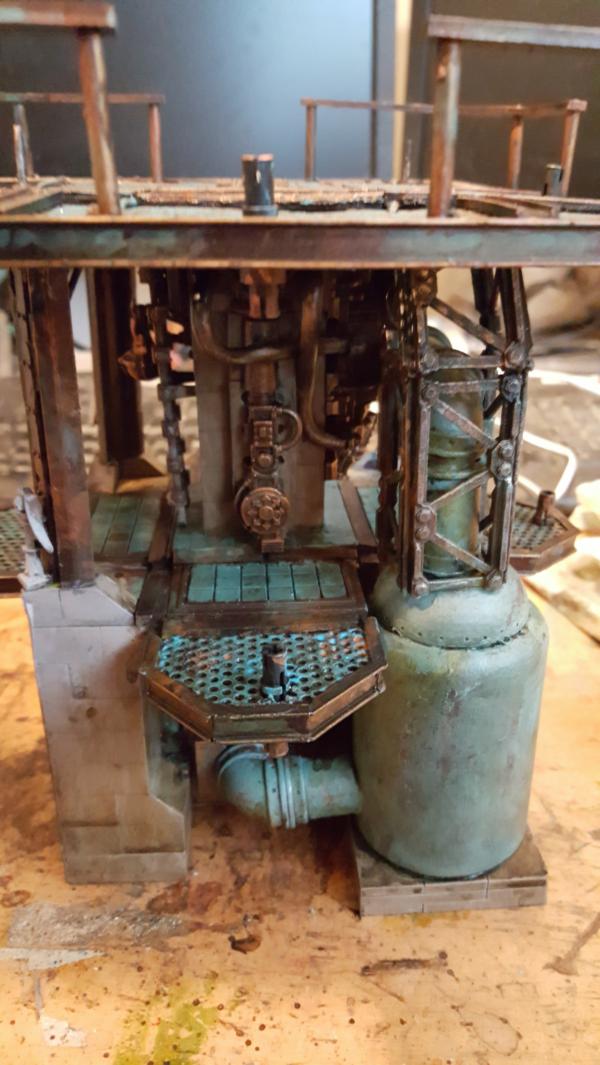
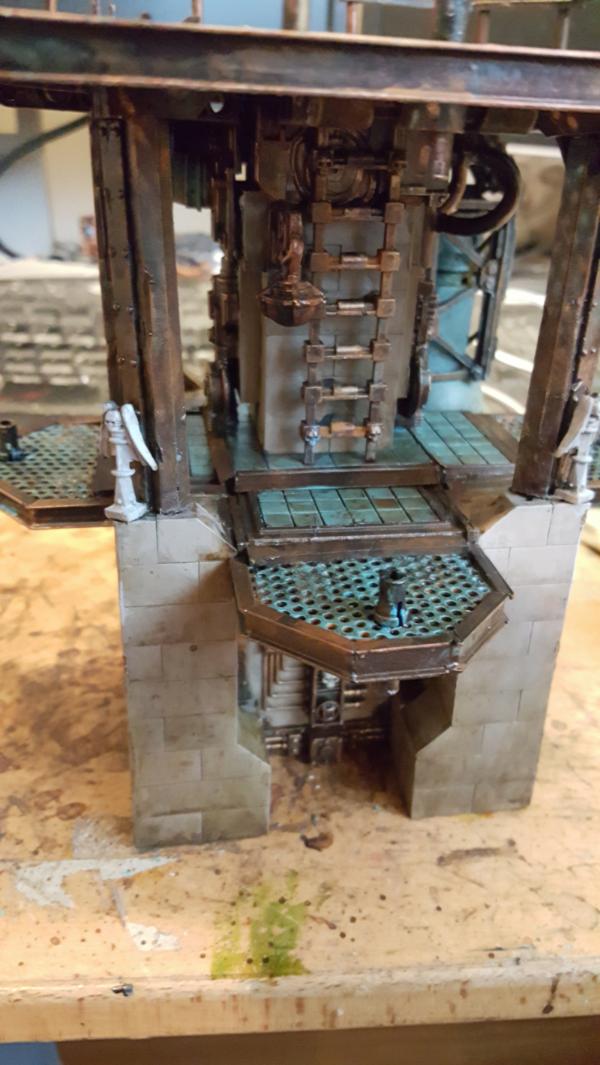
60913
Post by: Largo39
Here's a fun one, a painting slideshow showing how i get the platforms done.
Pre-Blue, rust undercoat.
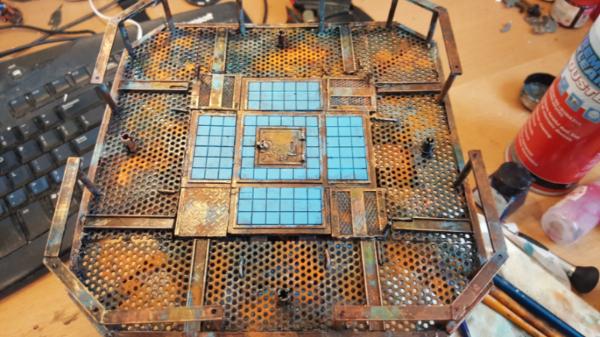
Heavy chipping fluid, then layering on blue.
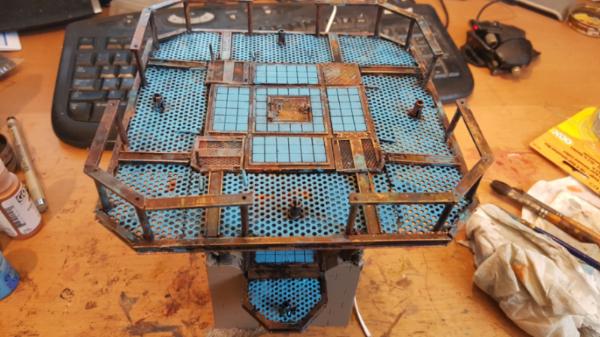
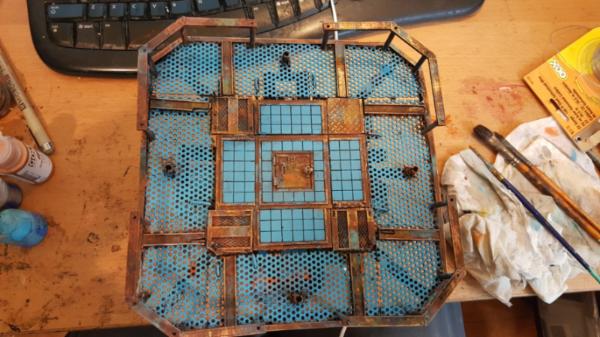
I wash it and while its damp chip the paint
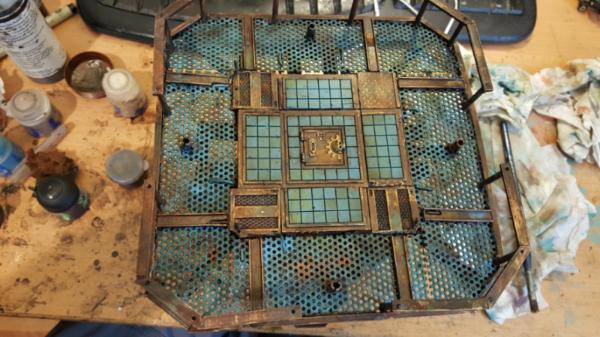
76303
Post by: Warboss_Waaazag
you know, I'm a little sad you covered up all that beautiful weathering work you did on the catwalk. The blue definitely ties the outside walkway together with the interior floor, but my personal preference would've been to only paint the catwalk in small patches of blue here and there. I feel like you lose that sense of weathering when you cover it in blue, even after the wash and chipping.
It's certainly your project and I don't mean to try to dictate what you "should" do, because frankly it's none of my business and ultimately not my call. I just really like your weathering techniques on the walkways and would love to see them take center stage. Maybe a wash to blend your weathering? Just to see how it looks on another piece before you cover it in another color.
Also, this is a really inspiring build and I'm likely to borrow the lego block idea on some upcoming projects. I'll add a link to your blog here when I do because I strongly believe in giving credit to an originator and cross-promoting.
Enjoy the rest of your day!
60913
Post by: Largo39
Its a fair point, and one I've struggled with, but, in the end I think the blue is worth it. Maybe i'll take a closeup just to show you but you see chips and flecks and things in it where it scrapped away, revealing the rust underneath.
I guess what ive learned over time is the level of contrast and detail needs to adapt to how far away you are looking at the piece. Remember the initial painting of the VSGs. Very rusty but.. kind of a blob when you looked at it from far away. So far away you see the blue vs the dark red metal, and up close you see within the blue oranges and rust and yellows. Remember that these weathering techniques ARE still on all the railings, i-beams, and any other exposed surface. Those will remain weathered rusty greeny bronze, just the walkways remain.. blue like all other walking surfaces. Easy to play on and spot. .
Yeah copy away! Everything I've built is totally copyable, I have no problem with that. Frankly of all my designs the towers, I think, are among the more functional pieces of terrain I've seen. One thing to remember is that I intend to use these pieces outside of 40k for shadowrun/dnd campaigns. So they need to be highly reusable for any situation.
As a result they are: Multi-Level, LOS blocking, Small footprint, hold a LOT of models (20+ pretty easily), and have 8 (!) total bridge points from where bridges can be attached. I have yet to think of any other terrain piece that I'll be able to use in more situations, so I hope the idea of it is copied so we all get such flexibility.
Compare them, for example, to the bastion. The bastion is roughly the same footprint and yet holds what, max 5 models? Realistically more like 4 with gun? The classic ruined building typically is a right angled shape (something which I actively tried to avoid but still have it for my small building with the curved roof) and pretty much can only ever go in the 4 corners of the table to be "fairly placed". So yes, please steal lego blocks! make your own towers! lets all shake up terrain and make it more modular and playable for a variety of game systems. These games really come alive when you have guys on different levels shooting across bridges and things and when models have to actually take a path to get from point A to B instead of a straight line.
76303
Post by: Warboss_Waaazag
Those are all good points.
60913
Post by: Largo39
So work moves on and I finished off the tops of the towers! I remembered this time to take good before and afters so you can see what the final drybrush stage does for the stone. Next post ill show the paints I use.
A brief recap of my stages of building painting:
1. Tin Bitz + MIcaceous Iron Oxide (from Golden Acrylic) undercoat
2. Dabs of rust, rusty green, and golden yellow and blue ink all over the place. The goal is that "cold steel" look (just red tinted) where you get swirls of various colors subtly in the dark metal.
3, Drybrush of red copper and bronze over it all (and, in the case of the dark metal, a third dryrbush thats heavir of pearl paint, the brightest white metal you can find)
4, Stone base color in the stone parts
5. Stone layer color over the stone parts
6. Cleanup and re-applying tin bitz where I messed up (often)
7. Wash
8. drybrush stone highlights.
This is the result of going from step 7 to step 8
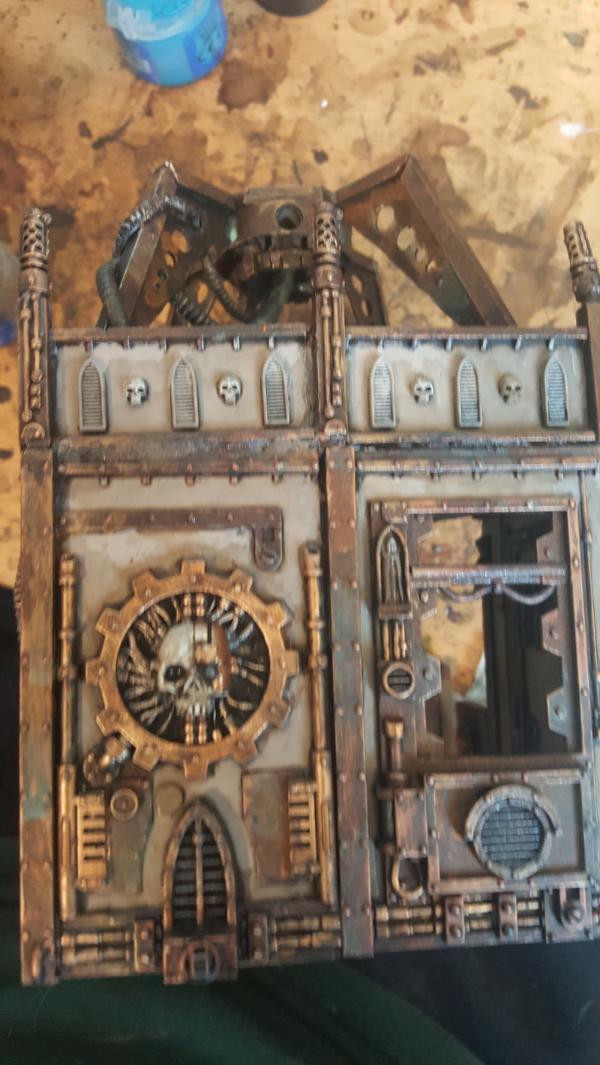
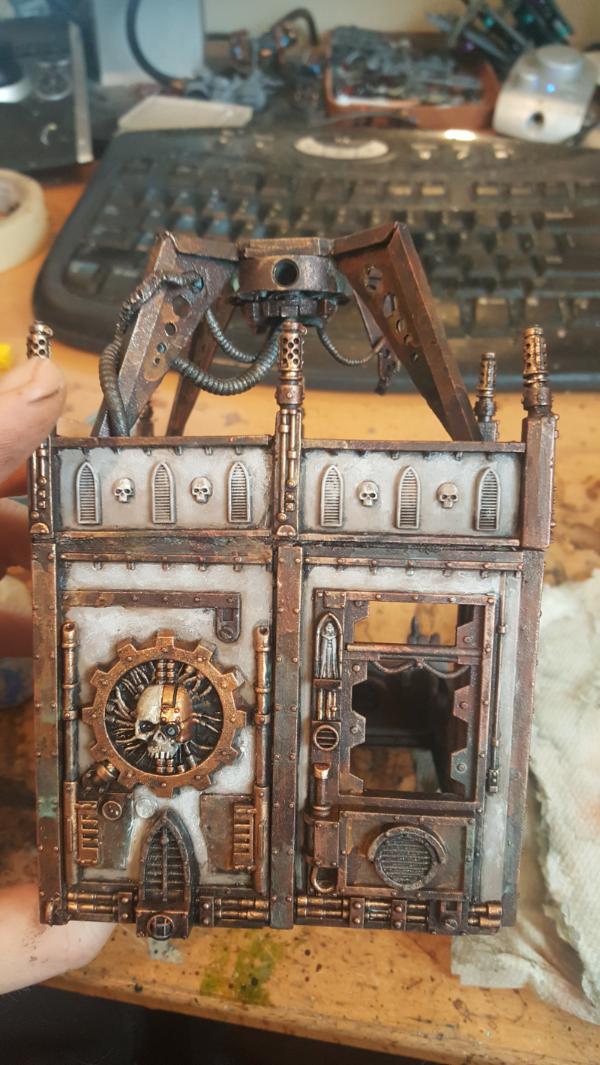
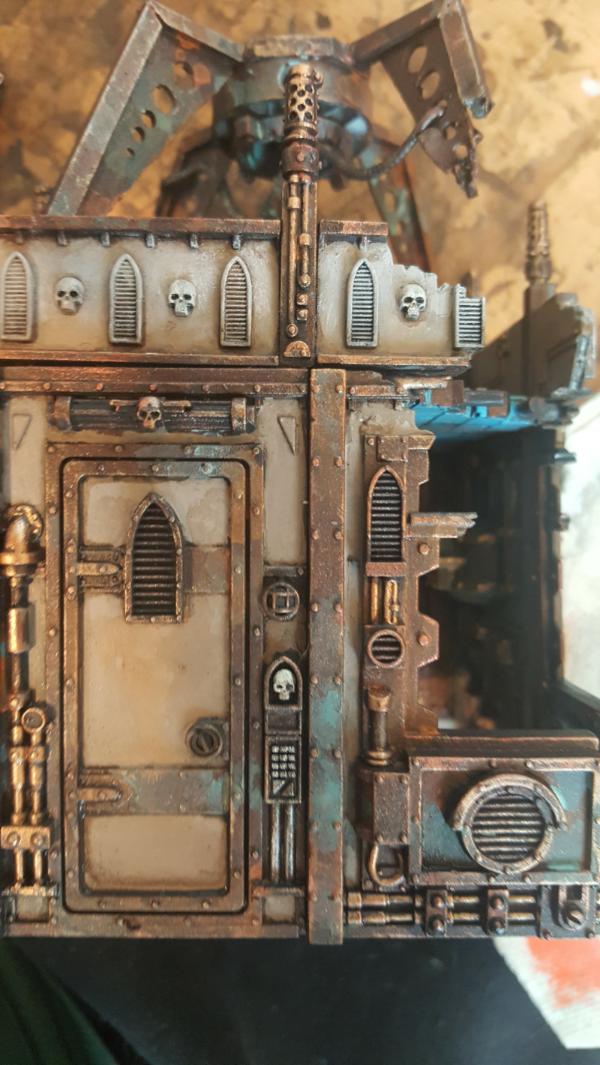
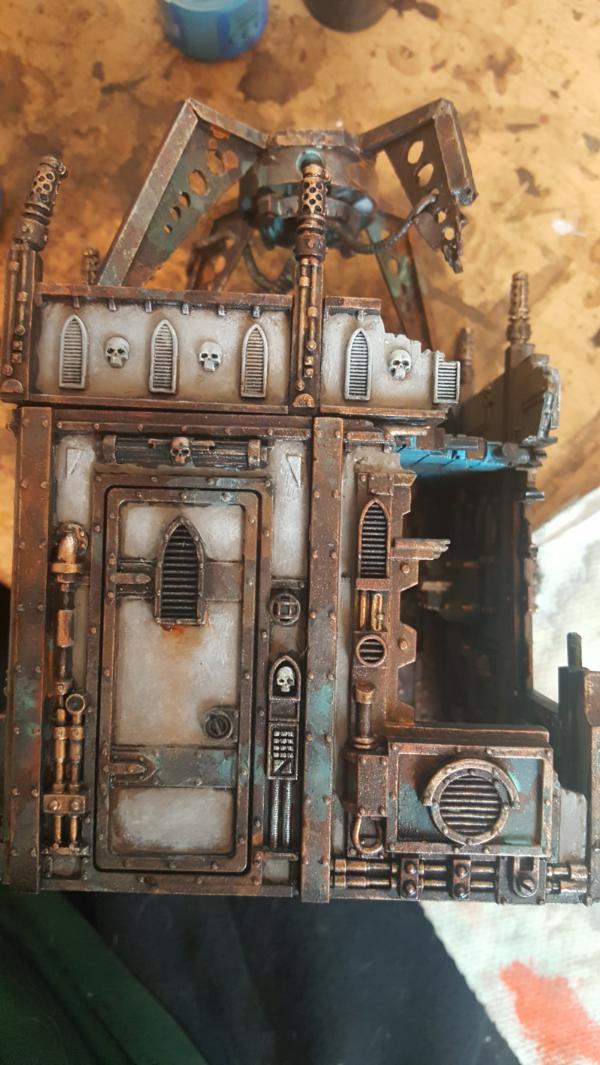
60913
Post by: Largo39
Now the paints I use! Using the steps in the previous post here are their paints.
When I say "get in fluid" that means that instead of a tube of paint golden has all the same paints in "fluid" form which is basically the exact same consistency as GW layer/base paints.
Its a bit more expensive than the raw tube but still cheaper than GW paints. I often get a goldden 1oz bottle for CHEAPER than a GW pot which is only half an ounce.
Step 1/6: Base/Cleanup
Left: (GET IN FLUID) http://www.goldenpaints.com/products/colors/iridescent-colors/heavy-body-iridescent-colors/micaceous-iron-oxide
Right: Citadel Warplock Bronze (Formerly Tin Bitz) https://www.games-workshop.com/en-US/Base-Warplock-Bronze
Step 2: Rust
Tube (GET IN FLUID): http://www.goldenpaints.com/products/colors/heavy-body/burnt-sienna
Orange: https://www.games-workshop.com/en-US/Layer-Fire-Dragon-Bright (Though any CRAZY bright orange will do, the brighter the better)
Green: https://www.games-workshop.com/en-US/Technical-Nihilakh-Oxide
Yellow Bottle (HIGH FLOW): http://www.goldenpaints.com/products/colors/high-flow/transparent-yellow-iron-oxide
Red Bottle: https://www.amazon.com/Vallejo-Game-Color-Skin-Paint/dp/B000PH9ILU
Step 3: Drybrush
Pearl: (GET IN FLUID) http://www.goldenpaints.com/products/colors/iridescent-colors/fluid-iridescent-colors/iridescent-pearl--fine
Bronze: (GET IN FLUID) http://www.goldenpaints.com/products/colors/iridescent-colors/open-iridescent-colors/iridescent-bronze--fine
Copper: (GET IN FLUID) http://www.goldenpaints.com/products/colors/iridescent-colors/heavy-body-iridescent-colors/iridescent-copper--fine
Step 4/5/8: Stone (left is the Base, middle is the Layer, right is the Drybrush)
Left: https://www.games-workshop.com/en-US/Layer-Baneblade-Brown
Middle: https://www.games-workshop.com/en-US/Base-Rakarth-Flesh
Right: https://www.games-workshop.com/en-US/Layer-Pallid-Wych-Flesh
Step 7: Wash
Umber (HIGH FLOW): http://www.goldenpaints.com/products/colors/high-flow/raw-umber
Black Magic (Any black ink will do but this one is nice and dense so easy to get super dark if needed): https://www.michaels.com/higgins-black-magic-waterproof-ink/10015490.html
Crimson: https://www.games-workshop.com/en-US/Shade-Carroburg-Crimson
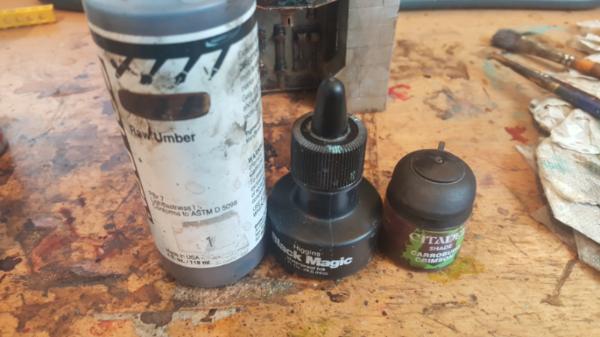
Also, when there are coppery bits these is the setup for copper. Basecoat of copper, then wash of the peat brown and sephia to dull it down
Sepia:https://www.games-workshop.com/en-US/Shade-Seraphim-Sepia
Copper (FLUID):http://www.goldenpaints.com/products/colors/iridescent-colors/heavy-body-iridescent-colors/iridescent-copper-light--fine
Brown: https://www.amazon.com/Winsor-Newton-Drawing-Bottle-Brown/dp/B000KNJ1J8
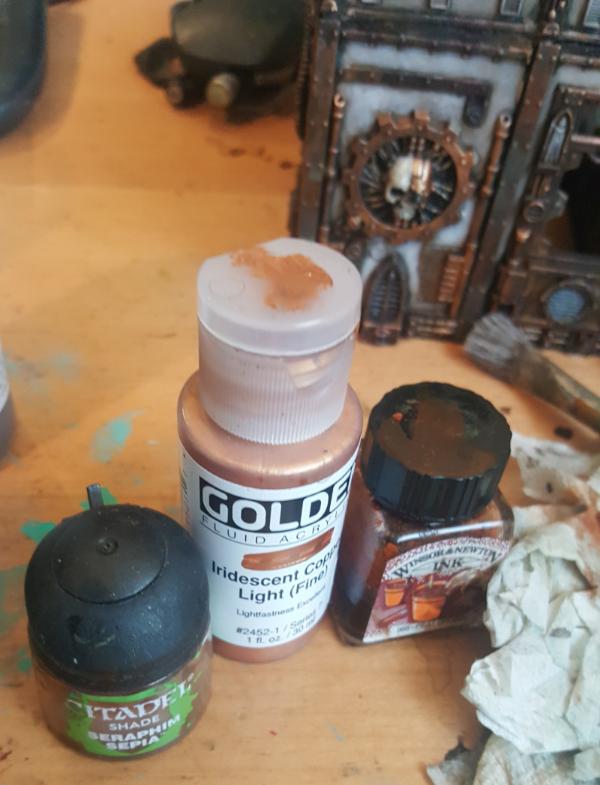
76303
Post by: Warboss_Waaazag
What is in the JAR? Also, could you list with words what your colors and brands are? Because some of your pots are impossible to read.
60913
Post by: Largo39
Good point and done!
76303
Post by: Warboss_Waaazag
I'm really impressed with how well those lego blocks take paint. Tower looks awesome.
76303
Post by: Warboss_Waaazag
Beautiful work. Would love to see some photis of them together.
60913
Post by: Largo39
Time to make some bridges! Or, more specifically, finish some bridges.
Now, last time I worked on this stuff I had left off with this:
More a proof of concept than anything. The gears werent all the same, the axels stuck out a lot and, of course, I hadn't figured out how the railings would work when you tilted ends of each bridge to go up a level. But, now I know how all the pieces work having done this with the towers so I know what to do!
First up is finishing off the bottom technic side. Like with the towers I drilled out the hole to fit the longer lego pins. This makes them sturdier and, critically, more easily pulled out. The one problem I'm struggling with is the fact that the lego pin sticks out the top and cant really have a model placed on it. So If i ever, for example, wanted to make the top assembly snap together with magnets and the bottom with legos, by drilling otu the holes I am able to do that, since I can pop out the long lego pin and replace it with a shorter one for just the bottom.
Next is more firmly gluing down the bottom lego attachments using my new plasti-zap. The act of drilling out these holes pretty much popped them all off so they needed MUCh more glue.

Long pin in place and going all the way through the piece! SO STURDY NOW ZOMG.
I also added spacers to fill in the gaps between the gears and the underbridge assembly, to reduce how loosey goosey it could get
And a little "fix" that engineers would weld down to fix the broken chunk of the long bridge
Downside is that at just about that point I realized i needed to go all railings, no more GW railing panels. Sad, but at least it'll be a lot less pointy.
Time for a lot of mass production...
60913
Post by: Largo39
And the bridges built and tested:

you an see the problem of the center peg sticking out, BUT if i use wider lego platforms instead of the small sticks it might be alleviated. Dunno, have to experiment later, for now onto painting what i hasve!
Note that you only see about half of the bridges from the pictures, sadly the other half are.. gonna have to wait until i get more gears of the right type. All I'm left with are the gears that bend at 90 degrees. While more useful from a lego perspetive they dont look so good sadly.
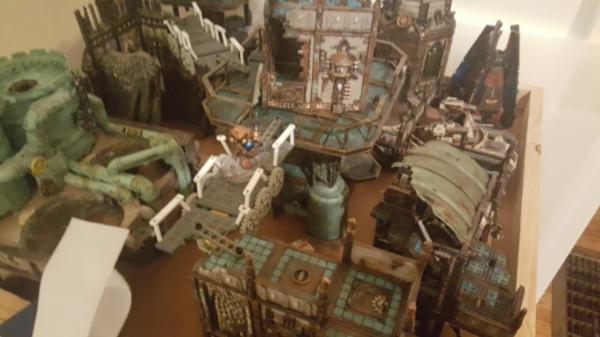
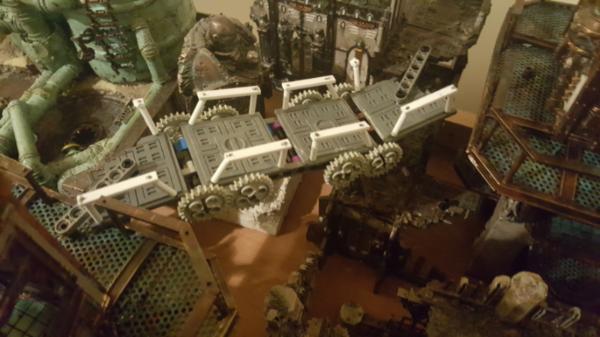
42839
Post by: stonned_astartes
Looking good, pity you cant put the bars linking the bridges to the towers under the bridge/walkway.
60913
Post by: Largo39
So I can but.. they are a lot less stable. You really need it on both sides for it to really work. Ill post some side pictures soon to show the full setup.
In the future I might have the top side be magnetized but we'll see. Alternately I could use wider lego beams so its more of a gang-plank.
60913
Post by: Largo39
So, sorry abotu the delay but the first set of bridges are done! The remaining bridges are waiting on alternate lego gears.
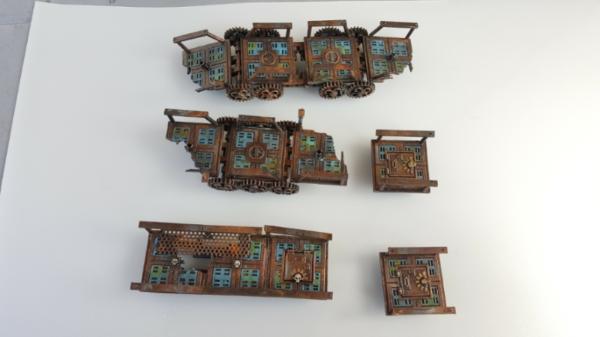
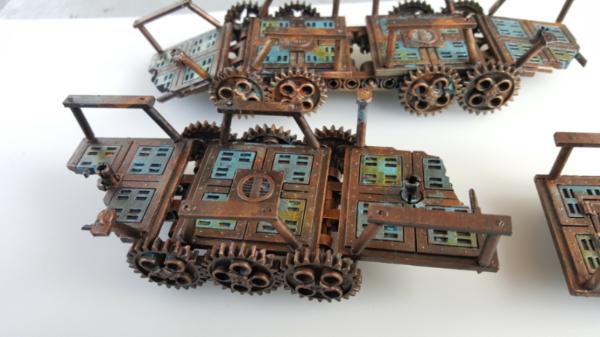
I also wanted to be a bit more clear about the mechanics of how they all work and why stuff has been necessary.
First up, the undersides, the goal is to easily make stuff wider, which I can! (when its not stuck from being painted together. Dont paint bridge pieces that are assembled! D'oh!
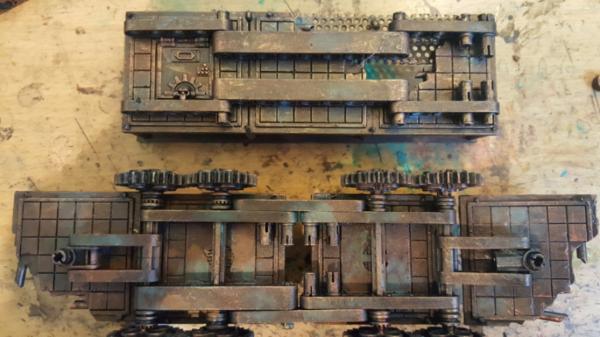
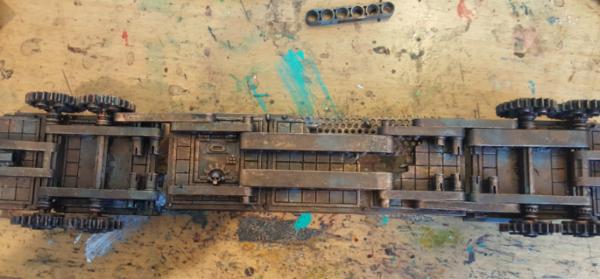 Le
Le sigh, missed a spot there. Grrr, more to fix and repaint.
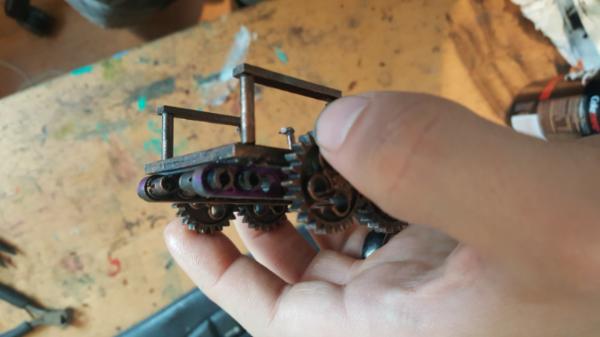
Next up is the gears, basically they are so I can do this to my bridge:
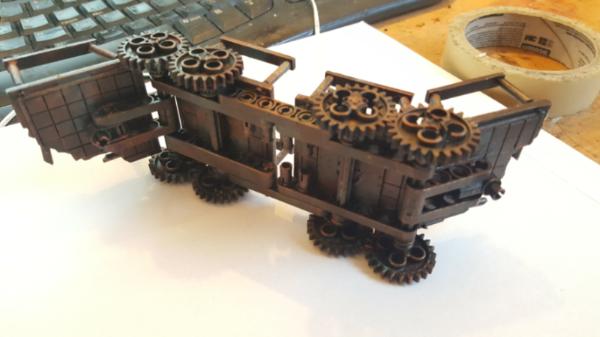

Obviously a very extreme angle but still useful to mark paths. The normal case is a much gentler slope but thats the point, I can do whatever!
Finally the attachments, here is how that works:
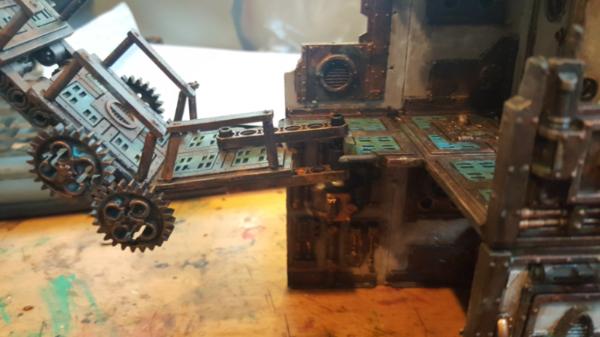
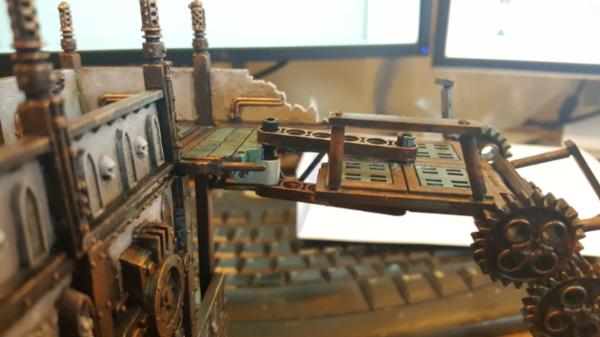
Without the top piece it uh.. sags a LOT more:
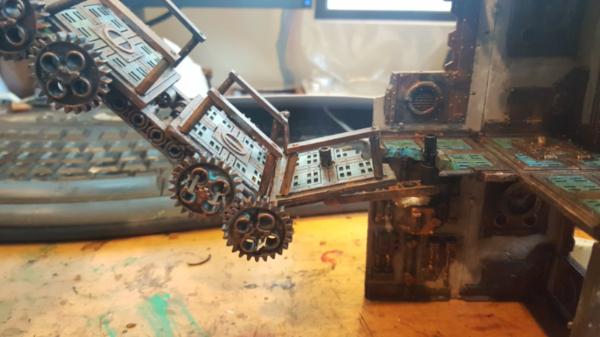
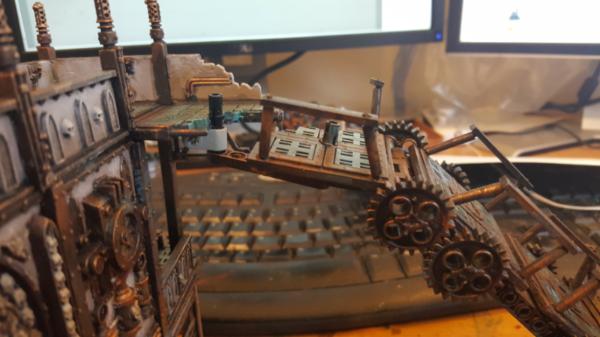
When I was suggesting using a wider block this is what I meant. Very easy to put models on but.. very obvious that it's lego

I can also rotate the bridges around with this setup:
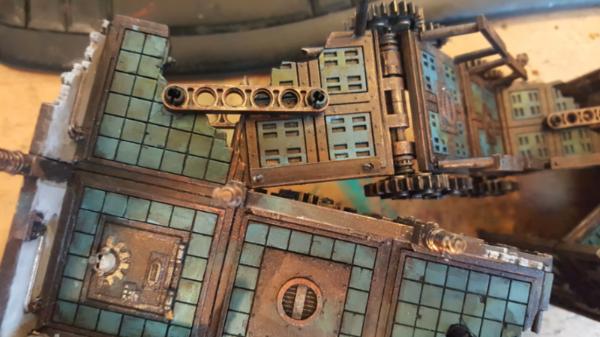
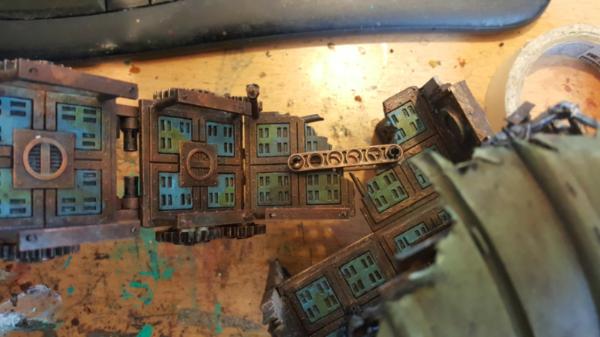
60913
Post by: Largo39
So, few little things.
First up is the water tower, filling in cracks and crevices. I started painting it and realize it didnt actually have THAT much playable area. Most of the crannys were jagged with piles of sand and stuff in there. So I cleaned it out and started to fill them in, simplifying things:
The before:
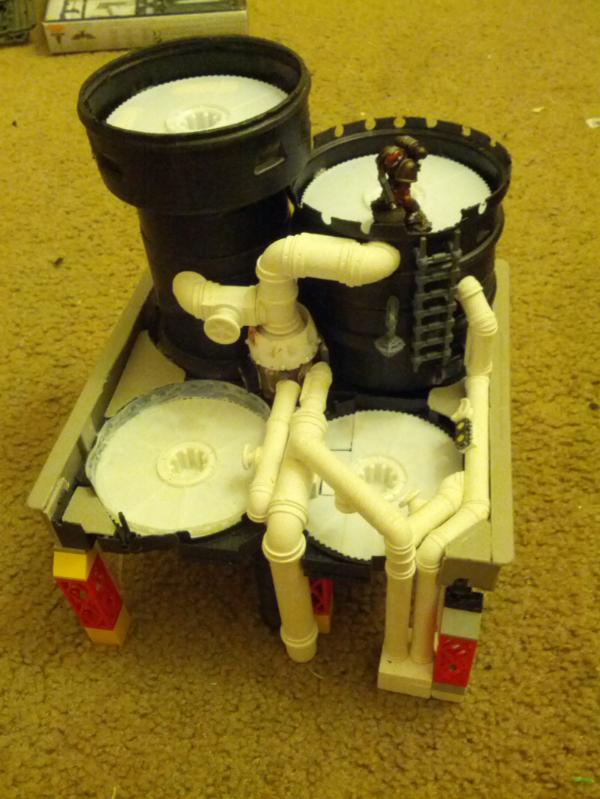
Go away you wierd pit on the left!
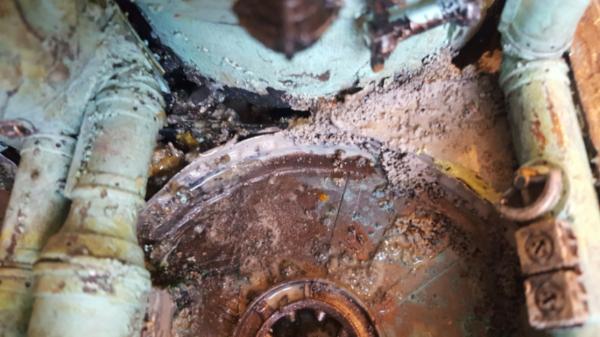
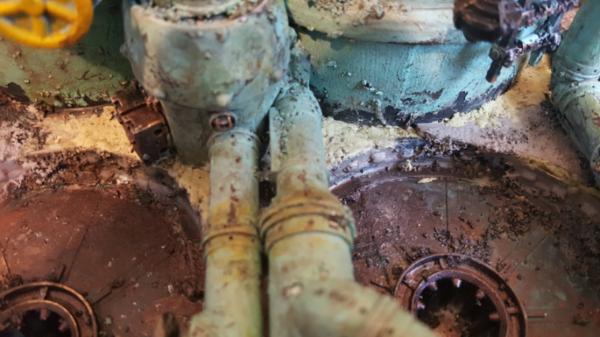
I promise this wasnt dried, its a lot smoother now!
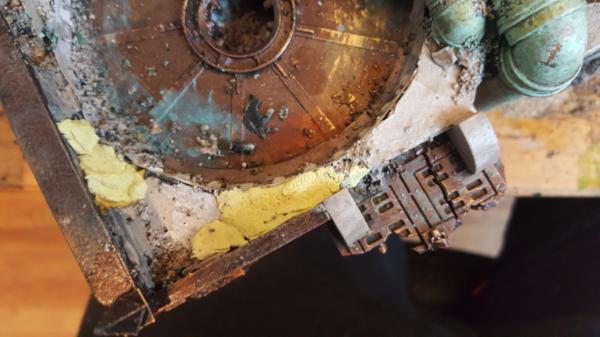
While waiting for all that to dry and be sanded I also started re-working my very first building in this scheme. Now that the floors are blue and we have the dark metal look it was time to revist and touch it up a bit. My goals were to reduce some of the sand covering it, add the texture of the dark metal look, and add the blue to the floors/ceilings.
First up is the before of where I started:

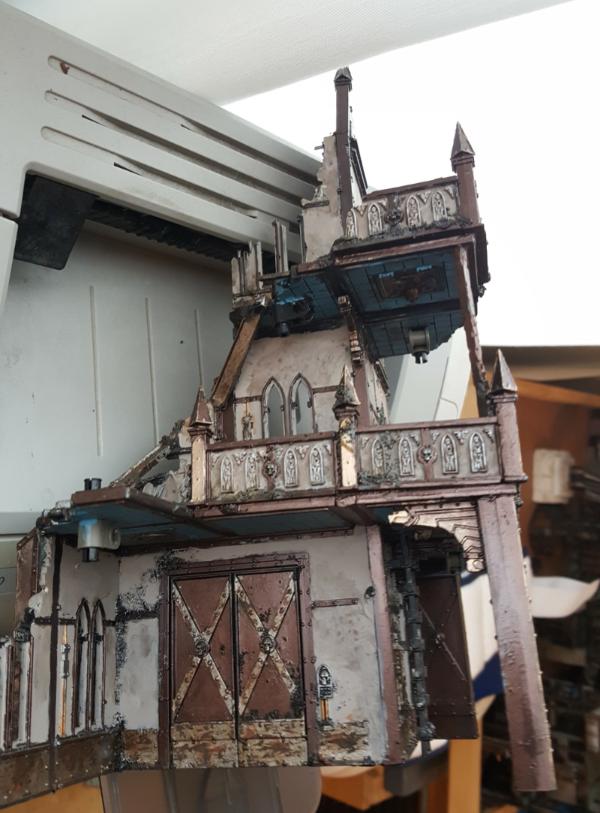

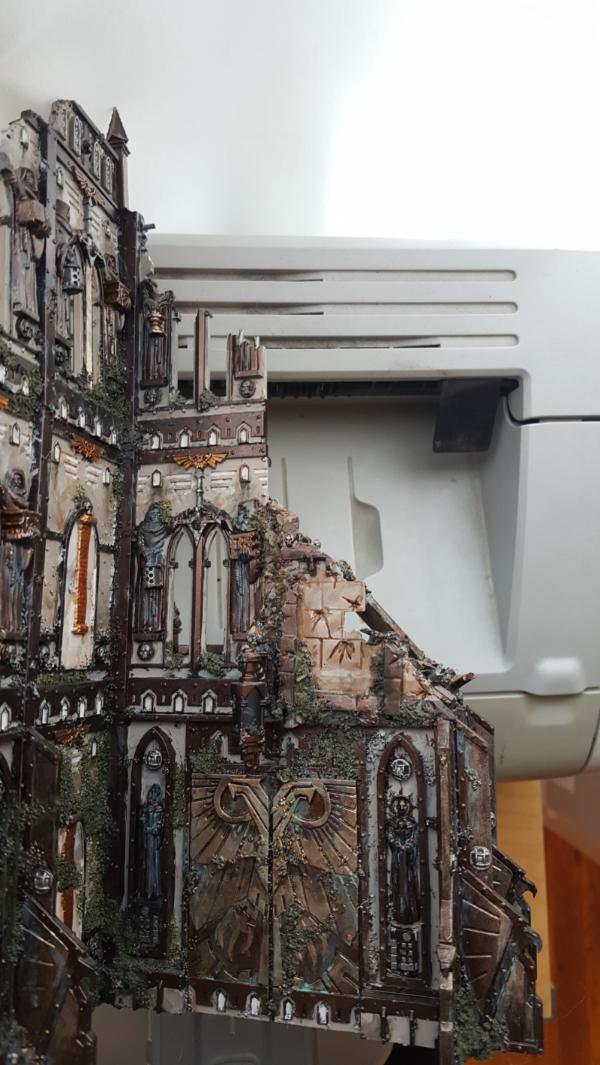
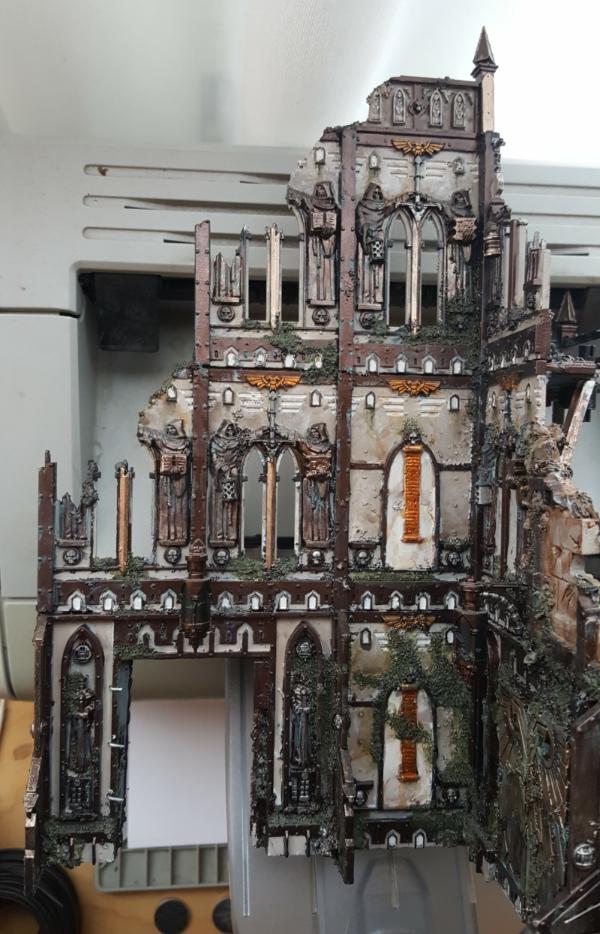 Automatically Appended Next Post:
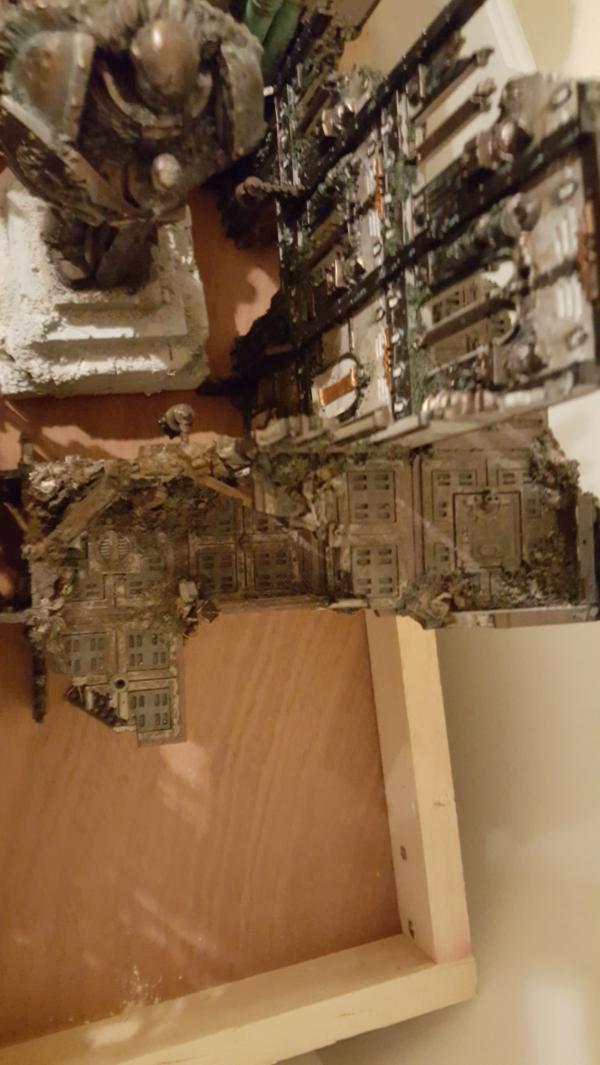
106439
Post by: Ynneadwraith
Great work man love the multi-use adaptable bridges.
Just a thought, if you don't like how it looks on the top, do you have any of the lego bits that are like a double thickness of the one you're using? Like the ones on the far left of this picture rather than the ones in the middle
[imghttp://images.brickset.com/sets/images/10072-1.jpg?200304210518[/img]
If you stick one of those on the underside then it might hold well enough not to sag but also be hidden from sight.
If that's an improvement, but not quite enough, then two of those per side would be more than sufficient
60913
Post by: Largo39
So I can do that if I flip the peg around, but the problem there is if i do that it doesnt quiitteee stick out the top to lock.
Still, you are right in that using a double thickness lego beam on the bottom would be a lot sturdier, potentially enough to counteract that. I'll give it a try tomorrow and let you know!
52201
Post by: evildrcheese
Excellent work on the terrain dude, really impressive and inspirational!
EDC
60913
Post by: Largo39
Thanks! and now the after!
SO MUCH CLEANER! I still like the vine idea, but I want the ability to actually get vines and put them on. Thus this is more about hints of vine and green before a potential vine layer.

The statues also now have the same dark metal effect so the bolts and highlights standout now too
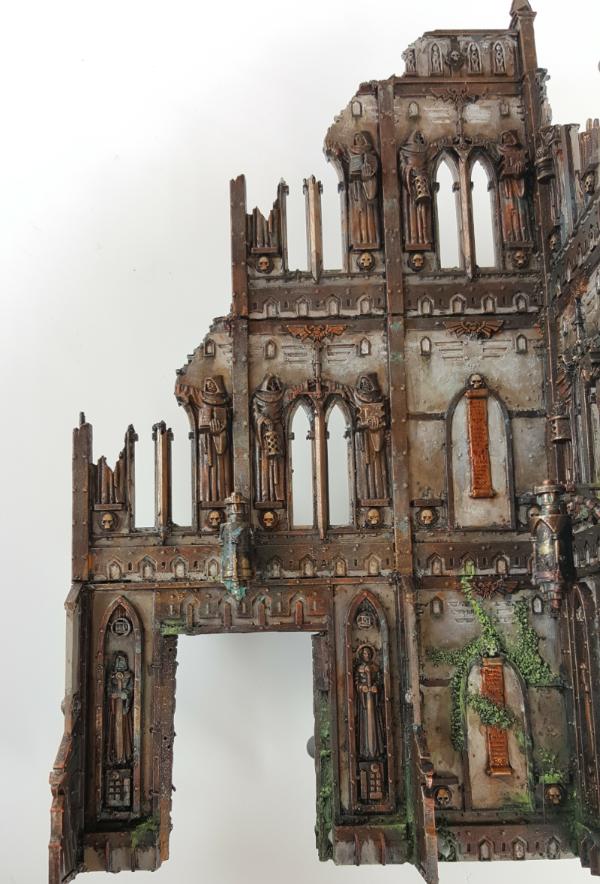
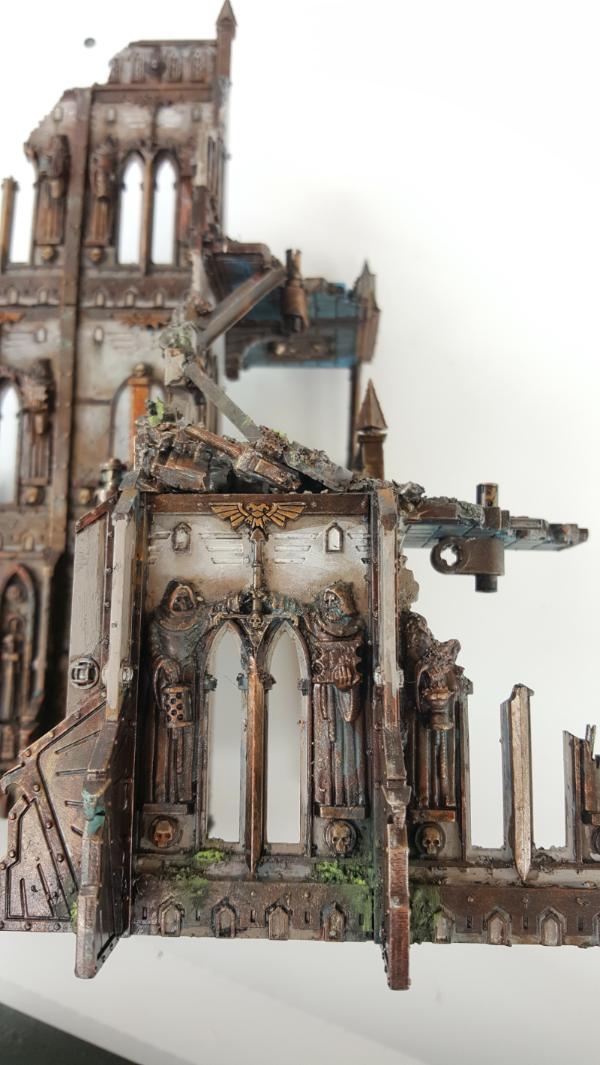
No more crazily scratched metal. Simpler here is better given all the detail
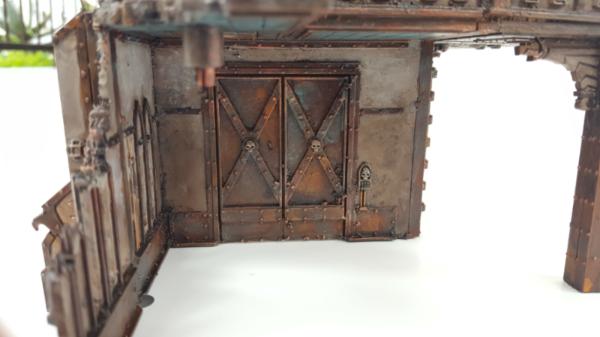
Still dig the blue floors. Some of the green is probably a bit much, almost looks like OSL, but again i eventually want plants so there will be a wash pass once i get around to them to tone it down.
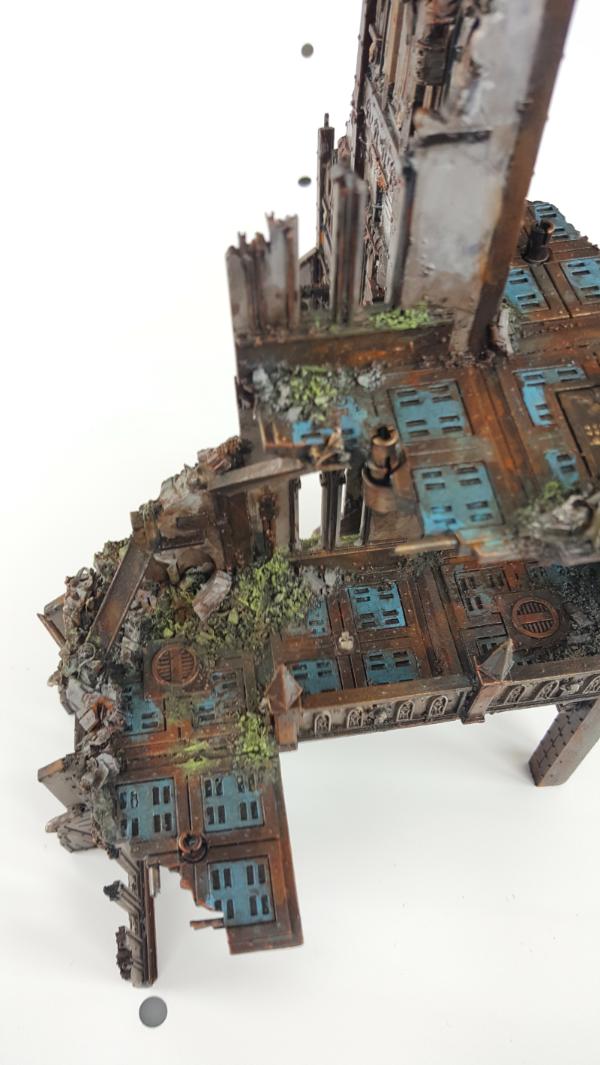
Its nice to be able to read the rubble piles:
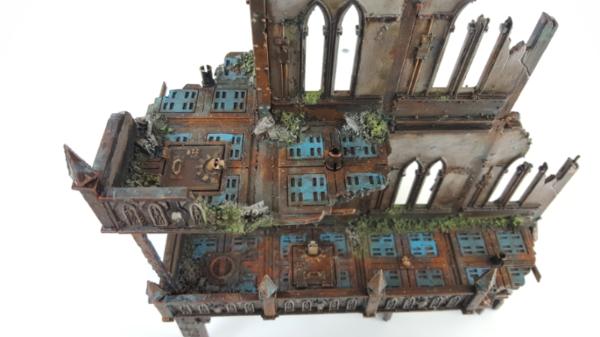
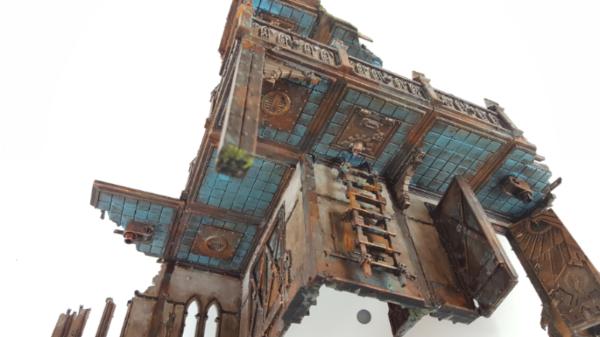
60913
Post by: Largo39
So! yesterday I did some tests of an alternate method of putting up the bridges. The first thing ot understand is that the lego piece I'm using for all this is this one:
That band of plastic in the middle subdividing a 2 length peg from a 1 length peg is the core of the "problem". The thickness of my building + lego structure is a touch more than 1.5 pegs thick. Theoretically leaving me one full peg on one side, either the top or bottom, and half a peg on the other.
Unfortunately that "touch more" is basically the thickness of that band in the middle, thus depending on how I orient the peg I can run into situations where the lego pieces I use dont "click" into place. You can see that here:
where the "lips" of the lego peg dont quiittee stick out far enough to expand out again and lock in.
So what I started with was this., the full peg on top and the half peg on bottom:
The legos are secure but it sticks out the top a lot and is difficult to put a model on. What Ynnead suggested was instead flipping the orientation to be more like this:

With a double thickenss beam at bottom. As you can see there is sag BUT it does seem to be better, and it is easier to put on and take off than single thickness beams.
When I add the top piece, even though its looser than id like, we're no worse off than where we were before.
So thats very promising! Having the half thickness on top is so much easier for model placement:
Full thickness they unbalance
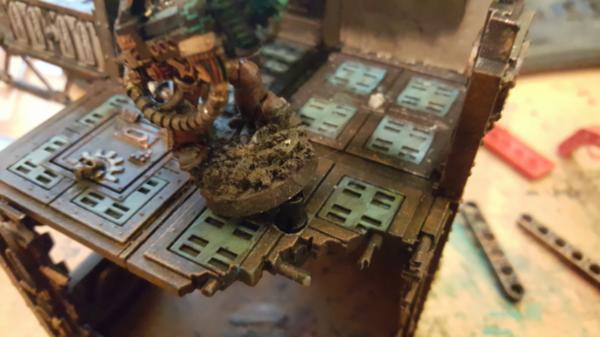
Half thickness its just fine:
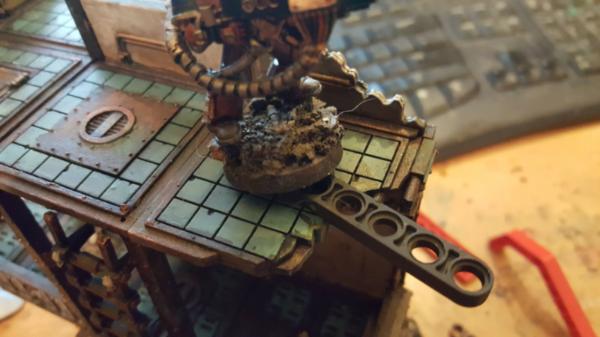
Also when its oriented that way and not in use I can just push it down to make it flat:
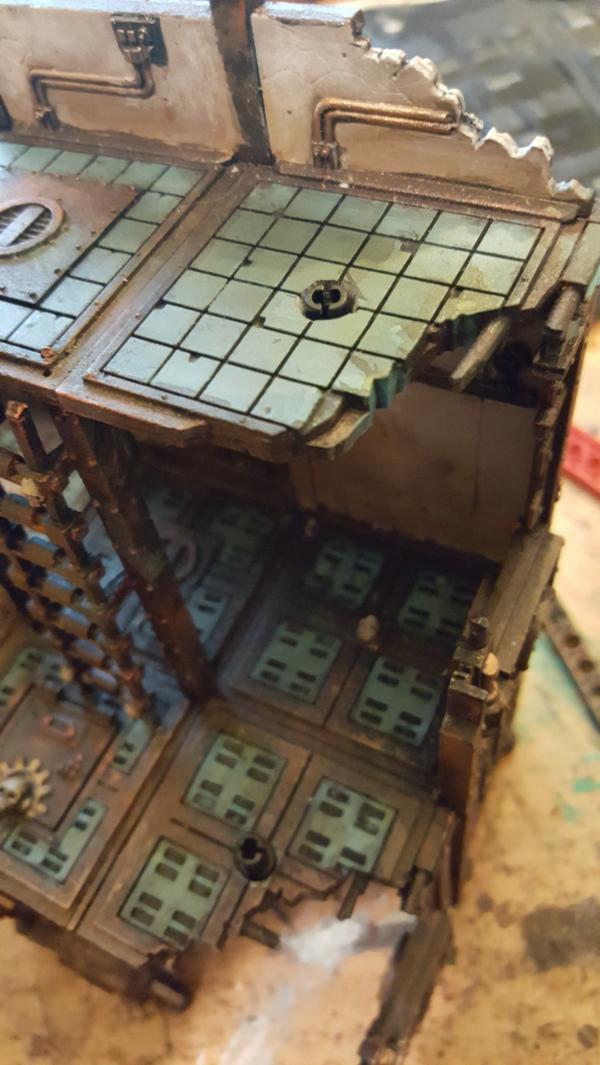
So I thinkkk all told this is better. Im worried about the ease at which the top piece can pop off, so this is something that only real world testing will figure out, BUT its worth having a set of thicker beam legos painted up anyways. I also did some testing making the thin platform legos better and seeing if i can thin them even more to just sneak it in there:
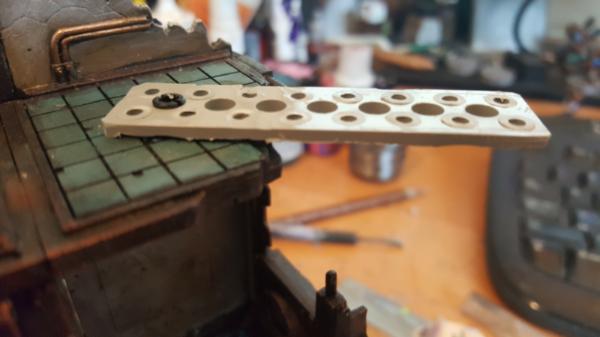
I didnt quite make it to "locked" but its still more resistant to popping off before, so that might just be enough to make it all the best solution.
Thanks for the idea Ynneadwrath!
106439
Post by: Ynneadwraith
Years I've been waiting. Years! But I knew that one day my childhood mucking about with lego would come in useful
Glad I could be of assistance
It's looking great dude I'm loving the creepers climbing up the side of the ruins. Never seen that before but it really just completes the whole look the lego strips look really natural with the stubs stripped off the top too
60913
Post by: Largo39
Childhood mucking? Psh, now we're 40k WITH leogs! its all adulthood mucking now.
I give it a year tops before my next terrain piece involves motorized walkways, traps, and other such things that reconfigure themselves on a per-turn basis.
60913
Post by: Largo39
So we're back to the water tower, and after various patching and whatnot we're slowly getting to a cleaner/easier to read state on the bottom.
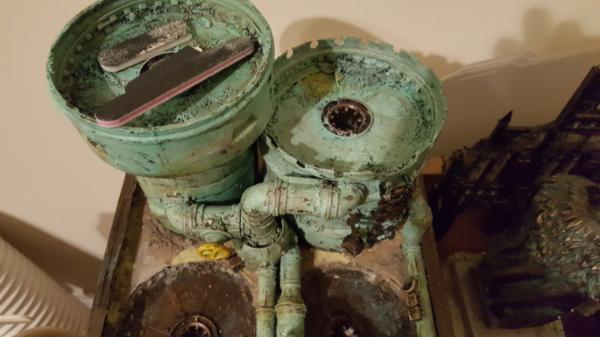
But there's still a problem. For such a big model (almost a foot square) there is still relatively little space to place models. Furthermore there is only a single bridgepoint in the front and nowhere else.
I hemmed, I hawed, I shed single tears for what I was about to do but.. I decided it needed platforms. To say Im tired of making platforms is an understatement but, it needed to be done. Furthermore it doesnt actualyl FEEL like a water tower unless there is, well, water. So i need to wet it up to boot, maybe add some water to the top of the cisterns. Then its more a water processing plant with the dirty water at the top and clean water at the end.
Now adding platforms is an interesting challenge because the water towers are totally hollow and the walls pretty thing. They were just thin plastic gardening tubes from home depot and the like. So there is no way to 'secure" them to something esasily. Still, thats another problem for another time. For now I can use some tape and work it all out. I wanted 2 levels to maximize the usable area and figured I'd want to have some kind of sensors feeding into the water, as justification for these platforms. I also didnt want them to extend any further out of the base of the tower because, well, its big enough! So this is strictly a forward only set of platforms.
I also figure I keep my ladder up and just cut out a hole for it so its relatively logical.
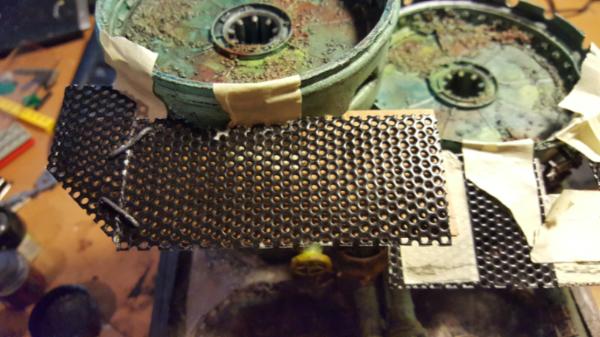
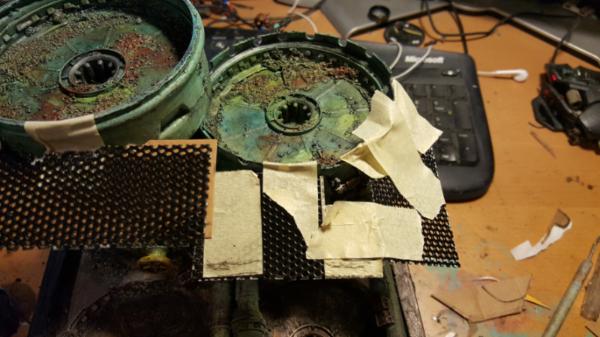
60913
Post by: Largo39
So we have the first platform made, see a construction process!
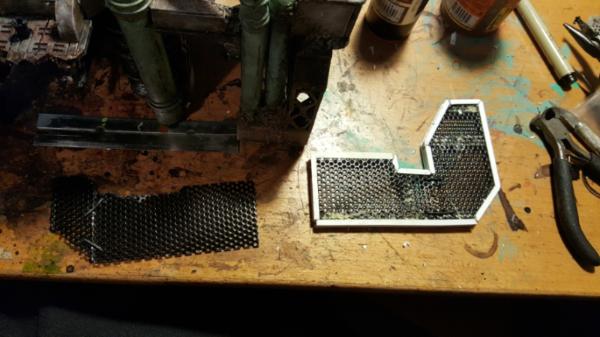
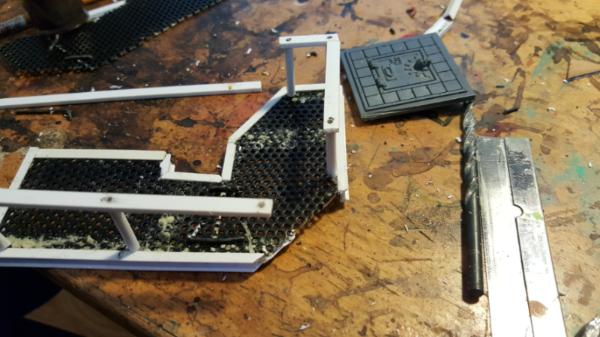
I also wanted to add some kind of small set of buttons/electronics so you could have a sensor pipe/cabling feeding into the wate.r Just a nice little detail to sell why these platforms exist.
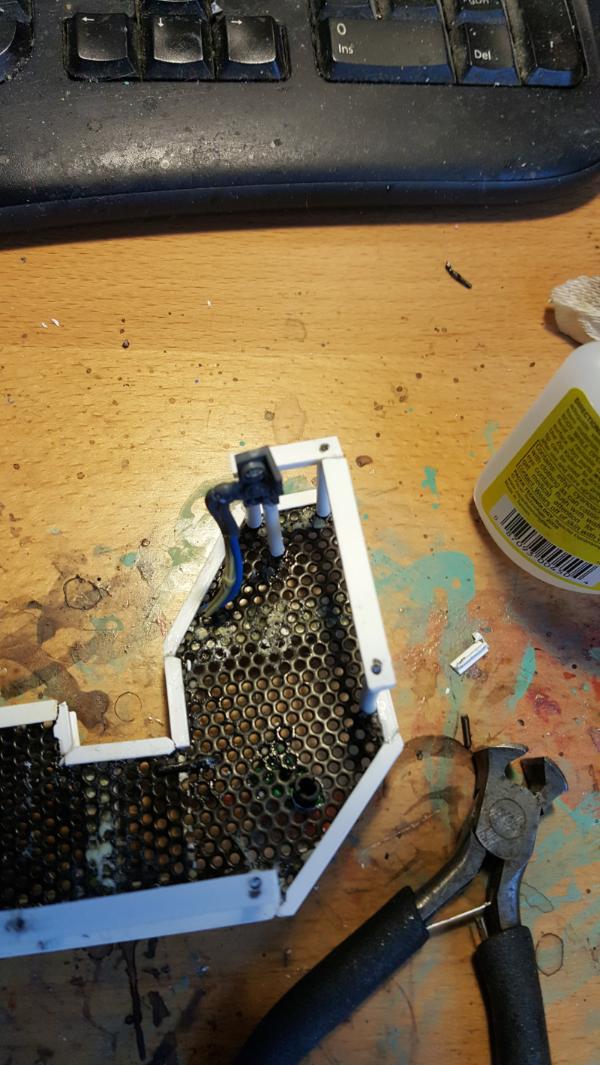
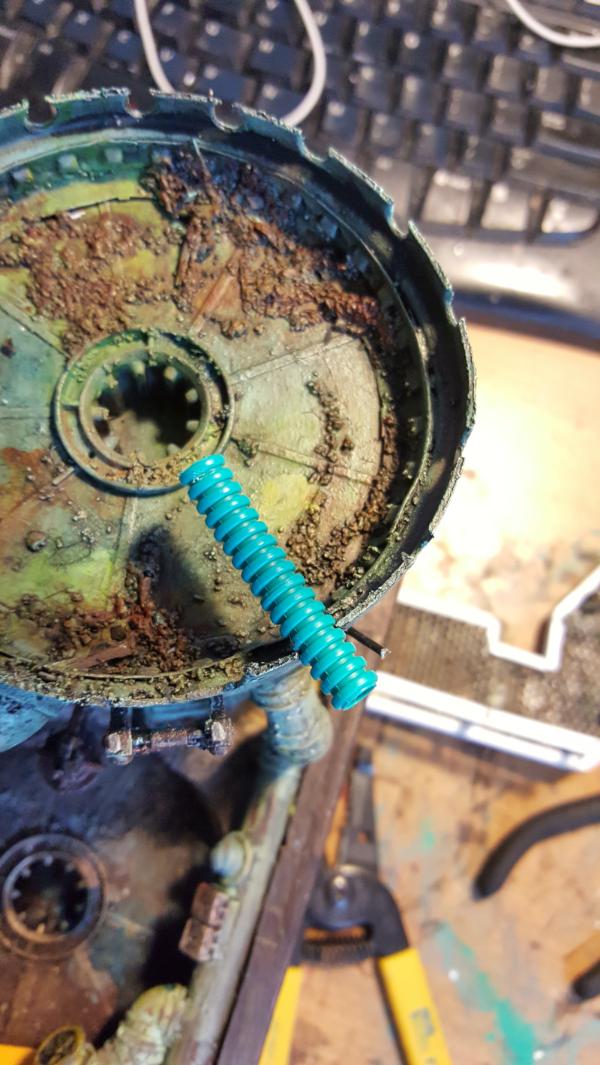
And now we're installing! With difficulty! So the first thing I did was feed a bundle of wires thruogh the platform and as far as it would go into the water tower. Downside is there was no way to ever find them on the other side of the water tower so I just coated all my wires in gorilla glue so it expanded and shoved it in there.
As you can see by the wire sticking out the right it wasnt quitteeee neough to make it no wobbly. Im hoping maybe the other platform strengthens it a bit so the wire stays for now:
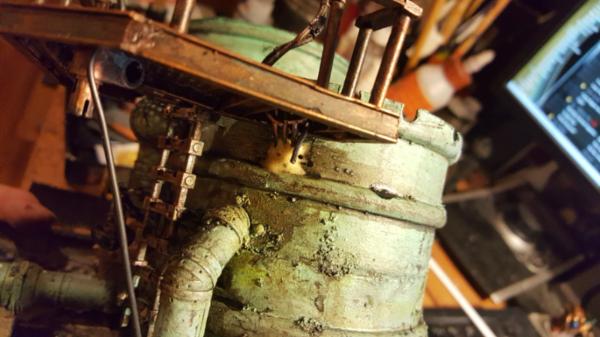
60913
Post by: Largo39
Second platform is installed! Downside is.. it didnt quite make the first platform as sturdy as id like, so I need to go back and reinforce it. Still, it looks great and the model surface area is huge now!
It's roughly (with my 32mm bases) a max of 4 models per platform and 4 models per circular area, so 24+ total.
Realistically it would be more cinematic with 3 per instead but your still looking at 18 or so, which is great.
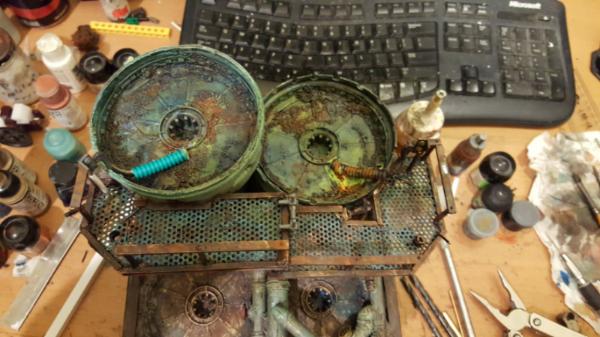
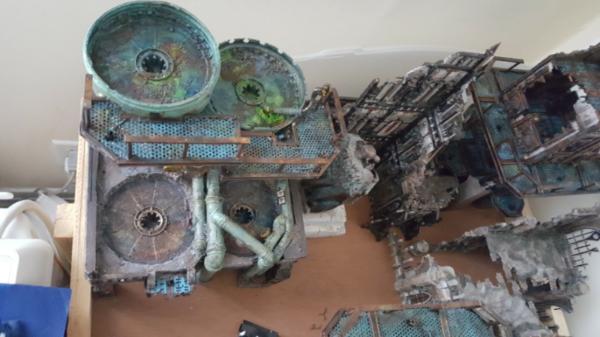
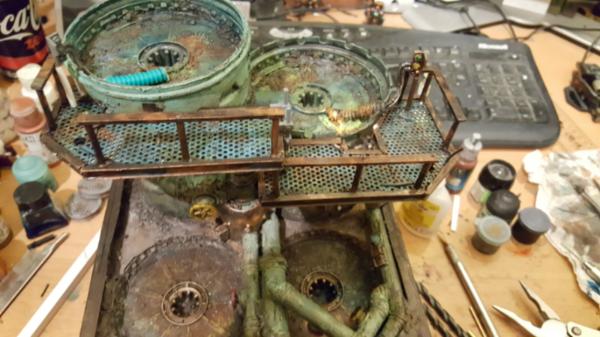
53636
Post by: Chaos Legionnaire
Magnificent.
106439
Post by: Ynneadwraith
Yeah that's immense you have a real talent for this!
60913
Post by: Largo39
It's not done yet! Water is coming! First I have to figure out a support beam.... pics soon!
Automatically Appended Next Post:
So with the initial connection point okay but not nearly strong enough for game use (i like to overbuild but hey, having models fall sucks. So, none of that) it was time to add a truss
First making a hole. It wasnt large enough, it ended up getting QUITE big to figure this all out.
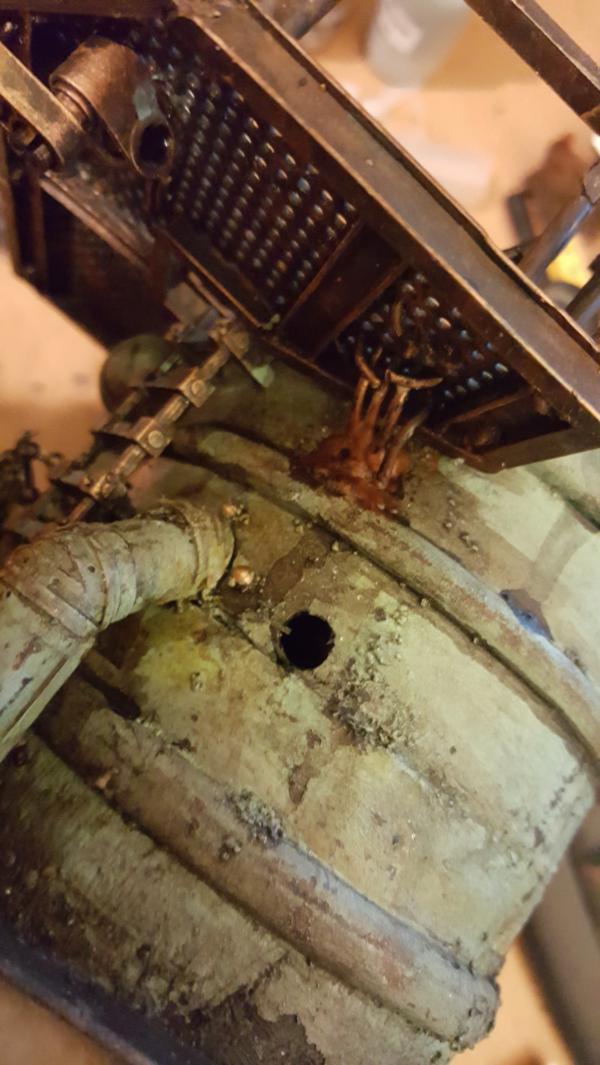
And then. yeah.. need something sturdy to run all the way through the hollow plastic. When in doubt now lego so lets figure out a beam!
My first option wasnt long enough! o.O
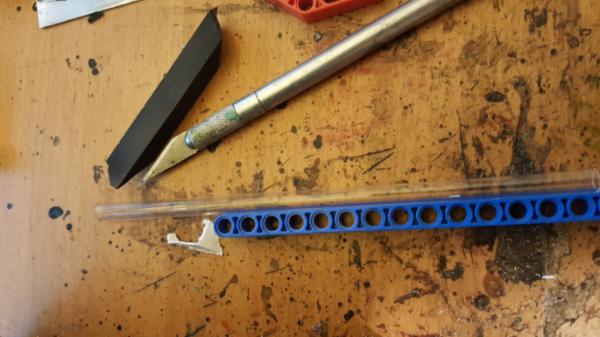
I also considered the plastic tubing but it wasnt nearly as sturdy... Finally I found a beam even longer that worked okay
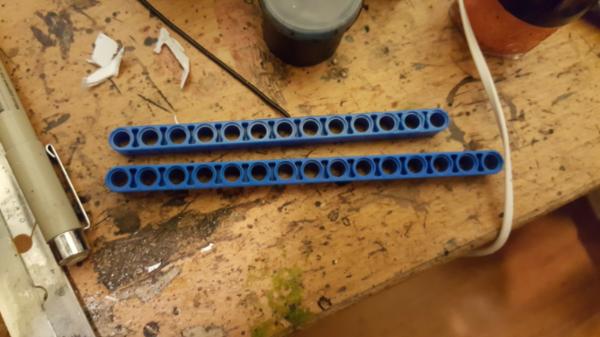
Now of course these are a LITTLE obvious that they are lego and there is no good way to attach the beam to the platform, so I needed a wrapper. Fortunately I have square plastic tubing just big enough:
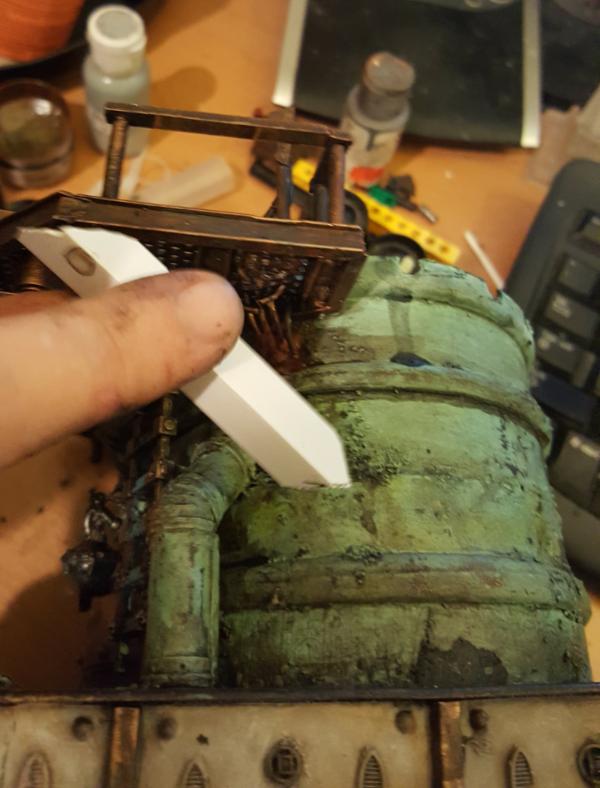
So the final process:
1. poke some holes in my lego beam and run a single wire into it so I can attach the lego beam to the platform
2. . Cut up the beam and scratch it up so it clues better.
3. Drop some water into the hole and gobs of glue
4. Get the beam wet and coat it in gorilla glue
5. Feed the beam into the hole not quite in final position
6. Put the square plastic sleever over the beam and then finagle it all under the platform. The water tank walls are a big flexible so this worked okay and it mostly could "snap" in place
7. WIth everything in place, feed more wire down the platform mesh into the gaps between the square tube and the lego beam. Feed them as far as they will go into the water tank hollow if possible.
8. Wait for the gorilla glue to expand and deflate any obvious bubbles.
Ended up very sturdy! A little bubbly at the base but ill make that a slightly rusty spot and it'll be fine.
After an initial coat of paint covering up the gorilla glue
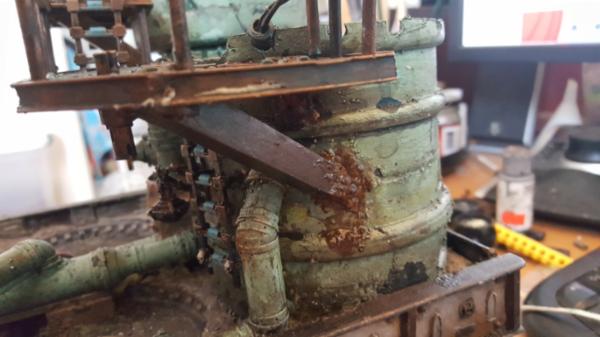
Next time.. WATER
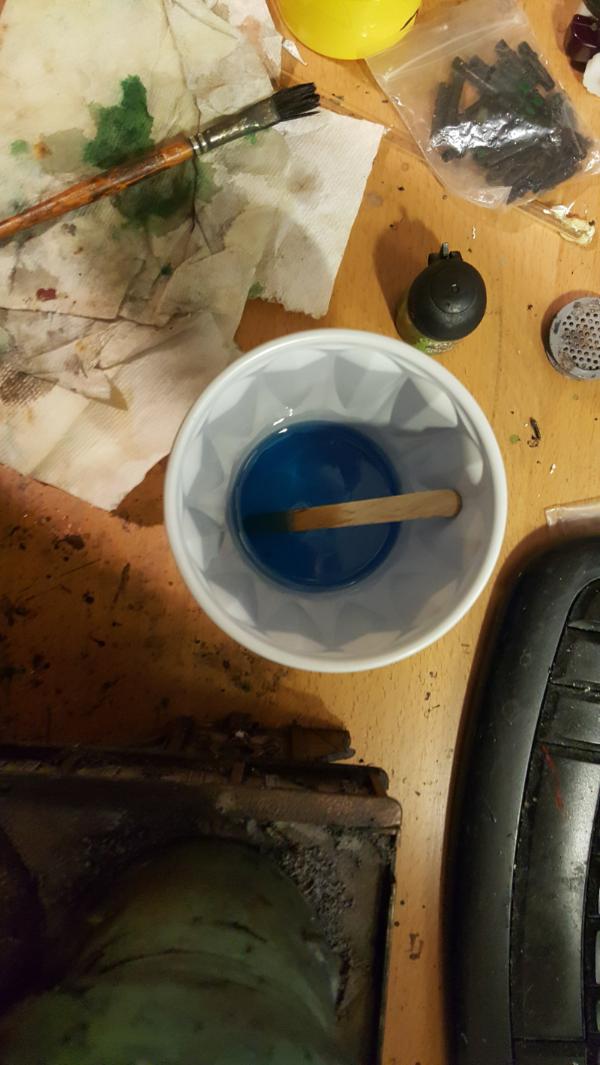
60913
Post by: Largo39
Time to add some water to my tower!
So first up was preparing the underlayer. I wanted this water to be a bit brownish and dirty with one of those fun neon trails wandering around. Mostly cause it looks fun and grimdark. Having my water too clear would just be boring! Ill justify it by saying its a water purifying tower
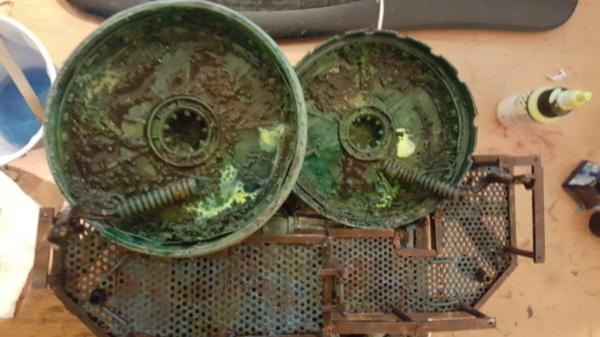
That done time to pour in water!
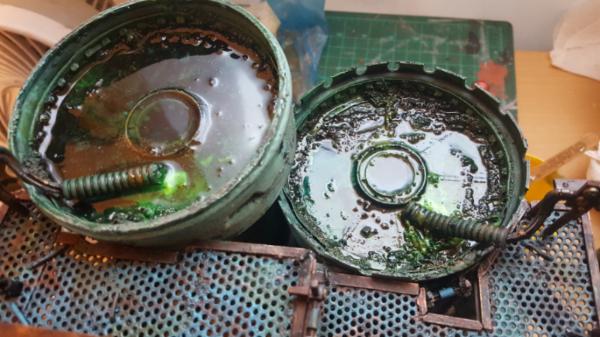
Wait... where did it all go?
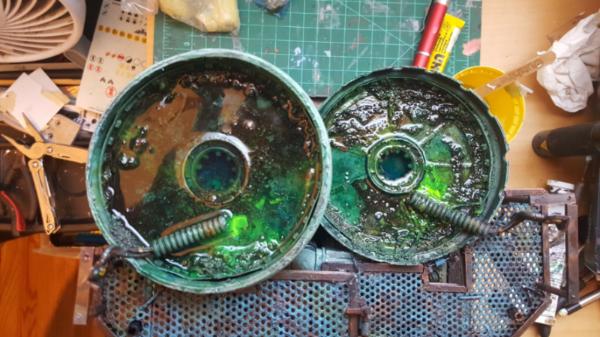
Yeha, there was a leak. First lesson! There is always a leak. We learned this a bit with the previous water spillage on the tile but in this case I didnt think id need to wait and let the water cook because it should be relatively water tight. And it wasnt.
Its okay, basically you just wait, mop up underneath your table, and let it dry. Once dry all the holes it leaked through are, by definition (assuming they arnt giant, which these werent, just small cracks in places), sealed.
Then you try again:

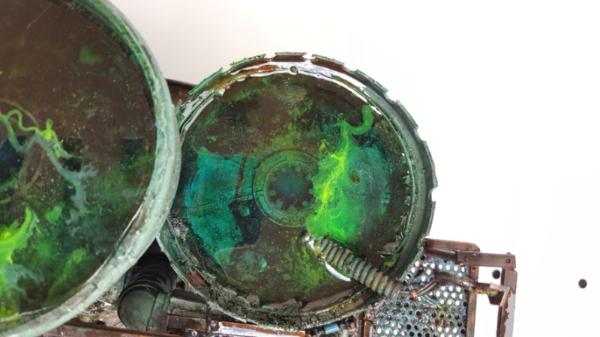
88921
Post by: Stevefamine
Awesome! Looks like Cryx terrain
106439
Post by: Ynneadwraith
Ooh that looks really cool! You're testing my resolve at sticking to my existing projects...
TBH leaks might not be such a bad idea. If they leak somewhere visible then they could look like the tower is in even more of a state of disrepair.
What do you use for your water?
60913
Post by: Largo39
It would! And I did have some excess water that I used to pool in different areas and add leaks that you'll see tomorrow. Unfortuantely in this instance the leaks were just all internal to the tank itself so they just went INTO the tank and dribbled a bit underneath, nowhere visible.
The water I use is called Magic Water
http://www.unrealdetails.com/
Its a 2 part solution you mix together and pour. It takes about 24 hours to set and 48 to be fully for realz dry and it never fully hardens. Its more like.. hm.. the consistency of hot glue when its cooled.
The benefit of not fully hardening is that it wont crack or shrink/pull away from your edges. Theoretically it also means it heals better when hit with cuts/scratches/model indents.
When mixed it starts with the conisstency of actual water, and flows as such. So you REALLY have to be sure you arnt leaky or it'll find it. For my other water experiment with the tile/water spilling out of the container I let the solution sit for 6-8 hours so it would thicken up and not spread quite as far.
So far I like it a lot, its very easy to use and looks vert realistic. To add my "trails of toxic waste" you just sorta pour in your water and then drop on the ink you want to spread around. If there is flow to the water it'll spread naturally, if not you can just take a stick and draw with it into the shape you want. Its super fun and very predictable.
The ink I use right now is Golden Acrylic fluid flourescent paint. To color the water slightly I've been using my set of Tamiya Clear alcohol based inks and that all works very nicely.
60913
Post by: Largo39
Woohoo its finished! Well, there are always things to fix, but finished enough! Haha. So I had some extra water after the second filling of the tops so I used it to add more leaks and drips in places to see what would work. Surprisingly it worked pretty well. By that point it had set for a few hours so it moved a lot mroe slowly so you could actually get a glossy path of water down the side of the tower.
Either way with that and some pooling in my lower areas It is all done! I really like how wet it is now, it feels in use and leaky. Its probably too much in areas buuutt this isnt the tile so its a place for experimentation. Im super happy, I never honestly thought I'd ever get this thing painted, let alone as functional as it now is with its added walkways.
Back: You can see the gloss hits here, and some of the pooling at the base
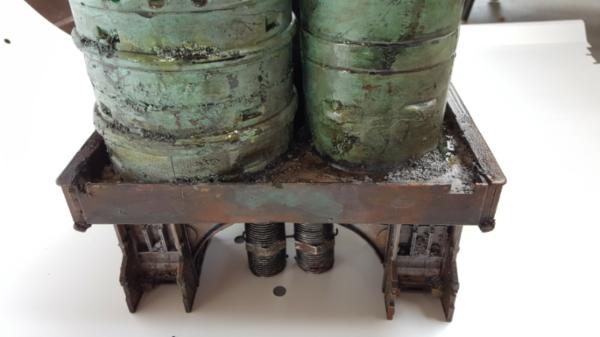
Lower Front:
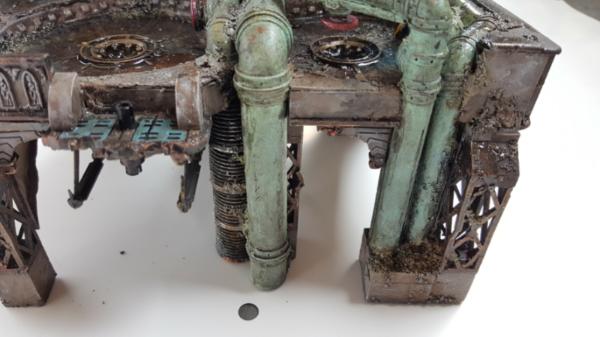
Middle Front:
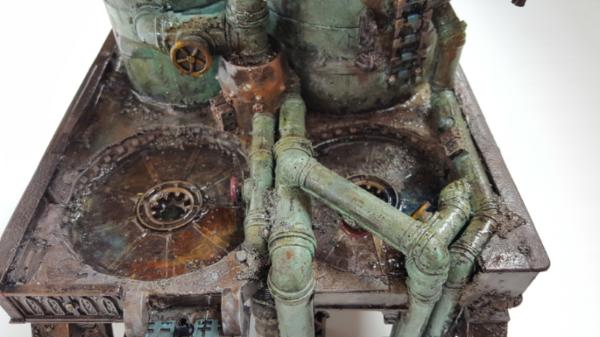
Leaking water pool!: The colors really are really nice, very mixed together, it really helped this area
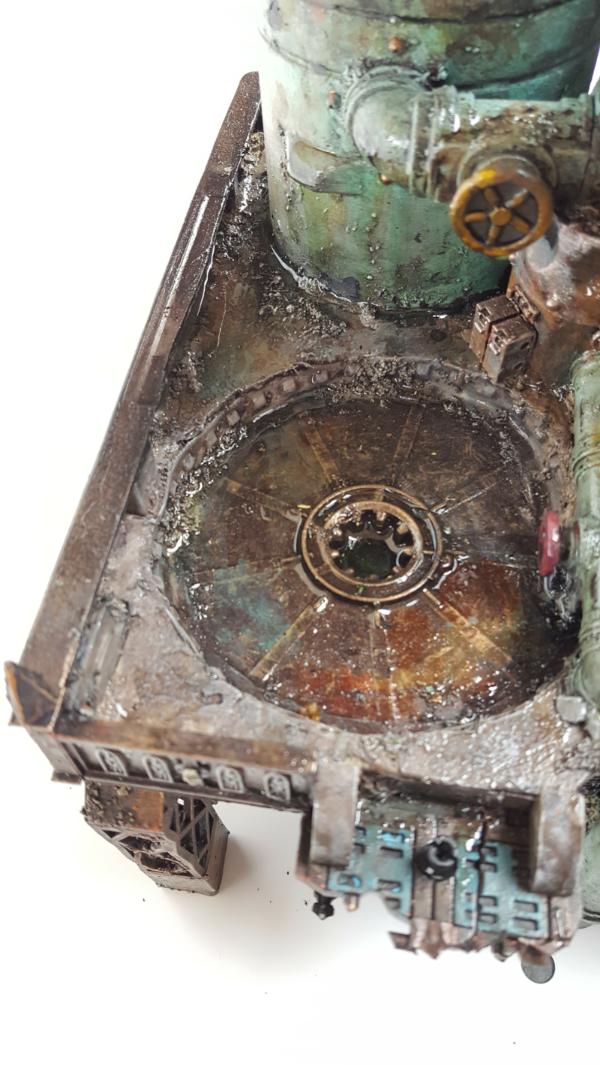
Leaking water pools top view

Top:
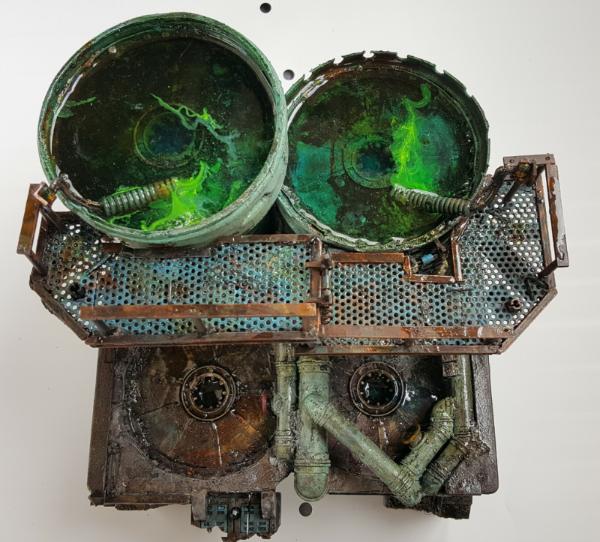
Support strut final. I added some dripping water here too, with the idea that the welds are cracking a touch.
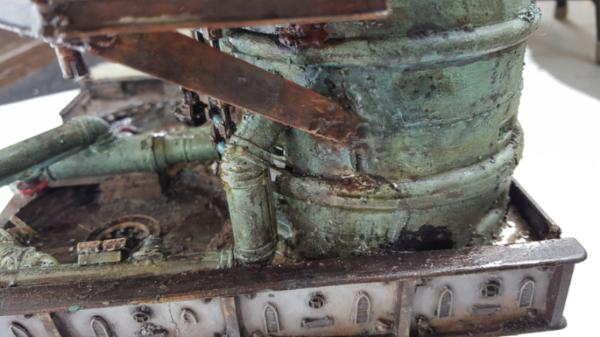
Side

Left Side:
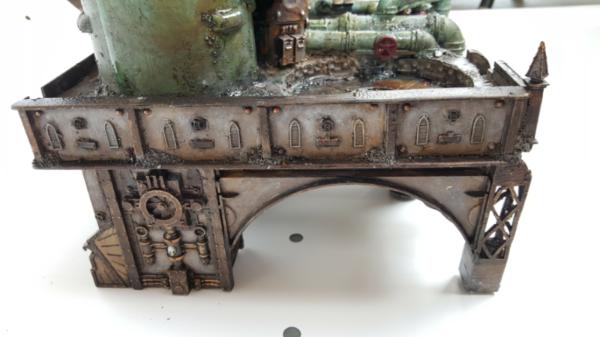
60913
Post by: Largo39
Huzzah! Its all together!
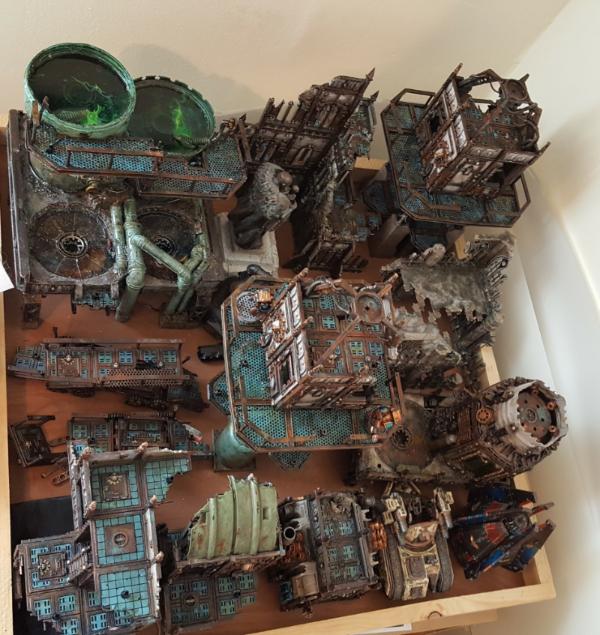
BAM, buildings are PAINTED. I still cant really believe it.
But, life moves on and so must we! Time back to finish off some nids attacking and various other backlogs of thigngs. Now onto.. really boring stuff. Ugh.
First up is prepping and cleaning my Khan bike. This should be funish cause its a one-off, but also lame because i really want ti have it look good.
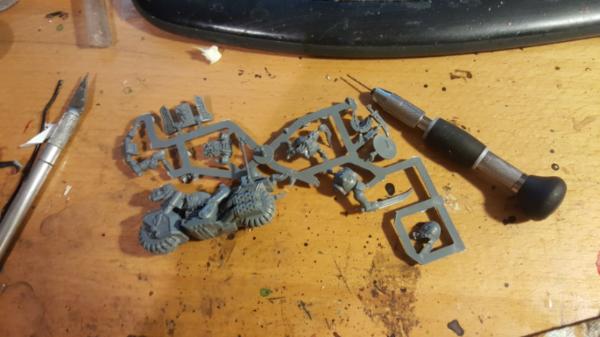
And also lots and lots and lots of rippers... yay...
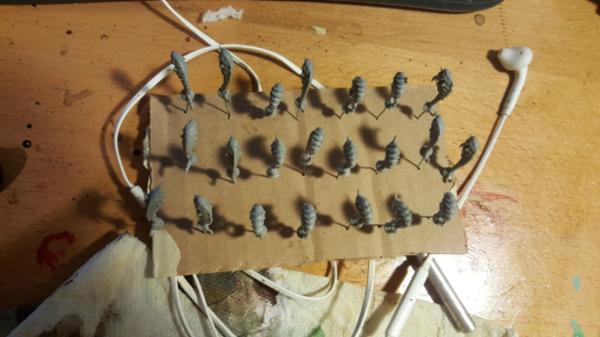
85400
Post by: Mad..
Fantastic work!
Awesome seeing all the bits together there, and with the rippers at least you didn't make the mistake I did and glue them all to bases before painting... makes them a real PITA. I assume your rippers will be scurrying all over the place which will look cool!
Love following this blog, keep up the great work.
52201
Post by: evildrcheese
Nice job on the buildings and terrain, they look excellent.
EDC
106439
Post by: Ynneadwraith
Wow that is completely stunning really, really impressive work dude!
60913
Post by: Largo39
Thanks all!
Yeah I dont have a full plan in place for the rippers but scurrying all over the place is definitely the idea.
I like the visual of the wall of beetles from the mummy or how ants work in using each other to climb obstacles, so id love to have this mass of rippers attacking something.
I may also use some as filler for the nids that burst out of the ground.
9394
Post by: Malika2
Holy crap this is really becoming super awesome!
60913
Post by: Largo39
Thanks!
Hey look, its a pile of painted rippers.
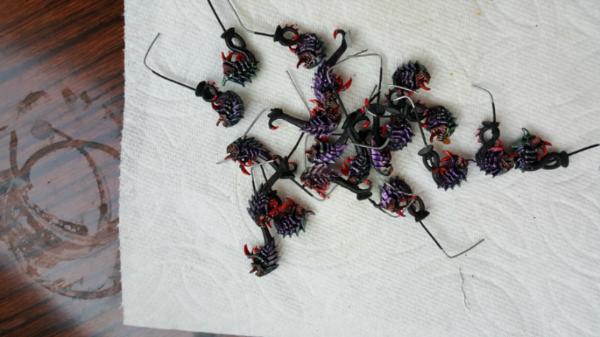
Oof, okay, next up is some gargoyles!
I really liked how the flying rippers looked, so we're gonna keep with that. The spines of the wings will be red, the wings themselves that lovely brown green orange shimmery look and the body as normal.
So first is the wings

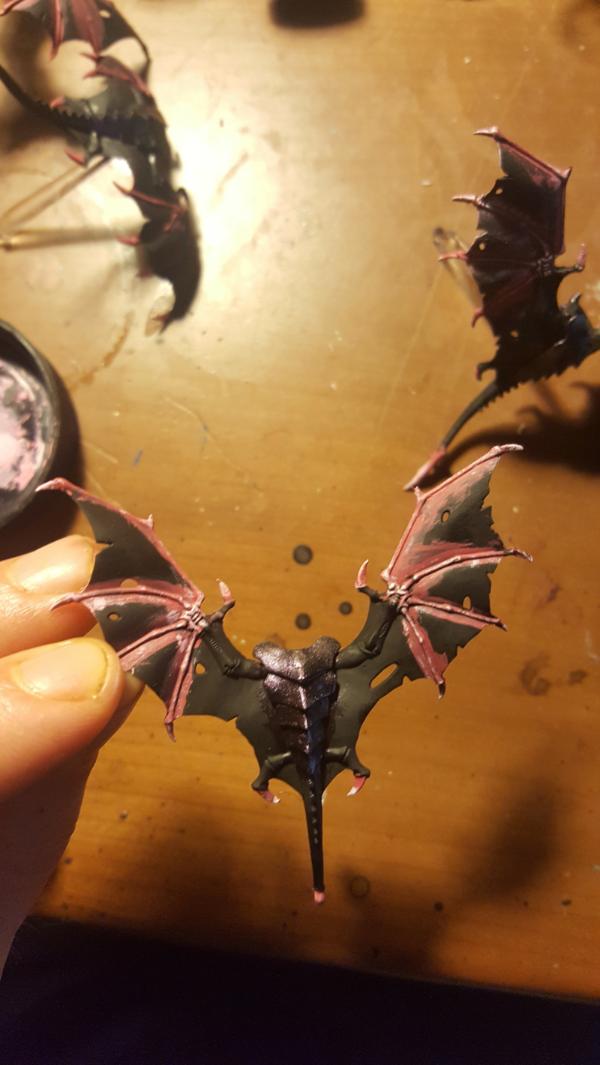
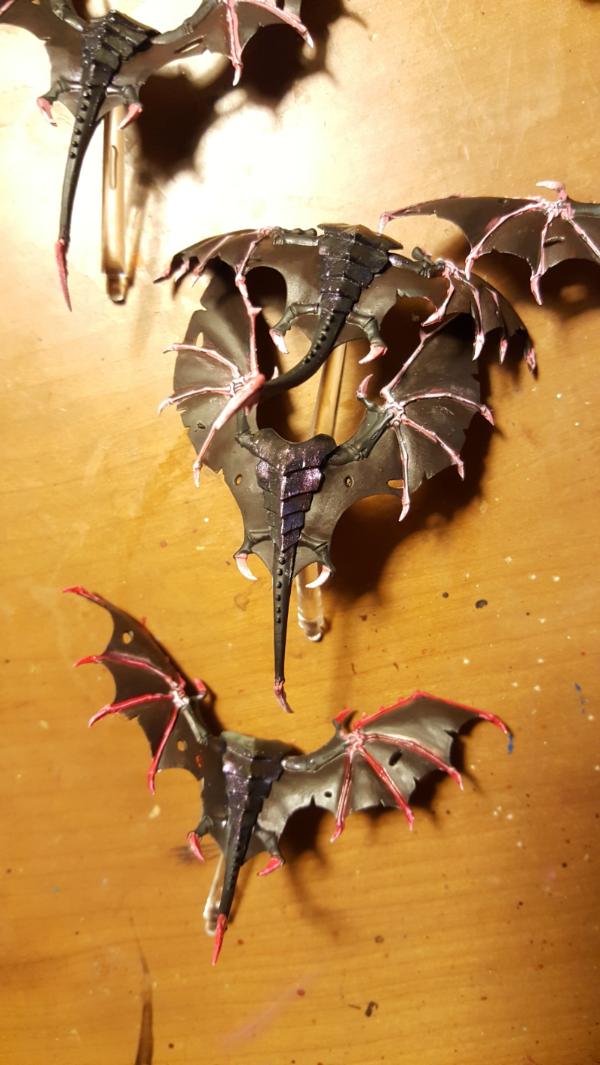
60913
Post by: Largo39
So while nids are progressing well its time for abit of a break. One thing that has always been in the back of my mind was the idea for Tau. Now, of course, there is no way I'm going to do a Tau army. This SM vs Nids thing is enough for me. BUT I did want to at lease paint one squad in this scheme just to have "gotten it on paper" so to speak.
Anyhoo the idea is to take the blue -> green transition I have on my space marines and break out the transitions on a step by step basis. So for the broadsides each armour plating would be a seperate step and color.
It would be time consuming but if I premix my transitions and figure them out its not too bad. It also wouldnt be glittery like the marines, just straight colors.
Then for the underside it would be my darkmetal/copper look as my (new) normal.
Since I wasnt making an army I wanted to do railsides cause they look soooo much cooler, but first I had to take off the shoulders of the missile sides. THey look so much better for what I want to do!
Railside shoulder is on top, missile on bottom. Why is the missile one bigger? SO CONFUSING.
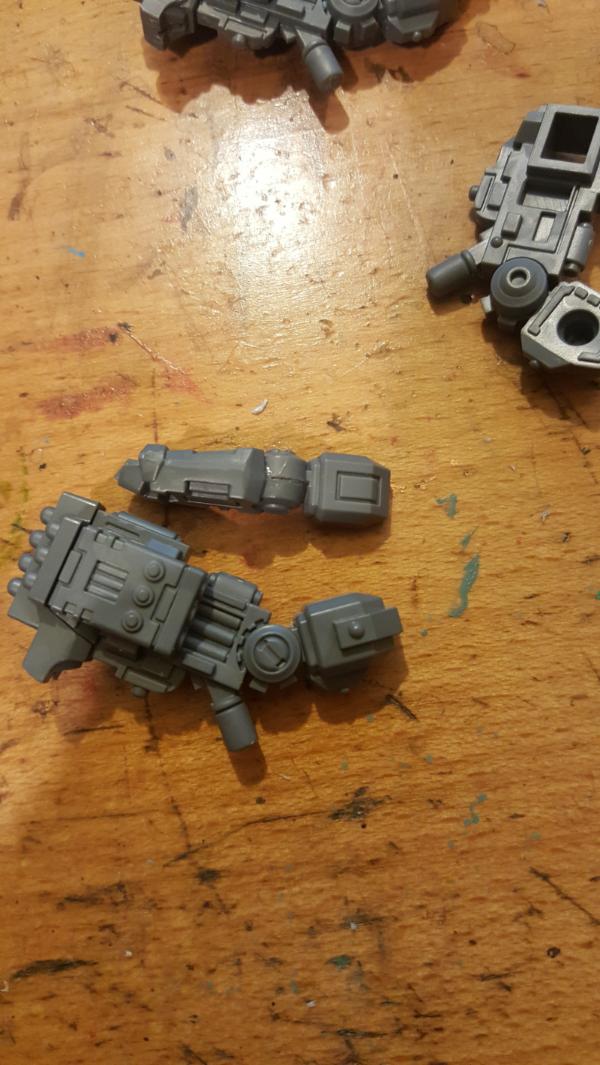
Then I did a small test of on of the plates to start working on the first four transitions, not bad! Though it means that the feet would have to be just all black, which is lame.
Because I REALLY didnt know how this would look and what all i'd need to mix up I focused my efforts on 1 broadside first before i'd move on to the other 2.
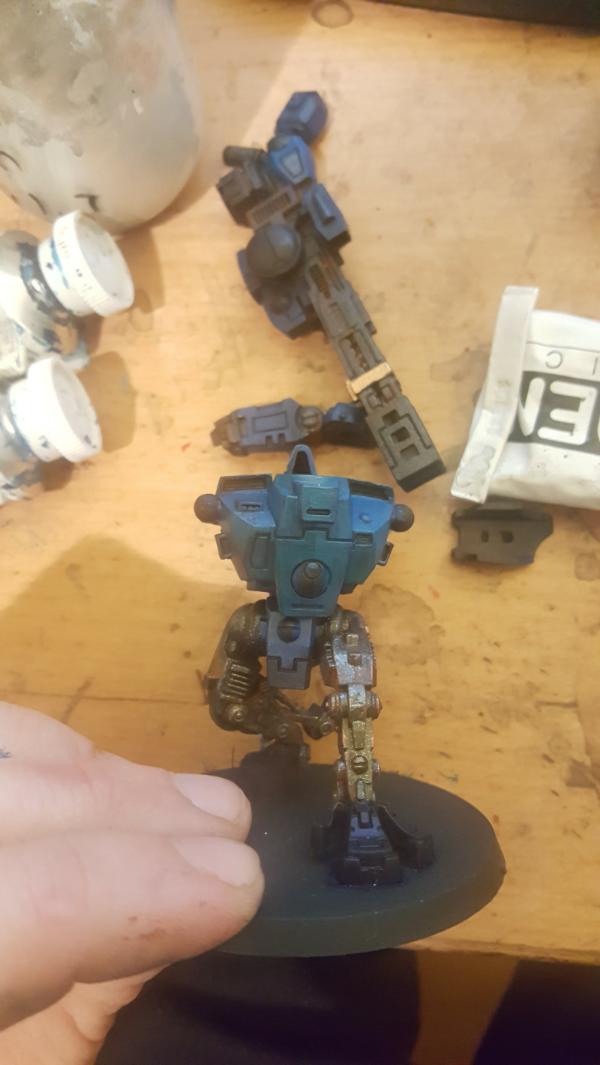

You can see the completed undercarraige part, still looks great. The armour plating is coming up it takes a while, some of these paints (cerulean blue dark in particular) are very transparent and take lots of layers. I might need to find a better cerulean.
60913
Post by: Largo39
Work continues. Regardless of the potentially too dark feet plates I was otherwise happy with the legs so I started working ont he other 2 pairs of them.
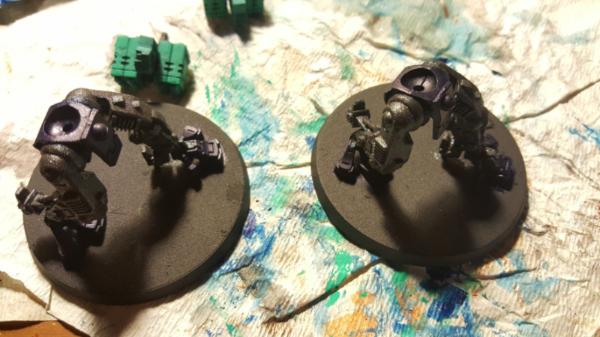
Also just more work on the main gradient, defining it out and getting it applied top to bottom. Overal its looking great but as my friend pointed out it really could use some edging. I figure i broadly edge about 2ish color stops up. So green goes to the super pale green, the darks get the cerulean blue and so forth.
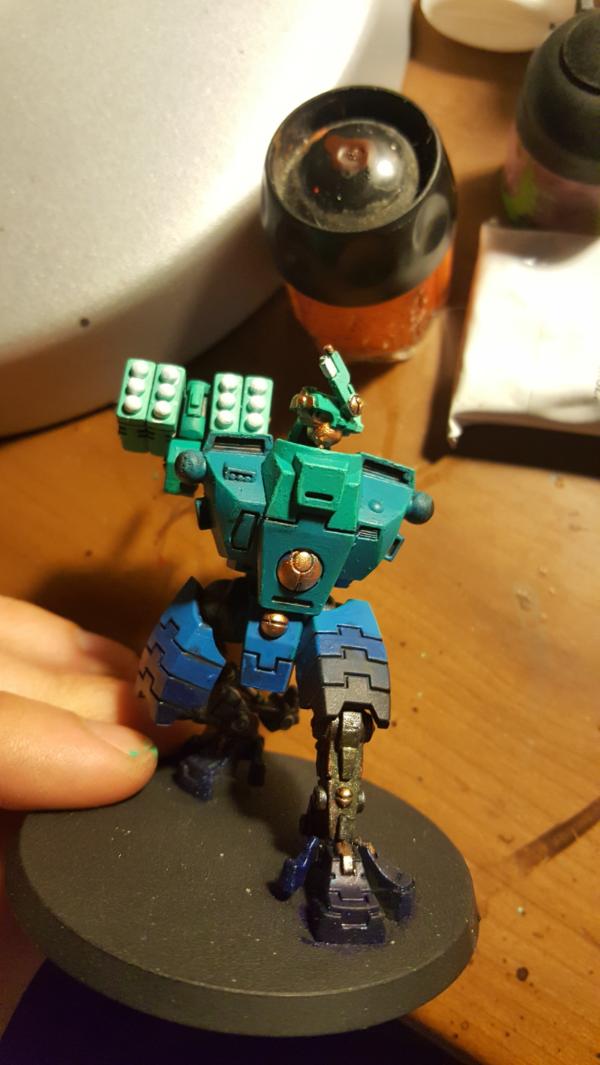
60913
Post by: Largo39
So, after my break of Broadsides, back to the tile for a bit. What I wanted to do next was start to populate my main tile with all the new nids I had painted.
First up was getting my Scion bases done, so they can be shooting down some gargoyles. Now I dont have any particular "thing" they will be fighting on the base, due to the fact that the scion poses are pretty pedestrian. So I thought I'd make the bases themselves unique by putting them on my red/green armoured containers on the right side of the tile:
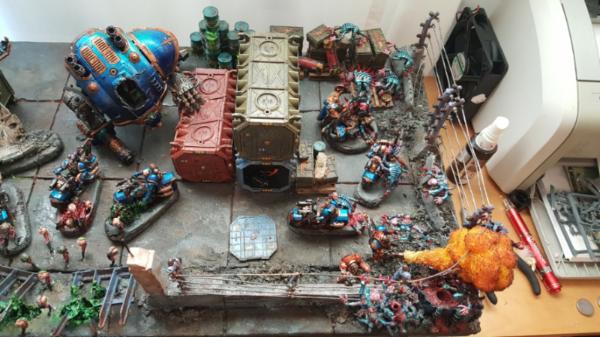
So first up was assembling the top with its's side pieces and then cutting the whole top down to the right depth:
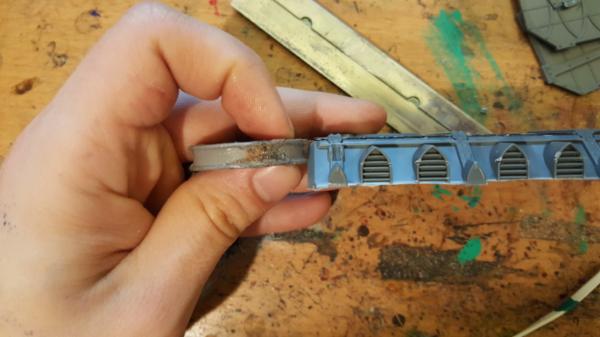
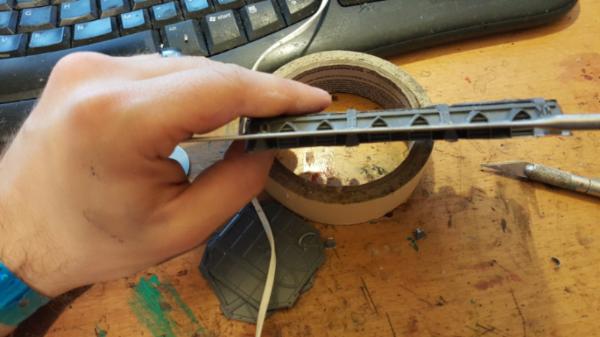
Next I could place out where my bases would go. I could only fit 3 for the green crate, so 2 more will go on the red one.
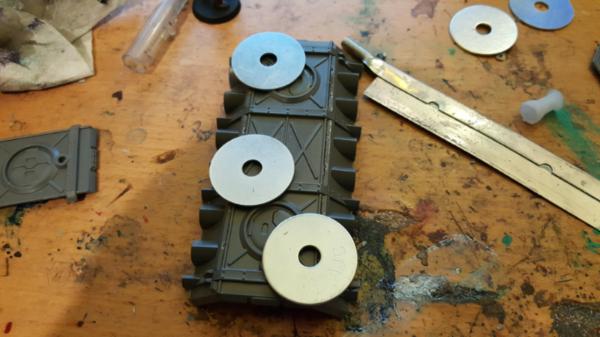
That way I could also have a crashed gargoyle on the green crate, to sell what the scions are doing there:
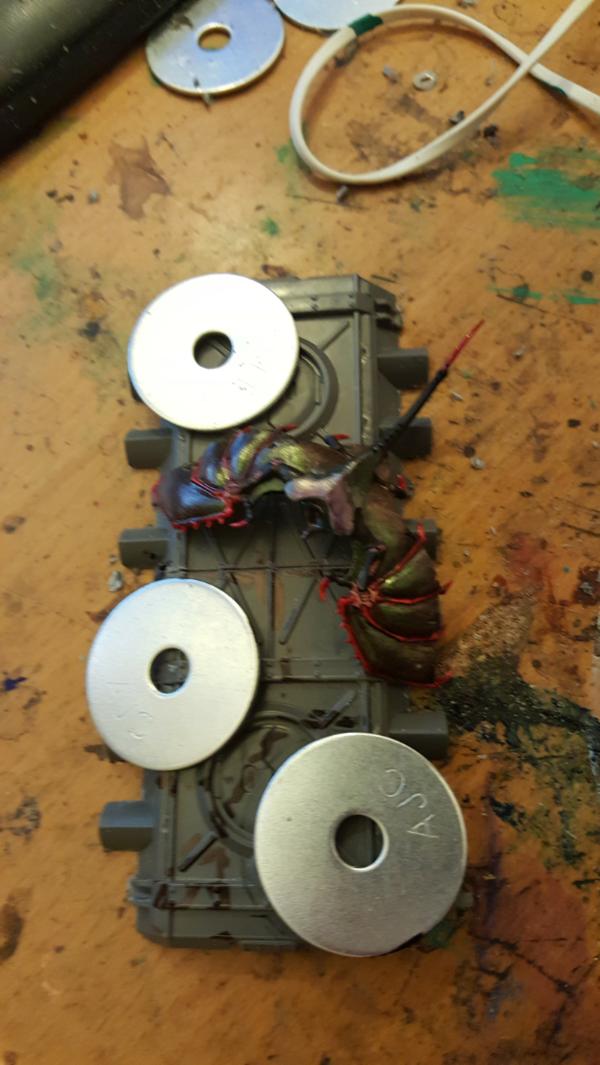
Then it was just carefully ccutting out boxes around my marked circles and rounding them off with an xacto blade and sanding. Worked out pretty well:
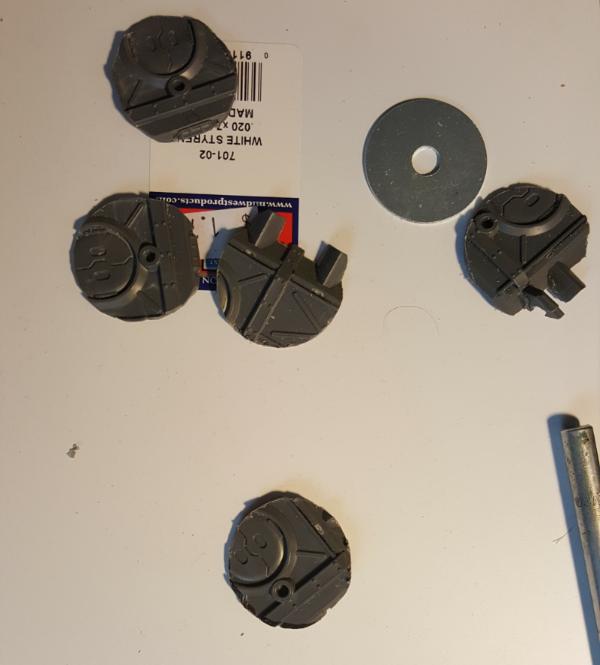
60913
Post by: Largo39
So after cutting them out it was pretty much just about painting, no nids to battle here,
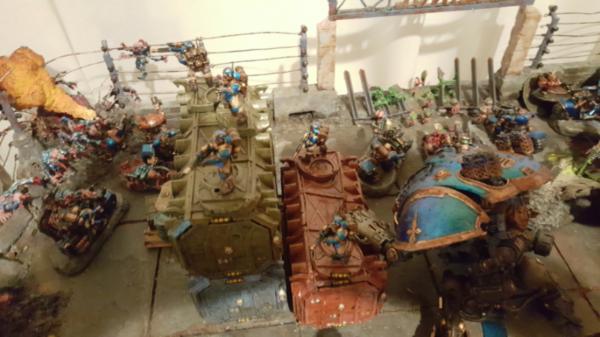
they look good and line up well!
I also wanted to make sure to magnetize them, and give them a little more heft. Without any sort of metal in there the bases were... crazy light.
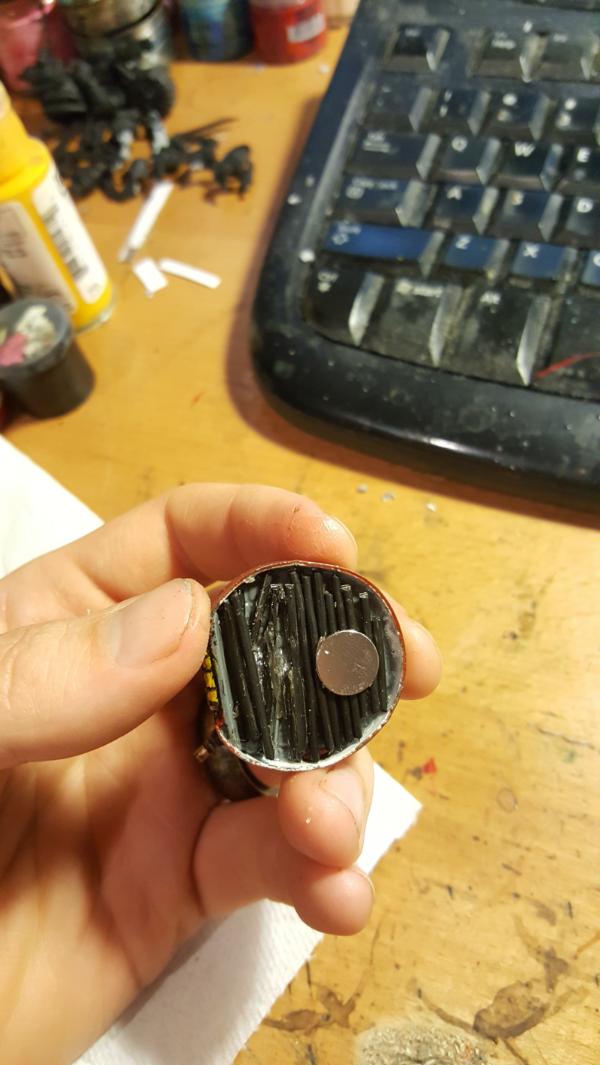
To attach it I ripped off the back doors of my crates and.. pondered. the K.I.S.S method seemed like it would be best to start with metal strips to the ceiling, so thats what I did. You just add a lot of glue to the back of the plate, put on the figures and use the magnetization to stick the place on the top

The strips worked! but.. not nearly strong enough. So.. it needed to be a magnet on either side. Ugh
The magnets were strong enough to attract from a ways away, but you had to navigate the initial metal wires I had snaked through to attach all this, so it was tricky, especially the oens int he back, but I managed to get it (took like an hour but hey! magnets)
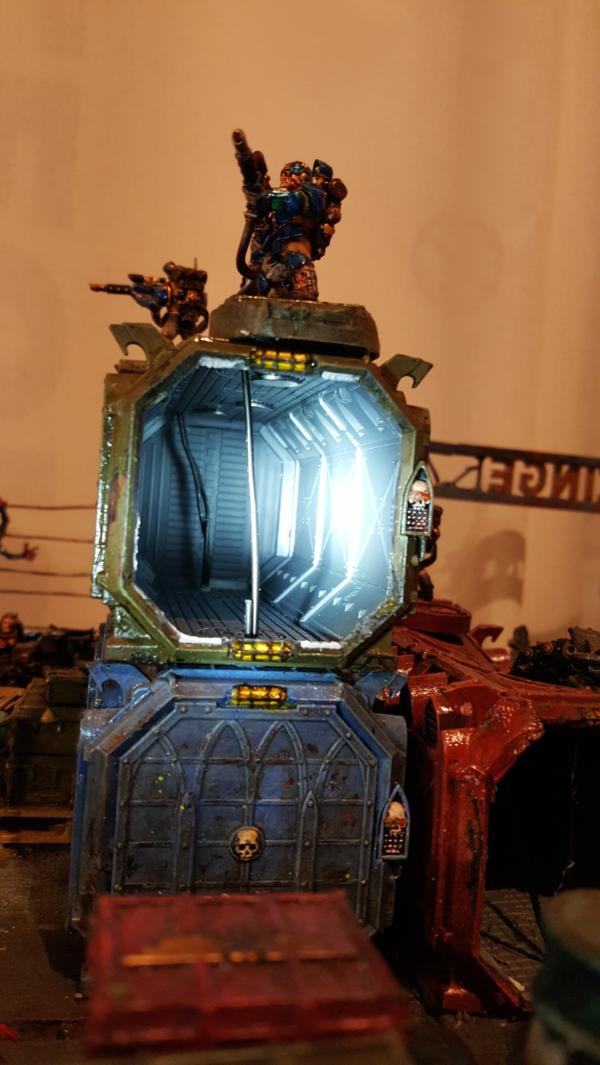
60913
Post by: Largo39
So with the right side pretty much done its time to move over to the more ignored left side and finish off my nids attacking there. The idea for this side was to have my gaunts bursting out of the ground and streaming in through the gaps left by the Old One Eye
So lets start with bursting out of the ground. I have some little single gaunt holes and one large pit, first up is the small holes.
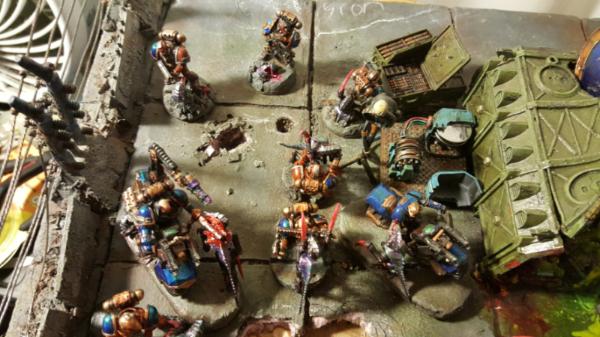
The first step was to make an initial hole, and then use pliers to breakup the ground around it. this gives me some chips to work with for the outward mound/crater they are pushing up on and also gives me room to squeeze in a gaunt. I also wanted to leave at least one hole just as a hole, because the gaunt that comes out is attacking a marine on his base.
I added my mud mixture (superfine sand and wood glue) and layered my chips approrpriatly to get this:
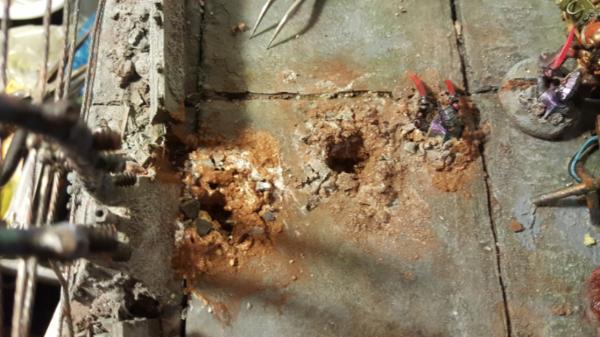
Not bad! I might add a third gaunt to that third larger hold on the left side but we'll see. For now lets start work on the bigger pit;
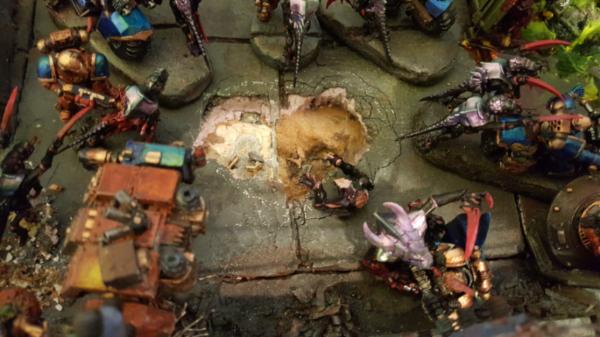
First I started with the legs from the warrior my chaplain is killing, as thats the only thing that actually mattered positionally
Next up is a brief painting. I've learned that even when you arnt finished gluing, when it comes to pits like this its good to paint often, just because it can get hard to access little pink foam rocks later once everything is in place
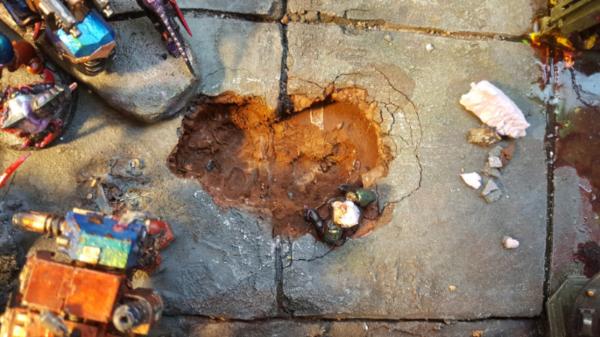
60913
Post by: Largo39
So work continues pice by piece. Because I was low on Gaunts and to sell the warrior the Chaplain is killing I thought I'd add another warrior coming out of the pit as well, to amp the threat up a bit from this hole. So he's the pair of legs in the middle.
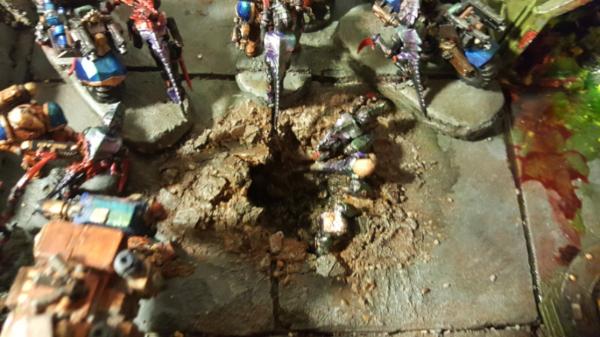
Next to him was a one armed gaunt that I squeezed in there, as if he's almost being trampled trying to get out.
The other really big thing was adding back some of what I took away from the pit. THe idea was to have some depth and caveness to my hole so you got a sense of stuff coming out. I wasnt sure how we'll it'd hold up but with gorilla glue and superglue it seems to be pretty solid actually, no wire needed.
As always, also kept painting as I built up my nids popping out.
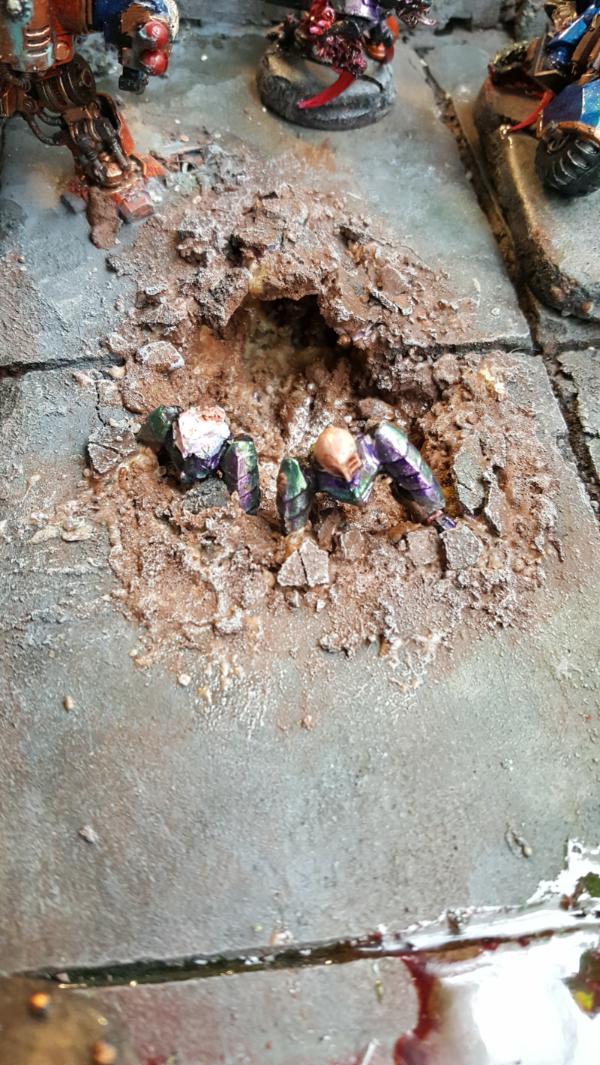
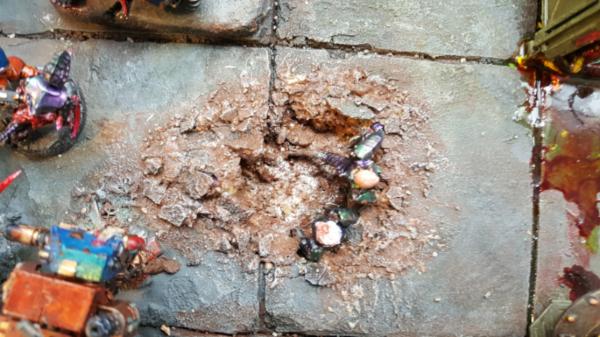
Finally it was just about layering in the remaining gaunts and finishing off the warrior. Overall I'm very happy! It turned out well and I even added a touch of water in the bottom of the pit for a little added depth. The muddier it is down there the more it'll hide any legs/tails that are cut off or wedged wierdly to get the right pose.
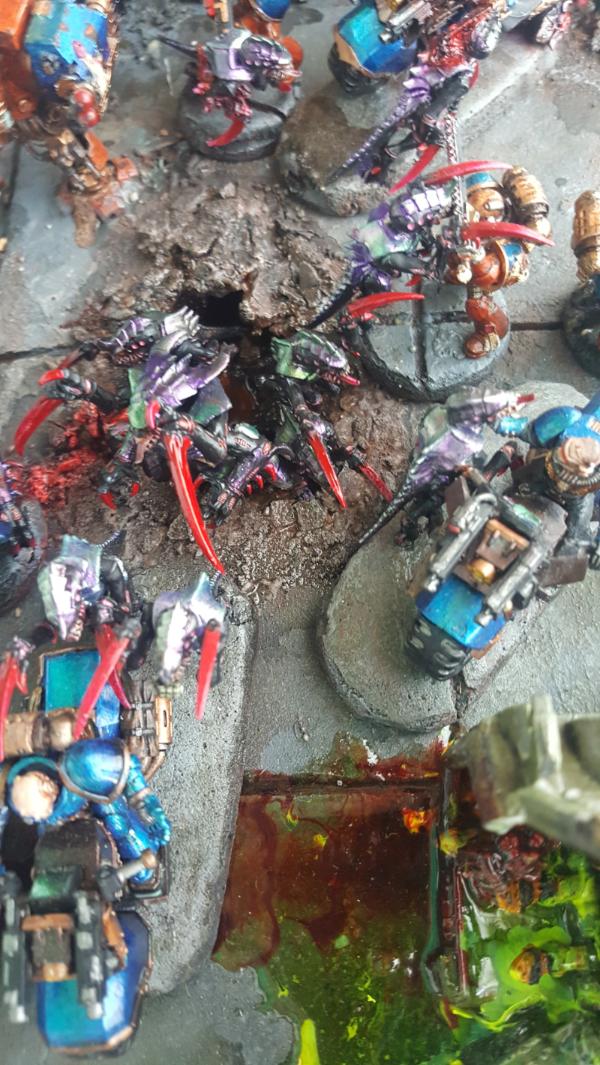
Also added a guts trail for the Chaplain's warrior
And added one last gaunt mostly out of his hole:
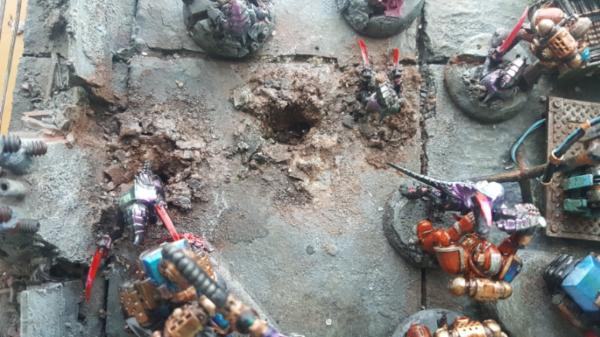
85400
Post by: Mad..
This is looking more and more awesome every time I check... I guess that is the point.
Awesome work! I like the look of the magnets under the scions, they look like part of the container when looking inside, so good solution. The gargoyles shredded wings is very effective, and I am absolutely loving thing nids emerging from holes in the ground... the scene is looking very dynamic! C'mon OOE get in there!
60913
Post by: Largo39
So just a few more finishing touches to the left side of this tile and we're done (for now
First up was actually busting out my international UHU and messing with it. Turns out, it works pretty well! my strands were a bit thin, it was hard to get any strand with any sort of thickness to span those distances. But as first pass it looks great, I just may try to add some more later.
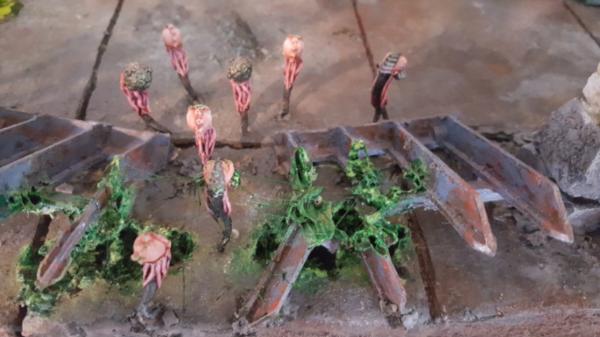
I also felt that the back left corner was a little light on crates and things, so I finished off the remaining plastic crates I had from the armoured container set and made more wooden pallets.
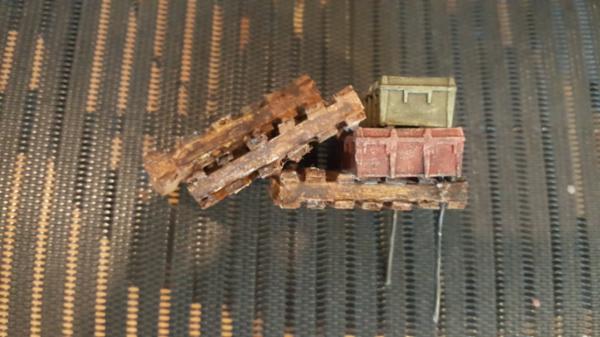
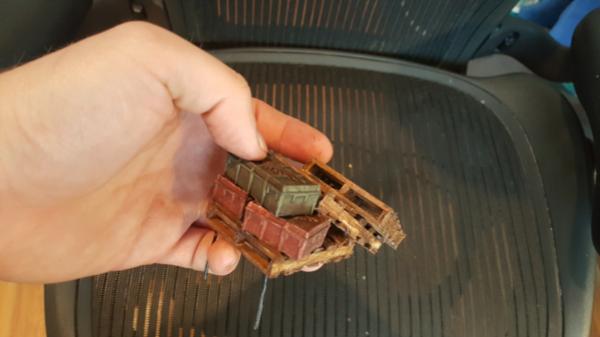
And now the overview shot! I already put away the actual models because.. well.. im tired of dust and they didnt need to be out. Sorry!
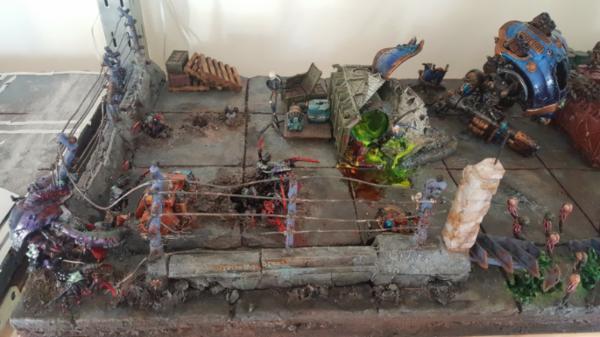
85400
Post by: Mad..
Looks awesome. Agree that back left corner was missing something, but the containers and crates fill it nicely!
I love this blog
60913
Post by: Largo39
Thanks! Next up is to finally add walls to the garage tile, so I can have an actual full 2 tile diorama of the nids attacking. Then I have to figure out some sort of cart I can build to carry all this for display at events like LVO and so forth.
60913
Post by: Largo39
Back to the design phase!
So now its finally time to work on my OTHER tile, the one that will house the garage and my SM base. There are 2 broad 'phases" to this tile.
Phase 1: Get Her Done.
Get the walls up, have the flyrant landed on the wall/dakkaing down the knight, mawloc popping through another wall. Leave room for a Porphyrion or other knight to the right of the garage.
Key notes: the walls need to look imposing and be tall but still be juusttt short enough to leave clear sight lines into the interior of the garage. Key to this will be the mawloc knocking down a significant portion of wall.
Phase 2: The dream phase:
Build a full SM barracks in the space where the knight was, with afull interior that pulls out for play.
Make a church/temple/etc in the space underneath the flyrant where I can add marble and place the marble marines.
So any walls now need to take into account phase 2. Which means a section of wall in the back needs to be removable. In order to accommodate all this more extensive planning was needed, including actually building cardboard walls to see how it all looks. So thats where we begin:
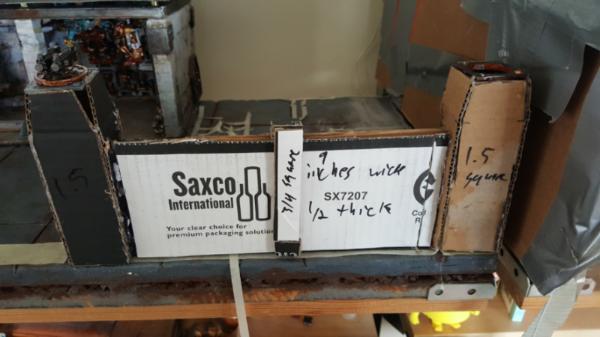

You can already see there isnt really a lot of room for an enclose church, so it would be more of a marbled garden with old statue in the back. Should still look good though.
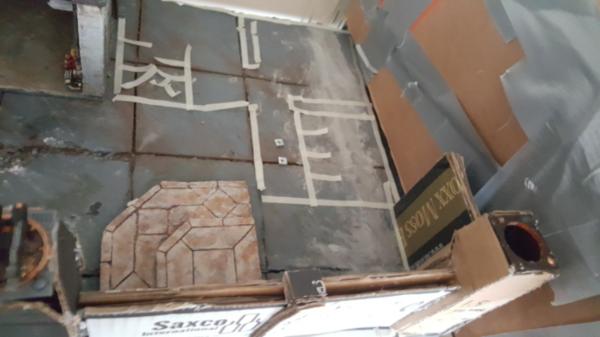
I also wanted the gates to be open and see thru, not sure I like the Xs but we'll see.
88921
Post by: Stevefamine
Love it so far man keep it up!
60913
Post by: Largo39
So we're back to lego mould making! Its been a while, at least a year? Turns out a year gap with no notes inbetween leads to some mistakes which I'll talk about. But for now its just the innocence of putting together legos.
First up is the main tower. Now one thing different I'm doing with these moulds is emebdding the wire sticking out first. That way there is half as much drilling later one. THe consequence of that is the mould has to basically be completely taken apart but hopefully its still at least stronger than before.
For these main towers I'm also using a much, much thicker bolt. The idea is to bolt this to the wood tile below, not just glue.
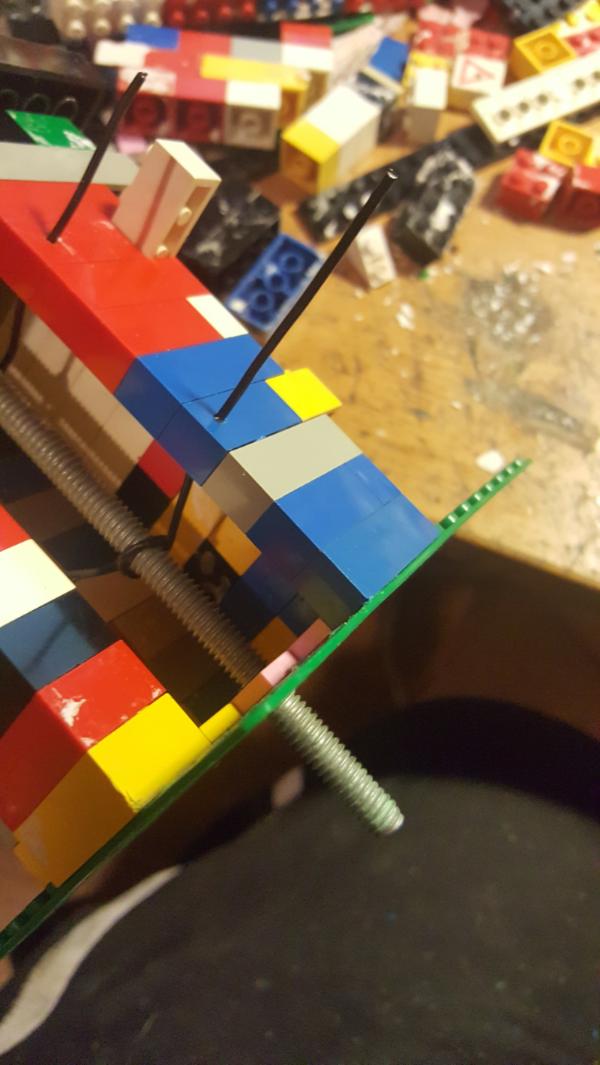
The layers as I build them up:
60913
Post by: Largo39
Bit of a delay, I get distracted updating this on wekends trying to keep working! lol.
Anyways we also have the first wall mould.
Adding in my wires:
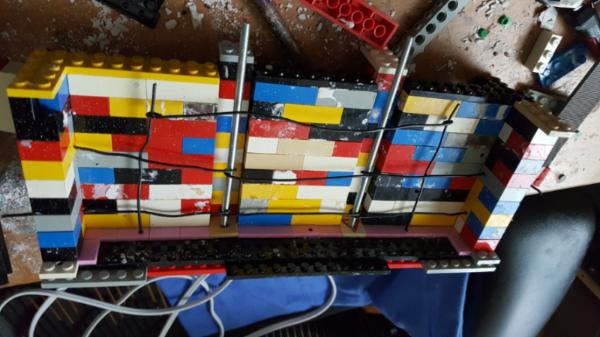
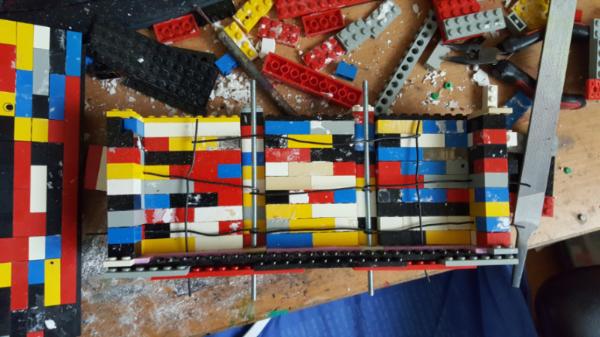
I also tried to help deal with the tops being rough by filling in some legos, to make smooth "cover" pieces:
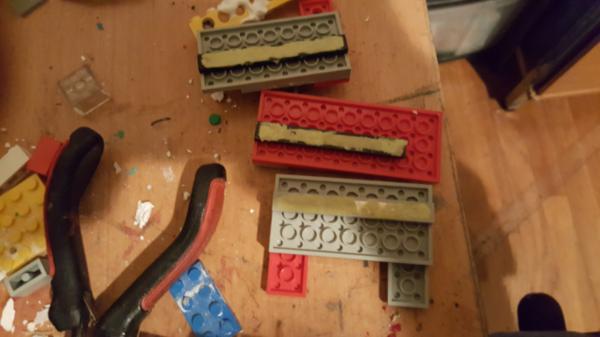
60913
Post by: Largo39
So, time for a lesson. It's been a while since I had messed with Hydro stone (at least a year), and one thing I didnt do from last time was write notes as to what I should and shouldn't do for later. I even went back over my blog for that time and it was basically "this stuff is awesome! it works well with legos" and thats about it.
The key lesson I should have written down is the ratio of water to hydrostone to use, and what kind of consistency you want to cast with. The answer is.. very very solid.
What I remember from my first go at this was that it worked well, required being "pressed" into the mould and required some but not too much cleanup of the legos. So I mixed it up this time for this first mould and it ended up being runny, okay fine no huge I can just pour it in instead, even easier.
Yeah it went.. everywhere. Every crack, every hole in every lego, and even IN BETWEEN the lego joints, filling in some of those gaps.
See the white on my table? thats just remnents of what poured out.


It took.. a while to fix all this. The cast looks great, as always, but the cleanup after took.. a long time. The legos had to be cleaned off before they could be used again, and this would be a feature EACH time I remade a mould. Unfortunately, due to the fact that none of the wall lengths are consistent, i had to rebuild the mould EACH time. So the casting process, alone, took like 4-5 days for all this. I also started added wire poking out to help me with assembling everything, so I ahve less to drill. Unfortuantely that also lead to having to take apart the entire mould to get he wires out after each cast. This just took.. forever. Even when I made the mixture less runny it still needed to be thick enough to pour for the tower moulds (no real easy way to "press" it in I could think of, not with a giant bolt running down the middle), which mean it went up into the lego joint cracks that were there from the previous cleaning not being perfect. Ugh.
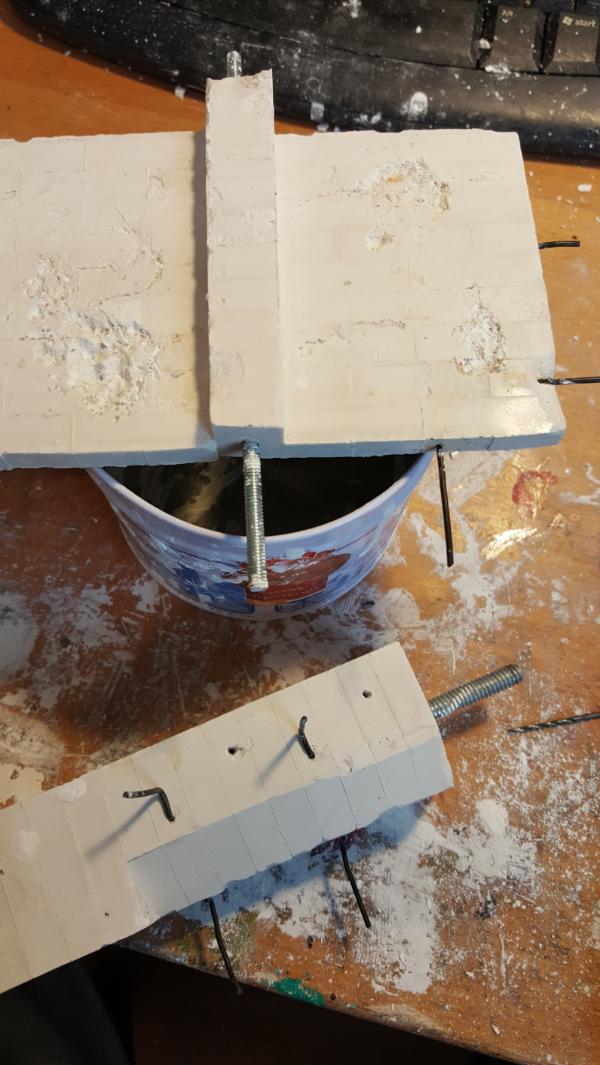
76303
Post by: Warboss_Waaazag
I like the "rebar" effect.
60913
Post by: Largo39
It's actually pretty critical, I should have done more of it.
This stuff is basically concrete, it has the same PSI (4000) which is great for accidental scratches and stuff BUT on the flip side still is just as vulnerable to cracking/bending/etc.
So the rebar helps keep it together once you start cracking it for various effects. Automatically Appended Next Post: So this skips forward (technically) about 4-5 days worth of casting process. Just as an FYI. Still yay progress!
Walls are up and assembled! Unlike the garage I cast the walls in much, much bigger chunks, pretty much the whole wall at once between the giant pillars.
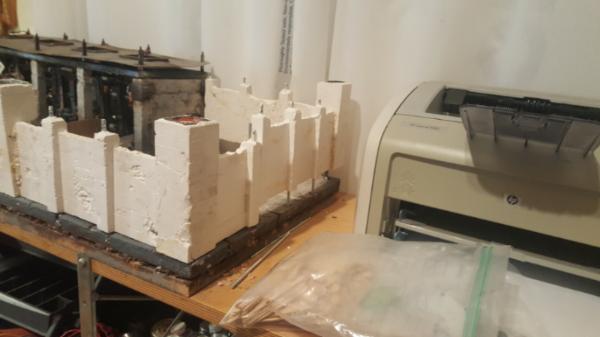
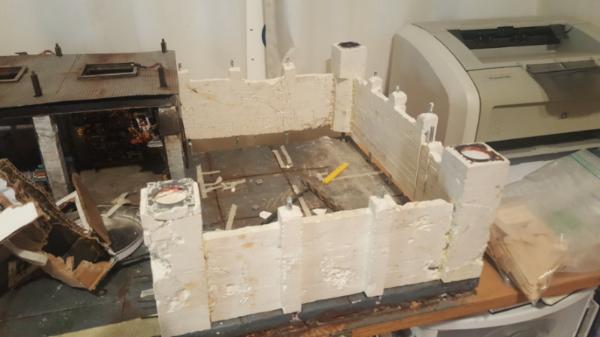
The other side is the mawloc side, so after casting it I started to hammer out the areas where its bursting through and tearing down the walls. You can see here why more rebar would have been good (i would have normally but accidentally got my casts mixed up in terms of which side the small pillars were on, so I ended up with the lighter rebar wall being destroyed instead of the heavier rebar one) because it would have meant that the top and bottom chunks that are missing would have broken into smaller pieces and stuck to the rebar. While i can easily glue those pieces back on its still not quiitteee as realistic.
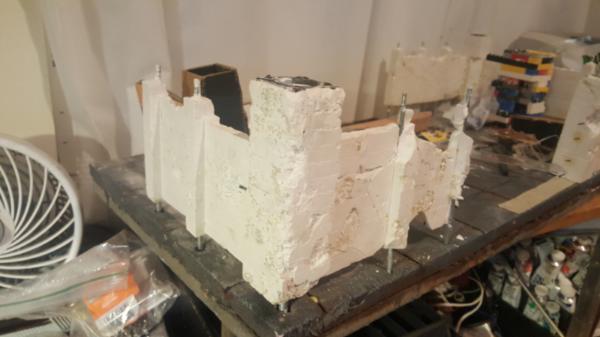
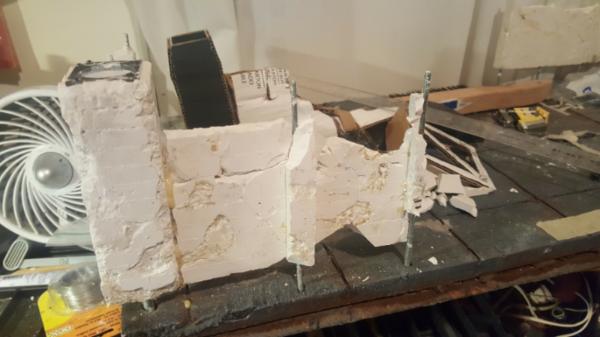
60913
Post by: Largo39
So with the setup of the previous pre-cracked wall I thought id go ahead and try and finish it off by bending it into its final collapsed position.
Yeah it pretty much all fell apart. Actually the post i bent thats in the middle of the wall which has a metal rod through it actually snapped so that was.. interesting. I'll have to recast that.
Still i took out some of the bigger chunks of the rubble and got out my jigsaw puzzle skills and rebuilt where i could to get a decent result:
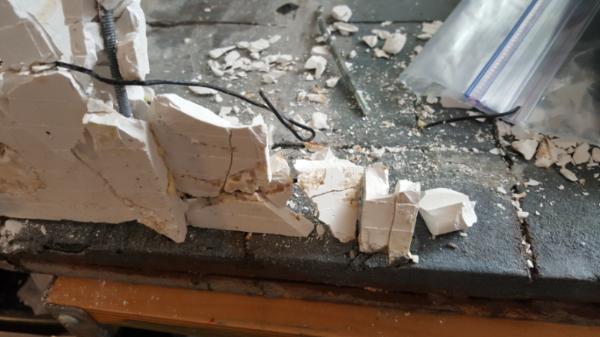
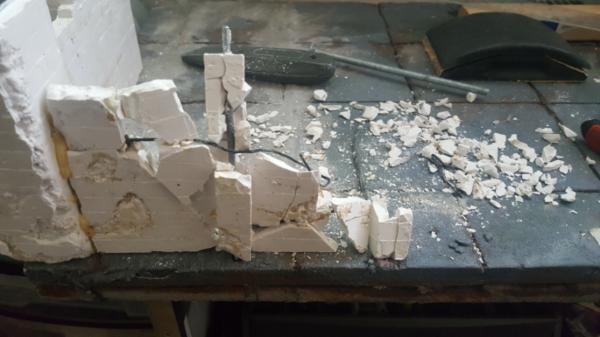
So you can see the base of the wall-post that will have fallen over with the wall section collapsed next to it. The other side of the wall I have to figure out because thats where the Mawloc will have burst through, so its unclear which direction that would be falling. Technically onto the other tile? Ergh. Hmm.
I also worked on the tops of my walls, adding some elecrified line to thematically match the fencing type on the other tile. Im happy with how it turned out.


76303
Post by: Warboss_Waaazag
It looks awesome.
61618
Post by: Desubot
Man looks really good
cant wait to see paint on it.
106439
Post by: Ynneadwraith
Sweet! That looks excellent
60913
Post by: Largo39
Thanks!
Here's a top down view:

And progress on the other walls:
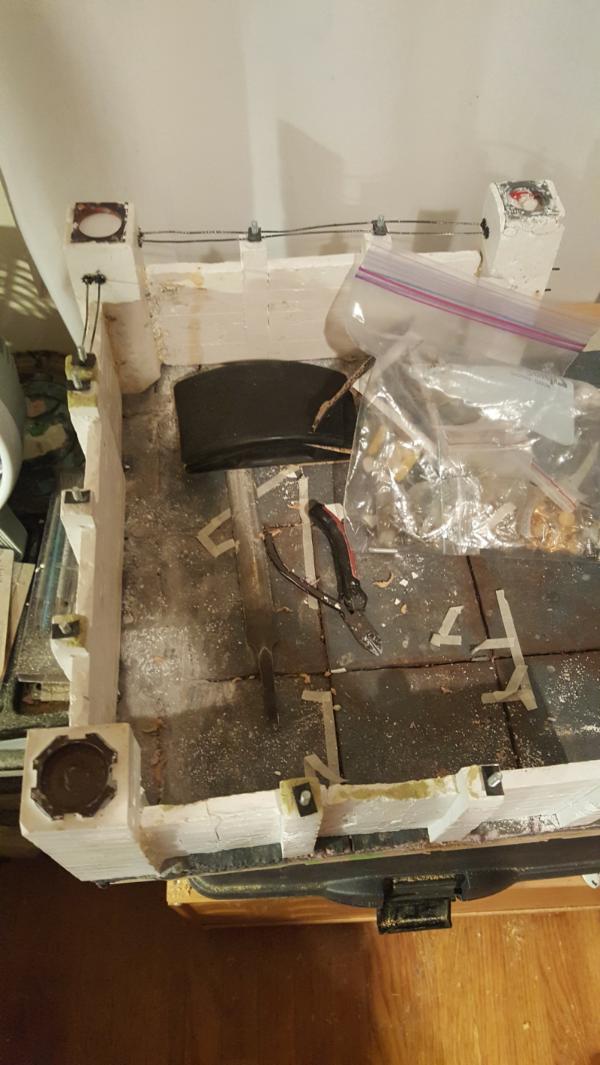
We also have some less pretty mechanics. How to actually attach this stuff!
So we have a wooden base with foamcoated foam on top. I'm attempt to attach what amounts to blocks of cast concrete in a permenent way. Glue just aint gonna cut it. So we use the threaded rods I've been inserting in all these walls to actually bolt the walls too the wood underneath. A bit overkill but hey it sure is sturdy.
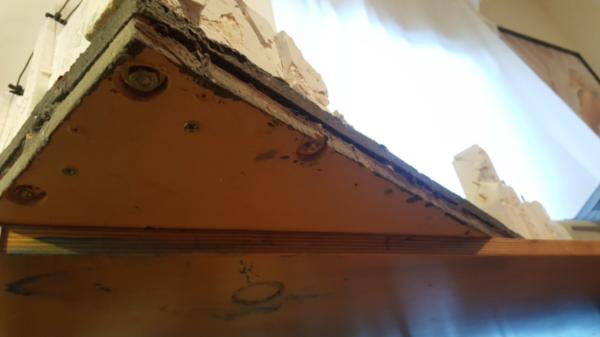
Sometimes they poked out abit in front but I can patch that later.
60913
Post by: Largo39
So, all the walls are up and bolted down. Yay! Time to test putting it all together with the garage.
Looks okay on this side..
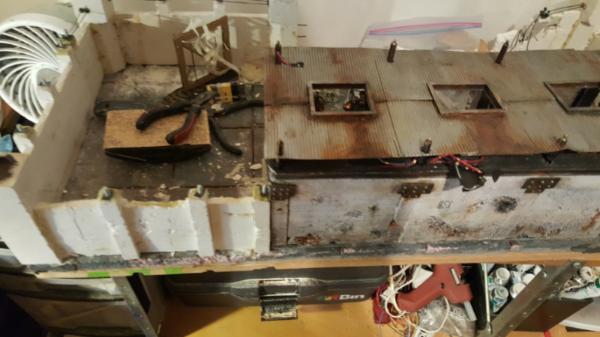
whoops whats that?

yeah we're off by almost a half inch. TBH. this was somewhat inevitable. I measured plenty but between lego dimensions being not quite 1/4th inch per dot AND actually mounting the walls to the board adding more wiggle room... it just got off.
Its okay, not a hugely tough fix just gotta get out my dremel and cut a bit off.
Basically I just am going to shift the post over a bit:
Dremel time!
Cut off the wall bits I need, sand down the post a bit, re-add a new hole to pin the post back to the rest of the wall and we drill the hole in the tile and we're good to go.
All fixed:
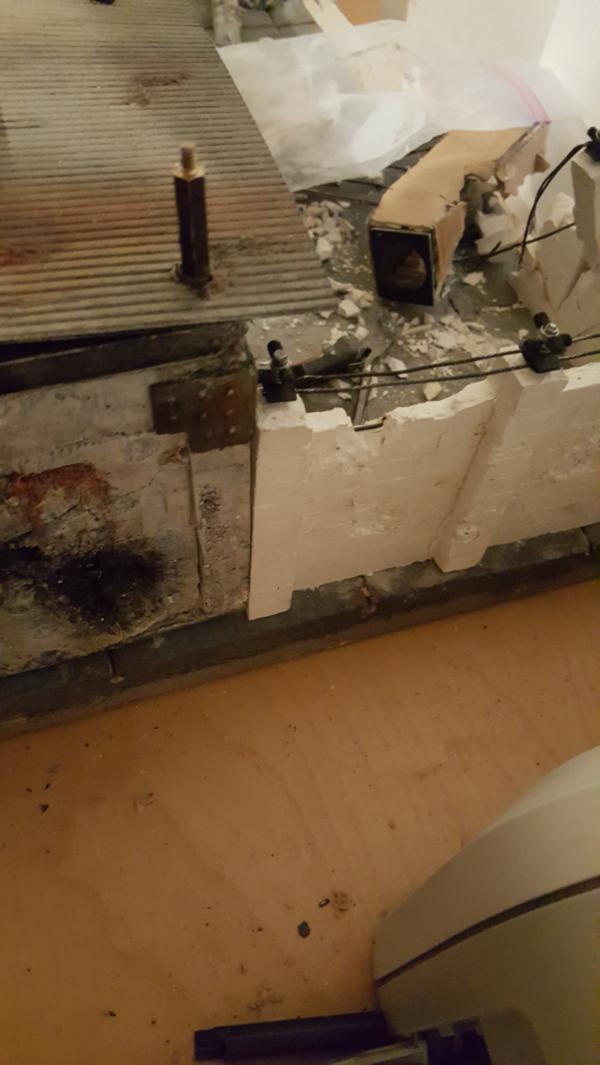
85400
Post by: Mad..
Walls are coming along really well... hard luck on the casting with it pouring out everywhere, can only imagine the thoughts going through your head as it went everywhere hehe.
Going to be cool seeing the wall effects with the Mawloc and Tyrant etc in there... nicely done!
60913
Post by: Largo39
Yeah, lots of swearing and moving quickly. Blu tac is my friend at quickly plugging holes. And remnants of my crappy green stuff that I'm trying to get rid of before getting actual green stuff.
Its okay, I just have to remember that you really want the consistency to be about toothpaste, something that almost stands together on its own. A little runnier is okay too if you need to pour but justtt bareeelly. It should oooze out.
The ratio is basically 1 part water to 3 parts powder (the official number is 5oz of water per 1lb of hydrostone). You dont really need to be precise you just need to keep adding powder until the proper consistency is achieved.
60913
Post by: Largo39
So, the right side is bolted down and I'd be done with the fencing/eletrical tops already butttt I need my hardware store to get more parts.
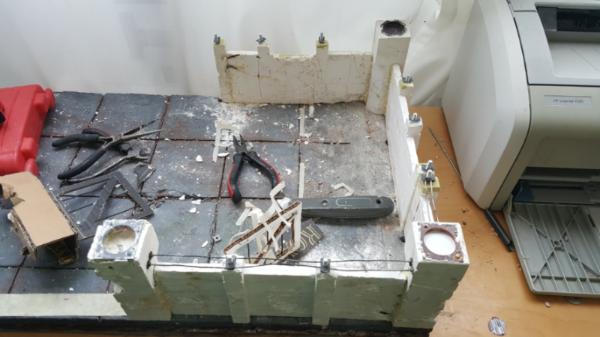
So its time to work on the mawloc some more!
I went ahead and cast the mawloc half-destroyed tower as well, the goal is for it to be as destroyed as possible but still upright. So just barreeellly hanging on. We also have the mawloc sitting on top of the collapsed wall support, which works well because it allows the mawloc to face the tower and thus outwards. Having him face inwards seemed.. unideal from a display perspective.
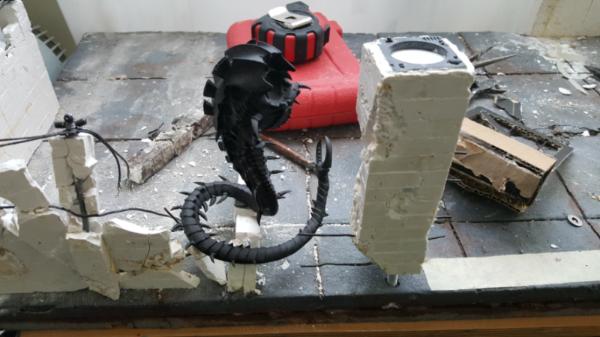
I started adding more rubble around the tower and also working on the pit the mawloc is coming out of. This bad boy needs to be pretty big and I intend for my rippers to also be swarming out int he gaps.
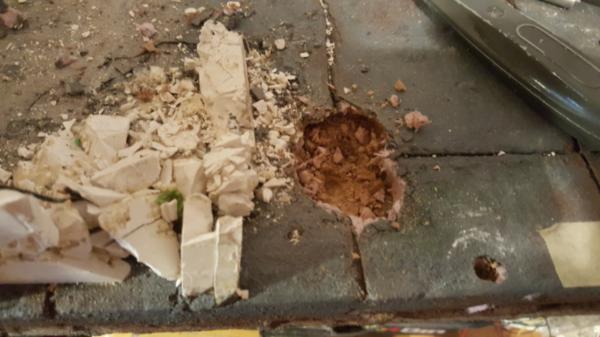
I started building up the wall the mawloc pushed outwards/completely destroyed, so you could see remnants of it:
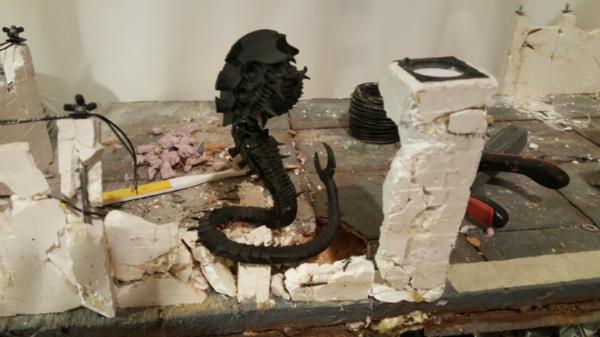
Continuing to build out more:
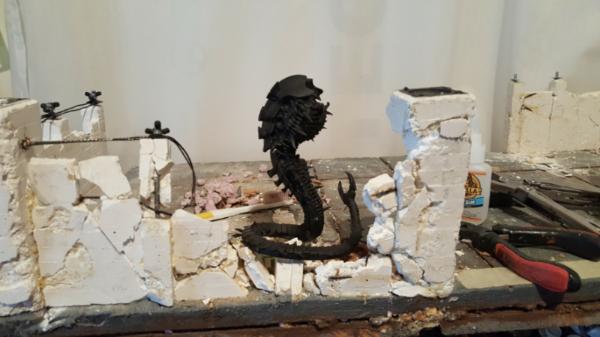
60913
Post by: Largo39
SO work continues, mostly just adding rubble and such in the hole, and trying to hollow it out without actually punching through to the other side (which i do.. once. Whoops! Sorry table underneath)
Also got.. SOME more nubbies for my electrified tops so.. just slowly finishing off the right side:
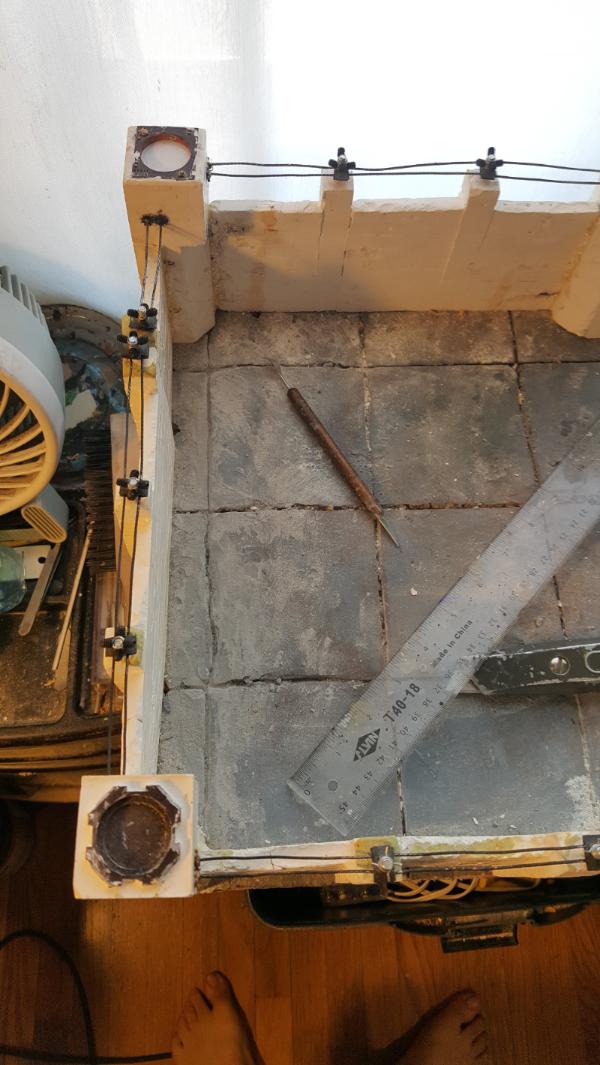
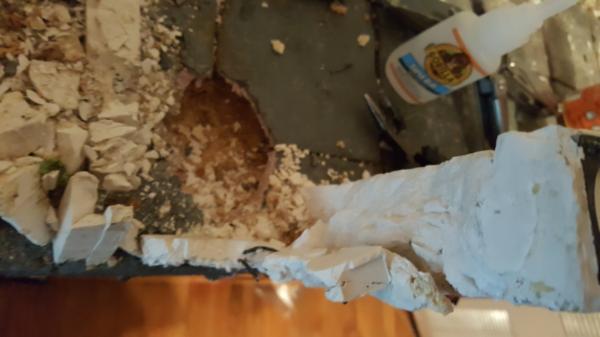
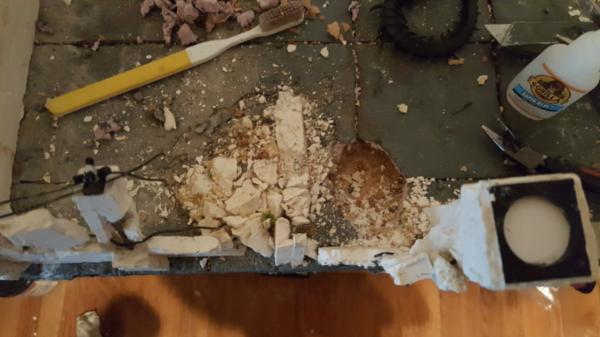 \
We also have our first "all together" shot, trying to make sure the placement of the mawloc doesnt impact the sighlines to the garage TOO much, so far so good!
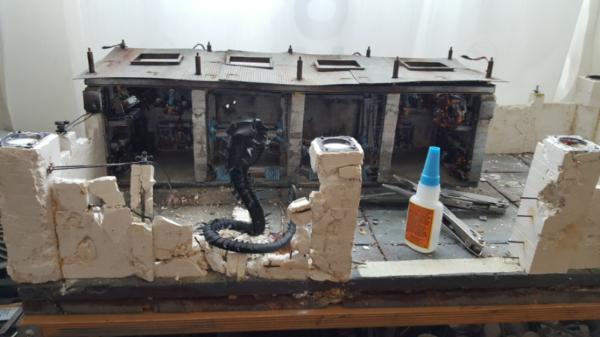
60913
Post by: Largo39
. So like with the other "nids coming from the ground" crater I wanted to build a tunnel for the mawloc to come out of. Its a good way to hide my relative lack of depth and gives a better feeling of the big guy coming out of the ground and causing lots of damage.
So lets do a little timelapse of me making it!

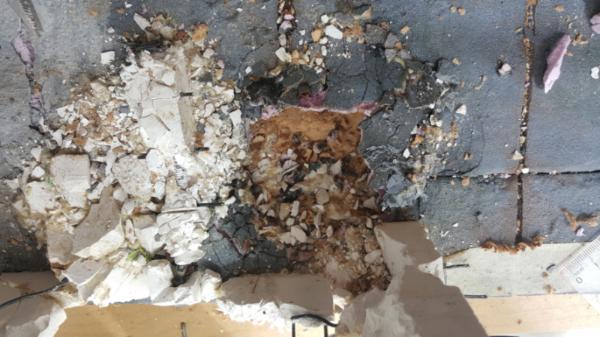
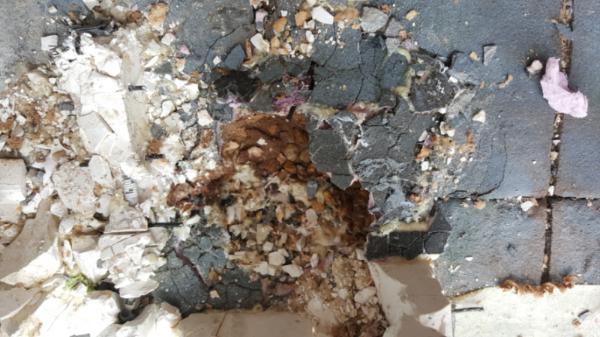
Now even with liberal use of gorilla glue the tunnel "roof" that I had built was.. a touch flimsy. Definitely one of those things that seemed like the first actual dropped model it might collapse it, so I decided to just shove in some wire supports as far as they'll go. Turns out that worked pretty well at stiffining it up.
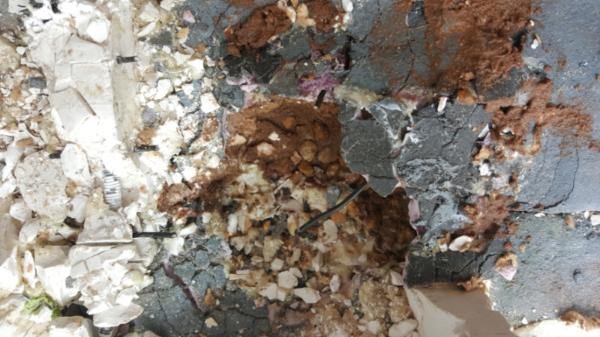
Turned out pretty deep! Im happy. There will be black/water/etc in the back there to develop the depth even further.
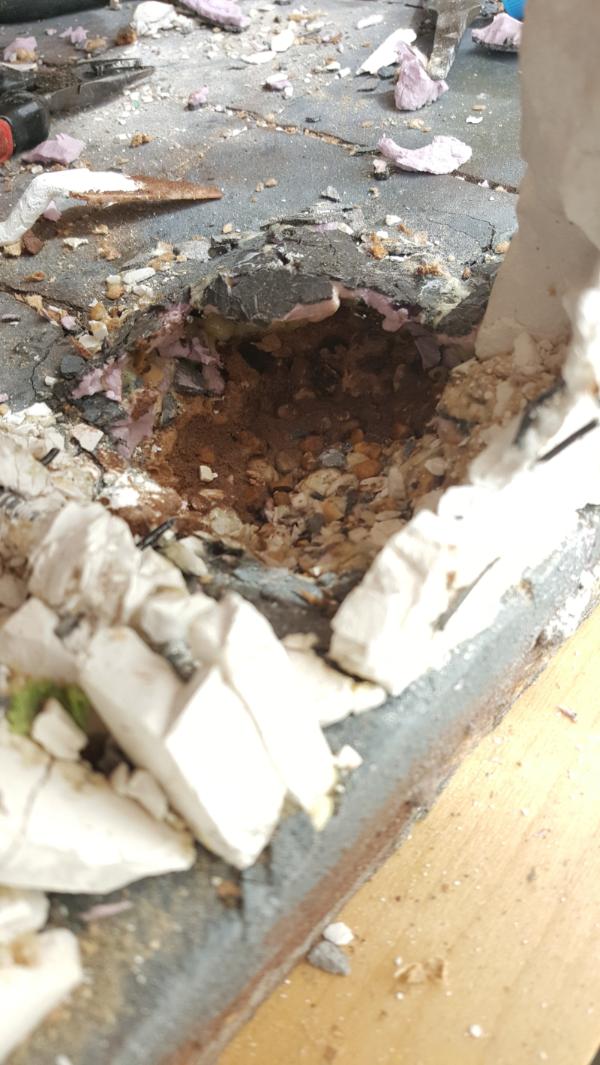
I also started working to bend the tail down into the hole:
60913
Post by: Largo39
So with the Mawloc portion basically done conceptually it's time to figure out the flyrant attacking the other side and get that pose figured out before I start painting.
First upw as trying to figure out a good leg position. the wingspan on flyrants really are huge, so I need this guy to hug the edge as much as possible. Ideally that means his left wing (screen right) is wrapped aroudnt he pillar and ripping off the turret there.
I think the pose worked pretty well but I need to figure out the tail a touch better. Still, pretty good.
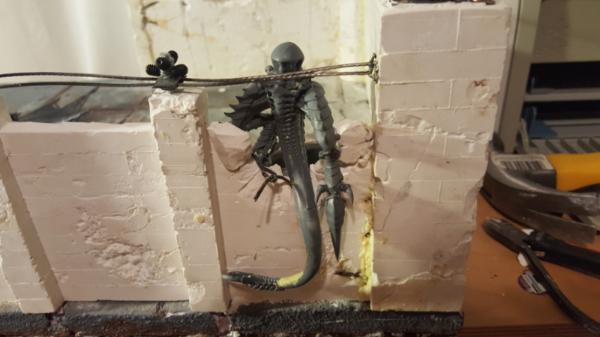
Next was working on the left arm. I had to cut it off to repose it, which also meant taking out some of the small wing bits. They should relatively easy to re-green stuff though.
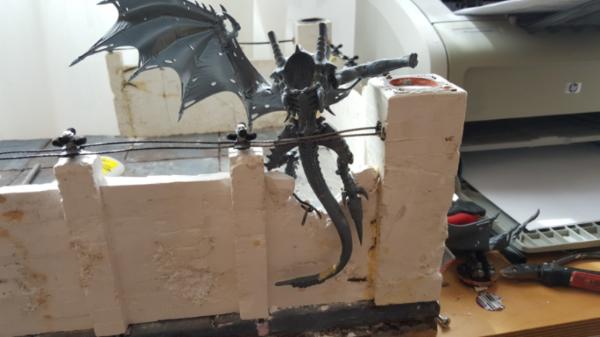
Next up was re-attaching the wing:
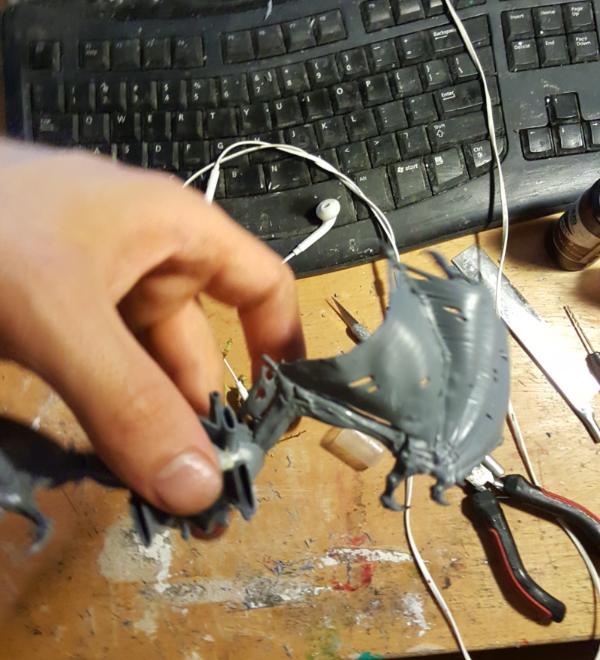
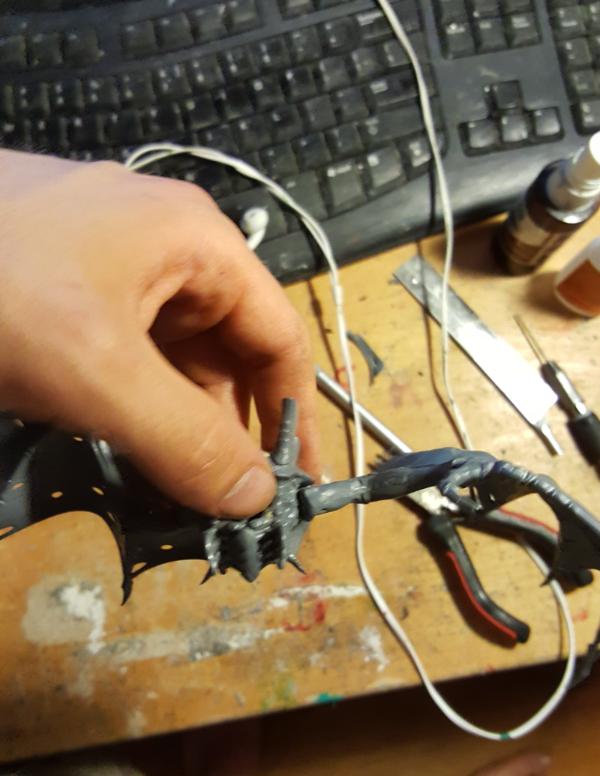
I then curled the wing a bit with heat.. carefully and hey the pose works! THe wing sticks out a touch more than i'd like but I'm hesitant to heat it more. Stuff like claws start shrinking if i am not perfect in my positioning of the soldering iron.
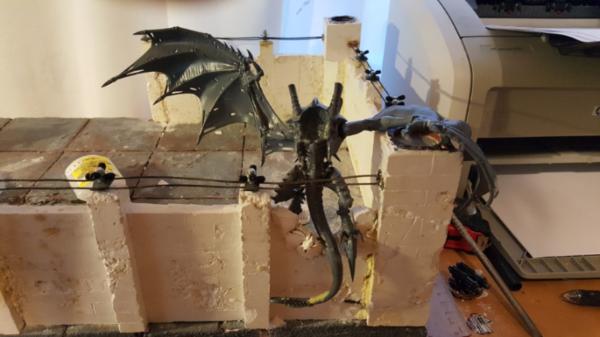
The right wing though is a bit wierd like that, so i might cut it off too. Blergh.
76303
Post by: Warboss_Waaazag
It looks kind of like it's landed awkwardly and is trying to haul itself into a better position. With all the work you've done with one wing, the unmodified one looks pretty stiff and static by comparison. Sorry to advocate for more work for you.
60913
Post by: Largo39
Yeah the other wing is.. going to get changed.
52201
Post by: evildrcheese
This is brilliant. I found the info about the casting process really fascinating , although it's probably not something i'll ever try.
The results are certainly fantastic though.
EDC
106439
Post by: Ynneadwraith
Man those Marines are all kinds of screwed aren't they?
Looking great man
60913
Post by: Largo39
RE: evildrcheese. Try it you should! It's surprisingly not *that* time consuming comparatively speaking. For example, if you just wanted to cast some straightforward wall segments for use in a generalized way thats a lot easier. I onyl ran into problems cleaning the legos because I had to A: take apart the mould each time to pull out my wires to firmly attach wall segments and B: had a lot of different sized walls.
Given how strong it is (with rebar/any sort of mesh inside to protect againts cracking) its well worth it for durable terrain.
RE: ynnead yep! they totally are. The original "story" of this was to have the very screwed marines so desperate that they are calling up demons to help them, and the demon they get is Crowley. So it's marines that are... quickly becoming chaotic good paired with demons that are chaotic neutral at best. I had a really great all white/burning ashen wings scheme for my demons. Very classic fallen-esque. Now that summoning will likely go away that storyline isnt as needed but its still one to keep around.
Anyhoo, time to fix that right wing.
I pretty much just cut it off and pulled it down and it worked pretty well, no need to try and heat warp it into a curve and risk the talons.
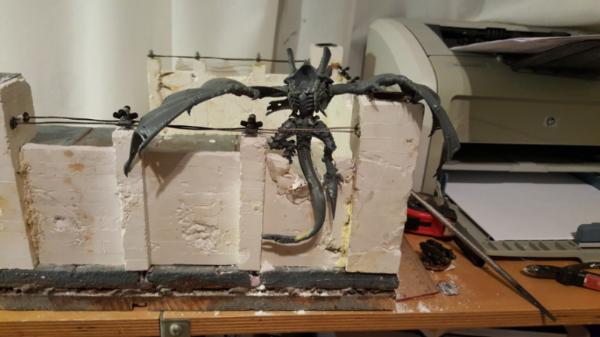
I pulled it over as far as possible so the hand is resting on that fence post. I'll probably cut at least one of the lines to make that easier to pull off.
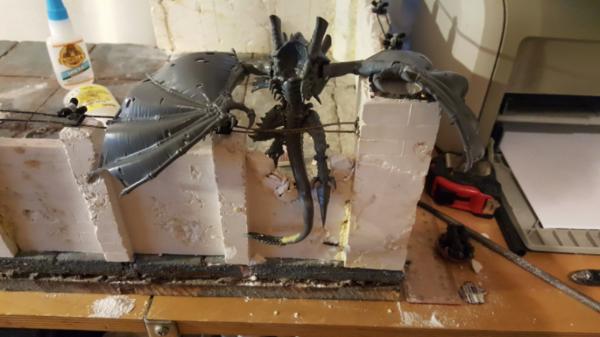
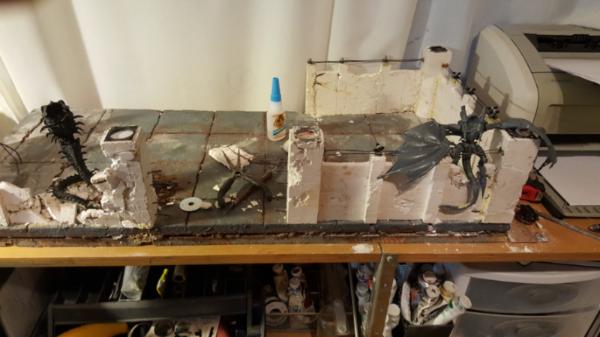
Next up is the tail, it's not bad per say but it would be nice if it was DOING something. I figure slight bending and it will be embedded into the post, ripping it apart.
60913
Post by: Largo39
So now its time to tweak the tail! One thing I watned to add was have it digging into the concrete some, so its a bit more active than just hanging there. Bending it was.. difficult however. Its so thick it didnt respond to heat quickly and unfortunately I accidentally melted one of the foot claws by just being close to it! So.. i had to swap it out for the rear one. Ugh. Still, i ended up with ad ecent enough bend to make this "good enough".
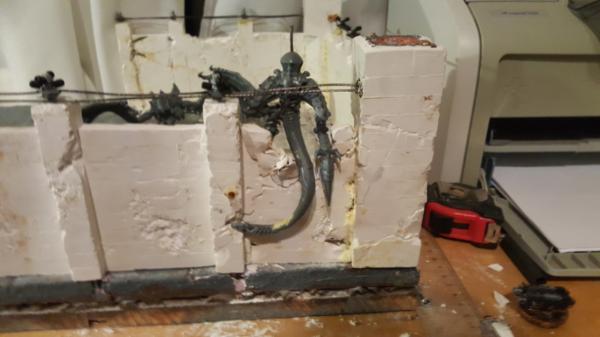
With that we're in decent shape. Now I gotta start green stuffing the wing bits I cut off and also painting up my walls.
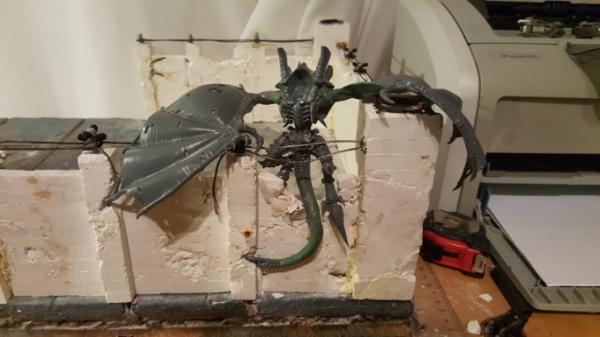
So hey look! paint! Now for this I did have more detailed accounts, including what NOT to do (ie: it takes washes VERY heavily so go even lighter than you expect). So I was feeling pretty good, fairly in control of the colring and seemed like I was closing in to the final look much faster and better.
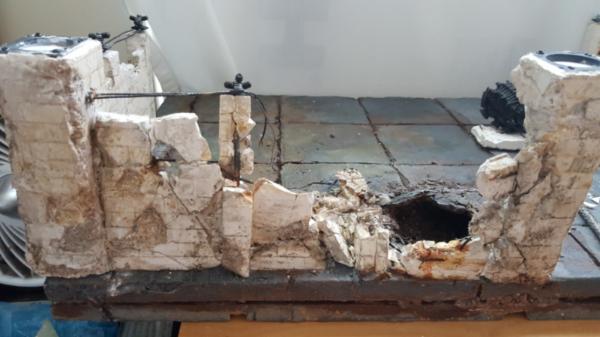
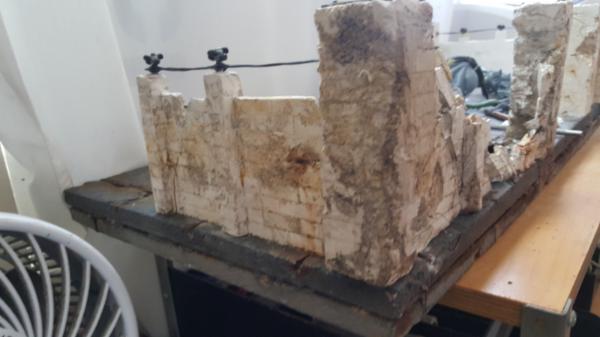
Until I compared it to the garage and went "well.. crap"
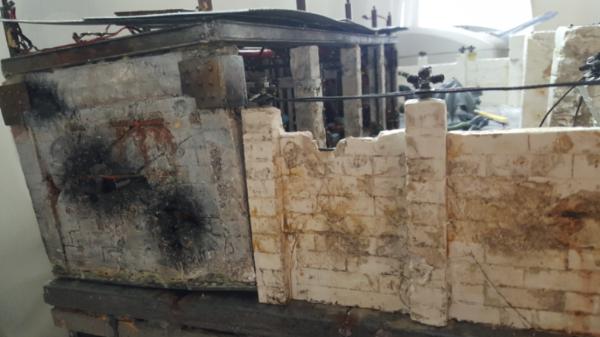
Not only is it darker but its just fundamentally bluer and more concretey instead of white marble. So.. in other words.. I basically got to do everything about what I did before all over again. Wash the entire surface darker than it should be, only to bring it back with heavy drybrushing/white washes that tint it more concrete blue-grey.
Now I just gotta remember what every so slightly off-white mixture I used to blue this up...
60913
Post by: Largo39
While I moan and groan slowly washing and drybrushing my walls... lets do some greenstuff.
We're back to the real deal and boy was it good timing. The other stuff I was using was so crumbly it could never work for these wings, I needed something flexible.
Pretty basic. Im still "meh" on sculpting but I know that these will be my brown shiny orange/green look, so hopefully that hides imperfections in this.
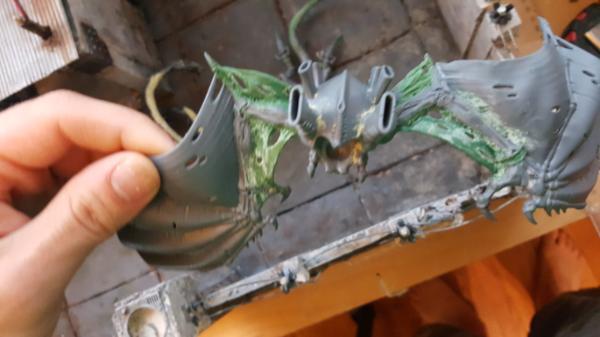
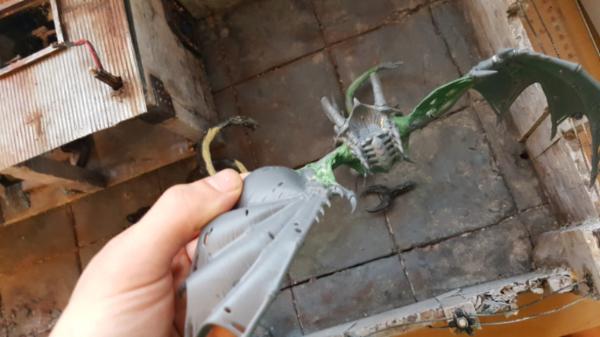
60913
Post by: Largo39
SO back to painting, mostly just working on the walls and getting them to line up with the garage better. Lots of wash then drybrush then wash on the bottom over and over. Its taking a whil ebut we're getting there and its getting some good richness in color as a result.
I'll do some pics of my paints in a bit, unfortunately some of them end up being home brew mixtures but you'll recognize the washes at least.

The tunnel is also coming along well:
Gets nice and dark in there:
22192
Post by: whalemusic360
Man, that wall looks great. Would never have guessed it started life as Legos.
60913
Post by: Largo39
Thanks! Lego casting is my new favorite. Despite the.. problems cleaning them.
Next up, work on the right side! man this is a lot of wall...
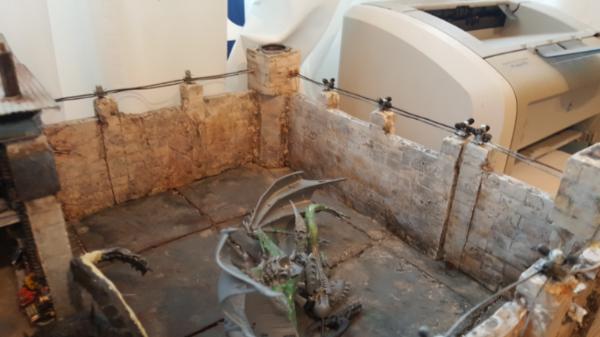
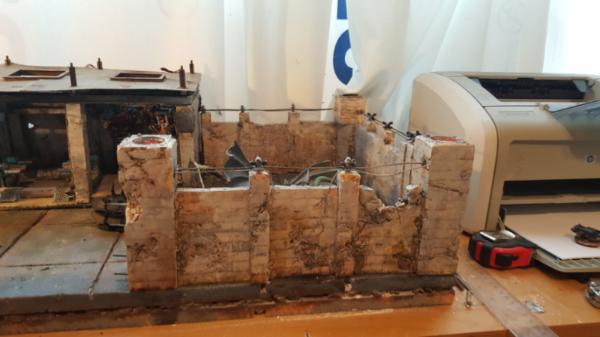
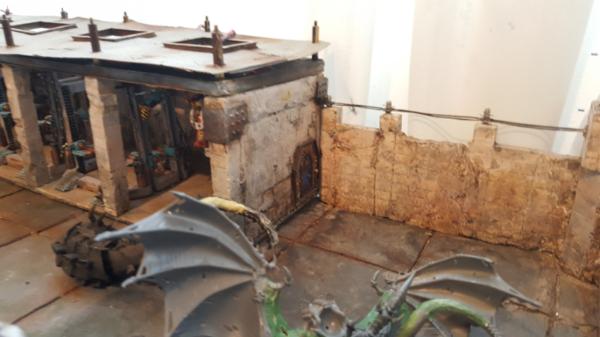
60913
Post by: Largo39
So before I really start attaching things for good I want go go ahead and tackle a relatively straightfoward cleanup step that will really help make things look better: the front edge.
I dont have a good picture of the before but you can see it here:
or on the side here:
Basically it's that gap between the foam/foam coat andt he wood underneath. Its where cork was to show the dirt layer originally but over time/scrapes/etc its just become more of a gap. This was further exacerbated when I drilled in the holes to mount the walls a lot of the foam got punched through. So its time to fill that all in, at least for the front side.
Since the front wall is permenent, I also figured I'd go ahead and fill int he drill holes for the bolts underneath. So I quickly cutout some plastic, added lots of blobs of Gorilla glue and water.. and went to town. Then for the crack itself just.. a lot of gorilla glue, rocks, and coatings of my mud mixture (superfine sand + wood glue)

Since the Gorilla glue expands so much I had to watch out for mud bubbles but otherwise it was just a waiting game.
And now I have a much sturdier and cleaner front edge. Still needs to paint it up with drybrush/washes of browns but the texture is correct. No wood or foam showing:
106439
Post by: Ynneadwraith
Wow that's looking phenomenal with paint on you've done a brilliant job with those.
60913
Post by: Largo39
Thanks!
One thing I realized would help was adding in the steel t-plates I did on the garage. It really helped give some contrast to the wall of concrete and made it feel more real. So I figured I'd do that here too!
First up, making the plates. I sized them to match the ones from the garage.
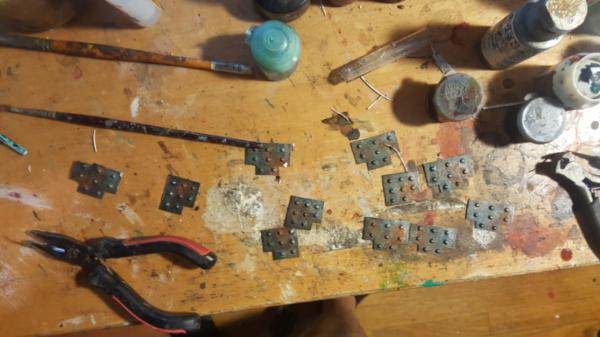
Unfortunately if you look at the garage those plates are for the bigger beams. Not the smaller joints. So when you apply the same sized plate there it just.. dunno, it was too big.

So I cut them down pretty much right to the bolt, no more excess:

That worked a lot better.
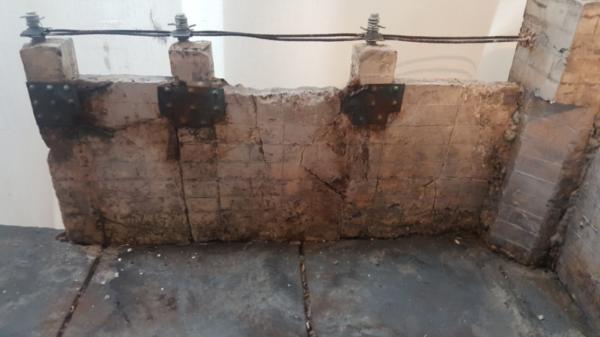
60913
Post by: Largo39
So I started slowly figuring out painting the bits i green stuffed. It's odd because its such a different material than the hydrostone that even painted it still looks smoother and off, so it'll take a while to get right.
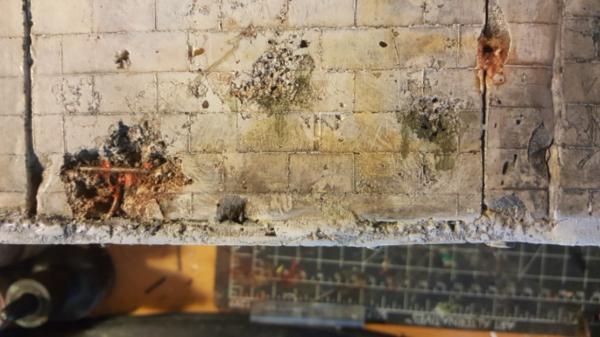
Meanwhile I also added some cabling to my downed wall section. This is an instance where using the braided stuff I'm using (100lb braided wire for holding up frames) is both good and bad. Good in that it looks perfect and is tough, bad that it's stiff enough to not drape naturally. So you have to shape it into place, which can take longer than expected.
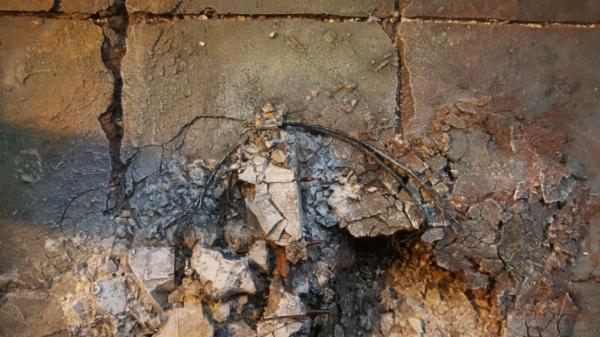
Finally we have a lesson I hope you've all learned by now. Its okay to get things wrong! Its okay to do something just to get it done, then come back later and re-do it better. I hope I've highlighted that throughout this blog. As happy as I am with my projects and how they've been turning out, they certainly didnt start that way and more often than not I've iterated my way into a look im happy with (dark metal, marine blue, these walls, blood and guts, nids ATTACKING on bases) and then gone back and realized I need to re-do some old things to line up (orange marines).
So the latest case is the wiring for the garage. At the time well I was burned out and just wanted done, so I cant even be mad at my old self. But during LVO it was definitely difficult to turn the garage on the fly since I didnt have a switch. Furthermore detatching/re-attaching the walkway from everything is a major pain. Further-furthermore the battery pack magnet idea didnt really work out, its time to just glue that sucker down. Further-further-furthermore I need some more LEDs in there, raw and untinted just to get some basic white light in there.
So, first up is the re-wiring. This is where I left things last time:
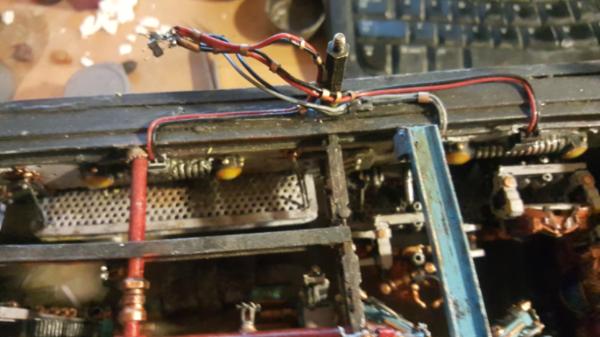
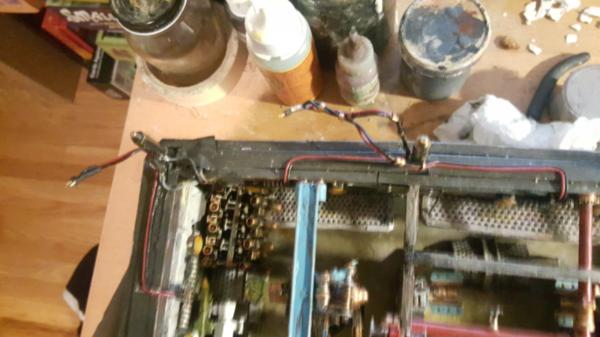
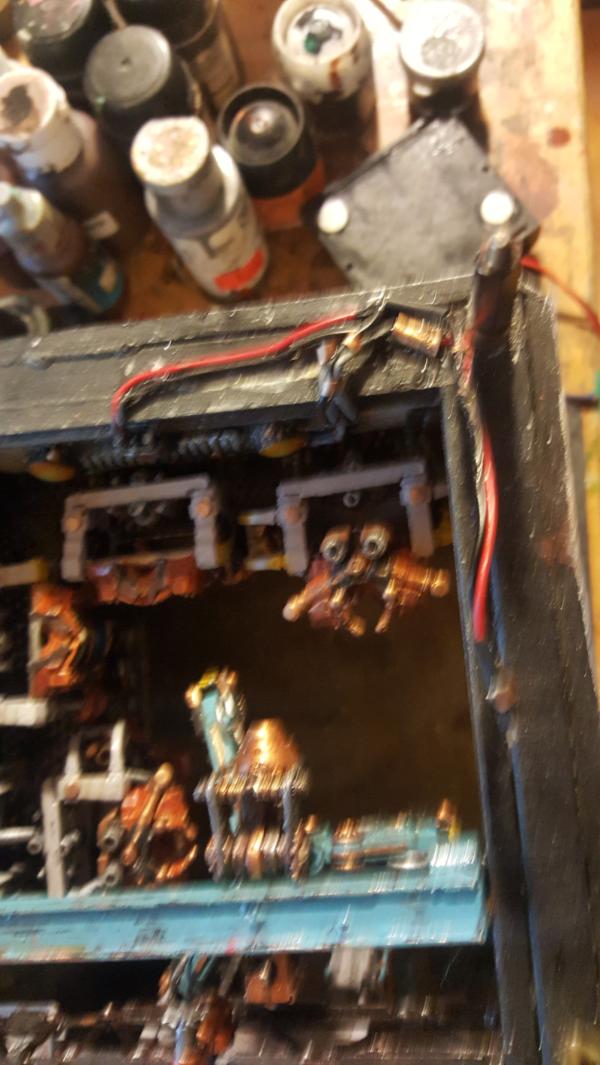
Lots of connections, lots of things to hook up, pretty messy. So lets fix that. The goal is to re-wire it to just all feed into a single connection with a switch attached.
60913
Post by: Largo39
So the first part of the re-wiring went okay. It's time consuming, as you have to basically make a tri-wire connection each time you want to reduce a pair of wires which can be tricky to make sure its secure but also test it before you put the solder down. My abilities at de-soldering are.. uh.. lacking? It never seems to work well, even the copper mesh stuff, so its best to test first otherwise you have to cut and the whole point of this is to not have much excess wire.
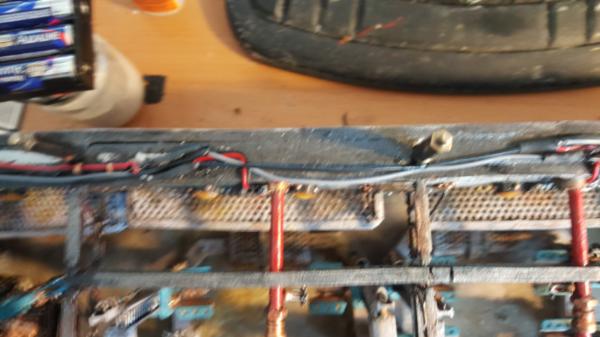
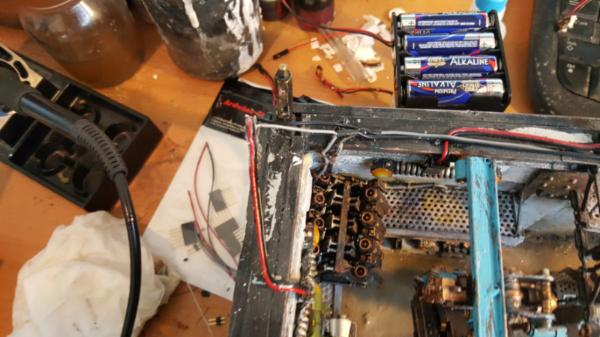
I also decided it would be nice to add cross-beams to help ensure my slant is in place and support the roof a bit more. I've noticed it can sag ever so slightly when on its own and when I add the walkway on top of it it's easy for the roof to start sliding down the pins instead of staying at a nice angle.
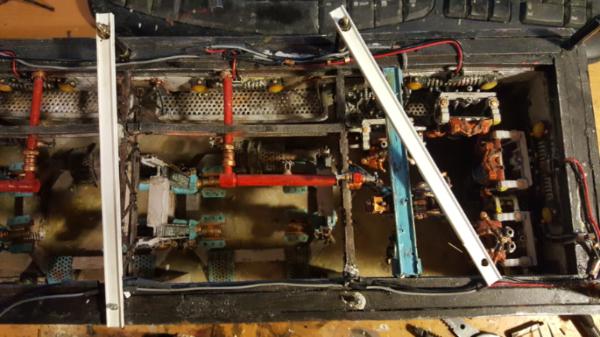
60913
Post by: Largo39
So the re-wiring continues and I added in some new LEDs. I wanted some more in the middle, raw and hidden to help flood it with light. The result is cooler then possibly it should be but I might add even MORE that are yellow to balance it out. I wanted the white to be as raw as possible so I get the most light. If not Ill just color the led bulb directly a bit but im hoping to avoid that.
We also have the first few crossbeams painted up!
60913
Post by: Largo39
So! quick tut of the lights I made. Whats unqiue about these is that I needed them to be minimally impactful on the LED brightness BUT also block the LED from being super bright right in the eye. Unfortunately because of the gap in the back my "hidden" extra fill LEDs are anything but, which is why I needed these shades.
I settled on using plastic tubing cut in half and along the angles to make a trapezoid, letting light escape at the angles. To maximize the light I then covered the interior with tin foil to reflect as much as possible. Seems to work okay as a result?
Sadly this is the best picture i have of the shape of the lights.
All the pieces seperately:
Surprisingly supergluing tin foil to plastic worked pretty well. Seemed to hold well enough, just dont tear the tinfoil. I wrapped it around the plastic too just to really try and.. secure it as best I could.
The light in place. Look in the upper right corner.
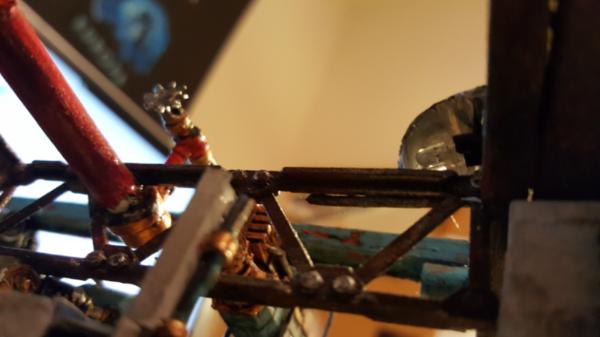
60913
Post by: Largo39
So back to working on LEDs! I figured out my light covers, build them and primered the exterior black and installed. With that and some more cleanup we're good to go! One thing that Im sorta glossing over is.. this still took a while to wire up. Worse yet was the fact that 2 of my LEDs were duds, so I wired the middle light with only 1 led because I didnt want to make the lengthy drive to get more LEDs... only to find out I was still short an LED because of the second dud. So the middle light could be brighter but.. oh well. At this point I was tired of wiring and re-wiring things (took pretty much an entire weekend to get all this soldered up and cleanish). Of course I then found more (weaker) LEDs later after I went through my bits... sigh. Oh well, 5 instead of 6 is okay for brightness.
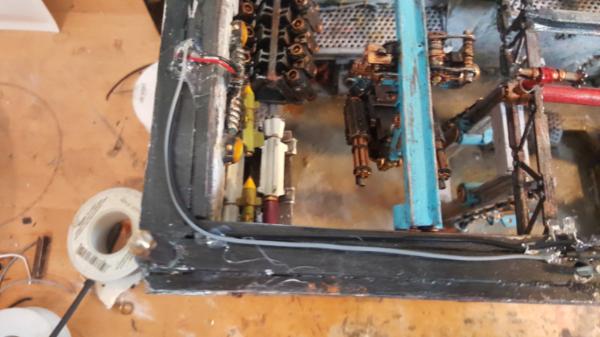
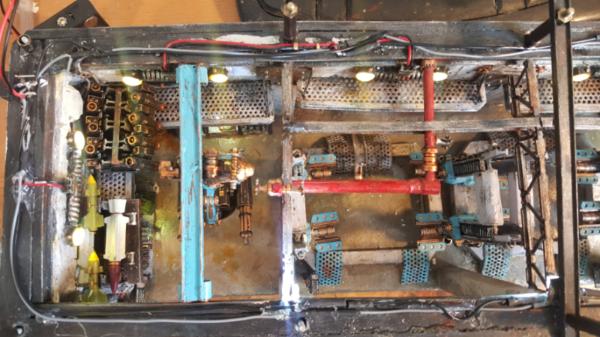
Then I added in a switch and.. did it terrible wrong! I have no idea why, sleepiness I guess, but I just wired up both leads to it and both of the battery leads as well. So when its in the open position it lights up! but when its closed.. well.. the battery shorted out.
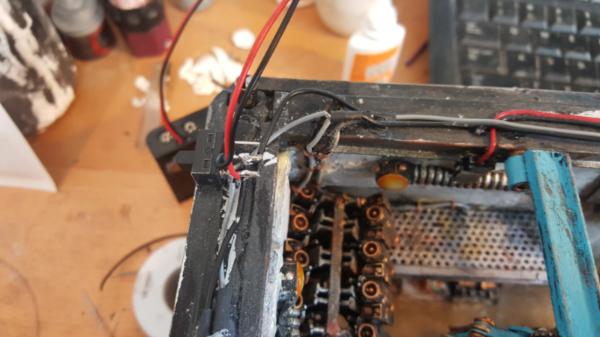
This was not how I wanted to end my weekend but.. the lights still worked, I just needed a new battery pack (guess where those are... the super far away store! ARGH BLARGH) and to re-do the switch wiring. With that done we're back to working again:
Much better on the brightness levels I just want a couple more LEDs to yellow it up.

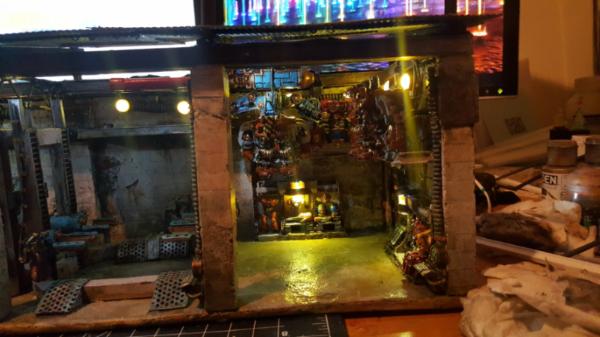
76303
Post by: Warboss_Waaazag
Wow, that looks great!
60913
Post by: Largo39
Danke! now for some windows! Or well, the back ones at least. The side ones i havent figured out yet since htey are triangular and tthose kind of windows are always wierd when it comes to adding trims and such.
First up was finishing off all my roof central beams:

The window itself was fairly straightforward. I had already gotten some convienent plastic garage-style mass window panes that were the perfect height. So I just painted them up and sandwiched some plastic between them. It's not as clear a plastic as it could be but.. ehh.. its "realistic!" lol.

Added some caps on the top of the frame:
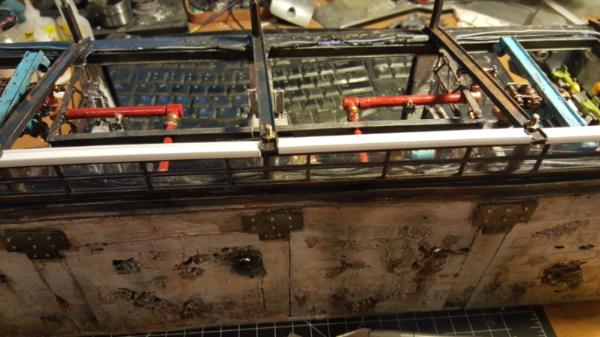
The final result! looks good, much more official garagey now. Of course having such a thick cool looking dark metal chunk is really making me wonder if i should just strip my walkways and go dark metal with them... The other walkways turned out so well that it is awfully tempting. Downside is that i'd have to (very very carefully) somehow strip my existing bases I've already made. Maybe something to save for later. The blue also really wouldnt work, as i'm deliberately trying to keep all the color for the details on the interior. Dunno.
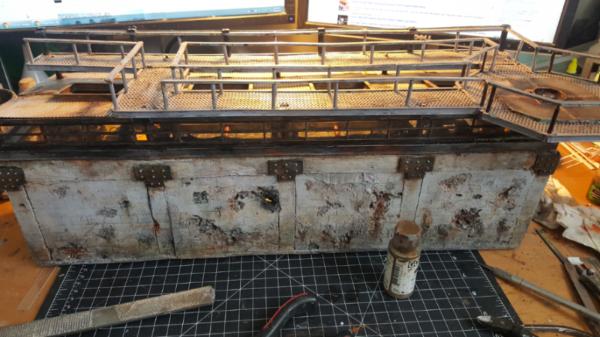
60913
Post by: Largo39
So here is where we're at with the garage tile
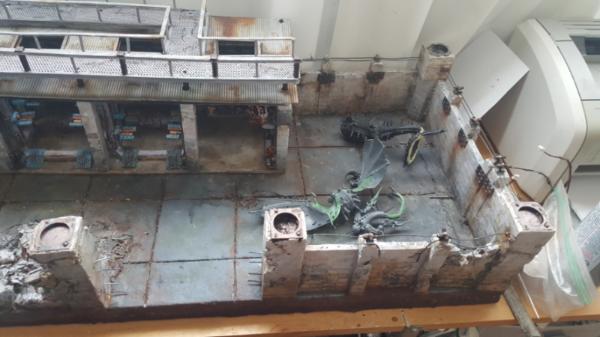
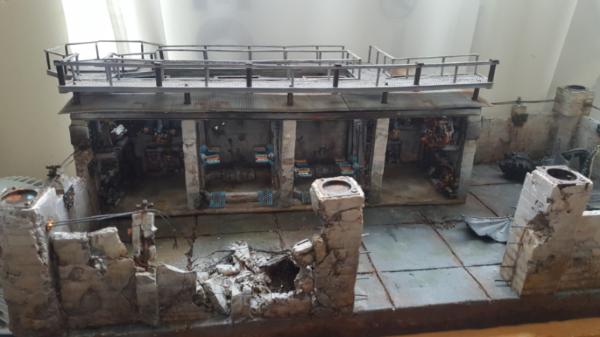
Pretty good shape! So the list of remaining things to do:
1. Paint up the flyrant
2. Paint up the mawloc
3. Make a gate
4. Turrets, make sure they are up to snuff paint wise and destroy a few
5. A few extra lights in the garage.
6. Still try to think about where to put my marble base marines, if anywhere.
Thats about it! Not worrying about barracks/giant cranes/etc until we know whats good in 8th. So given that lets.. start on the gate! I really didnt want to paint the nids yet.
First up, my third favorite plastic shape: square tubing.
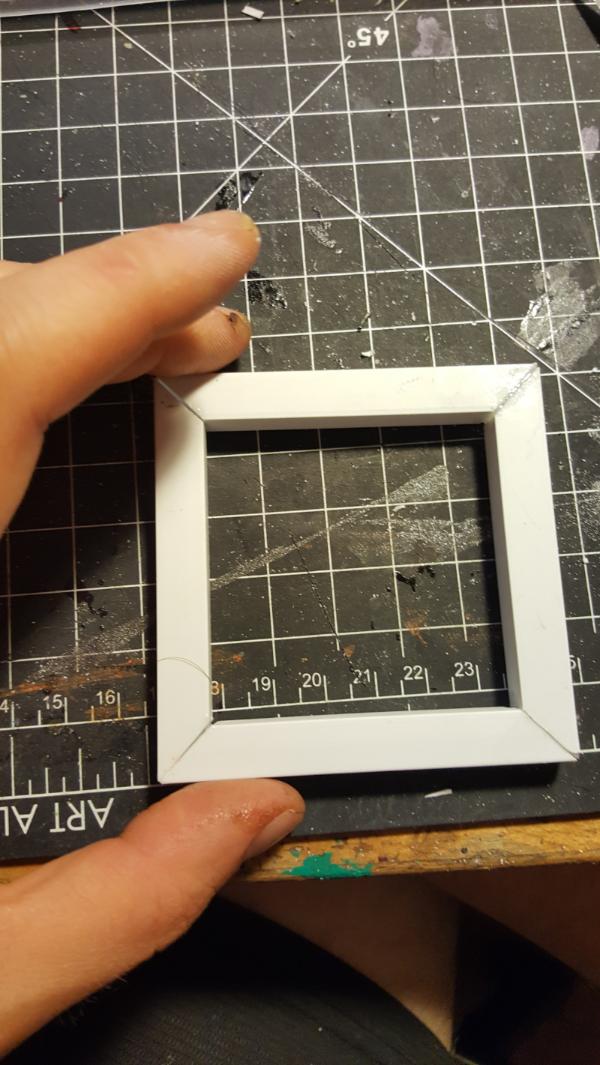
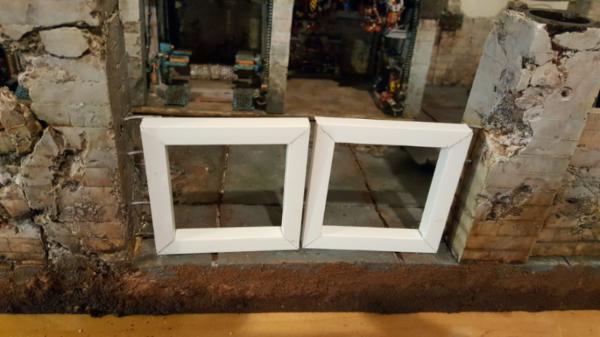
60913
Post by: Largo39
Just continuing work on the gate. As with the cardboard, I wanted it to look sturdy but not be solid, after all "windows" through the wall to the garage/stuff beyond are relatively few so this has to be one of them. Given that this will be the "second" tile the ability for people to get in close from the front will be more limited.
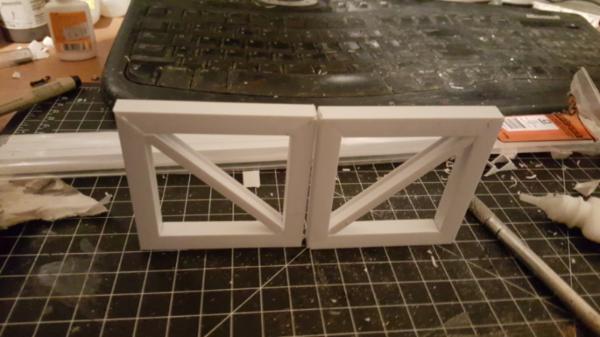
Of course that means I need more charged electrical fencing to fill in those gaps!
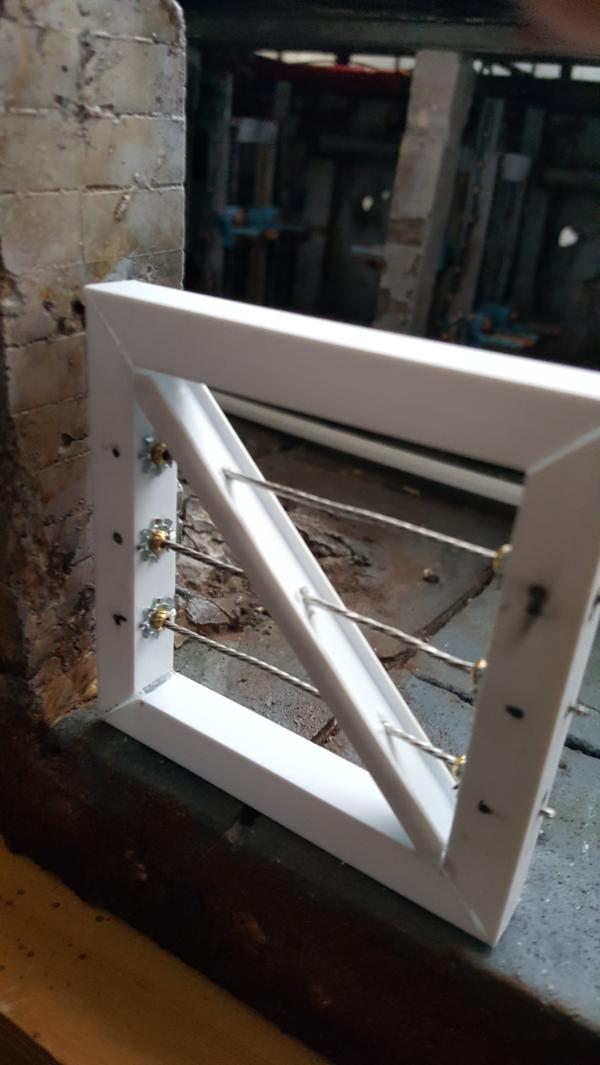
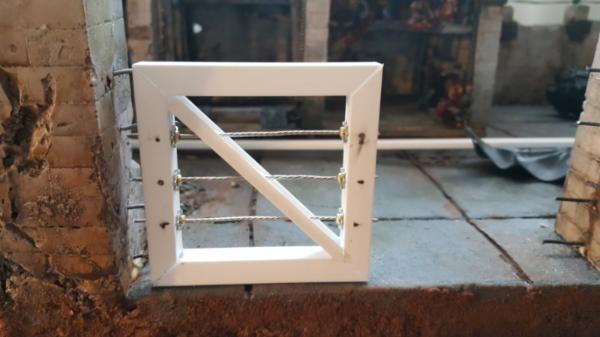
Now one thing you wont see that I did is poke some holes in the bottom of each vertical side of the gates, where the braided wire attaches. The reason for this is.. well square tubing in plastic form is pretty flimsy. The joints holding the squares together are pretty easy to break and its not like there is much holding the wire in place.
So to help with that I poked a nice big hole in the bottom and just FILLED the vertical sides with gorilla glue. I put so much in that i could actually feel a weight difference. An hour later and a lot of patience clearing off the expanding out of various holes and pores you get a much more solid structure all around for holding everything in place.
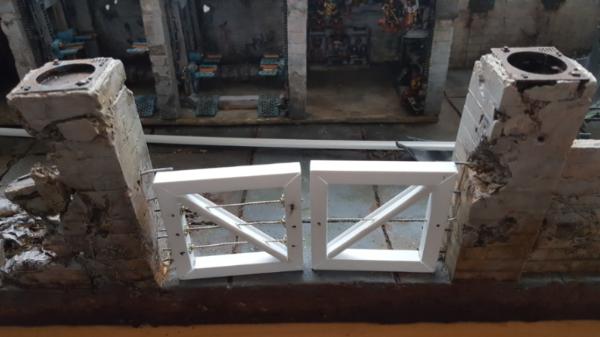
Next up is figuring out how this thing will attach to the wall. Doing a little research on blast doors revealed that the hinges are typically on the outside of the door attaching to the outer part of wahtever wall. This is to ensure the door can only outwards buttt... that would mean I have to have the gate flush up against the pillars.
http://www.pogo.org/assets/images/blog/2013/blast-doors-575.jpg
http://www.strangemilitary.com/images/content/199911.jpg
Not something I really want since Im attempting to limit how much stuff sticks out over the tile.
Thus I'm thinking more a giant piano hinge. It'll feel nice and study and I already have the legos for it in the perfect size!
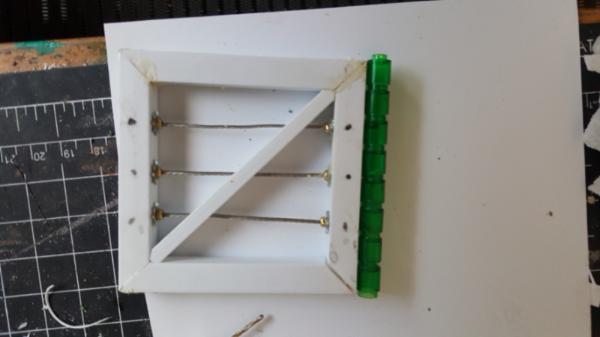
60913
Post by: Largo39
More work on the gate:
First up hte other side
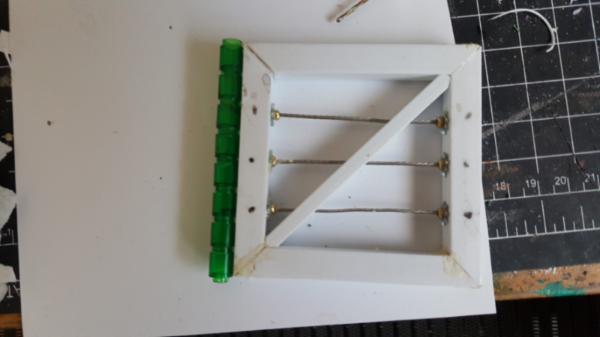
Then it was about how to actually bind the hinge to the gate itself, normally it would be metal plates on half of the piano hinge hooking up to the gate and the other half hooking up to the wall, so thats what I went with here. In order to make it more realistic/able to actually poen I moved the hinge forward so more of it was sticking out in front of the gate, letting it open further.
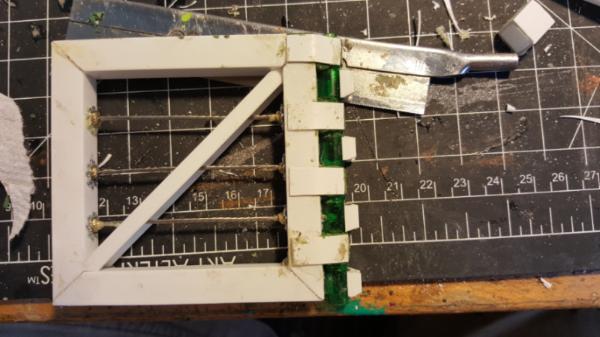
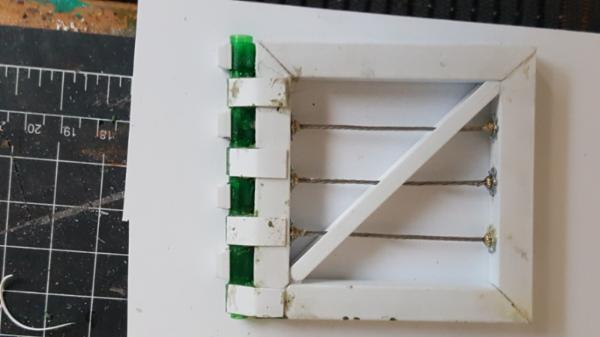
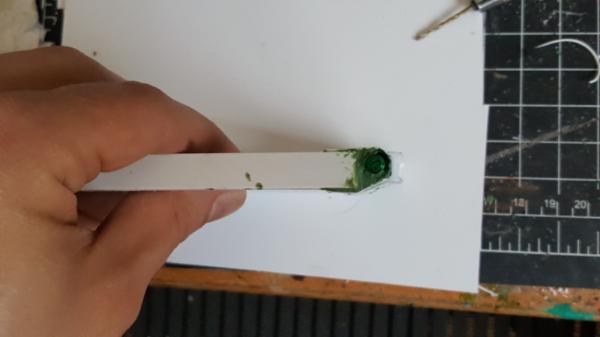
You can also see what I started with for my side attachment method. At first I started with I-beams but they looked.. flimsy. I really wanted something that tapered in like a cone or pyramid which ended at the hinge. Fortunately I had these rubber cone things I had found at a hardware store a long time a go that were perfect with a bit of sanding!
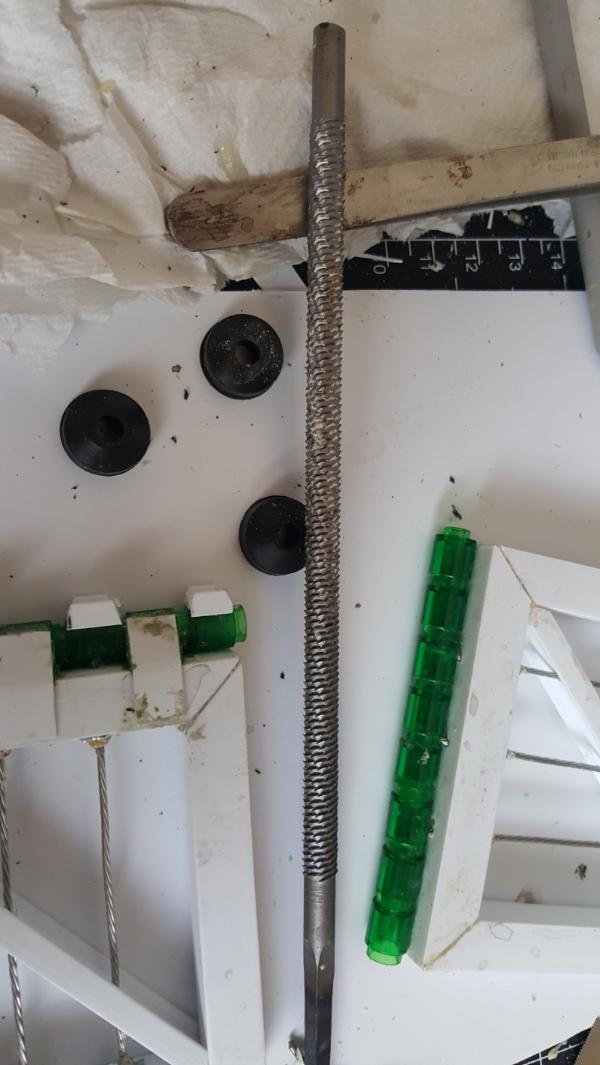
Which led to my first test install, looks good!
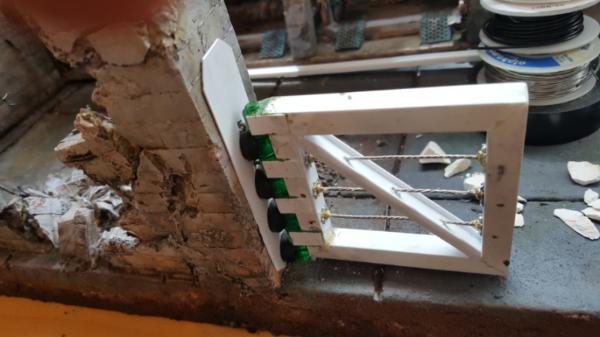
60913
Post by: Largo39
So the gate's looking good but a little bare. I want a way to illustrate how it opens and closes, so I figured I'd make some pistons to attach.
I figure I have it wrap around back corner of the pillars which should look nice and make sense to actually open it up:
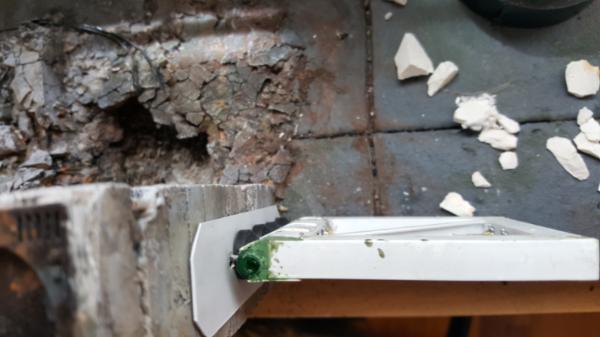
Looking promising! I think it'll work, now I just need to acutally make it work like a piston hinge would, freely available to rotate along the Y axis along both ends as it pushes;
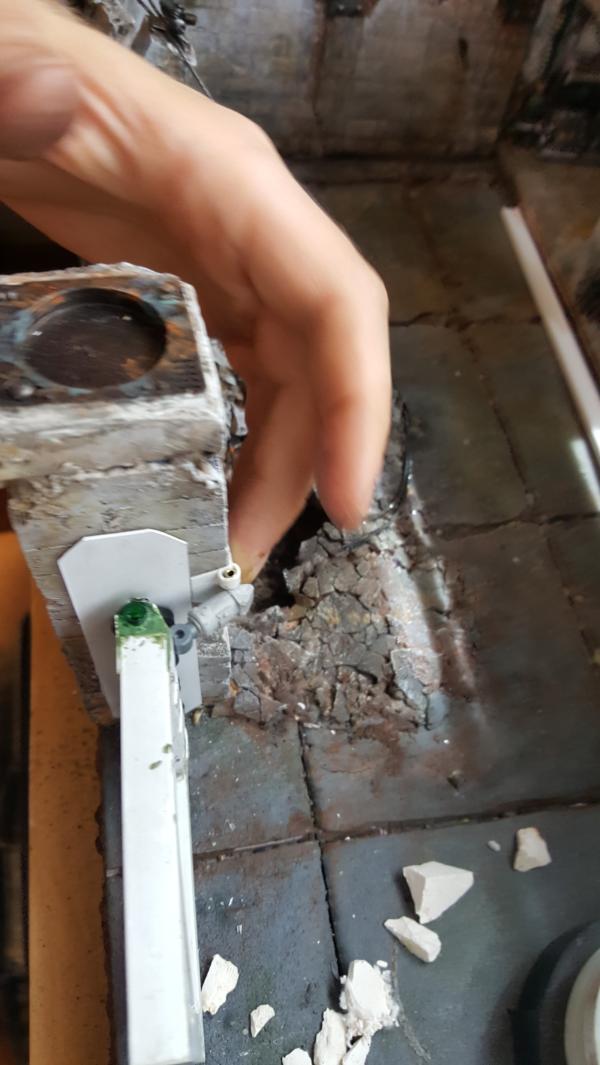
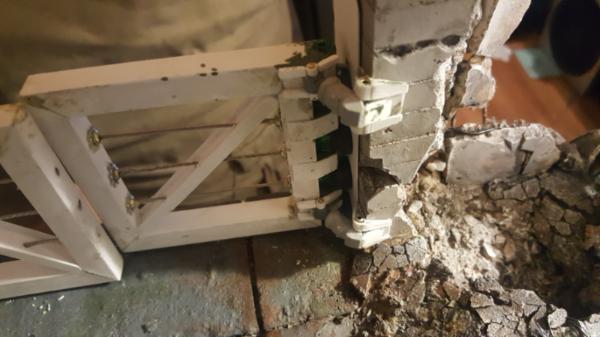
And there you have it!
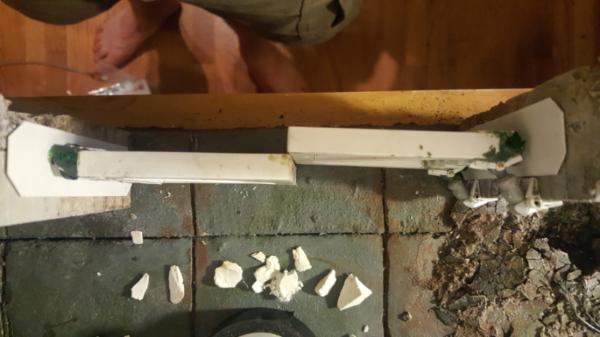
60913
Post by: Largo39
Bit of a time jump buttt.. you've seen this all before so you aint missing too much.
ANyways I added bolts and painted up and voila gate done! The big trick was getting it to fit in my gate gap. I was off about 1/8th of an inch in the end so lot of sanding of my cylinders to get each gate side down to sie so they just squeeeeze together. Aside from that it worked out and looks good. I kept it raw because.. well.. yeah its a better look *shrug*. I might tone down some of the rust spots in the back but otherwise im happy with the result.

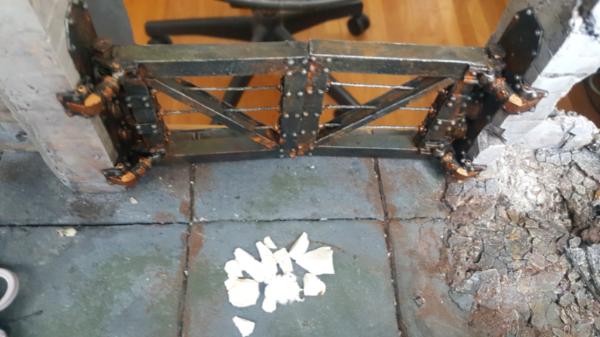
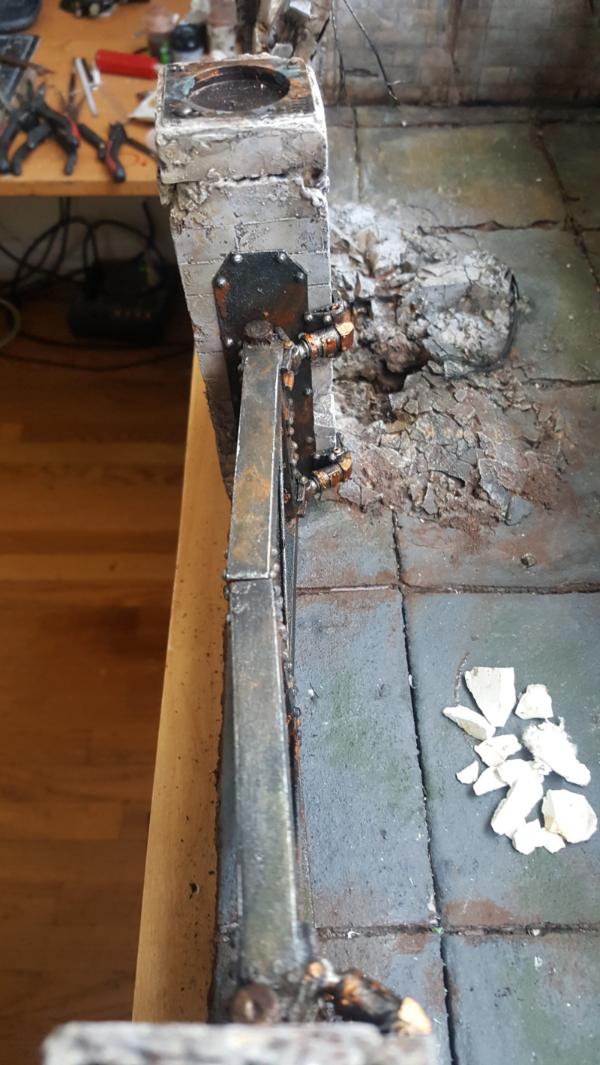
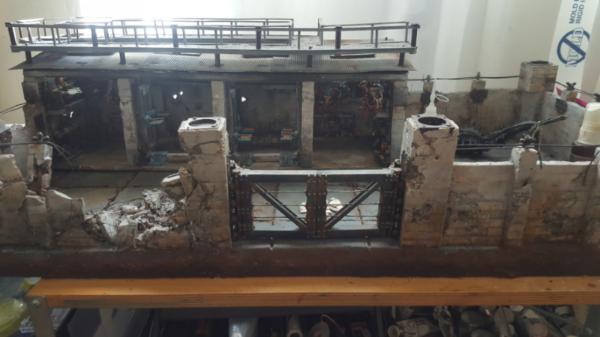
60913
Post by: Largo39
So the gate is completed! Back to the garage for a bit. Just a few major things left: a few extra yellow lights, dirtying up and cleaning up my walkway painting (i still dont yet want to strip it and go raw) and some side windows.
First up is the side windows. I was planning on adding detail in there but.. didnt have the plastic for it and didnt care THAT much. We're already in the nitty gritty I didnt need to double down.
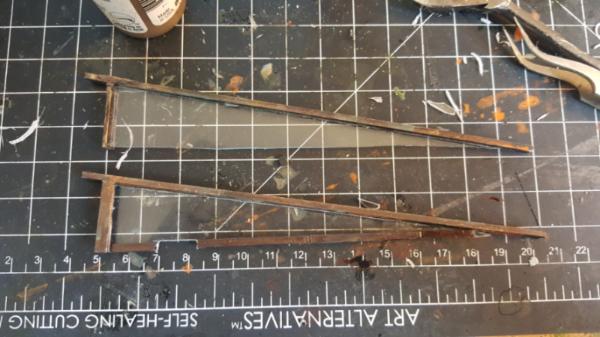
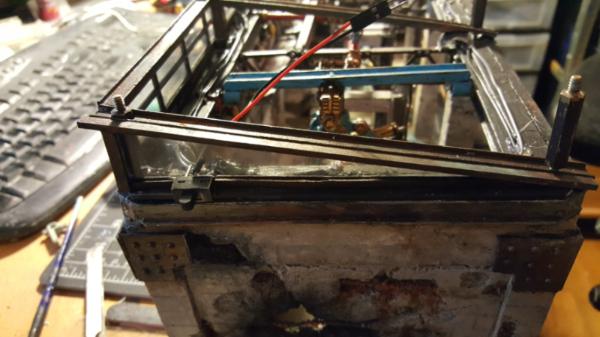
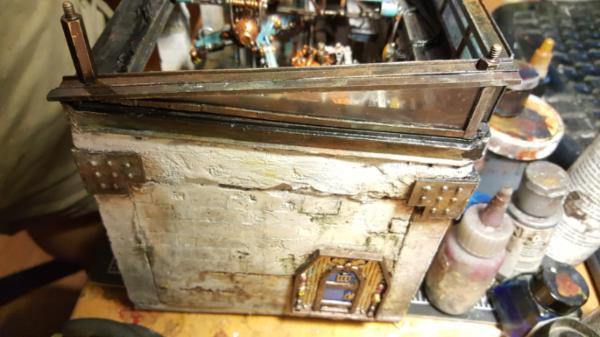
Took a bit but the results are nice and give a good "finished" look to the top now of the garage in terms of detailing.
Next I started re-thinking my marble shrine a bit. With all the new 8th edition madness.. a lot has changed. The meta now is pretty uh.. all over the place? I just dont know what I'm going to want. A pory might be key.. or not maybe my sicaran! or.. a flyer! Either way it feels like something like an exposed garage with heavy lift crane capable of handing a big tank or big knight feels like a more "future proof" method of finishing off this tile. It leaves me room for whatever and also takes advantage of all the new crane/mechanical goodies GW has come out with. The new walkway design for everything, for example, would make for a great landing pad hanging off a corner I could put scouts on.
So while I'm not planning on making any of that for a while it seems to be the frontrunner for how this tile will finish off. Thus I need room which means squeeing some marble shring in the corner seems like a bad idea. Furthermore I have this problem:
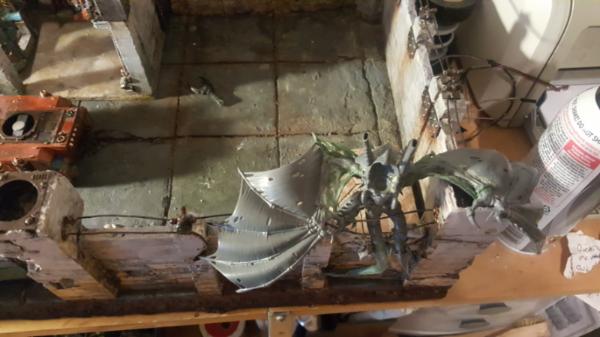
With the flyrant there you just arnt gonna see it. So I had the brainwave of seeing how well it would fit in the left corner instead:
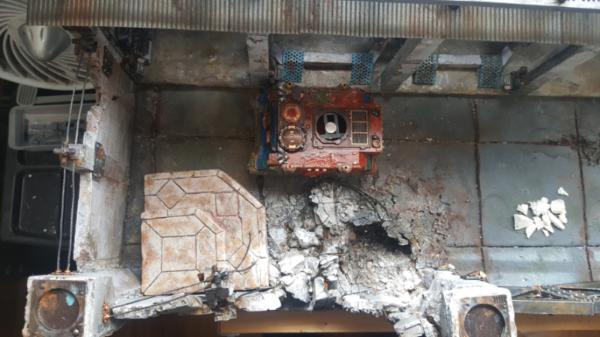
Since there is a giant hole in the wall visibility should be better, and my marins already look like they are fighting something, so they could be shooting at the mawloc. I just gota make sure a tank could still roll past into it's garage but aside from that... could work.
62835
Post by: IGtR=
I just love the attention to detail here, it is inspiring!
10972
Post by: Ruglud
Haven't checked in for a while but this is out-friggin-standing work - and agreed that the attention to detail is inspiring
106439
Post by: Ynneadwraith
 Ruglud wrote: Ruglud wrote:Haven't checked in for a while but this is out-friggin-standing work - and agreed that the attention to detail is inspiring
Could not agree more
76303
Post by: Warboss_Waaazag
Additional agreement comment. All of this plus WOW.
65595
Post by: Camkierhi
Such brilliance, fantastic work sir.
60913
Post by: Largo39
Thanks all! I just wanna be done with this tile! Or, well, done for now at least. Not gonna lie.. I need a break.
Anyhoo, lets finish off planning my small marble shrine placement!
I basically convinced myself this was gonna work and be a good idea so I went ahead and chopped off the end to make it fit. Yikes!
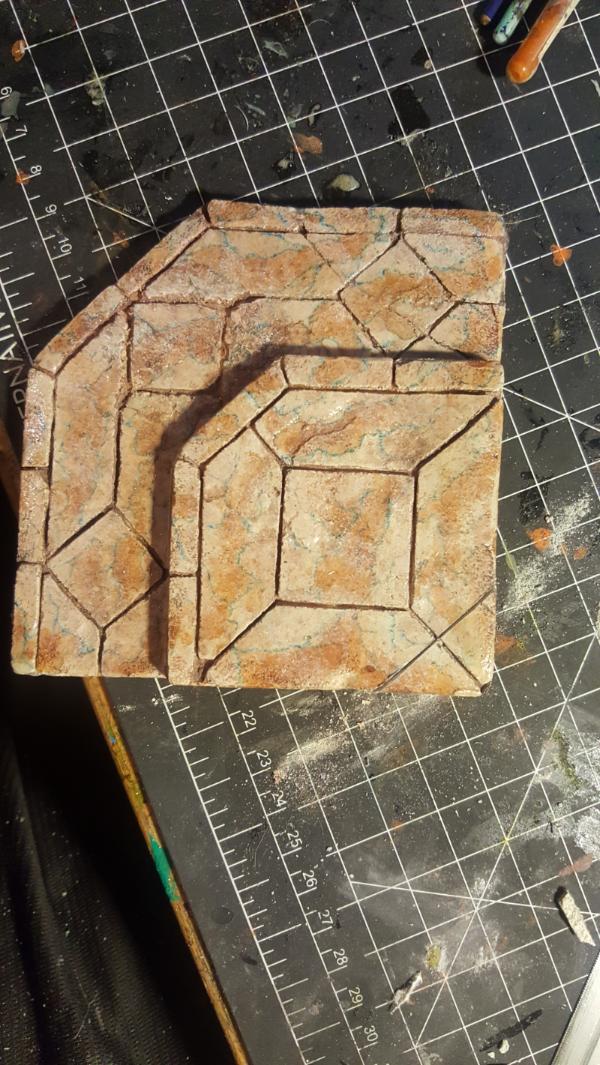
With a little squeezing and crumpling in certain places to match where the wall is falling you get this, hooray, the rhino will fit fine.
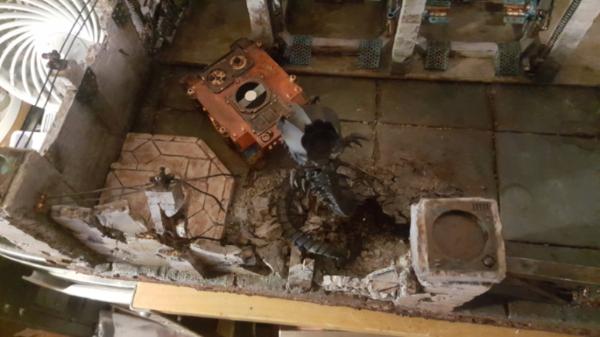
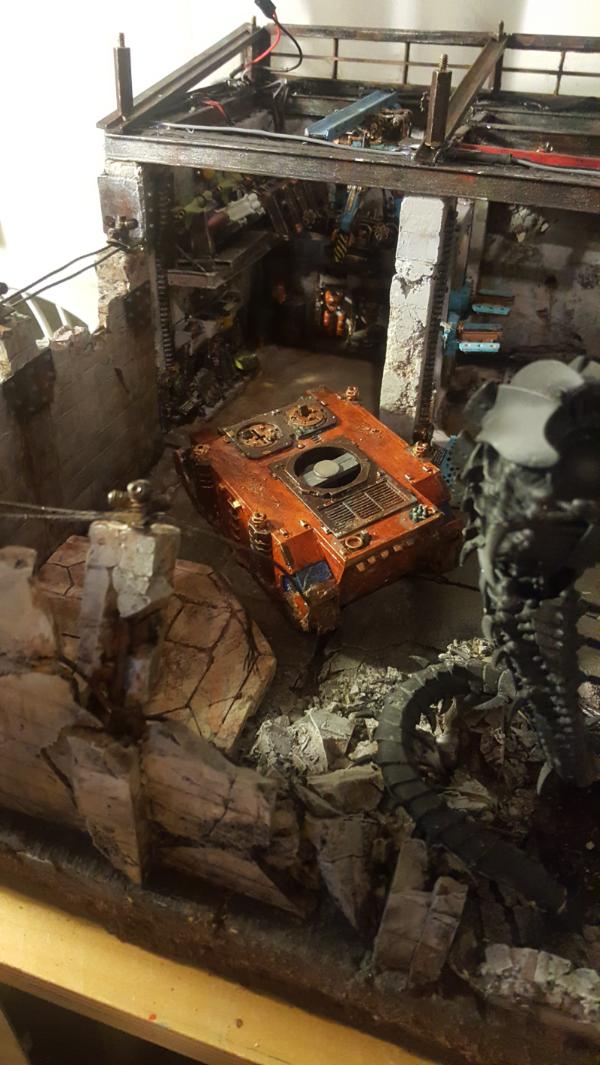
SO thats good, this may actually work. Then I realized I should actually test this WITH the marines .
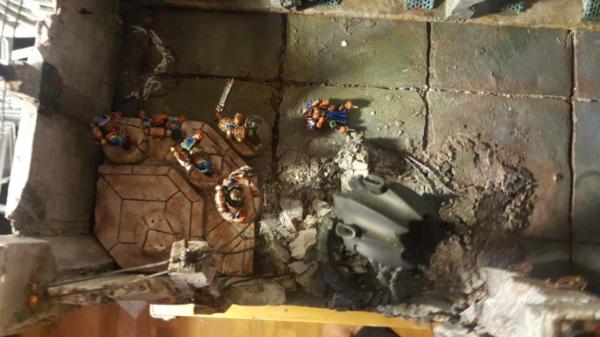
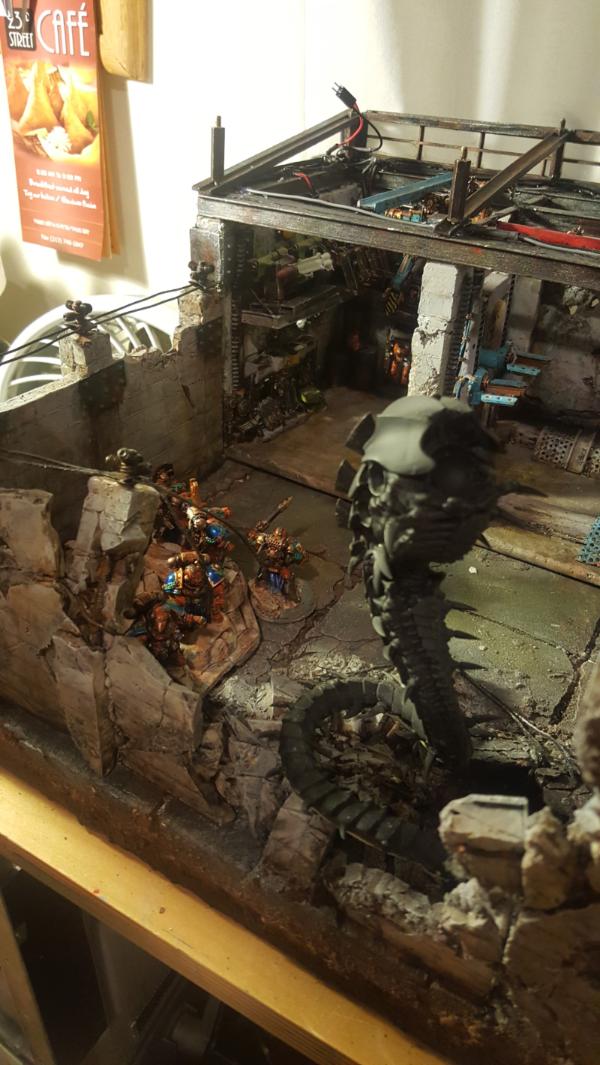
On the one hand, they'll look good! On the other, they arnt.. uh.. all facing the right way. I don't mind pulling some off the bases but the leader on the step in front is not an easy one to either rip off or turn around. So what on earth is he fighting?
At first I thought maybe I have my rippers coming out of the ground there but... that would kinda look wierd near the wall. Then I thought of a lictor!
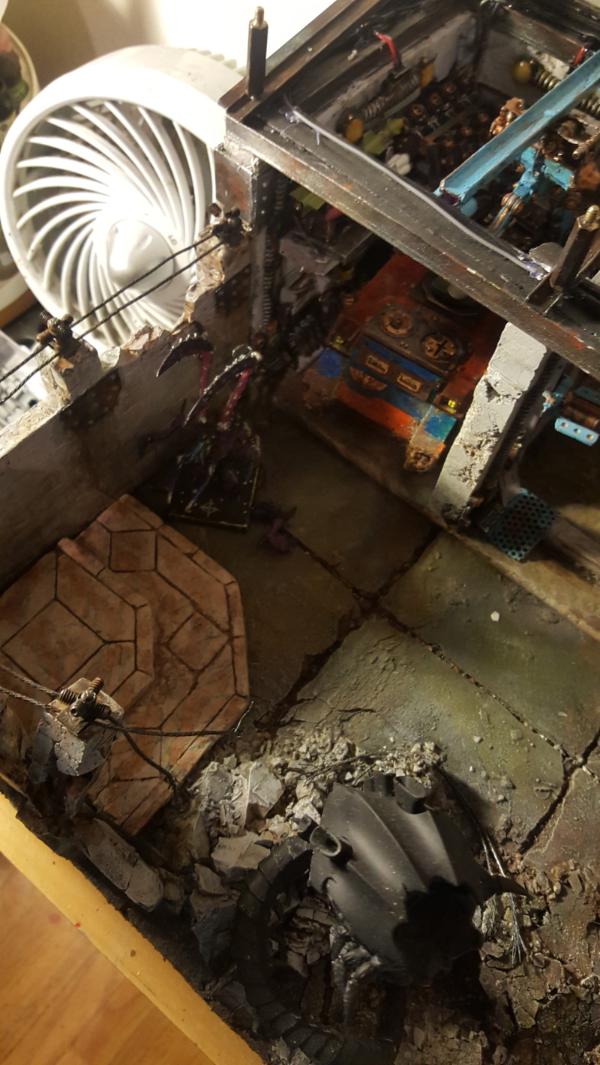
Okay, thats promising, havnet had one of those yet and they are classic! The metal body sucks but I can use one of my spare warrior bodies to make him a plastic body and keep the metal arms. Downside though is that he's big enough to block physically putting a rhino in that bay (at least, easily) which I intended to do when actually displaying my army. So I need the lictor out of the way but still at that threatening angle. Oh!
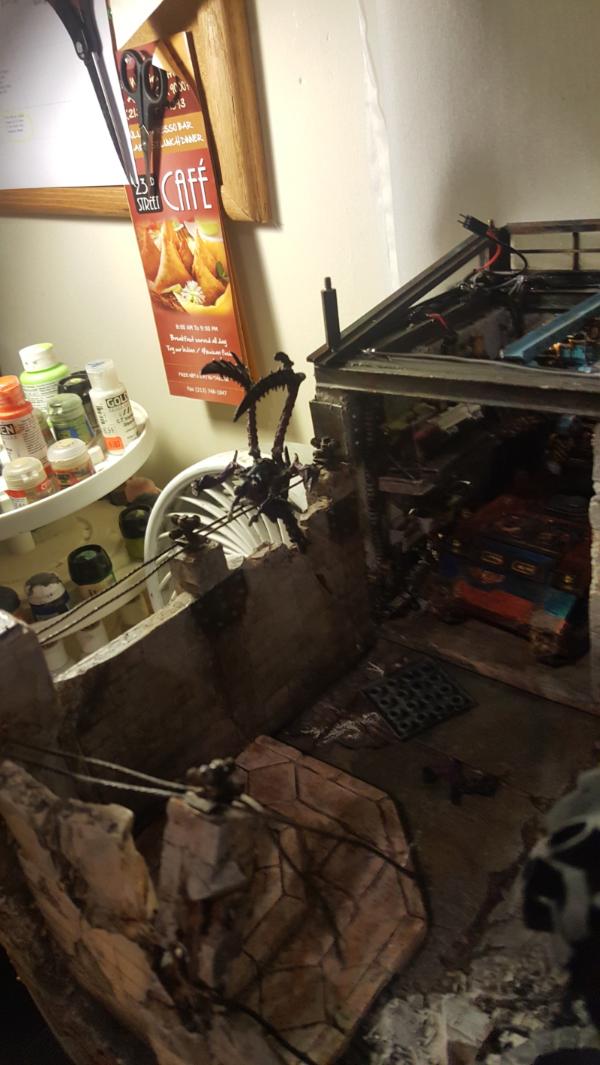
BAM. Now thats fun. One lictor a leapin.
This is a good example of where digging yourself in a corner isnt really a bad thing if you can keep your mind flexible enough for new ideas to filter in. Originally I started with a barracks and church on the right side, like so:
But with all the uncertainty around 8th edition and whats good, I need to keep that space open so once the meta settles I can see whats good (heck, i might be able to pull out my sicaran again. Wouldnt that be fun to be able to have on the display tile?
So now its maybe I dont have marble at all.. but where else would have it if not here.. so I came up with 2 requirements:
1.Must have marble.
2. Marble must make sense.
This led to further requirements as I thought about things
2a. Marble must be visible, cant be blocked by flyrant.
3. Must leave room on the right side for a potential Poryphrion (THEY ARE HUGE) which probably takes up the space of the barracks AND right side shrine combined
4. If not pory, then potential sicaran/other big *thing* of some kind
5. All tanks must be able to enter their bay.
This led to a small shrine on the left side, great! I havent even figured out the shrine part yet but I know it'll work. Ill maybe have some marble "wall of the fallen" on each wall and a small statue where the 10th marine used to be. Maybe I paint up a stone celestine? who knows, it'll look good
But now we have a new wrinkle:
6. marines cant all face the trygon
okay, well, uh,, have something else attack! and on it goes. Not gonna lie, these "brainwaves" take time, most of this thinking and planning has occured over days where I fiddle with something, think about it, then move onto something else while the brain stews over whether thats a good solution. So you guys are getting the compressed version, but by having this time and keeping the plan flexible (the dream is still there of a marble shrine of SOME kind but the precise look is flexible) its all coming together in ways probably better than It could ahve been otherwise. After all, i can STILL make a barracks if I wanted too, thats still around.
The gate, for example, was a similar process.
1. Fill in the space
2. Gate must be see through for maximal viewing angles.
3. The main gate square tubing structure needs to be square, looks better that way.
4. Gate needs to be able to hinge well
okay cool now the hinge looks good but wait, what are the marines just gonna push this thing open? no.. so now..
5. Gate needs to open
and so on.
34385
Post by: doktor_g
UHHHH.... WOW...
100928
Post by: Alaricuk
Love this thread, the buildings and there interiors are truly excellent might steal the idea of Lego casting for walls, turns out a really nice effect.
60913
Post by: Largo39
Thanks! It looks.. awesomely realistic especially when its all cracked and aged. Heavy tho buuttt the weight is worth it.
So now that I'm set on a placement for my marble shrine:
(gonna be so fun!)
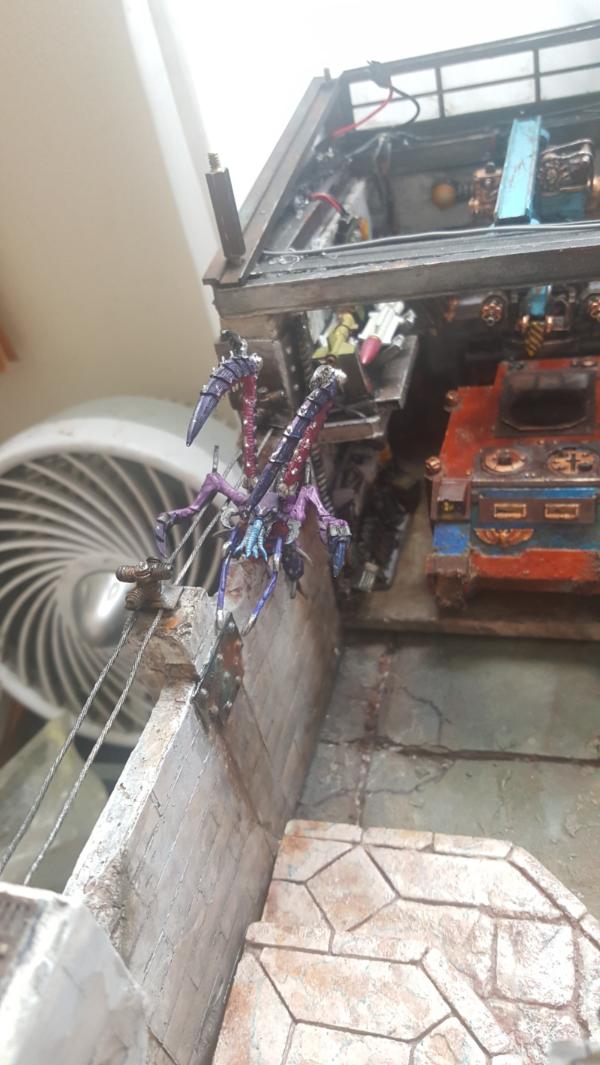
its time to actually repose the marines to fight their lictor/tyrgon enemies.
The original posing was more open, with them facing a broader specgrum of directions:
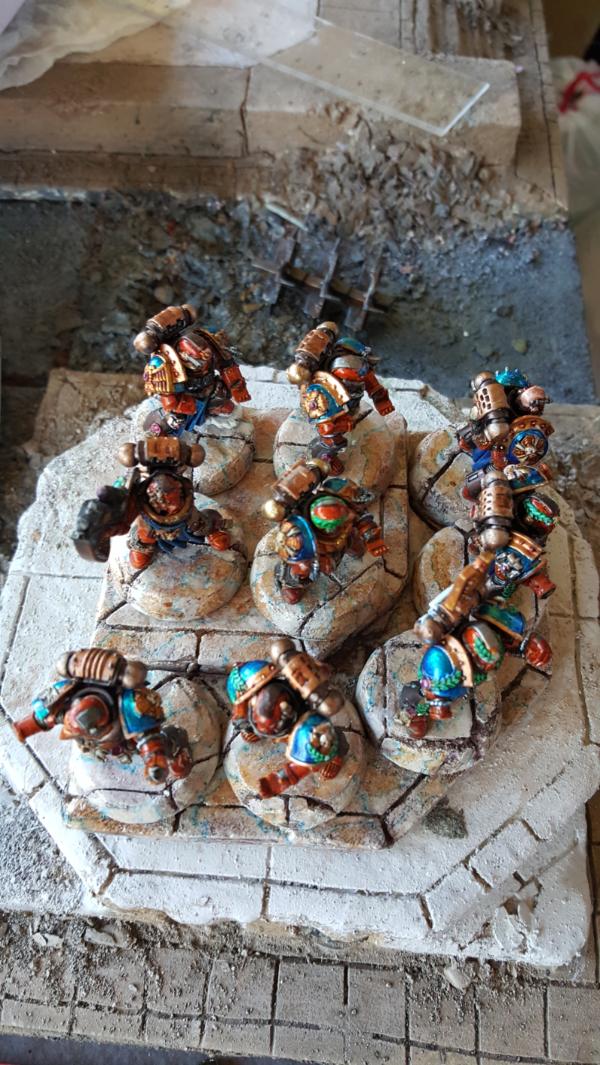
Which doesnt really work here, so i had to.. very carefully try to pull them off their bases and figure out how to get them to face the right way.
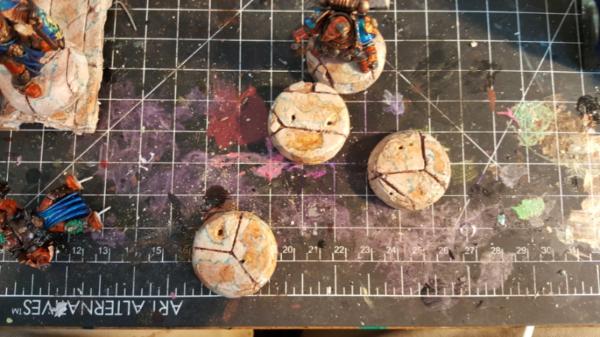

it took a bit, and I had to greenstuff in some holes and patch my marble but that didnt turn out to take TOO much effort. I was afraid I'd never get the marble to match right.
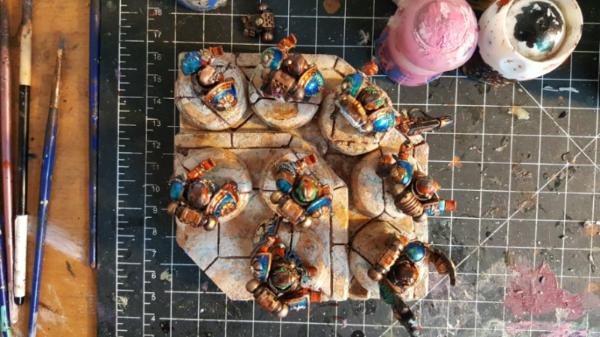
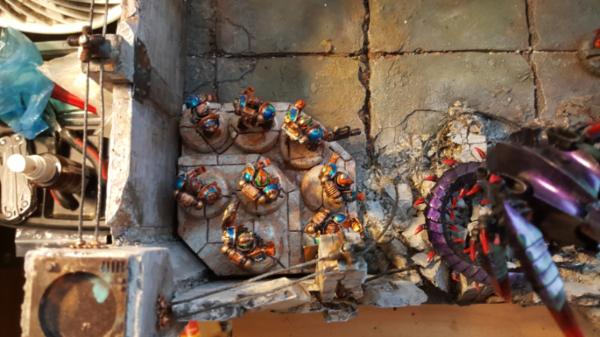
Oh hey, look at that, the trygon is painted. Hmm... wonder what you're gonna see tomorrow?
60913
Post by: Largo39
Small update today. The uh, trygon took a weekend to finish off so you guys are rapidly catching up to the present
Anyhoo next up is the flyrant. Since the wings do hang over the edge for now I'm just going to keep his body and legs seperate, for potential ease of transport. So legs first!

You also get an updated "overview" with my theoretical turrets in place as well and facing their targets:
Right now my one concern is that the bolter turrets are kinda... meh. Compared to the Icarus lascannon turrets which look AWESOME its just kinda lame. I have one quad cannon but I'd need 2 and they dont seem to be up on ebay much anymore. Hm.
60913
Post by: Largo39
Flyrant is done! Sorry for the delay, I get so caught up working on weekends I forget to actually post things. Anyhoo with the flyrant done we have 3 main things left for this round of progress:
1. Ripper attacks out of the hole.
2. Turrets, repainting all of them with copper instead of leadbelcher and destroying 2 of them
3. Adding a few extra lights to the garage and bolting it down to the tile.
Then over the summer more slowly my next "big" projects will be:
1. Clear Acrylic anti-dust/anti-earthquake housing for both tiles
2. Display/Transport cart to hold 100 pounds of tile
3. Khan bike
4. a pair of twin linked devourers for the flyrant
Finally the progress foal in the fall pre- LVO:
4. 8th edition army editions
5. Some kind of industrial super crane construct adjacent to the garage, capable of handling a variety of "big" toys as armies evolve.
Getting down to the nuts and bolts now for stage 1! Its exciting.
Man the green brown shift is a fun look. Looks really organic in person.

60913
Post by: Largo39
Time to plant me some rippers! Turns out this was pretty tough to do because of the trygon bits getting in the way. the backmost set were the hardest since the ground is... no longer cork but very very solid. So I had to cut off the pinning wires and very slowly glue them in place. Gorilla glue was once again my friend here because the rougher terrain meant that as the glue expanded I had more opportunities for it to stick to the ripper base. It meant I had a bit of paint up cleaning to do but its so dark back there it wasnt a big deal to make formerly black rocks black again.
Once I got past that initial batch it got a lot easier because I could just drill a hole for the pin. I cut up their bases to be more rocky and less obvious and it worked pretty well.
Now conveniently I can finally use another set of marine bases! Its alll coming together!
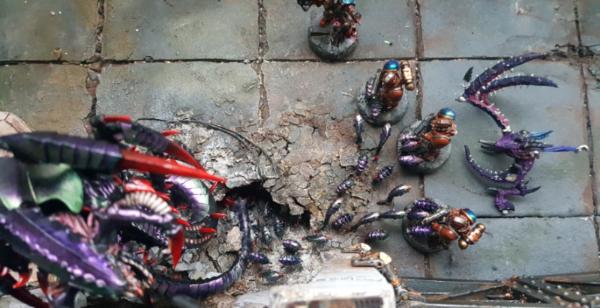
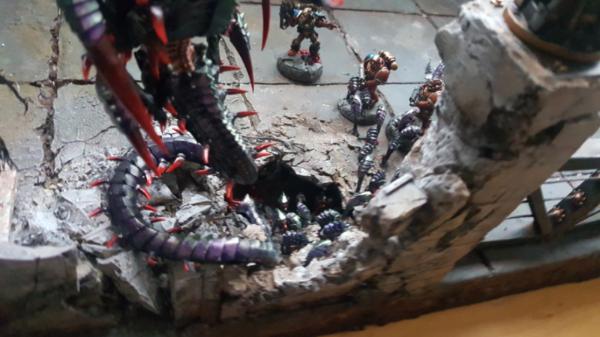
Some areas might need a bit more touchup green, especially on the ripper bases. Just so the purple-green angle is more consistent across the board.
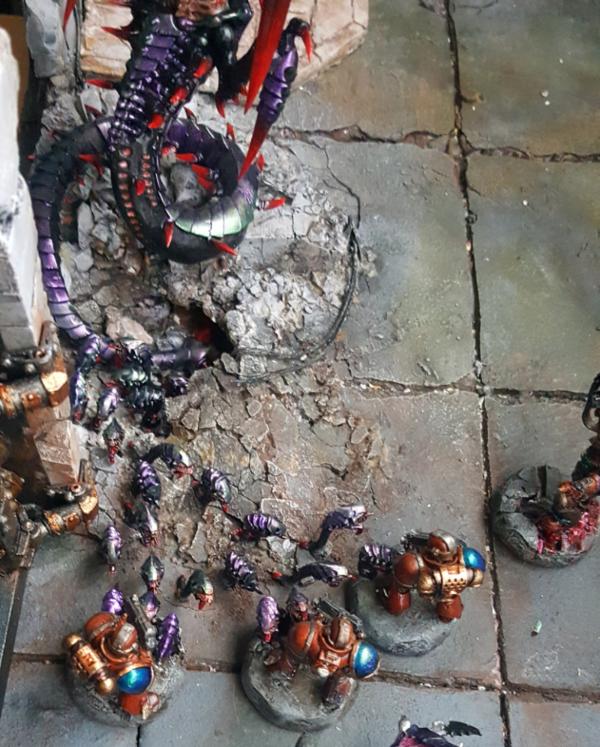
60913
Post by: Largo39
Just munching down the list at thsi point, now its time to wreck me some turrets.
First up is repainting them, gotta make that leadbelcher into copper!
Next is the flyrant wreck. Now since some of the left wing is curled around and pushing past the tower I thoguht it would look best for it to be mid-ripping off the turret. So when the flyurant wasnt there it would be dangling by just a few wires kinda deal.
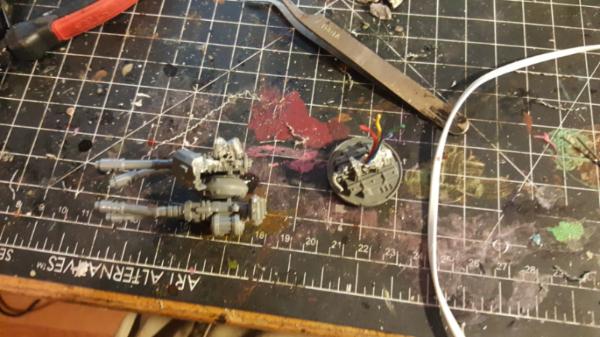
Of course, gotta bend up some barrels too! Good ole soldering iron to the rescue again.
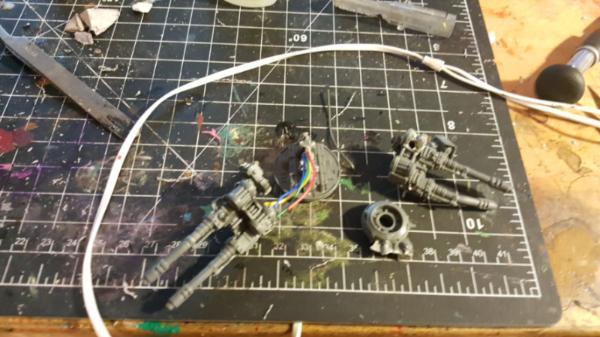
95173
Post by: ROTTEN_FACTORY
WWOOWW
60913
Post by: Largo39
Light day today but here is the un-wrecked version of that turret:
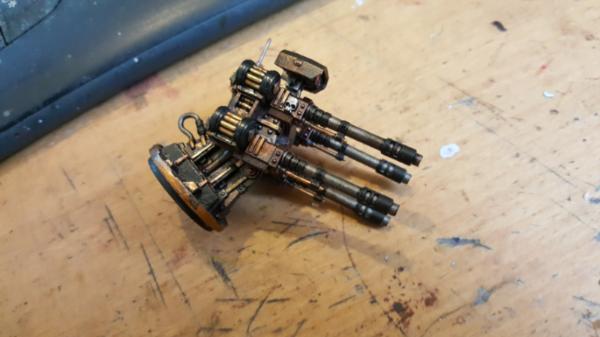
60913
Post by: Largo39
And now for the wrecked lascannon turret, finish out the main wall turrets! I forgot to make pictures of the back antannae turret so you'll see that tomm but yeah.
Basically for this I drilled holes, stuck in my soldering iron for a bit, and pulled it apart. Worked out pretty well though thats something where you kinda only get one shot at the best result?
As in when I initially pulled it apart the plastic made lovely stretched bands across the 2 halves. But since I wanted to put in cables too I had to reheat it in one spot which broke the bands. Unfortunate but it let me have the cables now be whats keeping it together so it kinda worked out, just not quite as cool.
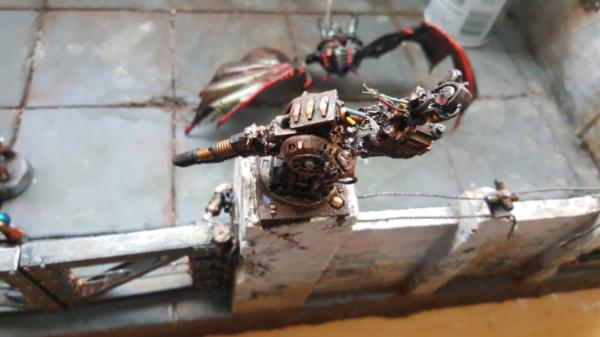

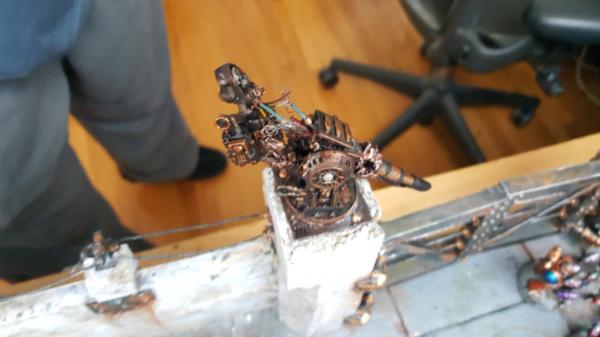
Turrets in place!
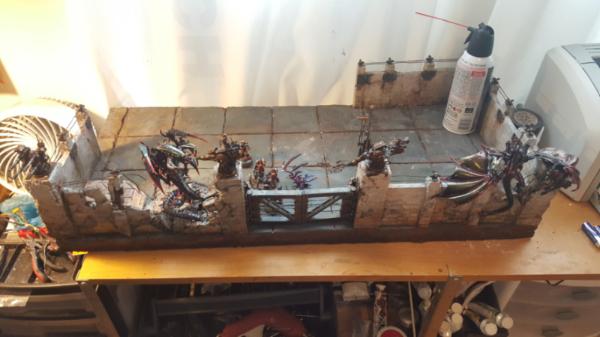
60913
Post by: Largo39
Because I forgot to take pictures here instead is work on the lictor! Now lictor is interesting because there is only finecast and metal versions, no plastic. I cant do finecast because (aside from being a pain to work with) its super brittle. Those long hook arms are one gently bump away from snapping and that's exactly where this guy will be, right on the edge of where people might bump the board.
So that means I had to do metal (which, conviently, i had), butttt the body of the metal lictor is awful. So I decided to make my own, keeping the metal head and metal hook arms and use a plastic warrior for the rest.
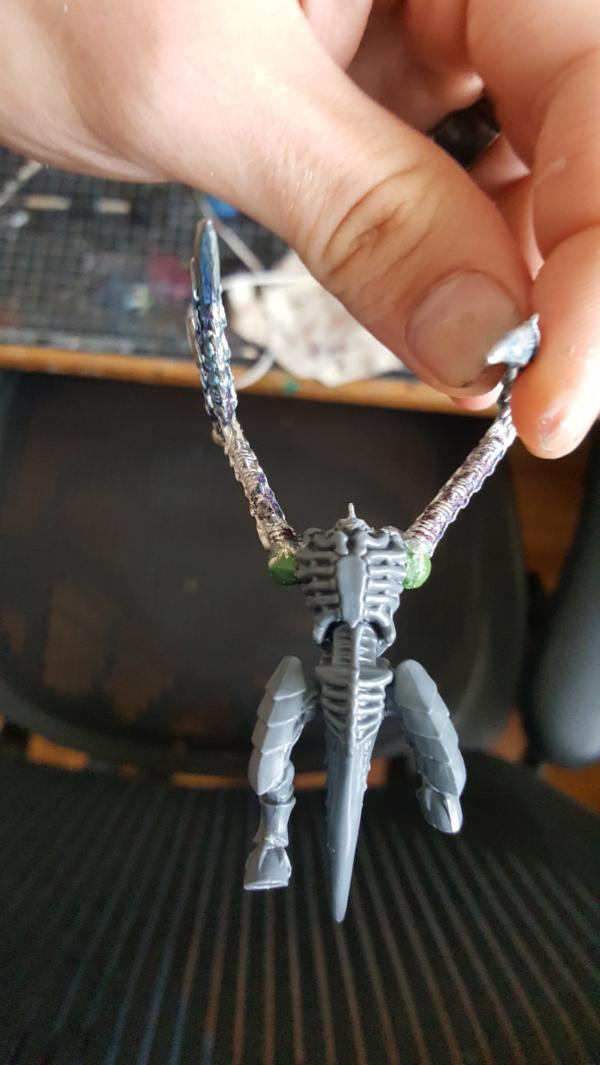
Surprisingly the pose turned out pretty well, he feels mid leap. Poor poor command squad, they didnt look up!
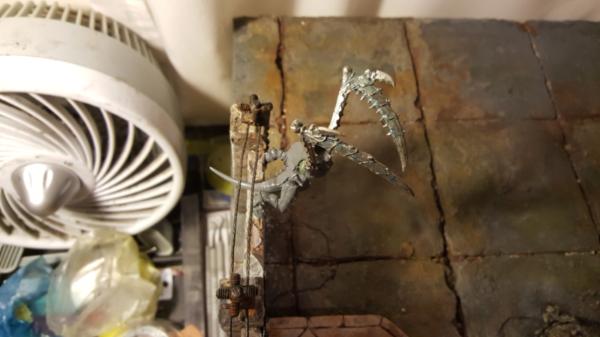

60913
Post by: Largo39
More tiny details time no one will notice!
So one thing I never did was actually hook up my computers to the cranes/lifts that they power. I just had this:
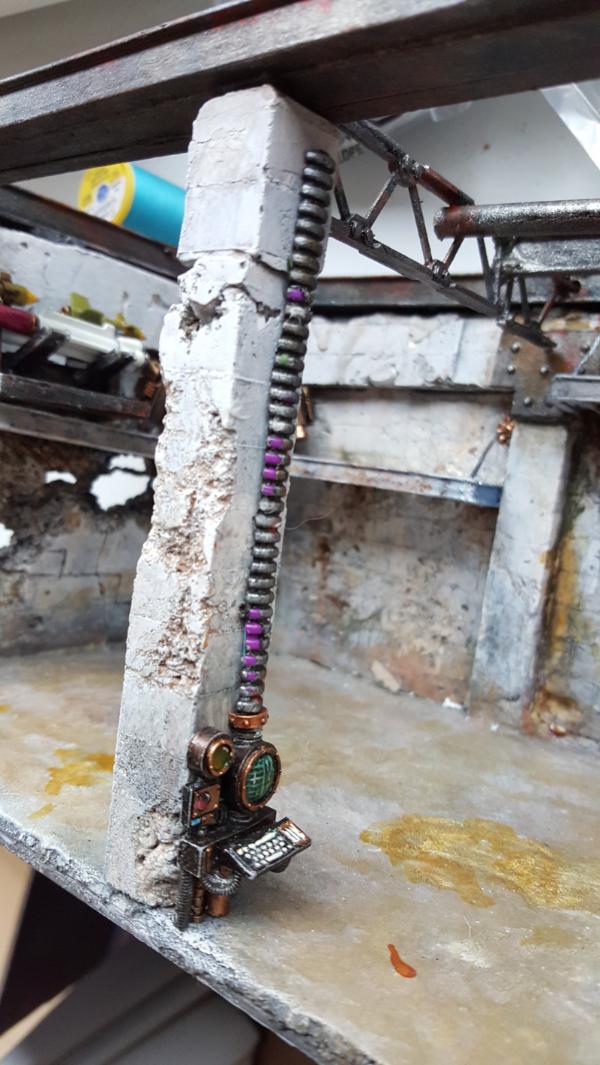
or this:
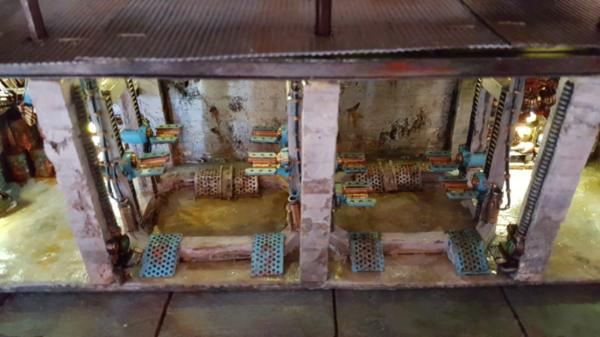
Where the cable ended at the top. Also, future note, never use the ribbed legos. they really dont paint well and it all just comes right off. I always have to repaint little chunks when i work with those things.
Anyways I wanted to add some cables to hook everything up. I didnt need all the copper bands and stuff because that would get distracting. Just big black cables on draped on the ceiling. Getting the right "cable" was interesting. You want it droopy but actual wire sometimes is.. sometimes isnt. The first wire I glued down was a nice thickness but tough to get the droop
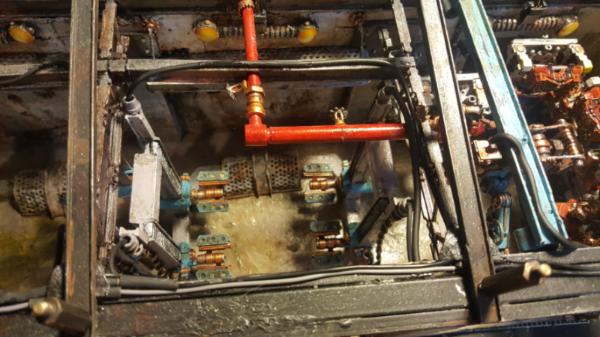
so its a bit lamer but thats okay. This doesnt need to be symmetrical.
Next I found the perfect cable (i have a big bag of wires lol) which was much more flexible and had like 6-7 mini wires inside! It was great and was a much more fun effect:
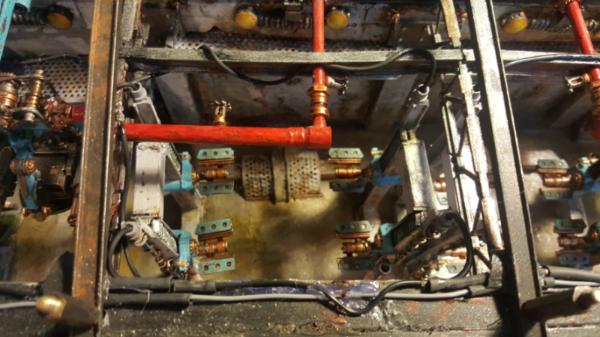
Finally I hooked up my cranes:
and bob's your uncle! All hooked up. You can see that the ribbed cable wrap paint rubbed off AGAIN. Grr. Thankfully I no longer have to touch that area, but still. If only it werent pink underneath...
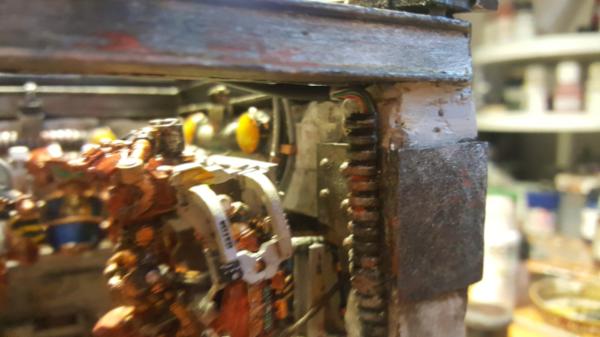
60913
Post by: Largo39
So, one of the last major pieces of the garage before I install it was some last LEDs. These are meant to be more overhead lights to counteract and warm up the light coming from my white "flood" lights.
For the clear light cover I used googly eyes btw, they are a good shape and come in multiple sizes.
First up was making the light itself. As before I wanted to line it with tinfoil to maximize output but then I realized I had these lovely metal.. whatevers sitting there that would do the job perfectly!
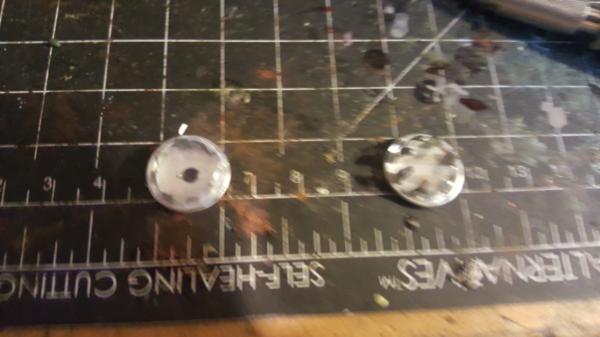
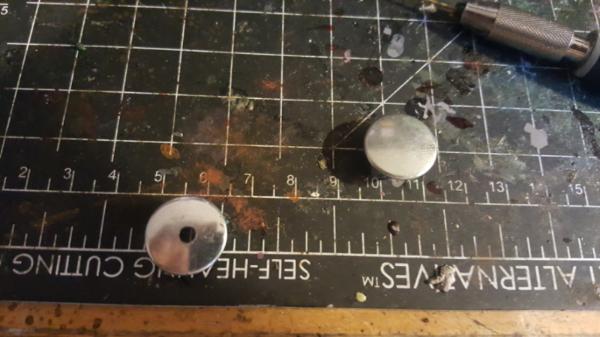
Next up was wiring the leds in there and together (remember 2 3v leds have to be in series to match the 6V output of my 4 AAs)
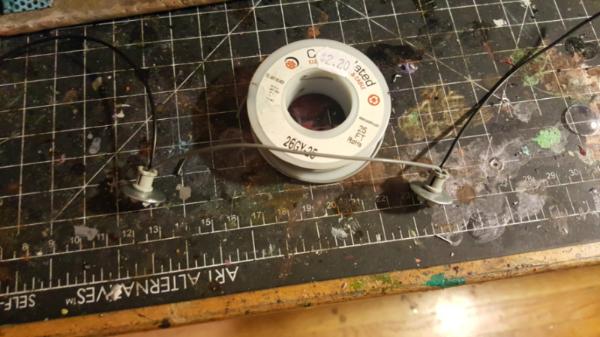
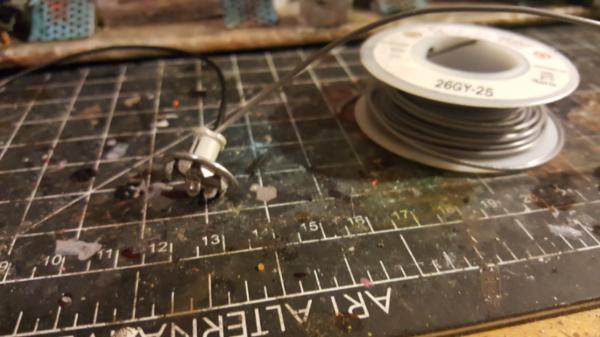
Then it was just a matter of installing. For now I just used the wire itself to hang them. Eventually I'd love to add chain but I cant figure out where to attach it well.
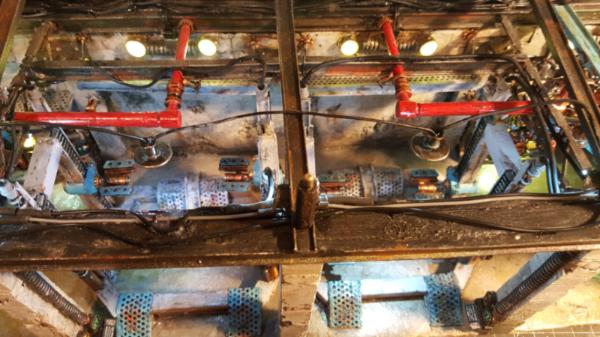
Before the tinted clear light cover:
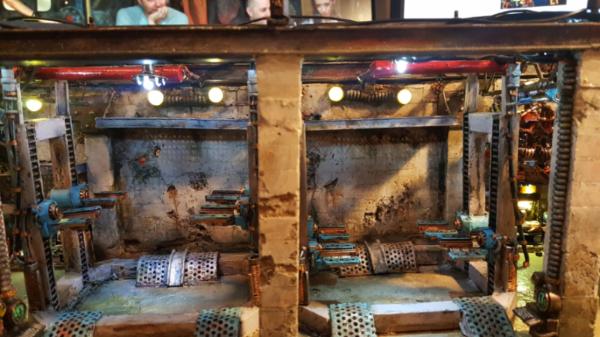
Finally with all of it lit together. Its so bright now!
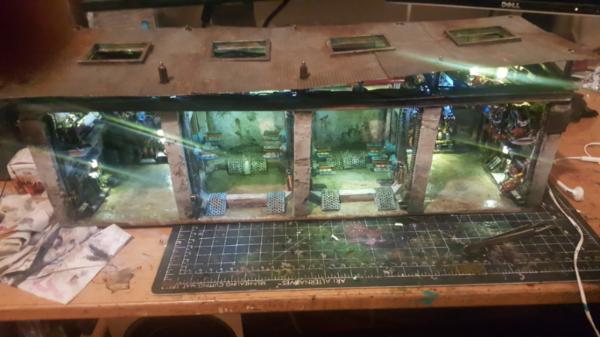
1001
Post by: schoon
Great work on the lighting!
60913
Post by: Largo39
And now the finishing touches!
First up we did one final test:
it all works, I can put a tank underneath the lictor okay with no problems. So its good. Someday I may add a slight ramp off the garage but no rush.
then it was a matter of isntalling. Fortunately my original threaded rod in the garage was sticking out the bottom so I could use nuts to hold it together. So I could just take those off and thread in replacements. In this case, since the rod was so small (#4), I had to go to my electronics store to get some standoffs. However, just threading a standoff onto a #4 nut's amount of width is.. not alot of threading.
So I needed to drill a few holes in my acrylic underplate of the garage to add some depth and have more rod be available to attach my standoff too. I was afriad this would take forever (since you have to carve out of the acrylic a space big enough to handle the size of the hexagonal standoff) but I managed to find small enough standoffs that it went pretty quick. Just drill 6 holes and cut/pull away the remaining material with my cutters.
The main thing I had to worry about was when twisting on the standoffs to not twist hard enough to twist the rod right apart (which I did once, whoops! Tools sometimes can hurt you if they are too strong for your material)
After it was just like before, drill my holes in and make them big enough to handle a nut/washer on that side. There are.. many holes from mistakes/trying to get 12 of these to line up right but they are easily filled.
And all together!
32193
Post by: PDH
Your terrain is an inspiration. Its brilliant. The texture you've got on the stone work and the rust on the corrugated roofs looks so realistic.
Thanks for sharing
62835
Post by: IGtR=
Awesome as usual. Thanks for letting us all live vicariously through this!
60913
Post by: Largo39
Aloha! So it's time for a new dump of progress! There shall be intrigue, plot twists, 3d modelling, laser cutting, and 3d printing! Some of which might be successful.. or not! I dont actually know yet haha. But you'll see it all!
The main project is finishing off my khan bike vs neurothrope model. Recall that my original idea was to have this faceoff involve the "shield" of Khan being struck by a lightning bolt by the neurothrope. But, before I get to any of that I have to paint up khan and, also, you know, pull the base off my board.
Since I had had the base on the board while I poured my spilling fluid and since I didnt think to.. add blu- tac to the bottom to prevent fluid from gluing the base TO the board. Yeah it took some doing.
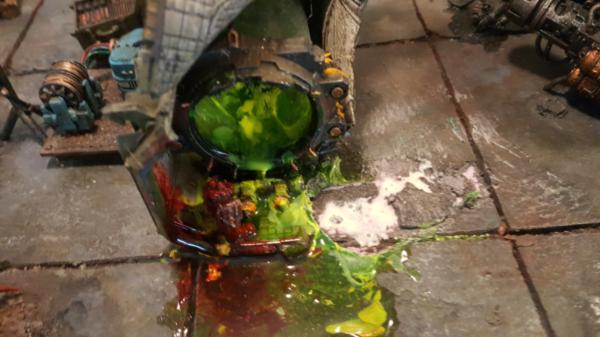
Still, I was eventually successful and next up was starting to paint the bike itself.
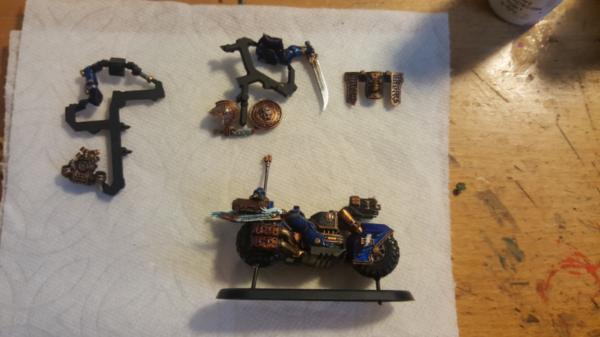
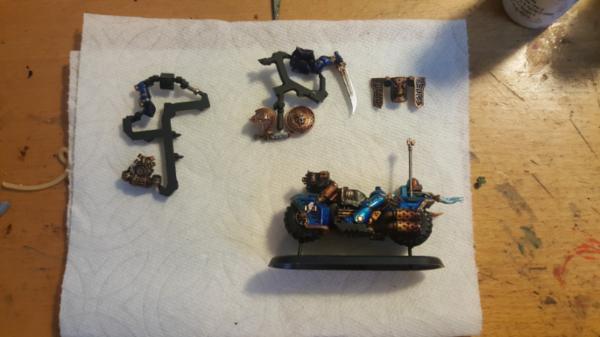
60913
Post by: Largo39
So, in between working on Khan I painted up a quick little ad-mech experiment.
I've really transitioned to the more dulled copper look, as it helps let other stuff pop and when you re-drybrush on my copper afterwords it looks like little scratches and flex, very cool.
Anyways I wanted to try out purple + copper to see how that looked, so I took a.. thallax? something? that I had spare that a friend gave me to see how it would look!
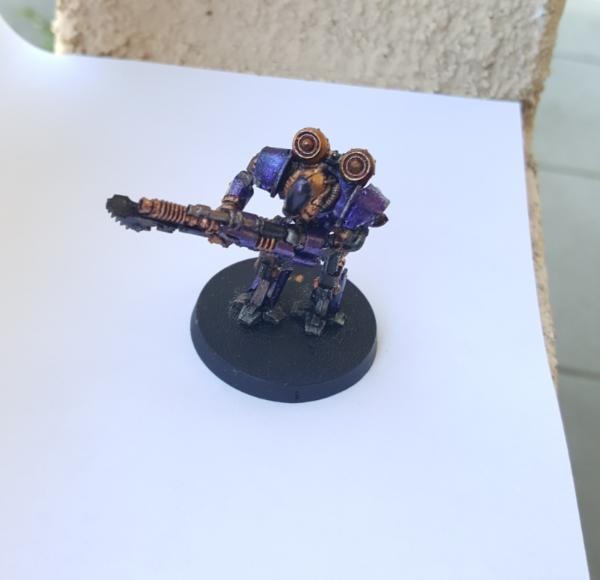
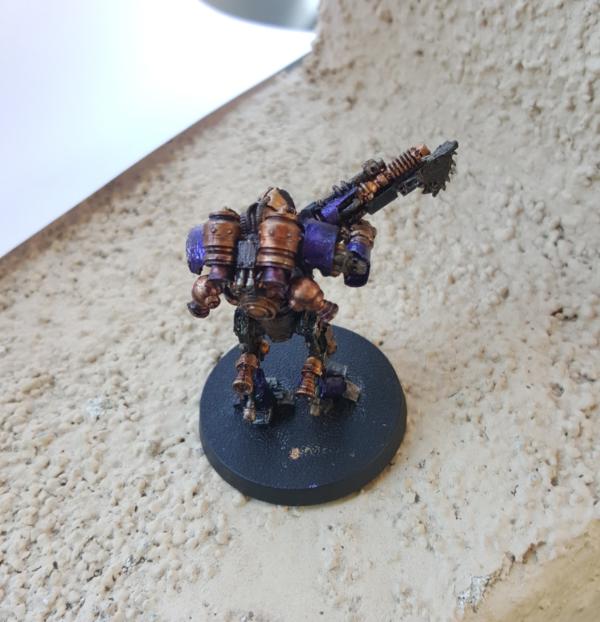
60913
Post by: Largo39
So i'm working on pondering my shield so while I do that lets paint up some scorpius turrets!
Sadly rhinos have broadly lost some favor in 8th, or, at least, 8 of them, so Im convering my prettiest into razorbacks to gain options, namely scorpius turrets! woo! such a fun model.
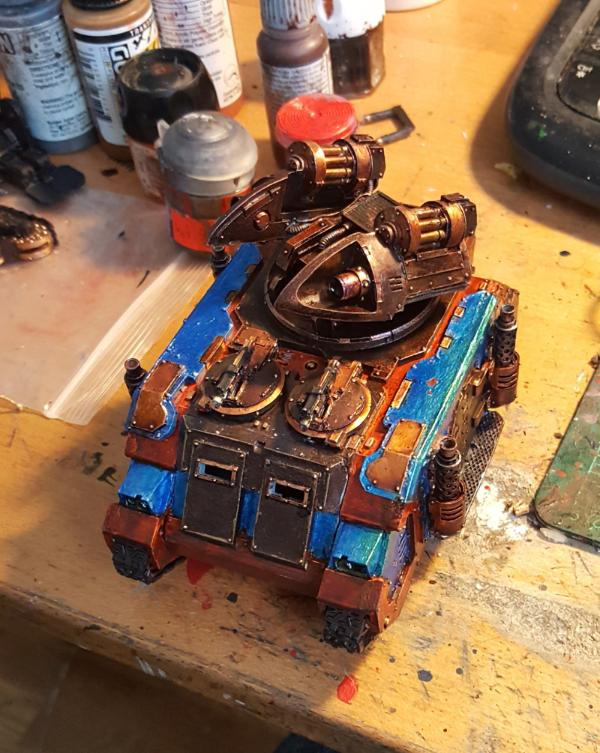
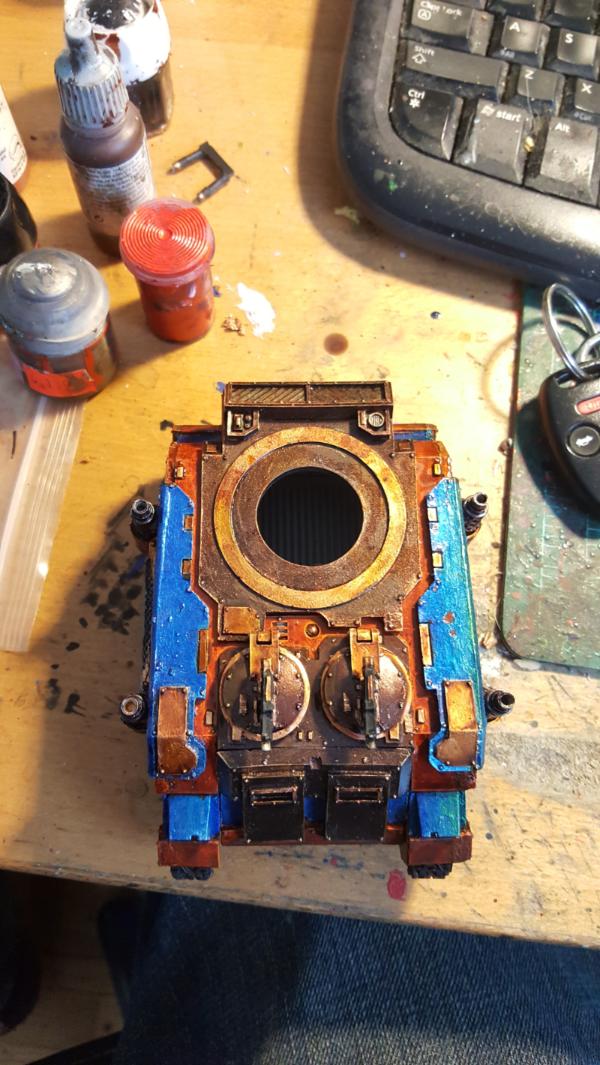 \
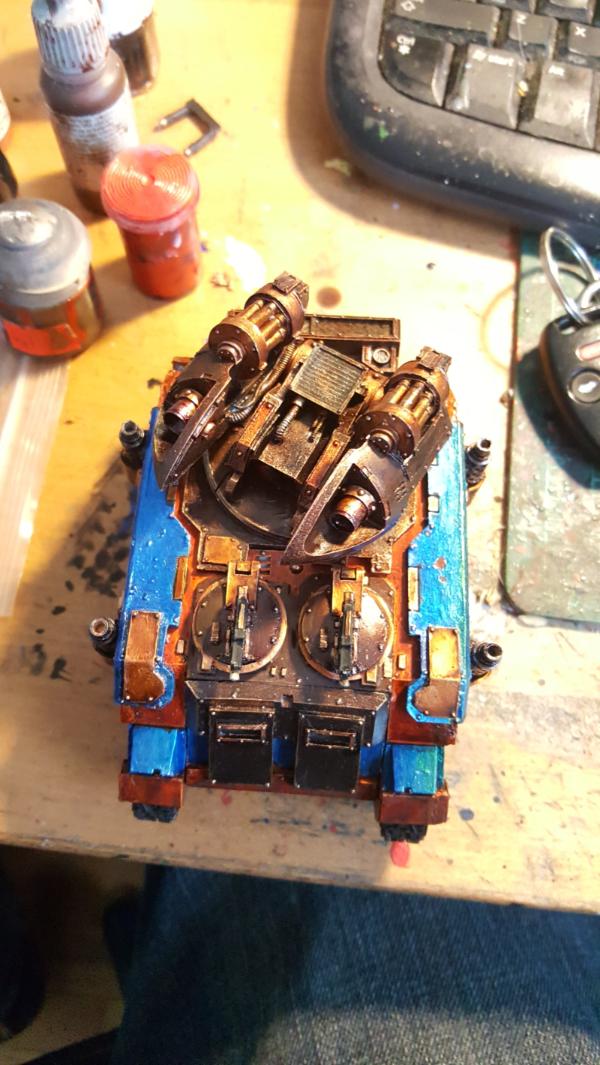
60913
Post by: Largo39
In continuing with painting things actually relevent to playing 8th edition we have a cyclops!
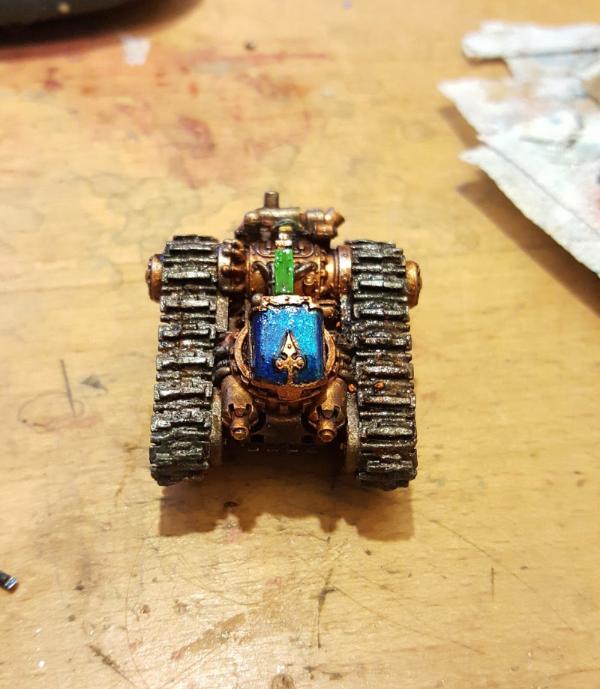
Aww, look at that, so cute.
Anyways, next is actually doing a rough model of my bike/neurothrope. This is for 2 reasons. The first is to figure out just how big the shield will be, or, more specifically, how big the plates will be. Second is to model up the lightning bolt and figure that out. Thus, while the model can be crude it needs to be as accurate as possible so nothing is misjudged *too* badly.
That means.. for starters taking halfway decent pictures! If i were'nt lazy that means getting a tripod out and (i think?) zooming in to reduce depth of field to get as flat and orthogonal as possible. In my instance i just got close enough. I figured having the grid would help more than anything else at keeping me in check size wise.
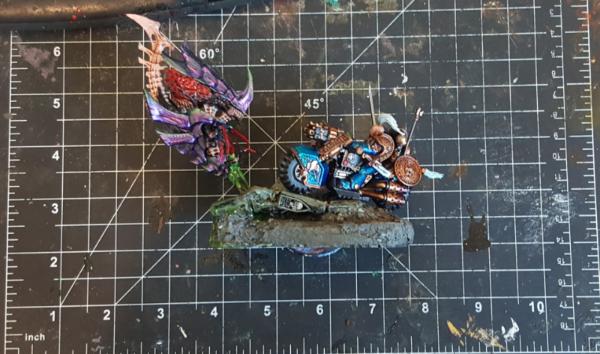
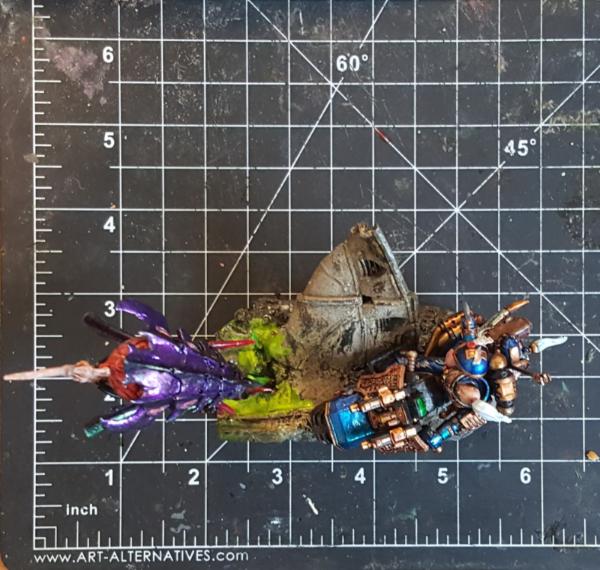
Then you just make some planes and stick it on!
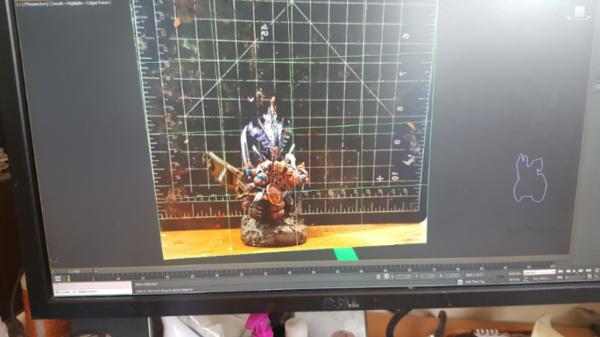
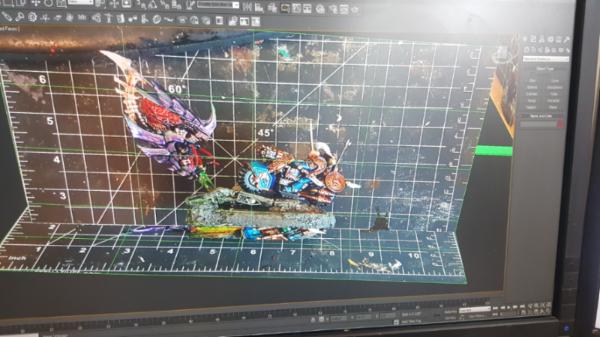
Next up is modelling it all!
60913
Post by: Largo39
So, mostly just work on the 3d model representation of the figure. Started with the bike:
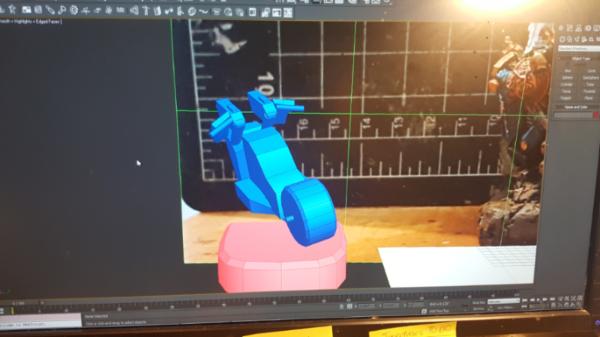
And added in the Neurothrope. one thing though that I kept running into was just putting it all together accurately. Id make the bike and it would seem right, but you put it next to the neurothrope and it still seemed off. Part of this is the fact that the bike is add an angle to everything in the pictures so it's not quite orthogonal.
So what I ended up doing to nail this all down was do "range tests" to subtly adjust the bike until it matched all the range points I would measure on the model. It took a while (propogation of error is a pain in the butt. Small things wrong in the model ended up making huge differences in where things went)
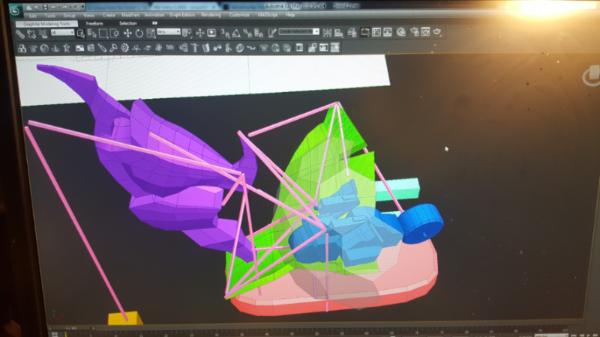
Once that got nailed down I could start figuring out how much shield I would need and how big the plates would be:
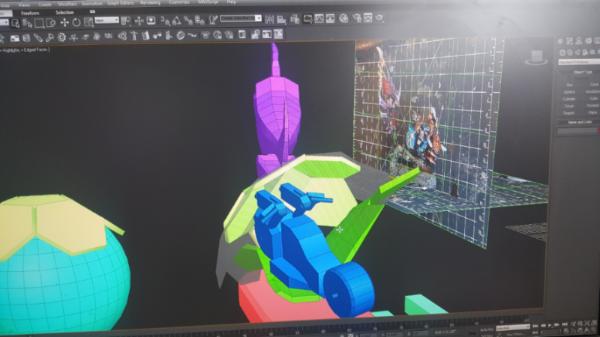
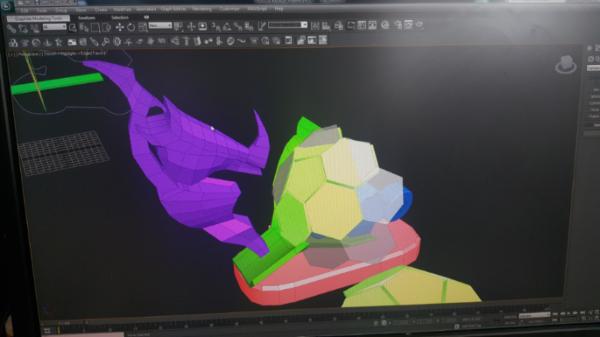
60913
Post by: Largo39
So with the first stage of my model complete I now have a size for my tiles! Which means... I can laser cut them out!
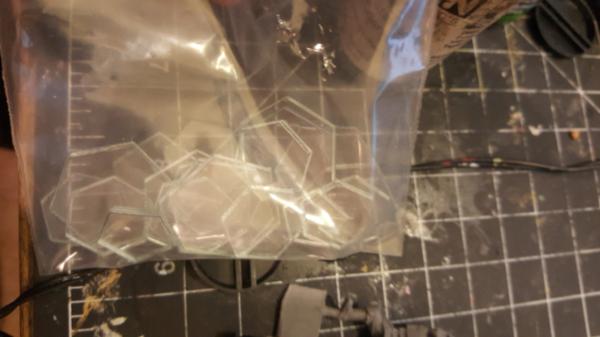
Huzzah big bag of hexagons and pentagons. Okay so now it's time to figure out how to glue them to each other. From a previous project with acrylic I know that there is a specific acrylic glue for this job which melts the acrylic together for a stronger bond:
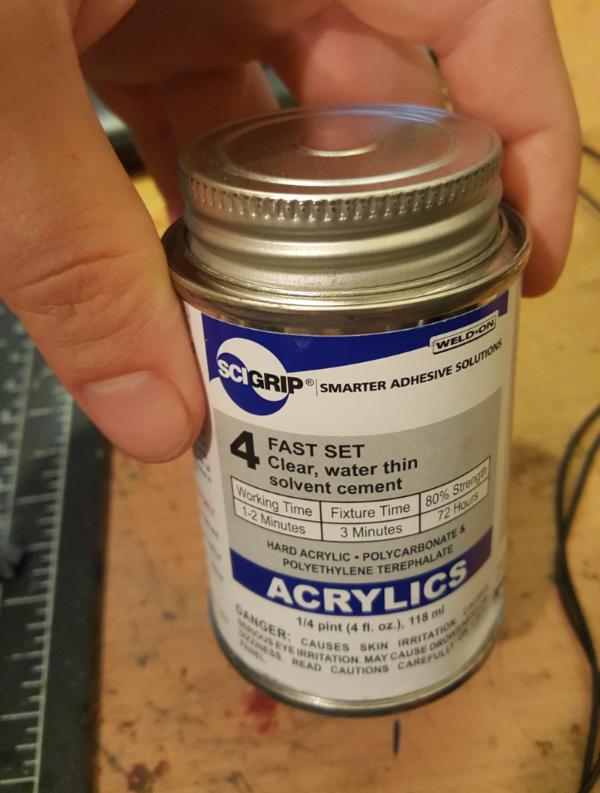
Now this glue is.. interesting. One the one hand it really means water thin, the applicator bottle has a hair thin tip that this stuff just sort of starts dripping out once you tilt it. Its the single hardest glue to control ever. On the flip side though if you have a teeny crack it will instantly fill it, so its great to really get in the crevices of a tight joint. However since it melts thea crylic it will nearly instantly scar acrylic as well so if it drips somewhere you DONT want you only have a few seconds to wipe it off or it'll mark the acrylic.
Very tough stuff to use for sure but strong.
First up was figuring out how to actually attach these plates to each other. I dont really have any helping hand type things and I need to put these things at angles pretty precise to each other to get the next plate on properly. Not helping is the fact that the edges are flat which means there isnt much surface contact between the plates.
After a couple of hours of work, some helper tape, and a day in between to maximize strength (theoretically this stuff takes 24 hours to get 80% set strength) I managed to get this:
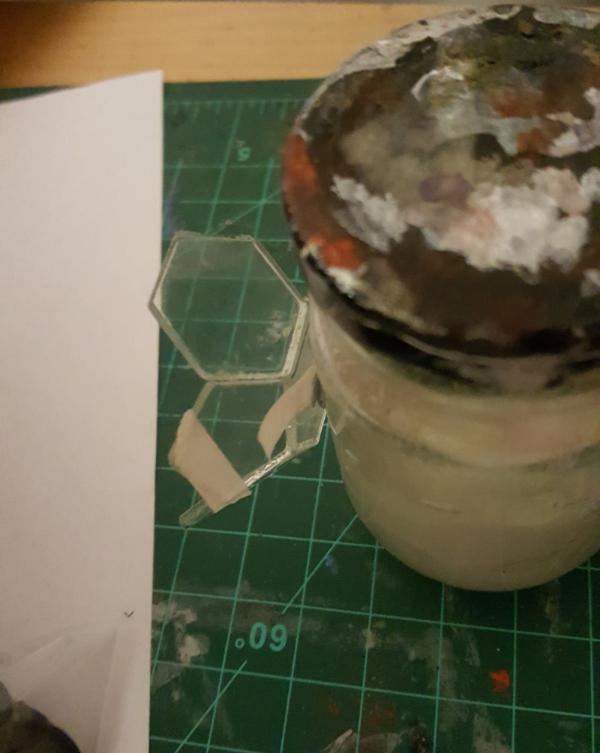
... which immediatly broke as soon as I breathed on it funny. there is just not enough surface contact between the plates. So I decided to start standing down the edges at an angle so i can more easily overlap them and get a good contact. Annoying but.. necessary.
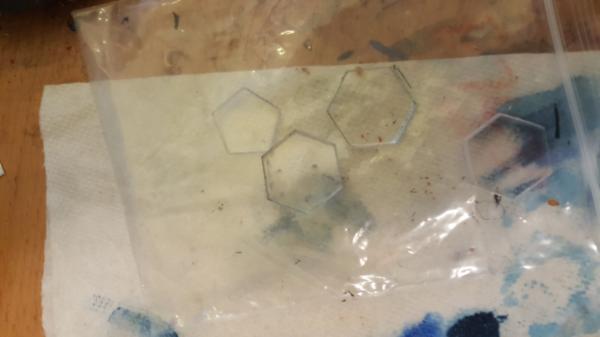
That picture is a bit hard to tell whats going on but you can see the edges are "thicker" and thats as a result of the sanding them at an angle to bevel them. Even with the sanding though I would need some other way to hold the plates together. I was trying it with one hand while the other fumbles at the glue trying to tilt it just so I only get a single drop and yeah.. not workable.
Meanwhile I also needed to figure out how to color these plates. My best contender so far was the tamiya clear blue I've been using for just about everything now. But.. well, yeah, on the smooth acrylic it just pools and condenses as soon as I paint it on, so it dries not so bueno.

Painting it on the edges is better but I really wanted some kind of smooth blue look on the tile itself.
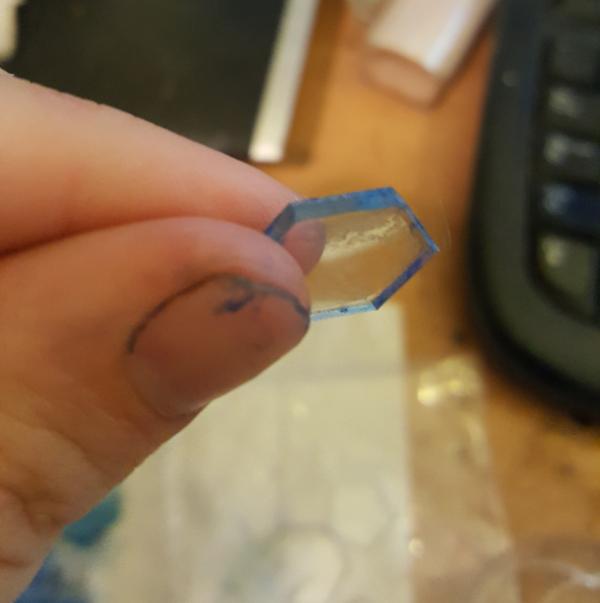
61618
Post by: Desubot
Yay some one finally started using the glue i use.
60913
Post by: Largo39
So.. figuring out how to make a half dome of plates. I had already figured out that I couldnt do it by hand, takes too long and too flimsy. The best way would be to lay it on top of a half dome so I could do it all at once. The problem is.. I needed to find something (not acrylic) that could be a half dome in the right size (about 2.4ish inches in diameter).
Art stores dont really carry that kind of thing, as they mostly have foam balls in set sizes. Ornaments *might* work but wrong season, and nothing in a hardware store either. A very vexing conundrum. But, luckily, one of my more local hardware stores (ie: not a home-depot) has a old toy section (you know those kinds of toys you pay quarters for and turn) and, voila, we had options again. Cheap round toys. In this case its those things you push down and they "pop" back up.
With liberal application of blu- tac we get this:
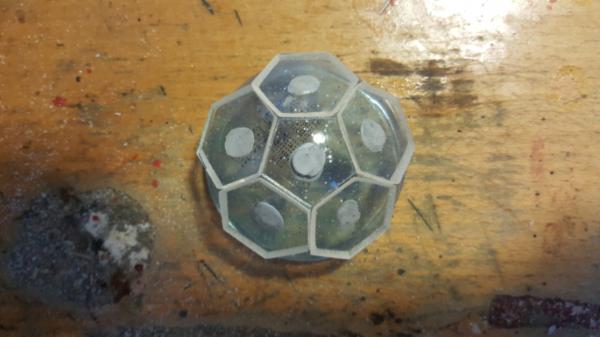
which I can then glue at once (with sanding for better joints) to get this:
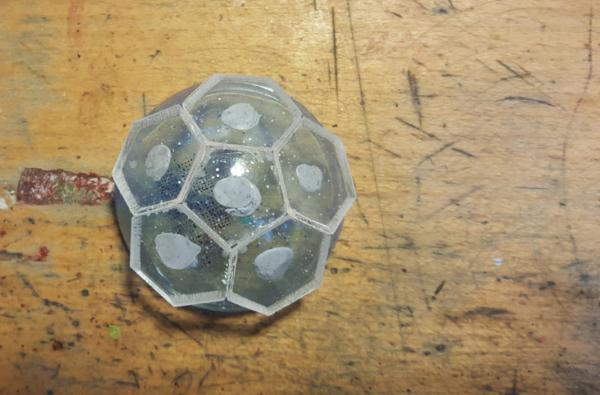
Seperatly I also figured out a method for the blue. Turns out that Tamiya also makes my clear blue in spray form, which works great. I have to be careful with how much I spray but otherwise it's perfect.
This, for example, is lovely but way too dark:
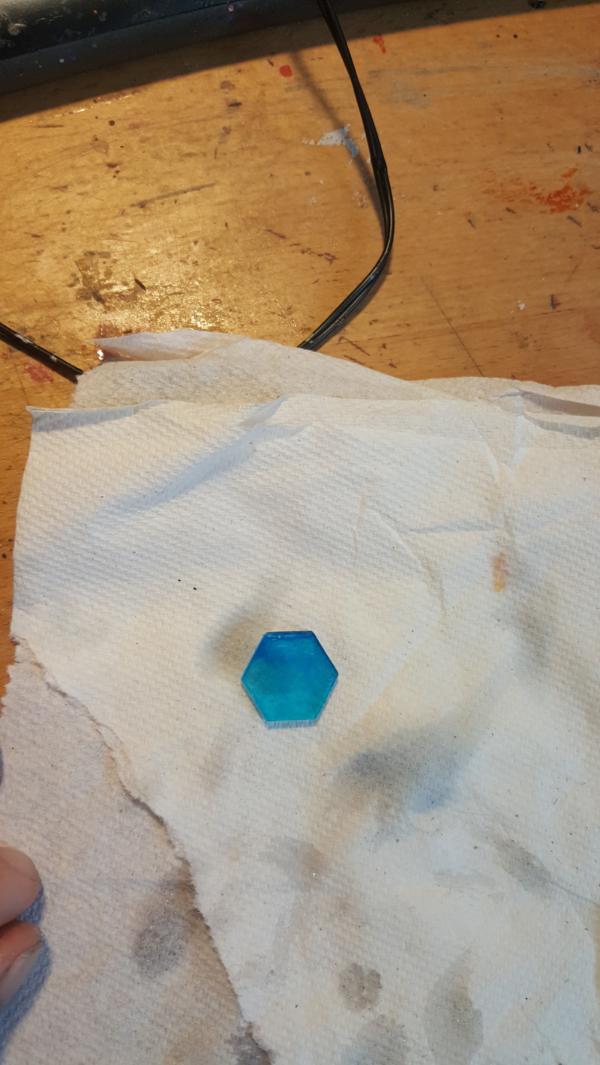
You can also see me begin gto figure out how to apply the foil. So far.. its very patchy:
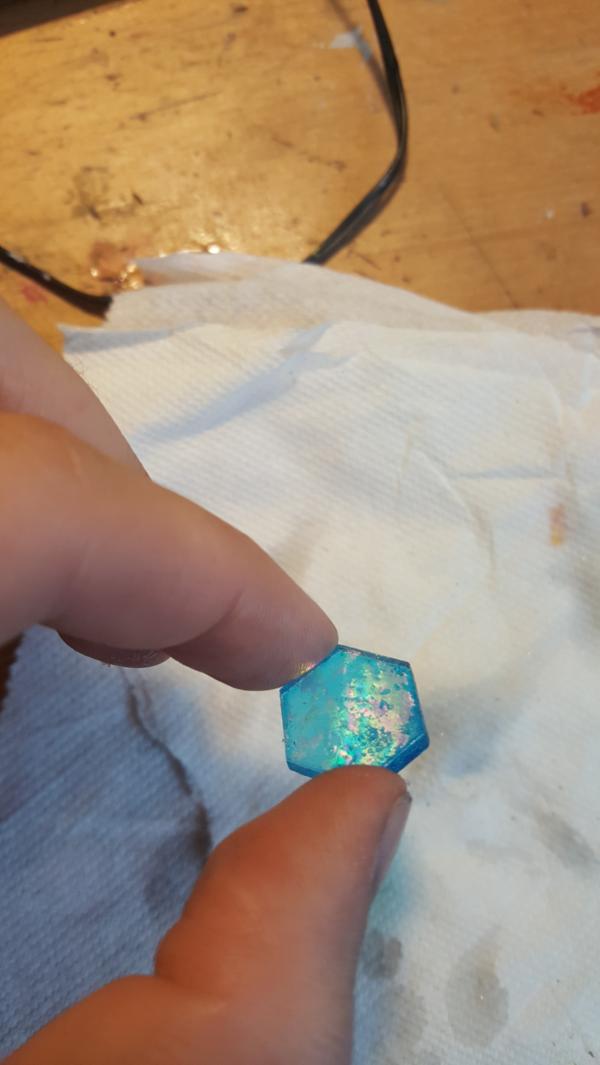
More experiments:
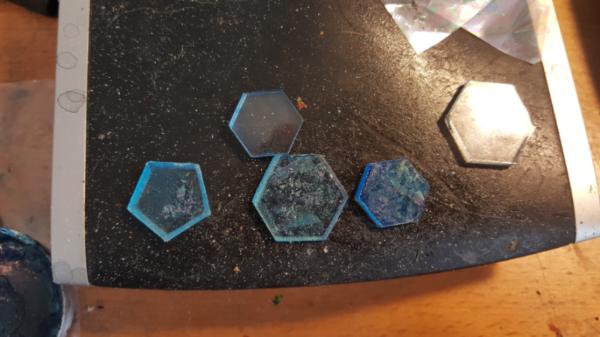
60913
Post by: Largo39
So I've gotten the core of the dome done and much sturdier than before but now its time to figure out how *much* dome to do. Just the single pentagon and hexagon flowers feels a bit.. small. Also there is no easy way to really attach it to anything. So I cut out some card stock to size to test how going bigger would look.
Pretty happy actually, i think it'll work! Having more of a compelted dome will also sell the shimmer/oily effect better as well since you'll get more angles from a single viewpoint.
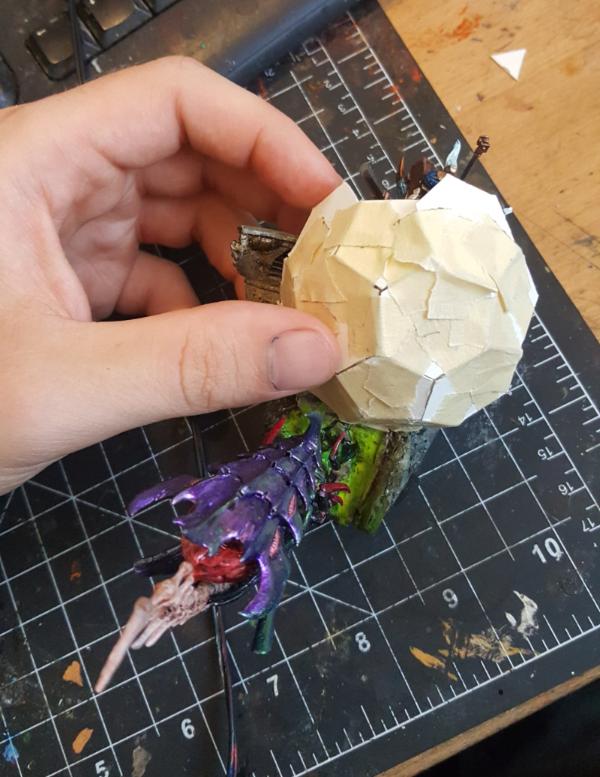
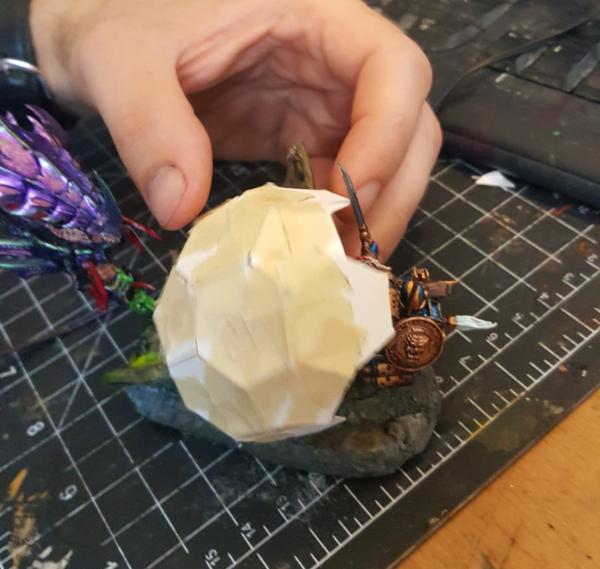
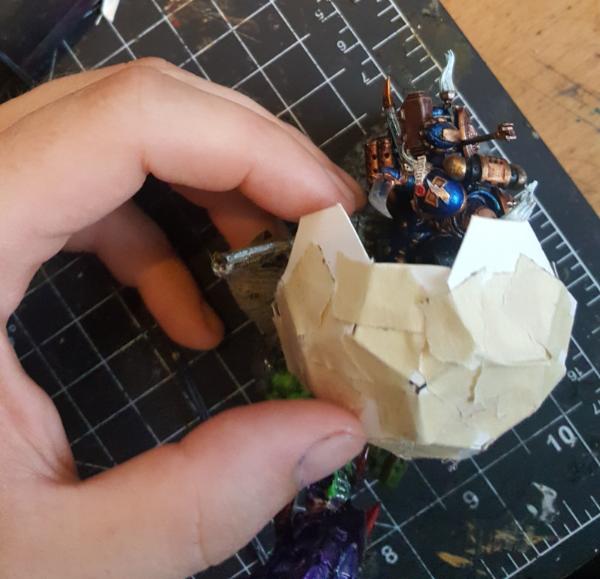
We're also moving onto the next thing which was the lightning effect. Now the goal here was to use EL wire from the horn of the neurothope striking the shield. This.. will be a tale of woe. But for now it'll just be me modelling and trying to figure this guy out. First up, the ortho views.
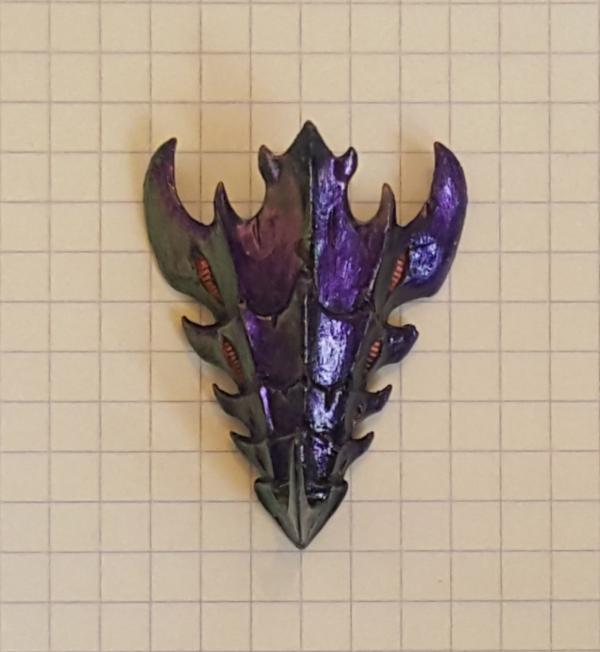
11
Post by: ph34r
This is an amazing blog, and if I may ask, where does this computer console come from?
https://www.dakkadakka.com/gallery/768862-.html
60913
Post by: Largo39
The reaver titan interior:
https://www.forgeworld.co.uk/en-ES/Mars-Pattern-Reaver-Titan-Body-Only
Note: I do not have a reaver titan, I just have a friend with a lot of bits. But yeah, the shelves I use for the lower level armour racks in the garage are also from the interior. There are a lot of goodies that FW would make a mint on if they sold individually. All that greebling :/
60913
Post by: Largo39
So, continuing on we have more attempts to glue this foil down in a clear way. So far I've been using glossy laquer/varnish coats to no real success.
The foil in question:
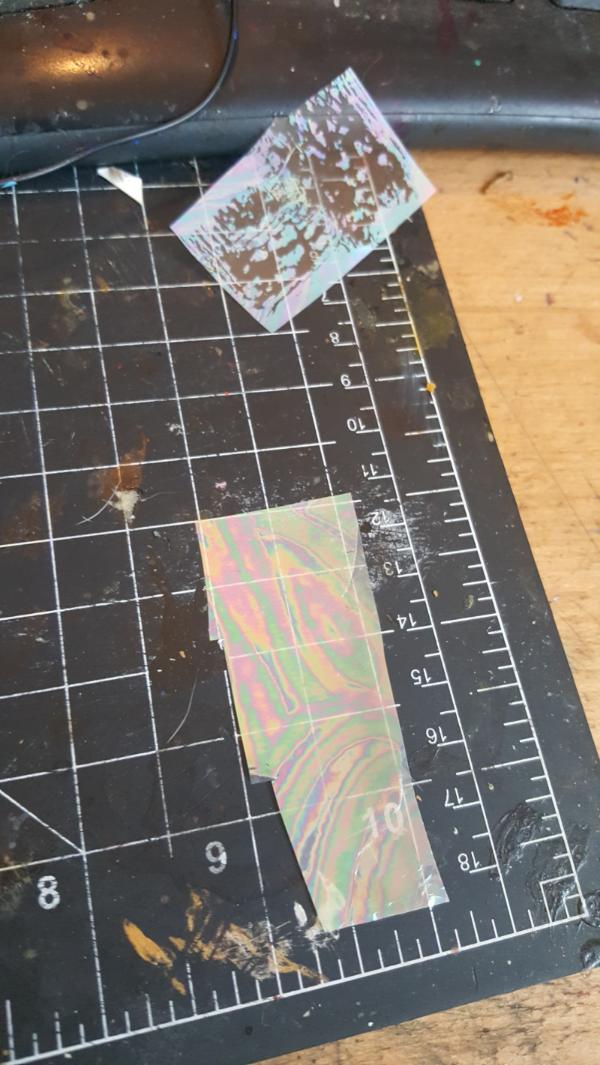
Then at my hobby shop I discovered this stuff and decided to try it out:
Basically you plunk it down, and as it gets clear it gets stickier so (theoretically) when its fully clear you are ready to foil up.
Initial experiments were good!
As you can see I got much, much more foil down. The main problem right now is the fact that as soon as you start putting it down it pools on itself, since the acrylic is so smooth. So the gaps where it didnt pool end up not being sticky enough.
I attempted to do an initial coat, let it get sticky, and then add more on top of it but this stuff is VERY sensitive to touch. If you touch it while in sticky mode it blisters and stops being clear, so that method doesnt really work. What im hoping is that it stays sticky for a while so I can start with just a TON of it on there to force the issue. (IE: I can put so much on there that it wont pool but there will be areas that are still clearing up 20 minutes later. So if the areas that clear faster also lose stickiness in that time I'm screwed)
60913
Post by: Largo39
So in order to make it in time to 3d print this I had to switch gears away from shield work to modelling up the lightning bolt. I finished off the horn which looks fine but the next step is actually figuring out the bolts themselves. I started by making rough lines of where I wanted them to start/end and then added noise to it:
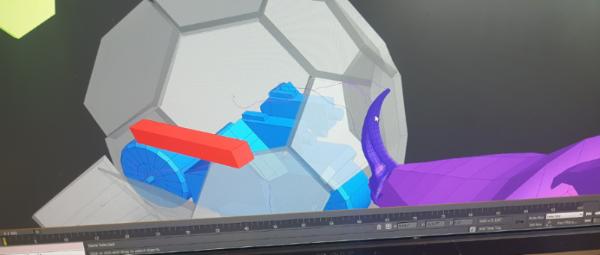
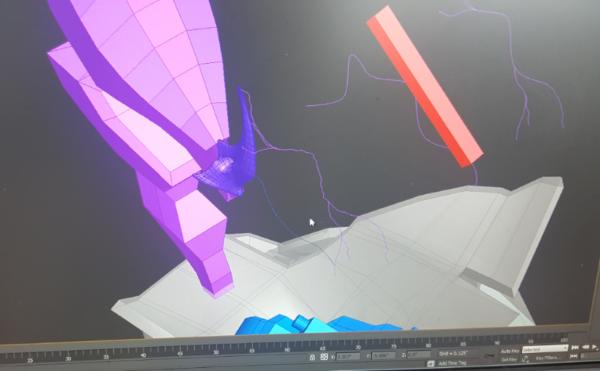
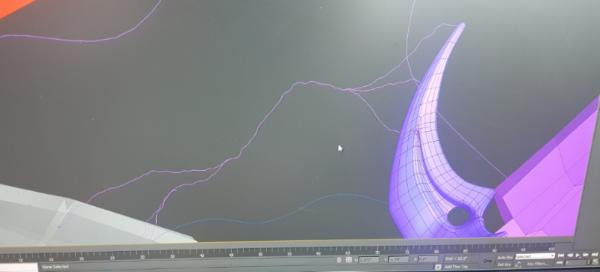
It was looking pretty good until I added thickness to those lines:
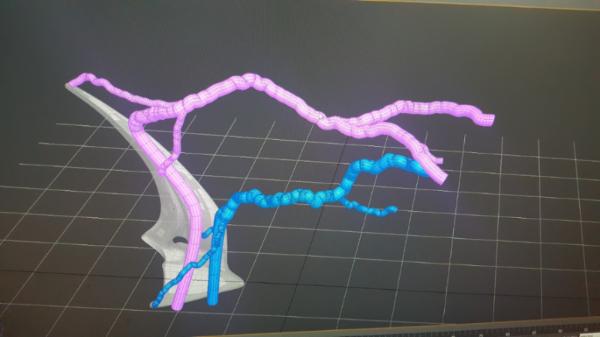
Introducing.. super knobby branches! Hmm, so, clearly I would need to drastically reduce the noise depending on the thickness of the line. Blergh.
8330
Post by: kestral
Amazing stuff! I look forward to reading the whole blog some day. You're really on the next level here!
60913
Post by: Largo39
Thanks! you could probably start on page 10 and be okay its okay to skip some!
116551
Post by: AquilaPeela
Man the terrain and models you're doing are just kick ass!
|
|