Titan's Fall:A Tau vs Ultramarines Escalating Campaign
This will be the start of a multi-part campaign between the plucky Tau Forces of Fi'Rios Septword (under my command) and the cunning Ultramarines (under the command of Neophyte2012). Batreps will be written reports & pictures format, with as much fluff as can be mustered liberally sprinkled in between.
The Campaign will be split into five chapters, and each will have its own campaign book uploaded here for you to look at and even play if you so wish to do so (it will not be GW standard or anything, but you might find it fun ) Points will escalate throughout the missions, with various bonuses becoming available depending on battle results. All games will be hosted by the good people at Fun Atelier and their excellent selection of scenery will hopefully be used to add an extra visual dimension to a fluffy campaign. So, without further ado.....
Titan's Fall: Prologue
Spoiler:
O’Vash gazed up to the heavens, a myriad of stars scattered lazily across the black dome of the night sky. The trees of the forest swayed gently in the wind, thin tendrils of mist gliding between their branches like cobwebs on the breeze.
‘It is a beautiful addition to the empire, do you not think El'Or?’
‘As good a place as any to die.’ he replied, a hint of weariness in his voice.
O’Vash laughed loud and long. 'Come now, why so melancholy. Do you feel it in you destiny to die in this place?’
El'Or considered this for a moment, and gave his measured replied. 'If it is my destiny to die in this place, so be it. For the Greater Good.’
‘Ha!’ came the abrupt reply, the humour in the laugh replaced with resentment. For the greater good indeed. El’Or had chosen his words carefully, in full knowledge of the response it would garner from his commander.
O’Vash knew all about the greater good. He had ordered thousands of lives be laid down in the pursuit of it, on a hundred worlds before this. The bitterness of those losses still haunted his dreams, and the memory of it robbed the moment of its serenity.
‘Very well El’Or. Report.’
The grizzled veteran raised the dataslate, its dull yellow glow casting shadows about his craggy features.
‘Fleet reports no extra orbital activity in the system. All Tethys outposts and recon teams have reported in during the last hour without fail. Sensor drones are on station but thus far quiet.’
Silence filled the void between the two warriors, as O’Vash Continued staring into the distance. El’Or had been deployed under his command enough times to know not to interrupt such moments.
O’Vash turned, the soft mechanical whirring of his battle suit barely audible above the rustling of the leaves. ‘And so you doubt me, El’Or?’.
The question hung in the air like a lead weight. El’Or met the cold grey eyes of his commander and held his gaze before answering.
‘Have I ever doubted you? I merely report the facts that are before us, as instructed’ came the typically careful response.
‘And yet I sense unease in your voice?’
‘The only unease I have is at our exposed position. If you are right about this, we are ill situated to deal with it. The battle may go against us.’
‘If I am right…..’ O’Vash strode past his subordinate, stopping at the edge of the ancient ruin to observe the defensive preparations underway.
‘All warfare is based on deception. When we are able to attack, we must seem unable. When our forces are active, we must appear inactive. When we are near, we must make the enemy believe we are far away. When far away, we must make him believe we are near.’
‘I am well aware of Puretide’s teaching on the matter.’ El’Or replied, lowering his dataslate and turning to observe his commander. The worn, pitted surface of his battle suit cut a ragged silhouette against the camp lights. ‘But to assume the enemy is present simply through his absence is…..’
‘Madness?’ O’Vash cut in, turning suddenly.
‘Overly prudent’ El’Or retorted calmly, sliding the dataslate into his breast pocket ‘However, preparations have been made, and if it comes we are as prepared as we can be. Given our position.’
O’Vash observed his subordinate for a moment, letting the rage subside within him. He was his brother of countless battles by now, and even though he would never admit it to his face, he valued El’Or’s perspective on the world. Especially when in such sharp contrast to his own feelings.
This time however, he could not ignore the doubt that had taken root in the back of his mind.
Something was wrong.
He had argued against this deployment with Contingent Command on Titan Prime. The Imperium was not as lethargic as they assumed, and more capable of launching a quick response than they thought. Half the Cadre was now on Tethys, engaged in this fool’s errand of setting up the Relay Beacon. The moon was only slightly more optimal for transmitting that Titan Prime, but vastly less defendable. If the Imperial counter came now and trapped them here, the consequences could be disastrous. However, the earth caste had been victorious in swaying the Ethereal s to their way of thinking, and so it was decided.
A soft chiming noise broke the silence, along with O’Vash’s introspection.
El’Or once more removed the dataslate and observed its output, the dull yellow glow replaced by a pulsing red rhythm. He looked up.
‘Sensor drones report enemy movement two kilometers to the north. Heading this way.’
A wry smile broke across O’Vash’s face as his fingers danced along the suit control panels. The Plasma rifles swung to life on his shoulders, as the soft whine of the jet pack engines kicked in.
‘Prepare the men. And get to your unit El’Or, they will need you soon enough’.
‘For the Greater Good’ came El’Or’s dead pan reply as he saluted and strode away.
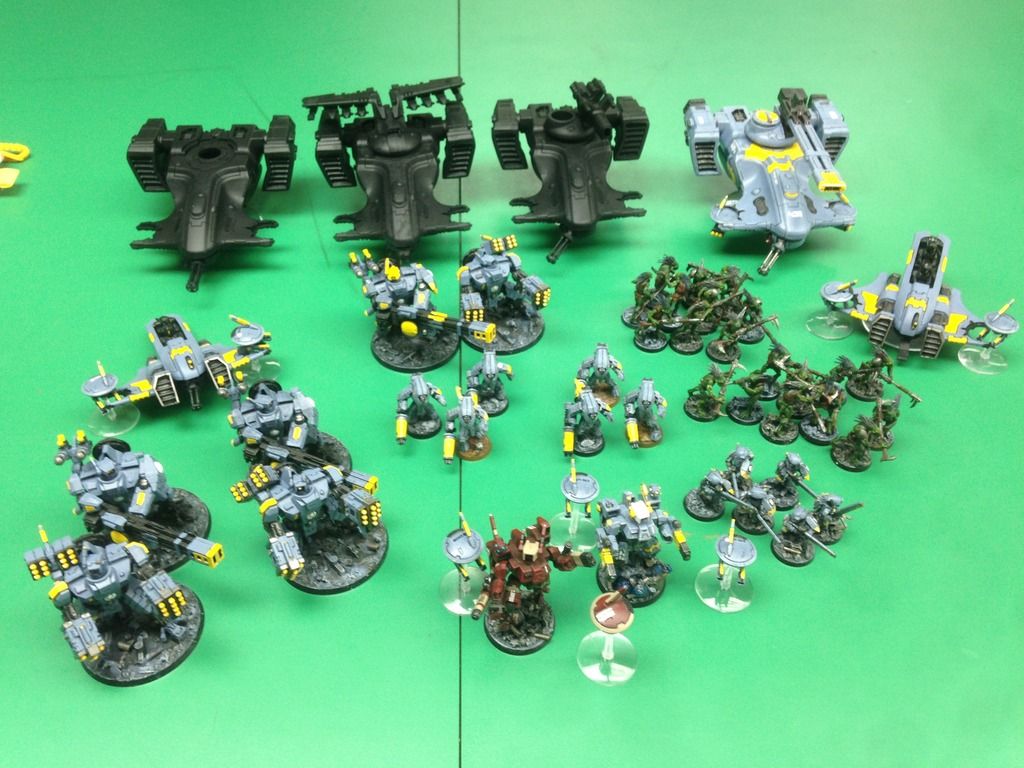
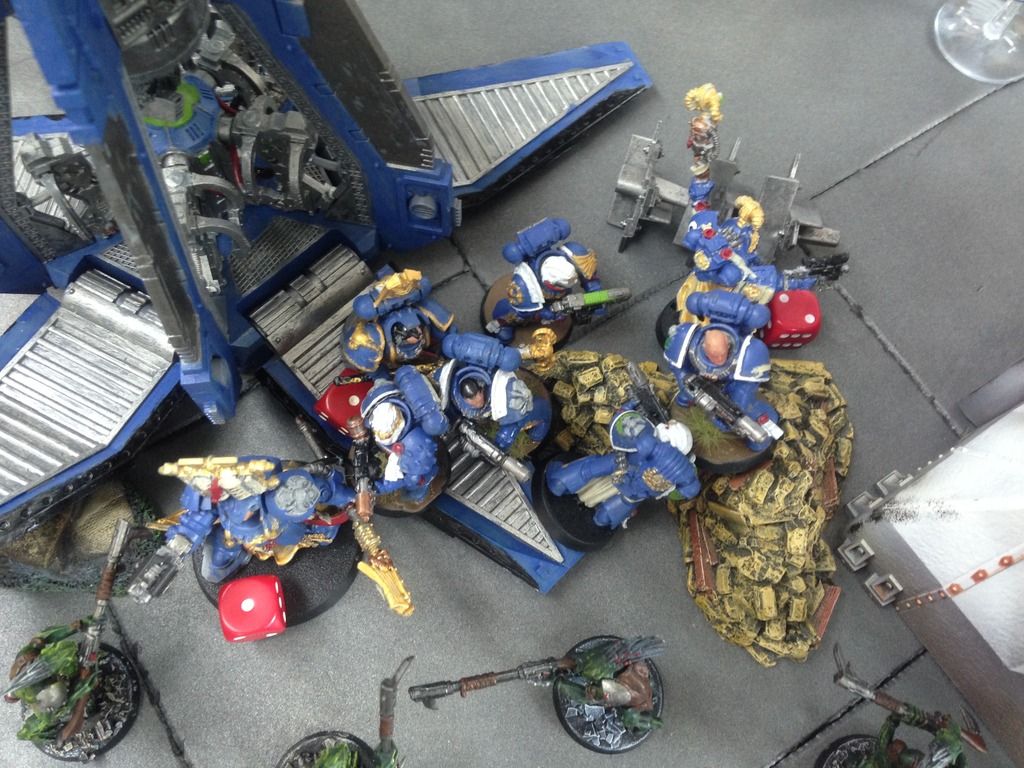
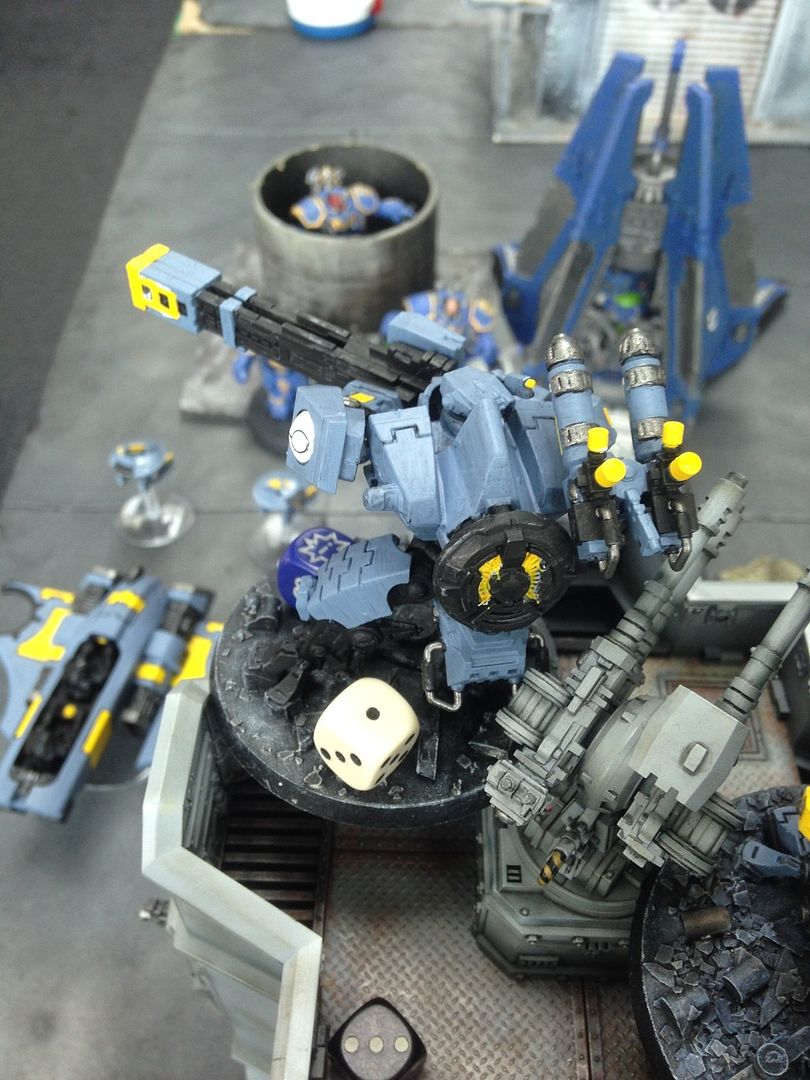
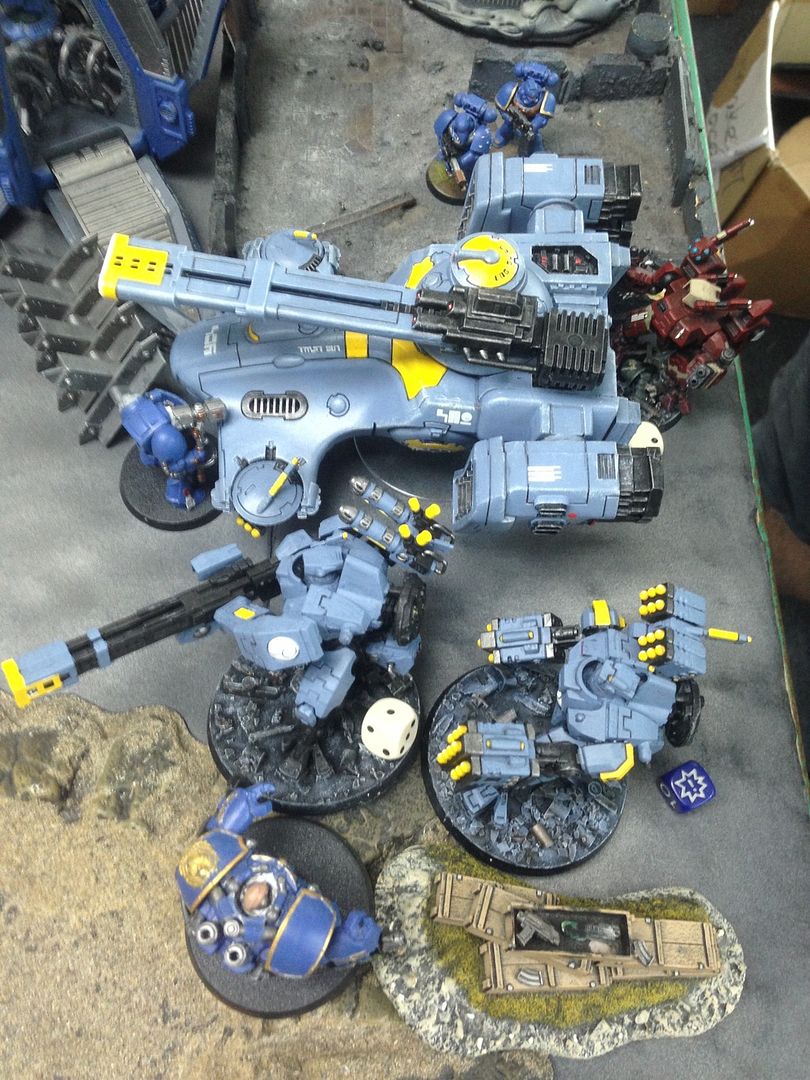
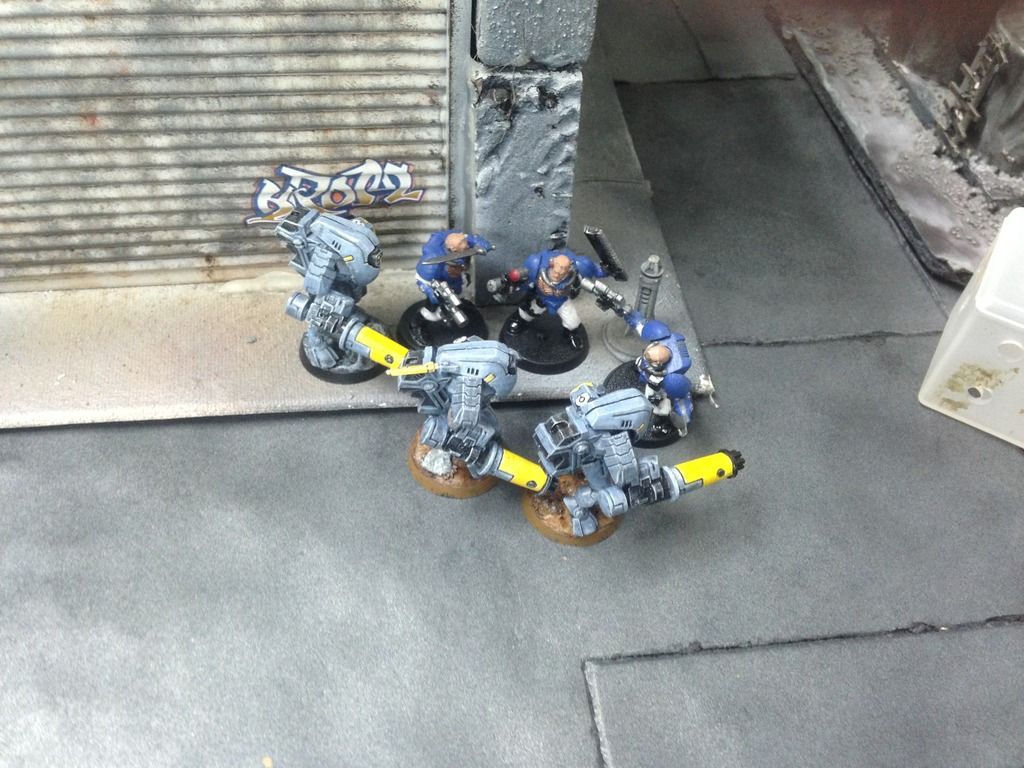
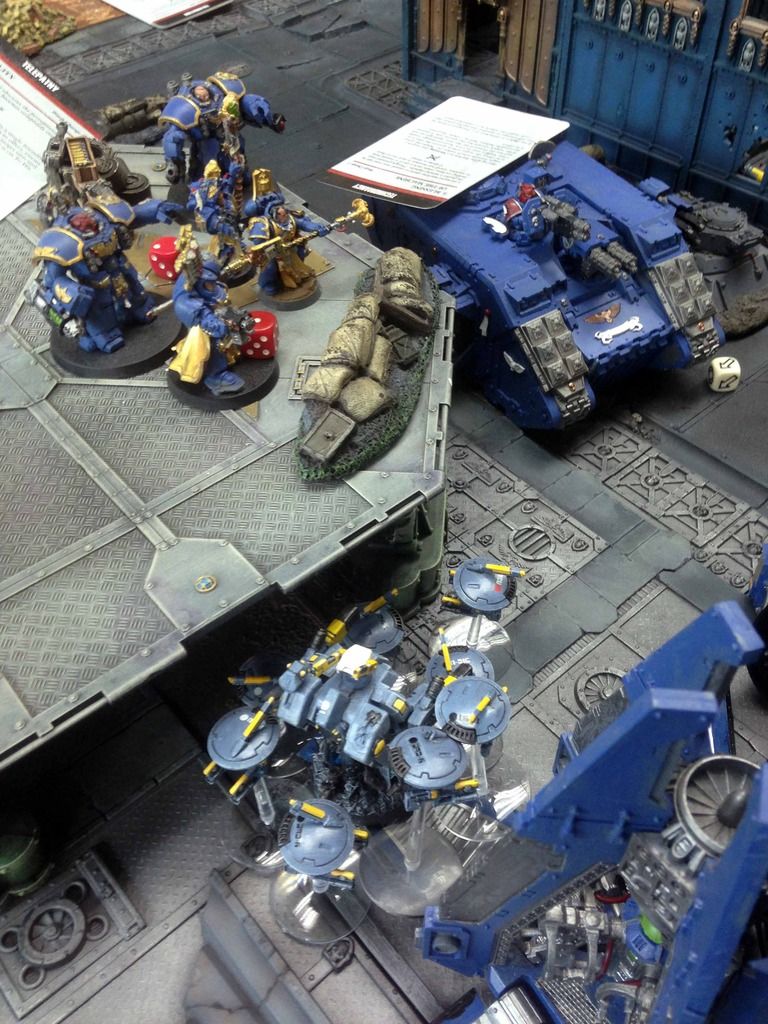
Troops Fire Warrior Team x 12, combat armour, pulse rifle, photon grenades 108pts Fire Warrior Team x 6, combat armour, pulse carbines, photon grenades 54pts
Total Models 26/Infantry 21/Characters 1 /Vehicles 5/Psykers 1/ Wounds 29/ Total KPS 9
SETUP
Spoiler:
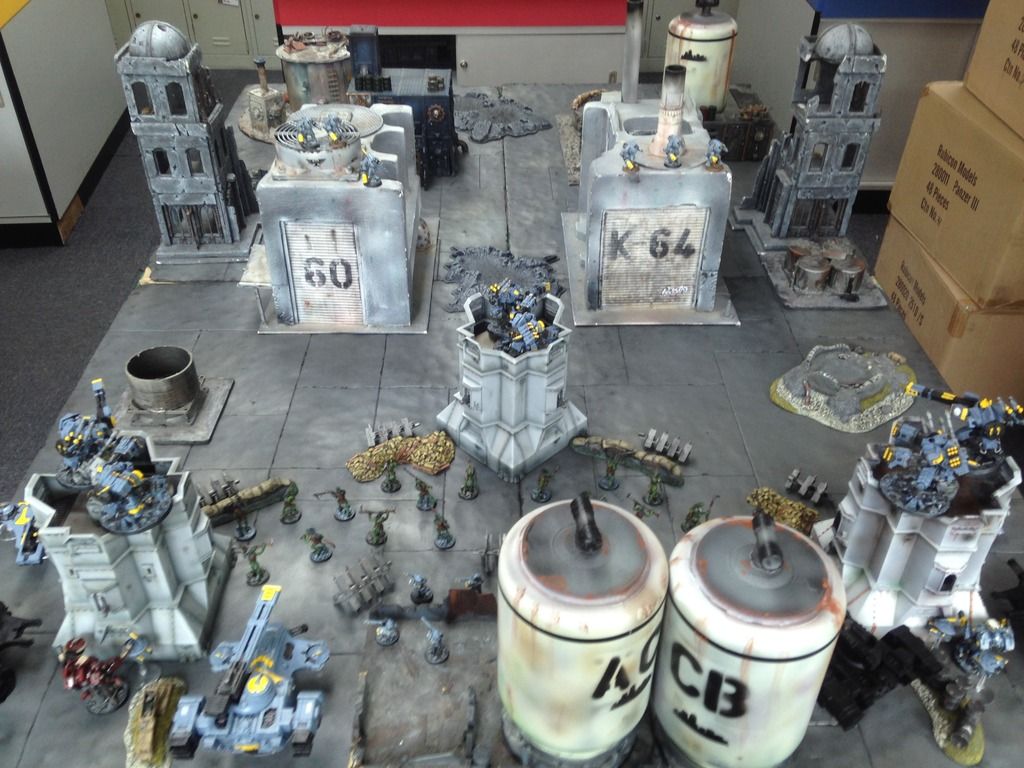
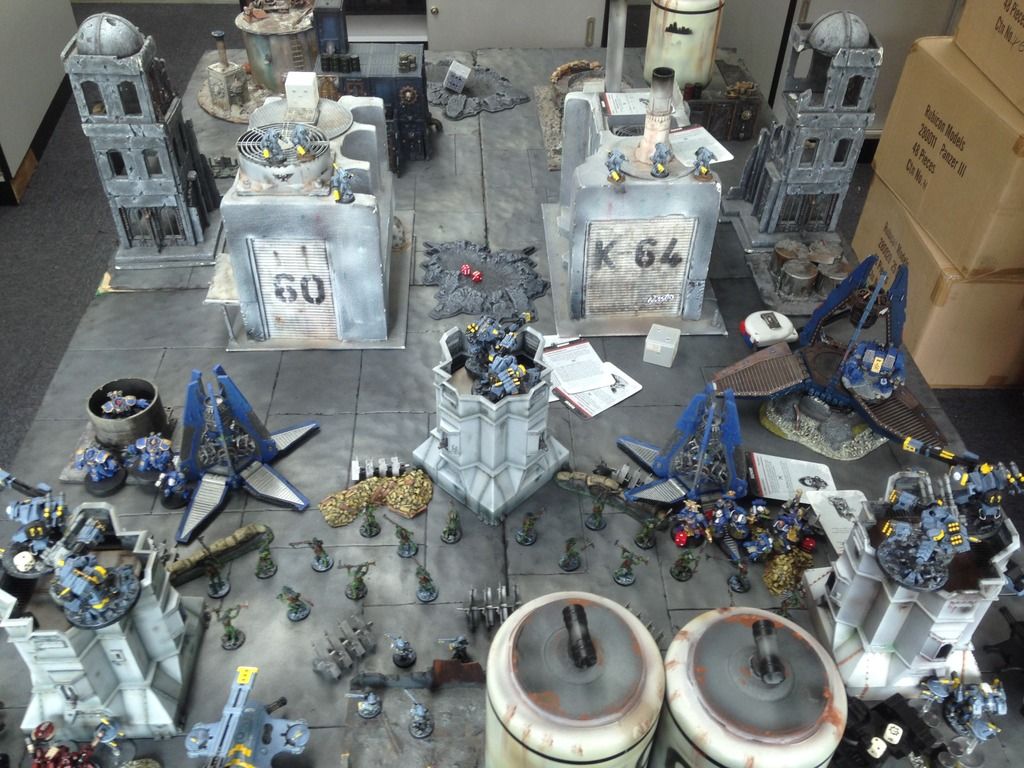
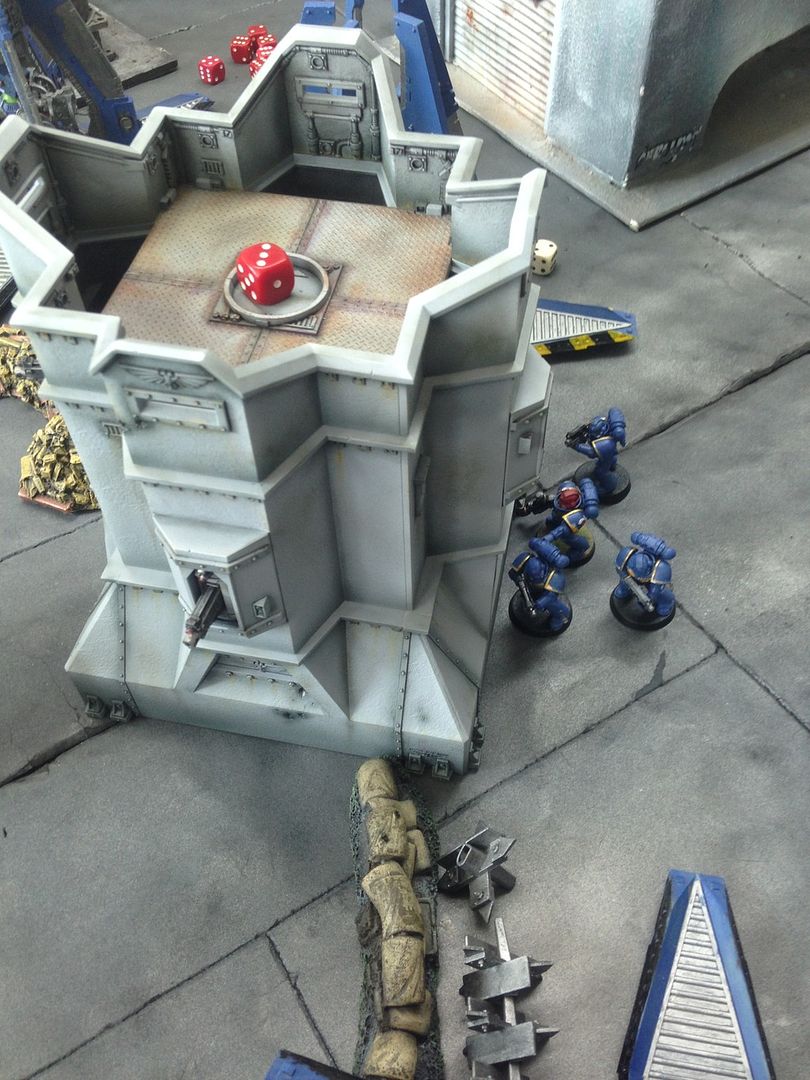
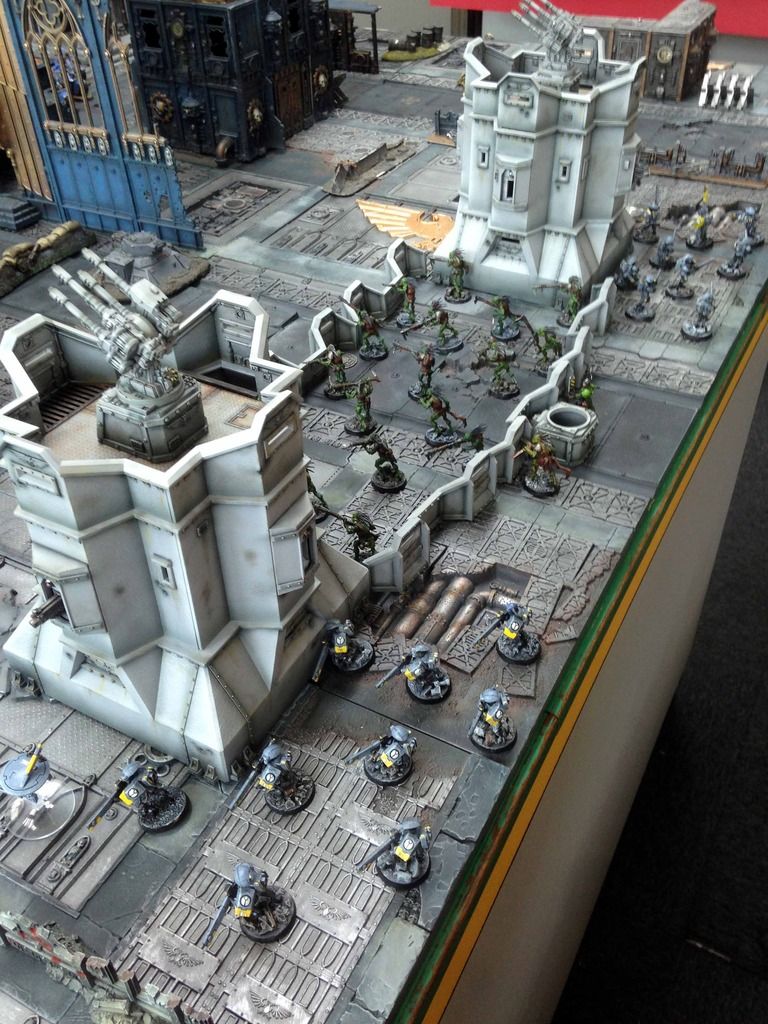
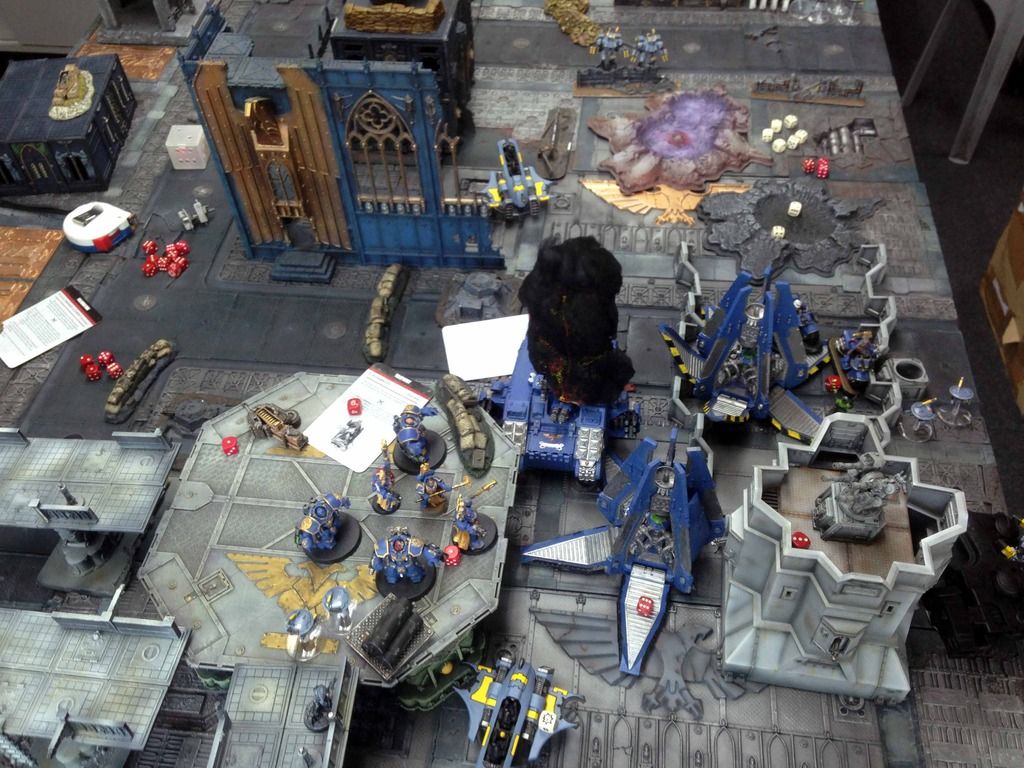
Mission: Mission 1.1 Ambush - Destroy the Enemy Deployment: Vanguard Strike Initiative: Tau win the roll off and decide to go second Special Rules: Reserves, Night fighting Terrain: The initial encounter between Imperium and Tau is set deep in the remote forests of Tethys, first moon of Titan Prime. Thick vegetation, rocky outcrops and the remains of a primitive temple litter the battlefield.
Warlord Traits:Tau roll on codex Traits and get 'Through Unity, Devastation (reroll 1's within 12" of warlord for one turn), while the Librarian gets 'Storm of Fire'. Psychic: Librarian rolls on Biomancy and gets Warp Speed and Enfeeble, with Smite Primaris. Some nasty buffs for the psyker if he makes it to close combat. The Tau are unaware of the warp, innocent little blue dudes.
PRE GAME ANALYSIS
Spoiler:
Reasons why Tau will win:
1: Volume of Fire. Tau have multiple units who can pump out obscene amounts of S5+ fire, which will whittle the Space Marines down even with their 3+ saves. They also have better range on average. 2: Markerlights. Given all the cover on offer, these should help to lessen its value to the space marines player. With drone controller on the Mark'O, it should be a guaranteed 5/6 MLs each turn. 3: Broadsides. The missilesides will make short work of TAC combat squads, and should destroy one per turn on average. The fact they have interceptor should also ensure Drop Pod teams get a nasty surprise.
Reasons why the Ultramarines will win:
1: Librarian - Space Marines effectively get a whole phase to themselves, while the Biomancy powers rolled will make him very dangerous, especially in assault. 2: Drop pods - three units will be able to drop right into the heart of the Tau formation, circumventing the Tau range advantage. They just need to avoid being intercepted by the broadsides..... 3: Ironclad, AKA the monstersmurf. Beyond glancing with the S7 MPs & HYMPs on the broadsides, the Tau have no answer to AV13. If he makes it into combat - which he should arriving in a DP - it will be a long afternoon for the Tau. HF is also instadeath to the fire warriors.
DEPLOYMENT
Spoiler:
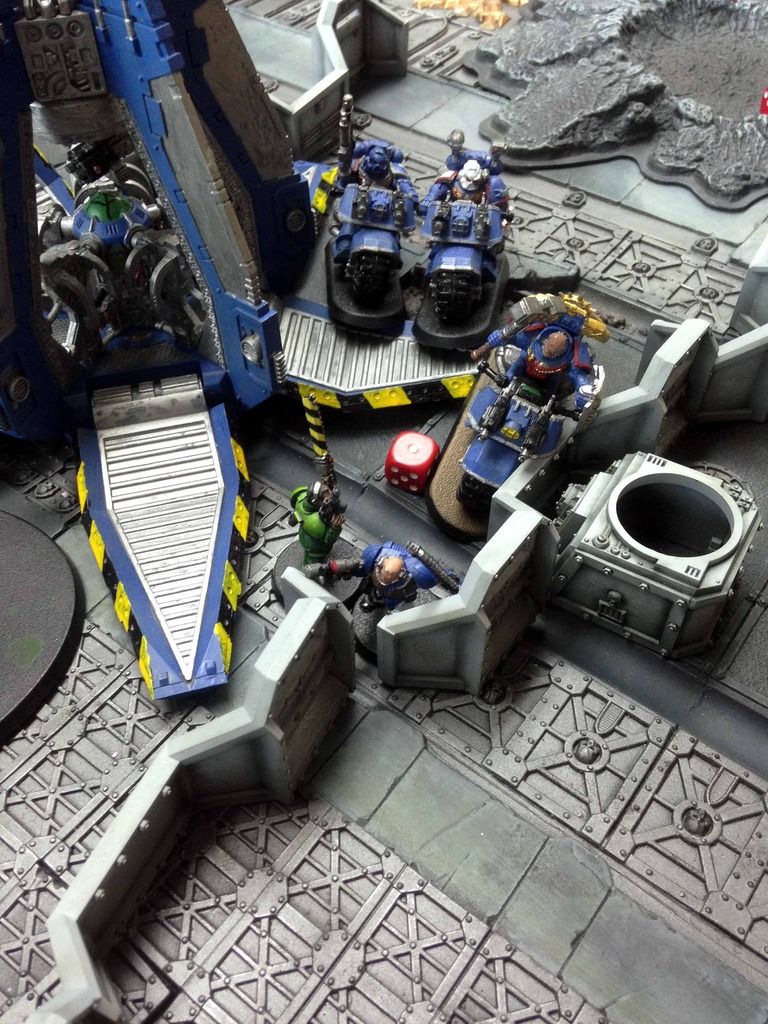
My opponent has relatively little to deploy as most of his forces are in reserve. The 6 Man TAC squad in the rhino start behind the LOS blocking Ruins.
Tau deploy all models, holding nothing in reserve - given vanguard deployment and terrain, there are limited feasible deployment locations and the Tau corner soon becomes a bit congested. Just as well with all those drop pods...
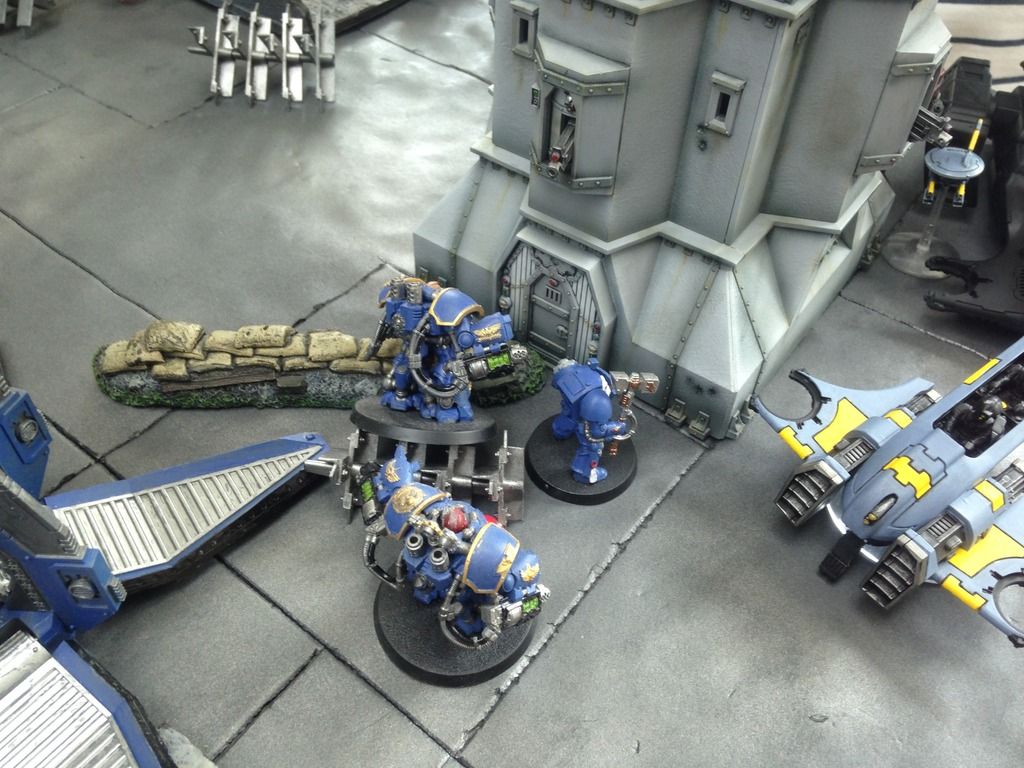
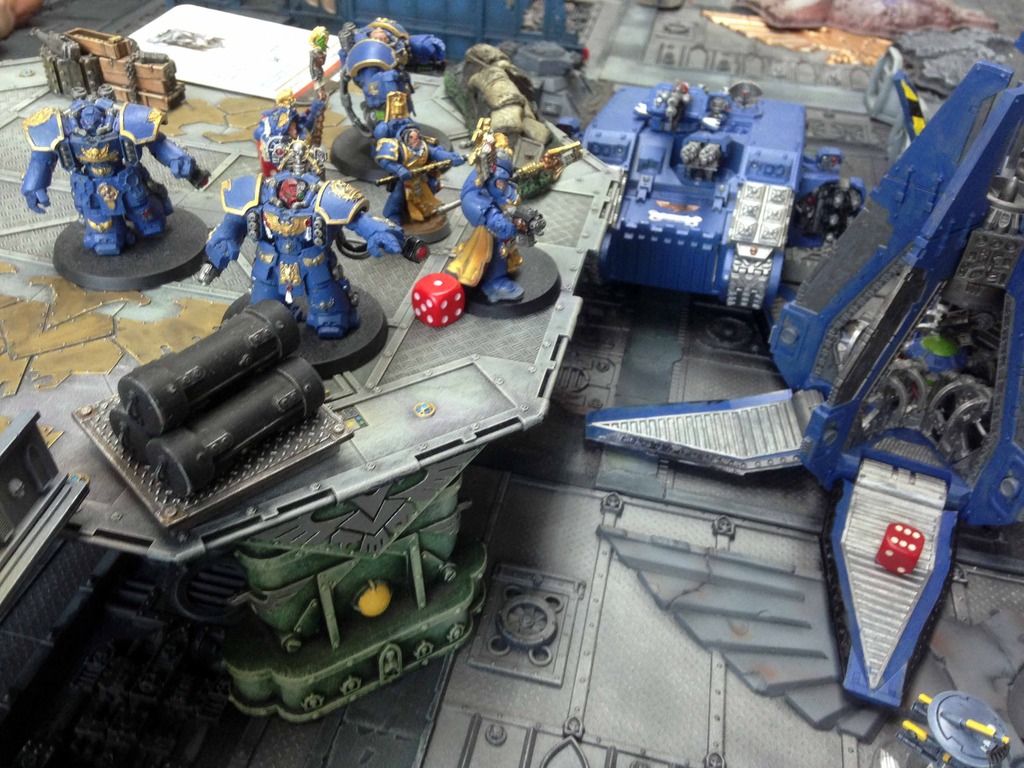
12 man fire warrior squad and fireblade are deployed toward the centre-front of the Tau deployment zone, surrounding themselves with the ADL.
Broadsides deploy in the ruins to the right to give the FWs fire support and intercept Drop Pods.
6 man Fire Warrior Squad deploys behind the rock outcrop on the left flank
While the Stealth squad infiltrate behind the central ruins
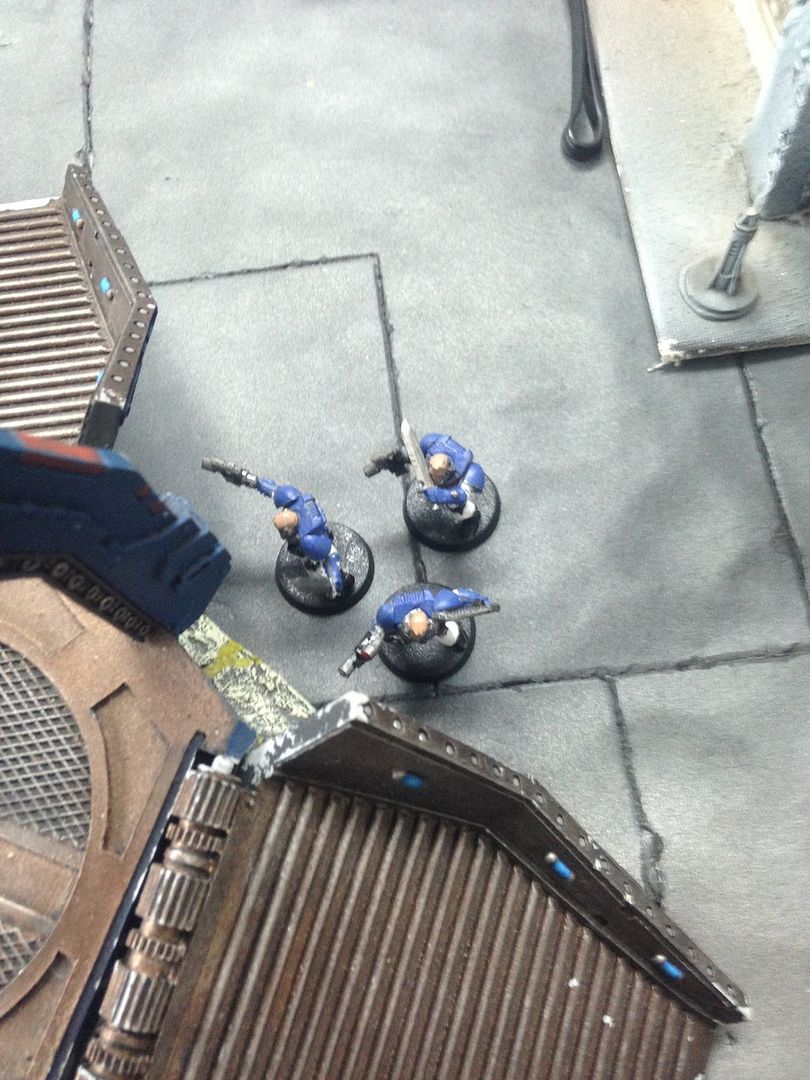
Commander, crisis team and drones spread out along the backline to prevent Drop Pods getting in behind.
TURN 1 – Ultramarines
Spoiler:
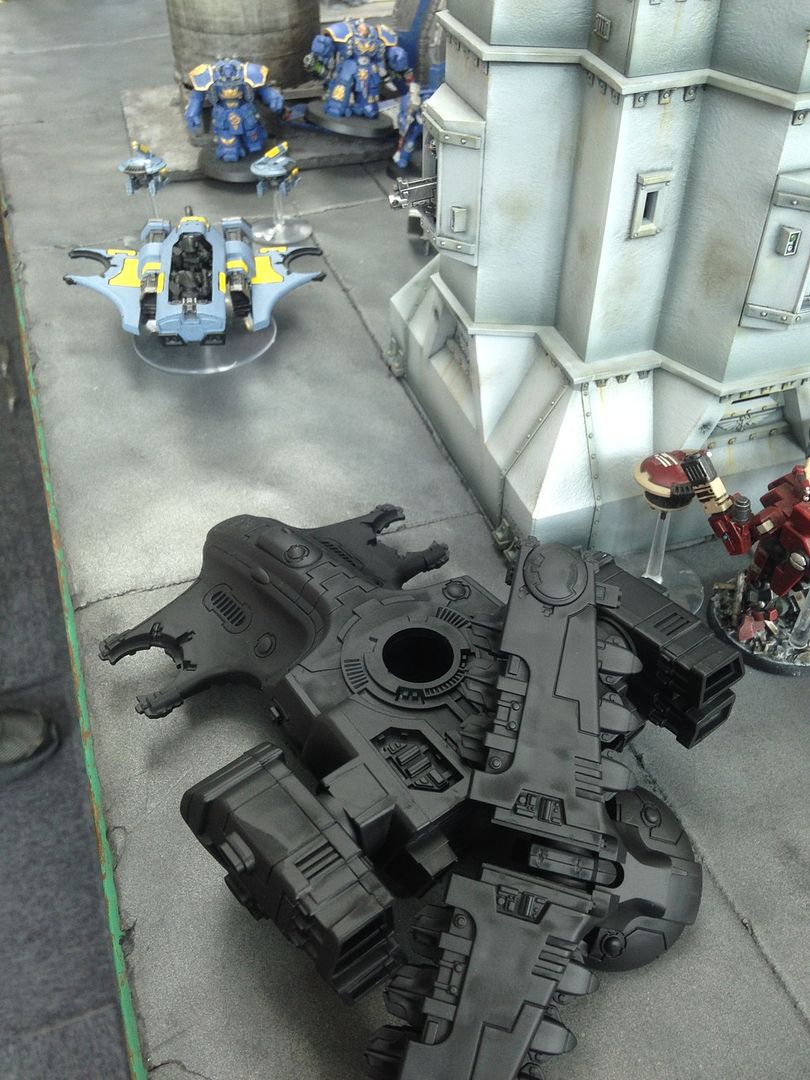
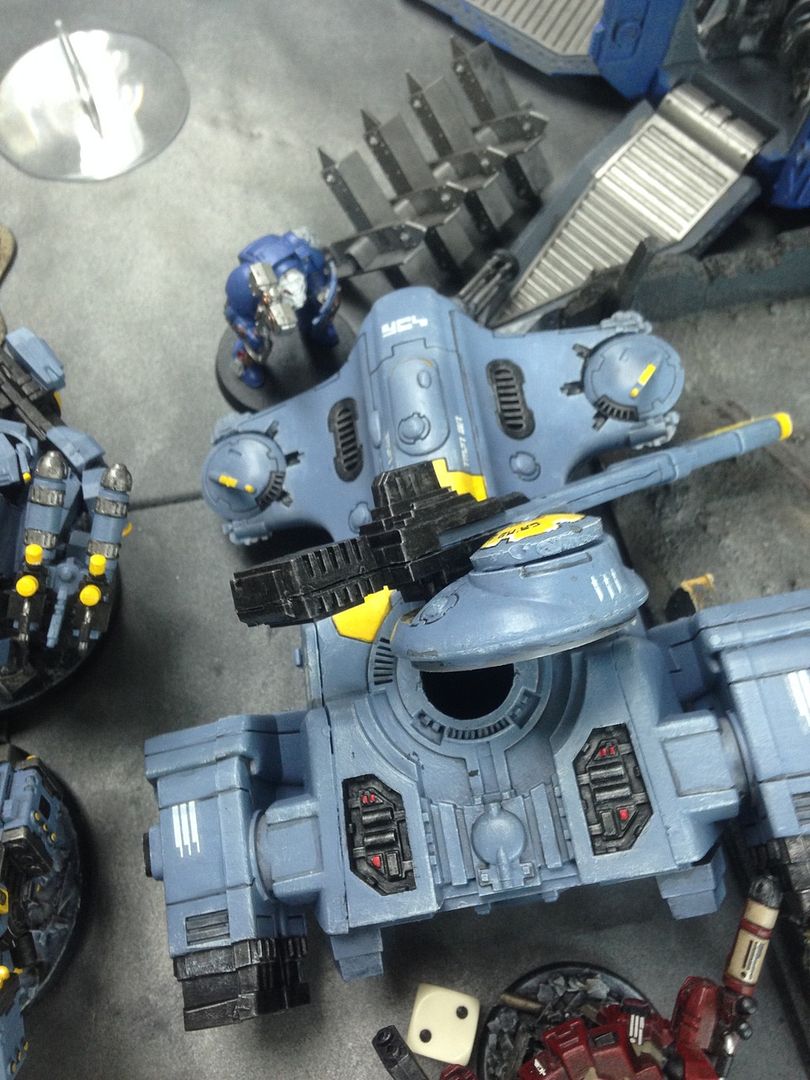
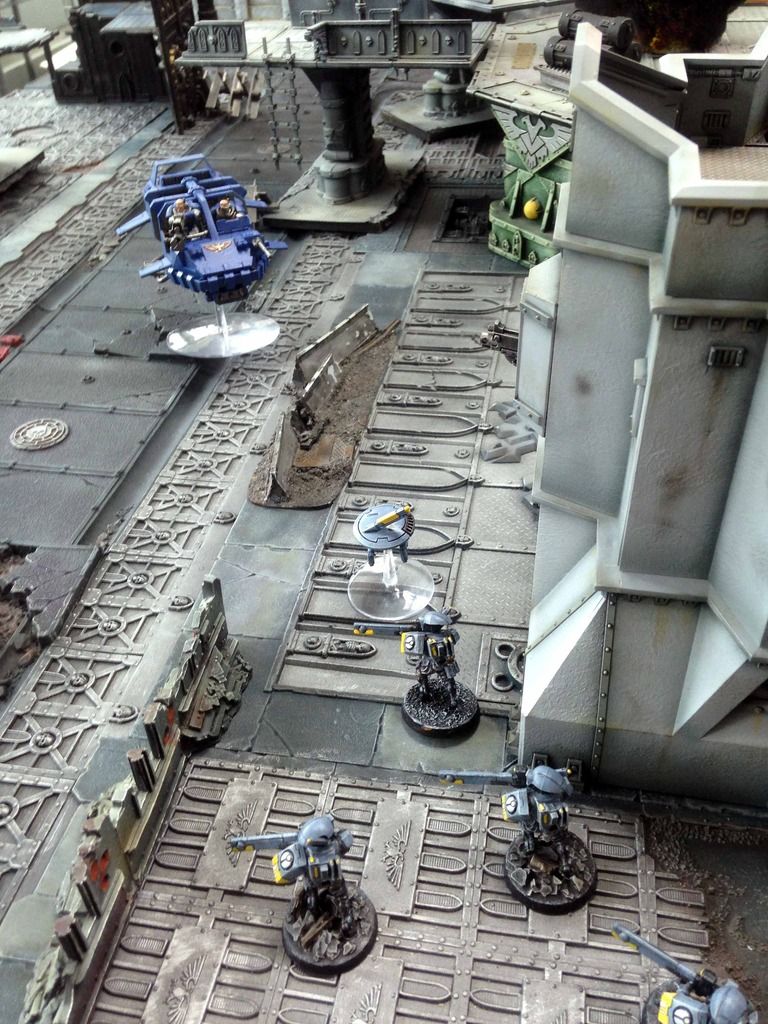
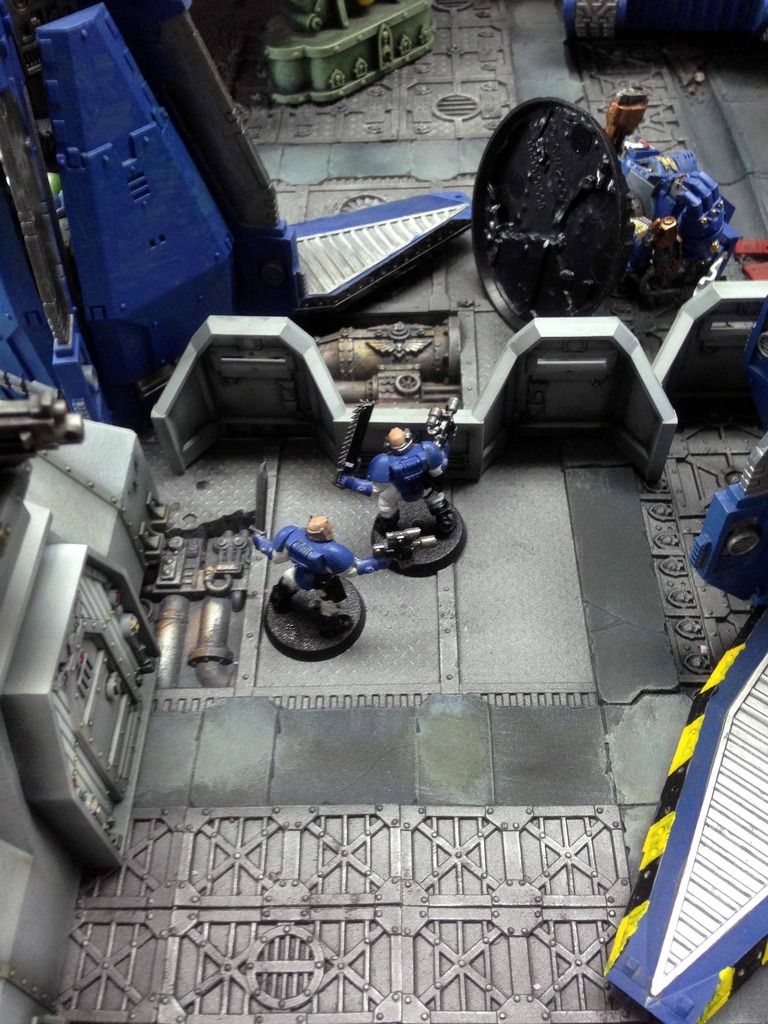
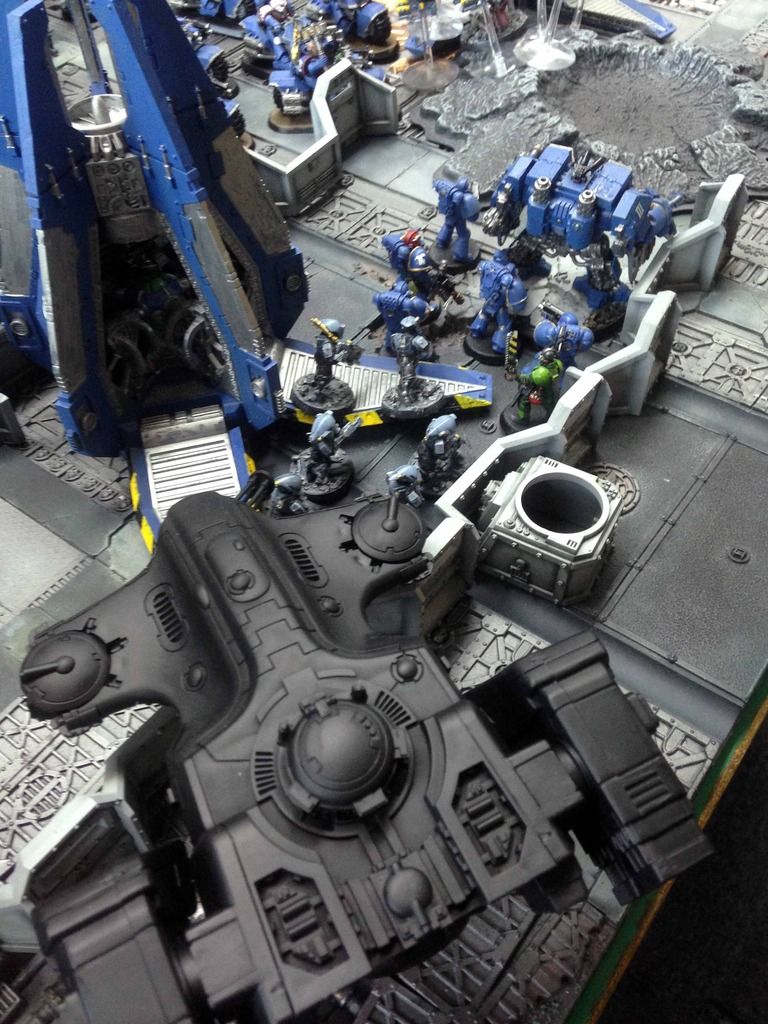
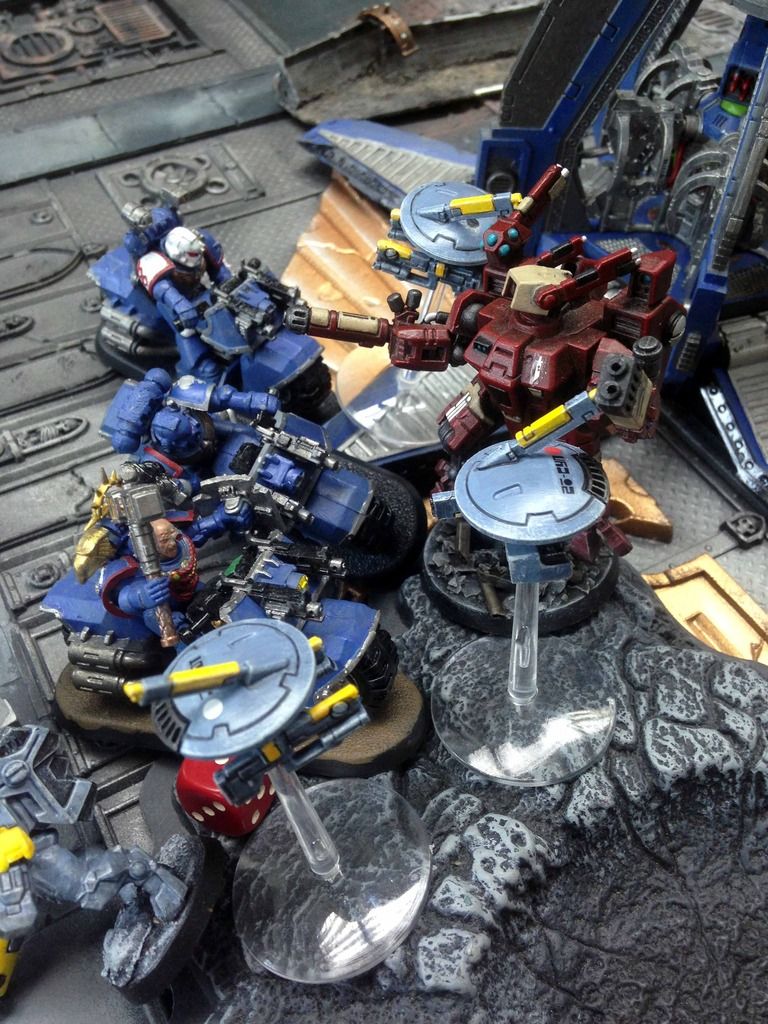
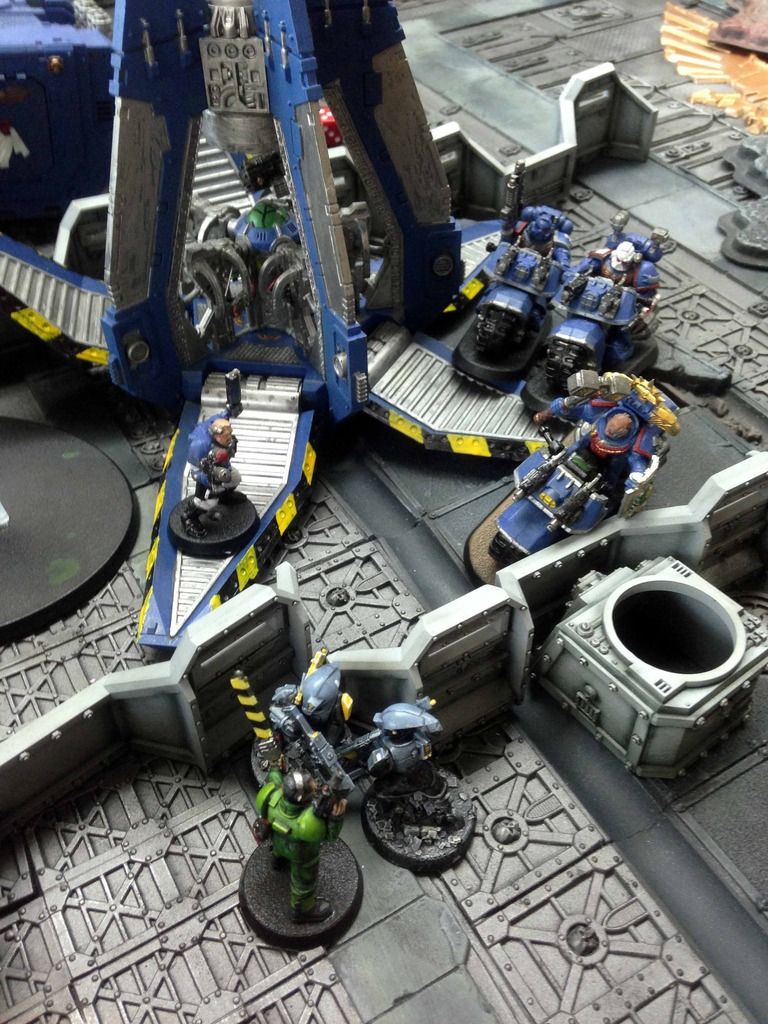
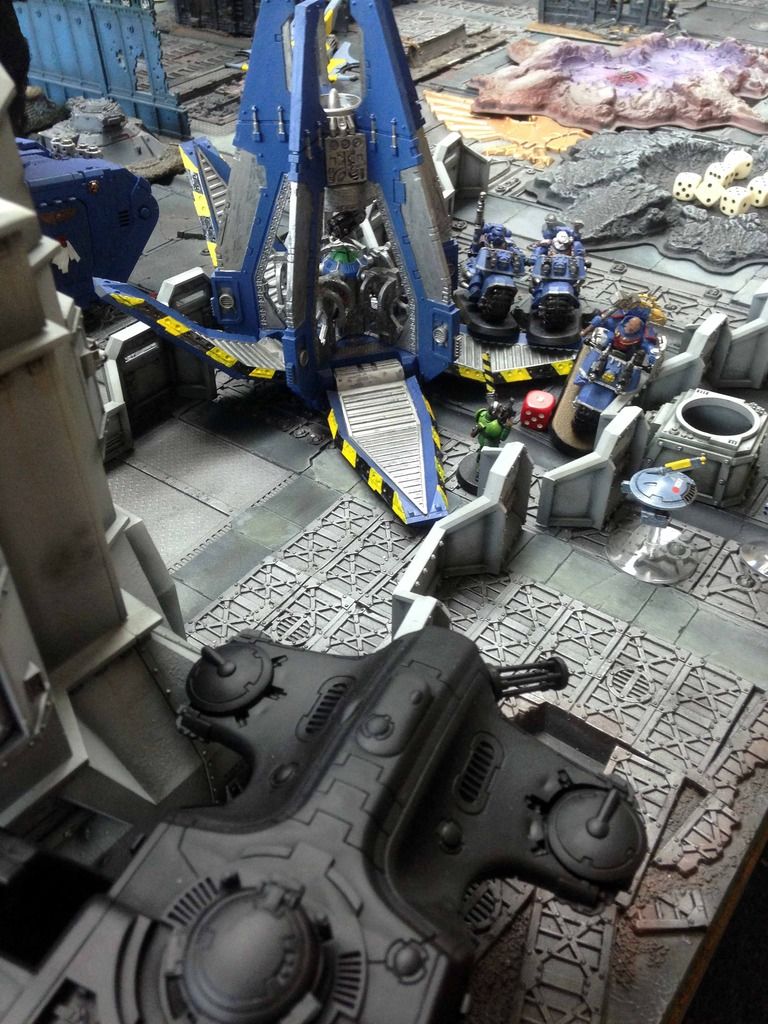
Two Drop Pods come in, and no surprise that the Ironclad is in the first wave.
It drops on target in front of the ADL and firewarriors, heavy flamer all warmed up.
Second Pod containing the 9 man TAC squad and Librarian comes in but scatters off target.
Marines spill out only to fins themselves facing the missilesides. This could hurt....
Rhino moves at combat speed into the centre, cautiously keeping its rear armour out of view of the stealth suits
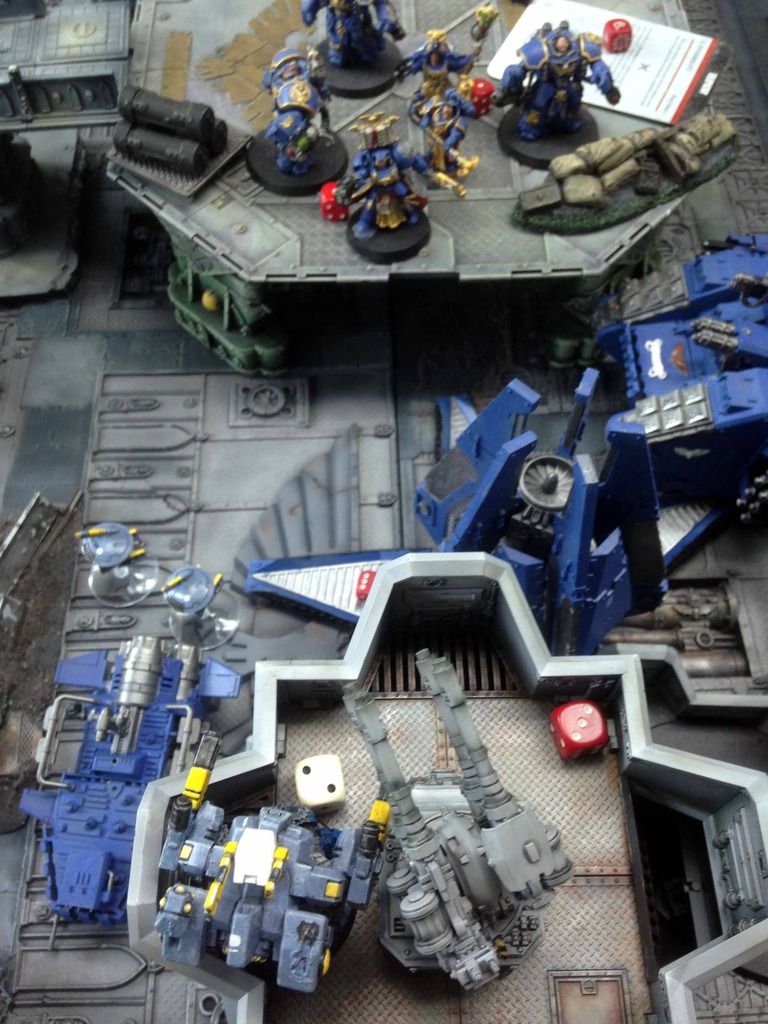
Before my opponent can begin his shooting phase, I intercept using the Missilesides. 16 shots later, I only manage to kill three marines. Poop.
Librarian rolls low on the warp charge and only manages to get Enfeeble off on the broadsides. The TAC Squad then return fire, but only manage to kill a single missile drone. This is, however, enough to cause the Broadsides to run for their lives.
Ironclad hits the Fire Warriors behind the ADL - 2+ to kill outright, he fries 4. Thanks to the fireblade though, they would hold.
Snap shooting from the Rhino and occupants fails to hit the stealth team, and it is turn over for the Ultramarines.
Turn overview
TURN 1 – Tau
Spoiler:
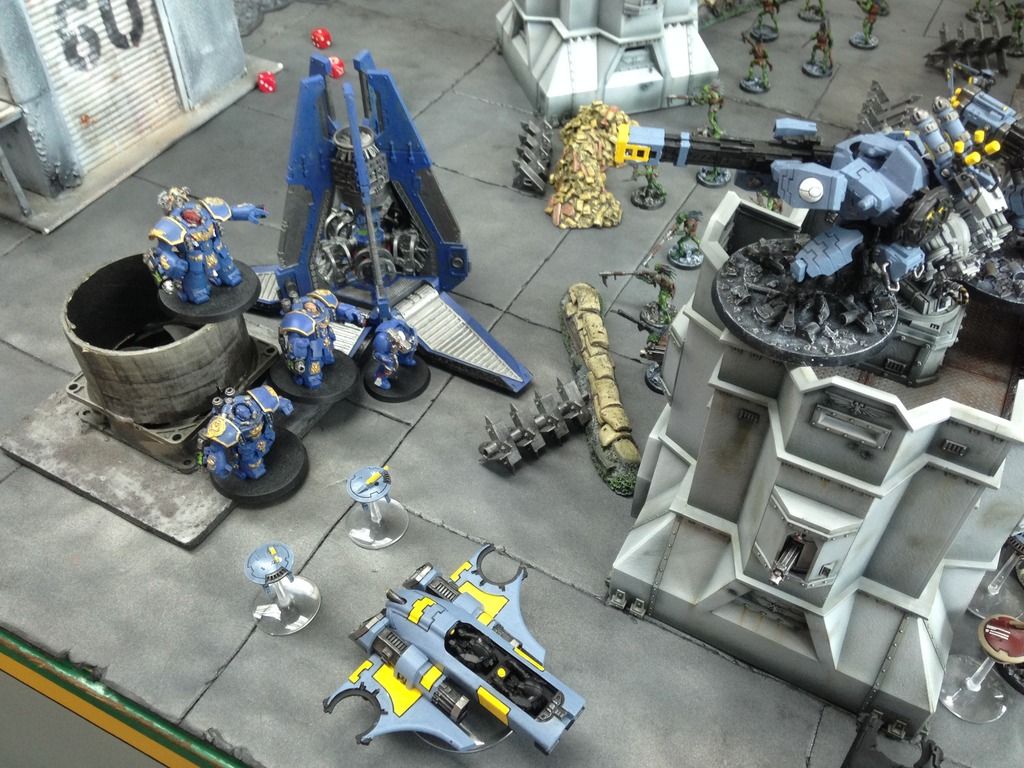
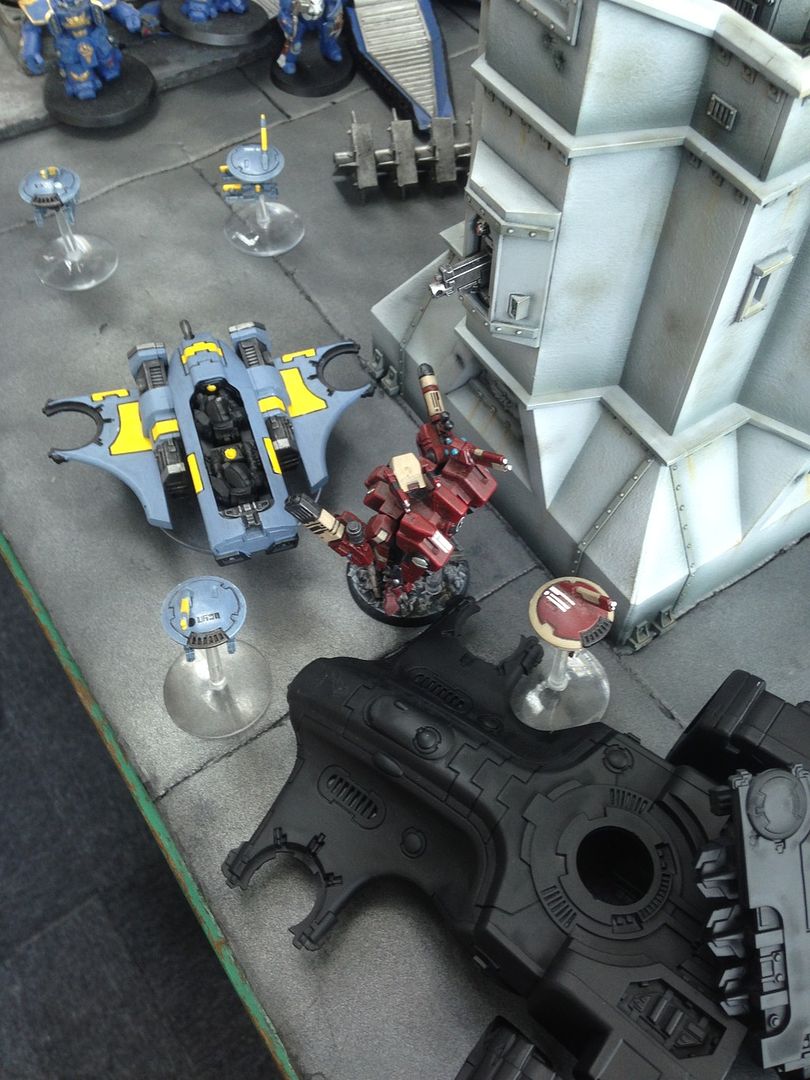
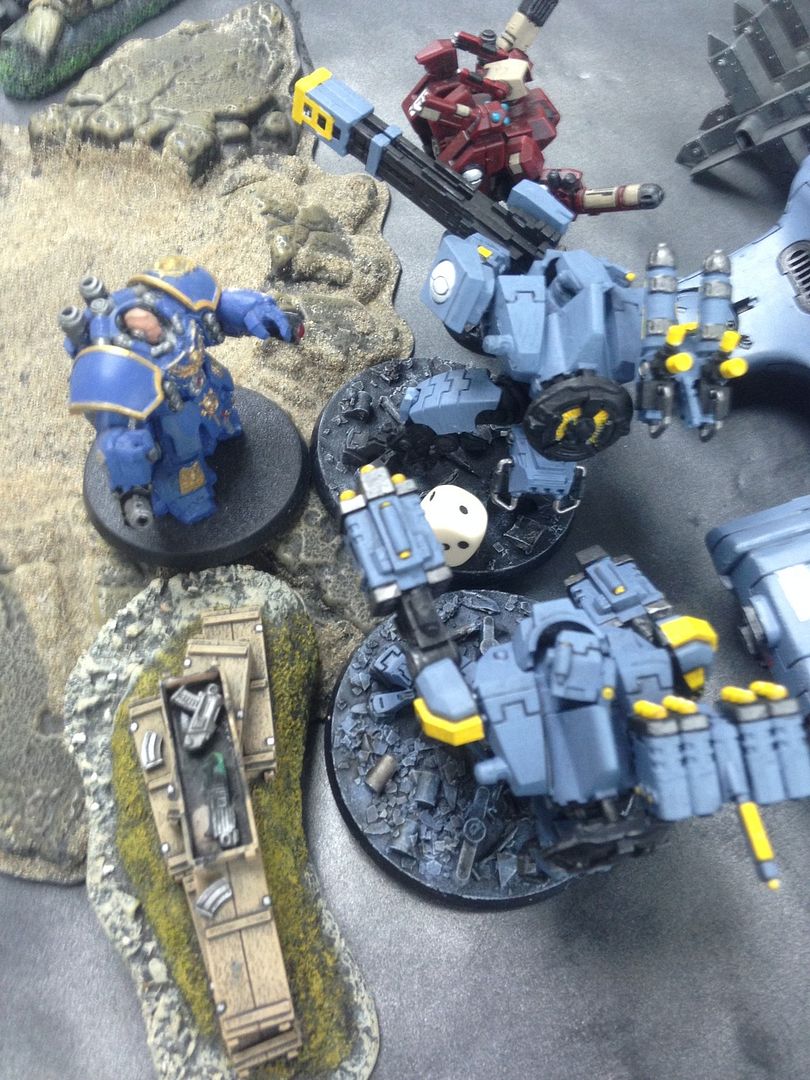
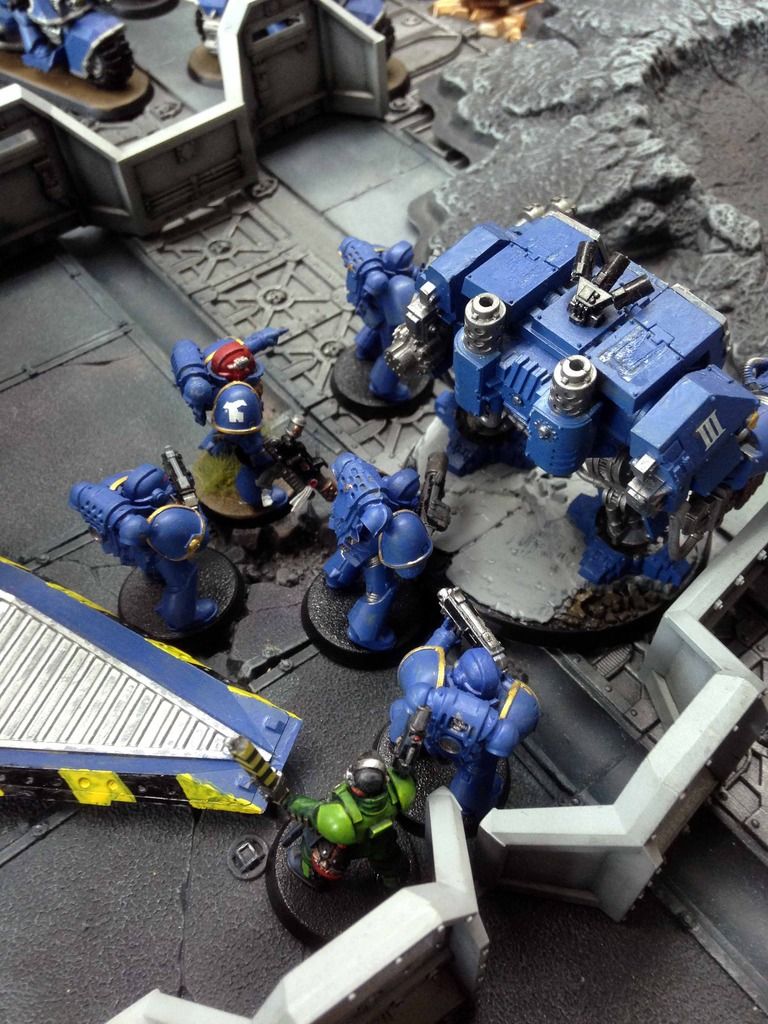
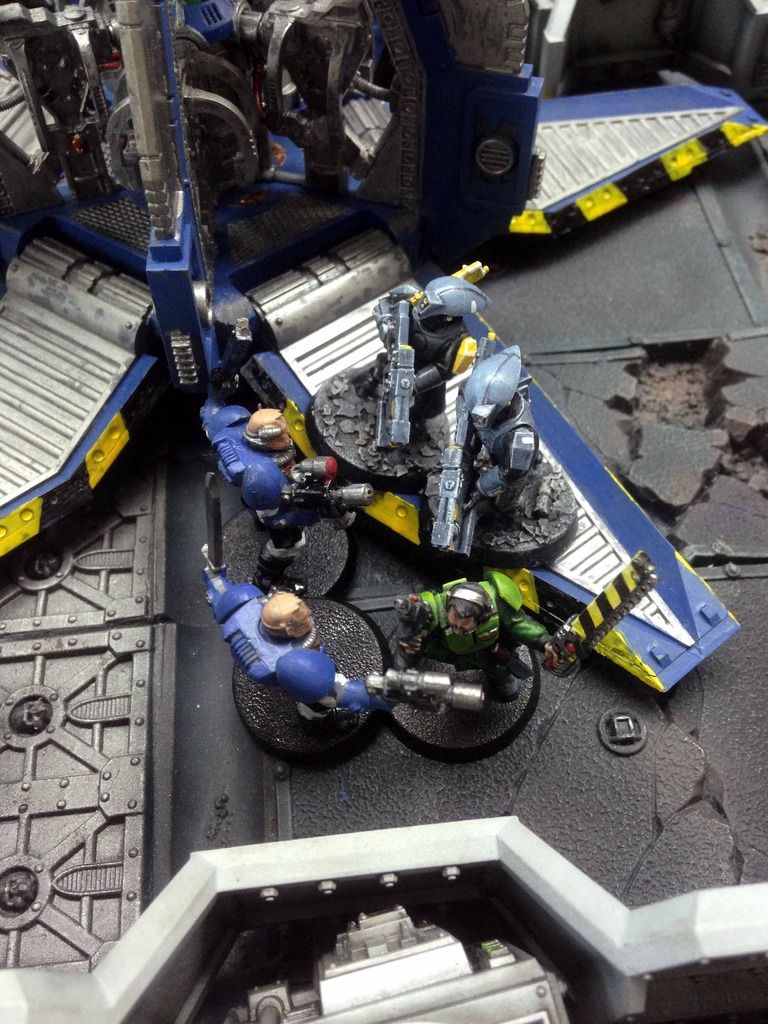
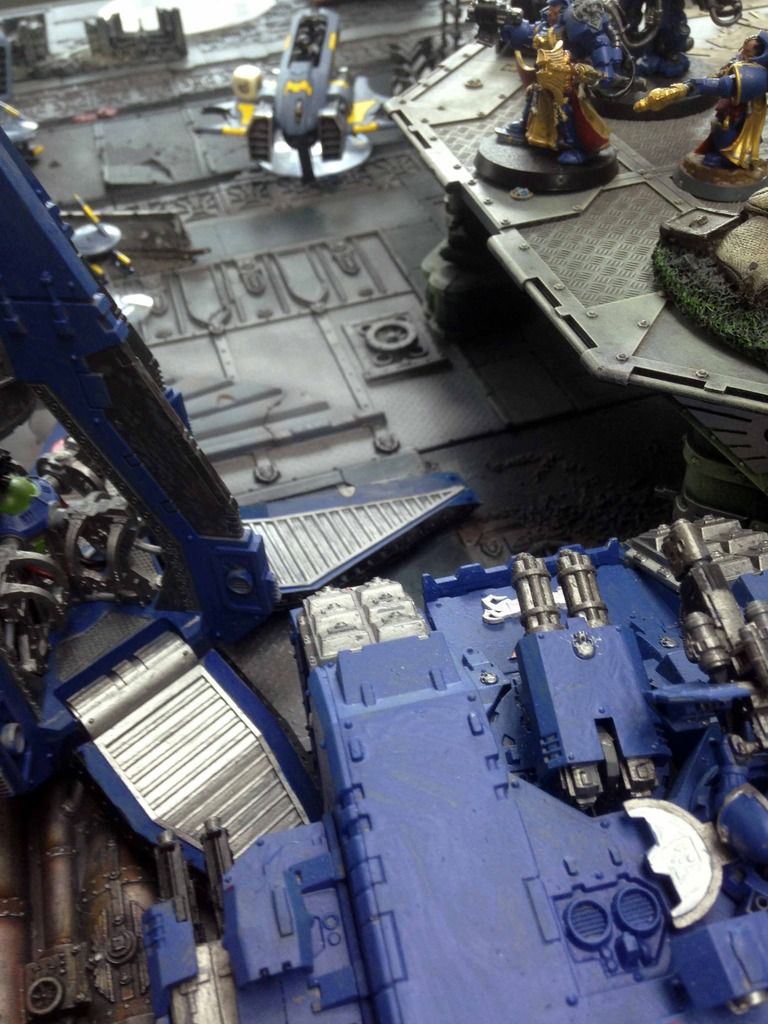
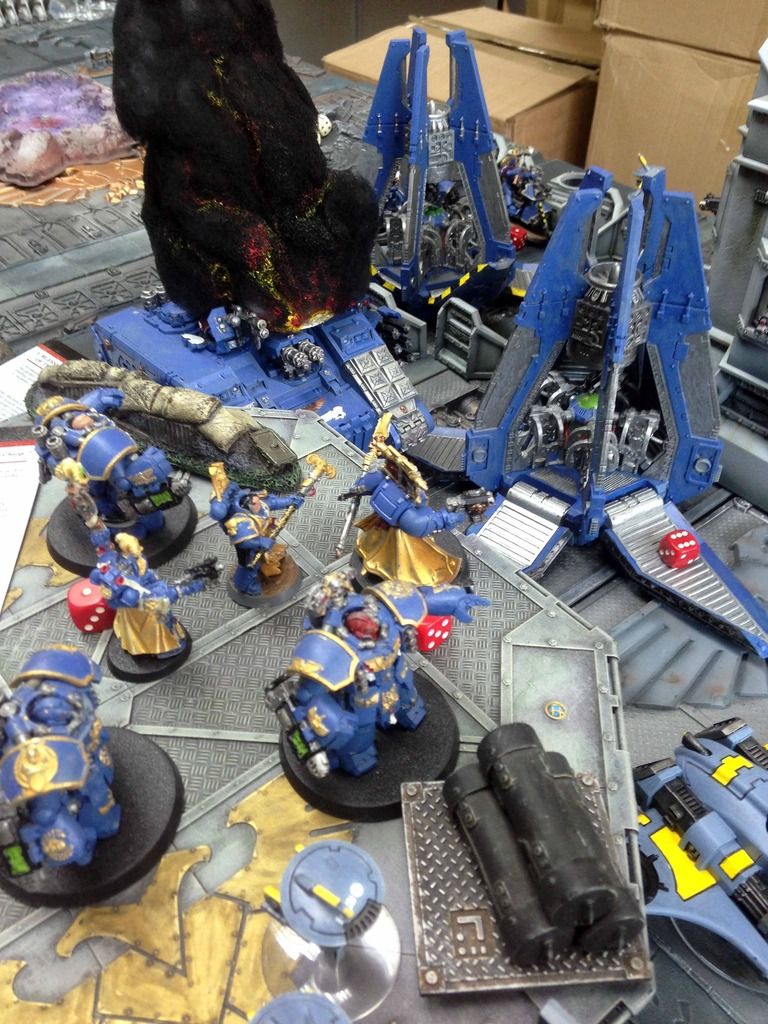
Target priority for the Tau has to be the Ironclad - he hasn't even got going yet and he is already up 4 fire warriors. Crisis team and Commander move up to get their plasma rifles in range, and give the marker drones a better field of fire.
The 6 man fire warrior team moves out of cover for an angle on the ironclads rear. The stealth team in the ruins stay still, eyeing up the same target.
Broadsides regroup, but can only snap shoot this turn. Even with TL everything, they manage no hits.
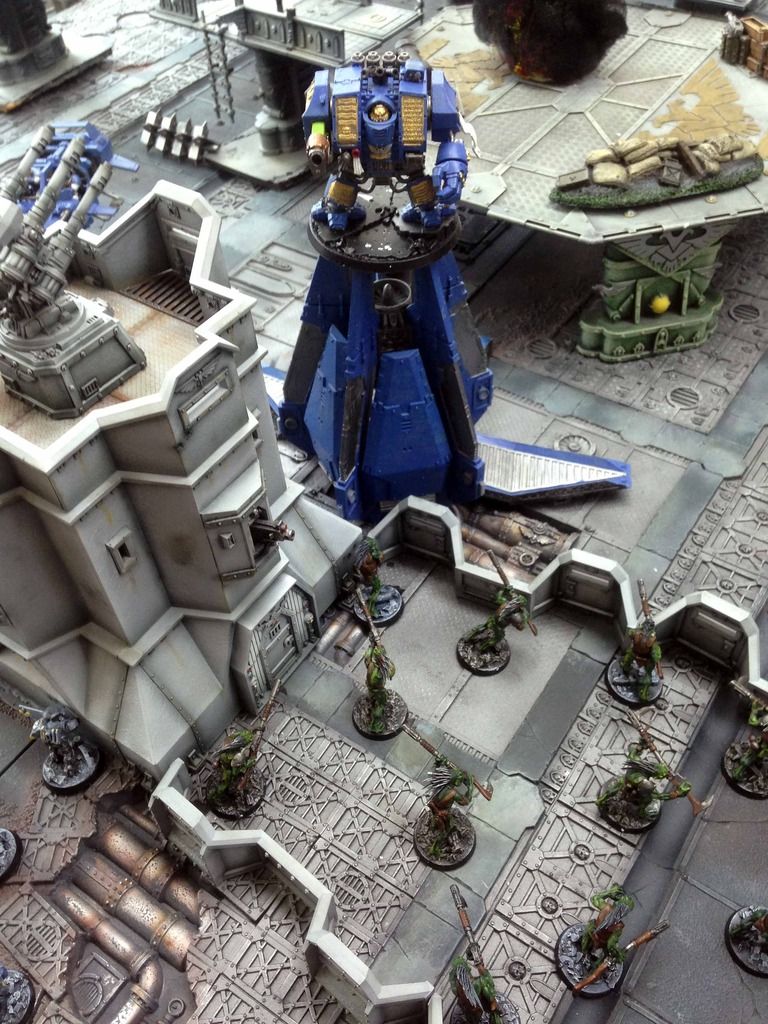
Markerlights target the Ironclad, and I get four tokens. The Stealth team use two to remove the cover save and fire their burst cannons. They will glance on 5's, and twelve shots later I get two 5's and a 6, wrecking the ironclad and removing the biggest threat to the Tau. This is huge. It also gives the Tau First Blood and a VP for killing a unit.
Firewarriors and Fireblade volley fire at the Librarian's unit, unleashing 24 S5 shots. SM player rolls well, but still losses four marines, including the sergeant.
With no target left, the 6 man FW team run back into cover.
The Commander & his crisis team fire at the DP with the deathwind missile launcher, but only manage one 6 to glance it, ending the Tau turn.
VP – Tau 2:0 Ultramarines
TURN 2 – Ultramarines
Spoiler:
Third and final pod containing the sternguard comes in for the ultramarines. It deploys aggressively for maximum effect behind the Tau lines, targeting the commander and his unit.
Unfortunately, if scatters wildly off 11" and almost off the side of the board, eventually settling under the noses of the regrouped broadsides (again).
Rhino moves 6" and disembarks the TAC squad
The Librarian and the remnants of his squad change focus and move towards the Stealth team.
End of movement phase, and the Broadsides intercept the Sternguard. Only one dies to the HYMP fire, while the SMS scores 4 wounds. The SM player rolls his 3+ saves...
...and they are gone, removing another huge threat to the Tau and handing them another VP
Psychic turn, and the Libby cast enfeeble on the Stealth suits and Warp speed on himself. The coming assault phase will hurt for the little blue dudes...
Shooting, and the DP deathwind missile launcher takes out two more FW, but they would hold once again. The 6 man TAC and rhino kill 5 out of 6 Firewarriors, but the last man standing would hang tough.
The Librarian and his unit charge, survive over watch, and wipe out the stealth team easily, exacting revenge for the ironclad and getting their first VP of the game.
TURN 2 – Tau
Spoiler:
Tau are now in a pretty commanding position, and happy to just sit back and try to contain the Ultramarines from range.
A few units shuffle around but not much. Marker Drones light up the Libby's unit, DP deathwind missile launcher is wrecked by plasma rifle fire from the commander and crisis team.
The Firewarriors pick off one of the Librarians unit
The lone firewarrior doesn't contribute much, while the broadsides cannot fire as they intercepted last turn
VP – Tau 4:1 Ultramarines
Turn 3 – Ultramarines
Spoiler:
The librarian surveys the battlefield and realizes he is going to be the sole focus of Tau fire next turn
The rhino moves up and offers the Libby some badly needed protection (embarked inside)
Rhino gunner takes out the last remaining FW for a VP
While the TAC squad takes aim at the broadsides. Plasma fire forces them to go to ground, but one still suffers a wound
TURN 3 – Tau
Spoiler:
Commander and crisis move up for better angles on the remaining space marines. Marker drones light up the rhino, allowing the broadsides to ignore cover and boost their snap firing to BS 2. They take aim...
...and wreck the rhino for another VP, with the Librarian and marine disembarking right back into danger
The commander kills the last TAC squad member in the Libby's unit, while the crisis team also wreck the closest DP for another 2VPs, and put a glance on the remaining DP.
VP – Tau 7:2 Ultramarines
Turn 4 – Ultramarines
Spoiler:
Ultramarines decide to go out with a bang and move up on the broadsides. Librarian moves aggressively towards the firewarriors and gets ready to charge.
Shooting from the TAC squad kills a broadside and the last missile pod, but the remaining suit would hold. The Libby casts Warp Speed on himself and charges the Fire warriors, surviving a hail of over watch to make it into CC.
Despite warpspeed, combat is a bust for the Libby. He kills only one FW, while the fireblade deals a wound back to him. Combat would continue.
TURN 4 – Tau
Spoiler:
Broadside fires at the TAC squad, killing 2. The remainder flee into the ruins.
Combat resumes, but goes badly for the Tau. They loose, break and are swept for 2 VPs (FW team and the fireblade). Libby then consolidates towards the broadside.
VP – Tau 7:4 Ultramarines
Turn 5 – Ultramarines
Spoiler:
TAC squad continues to hide in the ruins out of Tau LOS, while their Libby gears up for 3/3 in assault.
Libby casts Warp speed on himself, and annihilates the last broadside in combat for another VP. He then consolidates behind the DP to try and get out of LOS.
TURN 5 – Tau
Spoiler:
Somehow the Tau now find themselves down to one unit! How is this possible? The Libby must die. Marker drones light up the Libby, giving the commanders unit ignores cover and BS7. Plasma rifles take aim...
And drop the Libby, giving Tau 2 VPs (kill point & slay the warlord). The unit then assault jumps up towards the remaining TAC hiding in the ruins.
VP – Tau 9:5 Ultramarines
Turn 6 – Ultramarines
Spoiler:
Cowardly TAC unit finally find their courage and emerge from the ruins with guns blazing. The unthinkable happens - they kill and crisis suit and two drones, causing the unit to flee!
Alas they only run about 4", but if they don't regroup next turn they could potentially flee straight off the table.
Heroes of the Imperium! Well, kind of...
TURN 6 – Tau
Spoiler:
So the roll that could lose the game for the Tau, and after such dominance..... they need a ten or less to regroup, and thankfully roll an 8. Regrouping, but with only a 3" move and snap firing they do not manage to take out the last DP for an extra VP. We roll to see of the game continues, but the dice say the battle is over
RESULT
Spoiler:
VP POINTS
Tau: 9 pts First Blood 1pt Slay the Warlord 1pt Unit Kills 7pts
Ultramarines: 6 pts Line breaker 1pt Unit Kills 5pts
TAU VICTORY
BREAKDOWN
Decisive moment – the downing of the Ironclad. Not only did this wrack up 2 VPs in the Tau first turn, it also removed the biggest threat to the Tau. Had it made it into turn two, it would have probably spend a lot of time in CC and avoided fire. Besides, the Tau were woefully underequipped to deal with AV13.
Key units
Tau: Lots of contenders, Stealth team made a crucial kill and broadsides made a massive intercept on the sternguard, but the most productive unit was the commanders team. The markerlights played a key role in boosting hitting power, while the crisis suits plasma rifles generate 4 of the 9 VPs.
Ultramarines: Librarian. Went on a rampage that chewed up four units in assault and scored 4 VPs all by his lonesome. Great return on 95 pts.
STATS
Tau: Models remaining 6/35 Kill to Death Ratio 0.75 Efficiency 44%
Ultramarines: Models remaining 4/26 Kill to Death Ratio 1.31 Efficiency 56%
POST GAME
Spoiler:
The Tau open the campaign with a hard fought win, but almost snatching defeat from the jaws of victory in the final turn. Ultramarines pushed them very close and recovered well from a brutal first two turns, the Librarian rallying his forces superbly.
Going into the second mission, the Tau player will be allowed to open up 3 FOC slots of his choice, while the Ultramarines will be able to open up 2. The Tau also generated 175pts extra for the final mission, whilst the Ultramarines generated 125pts.
‘It was planned to launch the main assault from orbit rather than from the beachhead landing zone against the Xenos’ survey site, in an attempt to utilize the element of surprise. I was wrong to do so - the Tau forces seem to be prepared for us, and what should have been a glorious battle in the name of the emperor soon turned into a meat grinder……’ Brother Librarian Herbort, in the Apothecary cell of the Accipiter
‘I ordered my brothers to be prepared for close combat against the Tau forces, but when we came out of the Drop Pod, the sky…..it was… raining…missiles.’ Brother Sergeant Lemal, in the Apothecary cell of the Accipiter
‘fzzzt---------------Incoming! Get dow---------------‘ Final transmission received from Brother Adamant, Sergeant of Sternguard Veteran Squad
‘My squad and I had been dispatched by Thunderhawk gunship to slip through the Tau sentry forces in orbit over Titan and land on the moon of Titan long before this raid operation was due to begin. Three hours before the operation, I was ordered by Brother Captain Fibian to proceed to the drop zone to relieve the forward scouts under the command of Brother Hansus and assist Librarian Herbort and his orbital inseetion force coming directly from the Accipiter.’ ‘During the initial engagement my squad eliminated a small squad of Tau warriors, but I was informed over the vox that the foul XV-88s had slain all brothers of the Veteran Squad Adamant upon arrival in their drop, and also percived our Rhino destroyed by those Battlesuits. It was then that I determined the battle was lost and incorrectly ordered my squad to disengage. Although it looked to me that was the only way to preserve our strength before the arrival of reinforcement, abandoning my brothers on the battle is a great sin and a grave violation of the Holy Codex.’ ‘Apon this realization, I saw a shadow emerged from the smoked of the burning Rhino that bellowed a mighty cry and charged into the heart of the Xeno defense gun line. I realized that was Brother Librarian Herbort, and that he must be under some effect of his sorcery as even with the Astartes’ heightened eyesight, he is so fast that I cannot see his figure clearly. All I can see is a fast moving blur in the shadows of my vision and the lightning striking down the Xeno warriors and battlesuitsn alike. It seems nothing can stand in his way……’ ‘……After the battle, we recovered the Herbort on the field. Thank the Emperor, he is still alive…..’ Brother Sergeant Volus, confessing to the Company Chaplain
‘Brother Adamant will be remembered, and his memory will always remind us never underestimate our foes. It was initially planned to be a quick raid action to destroy a small fraction of the Tau force on Tethys, and such high casualties on both sides were utterly unexpected. It seems that, despite the Xenos noticing that our forward recon forces had already established a beachhead on the surface of Tethys, they had somehow been made aware of the arrival of our fleet and were fully expecting to fight our Drop Pod operations. The Intel collected by Brother Hansus indicated that the Tau forces are smaller than we estimated, and may now retreat from Tethys in a short time. It will be much easier to destroy them during their retreat than to flush them out from their forts. This time, I will lead the force personally….’ Brother Captain Fibian, Ultramarine Master of the Arsenal
Despite my repeated warnings to the Contingent Command on Titan Prime, what I foretold has come to pass.
At 0:600 hrs a small detachment of Gue’ron’sha (‘Ultramarines’ designation, REF: IM/AA/CSM/2889.01) attempted to ambush our position, with the presumed intention of capturing/destroying the engineering teams under my command.
The engagement was brief but fierce, resulting in many casualties on either side. As per standard procedure, sensor drones deployed to the surrounding forest gave limited early warning of incoming forces and allowed us to prepare our defensive position. What came as a surprise however were the orbital insertion elements – three Gue’ron’sha ‘drop pods’ being allowed to enter the theatre with no warning from our fleet in orbit around Titan Prime should be of grave concern to, and we would ask that Contingent Command review Fleet procedures to ascertain how this was able to happen.
The battle has ended in favour of our forces and the remnants of the enemy have pulled back to the forests to regroup and no doubt plan their next strike. Losses have been extensive, and my Second in Command 'Darkwave' El'Or'Es has been badly wounded.
It was pure folly to deploy the engineering team to this remote location with so little support, and only a miracle has ensured their survival. Our forces are too meager to pursue the enemy, and I have therefore given the order to withdraw to Supply Base Zulu for reinforcements. It is also my recommendation that we immediately begin reviewing the threat presented by an Imperial force, however limited, and what implications this may have for our presence in the Titan System.
As for our dead, they have been buried at the site of battle and a Mont’Ahsa memorial erected in their honour. These heroes of the Empire have paid the price of the greater good with their blood. Let us ensure their sacrifice was not in vain.
Automatically Appended Next Post: I think I spotted only one error. As I can remember, in Turn 1 Ultramrine, that Tau missile drone is shot down by smite from Librarian psychic phase, they break and run over 10 inch so present no target for that squad. So I hesitated for a long while and decide to make a run move towards the Stealth Suit, which is the only unit possible to charge in the next turn.
Nocturus wrote:Liked the report. A few comments though:
1. You can only intercept with one of the guns, either the sms or the hymp.
2. A unit cannot benefit from its own marker lights unless they are networked markerlights.
Otherwise I look forward to seeing more of the campaign!
Noc
Glad you enjoyed it! Thanks for your comments - in reply;
1. They didn't - Sorry, I wrote part of that report badly so it sounded like they did, but I have corrected it now though 2. Its my understanding that EWO gives intercept to all the model's weapons, and since they have multi-tracker allowing them to fire more than one they can both be used to intercept. This is also the most common way I have seen it interpreted here on Dakka.
Dozer Blades wrote:Great report and a very exciting game ! I'll be following this thread.
knightofkob wrote:Insane Battle report bru. Very well done, you could follow it like you where playing yourself. Well done!
DCannon4Life wrote:Good fun! I just started dusting off my CSM...and boy am I rusty! So, if the Tau are new to you, I completely understand how mistakes can be made. I look forward to future reports--really liked all the pics and the after action reports!
Las wrote:Awesome batrep. Cannot wait for more.
Glad you all enjoyed it - was fun to write but even more to play, second game is this weekend so hopefully next batrep will be up this coming week. For the after action reports, Tau is by me and Ultramarines is from Neophyte2012 so thanks to him for making the effort too
Neophyte2012 wrote:Really nice batrep as always. Great work Iapedus Automatically Appended Next Post: I think I spotted only one error. As I can remember, in Turn 1 Ultramrine, that Tau missile drone is shot down by smite from Librarian psychic phase, they break and run over 10 inch so present no target for that squad. So I hesitated for a long while and decide to make a run move towards the Stealth Suit, which is the only unit possible to charge in the next turn.
Ah yes you are right! Sorry that's what happens when you wait so long before writing up looking forward to the continuation this weekend!
Fantastic Bat Rep! I've been looking for something to base my own campaigns on and this is really what I've been looking for. Did you write the rules yourself or are the based on another system? That PDF file at the bottom fo the post is really slick and professional, too.
Powerfisting wrote:Fantastic Bat Rep! I've been looking for something to base my own campaigns on and this is really what I've been looking for. Did you write the rules yourself or are the based on another system? That PDF file at the bottom fo the post is really slick and professional, too.
Glad you liked it - wrote the rules for the missions myself, with Tau fluff from me and SM fluff from Neophyte2012. Some of the rules are inspired by bits of batreps I have seen here on Dakka, bu I mainly wanted to build a campaign that reward you as you went on with extra points/slots/special rules/etc so even if you lost the game there was still something to play for, and I think it works quite well. Looking forward to writing parts 2 and 3
toasteroven wrote:This is really, really impressive. Checking out the campaign book now.
(This book is pretty dang nice too)
Thanks! Mission 1.2 was played out over the weekend, so hopefully the next bat rep will be up this week
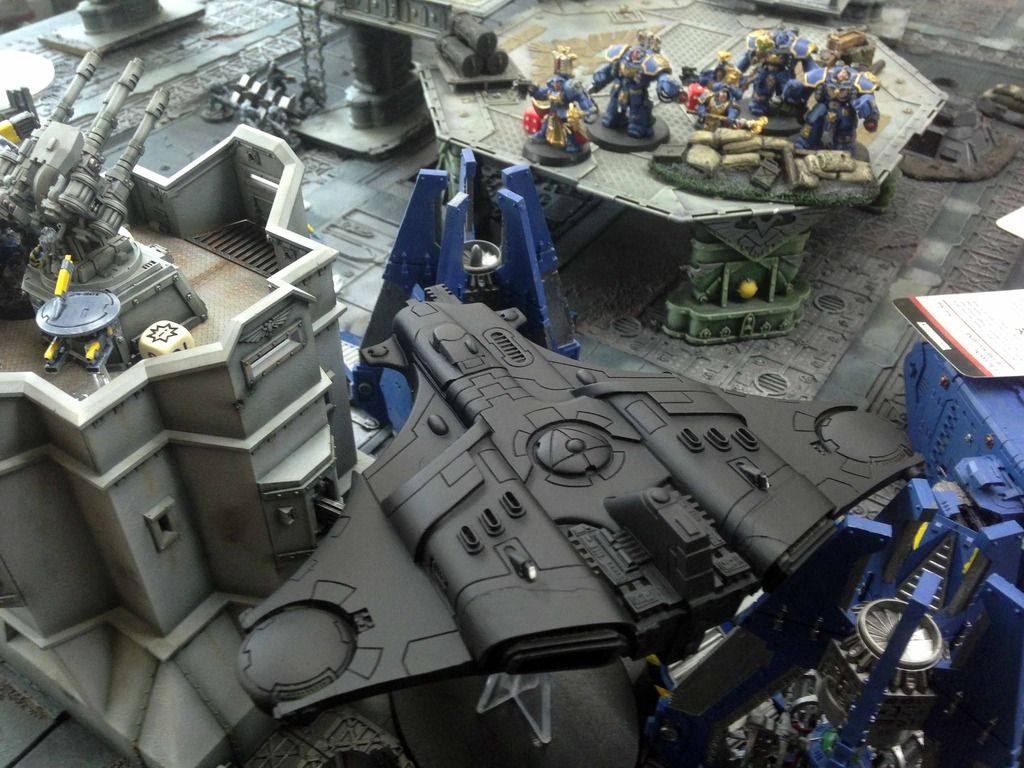
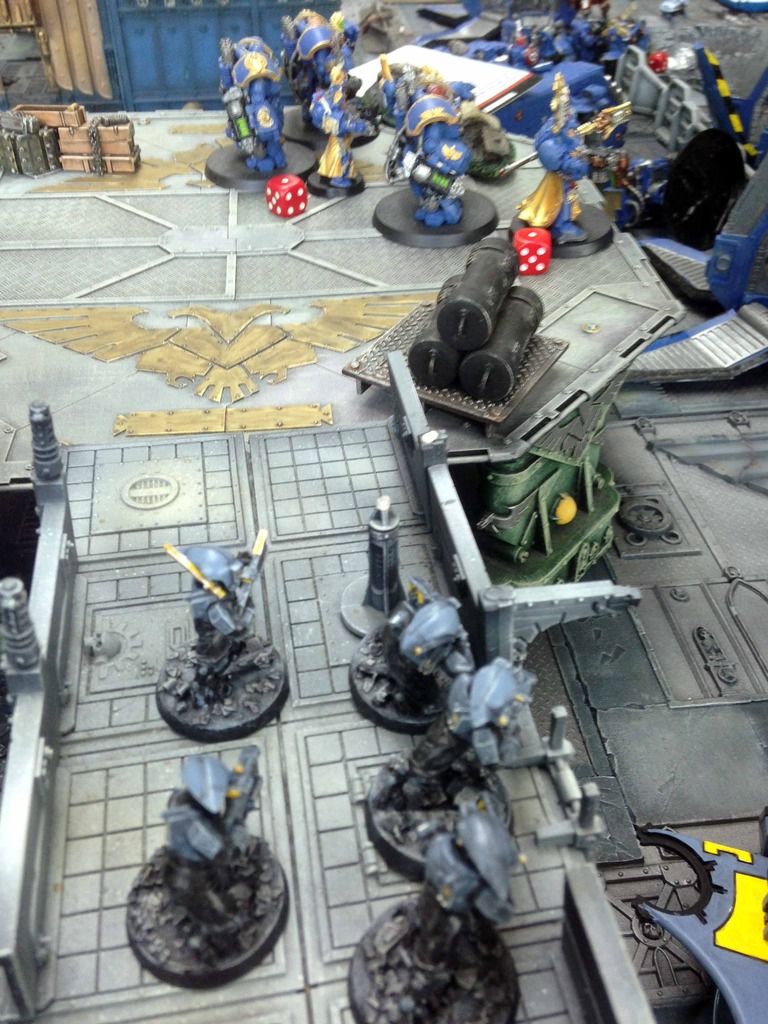
PART 1: The Tethys Moon Campaign Escalating 850/1000/1000+ point missions with bonuses.
MISSION 1.2: Fall Back
OPPOSING FORCES
Utilising Bonus earned from last game, the Tau have decided to open up two fast attack and one heavy FOC slot. The Ultramarines open up no FOC slots, saving it for the last mission. The Tau forces are 'in the ascendancy' having won the first mission, and therefore will choose whether to go first or second.
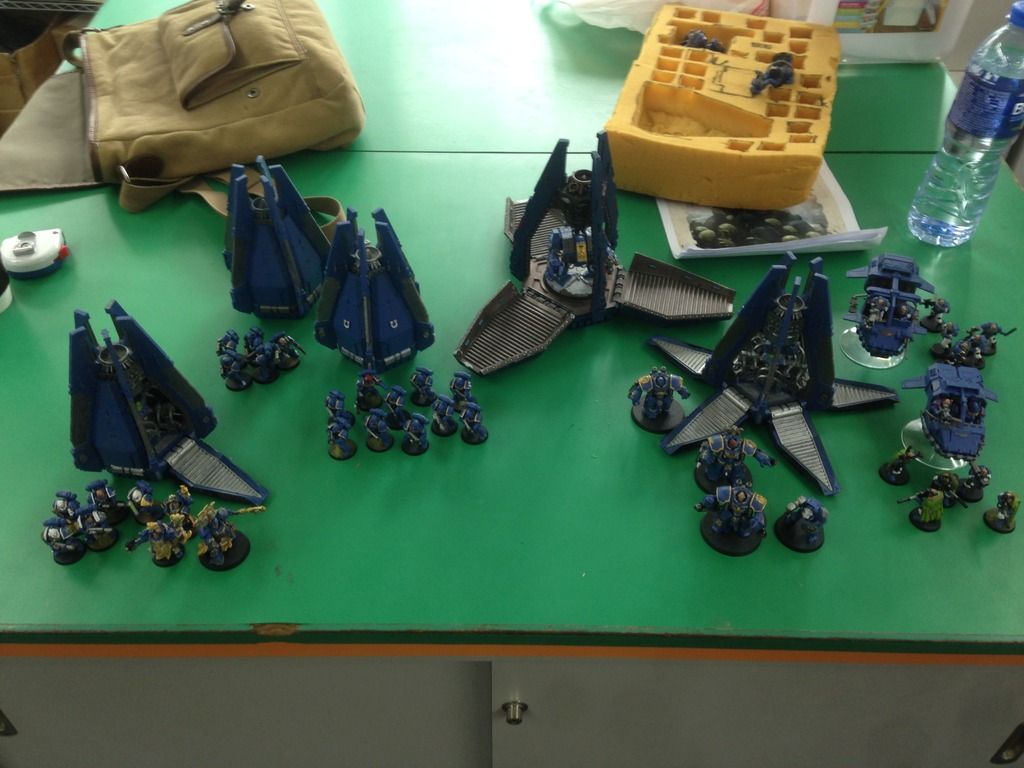
Tau Forces: Fire Warriors from the Setpworld of Fi’Rios 1000pts
Heavy
Vindicator, Tank Commander Brother Anrik, Dozer blade 130pts
Total Models 25/Infantry 15/Characters 1 /Vehicles 10/Psykers 0/ Wounds 35
SETUP
Spoiler:
Mission: Mission 1.2 Fighting Withdrawal (Destroy/Defend the Supply Depots)
Deployment: Dawn of War
Initiative: Tau are 'in the ascendancy' and decide to go first
Special Rules: Reserves, Night fighting, Mysterious Objectives
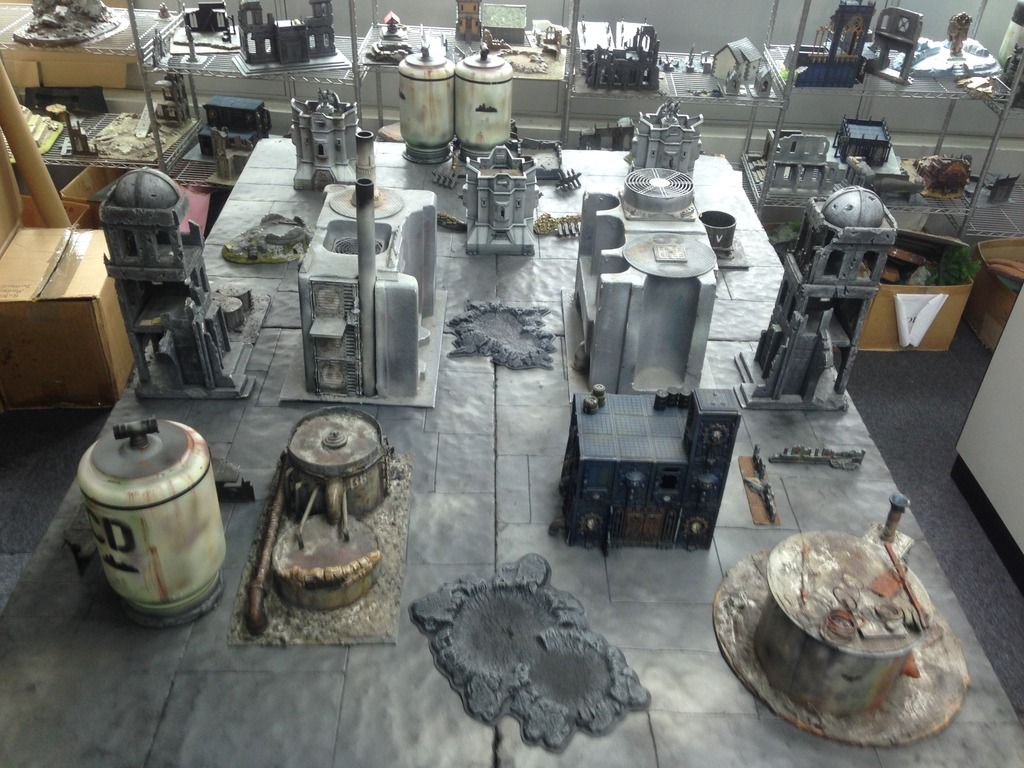
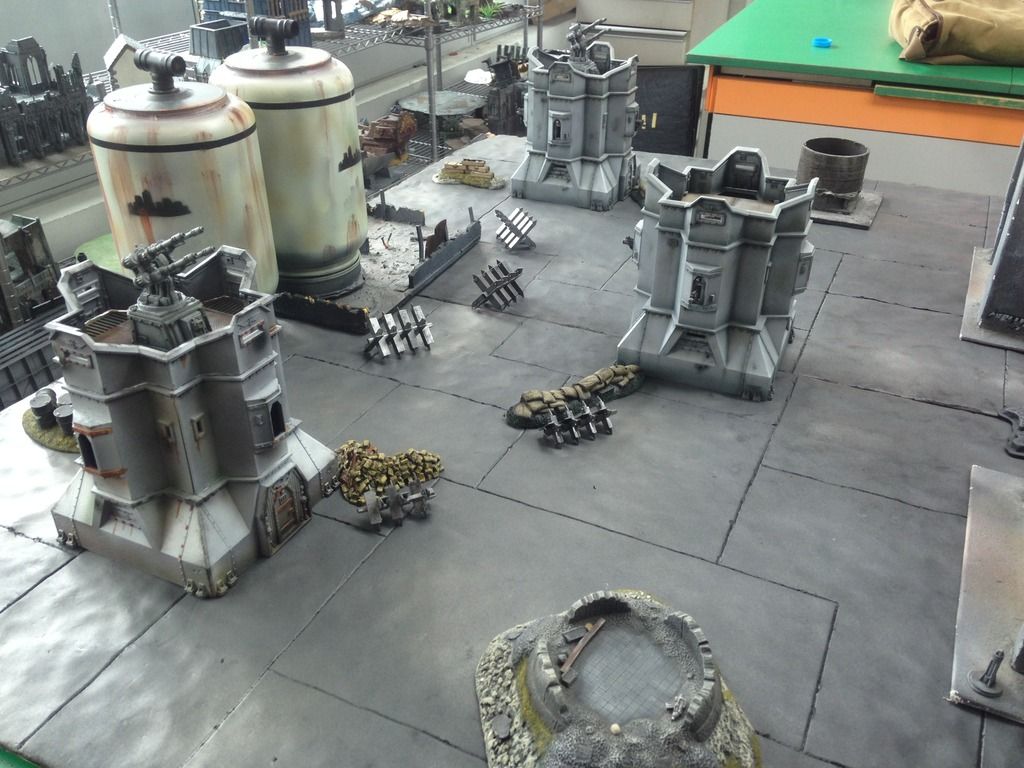
Terrain: The second encounter between Imperium and Tau is still set deep in the remote forests of Tethys, first moon of Titan Prime. Thick vegetation, rocky outcrops and the clustered remains of a primitive society litter the battlefield.
Warlord Traits:Tau roll on codex Traits and get 'A Ghost Who Walks Among us' (Warlord & Unit get 3D6 Jet Pack thrust moves), while the Captain rolls 'Rites of War' (Morale checks within 12" of warlord can use his LD).
Psychic: No Librarian in the SM ranks, and the Tau are unaware of the warp. Poor innocent little blue dudes.
PRE GAME ANALYSIS
Spoiler:
Reasons why Tau will win:
1: Volume of Fire. Tau have multiple units who can pump out obscene amounts of S5+ fire, which will whittle the Space Marines down even with their 3+ saves. They also have better range on average.
2: Markerlights. With 12 on offer per turn (4 with commanders, 8 with pathfinders) the Tau shooting should be seriously buffed. With drone controller on the Mark'O's, it should be a guaranteed 5/6 MLs each turn.
3: Infiltrators. 2 stealth units plus the kroot mean Tau can infiltrate onto the supply depots and just camp, inviting the enemy onto their supporting fire overwatch. Ouch.
Reasons why the Ultramarines will win:
1: Bike Squad. Beyond volume of fire, the Tau have no answer to this unit. If it makes combat T1, expect it to sweep a unit each turn as it romps around the field unchallenged.
2: Vindicator. Dawn of war deployment has helped its range issues, and its S10 AP1 means instant un-savable death to pretty much everything the tau possess. Also AV13 on front.
3: Once again, the dreaded Ironclad, AKA the monstersmurf. Beyond a sole Fusion wielding crisis suit and trying to glance it to death with the S7 MPs & HYMPs, the Tau have no answer to AV13. If he makes it into combat - which he should arriving in a DP - it will be a long afternoon for the blue dudes. HF is also insta-death to all the Tau infantry.
DEPLOYMENT
Spoiler:
Ultramarines win the roll for sides and chooses the side of the board with slightly more terrain (the right). Tau places the four objectives on their side of the board but outside of his deployment zone.
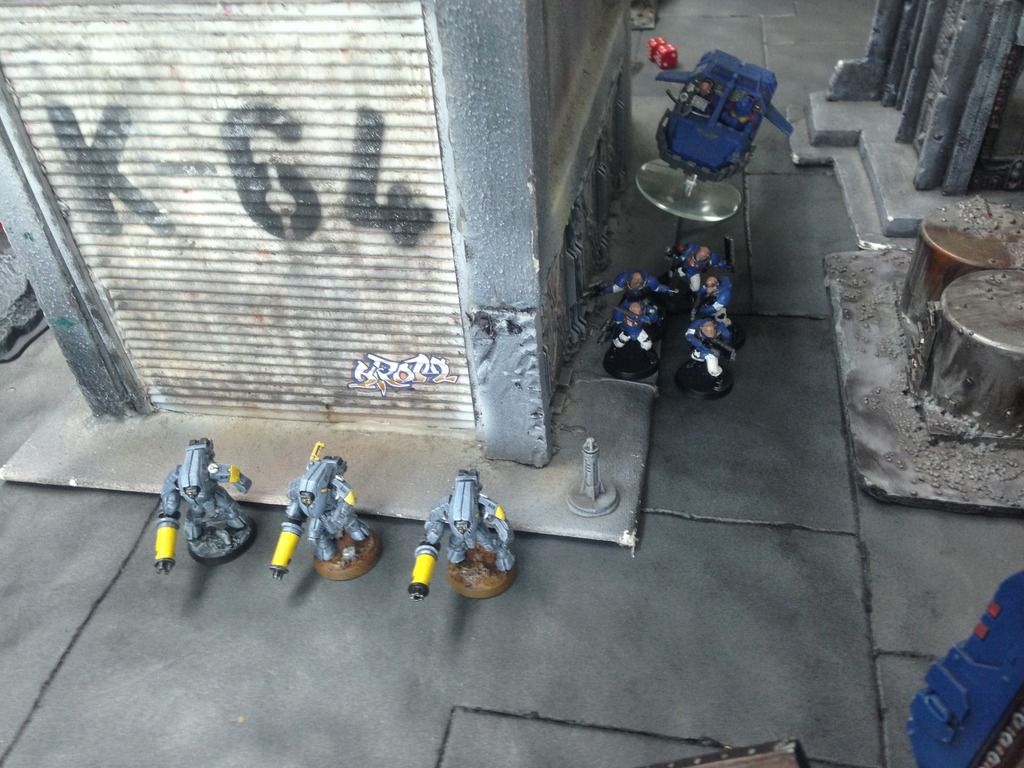
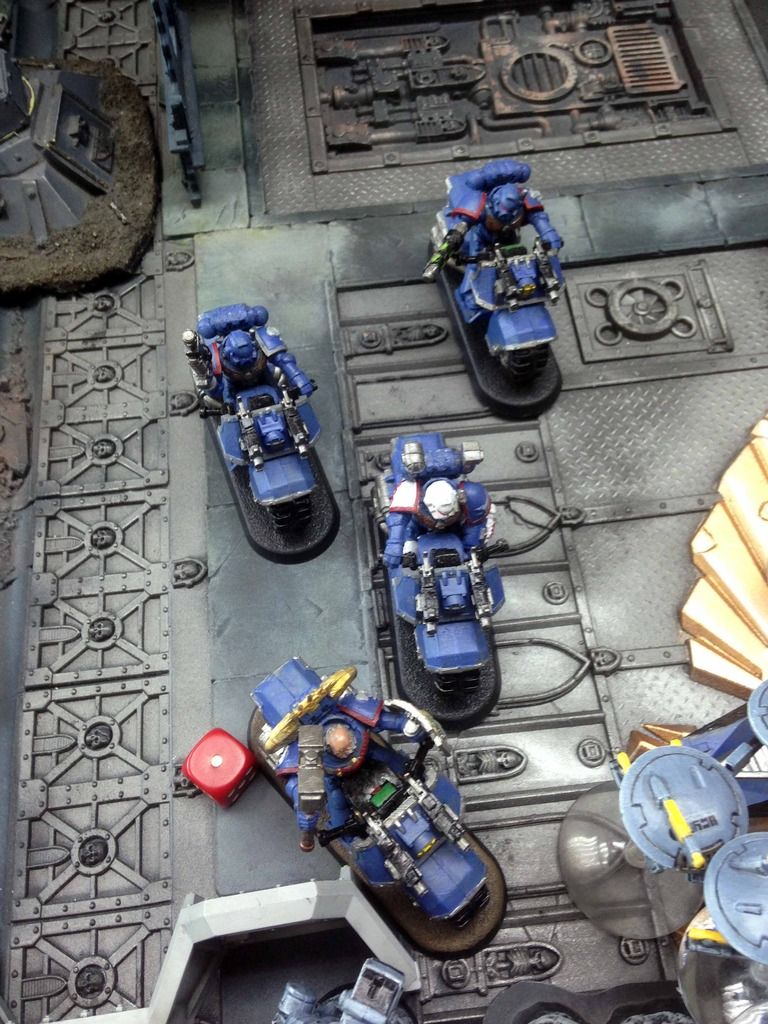
Tau forces deploy their troops across the board, with the intention of countering any SM flank stacking with their infiltrating units. Broadside, pathfinder team and Commander 'Banetide' deploy on the right flank, behind objective 1
Fire warriors and crisis body guard teams deploy in the centre, behind the LOS blocking terrain and near objectives 2 & 3
While Commander 'Calmstar', the other broadside and the remaining pathfinder team take the left flank
View across the Tau line (left flank to right in distance)
Ultramarines decide to stack the right flank with the Rhino & embarked 5 man TAC with PG and serg. on the very right (behind terrain), bike squad and vindicator slightly inside of them
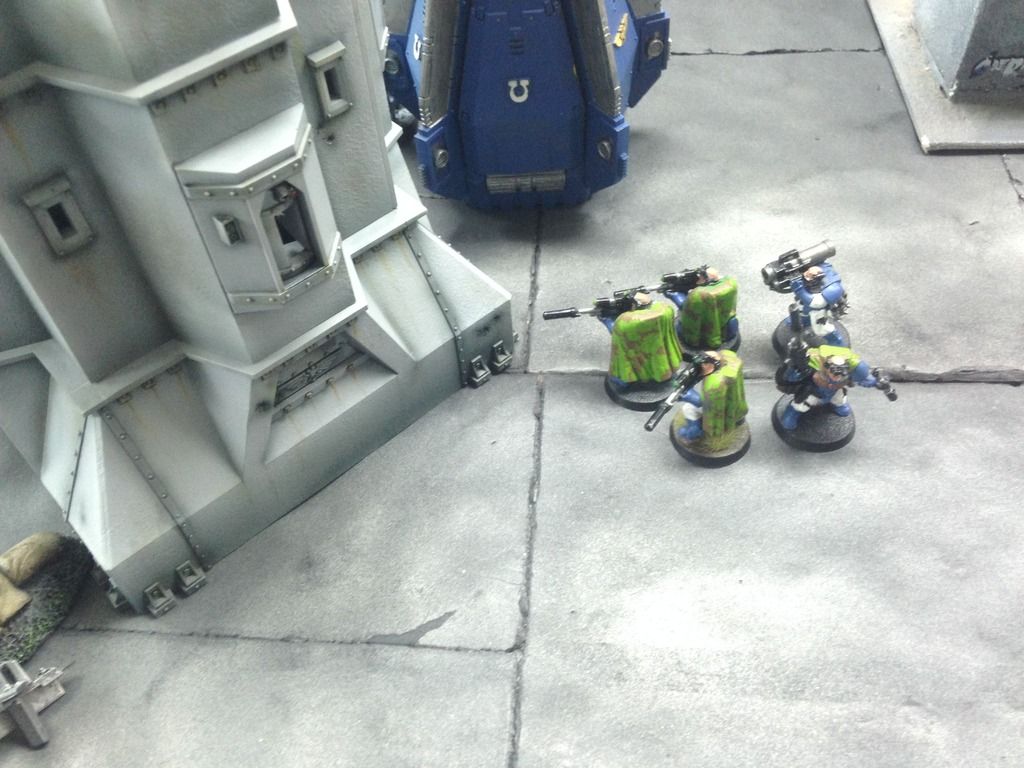
TAC squad with ML deploys into central ruin for clear lines of fire (sorry no photo).
Tau places first infiltrators, going against the initial plan of infiltrating onto objectives, instead deploying to try and contain the bike squad. First Stealth team deploys behind the right most ruin.
Ultramarines deploys their scouts, behind the central LOS blocking terrain.
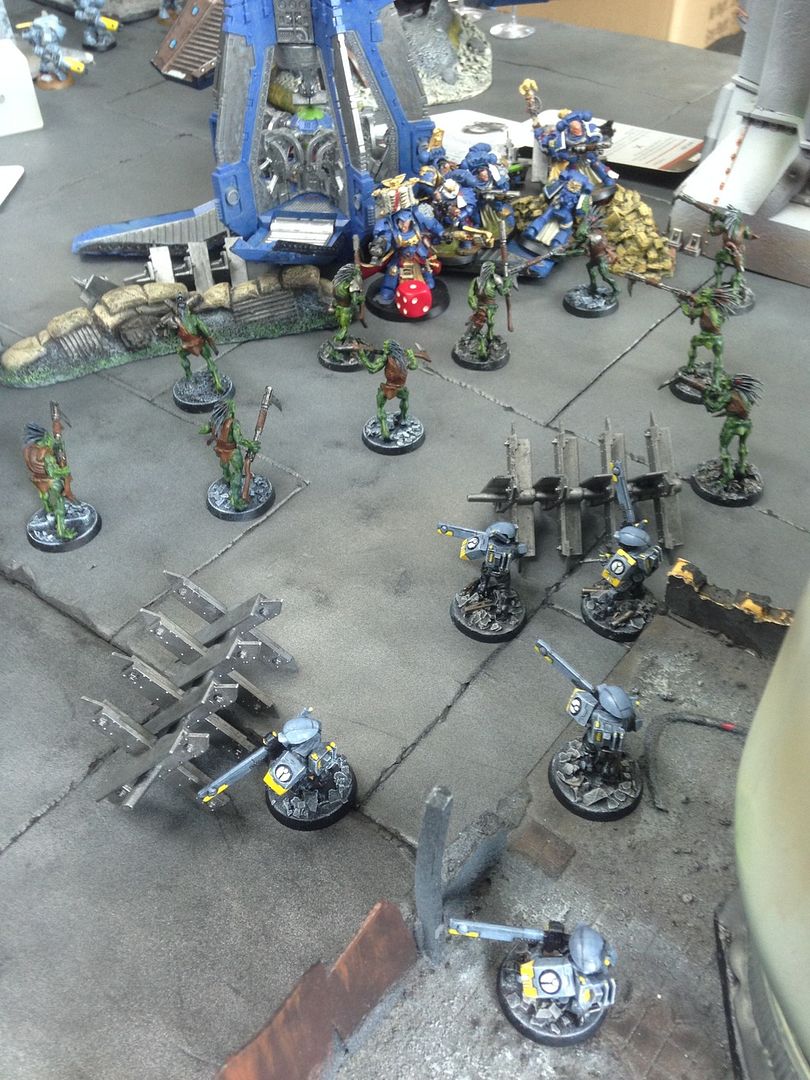
Tau then place their remaining units - the second Stealth team onto objective 2 and the Kroot in a long line in front of the bike squad. The intention here is to provide both a CC speed bump to the bike squad (and not a very good one at that) and also set an overwatch trap. Between the kroot and the supporting fire stealth suits there are about 44 overwatch shots that can be got off if they charge the kroot.
Scout movement, and the Tau move all kroot and stealth suits up to block the bike squads path
While forgetting to move the pathfinder teams. Ultramarine scouts shuffle a bit.
TURN 1 – Tau
Spoiler:
Kroot and stealth units move up another 6", boxing the bike unit and vindicator in
Lone fusion suit makes a move for objective 2, while the plasma suits go for objective 3, taking care to stay behind the LOS blocking terrain.
Commander Calmstar also moves up for a marker light option on the MLTAC squad
On the right flank, markerlights and commander Banetide light up the bike squad for four tokens between them. Then all hell breaks loose - the Kroot, stealth teams and broadside utilize the markerlights and pour almost 50 shots into the bike squad. After some serious tanking by the captains artificer armour though, and a couple of inspired FNP saves, the squad only losses one biker and a wound of the captain. Major blow for the Tau , who really needed to cripple this unit asap. Only hope now is that they fall for the overwatch trap.....
On the right flank, commander Calmstar and the broadside take on the MLTAC squad, killing three (but not the ML). They would hold.
Tau shooting over, and the suits jump around. Fusion and commander Banetide reposition, while stealth suit team moves away from the kroot (but still within supporting fire range)
Plasma suits jump forward, keen to get in the fight but keeping their distance from the scouts
While the commander jumps a massive 17" thanks to his warlord trait, getting up nice and close the to the TAC squad.
TURN 1 – Ultramarines
Spoiler:
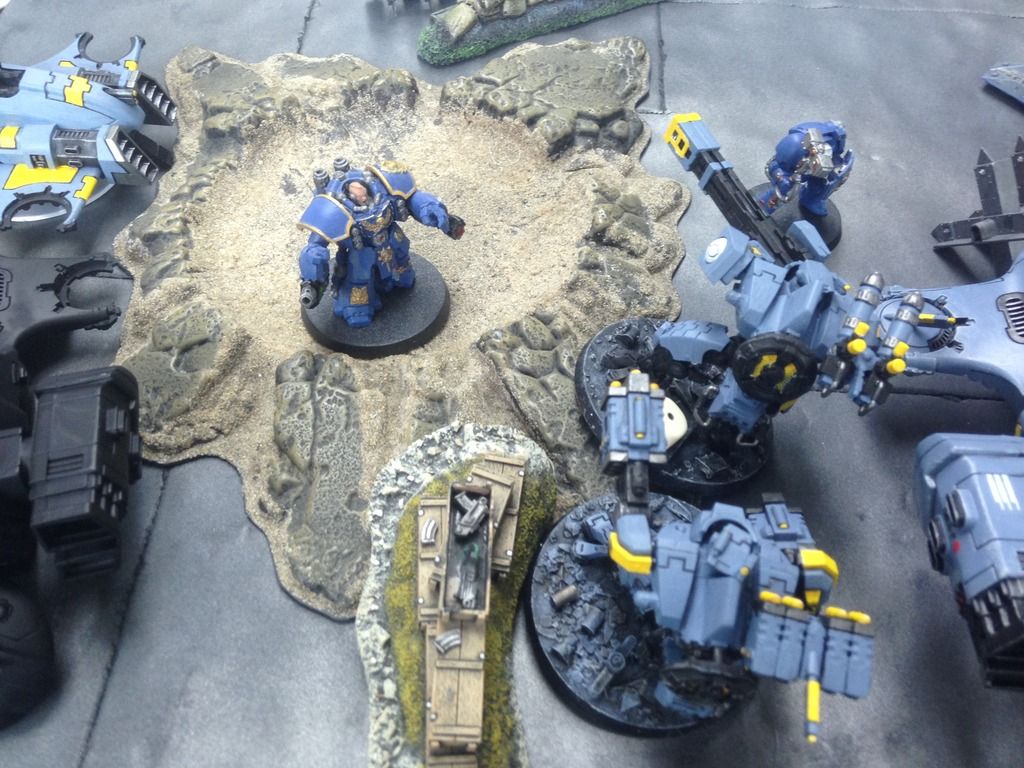
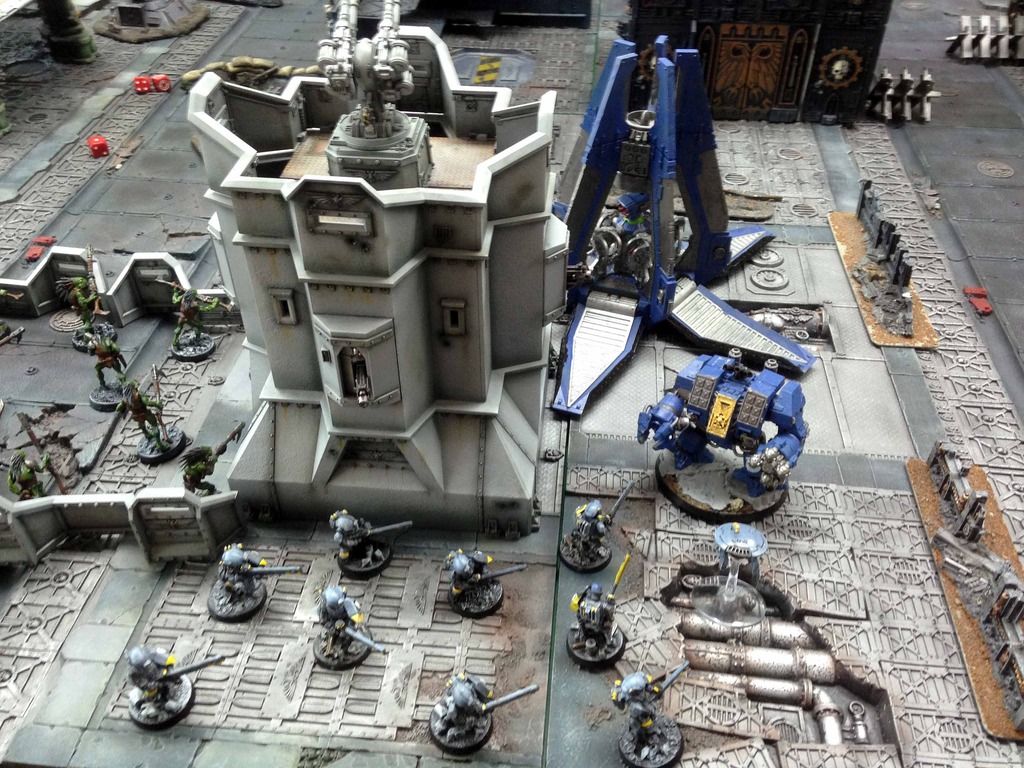
The Marines have weathered the Tau shooting well, time to take advantage of it. Ironclad comes in and plops down right in the middle of the Tau front to claim objective 3.
Unfortunately it scatters slightly right, but the ironclad deploys out to claim objective 2 (remember the SM payer needs to hold the objective for a whole turn uncontested to destroy it).
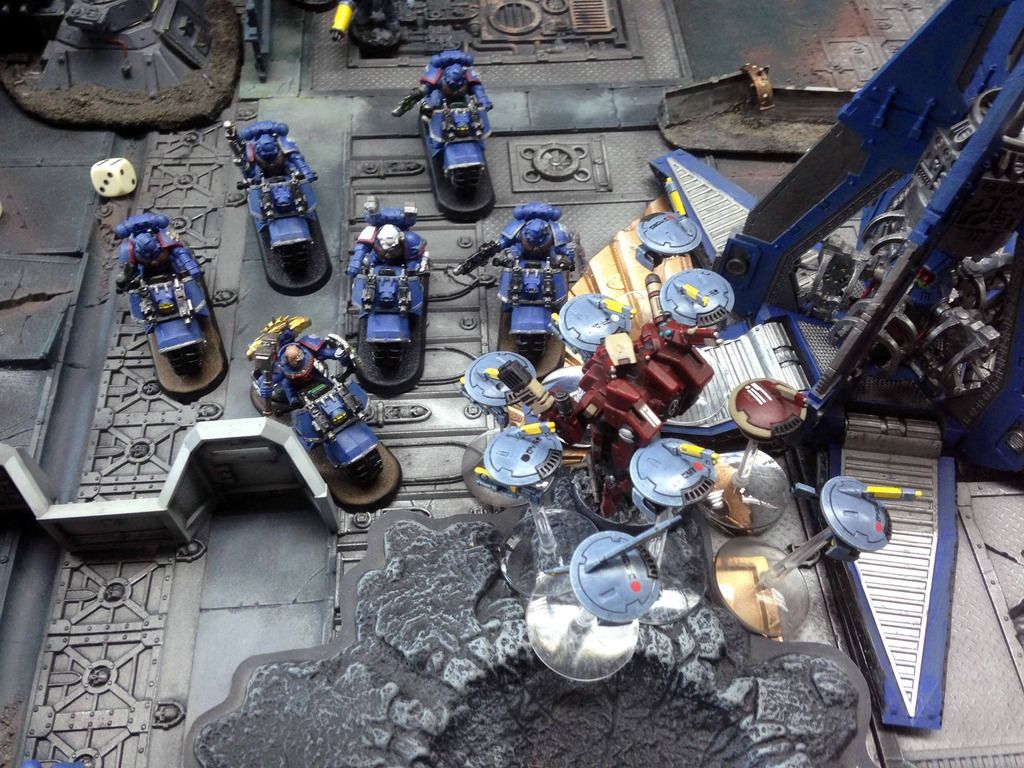
Bike squad and vindicator move up to the kroot line
While the right Rhino comes in off its flank and deploys its TAC squad with PG
Scouts move towards the suits
As the movement phase ends, the Tau intercept the Ironclad with the HYMPs of both Broadsides, resulting in a glancing hit.
Shooting, and the Ultramarines recognise the trap for what it is and structure their fire accordingly. Firstly the TAC squad blow a hole in the kroot squad, killing two but also losing the Plasma gunner to gets hot. Storm bolter on the Rhino kills another.
Having made a hole, the bike squad takes aim at the Stealth squad behind the kroot, killing two of them.
Unfortunately, having started to deconstruct the trap, SM firing starts to go awry at this point. Vindicator takes aim at the broadside and hits, but he makes his cover save by going to ground
While the ML marines takes aim at the kroot but misses too.
Ironclad also has a pop at the fusion suit but misses
and the scouts do nothing to the plasma suits with their bolt pistols.
They would then compound their misery by failing a 5" charge.
Ending a fairly lack luster turn for the smurfs. Morale tests don't go in their favour either, with the Kroot and lone stealth suit holding.
VP – Tau 0:0 Ultramarines
TURN 2 – Tau
Spoiler:
Tau movement, and the kroot spread out to fill the gap
While the lone Stealth positions himself for a go on the Ironclads rear armour
Plasma suits move away from scouts but keep them in rapid fire range
Commander Calmstar gets the angle on the vindicator side armour
Commander Banetide lights up the Ironclad, and the Fusion suit one shot wonders it, penning with an explodes result, for first blood and removing a major threat to the Tau. Brother Boris has not had a good campaign.....
Pathfinders light up the bike squad, and once more the Kroot, stealth suits and commanders MPs pour almost 40 shots into the unit....killing one biker. Great tanking again by the Captain, with some more brilliant FNP roles.
Pathfinders easily wreck the DP with EMPs
While Plasma suits kill 3 scouts. They hold, so crisis move up to tempt them into combat.
Commander fails to hurt the vindicator and assault jumps up towards the TAC remnants
While the fusion suit and lone stealth jump forward too
TURN 2 – Ultramarines
Spoiler:
Turn overview
Bike squad decides to go after the Stealth suits in the ruin as they have the more dangerous weapons and cannot get supporting fire from the Kroot. Plan will be to soften them up with the grav guns and then assault, sweep them and consolidate beyond the kroot. They reposition accordingly.
Bikes take aim...
And kill all three with the grav guns, despite the 2+ cover saves. This is disastrous for the Bike squad, as they now have no one left to charge and remain stuck in front of the Kroot.
Elsewhere, the Vindicator takes aim at the Fusion crisis lurking in cover
And annihilates him
TAC squad has a pop at Commander Calmstar, but whiffs it shooting
While the scouts shoot and assault the plasma suits, hoping to tie them up in CC for a turn or two
but suffer a complete reversal, getting killed outright. A rare day for Tau in CC indeed.
VP – Tau 1:0 Ultramarines
Turn 3 – Tau
Spoiler:
Turn overview - Tau control most of the board and still have the marines boxed in, but if the bikes can break out this turn it will all change.
Kroot shuffle around to block in the bikes
Despite having written the mission rules, Tau suffer a brain fart and think that they have to capture the supply depots to get the victory points, so start moving pathfinders and fire warriors away from the action and towards objectives 3 and 4. Broadside tries to get into the action but will snap fire accordingly as a result.
Plasma suits move forward to try and engage the vindicator
While Commander Calsmstar moves into finish the TAC squad off
Lone stealth moves in to support the kroot
So, for the third turn in a row the Tau throw everything they can at the bike squad. Pathfinders and marker drones light them up for 4 tokens, then Kroot, Stealth and broadsides (one snap firing) pour everything they have into them (30 shots). Finally, they wilt under the pressure and start failing their saves. Captain Fabian tries to tank one too many hits and falls, giving up slay the warlord, while the bike squad is decimated leaving only the apothecary standing.
Commander Banetide then lines up the apothecary and finishes him off, removing the last best hope for the ultramarines force.
To top off a bad turn for the marines, Commander Calmstar also finishes off the TAC squad
Everything that didn't shoot for the Tau runs to claim objectives (needlessly) and the various suits assault jump around
TURN 3 – Ultramarines
Spoiler:
Ultramarines may not be able to win the game now, but they can at least reclaim some pride and pick up some bonuses for the final mission.
Vindicator moves forward
While TAC squad embarks into the rhino, which moves forward to challenge for objective 1
Only one shot this round, and the vindicator vaporizes the broadside on objective 1, despite him going to ground.
VP – Tau 2:0 Ultramarines
Turn 4 – Tau
Spoiler:
Suits tighten the noose on the Vindicator
While Fire warriors, kroot and pathfinder team move towards objectives
Shooting at the vindicator is a bust for the Tau, who then forget to assault jump the suits. Shooting at the rhino only manages one glancing hit also.
TURN 4 – Ultramarines
Spoiler:
Rhino rolls forward and the TAC squad disembark, claiming objective 1
Shooting at Commander Banetide kills one drone and puts a wound on him
Vindicator repositions itself and lines up the plasma suits
And once more auto deletes them. Good day for the vindicator
VP – Tau 2:0 Ultramarines
Turn 5 – Tau
Spoiler:
Fire warriors finally end their long trek to objective 4
While stealth suit and Commander Calmstar give up on killing the vindicator and move out of range/LOS
Pathfinders use their pulse carbines for the first time and go after the rhino, getting one pen and stunning it
While the commander backs off the approaching TAC squad
TURN 5 – Ultramarines
Spoiler:
Turn overview
Objective 1 has been claimed for a full turn now, and it duly explodes.
TAC squad move up and kill a few pathfinders. They would hold.
While the vindicator kill off a few more kroot on objective 2. They would also hold.
We roll to see of the game continues, but it doesn't. The battle is over.
RESULT
Spoiler:
VP POINTS
Tau: 6 pts First Blood 1pt
Slay the Warlord 1pt
Line breaker 1pt
Supply Depots intact 3pts
Ultramarines: 2 pts Line breaker 1pt
Supply Depots destroyed 1pts
TAU VICTORY
BREAKDOWN
Decisive moment – the bike squad not charging the Kroot on turn 1. A tough call for the Ultramarines, as the overwatch trap was very real and could just as easily been devastating. However, by charging they would have at least had a chance to break out T2 and start terrorising the Tau supporting units and claiming objectives. As it was, they never broke the Kroot line and we contained and ultimately destroyed by volume of fire.
Key units
Tau: Kroot. Not often these guys are the hero of the Tau hour, but they and their supporting stealth teams did a fantastic job of containing the most dangerous enemy unit on the board, allowing the Tau firepower to bear down on them for three turns.
Ultramarines: Vindicator. Racked up the most kills of any unit, taking out three suits, a broadside and a couple of the pesky kroot to boot.
STATS
Tau: Models remaining 21/37
Kill to Death Ratio 1.18
Efficiency 54%
Ultramarines: Models remaining 6/25
Kill to Death Ratio 0.84
Efficiency 46%
POST GAME
Spoiler:
The Tau continue the campaign with another victory, dealing another bloody nose to the Ultramarines. Captain Fabian will be thirsting for revenge after this reversal, just as soon as he gets out of the sick bay.
Going into the third mission, the Tau player will be allowed to open a further FOC slot of his choice. The Tau also generated 150pts extra for the final mission, whilst the Ultramarines generated 50pts.
‘As we moved forward towards the wretched Kroot and Stealth Suit lines, we ran into a hail of pulse shots, so many that Brother Captain Fabian, who led the charge from the forefront, succumbed to the pure weight of fire’
Brother Helion, Apothercary of 3rd Company, in the apothecary cell of the Accipiter
‘With the Brother Captain felled, I spotted an alternative route to bypass the Kroot, and ordered Brother Anrik to cover our advance. My squad embarked back into our Rhino and drove as fast as we could, outflanking the enemy towards the nearest supply depot. Thank the Emperor, Brother Anrik’s Vindicator bought us enough time to destroy that depot, and Brother Vetiman is truly a sharp gunner, his precise shots either vanquished the enemy or kept them pinned down.
Brother Sergeant Volus
Suddenly a squad of Tau Battle Suit appeared at our right flank - missiles and plasma bolts showered upon our armored hull, but were nothing more than rain on the rocks. We can still feel the shock caused by the impaction. I ordered the tank to break right, so Brother Vetiman could bring the main gun to bear on them, and he once more fired a precision shot - the entire Battle Suit squad was obliterated in the huge explosion of the siege shell!
Brother Sergeant Anrik, Tank Commander of Vindicator
It was my hesitation in front of the enemy gun line that led to the demise of the whole operation. We were confusing by the presence of the Kroot screen for too long, and offered ourselves as targets to the massed Tau fire power. Thanks to the initiative of Brother Volus, we have at least caused some damage to the Tau supply lines, but it was far less than enough to break their operation.
I have to pay my highly respect to those lowly Kroot. They gallantly poured themselves in front of the Demolisher Cannon and all our bolters to buy their allies time to accomplish their mission. Although they are the enemy of the Emperor, their bravery deserved respect even from the sons of Guilliman. However next time I meet them, I will crush them without any hesitation, and bury them properly after the battle, if I can.
As we failed to destroy the Tau supply depots, it is going to be hard to stop their relocation to Titan Prime. However, we may still stand a chance to undermine their defenses in this system if the partially established Relay Beacon can be captured or destroyed. This will severe their communication with their own realm, which will delay their reinforcements until after the full Imperial forces can be brought to bear.
Brother Fabian, Captain of Ultramarine 3rd Company, Master of Arsenal, acting commander of Battle Force Titan, in the apothecary cell of the Accipiter
Brother Fabian made fatal mistakes in this operation, which not only caused extreme casualties on our own forces, but also let the tide of this crusade turn against the Imperium. However, I have decided to offer him a chance to redeem his soul in the coming battles, as it is always a bad decision to replace a visionary commander like Fabian for one mistake, especially during the battle.
Reinforcements are already on route from Ultramar to Titan System, and will arrive imminently. In the meantime Brother Fabian and Brother Herbort should continue to identify and destroy vital Tau forces in Titan System quickly, giving the Astra Militarium in our wake an easier task of purging the vile Xenos and Heretics in this system once and for all. The Imperium cannot allow such a huge force and mountain of valuable resources being locked in Titan System for a long time, as much greater dangers are now threatening the Holy territory of the Emperor from all corners towards…..
Marneus Augustus Calgar, Chapter Master of Ultramarine, Lord of Macargge, upon Chapter Council in Fortress of Hera, Macargge, Private Scriptures of meditations.
It would now appear that Imperial Forces on Tethys are in greater numbers than previously estimated, and the fretting over whether to evacuate or not must be bought to an end.
Preparations for an evacuation have begun, but at the behest of the Earth Caste work has continued on the establishment of the Communication Relay Beacon, despite my reservations on the matter being repeatedly expressed. Notwithstanding our expectation to come under further attack, at 0:530 hrs a larger than excepted force of Gue’ron’sha (once again ‘Ultramarines’ designation, REF: IM/AA/CSM/2889.01) launched an attack on our position.
The engagement was once again short-lived and ferocious, but the enemy has been repelled and had much the worst of it. A further adaption of their tactics was evident, as they attempted to combine orbital insertion elements with fast moving ground vehicles. The presence of a Tank (designation, REF: IM/AA/VDCTR/0255.01) also signified the escalating force strength and confirmation that this action is not merely intended as a raid.
It was initially assumed that the intention of the attack was to once more annihilate the engineering teams under our supervision, but post battle analysis has suggested that the intended target may well have been our supply depots. If so, this will represent a dangerous evolution of the Gue’ron’sha tactics, as they may now understand just how precarious our position is on this (Profane Expletive Deleted) forsaken moon.
Thanks in no small part to our Auxiliary Kroot units, losses amongst the enemy were severe and they have once more retreated to the forests where they will no doubt regroup and retaliate. Our position here on Tethys is even less defendable now the Imperium has established a foothold, and as such I would now advise that the evacuation be accelerated. I have already overridden the Earth Caste engineer’s senior officer and ordered that the Relay Beacon be disassembled. I have also ordered that all on world operations cease and outlying teams report to their evacuation points. We will be returning to Tethys HQ within the hour, along with those supplies that have survived, to oversee the final evacuation.
On a side note Commander Banetide, my temporary second in command while Fireblade 'Darkwave' El'Or'Es recovers from his wounds, acquitted himself well in his new role. He is however still too green to be give the post on a permanent basis, and will benefit from more direct supervision of an experienced commander. It is my intention to reassign him to bodyguard team duty so he can further benefit from my direction.
The situation on Tethys is in danger of deteriorating rapidly, and all effort must now be made to get our forces and supplies back to Titan Prime, and ensure the Relay Beacon does not fall into enemy hands.
Despite having written the mission rules, Tau suffer a brain fart and think that they have to capture the supply depots to get the victory points, so start moving pathfinders and fire warriors away from the action and towards objectives 3 and 4. Broadside tries to get into the action but will snap fire accordingly as a result
Classic
Great batrep! will be looking forward to seeing this campaign end!
As the marine player in this campaign, I spotted some of my own mistakes in the game. First off, sometimes it is a bad idea to fire the strongest weapon at the target enemy unit if you intend to charge them, that may either wipe them all out and leave you in no man's land or worse, make them suffer a some wounds and break morale and run away from danger.
After reviewing the second game one week after the game. I think the best solution to break through the Kroot screen is let the scout move towards the blockade line is let the Captain's squad and Scout against the left and right stealth suit squads respectively at the same time. Which would divert overwatch fire, and the stealth suit squads maybe more than 6 inch from each other and may have problem in helping out each other. Accorrding to the game result, the true, fatal mistake I made in this game is let the scouts moving to the marines right flank to try to hold up Crisis Suit. Which actually gain nothing.
I am also testing new combination by playing the campaign. So this is the first time I ever use a "smashbane" build Captain I will also try some new units that I never used before in the rest of the games.
Automatically Appended Next Post: One more thing. Highly appreciate Iapedus for posting the batrep so quick. Great effort once again.
Powerfisting wrote:Great batrep! will be looking forward to seeing this campaign end!
Thanks! Third battle coming up soon, should be a cracker
Neophyte2012 wrote:As the marine player in this campaign, I spotted some of my own mistakes in the game. First off, sometimes it is a bad idea to fire the strongest weapon at the target enemy unit if you intend to charge them, that may either wipe them all out and leave you in no man's land or worse, make them suffer a some wounds and break morale and run away from danger.
Yeah, I think you were just really unlucky in a strange sort of way - failing my 2+ cover saves should not have really happened but it actually turned out to be a bit of good fortune for me!
Neophyte2012 wrote:After reviewing the second game one week after the game. I think the best solution to break through the Kroot screen is let the scout move towards the blockade line is let the Captain's squad and Scout against the left and right stealth suit squads respectively at the same time. Which would divert overwatch fire, and the stealth suit squads maybe more than 6 inch from each other and may have problem in helping out each other. According to the game result, the true, fatal mistake I made in this game is let the scouts moving to the marines right flank to try to hold up Crisis Suit. Which actually gain nothing.
I think a further refinement might have been to shoot out both Stealth teams with both TAC squads and the vindicator (rather than going after the more tempting broadside ) and then hit the kroot with the bike squad - their grav guns wouldn't have done much but you would have easily swept them in CC. You could also have charged the remaining stealth suits beforehand with the scout/TAC squad so they couldn't supporting fire. But the dice were really against you in that game and they would probably have all failed their charge ranges anyway
Neophyte2012 wrote:I am also testing new combination by playing the campaign. So this is the first time I ever use a "smashbane" build Captain I will also try some new units that I never used before in the rest of the games.
I look forward to seeing these! I am also going to vary it up a bit and try out some new toys...... don't worry though, no riptide.... yet
Dozer Blades wrote: That one was kind of a disappointment. He could have easily multi assaulted both units.
He could have, but only had he gone after the Stealth team as the primary target (as if he had charged the kroot as the primary target of the multiple assault they would have had more than enough bodies to accommodate his bike squad, leaving him unable to charge a secondary target) but the stealth team were in cover which would have meant dangerous terrain tests for the bike squad.
He would also have still been subject to the 44 supporting fire overwatch shots, which might have obliterated his squad before he got there (unlikely I know, but stranger things have happened.....). I think he had the right idea trying to shoot out the supporting units, it just didn't go to plan - the shooting sort of fell apart T1 and in T2 was too effective in wiping out a unit and leaving the bike squad stranded with no one to charge.
It was a tough call for Neo, as had they made it through the overwatch T1 they would have been heroes and run riot. Had they not, the game would have been a lot earlier than it was.
I'm just sad that the Ironclad has been having such a hard time. I understand why he took that shot at the melta-suit, but I still think it was a mistake. The Commander was right there begging to take the heavy flamer to the face, and you should have obliged him.
Belac Ynnead wrote:I'm just sad that the Ironclad has been having such a hard time. I understand why he took that shot at the melta-suit, but I still think it was a mistake. The Commander was right there begging to take the heavy flamer to the face, and you should have obliged him.
Yeah, I think he was all too aware of what would happen in the next turn to the poor ironclad and was desperate to try and avoid having him knocked out two games in a row. In all likelihood had he gone after the commander the marker drones would have tanked the hits anyway - although I guess he still might have failed morale
PART 1: The Tethys Moon Campaign Escalating 850/1000/1000+ point missions with bonuses.
MISSION 1.3: Steadfast
OPPOSING FORCES
Utilizing bonuses earned from last game, the Tau decided to open up a further fast attack slot. The Ultramarines also open up a Fast attack Slot. The Tau forces are 'in the ascendancy' having won the Second mission, and therefore chooses whether to go first or second.
Time constraints: Due to Real Life priorities, there is a time limit of three hours on todays game (including setting up, and alas I was 15 minutes late due to traffic), so both sides will be up against it to get the game played out in full. They will, however, try their best
Tau Forces: Fire Warriors from the Setpworld of Fi’Rios 1325pts
Mission: Mission 1.3 Steadfast (Capture/Defend the Relay Beacon)
Deployment: Vanguard Strike
Initiative: Tau are 'in the ascendancy' and decide to go first
Special Rules: Reserves, Night fighting
Terrain: The Third and final encounter between Imperium and Tau is still set deep in the remote forests of Tethys, first moon of Titan Prime. Thick vegetation, rocky outcrops and the clustered remains of a primitive society litter the battlefield.
Warlord Traits:Tau roll on codex Traits and get 'A Ghost Who Walks Among us' (Warlord & Unit get 3D6 Jet Pack thrust moves), while the Chapter Master rolls 'Rites of War' (Morale checks within 12" of warlord can use his LD). Exactly the same as the previous game. Spoooooky....
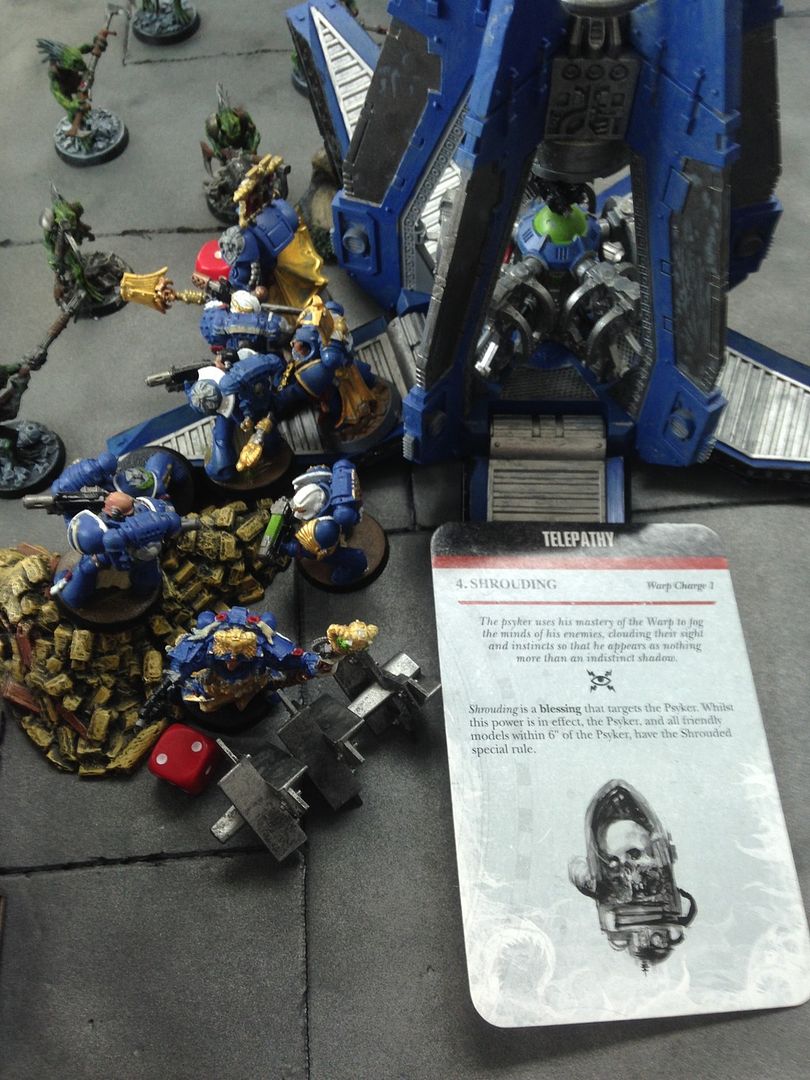
Psychic: The Librarian Rolls on Telepathy, getting Shrouding, Hallucination and Psychic Shriek Primaris. The Tau are unaware of the warp. Poor innocent little blue dudes.
PRE GAME ANALYSIS
Spoiler:
Reasons why Tau will win:
1: Numerical Superiority. Tau have almost twice as many models on the board, and equally disproportionate wound count. It will be hard for the Space Marines to remove significant numbers of enemy every turn unless they can get into combat quickly and regularly.
2: Volume of Fire. Tau have multiple units who can pump out obscene amounts of S5+ fire, which will whittle the Space Marines down even with their 3+ saves. They also have better range on average, although this is hurt slightly by the Vanguard Strike Deployment.
3: Markerlights. With 14 on offer per turn (4 with commanders, 10 with pathfinders) the Tau shooting should be seriously buffed. With drone controller on the Mark 'O, it should be a guaranteed 8/9 MLs each turn.
Reasons why the Ultramarines will win:
1: Threat Overload. The Ultramarines have lots of highly mobile units, meaning they will try to get up in the Tau faces as soon as possible, forcing them to dilute their firepower over multiple threats. The lack of a decent interceptor threat in the Tau arsenal is also a boon to the Drop Pod Unit.
2: Bike Squad. A significant part of the above. Beyond volume of fire, the Tau have no answer to this unit. If it makes combat T1, expect it to sweep a unit each turn as it romps around the field unchallenged.
3: Vindicator. Vanguard deployment has really helped its range issues, and its S10 AP1 means instant un-savable death to pretty much everything the tau possess. Also AV13 on front.
DEPLOYMENT
Spoiler:
Ultramarines win the roll for sides and chooses the side of the board with slightly more terrain (the blue zone). Tau places the Relay Beacon objective on their side of the board (red dot in Orange zone).
Relay Beacon
The Tau deployment is attempting to bait the enemy towards the Relay Beacon. The ADL is arranged to form a pocket around the objective, with flanks curling around it. Fire warriors and Fireblade 'Darkwave' holds the centre of the ADL, with a unit of pathfinders on the left edge of the wall. Broadsides sit behind the fire warriors, ready to lend fire support or switch attentions to anything try to outflank on the left.
Another unit of pathfinders and the Hammerhead deploy behind the ruins on the right flank to try and set up a cross fire.
While Commander 'Calmstar' and his Mark 'O unit deploy behind the LOS blocking terrain.
Tau Deployment Overview
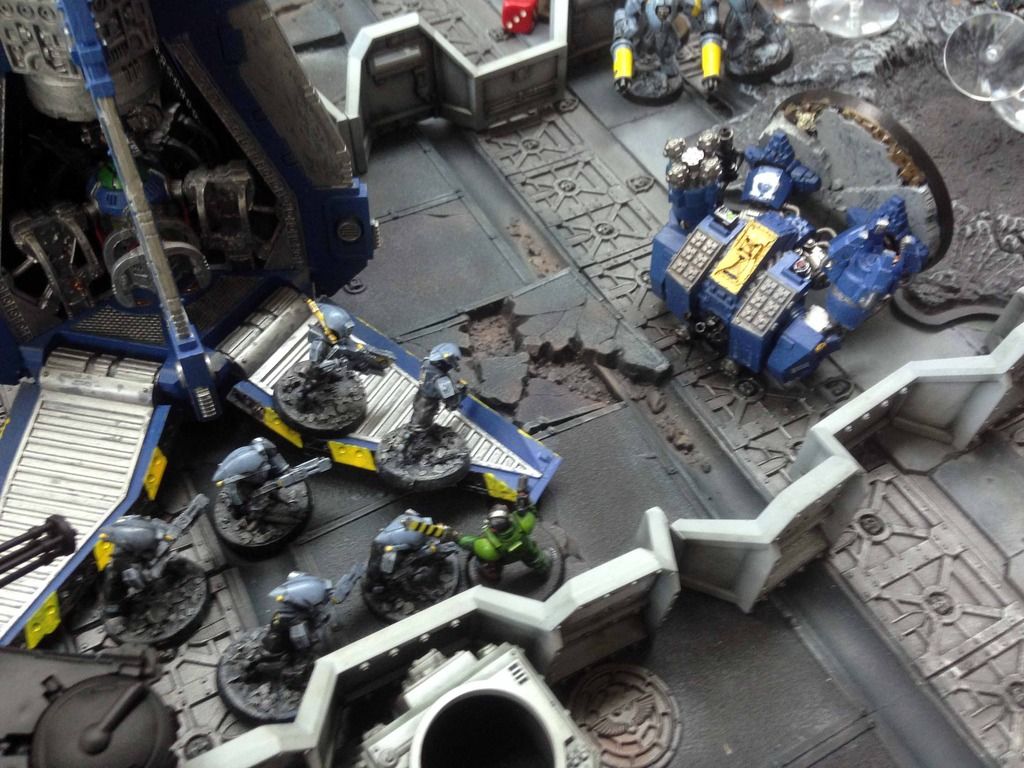
Ultramarines decide to deploy the main force to the centre, presumably to go after the objective. Bike unit, assault squad and Rhino with TAC squad embarked move right up to the line.
While vindicator deploys on the right flank, to try and close the distance asap. DP in reserves, Librarian has joined the TACs quad embarked inside.
Overview of Ultramarines deployment
Tau places first infiltrators - one stealth team deploys on the left flank to keep the Vindicator honest.
While the other deploys on the far right to harass the assault squad
Kroot blob on the central ruins, completing the killing zone around the objective and providing a possible speed bump if needed.
Seizing the initiative would be a relief to the marines, since they are a significant chunk of points down due to previous mission bonuses, and any reason to avoid a round of Tau shooting is a good one. Ultramarines roll to seize...
And are successful! The Emperor be praised!
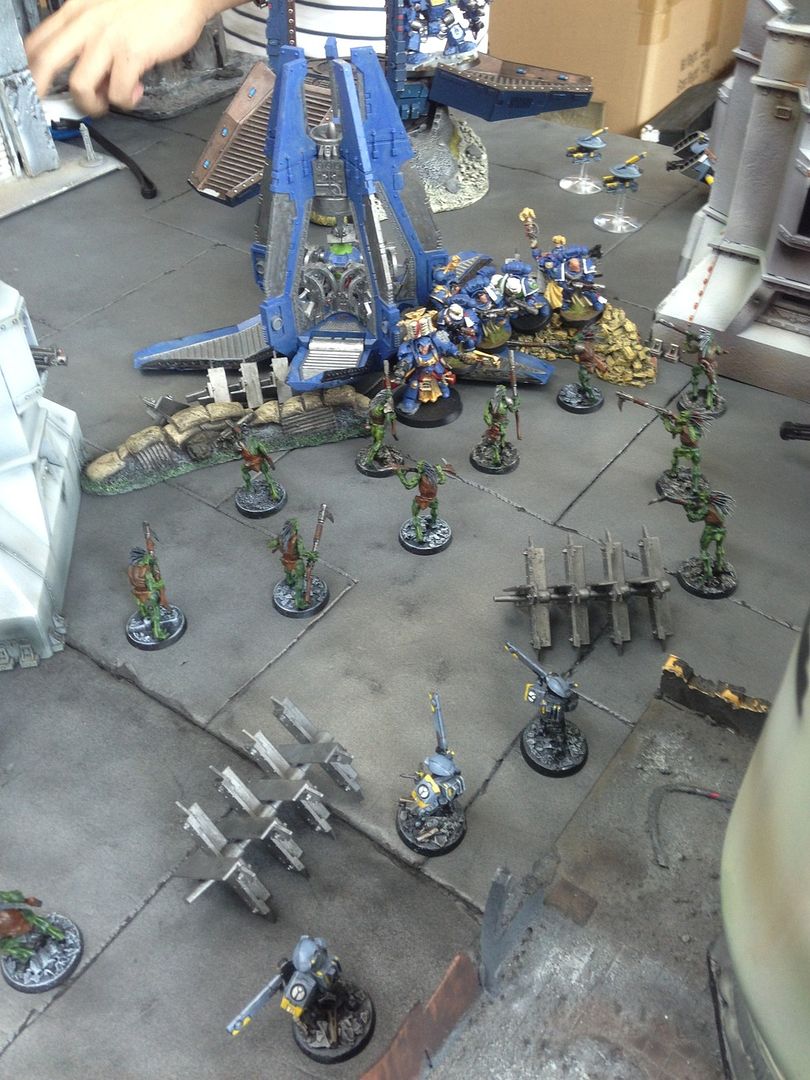
TURN 1 – Ultramarines
Spoiler:
Ultramarines signal their intent early on, deploying the drop pod team directly on top of the objective and capturing it immediately. Tau Broadsides opt not to intercept, preferring to wait for possible marker light support.
Librarian and TAC squad pile out, putting the DP between them and the fire warriors as much as possible, but finding them selves in the midst of the cauldron.
The vindicator moves up to try and get the angle on the Commander team
While the Bikes pour forward towards the enemy lines
Assault squad and Rhino also get going
Psychic Phase, and the Libby gets Shrouding off on his boys, Tau don't try to deny
The Libby then casts hallucination on the fire warriors, and Tau fail to deny. Result is a -1 to WS, BS, Initiative and Attacks while the fire warriors sit around and contemplate how beautiful the world is...
Vindicator finds itself slightly out of range of the commander, so moves up closer but remaining in cover.
Bikes also continue to trundle forward, passing their dangerous terrain tests to boot.
With everything else having run, the Libby and his TAC unit open up on the Kroot in cover, killing three. They would hold.
Marines may not have killed much, but they have significantly closed the gap between them and the waiting Tau gun line with no casualties....yet.
TURN 1 – Tau
Spoiler:
So.... the Tau forces, being Tau, don't see that much in the way of close combat. For understandable reasons. Believing their own hype in the fluff that Kroot are the answer to this issue, they decide to take advantage of the close proximity of the TAC unit, forgo their rapid fire shooting and position themselves for an easy charge.
Hammerhead comes out to play
Stealth team move up on the Bounding Assault marines
While the Mark 'O unit get the angle on the bike squad
The other stealth team maneuver for the angel to get side armour on the vindicator
Pathfinders suffer from marker light blindness - rather than pumping their pulse carbines into the TAC squad right in front of them, they opt to light up the assault marines with 2 tokens. The rail rifle also manages to kill one.
Command team light up the Vindicator for four ML tokens, while firing their MPs at the bike squad to no effect (thanks to some awesome FNP saves)
Stealth team take advantage of the tokens, boosting BS to 7 and make every shot count. 12 rolls at AP, need 3 6's to glance it to death.... but only manage 2! Could mean death for the stealth team next turn...
Hammerhead's turn to whiff. Goes after the rhino laden with troops - Big gun hits but it gets cover saved. SMS then hits home, but only manages a glance.
Other stealth teams use up the ML tokens on the assault squad, killing 2 more. They would hold.
Time to bring the gun line to bear. Broadside have a crack at the bike squad, but whiff. Pathfinders light up the bike squad for 2 MLs, and Fire warriors bring their guns to bear and utilize the ML tokens to bring their BS back up to 4 (after -1 from hallucination).
29 shots later, and one biker is dead - again, mostly due to tanking by the chapter master, some inspired FNP rolls and a timely Look out Sir.
Combat phase (yes, there is one to write about in the Tau turn!!!) and kroot charge in
In hindsight, this was a stupid decision. The kroot might be able to beat down on, say, guardsmen I suppose, but they are not built for dealing with marines in close quarters. The combat is predictably disastrous, and the kroot are swept on their own charge, with no loss to the marines.
Assault moves, and the command team try to get out of range/sight of the vindicator
While the stealth team spread out to try and lessen the pain if he decides to go after them instead
Overall, a very bad turn for the Tau.
TURN 2 – Ultramarines
Spoiler:
Ultramarines prepare to get stuck in. Libby and TAC squad move towards the pathfinders in the ruins
While Rhino with TAC embarked moves up 12" to support
the battered and bruised assault squad switches focus and go for revenge against the stealth team
Bike squad moves in on the pathfinders. Having survived a hail of fire last turn, they lose a marine to dangerous terrain. Go figure.
While the vindicator positions for an angle on the Command teams marker drones
Psychic phase, and Libby gets shrouding off on his unit again
While he casts Psychic Shriek on the Fire warriors. Thanks to the Cadre Fireblade's LD9 though it ha no effect
Shooting, and the vindicator scatters off the marker drones
While bike squad and Libby TAC squad forgo shooting, not wishing to remove their charge target form play. Assault squad charges the stealth team, but fails the distance.
To make matters worse, they then lose a marine to over watch
Libby ad TAC squad charge the pathfinders
and sweep them, with no casualties
The then consolidate back towards the drop pod
Bike Squad charges the other unit of pathfinders with ease
They take 40+ over watch shots due to supporting fire from the fire warriors
But emerge unscathed to sweep the pathfinder unit
They don't consolidate enough to get past the ADL, so just shuffle around instead. All in all, great turn for the marines.
TURN 2 – Tau
Spoiler:
Tau are in a tough spot - they have lost 2/3 of their marker light support and have barely dented the enemy who are now in charge range of multiple units. Time to start focusing down enemy units and reducing the number of threats on the board before the Tau get overwhelmed.
Rolling on reserves, and the Piranha comes in. Unfortunately, it mishaps by 1/2" and goes back into ongoing reserves.
Stealth team move in to eliminate the lone assault marine. He will not survive.
While the other team move in for another go at the vindicators side armour
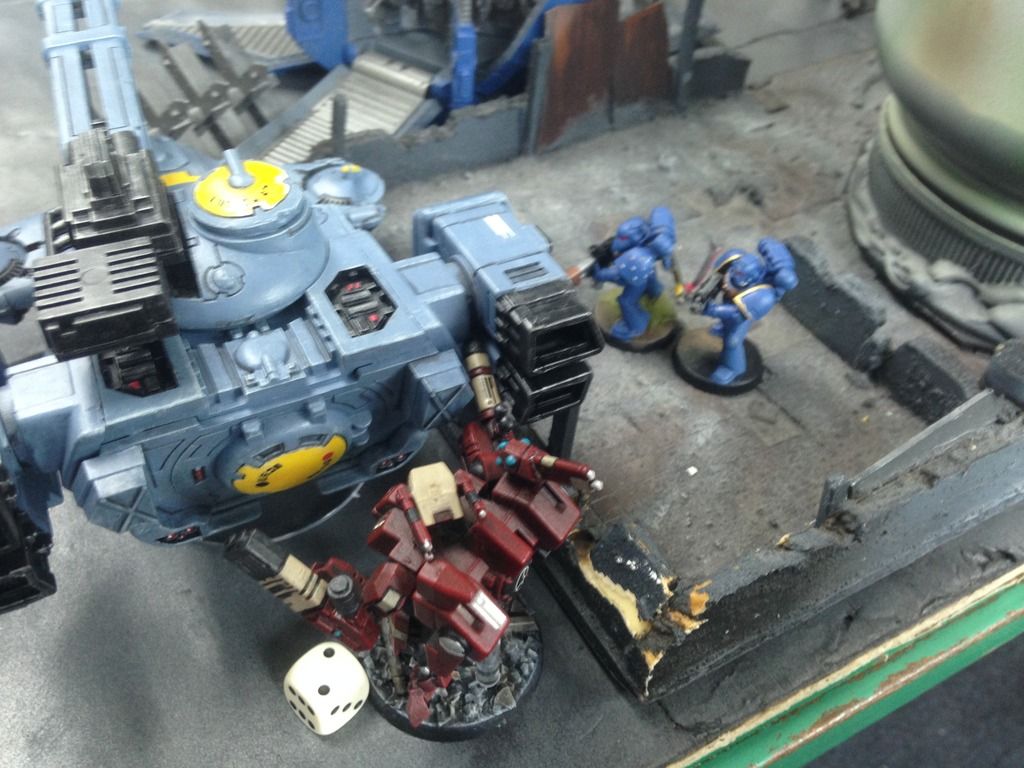
Hammerhead ignores the rhino and gets the angle on the Libby and TAC squad. Nicely packed together, if only this big gun had some kind of pie plate it could drop....
Commander team start moving away from the bike squad.
Shooting, and the Stealth team wipe out the assault marine (top left), while hammer head drops a submunition round on the TAC, followed up with the SMS. Unfortunately, this only manages to kill 2 marines.
Command team light up the bike squad for 2 ML tokens, and as a bonus manage to take out a biker with their MPs
Broadsides shoot at the rhino laden with TAC squad, but once again whiff. The fire warriors use up the marker lights and pile 30 shots into the bike squad, scoring a massive 15 wounds!
Two marines by the farm with Look Out Sirs, leaving the Chapter master to tank 13 wounds on his Artificer armour / FNP. The dice are rolled..... and he only fails two!
To make matters worse, the Stealth team fail to get the single dance they needed at point blank range to take out the vindicator.
Another sub par shooting phase for the Tau, the command team assault jump as far as possible from the bike squad
Turn 3 – Ultramarines
Spoiler:
Ultramarines find themselves in a commanding position, time to go for the jugular
Bike squad moves forward, with only one target in mind
Vindicator decides to deal with the pesky stealth team
While the rhino repositions and deploys the TAC squad in behind the hammerhead
The Libby & TAC squad move menacingly towards the fire warriors position
Psychic phase, and the Libby Perils while getting Shrouding off, suffering a wound.
He also manages to cast Psychic Shriek, killing three fire warriors. They would hold.
TAC squad open up on the stealth team with mixed results. They only kill two (mostly tanks to the 2+ cover save) but lose their sergeant to gets hot on the combi-plasma.
Vindicator shoots at the other stealth team, but they make all their cover saves. Bike squad charges the command team, losing nothing to over watch (including supporting fore from the broadsides, who are yet to hit anything...)
They win the combat, destroying the marker drones. The command squad would hold, remaining in combat.
Libby and TAC squad go for glory and attempt to storm the Tau lines, but fail the charge. They then lose two marines to over watch
TURN 3 – Tau
Spoiler:
Turn Overview
Unfortunately for us, time has run out and we are forced to call the game. It would be fairly unfair to just call it a draw, as one player is clearly in the ascendancy. So, lets see if we can predict how the next turn would have played out.
Given the removal of all maker light support, if the Tau player was lucky he might kill off the TAC squad & Libby in the centre this turn, but wont be removing the drop pod from the objective anytime soon.
The Broadsides would probably have stayed true to form and continued whiffing, while the command team would be dead in their own assault turn thanks to AP2 instant death on the bike chapter master.
The Hammerhead might take out a marine or two or maybe the drop pod on the objective, but will only be moving 6" max, leaving him dangerously close to the krak grenade wielding TAC squad.
While Both stealth units are out of position and not going to contribute to the end game. The latter will spend most of its time running away from the vindicator, now it has little to no chance of getting the angle on the side armour
Ultramarines turn, and the bike squad would charge the broadsides and easily sweep them, consolidating towards the fire warriors position. TAC squad would charge and easily wreck the Hammerhead on its AV10 rear, while the rhino would either reclaim the objective (if DP was taken out last turn) or turn its attentions to the lone stealth suit behind him. Either way, end of SM turn 4 the Tau would have been out of the game anyway, so it is more than fair to call the game in favour of the Ultramarines.
RESULT
Spoiler:
VP POINTS
Tau: 0 pts Tau Forces do not hold the Relay Beacon
Ultramarines: 1 pts Ultramarine Forces do hold the Relay Beacon
ULTRAMARINES VICTORY
BREAKDOWN
Decisive moment – Ultramarines seizing the initiative. This gave the smurfs a massive advantage, taking them out of Tau ranged for a turn and allowing them to close the gap quickly with no losses. Also hallucination on the FWs at a crucial moment meant they whiffed first turn shooting at the bike squad.
Key units
Tau: Fire warriors. Nothing really stood out for the Tau this game, Stealth teams came close to knocking out the Vindicator, but the fire warriors probably had the most solid performance in a rum bunch.
Ultramarines: Libby & Unit. Effectively sprung the Tau 'trap' around the objective, swept two units in combat and held the objective all game, proving very difficult for the Tau to remove. Psychic powers also had a significant effect this game.
STATS
Tau: Models remaining 19/57
Kill to Death Ratio 0.34
Efficiency 25%
Ultramarines: Models remaining 16/29
Kill to Death Ratio 2.61
Efficiency 75%
POST GAME
Spoiler:
The Ultramarines have captured the Relay Beacon, dealing a blow to the Tau defence of the system. It also allows them to introduce a named character for the part 2 campaign.
Overall the Tau take the Part 1 campaign though, 2 wins to 1. After this final reversal though, they will be at a significant disadvantage in the part 2 campaign.
‘We emerged from our Drop Pod into cover to avoid enemy interceptor fire, but find ourselves sandwiched between the wretched Kroots and skulking Pathfinders. I heard the tales from Brother Fabian about the bravery of those Kroots, and this time I witnessed it for myself. Like enraged animals they charged bravery towards my brothers, only for us to decimate them in the blinking of an eye. Poor fools.’
Brother Librarian Herbort
‘I have to complain to Brother Techmarine, our plasma weaponry has obviously not been properly blessed before being delivered to us at the start of this crusade. It seems to always malfunctioned and end up hurt our own brothers… ‘
Brother Sergeant Volus, in the apothecary cell of Accipiter
‘A Tau skimmer tank suddenly emerged from our behind our position, followed by a HE shell exploding just above our heads. Thanks to the Power Armor and the protection of the Emperor, most of my brothers were unharmed. However, I am unlucky in that a few pieces of shrapnel cut through the knee junction of my armor and broke my leg, stopped me from keeping up with Brother Librarian Herbort and the rest of my brothers.
As I crawled along the ground, I looked up and I suddenly saw blood spewing from Brother Herbort’s ears and mouth as he began to emit an extremely strange noise, So fierce and unnatural it was, as I imagine the sound generated by the opening of the Gates of Hell itself, which almost forced my soul to resonance with it. It was directed towards the enemy though, and multiple Tau warriors opposing us fell to the ground unconsciously to this tumult, their bright cyan blood spilling out all over their armor.’
Brother Veteran Sergeant Lemal, in the apothecary cell of Accipiter
‘All Battle Brothers of Tactical Squad Lemal were very lucky to not suffer the consequence of that Peril of the Warp. Should the mental strength of Brother Herbort be a little weaker at that catastrophic moment, his own soul would have been dragged into the Immaterium, and any souls nearby would have been lashed by the unnatural forces from the Warp.’
Varro Tigurius, Chief Librarian of Ultramarine, Macragge
We buried the Kroot warriors fallen on the battle. They showed their valor once again as they try to tie up Brother Herbort and his men. This time however, it was more like a suicide charge than a well-planned action.
We won a hard fight victory today, capturing the enemy relay beacon and dealing a significant blow to the Tau forces, but with the cost of high casualties on our own side. I decided not to chase the enemy commander and his body guard when they retreat from the battle, as we were not sure whether the cowardly Tau were preparing an ambush for us in the deep forest at that moment. We deconstructed what is left of the relay beacon and delivered it to Brother Sevano the Techmarine, and he promised he will try his best to intercept and compromise the enemy interstellar communication with these devices at hand.
Intel shows that the Tau forces have now decided to retreat from Tethys and relocate on Titan Prime. We may have brought this moon back into the light of the Emperor, however when we move on to the Titan Prime itself we can expect much higher levels of resistance. The battle has been won, but this is only the end of the beginning.’
Brother Fabian, Captain of Ultramarine 3rd Company, Master of Arsenal, acting commander of Battle Force Titan.
Disaster is upon us, and there may be no recovery from it.
This may seem like a hyperbolic statement, but there can be no denying the impact of losing the intact Relay Beacon to the enemy. While communications have been send to Fi’Rios by secondary means to immediately change their encryption codes, it will take time for this message to arrive - time in which our every movement and preparation in this sector will be under Imperial Scrutiny.
The strategy was sound, in line with Puretide's teachings, and an adequate trap set that should have exploited the boldness of the Gue’ron’sha. However our preparation was not sufficiently well planned and the strategy not sufficiently well executed by all forces under my control. It did not help matters that we were further undone by our Auxiliaries recklessness, and a lack of appropriate equipment.
In terms of equipment, we were forced to deploy what little we had remaining that was undamaged – most notably our heavier anti-tank equipment. This was utterly inappropriate for the enemy composition, and proved largely ineffective.
However, the key part of this defeat was our Kroot allies’ recklessness. They formed a keystone of the trap set around the Relay Beacon, and once the Gue’ron’sha had taken the bait, they should have held their position and provided a deadly crossfire. What possessed them to charge into the enemy headlong, I will never know, but it resulted in their destruction and the beginning of our defeat.
The battle was a disaster, and it seems I underestimated the Gue’ron’sha ability to adapt their tactics and foresee our own. Further meditation on the subject to fully understand our failings will be required.
However, the Imperial obsession with capturing the Beacon and an unwillingness to pursue our forces did at least buy us enough time to evacuate all remaining equipment and personnel from Tethys, enabling us to better cement our defence of Titan Prime while we await reinforcement. We can only pray that this is enough.
Borntolose wrote: Great Battle Reports! Nice style, very easy to understand what's going on. Are you going to continue this campaign?
Thanks! Yes, definitely - we have Parts 2 & 3 planned, and they will come with their own campaign booklets too. Hopefully we will pick it up again after Chinese new year. I may even have some more of my Tau painted by then.....
As the marine player, I view the victory due to no small part of luck, that stolen inititive is crucial and Imho, Tau's list is not fully optimised, if the Broadside is arming HYMP like the two previous game, it is doubtful wether the bikers can get into combat that smoothly. Maybe Tau is too concern dealing with the Vindicator or the probably present Ironclad Dreadnought. But according to the games played in this campaign, the best way to deal with these "Heavy armor" in these dense terrains scenarios would be tons of S5 or 6 shots into their AV10 rear, rather than only a couple S10 or S8 shots, even AP1. These vehicles can find cover or even hide out of LOS from the heavy AT platform.
On the Ultrmarine side, despite winning, there is one obvious tactical mistake in game. The Libby and his squad should consolidate directly towards the Tau Fire Warriors after eliminate the pathfinders instead to the droppod to seek cover, as the Tau forces were mainly concentrating on the CM and command squad, they may not take heavy causaulty in the incoming Tau shooting phase, and this squad would stand a high chance making into combat in marine's turn 3. Should they made it, the marine's victory might be more convincing.
No matter winning or losing, this campaign is breat chance for me to keep practice the gaming skills, and try out new unit. It is great experience.
Dozer Blades wrote:Nice to see the boys in blue finally take one for the Emperor !
Indeed! The Smurf's luck has finally changed for the better!
Neophyte2012 wrote:As the marine player, I view the victory due to no small part of luck, that stolen inititive is crucial and Imho, Tau's list is not fully optimised, if the Broadside is arming HYMP like the two previous game, it is doubtful wether the bikers can get into combat that smoothly. Maybe Tau is too concern dealing with the Vindicator or the probably present Ironclad Dreadnought. But according to the games played in this campaign, the best way to deal with these "Heavy armor" in these dense terrains scenarios would be tons of S5 or 6 shots into their AV10 rear, rather than only a couple S10 or S8 shots, even AP1. These vehicles can find cover or even hide out of LOS from the heavy AT platform.
Yeah Seizing the Initiative was key here, put your guys on the front foot and I couldn't stop their momentum. I went for the HRR mainly as I hadn't tried it before and wanted to see how it performed (as well as the model looking cool ) but in all it was very sub par and I choose its targets poorly (going after Bike squad instead of Drop Pod, etc).
Neophyte2012 wrote:On the Ultramarine side, despite winning, there is one obvious tactical mistake in game. The Libby and his squad should consolidate directly towards the Tau Fire Warriors after eliminate the pathfinders instead to the droppod to seek cover, as the Tau forces were mainly concentrating on the CM and command squad, they may not take heavy casualty in the incoming Tau shooting phase, and this squad would stand a high chance making into combat in marine's turn 3. Should they made it, the marine's victory might be more convincing.
Yeah, would have made the rout complete I think - Threat overload really hurts Tau and I think you demonstrated it here, good job
Righteousrob wrote:Nice reports. Fun to read.
Glad you liked it, more to come in the near future!
Silent_Tempest wrote: Why didn't the stealth team assault the vindicator? They can hurt it and should cause one HP on average: 9 attacks : 6 hits : 1 glance.
Ha ha, oh yeah - so used to not assaulting with the Tau that I didn't even think of it. Combined with the BC S5 Assault 4 beforehand it should have been dead T1. Oh well, next time...
Elites
Sternguard x 5, 120pts
- Sergeant Aries, bolter
Terminators x 5, Cyclone Missile Launcher 225pts
- Sergeant Darith, bolter
Fast Attack
ASSAULT squad x 5 100pts (reinforcing unit)
- Sergeant Vamtice, Power Axe
Total Models 41/Infantry 41/Characters 1 /Vehicles 0/Psykers 1/ Wounds 42
SETUP
Spoiler:
Mission: Mission 2.1 Beachhead - Capture objectives and hold for reinforcements
Deployment: Random Deployment Zone allocation
Initiative: Ultramarines win the roll off and decide to go First
Special Rules: Reserves, Night fighting, Reinforcements.
- Reinforcements: Out of your 1000 point force, only 500 points may be deployed at the beginning of the game. The remaining 500 points are placed in reserve, and can only be introduced into the battle as per the reinforcement’s deployment special rule (see below). Units arriving as reinforcements may not exceed 100 pts in value each. For teleporting units, refer to the campaign rules.
- Reinforcement’s deployment: At the beginning of each turn after the first, for two objectives held one unit of reinforcements may enter from your board edge. For each additional objective held, one further unit of reinforcements may enter from your board edge (this rule was rewritten after the game to read 'every one objective held' as it was too harsh on the player who goes down to one objective)
Terrain: Mining Station Zebra is a cluster of hollow asteroids linked together by walkways, containing heavily damaged facilities and ruins. To represent the cluster of small asteroids and link bridges, 2’ x 2’ boards will be used in the below arrangement (see below).
Objectives are placed inline with the mission rules, in the centre of each asteroid enclosure
Warlord Traits:Tau roll on Strategy Traits and get 'Master of Ambush (Warlord and three non vehicle units may infiltrate), while the Librarian rolls on Space Marines Codex traits and gets 'The Imperium's Sword (furious charge, one use)'.
Psychic: Librarian rolls on Telepathy and gets Mental Fortitude and Shrouding, with Psychic Shriek Primaris. Tough break, although shriek is not to be underestimated. The Tau are unaware of the warp, innocent little blue dudes.
PRE GAME ANALYSIS
Spoiler:
Reasons why Tau will win:
1: Master of Ambush / Infiltrate. The Tau plan was to infiltrate right onto the middle two objectives and contest right from the start with their three infiltrating units. With master of ambush however, the entire Tau starting force gets to infiltrate. This is huge.
2: High model/wound count. The utilisation of cheap bodies available in the Tau codex, as well as their Gue'vesa underlings, means a lot of meat to put into the grinder. The smaller elite space marines force might not have enough firepower to effectively clear the bodies away from objectives.
3: Volume of Fire. Tau have multiple units who can pump out obscene amounts of S5+ fire, which will whittle the Space Marines down even with their 2+/3+ saves. They are also mostly assault weapons, so if things get desperate they can pile in with their tiny fists of fury.
Reasons why the Ultramarines will win:
1: Librarian - Space Marines effectively get a whole phase to themselves, while the Libby has previously proved how dangerous he can be against Tau in assault.
2: Asteroids - with firing being limited to within asteroid enclosures (24"x24"), the Tau range threat is severely curtailed, which should mean more marines making it into combat.
3: Terminators. Expensive, but hardy enough to weather the Tau volume of fire and get up close and personal with the filthy xeno scum. Combined with the Libby, this unit is a very dangerous threat to the Tau who only really have one answer to it (the Plasma Crisis team).
DEPLOYMENT
Spoiler:
Ultramarines win the roll off to choose ends and go for the right hand side. Sternguards and terminator unit with Libby attached deploy in and around objective 4
While Tau have nothing to deploy as they are all infiltrating.
Ultramarines deploy their sole infiltrating unit (the scouts) directly onto objective 3 and into cover
Tau then infiltrate everything. 'Darkwave' Deploys onto objective 1
The Kroot and Broadside deploy into a strong defensive position on objective 3
A single stealth team deploys within 12" of the scouts on objective 3 (as they are out of sight) while the other stealth team and the crisis team deploy just outside of the asteroid enclosure containing the Scouts (as there is no other scenery in the enclosure to block LOS).
Deployment overview
Tau roll to seize..... and fail.
TURN 1 – Ultramarines
Spoiler:
Scouts stay put on the objective, while the Terminator squad and Libby trundle forward. Sternguard move in to capture objective 4
Psychic phase - Libby casts mental fortitude on his unit
He also tries for shrouding, but is denied by some pretty hot dice from the Tau
(not-so-interesting side note - this is the first time I have noticed that shrouding targets the Libby, not a target unit. Ha, who knew? Everyone bar me I presume...)
Nothing is in LOS of the Ultramarines, so the Termies and sternguard run
TURN 1 – Tau
Spoiler:
The massed Tau forces make their move on the beleaguered scouts. Stealth suits and crisis move into range
While kroot and broadside jiggle around a bit (as broadside was in danger of failing his wobbly model test up on the battlement)
Shooting begins, and over 24 S5 shots pile into the scouts from the stealth teams, along with 5 S6 from the crisis plasma. Average to hit and wounding rolls force the scouts go to ground for their 2+ cover save.... and they make them all except one, losing a lone scout but hanging onto the objective.
With nothing else in range, the suits assault jump around, keeping a wary eye on the terminators progress...
VP – Tau 2:2 Ultramarines
TURN 2 – Ultramarines
Spoiler:
Turn overview
Boarding action successful, the first of the space marine reinforcements arrive
Movement, and the Termies and sternguard continue to move up, joined by the assault marines
Psychic, and shrouding is once again denied by the hot Tau dice. Who says they no nothing of the warp?
Scouts went to ground and are out of snap shot range, while everything else runs forwards (termies and assault marines both rolling awful 1's)
TURN 2 – Tau
Spoiler:
Tau reinforcements arrive - 11 of Fi'Rios finest fire warriors
Who immediately move up 6 inches despite difficult terrain
Stealth teams and crisis move in for another go at dislodging the scouts
While broadside moves up into a decent supporting fire position, ready for any assault marines threat
Better shooting this time, but still not good enough to eliminate the scouts - three are killed, but the final one holds, and stealth suits are out of charge range.
Assault jumps, and the stealth suits and crisis move closer to the scouts but keep distance between them and the termies predicted entry point
VP – Tau 2:2 Ultramarines
Turn 3 – Ultramarines
Spoiler:
Sorry, no Turn overview as I forgot to take it. More Ultramarine reinforcements arrive in the form of Sergeant Nahem's squad
Terminator squad breaches the second asteroid, finally joining up with the beleaguered scouts
And look to join the fight at last
Assault marines move up towards the access tunnel, while the sternguard are stuck manning the objective
Psychic, and the Libby gets shrouding off on his unit
The termies take aim at the crisis, but lackluster shooting only manages to put a single wound on one
While the scout has a pop with his bolt pistol, but doesn't manage much, leaving the Tau pretty intact
Shooting over, and the Assault squad gather at the tunnel entrance in preparation to breach next turn
TURN 3 – Tau
Spoiler:
Turn overview, with the game still in the balance
Reinforcements arrive, and this time its the pathfinders
Fire warriors move up and the Fireblade joins the unit
Crisis team and a stealth squad move up on the terminators
While the other stealth team moves in on the remaining scout, planning on assaulting if necessary
Kroot and broadside prepare the supporting fire over watch trap
Shooting from the Crisis dual rapid fire plasma rifles is hot (no pun intended), forcing the terminators to go to ground for the 2+ save. One termie still buys the farm though, throwing himself in front of his sergeant
The stealth team fails to add any further damage to the Termies, but the second team finally annihilates the scout squad, clearing the objective and cutting off the flow of reinforcements for the ultramarines next turn. This also gives the Tau First Blood
Stealth suits assault jump to claim objective 2, boosting the Tau reinforcements by one unit next turn (if they can continue to hold all three)
While the crisis jump out of LOS from the termies
And the other stealth team hold the line
VP – Tau 4:1 Ultramarines
Turn 4 – Ultramarines
Spoiler:
Turn overview. Smurfs are up against it now
Assault marines breach the third asteroid, looking to do some damage to the kroot
TAC unit moves up, but the sternies are now completely stuck guarding the objective
Psychic, and the Libby gets shrouding off on the termies once more, but fails to hit the stealth team with psychic shriek. Another lackluster round of shooting by the termies only kills a single stealth suit. They would hold.
While pre-assault shooting from the assault marines kills three kroot
They then charge the kroot, but lose two marines to the supporting fire from the broadside (who has the counter fire defence system)
Assault marines pile in regardless, easily making the charge range
And even with their depleted numbers, they easily sweep the kroot and denying the Tau an objective in the process
they only manage to consolidate one inch though, and will find themselves at the mercy of a point blank broadside next turn...
TURN 4 – Tau
Spoiler:
Turn overview. The fight for the middle two objectives is in the balance - time to get those reinforcements moving.
Reinforcements arrive, and this time its the Gue'Vesa squad
Crisis suits and stealth teams move in to cover around objective 3
and get a good view of the termies
Fire warriors and fireblade abandon their objective and make a move for the access tunnel
While the pathfinders make their way to support the isolated broadside
Shooting from the Crisis and stealth team kills two terminators, who then (unbelievably) fail their morale check and fall back to the asteroid enclosure. Disastrous for the Ultramarines hopes of contesting the objective next turn
Lone broadside takes aim an kills two assault marines, including the sergeant. The last mans standing holds though, meaning fisticuffs for the battle suit next turn
Gue'vesa squad make their run to reclaim objective 1 for the Tau, reestablishing the reinforcement stream for next turn
While the fire warriors blob at the tunnel entrance, ready to breach next turn
VP – Tau 3:1 Ultramarines
Turn 5 – Ultramarines
Spoiler:
Sorry, no turn overview photo again, obviously too enthralled. Termies regroup and charge straight back into the fight. Sternguard finally decide to abandon the objective also, leaving the newly arrived TAC squad to string themselves out to both claim the objective and get some plasma gunners into the neighboring asteroid
Lone assault marines shimmies up to the broadside, more than a little apprehensive about what comes next...
Psychic, and the Libby gets Shrouding and Mental fortitude off on his unit
But once more hot dice from the Tau deny the psychic shriek
Fire from the plasma gunners kills a stealth in the ruins. They would hold.
While krak fire from the termies cyclone missile launcher kills a crisis , instagibbing him
His wounded compatriot would then break and leg it towards the access tunnel
Assault, and the lone marine somehow manages to survive overwatch and makes it into combat. It is, however, a stalemate and they stay locked up
TURN 5 – Tau
Spoiler:
Again, no overview. Reinforcements arrive in the form of a broadside with missile drones. Just what the marines want to see rocking up about now...
Stealth teams reposition around objective three
While the fire warriors finally breach into the thick of it. Crisis does not regroup, but also doesn't make the 6" move to traverse the tunnel
Broadside continues to move up with a solid 6" run, while the gue'vesa shuffle around
While the pathfinders move up to claim objective 3, and position themselves to take over incase things go south for the broadside
Shooting from the fire warriors and stealth teams once more focuses on the termies
and results in the sergeant going down. This time the unit would hold though.
Assault, and the unthinkable happens. In a glorious day for tiny fisted Tau everywhere, the broadside bests the assault marine in combat!
so overjoyed is he at his amazing feat, that he consolidates back towards the objective. And more importantly towards his support.
Assault jumps, and the stealth teams reposition to claim the objective as well as offer supporting fire in the face of the inevitable terminator charge.
VP – Tau 4:1 Ultramarines
Turn 6 – Ultramarines
Spoiler:
We roll to see if the game continues.... and it does! Turn overview, and things are looking bleak for the Ultramarines boarding action. It is make or break time
Sternguard move up to the edge of the asteroid enclosure, while the termy and Libby move towards the stealth team.
Shooting results in nothing, which is just as well as the termy and Libby can now charge. The weather the over watch no problem, thanks to the terminators 2+.
And easily destroy the stealth team in combat
They then consolidate towards the objective, contesting it
TURN 6 – Tau
Spoiler:
Turn overview. Time to put the hurt on the Libby and company
Broadside moves up. He is probably not going to see any action this game
Pathfinders consolidate the objective, but no threats insight
Crisis regroups in a timely fashion, and maneuvers for an angle on the Libby unit, along with the mass of fire warriors
Shooting, and the Crisis and stealth suits take out the final terminator between them
While the weight of fire from the rapid firing fire warriors proves too much for the Libby. This gives the Tau Slay the Warlord, and ends the Ultramarines last best hope.
Crisis jumps up to claim the objective, failing his dangerous terrain test but just about making the armour save. Phew...
VP – Tau 5:1 Ultramarines
Turn 7 – Ultramarines
Spoiler:
We roll to see if it continues, and it does, but the marines are playing for bonus points now. Turn overview
Sternguard breach, hoping to shoot the Tau off the objective and deny them the bonus points
They go for the dragon fire rounds to try and circumvent the stealth suits cover saves, but it doesn't work as they make all their 3+ armour saves instead.
Plasma gunners also fail to take out the crisis, and with that the game is called.
TURN 6 – Tau
Spoiler:
Turn overview - objective 1 is held by the Tau, as it has been all game
objective 3 is also held by the Tau, although littered with the bodies of kroot and assault marines
Objective four, the scene of the most bitter fighting, finally ends up in Tau hands also
While objective 1 is held by the Ultramarines, as it has been all game.
RESULT
Spoiler:
VICTORY POINTS
Tau: 5 pts First Blood 1pt
Slay the Warlord 1pt
Objectives Held 3pts
Ultramarines: 1 pts Objectives Held 1pts
TAU VICTORY
BREAKDOWN
Decisive moment – rolling on the warlord traits. Master of Ambush gave the Tau a huge advantage over the Ultramarines. While the Tau strategy was always to maximize the amount of infiltrators to challenge for objectives, being able to infiltrate everything meant a lot more pressure could be bought to bear on the Ultramarines from turn 1.
Key units
Tau: Lots of contenders, Stealth teams were good as usual and the crisis suits helped deal with the terminators, but the man of the match has to go to the broadside for almost single handedly ending the assault squads push on objective 3, topping it off by showing his hitherto unknown prowess in combat. Brillz.
Ultramarines: Terminators. While the Assault squad got more kills, the termies soaked up enormous amounts for fire, and kept the marines in the game while all other units were faltering. Given more support, they would have proved invaluable.
STATS
Tau: Models remaining 51/68
Kill to Death Ratio 0.94
Efficiency 51%
Ultramarines: Models remaining 25/41
Kill to Death Ratio 1.06
Efficiency 49%
POST GAME
Spoiler:
The Tau open the part 2 campaign with a gritty win, utilizing their deployment advantage to grab objectives and starve the Ultramarines of reinforcements.
Having played the first installment, some rule modifications have been made to try and balance various issues (such as it being very hard to come back from being down to one objective, allowing teleporting units to arrive T1, ensure all 7 turns are played, etc). These changes are already incorporated into the attached booklet, and will be followed for the next mission.
Going into the second mission, the Tau player will be 'in the ascendancy' and will choose to go first or second. The Tau also generated 150pts to spend on reinforcements in the next mission, whilst the Ultramarines generated 50pts.
We successfully infiltrated into Baker Sector of the Mining Station Zebra before our brothers assault began, but suddenly found enemy infiltration forces were deployed danger close to our position, and that they outnumbered us. Serverly outgunned by the enemy, to hold our assign objective all we could do was to dig in, keep our heads down and wait for Brother Librarian and his retinue to come and relieve us. Thanks to our trusty camocloaks we survived the first volley of fire, but those Burst Cannon shots were just too intense, and Brother Scout Caito got hit. Still. We held on as long as we could....
Brother Scout Sergeant Hansus, in the apothecary cell of Accipiter
We moved into Charlie Sector as soon as possible once we boarded the Mining Station. According to the intel, there was only a pack of Kroot and one XV-88 battlesuit defending that sector. Utilizing our Jump Packs, we breached Charlie Sector quickly and charged the Kroot, wiping them out with little difficulty. However, that Battlesuit lending deadly supporting fire wreaked havoc, downing two of my brothers in the chagre. I also got knocked out by the rain of missiles just as we cleared those wretched Kroots. Only Brother Thiel made it through the hail of missiles to charge into the Battlesuit, but the armor of that XV-88 proved too thick for his Chainsword to cut through, and he failed to parry the return blow from that Battlesuit, which clumsily knocked him unconscious, its ham-fisted fist scoring a lucky blow...
Brother Sergeant Vamtice, in the apothecary cell of Accipiter
We breached Able Sector via two Boarding Torpedoes, fired directky from the Accipiter in high orbit. Our initla landing was unopposed, so I led Brother Darith and his men rushing towards Baker Sector to relieve Brother Hansus and his Scouts, while Brother Aries and his Sternguard secured Able Sector and awaited the reinforcements. I was wrong in making this decision; we did not have enough hitting power to push the Tau out of Sector Baker. Even though the Terminator brothers fought extremely hard, those Tau Battle Suits still whittled us down and held on long enough for their reinforcement to arrive.
It was a tough encounter, and this defeat has dealt us heavy blow in the battle for the Passenger Ferry Terminus. It once again told us to never underestimate our opponents. Thank the Emperor, my wounds are healing quickly, and I am going to lead the boarding force attacking the Engineering Sector of this Mining Station in the next hour.
Brother Librarian Herbort, in the apothecary cell of Accipiter
Think what you will about these Gue’ron’sha – they may have the tactical subtlety of a Greater Gnarlok on heat, but their savage directness has its place in warfare. This is one of those times.
While not wholly unexpected, out analysis of the enemy strategy thus far led us to believe that a full frontal assault would be undertaken. As such, our focus was on manning the defense batteries to repel the larger ships. The assault began at 06.30 hrs. Standard Empire Time (SET), but not in the manner expected - a number of boarding Torpedo’s small enough to evade out guns began slamming into the loading bay of various areas, most notably the Passenger terminus.
We immediately deployed our mobile reserve to counter the threat, and met stiff opposition. Elements of the enemy force had even been able to infiltrate onto the station in advance of the main boarding party, unknown to us. This is an unacceptable breach of security which could have cost us the battle – we have tried to ascertain how they managed it, but so far it remains a mystery. Perhaps the governor’s troops were not as thorough in clearing out the loyalists as they thought? Inside help remains the most likely explanation.
As it is, the battle swung in our favour and we have successfully repelled in invaders. Our Gue’Vesa allies have been left to clear up and hold these sectors, while the reserve goes back into its mobile deployment – ready lest the Imperials try this again.
The major mistake on Ultramarine side is leaving the Sgernguard in the back field. Which is best used in 12 inch from enemy. And they should have more fast moving units.
SM had a good list but poor decision making plus shriek always being denied was huge and seems to have been very lucky for you. These games always seem to play out the same.
Neophyte2012 wrote:The major mistake on Ultramarine side is leaving the Sternguard in the back field. Which is best used in 12 inch from enemy. And they should have more fast moving units.
Well, it was a tough decision to make - without them holding it, you would not have got any reinforcements if you had regained your second objective, but then again after losing the second objective it might have been wiser to abandoned it and pushed forward with what you had. I think another unit of scouts starting on the board would have been a better solution, as they would have been cheaper and less wasted hanging back. In fact, more scouts all round for infiltrating onto objectives/stopping my infiltrators would be a good idea (but then I love scouts, so am biased )
Dozer Blades wrote:SM had a good list but poor decision making plus shriek always being denied was huge and seems to have been very lucky for you. These games always seem to play out the same.
Shriek was only denied once and it failed to hit once, but you are right still quite lucky - maybe not game defining though. I think Tau rolling 'master of ambush' was a much bigger factor, but then I also played to the mission objectives more. It also helped that the SM reinforcement flow was cut so early - something we have revised for the rule set so it doesn't go so hard on a player who goes down to one objective in the future.
As for the way the games play out, it generally seems that the initial SM attack fails to do enough damage, and then sort of fizzles out under the weight of Tau fire. That is the price you pay for a smaller elite force I guess, the only solution I can think of is putting more boys on the board at the expense of toys and try to match the Tau in numbers (as far as possible) and overwhelm them with threat overload. It also doesn't help that my opponents dice have been consistently cold, except in mission 1.3 - which he went on to win.
You're just a better player than your opponent. In every way. His lists have gotten better though so that's a step in the right direction. I'd love to see some reports where you have to face a true challenge like your GT batreps.
Well, I'm not sure that's true but we both started gaming regularly again last year and so we are both on a 40K learning curve - and this campaign is helping both us us develop our skills. By the time this years Hong Kong GT comes around, we should both be in a better position to perform
Bonuses: The Tau generated 150pts to spend on reinforcements in this mission, whilst the Ultramarines generated 50pts. Ascendancy: Having won the first mission, Tau Forces are in the ascendancy
Tau Forces: Fire Warriors from the Setpworld of Fi’Rios 1147pts
Fast Attack ASSAULT squad x 5 100pts (reinforcing unit) - Sergeant Vamtice, Power Axe BIKE squad (x3), Grav Gun 78pts - Sergeant Lazlo
Total Models 41/Infantry 41/Characters 1 /Vehicles 0/Psykers 1/ Wounds 42
SETUP
Spoiler:
Mission: Mission 2.2 Breach - Capture objectives and hold for reinforcements Deployment: Random Deployment Zone allocation Initiative: Tau are 'in the ascendancy' and decide to go First Special Rules: Reserves, Night fighting, Reinforcements. - Reinforcements: Out of your 1000 point force, up to 500 points may be deployed at the beginning of the game. The remaining points are placed in reserve, and can only be introduced into the battle as per the reinforcement’s deployment special rule (see below). Units arriving as reinforcements may not exceed 100 pts in value each. For teleporting units, refer to the campaign rules. - Reinforcement’s deployment: At the beginning of each turn after the first, for each objective held one unit of reinforcements may enter from your board edge. For each additional objective held, one further unit of reinforcements may enter from your board edge.
Terrain: Mining Station Zebra is a cluster of hollow asteroids linked together by walkways, containing heavily damaged facilities and ruins. To represent the cluster of small asteroids and link bridges, 2’ x 2’ boards will be used in the below arrangement (see below).
Objectives are placed inline with the mission rules, in the centre of each asteroid enclosure
Warlord Traits: Tau roll on Strategy Traits and get 'Master of Ambush', but decides to reroll and gets 'princeps of defeat' instead (three enemy units take pinning test, which I forgot to do ), while the Librarian rolls on Space Marines Codex traits and gets 'Rites of War' (morale checks within 12" of warlord use his LD)'. Psychic: Librarian rolls on Telepathy and gets Mental Fortitude, with Psychic Shriek Primaris. Once more a tough break for the Libby, but shriek is still decent. The Tau are unaware of the warp, innocent little blue dudes.
PRE GAME ANALYSIS
Spoiler:
Reasons why Tau will win:
1: Mobility. Most units are on foot like their marine adversaries, but the stealth suits and crisis can assault jump around (crisis having the extra boost of VRT) making them super mobile and able to go after objectives/hunt the enemy down. 2: High model/wound count. The utilization of cheap bodies available in the Tau codex, as well as being 100pts up due to bonuses, means a lot of meat to put into the grinder (over 90 wounds!). The smaller elite space marines force might not have enough firepower to effectively clear the bodies away from objectives. 3: Volume of Fire. Tau have multiple units who can pump out obscene amounts of S5+ fire, which will whittle the Space Marines down even with their 2+/3+ saves. They are also mostly assault weapons, so if things get desperate they can pile in with their tiny fists of fury.
Reasons why the Ultramarines will win:
1: Librarian - Space Marines effectively get a whole phase to themselves, while the Libby has previously proved how dangerous he can be against Tau in assault. 2: Asteroids - with firing being limited to within asteroid enclosures (24"x24"), the Tau range threat is severely curtailed, which should mean more marines making it into combat. 3: Terminators/Libbynator. Expensive, but hardy enough to weather the Tau volume of fire and get up close and personal with the filthy xeno scum. Also able to teleport right in the action this time (thanks to the rules change) so should be able to make a huge difference...as long as they don't mishap
DEPLOYMENT
Spoiler:
Tau are in the ascendancy and choose to go first. They also win the roll off to choose ends and go for the left hand side (objective 1). Cadre fireblade and both units of pathfinders start up on the 6" line, while everything else infiltrates.
Ultramarine bikers deploy near objective 4, everything else infiltrates or teleports.
Infiltrators deploy - kroot grab objective 2
Ultramarines then deploy their sole infiltrating unit (the scouts) directly onto objective 3 and into cover
The Stealth teams then join the Kroot and deploy into a strong defensive position around objective 2
Scout moves, and the pathfinders move up 6"
While the scouts realize they are not quite on the objective, so move down into range
Deployment overview
Ultramarines roll to seize..... and fail.
TURN 1 – Tau
Spoiler:
Pathfinders roll poorly on their difficult terrain tests, so opt to stay within 6" of each other incase the Libbynators teleport in to challenge objective 1
While Stealth and Kroot remain dug in, waiting to see where the Libbynators will drop
Tension clear on the faces of the waiting (and possibly hungry) kroot
TURN 1 – Ultramarines
Spoiler:
Libbynators come in, and they opt for the safe deployment and drop within 6" of the scouts and their teleporter homer
Bikes move up
Psychic, and red hot denial dice for the Tau follow on from the last game
Libbynators opt to run, moving in the direction of objective 2 asteroid
While bikes flat out
VP – Tau 2:2 Ultramarines
TURN 2 – Tau
Spoiler:
First wave of reinforcements arrive - the Crisis team and a broadside come in
Ion rifle pathfinder move into cover
Stealth teams and kroot remain dug in around objective 2
While Broadsides, rail rifle pathfinders and crisis move and run forwards
TURN 2 – Ultramarines
Spoiler:
Ultramarine reinforcements arrive, in the form of the assault squad and the plasma totting TAC squad
Who immediately move up
Bikes move in to join up with the guys holding objective 3
While Libbynators prepare to breach the Tau held asteroid
Still no Tau in sight, so reinforcements run
While bikes flat out top support the libbynators
VP – Tau 2:2 Ultramarines
TURN 3 – Tau
Spoiler:
Game overview. Lots of running thus far.
Tau reinforcements arrive - the other broadside, and a unit of fire warriors
Stealth suits back off the projected libbynator entry point
While crisis and rail rifle pathfinders move to support them
Broadside and ion rifle pathfinders head to bring pressure on objective 3
TURN 3 – Ultramarines
Spoiler:
Two more units arrive for the ultramarines - two TAC squads - while the assault marines move up to the access tunnel entrance
Libbynators breach - battle is finally met!
Psychic, and Libby casts Shriek at the stealth unit. Tau fail to deny, and Libby hits - only to roll a 7! no damage taken, woeful stuff from the Libby
He does manage to cast mental fortitude though, help stop them running off the table of they get shot up next turn
Terminators open up on the kroot - frag missiles from the cyclone missile launcher take care of three
While storm bolters get another 3, the remainder breaking and legging it 5"
Everything else runs
VP – Tau 1:2 Ultramarines
TURN 4 – Tau
Spoiler:
Game overview. starting to warm up
The kroot have abandoned their post, so only one units arrive for tau this turn - the fire warriors
Kroot regroup, stealth suits move in on the libbynators
Crisis team and rail rifle pathfinders time their breach to catch the libbynators in a crossfire
While broadside messes up his run and blocks the entrance to asteroid with objective 3
Pathfinders open the shooting, and take out the termy sergeant with the rail rifles, as well as lighting them up with a single ML token
Crisis then use the token to kill two more termies with their plasma rifles
Stealth suits then finish the job, killing the last two termies for First Blood, and stranding the Libby all on his lonesome
Crisis and stealth suits then jump out of assault range from the Libby and approaching bikes
TURN 4 – Ultramarines
Spoiler:
Last unit arrives for the Ultramarines - a TAC squad with ML
Libby moves towards cover
While Assault marines breach, but move straight for cover as they are well out of charge range
While the bikes also breach, eyeing up the squishy pathfinders
The blue tide advances slowly
Libby cast shriek once more, this time at the crisis team...
...and utterly annihilates them. Major blow struck by the chief smurf
Bikes attempt the charge, but fail on a roll of 5" . They then lose one bike to over watch. Oh, the ignamy...
VP – Tau 3:2 Ultramarines
TURN 5 – Tau
Spoiler:
Game overview. Still in the balance
Tau accidently abandoned objective 1 last turn so only one unit arrives - the last unit of pathfinders
Fire warriors, cadre and broadside move into position to breach next turn
While other broadside moves in to harass the scouts
Kroot and stealth take aim at the bikes
And wipe them out
Rail rifle pathfinders take aim at the Libby, but only cause one wound between them
While the broadside kills two scouts, even when snap shooting. They would break, but not run very far, and temporarily lose their grip on the objective
Stealth units then move away from the assault squad lurking around the corner. Poor kroot...
TURN 5 – Ultramarines
Spoiler:
Plasma TAC squad enters the fray to support the assault boys
who make their move towards the kroot
Libby lines up the charge on the pathfinders
While another TAC squad moves to support the scouts. The MLTAC hangs back to hold objective 4
Libby tries to cast shriek - but is denied by the Tau.
He then charges the pathfinders, but is wiped out in over watch. This gives Tau Slay the Warlord
Assault squad makes the charge on the kroot
And wipe then out with no losses, consolidating out of LOS from the stealth suits. Tau lose control of the objective.
VP – Tau 3:1 Ultramarines
TURN 6 – Tau
Spoiler:
Game overview. Time for both sides to start making their endgame moves
Gue'Vesa arrive for Tau, but they are pretty irrelevant at this stage
Tau player makes a mistake here - stealth suits cannot see the assault squad, so they back off as far as possible (what they should have done is charged, naturally)
leaving it to the rail rifle pathfinders, who move in for the kill
Fire warriors and broadside move in to support
While ion rifle pathfinders move in to support the broadside hassling the scouts
Shooting, and the rail rifle pathfinders only manage to kill one assault marine.
Broadside kills the lead two marines trying to support the scouts. They would hold.
Other units move up into better support positions
TURN 6 – Ultramarines
Spoiler:
Assault marines make the jump move to get in close to the stealth suits
While the scouts continue to cower
TAC squad moves up and takes aim at the pathfinders
and annihilate them. AP5 being and issue for pathfinders in the open. Dangit.
Arriving marines also kill two pathfinders in the neighboring asteroid, causing them to break and block the route for tau reinforcements
Assault marines charge the Stealth, careful to avoid supporting fire from the lurking broadside
And destroy them , but leaving themselves rather exposed for the next turn
VP – Tau 3:1 Ultramarines
TURN 7 – Tau
Spoiler:
Game overview. Battle has swung the ultramarines way, who are now in the driving seat on account of having gone second.
Final Tau reinforcements arrive
Pathfinders regroup, allowing them to clear the way for the fire warriors to come in behind them
Stealth and broadside take aim at the assault squad, and fill them full o'shot
While the fire warriors and cadre stay still and unload into the TAC squad. They need to wipe him out or break them to avoid having them contest the objective, but only manage to kill four! The lone Serg would then hold!
Another Tau mistake - the Broadside makes a run on objective 3, trying to block the scouts route with drones (he should have charged the scouts instead)
Shooting at the supporting marines is ineffective also
Stealth suits also move up onto objective 2, trying to tempt the lone serg into charging
TURN 7 – Ultramarines
Spoiler:
Now or never for the marines. The lone serg moves up into claiming distance of objective 2, and now has control of it over the stealth suits on account of being ObSec. This gives the ultramarines a VP.
While in the neighboring asteroid, the TAC squad move up and shoot the broadside dead with their plasma gun
The scouts then shoot the blocking drone, allowing them to creep just up into range of the objective and also control it on account of being ObSec (and drones being non scoring). This gives the ultramarines another VP!
And with that, the game ends after 7 turns
RESULT
Spoiler:
VICTORY POINTS
Tau: 3 pts First Blood 1pt Slay the Warlord 1pt Objectives Held 1pts
Ultramarines: 3 pts Objectives Held 3pts
DRAW
BREAKDOWN
Decisive moment – actually two Tau mistakes. T6, and stealth suits should have gone after the assault squad rather than backing off, tying up the arriving forces further away from the objective. In T7 the broadside should also have charge the scouts - with the drones intact, he would have stood a decent chance at breaking them and clearing them off the objective or at the very least tar pitting them and keeping himself safe from shooting.
Key units
Tau: Crisis Team - showed their speed in getting up into the line quickly from reserves, and arrive just at the right time to take the sting out of the Libbynators. They then died horribly to psychic shriek, but I guess you cant deny the witch all the time when you know nothing of the warp...
Ultramarines: Assault squad. Not only finished off two units, but were also the threat that made the stealth teams back off, allowing objective 2 to be nabbed on the last turn.
STATS
Tau: Models remaining 54/83 Kill to Death Ratio 0.75 Efficiency 43%
Ultramarines: Models remaining 19/41 Kill to Death Ratio 1.31 Efficiency 57%
POST GAME
Spoiler:
The ultramarines grind out a stubborn draw, grabbing the key objectives in the last turn.
Going into the third and final mission, neither player will be 'in the ascendancy'. The Tau generated 50pts to spend on reinforcements in the next mission, whilst the Ultramarines generated 150pts.
Excellent batrep. As was said before, the Ultramarines have seemed to be at a disadvantage because of their low number of bodies, it seems, however they really picked up the pace this round and that was a fairly close battle.
O'connell wrote: Excellent batrep. As was said before, the Ultramarines have seemed to be at a disadvantage because of their low number of bodies, it seems, however they really picked up the pace this round and that was a fairly close battle.
Keep 'em comin!
Thanks! Yeah, this time shooting went ok for the smurfs - psychic shriek proved its worth and the bolters also had a good time against some of the 5+ saves on the Tau side. The bikes also really helped with the mobility issues of the marines (even if they died before firing a shot), along with the change in rules allowing the termies to deep strike first turn. The Ultramarine list keeps getting better the more mission-orientated it gets, I expect to see more scouts on the board T1 and bikes in reserve in the final installment
Ultramarine also made a significant mistake in the game. The fast moving Biker and the relatively slow Terminator squad should not try to go through the same choke point into battle. Which caused a traffic jam which eventually led to the death of both squads. I would say Ultramrine had a better list and a better deployment. And the lady luck actually goes to both side. So it ends in a draw.
Definitely Lady Luck or a bad set of dice. I remember plenty-a-game when my force outnumbered and outgunned the enemy 2:1... Yet a few bad dice rolls caused a humiliating loss.
O'connell wrote:Definitely Lady Luck or a bad set of dice. I remember plenty-a-game when my force outnumbered and outgunned the enemy 2:1... Yet a few bad dice rolls caused a humiliating loss.
Yes, so far in this campaign my opponent has had the worse of the dice rolls - maybe it will start to even out in the second half
tetsuo666 wrote:Thanks for your excellent reports. Your last scenarios are interesting but not very good for SM on foot against Tau
Thanks!
Don't forget though, the Tau are on foot too and mobile play is required to capture the objectives Sure, the jet pack crisis suits give the Tau a bit of mobility, but then the Ultramarines have bikes, jump pack assault troops as well as the only deep striking unit allowed (which also auto-arrives turn 1!) so if anything the advantage is slightly more in the smurfs favour. The ranged advantage of Tau over SM is also nerfed by the size of the asteroid enclosures (about 24"), so being on foot is not really a disadvantage to the Marines anymore than it is to the Tau.
Dozer Blades wrote:They are all rigged.
As rigged as Riggy McRigstein, Chief Rigging Officer incharge of adjusting the rigging aboard The Oil Rig 'Rigsby's Pride' somewhere off the cost of Riggerston...
Tau are super mobile and have the firepower to match. I feel as though marines are able to lumber forward, on foot, supported by armored vehicles, soak up a tremendous amount of firepower, be able to dish that firepower back, and then being able to close in an assault with the vanguard of the force; much like the imperial guard, save for conscript-charge-style assaults. Unless, of course, you're that kind of a guard player.
Tau are super mobile and have the firepower to match. I feel as though marines are able to lumber forward, on foot, supported by armored vehicles, soak up a tremendous amount of firepower, be able to dish that firepower back, and then being able to close in an assault with the vanguard of the force; much like the imperial guard, save for conscript-charge-style assaults. Unless, of course, you're that kind of a guard player.
Marine player is just a bit outclassed. It was really evident when he was still using the biker command squad. Against Tau he should have been making those grav guns talk against the suits for a couple turns before jumping into assault. And I never saw him use the vindi to break up lines of sight for supporting fire. Drop pod placement is usually sketchy, why not drop the dred where it can survive to make cover and assault something squishy the next turn rather than always right in front of what can kill it? His forces need to support each other a little bit better. And why put shrouding on troops instead of on the bikers, who can jink for that 2+ before diving into the broadsides or command squad? If you're going against tau in assault, fake out supporting fire with a throw away unit, break up supporting fire LOS and then multiassault everything you can and hope that you break them in their turn, not yours. Even if they break early, hey, you killed two squads instead of one.
Tau are super mobile and have the firepower to match. I feel as though marines are able to lumber forward, on foot, supported by armored vehicles, soak up a tremendous amount of firepower, be able to dish that firepower back, and then being able to close in an assault with the vanguard of the force; much like the imperial guard, save for conscript-charge-style assaults. Unless, of course, you're that kind of a guard player.
Tau are super mobile and have the firepower to match. I feel as though marines are able to lumber forward, on foot, supported by armored vehicles, soak up a tremendous amount of firepower, be able to dish that firepower back, and then being able to close in an assault with the vanguard of the force; much like the imperial guard, save for conscript-charge-style assaults. Unless, of course, you're that kind of a guard player.
except that marines can't do that on the table.
Why not?
as in the above battle they get shot to bits before getting to anything. Volume of fire brings everything down, not to mention the amount of ap2 shooting that is easy to come by.
Marines might as well have an ork armor save when shot at by those.
Obviously in the above, yes. Tau are an extremely formidable opponent (dare I say overpowered?) My solution to his problem would probably be a lot of assault marines and extreme cover utilization.
O'connell wrote:Tau are super mobile and have the firepower to match.
Yes, this is generally true of Tau but in the context of this mission and the restrictions the Marines are actually more mobile. Also, the main advantage of Tau firepower (superior range) is restricted by the asteroid enclosures.
raiden wrote: Volume of fire brings everything down, not to mention the amount of ap2 shooting that is easy to come by. Marines might as well have an ork armor save when shot at by those.
Yup, Power Armour basically melts under VoF pulse rifles, especially with the Fireblade's buff. Its been said before, but 3+ saves 'aint what they used to be...
Dozer Blades wrote:units such as terminators are not cheap and eat up a lot of points.
Again, I would normally agree (especially when there is only 500 points starting on the board) but they do offer a significant tactical advantage in the context of this mission, in that they are the only deep striking unit allowed by either side and can arrive T1. In this case, their deployment was just a bit too conservative (deciding to use the scouts locator beacon to avoid a DS mishap). IMO they would have been better off striking right into the Tau reinforcement zone and causing havoc/slowing down the reinforcement trickle while the supporting units lumbered forward.
If I were in the SM player's boots, in the next mission I would probably go for more scouts to infiltrate at the beginning, some solo deep striking Libby's to target the battlesuits with psychic shriek and try to get into CC/slow Tau down, with bikes and assault squads arriving from reserves to get up and support quickly. There could even be a role for the Scout Biker somewhere? Infiltrating bikers could be a threat to the Tau deployment zone early doors.
- If I ploped down those Terminators in your back zone, your suits would be fast responding,
If I got lucky, I would kill a unit, MAYBE two if got REAL lucky. At that point ap2 cuts me down with VoF, no support to be had for the poor guys (which, is really what killed his units this game)
What he SHOULD have done, was breach that (sphere?) with his assault squad and terminators at one time, at that point he could have caught your suit squad. (From what I could tell, you can't shoot into or out of other "spheres?")
After that, he should have moved his tacs to take the obj. from his sternguard. If he could have gotten those assault marines to catch the suits his terminators would have gotten in and made mince meat of them.
raiden wrote: If I ploped down those Terminators in your back zone, your suits would be fast responding,
If I got lucky, I would kill a unit, MAYBE two if got REAL lucky. At that point ap2 cuts me down with VoF, no support to be had for the poor guys (which, is really what killed his units this game)
Interesting point, but I'm not sure that I agree.
Crisis suits didn't come in until Turn 2. If the Libbynator squad had dropped into the Tau deployment zone T1, they would only have had to contend with 2 pathfinder teams and a Cadre Fireblade. That squad could easily have killed/broken the pathfinders in shooting (being Ap5 storm bolters vs pathfinders 5+ and split firing the cyclone missile launchers frag missiles at the other team) while the Libby could have psychic shrieked the cadre to death for Slay the Warlord - all best case scenario I admit, but entirely plausible. They could even have contested the objective, reducing the flow of Tau reinforcements/increasing the marine reinforcements immediately and been in a commanding position to intercept Tau reinforcements as they arrived into play.
So lets say the Tau hang on to one objective and the crisis come in T2 - what happens? 8 Rapid fire plasma shots at the Libbynators, 4-5 hits, 3-4 wounds, 2-3 failed saves (rough average). Libby definitely survives thanks to LOS, as does half the squad. No way they are going to break thanks to LD10, and assault jump is unlikely to get the crisis out of charge range come the marines turn. Basically game over for the Tau.
Bonuses: The Tau generated 50pts to spend on reinforcements in this mission, whilst the Ultramarines generated 150pts.
Ascendancy: Having Drawn the second mission, neither force is in the ascendancy
Tau Forces: Fire Warriors from the Setpworld of Fi’Rios 1049pts
Fast Attack
ASSAULT squad x 5 100pts (reinforcing unit)
- Sergeant Vamtice, Power Axe
BIKE squad x3 98pts (reinforcing unit)
- Veteran Sergeant Lazlo, PowerFist
BIKE squad x3 98pts (reinforcing unit)
- Veteran Sergeant Deigo, PowerFist
Total Models 47/Infantry 47/Characters 1 /Vehicles 0/Psykers 1/ Wounds 49
(No photo - I forgot to take one! Sorry Neo!)
SETUP
Spoiler:
Mission: Mission 2.3 Lock Down - Capture objectives and hold for reinforcements
Deployment: Random Deployment Zone allocation
Initiative: Random
Special Rules: Reserves, Night fighting, Reinforcements.
- Reinforcements: Out of your 1000 point force, up to 500 points may be deployed at the beginning of the game. The remaining points are placed in reserve, and can only be introduced into the battle as per the reinforcement’s deployment special rule (see below). Units arriving as reinforcements may not exceed 100 pts in value each. For teleporting units, refer to the campaign rules.
- Reinforcement’s deployment: At the beginning of each turn after the first, for each objective held one unit of reinforcements may enter from your board edge. For each additional objective held, one further unit of reinforcements may enter from your board edge.
Terrain: Mining Station Zebra is a cluster of hollow asteroids linked together by walkways, containing heavily damaged facilities and ruins. To represent the cluster of small asteroids and link bridges, 2’ x 2’ boards will be used in the below arrangement (see below).
Note: Setup is slightly different from that outlined in the mission document, mainly because we couldn't fit the tiles on the table in that arrangement.
Objectives are placed inline with the mission rules, in the centre of each asteroid enclosure. The Piles of Iridium Ore (the brown terrain) count as 5+ cover and difficult terrain. All other terrain is ruins.
Warlord Traits:Tau roll on Strategy Traits and get 'Night Attacker', but forget to use it, while the Librarian rolls on Space Marines Codex traits and gets 'Imperium's Sword' (one use Furious Charge for Warlords unit)'.
Psychic: Libby rolls on Telepathy and gets Invisibility, Shrouding and Psychic Shriek Primaris. The Tau are unaware of the warp, innocent little blue dudes.
PRE GAME ANALYSIS
Spoiler:
Reasons why Tau will win:
1: Drones! Ok, so this is the first time I have run such a drone heavy list but I think it will work well in this scenario, as they will be fast moving (jump pack infantry) and able to get up into the fight quickly when arriving reserves. They also provide great VoF and BS2 is kind of mitigated by the TL. Pinning could also come in very handy. The Mini-Batmander unit (Commander, dual BC, Drone controller, 7 gun drones) puts out 22 shots at range 18" alone, and could be lethal.
2: Mobility. Some units are on foot like their marine adversaries, but majority - drones, stealth suits and crisis suits - can assault jump around making them super mobile and able to go after objectives/hunt the enemy down/get up quickly form reserves.
3: Volume of Fire. Tau have multiple units who can pump out obscene amounts of S5+ fire, which will whittle the Space Marines down even with their 2+/3+ saves. They are also mostly assault weapons, so if things get desperate they can pile in with their tiny fists of fury.
Reasons why the Ultramarines will win:
1: Libby - Space Marines effectively get a whole phase to themselves, while the Libby has previously proved how dangerous he can be against Tau in assault. Psychic shriek is also brutal against crisis suits.
2: Asteroids - with firing being limited to within asteroid enclosures (24"x24"), the Tau range threat is severely curtailed, which should mean more marines making it into combat.
3: Terminators/Libbynator. Expensive, but hardy enough to weather the Tau volume of fire and get up close and personal with the filthy xeno scum. Also able to teleport right in the action this time (thanks to the rules change) so should be able to make a huge difference...as long as they don't mishap
DEPLOYMENT
Spoiler:
Ultramarines win the roll off to choose ends and go for the left hand side (objective 4). Tau win the starting roll off and ecide to go first.
Cadre fireblade and Batmander unit (Commander and 7 drones) deploy on the edge of the Tau DZ.
While Ultramarine have a null deployment strategy
Infiltrators deploy, and kroot grab objective 2
Ultramarines deploy their first unit of scouts directly onto objective 3 and into cover. This is a bold move by the ultramarines, but possibly a mistake.
Tau player had intended to use the stealth team to challenge for objective 3, but since the Marines have left their Deployment zone unguarded the Stealth teams deploy onto objective 4. They are now in a great position to intercept arriving reinforcements.
Luckily, all is not lost for the ultramarines - the second scout unit comes in behind LOS blocking terrain and within 12" of the stealth suits, ready to challenge them for the objective.
Scout moves, and the first group shuffle on objective 3, trying to get in range of the kroot
While the second squad move into the ruins for some cover
Ultramarines roll to seize..... and fail.
TURN 1 – Tau
Spoiler:
Cadre fireblade hangs onto objective 1, while the batmander unit moves and runs up to the asteroid entrance ready to breach next turn.
Kroot stay still and snipe the scouts, killing one.
While stealth stay on the objective and shoot the other scout unit, also killing one. They opt to not assault jump, instead relying on their 4+ cover in the open to keep them claiming the objective.
TURN 1 – Ultramarines
Spoiler:
Libbynators come in, and they opt for the safe deployment and drop within 6" of the scouts and their teleporter homer
Psychic phase, and the Libby gets invisibility off on his unit.
Shooting, and combined shooting from the termies and the scouts only manage to down one kroot on the opposite objective (thanks mostly to the kroot going to ground)
VP – Tau 3:1 Ultramarines
TURN 2 – Tau
Spoiler:
Tau get three reinforcing units this turn, and bring in all three crisis teams
Stealth suits get a bit hot headed and decided to assault the scouts in the Ultramarines DZ. They move off the objective
While the Batmander breaches into the central asteroid
Shooting from him and the kroot cause no casualties on the invisible Libbynator squad
But the stealth have better luck, softening the scouts up by killing 2 in shooting
They then charge, easily making the 5" range...
...and kill the scouts in assault for no losses! Yes, you saw it here first folks - tiny blue fists of fury! This also gives the Tau First Blood
The newly arrived crisis suits them run and assault jump up towards the action. Fireblade hangs tight.
TURN 2 – Ultramarines
Spoiler:
Marines hold one objective, so the plasma wielding TAC squad comes in to deal with the stealth squad.
They move into a better position
But fail to kill any stealth suits in shooting (thanks to the 2+ cover save). Worse still, they lose the plasma gunner to gets hot!
In the centre, Libbynator squad moves forward and unleashes everything at the kroot
They have better luck this time, killing 7. Unbelievably though, they would hold and retain the objective.
VP – Tau 3:1 Ultramarines
TURN 3 – Tau
Spoiler:
Tau hold two objectives so both drone squads come in
Batmander moves up onto the ore pile, getting the angle on the Libbynator squad
He then lets lose all 22 shots at BS5, killing three termies even with their 2+ saves. This guy is lethal... but the termies would pass their pinning and morale checks and hold.
The stealth team are now in the full grip of the Mont'au, and decide to assault AGAIN! They soften up the TAC squad first though, killing one in shooting
Before once more making the 6" charge, losing none to over watch
Combat goes against the marines, with two going down to no loss for the Tau. The Sergeant holds the line on his own.
Meanwhile, the crisis and drones move up towards the action
With the solo flamer crisis and Dual plasma Team breaching the asteroid on their assault jump moves (needing to roll 6's)
TURN 3 – Ultramarines
Spoiler:
Marines are hanging on in there, but only just. One objective is still held so reinforcements come in - this time its a bike squad, who head straight for the action
Psychic phase, and the Libby comes into his own. He casts Psychic Shriek on the plasma crisis team, and utterly annihilates them with a roll of 16!
The Cyclone missile launcher then targets the flanking solo flamer suit, and doubles him out with a crack missile! Things are suddenly looking up for the marines!
The scouts, eager to get in on the action, also manage to kill a single kroot from range. This time they break, abandoning the objective as well! What a turn around!
Combat continues, and the stalwart sergeant kills a suit, winning the combat! Alas, the stealth team would hold, but still a good result and keeps them tied up while more reinforcements arrive.
Bikes cap off a great round by doubling up, ready to breach next turn. Can the marines keep the momentum?
VP – Tau 2:1 Ultramarines
TURN 4 – Tau
Spoiler:
Tau only hold one objective, so the fire warriors come in and try to join up with the cadre.
Second plasma crisis team breaches, while the drones move up into position ready to try and breach with their assault jumps
Lone kroot rallies and moves back onto the objective. Batmander and the plasma crisis team move in on the libbynator unit...
...and kill a terminator and the Libby. The remaining termie would hold, but the Tau pick up Slay the Warlord
Assault is a bust - the serg hangs on in there
While plasma Crisis team assault jump away from the lone terminator and his 'krak missiles of double-out doom'
Finally, one drone squad breaches but the other gets hung up.
TURN 4 – Ultramarines
Spoiler:
Marines still hold an objective so another unit of bikers comes in
In the centre, Bike squad breaches and rushes to help the scouts hang onto the objective
While the Lone Termy tries his luck against the Batmander, and manages to take out two drones and put a wound on the commander himself.
Scouts attempt to charge the crisis and tie them up - but fail the distance!
While the serg finally succumbs to the sheer weight of tiny blue fists! The stealth team consolidate back towards objective 4.
Bikes move up top breach next turn
While the other bike squad move up to support the scouts
VP – Tau 4:1 Ultramarines
TURN 5 – Tau
Spoiler:
Final reinforcements one in for the tau - the mighty gue'vesa!
Batmander moves in on the lone termy, while a drone squad moves in behind him to cover the second bike squads possible breaching point
The other drone squad breaches to support the plasma crisis team
Shooting, and the drones bring their Volume of fire to bear. In one turn of brutal shooting, the Lone Termy is taken out by the drone squad around objective 2. Batmander then takes out the scouts holding objective 3, while the bike squad is killed off by the gun drone squad next to the crisis. Utter carnage for the Ultramarines!
The plasma crisis them easily claim the uncontested objective.
While the stealth team jump away from the bikes to make any possible charge more difficult
TURN 5 – Ultramarines
Spoiler:
The marines hold no objectives and are down to a single bike squad. They must reclaim objective 4 and hang onto it to stand any chance of staying in the game. They park on the objective, eschewing the chance to charge the Stealth (who are 10" away anyway).
Now they just need to hold on!
VP – Tau 5:1 Ultramarines
TURN 6 – Tau
Spoiler:
Time to make or break the game. The stealth team, still in the grip of the Mont'au, once more prepare themselves for assault! They move towards the bikers
And soften them up with some shooting. Scoring 6 wounds, the bikers need to make their 3+ saves...
...and fail three! The bikers are wiped out!
And with that the Ultramarine forces are tabled!
TURN 6 – Ultramarines
Spoiler:
Game ended on Tau turn
RESULT
Spoiler:
VICTORY POINTS
Tau: 7 pts First Blood 1pt
Slay the Warlord 1pt
Line Breaker 1pt
Objectives Held 4pts
Ultramarines: 0 pts
TOTAL TAU VICTORY
BREAKDOWN
Decisive moment – There were a couple of bad moments for the Ultramarines - losing the final three bikers to below average rolling, or the loss of the plasma gunner to 'gets hot', but probably the biggest moment was the Tau Rolling to go first. This, combined with the marines null deployment / Infiltrator deployment start mean that the Tau had first pick of three objectives. This gave them the reinforcement boost from the start, as well as putting them in a position to intercept arriving forces.
Key units
Tau: Stealth Team - not only did they destroy TWO (yes, TWO!!!) units in assault, but they also delivered the killing blow than ended the game. These guys are on a mission to change the reputation of Tau in combat, one game at a time...
Ultramarines: Libby. Lead the turn three fight back by annihilating the plasma crisis squad, which almost had the tau on the back foot - until the drones arrives.
STATS
Tau: Models remaining 44/59
Kill to Death Ratio 1.8
Efficiency 64%
Ultramarines: Models remaining 20/47
Kill to Death Ratio 0.55
Efficiency 36%
POST GAME
Spoiler:
The Tau end the pat 2 campaign with a total victory, allowing them to introduce one named character into the next campaign.
They are also victorious in the overall part 2 campaign, earning their warlord the 'Orbital Bombardment' special rule for the Part 3.0 Campaign.
Compared to the initial assault, we had better luck in the Maintenance Bay than in the Ferry Terminus. When we arrived at the field of battle, the Tau were under pressure from Brother Librarian and Brother Darith’s Terminators, so we took the opportunity and charged into the isolated Tau units, finishing the Kroots and Stealth Suits without taking heavy casualties. Although all of us were later wounded by other Tau reinforcing forces, we provided the distraction for Brother Volus and his men to capture the vital region of the Maintenance Bay Sector and secure a foothold on this labyrinthine station.
Brother Sergeant Vamtice, in the apothecary cell of Accipiter
…By the Golden Throne… the Tau Stealth Suits are launching an assault?
Last transmission from Brother Sergeant Nahem
When the Tau Commander in his battle suit and those cursed gun drones aimed their burst cannon and pulse carbine at us, we believed that our invincible Terminator armor would easily deflected those weak incoming shots like rains on the rocks! Alas, the venerable old suits all malfunctioned at the critical moment and failed to protect us…
Brother Sergeant Darith, in the apothecary cell of Accipiter
Despite being an Emperor’s Astartes and having never before failed to do my Emperors bidding, I have to admit that we failed to bring the Mining Station back into the Imperium’s realm. At least, that is, not before we landed on Titan Prime.
In the last few hours we have tried to secure both the Maintenance Vehicle Bay and the Ore Landing Bay, but without success. We barely controlled more vital regions in the maintenance bay than our enemy - which thanks to the bravery, initiatives and wisdom of Brother Volus, Brother Hanus and Brother Vamtice will still hold. However, our actions in the Ore Landing Bay ended in a complete disaster. It is my mistake to task every brother in Hansus’ squad to infiltrate, leaving our landing point unguarded. Though the brothers of the boarding force fought hard, we literally have very little chance to win it. Besides, we should bless the machine spirit of our armor and weapon more properly, especially the plasma weaponry!
But the clock is ticking, and we need to launch our attacks on Titan Prime before the Tau reinforcement from the nearby Xeno system can muster, Thus it is that we will have to leave the station for the main bulk of the Imperium forces to destroy when they arrive. For now the enemy of the Emperor will controlled its bombardment weaponry within, and we may face ever greater dangerous when we landed on Titan Prime. Fortunately for us, all is not lost; this mining station is so colossal that it is not possible to change its orbit swiftly, which in turn limited its threat on us. We have to make our attack plan accordingly.
Brother Librarian Herbort, in the apothecary cell of Accipiter
We may breathe a sigh of refill - the Imperial Attack is over.
The assault has been sustained, and brutal. Our forces and those of our Gue’Vesa Allies have been severely depleted. Many fine warriors – Tau, Kroot and Human alike – have laid down their lives for the greater good this day. Now we can say that sacrifice has not been in vain!
The Imperial strategy of simultaneous attacks was well planned and even better executed, but our strategy of having a mobile reserve was equal to it. Where our lines wavered, the reserve company was able to redeploy quickly and extinguish the threat before it became uncontainable.
The battle came to a head in the Ore Loading Sector. With the majority of our reserve engaged in other areas, it was left to the drones and a few Shas’vre in their battlesuits to hold the line. These Gue’ron’sha, bold and brave as ever, over extended themselves and were cut down. With the landing zone secured and all infiltrating forces neutralized, the Imperial attack faltered.
After what has felt like days of fighting, those Imperial forces that had managed to force a beachhead in the Maintenance Vehicle Bay have admitted defeat and begun to withdraw. Our opponents fought bravely, and we have no wish to add further slaughter to this day’s work, thus we will allow them safe passage off the station. Victory is already ours, and there is no honour in hounding a wounded man to death.
We do not expect any further assault – the cost has been high enough already for the Gue’ron’sha, and the prize is beyond their grasp as much now as it ever was. The station is ours.
While this will not delay the inevitable invasion of Titan Prime below, it does at least offer us some prospect of making that invasion as difficult as possible.
Ok, it is time to put on some review of the mistakes I have made which caused this disaster. Further to the most fatal "null deployment" choice AND the "Tzeentch cursed" blue dices (which not just the lost of plasma gunner and the last bikes. The bikes in the center piece of closures failed all three armor save to only three wounds caused by gun drones ). I found out two more bad bad choices I made during the game.
First is moving the scout close to the stealth suit on Objective 4, which the scouts eventually have no hope to shoot that large suit squad off or contest the Objective before getting shot first, this decision is utterly inviting death. Better decision is hiding them while waiting the tactical squads to arrive and combine the fire and combat ability of the two squads to remove or tie down them. Rather than let the stealth suit to wipe out one then another
Secondly, after the scout is wiped in the top half of T2, it maybe better to simply abendon Objective 4, and let in a squad of bikes in the left flank and move them quick towards the major battle ground. Since the stealth suits are on the 1st floor of the bottom right terrain in Marine deployment, and the bikes can move 12, then turbo boost 12 which puts them at the left connection bridge, it will be almost impossible for the stealth suit to carch them even with their 18 inch guns (at that tme they looked like more than 21 inches on horizontal plane from the upper left corner, if the they try to move closer they have to jump down to the ground floor first) . If the bikes made into the main closure in the middle at T3 unharmed and threat to lauch an assualt on or before T4, Tau may have a harder fight to win as the Terminators are not wiped out yet and the gun drones not yet in. Marines maybe still not able to climb back, but at least can put up a better fight.
Have to learn from the battle, be it utter defeat or great victory. Anyone spotted more mistake I made in the battle. Welcome all comments and discussion
One thing I have expected to see, but have not yet, is for the Space Marine lists to start to optimize for their opponent. While list-tailoring is not a good idea for pick-up games, in a campaign it makes absolute sense: "Brother Martelus, where did I put my power sword?" The terminators need to be on the board when the game starts. Their firepower & resiliency provide good board control versus the Tau. The plasma gun needs to be put away and the squad leaders need to be equipped with power swords; there is no need for AP2 but there is a need to a) discourage the tau from thinking they can win assaults and b) show the tau that they cannot win assaults. Finally, if possible, the Scouts will be more useful armed either with shotguns or with bolt guns. There are no high-toughness targets to go after and being equipped with a Heavy 1 weapon restricts their movement. Mobility is extra important when facing Tau, no?
I'm enjoying these narrative battle reports--keep them coming!
Neophyte2012 wrote:Ok, it is time to put on some review of the mistakes I have made which caused this disaster...
Yeah, I think you pretty much covered it - personally, I would have thrown all my arriving reserves at the stealth team and dealt with them first - I was mightily relieved to see both bike squads zipping right past them and heading for the centre of the board! As I have said before, I would also have been more aggressive with the terminators and dropped them into the Tau deployment zone. The odds of a deep strike mishap are pretty low (more likely to just be a dangerous terrain test or two) and they would have put immediate pressure on the key Tau units, as well as stopped the flow of reinforcements to the centre.
However, I don't think we should underestimate the role your dice played in this one (pun intended) - losing both bike squads to some mediocre shooting and bad save rolls really hurt your cause - I hope you burned them afterwards!
DCannon4Life wrote:One thing I have expected to see, but have not yet, is for the Space Marine lists to start to optimize for their opponent. While list-tailoring is not a good idea for pick-up games, in a campaign it makes absolute sense: "Brother Martelus, where did I put my power sword?" The terminators need to be on the board when the game starts. Their firepower & resiliency provide good board control versus the Tau. The plasma gun needs to be put away and the squad leaders need to be equipped with power swords; there is no need for AP2 but there is a need to a) discourage the tau from thinking they can win assaults and b) show the tau that they cannot win assaults. Finally, if possible, the Scouts will be more useful armed either with shotguns or with bolt guns. There are no high-toughness targets to go after and being equipped with a Heavy 1 weapon restricts their movement. Mobility is extra important when facing Tau, no?
I'm enjoying these narrative battle reports--keep them coming!
Glad you are enjoying them!
The SM list was fairly optimized for this last game, but more so for the mission than the enemy (i.e. infiltrators/deep strikers/fast support units from reserves). The special rules for this campaign meant that terminators had no reason not to deep strike and offered a significant advantage in doing so (arrive T1, only unit on either side that could DS).
Power swords might have helped, but so would have flamers (especially in shooting at the stealth team, getting rid of that 2+ cover save in the ruins). Plasma also does have a role against Tau, plenty of 2+/3+ saves that it circumvents nicely (as well as instant death to a few elites/HQ choices) but again the gets 'hot can' really hurt sometimes (as it has in almost every game in this campaign so far!)
Oh, and the scouts were actually shotguns (just proxied by the sniper scouts) but they still had a hard time getting through the 3+ save of the stealth suits (mainly due to their BS3 and aforementioned dice).
PART 3: The Titan Prime Campaign Escalating 1000/1250+/1500+ point missions with bonuses.
This is Part Three of the Titan Fall Campaign. The Campaign booklet, along with all mission rules can be found in the attached PDF document. Enjoy!
MISSION 3.1: Insurrection
OPPOSING FORCES
Bonuses: None
Ascendancy: Neither
Force limitations for both sides are a single standard Combined Arms Detachment + 1 Formation (from same Faction)
Both Forces are now at full strength, so no restrictions to number of FOC slots apply, and one formation slot has been introduced. HQ choices still exclude ‘named characters’ unless previous campaign bonus was earned.
Tau Forces: Fire Warriors from the Setpworld of Fi’Rios 1000pts
Fast Attack
Pathfinder Team x5, Pulse Carbine with Marker light, Recon armour 55pts
Pathfinder Team x5, Pulse Carbine with Marker light, Recon armour 55pts
Heavy
Hammerhead Gunship, Ion Canon, TLSMS 125pts
Skyray Gunship, Seeker Missiles, networked marker light x2, TLSMS 115pts
Troops
Bike Squad x5, 2x Gravgun, 145pts
- BrotherSergeant Lazlo/i], PF, Combi-Grav
TAC squad x 10, MG, DP, 195pts
- [i]Sergeant Volus, combi-plasma
TAC squad x 10, Flamer, ML, DP, 205pts
- Sergeant Regulus, combi-plasma
Scout squad x 5, LSS with HF, 95pts
- Sergeant Hansus
Elites
Ironclad Dreadnought Ancient Brother Ferox, PFHF, SHMG, DP, 180pts
Total Models 36/Infantry 32/Characters 1 /Vehicles 4/Psykers 0/ Wounds 45
SETUP
Spoiler:
Mission: Mission 3.1 Scorched Earth - Destroy the Objectives
Deployment: Hammer and Anvil
Initiative: Tau win the roll off and decide to go first
Special Rules: Reserves, Night Fighting, Spaceport (see below), Ares Burns! (see below), Rugged Terrain (see below)
•Spaceport: Due to the nature of the spaceport, all deep striking units do not scatter when they arrive.
•Ares Burns!: When an objective is destroyed, it is set alight - roll a D6. On a 1-3, the objective is burning and counts as dangerous Terrain. On a 4-6, the objective begins smoking, adding +1 to the cover save of terrain. In both cases, LOS is now blocked when drawn across them.
•Rugged Terrain: The spaceport is surrounded by sheer cliffs – as such, no outflanking is possible but troops can arrive as normal from reserves on their own table edge.
Terrain: The first exchange on soil of Titan Prime takes place in a spaceport, recently damaged by orbital bombardment. Damaged facilities, intact buildings and wrecked sapcecraft litter the spaceport, which is surrounded by rocky outcrops.
Map
Objectives are the orange barrels
Warlord Traits:Tau roll on codex Traits and get 'A Ghost Who Walks Among Us' (3D6 Assault Jump Moves), while the Captain gets 'Iron Resolve' (4+ FNP).
Psychic: No Psykers are present
PRE GAME ANALYSIS
Spoiler:
Reasons why Tau will win:
1: Volume of Fire. Tau have multiple units who can pump out obscene amounts of S5+ fire, which will whittle the Space Marines down even with their 3+ saves. They also have better range on average.
2: Mobility. Tau list is highly mobile - crisis, stealth, devilfish and gunships - allowing it to get to the objectives quickly and hold them against the space marine advance.
3: Double Bluff. I have gambled that the SM player will NOT bring drop pods, even though nothing scatters due to mission special rules. I am betting he will be afraid of interceptor. As is, I have gone for a mobile fast list to counter his units and compete for the central objectives from the off. Only time will tell whether this gamble has worked or not (spoiler: it didn't)
Reasons why the Ultramarines will win:
1: Mini smashfether - Not the full hit (no command squad + medic, no shield eternal) but still very capable of getting into the tau and messing them up in assault.
2: Drop pods. My gamble has backfired, with my opponent opting for three drop pods and threat overload to see him through any interceptor I may have had. This means five units will be able to drop right into the heart of the Tau formation, circumventing the Tau range advantage and challenging for objectives from T1.
3: Ironclad, AKA the monstersmurf. Always a threat in the drop pod, will be target priority for the skyray/fusion crisis. If he makes it into combat - which he should - it will be a long afternoon for the Tau.
4: New codex. This is the first campaign game since the new codex for SM dropped, so it will be interesting to see if it makes any difference.
DEPLOYMENT
Spoiler:
Tau: The gamble has not come off, so the Tau deploy accordingly in an attempt to stop the Drop pods getting in behind the vehicles. Hammerhead and skyray set up centrally with good fields of fire to either side of central LOS blocking terrain, while devilfish with fire warriors embarked starts on left flank.
Fire warriors and pathfinders full the gaps in between and to the sides, meaning the drop pod will have to come down in front. It is still going to hurt without interceptor, but maybe a little less on the AV 13 fronts.
Commander and crisis suits start in reserve, with stealth and kroot infiltrating
SM: Bike squad and captain start centrally, while scouts grab objective on top of the wreck and MLTAC squad grab objective in the tower
Kroot infiltrate onto right flank midfield objective
While stealth suits infiltrate onto left flank midfield objective
Ultramarines roll to seize and fail.
TURN 1 – Tau
Spoiler:
Main Tau battle line does not move in anticipation of the pods, but drones detach from devilfish and move forward on their own
While stealth suits jump towards the MLTAC squad
Not much is in range for the Tau - ion cannon from hammerhead scatters off the bike squad, but the orbital barrage is on target and takes out two bikes
Stealth suits have a pop at the TAC squad, killing two. They would hold, and stealth suits would jump back into the bunker
TURN 1 – Ultramarines
Spoiler:
First pod comes in straight on top of the objective in the Tau DZ
While the Ironclad comes down in from of the skyray. Pod is just out of scoring range on the objective.
Bikes move forward
and then turbo boost
Ultramarines use their tactical doctrines. The meltagun and a krak grenade both hit home on the hammerhead, causing a glance and crew stunned result. Hammerhead jinked but failed both saves.
The other TAC unit and drop pod both fire at the pathfinders, who go to ground. Only one survives, but he holds
Ironclad shoots at the skyray, which jinks and survives.
VP – Tau 0:0 Ultramarines
TURN 2 – Tau
Spoiler:
All reserves come in for the Tau. Fusion suit drops in behind the Ironclad
Commander drops in to help out the hammerhead
While the Missile suits drop in to help wherever needed
Hammerhead gets out of trouble by cruising forward
While pathfinders move up to engage
Devilfish shoots forward, while skyray gets away from ironclad (snap shooting only due to jink, don't want to waste missiles)
Fusion suit fluffs both shots against the Ironclad. Missile suits try to cover for him, but only manage a single pen and crew shaken result
Commander and pathfinders try to shoot the TAC squad off of the objective, but only manage to kill three marines. They would hold.
Fire warriors run towards the objective
While all the suits jump around
pretty underwhelming turn for the Tau
TURN 2 – Ultramarines
Spoiler:
Final pod comes in, this time to challenge the kroot for the centre right objective. LSS stays out for now.
Having held three objectives for a whole turn uncontested, they are all destroyed for 3 VPs.
Bikes move towards the stealth suits
P While the ironclad zeros in on the fusion blaster suit
Marines use the devastator doctrine. The devilfish is forced to jink by the missile launcher
The 5 man TAC squad kills four pathfinders in the ruin, but the two man unit fails to finish off the lone pathfinder (who again goes to ground)
The flamer makes short work of four kroot, who break
The bike squad lose a marine to dangerous terrain and the captain takes a wound in overwatch, but they manage to destroy the stealth team for First Blood
While the ironclad makes short work of the fusion suit
VP – Tau 0:4 Ultramarines
TURN 3 – Tau
Spoiler:
Tau are reeling under the Ultramarine blitzkrieg. Four points down at this stage is almost impossible to comeback from.
Kroot rally, while the commander moves towards the TAC squad
Hammerhead moves to get the angle on the Ironclads rear armour
As the skyray moves for an angle on the side.
Commander and drones reduce the TAC squad to one. He would hold.
While skyray fires all six missiles into the ironclad, destroying it.
The hammerhead then turns its Ion cannon on the TAC squad, scattering again but still killing four. The sergeant would hold.
Missile suits try to take out the drop pod, but only manage two glances.
Fire warriors disembark form the devilfish, and attempt to form a screen with the drones in front of the oncoming bike squad
TURN 3 – Ultramarines
Spoiler:
Turn overview
LSS comes in, dropping next to the fire warriors
Bikes come towards the other fire warrior team
and kill two in shooting, while a crisis gets picked off by the ML with a krak missile
While the LSS wipes out the fire warriors squad with its HF The bikes make the charge, but the fire warriors only lose combat by one and hold
While the remaining TAC marines assault the hammerhead with Krak grenades but fail to do any further damage
VP – Tau 0:4 Ultramarines
TURN 4 – Tau
Spoiler:
Turn overview
Devilfish moves towards the objective, while skyray tries to get the marker lights angle on the LSS Missile suit also gets a bead on the LSS While the hammerhead backs off the TAC marines and warms up the ion cannon...
...only for it to fail a gets hot roll and destroy itself. Great stuff.
LSS jinks like crazy and survives with just one glance
While Combat would remain a stalemate again. Go fire warriors!
TURN 4 – Ultramarines
Spoiler:
LSS jumps up onto the objective
While the skyray gets a krak missile up the bum from the TACML, getting a crew stunned result
While the TAC remnants have a go at the missile suit but fail to hurt him
Fire warriors lose another but still manage to hold on for a third straight turn!
VP – Tau 0:4 Ultramarines
TURN 5 – Tau
Spoiler:
Skyray manages to finish off the LSS before the objective blows
While the fire warriors finally capitulate, allowing the bike squad to consolidate towards the devilfish
TURN 5 – Ultramarines
Spoiler:
Another krak missile of double out doom hits the missile suit, taking him out
While the bike squad assault and wreck the devil fish
And with that the game is all but done, We roll to see of the bike squad would have had enough turns to destroy the objective, and they would
Giving them a further VP and ending the game.
TURN 6 – Tau
Spoiler:
Game ended last turn
TURN 6 – Ultramarines
Spoiler:
Game ended last turn
RESULT
Spoiler:
VP POINTS
Tau: 2 pts Objectives Defended 2pts
Ultramarines: 6 pts First Blood 1pt
Line breaker 1pt
Objectives Destroyed 4pts
ULTRAMARINE VICTORY
BREAKDOWN
Decisive moment – when the marine player called the tau bluff and stuck with the drop pod assault. Without any interceptor or counter assault units, the Tau player had no answer to the threat overload presented and no way to clear the Ultramarines off of the objectives before they blew (very poor shooting rolls did not help either). Tau also should have claimed the objective in their DZ from the off rather than worrying too much about the drop pods.
Key units
Tau: No one really stood out for the Tau - fire warriors did well to hold the bike squad in combat for three turns, but the skyray probably contributed the most taking out an ironclad and LSS, as well as stopping an objective going up in flames with the latter.
Ultramarines:TAC squads. By virtue of the drop pods and Tactical doctrines, these guys arrived and disrupted the Tau game plan from T1. Took out two squads of pathfinders, two hull points off the hammerhead and blew an objective. Even caused the hammerhead to self destruct in pure fury. The humble TAC squad is most certainly back under the new dex.
STATS
Tau: Models remaining 11/42
Kill to Death Ratio 0.61
Efficiency 38%
Ultramarines: Models remaining 17/36
Kill to Death Ratio 1.63
Efficiency 62%
POST GAME
Spoiler:
The Ultramarines open the Titan Prime Campaign in style, annihilating their opponents with their direct and fearless assault on the spaceport.
Going into the second mission, the Tau player has generated 100 bonus points, while the Ultramarines generated 200 bonus points
AFTER ACTION REPORTS CaptainBrother Fabian:
Spoiler:
Concentrated plasma shot with destructive power came down from the sky, and exploded right among us. Brother Macellous and Brother Klion were evaporated in the flame. It is that damn orbital mining station.....
--Brother Sergeant Lazlo
…When my Powerfist brutally punched the Tau Battle Suit to the ground, a shadow emerged from my left side, it is the skimmer tank that I failed to destroy at the moment of my landing. Rain of missiles showered upon me, some penetrated my armor hull, the explosion knock me down to my knee and destroyed most of the vital mechanical devices...
--Ancient Brother Ferox, Ironclad Dreadnought, under the attention of the Techmarine in maintenance bay, Accipter
It looks like a easy mission at first as there is not even a single interceptor missile fired upon my squad and Ancient Brother Ferox. However, as the Tau reinforcement Battle Suits and Hammerhead surrounded us along with the rallied Pathfinders, we were pushed into defensive position to try to preserve our strength and destroy the designated spaceport facility.
Just as we set ablaze the facility, that Hammerhead fired its Ion Cannon at us, the focused ion burst caused a huge explosion which cut through our power armor like hot knife through butter. Four brothers were downed in this explosion, I was lucky that the center of explosion was far from me. The rest of us launched an assault but failed to destroy it. The tank quickly backed away and I can see its main gun was charging rapidly and aiming at us. Just as I thought we were all going to join the Emperor today, a blue lightning flashed deep in that gun barrel followed by smokes coming out of every junction of the tank's turret, and the tank just got silenced. Thank the Emperor.....
--Brother Sergeant Volus, in the apothecary cell of Accipter
I was relieve when I founded that the Tau forces deployed at this spaceport not containing any unit capable of delivering intense interceptor fire, as Ancient Brother Ferox, along with Tactical Squad Volus and Regulus can all landed smoothly. Brother Volus and his men performed exceptionally brave today, despite suffering severe casualty under the enemy counter attack, they not only destroyed their targeted facility, but also inflicted heavy lost to the Tau forces near them.
On a side note, we encountered a squad of Tau warrior today who are both every brave and are much more skilled in melee combat compared to most of their comrades. They tied us up in melee combat way longer than anyone could have expected.
We have scored first victory after we assaulted Titan Prime, due to both the bravery of our brothers and the carelessness of our enemy. The scorched facility should be able to send clear message to the heretics hiding in the Hive Cities, that now the Emperor's justice is falling upon them. It is time to repent.
Reinforcement had arrived from Ultramar, and we should keep this momentum. The power distribution node between Hive Cronos and Hermes is determined one of the most vital facility in this contingent. We have to destroy it while the Tau and the heretics must defend it. So we should deploy the most elite forces among us for this raid.
--Captain Fabian, Ultramarine Master of Arsenal, acting commander of Strike Force Titan
Commander O'Vash:
Spoiler:
I find myself oddly glad that the war proper is finally upon us- while many battles have already been fought, none has been the full engagement of mind and matter that I so dearly look forward to.
The first blow has been struck on Titian Prime, and the Gue’ron’sha have wrought devastation on the spaceport here in Ares. While the Hive remains intact, morale of the Gue'la has been severely depleted by the black plumes of smoke hanging over the city.
Once their rampage was complete, the Gue’ron’sha used their air superiority to withdrawal from the spaceport, broadcasting triumphant vox-casts on all frequencies warning of the dire consequences of betraying their so called 'God-Emperor's' will. Ha! We will show them soon enough that no man is a god - they die as easy as any other life form, when the right amount of pulse fire is applied.
Imho, the Tau missle Broadsides are a great "anti everything" unit, and is turly a unit I fear most. Because any failed 3+ armor save in a marine army really hurts. So it was my original plan to "bring more body than missiles can hits" and MSU which could not all be wiped out from objectives while use the Dread and biker Captain to attract fire. The lack of interceptor / HYMP Broadside is truly benefits me a lot. I think during the deployment Tau may consider infiltrate the stealth suits a little backwards form the mid field objective. Thus giving marine a harder choice wether to assualt this harassment unit staying 18 inches away from the objective or go claiming the objectives, . Shooting against them had long been proved not that effective owing to their 3+ armor and 2+ cover saves when in ruins. I think that the Tau's luck is generally worse than the Marines, most notably the fusion Crisis Suit failed to any damage to the Ironclad, which not only caused his own death, but also attracted more firepower from Tau side. The "gets hot" on Ion Cannon also truly sucks.....
Great batrep as always. Iapedus done a great work putting it up.
Just one error though, that bike sergeant only have combi grav, no powerfist and iron reslove WT is only 5+ FNP
Thor665 wrote:Definitely appreciate the work and time it took you to put together these reports. Good stuff.
tetsuo666 wrote:Another really good battle report, thanks !!
Thanks, glad you are enjoying them! Hopefully not so much of a long hiatus between them from now on. Have you tried out the campaign books for yourselves?
Neophyte2012 wrote:Imho, the Tau missle Broadsides are a great "anti everything" unit, and is turly a unit I fear most. Because any failed 3+ armor save in a marine army really hurts. So it was my original plan to "bring more body than missiles can hits" and MSU which could not all be wiped out from objectives while use the Dread and biker Captain to attract fire. The lack of interceptor / HYMP Broadside is truly benefits me a lot. I think during the deployment Tau may consider infiltrate the stealth suits a little backwards form the mid field objective. Thus giving marine a harder choice wether to assualt this harassment unit staying 18 inches away from the objective or go claiming the objectives, . Shooting against them had long been proved not that effective owing to their 3+ armor and 2+ cover saves when in ruins. I think that the Tau's luck is generally worse than the Marines, most notably the fusion Crisis Suit failed to any damage to the Ironclad, which not only caused his own death, but also attracted more firepower from Tau side. The "gets hot" on Ion Cannon also truly sucks.....
Yeah to be honest I just had a really bad game while you were on top of it from the start - I made some bad decisions in the list building (no interceptor bluff was just stupid), some even worse decisions in deployment (why not hold the objective in my DZ!?!?) and then some awful decisions in game play (should have put the ion blast and orbital bombardment on the scouts or TAC squad holding the objectives to try and clear them off) all of which was compounded by some woeful dice roles (I'm looking at you fusion crisis and hammerhead!)
Anyway, I basically failed to play to the mission as well as you did, which is something considering I wrote it! Anyway, well played sir - fully deserved victory
Iapedus wrote: Have you tried out the campaign books for yourselves?
Have not, but that might be a fun thing to do - replay someone elses' batrep campaign with a new batrep campaign doing the same missions...
I may have an idea for our next campaign
PART 3: The Titan Prime Campaign Escalating 1000/1250+/1500+ point missions with bonuses.
MISSION 3.2: Supply & Demand
OPPOSING FORCES
Bonuses: Going into this mission, the Tau player has generated 100 bonus points, while the Ultramarines generated 200 bonus points
Ascendancy: Ultramarines are in the ascendancy and choose to go first
Force limitations for both sides are a single standard Combined Arms Detachment + 1 Formation (from same Faction)
Both Forces are now at full strength, so no restrictions to number of FOC slots apply, and one formation slot has been introduced. HQ choices still exclude ‘named characters’ unless previous campaign bonus was earned.
Tau Forces: Fire Warriors from the Setpworld of Fi’Rios 1350pts
Troops
Kroot Carnivore Squad, Kroot Rifles, Kroot Armour, Sniper Rounds 70pts
Fire Warrior Team x 6, combat armour, pulse rifle, photon grenades 54pts
Fire Warrior Team x 6, combat armour, pulse rifle, photon grenades 54pts
Gue'Vesa team x10, Flak Armour, Las Gun, Close Combat Weapon, 41pts
Gue'Vesa team x10, Flak Armour, Las Gun, Close Combat Weapon, 41pts
Fast Attack
Pathfinder Team x4, Pulse Carbine with Marker light, Recon armour 44pts
Pathfinder Team x4, Pulse Carbine with Marker light, Recon armour 44pts
Pathfinder Team x4, Pulse Carbine with Marker light, Recon armour 44pts
Heavy
Hammerhead Gunship, Railgun, TLSMS, DPod 140pts
Broadsides Team x2, TLHYMP, TLSMS, EWO 140pts
Broadsides Team x2, TLHYMP, TLSMS, EWO 140pts
Mission: Mission 3.2 Surprise Attack - Destroy/Defend the Objective and destroy enemy units
Deployment: Special (see attached mission pack)
Initiative: Ultramarines are in the ascendancy and choose to go first
Special Rules: Reserves, Night Fighting, Coordinated Assault (see below), Dug In (see below)
•Coordinated Assault: The attackers are launching a carefully coordinated Orbital and Ground assault. However, to try and preserve the element of surprise, radio silence is in force and they are reliant on timings only.
•Orbital Assault: Any attacking units that can Deep Strike can do so on turn one, using the deep strike rules as normal and with no need to roll for reserves.
•Ground Assault: Even the best laid timings can go awry. All non-deep striking attacking units must arrive from reserves, but can arrive from any table edge. Reserve rolls for these units must be taken, but may also start on Turn 1.
•Dug in: The Defenders have been in position for some time and are well acquainted with the base terrain. As such, all units have the ‘Move Through Cover’ Special rule.
Terrain: The second exchange on the soil of Titan Prime takes place in a small cluster of buildings, facilities and machinery. The Distribution node is placed in the centre of the board.
Distribution node
Warlord Traits:Tau roll on codex Traits and get 'A Ghost Who Walks Among Us' (3D6 Assault Jump Moves), while Tigirius gets 'Storm of Fire' (Now Rending to a single unit within 12").
Psychic: No Psykers are present
PRE GAME ANALYSIS
Spoiler:
Reasons why Tau will win:
1: Volume of Fire. Tau have multiple units who can pump out obscene amounts of S5+ fire, which will whittle the Space Marines down even with their 3+ saves. They also have better range on average.
2: Supporting Fire. If the defensive position is arranged properly, there will be very few opportunities for charging opponents not to come under extensive fire
3: Interceptor. I have learnt my lesson from the last game and gone for three interceptor units to deal with any deep strikers - 2x pairs of Missilesides and the Riptide with IA. If he comes in from different sides then it should be enough to deal with the units piecemeal, while if he overloads one flank it should be enough to lessen the initial threat overload and fragment his force.
Reasons why the Ultramarines will win:
1: Tigirius - Not only is Tiggy great on his own, but he will buff the already dangerous assault terminators, probably fishing for invisibility. It also means the Ultramarines will get the psychic phase to themselves, and I fully expect psychic shriek to wipe a unit or two out in the game.
2: 1st Company Strike Force Formation. A bit of an unknown, but fear is nice against Tau and fearless should help the marines keep going forward under weight of fire, while the -2 to LD should work nicely in conjunction with psychic shriek and fear tests. The overall 'elite' nature of the force will also reduce the amount of kill points available.
3: Land Raider. Damn, really wasn't expecting that. Not only is AV14 really tough for my army to take down (only the hammerhead and solo fusion suit can realy touch it) but it will mean the assault terminators can get into combat relatively unscathed.
DEPLOYMENT
Spoiler:
Ultramarines: Missions special rules mean it is a null deployment for the marines
Tau: Tau units setup their defensive perimeter, unsure as to which direction the marines will come from. Right of centre, broadsides and pathfinders go in the tower, while hammerhead, riptide and a unit of pathfinders go on the ground floor of the ruin
Left of centre, the other unit of broadsides and the crisis team occupy the ruins, while the pathfinders sit in the bunker. Kroot go out on the far corner, trying for the ambush
In the centre, both units of gue'vesa, pathfinders with the cadre fireblade and Crisis Commander wrap up the objective, with pathfinders sat atop
Deployment overview
TURN 1 – Ultramarines
Spoiler:
As per mission rules, Marine player rolls for land reserves - and they all arrive T1. Huge boon for the ultramarines. Deep striking units also arrive automatically.
Drop pod comes in left of centre as a distraction, but scatters away from its target area between the ruins. It disgorges the TAC squad into the open
The LSS with scouts also goes for a risky deep strike in the centre of the ruins, but scatters and mishaps. The marines player then rolls a 1, killing both units and giving the Tau First Blood and two VPs. This also wipes out the Ultramarines 100pt advantage from the last mission
1st Company Strike Force arrives and goes straight for the objective. Land Raider containing tech marine, Tigirus and assault termies, Rhino with combat squaded sterngaurd and vanguard vets with jump packs come on
Tau interceptor fire kicks in, but it takes both Missileside squads HYMPs to take down the Rhino due to some poor rolling, but at least gives the Tau another VP.
The riptide also scatters off with the IA blast, completing a poor interceptor effort from the Tau
TAC squad drowns the pathfinders in bolter rounds thanks to the tactical doctrine, but only manage to kill two due to the pathfinders gong to ground
They still fail their moral check and break though, moving towards the nearest table edge
Tigirius gives the Land Raider rending (Warlord trait) and it fires at the Riptide, but causes no damage
TURN 1 – Tau
Spoiler:
Not much movement for the Tau as most units have a target. Commander jumps out to get into rapid fire range of the sternguard
The gue'vesa reposition from the other side, while the hammerhead backs off for a clear shot on the land raider
Pathfinders fail to regroup and continue retreating
Hammerhead has a pop at the land raider but only manages a glance
Kroot rapid fire the TAC squad, but only manage to kill one
While everything that can see them shoots at the Sternguard, killing three form each squad, They hold due to fearless. Two vanguard vets also go down to fire warrior fire.
Failure of the Hammerhead to take down the land raider leads to the riptide doing something rather rash. It moves forward to hit it with the fusion blaster, but misses. As a result, it lines up the smash...
...but only scores a glance! It is now in a very precarious position come next turn, as is the commander who rolled a 4" assault jump move and failed to get back into cover
VP – Tau 4:0 Ultramarines
TURN 2 – Ultramarines
Spoiler:
Turn overview
Sub par shooting by the Tau puts the marines in a good position. Assault Termies and Tigirius pile out of the Land Raider, looking to assault the riptide along with the vanguard vets. Land raider then turns its attentions to the exposed commander, while the remaining sternguard vets move either side of the wrecked rhino
The TAC squad decide that the kroot are worthy of their attentions, and also line up an assault
Psychic phase, and Tiggy casts Hallucination on the missilesides, reducing their BS by 1 amongst other stats
He also gets shrouding off to cover multiple units
as well as hitting the fire warriors with psychic shriek. With a -2 leadership modifier due to the 1st Company Strike Force special rule, a good role will easily destroy them... but Tiggy fluffs it and only dispatches one
Shooting phase, and Tiggy once more gives the land raider rending. It goes after the commander, but is only able to take out the shield drone and a single wound off the warlord
The kroot are decimated by bolt pistol fire from the TAC squad and break, but only fall back two inches
Assault terminators and vanguard vets get into assault, with no over watch losses. They should make short work of the Riptide..
...but unbelievably don't, with some bad whiffs from the marines and great invulnerable saves from the riptide. Combat remains locked
TAC squad assaults the falling back kroot, killing only two and taking one casualty in return. Kroot pass their moral check and combat remains locked here also
TURN 2 – Tau
Spoiler:
Tau roll for reserves and the solo fusion suit comes in. He lands on target, within melta range of the land raider
Commander gets out of the land raiders field of fire, heading for the drop pod
While the Tau situation on the right flank goes from bad to worse. In a misguided effort to help the beleaguered Riptide, the fire warriors and both units of gue'vesa line up to join the combat
The riptide also attempts to Nova charge for the 3++ save, but fails and takes a wound instead
In shooting, there is a distinct lack of targets due to all the units locked in combat. The missilesides and commander do however manage to take out the drop pod for another VP
But the hammerhead whiffs against the land raider
As does the solo fusion suit
Combat, and only one unit of gue'vesa make it into combat with the assault terminators
To make matters worse, the Riptide also fails his fear test
As a result, the riptide is easily beaten by the Termies and Vanguard vets, giving the Ultramarines their first VP
Tiggy them kills two gue'vesa, forcing them to break but he cannot sweep them as he is attached to the terminator unit. The gue'vesa fall back towards the objective
Disastrous round for the Tau, the solo crisis suit jumps into the crater for at least some cover save against the land raiders inevitable rending wrath
VP – Tau 5:1 Ultramarines
TURN 3 – Ultramarines
Spoiler:
Turn overview
Tiggy and Termies head for the objective, while vanguard vets move towards fire warriors
Psychic, and Tiggy gets hallucination off on the broadsides again for another -1 BS penalty
And shrouding for his unit too
AND psychic shriek, which hits the retreating gue'vesa and kills seven
The tech marine riding in the land raider also manages to regenerate a hull point
Tiggy then gives the land raider rending, and it proceeds to annihilate the fusion suit, giving them another VP
Assault, and the vanguard vets charge the fire warriors. They lose a man on over watch, but kill three warriors in the close. They would however hold
Termies and Tiggy also make it into assault with the fire warriors and cadre guarding the objective. They lose four warriors, but again hold the combat (all these locked combats are costing the Tau valuable Targets in the shooting phase! Curse you brave fire warriors!)
Combat continues with the kroot also, who lose another man but still hold their ground
TURN 3 – Tau
Spoiler:
With so many units locked in combat, Tau targets are very limited for yet another turn. All the surviving geu'vesa move towards the fire warriors in combat with the vanguard vets, in another vain effort to help the struggling Tau and their tiny fists of fury. In the background, the Hammerhead has another crack at the and raider and once more fluffs his lines
Elsewhere the broadsides, despite being delirious, manage to wipe out the last of the sternguard veterans for another 2VPs
While the Vanguard vets lose an man to the tide of gue'vesa, but single handedly sweeps a gue'vesa unit and the fire warriors for two VPs, leaving a sole survivor fleeing for his life (who will eventually run off the board). The vanguard consolidates towards the pathfinders in the tower
The termies and Tiggy also kill off the remaining fire warriors and fireblade for another two VPs
While the kroot are also swept by the TAC squad for another VP. Tau have shipped 6 VPs in their own assault phase, a huge turn around for the Marines.
Commander jumps out of danger and hides in the tower with the crisis team
VP – Tau 7:8 Ultramarines
TURN 4 – Ultramarines
Spoiler:
Turn overview
Land Raider gets rending from Tiggy again, and this time goes after the missilesides hiding in the tower but to no effect
Tiggy takes a wound from perils casting shrouding, while the TAC marines move up and fire on the crisis team
And cause one wound
The last vanguard veteran charges the pathfinders in the ruined tower, but is cut down by missileside supporting fire for another Tau VP
While Tiggy and termies try to charge the pathfinders atop the objective, but fail the distance (they are on second floor internally, not ground floor as shown)
TURN 4 – Tau
Spoiler:
Crisis team and commander come forward to shoot on the termies in the building
Along with th broadsides they only mange to down one due to a bucket load of 2+ saves
The hammerhead lines up the land raider for the fourth time...
...and fails to hit again!
Commander jumps back into cover
VP – Tau 8:8 Ultramarines
TURN 5 – Ultramarines
Spoiler:
Turn overview
Commander wasn't hid quite well enough, and takes a wound under bolter fire from the advancing TAC unit
While the Termies close in on the pathfinders for an easy charge
Which they make, easily dispatching them for a VP as well as capturing the main objective!
TURN 5 – Tau
Spoiler:
Tau throw everything they have at the Termies to try and dislodge them, but they weather the storm of fire very well, only losing one termie to another bucket full of dice. The game might end this turn, so the commander jumps up to contest the objective
If the game doesn't end now, the Commander will be minced meat in the next assault phase. We roll to see if it ends, and it does!
TURN 6 – Ultramarines
Spoiler:
Game ended last turn
TURN 6 – Tau
Spoiler:
Game ended last turn
RESULT
Spoiler:
VP POINTS
Tau: 8 pts First Blood 1pt
Units Destroyed 7pts
Objectives Defended 0pts
Ultramarines: 9 pts Units Destroyed 9pts
Objectives Defended 0pts
ULTRAMARINE VICTORY
BREAKDOWN
Decisive moment – when the riptide charged the land raider, followed by the pilling in of the gue'vesa. This was stupid for a number of reasons. Firstly, the land raider was not actually than much of a threat with its load out, so I'm not sure why I was so obsessed with taking it out. Secondly, the smash attack - failed or successful - left the Riptide right where my opponent wanted him, whereas what I should have done was backed off and kited the termies, hitting them with IA blasts all game. Thirdly, the pilling in to help him only served to remove the meat road block that was the gue'vesa from around the objective If they had held position, it would have taken the termies a lot longer to chew their way through all the units guarding it.
Key units
Tau: Hammerhead. Ha ha ha, no wait he was easily the biggest villain. The Commander proved a constant thorn in the enemy's side, and even though he didn't score many points he did manage to contest the main objective on the last turn, helping to change a crushing defeat into a close one.
Ultramarines: Assault Terminators. As soon as they left the land raider, they went in relentless pursuit of the objective an chewed through everything in their way to get there. They scored 4pts on their own, and also weathered a phenomenal amount of fire to hang on to the main objective, If the game had carried on one more turn they would have easily dealt with the commander and scored 7 VPs, turning the game into an absolute massacre.
STATS
Tau: Models remaining 14/66
Kill to Death Ratio 0.66
Efficiency 40%
Ultramarines: Models remaining 13/41
Kill to Death Ratio 1.5
Efficiency 60%
POST GAME
Spoiler:
The Ultramarines continue their winning streak in Titan Prime Campaign, with another direct and fearless assault winning the day.
Going into the third mission, the Tau player has generated 175 bonus points, while the Ultramarines generated 225 bonus points
AFTER ACTION REPORTS Chief LibrarianVarro Tigirius:
Spoiler:
….We ride into the battle in Rhino following the Land Raider carrying the Chief Librarian and the Terminator Squad Darith. Our vehicles were showered in a rain of missiles and Ion blasts from those damned Broadsides as soon as we contact the enemy and the Rhino got wrecked immediately. We were all forced to footslog across the battle to reach the enemy and got shot all the way. On the other hand the mighty Land Raider leading the charge just drove through the intense fire unharmed….
--Brother Veteran Sgt. Aries, in the apothecary cell of Accipiter
….Thanks for the distraction provided by the Brothers from 1st Company, we encountered little resistance and took no causality compared to our raid at the Space Port. But we were scattered miles from our intended landing location during orbital insertion. Though we easily wiped a squad of Kroots near our landing location, we were too far to help our Veteran Brothers…..
--Brother Sgt. Volus, at Rally Point Nahem on Titan Prime
….2 mobs of traitor militias charged furiously at us trying to save their alien allies, Brother Vamtice, who just promoted into my Squad owing to his valor in the previous battles, got dragged down under the sheer weight of fists. I immediately turned towards him and drove my power axe into anyone who dare stand in my way. Those traitors and Tau warriors were so scared by this bloody encountered and totally lost the will to keep fighting, they try to run for their life but many of them were ultimately cut down by me from the back, those who made good their escape threw their weapons everywhere and never seen them return to the battle…..
--Brother Veteran Sgt. Abantes, in the apothecary cell of Accipiter
….While we fought our way through the Tau Warriors, Ripetide and their traitor ally, I heard the Chief Librarian murmured some strange syllables that I cannot comprehend, but then I saw the Tau Broadsides who were ready to provide long range support fired all their missiles aimlessly into the air, the sorcery seduced them into a state of dream walking even in the heat of battle….
--Brother Terminator Sgt. Darith, in the apothecary cell of Accipiter
….We scored a Pyrrhic victory today, like the days we fought Hive Fleet Behemoth on our home planet, the battlefield turned in a river of blood. Although we made the enemy suffered more casualty than we do, every lost from us, especially from those in the 1st Company is now weakening the fighting strength of the Chapter, not to mention that our intended target – the power distribution facility, is only slightly damaged and the enemy repaired it with less than a hour. We also need to improve our orbital insertion technique, as we cannot afford a whole squad of brothers to loss combat effectiveness before even entering the battlefield again, just because their Land Speeder Storm crashed into enemy defense line!
I can sense that there is a tiny but sensible disturb in the current of the Warp, as the frequent raid led by Brother Fabian is starting to insert horror in the souls of those traitors on this world and their morale is lowering. I can foresee that there will be an important human engineer among the traitor ranks trying to repent and come back into the light of the Emperor in a few days, and we may extract some useful information that may benefit our next stage of offensive, if we can pick him up.
--Varro Tigirius, Chief Librarian of Ultramarine, at Rally Point Nahem on Titan Prime
Commander O'Vash:
Spoiler:
Although we have managed to stop the power node form falling into the hands of the enemy, I am ashamed to admit that this battle has undoubtedly ended in another defeat for the Empire.
Our losses in defending this place have been severe - many warriors have laid down their lives in defence of this remote outpost, as have the Gue'vesa who are so new to our cause and yet sacrificed themselves to defend our shared ideals. There names shall not be forgotten.
The enemy composition was much different from previous encounters with the Gue’ron’sha deploying numerous elite forces supported by heavy tanks. Our forces had very little answer to such a resilient enemy - even the might hammerhead was powerless to stop it.
We have also lost one of the precious riptide battlesuits, who fell trying to strike a killing blow against the infernal machine that plagued out lines. The earth caste engineers assure us the suit is recoverable, once the pilots remains have been scraped off the inside.
Despite this defeat, we can at least take heart from the fact that power to the cities has been maintained, and that moral amongst the population - whilst low - will not now turn into despair.
This is not the last we will see of the Gue’ron’sha, but the next time we meet it will be us who dictate the theatre of battle.
The stage is set. The Mont'ka stads ready to strike...
First of all, sorry Iapedus for the huge mistake in regard to who can be affected by Storm of Fire WT. I only noticed this problem one day after the battle and the discussion I posted in dakka seem more guys think that LRC don't get the benefit. Should have put more awareness to the changes in new codex.
Comes to the tactics, assualting with the Riptide is trully the most fatal mistake on the Tau side, as it cannot consolidate even after destroying a vehicle. Moreover, forgetting orbital bombardment that won from last part of campaign is painful. Had it been remembered turn 1, the 1st company will experience hell. Besides, it is ordance, so more than 1/2 chances to penetrate the LR, while normal S10 only have 1/3. Aside from that, Tau may want to bring more fusion. One shot or two is too unreliable.
On the marine's side, LRC performs higher than expected as a psychological wepaon . But there was a quite obvious mistake in trying to use it to protect the whole formation when coming in the battle. They just clustered together during the 1st turn when trying to hide behind the big tank. Had Tau remember to use the orbital bombardment and land a direct hit (there is 1/3 chances), it may wipe the Vanguard and possibly cause some significant damage on the tank.
Automatically Appended Next Post: Furthermore, I think the deployment zone benefitted the marines. Marines ground forces can come in from table edge, so when coupled with assualt vehicle, there is no safe zones for the Tau on broad as a second turn assualt is almost ensured. That is also one of the reason I try out a Land Raider in this game
Neophyte2012 wrote: First of all, sorry Iapedus for the huge mistake in regard to who can be affected by Storm of Fire WT. I only noticed this problem one day after the battle and the discussion I posted in dakka seem more guys think that LRC don't get the benefit. Should have put more awareness to the changes in new codex.
Oh really? I had no idea it could not be applied to the LRC - how come, the trait just says unit? Either way, it didn't really make that much difference to the game - even without it, the marines would have still won the day.
I agree with your assessment, Riptide insanity was definitely the turning point of the game Still, lesson learned for future games - will only try the smash attack on empty rhinos and drop pods from now on
I don't think the deployment was too much of an advantage to the marines though - it balanced out the supporting fire aspect of the Tau, meaning they wouldn't just shoot you of the board when you charged the gun line as there was no where to set up a gun line really. I was also completely sideswiped by the inclusion of the LRC, which got your Termies right where you wanted them so well done to you for having a great plan and building accordingly
Anyway, I look forward to the final installment and restoring some Tau pride!
PART 3: The Titan Prime Campaign Escalating 1000/1250+/1500+ point missions with bonuses.
MISSION 3.3: Bushwhacked
OPPOSING FORCES
Bonuses: Going into this mission, the Tau player has generated 175 bonus points, while the Ultramarines generated 225 bonus points
Ascendancy: Ultramarines are in the ascendancy and choose to go first
Force limitations for both sides are a single standard Combined Arms Detachment + 1 Formation (from same Faction)
Both Forces are now at full strength, so no restrictions to number of FOC slots apply, and one formation slot has been introduced. HQ choices still exclude ‘named characters’ unless previous campaign bonus was earned.
Tau Forces: Fire Warriors from the Setpworld of Fi’Rios 1675pts
Troops
Kroot Carnivore Squad, Kroot Rifles, Kroot Armour, Sniper Rounds 70pts
Fire Warrior Team x 6, combat armour, pulse rifle, photon grenades 54pts
- Devilfish Transport 80pts
Fire Warrior Team x 6, combat armour, pulse rifle, photon grenades 54pts
Gue'Vesa team x10, Flak Armour, Las Gun, Close Combat Weapon, 41pts
Gue'Vesa team x10, Flak Armour, Las Gun, Close Combat Weapon, 41pts
Mission: Mission 3.3 Ambush (Capture Euphrati Dell / Destroy the Enemy)
Deployment: Special (see attached mission pack)
Initiative: Ultramarines are in the ascendancy and choose to go first
Special Rules: Reserves, Night Fighting, Grim Resolve (see below), Relief Force (see below), Welcome to the Party (see below), Euphrati Dell (See below)
•Grim resolve: When in possession of Euphrati Dell, all friendly units within 6” of his model have the fearless special rule.
•Relief force: The Ultramarine Player may either deploy reserves normally or may hold the entire reserve force in standby and automatically deploy it all on turn 3. If deployed in this way, they may also choose to arrive on any table edge.
•Welcome to the Party: Tau forces set up the ambush, and thus have the element of surprise. As such, in the first turn all Space Marine units can only use psychic powers, shoot / run or assault if they first pass an initiative test.
•Euphrati Dell: As the objective in this game, he follows
Terrain: The third exchange on the soil of Titan Prime takes place in a small cluster of buildings, facilities and machinery. The rendezvous point with Euphrati Dell in the centre of the board.
Euphrati Dell (has been hitting the gym recently)
Warlord Traits:Tau roll on codex Traits and get 'A Ghost Who Walks Among Us' (3D6 Assault Jump Moves), while im afraid I cannot remember what Captain Fabian rolled (possibly the 'furious charge' one?).
Psychic: Space Marines get an absolute bucket load of powers with the conclave formation.
- Chief Librarian Tigirius rolls on Telepathy for Shrouding, Invisibility, Hallucination, and Psychic Shriek
- Librarian Agenostin rolls on Pyromancy for Sunburst, Molten Beam, and Flame Breath
- Librarian Herbort rolls on Biomancy for Life Leech, Warp Speed, and Smite
PRE GAME ANALYSIS
Spoiler:
Reasons why Tau will win:
1: Interceptor. Two units have it today (Iontide and Missilesides) so if the marine player is careless in his deployment of drop pods it should be easy pickings for these units to blow reserves away before they fire a shot, allowing everyone else to concentrate on the centre.
2: Firebase Support Cadre. Tank hunter will hopefully come in useful taking out any land raider / various transports, while the riptide and HRRs should be good when it comes to dealing with the Terminators
3: Twin Linked. A lot of weapons n the Tau side are twin linked, which will help in scoring snap shots when trying to deal with the invisible Librarius conclave deathstar. However, I will still need to drown them in fire just to scratch the surface...
Reasons why the Ultramarines will win:
1: Tiggys invisible psychic deathstar - Not only is Tiggy great on his own, but he will running around with the already dangerous Librarius Conclave almost certainly paired up with the assault terminators. When invisible (all but guaranteed) this unit will be nigh on impossible to deal with.
2: Threat overload. The Ultramarines have the numbers and transport options to overwhelm a single Tau flank and collapse it if they want, heling to make good their escape with Euphrati Dell.
3: Land Raider. The AV14 monster is back, this time to no doubt provide a mobile bunker for Euphrati Dell. Once again it will be really though for my army to take down (only the Piranha, Riptide and solo fusion suit can touch it).
DEPLOYMENT
Spoiler:
Ultramarines: Ultramarines forgo the special rull allowing all units to arrive on any flank Turn three, and opt for a normal reserves deployment of the drop pod units. Land raider, Terminators and Librarius Conclave deploy centrally, securing Euphrati Dell
Techmarine grabs him by the scruff of his neck, ready to bundle him into the boot of the land raider
Scouts in the LSS will infiltrate, while all other units are in DPs in reserve
Tau: Tau units set their ambush, but with a wary eye on the sky for drop pods. Riptide, Missilesides, Hammerhead, missile crisis suits and a unit of geuvesa take the south flank
On the North/East Flank, Railsides, guevesa, Kroot and pathfinders set up
While on the North/West Flank, Skyray and Pathfinders deploy
Along the northern edge of the board, the piranha and a devilfish containing the fire warriors hide. The plan for these guys is to swoop in and secure Euphrati Dell after the Fire support units have pounded the land raider and deathstar.
Finally, the LSS infiltrates on top of the central ruin
TURN 1 – Ultramarines
Spoiler:
Turn overview
LSS makes a break for the pathfinders on the western flank
Techmarine bundles the engineer into the land raider
Ironclad dreadnaught comes in and goes straight after the Missielsides
While the plasma TAC squad comes in on the North Eastern corner and goes after the Railsides
Land raider, with cargo safely stowed, makes a break for the western edge
While Libbynator unit moves east to deal some death
Time for the Tau to strike - EWO kicks in, and the missilesides immediately glance the Ironclad to death, mainly thanks to Tank hunter from the FBSC formation. This gives Tau First Blood and a kill point
Riptide also eyes up the drop pod through the ruins
And kills two marines with a overcharged large blast scatter
Epic psychic phase begins. Invisibility is successfully cast on the Libbynators, as well as shrouding for good measure. Smite kills a single Kroot, while life leach kills a single pathfinder
Hallucination is cast on the Railsides, reducing one models BS to 1
and finally psychic shriek is cast on the Kroot, but it fails to kill any of them
Shooting phase, and the LSS toasts a unit of pathfinders with its heavy flamer, gaining one kill point
While the plasma marines open up on the Railsides, causing one wound
No combat though, and various shuffling about marks the end of the Ultramarines turn
TURN 1 – Tau
Spoiler:
The invisible deathstar is my priority now, and the plan is to try and hit the land raider with blasts that hopefully scatter onto the nearby Libbynator unit. Ionhead moves over for a better angle
Riptide jumps out for a better view of the drop pod, as he has already used his main weapon this turn
Twin Linked missile Crisis get in range of the libbynator unit
Piranha comes out of hiding to deploy the drones to help against the marines. Hs should have flat outed back into cover but I forgot
Skyray aims to take revenge on the LSS
Riptide fails to nova charge for ripple fire, taking a wound. Really don't know why I bother...
And he really doesn't need it either, one shotting the drop pod for a explosion result and another kill point for the Tau
Skyray downs the LSS with its SMS for another kill point, with the scouts disembarking into cover
ionhead manages a glance on the Land raider
Gue'vesa and drones target the Plasma TAC squad, killing two more and forcing them to break
Whilst everything else shoots at the deathstar. Huge amounts for fire pour in, killing..... a single terminator. This nut is going to be tough to crack.
Suits and riptide jump back into cover, ending the Tau turn
VP – Tau 4:1 Ultramarines (+5 for Euphrati Dell)
TURN 2 – Ultramarines
Spoiler:
Turn overview
Melta TAC squad comes in on the north west corner, going straight after the Devilfish and fire warriors. Nothing is in interceptor range so it lands safely
Plasma TAC regroups and comes back after the guevesa
While Libbynator unit makes its way towards the Railsides position
Another epic psychic phase begins. Invisibility is successfully cast on the Libbynators again, as well as shrouding again. Sunburst is cast, killing five kroot
With smite finishing off one more
While the big one is left till last - Psychic Shriek is cast on the Railsides...
...and utterly annihilates them, giving the Ultramarines and kill point and dealing a heavy blow to the Tau
Shooting, and the land raider opens up on the missilesides. They go to ground, but still take a single wound
Melta guns and a krak grenade fail to hurt the devilfish as he jinks his way to safety
While the plasma TAC has better luck, killing six Guevesa. They would hold
Still no combat, so the marine turn ends
TURN 2 – Tau
Spoiler:
Turn overview
Tau reserves, and only the solo suit comes in. He drops in next to the land raider, looking for redemption after the last game
Plan this turn will be to drop blasts on the drop pod and hope for scatter onto nearby Libbynator unit. The loss of the twin linked railsides may start to show this turn though. Riptide and missile suits move into view
Broadsides also move up to try and get in the action, their only current target being the untouchable land raider
Devilfish cruises away form the TAC squad
While guevesa and drones bravely confront the TAC squad remnants
Shooting, and the fusion suit aims both blasters as the Land raider. He is in melta range, and has two marker lights from the skyray to use - surely he an do it this time?!? Nope. He misses with one and only manages a glance with the other
Guevesa and drones kill another marine, while everything else fires at or near the libbynators. One more terminator goes down. At this rate it will take another 5 turns to break the conclave
Fusion suit tries to escape form the land raiders inevitable wrath
While the missilesides roll a one for their run move, so scramble back into cover
VP – Tau 4:2 Ultramarines (+5 for Euphrati Dell)
TURN 3 – Ultramarines
Spoiler:
Turn overview
Scouts make a move towards the fusion suit
While the land raider tucks back in cover, but still has a line of sight on the drones
The TAC squad comes round to deal with the Guevesa and drones
While the Libbynator unit holds position
Psychic phase a bit more limited this turn due to a one being rolled for warp charge. Tiggy also perils casting invisibility on the Libbynators, taking a wound
Shrouding also goes off, as does psychic shriek which destroys the unit of pathfinders for another kill point
Shooting, and the land raider takes out both of the fusion suits gun drones
While the scouts put a wound on him with pre-assault fire
The final kroot are also wiped out by fire from the libbynators, giving another kill point to the marines
One drone and a guevesa are killed by the TAC squads, the drone holds but the guevesa run for it
Scouts charge but lose two in overwatch
but successfully exact their revenge, easily killing him for another kill point and consolidating into cover
TURN 3 – Tau
Spoiler:
Turn overview
Commander arrives from reserves, and goes after the TAC squad
Guevesa move forward to claim the objective incase the land raider is ever popped
Devilfish moves into the ruins and deploys the fire warriors, eager to get into the fight
and the skyray moves to get some markerlights on the deathstar
Piranha throws caution to the wind and makes a daring move, risking a dangerous terrain check to land on to of the ruin for a clear shot at the land raider in melta range. Unfortunately, he whiffs the shot
Shooting, and the commander finishes off the plasma TAC squad for a kill point
While the fire warriors kill off the scout remnants for another point
Everything else fires at or near the libbynators once more, and once more a single terminator falls
Suits jump around and that's it for the Tau turn
VP – Tau 6:5 Ultramarines (+5 for Euphrati Dell)
TURN 4 – Ultramarines
Spoiler:
Turn overview
Libbynators go after the commander
While the land raider backs off from the piranha but keeps him in its sights
Psychic phase, and both invisibility an shrouding go off on the Libbynators for the fourth straight turn
Psychic shriek attempts to take down the commander, but it is denied by the Tau!
So life leech has a go instead, but only succeeds in destroying the shield drone
Hallucination is also cast on the commander, slightly decreasing his BS skill
Shooting, and the Land raider opens up on the Piranha. However, he jinks his way to safety, taking only a glance in the process
While the Libbynator unit makes a run towards the fire warriors with the aim of scoring some easy kill points
The TAC squad also runs. looking to outflank the commander and guevesa remnants
TURN 4 – Tau
Spoiler:
Turn overview
Commander gets out of psychic shriek range, going after the TAC squad instead
As does the supporting devilfish
While fire warriors move up into rapid fire range of the Libbynator unit
supported by the skyray
Shooting, and the ionhead tries to take out the far drop pod but fluffs it
Commander and devilfish manage to take out two marines, but they would hold
While the missile suits and riptide come forward
The riptide hits the land raider with his fusion blaster, managing a glance
While the missile suits divert their fire onto the other remaining drop pod, destroying it for another kill point
Piranha doesn't move so as to avoid the dangerous terrain test, but misses the snap shot onto the land raider. Everything else fires at the deathstar as usual, but to no avail. Commander jumps out of assault range from the TAC squad, and that ends the Tau turn.
VP – Tau 7:5 Ultramarines (+5 for Euphrati Dell)
TURN 5 – Ultramarines
Spoiler:
Turn overview
Disaster strikes for the Marines! The Land raider fails a dangerous terrain test and losses a hull point. It has done almost as much damage to itself as the Tau have all game
Libbynator unit positions itself between various targets, but mainly the fire warriors
While the TAC squad, out of probable charge range on the commander, decides to try and take out the guevesa for a kill point
Psychic phase, and molten beam is cast at the piranha but fails to hit. Sunburst kills a few fire warriors, while hallucination cripples one unit further but both hold
In a desperate bid to keep the land raider alive, the libbynator unit forgoes invisibility for itself and casts it on the land raider
but they still get shrouding off on themselves as a backup
Shooting, and the land raider once more misses the piranha, which will live to fight another turn. The TAC squad does however manage to wipe out the guevesa guarding the commander for another kill point.
The land raider also restores a hull point thanks to the tech marine stationed within
TURN 5 – Tau
Spoiler:
Turn overview
With invisibility down, focus switches from the land raider back to the deathstar. This is the chance to break the conclave once and for all. Riptide and missile suits move into range
As does the ionhead
While commander and devilfish continue to harrass the TAC squad
They shoot at the TAC and cause no damage while the Riptide lines up a shot into the Libbynators with his nova charged Ion Accelerator...
...and Boom! Utter devastation ensues! The blast scatters slightly but it is not enough to save unit from severe damage. Some horrible saving roles combined with instant death sees two librarians go down, as well as the captain and a terminator. Tiggy even takes a few wounds from fire warriors shooting just for good measure.
This gives the Tau 3 Kill points as well as Slay the Warlord
If it ends now, the game will be a draw as the marines still have possession of Euphrati Dell. We roll to see if the game continues... and it does!
VP – Tau 11:6 Ultramarines (+5 for Euphrati Dell)
TURN 6 – Ultramarines
Spoiler:
Turn overview
land raider once more stays still, trying to get a bead on the tricky piranha, while Tiggy and serg. head for cover
TAC squad remnants also decide against the long range assault on the devilfish, so also opt for cover
Psychic, and Tiggy manages to get invisibility off by himself on the land raider
And tops it off with shrouding on his unit too. It is all about survival now.
Shooting, and the brave piranha finally succumbs to the land raider, giving the ultramarines and all important victory point
TURN 6 – Tau
Spoiler:
Turn overview
Last chance saloon for the Tau. Riptides comes forward and successfully nova charges for ripple fire of his fusion blasters, while the missile suits and missilesides get in range of Tiggy
Fire warriors and devilfish also move in on Tiggy
Shooting, and everything except the riptide shots at Tiggy. He survives, but the terminator sergeant succumbs, giving the Tau a victory point. Riptide steps up and fires twice point blank at the invisible land raider - and gets a 6! I roll two dice for armour pen (being in melta range) and roll a ! Nooooooo! Wait - I have tank hunter to reroll! I pick up the same dice, roll again...... another ! angry face:
Riptide goes from hero to zero in the space of a turn. He tries to smash the riptide but is unsuccessful, and thus the games ends.
RESULT
Spoiler:
VP POINTS
Tau: 12 pts First Blood 1pt
Slay the Warlord 1pt
Units Destroyed 10pts
Ultramarines: 12 pts Units Destroyed 7pts
Captured Euphrati Dell 5pts
DRAW
BREAKDOWN
Decisive moment – when the riptide fluffed his armour penetration rolls against the land raider. At point blank range and with reroll for tank hunter he should have finished it or at least have glanced it and given himself a chance on the charge. If it had been wrecked, it would have given the Tau a vital extra VP, but also there were other units around who would have taken out the techmarine and denied the ultramarines their 5 VP prize. But, alas that is just the way it goes sometimes and the Tau have really struggled with the Land raider in this part of the campaign. Besides, my opponents tactics were spot on - drawing atentin away from the land irader in earlier turns, then sacrificing the conclve to kep it safe in the end game. Good play all round
Key units
Tau: Riptide. Hero and villain today, but just about redeemed his land raider misery with the killer blow on the librarius conclave. He was also responsible for 4 VPs all by himself today, so take a bow sir.
Ultramarines: Land Raider. Sure, the librarius conclave put a lot of hurt on the Tau and distracted them from dealing the land raider, but the AV14 bunker did its job, keeping Euphrati Dell safe and sound while Tau fire bounced off it. Helped of course by the invisibility being cast on it, but the Tau would have struggled even without it.
STATS
Tau: Models remaining 26/69
Kill to Death Ratio 0.60
Efficiency 37%
Ultramarines: Models remaining 9/36
Kill to Death Ratio 1.65
Efficiency 63%
POST GAME
Spoiler:
The Ultramarines and Tau battle to a bitter draw in the last game of the Titan Prime Campaign: Part 3, but the Ultramarines win their first campaign 2:0. As a result, in the Part 4 Campaign the Tau will lose the ability to field human auxiliaries, while the Ultramarines will gain the ability to do so.
AFTER ACTION REPORTS Chief LibrarianVarro Tigirius:
Spoiler:
We reached the designated evacuation location to pick up the redeemed chief engineer without resistance. But all of a sudden, the Tau forces appeared from everywhere, and we realised too late that we had fallen into an ambush. Brother Captain immediately ordered me to take our captive into the Land Raider and protect him carefully. He led the Librarians and Brother Darith fought and stayed on foot to try and breach the trap for us…..
--- Brother Techmarine Sevano, rally point Sanctus on Titan Prime
I had no foreknowledge that the reinforcement from Ultramar was led by Chief Librarian before they arrived, and this is the first time in a decade that I have fought alongside my mentor and Brother Agenostin again, the three of us combined our psychic strength and unleash the wrath from the warp against our foes….
---- Brother Librarian Herbort, in the apothecary cell in Accipter
I was deployed onto the battlefield via our Droppod, but this time the enemy had been expecting our arrival. As soon as I came out of the Drop pod, rains of missiles poured at me, and the intense impact and explosions crippled my mechanical hulls immediately….
----Ancient Brother Ferox, the Ironclad Dreadnought, in Maintenance Bay of Accipter
We were out of luck today, we lost two brothers to the interceptor fire while we land, and as we were attacking the heretic auxiliary, a shadow decent from the sky and rained plasma fire at us, we were soon all laid low….
----Brother Sergeant Volus, in the apothecary cell in Accipter
Despite we got our main objective back safely, I won’t call it a victory today, as it is obvious that the Tau had use the defecting engineer as bait to set up a trap, and I had to amid that their strategy worked out successfully. They inflicted heavy casualty on our side. More than a dozen of our Battle Brothers along with Librarian Herbort and Agenostin went down through out the fight; it is going to take a lot of time to get the Strike Force getting back to combat effectiveness. Thank the Emperor and the heavy armor of our Land Raider, our captive is unharmed, hope the information we extracted from him would be enough to make up this kind of losses...
A debate had broken out around the strategy of our next stage of battles, between Chief Librarian Tigirius and me, since his “sorcerer’s vision” saw the Tau reinforcements are already on the way towards Titan Prime, he proposed that we should launch attacks against the Capital Hive immediately, otherwise the Xeno defenders may have enough time to dig in and drag us into a meat grinder, the tide of this Crusade may turned against us when their reinforcement arrive and we were still at the walls of the Hive. But now, as our Strike Force had suffered such a lost, I don’t think we are capable to deploy a full scale siege against the Hive City at the moment. After an hour of discussion in the apothecary cell, the two of us reached a compromise, that we keep launching squad scale raids against isolated outposts of the Capital Hive and ambush the logistic convoys if opportunity presented itself, attacking only when we outnumber and outgun the Xenos to ensure a major victory without significant casualty. Playing hit and run with the Tau defenders and try to delay their defensive deployments. The main siege will start in five days, hope we are still in time to win a crushing victory in the Hive City before the Tau reinforcement can arrive. May the Emperor protects…
----Brother Captain Fabian, Acting Commander of Strike Force Titan, in the apothecary cell of Accipter
Commander O'Vash:
Spoiler:
It is a rare day indeed that both foes on a abttle field must admit defeat, and yet this is the shamefull prospect we are faced with on this fateful day.
The trap had been well set for the Gue’ron’sha who, in their usual brazen and forthright manner, sparred little time in springing it. However, what we could not have known was that the force sent to collect the treacherous enginner would contain a conclave of Gue’ron’sha shammans. I am not afraid to admit that my nderstanding of these beings is limited, and the closest analogy i can find is in the ancient belifes of magic and scorcery from our unenlightned past, but these men performed feats today which defy any logical reasoning i can apply to them.
For the first time in over three decades of warfare, i tasted the bitter twinge of a long forgotten emotion - fear. Yes, i am ashamed to amit it, but fear can be a great driver of nobler sentiments - duty, honour and of course bravery. The men under my commanded auitted themselves with all of this and more today, but the batel wa sjust beyond us once more. Both sides have pummeled each other into twisted, bloody recks this day, and while the Gue’ron’sha leave with their prozed engineer, we have exacted a heavy enough toll on their force to maybe buy some respite from their raids for the moment.
And this could not have come at a better time for us. We have finally recieved word from FFi’Rios - the fleet has departed.
I think it looks like our luck going back and forth, that double ones rolled twice is actually a 1/1296 chances ..... But I do think Tau should let at least one more crisis suit to pack dual fusions instead of missile. The FSBC Broadsides should be ok enough for volumes of missile fire, where only invisibility or hallucination have a hope to keep MEQ and mid/light armored vehicles being killed by them.
On the Marine side, a mistake in early game is dropping the Ironclad next to the missilsides. Too arrogant believing that AV 13 could walk through 8 S7 shots but the Tank Hunter of FSBC find its mark here.... In after game self review, the first turn of Marines is actually without direction, with conclave going east, scout and LSS going west (probably the only non directional action as they picked off a marker light unit), Ironclad dropping south and plasma TAC dropping northeast. In ths sense, it maybe better for Ironclad to drop at ESE direction or drop near the Tau Skyray and Devilfish (out of range or LoS of the Missileside and Riptide), the former perform as a road block and cover for the east moving LR, latter to threaten the Tau skyray to make LSS less a suicide move.
Overall it seems the new Marine Codex had brought in some new combination and brought them to the level that can match up with the claimed "OP" Tau, although yes I do brought some nasty strategic surprise in game such as AV14 almighty and the "shaman conclave" which is a direct result of the outcome of the last two battle. Now we are waiting for the new Tau codex to drop, by when it will be two brand new armies to fight for the fate of Titan Prime.
Automatically Appended Next Post: Again a big big thanks to Iapedus, it is a lot of great work to draft up these batrep and design of the Narrative.
Why wasn't the techmarine restoring hull points throughout the game instead of just once? Terrible rolling?
Did the LR have to stay in the center of the board? And can the unit carrying the hostage not do anything? Otherwise I don't know why the Marine player didn't load up the conclave and terminators into the raider and crush one side of the board completely then hide in ruins. If the north side of the board fell (probable after the railsides got nuked) then the raider could just hide in terrain all game with the terminators inside.
Well, the Tecmarine is repairing every turns when LR is not on full HPs. The land raider is actually moving east / NE in the mid-late game. But with no clear direction, one turn want to pop shot the missileside, the next shot the fusion battle suit's gun drones, then the final two turns is actually trading shots against the Piranha, and yes it should be moving from turn one towards the NE corner.
I need the Librarians fight on foot, if they are in LR, they cannot cast psychic power....., so the TH/SS Terminator is actually meat shield for them while the whole unit's survivability become even more ridiculous under invisibilty.
But well, the DICE god in this game is even more funny, I actually failed every 3++ called upon, while passed almost every 2+ armor save and 5++ saves.... Meanwhile my opponent got a fusion blaster hit on LR despite invisibilty, but rolled double one twice when rolling to penetrate
Sounds good. If you're feeling lucky I'm pretty sure you can keep one librarian out of LOS on a side of the raider and still cast with the conclave benefits
Neophyte2012 wrote:I think it looks like our luck going back and forth, that double ones rolled twice is actually a 1/1296 chances ..... But I do think Tau should let at least one more crisis suit to pack dual fusions instead of missile. The FSBC Broadsides should be ok enough for volumes of missile fire, where only invisibility or hallucination have a hope to keep MEQ and mid/light armored vehicles being killed by them.
On the Marine side, a mistake in early game is dropping the Ironclad next to the missilsides. Too arrogant believing that AV 13 could walk through 8 S7 shots but the Tank Hunter of FSBC find its mark here.... In after game self review, the first turn of Marines is actually without direction, with conclave going east, scout and LSS going west (probably the only non directional action as they picked off a marker light unit), Ironclad dropping south and plasma TAC dropping northeast. In ths sense, it maybe better for Ironclad to drop at ESE direction or drop near the Tau Skyray and Devilfish (out of range or LoS of the Missileside and Riptide), the former perform as a road block and cover for the east moving LR, latter to threaten the Tau skyray to make LSS less a suicide move.
Overall it seems the new Marine Codex had brought in some new combination and brought them to the level that can match up with the claimed "OP" Tau, although yes I do brought some nasty strategic surprise in game such as AV14 almighty and the "shaman conclave" which is a direct result of the outcome of the last two battle. Now we are waiting for the new Tau codex to drop, by when it will be two brand new armies to fight for the fate of Titan Prime.
Yeah, I agree with most of that - I definitely need to double up the fusion suit dropping in to take out armour, he has failed me too many times on his own! I think the new marine codex has definitely helped them into a stronger position than the current Tau codex, (but not by much, which just goes to show how strong the Tau one was when released) and it will be interesting to see if that parity is still there when the new Tau codex comes out next month. I for one will miss the current Tau dex when it is gone
hanshotfirst wrote:SQUEEEK SOOO AWESOME!
Silverthorne wrote:Sounds good. If you're feeling lucky I'm pretty sure you can keep one librarian out of LOS on a side of the raider and still cast with the conclave benefits
Dozer Blades wrote:These are good batreps because the games are very competitive and the format is tight.
Glad you all enjoyed them - part 4 will be commenced once the new Tau dex is out so stay tuned!
PART 4: The Artemis Hive Campaign Escalating 1500/1750+/2000+ point missions with bonuses.
This is Part Four of the Titan Fall Campaign. The Campaign booklet, along with all mission rules can be found in the attached PDF document.
Sorry, I know It has been a while since the last one was posted, but with a new job, the Christmas break and Chinese new year kind of derailing things we will hopefully now be able to get on and complete the campaign in good order. Enjoy!
MISSION 4.1: Unswerving
OPPOSING FORCES
Bonuses: None
Ascendancy: Neither
Force limitations for both sides are a single standard Combined Arms Detachment + 1 Formation OR a Decurion style detachment from either codex (yes, this campaign has been going so long it has crossed codex editions for both players...)
Both Forces are now at full strength, so no restrictions to number of FOC slots apply. HQ choices still exclude ‘named characters’ unless previous campaign bonus was earned. To represent the desperate defensive efforts of the Tau and their dug in stance, the Tau player must pick 1-3 fortification for each battle, although they do not need to be taken as part of a CAD or formation.
Tau Forces: Fire Warriors from the Setpworld of Fi’Rios 1500pts
Total Models 26/Infantry 21/Characters 2 /Vehicles 5/Psykers 1/ Wounds 39
SETUP
Spoiler:
Mission: Mission 4.1 Assault - Destroy the Objectives & enemy units
Deployment: Dawn of War
Initiative: Tau go first unless Ultramarines can seize
Special Rules: Reserves, Night Fighting, Targeting Nexus (see below)
•Targeting Nexus: While in control of the targeting nexus, the Tau player can call in a bombardment during their shooting phases. This bombardment follows the rules and profile in the campaign book
Terrain: The first exchange at Artemis hive takes place on the city outskirts, recently transformed into a rugged line of defensive works. Bunkers, trench lines, tank traps, barricades and craters.
Map
Warlord Traits:Tau roll on codex Traits and get 'Skilled Hunter' (no look out sirs can be taken against his shooting), while Tigirius gets his set trait 'Storm of Fire' (rending to one unit within 12").
Psychic: Tigirius gets what he needs, Invisibility, along with Terrify, Mental fortitude and psychic shriek
PRE GAME ANALYSIS
Spoiler:
Reasons why Tau will win:
1: Volume of Fire. Tau have multiple units who can pump out obscene amounts of S5+ fire, which will whittle the Space Marines down even with their 3+ saves. They also have better range on average.
2: Hunter Contingent*. First time I have wheeled out the Tau' Decurion' in this campaign, and looking forward to seeing how it performs, specifically the Coordinated Firepower rule for +1 BS. To this end, I have not even bought any MLs as I am keen to see if they can now be bypassed. This increased BS will allow the Tau to score more hits by concentrating their fire and hopefully whittle the Marines down even quicker
3: Gun Line. Tried and tested, ideal for defending the nexus. Also now improved by the Hunter Cadre, giving all those chaps in the line a nice 12" range for supporting fire. Hopefully this will keep those punchy marines at bay.
*Note: I am of course not going to use this formation in the 'broken way' (i.e. giving all my fire warrior units an extra shot for having a fireblade in there, or sharing tank hunter around from the FBSC, etc). +1 to BS will do just fine thank you
Reasons why the Ultramarines will win:
1: Double Deathstar. Not just the Smashfether (chapter master, command squad + medic, very capable of getting into the tau gun line and messing them up in assault) but also Tiggy & Assault Terminators + invisibility (another nasty punchy unit that might be hard to take down at range).
2: Land raider. Oh man, not again. I really hate land raiders, and I don't think I have managed to destroy this one yet in the campaign. No doubt it will be carrying Tiggy & chums just to make matter worse.
3: Ironclad, AKA the monstersmurf. Always a threat in the drop pod, will be target priority for the fusion crisis. If he makes it into combat - which he should - it will be a long afternoon for the Tau.
DEPLOYMENT
Spoiler:
Tau: Tau set up the gun line centrally, behind the aegis with both vengeance weapon batteries. Both fire warrior squad and the firebalde man the line. Riptide and hammerhead also hunker down with the troops, taking advantage of the ammo dump to help with their gets hot rolls. Nexus in the middle.
Broadsides and Piranhas take both flanks
Defenses set, kroot to infiltrate and Commander/crisis suit to deep strike
SM: Bike squad deploys on the extreme right flank, keen to take some of the Tau fire power out of the equation. Land raider with Tiggy & chums also starts left, clearly signifying the intent to collapse the Tau right flank. Scouts to infiltrate, LSS to outflank
Infiltrators, and Kroot occupy the central bunker
As well as reinforce the gun line
While scouts also go on right flank to support other units
Who then scout move into cover
Ultramarines roll to seize and fail.
TURN 1 – Tau
Spoiler:
Main Tau battle line does not move in anticipation of the pod and LSS, but left flank does adjust slightly with Missilesides trying to get more central or risk being out of the game. drones detach from piranhas, while fire warriors deploy DS8 turrets.
Shooting is pretty lack luster for the Tau, only managing a glance on the land raider. Still, one quarter of the way there
They also manage a wound on the chapter master
As well as a single scout from each squad. And with that, the Tau turn is complete.
TURN 1 – Ultramarines
Spoiler:
Drop pod comes in, and also goes right to prepare the way for the rest of the Ultramarines
Scouts and bikes move up in support
While other scout squad moves in on the kroot
Interceptor kicks in, and the Railsides and Riptide manage to put a glance on both the ironclad and drop pod
Shooting, and the ironclad instajibs a railside with his meltagun, while putting a wound on the other with his flamer. Scouts kill off the piranhas drones too, giving them nothing to charge.
Elsewhere, scouts manage to kill a single kroot but fail the charge. They also lose a man to overwatch just to compound their misery
And with that, a tame opening comes to an end
VP – Tau 0:0 Ultramarines
TURN 2 – Tau
Spoiler:
Turn overview
All reserves come in for the Tau. Fusion suit tries to drop in behind the Ironclad, but almost scatters off the board. He just about makes it, but is now stuck between the veritable rock and a hard place
Commander drops behind the land raider to have a pop, and manages to stick the landing more or less
Left flank missilesides continue to reposition, right flank railside does a runner back towards the gun line. Piranha also backs off from the oncoming ironclad
Shooting, and the fusion suit completely whiffs his shooting, even with a boosted BS due to coordinated fire power - he rolls snake eyes to hit He tries to assault jump out of trouble, attempting to tempt the bike star into going backwards
Commander fairs a little better, but only manages a glance on the land raider (still, now half way there). He also jumps back towards the marines table edge to see if he can tempt the raider into coming after him.
Piranha helps to take down three more scouts on the right flank, but the last man standing would hold
While the kroot take out three more in the centre. Again the last man would hold - go marines!
And with that the Tau turn ends
TURN 2 – Ultramarines
Spoiler:
Reserves, and both LSS come in despite Tiggys best reroll efforts to keep them out. One comes on the right flank to help out the ironclad
While the other comes in left to take on the piranha
Tiggy takes the bait and goes after the commander. However, the Land raider manages to immobilise itself on dangerous terrain, leaving it stuck as a big sitting duck in the middle of the board. Riptide target practice?
While the bike star seems to ignore the solo fusion suit and proceed forwards as planned
Psychic, and Tiggy terrifies the Kroot in the central bunker, while failing to hit with psychic shriek. He also gets invisibility off on his unit which is crucial now they are out in the open
Interceptor kicks in, and the left flank LSS is downed by SMS from the missilesides, even though he is hidden behind terrain. This gives the Tau First Blood
Shooting, and the land raider takes the kroot apart, killing three and sending them scurrying for their lives
Ironclad and LSS shoot at piranha but he jinks
The bike star decides to deal with the fusion suit after all, killing a drone and putting a wound on the suit in shooting. They then charge the suit, but lose a bike to dangerous terrain
They make up for the loss by wrecking his face though, gaining a VP and consolidating back towards the centre
Tiggys unit go for the commander
And emerges victorious without loss for Slay the Warlord as well as another VP
Ironclad charges the piranha and makes it three out of three in combat for another VP
VP – Tau 1:3 Ultramarines
TURN 3 – Tau
Spoiler:
Turn overview
Kroot in the centre continue to fall back
Left flank piranha goes flat out to grab line breaker, while right flank railside halts his retreat and takes aim at the Ironclad, which he wrecks for a VP
Most other shooting goes at the bikestar, but only manages one more wound on the chapter master
Tiggys unit also lose a man, but I cant really remember how
The fire warriors DS8 turrets also take out the drop pod for a timely VP
TURN 3 – Ultramarines
Spoiler:
Bikes move towards the gunline, sans land raider support
While Tiggy and co trundle past their broken down transport
LSS also tries to duck for cover behind the bunker, but doesn't quite manage it
Tiggy tries to get invisibility off, but the Tau mange to deny it! Go little warp-innocent blue dudes go!
Shooting, and the land raider kills some more kroot who are just about in range
While the bike squad kill a few kroot, making the charge range just a few inches longer...
Which they promptly fail, leaving them exposed out in the open
VP – Tau 3:3 Ultramarines
TURN 4 – Tau
Spoiler:
Turn overview
Tau have a choice to make here - go after the closer and more dangerous bike star or take advantage of the lack of invisibility and go after Tiggy. They decide on the former.
Quad Icarus cannon downs the LSS trying to hide on the right flank for a VP, while everything else goes after the bikestar - 20 punisher Gatling cannon shots, 40 pulse rifle rounds, a volley of kroot rifle fire, Ionhead and Iontide and some HYMP for good measure, all of which with boosted BS due to the hunter contingent - succeed in only killing one more biker and bringing the chapter master down to 1 wound. That is some punishment they have just soaked up
Great saving rolls by neophyte2012, including a few crucial FNP saves
TURN 4 – Ultramarines
Spoiler:
Tiggy and Co continue to trundle forward
And also manage to get invisibility off, but fails once again to hit with psychic shriek on the missielsides
Bikestar is now committed to the charge, and so once more tries to charge the kroot. They absorb slightly less fire power in overwatch, but the saving roll magic deserts the remaining marines and they are annihilated for 2 VPs
Lone scout also makes a do or die move and goes after the railside, but also fails the charge
VP – Tau 6:3 Ultramarines
TURN 5 – Tau
Spoiler:
Turn overview
Railside takes out the lone scout, who fails his 2+ cover save and gifts the Tau another VP
While all other shooting goes after Tiggy, and manages to eliminate all but two, even through invisibility thanks again to some huge volume of fire for the Tau and some bad armour save rolls once more for the smurfs
TURN 5 – Ultramarines
Spoiler:
With the land raider stranded out of range, the lone scout hiding for his life, and Tiggy out of range we roll to see of the game will continue, and it doesn't
The defenses remains intact
While Tiggy surveys the objective, just out of reach
game over view
TURN 6 – Tau
Spoiler:
Game ended last turn
TURN 6 – Ultramarines
Spoiler:
I said the game ended last turn!
RESULT
Spoiler:
VP POINTS Tau: 10* pts Units killed 7 (only 5 VPs awarded*)
First Blood 1 VP Line breaker 1 VP Nexus Defended 3 VP
* After a quick post game discussion, it was agreed by both players that the Tau VPs should be reduced by 2 due to an oversight rules wise. The Gatling Punisher cannon was manned by the fireblade during the game, giving it BS5 rather than BS2 as it should have been, on account of being an impassable building and therefore not capable of being manned. While it had little real impact on the game (not sure it caused too many crucial wounds anywhere) it did significantly increase the number of saving throws that the bikestar had to make in its advance. Therefore, the VPs for those two units are removed
Ultramarines: 4 pts Units Killed 3 VP Slay the Warlord 1 VP
TAU VICTORY
BREAKDOWN
Decisive moment – when the land raider with Tiggy and chums turned around to go after the commander in the back field. The key to unlocking a Tau gun line is threat overload, and with the iron clad terrorising the Tau right flank while the bikestar and land raider trundled ominously forward the marines had a good chance of overpowering the defenders (admittedly with large losses in the process, but they would have got there and proceed to wreck face when they arrived). As it was, the two VPs were too tempting and bad luck struck with the land raider immobilising itself, leaving Tiggy and chums stranded at the back of the field and 350+ points effectively out of the game, while the bikestar went at the defence line all on their own.
Key units
Tau: Fire warriors did their job in defence, and the railsides had good game but the key unit was undoubtedly the Commander, who's sacrifice ensured victory. Even generals are sometimes called upon to sacrifice themselves for the greater good...
Ultramarines: Ironclad had a decent game, surviving the interceptor fire for once and rampaging thru the right flank, but the bike star still had a good game despite being annihilated, as it soaked up an absolutely tremendous amount of fire power in doing so.
STATS
Tau: Models remaining 45/67
Kill to Death Ratio 1.0
Efficiency 50%
Ultramarines: Models remaining 4/26
Kill to Death Ratio 1.0
Efficiency 50%
POST GAME
Spoiler:
The Tau start the defence of Artemis Hive with Victory, repulsing their opponents direct and fearless assault on the Brohos Point
Going into the second mission, the Tau player has generated 175 bonus points, while the Ultramarines generated 100 bonus points
AFTER ACTION REPORTS Chief LibrarianVarro Tigirius:
Spoiler:
By the time I wrecked that Piranha at the corner of the defense line, I noticed I made a huge mistake as I was totally exposed to the Tau fire line, and the last surviving Broadside fired his railgun at me which brought me to my knees……
--Ancient Brother Ferox, Ironclad Dreadnought, in the maintainence dock, Rally Point Alpha 2-4
The Terminator brothers and I achieved a tactical victory as we punched down the Tau Commander with almost no effort. However we lost this battle due to being diverted too far away from the Tau main defensive position, thus allowing the Tau gun line to pick off our force piece meal…….
--Chief Librarian Tigirius, at Rally Point Alpha 2-4, Titan Prime
Our initial plan was to outflank the Xeno defenders, crippling one flank and crush down into their central position. Initially the battle unfolded well as we avoid most of the worrying Tau fire power, but it is just me being way too impatient to engage the Tau main defense position in the wrong timing, which let our Brothers run into a hail of Tau fire power from the whole gun line, which ruined the whole battleplan.
This assault on the Brohos Point also saw the Xeno forces are recovering well from our initial assault on this planet, they mustered a sizable force and more than sufficient fire power to defend the Brohos Point and the Targeting Nexus, they also have their strategy adapted to handle our assault and their fire power is now becoming even more deadly in such a siege warfare. All of these herald the even more bloody warfare awaiting.
The bulk of our forces will be moving towards Dentone Basillca, it would be the shortest path towards the Palace of the renegade Governor, while we can swept the Tau acting command and relay posts on our way. The sector along with the palace must be heavily defended, hope our brother left in the sector in the vicinity of Brohos Point, Kales Town and Manufactorum District could deceive the Xenos and delay their forces pulling back to reinforce the sectors that we must take……..
-- Captain Fabian, Ultramarine Master of Arsenal, acting commander of Strike Force Titan
Commander O'Vash:
Spoiler:
The storm has finally broken.
Months of hit and run raids have left our human allies on their knees, with gue'vesa units surrendering, fleeing into the wilderness or turning on each other in a desperate attempt to show their new found loyalty to this so called 'god-Emperor'. Nearly all defensive positions outside the cities have collapsed, while some of the smaller Hives tear themselves apart as only these humans know how to do so effectively.
All of which has been leading to this moment, the final battle for Titan. We have played the role of Kauyon well thus far, preserved our forces and fed the human fodder into the Gue’ron’sha mincer to dull their blades and spend their ammunition. Now as they break upon our defensive lines we will strike back with counter attacks and coordinated barrages to encircle and destroy them as they come.
And to make matters better, it appears our reinforcements are on route. A low band burst communication has made it through the Gue’ron’sha jamming, one short sentence - Hold the Line. We come to aid our kin. The signal was unexpected, and in an unusual format, but it is none the less welcome.
We stand firm here at Artemis, for we know this is where the true heart of Titan Prime lies. Control of this city means control of this system, and with that will come another nail in the coffin of this Imperium of Man.
It was an excited game, and a great one. My initial plan was to use the three deathstar to overwhelm one flank, when the major Tau units are destroyed or tied up, the land speeder storm would rush in to contest the primary obejctive. A cunning plan but somehow a bad execution, which cames in two ways in the after thought, first being the Land Raider turnning back to catch the Tau Commander, second one is the way too impatient biker charge at T3, which they should keep to the left table edge for LoS blocking terrain cover, and try multi charge in T4, although they don't have enough time to swept the whole Tau defence line all by their own, they may brought the marines one or two more kill points....
Tau player had great moves in moving the broadside back towards the main defence line, while left the piranha to the table corner to be the only viable charing target for the dreadnought, and also the sacrifice of the warlord as a bait which disrupted a what should be a well planned cooridnate assault and divided the marine's forces, letting the bikers to bear the whole gunline which is proved to be too much for them alone.
Lord Ruby34 wrote:It's always fun to see these. I know how much work it takes to put something like this together, and I want to let you know that I appreciate it.
Ratius wrote:Terrific stuff Lap!
kezwick wrote:nice to see theese again is always a good read!
After the first turn my hopes for the Tau were dwindeling slowely but am pleased to see the tau prevailed!
Thanks chaps! Glad you are all enjoying the games, sorry its been so long a break in between. Anyway, we are back now and hopefully we will be playing the next part this Friday
Neophyte2012 wrote:It was an exciting game, and a great one. My initial plan was to use the three deathstar to overwhelm one flank, when the major Tau units are destroyed or tied up, the land speeder storm would rush in to contest the primary objective. A cunning plan but somehow a bad execution, which comes in two ways in the after thought, first being the Land Raider turning back to catch the Tau Commander, second one is the way too impatient biker charge at T3, which they should keep to the left table edge for LoS blocking terrain cover, and try multi charge in T4, although they don't have enough time to swept the whole Tau defence line all by their own, they may brought the marines one or two more kill points....
Tau player had great moves in moving the broadside back towards the main defence line, while left the piranha to the table corner to be the only viable charging target for the dreadnought, and also the sacrifice of the warlord as a bait which disrupted a what should be a well planned coordinate assault and divided the marine's forces, letting the bikers to bear the whole gunline which is proved to be too much for them alone.
Yes I totally agree Neo - I think your plan to collapse one flank was the right one to go with since you had a relatively small elite force, but a few key mistakes meant it just didn't quite come off.
The Land raider turning back was the main fault, although you were unlucky that it immobilized itself - I guess you will never leave home in the LRC with out a tech marine again Other issues were the LSS's coming in too early and being outflanked too aggressively - they should probably have come in more on your side of the board and waited for their chance to strike, rather than offering up two easy kill points (as well as first blood). I think also the double death star was at a disadvantage against the gunline as it meant I had only two targets to aim at every turn - admittedly very durable targets, but they would have probably benefitted from having some other distractions to help overload the Tau line, either the scouts zooming in T1 with the LSS's or some drop pod marines to back up the Ironclad.
Anyway, I look forward to seeing how the marines change their tactic for the next one
PART 4: The Artemis Hive Campaign Escalating 1500/1750+/2000+ point missions with bonuses.
MISSION 4.2: Unrelenting
OPPOSING FORCES
Bonuses: Tau generated 175 bonus points, while the Ultramarines generated 100 bonus points
Ascendancy: Neither
Force limitations for both sides are a single standard Combined Arms Detachment + 1 Formation OR a Decurion style detachment from either codex
Both Forces are now at full strength, so no restrictions to number of FOC slots apply. HQ choices still exclude ‘named characters’ unless previous campaign bonus was earned. To represent the desperate defensive efforts of the Tau and there dug in stance, the Tau player must pick 1-3 fortification for each battle, although they do not need to be taken as part of a CAD or formation.
Tau Forces: Fire Warriors from the Setpworld of Fi’Rios 1925pts
Heavy
Centurion Devastators x 3, Grav Cannons, 250pts
- Sergeant Excis, Ominscope
Librarius Conclave Formation
Chief Librarian Tigirius , Power armor, Bolt Pistol, Hood of Hellfire, Rod of Tigirius , 160pts
Librarian Agenostin , Level 2, Terminator armor, SS 125pts
Librarian Herbort , Level 2, 905pts
Total Models 45/Infantry 38/Characters 4 /Vehicles 7/Psykers 3/ Wounds 69
SETUP
Spoiler:
Mission: Mission 4.2 - Break out (Capture /Defend objective and destroy enemy units)
Deployment: Hammer and Anvil
Initiative: Tau go first unless Ultramarines can seize
Special Rules: Reserves, Night Fighting, Hold the Line (see below), Punch Through (see below), Straight at 'em (see below)
•Hold the Line : The Tau units may reroll failed moral checks if they are within 6” of objectives
•Punch Through: The Ultramarines units may move off the Tau players table edge. To do so results in extra VPs being awarded
•Straight at ‘em: Neither side may outflank, although reserves otherwise function as normal
Terrain: The second exchange at Artemis hive takes place deep in the heart of the defenses. Bunkers, trench lines, tank traps, barricades and craters, as well as urban buildings and industrial facilities.
Table setup
The Tau Command posts (bastions)
The Industrial zone
Warlord Traits:Tau roll on codex Traits and get 'Skilled Hunter' (no look out sirs can be taken against his shooting), while Tigirius gets his set trait 'Storm of Fire' (rending to one unit within 12").
Psychic: Tigirius and the Conclave do NOT get Invisibility! However, they do get a whole lotta other stuff including shrouding, smite, iron arm, dominate, Mental fortitude and psychic shriek
PRE GAME ANALYSIS
Spoiler:
Reasons why Tau will win:
1: Volume of Fire. Tau have multiple units who can pump out obscene amounts of S5+ fire, which will whittle the Space Marines down even with their 3+ saves. They also have better range on average.
2: Armoured Interdiction cadre. Four tanks is nothing to sniff at, and I have gone for a range of weapons to deal with both blobs of marines (ion cannon) as well as the troublesome Land raider if it comes this time. rerolling to hit within 6" of a designated point will also be nice, especially when combined with the hunter contingents 'coordinated firepower' rule for rerollable 2+ to hit.
3: Interceptor net. I have an inkling that, after the last game, my opponent will go more boys over toys and avoind deathstars in favour of increased units. In order to get them into battle, i suspect he is going to bring flyers and drop pods, so I have invested in EWO on the missile sides and two quad guns on the bastions as my deterrent. I just hope it is enough...
Reasons why the Ultramarines will win:
1: Double mini-deathstar. Not as powerful as last time, but the centurions with chapter master on foot will be very durable and right in the fight from the drop pod, while the conclave will have very good offensive capabilities (if now a bit less resilient due to not getting invisibility).
2: Threat overload. 5 drop pods (including a lucius pattern one for the ironclad) and two LSS all packed with troops could have the ability to overwhelm the Tau position, jut as long as they come in when planned and don't mishap...
3: Null deployment. Interesting move by the Smurfs, might pay off as it means one less round of shooting to endure and negates the hammer and anvil deployment issues at the same time
DEPLOYMENT
Spoiler:
Tau: Broadsides sit atop the bastions, with the quad guns on either side. Tanks, crisis suits (including the commander) and Piranhas cover the flanks, while the kroot and fire warriors spread out in the centre to stop any drop pods coming in.
SM: null deployment
Stealth suits infiltrate onto industrial buildings to create a cross fire on the potential landing zone
Ultramarines don't try to seize
TURN 1 – Tau
Spoiler:
Overview
Gun drones detach from the piranha's, and the Tau turn is complete. Shortest turn ever
TURN 1 – Ultramarines
Spoiler:
Three drop pods come in automatically. First up, the chapter master and grav cents come down on the Tau left flank
While the Ironclad comes down on the right flank. He stays aboard the lucuis pattern drop pod this turn
The Librarius conclave and command squad come in last, landing just right of centre
Interceptor kicks in for the Tau, and since nothing is AP4 or lower the three missilesides and the quad guns go after the librarius conclave. They pour fire in, but some good armour rolls and FNP from the medic saves the command squads meltaguns. They Librarians tank a lot of wounds but hang in there on 1 wound each, while Tiggy also loses one.
Having weathered the storm without loss, its time to see if the marines can get the alphastrike to pay off. Psychic phase is a bit of a bust though, shrouding on the Libby unit and dominate on the stealth team just about the only things that come off
Shooting, and the chapter master brings in the orbital strike. He gets a direct hit on the Skyray but only manages a glance, while the bastion is also glanced
The grav cents split fire, the serg going after the broadside on the battlements and putting a wound on him
While the other two go after the skyray, finishing it off for a VP and first blood
Command squad go after the ionhead with their meltaguns, but he jinks well and only suffers a glance
While the ironclad goes after the piranha, annihilating him for another VP
And with that, the alpha strike is over and marines take the lead
VP – Tau 0:3 Ultramarines
TURN 2 – Tau
Spoiler:
Turn overview
Commander comes forward to lay down some supporting fire on the left flank
As does the crisis on the right flank
Fire warriors move up into rapid fire range of the conclave, while kroot remain perfectly still
Shooting, and one grav cent goes down on the left flank to combined fire, as well as the chapter master taking a wounds
In the centre, a librarian and three of the command squad go down, and tiggy is left on his last wound also
The ironclad also takes a glance from a sneaky drone shot to the hind quarter
The suits would assault jump back behind the bastions, and the marines survive their first full round of shooting fairly intact
TURN 2 – Ultramarines
Spoiler:
turn overview
The ten man TAC squad comes in, but the five man squad remains in reserves. The DP lands next to the cenral bastion, claiming the objective from the broadsides on top
Both LSS come on too, from the space marine table edge to avoid any interceptor fire
Grav cents move forward but are held up by difficult terrain
While conclave line up the charge on the kroot
Iron clad moves off the DP and fires at the right flank bastion but fails to hit
Interceptor also kicks in, and all the missilesides shoot the newly arrived TAC squad (as im not sure how many will survive to the next Tau turn). Five marines go down, but they would hold
Psychic phase, and the conclaves effectiveness may be reduced but they still manage to kill a broadside atop the right flank bastion with psychic shriek
As well as one atop the central bastion with smite
The right flank broadside would hold, but the central one would break and fall back
Shooting, and the marines put some fire up the fleeing broadsides butt, dealing him a wound
While the pair of LSS's flat out
Assaults, and the iron clad compounds his poor day thus far by failing a 5" charge at the right hand bastion
Grav cents and chapter master sweep both the kroot and piranhas drones for a VP, consolidating towards the bastion
While the Librarius conclave squad would sweep the other kroot unit for another VP, but not before losing a libby and the final two command squad marines to overwatch. This give the Tau two VPs, and leaves Tiggy hopelessly exposed out in the open
VP – Tau 3:5 Ultramarines
TURN 3 – Tau
Spoiler:
Turn overview
Commander comes forward again, to back up the piranha
While fusion crisis jumps up onto the bastion, but not before losing a drone to dangerous terrain
Stealth team also move to intercept an onrushing LSS on the right flank
Commander only manages to put another wound on the chapter master. He would then assault jump back behind the bastion
Tiggy is laid low by combined fire, giving the Tau a VP and Slay the Warlord
Ironclad also pays the price for his failed charge, a railgun round to the face putting pay to his afternoon and giving the Tua another VP
Elsewhere the LSS on the left flank is immobilised by some quad gun sniping, while the right hand one is forced to jink
TURN 3 – Ultramarines
Spoiler:
turn overview
The final drop pod comes in, slamming down in the centre of the Tau position now the Kroot have been cleared away
Cheeky move by the marines here - chapter master and grav cents embark into to bastion
and get a clear line of sight on the commander with the grav cannons through the firing points. Cunning play indeed
Interceptor kicks in, and the remaining missileside takes down three of the newly arrived marines, but they would hold
They then take their revenge on the fire warriors, killing two and sending the last one running
Grav cents open up on the command from inside the bastion, but they don't do enough damage of kill him off
Sergeant also tries to take down the bastion with a melta bomb, but only manages a glance for his troubles
Elsewhere, scouts continue their move up the board
VP – Tau 6:5 Ultramarines
TURN 4 – Tau
Spoiler:
Seeing no other way to get the grav cents out of the bastion, and not wanting to give up three VPs for them controlling it, the Tau decide to take down their own building. Fusion blaster on the piranha does the job, triggering a collapse that ends up doing no damage to the occupants or the broadsides on the roof. Fire from the commander does however finish one Cent off
The stealth suits come down out of the buildings to finish off the four man TAC squad holding the central bastion, while the hammerhead destroys the DP next to it for good measure. This is another two VPs for the Tau
Commander jumps behind the tank for cover, and the turn ends
TURN 4 – Ultramarines
Spoiler:
Scouts continue forward, looking for some assault targets
While Grav Cent and Chapter Master split up to go after separate targets
two surviving marines also move in on the commander
Cent decides to charge the broadsides, hoping he will be safe in combat. Chapter master makes it into assault on the hammerhead, but the two marines fail their charge on the commander
The Cent combat is a draw, but the chapter master does wreck the hammerhead for a VP
Assault, and the stealth suits kill two without loss, winning the combat but staying locked up
VP – Tau Tau 8:6 Ultramarines
TURN 5 – Tau
Spoiler:
Table is starting to look quite sparse now - it has bee a real bloodbath out there, and its not done yet. Commander and piranha line up the chapter master, and take him down for another VP
Other shooting fails to destroy any drop pods, but the remaining mobile LSS is destroyed by the quad gun for a further VP. The Grav cent and broadsides remain locked up, and will do for the remainder of the game
The scouts vs stealth team combat is also another draw
TURN 5 – Ultramarines
Spoiler:
turn overview
Scouts from the immoblised LSS on the left flank finally make it into the fray on foot, capturing the now abandoned central bastion
The other squad also finish off the stealth team for a VP, and consolidate to cover behind the DP
If the game ends now, the marines will just about win thanks to the scouts holding the middle bastion. We roll to see if it continues.... and it does!
VP – Tau Tau 10:7 Ultramarines
TURN 6 – Tau
Spoiler:
Tau shooting, and the scout team holding the central bastion are annihilated by the other stealth team, exacting revenge for their fallen brothers. This gives the Tau a VP and puts the bastion back in Tau control. The other scout squad loses a man and breaks, falling back 10"
The two man TAC squad are taken out by the commander for another VP, while the Cent vs Broadsides combat trundles on to its inevitable draw
TURN 6 – Ultramarines
Spoiler:
Since the scouts are too far away to make a difference, and the Grav Cent is tied up for the rest of eternity, we decide to roll and see f the game would carry on to give the marines any chance, but it doesnt.
final overview
Left flank bastion has been levelled by the Tau themselves, rather than have it fall into enemy hands
The central bastion is damaged but intact, manned by the commander and stealth team
While the right hand bastion stands erect and untouched, despite the ironclads best (or worst) efforts
RESULT
Spoiler:
VP POINTS Tau:18 pts Units killed 11
Slay the Warlord 1 VP Command Posts Defended 6VP
Ultramarines: 16 pts Units Killed 8VP
Units in Enemy Deployment zone at game end 5VP
First Blood 1VP
Line breaker 2 VP
TAU VICTORY
BREAKDOWN
Decisive moment – the game going to turn 6. The momentum the marines had built with their direct and fearless assault just didn't have the legs to last one more turn, and the Tau were able to swing a very bloody battle back in their favour at the last gasp
Key units
Tau: lots of units had good days, the stealth teams made crucial kills towards the end and the fusion blaster piranha dug the Cents out of their bastion, but the key unit was actually the kroot - their spread out deployment at the beginning made containing the drop pod assault a bit easier, forcing them to come down in the kill zone between bastions and stealth teams
Ultramarines: Grav Cents and Chapter master - soaked up an awful lot of fire power throughout the game, while taking down a lot of Tau with them and scoring a hatful of VPs
STATS
Tau: Models remaining 12/50
Kill to Death Ratio .97
Efficiency 49%
Ultramarines: Models remaining 8/45
Kill to Death Ratio 1.03
Efficiency 51%
POST GAME
Spoiler:
The Tau continue the defence of Artemis Hive with a close victory, just about handing on to the Dentone Bastion complex after a brutal assault
Going into the third mission, the Tau player has generated 375 bonus points, while the Ultramarines generated 325 bonus points
AFTER ACTION REPORTS Chief LibrarianVarro Tigirius:
Spoiler:
Brother Fabian and I decided to launch an overwhelming orbital strike to break open the Tau defenses at this region, since the urban morphology of Dentone Basilica only contains a few long narrow street corridors for our tanks and Rhinos to pass through, and the defenders could easily find ambush points along our advance lane.
I led the Conclave and the veteran brothers to form the vanguard of this assault along with Brother Fabian, Brother Excis and his Centurion Devastator squads and Ancient Brother Ferox. Thanks to the formidable storm shield carried by the veteran brothers in the command squad, we took no damage from the Tau interceptor fire when we landed, but we did not cripple their force in the initial attack, the Tau firepower was still intense throughout this encounter and whittle us down one by one before we can bust open their bunker defenses.
We suffered heavy losses and did not achieve our intended result in the fight of Dentone Basilica, this failure made our next offensive operation even more difficult, as our ground forces have to reach the renegade governor’s palace through an alternative path. It is going to cost us more time and all the while there would be no doubt another brutal battle awaits the already bleeding strike forces.
Worse still, I sensed a tiny periodic change of the warp turbulence, despite its insignificance, such a signature is clear enough in the eyes of a talented psyker like me – it is the eddy left by the Tau fleet as they periodically making short range skim through the surface of the warp, they will be reaching the Titan System in three days. Upon this discovery, I immediately sent out a squad of Battle Brothers to disengage from the battle and find a suitable location for us to set up our own defensive perimeter, a solid bridgehead upon this planet is essential for us to hold and buy time for the whole Imperial Crusade Forces to bring their might to bear. Fortunately for us, the Xeno forces on this planet also suffered severe casualty in the past months. Brother Fabian and I would led the bulk of our strike force to make one last push towards the Palace, since the enemy is also bleeding, we may still have a chance to bring the renegades to justice and cripple the threats from the on planet Tau army before their relieve forces arrives. The balance of this system and maybe the whole sub-sector would now hang on the gates of the Governor’s Palace. May Emperor protects.
--Chief Librarian Tigirius, at Rally Point Alpha 3-7, Titan Prime
Commander O'Vash:
Spoiler:
If the Gue’ron’sha were not our enemy, they would make interesting companions on the battlefield, and worthy of further study by our fire cast tacticians. They have once more proved they are no fools this day, and have earned our respect as well as our hatred.
Dentone Basilica still stands, albeit with a few less towers than when the Gue'la built it. The Gue’ron’sha assault has been brutal and direct as we had expected, but the overwhelming manner in which they utilized their orbital drop deployment almost caught out forces by surprise.
Having already encountered heavy fighting at Brohos point, we had expected the direct land assault to continue. We had brought our armoured column up from reserves to meet the threat of heavy tanks head on, and they proved largely useless against the initial sky borne assault. Our interceptor net of broadsides and Gue'vesa gun emplacements also did little to impede there advance.
However, once they had landed we were able to isolate and contain the Gue’ron’sha in their landing pockets, giving our armour enough tie to reposition and blast them to dust.
But we cannot be too sure in out victory here - we are still out numbered, and our defenses hold by the thinnest of threads, Right now the Gue’ron’sha head for the Governors palace, trying to expose our weakened position, and we must once move to counter the threat and hold out for as long as we can...
I admit I have done some strategy tailoring against the pre-set mission and table set up (deployment type), and try to even turn going second facing Tau into some kind of advantage for Marines, introduction of the two Scout with LSS to rush the objective is one of it, just been broken by the 4 rolled when determine if thegame ends or not , same as five Droppod army in this game and the small number elite double death star in the last one. But the Tau player counters it well in the game play, from the distraction in last game to the Kroot screen plus spreading out the armor vehicles (which forces me to have to go after both the Skyray which is the only markerlight source and the Ion cannon Hammerhead on the 1st wave drop) in this one. Well played
There is also a huge tactical mistake in process of execution of the game plan, in this game is the splitting of the Chapter Master from the Grav Centurion at the end game, instead I should just keep them together and multi charge the Hammerhead and Broadsides, so when the vehicle is destroyed by the Powerfist, the unit is still count as tied in combat with Broadside, and that will save the Chapter Master from next round shooting, which may see two units moving off the Tau table edge, after he killed the Broadsides in the Tau's assault phase
I also think the luck factor in this game is somehow balanced. The command Squad and Conclave soaked up around 70% of Tau firepower in the first turn after they landed and was Only half dead, But after that I failed a lot of saving throws at the end game. On the Tau side, some great sixes are rolled when overwatch as well as the Quad gun shooting infantries, But was balanced back by the poor perfomance of the Fusion Battle Suit.
Neophyte2012 wrote:I admit I have done some strategy tailoring against the pre-set mission and table set up (deployment type), and try to even turn going second facing Tau into some kind of advantage for Marines, introduction of the two Scout with LSS to rush the objective is one of it, just been broken by the 4 rolled when determine if the game ends or not , same as five Drop pod army in this game and the small number elite double death star in the last one. But the Tau player counters it well in the game play, from the distraction in last game to the Kroot screen plus spreading out the armor vehicles (which forces me to have to go after both the Skyray which is the only markerlight source and the Ion cannon Hammerhead on the 1st wave drop) in this one. Well played
There is also a huge tactical mistake in process of execution of the game plan, in this game is the splitting of the Chapter Master from the Grav Centurion at the end game, instead I should just keep them together and multi charge the Hammerhead and Broadsides, so when the vehicle is destroyed by the Powerfist, the unit is still count as tied in combat with Broadside, and that will save the Chapter Master from next round shooting, which may see two units moving off the Tau table edge, after he killed the Broadsides in the Tau's assault phase
I also think the luck factor in this game is somehow balanced. The command Squad and Conclave soaked up around 70% of Tau firepower in the first turn after they landed and was Only half dead, But after that I failed a lot of saving throws at the end game. On the Tau side, some great sixes are rolled when overwatch as well as the Quad gun shooting infantries, But was balanced back by the poor perfomance of the Fusion Battle Suit.
Thank Neo, good analysis and I agree with you on all points.
I think you had the strategy right form the start, a drop pod heavy list and null deployment was definitely the way to go (and also very cinematic ). Tau always suffer from threat overload, and you list delivered that in spades on the first turn. If you had managed to get both remaining drop pods in on T2 I think you would have overwhelmed my defenses, or if the LSS had deep struck in rather than coming up the board - I would have undoubtedly intercepted them, but at least your scouts would have been in the fight and those shots wouldn't have been put on something else. I also think maybe you could have run the grav and chapter master off the board, as well as the two man tac squad that tried to charge the commander, as they would have all been worth more points off the board than on it.
Anyway, these are only minor tweaks to your tactics and it doesn't really matter as you had this game won on turn 5, it was just unlucky that it went to T6. Great game, and I look forward to the final battle for the governors palace
Very nice battle report. Seeing all those tanks and bastions the Tau had to play with, I knew the Marines were going to have a bit of a challenge. Still, they handled it rather well, though lascannons on the Centurions might have been an option for dealing with the bastions and tanks (but then I play Crimson Fists so the strategy is a bit different)
iowaforever wrote: Very nice battle report. Seeing all those tanks and bastions the Tau had to play with, I knew the Marines were going to have a bit of a challenge. Still, they handled it rather well, though lascannons on the Centurions might have been an option for dealing with the bastions and tanks (but then I play Crimson Fists so the strategy is a bit different)
Can't wait to see more
Thanks, glad you liked it!
I think if my opponent had known I was going to bring three bastions he may well have changed up his fit out a bit - a few more chain fist termies for starters Still, the boys in blue gave a pretty good account of themselves, and literally just lost out on the roll of a dice. Poor smurfs
in the last battle i was like should have put the kroot in Outflank and if i had i would have lost haha! good games good fun thanks for the epic Bat reps!
Nice bat rep. When you said the chapter master and cents "swept" do you mean killed them all or caught them in fall back. As they can't catch them due to slow and purposeful. Also I might be wrong but they aren't affected by dangerous terrain either? I'm not confident in that one.
kezwick wrote:Had fun re reading all theese again,
in the last battle i was like should have put the kroot in Outflank and if i had i would have lost haha! good games good fun thanks for the epic Bat reps!
Thanks man, glad you are re-enjoying them
Gordy2000 wrote:Great to see these reports - the difference from the early ones to now is marked. Really excellent to see painted armies on well made terrain
Keep up the good work!
Cheers - when we first started the Tau were my new army and a lot of stuff was straight out of the box or fresh from ebay. Its taken a while, but now I am able to field almost entirely painted armies and most of that has been thanks to these batreps providing motivation to do so. I highly recommend it as a way of dealing with painting backlog
Righteousrob wrote:Nice bat rep. When you said the chapter master and cents "swept" do you mean killed them all or caught them in fall back. As they can't catch them due to slow and purposeful. Also I might be wrong but they aren't affected by dangerous terrain either? I'm not confident in that one.
Thanks for the comments - Yes they did sweep them, and you are right they shouldn't have been able to do so. The kroot were fairly decimated in the attack though and would have probably fallen back of the table edge anyway, so it wouldn't have made much difference. As for the cents, not sure why they would ignore dangerous/difficult terrain? They are still infantry, just very bulky.
Anyway, final battle of part 4 coming up soon, so stay tuned
I've just found these battle reports in the last few days. I've read each one and enjoyed them very much!!
Neo, you should really consider running a full battle company plus 10th company strike force together. I run them both at 1850 with 3 free drop pods and 5 free razorbacks. It's a total of 95 models and it will dominate those blue-fisted cheaters!!
I run three 10-man tac squads in drop pods, three 5-man tac squads in razorbacks, one 10-man assault squad with jump packs, a 5-man assault squad with jump packs, two 5-man dev squads 4 LC and 4 ML respectively) with 2 razrobacks, a captain and a jump pack chaplain. 1 razorback has TLLC, 2 have LC and TLPG, and 2 razorbacks have HB. The 10th Co TF is three 5-man Scout Squads. This list ROCKS!
PART 4: The Artemis Hive Campaign Escalating 1500/1750+/2000+ point missions with bonuses.
MISSION 4.3: 'Undeniable'
OPPOSING FORCES
Bonuses: The Tau player has generated 375 bonus points, while the Ultramarines generated 325 bonus points, but to keep it manageable we have decided to split the difference and just give the Tau a 50pt starting bonus.
Ascendancy: Neither
Force limitations for both sides are a single standard Combined Arms Detachment + 1 Formation OR a Decurion style detachment from either codex
Both Forces are now at full strength, so no restrictions to number of FOC slots apply. HQ choices still exclude ‘named characters’ unless previous campaign bonus was earned. To represent the desperate defensive efforts of the Tau and there dug in stance, the Tau player must pick 1-3 fortification for each battle, although they do not need to be taken as part of a CAD or formation.
Tau Forces: Fire Warriors from the Setpworld of Fi’Rios 2049pts
Troops
TAC squad x 6, MG, MB, Combimelta, DP, 144pts
- Sergeant Volus, MB Scout squad x 5, BP & CCW, LSS with HF, 100pts
- Sergeant Moris
Elites
Command Squad x5, 2x SS, 3x MG, MB, Bikes 190pts
- Apothecary Helion Ironclad Dreadnought, PFHF, SHMG, DP (lucius Pattern), 220pts
- Ancient Brother Ferox Venerable Dreadnought, MM, PF with HF, DP (lucius Pattern), 195pts
- Ancient Brother Boris
Heavy
Centurion Devestators x 3, Grav Cannons, 250pts
- Sergeant Excis, Ominscope
Land Raider Crusader, MM 260pts
Librarius Conclave Formation
Chief Librarian Tigirius , Power armor, Bolt Pistol, Hood of Hellfire, Rod of Tigirius , 165pts
Librarian Agenostin , Level 2, Terminator armor, SS, MB 130pts
Librarian Herbort , Level 2, Auspex 95pts
Total Models 31/Infantry 24/Characters 4 /Vehicles 7/Psykers 3/ Wounds 52
SETUP
Spoiler:
Mission: Mission 4.3 - Last Stand (Capture /Defend Governor Malorak and destroy enemy units)
Deployment: Special (See mission pack)
Initiative: Ultramarines go first unless Tau can seize
Special Rules: Reserves, Night Fighting, Grim resolve (see below), Shattered Ruins (see below), Relief Force (see below), Governor Malorak (see below)
•Grim resolve: When in possession of Governor Malorak, all friendly units within 6” of his model have the fearless special rule.
•Relief force: All Tau forces in reserve arrive from T2, and roll on the following table to ascertain when they arrive in battle.
•Governor Malorak: As the objective in this game, he follows the same rules as ‘the relic’ in the Eternal War mission of the same name (refer to 40K Rulebook).
•Shattered Ruins: As the cavernous palace collapses under the heavy fighting, large chunks of wreckage fall from the ceiling. At the beginning of each players turn, they must roll a die. On the roll of 1, your opponent selects one of your units to receive D6 S7 AP- wounds as it is hit by falling debris.
Terrain: The last exchange at Artemis hive takes place within the shattered remnants of the Governers palace complex. Bunkers, trench lines, tank traps, barricades and craters, as well as ruined buildings and industrial facilities.
Table setup
The Tau 'Last Stand'
The Ruins of the Governor's palace complex
Warlord Traits:Tau roll on codex Traits and get 'Skilled Hunter' (no look out sirs can be taken againts his shooting), while Tigirius gets his set trait 'Storm of Fire' (rending to one unit within 12").
Psychic: Tigirius and the Conclave do get Invisibility this time, as well as a whole lotta other stuff
PRE GAME ANALYSIS
Spoiler:
Reasons why Tau will win:
1: Volume of Fire. Tau have multiple units who can pump out obscene amounts of S5+ fire, which will whittle the Space Marines down even with their 3+ saves. However, this firepower needs to get onto the field of battle first, so....
2: Fast Attack Bonanza! In an effort to get as many reinforcements onto the table at once, I have gone for mostly troop in transport and fast attack choices with a few elites mixed in for good measure. This should allow me to bring much needed firepower to the enemy and start whittling them down. However, in an effort to ensure as many reinforcements arrive T2 to as possible I have also gone for a...
3: Comms Relay. Specifically to go with the ADL, this should maximize the chances of the relief force arriving on turn two. As per the missions rules (see booklet for more details) my Fast Attack will be arriving on a 4+, While everything else will be in on a 5+. With that improving to 3+/4+ respectively for T3, the reroll should ensure pretty much everything gets in ASAP.
Reasons why the Ultramarines will win:
1: Double deathstar. Libby Conclave + Grav cents and a Chapter Smashfether with Command squad = hard time for Tau shooting, especially without the Tau formation Buffs and no marker lights.
2: Dreadnaught overload. First turn these two will come in, sit inside their DPs and burn anything in range with their HFs. The Tau lasts stand will have a very tough first two turns trying to hand on against these guys
3: Land Raider. I am yet to take it down in this campaign, and without any of my heavy support units it is the perfect getaway vehicle for bundling the governor into and getting way.
DEPLOYMENT
Spoiler:
SM: Centstar goes in the land raider, who starts across the board next to the chapter smashfether and his posse
Tau: Kroot fill out the ADL enclosure to keep the Drop pods out, while fire warriors guard the flanks. I mess up my deployment here, as everyone should have been within 6 " of Governor Malorak to be fearless, but the left hand fire warriors squad was an inch out.
Infiltrators: LSS infiltrates on Tau left flank, and then scouts up to within flamer range of the fire warriors who, as I would discover, are not fearless...
Tau try to seize and fail
TURN 1 – Ultramarines
Spoiler:
As predicted, both dreads come in. Brother Boris lands on target, close enough to the kroot to not have to leave his DP
Brother Ferox scatter slightly though, forcing him to exit in pursuit of the fire warriors
Smashfether comes forward
As does the Land Raider, with the Centstar choosing to disembark and lend their psychic powers and Grav cannons to the effort of a T1 tabling for the Tau
LSS roasts 3 fire warriors, enough to force a morale check
Which they of course fail, fleeing off the table edge and giving up First Blood and a VP. This leaves the Tau with just two units to survive the turn with
On the right flank, the Ironclad roast 4 with his flamer, but the fire warriors hold
In the centre the Kroot are heavily mauled by a mixture of psychic and shooting, but survive with 11 remaining, including the shaper, and ensuring tat the Tau wont be tabled. Unless they fail all their reserve rolls that is....
TURN 1 – Tau
Spoiler:
Very little for the Tau to do this turn - the kroot move up to get an angle on the LSS, taking care to remain within 6 " of Governor Malorak, while the fire warriors back away from the ironclad
Shooting, and the Kroot make the LSS to jink, causing no damage but at least resulting in one less heavy flamer out there next turn. The Quad guns kill two scouts as well, who would hold
VP – Tau 0:2 Ultramarines
TURN 2 – Ultramarines
Spoiler:
Reserves, and the remaining drop pod does not come in - a slight boon to the beleaguered Tau. As the Centstar and land raider make their way across the battlefield, the venerable Boris moves towards the kroot and gives them another spurt of promethium
Psychic is another bust for the marines, they do get invisibility off, but psychic shriek is denied by the kroot!
In combat the Ironclad makes it into combat with the intent of wiping out the fire warriors, but whiffs a single wound role and leaves one man standing. He is fearless due to being in control of Malroak, and so combat is tied up
The kroot are charged by both the scouts and the smashfether, but somehow survive and remain in combat. And who says shapers aren't worth it?
TURN 2 – Tau
Spoiler:
turn overview
The Tau hang on with four models remaining. Time to roll for the reserves...
Despite the rerolls for still being in control of the comms relay, less than half of my reserves come in (5 out of 13 units). Worse still, only one of my fast attack units come in, rendering my strategy of weighing selection heavily in their favour of them pointless. This could well have cost the tau the game already
The devil fish with breachers comes on to the left flank
While the stealth suits go for broke and try to get on the Venerable Dreads rear armour, one squad scattering off slightly
Everything else is tied up in combat, so the piranha comes on the right flank to go after the drop pod, with the Plasma suit hiding behind the bastion
Shooting, and the Devilfish wrecks the LSS for a VP
But the piranha fails to hit the drop pod
The Stealth teams have more luck, taking down the venerable between them for another VP. One squad assault jumps behind the wreckage
While the other jumps up into the ruins
The plasma suit also jumps onto the Bastion for a better shot next turn
Combat, and the bikers overcome the kroot in front of them but the shaper holds on against the scouts. The bikes cannot get back into combat and so are free to charge around next turn
The ironclad easily finishes off the remaining fire warrior for a VP, but cannot take possession of governor Malorak on account of being a vehicle
VP – Tau 2:3 Ultramarines
TURN 3 – Ultramarines
Spoiler:
Turn overview - looking a bit grim for the Tau now, with the marines relentless advance putting real pressure on their position
Last drop pod comes in, slamming down in the heart of the Tau position ready to take possession of governor Malorak
Marines shuffle around a bit and psychic is not great again but they do get invisibility off once more. Grav cents fire and take out the devilfish on the left flank for a VP
Both stealth teams take casualties and fall back, with the one man squad being wiped out in shooting for another VP
In combat, the Ironclad takes down the Bastion, killing the plasma suit on top for another VP
While the scouts also finish off the shaper in combat for a further VP
The Tactical squad runs to capture governor Malorak, opening up a very wide lead for the boys in blue
TURN 3 – Tau
Spoiler:
Tau really need their remaining forces to come in this turn. They have lost control of the coms relay, but it turns out that they didn't need it as all but one unit comes in! But will it be enough?
Commander drops in to take on the Bikestar
While his comrade goes after the land raider
Second breacher squad get in nice and close behind the Tactical marines
And the Barracuda begins its run, targeting the ironclad
The Devilfish and Barracuda take out the ironclad between them, while the breacher team annihilate the tactical squad at close range. This scores the Tau 2 VPs, and they recapture governor Malorak to boot
Commander O'Vash and his drones kill two bikers and eave the chapter master on one wound after shooting, but fail to assault jump far enough away to avoid being charged next turn
His subordinate fails to hurt the land raider though, and assault jumps into the remaining bastion for cover
Left flank piranha manages to take two HPs off the drop pod, but the right flank piranha whiffs his shot at the land raider
Breacher squad continues to flank towards the centstar, more in hope than expectation
VP – Tau 4:7 Ultramarines
TURN 4 – Ultramarines
Spoiler:
Marines are firmly in control, despite the Tau reinforcements. Grav cents target the commander in the Bastion, killing 5 drones and putting a wound on him, as well as forcing him t go to ground
Various shooting also reduces the breacher squad to two men, but they would hold and retain custody of Malorak
Bikestar charges the commander and kills 5 drones, losing one of their own in the process. Combat would hold
While the scouts would charge the breacher squad to try and take possession of Malorak, but the fire warriors would also hold their ground
TURN 4 – Tau
Spoiler:
Final reinforcements arrive
Barracuda continues its ineffective run, targeting the drop pod to no avail (who knew barracudas couldn't hover? Not I until this point...)
While breachers get closer to the centstar
Shooting, and the piranha on the right flank takes out the drop pod for a VP
While the left flank piranha glances the other, finishing it off for another VP
In combat, the fire warriors best the scout and send the remaining marine packing
However Commander O'Vash does not fare so well, and is killed along with his drones by the smashfether, giving up 1 VPs and Slay the Warlord
VP – Tau 6:9 Ultramarines
TURN 5 – Ultramarines
Spoiler:
The Marines are in the ascent but need to get their hands on Malorak before the end of this turn, or at least get him out of Tau Custody. Grav Cents and Land raider reposition towards the right flank in an effort to score some more VPs
While the bikes and regrouped scout move in on the breachers
Grav Cents split fire and kill all but one of the breacher squad, who would hold
They also kill off the drones and put another wound on the commander hiding in the bastion
While the land raider would go after the piranha, who would jink his way to safety
Bikes and scout easily sweep the breachers for a VP, but cannot pick up the Governor until next turn (as per relic rules)
TURN 5 – Tau
Spoiler:
Unfortunately the Stealth suits failed to regroup for the third time and fall off the table, giving a VP to the marines. Its probably too late for the Tau to win this one, but they are determined to make it as difficult for the marines as possible.
The piranha moves in behind the land raider, just in melta range
And, with some help fro the commander in the Bastion, wrecks the land raider for a VP!
Drones also move in on the governor, killing the last scout for another VP
The Commander then assault jumps down from the bastion to the devilfish, hoping to bundle Malorak into the tank if it goes to another turn
If the game ends now, the marines will just about win. We roll to see if it continues.... and it does not :(
End of battle
TURN 6 – Tau
Spoiler:
Game ended last turn
TURN 6 – Ultramarines
Spoiler:
Game ended last turn
RESULT
Spoiler:
VP POINTS Tau:8 pts Units killed 8 VP
Ultramarines: 11 pts Units Killed 9 VP First Blood 1 VP Slay the Warlord 1 VP
ULTRAMARINES VICTORY
BREAKDOWN
Decisive moment – the failure of the Tau reinforcements to come in turn 2. In all honestly, the Tau were up against it from the start what with their being two very durable deathstars on the table and no formation buffs or markerlights to improve their shooting. However the marine player knew what he needed to do and did it - the use of ironclads and infiltrating LSS to get all those heavy flamers in close T1 had the tau on the back foot from the start, forced to deal with them as the deatshstars rolled up the table.
Key units
Tau: Second Tau Commander, who landed the killing blow on the Land Raider. This is the only time in the campaign I have managed to take this brute out, and so was pretty happy afterwards even if I did lose the battle
Ultramarines: Hard to pin it down as lot of guys had a good days hunting in amongst the little blue dudes, but the smashfether probably takes it on account of getting the warlord kill as well as tanking a lot of fire throughout the game
STATS
Tau: Models remaining 7/85
Kill to Death Ratio .27
Efficiency 22%
Ultramarines: Models remaining 10/31
Kill to Death Ratio 3.7
Efficiency 78%
POST GAME
Spoiler:
Despite the crushing defeat at the Governors Palace, the Tau win this part of the Campaign 2:1 and take a 3:1 lead in the series
AFTER ACTION REPORTS Chief LibrarianVarro Tigirius:
Spoiler:
Forewarned by the Chief Librarian that the Tau reinforcement is encroaching to the Titan System, we have to split the our men into two forces, several tactical squads along with the devastator squads went on to explore the suitable location to set up our own defensive perimeter, while the most tough and heavily armed brothers go with Chief Librarian and me went on to make a final push at the Governor Palace.
It is my plan to use a combined orbital strike and land assault against our target. Emperor protects, the Tau forces guarding the palace neither tough nor have enough fire power to cause serious problem for us, so despite fighting bravely and skillfully, they are overwhelmed by us. However, they bought enough time for the renegade governor to fled into the under tunnel of palace and disappeared. While we don’t have time to search and catch him.
It is a shame that our strike is not swift and precision enough to bring the Titan Prime back to Emperor’s light before the Tau relieve forces arrive. By this failure, this planet is doomed to be reduced to rubble and become a monument of war. We now have to prepare our defenses to repel the Tau reinforcement, as we could not expect out fleet currently in system could win a total victory in orbit, so there would be ground fighting. Fortunately for us, we had now find some good place to make our last stand and we just need to hold long enough for the brothers drawn from Inceptor Chapter, White Scars, along with Cadian 1503, 1504 and 1505 Regiments to arrive and relieve us in return.
-- Captain Fabian, Ultramarine Master of Arsenal, acting commander of Strike Force Titan
Commander O'Vash:
Spoiler:
Signal Intercept: 02:15:1923.4
Axial refraction angle 23.5/8
Signal Degredation: 12%
Authentication Status: Partial
Transcript as follows:
As the marine player, I think I might have brought a too brutal list compared to what Tau had put on the table in this game, I was preparing to face Riptides plus one or two squad of Broadsides. Considering the mission set up in this campaign, these squads should be the best bet for Tau to hold on long enough to wait for the reinforcement to come in, while their firepower is great to handle Droppods or whittle down a few members in biker star unit. However, it turns out that neither of these two units is in the Tau army, so it becomes a "Quad-Star" (Samshbane, Grav-Cents, plus TWO Dreadnought) 7E marine army fighting a around 5E Tau army without marker light support . Plus this mission flavors the attackers, and Iapedus made a few bad rolls, especially on the 2nd turn reserve rolls , which made the game pretty one sided.
Anyway, Tau still put up a good fight in this game, glad to see the fusion suit finally blow up the land raider, while most impressive is the Tau Commander who challenged the Chapter Master who only had one wound left at the moment, that was the one most "hangs on a single dice" combat ever occurred in this campaign.
Neophyte2012 wrote:As the marine player, I think I might have brought a too brutal list compared to what Tau had put on the table in this game, I was preparing to face Riptides plus one or two squad of Broadsides. Considering the mission set up in this campaign, these squads should be the best bet for Tau to hold on long enough to wait for the reinforcement to come in, while their firepower is great to handle Droppods or whittle down a few members in biker star unit. However, it turns out that neither of these two units is in the Tau army, so it becomes a "Quad-Star" (Samshbane, Grav-Cents, plus TWO Dreadnought) 7E marine army fighting a around 5E Tau army without marker light support . Plus this mission flavors the attackers, and Iapedus made a few bad rolls, especially on the 2nd turn reserve rolls , which made the game pretty one sided.
Anyway, Tau still put up a good fight in this game, glad to see the fusion suit finally blow up the land raider, while most impressive is the Tau Commander who challenged the Chapter Master who only had one wound left at the moment, that was the one most "hangs on a single dice" combat ever occurred in this campaign.
Hey Neo, it was a great game and I don't think you bough too brutal a list at all - it was in fact the kind of list I was expecting, and I tried to adapt my usual 'wall of fire' tactics to something that you might not expect. The entire Tau strategy hung on all the reinforcements arriving turn2 (or at the very least both devilfishes!) so I could start bringing the volume of fire to bear as well as whisk Malorak off to a remote corner of the field. My intention was to concentrate fire your bikestar and leave your centstar unable to catch the devilfish with Malorak inside. Anyway, you know what they say about best aid plans
Oh and you are absolutely right, I forgot to mention the big challenge in the batrep - commander O'Vash and the onager gauntlet of doom looking to take down the chapter master with one punch! Well done though, you needed nerves of steel to make that 3+ save
FortheEmperor! wrote:I've just found these battle reports in the last few days. I've read each one and enjoyed them very much!!
Neo, you should really consider running a full battle company plus 10th company strike force together. I run them both at 1850 with 3 free drop pods and 5 free razorbacks. It's a total of 95 models and it will dominate those blue-fisted cheaters!!
I run three 10-man tac squads in drop pods, three 5-man tac squads in razorbacks, one 10-man assault squad with jump packs, a 5-man assault squad with jump packs, two 5-man dev squads 4 LC and 4 ML respectively) with 2 razrobacks, a captain and a jump pack chaplain. 1 razorback has TLLC, 2 have LC and TLPG, and 2 razorbacks have HB. The 10th Co TF is three 5-man Scout Squads. This list ROCKS!
I can't wait to see your next battle report!
Glad you are enjoying them! I'm sue we will see the full battle company at some point, although I don't think we have that many transport models between us
Lippy777 wrote:Really love the theme of this campaign guys. A good read with plenty of pictures to illustrate the carnage!
Thanks man! Hopefully the final part will be along soon and live up to this chapter!
PART 5: Towards a Glorious End! Campaign Escalating 1500/1750+/2000+ point missions with bonuses.
Sooooo, its been a while since we concluded this campaign, but due to RL things getting in the way (moving country/having a baby/buying a house/fixing said house/photobucket being utter gakk) I have not really had the time or energy to ge around to posting the remaining games up. We are also now into a whole new editon of 40K which makes the games themselves a bit obsolete, however for those of you who have been following this campaign it seems a shame not to write it up and let you know how it finished. Enjoy!
MISSION 5.1: Patient Hunter
OPPOSING FORCES
Bonuses: None
Ascendancy: Neither
Force limitations for both sides are a single standard Combined Arms Detachment + 1 Formation OR a Decurion style detachment from either codex
Both Forces are now at full strength, so no restrictions to number of FOC slots apply. HQ choices still exclude ‘named characters’ unless previous campaign bonus was earned. To represent the defensive network that both sides find themselve fighting through, both players may pick 1-3 fortification for each battle, although they do not need to be taken as part of a CAD or formation.
IN addition, for this mission the Tau player must choose at least 50% of his unit from the Tau Empire, and at least 50% from the Farsight Enclaves.
Tau Forces: Fire Warriors from the Setpworld of Fi’Rios 1026pts
Troops
Kroot Carnivore Squad x10, 60pts
Fire Warrior Team x 6, 54pts
Fire Warrior Team x 6, 54pts
Fire Warrior Team x 6, 54pts
Breacher Team x 5, 45pts
Breacher Team x 5, 45pts
Elites
Stealth Suits x3, BC 90pts
Stealth Suits x3, BC 90pts
Fast Attack
Piranha, Gun drones 40pts
Piranha, Gun drones 40pts
Heavy Support
Broadside Shas'vre, BK, EWO, TLHYMP, TLSMS, 2 x Missile Drones 105pts
Broadside Shas'vre, BK, EWO, TLHYMP, TLSMS, 2 x Missile Drones 105pts
Broadside Shas'vre, BK, EWO, TLHYMP, TLSMS, 2 x Missile Drones 105pts
Imperial Forces: Ultramarines Space Marine Chapter 1999pts
Spoiler:
Battle Forged CAD
HQ Techmarine Sevano, 65pts
Troops
TAC squad x 5, Flamer, DP, 110pts
- Sergeant Exris, MB Scout squad x 5, 3 x BP & CCW, 2 x shotgun, LSS, 95pts
- Sergeant Regulus
Elites
Command Squad x5, 3x SS, 1x PF 160pts
- Apothecary Helion Ironclad Dreadnought, PFHF, SHHF, DP 180pts
- Ancient Brother Ferox Dreadnought, MM, PF with SB, DP 135pts
- Ancient Brother Boris
Heavy
Vindicators x 3, Sb, Dozer Blades, 390pts
- Sergeant Anrik,
Land Raider Crusader, MM 260pts
Librarius Conclave Formation
Chief Librarian Tigirius , Power armor, Bolt Pistol, Hood of Hellfire, Rod of Tigirius , 165pts
Librarian Agenostin , Level 2, Terminator armor, SS 125pts
Librarian Herbort , Level 1 65pts
Total Models 29/Infantry 19/Characters 4 /Vehicles 10/Psykers 3/ Wounds 54
SETUP
Spoiler:
Mission: Mission 5.1 - Counter Attack (Capture objectives and destroy enemy units)
Deployment: Special (See mission pack)
Initiative: Ultramarines go first unless Tau can seize
Special Rules: Reserves, Night Fighting, Counter Strike (see below)
•Counter Strike: Farsight Enclave forces do not follow the normal rules for reserve deployment. Instead, roll a single dice for all reserves at the beginning of turn 3 onwards, adding one to the score. If successful, those units arrive. Additionally, those units gain the outflank special rule
Terrain: The shattered remains of an Imperial Hive, strewn with the detritus of war and scattered clusters of defensive fortifications.
Table setup
Central Objective
Objective in Tau DZ
Objective in Ultramarines DZ
Warlord Traits:Tau roll on strategic Traits and get the one where three units can infiltrate (I chose the broadsides), while Tigirius gets his set trait 'Storm of Fire' (rending to one unit within 12").
Psychic: Tigirius and the Conclave do get Invisibility this time, as well as a whole lotta other stuff
PRE GAME ANALYSIS
Spoiler:
Reasons why Tau will win:
1: Volume of Fire. Tau have multiple units who can pump out obscene amounts of S5+ fire, which will whittle the Space Marines down even with their 3+ saves. However, this firepower needs to get onto the field of battle first, and hanging on till turn three may be an issue
2: Formation goodies. Both formations give pretty good bonuses for the Tau, which should help the shooting count in the absence of marker lights.
3: Hammer and Anvil. Plan will be to invite the Marines forward by setting up deep in my own DZ, hopefully leaving plenty of space for the Farsight Retaliation cadre to drop in behind and ambush them with a lethal crossfire
Reasons why the Ultramarines will win:
1: Double deathstar. Libby Conclave + Command squad = hard time for Tau shooting, especially without no marker lights.
2: Dreadnaught overload. First turn these two will come in and burn anything in range with their HFs. The Tau infantry will have a very tough first two turns trying to hand on against these guys
3: Vindicator squadron. The combined fire option of this is just crazy, and will make a mess of any Tau units caught in its way. It CANNOT be allowed to fire!
DEPLOYMENT
Spoiler:
Tau: Fire warriors and breachers set up in the back field, inviting the marines onto their defensive position. Everything lese is in reserve or infiltrating
SM: As expected, vindicator squadron and Land raider with libby conclave + command squad push right up on the DZ edge. Unexpectedly, the scouts and LSS also deploy, to stop any infiltrators getting in behind
Infiltrators: Broadsides, robbed of the opportunity to get in behind the vindicator, deploy on the right and left flanks as best they can. Kroot cover the objective and fan out to stop drop pods securing the prize
Stealth suits get up around the large building, hoping to jump in and take out at least one vindicator if I can seize
Tau try to seize and fail
TURN 1 – Ultramarines
Spoiler:
Vindicators and Land raider move forward, with the latter disgorging its contents onto the field of battle.
Both dreads drop in. The ironclad lands on the Tau left flank, killing two fire warriors in cover and sending them running.
The other drops in on the right flank but fail to do any damage
The ironclad is immediately intercepted by the missileside, taking two glancing hits
in turn, the libby conclave cast invisibility and shrieks the missileside, killing both drones and pinning him
The vindicators, without a decent target to hand, drop the massive pie plate on the kroot. Some poor to wound rolls see only 6 killed. They would also hold to add insult to injury
TURN 1 – Tau
Spoiler:
Not much for the Tau to do this turn except hang on for the reinforcements. The stealth teams leap into action and try to take down one of the vindicators, but only manage to take of a single hull point between them
The broadside also backs off the dread, having intercepted but caused no damage last turn
A fire warrior team falls back of the table, giving the marines First Blood and a VP. Everything else hangs tights
VP – Tau 0:2 Ultramarines
TURN 2 – Ultramarines
Spoiler:
Turn overview
The last drop pod comes in for the marines, looking to clear out the kroot from the objective but scatter wildly off target
Scouts and LSS also close in on the stealth team
The psychic deathstar kills four fire warriors, sending the remainder fleeing into the ruins
Shooting is pretty ineffectual for the Marines this turn, with the drop pods blocking the vindicators views and stopping the big combo shot from being used. They target the breachers in the ruins instead, killing four. He would remain at his station
The kroot also suffer casualties, as they are reduced to 2 - and still do not break!
In the assault phase, both dreadnaughts fail their charges on the broadsides!
The scouts would make it in though, losing one of their own but killing two of the stealth team. He would also hold, completing a remarkable show of bravery from the Tau
TURN 2 – Tau
Spoiler:
The Tau are hanging on, but faring much better than i imagined they would under the sustained assault while they wait for reinforcement. Most units stay put, but the piranha comes on and promptly finishes off the ironclad with a burst cannon in the back for a VP
The fire warriors on top of the ruin also maneuver around the back of the dread and finish him off with their pulse carbines for another VP
The stealth team also get in on the action, torching the LSS for a VP before assault umping out of danger up onto the building
However, their brave colleague finally capitulates to the scouts, giving them a VP
The broadsides would also finish the drop pod tactical squad off in their withering cross fire for another VP
VP – Tau 4:3 Ultramarines
TURN 3 – Ultramarines
Spoiler:
Turn overview
Only the Libby conclave comes forward everything else already in range and not wanting to commit themselves too much. The drop pods and vindicators finish the kroot for a VP, while killing all but one of the other breacher squad. He would also hold morale, but at least the objective is now clear
The Libby conclave and land raider would finish off the broadside cowering in the ruins for a VP, as well as the piranha's drones
TURN 3 – Tau
Spoiler:
SO here come the big roll for the Tau. Anything but a 1 and the reinforcement will arrive....
Phew! Squeaking in under the wire, the missile crisis suits drop into the marines DZ and move for the objective
The fusion commander also dropped in behind the land raider, but just out of melta range
The Rail side also dropped into the ruins, taking a wound for their troubles
With the riptide deploying out in the open, to avoid a mishap
and the plasma crisis dropping in to take on the scouts
The other commander mishaps and goes back into ongoing reserves, while the last piranha also comes in and hides behind the ruin in the Tau DZ
Shooting phase, and the railsides make short work of one of the vindicators, reducing the threat fro their big pie plate shot
The fusion commander only manages a glance on the land raider, but assault jumps back into cover
While the plasma crisis finishes off the scout for a VP
Nothing else sticks, with the riptide ineffective and missilesides out of range everything jumps around and the tau gird their loins for the next round
VP – Tau 5:5 Ultramarines
TURN 4 – Ultramarines
Spoiler:
Turn overview (at this point, the light bulb over our game blew giving us a shadowy effect good for the game but not so good for the taking of photos)
The land raider immobilizes itself trying to go over some rough terrain, so the Libby conclave start to make their way back to the objective in the space marine DZ on foot.
On a brighter note, the vindicators turn and fire on the railsides, wiping them out for a VP
TURN 4 – Tau
Spoiler:
The riptide and missile crisis suits combine fire and take down another vindicator, while the stealth team fie and assault the remaining tank, glancing it once
The fusion commander tries his luck on the immobilized land raider but fails to hurt it
While the piranhas move up to secure the objective in the Tau DZ
And the riptide and crisis suits secure the one in the marines DZ with assault jumps
VP – Tau 5:6 Ultramarines
TURN 5 – Ultramarines
Spoiler:
With numbers dwindling and options running out, the Ultramarines try to hold on to the central objective, clustering the last remaining vindicator and the Libby conclave around it
The vindicator fires at the piranhas, forcing it to jink and glancing it once
but with that their effort is spent, leaving the Tau to do their worst
TURN 5 – Tau
Spoiler:
Fire from the riptide takes out the last Vindicator for a VP, while the remaining fire brings down a couple of honour guard escorting the Libby conclave
The damaged piranha also jumps in near to grab the central objective, incase the game should end this turn. We roll the dice...
and the game ends
VP – Tau 0:0 Ultramarines
TURN 6 – Tau
Spoiler:
Game ended last turn
TURN 6 – Ultramarines
Spoiler:
Game ended last turn
RESULT
Spoiler:
VP POINTS Tau:9 pts Objectives 9 VP Units killed 8 VP Line Breaker 1 VP Ultramarines: 11 pts Units Killed 5 VP First Blood 1 VP
ULTRAMARINES VICTORY
BREAKDOWN
Decisive moment – deployment. Specifically setting up the vindicators right on the deployment edge. Even thought it was initially countered with the deployment of the scouts, they could not stop the retaliation cadre getting in behind them and creating a murderous cross fire.
Key units
Tau: Kroot. Denied the first two waves of drop pods from securing the objective, as well as soaked up a lot of fire power before finally succumbing. Far exceeded their meagre 60pt point value
Ultramarines: Vindicators. When it worked, it really worked (poor railsides) but too often it failed to deliver on its promise
POST GAME
Spoiler:
The Tau start the final campaign with a win, taking a 1:0 lead in the series. Tai player earn 145 bonus points of the final battle, while the Marines earn 50pts
AFTER ACTION REPORTS Ultramarines:
Spoiler:
……………………..
--Sergeant Anrik:
“Brother Librarian, we have enemy in sight, formations of Kroots and Fire Warriors, they are forming frontal defense line in ruins, requesting permission to engage.”
--Chief LibrarianTigirius:
“Granted, watch out for enemy ambushes, I sense there are Broadsides covering their flanks, and Stealth Suit approaching from your left”
--Sergent Regulus:
“Brother Librarian, Borther Anrik, I got your back covered, let my man and Landspeeder Storm deal with enemy infiltrators”
………………………
………………………
--Techmarine Sevano:
“Brother Ferox is down, repeat, Brother Ferox is down!”
--Ancient Brother Boris, Dreadnought:
“I will smash down that Broadside to revenge him!”
--Librarian Herbort
“Boris turn around! Turn around!!! Xeno Warriors at your back!.....”
--Ancient Brother Boris, Dreadnought:
“Ahhhhhhhh……”
………………………
………………………
--Sergeant Anrik:
“309 is offline! We have Xeno Battlesuits descended at our back! Drivers, turn around! All gunners, load siege shells, target the Broadsides in that building, fire on my mark”
“Gunners, fire now!”
BOOOOOOOM
--Librarian Agenostin:
“Good shot! Enemy Broadsides neutralized.”
……………………….
……………………….
--Techmarine Sevano:
“Brother Boris, report.”
“Boris, Report!!!!”
--Sergeant Anrik:
“Cou… Cou… Cou… Brother Techmarine, situation severe! 307 is on our own, and is glanced to critical condition.”
--Chief LibrarianTigirius:
“Hold on, Brother Anrik, I will shroud you with my power, your tank gonna be ghost in enemy sight!”
--Sergeant Anrik:
“Copy. Missile incoming, 10 o’clock! Ahhhhhhhhhh………”
--Techmarine Sevano:
“Brother Anrik, abandon tank!”
“All forces, enemy too strong at the Governor’s Spaceport, initiate Protocol Delta-2. Fall back now! We will come back and get them another day.”

 ) Points will escalate throughout the missions, with various bonuses becoming available depending on battle results. All games will be hosted by the good people at


 looking forward to the continuation this weekend!


 I will also try some new units that I never used before in the rest of the games.
  ) and then hit the kroot with the bike squad - their grav guns wouldn't have done much but you would have easily swept them in


 AND the "Tzeentch cursed" blue dices
 . If the bikes made into the main closure in the middle at T3 unharmed and threat to lauch an assualt on or before T4, Tau may have a harder fight to win as the Terminators are not wiped out yet and the gun drones not yet in. Marines maybe still not able to climb back, but at least can put up a better fight.


 and iron reslove


 angry face: