Switch Theme:

Share on facebook Share on Twitter Submit to Reddit  [RSS] 

TP^DC Terrain Blog: I promise it will be to do with wargames too @ 2015/04/17 20:38:43


Post by: TP^DC Deputy Manager


I thought I'd start a new blog for terrain building, because I am going to get very confused if I try to keep miniatures and terrain in one place.

The title is just because I'm feeling nostalgic and silly at the moment, there have been no prior attempts at terrain plogging.

Projects so far:
Page 1 - LoER 14: Tau Landing Pad/Fortification with Sensor Tower
Page 2 - LoER 15: Trap Door on a Space Hulk

Project 1 - LoER 14: Tau Landing Pad/Fortification with Sensor Tower
So Dr H is running the current League of Extraordinary Riveters this time and the challenge is to make a terrain piece which incorporates at least two household items - one has to stay intact, another can be butchered. This is my attempt.

Progress slow due to a bunch of 12 hour days recently in work. I have however made a little progress on my Tau Sensor Tower:
Spoiler:

I've modelled it relatively closely on the Forge World Sensor tower, but with obvious proportional differences. After all this is a Farsighted Enclaves Landing Pad, their tech is not fully up to date - this is model blah, blah, blahdedy blah. That's a lot older and less streamlined than the standard sensor tower, don't you know. Ahem. Carrying on.

So here are my two Kinder eggs glued together with an air freshener cap stuck on top with air drying modelling clay inside. The drone component at the top was going to just be a second-hand tau drone I had bought with a snapped aerial but it was too small. So instead I glued the clear flying base to the top of an old Bionicle Power Disc and then used air drying clay inside the disc and stuck the tau drone (with the top shaved off) inside. That way I got to keep the Gubbins underneath for effect, but the disc was bigger. If my modelling skills were better I may have tried to sculpt something to span the whole disc, but I'm mediocre at sculpting so left it. I'll possibly do some green stuff detailing in the top after, but at the moment I like the way it looks so may just leave it.


Detail photo of how I incorporated the drone into the base of the Bionicle disc:


Now I need to four "legs" to stabilise the tower and create a Tau disc icon for the side of the tower


Need to find somewhere where I can get free polystyrene from in the Cardiff area to try and make the rock sections of the overall terrain piece, so I can get started on that.

Would be really grateful for comments.

Head over to the LoER page and take part, it's a good laugh (click on the banner in my signature).


TP^DC Terrain Blog: I promise it will be to do with wargames too @ 2015/04/26 00:53:06


Post by: TP^DC Deputy Manager


Project 1 - LoER 14: Tau Landing Pad/Fortification with Sensor Tower
Well, I kept scouting for polystyrene but no success.

Then I went to buy pond plants only to be given them in a polystyrene box and then someone in work got a new printer for their office, so got polystyrene from that - result!


Automatically Appended Next Post:
So had a productive building session last night. This is how it went:

Old picture frame and clock for scale:

I dismantled the frame and used the backing piece as the base of the terrain. This means the frame can be painted up and used as a diorama frame when all finished. I forgot to take a photo of the layout drawn on, but this was the next step, trust me

I then glued four pieces of polystyrene together to start building the slope up to the ramp. Then it was a case of cutting out some islands:

Off-cuts glued together in a pile for a more random section.

An island with a tunnel for lava to flow underneath.


The island for the sensor tower with and without the tower itself. There was a disasterous moment shortly after this when the tower broke into three pieces it's in the process of being repaired.

Thanks to these drawer openers (with spring cut shorter) from ikea and an empty tin of ravioli, we went from them to this:

Which allowed this:

Therefore this landing pad can also be a fortification (I think - I'm not really one who plays the games, but from what I've read this seems to be true). You'll note only two drawer openers are in the tin, the third has a weird mechanism, so I'm going to need to find a way to make the third work, at the moment it won't reset back to the base level without being fully extended to twice the depth I want it to

Overall progress:

Next phase is to shape the slope and make the remaining rocky area away from the landing pad. After this I wI'll paint the rocks with a PVA/water/sand mix to give it some texture. More soon.


TP^DC Terrain Blog: I promise it will be to do with wargames too @ 2015/05/04 07:26:20


Post by: TP^DC Deputy Manager


Project 1 - LoER 14: Tau Landing Pad/Fortification with Sensor Tower
Finally managed to get some terrain building done. Here's the progress so far:

The ramp up to the pad is in progress too and here the top component is placed in it's position to give a idea of the overall look:

This is how the rock face looks (bad photo, sorry)

Here's an angle test of the slope with my Dark Angels helping out:


I've tried a Landspeeder too and it works fine.

Next steps are:
  • Finalise some shapes and slopes

  • Shape slope for landing pad

  • Put in some debris and rivets

  • Make third drawer opener work

  • Decide if putting LEDs in is something I can be bothered to do

  • Thinned layer of PVA with sand on this for texture

  • Prime non-lava areas

  • Thin layer of plaster poured in for lava

  • Painting etc (you know the minor stuff )


  • Automatically Appended Next Post:
    Oh, whoops!
    Added to my list:
  • Finish Sensor Tower


  • TP^DC Terrain Blog: I promise it will be to do with wargames too @ 2015/05/05 06:23:41


    Post by: TP^DC Deputy Manager


    Project 1 - LoER 14: Tau Landing Pad/Fortification with Sensor Tower
    Had a horrible shift in working yesterday so to help me forget some of the stuff I took the unprecedented decision to stay up and start on my pad ramp to help me wipe some memories away.

    Here's the ramp attached to the pad - I used polystyrene to add some substance to the inside of the ramp, with air drying modelling clay to ensure the top ramp surface was sat on a predominantly flat surface:

    Here's how I attached the ramp to the pad so it was stronger than just using glue which may have sheared away at some point. The screws have been driven into the polystyrene and have created a firm fit:

    I need to use some plaster now to smooth over the ramp edges so it looks a bit more ma made and smooth. The ramp top will have sprue nieces glued along the edge to create a curb type effect to stop those tanks veering over the edge.

    That's all for today.

    Thanks for looking.


    TP^DC Terrain Blog: I promise it will be to do with wargames too @ 2015/05/09 18:12:39


    Post by: TP^DC Deputy Manager


    Project 1 - LoER 14: Tau Landing Pad/Fortification with Sensor Tower
    Made some more progress today - applied PVA glue to the polystyrene and covered with sand:

    This is with the loose sand brushed off:

    Need to decide now between brush painting it black or spray


    TP^DC Terrain Blog: I promise it will be to do with wargames too @ 2015/05/09 19:58:48


    Post by: nflagey


    Wow, this is really cool!
    Next time I see a clock, I won't be able to un-see a landing pad!!


    TP^DC Terrain Blog: I promise it will be to do with wargames too @ 2015/05/09 22:17:11


    Post by: TP^DC Deputy Manager


    Thanks nflagey it's become a labour of love now


    TP^DC Terrain Blog: I promise it will be to do with wargames too @ 2015/05/16 14:23:29


    Post by: TP^DC Deputy Manager


    Project 1 - LoER 14: Tau Landing Pad/Fortification with Sensor Tower
    WIP:


    May have cracked the third drawer opener:

    Who'd have thought my green stuff moulding skills would be used for this?!

    Hopefully some proper progress soon, with sprue, lollipop sticks and a transparent blue ruler. All put to good use


    TP^DC Terrain Blog: I promise it will be to do with wargames too @ 2015/05/17 06:40:22


    Post by: TP^DC Deputy Manager


    Project 1 - LoER 14: Tau Landing Pad/Fortification with Sensor Tower
    WIP from last night.
    So we have sprue and lollipop sticks added on one side of the ramp and I am very chuffed. I need to green stuff in around the edges and have bought new which will hopefully work much better.


    This is the current state of play:

    The black makes it look brilliant in person and with the pad being able to sit raised and lowered, that element has succeeded. The rule that can be seen in the photos was found in the bottom of a drawer and I'm thinking sand off the markings, pint with Tamiya's clearish red paints and then a blue wash, with maybe a white highlight to create a beam of forcefield walkway across to the sensor tower island (I'll make a start and end of beam transmitter array of some description, I'm thinking Plasticard and sprue).


    TP^DC Terrain Blog: I promise it will be to do with wargames too @ 2015/05/19 01:16:12


    Post by: TP^DC Deputy Manager


    Project 1 - LoER 14: Tau Landing Pad/Fortification with Sensor Tower and Force Field Bridge
    So, I managed to paint the rocks and drybrush tonight. I was very proud of the end result. I can see it really starting to come together. I need to put some lava down then I will feel like I'm on the home stretch. It's a bit daunting to think about pouring plaster over my beautiful rocks, but hopefully the end result will justify the period of absolute panic! The photo below is rubbish due to being a phone photo in bad lighting, so the variability of shade doesn't come through:

    Need to consider that for the final piece photos.

    Updated "to do" list:
  • cardboard around beans tin (because the ridges don't fit in to a Tau style), then paint black with a little brown weathering. I'll be doing lava glow when I paint the lava up

  • After that it will be finishing the external appearance of the landing pad

  • Put in some debris and rivets

  • Decide if putting LEDs in is something I can be bothered to do

  • Thin layer of plaster poured in for lava

  • Painting etc (you know the minor stuff )

  • Finish Sensor Tower

  • Finish force field bridge


  • TP^DC Terrain Blog: I promise it will be to do with wargames too @ 2015/05/20 07:13:16


    Post by: TP^DC Deputy Manager


    Project 1 - LoER 14: Tau Landing Pad/Fortification with Sensor Tower and Force Field Bridge
    I hope this turns out to be a linchpin event WIP. Well less dramatic, but still relevant. Before that though here are close-ups of the rocks as requested for over on the LoER contest page:


    Next up is the central column (with rivets on!!) which needed an external surface to smooth it out. Thin cardboard wrapped around tin, then gum paper over it with green stuff rivets added. Sprayed black (for convenience) then placed over tube. Cardboard box in tin is for a battery if I put in LEDs and the. The final photo is plaster poured in to tin to prevent drawer openers from moving:


    Then the heart-stopping moment. I folded up some more thin card in an L shape and then taped to the base of the piece with blu tak between cardboard and rocks to prevent massive leakage (there was a minor leak at the open corner, but not dramatic). Then I mixed up two lots of plaster with PVA glue added to try and prevent cracking. Poured this in and as you can see, there is a smooth layer of white between the rocks (which looks very non-lava-like):


    That was all done by half past midnight, which I had not realised! Therefore I tried sitting around waiting for some drying (important reason), but sadly got nout dried by one o'clock, so knowing I had work today I opted for the hairdryer option. I was hoping for ripple-effects and was going to blow with a straw to create that texture as it started to harden. Glad I didn't because with a combination of heat, force of air and a little straw blowing I managed to make bubbles, blebs and gnarled surfaces. Which is what lava looks like!!!! Ripples would have been visually interesting, but very watery, not lavay (is that a word?). So here's some of the final result:


    Bit disappointed to have some cracking of plaster this morning because of the thin layer, but that was always something I would have to deal with. I'll try to incorporate into the paint job. There a couple of plaster splatters on the rocks which are going to be painted up as lava splatters - seems appropriate.

    As always, comments gratefully received.


    Automatically Appended Next Post:
    Updated "to do" list:
  • After that it will be finishing the external appearance of the landing pad

  • Put in some debris and rivets

  • Decide if putting LEDs in is something I can be bothered to do

  • Painting etc (you know the minor stuff )

  • Finish Sensor Tower

  • Finish force field bridge


  • TP^DC Terrain Blog: I promise it will be to do with wargames too @ 2015/05/20 18:10:57


    Post by: GawdamSumbish


    if you don't like the way the texture looks re: lava, you can always chip/sand/grind it down and start again...

    looks pretty awesome, man.


    TP^DC Terrain Blog: I promise it will be to do with wargames too @ 2015/05/20 18:44:35


    Post by: TP^DC Deputy Manager


    Thanks Gawdam. I like the texture as it was last night, the cracks look a lot like cracked plaster with cool texture in it, but I'm not redoing the plaster again, it'll become obsessional and I'll lose too much of the rock detailing which Would upset me more. I'll get on to some painting soon and see what comes of it. I can't wait to see what you do with your plasma generator. You were my inspiration for trying to incorporate LEDs, not sure I'll be able to pull it off yet though.


    Project 1 - LoER 14: Tau Landing Pad/Fortification with Sensor Tower and Force Field Bridge
    Automatically Appended Next Post:
    So, took a look tonight and the plaster is drying well, but not fully yet. Was surprised to see the base has buckled in a few place and has bowed in the middle due to moisture. The only feature that will be affected is the central column for the landing pad, because it is now angled, but I will compensate in the way that the pad and column join together:

    Overall very pleased, just want to get the paintbrushes out


    TP^DC Terrain Blog: I promise it will be to do with wargames too @ 2015/05/21 12:58:46


    Post by: GawdamSumbish


    have you decided what/started doing anything to/for that ruler/walkway?
    it's hard to judge the plaster/lava from pictures...we shall se what it looks like with paint on it. although i wouldn't be surprised it it was already awesome...


    TP^DC Terrain Blog: I promise it will be to do with wargames too @ 2015/05/21 18:19:06


    Post by: TP^DC Deputy Manager


    Plan is to remove black markings and then apply a combination of candy red Tamiya paint (partially transparent) and blue inks with maybe a light White drybrush over it. I may sand lightly a swirling pattern in to the surface to enhance the idea of a force field. Then some plasticard wrapped around each end and something to anchor it to the ground. The anchoring bits are undecided so far.

    The surface is so hard to photograph when white. No flash = dingy and unclear, flash=can't make out detail

    Thanks for your kind words


    TP^DC Terrain Blog: I promise it will be to do with wargames too @ 2015/05/21 21:24:03


    Post by: Mymearan


    Hey TP, this project is looking awesome indeed! Loving the use of that clock


    TP^DC Terrain Blog: I promise it will be to do with wargames too @ 2015/05/21 21:41:17


    Post by: TP^DC Deputy Manager


    Thanks Mymearan I'm getting badly obsessed with it now. Was ill last night so had to abandon any progress and tonight have work to do More updates soon I hope


    TP^DC Terrain Blog: I promise it will be to do with wargames too @ 2015/05/21 23:24:05


    Post by: CT GAMER


    Awesome army.


    TP^DC Terrain Blog: I promise it will be to do with wargames too @ 2015/05/22 00:18:48


    Post by: EyeamRai


    Your project looks really good. I'm looking forward to seeing the lava all painted up.


    TP^DC Terrain Blog: I promise it will be to do with wargames too @ 2015/05/22 06:13:17


    Post by: TP^DC Deputy Manager


    Thanks guys. I really want to get it finished this weekend because I keep getting distracted from doing other things because I'm thinking about this! It's got to the point that my entry to Paradigm's painting challenge has ground completely to a halt. The closing date for that is 31st May, so if I finish the landing pad I can paint up my vindicator the weekend after.


    TP^DC Terrain Blog: I promise it will be to do with wargames too @ 2015/05/22 06:39:20


    Post by: Viktor von Domm


    ach... the joy of a full hobby schedule...... i know that quite good...and get always reminded by my shelf of shame

    needed to subscribe here...

    cheers, vik


    TP^DC Terrain Blog: I promise it will be to do with wargames too @ 2015/05/22 15:04:11


    Post by: GawdamSumbish


    TP - do you have a dremel (or other brand rotary tool)? they make a wire cup that would probably have an awesome effect on the plastic.
    this on ebay.uk:
    Spoiler:


    TP^DC Terrain Blog: I promise it will be to do with wargames too @ 2015/05/22 18:30:13


    Post by: TP^DC Deputy Manager


    @Gawdam - I looked at a dremel (or equivalent) a few months back when I had originally planned to start doing some dioramas, but dismissed it as an expense I couldn't justify. I have been selling a bunch of stuff on eBay and may be able to justify it now. I shall ponder this, thanks for the tip


    TP^DC Terrain Blog: I promise it will be to do with wargames too @ 2015/05/22 21:01:09


    Post by: Viktor von Domm


    i own a cheap brand version of a rotary tool too... and it was an expense i never regretted... try to get one with a flexible shaft... this will give you lots of flexibility when working with minis for instance...
    it´s almost like an electric version of the swiss penknife^^


    TP^DC Terrain Blog: I promise it will be to do with wargames too @ 2015/05/22 22:49:13


    Post by: GawdamSumbish


    i bought one on sale, and i use it almost every day. if you plan on modelling/scratch building for any real length of time, it's worth it, but you don't really have to have a dremel...if you have an electric drill of any kind, the bits would fit in it...dremel is just smaller and therefore theoretically easier to use. Vik pointed out a flexible shaft, which is nice, but is a touch on the pricey side; i considered buying one, but didn't because it was almost 75% of what i paid for the dremel and a bunch of bits...

    your call, obviously. but i highly recommend them.


    Automatically Appended Next Post:
    PS: a dremel would have made reworking the problem spots in your lava plaster that much easier....just saying.


    TP^DC Terrain Blog: I promise it will be to do with wargames too @ 2015/05/23 07:18:44


    Post by: TP^DC Deputy Manager


    Thanks for the advice guys. Will definitely look in to that then.

    Project 1 - LoER 14: Tau Landing Pad/Fortification with Sensor Tower and Force Field Bridge
    Here are some WIP of the lava painting:

    The initial yellow layer was obviously straight-forward (pic 1). I dry-brushed the rock at the edge with yellow too, next was a relatively heavy orange dry-brush (not pictured) with rocks getting dry-brushed also. I did to shades of orange but it added little. The final stage was then a dry-brush red layer with some areas heavier than others to get some variability (pic 2) and the rocks also getting a coat of dry brush as they meet the lava. After this I picked out some higher areas with a red-black mix to indicate bits of lava that had cooled considerably (pic 3).

    And here is the lava without and with landing pad in place:


    Would love to hear your thoughts on whether I managed to pull off the effect well enough.


    TP^DC Terrain Blog: I promise it will be to do with wargames too @ 2015/05/28 07:15:54


    Post by: Viktor von Domm


    amazing... this outcome with a brush that ruined.... respect!
    i like the lava, it looks very hot...but for a final judgement it definitely needs daylight pics... the flash ruins a lot of the colour temperature...
    regarding fluff... i wonder how the tau could build a landing pad straight over live lava...that must be some awesome heat resistant material


    TP^DC Terrain Blog: I promise it will be to do with wargames too @ 2015/05/28 15:06:32


    Post by: warboss


    Wow... an army and a table of matching terrain concurrently? That is a very aggressive hobby schedule!


    TP^DC Terrain Blog: I promise it will be to do with wargames too @ 2015/05/28 18:00:00


    Post by: TP^DC Deputy Manager


    Go big or go home is what some people say and I have stupidly listened to

    Thanks for the kind words Vik and I am planning on setting up my SLR with macro filters and zoom lens for the final shoot with good lighting. I didn't really put much thought into the fluff specifically other than I wanted something to display my Farsight army on, he's from Vior'La (iirc) which is a volcano planet and it kind of went together. I will put a bit more thought behind this now you've challenged me


    TP^DC Terrain Blog: I promise it will be to do with wargames too @ 2015/05/28 18:26:51


    Post by: Viktor von Domm


    Lol...well, honored to be among those that help you getting out and beyond your comfort zone


    TP^DC Terrain Blog: I promise it will be to do with wargames too @ 2015/05/28 19:12:58


    Post by: EyeamRai


    The lava looks great! Believably nice and hot!


    TP^DC Terrain Blog: I promise it will be to do with wargames too @ 2015/05/28 19:33:03


    Post by: RiTides


     Viktor von Domm wrote:
    amazing... this outcome with a brush that ruined.... respect!
    i like the lava, it looks very hot...but for a final judgement it definitely needs daylight pics... the flash ruins a lot of the colour temperature...
    regarding fluff... i wonder how the tau could build a landing pad straight over live lava...that must be some awesome heat resistant material

    Agreed with this, the only thing missing is a bit of reddish-ness on the rocks, I think, since they're so close and touching the lava but look cool from this pic. But quite nice so far


    TP^DC Terrain Blog: I promise it will be to do with wargames too @ 2015/05/28 19:44:37


    Post by: TP^DC Deputy Manager


    EyeamRai - thanks for the kind words

    RiTides - there is some drybrushed red as the rocks touch the lava, but due to the sand texture, any more could have made it looked less glow and more gloop. Photos clearly aren't showing it off well, I'll make sure the final set highlight the detail that exists (I've put in tunnels for lava to go under and holes at the back of a mini cave etc)


    TP^DC Terrain Blog: I promise it will be to do with wargames too @ 2015/06/16 01:24:16


    Post by: TP^DC Deputy Manager


    Project 1 - LoER 14: Tau Landing Pad/Fortification with Sensor Tower
    Finally done some more on the terrain - bit too close to deadline though!!!

    Made a few leaps forward tonight - finished the collar beneath the pad that will smooth transition between it and the central column and have the significant benefit of allowing pad to be removed for transit/storage and being therefore easily reattached:

    Once dry I'll give that a prime and then aim to paint tomorrow.

    Next I managed to complete construction on the force bridge and sensor tower:

    The tower is not as I had originally envisioned and has a lot of SM bits attached, because I have not yet made any Tau models to have been left with parts. I hope this looks the part it is supposed to play. It is detachable due to it's fragility and likelihood of being knocked in transit/storage. To mark it's position, the bridge has a longer base piece on one end which will be glued down after painting and allows the sensor tower to be in be correct place.

    Would love C&C


    TP^DC Terrain Blog: I promise it will be to do with wargames too @ 2015/06/16 01:34:18


    Post by: Warboss_Waaazag


    Bits and doodads are what makes things look great. None of the stuff I make ever looks exactly like what I envisioned to begin with. Just run with whatever happens and it will look awesome. Great work so far.


    TP^DC Terrain Blog: I promise it will be to do with wargames too @ 2015/06/16 01:45:12


    Post by: Januine


    thats coming along famously TP. Loving the lava btw. looks great.


    TP^DC Terrain Blog: I promise it will be to do with wargames too @ 2015/06/16 07:42:45


    Post by: TP^DC Deputy Manager


    Thanks guys. Was really pleased when I went to bed last night having achieved that, I've also primed the plate and force bridge now. Now the collar and sensor tower are dry I'm going to prime this morning, so I can cut down painting time tonight.


    TP^DC Terrain Blog: I promise it will be to do with wargames too @ 2015/06/17 01:50:04


    Post by: EyeamRai


    I really like how your bridge turned out.


    TP^DC Terrain Blog: I promise it will be to do with wargames too @ 2015/06/17 09:30:41


    Post by: Viktor von Domm


    isn´t it crazy how some parts/ bitz are so interchangeable between factions?... i´ve used bitz of tau/ork/marines/eldar/IG for vice versa quite often... if you look careful your bitz bx is always your best buddy in the hobby^^


    TP^DC Terrain Blog: I promise it will be to do with wargames too @ 2015/06/17 17:50:51


    Post by: TP^DC Deputy Manager


     Viktor von Domm wrote:
    isn´t it crazy how some parts/ bitz are so interchangeable between factions?... i´ve used bitz of tau/ork/marines/eldar/IG for vice versa quite often... if you look careful your bitz bx is always your best buddy in the hobby^^


    Absolutely agree, I've incorporated some of the reasons for SM stuff in to the fluff actually just for fun. Thanks to the extension and Dave Grohl breaking his leg, I'll have three days to work on this now from Friday to Sunday - it's on! All I gotta do is paint the pad, first attempt didn't cut it - back to the beginning I've decided.

    @EyeamRai - I love my bridge, really chuffed.


    TP^DC Terrain Blog: I promise it will be to do with wargames too @ 2015/06/17 17:53:37


    Post by: Viktor von Domm


    Did you know that he broke his leg here in Berlin?


    TP^DC Terrain Blog: I promise it will be to do with wargames too @ 2015/06/17 20:01:59


    Post by: TP^DC Deputy Manager


    It was in Sweden I read, or has he done it before????


    TP^DC Terrain Blog: I promise it will be to do with wargames too @ 2015/06/17 20:05:09


    Post by: Viktor von Domm


    er....i heard it on the radio... but i might have not heard the full story...


    Automatically Appended Next Post:
    silly me... just read the news......my favourite rock station told the story... but i only listened with half an ear^^


    TP^DC Terrain Blog: I promise it will be to do with wargames too @ 2015/06/18 00:01:37


    Post by: TP^DC Deputy Manager


    I'm doing that all the time. Why don't we all say that he broke his leg in our own countries so we feel like we own it poor man. He's such a nice bloke too.


    TP^DC Terrain Blog: I promise it will be to do with wargames too @ 2015/06/18 06:49:54


    Post by: Viktor von Domm


    lol... it is a bit as it is with William Shakespeare...there is still a mystery about his true origins... many countries claimed he is from theirs then^^


    TP^DC Terrain Blog: I promise it will be to do with wargames too @ 2015/06/18 15:33:33


    Post by: TP^DC Deputy Manager


    Ah the comparison is apt - Dave Grohl is the William Shakespeare of modern music


    TP^DC Terrain Blog: I promise it will be to do with wargames too @ 2015/06/18 15:45:07


    Post by: Viktor von Domm


    weird thing is tho that i doubt he would have become that famous too with nirvana and cobain still alive... he needed his death in my view to get out of his vast shadow...


    TP^DC Terrain Blog: I promise it will be to do with wargames too @ 2015/06/18 15:56:15


    Post by: GawdamSumbish


    TP--do you have any close ups of the ruler/bridge?

    project looks great, btw.


    TP^DC Terrain Blog: I promise it will be to do with wargames too @ 2015/06/20 09:31:22


    Post by: TP^DC Deputy Manager


    I've been dragged away from modelling for a couple of days. I've gotta get this beasty finished, in the process of that I'll take some close-ups of the bridge and post here


    TP^DC Terrain Blog: I promise it will be to do with wargames too @ 2015/06/21 02:50:41


    Post by: EyeamRai


    I'd love to see some final shots, for sure!


    TP^DC Terrain Blog: I promise it will be to do with wargames too @ 2015/07/05 13:41:12


    Post by: TP^DC Deputy Manager


    Project 2 - LoER 15 Trap Door on a Space Hulk
    Hey guys, the landing pad is not abandoned, and any followers of my modelling blog (see signature for link) will know that I am going to utilise it for a miniature challenge run by Paradigm which will force me to get that baby finished. Therefore expect updates soon.

    The next LoER is themed Trap Door! So having just bought a sealed copy of Space Hulk 4th ed off eBay and having received great responses for my Tyranids eggs and goo included in my June entry to Paradigm's painting challenge, I couldn't shake the idea of producing a Space Hulk room for use in game that had a trap door in it with eggs included under the trap door.

    So planning underway, I used the claymation show from the 1980s as a slight theme partly as an homage as it was included in the original LoER 15 post but also because it helped me to achieve part of the effect I needed to allow it's use in game. So here is the dungeon from said show:


    Here are my sketches:

    Long story short - there are three components. First is essential for contest (the room), 2nd is for gameplay (intersection and ladder combination) and 3rd (bridge) connects the two.
    Room is twice the height I have allocated for Space Hulk corridor height (8cm) to allow for tallest Genestealer, the big room is a store room with large hatch at the left wall (in the same way there is a door in the Trap Door Dungeon) to allow loading cranes etc to get in. Might check on dreadnought size for a degree of scale appropriateness, but this won't open. In the facing wall there is a high door on the second floor level off-centre to the right, with a high platform and ladder coming down on the left (again as in Trap Door Dungeon). The trap door is Off-centre to the left and is left ajar with eggs down the hatch, there will be mesh floor tiles with eggs visible through these too. The floor with trap door and mesh will be 2cm above real base to allow the eggs to sit there without looking forced in to a tight space.

    I thought the trap door and high door being central would look a little odd and cramped, hence spreading them out and forcing myself to veer a little away from the Trap Door dungeon, happy to hear everyone's thoughts on this.

    I plan to concentrate fully on the room. The intersection and bridge pieces would be magnetised etc, bit fiddly and are not priority for the contest, but I would want them completed so the room could be used in a game at some point. I'm going to plan a timetable and get started with completion of the landing pad being the first thing to do in the next few weeks.

    Hope that makes some sense.


    TP^DC Terrain Blog: I promise it will be to do with wargames too @ 2015/07/05 14:22:57


    Post by: GrimDork


    This definitely sounds interesting, though I think I'll have to see things underway for me to *get it*, more of my problem than one with your drawn plans


    TP^DC Terrain Blog: I promise it will be to do with wargames too @ 2015/07/05 14:40:26


    Post by: TP^DC Deputy Manager


    You're being kind. My drawings are poor.

    Imagine a box (space ship store room) with a fake bottom, alien eggs in the gap between real and fake bottoms and a little trap door going down to the eggs. People enter the store room from a high door and climb down a ladder.

    My brain and typing rambles a lot, the rest is not overly necessary, but that's the main crux. I tried copying the Trap Door claymation dungeon because I loved that show as a child.


    TP^DC Terrain Blog: I promise it will be to do with wargames too @ 2015/07/05 20:16:33


    Post by: Viktor von Domm


    do i get this right, basically it will be a box shaped cellsystem to be built as a space hulk table?...hell... you have cool ideas mate! totally wanna see this as i want to build something along that lines for quite some time now too... but always i got stopped due to certain limitations... measurings done dumb^^ or the materials not enough...


    TP^DC Terrain Blog: I promise it will be to do with wargames too @ 2015/07/05 21:43:18


    Post by: inmygravenimage


    Very interesting. As for the magnetization, that would be considered an advanced modelling technique - i.e., credit where credit's due


    TP^DC Terrain Blog: I promise it will be to do with wargames too @ 2015/07/05 22:01:42


    Post by: TP^DC Deputy Manager


    Viktor von Domm wrote:do i get this right, basically it will be a box shaped cellsystem to be built as a space hulk table?...hell... you have cool ideas mate! totally wanna see this as i want to build something along that lines for quite some time now too... but always i got stopped due to certain limitations... measurings done dumb^^ or the materials not enough...


    My brother had 1st ed Space Hulk when I was a kid and I was not allowed to play, I was the baby. So I clearly fell in love with it. Now I have a bright shiny new 4th ed set I love it! Of course I clearly want to see the ship itself, so would love to build each segment required for the maps. However if I aim to do the whole thing I'll never succeed, so I'll build one little room that I can use with the cardboard bits that come with it and then maybe over time make more, or not. Either way it'll make a good diorama base to show off future minis.

    inmygravenimage wrote:Very interesting. As for the magnetization, that would be considered an advanced modelling technique - i.e., credit where credit's due


    Graven, you are a supportive, complimentary evil genius! I was trying to make sure I finished this time - you know, "only aim to build one room", "the rest is a bonus" and all that. How do you know how to manipulate me so easily when I barely know you?????

    On a less sarcastic (and rubbish attempt at humorous) note, thanks for that tip Graven. At least I'll know I'd get that credit if I pull it off


    TP^DC Terrain Blog: I promise it will be to do with wargames too @ 2015/07/11 21:22:22


    Post by: GawdamSumbish


    the project looks promising on paper...good luck with it.

    did you ever finish the lava board for the last comp?


    TP^DC Terrain Blog: I promise it will be to do with wargames too @ 2015/07/12 02:03:32


    Post by: Januine


    this sounds awesome TP - cant wait to see it. cracking idea
    (wish my copy of SH would hurry up and arrive :( )


    TP^DC Terrain Blog: I promise it will be to do with wargames too @ 2015/07/12 14:38:28


    Post by: TP^DC Deputy Manager


    GawdamSumbish - I'm on the case. Another paint coat went on a few nights ago. That's my priority at the mo, I need it for a figure contest.

    Thanks Jan - I'm quite excited about this idea

    On that topic, I've been buying materials:

    I think this is a good steel grate proxy.


    Automatically Appended Next Post:
    Good news! The landing pad has lights:

    Was really cool to see them on when in place
    Can't get the red paint I'm using to smooth out. Will try one more coat and see, but the distressed red is growing on me


    TP^DC Terrain Blog: I promise it will be to do with wargames too @ 2015/08/01 23:40:43


    Post by: TP^DC Deputy Manager


    So I got fed up of getting nowhere near started with my Space Hulk room. Therefore I started cutting stuff up:

    Need to timetable the project so I know my progress


    TP^DC Terrain Blog: I promise it will be to do with wargames too @ 2015/08/02 04:50:16


    Post by: Warboss_Waaazag


    Tau landing pad looks great. And that's a good start on your second project.


    TP^DC Terrain Blog: I promise it will be to do with wargames too @ 2015/08/02 08:41:10


    Post by: Viktor von Domm


    gotta agree... with those lights...that is a hell of a cool terrain piece!

    and the space hulk room has lots of potential...


    TP^DC Terrain Blog: I promise it will be to do with wargames too @ 2016/01/14 13:20:27


    Post by: TP^DC Deputy Manager


    So, I don't believe in thread necromancy, however, I have decided to finish the landing pad, so will resurrect this for a short while.

    I the house alone today and after completely revamping my hobby space decided to finish the beasty.

    I know the paint scheme is not up to par, but it will never get used by anyone but me so who really cares! The rocks fit the vast majority of my army, so for shots and fluff this will work well.

    The main things left were to tidy up the sensor tower disc, spray the landing pad plate with the Farsight logo and then varnish the whole thing. So therefore I have masked off the plate and will show you the post-spray result after. It is gonna be rough and messy, but don't mind, I'm gonna put some Leadbelcher patches, a wash of Agrax and then some powders on the disc then seal. If it ain't perfect, it doesn't matter

    [Thumb - image.jpeg]


    TP^DC Terrain Blog: I promise it will be to do with wargames too @ 2016/01/14 13:35:11


    Post by: Camkierhi


    Good to see.


    TP^DC Terrain Blog: I promise it will be to do with wargames too @ 2016/01/15 11:55:22


    Post by: TP^DC Deputy Manager


    Thanks Cam.

    So here we go.

    All painted up. Looked awful after spray - masking efforts weren't tight enough, but used it as opportunity to weather it a bit (probably too much). But it's done. So there we go. Not primed yet. I'll take better photos when I have everything primed, dried and put in place. Here's pad minus lights

    [Thumb - image.jpg]


    TP^DC Terrain Blog: I promise it will be to do with wargames too @ 2016/01/15 11:56:16


    Post by: TP^DC Deputy Manager


    And here is with lights on

    [Thumb - image.jpg]


    TP^DC Terrain Blog: I promise it will be to do with wargames too @ 2016/01/15 12:21:45


    Post by: Januine


    Can't wait to see the whole thing assembled finally. This was the one with the lava right?


    TP^DC Terrain Blog: I promise it will be to do with wargames too @ 2016/01/15 12:45:26


    Post by: TP^DC Deputy Manager


    Aye. This is the lava one. You made some great painting suggestions at the time, but it's come too far to correct the whole paint job.

    Will be good to have it for dio-style photos.


    TP^DC Terrain Blog: I promise it will be to do with wargames too @ 2016/01/16 18:01:28


    Post by: TP^DC Deputy Manager


    And here it is.

    Finally finished last night and photographed, but couldn't get them processed until tonight. I hope some people like it. Pleased with it, photos didn't quite come out the way I hoped, but it's so big I couldn't get the lighting consistent across all of it:


    And for the pure heck of it, here's a squad of Dark Angels Tac Marines accompanied by a Vindicator and Landspeeder investigating the abandoned landing pad.......
    ......or is it abandoned after all?


    C&C welcomed gratefully


    TP^DC Terrain Blog: I promise it will be to do with wargames too @ 2016/01/16 18:49:18


    Post by: inmygravenimage


    I really hadn't realised quite how big it is! That is most impressive, and I love the colours.


    TP^DC Terrain Blog: I promise it will be to do with wargames too @ 2016/01/16 19:05:31


    Post by: TP^DC Deputy Manager


    Thanks Graven, means a lot coming from you. It was a good first attempt, but some skills/techniques need honing.

    It is pretty huge!


    TP^DC Terrain Blog: I promise it will be to do with wargames too @ 2016/01/17 00:03:26


    Post by: Januine


    Excellent stuff TP - really liking that. Looks great with the DA's checking it out. Finally got it done eh!?! Great job
    Look carefully folks - there's a wee easter egg hiding in there for ya


    TP^DC Terrain Blog: I promise it will be to do with wargames too @ 2016/01/23 08:20:53


    Post by: Freytag93


    That lava is ace mate! Great job on the landing pad. I know it was a long road, but its always worth it to see the finished product


    TP^DC Terrain Blog: I promise it will be to do with wargames too @ 2016/04/04 22:59:47


    Post by: TP^DC Deputy Manager


    So I took a side-step tonight. Had some RL stuff that was important to prep for, but did some hobby in the background. Got me a SH test door base done, edge painted 6 doors with a Sharpie silver oil based paint pen before a Nuln oil layer to dull it down and finished toothbrushing and rinsing the Fenris bases. So a pretty productive evening all things considered.


    Automatically Appended Next Post:
    Uh oh. Finished all 8 bases and door edges. Will post photos in the morning


    TP^DC Terrain Blog: I promise it will be to do with wargames too @ 2016/04/05 17:28:12


    Post by: TP^DC Deputy Manager


    Here are the finished 8 doors and bases:


    TP^DC Terrain Blog: I promise it will be to do with wargames too @ 2016/04/05 19:22:52


    Post by: Theophony


    It's little touches like the edge painting that make a world of difference.


    TP^DC Terrain Blog: I promise it will be to do with wargames too @ 2016/04/05 19:52:16


    Post by: TP^DC Deputy Manager


    Aye! I was disappointed at firs though because it was meant to be a quick silver paint job with a pen. The contrast between the bases and door fronts versus the bright shiny silver edge did NOT work. That said a bit of care, Nuln oil and Agrax earthshade made all the difference. Would definitely recommend for all such board pieces


    TP^DC Terrain Blog: I promise it will be to do with wargames too @ 2016/04/05 22:59:20


    Post by: inmygravenimage


    Ooh... Very pretty


    TP^DC Terrain Blog: I promise it will be to do with wargames too @ 2016/04/06 08:33:01


    Post by: TP^DC Deputy Manager


    Cheers muchly Graven


    TP^DC Terrain Blog: I promise it will be to do with wargames too @ 2016/04/06 10:20:18


    Post by: evildrcheese


    Nice idea for the edge of the doors. Looks really good.

    EDC


    TP^DC Terrain Blog: I promise it will be to do with wargames too @ 2016/04/10 01:15:01


    Post by: TP^DC Deputy Manager


    Needed a less brain-challenging evening, but wanted to hobby. So I decided to do some more Space Hulk edge painting. Did 10 tiles and am really pleased with them. Little bits on nights like tonight will hopefully keep me motivated. I am quite keen to do the MEdge suppression tokens the way JP1138 has done his but want to stick with the edge painting that I can do in any room with out the need for more equipment than just the Sharpie pen. Photos below are stack of ten (top left), comparison between standard and painted edges (top right) and the drying ten (bottom).

    [Thumb - image.jpeg]


    TP^DC Terrain Blog: I promise it will be to do with wargames too @ 2016/04/10 07:49:51


    Post by: inmygravenimage


    It's the little details that make it very cool indeed.


    TP^DC Terrain Blog: I promise it will be to do with wargames too @ 2016/04/10 08:24:34


    Post by: JoeRugby


    The edge colouring really elevates the pieces

    great job


    TP^DC Terrain Blog: I promise it will be to do with wargames too @ 2016/04/10 13:36:01


    Post by: Littletower


    Coming along good!


    TP^DC Terrain Blog: I promise it will be to do with wargames too @ 2016/04/10 13:52:08


    Post by: Nevelon


    Have you thought about cleaning the mold lines off the tiles? You can see where you punched them out.


    TP^DC Terrain Blog: I promise it will be to do with wargames too @ 2016/04/10 17:14:53


    Post by: TP^DC Deputy Manager


    I did think about it, but:
    A) was nervous that I would rip the tile because cardboard is not as easily shaveable as plastic
    B) decided that I didn't want to spend too much time on these. I have a very bad habit of spending longer planning/prepping things than actually using them.

    I appreciate if people feel different, but it's a call I had to make for right now *shrug*


    TP^DC Terrain Blog: I promise it will be to do with wargames too @ 2016/04/17 10:11:29


    Post by: TP^DC Deputy Manager


    I was very interested by Lost Patrol being released on 18th June.


    I hadn't heard of it before and thought that at £35 it was a bargain for the minis. But then I realised that I already had the scouts and some Genestealers so figured there was no real point in me getting it. If you have seen my Hobby Mission you'll know that I am going to have to be very serious about justifying buying more minis. But the current genestealer sprue is appealing so I was kind of torn especially when www.Elementgames.co.uk have it listed as £28 pre-order!

    I liked the dynamic of the game and when I saw the back of the box says complexity level 1, I got to thinking that maybe this would be a great way to break my teeth on gaming and get over my "mind-racing-over-thinking" that occurs every time I read a 40K/Space Hulk/Deathwatch: Overkill rulebook. I'm fairly certain I will pick up the tiles and rulebook on eBay if being sold separately (at a reasonable price!!!). However I wanted to try it first otherwise I was spending more and more money for no reason.

    Then as I read more I discovered that this was a re-release. I found quite a few fan-made tile sets. I settled on a set by Mark Nutter's called Star Freighter (which you can find here) because I loved how close it was to the Space Hulk aesthetic. I've actually altered the "tumbleweed" tiles to be fireball tiles using Photoshop.

    Mark's originals are of a brilliant quality and I think they are great, but had a combination of fire and holes in flooring instead of Tumbleweed. I found it more confusing to understand what was an obstacle, hence the fireballs. I am very pleased with what I came up with the fireballs but would need to try and ask Mark if he was happy for me to share before I sent them out to anyone (I am more than happy to send along, but it was originally Mark's work and if he didn't approve of what I've done I would have to respect his feelings).

    I then decided to back them on to picture frame mount board that we had lying around. I printed the tiles on to gloss photo paper and I painted the back side of the mount board black using poster paint.

    The tiles were cut our using a sharp craft knife and then PVA glue was used to attach the image to the mount board. A brand new knife blade was used to cut around the hexagons again cutting the mount board.

    This is how they look now and I am very pleased with them.

    They are slightly thinner than Space Hulk tiles but have a good thickness. I will paint the edges black with a Sharpie paint pen like I did with the Space Hulk tiles to partly seal, but also for aesthetics.

    I am going to use the rules for the 2000 1st edition that I managed to glean from forum posts using 2p coins as my lurkers. Overall I am very pleased with these. I'll post again when finished and I will hopefully have played a game of a 40K universe game for the first time ever really. The 2 or 3 games I played as a teenager don't count because my opponent wasn't really interested and as I recall the games kept being abandoned.


    TP^DC Terrain Blog: I promise it will be to do with wargames too @ 2016/04/17 10:52:43


    Post by: Paradigm


    Good stuff,

    I'd be interested on your thoughts on Lost Patrol, I have all the minis needed and the rules/tiles seem easy enough to find, might be a good one for the gaming group when we can't get proper tables out due to space ect.


    TP^DC Terrain Blog: I promise it will be to do with wargames too @ 2016/04/17 11:14:24


    Post by: TP^DC Deputy Manager


    Will write up a report when I give it a go. It will be a solo effort and I'm trying to decide on scatter dice or D6 to decide on where the next tile should be placed. My gut is D6 because it's easier to assign a number to an edge than an arrow direction


    TP^DC Terrain Blog: I promise it will be to do with wargames too @ 2016/04/17 11:17:39


    Post by: Paradigm


    D6 makes most sense to me, keeps things clear and simple. How is done in the proper rules?


    TP^DC Terrain Blog: I promise it will be to do with wargames too @ 2016/04/17 11:47:59


    Post by: TP^DC Deputy Manager


    Lurker player chooses. Scouts win if at least one guy gets to the last tile. Nice and simple...... although I understand it ain't that straight forward.

    D6 was my preference. Less kit too. I only plan to use the D6 because it will stop my subconscious siding with the scouts, so at least there is some challenge. You see the scouts can lose the game without them all being killed if a circular path occurs. No matter how altruistic I may be I would never knowingly create that scenario


    TP^DC Terrain Blog: I promise it will be to do with wargames too @ 2016/04/17 16:58:52


    Post by: TP^DC Deputy Manager


    Here's how the tiles are looking. I am very pleased with these and when I get the last 21 (groan) done, can't wait to have a go

    [Thumb - image.jpeg]


    TP^DC Terrain Blog: I promise it will be to do with wargames too @ 2016/04/19 20:10:19


    Post by: TP^DC Deputy Manager


    Just posted my first battle report here of my first Lost Patrol game.


    TP^DC Terrain Blog: I promise it will be to do with wargames too @ 2016/05/04 21:31:36


    Post by: TP^DC Deputy Manager


    Very quick update. No more major terrain finished but have done 4 more door bases for Space Hulk. Trying to keep momentum up for now and if life settles I may well doing something bigger. All of these door bases will eventually get some skulls, SM arms and maybe some genestealer parts glued to them to add some more interest, but for now want the basic colours done and I'll revisit when I have some of the models painted up so I know the way my base theme is going.

    [Thumb - image.jpeg]


    TP^DC Terrain Blog: I promise it will be to do with wargames too @ 2016/05/05 06:30:44


    Post by: inmygravenimage


    They are seriously nice. Like giant mecha bear traps


    TP^DC Terrain Blog: I promise it will be to do with wargames too @ 2016/05/05 17:49:53


    Post by: TP^DC Deputy Manager


    LOL!

    Thanks Graven. I really like them looking more realistic. Januine is right they need a bit of story (ie dead things ) to make them better again. To be honest I actually feel a bit of a thief, it's Januine's technique that I used to paint them up and they were bought not handmade. I will make some of my own terrain one day, well I hope so


    TP^DC Terrain Blog: I promise it will be to do with wargames too @ 2016/06/03 09:04:48


    Post by: TP^DC Deputy Manager


    So I did a thing.

    Thanks to a big RL project, hobby time is a no no. RL project is a Masters Dissertation due at the end of June. I'm getting there, but it's a hard slog. Don't give me too much sympathy though, as my wife reminds me I've had 18 months to do this! In my defence though I've been through 3 iterations of this project and it all fell together last December. Now the hard part is transplanting everything that is basically already written in my head down on to the page......while fighting past plans for Doctor Who miniatures......and terrain........ Uh oh!

    So yeah. I was reading inmygravenimage's blog here and was taken by the TT Combat terrain he was sent to review. Well luckily for TT Combat I listen to Graven and therefore hot-footed it over there to take a gander. Now I will say that I've seen some of the MDF stuff in a flgs and wasn't overly wowed by it because of the necessity for tabs to stick out to hold the construct together. That said, if you pick the right piece it is probably not a big issue and there we have the crux. I found the (probably first of many) "right stuff". I needed 32mm MDF bases and mould material anyway so picked up some terrain too. They are really cheap if you buy the right stuff. It will depend what you want but I have no space for large stuff so £4.95 for a set of scifi crates suits me just fine. So here is a brief (not as good as Graven's review).

    See pic below for relevant image:
    1 - Lovely surprise in the post. Bases look good too, more of those at some point in my miniatures blog (link in sig). The sprues are thinner than I expected, but I wasn't judgemental.
    2 - First things first, make the stuff I fell in love with. Instructions are very clear.
    3 - As Graven has stated, the sprue is well laid out to maximise product for the consumer.
    4 - I'm a bit of a perfectionist and like order, for this it's probably worthwhile though. There are two different shapes of each crate side 2 top/bottom, 4 sides. Make sure you have the right number of each.
    NB At this stage I realised a silly thing about these terrain pieces. They smell of smouldering wood like you get after a barbecue. I love barbecues, ever since Uni. Some of my happiest times were at barbecues in friend's houses as we all discovered how to be "grown ups" and we all looked after each other through bad times. So bizarrely, the olfactory (big words) benefit for me was worth every penny. But that's my just being me. Meh!
    5 - I recommend PVA glue and time. Took an hour to put the crates together due to the amount of joins. Care means the final appearance will be worth it though. I glued three sides together initially to make a corner for stability but also to stop PVA glue making it all over my work space and potentially result in terrain piece destruction.
    6 - And here we have finished crates. Make sure to have a bit of obsessionalism here to line up the detail piece properly or the essence of the crates will be lost.
    7 - My "in progress" Necron Warrior for scale
    8 - In contrast to the crates the skips took about 20mins to make and that was only because it was 01:15 and I started drifting off to sleep while doing it. I therefore didn't take pictures of the build, but can assure you that they were a dream to put together.

    Overall a massive fan of TT Combat after these, check them out here I want to buy a bucketload more of those crates because they are so great to look at. Will try painting these first and see how I go. I have had a tip from Graven about painting the MDF terrain that you need to apply a thinned coat of PVA to the surface to prevent it drinking your primer coat, so will make sure I do that prior to painting proper. Thanks for reading, hope it was of some use. Now what colour to go for?..........

    [Thumb - image.jpeg]


    TP^DC Terrain Blog: I promise it will be to do with wargames too @ 2016/06/03 09:07:14


    Post by: Paradigm


    Going to have to grab some of their stuff for Batman, it's so cool and so reasonably priced!


    TP^DC Terrain Blog: I promise it will be to do with wargames too @ 2016/06/03 09:12:08


    Post by: TP^DC Deputy Manager


    You really really have to. The price is brilliant and the quality is superb. Their city scenics range is clearly perfect for stuff like Batman. I quite liked the idea of the skips being suitable for any time period hence putting the crates within the fence for the photo.

    If there were large scifi crates I would be tempted to get those to compliment the GW armoured stuff I will more than likely buy at some point.


    TP^DC Terrain Blog: I promise it will be to do with wargames too @ 2016/06/03 09:18:22


    Post by: Paradigm


    Yeah, I have grand plans for a proper modular Gotham board at some point and this stuff will definitely feature heavily, probably going to have to wait until after I'm done with uni though.

    Are you planning a full board or anything with your terrain, or just scatter bits and pieces.


    TP^DC Terrain Blog: I promise it will be to do with wargames too @ 2016/06/03 09:54:31


    Post by: TP^DC Deputy Manager


    Short answer:
    Scatter for my shelf

    Long answer:
    I've had ideas for various board setups over the last year - there's one I'd love to do with the ability to mix and match six 12"x48" boards to allow a diverse variety of grey stone landscape with ravines and bits of derelict cities. The blueprints are in the noggin, but currently I don't have anyone to play games with so tough to justify. That said, I am accumulating more and more solo rules for stuff so I'm not ruling it out.


    TP^DC Terrain Blog: I promise it will be to do with wargames too @ 2016/06/03 09:59:08


    Post by: TP^DC Deputy Manager


    Quick follow-up. There are large crates (first photo) but they aren't overly exciting unfortunately. Only £3.95 each though

    Then there are the shipping containers - £13.95 for four - but I'm just not as blown away.

    Not sure, but there is no rush. I would be happy with 2 or 3 more sets of the small crate set and build up some walls of crates of needed.

    [Thumb - image.jpeg]
    [Thumb - image.jpeg]


    TP^DC Terrain Blog: I promise it will be to do with wargames too @ 2016/06/03 19:12:28


    Post by: inmygravenimage


    Still nice. I recommend the regular shipping containers. Which reminds me, I have a ship to build...


    TP^DC Terrain Blog: I promise it will be to do with wargames too @ 2016/06/03 20:04:08


    Post by: TP^DC Deputy Manager


    Wow. Missed those! £5.95 for three is superb pricing. Looks like those intermodal containers are the same size as the GW armoured containers will be, but much cheaper. For the £5.95 price tag I imagine you could cheaply add some thin plasticard detailing to the sides to fit in with the scifi crates I have (even one is really that bothered!). You are right. They are still nice. A mix of shipping containers makes sense anyway from a terrain perspective, so a mix would just add to the aesthetic.

    Anyway they are added to the list too. Here is a pic from the website for anyone wondering.

    [Thumb - image.jpeg]


    TP^DC Terrain Blog: I promise it will be to do with wargames too @ 2016/06/03 21:10:10


    Post by: inmygravenimage


    Yup, although you get 6 with this £25.95 bad boy:


    TP^DC Terrain Blog: I promise it will be to do with wargames too @ 2016/06/03 21:24:05


    Post by: Buttery Commissar


    I can vouch for that boat being amazing. Crooked dice run their demo games on one.

    Lovely blog by the way. I'll have to keep an eye out for bits at work you may find useful. We get a lot of interesting scrap.


    TP^DC Terrain Blog: I promise it will be to do with wargames too @ 2016/06/03 21:26:25


    Post by: Nevelon


    But does it float?


    TP^DC Terrain Blog: I promise it will be to do with wargames too @ 2016/06/03 23:09:15


    Post by: TP^DC Deputy Manager


    @Graven - awesome! Can I check, did you do a thing (ie buy that boat)? Or are you trying to tempt me I already get in enough trouble with my wife buying what I do

    Would be great for a Sea Devil scenario though.........


    TP^DC Terrain Blog: I promise it will be to do with wargames too @ 2016/06/04 05:17:09


    Post by: inmygravenimage


    I love the Sea devils. They scared me witless as a kid! Now that would make Broadchurch interesting yes, I have that and the construction crane. May have to build it later today then there is so much good TT stuff. New city Park set is cool as, love the subway entrances too. I have so much to do And life/wife just get in the way


    TP^DC Terrain Blog: I promise it will be to do with wargames too @ 2016/06/04 06:02:36


    Post by: TP^DC Deputy Manager


     inmygravenimage wrote:
    I love the Sea devils. They scared me witless as a kid! Now that would make Broadchurch interesting yes, I have that and the construction crane. May have to build it later today then there is so much good TT stuff. New city Park set is cool as, love the subway entrances too. I have so much to do And life/wife just get in the way

    Can't believe you have the ship and crane - COOL!

    How big is the ship? I imagine it is a gaming table size

    I completely understand your challenges of life getting in the way!


    TP^DC Terrain Blog: I promise it will be to do with wargames too @ 2016/07/07 22:34:31


    Post by: TP^DC Deputy Manager


    Been a busy week. Managed to fit half an hour in to try painting one of the crates.

    Tried a scheme that would fit with my MEdge Epirians. Not finished yet, but here's a WIP. Happy to hear if people don't think it works, rather know now than mess up all of them.

    [Thumb - image.jpeg]


    TP^DC Terrain Blog: I promise it will be to do with wargames too @ 2016/07/07 23:16:14


    Post by: Theophony


    I like it. Just needs a little red arrow pointing up.


    TP^DC Terrain Blog: I promise it will be to do with wargames too @ 2016/07/10 04:08:25


    Post by: Azazelx


    I've had my eye on that Ship for ages. I might have to pull the trigger and buy it next time I get paid. I've got a couple of TT's buildings and scenics, none of which are built yet, of course.

    The crate looks good - it's not over-done and fits in with the sci-fi aesthetic.


    TP^DC Terrain Blog: I promise it will be to do with wargames too @ 2016/07/11 05:02:22


    Post by: GrimDork


    Wait that giant ship and six containers for ~$40? Wow. Would rock for pulp alley or the like.

    Crate looks good, like theo said maybe some instructions or a warning label or something.


    TP^DC Terrain Blog: I promise it will be to do with wargames too @ 2016/07/11 05:15:25


    Post by: evildrcheese


    Cool crate. Not sure why it reminds me of Portal/half-life...muat be the orange colour.

    EDC


    TP^DC Terrain Blog: I promise it will be to do with wargames too @ 2016/10/27 19:43:41


    Post by: TP^DC Deputy Manager


    Hi. I've been so ridiculously busy recently that I have not been able to able to do as much hobby as I'd like.

    However I have been pondering hobby. I've also been planning a big present for my children for Christmas. I then had a crazy idea to combine the two.

    So here it is, the start of either the coolest thing I've ever built or the biggest disaster:

    [Thumb - IMG_1109.JPG]


    TP^DC Terrain Blog: I promise it will be to do with wargames too @ 2016/10/27 20:33:03


    Post by: Paradigm


    This ought to be good!


    TP^DC Terrain Blog: I promise it will be to do with wargames too @ 2016/10/27 20:41:38


    Post by: TP^DC Deputy Manager


    Haha. I hope so. I've been planning for about 6 weeks. I now need to deliver. Tying the two things together is causing me severe brain ache. Bear in mind that the element for the children is already including two separate products which don't technically gel well and then I'm trying to take it a step further!

    I hope to have more photos over the next few days


    TP^DC Terrain Blog: I promise it will be to do with wargames too @ 2016/10/27 23:00:22


    Post by: Guildenstern


    Oooooh cackles evilly!


    TP^DC Terrain Blog: I promise it will be to do with wargames too @ 2016/10/28 06:08:24


    Post by: evildrcheese


    Cool. Looking forward to seeing how this turns out. Good luck mate.

    EDC


    TP^DC Terrain Blog: I promise it will be to do with wargames too @ 2016/11/27 19:17:11


    Post by: TP^DC Deputy Manager


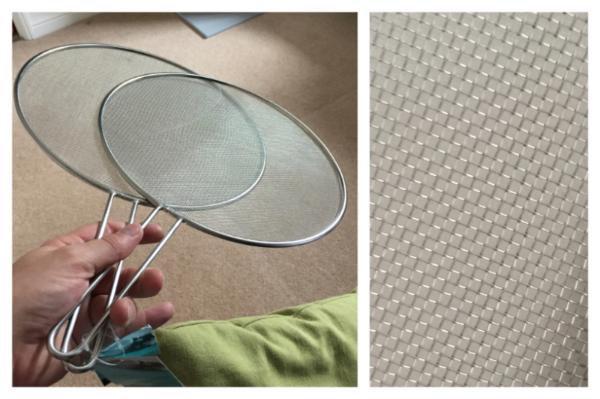
    Hi there. I've been pretty busy lately. Life has been filled with travelling, falls, bereavements and sleepless nights. I therefore haven't picked up a brush in months despite wanting to. That said I have been picking up power tools which as every terrain builder will tell you is essential in making the thing you ultimately will paint to look pretty

    I haven't really said so far, but the project is a mix-match of various things. My son is a huge Thomas the Tank Engine fan so Santa is bringing a Hornby OO gauge Thomas, Annie and Clarabel set for Christmas. I also admit that the board was clearly partly for me because this year instead of forking out £30 on the Lego Star Wars advent and not really get anything from it I've invest the money in to this. So I'm adding in Lego track too for family fun having found all of my old track from when I was little. But better than that is that this will double up as a hilly terrain board for wargames and one day I may come up with a 40K imperial train modification for a Lego/OO gauge train. But it gets better (in theory) in that I will be able to place an MDF sheet over the top to use this for more general wargaming.

    And so the process continues. These were emails to my father who is a veteran model train hobbyist to make sure I was on the right track but they also work as a process blog.

    27th October 2016
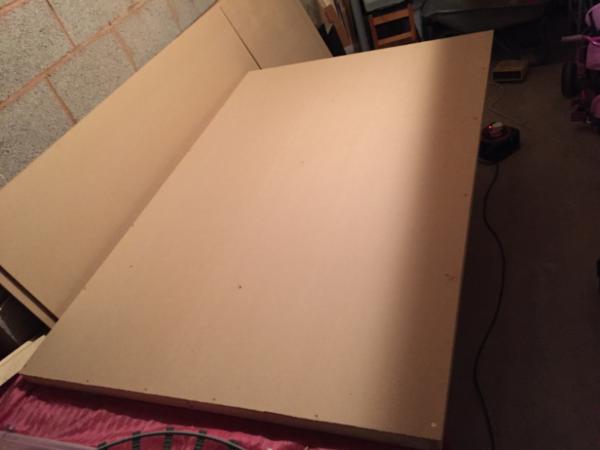
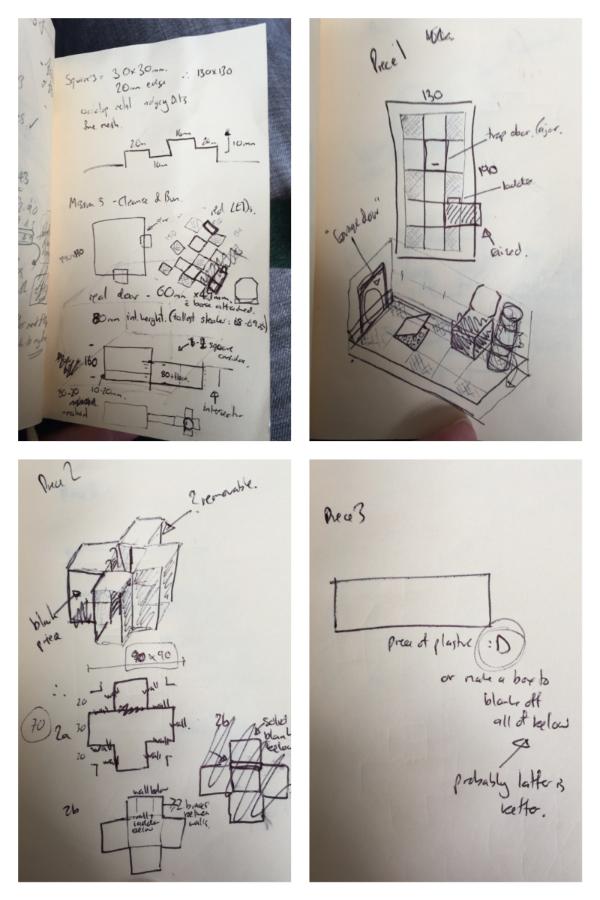
    I used the 2" x 1" for the frame vertically making it more rigid. This would also allow me to make the scenery more interesting by going lower than the base board into the frame area.

    18th November 2016
    With the frame already done, the next steps were completed.
    Step 1 - Cut and fixed MDF board to the frame

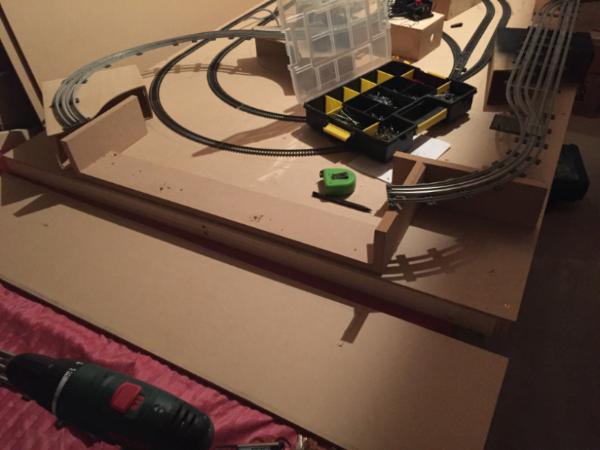
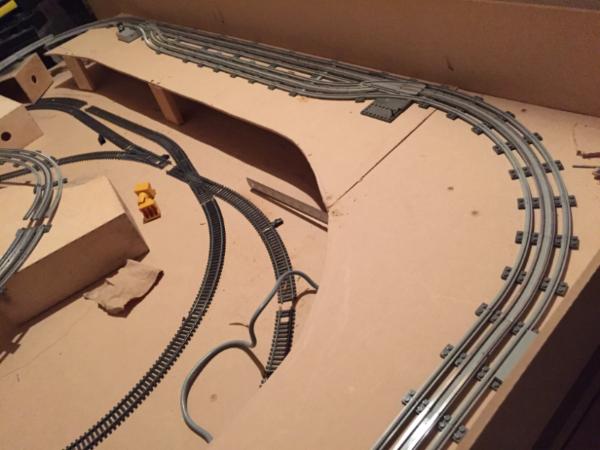
    Step 2 - Laid out the Lego track and got the trains out

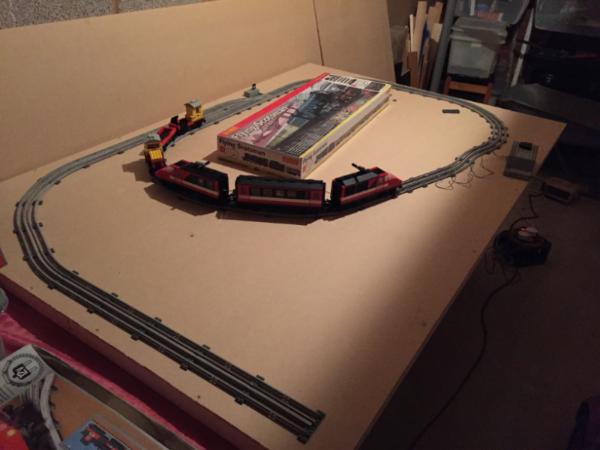
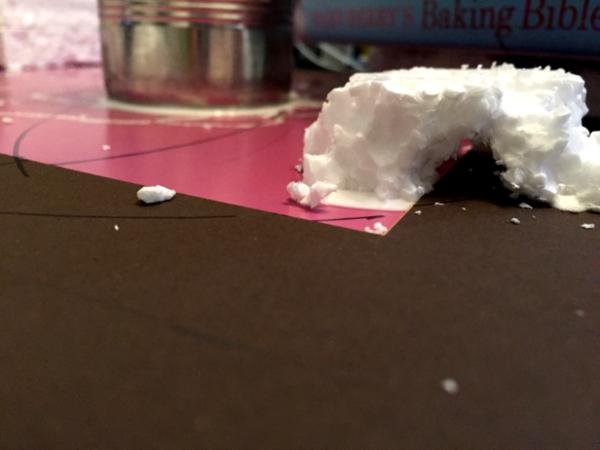
    Step 3 - Using a track rubber I bought I got the contacts sorted and checked they worked which they did, then I added some height to proceedings


    19th November 2016
    Was not a good night. I was up until 1am desperately trying to get the mismatch of OO train track to go together in to something interesting and just couldn't do it. Very angry. Wife was not impressed either, rightly so. Especially because I worked out the solution in 15mins the following morning. I'll never learn....

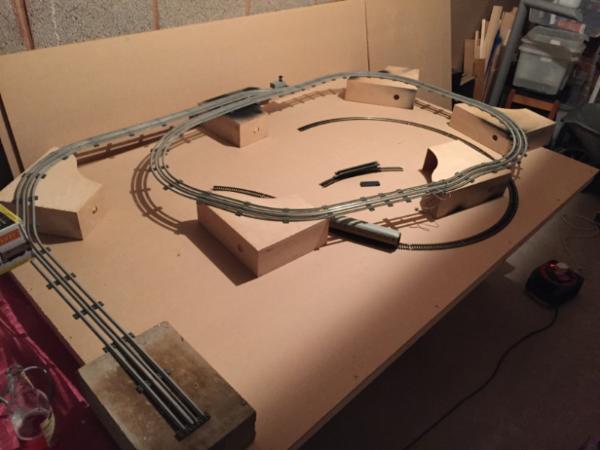
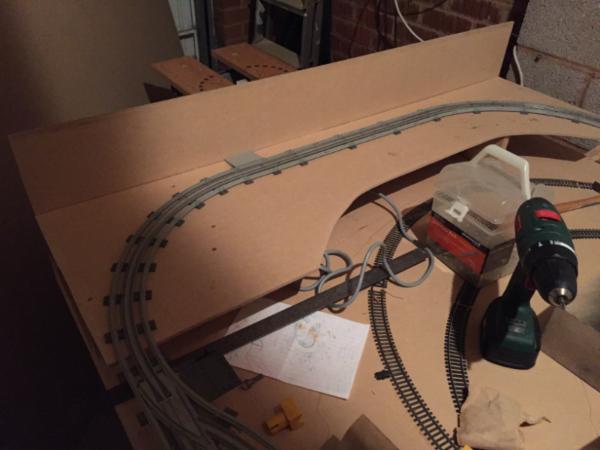
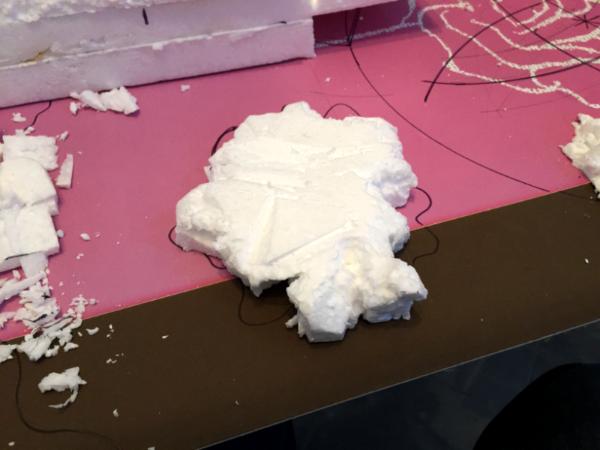
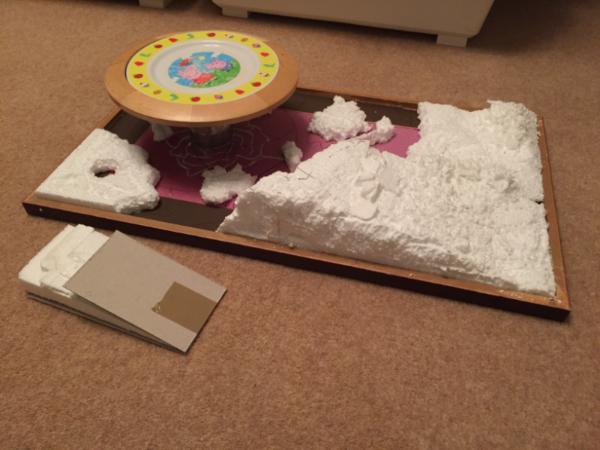
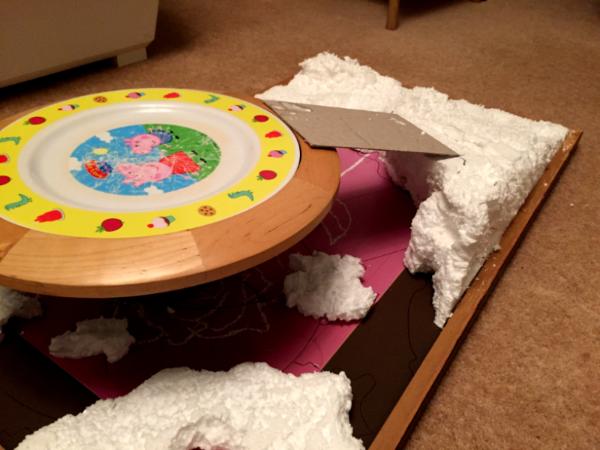
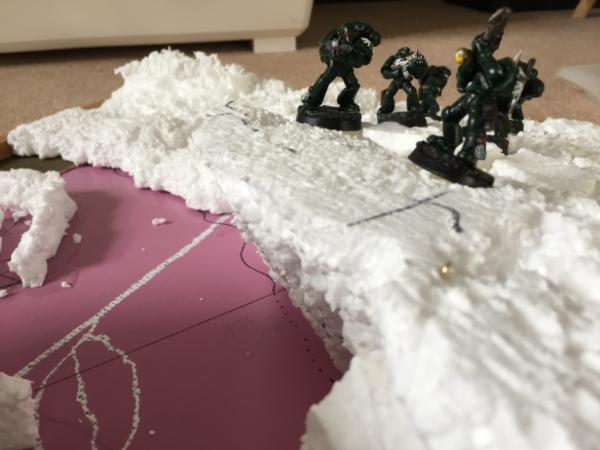
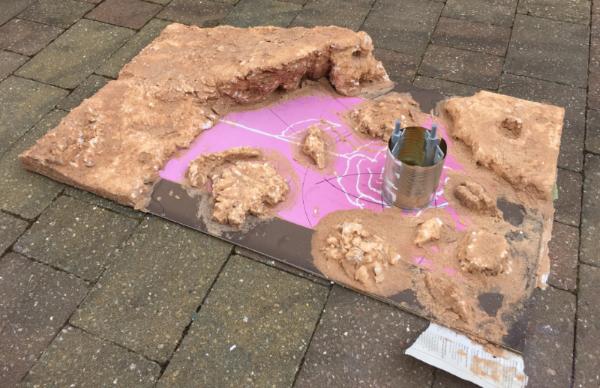
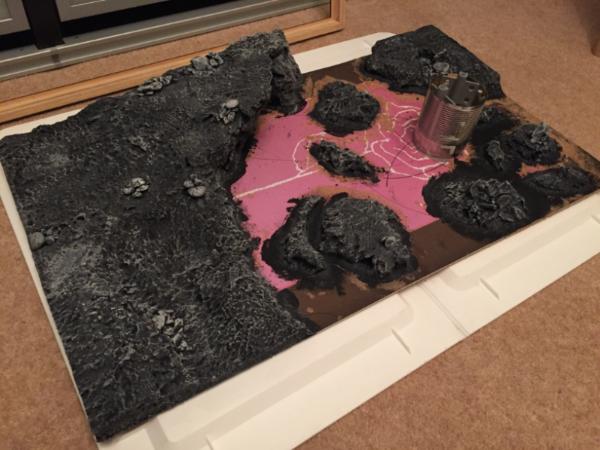
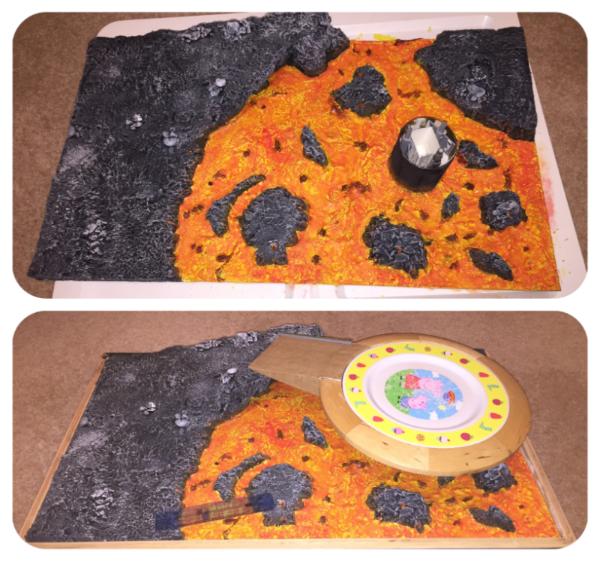
    The Lego track plan was re-arranged to make it simpler for the children and here it is suspended on the "hillwork" showing how it will sit suspended over the OO gauge track:


    At this stage the OO track siding is planned to be Brendam dock from Sodor.
    There will be a tunnel just prior to the dock on the siding track and a corresponding tunnel as the OO curves at the short near end just next to this.
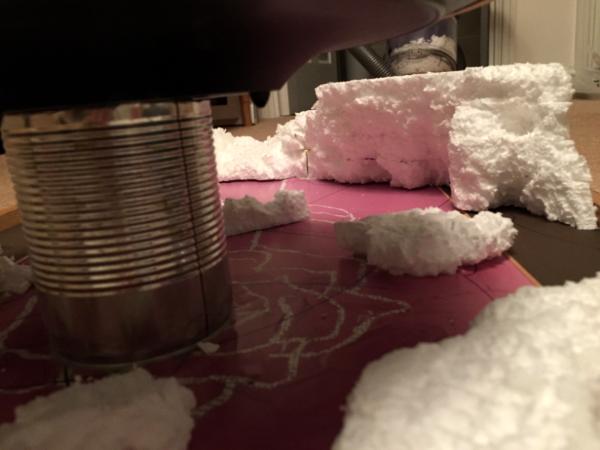
    There will be raised hills following the line of the Lego track with the OO track being in a valley where the diamond crossing is.
    The Lego straight on the far short end will have a Lego station on.
    The crossing of Lego track over OO track in the top right will be a bridge of Lego track going over OO track. I know it's a bit questionable having a curved bridge like that but needs must - it's surprising how restrictive each system is. The original idea was to have a Micro Scalextric set in too as the road of the layout, but it just would have been horribly busy.
    The area in the bottom right of the photo above, which is bordered by Lego curves on the left, the "dock siding" straight below and the OO curves to the right will be water with brickwork retaining walls on the right and by the track and then a cliff on the left

    20th November 2016
    I had a moment of confusion when I started thinking about the Christmas train not coming with a motor. I knew it was the case but hadn't really planned on any of this when I put the order in. If you want to you can buy these components.

    Which make it remote control and you can use the remote with up to 8 trains. However the remote is £11 and the remaining components are about £10-£11 each. So it's £44 to motorise the train.

    To buy a 12v motor is £65 second hand . So I am VERY glad I found the train stuff. I have two motors and could temporarily use one motor over Christmas which is fine, but would be nice to know it's always functional.

    So if it's £44 for the bits, you start to think why not buy a new train for a bit more and then just buy the 3 "non remote" components for the Christmas train utilising the remote from the set one would buy and have two remote controlled trains. Problem is even on eBay the cheapest train is about £50 if you are lucky and although some are very cool they duplicate what I have already - cargo and passenger trains.

    After much churning I decided to just use a 12v motor temporarily. I think I wanted to have it running around in the house on Christmas morning for a laugh and thought I would need the new stuff because the newer track is not powered. I could just try to use some of the original track if there is some left with a second controller in the house with the 12v modded in.

    I was getting worried about cost. Especially as I just bought this station second hand.

    I thought I could use the money saved to buy a OO gauge cargo ship and cargo crane for the dock instead which would be a better use of money. Of course then I remembered that OO gauge is 1:76 scale, so freighter would be huge........and expensive. So then the question was what I put in the water of Brendam docks? There are not a lot of 1:76 scale boats. 1:72 is not far off, but pretty much everything is military and Second World War. My Dad had some kits (his own plastic stash) but nothing thought would fit the setting. I found. Good lifeboat from Airfix on eBay which came with a helicopter. They could be painted up like two of the characters from Thomas the Tank Engine. But the lifeboat would fill most of the designated water area.

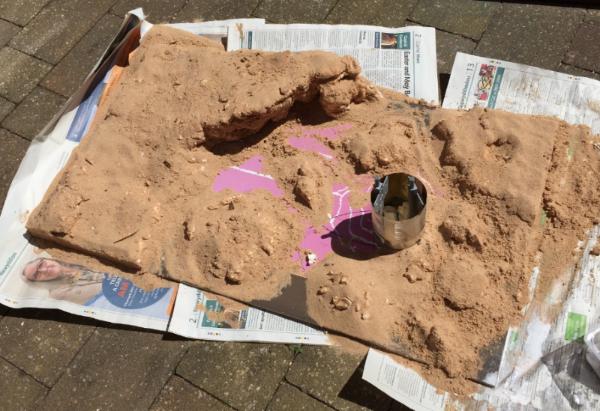
    I ultimately decided on a change of concept and the water area will now be a lake with a pebble beach edge. It will fit much better and am very happy with the change.

    22nd November 2016
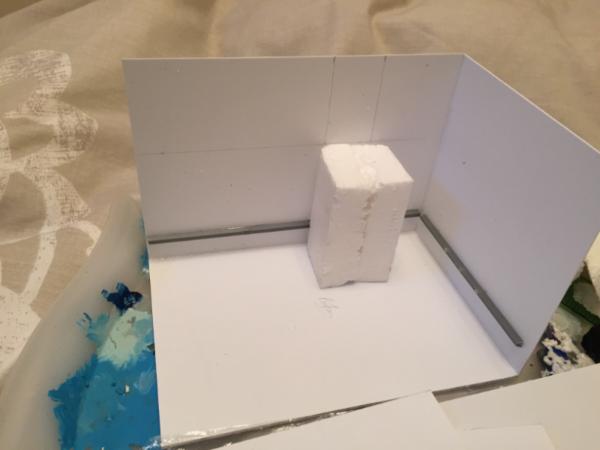
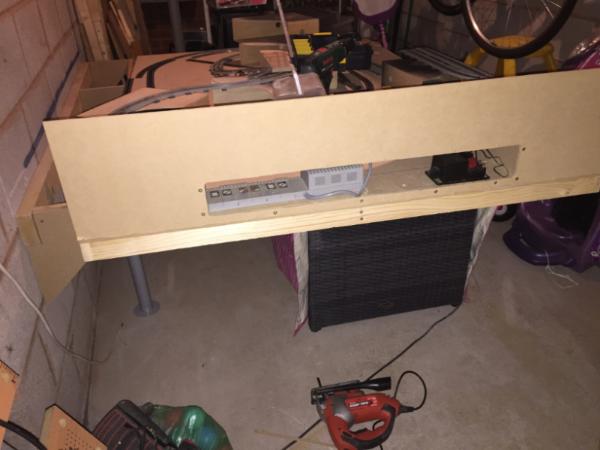
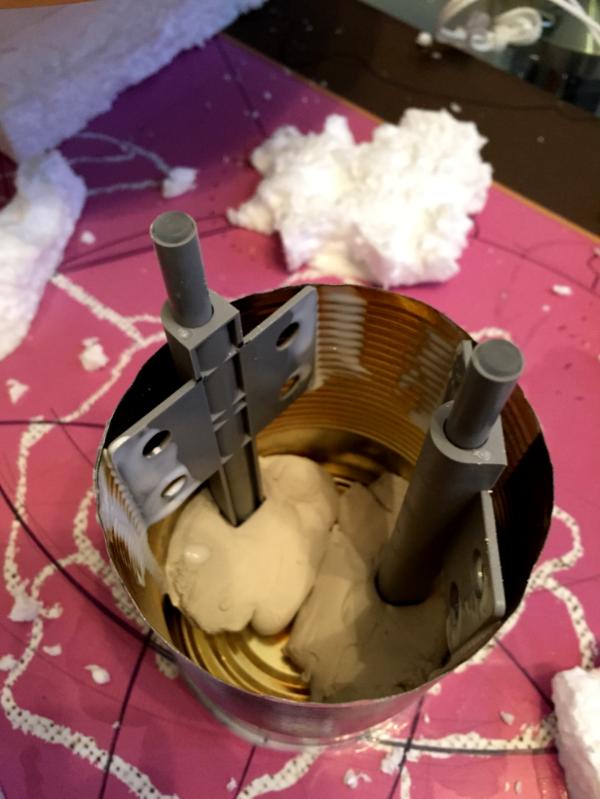
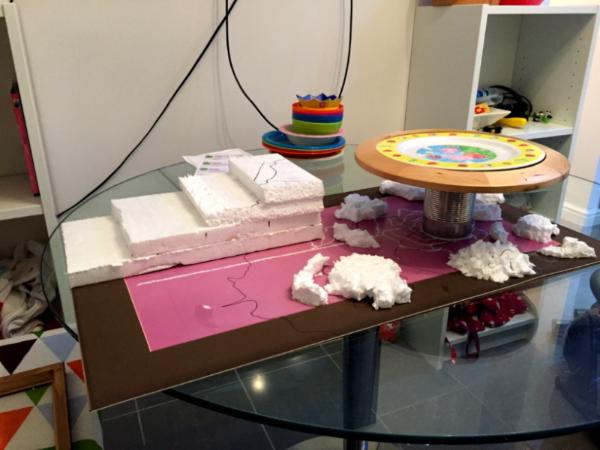
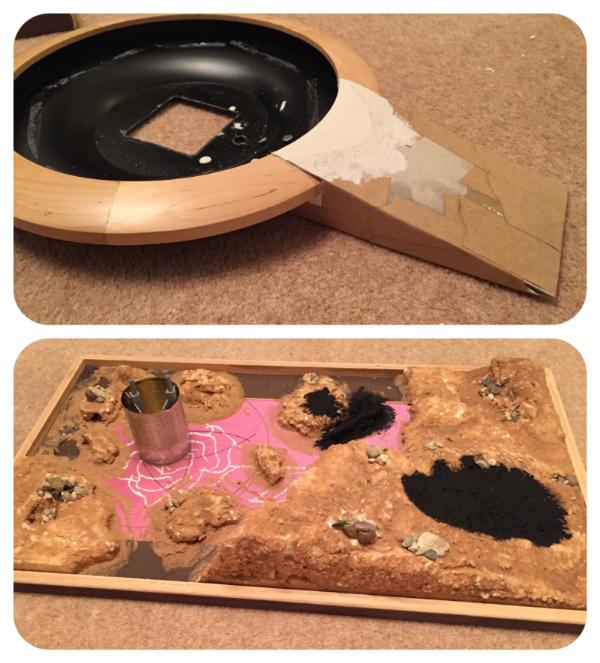
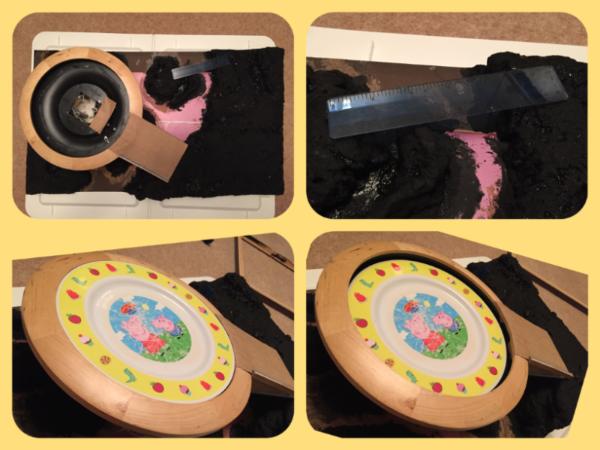
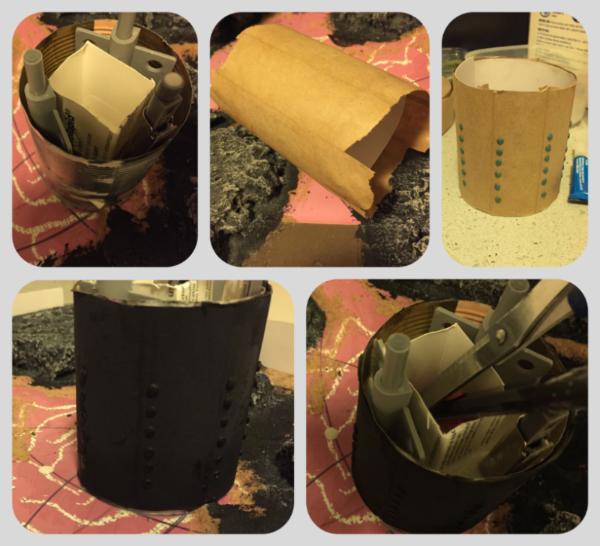
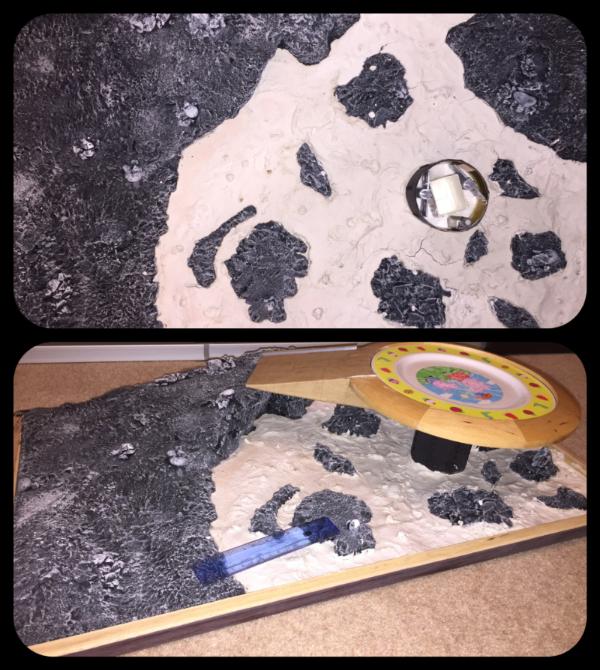
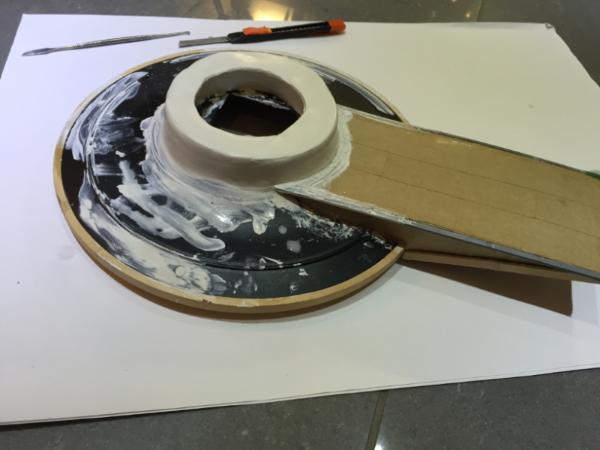
    Next I built the "control station" sitting under the short edge hill:

    It needs a back piece to make it look tidy which I didn't have time to cut that night due to lateness. There will be a hole for wires which will feed cables to track and to power extension block under the board.

    And with controllers for perspective:


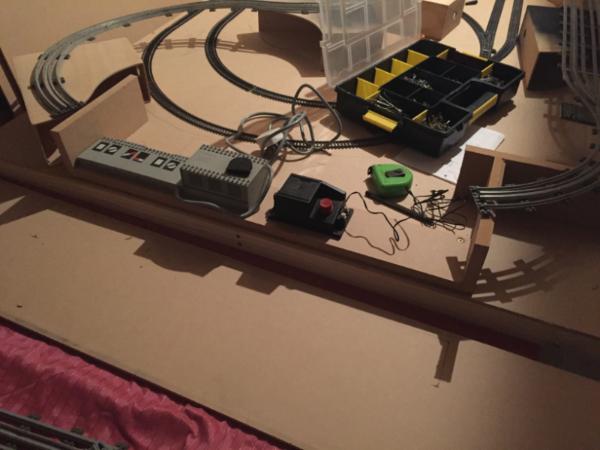
    I had planned to make the enclosure 24" long, but I was worried there wouldn't be expansion space for DCC and switches etc, so I went for 28" in the end.

    This will have a piece of thin MDF on top to support the Lego track, station and a level crossing (yes it will juuuust squeeze in next to the station). The crossing will end in the edge of the board, but at least it will be fun to open and close the barrier. The back and short edges will have a "wall" to work against. There will be an aperture cut in to the wall to allow access to the controllers and I think I may cut a "road hole" too for a laugh so Lego cars can finish going across the railway at the crossing. It will make it more interactive for my children too then.

    Early days. Not a lot of time until Christmas. But started at least.

    24th November 2016
    Isn't it sad that after all these years what is a toy has now come to the point that it cost £150 to buy this!!! (There was an auction for ~£50 but that would likely have sky-rocketed. And still it's £50!). It's got 18 or so components for goodness sake.

    This guy has a good solution that I'll likely adapt for trains - http://www.internetoflego.com/traffic-signal-led-sequence/

    The use of the LEDs is not an issue because it just needs to be two LEDs with an on-on switch to go between either colour. His Lego design would work perfectly. But you just think to yourself that a toy that's 30 years old shouldn't be that expensive.

    Anyway this would be for a later stage, doubt I'll have time for this before Christmas. But it is amazing what you find on eBay when you look.

    26th November 2016
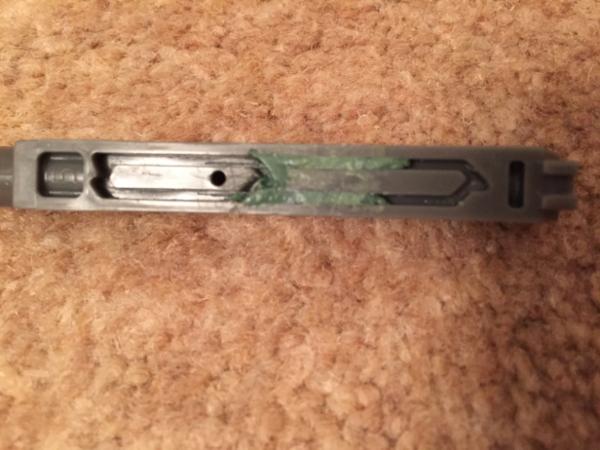
    Was planning on making the wall frame and realised that I had mounted the baton too high for the revised way I am going to mount it . There won't be a surrounding frame any more, it will just be folded up. This means I don't have so much faffing to do, but as I said, the baton was too high.

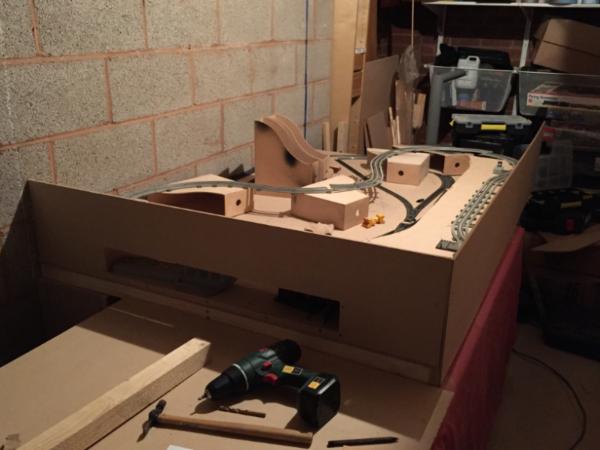
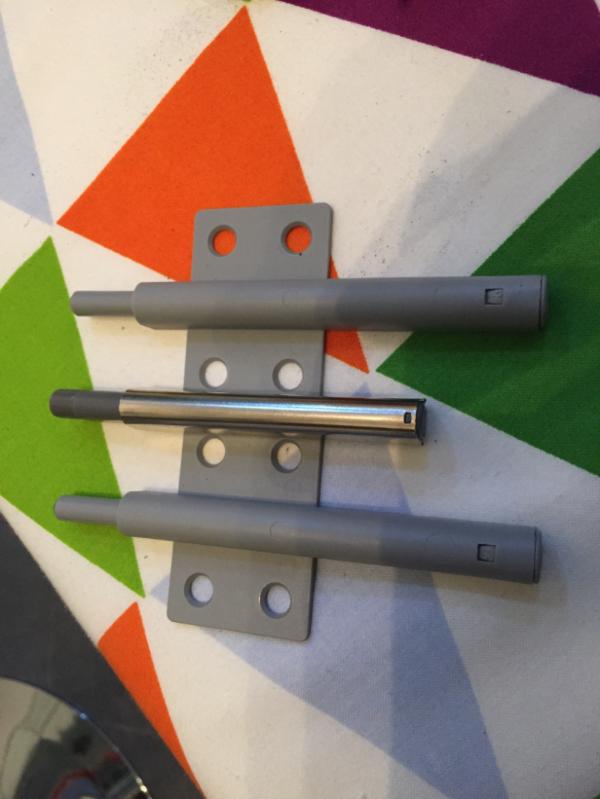
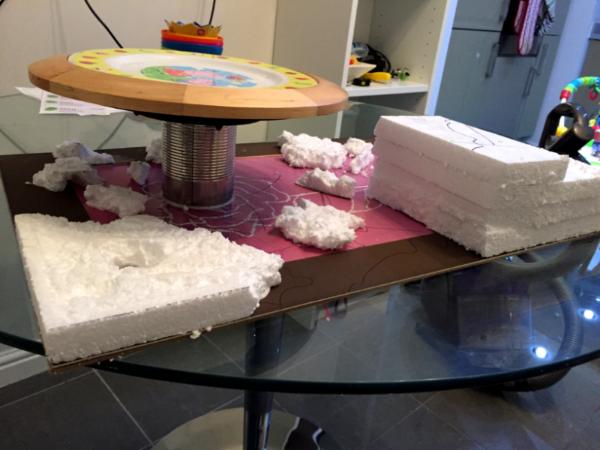
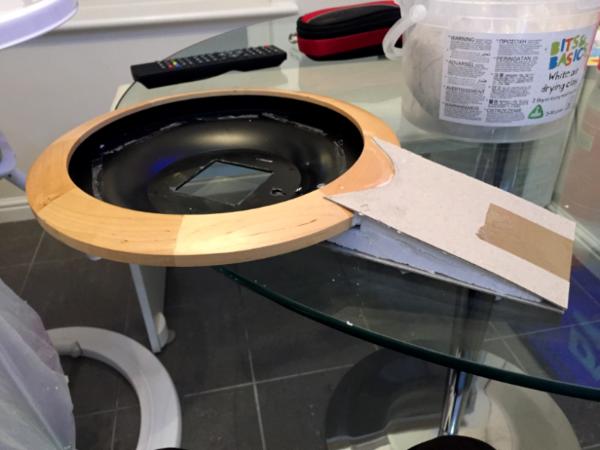
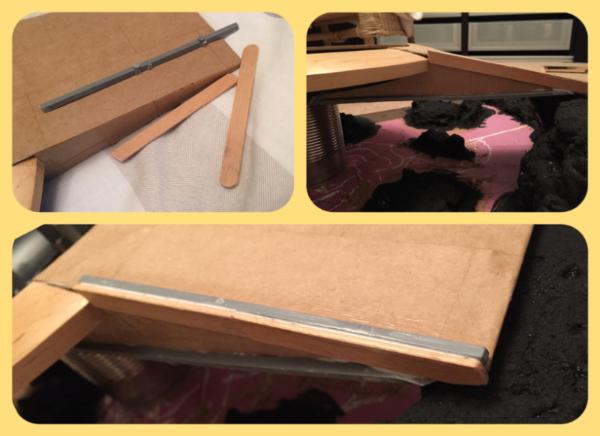
    Anyway, got the board out, cut some templates along a triangular shape to help weight distribution through the wall and then attached the front baton that the hinge will attach to. There will be a thin MDF "shelf" on top that I haven't cut yet, but in this picture I have placed a sheet on to give you an idea:


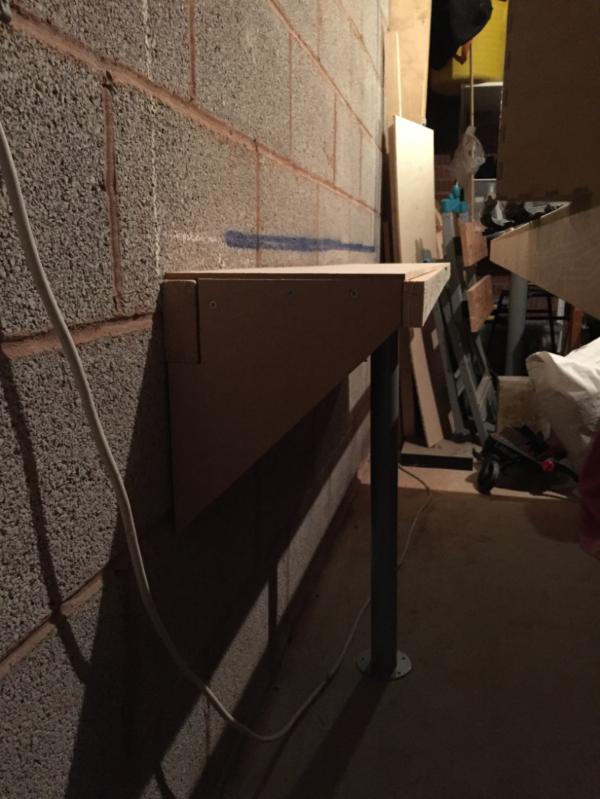
    The leg in photo is one of two that will be attached to the fold down table. Here's a top view:


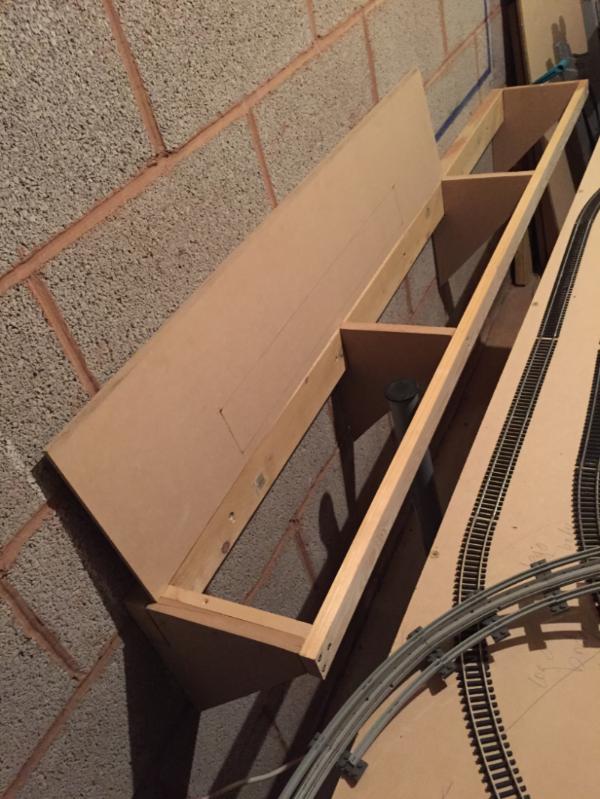
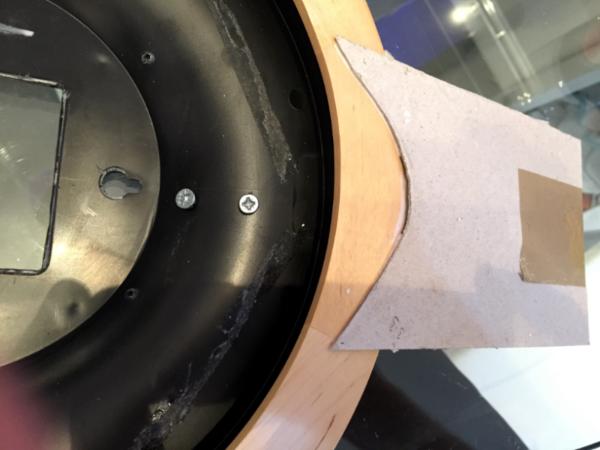
    Next was to cut out the controller aperture and then attach to the already attached frame for the controllers that doubles as a track support:

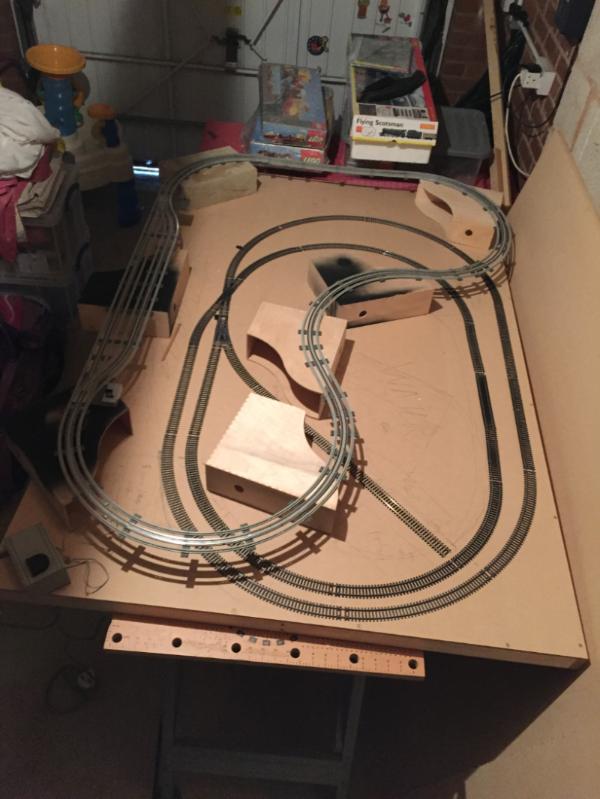
    I've also put the first layer of MDF down that will act as the Lego track base and at this end it will also support the station:


    Sadly the height of the controller station is probably too low for the Lego controller but at least the switches will work. If I need to I'll just have to pull it out and rest it on something. It's not a big deal and I wasn't going to be able to make anything else easily that was practical and I also wouldn't have been able to get more height anywhere else unless the whole Lego track was suspended higher which would have made the whole thing taller. No. This was a necessary sacrifice.
    I will be cutting the internal "back" of the controller area next and then it will be a case of cutting a large number of 4 inch lengths in a batch which will be the Lego track supports and when they are cut I can fly forward with this element. After that it will be a case of fitting the second short edge wall and the back wall and then prior to scenery creation it will be the structural elements for the lake.

    Speaking of which, a load of OO gauge people, ducks, swans and geese have arrived too which is cool. I wish I had the hills closer to finishing because I need to buy some tunnel portals but need to make sure a standard size will fit the double track because it is wider apart than I have seen when looking online. If my track is too wide I'll need to make my own which I'd rather not if I can help it.

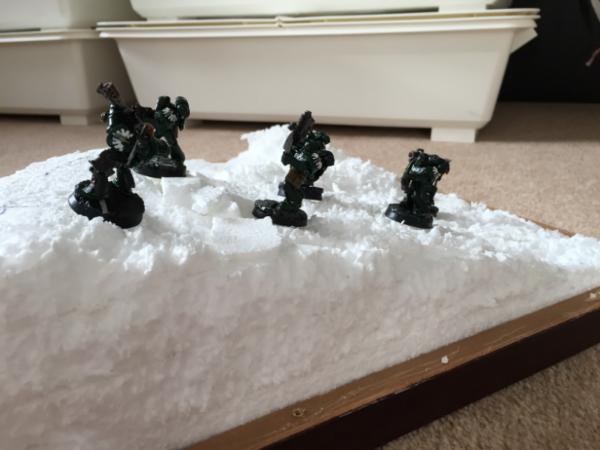
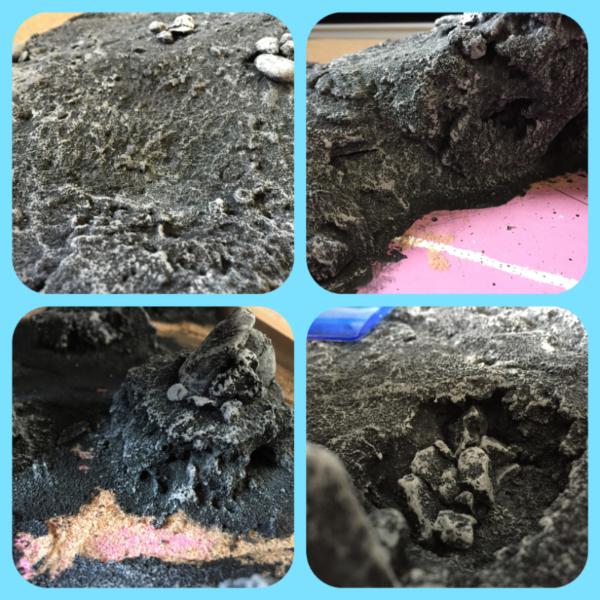
    Hopefully soon I'll be making hills and other scenery so the terrain element of this project will come to play. Then it will be far more wargame. If the MODs are unhappy with the current theme I can stop posting until I get to the terrain part. Just let me know.


    Automatically Appended Next Post:
    Just a quick addition. Not a large number of additions, but a stride forward:


    I am getting worried about doing the electrics - partly it being new to me (i.e. Do I need to do this thing everyone talks about where there are multiple power contacts along the whole length from a "bus" wire to ensure current is equal along the length?), but also when to do it all (i.e. Do I do it before I do the scenery or after? Is there some that must be done before scenery and some after? Etc etc).


    TP^DC Terrain Blog: I promise it will be to do with wargames too @ 2016/11/28 21:18:07


    Post by: inmygravenimage


    This is very exciting. And yes, unfortunately, wiring before scenery


    TP^DC Terrain Blog: I promise it will be to do with wargames too @ 2016/11/29 23:44:53


    Post by: TP^DC Deputy Manager


    Cheers Graven, means a lot.

    About wiring - Urgh! Thought so. Has to be done though

    Was flagging today so took a night off. It has been a shocking day.

    Last night I managed to get some of the hills in and that was a definite feel-good moment. I'll try to post images soon.

    Thanks for checking by


    TP^DC Terrain Blog: I promise it will be to do with wargames too @ 2016/11/30 06:59:39


    Post by: evildrcheese


    Looking pretty impressive so far.

    EDC