93655
Post by: Buttery Commissar
What's your one painting or modelling tip for the day? if you had just one pice of advice to give?  Think of this like your tear-a-page calendar of useful thoughts.
Doesn't have to be an advanced or technical idea... It's easy to get weighed down on the heavy stuff, but sometimes the little fixes and thoughts are worth remembering.  My thought for the day:
 If a pet hair or bit of fluff is stuck to your paint or primer, get the tweezers out and pluck that thing before the paint dries.
Waiting until after is easier, but you quite often snap the hair and only get half of it off. 
97130
Post by: Priest Foxley
drunk painting is fun, and may be educational, but don't paint anything you can't write off.
99
Post by: insaniak
- Don't use PVA glue for water effects. It looks fine when you first do it, but over time it can go yellow and/or cloudy (particularly in a humid climate), and will eventually shrink and go concave.
93655
Post by: Buttery Commissar
Wasn't GW's liquid water effect very similar to PVA? Seem to remember it could be watered down in a similar way.
I wonder what it was made from.
54708
Post by: TheCustomLime
If a weapon snaps don't just glue it back. Gently file down both ends and then glue it back. There will be a large contact surface for the glue to bond and the weld will be stronger.
74210
Post by: Ustrello
I personally use woodland scenics for my realistic water effects.
My tip is watch where you are putting your paints down, and don't let a wash mix with your layer/edge by mistake messing up a mini.
81303
Post by: Stormwall
Uh... where to start? I can't decide what to choose and what not to so I am going to narrow it down for myself with a few.
Don't forget your long term goals in favor of short term excitement/ideas over new kits.
Though it has been said before, always have bandaids and liquid bandage available/use sharp hobby blades to avoid getting cut.
Lastly, whatever you do, don't touch a fogged miniature from clearcoat as it will strip all the layers beneath it through your touch.
79243
Post by: Swastakowey
Train someone nearby like your children or your GF to base coat.
Base coating models is half the battle gone. Your painting time after the initial investment will increase as you focus on details and so on.
81303
Post by: Stormwall
^Or you could use sprays to basecoat. I use Corax White and Army Painter Pure Red.
It's amazing, hnng. Though family servants are valuable, I agree. A king must have peasants. (I'm joking here, please don't get mad.) 
3687
Post by: Red__Thirst
After cleaning mold lines off of models and priming, be sure to inspect the model thoroughly for any missed mold lines that might have been overlooked. I find I pick them out much easier once a layer of primer is on the mini generally speaking.
That's my tip. Hope it helps.
Take it easy.
-Red__Thirst-
79243
Post by: Swastakowey
 Stormwall wrote: Stormwall wrote:^Or you could use sprays to basecoat. I use Corax White and Army Painter Pure Red.
It's amazing, hnng.
I meant for the base colours, like when the armour is red, the cloth is blue and the flesh is fleshy colours. But yes I also agree.
Like train them to do the first layer of paints that require nothing more than not painting over the lines.
81303
Post by: Stormwall
 Swastakowey wrote: Swastakowey wrote: Stormwall wrote:^Or you could use sprays to basecoat. I use Corax White and Army Painter Pure Red.
It's amazing, hnng.
I meant for the base colours, like when the armour is red, the cloth is blue and the flesh is fleshy colours. But yes I also agree.
Like train them to do the first layer of paints that require nothing more than not painting over the lines.
Oh.
93655
Post by: Buttery Commissar
Swastakowey wrote: Stormwall wrote:^Or you could use sprays to basecoat. I use Corax White and Army Painter Pure Red.
It's amazing, hnng.
I meant for the base colours, like when the armour is red, the cloth is blue and the flesh is fleshy colours. But yes I also agree.
Like train them to do the first layer of paints that require nothing more than not painting over the lines.
Make sure if you do that, you explain what your end vision for the model is...
I asked my partner to do the gun-greys for my mordians that I'd painstakingly airbrush-shaded and highlighted to have white uniforms. Bear in mind this was a far more experienced miniature painter, than me, so I assumed that it was clear that getting mess on unpainted areas was fine, painted areas, no.
About six guns in I get asked, "What colour are the jackets going to be?"
"White."
"..."
"You didn't."
That did not save me any time.
79243
Post by: Swastakowey
 Buttery Commissar wrote: Buttery Commissar wrote: Swastakowey wrote: Stormwall wrote:^Or you could use sprays to basecoat. I use Corax White and Army Painter Pure Red.
It's amazing, hnng.
I meant for the base colours, like when the armour is red, the cloth is blue and the flesh is fleshy colours. But yes I also agree.
Like train them to do the first layer of paints that require nothing more than not painting over the lines.
Make sure if you do that, you explain what your end vision for the model is...
I asked my partner to do the gun-greys for my mordians that I'd painstakingly airbrush-shaded and highlighted to have white uniforms. Bear in mind this was a far more experienced miniature painter, than me, so I assumed that it was clear that getting mess on unpainted areas was fine, painted areas, no.
About six guns in I get asked, "What colour are the jackets going to be?"
"White."
"..."
"You didn't."
That did not save me any time.
I consider that part of the training 
93655
Post by: Buttery Commissar
"You can match it in."
"Pfpfpfpfpfgghff."
81638
Post by: kb_lock
Cleaning your tools is a full half of the hobby. $30 brushes and $200 airbrushes will last forever if you look after then, or will be worthless in no time if you don't. Additionally, working order tools make the job fun, you've got to fight the paint for light and shadow, don't fight the paint brushes too!
Also, a solid dark base colour like caliban green, and an off white like palid wych flesh are the only two paints you need to blend and highlight all the way from shadow to highlight, sure you can augment with other colors, but this trick saves a lot of time money and effort.
Finally, buy paints as you need them. I've got about 50 paints I've never used that I'll probably throw out one day. I also shouldn't have bought all gw paint. Buy the right paint when you need it (and sometimes gw is the right paint, but no brand is perfect)
93655
Post by: Buttery Commissar
Agree on the washing. I think it was Talys that piqued my interest about brush soap. It's cut my frustration down massively.
On the subject of tools... "Buy cheap, buy twice." holds true for so many things.
I was exceptionally lucky and got great advice on airbrushing from someone who grew up as the technology changed. he convinced me to buy a good brand as my first, and upgrade the compressor to suit use. I'm still using that airbrush,(plus one from the 70s) and the quality and ease of use have saved me so many frustrated moments in comparison to trying to use the various Chinese ones that came with my compressor.
kb, whilst the artist in me agrees on hand-mixing, if you're army painting in the 30s and 40s of figures, I'll argue for pre-mixed shades and triads.
If I grab another squad in a month's time, I don't want to be trying to match paint ratios I wrote down.
Until I started playing 40K, I mixed pretty much everything myself, because I could spend a week just doing a nice batch of minis.
81638
Post by: kb_lock
Excellent addition;
If you want a consistent look over a whole army, use pre mixed colours. I do this with ultramarines (imperial blue, French blue, glacial blue)
I think i just wanted to touch on the cheaper side - you CAN paint anything with a palette of 5 colours, and that is absolutely how you should start painting.
77159
Post by: Paradigm
On the note of mixing for shades and highlights, it pays to have both 'cold' and 'warm' highlight colours. Instead of adding white to a colour to brighten it, have a light grey and a light brown/sand on hand. You can get totally different tones to a mini just by varying the highlight mixing colour.
Eventually, you can move on to highlighting with all kinds of colour mixes, but to start, I'd say both sides of off-white are essential.
19806
Post by: mockingbirduk
Have your brush washing water in an obvious container in a specific place on your desk, and always keep it there. Do not put your tea/coffee/water/lemonade/whisky/whiskey down anywhere near it.
25853
Post by: winterdyne
Enjoy it, and be honest with yourself. The second you're not enjoying it (ie actually disliking doing it, rather than finding a particular task a bit boring), then you won't do good work and you'll be disappointed with the result. Stop, do something else and come back to it in a better frame of mind.
10953
Post by: JohnnyHell
SCRAPE OFF MOULD LINES
96387
Post by: Fieora
mockingbirduk wrote:Have your brush washing water in an obvious container in a specific place on your desk, and always keep it there. Do not put your tea/coffee/water/lemonade/whisky/whiskey down anywhere near it.
Learned that the hard way =p
My tip would be... a little superglue goes a loooooooooooong way. It's a pain having to chip off old superglue when you've stripped down a model, or if you use too much and have to sand down again on a new mini.
*cradles old metal Repeater Bolt Thrower*
Spent hours yesterday taking off massive chunks of superglue where the ex thought it was necessary to coat inside, outside and just about everywhere possible on joins >.>
A little dab is plenty! ^^ (and less risk of glueing yourself to assorted tools, self etc ^^)
81638
Post by: kb_lock
Oh man that is another one, keep a clean, shortish bristled brush with clean water nearby - this is your quick load brush
20983
Post by: Ratius
A lot of GWs decals wont stay on with water alone (no idea if thats the idea - I never researched it). So always apply a light dash of PVA glue to keep them secured.
14070
Post by: SagesStone
Practice, always try new techniques but never overwhelm yourself by trying to take on too much too fast. If you can manage to give yourself a challenge with each new squad or project, look back after a year and be surprised at how far you would have come.
Learn to take criticism, constructive though, so you can pick up easier on what you need to work on.
95147
Post by: Minimachine
Buy some flow improver. The positive difference it makes in the way acrylic paints behave is huge.
93655
Post by: Buttery Commissar
My thought for the day: Learn the multiple uses for everything you own.
For example:
Varnish is not only a finishing touch, it's an excellent midway step to preserve your work.
Scalpels work as a far subtler tool when stroked away from you, along surfaces with the blade angled towards you.
Pins can be used as writing utensils for scrollwork if you struggle with brushes. It takes a very long time, but you can treat them like a pen nib without fear of smearing.
Take things apart. Learn them intimately.
61618
Post by: Desubot
"Never paint in something you are not willing to get paint on."
17808
Post by: oadie
 Paradigm wrote: Paradigm wrote:On the note of mixing for shades and highlights, it pays to have both 'cold' and 'warm' highlight colours.
Not just highlight colors, but shades, as well. You can achieve some amazing lighting effects by manipulating color temperature, having barely even changed color 'brightness.' Some minis that would look flat in a greyscale photo really pop in full color, thanks to that temperature manipulation.
89127
Post by: Matthew
Finish everything you have to paint before buying something new.
61618
Post by: Desubot
 Matthew wrote: Matthew wrote:Finish everything you have to paint before buying something new.
Thats more a lifestyle choice then a tip.
89127
Post by: Matthew
Well, it helps you finish things... but well, uh, have a youtube playlist on when you paint?
93655
Post by: Buttery Commissar
Making yourself a little nest to paint in, figuratively speaking, can be quite good. Gather the drinks, the paper, the things you'll need. The other things you'll need. Yes those. You're not going to stand up for them midway, get them now.
60211
Post by: HairySticks
Matthew wrote:Finish everything you have to paint before buying something new.
Id love to do this, but its just not going to happen! Far to many new shinys available all the time, too little time to paint what I already have. I do try to buy less than I paint so the pile atleast shrinks a bit. ... thats the best I can do. I sort of miss the teen days where there was far more time than money,everything got painted and the next purchase was eyed up long before funding was available, back then I couldn't fathom why you would consider paying others to paint for you... but then you find yourself with more money than time and it doesnt look as silly..
My tip is to put on either music or a movie / tv show that is familiar and not fresh viewing. Something that wont draw your eyes attention (probably because youve seen it before many times and the sound track is enough to know fully what is happening.) Simpsons re-runs work well for me. That or painting tutorials on youtube go well for me.
20983
Post by: Ratius
Good idea Hairy, I used to paint whilst having Voyager reruns or TNG on in the background. I knew the scripts so well, I didnt need to view the screen
19806
Post by: mockingbirduk
Matthew wrote:Finish everything you have to paint before buying something new.
I stoutly envy your willpower.
752
Post by: Polonius
Know your goal before you start any project. Is this a display piece? Are you trying to learn a new technique? Is it part of an army? One-off?
It's okay to decide that you want to knock out a simple color scheme. It's also okay to decide that you want to spend 100 hours on a single model. Just know what you want the end result to be, and judge the model by that standard.
46094
Post by: KingmanHighborn
Keep the house cat (or any family pet I guess) away from Skaven models (or models in general)
89259
Post by: Talys
 KingmanHighborn wrote: KingmanHighborn wrote:Keep the house cat (or any family pet I guess) away from Skaven models (or models in general)
LOL. ++1
Housecat has special rules - Stomp, Rend, Smack, Chomp and also, most feared, Hide Model, which immediately Removes from Collection for D6 years.
80243
Post by: darkcloak
Keep your workstation organized!
I fall prey to clutter so easily, but once I take a moment to clean up my desk and get things organized its such a relief.
Oh and always check your paint pots are closed tight.
89259
Post by: Talys
My tip - don't file or sand near uncovered Work in Progress or finished models! Yeah, that's a great one. Whether it's screw-on or snap, you can't immediately see if it's not on securely. Worst thing ever: giving a paint pot that ISN'T shut a good shake.
59054
Post by: Nevelon
 Talys wrote: Talys wrote:My tip - don't file or sand near uncovered Work in Progress or finished models!
I have a separate workbench and paintbench after some bad experiences.
As a corollary:
Be sure the glue is completely dry and set before you get a paintbrush anywhere near it.
9306
Post by: Amen Brick
Talys wrote:My tip - don't file or sand near uncovered Work in Progress or finished models!
Yeah, that's a great one. Whether it's screw-on or snap, you can't immediately see if it's not on securely. Worst thing ever: giving a paint pot that ISN'T shut a good shake.
I'd miss my kitchen floor of many colours.
My tip; cheap paint (of the £1 a tube variety) can be surprisingly good at giving depth as it rarely goes on with one flat coat. You need to add a little water and beat it up a little first to make a smoother paste, though.
76836
Post by: hurtmypony
Or else it can turn into...um...a real cat-and-mouse game.
[Dodges thrown tomatoes and retreats from the stage.]
81303
Post by: Stormwall
hurtmypony wrote:
Or else it can turn into...um...a real cat-and-mouse game.
[Dodges thrown tomatoes and retreats from the stage.]
After working with some resin that is noxious as hell, I'd just like my tip for today to be, be very careful when working with chemicals. Always wear a mask and eyepro!
89259
Post by: Talys
Ditto on the mask for airbrushing, too. Some of those paints aren't healthy!
25580
Post by: Maelstrom808
Patience is your most valuable skill. If you find yourself rushing, it's time to take a break.
59054
Post by: Nevelon
 Maelstrom808 wrote: Maelstrom808 wrote:Patience is your most valuable skill. If you find yourself rushing, it's time to take a break.
Taking breaks is a good idea in general. Especially as we all get older.
On that note, try to sit properly, don’t hunch over, basic ergonomics stuff. Stretch periodically.
4042
Post by: Da Boss
Plan your scheme before you start. Then do a group of say, five of the cheapest model you have in that scheme. Leave them for a few days, come back to them. If you still like the scheme, go for it!
(Bitter experience!)
Cool thread idea btw.
93655
Post by: Buttery Commissar
Thought for today: You have not shaken your paint enough.
No you haven't.
59054
Post by: Nevelon
If you are using a rattle can to spray, keep shaking it. Does your arm hurt yet? Keep shaking. Ok, it hurts, but you can still feel the pain? Almost there. Numbness setting it? You could spray now, but might get a fuzzy coat. When your arm falls off, pick up the can with the other hand, and spray.
Then go to the hospital to get that arm looked at/reattached.
11961
Post by: Ifalna
Have two glasses of water, one for normal paints, and one for brushes with metallics on them
Using the same colour glaze for extreme shadow areas on a figure can massively tie the scheme together with minimal effort!
91101
Post by: gummyofallbears
mine would be glazing.
as said above, I basically use the GW glazes on most, if not, all of my models.
also, try using drying retarder, living in colorado during the summer means I am lucky if my paint doesn't dry out within 5 minutes of me putting it onto my pallet.
77159
Post by: Paradigm
Another day, another tip:
A brush has many lives. First, it is for painting, pointed and neat. Then, as the point fades, it is a basecoating/washing brush. If the bristles start to harden, it is a drybrush. Once all else has failed, it can be used for priming and varnishing.
Only when a brush is hardened, blunt, splayed and loose is it dead, at which point you may lay it to rest.... Or use the bristles as reeds/long grass/flowers for basing.
Old brushes never die, they just go missing in action...
81303
Post by: Stormwall
Paradigm wrote:Another day, another tip:
A brush has many lives. First, it is for painting, pointed and neat. Then, as the point fades, it is a basecoating/washing brush. If the bristles start to harden, it is a drybrush. Once all else has failed, it can be used for priming and varnishing.
Only when a brush is hardened, blunt, splayed and loose is it dead, at which point you may lay it to rest.... Or use the bristles as reeds/long grass/flowers for basing.
Old brushes never die, they just go missing in action...
What is dead may never die.
10143
Post by: Slipstream
Keep trying different styles/techniques when painting.
80243
Post by: darkcloak
 Nevelon wrote: Nevelon wrote:
If you are using a rattle can to spray, keep shaking it. Does your arm hurt yet? Keep shaking. Ok, it hurts, but you can still feel the pain? Almost there. Numbness setting it? You could spray now, but might get a fuzzy coat. When your arm falls off, pick up the can with the other hand, and spray.
Then go to the hospital to get that arm looked at/reattached.
No no no! That's all wrong! When your arm falls off pick up the can and repeat the process with your other arm! Yeesh!
69239
Post by: Thokt
Use a wet palette, it makes a world of difference - blending becomes much easier, and you save a good deal of paint.
93655
Post by: Buttery Commissar
 darkcloak wrote: darkcloak wrote: Nevelon wrote:
If you are using a rattle can to spray, keep shaking it. Does your arm hurt yet? Keep shaking. Ok, it hurts, but you can still feel the pain? Almost there. Numbness setting it? You could spray now, but might get a fuzzy coat. When your arm falls off, pick up the can with the other hand, and spray.
Then go to the hospital to get that arm looked at/reattached.
No no no! That's all wrong! When your arm falls off pick up the can and repeat the process with your other arm! Yeesh!
I have two severely arthritic painting buddies, I spend an extraordinary amount of time shaking paint pots for them some nights.
Something something arm muscles something something hurr hurr.
14392
Post by: nerdfest09
Try highlighting one highlight brighter than you think is good, then toning it all down and tying it together with an appropriate wash. this works especially well when painting reds and highlighting up to pure vomit brown.
81638
Post by: kb_lock
Buttery, i built a paint shaker for about $20 here - the cheapest jigsaw you can buy, the smallest quickgrip clamp you can get.
Put the clamp in like a blade (i had to grind mine down a bit) then clamp in the paint pot.
Push butan, paint mixed
60211
Post by: HairySticks
... And still havent!
17808
Post by: oadie
Yep, by which I mean 'nope.' HEY! I said NO! Keep shaking!
If you don't feel like your non-painting hand might as well be that of a lonely teenage boy, you could equally try painting with powdered pigment and a bottle of matte medium. Not that it wouldn't work, it'd just be a major PITA.
89259
Post by: Talys
Lesser known airbrush tip:
When you slide your needle through your airbrush, once it passes through the trigger mechanism you should feel some resistance. It's not a lot, but certainly enough to make your needle not fall out.
1. If your needle slides through freely, or with almost no resistance, you need to tighten the packing screw. On most double-action airbrushes, take out the piece that holds the needle, remove the trigger, and peer down the back end of the airbrush. You'll see a little nut with a hole in it, with a cut top that you can insert a screwdriver into. Twist it *just a little* -- quarter turn (clockwise, to tighten, and counterclockwise to loosen), maybe even less. Then test it. If it's till too loose, tighten it some more, etc.
Why do this: The packing seal is what prevents your paint from going from the front end of the airbrush into back, where the trigger is, and all that. If the packing seal isn't operating properly, eventually, the back of your airbrush will gunk up. And it's a real pain to clean in comparison.
I'm not exactly sure why, but some people say this is also a cause of bubbling in the cup (backflow).
How it gets loose: It can easily loosen if twisted while cleaning out the air brush, for instance, with a pipe cleaner.
2. If you find that your airbrush trigger is sticking (when you release it, it doesn't return to the front as quickly or smoothly as it should), a possible reason is that your packing seal is too tight. Or, it's possible that your needle is sticking to the packing seal.
In this case, you may wish to lubricate your needle (the lubricant transfers onto the packing seal), and/or loosen the packing seal very slightly.
46094
Post by: KingmanHighborn
Talys wrote: KingmanHighborn wrote:Keep the house cat (or any family pet I guess) away from Skaven models (or models in general)
LOL. ++1
Housecat has special rules - Stomp, Rend, Smack, Chomp and also, most feared, Hide Model, which immediately Removes from Collection for D6 years.
Oh you have no idea, one entire Mordheim warband box, and a dwarf longbeard much latter down the road. I first thought it was the dog (a puppy at the time and of course chewing things.) But then I found pieces in the litter box. But this was also the same cat that chewed the wire in half off a PS1 controller, peed on my college algebra book and stole and hid socks in the litter box. He also stole my dad's hearing aid once.
89259
Post by: Talys
KingmanHighborn wrote: Talys wrote: KingmanHighborn wrote:Keep the house cat (or any family pet I guess) away from Skaven models (or models in general)
LOL. ++1
Housecat has special rules - Stomp, Rend, Smack, Chomp and also, most feared, Hide Model, which immediately Removes from Collection for D6 years.
Oh you have no idea, one entire Mordheim warband box, and a dwarf longbeard much latter down the road. I first thought it was the dog (a puppy at the time and of course chewing things.) But then I found pieces in the litter box. But this was also the same cat that chewed the wire in half off a PS1 controller, peed on my college algebra book and stole and hid socks in the litter box. He also stole my dad's hearing aid once.
Wow. That's some cat, LOL.
Maybe your cat is just telling you that he wants to learn how to play Mordheim.
The weirdest transposition of items was when I lost a cell phone headset mowing the lawn. A raccoon brought it and dropped it off at our patio. Or at least, we assume it was one of our raccoons, because nothing else out there has the manual dexterity to bring something back like that without mauling it. I couldn't quite bring myself to stick it in my ear afterwards, though... Maybe raccoons play miniature wargames when we're not watching?
60211
Post by: HairySticks
Talys wrote:Lesser known airbrush tip:
1. If your needle slides through freely, or with almost no resistance, you need to tighten the packing screw. On most double-action airbrushes, take out the piece that holds the needle, remove the trigger, and peer down the back end of the airbrush. You'll see a little nut with a hole in it, with a cut top that you can insert a screwdriver into. Twist it *just a little* -- quarter turn (clockwise, to tighten, and counterclockwise to loosen), maybe even less. Then test it. If it's till too loose, tighten it some more, etc.
Why do this: The packing seal is what prevents your paint from going from the front end of the airbrush into back, where the trigger is, and all that. If the packing seal isn't operating properly, eventually, the back of your airbrush will gunk up. And it's a real pain to clean in comparison.
I Would urge you not to do this, unless you have the needle seal alignment tooling. At the very least be extremely careful to not remove the whole nut without it, you will not get the seal back in the housing straight and back into the place it goes with a normal screwdriver.
The tool required has a prong down the middle that fits perfectly in the hole to keep it all centred while you screw it in. I recommend buying the tool, and a spare seal if your airbrush cost more than £50 its probably worth repairing when things wear out. Most reputable airbrush makers sell all the consumable seals and replacement parts to fix them up when damaged.

93655
Post by: Buttery Commissar
I've honestly never tried doing that, but after ultrasonic cleaning my hp-cs, it's being a jerk and a half. Might have to look into it (literally).
One thing I have looked at: if your airbrush trigger is too dramatic for you, take a pair of clippers and remove a few mm from the spring at a time until you get it how you like.
25853
Post by: winterdyne
 Buttery Commissar wrote: Buttery Commissar wrote:I've honestly never tried doing that, but after ultrasonic cleaning my hp- cs, it's being a jerk and a half. Might have to look into it (literally).
One thing I have looked at: if your airbrush trigger is too dramatic for you, take a pair of clippers and remove a few mm from the spring at a time until you get it how you like.
Most airbrushes, even the chinese cheap ones have an action adjustment in the barrel of the airbrush. There should be no need to take clippers to anything.
89259
Post by: Talys
HairySticks wrote: Talys wrote:Lesser known airbrush tip: 1. If your needle slides through freely, or with almost no resistance, you need to tighten the packing screw. On most double-action airbrushes, take out the piece that holds the needle, remove the trigger, and peer down the back end of the airbrush. You'll see a little nut with a hole in it, with a cut top that you can insert a screwdriver into. Twist it *just a little* -- quarter turn (clockwise, to tighten, and counterclockwise to loosen), maybe even less. Then test it. If it's till too loose, tighten it some more, etc. Why do this: The packing seal is what prevents your paint from going from the front end of the airbrush into back, where the trigger is, and all that. If the packing seal isn't operating properly, eventually, the back of your airbrush will gunk up. And it's a real pain to clean in comparison.
I Would urge you not to do this, unless you have the needle seal alignment tooling. At the very least be extremely careful to not remove the whole nut without it, you will not get the seal back in the housing straight and back into the place it goes with a normal screwdriver. The tool required has a prong down the middle that fits perfectly in the hole to keep it all centred while you screw it in. I recommend buying the tool, and a spare seal if your airbrush cost more than £50 its probably worth repairing when things wear out. Most reputable airbrush makers sell all the consumable seals and replacement parts to fix them up when damaged.
You are right about not removing it entirely! You should be moving it a quarter twist or so at a time. I'm not sure about other airbrushes, but you can't misalign a packing seal on an Iwata airbrush (as far as I know), and the end of the metal cartridge is tapered to go in pretty easily. I replaced it myself after years of faithful service. My Paasche airbrushes are built like German tanks and have never needed adjustment or replacement there, even though I abuse the crap out of them when I clean them. The packing seal for some airbrushes are ridiculously expensive :(
26170
Post by: davethepak
When picking the base color for your army - pick one that works well in your airbrush.
You will thank yourself later....many times.
93655
Post by: Buttery Commissar
winterdyne wrote: Buttery Commissar wrote:I've honestly never tried doing that, but after ultrasonic cleaning my hp- cs, it's being a jerk and a half. Might have to look into it (literally).
One thing I have looked at: if your airbrush trigger is too dramatic for you, take a pair of clippers and remove a few mm from the spring at a time until you get it how you like.
Most airbrushes, even the chinese cheap ones have an action adjustment in the barrel of the airbrush. There should be no need to take clippers to anything.
Well, I'm talking tailoring the "snap" of the trigger, quite a few illustrators I am friends with have done this to get a far far softer trigger. I guess it's about what you want in a tool.
I only use a 1970s Aerograph (which has a unique construction and also won't run anything that isn't exceptionally thin/inky) and an Iwata hp- cs, (which is already soft enough for me) so I never felt the need myself.
I suppose my thought for the day: Take your airbrush apart. Learn to put it back together. Do it again. Do this before you put paint into it. Should be the first thing any curious mind does upon receiving one.
You don't want an airbrush to be a perplexing deity in your life, you want it to be your buddy.
93145
Post by: Crankpin
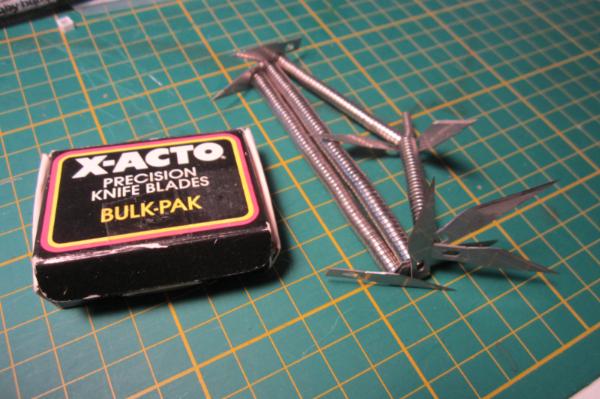
Always have spare blades for your hobby knife on standby. You're going to need a new one sooner or later.
752
Post by: Polonius
Paradigm wrote:Another day, another tip:
A brush has many lives. First, it is for painting, pointed and neat. Then, as the point fades, it is a basecoating/washing brush. If the bristles start to harden, it is a drybrush. Once all else has failed, it can be used for priming and varnishing.
Only when a brush is hardened, blunt, splayed and loose is it dead, at which point you may lay it to rest.... Or use the bristles as reeds/long grass/flowers for basing.
Old brushes never die, they just go missing in action...
Old drybrushes can be trimmed flat and used for stippling! that's even harder on the brushes than drybrushing, and stiffer bristles actually help with the technique.
96252
Post by: LeCacty
Textured paints make great base materials! 
61618
Post by: Desubot
New day new tip?
use a high desk or a low stool to have your desk up higher. and rest your arms on the side with like a towel. helps steady your hands and stuff.
9306
Post by: Amen Brick
Hard as Nails glue can be sculpted as it dries to make fire, splashing mud, etc.
93655
Post by: Buttery Commissar
As do textured nail varnishes, crackle enamels and magnetic paints. 
66830
Post by: morfydd
Use Brush Soap or Barbers Shaving Soap on your brushes to generally clean them and prolong life remember to coat the brushes in the brush soap at the end of the paint session after cleaning this is what prolongs the life of the brush( it leaves a nice coating of lanolin that keep the bristles from becoming brittle)
93655
Post by: Buttery Commissar
My thought for the day: If it annoys you, put it down. Sleep on it. It's not defeat, it's avoiding making a frustration-mistake.
Often coming back to things in the morning can change how you feel and give a new perspective.
17808
Post by: oadie
Unless, of course, you're frustrated by Chaos models. WAY too many spikes for a restful night.
93655
Post by: Buttery Commissar
Yes, don't sleep on your Slaaneshi Daemonettes either. Unless that's your thing. 
95147
Post by: Minimachine
On the subject of lighting, I own a few of these and have found them incredibly useful.
http://www.bunnings.com.au/light-fluoro-batten-crompton-1x20w-white-linkable-18839_p4322731
Equivalent to 100 watts, you can mount them under shelves, above your miniature photography setup, or suspend them from the roof above your painting area to flood it with light.
Much cheaper than professional daylight lamps like these if you're willing to create a DIY solution.
http://www.scrapdragon.com.au/daylight-triple-bright-lamp-white-a32500
85183
Post by: AUGmaniac
Find a way to relax before painting. Being super tense can and will affect your painting. One example is I normally go for a short bike ride before I paint.
92803
Post by: ZergSmasher
 AUGmaniac wrote: AUGmaniac wrote:Find a way to relax before painting. Being super tense can and will affect your painting. One example is I normally go for a short bike ride before I paint.
Exalted for truth. Also, although it may seem obvious, don't paint when you are really tired. It probably won't end well for you or your models. When you really get sleepy, go to bed and get back to it in the morning.
93655
Post by: Buttery Commissar
Aye, the best thing you can do late at night is prime, so that you're al ready to roll the next day.
35843
Post by: Peter Wiggin
Buttery Commissar wrote:What's your one painting or modelling tip for the day? if you had just one pice of advice to give?
Pin your models.
81638
Post by: kb_lock
Oddly, I've found modafinil in the morning makes me paint better at night, but that is starting to swing wildly off-topic.
Priming at night is good, but I've picked up the habit of letting the primer "cure" for 24 to 48 hours (and not just due to laziness!), Good results anecdotally.
60955
Post by: bossfearless
I think the most important bit of advice is to approach the hobby with balls. Big, angry, ceramite balls. Don't be afraid to try something extreme. Something that shouldn't work. Don't be afraid to push the envelope. Be ballsy.
96765
Post by: StarDrop
Don't forget about the gravity. Especially when you are doing washes on your model. Keep your model in it's natural pose, so the wash can flow 'down'.
55682
Post by: JoshInJapan
I second the tip for keeping your brush water and your drink in different places.
My tip: get up early and paint while the rest of the house is sleeping. You're fresher and you can work with no distractions.
89127
Post by: Matthew
 JoshInJapan wrote: JoshInJapan wrote:I second the tip for keeping your brush water and your drink in different places.
My tip: get up early and paint while the rest of the house is sleeping. You're fresher and you can work with no distractions.
This also applies to painting late at night when everyones asleep 
93655
Post by: Buttery Commissar
JoshInJapan wrote:I second the tip for keeping your brush water and your drink in different places.
I have the bright red Reaper C.U.P freebie thing that say on it "Don't drink paint water".
Nothing in my house looks like that cup. It's massive and plastic.
My partner has somehow been fooled by it.
Usually I use water dishes instead of cups, so I never have this problem. Sigh.
55682
Post by: JoshInJapan
I work 8-to-5, so late nights aren't an option most days. Painting first thing is a nice way for early risers to start their day, I think.
19806
Post by: mockingbirduk
Buttery Commissar wrote: JoshInJapan wrote:I second the tip for keeping your brush water and your drink in different places.
I have the bright red Reaper C.U.P freebie thing that say on it "Don't drink paint water".
Nothing in my house looks like that cup. It's massive and plastic.
My partner has somehow been fooled by it.
Usually I use water dishes instead of cups, so I never have this problem. Sigh.
For a while chewing gum was sold in the UK in little round pots with a flip-top lid. Those make an excellent evaporation-reducing and drinking-avoidance paint water holders. then you just need to stop washing brushes in tea.
77159
Post by: Paradigm
A kind of obvious one, but if you don't know how to do something, research it! In this day and age the Internet is flooded with tutorials, ranging from real-tive videos to written step-by-steps and across all levels of skill and detail; a quick search, read and plan before you sit down to paint can be immeasurably handy and save you hours of trial and error.
As with any other type of research, find the way that suits you best (actually following a tutorial as it plays, watching it done, reading and memorising ect) and use that.
95147
Post by: Minimachine
Another tip is to refresh your brush regularly. Dipping the tip in water or additive and adding more paint will keep things flowing along the tip but higher up in the belly of the brush paint may have already dried, affecting its' performance.
Rinsing out the brush completely, drying it, then loading it with paint from scratch is something I like to do every minute or two. I find the smaller the brush the more often it needs it, and it also depends on the task I'm performing as with something like basecoating I can usually get away with painting most of a miniature before refreshing.
To avoid this you can add drying retarder to the paint, but I find it tends to thicken my mixes in a way I don't like.
63059
Post by: goblinzz
Try and have at least one fun project you just pick away at occasionally while slogging through the main army. For example I had picked away at a unit of mega nobz while I was painting up a huge blob of Kommandos. Right now I'm painting a little model Tug Boat (phrasing...) in between doing my IG army. Keeps you sane to have a little fun project that doesn't make you feel like you're smashing your head into the wall.
59054
Post by: Nevelon
 goblinzz wrote: goblinzz wrote:Try and have at least one fun project you just pick away at occasionally while slogging through the main army. For example I had picked away at a unit of mega nobz while I was painting up a huge blob of Kommandos. Right now I'm painting a little model Tug Boat (phrasing...) in between doing my IG army. Keeps you sane to have a little fun project that doesn't make you feel like you're smashing your head into the wall.
On the flip side, if you have a project you you don’t want to do, but need to do for the game (Drop pods, I’m looking at you) don’t let it scare you away from the paint bench. Chip away at it while working on more entertaining things. I found that when I had a large vehicle as the only thing in progress, I’d read, play computer games, etc; anything but paint. But if I was working on a squad of guys at the same time, everything would get done.
89127
Post by: Matthew
A pot of paint never dies. It starts like a nice base coat paint, or a highlight paint. When it starts drying up, use it as a drybrushing paint. When that becomes impossible, add water, now it's a shade. When the shade runs out, it may finally rest...
... or be used as scenery.
93655
Post by: Buttery Commissar
Thought today:
The Dettol paint-stripper's secret saviour (other than gloves): hand cream. You'll thank me later when your fingers don't crumble to pieces in the morning.
93655
Post by: Buttery Commissar
Today's thought: The brush giveth, the brush taketh away...
One of the first things I ever learned way how to use a wet clean brush to wick away freshly applied paint if I slipped. I thought it was bunkum. Why would I need that? I'd just strip the model..
Nowadays I realise that it's a very very useful thing to learn early on.
89127
Post by: Matthew
Hold on, can you just use a wet brush for that? Thaaaaaank youuuuuu.
81638
Post by: kb_lock
Yeah panic brushes made such a difference to my painting. Much less fear.
The difference that masters of any profession have is the ability to recover from mistakes
My tip would be to try every method. Painting up this ork, i immediately thought of airbrushing the skin, then asking Jaunine about it he was using only a brush. Made me realise I've been avoiding my brush, and that i shouldn't be.
93655
Post by: Buttery Commissar
Yeah, the only thing I tend to airbrush rather than brush as a first choice is white.
It's hard to get consistent coverage with pure white, so I dig it out.
Maybe I'm the opposite and avoid the airbrush.
81638
Post by: kb_lock
I only use the airbrush for whites, blacks, yellows, reds, blues, and any shades between them.
It's funny though, i used to thin my paints, but would always get away with 2 coats, now i can do 5 coats without worrying about it. That many coats used to demoralize me for some reason
93655
Post by: Buttery Commissar
I still get a bit worried that I'm doing it wrong if it takes more than two.
Right now I'm working over green with flesh tones and reds, it's... Interesting... I'll say that.
57963
Post by: Zogg
Don't put your box of knife blades in the same drawer as a bunch of rare-earth magnets. Ouchy.
93655
Post by: Buttery Commissar
Oh my God. Just looking at it hurts.
56693
Post by: Bluedorian
First look, i thought that was a bad chainsword kitbash...........
93655
Post by: Buttery Commissar
Try and keep brush strokes in the same direction across an area. Especially when using multiple layers. Took me a long time to appreciate how useful this is.
87312
Post by: thegreatchimp
If you're making something out of greenstuff, or any other modelling putty, you'll usually have some left over. So once you've roughy moulded the object you're sculpting, and are waiting for it to firm up a bit, take the leftovers and make small bits of scenery. I've made a load of frest plants like this. Stick a blob of green stuff on a piece of wire, and shape it, and you have mushroom. Flatten it and cut to shape and you have a leaf. Roll it into little balls, and you have piles of animal poop. I'm not kidding I did actually make some poop from green stuff.
81638
Post by: kb_lock
Nice tip, i used instant mold to press mold the hobbit wood panels, i jam extra green stuff into them - makes skulls and stuff
77159
Post by: Paradigm
 thegreatchimp wrote: thegreatchimp wrote:If you're making something out of greenstuff, or any other modelling putty, you'll usually have some left over. So once you've roughy moulded the object you're sculpting, and are waiting for it to firm up a bit, take the leftovers and make small bits of scenery. I've made a load of frest plants like this. Stick a blob of green stuff on a piece of wire, and shape it, and you have mushroom. Flatten it and cut to shape and you have a leaf. Roll it into little balls, and you have piles of animal poop. I'm not kidding I did actually make some poop from green stuff.
To which I'd add a great way to make textured bases. Take some GS (leftovers are ideal) and roll it out over a base, then take something with the desired texture and press it in. Patterned or decorative buttons are great for this, and you can get all kinds of textures.
93655
Post by: Buttery Commissar
I have a little collection of green stuff bunnies. Until now I thought that was a good use.
89127
Post by: Matthew
Also, if you have any left over GS, press moulds are always fun
93655
Post by: Buttery Commissar
Thin your paints.
Same figure, different painters.
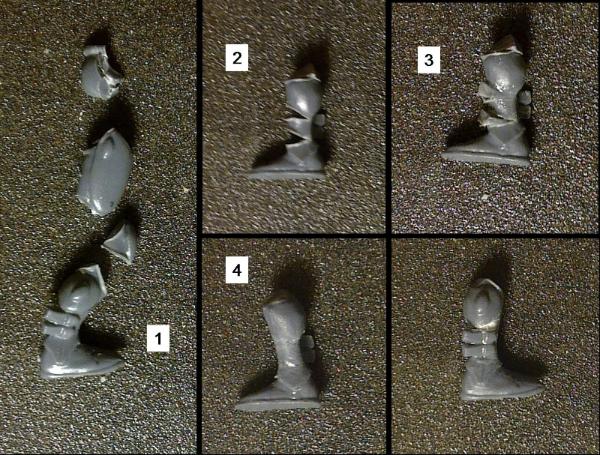
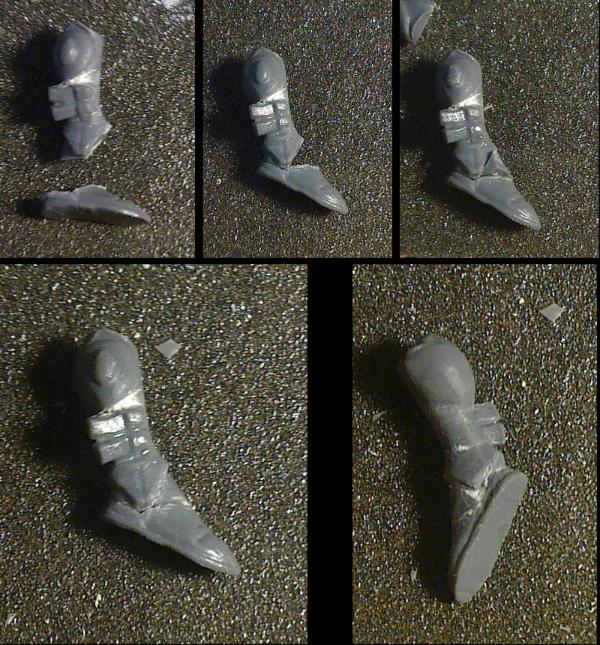
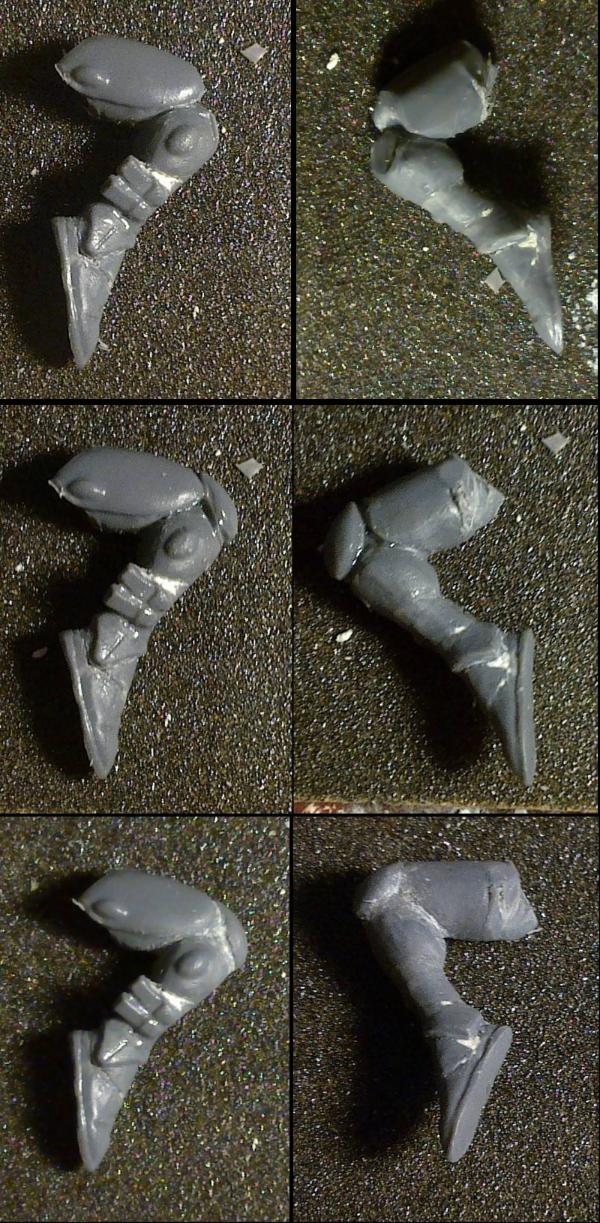
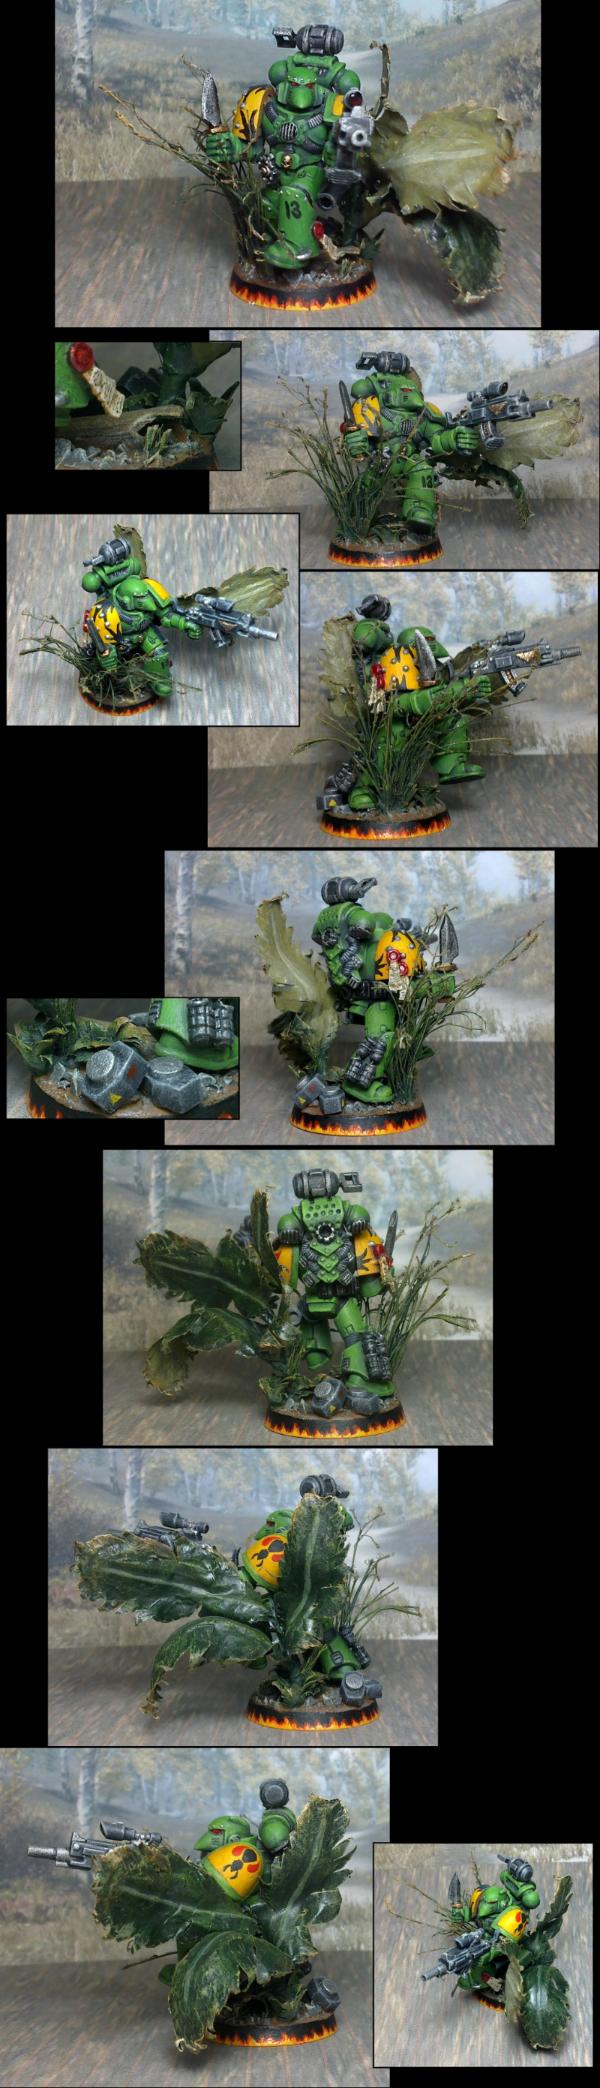
1
93655
Post by: Buttery Commissar
To further illustrate:
Unfortunately if I try and do it in one post, my iPhone just ups 2 of the same image.
1
62749
Post by: Dr H
I make tentacles with my left over putty. 
and for my tip I'll stick with the obvious (for those that know me):
Don't throw out your sprue. Make use of it in conversions, scratch-builds, and just for little details.
It's made from the same stuff that your models are made from and so sticks with the same glue.
I'll copy this from a previous thread about sprue use:
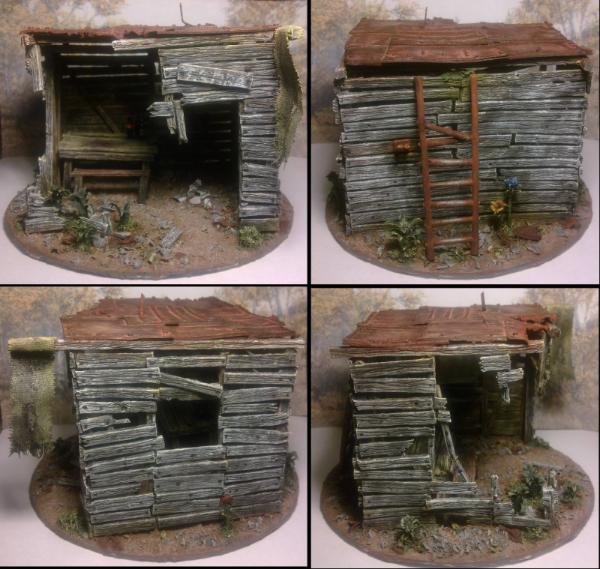
 Dr H wrote: Dr H wrote:Did someone mention sprue? I definitely heard "sprue"...
What do I use sprue for? Everything I can.
A hut:
Everything between the mud on the base (dried paint on a CD) and the metal plates of the roof (card) is made of sprue. That includes all the "wood", the plants/flowers, a ladder and it's hook, the table, the bench, and the bottles on the table.
The tutorial for the whole build is here: http://www.dakkadakka.com/dakkaforum/posts/list/545398.page#5935106
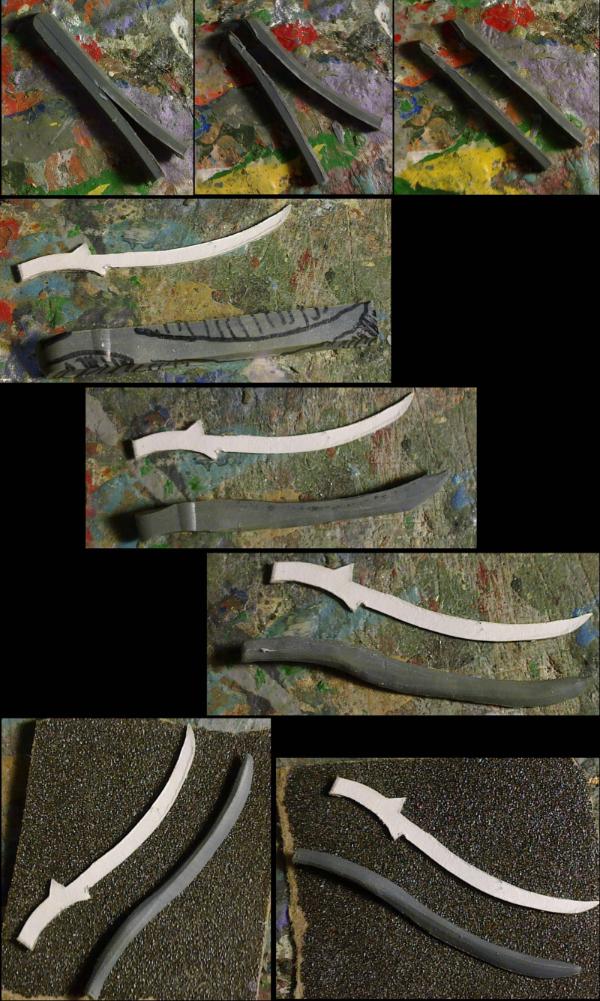
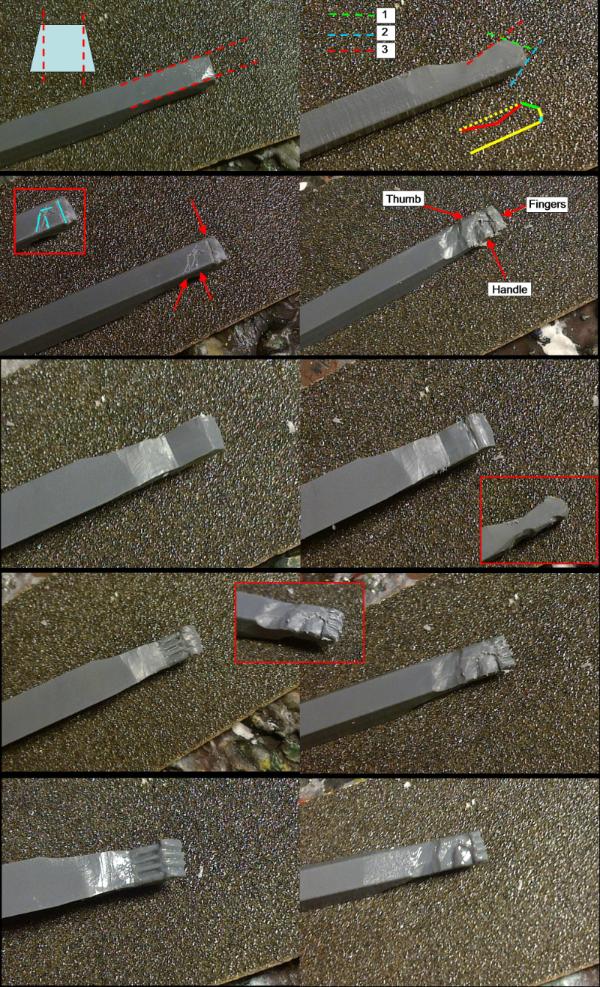
I've also carved hands, swords and many other small pieces out of sprue:
For larger things, you can glue pieces of sprue together with poly' cement.
You can also use pieces stuck together to quickly bulk out a shape before covering in GS (or equivalent putty).
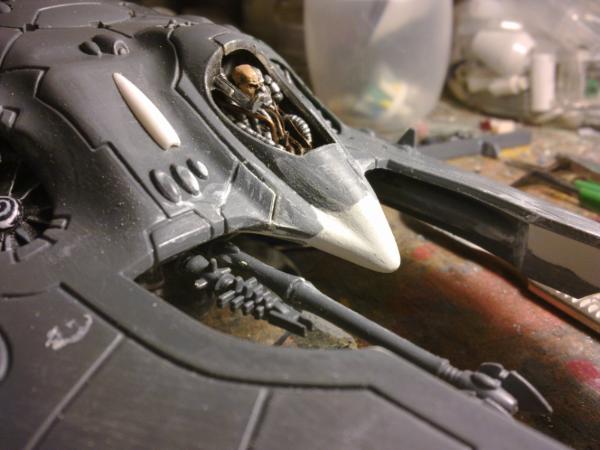
I did this for the nose on my Wave Serpent:
You can use wedges of sprue for re-posing models. Glue in with cement and then cut/sand down. Saves on putty and creates a stronger join:
Two pieces, stuck back to back and a third round piece of sprue were used for the mines on this model's base:
And the support structure for the dozer blade on this tank is largely sprue:
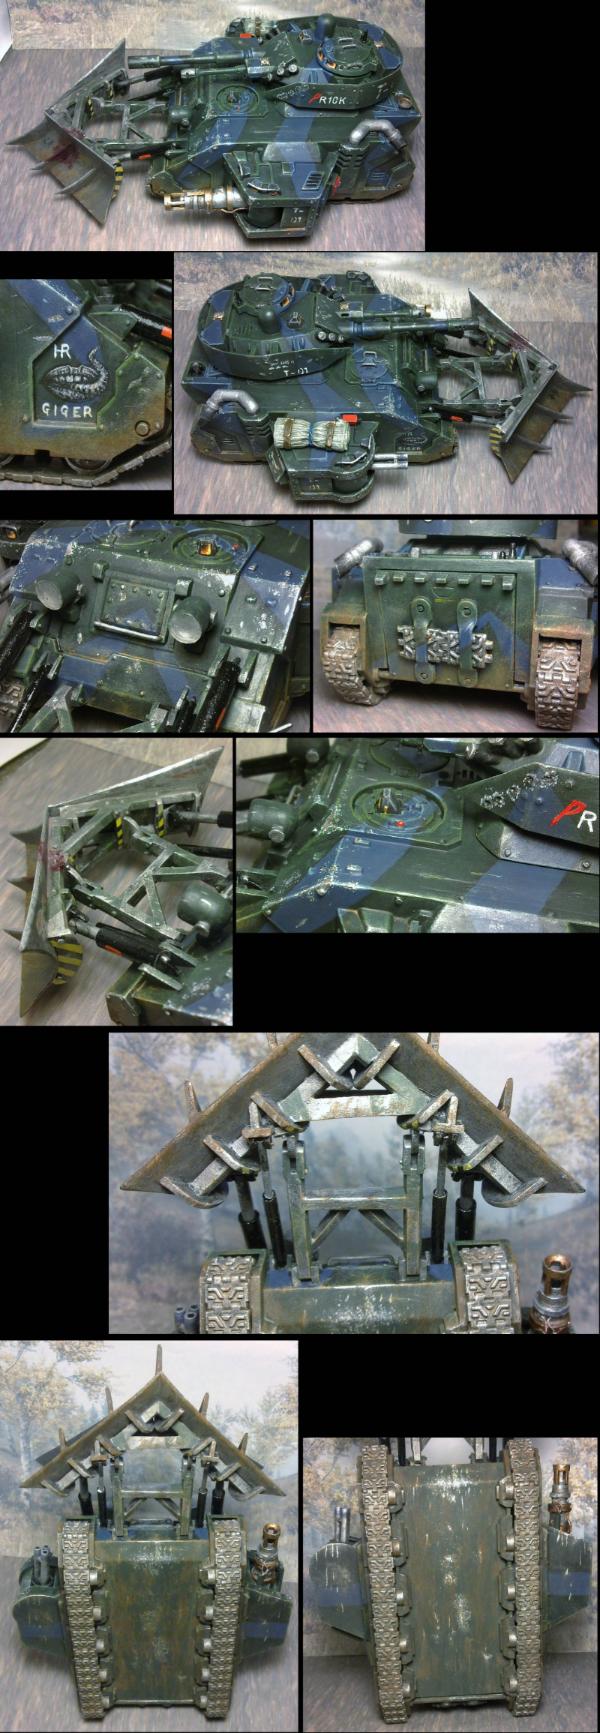
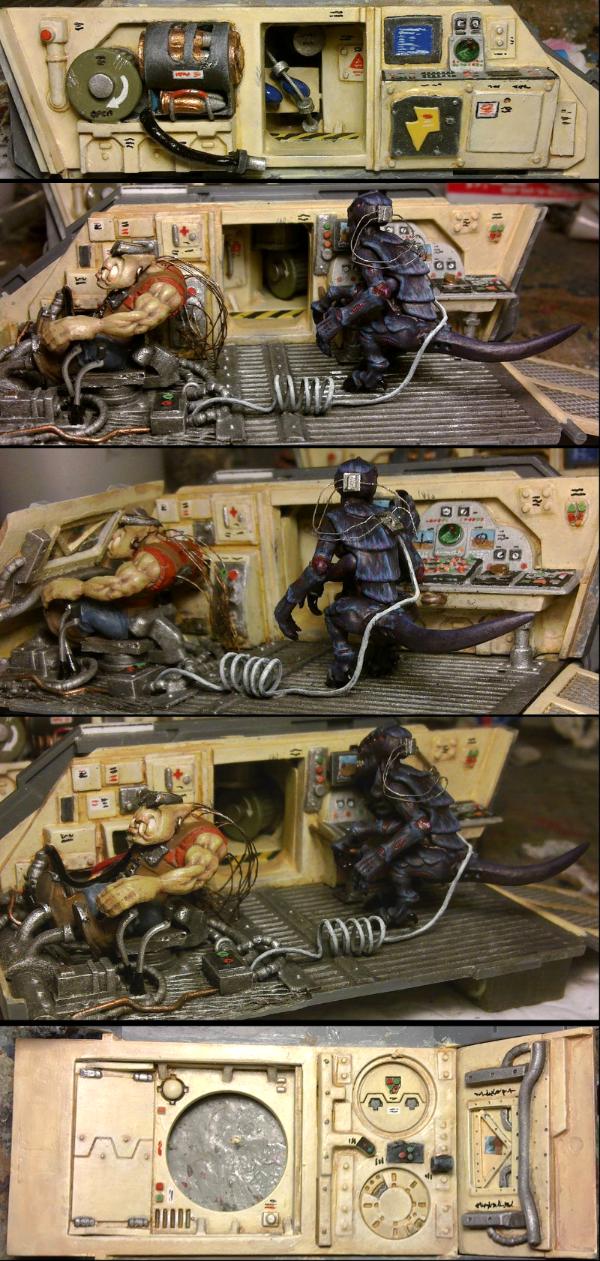
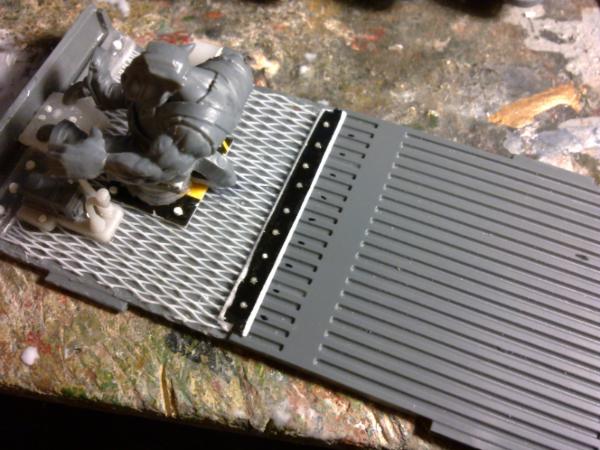
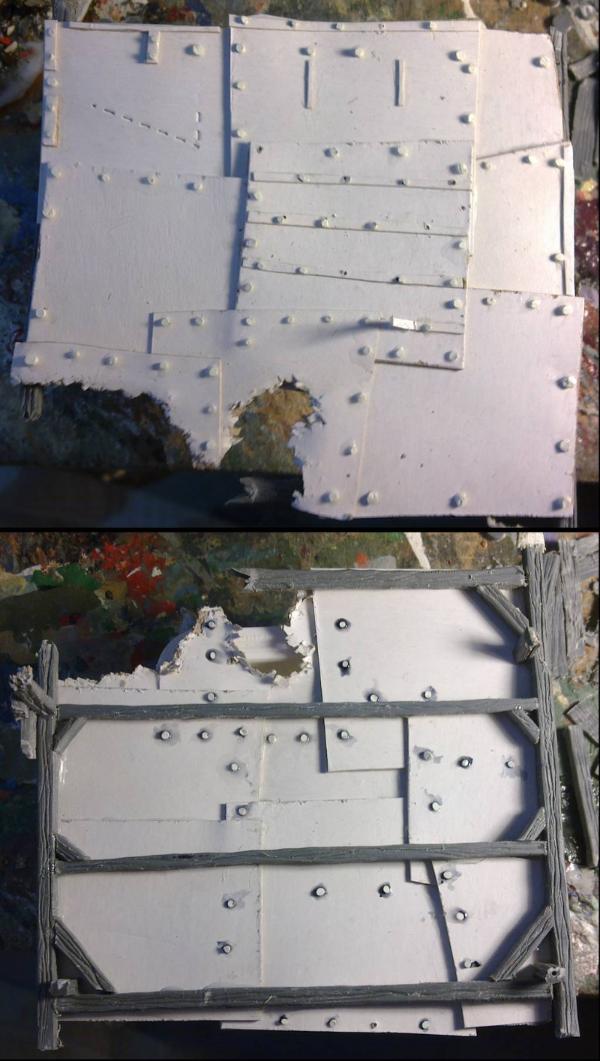
The electrical boxes on the Tryanid's back, the back of the Ork's chair, The computer monitor the 'nid is looking at, the details on the ceiling and front, and many other small parts etc, are all sprue here...
It's my "go to" material of choice when modelling.
Don't throw out your sprue.
96765
Post by: StarDrop
BadAss as always, Dr H.
84360
Post by: Mymearan
Remember that you will get the least paint where you start your brushstroke, and the most paint where you end it. Consider this when highlighting for example.
87312
Post by: thegreatchimp
Paradigm wrote:A kind of obvious one, but if you don't know how to do something, research it! In this day and age the Internet is flooded with tutorials, ranging from real-tive videos to written step-by-steps and across all levels of skill and detail; a quick search, read and plan before you sit down to paint can be immeasurably handy and save you hours of trial and error.
Obvious, but often neglected, particularly by newcomers to the hobby who want to charge in there with a brush and pot of glue. Even among hobbyists who've been at it for 2 years, I'm shocked by the amount of them who haven't looked up drybrushing, shading and other essential techniques.
95417
Post by: ColonelFazackerley
Squash sprue with pliers to make it thinner. Poly cement to the underside of the base. This gives something thicker to pin into.
96765
Post by: StarDrop
When removing paint, make sure you do it in well ventilated area, as paint stripper chemicals may release fumes that are strong in smell/taste. Do not faint, please!
77159
Post by: Paradigm
One I thought about earlier: don't dismiss the techniques you learned when starting out. They might be simple, but with the brush skills you'll have learnt since then, drybrushes/washes and other basic techniques can still go a long way even when you're painting more advanced, detailed or technical stuff!
93655
Post by: Buttery Commissar
Absolutely. I hated dry brushing because it always looked clumsy and reminded me of how rudimentary my starter skills were.
I am just returned to it now, and can get some very soft, almost airbrush results with patience.
Which brings me to today's thought: There's too much paint on your brush.
81638
Post by: kb_lock
When using super glue or epoxy, don't touch your eyes you utter moron.
Trevor 7: me 1
93655
Post by: Buttery Commissar
...7?
Should I call an adult?
81638
Post by: kb_lock
I was testing the durability if the join on the tail - you'd think 24 hours for 90 second araldite would be enough.
Instantly gave.
HRRRRRRRRRRRNNNNNNNNNNNNNNNNNG
So I sanded and filed, switched to tarzan's grip, held it again - never even tried to grab.
Right, now it is time for fire. So I set him on fire to burn off any residual glue and to satisfy my need for inflicting ultraviolence.
I super glued him together, let that grab, put it in instant mold to try and build a frame to cure it. broke in the mold, refused to hold. The mold is now the wrong shape.
I screamed (on the inside, because everyone was asleep) and then got out the spring clamps. By spring clamping the larger section, I can get the smaller section to gracefully fall onto one of the arms of the same clamp - this solves my key problem, that there is literally no way of holding this bloody thing.
Anyway, I cleaned it, scored the surfaces, added more fire, then gave it a healthy dose of pure 5 minute araldite, mounted it, and walked away.
About 5 minutes later, I heard a loud BANG, and looked over to see what is left of a spring clamp spinning on my desk. Fortunately, this was a spring clamp holding together my fancy new Fulgrim models base, and not trev. No real damage, but here is another tip - don't buy cheap spring clamps.
And yeah, at some point I've managed to get glue in my eyes
84919
Post by: Gwaihirsbrother
kb_lock wrote:Buttery, i built a paint shaker for about $20 here - the cheapest jigsaw you can buy, the smallest quickgrip clamp you can get.
Put the clamp in like a blade (i had to grind mine down a bit) then clamp in the paint pot.
Push butan, paint mixed
This got me thinking. Rubber band + Personal Massager wand your lady friend may have "for her neck and back" + paint = mixed paint with little effort?
93655
Post by: Buttery Commissar
I don't think I've ever laughed so hard at a post on P&M.
Do you see why I sent that fether off to boarding school, now? Automatically Appended Next Post: Gwaihirsbrother wrote:This got me thinking. Rubber band + Personal Massager wand your lady friend may have "for her neck and back" + paint = mixed paint with little effort?
Fella named Priest Foxley tried that out the other week, seemed to work well enough. What his wife thought isn't documented.
81638
Post by: kb_lock
Gwaihirsbrother wrote:kb_lock wrote:Buttery, i built a paint shaker for about $20 here - the cheapest jigsaw you can buy, the smallest quickgrip clamp you can get.
Put the clamp in like a blade (i had to grind mine down a bit) then clamp in the paint pot.
Push butan, paint mixed
This got me thinking. Rubber band + Personal Massager wand your lady friend may have "for her neck and back" + paint = mixed paint with little effort?
No, silly, personal massagers are for getting air bubbles out of your silicone and plaster castings!
You want one of these - > https://www.youtube.com/watch?v=FtMLHFV-hVA
Buttery Commissar wrote:I don't think I've ever laughed so hard at a post on P&M.
Do you see why I sent that fether off to boarding school, now?
I'll make a man out of him yet, don't you worry.
Also, this Grade A swear filter doesn't remove it from quoted text, I can see what you wrote.
93655
Post by: Buttery Commissar
Thought today: Painting symmetrical eyes is often easier if you hold the mini upside down to do the second.
92803
Post by: ZergSmasher
Gwaihirsbrother wrote:
This got me thinking. Rubber band + Personal Massager wand your lady friend may have "for her neck and back" + paint = mixed paint with little effort?
I was wondering something similar. Instead of a "personal massager" (snicker snicker) maybe use some kind of tape, a toothpick or preferably something a little wider (like a popsicle stick or a lollipop stick), and a Sonicare toothbrush for mixing paint. Would ultrasonic vibrations like that be good for mixing paint?
81638
Post by: kb_lock
No chance. Paint needs a ton of agitation
63059
Post by: goblinzz
My second entry here. Agitators for your paint pots. Ball bearings, or little bits of metal or sprue. Dump one in your paint pot and shake, and hoo boy, does it help. I have a lot of problems with Vallejo paints seperating, and buyinh a bag of BBs has saved me a huge number of head aches.
61618
Post by: Desubot
goblinzz wrote:My second entry here. Agitators for your paint pots. Ball bearings, or little bits of metal or sprue. Dump one in your paint pot and shake, and hoo boy, does it help. I have a lot of problems with Vallejo paints seperating, and buyinh a bag of BBs has saved me a huge number of head aches.
make sure its a VERY good stainless steel Ball Bearing. you dont want it rusting inside.
Same goes for other bits of metals and stuff.
On the safer side use glass or stone beads.
89127
Post by: Matthew
goblinzz wrote:My second entry here. Agitators for your paint pots. Ball bearings, or little bits of metal or sprue. Dump one in your paint pot and shake, and hoo boy, does it help. I have a lot of problems with Vallejo paints seperating, and buyinh a bag of BBs has saved me a huge number of head aches.
Wait what
how does this work
11961
Post by: Ifalna
 Desubot wrote: Desubot wrote: goblinzz wrote:My second entry here. Agitators for your paint pots. Ball bearings, or little bits of metal or sprue. Dump one in your paint pot and shake, and hoo boy, does it help. I have a lot of problems with Vallejo paints seperating, and buyinh a bag of BBs has saved me a huge number of head aches.
make sure its a VERY good stainless steel Ball Bearing. you dont want it rusting inside.
Same goes for other bits of metals and stuff.
On the safer side use glass or stone beads.
I use little ceramic beads from a jewellery store! No risk of anything discolouring, so thumbsup for the stone beads ^^
63059
Post by: goblinzz
Matthew wrote: goblinzz wrote:My second entry here. Agitators for your paint pots. Ball bearings, or little bits of metal or sprue. Dump one in your paint pot and shake, and hoo boy, does it help. I have a lot of problems with Vallejo paints seperating, and buyinh a bag of BBs has saved me a huge number of head aches.
Wait what
how does this work
Same principle as the ball in a rattle can. It rattles becuase there is an agitator, basically a stainless steel ball, that helps mix the paint up when you shake. If you have paints that keep seperating (my yellows are very badfor this) dump an agitator in, and shake!
57963
Post by: Zogg
goblinzz wrote:My second entry here. Agitators for your paint pots. Ball bearings, or little bits of metal or sprue. Dump one in your paint pot and shake, and hoo boy, does it help. I have a lot of problems with Vallejo paints seperating, and buyinh a bag of BBs has saved me a huge number of head aches.
I did this years ago with what were supposed to be stainless steel ball bearings. They rusted. Ceramic or glass would definitely be safer.
93655
Post by: Buttery Commissar
Yes, even Reaper moved away from metal (sadly, their skulls were so cool!) agitators.
91816
Post by: Januine
My tip for the day - don't throw out all your leftover sprue!!!!!! As I just found out - lamo
81638
Post by: kb_lock
I literally have 5kgs of sprue that I can't bring myself to throw out. What should I be doing with it?
91816
Post by: Januine
5kgs?!!!! Crikey - you needs to start Building stuff!!
62749
Post by: Dr H
kb_lock wrote:I literally have 5kgs of sprue that I can't bring myself to throw out. What should I be doing with it?
See the previous page...
93655
Post by: Buttery Commissar
Resin or plastic, kb?
FW resin makes good Dragon Teeth for IG, Orks etc.
Actually... Make the Dakka Waaagh some housing from it!
81638
Post by: kb_lock
Oh I've seen your stuff before Dr H, I am not that creative. I thought Januine had discovered how to melt them down into new marines quickly and easily.
All plastic BC, though I am sure I have some resin sprue here as well.
I really should find a way to utilise it somehow, especially for the orks, but I am quite satisfied with the 43 existing projects I have urgently awaiting attention before the next 18 arrive in 4 weeks (I've placed my order ) Automatically Appended Next Post:
Holy hell, look at this insanity
http://www.40konline.com/index.php?topic=163767.0
62749
Post by: Dr H
I am not that creative.
Sure you are, kb_lock.
Tip for today: less of those negative waves, man.
Give something new a try. Possibly on each model you build (this is what I try to do).
And don't give up if at first you don't succeed. You'll only get better by trying again.
Complicated results are often the result of layers of simple processes.
Don't look at the result and think "I can't do that".
Try it out, step by step, and you might surprise yourself.
I'm definitely giving those bricks a try one day. Good find.
92803
Post by: ZergSmasher
Dr H wrote:I am not that creative.
Sure you are, kb_lock.
Tip for today: less of those negative waves, man.
Give something new a try. Possibly on each model you build (this is what I try to do).
And don't give up if at first you don't succeed. You'll only get better by trying again.
Complicated results are often the result of layers of simple processes.
Don't look at the result and think "I can't do that".
Try it out, step by step, and you might surprise yourself.
I'm definitely giving those bricks a try one day. Good find.
Good advice, and I love that movie!
93655
Post by: Buttery Commissar
Thought today: Not getting the result you wanted straight off the bat is not truly wasted time. You've been practising, voluntarily or not. Every action you made to try doing so was improving your skill set.
That's how it works!
81638
Post by: kb_lock
Miliput reacts like clay when you add water, you can really shape and smooth it out.
Also, trev snapped his tail and my 1mm drill bit in said tail. Trevor: 12, me: 0
I am changing tack to 3mm brass rod going 10mm or more as well as trying to get two rods in there.
And i was having such a good day too!
That's probably another tip, don't give up - I can assure you that considerably worse things will happen to you throughout your life compared to anything that could possibly happen at the hobby table
93655
Post by: Buttery Commissar
Dang... Which is the join that's being so awkward? His uh.. bum?
Could you put a bolt through from the outside and just hide it with GS fur? I am not very well acquainted with his rear profile, despite the amount of time he spent in my company.
Agree with persistence. It took 3 months out on my wreck and came back, never gave up entirely.
57465
Post by: Chrissy_J
Experiment, and make notes on what you do. It takes very little time (I do bits of stuff while preparing meals) and you can surprise yourself. Right now I'm experimenting with making still water effects, with tinted polyurethane clear varnish, tinted PVA and Quickshade, in labelled pudding cups.
Also, sample cards are a great idea. A sample card of your paints saves a lot of searching for just the right shade of green or whatever. I have sample cards for paints, washes (on pine strips) and samples of bases, with instructions.
81638
Post by: kb_lock
 Buttery Commissar wrote: Buttery Commissar wrote:Dang... Which is the join that's being so awkward? His uh.. bum?
Could you put a bolt through from the outside and just hide it with GS fur? I am not very well acquainted with his rear profile, despite the amount of time he spent in my company.
There is a join in the middle of his tail. I've got brass rod and new bits coming now
26170
Post by: davethepak
Keep a small piece of foam near you airbrush area - stick the needles in there when storing them, helps prevent accidents that would either damage them or you!
93655
Post by: Buttery Commissar
Tip for today: Always test out your superglue if you've not used it for a few weeks.
That stuff can get funky. One brand I use skins and dries weirdly foamy if it goes off.
81303
Post by: Stormwall
Always have super glue.
91816
Post by: Januine
Experiment. Constantly
91101
Post by: gummyofallbears
when painting white, use a few very thin coats of matt varnish after you are done with the miniature, I find it helps prevent crumbs.
89127
Post by: Matthew
AUGmaniac wrote:Find a way to relax before painting. Being super tense can and will affect your painting. One example is I normally go for a short bike ride before I paint.
+1, why I go out running before painting. Nice.
7625
Post by: Alex Kolodotschko
Often when pinning an awkward model it is easier to assemble the two pieces with superglue then just drill through both pieces.
The glue bond can then be snapped off and the pin can be inserted.
If this technique involves pinning through a visible surface of the model it is often easier to just fill that small hole.
89127
Post by: Matthew
Put up too little paint on your palette when diluting, will saye you tons of paint in the long run. Also, if you accidentally add too much water, wait a few minutes for it to disappear instead of adding more paint.
7625
Post by: Alex Kolodotschko
Matthew wrote:Put up too little paint on your palette when diluting, will saye you tons of paint in the long run.
I can trump that, put out the right amount each time and you'll be gold. Practice makes perfect but this kind of thing comes down to experience.
19728
Post by: liquidjoshi
I am by no means a great painter, and I cannot say for certain how great my advice is. However, I would always recommend that people look up Doomthumbs. His unique ideas should serve as both an inspiration and a warning to us all.
Stare into the void too long, however...
20983
Post by: Ratius
Always keep a supply of loo roll or tissues handy for inevitable spillages or pot tipovers.
87312
Post by: thegreatchimp
When you know there's still some glue in your polycement tub, but you squezze it and just get air, store it upside down. The remaining glue will gather at the nozzle and will be easy to squezze out. Also keep a pin or small diameter drill buit handy to quickly unblock clogged glue nozzles (which seems to by my recurring curse!)
69226
Post by: Selym
Always keep a roll of toilet paper on hand. Cleans up spills, and can be dabbed onto a model if you've accidentally put too much paint onto an area.
And if you've really bollocked up the job, you can remove semi-dry layers of paint by putting a bit of plastic glue on your fingertip, rubbing it in until it's a little bit sticky, and then poking the paint off.
Saved my ass a few times, as I'm not a very good painter.
81638
Post by: kb_lock
thegreatchimp wrote:When you know there's still some glue in your polycement tub, but you squezze it and just get air, store it upside down. The remaining glue will gather at the nozzle and will be easy to squezze out. Also keep a pin or small diameter drill buit handy to quickly unblock clogged glue nozzles (which seems to by my recurring curse!)
Cigarette lighters on the revel contacta (and other) glue needles (once removed) will clear up a blocked nozzle real quick. Hold in a pair of pliers, set on fire, wait for the puff of smoke. Do the other end, wait for it to cool (10s) then put it back in.
93655
Post by: Buttery Commissar
 Selym wrote: Selym wrote:Always keep a roll of toilet paper on hand. Cleans up spills, and can be dabbed onto a model if you've accidentally put too much paint onto an area.
TOilet paper can be a little fibrous or dusty. Generally, shred up some kitchen towels into smaller pieces and have those to hand, they don't shed as badly.
Only really relevant on bigger smooth pieces, but it's a lesson hard-learned. 
92803
Post by: ZergSmasher
Might seem kind of obvious, but paint large models (like a Soul Grinder) in sub-assemblies rather than assembling the whole thing and then painting it. What a nightmare that would have been...
17808
Post by: oadie
Buttery Commissar wrote:Thought today: Not getting the result you wanted straight off the bat is not truly wasted time. You've been practising, voluntarily or not. Every action you made to try doing so was improving your skill set.
Piggybacking with a slightly different spin: Mistakes aren't just mechanical practice, up until the error occurs. Yes, brush control improves by tiny increments every time you put paint to model, but learning to improve upon a sub-standard base is also invaluable. Many painters that start with set-in-stone, formulaic, "recipe" painting learn how to step outside of that narrower (not 'bad,' mind you, just comparatively narrow) mindset by trying to salvage/improve upon mediocre results. Spend enough time smoothing rough blends, tinting 'off' colors, etc. and you find yourself incorporating them into your whole painting style. Some results are better achieved by glazing over one color with another than trying to mix the two... and a fixed mistake may be the only reason you realize it.
97208
Post by: rowboatjellyfanxiii
Just because a tutorial said so, doesnt make it right (Dafuq were they using nuln to shade Ultramarines? DRAKENHOF M8?)
87312
Post by: thegreatchimp
kb_lock wrote:
Cigarette lighters on the revel contacta (and other) glue needles (once removed) will clear up a blocked nozzle real quick. Hold in a pair of pliers, set on fire, wait for the puff of smoke. Do the other end, wait for it to cool (10s) then put it back in.
You're talking about the metal precision tubes though. I'm talking about plastic nozzles -couldn't put a lighter to them.
Thanks for the tip though, I will give that a go and so hopefully will get more than 2 days out of each glue needle
17808
Post by: oadie
I have a bottle of the Testors "Liquid Cement for Plastic Models" - the stuff that comes in a red-labeled black plastic bottle with a plastic 'precision' applicator. The included wires help clear gooey clogs, but the main issue in the actual bottle design - even with a clear passage, it's a  in' to get the glue to come out. When you finally do, it flows well... until you pause for a few seconds, then it's back to square one.
Got a bottle of Tamiya Extra Thin and haven't looked back!
95147
Post by: Minimachine
Comic books can be a great source of inspiration and will give you many examples of successful color schemes.
42662
Post by: master of asgard
If you spend a while between sittings, always make sure to dust your models before priming and varnishing!
63059
Post by: goblinzz
I think mine, today, would be to be brave and experiment with different techniques. For example, in the last few months I've made extiensive use of enamel washes/effects, and dipping. Never done either before in 19 years of painting, but they are simple, effective, and easy.
96765
Post by: StarDrop
Take your wrist watch off, turn off your phone, exclude yourself from reality and dive into the Magic of Color.
89259
Post by: Talys
 master of asgard wrote: master of asgard wrote:If you spend a while between sittings, always make sure to dust your models before priming and varnishing!
Heh... yes, avoiding the dust and lint in the air greatly improves the finished model, especially on those big vehicles! Every piece I work with goes in and out of a covered box of some sort as I work on it -- I leave nothing on the table between painting sessions, as all that accomplishes is a crap on the model that I have to clean off.
It has the added bonus of stuff not getting lost, too
93655
Post by: Buttery Commissar
Gotta admit I sometimes use a clean airbrush to blast anything that got fluffy sitting around. Weirdly entertaining.
52315
Post by: korbenn
If all else fails. Flat black and gunmetal!
87312
Post by: thegreatchimp
master of asgard wrote:If you spend a while between sittings, always make sure to dust your models before priming and varnishing!
One of the best buys I made was a rocket dust blower for about €5, it's saved me hours (days?) of painstakingly brushing and cleaning my modelling table. Also blows away plastic shavings, etc, and is great for dusting out the inside of a PC.
https://www.youtube.com/watch?v=7oQmq_c
93655
Post by: Buttery Commissar
Read the labels on your paints, especially airbrush paints.
Priming everything navy blue because it's late at night is never fun.
97208
Post by: rowboatjellyfanxiii
Wet blending will get you noticed
81183
Post by: zbg97
Spray primer, whether it's the best on the market or the worst, will do better if it's warm. Letting your spray can sit in a small bucket of hot water ("hot water from your sink" hot, not even close to boiling) for a while makes a difference.
Automatically Appended Next Post:
Also, as someone said, your brush isn't wet enough.
Not just re-posting that, but adding to the sentiment... Paint that's too thick just looks pretty bad; paint that's too thin, well, you can paint another layer. There are some folks in the P&M blogs who do amazing work with many, many layers of paint that's practically as thin as a wash. You can get some great blends of color or other color effects that way, too.
40466
Post by: kungfujew
Never cut towards yourself.
Blood for the modeling God!
Also, blue tac everything together first when you're doing a conversion.
89127
Post by: Matthew
...kungfujew? Are you related to happyjew?
81638
Post by: kb_lock
I always assumed that jew-jitsu would have been better than kung fu
I'll show myself out
40466
Post by: kungfujew
1, Not as far as I'm aware.
2, I like puns.
19806
Post by: mockingbirduk
I bet it's been said, but thanks to yesterday I am reminded:
When spraying a protective layer to finish a model after 20+ hours of painstaking layering...
Check it's not a can of grey primer in your hand.
63059
Post by: goblinzz
A simple one, but I discovered a very experienced modeller in my area didn't know it... When dissasembling models built with super glue, chuck them in the freezer for an hour, the super glue will become brittle, and pop apart very easily.
33564
Post by: Vermis
Paradigm wrote:A kind of obvious one, but if you don't know how to do something, research it! In this day and age the Internet is flooded with tutorials, ranging from real-tive videos to written step-by-steps and across all levels of skill and detail
Yup.
Human anatomy is not a match for non-humanoid/quadruped anatomy. Anatomy references for both (particularly the former) are plentiful online. Have a look, maybe even a printout, before you pull out the wire and putty.
20983
Post by: Ratius
Shamelessly stolen from another thread.
If you are removing paint with detoll etc and using a toothbrush, clip down the brush bristles so they dont bend in the recesses and are much firmer. Allows you to get rid of those hard to clean areas on a model.
91816
Post by: Januine
Get one of these multi emery boards. Places like boots should have them. This cost me about c70. 6 different grades of sandpaper from little rough to finishing smooth. Absolute dream for cleaning and smoothing up a fig before basing. The gradients are even numbered for you from 1-6
1
93489
Post by: Gordon Shumway
Never assume you are the only modeler in your area. Those old timer Revel modelers still have a few tips to share.
Treat every coat (other than the base) as if it were a wash as far as thinning goes.
96765
Post by: StarDrop
If you are one of the guys/gurls who likes to see drilled gun barrels....
Instead of drilling, think of making the hole with a super warm needle, or a fine tip soldering Iron.
70053
Post by: GrimDork
If you are gonna fool with restic, get some sharp blades handy and switch out frequently. The material is so much easier to clean with a fresh blade.
Same tends to go with bones and bendy board game plastic.
102
Post by: Jayden63
For those handbrushers out there, I will say change your brush cleaning water often. Those colors that have bleed into the color water can and will taint the color your are currently applying.
For the lazy, just do it between light, dark, and especially metallic colors. It will still make your life easier.
87312
Post by: thegreatchimp
 Ratius wrote: Ratius wrote:Shamelessly stolen from another thread.
If you are removing paint with detoll etc and using a toothbrush, clip down the brush bristles so they dont bend in the recesses and are much firmer. Allows you to get rid of those hard to clean areas on a model.
Thanks for that tip, I've made and modified a lot of tools for scratching off paint, but never crossed my mind to clip the bristles.
1197
Post by: Dullspork
Airbrush medium makes a good thinner for your acrylic paints. You can never really over thin - you just make it more transparent. Automatically Appended Next Post:  GrimDork wrote: GrimDork wrote:If you are gonna fool with restic, get some sharp blades handy and switch out frequently. The material is so much easier to clean with a fresh blade.
Same tends to go with bones and bendy board game plastic.
Good, old-fashioned sandpaper is also your friend when working with this stuff.
70053
Post by: GrimDork
^I'll give it a shot.
93655
Post by: Buttery Commissar
If someone in your house dyes their hair, when they're done, rinse out the application bottle with the fine nozzle.
It makes an excellent bottle to put your thinners and airbrish cleaner in, with that small nozzle you can drop right into the cup with no worries. I keep my airbrush medium in one.
81837
Post by: Cleatus
Use different rinse cups for metallic and non-metallic paint. If you find yourself mixing them up in between painting sessions, take a permanent marker and write METALLIC on the edge, and sides. No more sparkly Orks. Well, fewer.
63059
Post by: goblinzz
When constructing and gluing clear plastic canopies, either use good pva, or specialist glue, not superglue! unless you dip them in floor polish first, which looks wicked awesome!
81183
Post by: zbg97
Swiffer sweeper sheets are great for catching mold line shavings. Just have one under your model as you file/scrape. Cleans up your work station nicely, and you can just shake it out and use it again.
92803
Post by: ZergSmasher
mockingbirduk wrote:I bet it's been said, but thanks to yesterday I am reminded:
When spraying a protective layer to finish a model after 20+ hours of painstaking layering...
Check it's not a can of grey primer in your hand.
Omg...I am so sorry! I nearly did a similar thing once, but not with a spray on a finished model.
My tip for the day: watch where you put an open bottle of paint, especially if your workspace is very cluttered like mine. I managed to spill half a pot of Screaming Bell all over the table by hitting the pot with my elbow once. Cleaned up without leaving a permanent spot, but what a waste of paint!
93655
Post by: Buttery Commissar
My Nuln Oil has got me about three times that way in the past month. Also just opening it gets it everywhere. Always that bottle.
30672
Post by: Theophony
If you begin to nod off while painting a model youve got hours into, put the model down, close up your paint bottles, clean your brush and go to sleep. I wasted a bottle of paint, ruined a brush and messed up a model when I dozed off a little and my brush slipped on the model. I quickly tried to set it down to clean off the mis step with the paint and knocked over the pot of paint. as I tried to grab it unsuccessfully i dropped my brush which bounced under the rolling chair I was sitting in. As I stood up toclean up the mess in my hand the chair rolled over the brush tip and ruined a newer brush. lets just say i went to bed upset, and didn't even sleep well after that .
I've gotten close with the hobby knife when I was tired too.
57963
Post by: Zogg
 Theophony wrote: Theophony wrote:If you begin to nod off while painting a model youve got hours into, put the model down, close up your paint bottles, clean your brush and go to sleep.
This. Big time this.
Also, using the right tool for the job makes a huge difference. It was years before I got around to buying a razor saw and mitre box and couldn't believe how much easier it made cutting larger pieces, and for years I used a cheap pin vice where the hole that the drill bit fit into was slightly off-set, so my holes were often irregular and larger than intended. And as my budget allowed, I eventually picked up some of the other toys pictured here.
 
93655
Post by: Buttery Commissar
Same goes for just having woken up.
Have your breakfast, have a coffee, breathe some air. Don't sit straight down to your minis after waking up and washing.
In late August I stumbled downstairs after getting dressed and washed, and opened up my new craft knife. Pulling off the blade cover, I cut through the end and side of my finger so deeply that it's still healing now, despite being very clean.
In retrospect I should have got it taped at A&E, but I was home alone and still sleepy.
19806
Post by: mockingbirduk
What's a mitre box and how does it work?
I can google it if you don't fancy telling me, it just looks intriguing and I bet a lot of the google hits will be from a non-miniatures point of view
14
Post by: Ghaz
Wikipedia article on the mitre box.
81638
Post by: kb_lock
Pro tip: superglue that bad boy back together next time.
57963
Post by: Zogg
mockingbirduk wrote:What's a mitre box and how does it work?
I can google it if you don't fancy telling me, it just looks intriguing and I bet a lot of the google hits will be from a non-miniatures point of view
@Ghaz's link pretty much covers it, except it's a smaller plastic or metal version that works with a razor saw (see the pics in my post above). Most of these tools can be found at a model train store, or can be ordered from here: http://www.micromark.com/
91816
Post by: Januine
As I discovered this morning - throw nothing away!! (at least when it coming to finding/needing/rediscovering stuff for conversions) - having trouble finding the right stuff to make a convincing mount for a swivel platform for the back of a kataphron. Come to work look around my office desk and in my classroom - all neccessary pieces found within 10 minutes. The simplest stuff can be repurposed in the most amazing ways Automatically Appended Next Post: oh - on another note - anyone have any tips for bending/remolding sprue. I need to turn a lenght of sprue into circular frame..... hot water (as with FW resin) or hairdryers work dak??
93655
Post by: Buttery Commissar
Hold it about 3-4 inches above over an electric oven ring on medium heat and then form it around a can or circular object.
You have a few seconds to do this after taking it away from the heat, don't try and juggle doing it over the ring. You can reheat and do more if you don't get as far as you like. Automatically Appended Next Post: kb_lock wrote:
Pro tip: superglue that bad boy back together next time.
It was bleeding too much to seal or bind. I filled my sleeve in a matter of seconds whilst keeping it elevated.
DCM perk: You can see a picture of what was still pouring out after I bound it.
91816
Post by: Januine
Sweet - cheers BC. That'll be the last piece of the puzzle in place. Gonna get htis thing built this afternoon while the wife is at work.....can just seethe look on her face with me fething about with hot rings and plastic......it wouldnt end well!
93655
Post by: Buttery Commissar
I had to do this with the canopy piece I was replacing, I found out afterwards that I should have been moving the piece I was pressing into the mould away from the ring and then doing it.
The entire time I was like "Feeeeeeethhhh I'm gonna punch the oven ring when this gives suddenly and lose all the skin on my hands."
I am not clever some days.
83510
Post by: YFNPsycho
My tip?
Know your limits, but don't be bound by them. If you can't paint a certain thing well, practice it as much as you can, on as many different types of model as possible. Eventually you'll either figure out the "proper" technique or find an alternative method.
63059
Post by: goblinzz
Explore dipping! For those of us who are not the most amazing painters, try dipping your models to get through an army nice and fast!
55682
Post by: JoshInJapan
goblinzz wrote:Explore dipping! For those of us who are not the most amazing painters, try dipping your models to get through an army nice and fast!
Seconded. No matter your skill level, painting forty zombies, goblins, or Imperial Guardsman is a drag, especially if you're trying to get something finished for a tournament or whatever. Dipping is your friend in these instances.
93655
Post by: Buttery Commissar
goblinzz wrote:Explore dipping! For those of us who are not the most amazing painters, try dipping your models to get through an army nice and fast!
Yep. I've only just posted this elsewhere, but I think it's a very useful little example sheet.
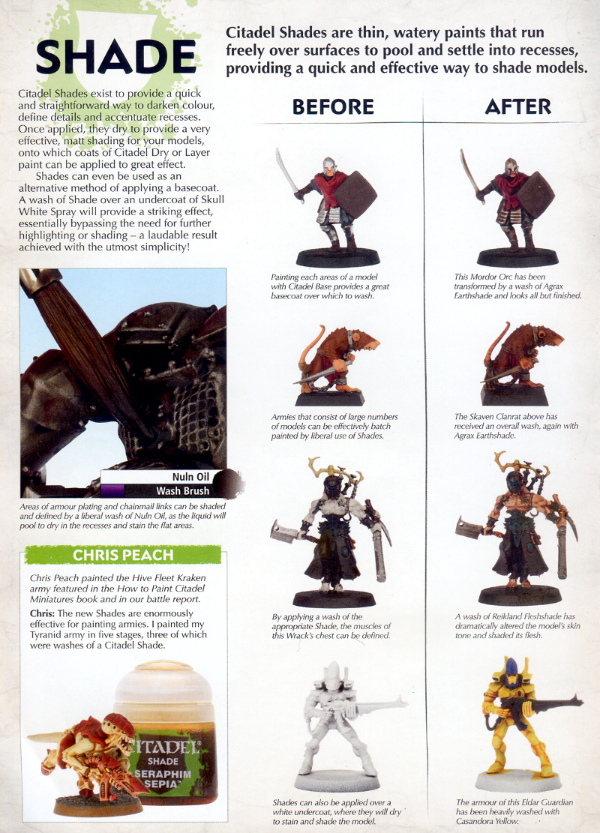
I try generally not to upload current tutorials that can still be bought, but I don't think anyone can object to an old page of White Dwarf plugging a paint line.
61618
Post by: Desubot
 Buttery Commissar wrote: Buttery Commissar wrote: goblinzz wrote:Explore dipping! For those of us who are not the most amazing painters, try dipping your models to get through an army nice and fast!
Yep. I've only just posted this elsewhere, but I think it's a very useful little example sheet.
I try generally not to upload current tutorials that can still be bought, but I don't think anyone can object to an old page of White Dwarf plugging a paint line.
Dip and Shade are different techniques.
but dammit i love instances of talent in a can or bottle.
93655
Post by: Buttery Commissar
They may be different product, but the theory is the same. Insta-shade.
81638
Post by: kb_lock
Don't be afraid of doing stuff.
I never liked mixing paints because it is hard to reproduce a colour, or it isn't what is written on the box. That was poor logic on my part, mixing paints is a brilliant way of sliding your gradients around and exploring new effects.
I also never liked modifying or customising things (I still don't, to a large extent), but some times you need to do what you need to do, and not having those skills can be to your detriment. Case in point, donlad's devs was missing a left arm, so I cast one in greenstuff using instamold, and more recently, MSRC sent me a flying hive tyrant which has both stupid feet, and a stupid base - I am going to cut the feet off and give it hooves (if he is happy for me to mangle a FW model).
I could not do these things if I was afraid of doing it. Don't make it a big thing, we are playing with plastic dollies, you really can't ruin anything that matters here (aside from your bank balance, or with an exacto knife, or giving yourself cancer with chemicals - BUT IGNORE ALL THAT)
96765
Post by: StarDrop
When working with resin models, make sure you wash them first, regardless of which phase you are in (removing form sprue, mold lines removal, assembly). Reason why is because they are greasy (in order to be removed from the initial mold.)
It will make your life easier.
69226
Post by: Selym
When working with 6mm scale minis, individual detail is not important. What's important is the overall effect of the force when assembled. What up-close looks like a rough job will look amazing when multiplied by 200, and viewed from 3 feet away.
33564
Post by: Vermis
Selym wrote:When working with 6mm scale minis, individual detail is not important. What's important is the overall effect of the force when assembled. What up-close looks like a rough job will look amazing when multiplied by 200, and viewed from 3 feet away.
Beat me to it. The thought sprang to mind when I read this:
goblinzz wrote:Explore dipping! For those of us who are not the most amazing painters, try dipping your models to get through an army nice and fast!
... and this...
kb_lock wrote:Don't be afraid of doing stuff.
My own thought is that people are put off by the tiny details of 6mm, and up to 15mm, because they imagine the minis have to be painted in the same way as 28mm minis, complete with blended layers, delicate washes and glazes, tiny highlights, etc. (Or so I imagine) In my experience that's not really necessary, and the techniques that look rougher on 28mm, like heavier washes and even drybrushing, look a lot better at 6-10mm. I wonder if it's something about the tinier details being better at catching the dry paint and the surface tension than larger areas of 28-32mm, but anyway. I'll point to these great Warmaster orcs. Just sprayed green, drybrushed, basecoats picked out, and given a dark wash, but wow!
And Selym's right - worrying about painting and look of individual minis at these tiny scales is missing the point! One of the themes of this entertaining rant.
87312
Post by: thegreatchimp
Magnetise Magnetise Magnetise! If you don't particularly enjoy assembly, the thought of spending another hour or 2 drilling holes and magging seems like unwelcome effort. However for me it comes down to a simple choice. You can spend 2 hours making a model's weaponry interchangeable, or you can very possibly spend 4x that time and your hard earned cash at a later point buying, constructing and painting a second model to get your desired weapon loadout. (You never know what is going to become a desirable / obselete loadout in the next codex).
The most typical example I can think of is magnetising a predators sponsons and top hatch, to allow you to switch it to a rhino or razorback in 10 seconds. However is also worthwhile doing this to a model's weapon arms, particularly models with power weapons and the like. Planting a magnet on a soldiers back or backpack is also dead handy for affixing interchangeable combi and power weapons as desired.
63059
Post by: goblinzz
thegreatchimp wrote:Magnetise Magnetise Magnetise! If you don't particularly enjoy assembly, the thought of spending another hour or 2 drilling holes and magging seems like unwelcome effort. However for me it comes down to a simple choice. You can spend 2 hours making a model's weaponry interchangeable, or you can very possibly spend 4x that time and your hard earned cash at a later point buying, constructing and painting a second model to get your desired weapon loadout. (You never know what is going to become a desirable / obselete loadout in the next codex).
The most typical example I can think ogf is magnetising a predators sponsons and top hatch, to allow you to switch it to a rhino or razorback in 10 seconds. However is also worthwhile doign this to a model's weapon arms, particularly models with power weapons and the like. Planting a magnet on a soldiers back or backpack is also dead handy for affixing interchangeable combi and power weapons as desired.
Definitely! In addition, consider how your going to swap out weapons and equipment as you build, you'd be amazed at just how versatile you can make your squads and vehicles!
69226
Post by: Selym
Pro tip: There are different sizes of 1:285 scale models. Most of them don't work in epic 40k.
87312
Post by: thegreatchimp
Reposing space marine arms using wire and putty is fairly straightforward. Reposng their legs is considerably harder and much more time consuming, particularly if the ankle has to be cut and repositioned. I've found it preferable to source GW or 3rd party legs in the desired position than converting them.
And on a related note, if reposing limbs, try and pick the plainest, most clutter-free / bling-free limbs to work off, as more often than not you'll end up having to painstakingly remove cloaks, pouches, furs and loincloths that get in the way of reposing the limb. More efficient to work off a plain unadorned limb and model detail onto the limb when you're finished, if necessary.
93655
Post by: Buttery Commissar
My thought for today is that whilst superglue and pinning is a more labour intensive method than epoxy, in the long run it allows for you to change your mind. I very rarely epoxy and never with resin.
97972
Post by: KINGPIN54
Don't know if this has been said before but when gluing small bitz onto something I found using a toothpick, put some prestik (think its blue tack for everyone else) on the tip and pick the small part up with that, instead of putting the glue on the piece, put a drop on something else and applie they glue by just touching it with the piece on the toothpick, put part in its place. Was gluing little pieces to my fingers a couple of times before I clicked. Everybody does it that way most propaboly - but I did not know.
69226
Post by: Selym
I've never seen that method before. Does the prestick not leave residue?
97972
Post by: KINGPIN54
You only put a little bit on the tip, where you not gonna put glue.
87312
Post by: thegreatchimp
KINGPIN54 wrote:Don't know if this has been said before but when gluing small bitz onto something I found using a toothpick, put some prestik (think its blue tack for everyone else) on the tip and pick the small part up with that, instead of putting the glue on the piece, put a drop on something else and applie they glue by just touching it with the piece on the toothpick, put part in its place. Was gluing little pieces to my fingers a couple of times before I clicked. Everybody does it that way most propaboly - but I did not know.
Thanks for the tip, sticking small bits to my hand, to my knife (and pretty much to everything except the connecting part), is the bane of my life. I will be giving your suggestion a try.
92803
Post by: ZergSmasher
After what happened last night, I will reiterate something I and others said before:  Don't paint or model when you're drop dead tired. I was working on Cypher (for the monthly challenge) late last night, and while I was drybrushing I bobbled him. The mini struck the frame of my bed where I was sitting, then the floor. His arm and backpack came off. Luckily, he didn't have a lot of wet paint all over him and the damage will be a quick fix, but it just goes to show how being tired can lead to stupid things happening .
69226
Post by: Selym
When ordering items for a 6mm army, make sure you're really, really, REALLY certain that everything is in a compatible scale. There's nothing worse than finding out that your infantryman makes your MBT look like a toy.
93655
Post by: Buttery Commissar
 ZergSmasher wrote: ZergSmasher wrote:After what happened last night, I will reiterate something I and others said before: Don't paint or model when you're drop dead tired. I was working on Cypher (for the monthly challenge) late last night, and while I was drybrushing I bobbled him. The mini struck the frame of my bed where I was sitting, then the floor. His arm and backpack came off. Luckily, he didn't have a lot of wet paint all over him and the damage will be a quick fix, but it just goes to show how being tired can lead to stupid things happening .
Same goes for ordering online. I ordered 100 square 25mm bases accidentally.
35046
Post by: Perkustin
When you've invested in a set of clay shapers it may seem the conical 'bullet' shaped one is the most useful, this is not the case. Only use it for rough work, neaten up and sharpen details with the flat bladed one. The conical blade leaves small creases in the putty that create an amateurish rough finish.
Also bear in mind that miliput and and 'greenstuff' mix perfectly well (at the expense of miliput's clay-like solubility in water). It creates a solid, more heavyweight, medium useful for blocking out large pieces.
59054
Post by: Nevelon
Just sit down and paint.
Thinking about getting stuff done yields a lot less finished work then actually putting a brush onto plastic. Sit at your bench, pick up a brush, open a pot, and paint. Even if it’s just a single layer, that’s progress.
There are a lot of ways to get and stay motivated. Find what works for you.
81638
Post by: kb_lock
No, what you ordered is a 10"x10" floor tile system for your next diorama.
92803
Post by: ZergSmasher
Here's one that is probably obvious to most of you: deal with mold lines on your models before you assemble them. It makes it so much easier. I decided to post this because I was looking at my Bloodthirster model and noticed it had a fair amount of mold lines on various parts of it . Fortunately, most of the major ones came off alright, but some of them are hard to get to with the model built.
69226
Post by: Selym
Spray-painting a basecoat onto 6mm models? Don't use a continuous spray - use quick bursts. Continuous spray tends to cover over details, while bursts can be layered for effect to cover all parts of the model properly, while keeping the detail.
81837
Post by: Cleatus
Did we run out of tips of the day? Surely the community must have more tips!
What about rivets? I know there are lots of schools of thought.
My personal favorite is using a a hole punch (1/16") to make rivets out of plasticard. Works great!
There are many other ways to make rivets too:
Cut thin plastic rod into slices to make rivets.
Camkierhi makes some fantastic rivets with a nail punch.
Apply PVA glue directly to the model (there's even a Dakka article about this I believe).
If you have a Britta water pitcher, save the filter and harvest the plastic beads from inside. (Never tried this myself).
87312
Post by: thegreatchimp
Don't sit on your high elf spearmen. Even a few Strength 3 hits can cause a very sore bum-bum...
59054
Post by: Nevelon
thegreatchimp wrote:Don't sit on your high elf spearmen. Even a few Strength 3 hits can cause a very sore bum-bum...
Over the years I’ve heard a few people suggest sharpening spears/swords/etc. Don’t do this. It might sound like a cool idea, but nothing but tears lie down that path.
62749
Post by: Dr H
A couple of air-brush related tips:
You know that pot of paint there, the one that's thickened up but with added thinner is perfectly good for hairy-brush painting... Don't use that for air-brushing, it'll likely have bits in it and they will clog your air-brush and mean you have to spend the next hour cleaning it out.
And
Having spent the day carefully air-brushing your model bright yellow, don't go and put a big, black fingerprint on it.
Check your fingers before picking up a model.
39827
Post by: scarletsquig
I find bone coloured primer to be more useful than white primer a lot of the time, especially when using washes for the bulk of the painting.
It has a warmer tone to it that takes washes and inks very well.
A zombie can look great with bone primer, red wash on the skin and some green/brown washes on the clothes. Takes hardly any time at all.
93655
Post by: Buttery Commissar
If we ever hit 365, I'm tempted to get a calendar made.
My tip for the day is not to wear cotton or cotton blend trousers if using superglue.
Superglue spill combined with cotton causes extreme heat, and can catch fire.
On the plus side my curtains were closed.
59054
Post by: Nevelon
 Buttery Commissar wrote: Buttery Commissar wrote:If we ever hit 365, I'm tempted to get a calendar made.
My tip for the day is not to wear cotton or cotton blend trousers if using superglue.
Superglue spill combined with cotton causes extreme heat, and can catch fire.
On the plus side my curtains were closed.
There are a significant number of drawbacks to working without pants. Just saying...
81638
Post by: kb_lock
Painting is about the only time I wear pants at home, gives me a place to wipe the water off the brush.
95040
Post by: Guildenstern
 Cleatus wrote: Cleatus wrote:Did we run out of tips of the day? Surely the community must have more tips!
What about rivets? I know there are lots of schools of thought.
My personal favorite is using a a hole punch (1/16" to make rivets out of plasticard. Works great!
There are many other ways to make rivets too:
Cut thin plastic rod into slices to make rivets.
Camkierhi makes some fantastic rivets with a nail punch.
Apply PVA glue directly to the model (there's even a Dakka article about this I believe).
If you have a Britta water pitcher, save the filter and harvest the plastic beads from inside. (Never tried this myself).
Wish I could find a decent inexpensive hole punch - but then I'm looking in scrapbooking supplies might be easier place to get one. Leather punch for instance - which I have not yet investigated.
"If you have a Britta water pitcher, save the filter and harvest the plastic beads from inside. (Never tried this myself). " <- actually trying this right now! One major drawback imo - getting rid of all the charcoal it's mixed in with. I may report back later how I accomplish this, if I accomplish this, if anyone's interested. Just looking at it right now I'm extremely tempted to make it one of those useless "you're not really listening to me/obeying me/or you did a bad thing ( tm)" chores for one of my minions, I mean, children.
err anyway, so my tip, you know those plastic trays made for glittering, primarily in scrapbooking but other crafts as well? They're made to retrieve the remainder of the glitter you use, via a pour spout. They're crap for glittering - someone needs to tell martha stewart et al that glitter + static in a plastic container != to getting all your glitter back, or even most of it. And as for cleaning it... ugh! BUT! my point: they're great for doing bases with turf or sand or rocks or whatever. Much easier to get the majority of your stuff back. Probably because said turf,sand and rocks aren't flippin flat, like glitter.
63059
Post by: goblinzz
Dr H wrote:A couple of air-brush related tips:
You know that pot of paint there, the one that's thickened up but with added thinner is perfectly good for hairy-brush painting... Don't use that for air-brushing, it'll likely have bits in it and they will clog your air-brush and mean you have to spend the next hour cleaning it out.
And
Having spent the day carefully air-brushing your model bright yellow, don't go and put a big, black fingerprint on it.
Check your fingers before picking up a model.
On a similiar note, vinyl gloves, available fromt he pharmacy by the 100 for very little, make air brushing, and even painting sooooo much easier. If you need to handle models that don't have fully cured paint, then they will stop the paint rubbing off (to some extent) and you can pull them off, and have clean hands after painting!
81638
Post by: kb_lock
Vinyl gloves also mean you don't show up at work the next day with one blue hand
62749
Post by: Dr H
Guildenstern wrote:"If you have a Britta water pitcher, save the filter and harvest the plastic beads from inside. (Never tried this myself). " <- actually trying this right now! One major drawback imo - getting rid of all the charcoal it's mixed in with. I may report back later how I accomplish this, if I accomplish this, if anyone's interested. Just looking at it right now I'm extremely tempted to make it one of those useless "you're not really listening to me/obeying me/or you did a bad thing ( tm)" chores for one of my minions, I mean, children..
If you use an inclined plane (a tray of some kind, held at an angle) and then the beads will roll downhill, the charcoal will not (quite as well). I used a brush to push the material upwards and let the beads roll to the bottom.
There's still a few beads in the charcoal and a few bits of charcoal in the beads, but better than mixed:
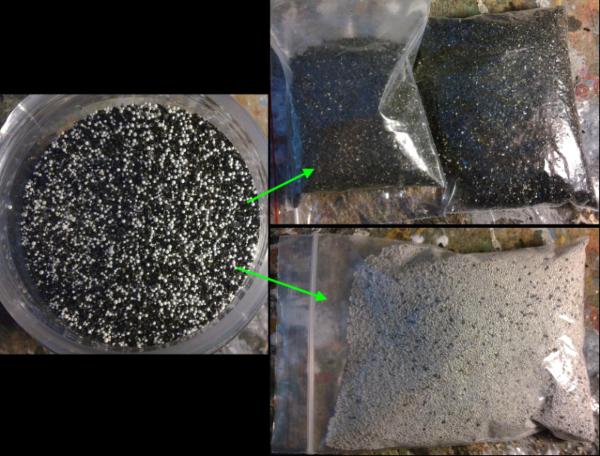
Also, keep the charcoal and use it for basing.
77206
Post by: Nicky J
Put your exacto/craft knife down before your scratch that itch on your forehead - very nearly just blinded myself!
87312
Post by: thegreatchimp
Nevelon wrote:Over the years I’ve heard a few people suggest sharpening spears/swords/etc. Don’t do this. It might sound like a cool idea, but nothing but tears lie down that path.
Tell me about it (sigh), I still have a broken off wight's doomblade embedded in my backside. Which might be funny excpet it sets off the metal detectors in the airport. Every time.
95040
Post by: Guildenstern
Dr H wrote:Guildenstern wrote:"If you have a Britta water pitcher, save the filter and harvest the plastic beads from inside. (Never tried this myself). " <- actually trying this right now! One major drawback imo - getting rid of all the charcoal it's mixed in with. I may report back later how I accomplish this, if I accomplish this, if anyone's interested. Just looking at it right now I'm extremely tempted to make it one of those useless "you're not really listening to me/obeying me/or you did a bad thing ( tm)" chores for one of my minions, I mean, children..
If you use an inclined plane (a tray of some kind, held at an angle) and then the beads will roll downhill, the charcoal will not (quite as well). I used a brush to push the material upwards and let the beads roll to the bottom.
There's still a few beads in the charcoal and a few bits of charcoal in the beads, but better than mixed:
Also, keep the charcoal and use it for basing.
Ahhhh duh >< awesome sauce! Thanks!!
93655
Post by: Buttery Commissar
Nevelon wrote: Buttery Commissar wrote:If we ever hit 365, I'm tempted to get a calendar made.
My tip for the day is not to wear cotton or cotton blend trousers if using superglue.
Superglue spill combined with cotton causes extreme heat, and can catch fire.
On the plus side my curtains were closed.
There are a significant number of drawbacks to working without pants. Just saying...
I started working with pants, then the glue set fire to my leg.
69226
Post by: Selym
thegreatchimp wrote: Nevelon wrote:Over the years I’ve heard a few people suggest sharpening spears/swords/etc. Don’t do this. It might sound like a cool idea, but nothing but tears lie down that path.
Tell me about it (sigh), I still have a broken off wight's doomblade embedded in my backside. Which might be funny excpet it sets off the metal detectors in the airport. Every time.
Once had my hand speared on an unsharpened spire from a GW ruin. Significant hand damage.
I am never going to sharpen anything
77159
Post by: Paradigm
It may have been mentioned before, but write down your paint recipes! If you don't, you'll end up doing what I did earlier this week, painting 4 Marines from the samw squad in 4 different shades of green that are just close enough to look decent, and just far enough apart to bug anyone who likes things consistent (like me). And I still haven't perfected the method, so I know Number 5 is going to look different as well...
91816
Post by: Januine
keep meaning to, keep forgeting ><
84360
Post by: Mymearan
Always keep a clean brush beside you so you can quickly pick it up and clean off stray paint if you make a mistake.
97972
Post by: KINGPIN54
Rivets - I found liquid green stuff works well for smaaaal rivets, I use a toothpick or something simmilar, just put a little dot where you need the rivet, let it dry and repeat till its high enough - then I use a brush and some water to just smoothen the gs around the rivet.
For larger rivets try mustard seeds or poppie seeds, I have not tried it as yet.
57963
Post by: Zogg
For orky rivets, I drill a small hole, glue in a rod and snip it off.
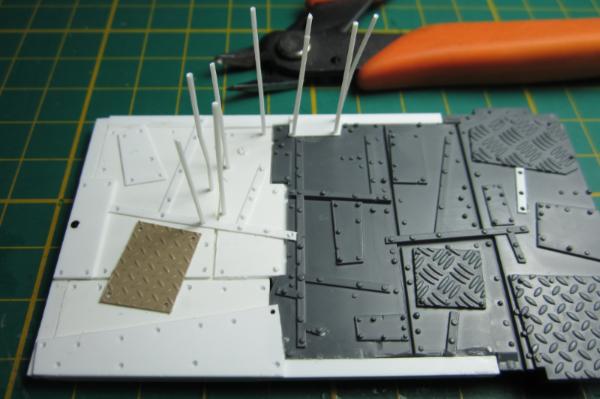
84360
Post by: Mymearan
I just cut a plasticard rod into tons of little slices that I keep in a container and simply glue them on.
93655
Post by: Buttery Commissar
...I use tiny rhinestones.
Are we talking about rivets?
59981
Post by: AllSeeingSkink
 Zogg wrote: Zogg wrote:For orky rivets, I drill a small hole, glue in a rod and snip it off.
That looks like a great idea.
Whenever I've tried gluing on small dots I find it hard to avoid noticeable pool of glue and/or marring of the surface.
66830
Post by: morfydd
Wish I could find a decent inexpensive hole punch - but then I'm looking in scrapbooking supplies might be easier place to get one. Leather punch for instance - which I have not yet investigated.
WallMart has a nice set of 3 for ~ 9 Dollars in the scrapbooking section (1/16, 1/8, 5/16) Which skips the common as peas 1/4"
Also Fiskars makes some interesting shaped hole punches..(Star, Heart, Music Note, etc..That run ~8 bucks each)
So really cheap for what you get
Rotary Leather Punch normally has 9 sizes running from 3/32 at the smallest and going up...(great for larger rivits) but the cost runs ~25 bucks for a good one(no point in going cheap as you will just be disapointed)
BIG TIP.. https://www.grainger.com/product/GRAINGER-APPROVED-Hi-Impact-Polystyrene-Sheet-WP143601/_/N-c1p/Ntt-hips?nls=3&ssf=3&sst=subset&ts_optout=true&s_pp=false&picUrl=//static.grainger.com/rp/s/is/image/Grainger/1EPF7_AS01?$smthumb$#nav=%2Fproduct%2FGRAINGER-APPROVED-Hi-Impact-Polystyrene-Sheet-WP143601%2F_%2FN-c1pZ1z0nqvoZ1z0nfi5%2FNtt-hips%3FR%3D3GXZ7%26_%3D1446824703065%26nls%3D3%26picUrl%3D%252F%252Fstatic.grainger.com%252Frp%252Fs%252Fis%252Fimage%252FGrainger%252F1EPF7_AS01%253F%2524smthumb%2524%26s_pp%3Dfalse%26ssf%3D3%26sst%3Dsubset%26ts_optout%3Dtrue..the thinner/cheaper is 0.75 mm and the thicker is 1.5mm ..they have thicker as well but I figure for all you scratch builders 1 to 2 dollars per squarefoot for basic plastic sheet is not a bad thing to know about ..yea its smooth but so what ;o)
if 32 square feet is more than you might use then go in with a buddy and split some I know I would much rather pay 75 pennies per squarefoot of 0.75 than the 5 bucks that evergreen or plastruct want..
62749
Post by: Dr H
Well if we're getting into the depths of rivets...
Chopping polystyrene rods (effective, you can choose the size you want, a little tedious). This is what I mainly use these days, and I vary the size depending on the particular rivet's importance (large 1.2mm ones for main corners etc, little 0.5mm ones for small things, or long lines, and others in-between).
As mentioned, using water-filter beads and drilling pits for them (effective, very tedious and sometimes hit and miss, expensive if you don't actually use the filters)
Don't drill the holes too large or deep, otherwise you'll loose the bead into it's depths (unless you're going for recessed).
You can also use small drops of glue ( CA or PVA), applied with a small point like a cocktail stick.
I like the idea of using liquid GS, I can see that being just as effective.
I have also used left-over milliput ( GS would also work), that I've rolled into a thin sausage and left to almost fully set (otherwise you'll squash the rivets), then cut into rivets. This also lets you choose the size of your rivets and uses up that bit of putty that you always have left over.
I've also seen a tutorial of using an automatic pencil to press recessed rivets (little rings) into putty (for when you are sculpting). You could lay down a thin strip of putty and then do this for a change.
Recessed rivets can also be done in plastic by using a hot metal tube to melt the ring into the surface (and then sand off the excess material).
Placing any of the above rivets into a hole slightly larger than them can also produce recessed rivets.
I've seen pins used, by drilling a hole (for the pin shaft), inserting the pin and cutting if off on the inside, leaving the head of the pin as the rivet outside.
There was a tutorial (here on DDakka), about melting the end of plastic rods to get the round-headed rivet look. You'll have to search for that yourself though.
That's all I can remember at the moment...
81837
Post by: Cleatus
Don't spray on windy days.
If you must, don't spray into the wind!
Nothing like walking back into the house with a face full of paint freckles, or dots all over your glasses. (never done this myself. nope. )
61618
Post by: Desubot
Speaking of rivet cut offs. dont throw those extra bits away. never know when you need em
Also I dont remember seeing it earlier but when taking photos with a phone cam, take a small white piece of paper or card and put in front of the model. press and hold to take the picture so that its focusing and getting ready. then when you are ready slip the paper out.
i remember seeing that tutorial some where.
some one should compile all these into somethin
63129
Post by: Littletower
My two cents on rivets:
If punching them out from styrene, I'd suggest a revolving or rotary hole punch over a hole punch. Heavy duty or reinforced if possible, it would handle .5mm thick card easily, and is far easier -and less noisy- to use than a punching tool, specially if thinking along Imperial-style rivet plentifulness
Nail art and/or scrap-booking rhinestones are a useful resource, half-spheres are available, and don't require a placing pre-drilled hole (again, important if using a lot of rivets!). MagosBiff90 provided links for both some time ago, listings are outdated, but might came in handy as reference:
Edit: Found a current, English based one: http://www.ebay.co.uk/itm/TRIXES-Revolving-Leather-Belt-Eyelet-Hole-Punch-Puncher-Plier-Craft-Tool-6-Sizes-/390537852570?hash=item5aeddeb69a:g:4XoAAOSwe-FU9JFS Starts at 2mm, slightly big, but usable.
89127
Post by: Matthew
Go to your local grocery store and ask for left over packaging. Free cardboard and polystyrene!
69226
Post by: Selym
When in doubt, stop painting, put down the mini, and go do something else.
You'll regret continuing otherwise.
87312
Post by: thegreatchimp
Time vs money:
Unless you're adamant about converting / scratch building a part, do a search on the net for GW or 3rd party conversion bitz and consider how long it will take to make vs the cost of ordering any suitable parts
While there is a joy and satisfaction in converting / scratch building parts yourself, sometimes it's just too time consuming. And on the other hand some parts are so easy to DIY out that ordering them would be a waste of money.
For example it's been my experience that reposing space marine arms with wire and green stuff is simple and easy, but reposing ankes and knee joints is a much longer and more difficult conversion -so given the choice I'll always order kneeling or running legs rather than spend 4-5 hours converting a single pair.
63059
Post by: goblinzz
If your in a pinch, then blue tax (poster putty) can be used to fill gaps or air bubbles in models. Just smooth it, and then smear a little super glue over the top.
It's also the best thing for filling gaps in slotta bases!
95119
Post by: Klaus von Groehm
It is much easier to wipe off excess oil wash if you wait 5 - 10 hours. At that point it is not fully dry but you don't accidentally pick up drag the whole wash into your brush / q-tip / thumb.
ALWAYS let the paint cure and ALWAYS let the varnsih cure before oil washing.
(I just messed up final touches on a riptide. ARGH!)
59054
Post by: Nevelon
On the topic of curing:
If you get a bad/fuzzy spray prime, get it into the simple green/other paint stripper of choice sooner, rather then later. Less scrubbing will be needed to get everything clean
97972
Post by: KINGPIN54
Don't know if been mentioned before, put steel bb bullets in your paint pot, it helps to mix your paint better when shaking.
84360
Post by: Mymearan
After basecoating, place a bright light above your mini and take a photo. Use this as a reference for shading and highlighting.
14
Post by: Ghaz
KINGPIN54 wrote:Don't know if been mentioned before, put steel bb bullets in your paint pot, it helps to mix your paint better when shaking.
No to the steel bbs. If they rust you could lose the entire pot of paint. You want a non-reactive material for an agitator.
84360
Post by: Mymearan
lava beads from eBay are ideal.
95040
Post by: Guildenstern
I put old small bits of sprue into pots as I cut stuff up. Not as good as something round I suppose but in my most use pots it works fine
5182
Post by: SlaveToDorkness
Always paint and model with a VERY bright direct light. Painting under your bedside lamp will make you go blind. Get a clampable lamp and put a high lumen LED daylight bulb in it.
93655
Post by: Buttery Commissar
 SlaveToDorkness wrote: SlaveToDorkness wrote:Always paint and model with a VERY bright direct light. Painting under your bedside lamp will make you go blind. Get a clampable lamp and put a high lumen LED daylight bulb in it.
I booked into a hotel with 1/3 of my army unpainted, and 12 hours to burn, thinking I'd have enough time to paint the rest.
It was one of those modern hotels where the only light was a single bedside lamp (no ceiling lamp), and all the sockets were safety-plugged and sealed.
I ended up painting in the bathroom on top of the cistern because there were better bulbs in there.
97972
Post by: KINGPIN54
 Ghaz wrote: Ghaz wrote:KINGPIN54 wrote:Don't know if been mentioned before, put steel bb bullets in your paint pot, it helps to mix your paint better when shaking.
No to the steel bbs. If they rust you could lose the entire pot of paint. You want a non-reactive material for an agitator.
Thanks for the heads up guys, I've got nickel plated in mine, will have to remove mine tonight and take some of the small pebbles out of my fish tank. Ones again dakka came through. So. Children remember DON'T put ball bearings in your paint pot.
89127
Post by: Matthew
So... Sprue clippings?
97972
Post by: KINGPIN54
Well I will be puting the pebbles that's in my fish tank, they been in there for about 8 years and the fish are fine and the pebbles have not rusted.
14
Post by: Ghaz
While pebbles won't rust, there's no guarantee that there won't be some other chemical reaction.
62749
Post by: Dr H
All my paints are stirred, not shaken.
I have always used an old paintbrush handle to stir my paints. Gets the settled gunk moving well. Sometimes I will finish it off with a shake though.
Each to their own...
89127
Post by: Matthew
Also, might sound weird... but watch Bob Ross while painting. Calms you down, you feel a bit sleepy, but you can focus on your minis. Remember, if you slip, it's not a mistake, just a happy little accident
92803
Post by: ZergSmasher
Dr H wrote:All my paints are stirred, not shaken.
I have always used an old paintbrush handle to stir my paints. Gets the settled gunk moving well. Sometimes I will finish it off with a shake though.
Each to their own...
I shake my paints to prepare them, but if they separate or something, I use a toothpick to stir them up. Sometimes I have to add water to get them thin enough to work with. I've heard people say that adding water is a no-no, but it works alright for me.
82151
Post by: Brennonjw
My tip: If, like me, you have a metric ton of unpainted stuff, put most of it away in your case or anywhere out of sight, and only work on a few models or a single squad at a time. It helps prevent that despair from building up to large
61618
Post by: Desubot
KINGPIN54 wrote:Well I will be puting the pebbles that's in my fish tank, they been in there for about 8 years and the fish are fine and the pebbles have not rusted.
You could also get ceramic bearings off ebay too.
if your bottle is glass or brittle plastic like the older GW pots, then a few smaller ones instead of 1 big one unless you like accidentally painting your floors
|
|