| Author |
Message |
 |
|
|
|
|
Advert
|
Forum adverts like this one are shown to any user who is not logged in. Join us by filling out a tiny 3 field form and you will get your own, free, dakka user account which gives a good range of benefits to you:
- No adverts like this in the forums anymore.
- Times and dates in your local timezone.
- Full tracking of what you have read so you can skip to your first unread post, easily see what has changed since you last logged in, and easily see what is new at a glance.
- Email notifications for threads you want to watch closely.
- Being a part of the oldest wargaming community on the net.
If you are already a member then feel free to login now. |
|
 |
2011/03/02 19:46:55
Subject: How do you paint?
|
|

Grisly Ghost Ark Driver
|
I have my own style but i was wondering how everyone else does it? Maybe it'll help me improve my productivity when painting but what process do you go about when painting. Mine in order (for my Word Bearers) are:
1. Prime
2. Base coat of main foundation paint (merchite red)
3. Anything Boltgun (IE:hoses, chords, blades, vents, etc)
3. Coat of red gore on armor (sometimes with a base coat of boltgun)
4. Coat of Scab red on armor
5. touch up (this takes the longest)
6. detail
7. touch up again
8. paint base
9. base model
10. throw down appropriate washes
|
|
|
|
 |
|
2011/03/02 19:58:56
Subject: How do you paint?
|
|

Jovial Plaguebearer of Nurgle
|
Varies depending on he model but generally:
1. Clip flash/mould lines away and prime.
2. Basecoat all areas in their 'starting' colour.
3. First wash, often an all over brown/black.
4. First highlight on main colour (like the armour if I'm doing a marine).
5. Wash of main colour.
6. Second highlight on main colour.
7. Another wash on the main colour.
8. Final main colour highlight(s).
9. Highlighting of details/trim etc.
10. Final touch up, maybe after another wash if needed.
11. Base.
Add massive prevarication in between each of those and that's pretty much the process.
|
|
|
|
|
2011/03/02 20:17:37
Subject: How do you paint?
|
|
Grisly Ghost Ark Driver
|
ohh, any tips for mine? you can see my pain jobs on my P and M, midn you it is not the best lighting but it gets you a general idea.
|
|
|
|
|
|
2011/03/02 20:24:31
Subject: Re:How do you paint?
|
|
Mutated Chosen Chaos Marine
|
1. Modeling (very important, includes trimming flash, conversion work, etc)
2. Prime (usually chaos black)
3. 2-3 thin layers of foundation
4. Wash
5. Drybrush
Repeat 4 and 5 as long as needed, working your way from darkest colors (in the recessed areas) to lightest (for your highlights).
6. Clean up the base (usually with chaos black)
Umm, then you do basing I guess. I haven't tried doing a base yet honestly.
|
|
|
|
|
|
2011/03/02 20:25:49
Subject: Re:How do you paint?
|
|
Grisly Ghost Ark Driver
|
Peter Wiggin wrote:1. Modeling (very important, includes trimming flash, conversion work, etc)
2. Prime (usually chaos black)
3. 2-3 thin layers of foundation
4. Wash
5. Drybrush
Repeat 4 and 5 as long as needed, working your way from darkest colors (in the recessed areas) to lightest (for your highlights).
6. Clean up the base (usually with chaos black)
Umm, then you do basing I guess. I haven't tried doing a base yet honestly.
i find basing to be incredibly fun. but my ADD+anal retentivness when it comes to detail makes me (i fee like) blotch my models up paintwise. not sure tho, probably having an overachiving standard.
|
|
|
|
|
|
2011/03/02 20:28:23
Subject: Re:How do you paint?
|
|
Mutated Chosen Chaos Marine
|
IronfrontAlex wrote:Peter Wiggin wrote:1. Modeling (very important, includes trimming flash, conversion work, etc)
2. Prime (usually chaos black)
3. 2-3 thin layers of foundation
4. Wash
5. Drybrush
Repeat 4 and 5 as long as needed, working your way from darkest colors (in the recessed areas) to lightest (for your highlights).
6. Clean up the base (usually with chaos black)
Umm, then you do basing I guess. I haven't tried doing a base yet honestly.
i find basing to be incredibly fun. but my ADD+anal retentivness when it comes to detail makes me (i fee like) blotch my models up paintwise. not sure tho, probably having an overachiving standard.
Wash early, wash often.
Don't think of it as "coloring", think of it as "building layers". The idea is to use contrast to define the shadows and highlights.
Also, thin the paints with a little water if you want. Honsetly, the vast majority of my layering is done by drybrushing.
|
|
|
|
|
|
2011/03/02 20:34:30
Subject: How do you paint?
|
|
Grisly Ghost Ark Driver
|
Wash often, why? I always thought it was something you did twards the end. I only use babab black on my whole mini and the base or anything leather/organic i use devlin mud.
|
|
|
|
|
|
2011/03/02 20:39:52
Subject: How do you paint?
|
|
Mutated Chosen Chaos Marine
|
IronfrontAlex wrote:Wash often, why? I always thought it was something you did twards the end. I only use babab black on my whole mini and the base or anything leather/organic i use devlin mud.
I start washing immediately after my foundation. I do this to bring out shadows....here are some WIP pics from my CSM to illustrate. They are maybe halfway done.
|
|
|
|
|
|
2011/03/02 20:50:50
Subject: How do you paint?
|
|
Jovial Plaguebearer of Nurgle
|
A wash part way through the paintjob can help to smooth the contrast between high and low lights. You can also water them down for a kind of tint or glaze (like a really light wash).
|
|
|
|
|
2011/03/02 21:45:47
Subject: How do you paint?
|
|
Dangerous Skeleton Champion
New Jersey
|
1. Modelling bits (usually forgetting things like drilling barrels out or missing one blatantly obvious mold line completely)
2. Basing with the medium or light grit ballast
3. Prime
4. Main color coat
5. Paint the base and ballast
6. Wash (usually devlan mud, payne's grey, or brown)
7. Drybrush the ballast
8. Drybrush the model
9. Black in metal areas
10. Metallic basecoats
11. Highlights all around, buckles and the like
12. Add a lighter grit element to the base - flock, sand, static grass, whatever
13. Neaten up the sides of the base (usually a dark, but warm brown)
It's a great process, but it doesn't help that I have the hands of a washed up boxer, so the end result isn't much different from a six year old hopped up on pixie sticks on his birthday.
|
|
|
|
|
|
2011/03/02 22:35:18
Subject: How do you paint?
|
|
Regular Dakkanaut
|
On my marines It's the following
1. Strip
2. Also remove paint from minis 
3. Forget to clean up as too excited to get on with them
4. Prime Minis, self and anything in general vicinity
5. Shouted at by wife.
6. Cup of Tea and a smoke (very important)
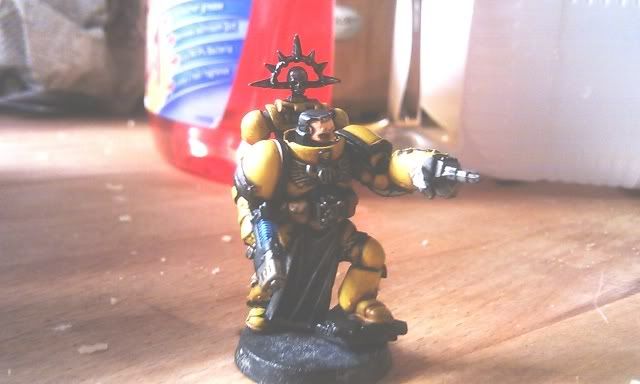
7. Foundation - Iyanden Darksun - 3 or 4 thin coats with yellow, if nothing else is even you must at least have the base even, or patches will be impossible to remove - followed by blacking everything that isn't going to be yellow.
8. 1st wash gryphonne sepia
9. Tea, Smoke
10. when 1st wash dry, 2nd wash
11. 1:1 Iyanden darksun to golden yellow midcoat (premixed in vast quantity - nothing worse than variation across units) Leaving shading
12. Base details - bolters, pouches, grenades etc
13. metallics
14 wash metallics and details
15 highlight blacks with adeptus battlegrey and highlight details
16 tea, smoke.
Currently it stops there. Trying to find the right yellow for armour highlight. Considering a premix of 1:1 badmoon or sunburst to golden yellow.
Ends up with
|
|
|
|
|
|
2011/03/02 22:59:33
Subject: How do you paint?
|
|
Ultramarine Master with Gauntlets of Macragge
|
I almost always do metallics last, because it's not uncommon to have some metallic specks show up in your washes after painting with metallics.
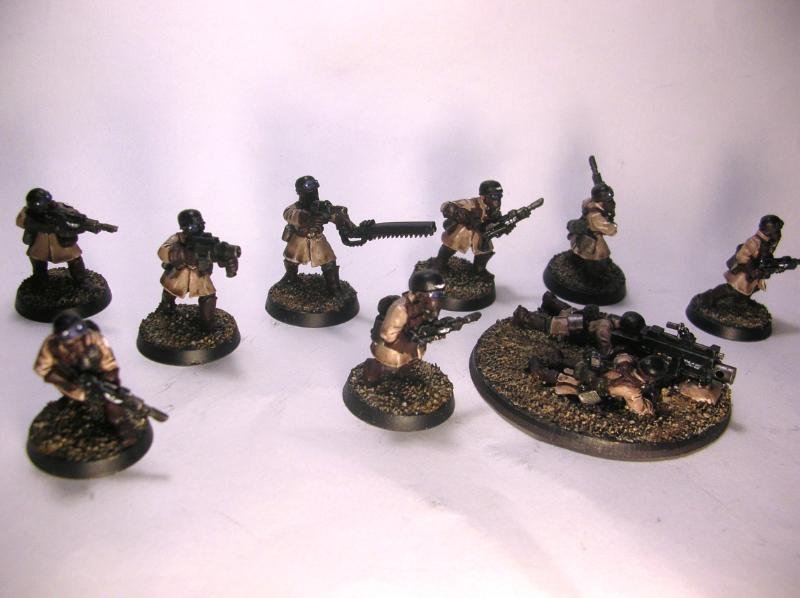
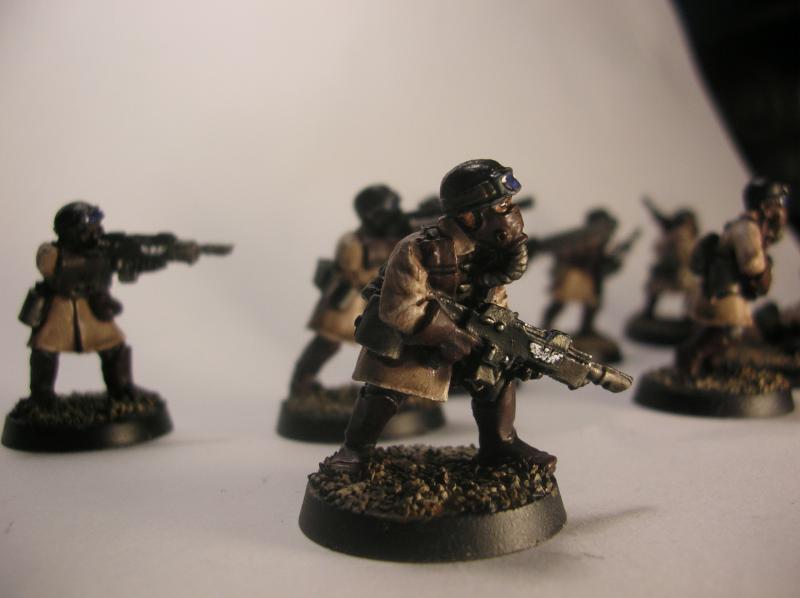
For my Steel Legion I've been painting:
- Black primer
- Dheneb Stone coats
- Skull white highlights on said coats
- Scorched Brown leather, belts, gasmasks etc
- Adeptus Battlegrey trousers
- Bedrolls painted Catachan Green
- Devlan Mud wash on pretty much the whole thing
- Faces picked out with Tallarn Flesh or Dwarf Flesh
- Faces washed with either Ogryn Flesh or Devlan Mud for skin tone
- Eyes painted black, then the edges painted white
- Army badge painted white with Blood Red lightning bolt
- Metallics painted Boltgun Metal
- Metallics washed with Badab Black
- Guns and helmets painted black, to touch up previous spillover and get a slightly glossy finish
- Guns, helmets, goggles, highlighted Adeptus Battlegrey
- Goggle lenses painted Regal Blue with Ultramarine Blue and white highlights
- Various eagles are picked out with Adeptus Battlegrey then white
- Basing is Graveyard Earth with Kommando Khaki drybrush

|
Check out my Youtube channel!
 |
|
|
|
|
2011/03/02 23:15:33
Subject: How do you paint?
|
|
Chalice-Wielding Sanguinary High Priest
Arlington TX, but want to be back in Seattle WA
|
My procedure is definately different than most. For my Blood Angels its been going something like this:
1: Prime
2: Paint base entirely
3: Basecoat model Mechred and pick out recesses with black ink
4: Wash with watered down red gore
5: Glue model to finished base
6: Apply 1:1 red Gore/Blood Red to the armor
7: Apply 2:1 Blood Red/Red Gore to the armor
8: Paint all black details
9: Add final edge highlight of pure blood red
10: Paint and glue bare-heads on at this stage
11: Clearcoat
12: Add flock to base
|
 4250 points of Blood Angels goodness, sweet and silky W12-L6-D4 4250 points of Blood Angels goodness, sweet and silky W12-L6-D4
 1000 points of Teil-Shan (my own scheme) Eldar Craftworld in progress 1000 points of Teil-Shan (my own scheme) Eldar Craftworld in progress
 800 points of unassembled Urban themed Imperial Guard 800 points of unassembled Urban themed Imperial Guard
 650 points of my do-it-yourself Tempest Guard 650 points of my do-it-yourself Tempest Guard
 675 points of Commoraghs finest! 675 points of Commoraghs finest!
The Dude - "Jackie Treehorn treats objects like women, man."
Lord Helmet - "I bet she gives great helmet."
|
|
|
|
|
2011/03/02 23:49:46
Subject: How do you paint?
|
|
Grisly Ghost Ark Driver
|
Any tips of "painting within the lines"? I always end up getting one color or another on something i didin't mean to, leaved me touching up the mini between each stage!
Automatically Appended Next Post:
great lists people!
|
|
This message was edited 1 time. Last update was at 2011/03/02 23:49:58
|
|
|
|
|
2011/03/03 00:17:02
Subject: Re:How do you paint?
|
|
Infiltrating Hawwa'
Through the looking glass
|
I was considering making a thread about this, but I might be able to get my answers here. I'm looking for ways to improve my painting, but I'm just not exactly sure what direction to take. I know there's a few techniques I don't use like dry brushing and the like. I'll explain two different projects and a particular issue I'm having with one of them.
Standard Imperial Guard Infantry Model
Clear off the mold lines
glue feet, chest, head
Prime all pieces black
Apply mechrite red to clothing
Apply mithril silver to helmet, shoulderpads, chest peice
Apply snakebite leather to boots and belt
Apply Boltgun to whatever weapon he's using
Apply bronzed flesh to skin
wash the armor with badab black
wash skin with devlan mud
That makes a pretty good tabletop quality model.
Tyranid Ravener
Clear mold lines/flash
Pin chest to tail
Prime all pieces white
Paint skin red gore
Paint plates bone white
Paint mouth, eyes, anythign showing internals mordian blue
Wash with badab
It looks like crap after the wash. I try washing the ravaner just like I do the guardsmen, and it doesn't work. It's like there's black splotches all over the larger flat areas like the large scything talons.
|
“Sometimes I can hear my bones straining under the weight of all the lives I'm not living.”
― Jonathan Safran Foer |
|
|
|
|
2011/03/03 00:22:04
Subject: How do you paint?
|
|
Lord Commander in a Plush Chair
|
Tend to do the faces and skin first, leave the metal bits like swords, guns and buckles until last. The base is the final thing. IronfrontAlex wrote:Any tips of "painting within the lines"? I always end up getting one color or another on something i didin't mean to, leaved me touching up the mini between each stage!
Happens to everyone. Practice and steady hands help, but everyone makes a few little mistakes when applying paint.
|
|
This message was edited 1 time. Last update was at 2011/03/03 00:42:16
|
|
|
|
|
2011/03/03 00:23:06
Subject: Re:How do you paint?
|
|
Battle-tested Knight Castellan Pilot
|
Good.
That's how I paint.
1. Assemble
2. Clean (Wash off, brush off)
3. Prime
4.) Foundation (if needed.)
4. Basecoat
5. Wash
6. Main layers.
7. Touch ups.
8. Wash
9. Details.
10. Highlights.
Done.
|
|
|
|
|
|
2011/03/03 00:36:16
Subject: Re:How do you paint?
|
|
Paladin of the Wall
|
1. Base
2. Primer
3. Paint
4. Drybrush
5. Wash
6. Finish Base
7. Matt Varnish
|
 Badork Magthugs 2000Pts WAAAGH Wins: 23 Loses: 4 Draws: 4 Badork Magthugs 2000Pts WAAAGH Wins: 23 Loses: 4 Draws: 4
Ork Tournament Wins: 2
 Purge the Unclean 5000Pts Wins: 33 Loses: 7 Draws: 5 Purge the Unclean 5000Pts Wins: 33 Loses: 7 Draws: 5
Castellan Crowe used to be good, then he took a Lascannon to the face. |
|
|
|
|
2011/03/03 00:42:56
Subject: How do you paint?
|
|
Wolf Guard Bodyguard in Terminator Armor
|
^^^ Same
1. Base
2. Primer
3. Paint
4. Drybrush
5. Wash
6. Finish Base
7. Matt Varnish
|
|
This message was edited 1 time. Last update was at 2011/03/03 00:43:19
DR:90+S++G++M+B++I+Pw40kPwmhd+ID+++A++/wWD359R+++++T(M)DM+
 Deff Gearz 2,000+pts. (50% painted), Deff Gearz 2,000+pts. (50% painted),  Retribution 57pt.(70% painted), Retribution 57pt.(70% painted),  FOW British Armoured Squadron 1660pts. (15% painted) FOW British Armoured Squadron 1660pts. (15% painted)
|
|
|
|
|
2011/03/03 00:43:33
Subject: How do you paint?
|
|
Chalice-Wielding Sanguinary High Priest
Arlington TX, but want to be back in Seattle WA
|
IronfrontAlex wrote:Any tips of "painting within the lines"? I always end up getting one color or another on something i didin't mean to, leaved me touching up the mini between each stage!
I dont run into many problems when keeping colors separate or painting within the lines of a model. I suppose the first thing you could try is working with washes to blend away the lines. I am anxious to try my hand at the Cadian Battleforce I have at home to see how Im going to paint those faces inside the helmets. I differentiate the hairline from the skin with a watered down version of the same color of the skin except I add a small amount of black. This generally gives me the right tone and doesnt over power the model. Best of luck keep your lines crisp.
|
4250 points of Blood Angels goodness, sweet and silky W12-L6-D4
1000 points of Teil-Shan (my own scheme) Eldar Craftworld in progress
800 points of unassembled Urban themed Imperial Guard
650 points of my do-it-yourself Tempest Guard
675 points of Commoraghs finest!
The Dude - "Jackie Treehorn treats objects like women, man."
Lord Helmet - "I bet she gives great helmet."
|
|
|
|
|
2011/03/03 00:47:21
Subject: Re:How do you paint?
|
|
Implacable Skitarii
|
1. Flash, position, apply basing sand.
2. Prime Grey.
3. base coat main color.
4. apply highlight to main color.
5.paint the silver parts Boltgun metal, and gold/bronze areas tin bits.
6. pain bronze areas bronze and do the same to gold areas, then add the gold to the gold areas.
7. add black wash to the silver areas, and Delvan mud to gold, followed by light black wash.
8. paint the rest of the colored areas.
9. wash the reds, then highlight the reds, and browns.
10.wash the browns, then add another highlight.
11. paint base.
12. add final touches, and dust if needed.
Result so far.

|
You know you're spending too much time on 40k when... you worry about the Gets Hot! rule when turning on a plasma tv. - frightenedfreddie 
原子炉へつれていって。 |
|
|
|
|
2011/03/03 00:54:11
Subject: How do you paint?
|
|
Krielstone Bearer
|
spraypaint white
dunk in minwax dip...
paint boltgun metal
=P
but for real:
Base
Primer
Paint
Wash
Base
finish (matt)
|
|
|
|
|
|
2011/03/03 00:55:52
Subject: How do you paint?
|
|
Ultramarine Master with Gauntlets of Macragge
|
IronfrontAlex wrote:Any tips of "painting within the lines"? I always end up getting one color or another on something i didin't mean to, leaved me touching up the mini between each stage!
Automatically Appended Next Post:
great lists people!
The difference between an average painter and a great painter is how much time they spend touching up! You need to keep a steady hand in general (which means no caffeine) and it helps to rest one or both hands on each other and your elbows on the table.
|
Check out my Youtube channel!
|
|
|
|
|
2011/03/03 00:59:11
Subject: How do you paint?
|
|
Dispassionate Imperial Judge
|
For pretty much any army - only thing that changes is the colours...!
- Prime (primer colour depends on main colour)
- Spraypaint the model the 'main' colour (red for BA, brown for my guard, etc)
- Apply all base colours except black and silver, usually with foundation paints.
- Black on any black or metallic areas.
- Metallic base colours.
- WASH/DIP
- Highlights on all colours, starting with the biggest by area.
- Second-level highlights on detail/faces/gems
- Paint base
- Flock base
- Spray Matt Varnish
- Gloss varnish on gems
|
|
|
|
|
|
2011/03/03 01:08:29
Subject: How do you paint?
|
|

Veteran Wolf Guard Squad Leader
Princedom of Buenos Aires
|
My technique is too simple in comparison :/ and only works I guess for I paint SW
1. Clean mould lines
2. Base
3. Prime "Neutral gray"
4. Paint non-grays bases
5. Wash
6. Drybrush
|
|
|
|
|
|
2011/03/03 07:31:20
Subject: How do you paint?
|
|
Grisly Ghost Ark Driver
|
Dark wrote:My technique is too simple in comparison :/ and only works I guess for I paint SW
1. Clean mould lines
2. Base
3. Prime "Neutral gray"
4. Paint non-grays bases
5. Wash
6. Drybrush
pft.. lucky
|
|
|
|
|
|
2011/03/03 07:48:26
Subject: Re:How do you paint?
|
|

Umber Guard
|
Necroshea wrote:It looks like crap after the wash. I try washing the ravaner just like I do the guardsmen, and it doesn't work. It's like there's black splotches all over the larger flat areas like the large scything talons.
Yep, large flat areas are not that great for washing. Since there´re no recesses for the wash to flow into they tend to pool on areas they´re not supposed to. All you can do is carefully removing all unwanted pools with your brush until the was is somewhat dried (assuming you don´t want a new layer of the old color over the washed areas).
Anyway, don´t we all have similar techniques? ^^
1.) Clean mould lines
1b.) Wash (as in Water and Soap) if metal or resin model
2.) Assemble (pinning if necessary)
2b.) close gaps with Green Stuff
2c.) Conversions if planned
3.) Base with Sand
4.) Prime Black
5.) Foundation and Metallic basecoats
6.) First Touch ups
7.) Main wash with Badab Black or Devlan Mud
8.) Highlights (biggest to smallest)
9.) Washes to blend the layers and help bring out some colors (mostly with the more colorful washes)
10.) Details
11.) Drybrush base with Brown, Gray and Bone
12.) Flock base
13.) Gloss Varnish the whole model
14.) Matt Varnish appropiate areas
All in all it seems more work than it actually is and that it should yield better results than it actually does ^.-
|
Pledge 2011:
Bought - 81
Build/Converted - 121/1
Painted - 26 |
|
|
|
|
2011/03/03 09:17:33
Subject: Re:How do you paint?
|
|
Regular Dakkanaut
|
Vimes wrote:Necroshea wrote:It looks like crap after the wash. I try washing the ravaner just like I do the guardsmen, and it doesn't work. It's like there's black splotches all over the larger flat areas like the large scything talons.
Yep, large flat areas are not that great for washing. Since there´re no recesses for the wash to flow into they tend to pool on areas they´re not supposed to. All you can do is carefully removing all unwanted pools with your brush until the was is somewhat dried (assuming you don´t want a new layer of the old color over the washed areas).
P3 Mixing Medium. You can also try Vallejo Matt Medium. Thins it out without affecting the colour. The surface tension will mean ink will actually dash for the recesses and tend not to pool on the flat surfaces. If you still get pools consider using less ink, or more than one coat of watered down.
Some people tend to wash the whole mini at once. Avoid. You've painted each area carefully up to this point, so why change the habit? Washes should be applied as carefully as any other coat.
You can also try inking up in a different way. Leave the talons etc till last. Apply just to the areas you want shaded. As it pools in the recesses, drag the ink down along the talon toward the point. There shouldn't be enough ink to pool, but there should be enough to pull back the colour if that's what you're looking for.
|
|
|
|
|
|
2011/03/03 09:34:08
Subject: How do you paint?
|
|
Avatar of the Bloody-Handed God
Inside your mind, corrupting the pathways
|
I use the following steps:
1) Modeling.
2) Undercoat white.
3) Base coat with airbrush.
4) Add on other base colours.
5) Wash base colours.
6) Paint on details.
7) Wash details if appropriate.
8) Base.
If don't really like or enjoy painting, so I find that starting light and painting and washing things towards the darker colours is easier than building colour up from black and dark colours.
|
|
|
|
|
|
2011/03/03 09:48:42
Subject: How do you paint?
|
|
Grisly Ghost Ark Driver
|
Is airbrushing worth the effort with marines?
|
|
|
|
|
|
|
|

 The Undying Spawn of Shub-Niggurath