Switch Theme:

Terrain Chain (mothsniper)  [RSS] Share on facebook Share on Twitter Submit to Reddit
»
Author Message
Advert


Forum adverts like this one are shown to any user who is not logged in. Join us by filling out a tiny 3 field form and you will get your own, free, dakka user account which gives a good range of benefits to you:
  • No adverts like this in the forums anymore.
  • Times and dates in your local timezone.
  • Full tracking of what you have read so you can skip to your first unread post, easily see what has changed since you last logged in, and easily see what is new at a glance.
  • Email notifications for threads you want to watch closely.
  • Being a part of the oldest wargaming community on the net.
If you are already a member then feel free to login now.


Made in us
Grumpy Longbeard


Consolidating all my terrain past topics/posts into one terrain blog.
Starting from earliest to latest.

Starting with first attempt at terrain. Over sculpted surface was covered with flock, lesson learned.


Tyranid terrain inspired by DoW2


Found pictures from one of me favorite terrain projects I have worked on back in 2016!
An Orc ended up buying it later at local swap meet.

Idea was to make 3 to 4 pieces of themed terrain.
And the theme for this set was a small cage camp.

Love carving the foam


Thank you for watching dudes and dudets.


This message was edited 1 time. Last update was at 2022/03/05 10:55:58


Made in us
Grumpy Longbeard


First LoeR participation:

dea I have is a Tesla Powerplant structure inspired by RedAlert 2

Golfballs, cup, sprinkler pieces, old flashlight, used printer cartridge, and pink foam.
2 part epoxy.
This is turning into much bigger piece than original design drawing

Trying out the Air-Dry-Clay Das to fill in the gaps.
Might shrink and crack. well see.

Wood-Glue brushed on all insulation- foam sides for spray painting.
Worked quite well.

Got Whole bunch of "rings" for the coils.
Unfortunately the selection of sizes to pick from is small.
Even a local dedicated plastics shop had very small and overpriced selection.

I think I will go with the Styrofoam rings.

1 - Decided to make 3 objective markers type structures. Turned out that 2-Part-Epoxy doesn't hold on to the smooth plastic surface.
Should of though of that... before drilling out the hole on the top... because everything flaked off.
Now the plastic pieces are scored with a rough file. Should hold better this time.

2 - Figured out that these tiny plastic tubes bend very easily when lightly heated, and hold the shape in seconds when cool.
Trying to bend multiples pieces at once failed because the tubes spread out the heat to the pieces next to them and just over melting the tips into oblivion...
However, the longer pieces worked-out quite well and will get used.

3 - I needed a way to cut thin pieces of plastic and small sections of balsa-wood to make details for this Tesla Tower. Ended up making this simple cutting table today.
The L bracket has a bit of give and could be adjusted for exact 90. The 90 and 45 will be drawn on table and the pieces would be held by hand, I don't think I need a rail of guard for pieces that small. And the blade is glued with 2-Part-Epoxy, should not be hard to pry off the old blade and glue in a new one if need be.


For the structure it self, the gaps are filled in with Das-Air-Dry-Clay around the curved structure and painted.

For the smaller tesla top, in addition to the "golf-ball", some small chess pieces are utilized
Tops melted slightly and dented with marbles.

Some sort of sphere will go on top, something easily pinable and easily paintable.

Cutting bases for the smaller teslas.
And the details.

A mixture, of: woodglue, mod pudge, acrylic paint, pigment, dirt from outside, twigs and ground leaves, decorative sand, and paper towels, is applied around the structures to provide texture and help secure the pieces together by encasing everything in a hard shelf.
Because the 2-Part-Epoxy is good, and glued in cardboard base is good, and Das Air-Dry-Clay is good, but it possible for those concrete sections to snap off the round shape with enough force. Now, they are not going anywhere.

This is the last progress update on the Tesla Tower as it is close to completion

And some more progress... I think I am overdoing it at this point.
Thought to have 4 rings (O-rings) go around the top pin getting smaller in diameter.
In my mind the only secure attachment for them rings are the pins and superglue... after attaching 2 larger rings... yeah... I think I will skip the consecutive decreasing 4 layers of tiny rings. That would be a day of work by it self.
AAAAAaand i broke all of my drilling bits.


Done


Made in us
Grumpy Longbeard


Next project:

Will try to make emergency soul harvester.

I have not seen good Drukari DE terrain, not in art not on tables.
Best inspiration I got is from Heroes 5 and DoW Soulstorm.
Even though I love both of those games, I am not feeling the architecture for the Drukari.

Will try come up with something more appropriate to the Druchi.


Hanging cage thing.

For folk who played DoW soulstorm with DE, you know what little guy I am trying to sculpt to go along with the emergency soul harvester.
Also, ENJOY! - https://www.youtube.com/watch?v=aDx2GirSJkA


2 - I was hunting for cool DE shapes, more angular and minimal offset shapes, think of Sith.
And got great idea to use piece of plastic cocktail stick for an "glow" inset

3 - Making use of collected trash, cheepo dollarstore krazy glue empty containers and caps.
Glued, cut at an angle with a backyard band-saw, spray painted everything with whatever spray can was in the shop.

4 - Sculpted the (Slave) guy from DoW just good enough to look ok-ish. Decided to swap the head, this one was already painted
and just fit better.
I relied on deformed and tortured body shape and the paint contrast to deliver
overall look and feel, because the sculpt is very quick and dirty.

5 - Spray caned foam pieces after a single coat of polyurethane, water based of course, found old jar of it in the shop, why not.

6 - Old test piece of colored sand and Mod-poge + some sort of egg half thing + foam structure + blade containers.
Before this step I was not very exited about the terrain and had no idea where it was going.

7 - The containers are not Xacto! But cheep 1dollar off brand. Super glued them together, and filled areas I needed flat with DaZ Air dry clay.
I used a bit of super glue on the clay after it dried, to make sire it wont flake out.

8 - Dry brushed the pieces, and on the back of the containers I drilled a row of holes through the joints, and worked JBWeld on both sides and through the drilled holes,
So JBWeld is holding from both sides, and is filling the holes in between the pieces, because initial super glue just would not hold the plastic containers together.
Even this, is a "poor" joint, hopefully it will serve long enough

9 - Use my colored sand to have uniform look with my DE https://www.dakkadakka.com/dakkaforum/posts/list/30/760381.page
And dry brushing the egg half turned out SUPER COOL! I had no idea it will look this good.
Getting closer to finished piece, maybe one more full day over a week.


Done:


This message was edited 7 times. Last update was at 2022/03/05 09:37:37


Made in us
Grumpy Longbeard


Inspired by the "sunken ruins of sargeras" campaign from WC3

Terrain is imagined as a Pre-(Hive Fleet Behemoth) Ocean world of Tyran.
(http://warhammer40k.wikia.com/wiki/Tyran)

Pink insulation foam flag-cut, coated with Golden-Matte, and lightly burned in areas.

Terrain pieces are gathered: Old sea shells, old dry sea weeds, old washed dry pine-cones, and other dry ocean shore-wash.
Everything is base attached with termo-glue and blended with (Paper / Wood-glue / Water) paste.

Two coats of base acrylic paint.
One Light-Beige dry-brush pass
One Raw-umber wash pass.

And a lot of detail painting


The Flagstones gradients are painted in with care.
Green seaweed-moss is a (Paper / Wood-Glue / Water / Acrylic Paint) mixture to color and apply texture where blending was needed.
(Extra mix could be stored in refrigerator)
And the Tiny roots are painted with care.

The dry seashells and seaweeds are very sturdy by them selves, however everything was coated in few layers of Wood-Glue and then few coats Satin-Varnish.
That allows me to pick up the piece from pretty much any detail, up to a point, also after accidentally dropping few of these they stayed intact quite well.

I love the way the paint job on the stone came-out, I like the yellow roots things alot, and pretty happy with the greenery.


[Thumb - d.jpg]

This message was edited 2 times. Last update was at 2022/03/05 09:44:23


Made in us
Grumpy Longbeard


Tr Nd Terrain
From an old, backyard cactus.

Cactus recovered:
Seems pretty sturdy, but brittle in some areas, will need few layers of wood glue I think.

De-Needled:
Needles are stored for safety and later use.

Cactus cut:
Cut into ("Aegis defense line") sections. Very nifty sponge texture inside and mesh like casing around the cactus.

Molded:
Sculpted around the cactus with Air-Dry-Clay

So far so good.


Progress has been made!

After everything is dry one coat of light-beige dry-brush, and a one wash of watered-down raw-umber.

Flat bases need bit of spackle and colored flat. These are turning out pretty nifty.

Update and finished.
Multi layers of dry-brush and washes.
2 coats of varnish.
Bottoms matt black, and as flat as i could make them. However not perfect.
Alien cacti are from aquarium plant, drilled, cut, glued.

Tyranid Hive spines covered in layers of time, with only the alien cacti cling to where nourishment still lingers.

Enjoy.


[Thumb - d.jpg]


Made in us
Grumpy Longbeard


League of Extraordinary Riveters [LoER] Round 33
Leaving 3 massive project's slumbers undisturbed for now, real life nd'ol, I've gots 2 smaller projects that are perfect.

Years and years ago me very first piece of terrain was a cave for the model trains to pass through. Nothing more but scratched up pieces of foam, dry-brushed and sprinkled with flock, yet it survived years in the rain and the sun and the cobwebs, and the dusty boxes, and my recent attempt to "up date it" Good thing I actually took a picture of it. I want to finish it so it looks good, and want to try some interesting with the basing, so it looks natural on any game mat, or table.

Second project was a small mirror test of an Idea I wanted to implement into the larger projects of KARAK GARAZ-GNOL
Be good to finish the mirror test an see if the concept actually works or fails.

Made first picture in the recent/ish attempt to fix the cave.
I took shots from all sides to see what needs to be added. I do not eve remember what some of my own instructions are for .

The plan is to fill in the base with air dry clay so it sits flat on the table, and create some "floating" pieces of terrain for natural look.
And to beef up those walls. Some of that was done in the fix attempt.

Will enter 2, hope to get at least 1 finished.
Cave - hope to get it finished so it looks like a ruined tower
Mirror - hope to get it finished so I can see if my idea was good or not.


PROGRESS!
Cave -
The only cost effective (filler/rock-solid-bond) material I have is mod-poge or wood glue and sand/dirt.
1 - Flattened the bottom as much as I could with a Random Sander, but there is no way for me to sand the piece as a whole perfect flat, so there is a tiny wobble. Plus I am not going for perfection here.

2 - Filled in some gaps with mod-poge/sand

Mirror -
1 - The original build is poops, these rough offcuts just don't look to scale, decided to scrap em, but the back piece I will keep
2 - Starting from ground up, frames for both sides, stained and will lacquer later because I do want this thing to sit on a shelf as a book-end or something.

3 - Speaking of ANCIENT foam boards, this one has green mold on it and looks like someone has burrowed in and lived there once.

4 - Box frame with outside flat and inside textured

5 - Mirrors fit perfectly snug inside on both sides

6 - Endless dungeon concept is kinda Win / Fail. Win is that works friking awesomely!!! even when I get to the very edge I cant see anything but the interior reflecting. However the test was for a much larger terrain piece! Will a different scale, size, and distance between the mirrors break the endless effect? dont know.

Progress
Thinking of adding front wall section, it looks cool but coves up interior...
and a cheep way of carving details into foam.

Frame done, ready for painting Back Wall, Celling, Floor, and Front sections.

With a test fit, the box ended up too dark inside, so I did cut small hole in the top of the ceiling to see how light will look going through. It looks good but now I can't decide if I want to put an LEDs or leave it empty and use the daylight.
I think I will end progress on the mirror here, because from here on out is just putting it together, sealing gaps, and details, so close to end look.
Will focus on the cave


Procrastinated on me cave some more until I realized my hesitation is mainly due to the fact that I have no room or no way to store or display finished pieces of terrain once completed.
Until today!
Was looking for more foam and found me pieces of an old dwarven (grudge thrower) rough build, and knew exactly what the cave will be for! and where it will go!

It shall be the top of my KARAK GARAZ-NGOL project!!!
Pretty much a top section of a diorama I have been putting off for many years.

Now the cave has a purpose! Fresh progress.

I needed a way to bulk up the walls, so instead of adding more foam, or building wooden structures inside, all I need is to cover up the entrances.
This entire project was suppose to blend terrain piece into any table surface, (I/E/ to sit on a table without showing gaps between the table and the terrain even if the table surface is not even or flat) therefor I am trying to make as many "Floating" pieces as I can.

Old wall sections are not strait, nor are the newly cut pieces, using clamps to force pieces together while the glue is drying.

Coats of ModPoge and colored sand to seal the gaps and cracks.


Small progress on the Mirror box
Single wooden beam right next to the mirror was reflecting int the mirror and it appears as if there are 2 beams next to each-other.
So I made (double-beams) to go into other "un-mirrored" palaces that would look similar to the mirrored beam, and hopefully break illusion some more.


Progress

More painting and detail is in order.
Began to glue in the vegetation.
The unique point I am trying to achieve with this piece is to have the greenery blend the terrain piece into the table as much as possible. And to hide the seam between the terrain and the table.

Floating bushes are wrapped in wire and wire is pushed into the foam, then each part of the plant that is touching the wall is then CA-glued. So Hopefully the plants not only look like they are organically growing around the ruins, but also will be sturdy enough and not fall off.
By gluing in the moss midway and allowing some of the "stems" stick out I am hoping that if the table is uneven the moss will be squished where terrain and table meet and expand to where there is a gap between the table and the terrain, thus blending in the terrain piece into the surface and hiding the seem as much as possible.


Progress
AHA! Secrete weapon test finally coming to life! BEHOLD! Floating Vegetation Frame!

Though cave could do with some mushrooms on the inside

Progress
so the idea is to create a real 3D grass texture with an alpha channel! ...
or a grass texture that is with a transparent background.

So this textured "mat" could be draped over any surface creating grass terrain anywhere-ish WITH the original surface showing through the said grass texture "mat".
Basically I want plants standing by them selves not attached to any piece o terrain, or seem like they are growing by them selves naturally

I noticed that some of rather large moss pieces nothing more but tubes and could be placed upright using little "pins"
Rolled some pins outof GrayStuff, though softer pins should be better than toothpicks

Pins cut in half and glued onto the frame

Piece of a moss glued on the the pin


Progress -
I think this be the last update image for the cave as it is getting close to the final look.
Attaching finished grass texture to the cave.
I can already see that "floating vegetation" test was a success. The only adjustment for future would be a randomized string frame to glue things too, like a string NET with a random pattern preferably without strait lines would be absolutely perfect.


Done


VIdeo
https://www.bitchute.com/video/xFdONFlPB7Ss/
https://odysee.com/@ArtNinja:1/Endless-Dungeon:e


[Thumb - d.jpg]


Made in us
Grumpy Longbeard


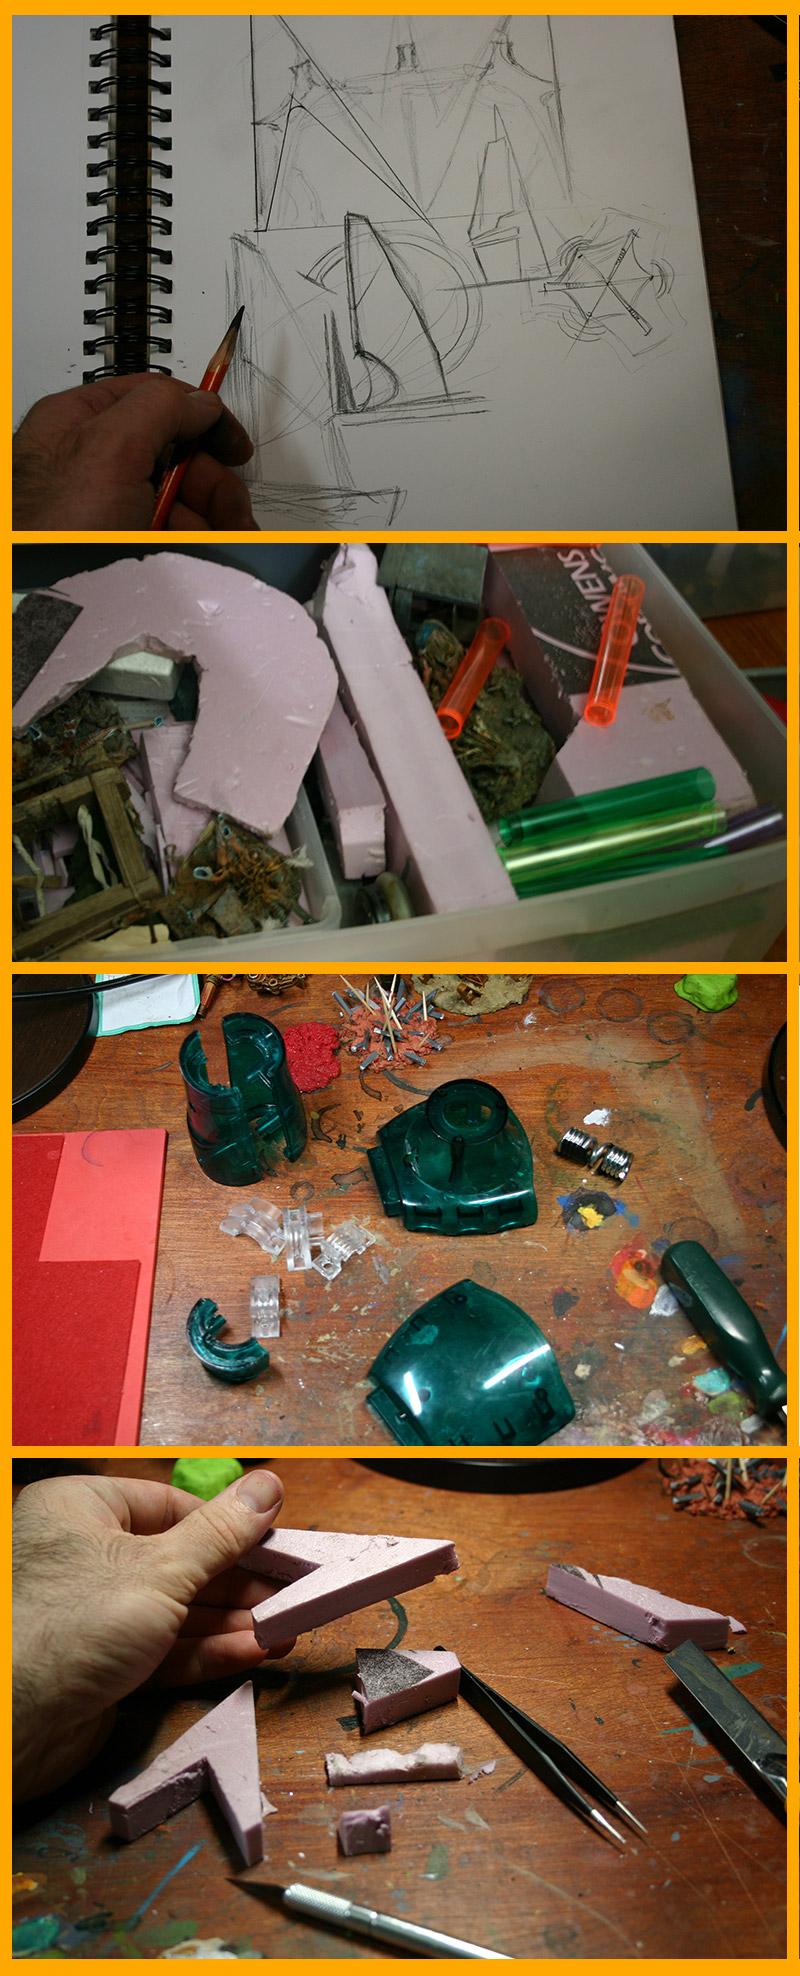
LoER Hobby Challenge #36 (Jan-Feb): Crossings

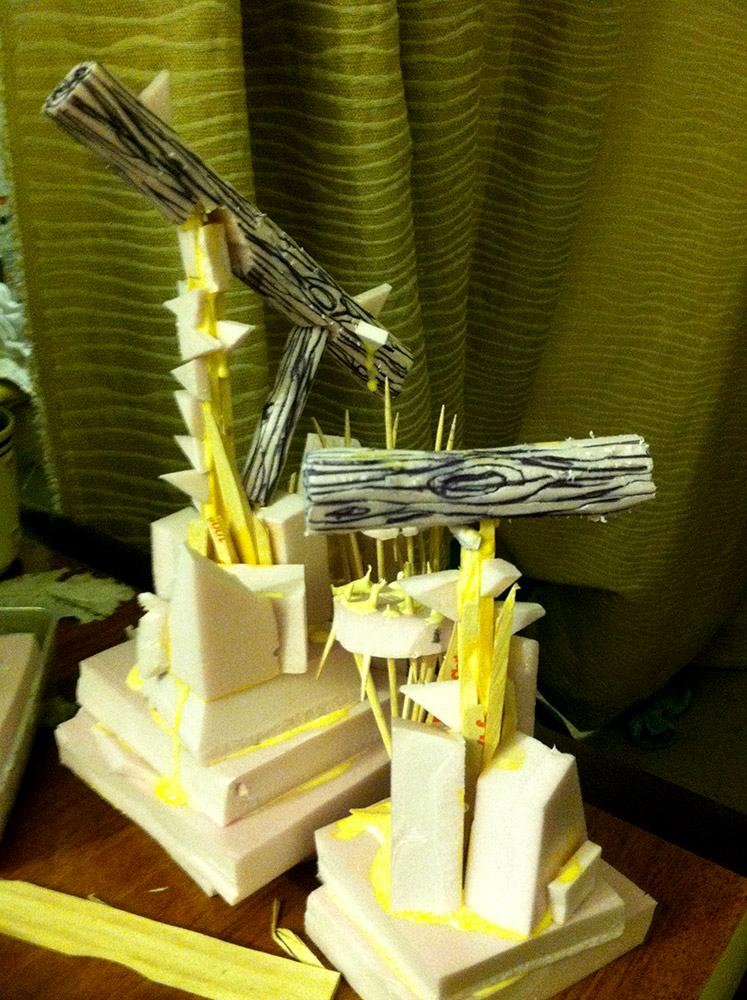
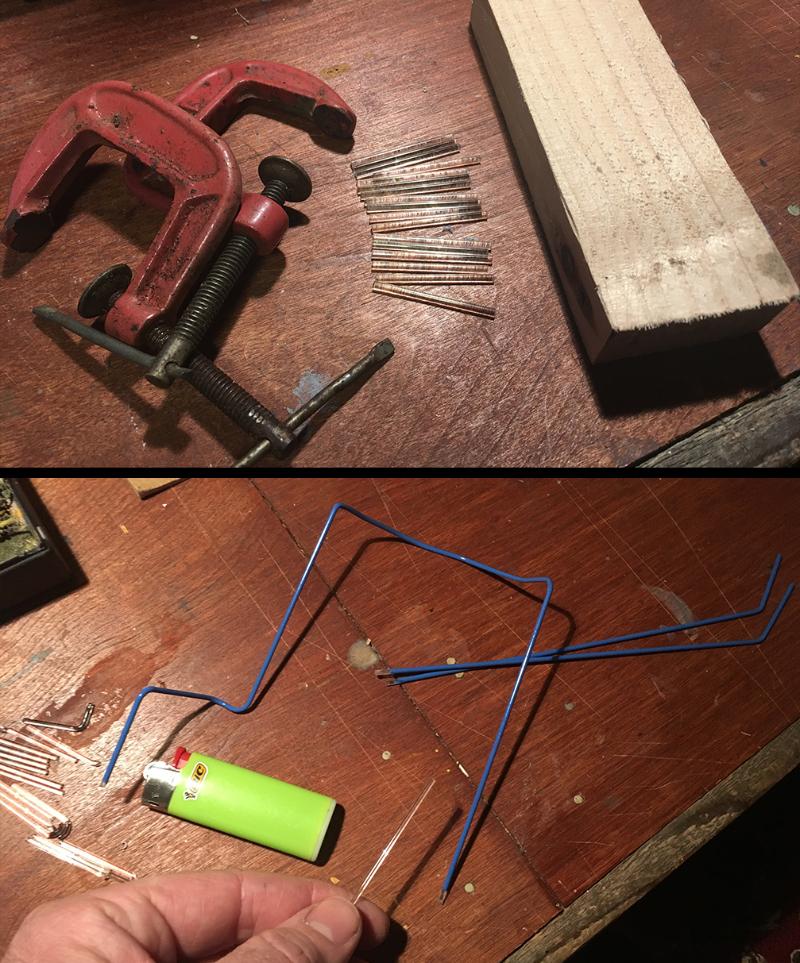
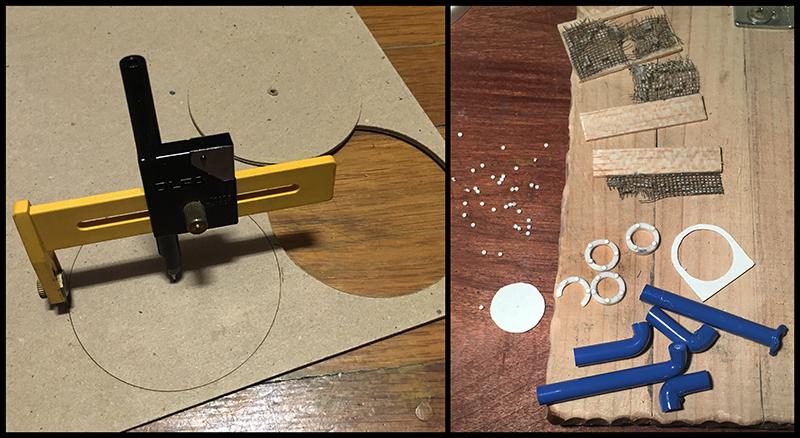
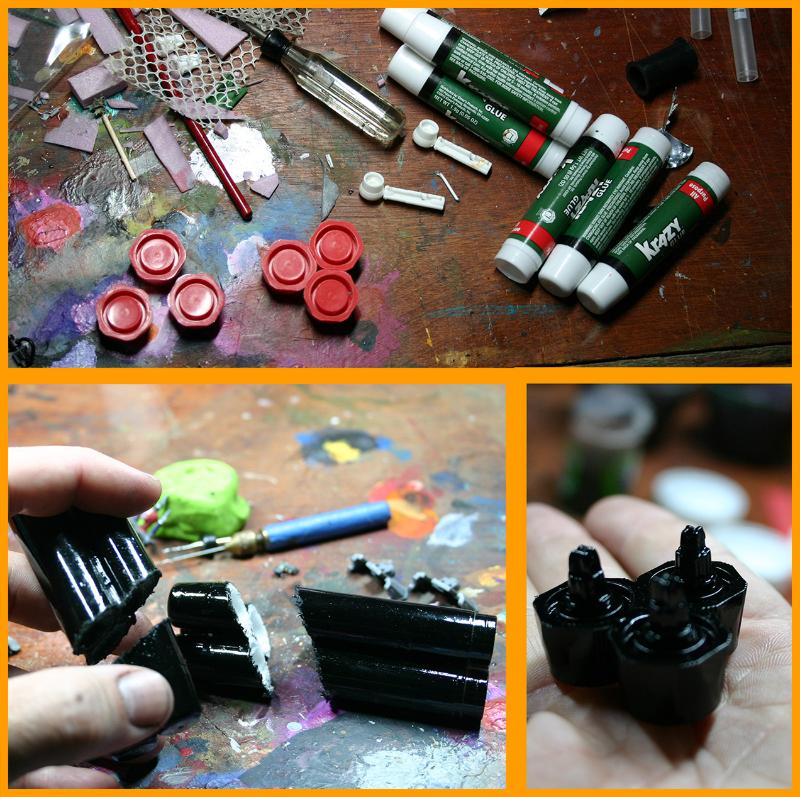
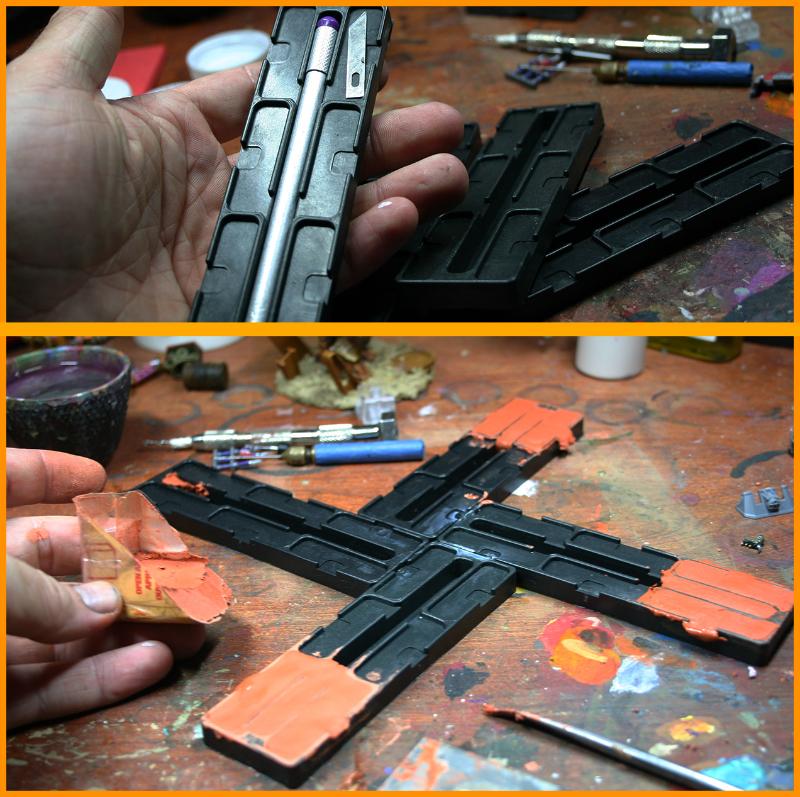
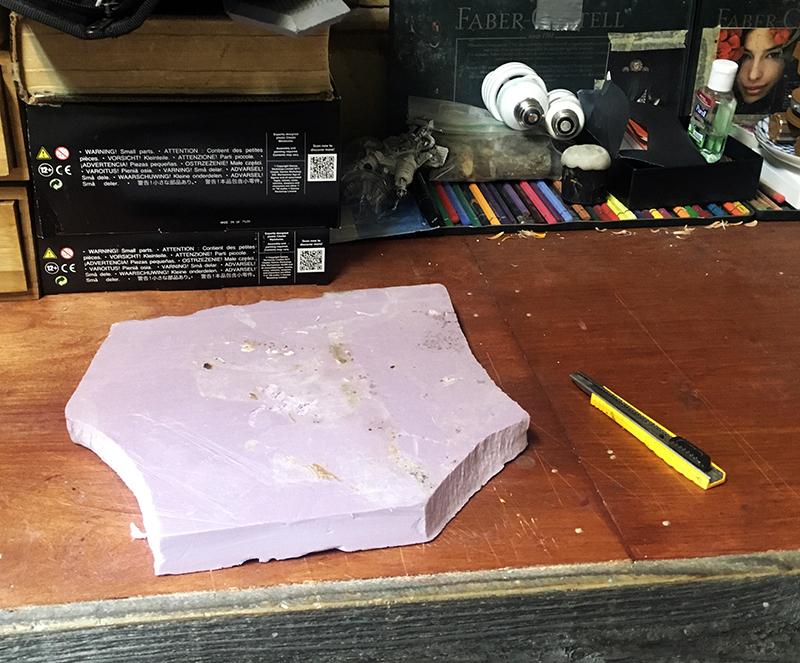
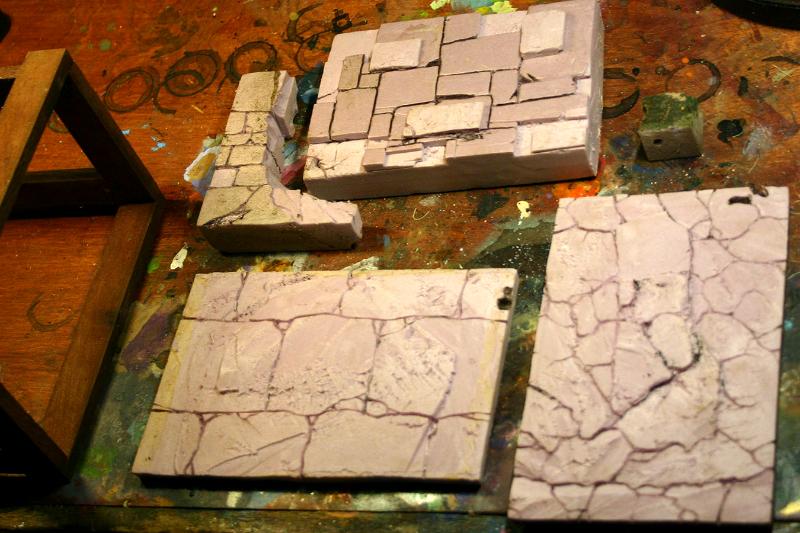
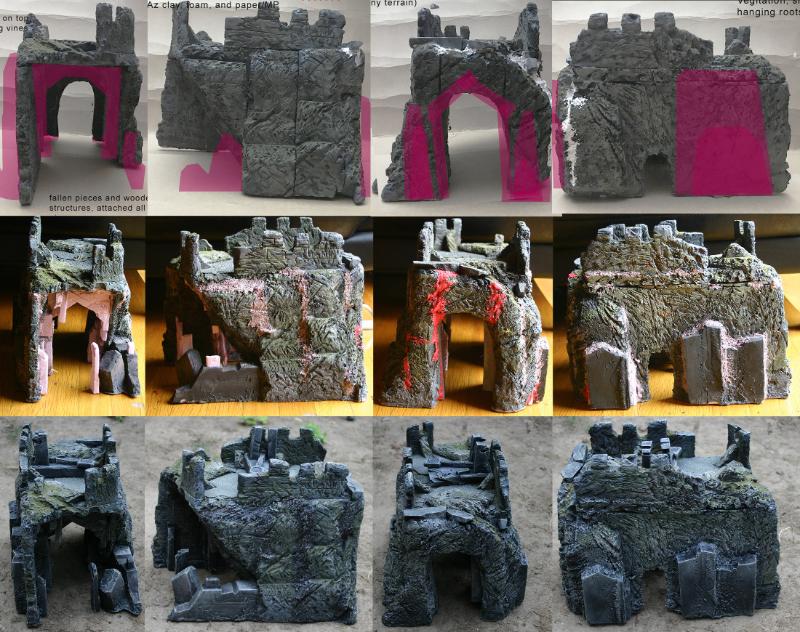
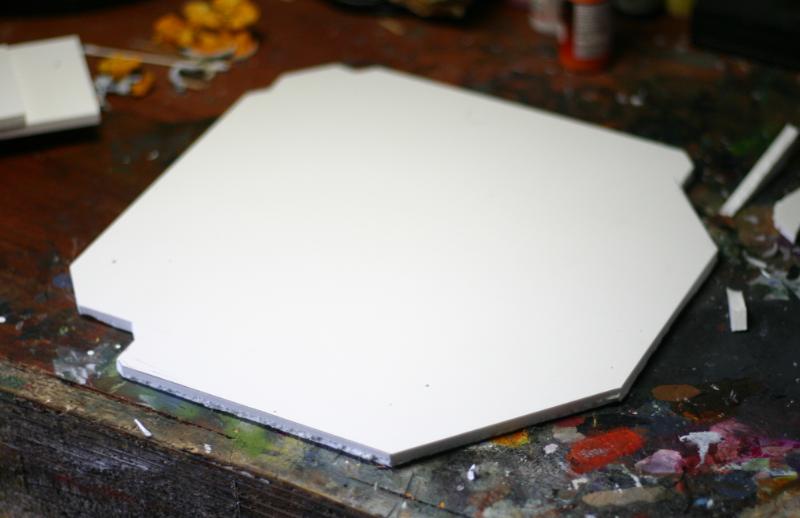
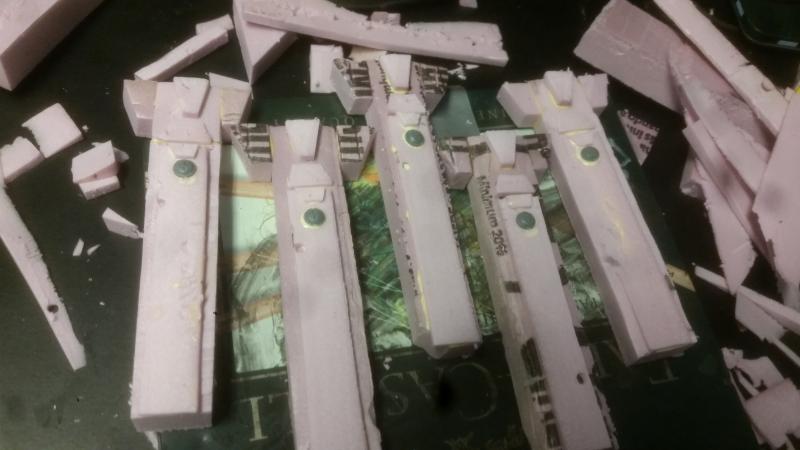
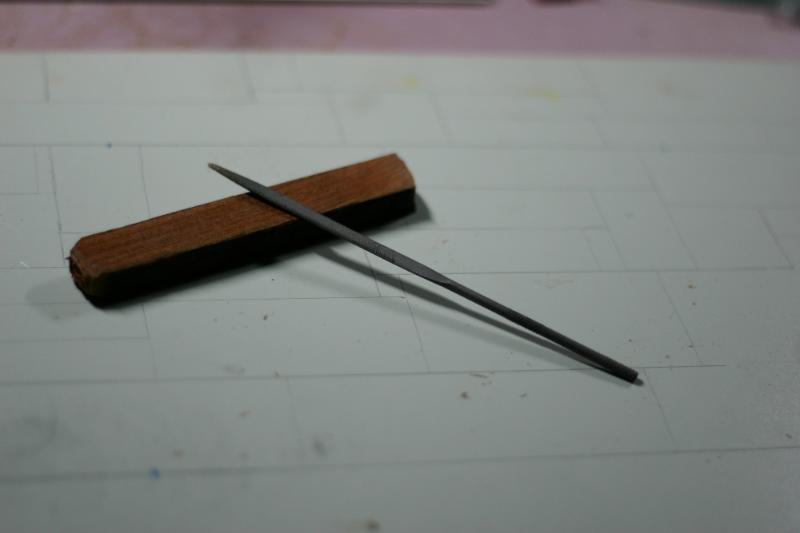
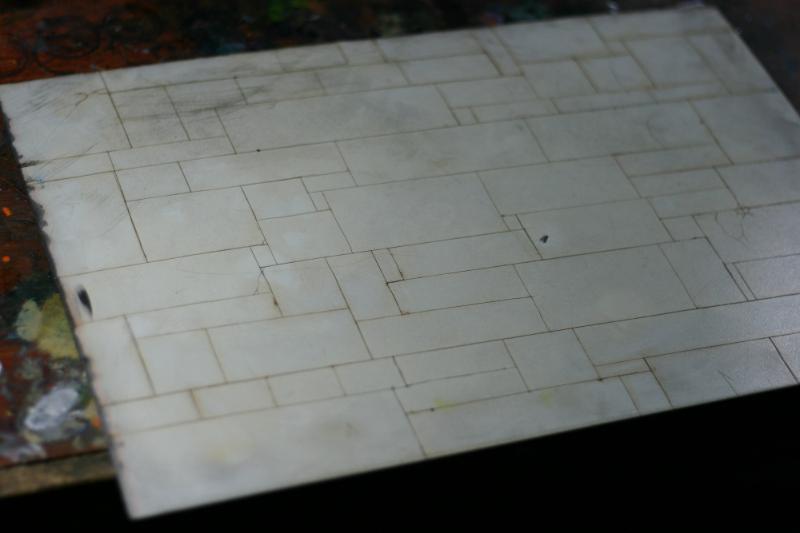
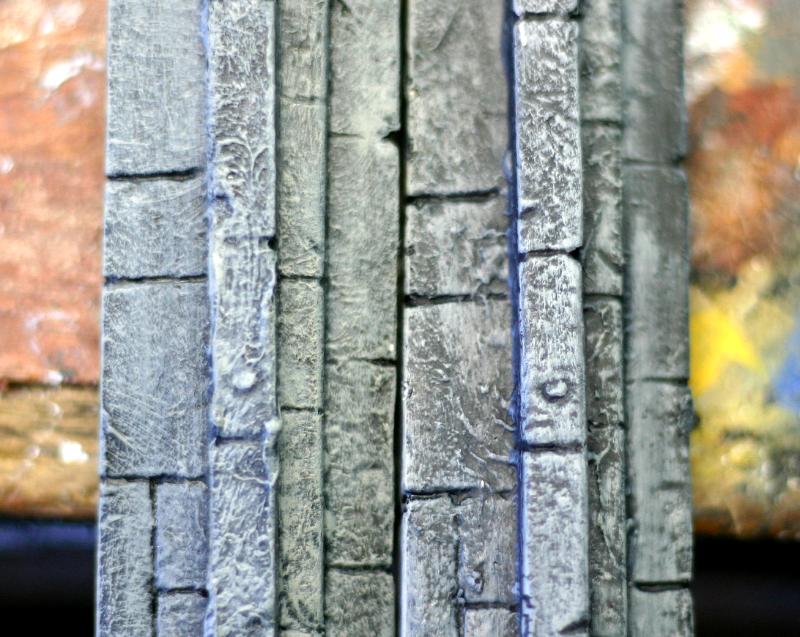
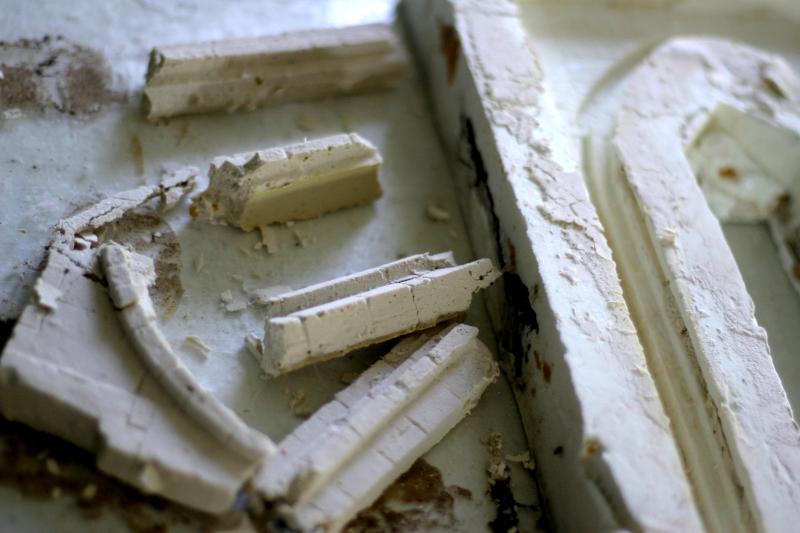
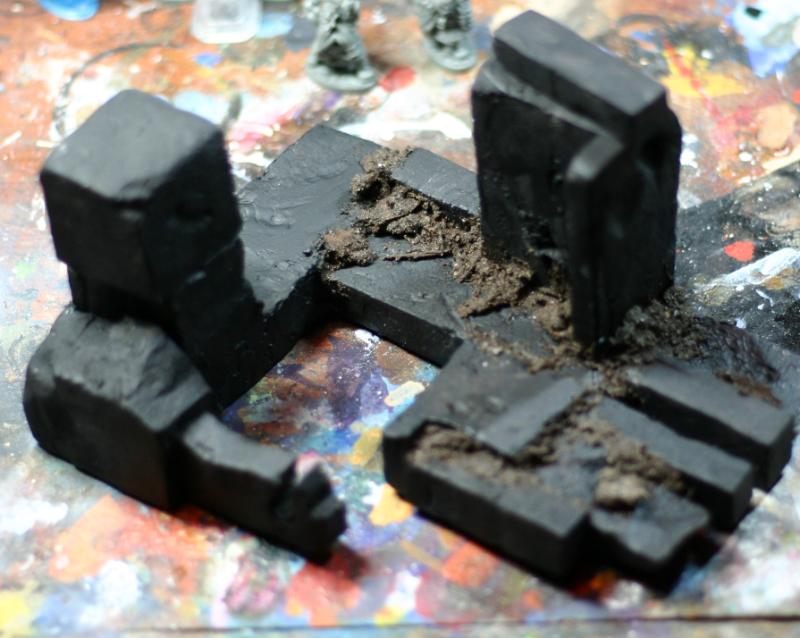
Cut foam stock of various sizes on my Proxxon.
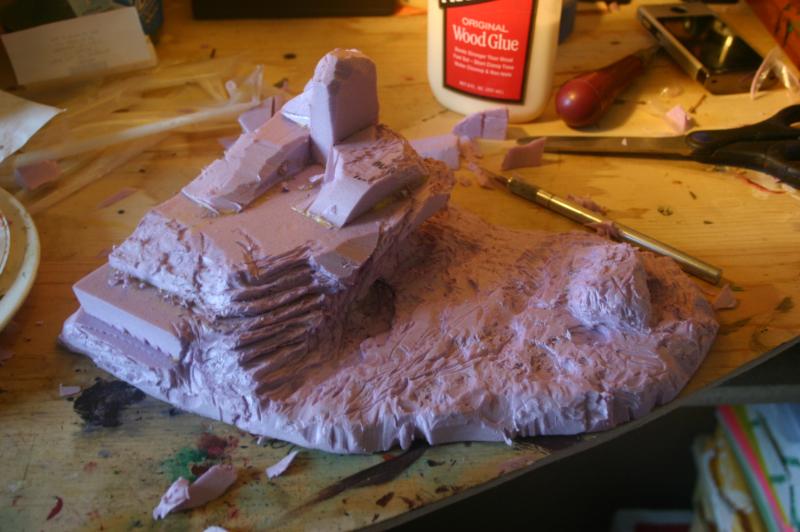
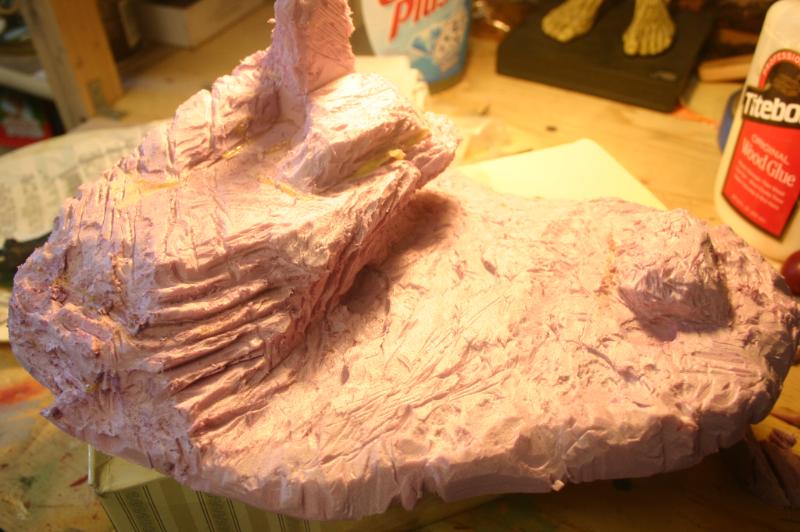
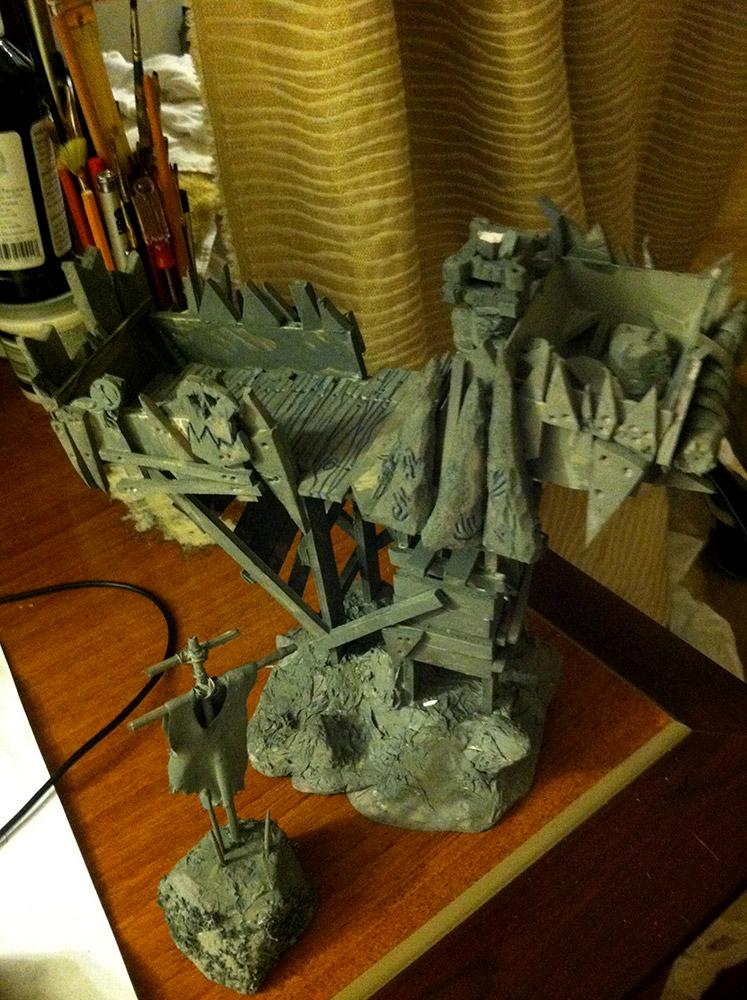
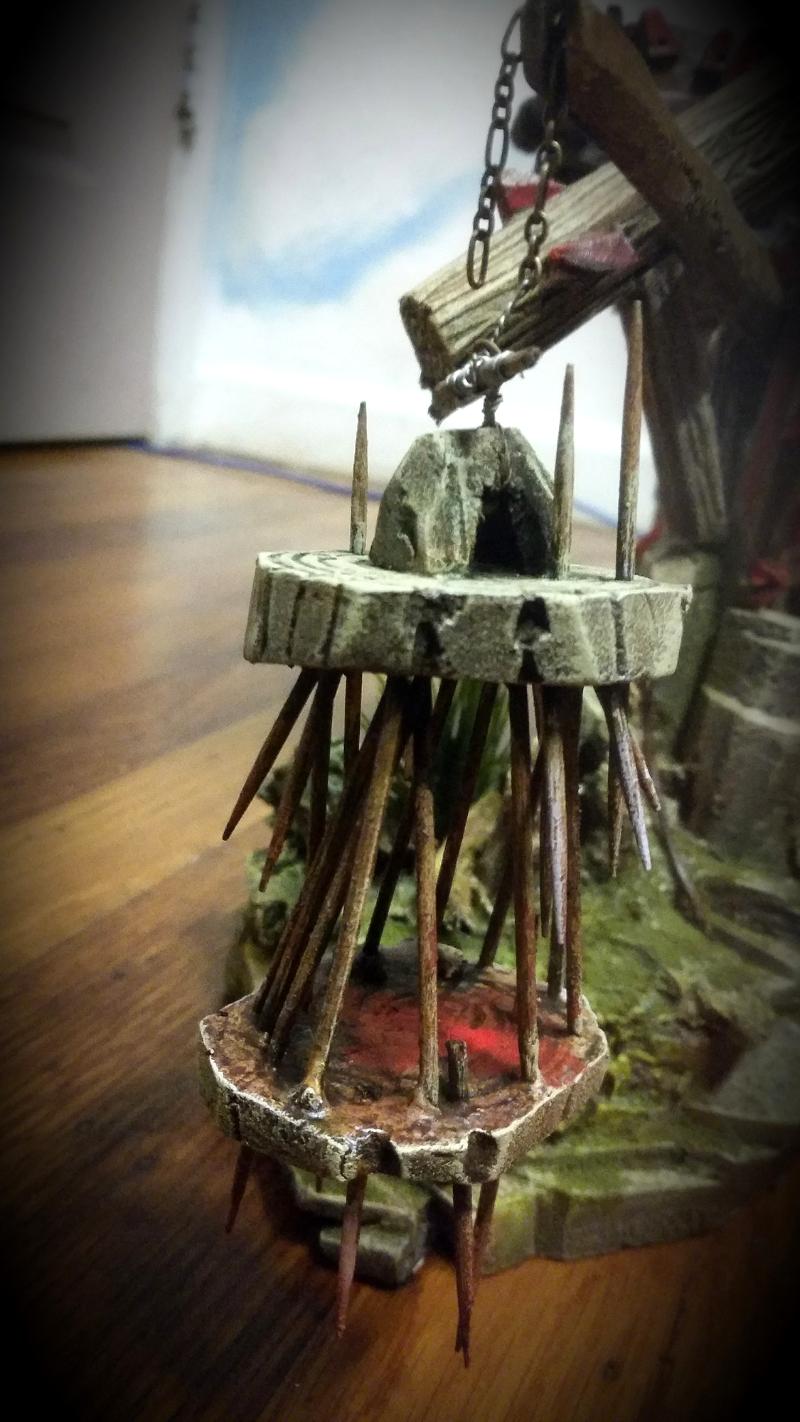
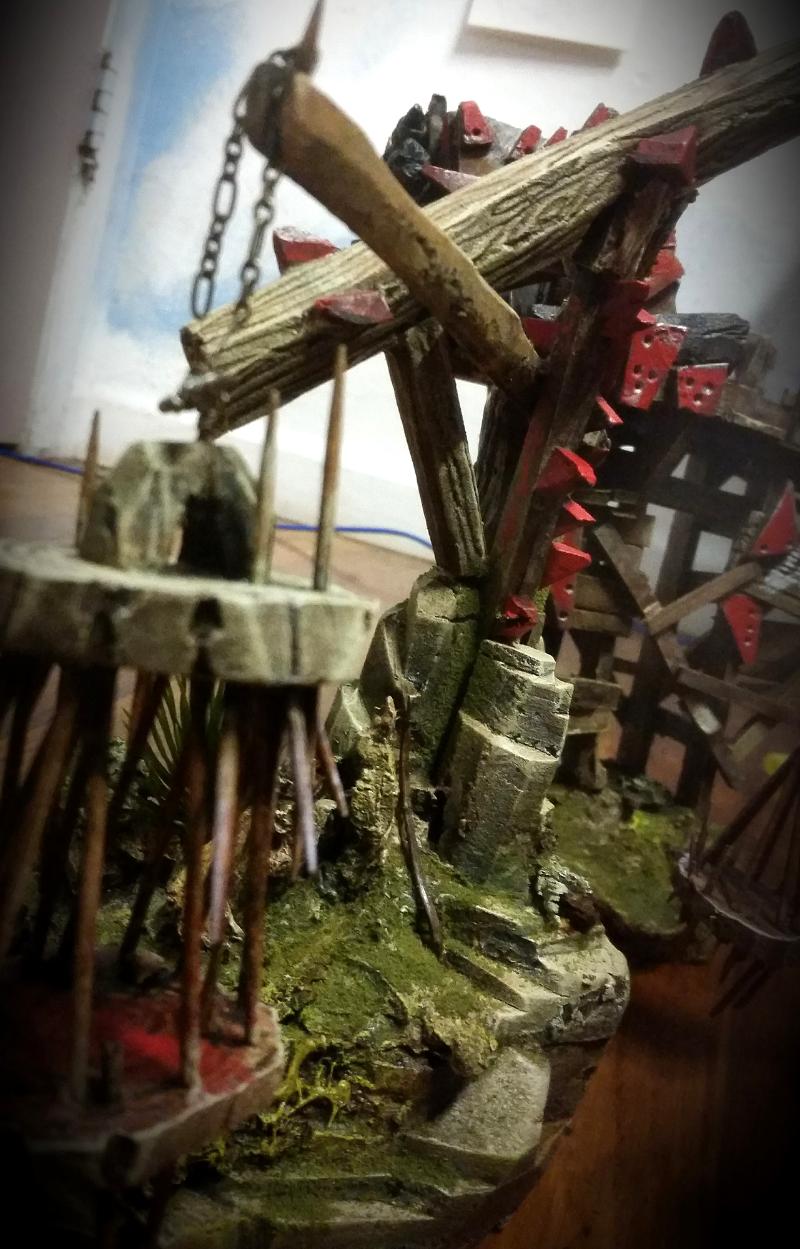
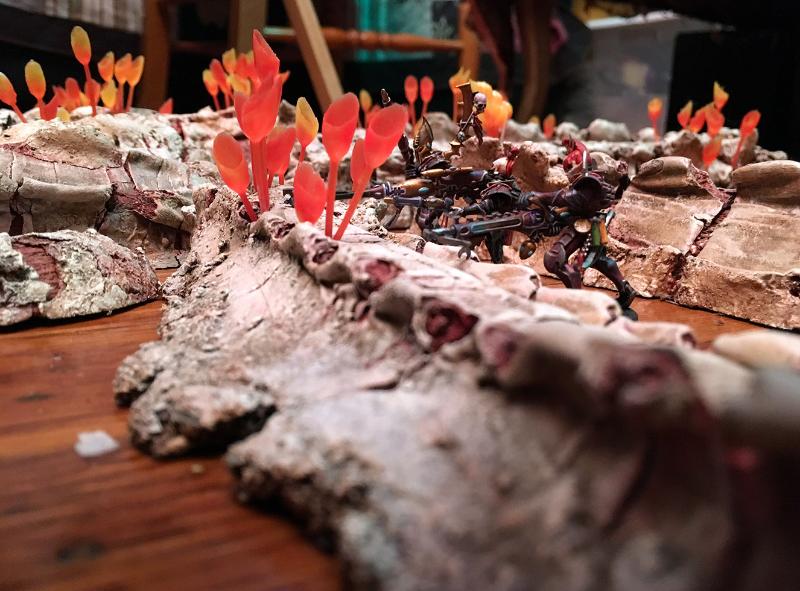
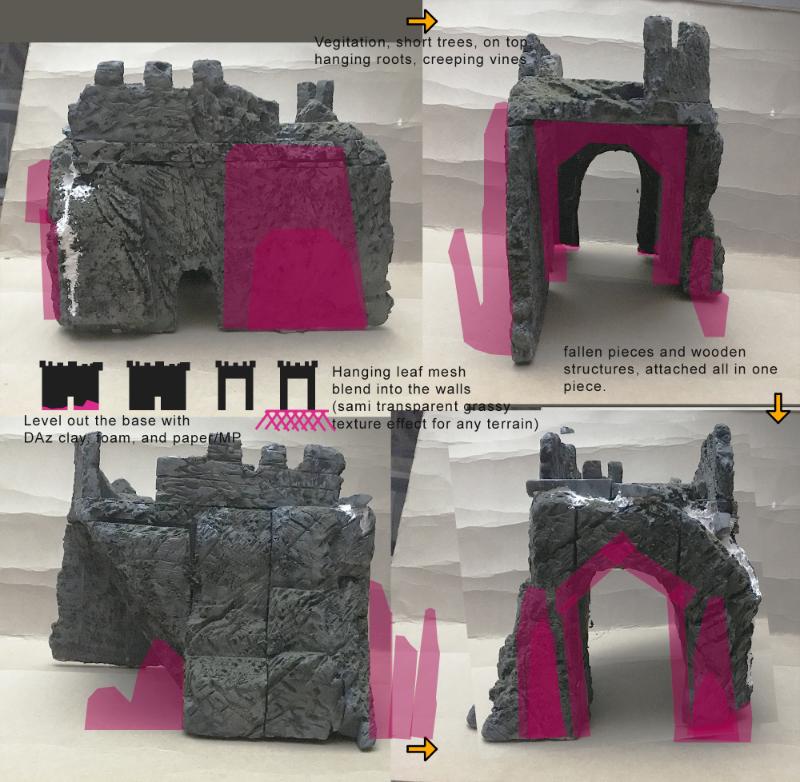
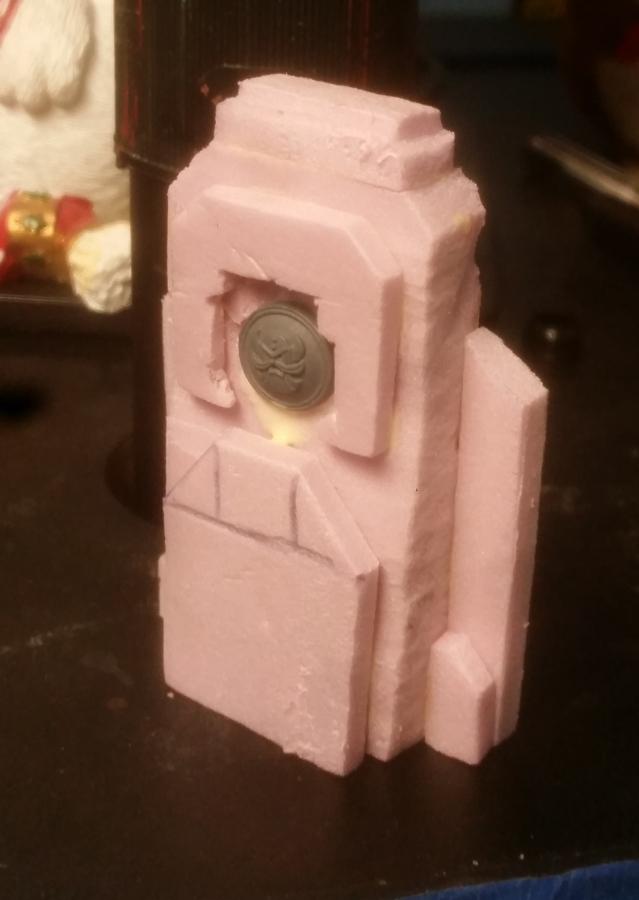
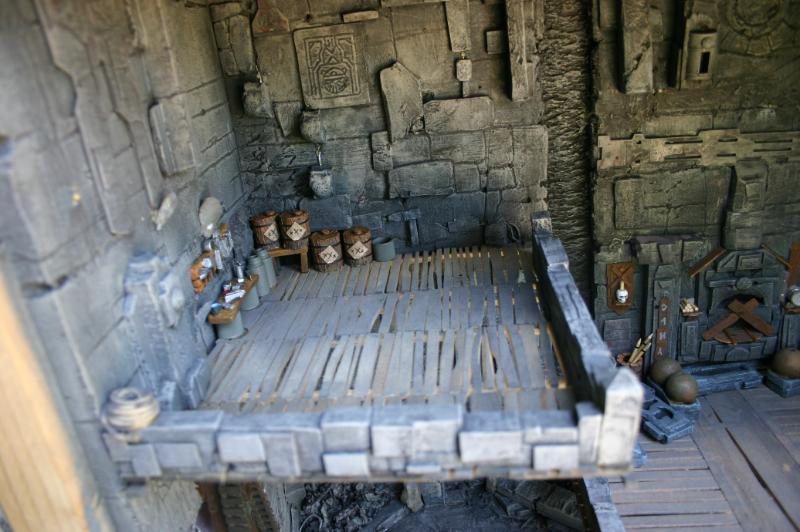
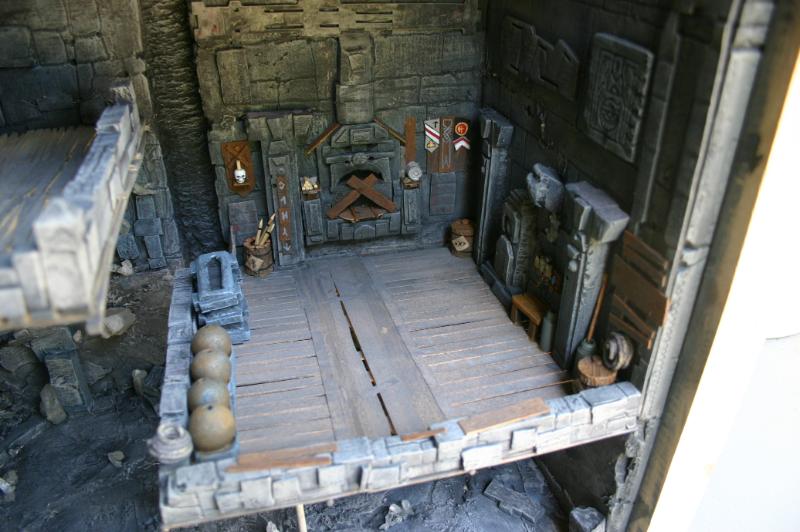
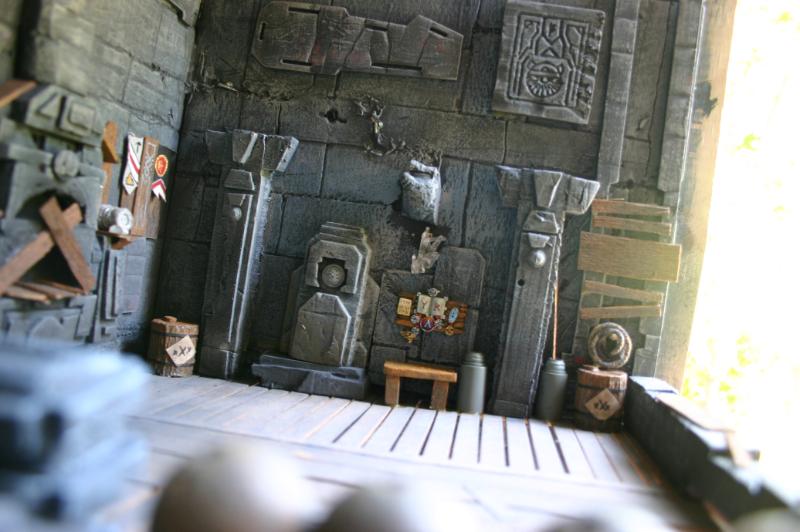
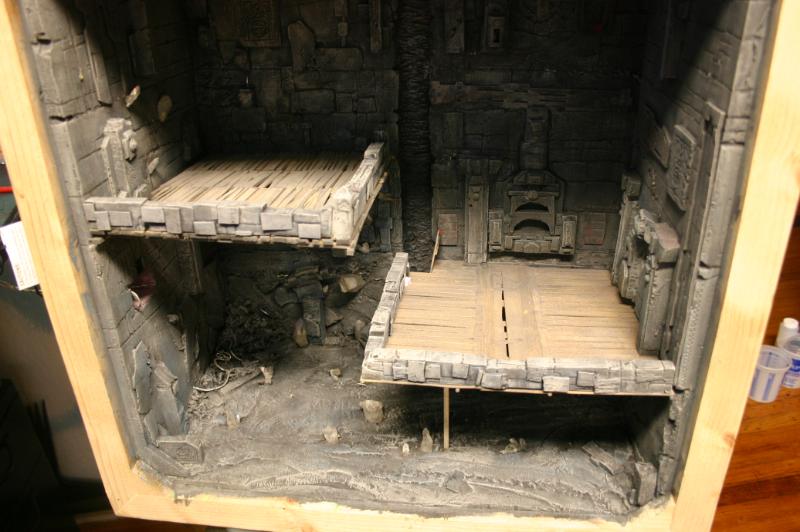
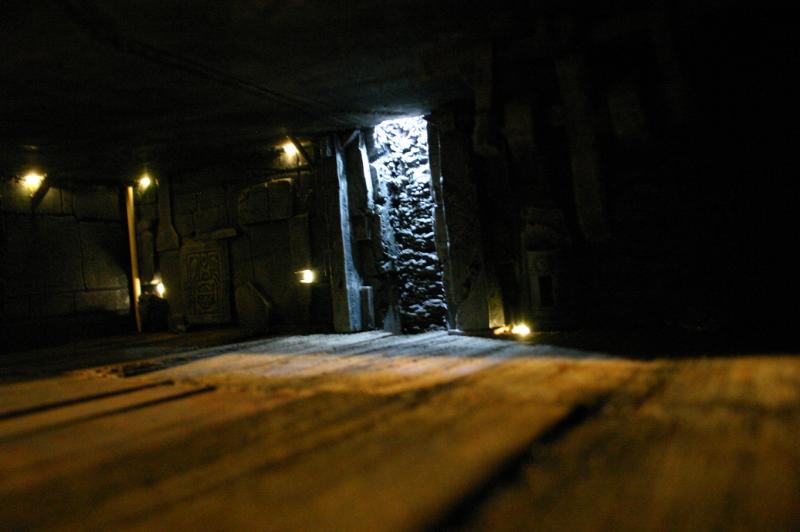
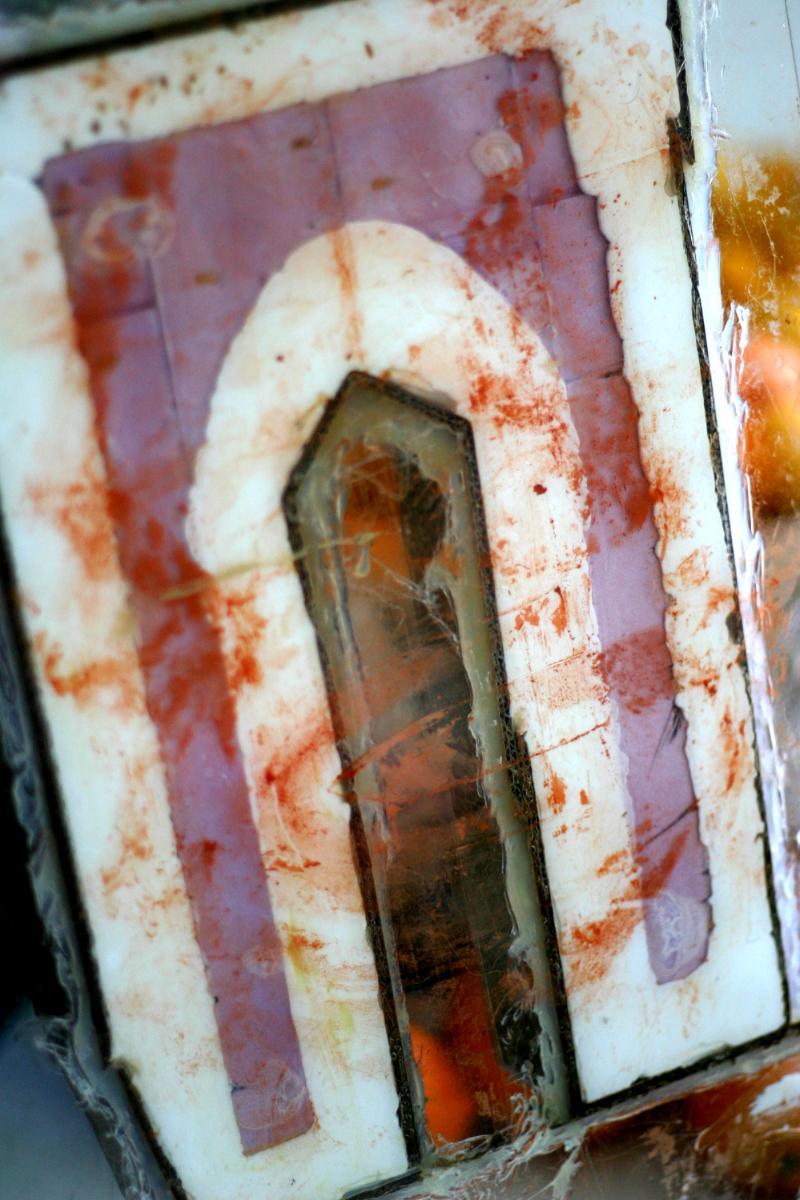
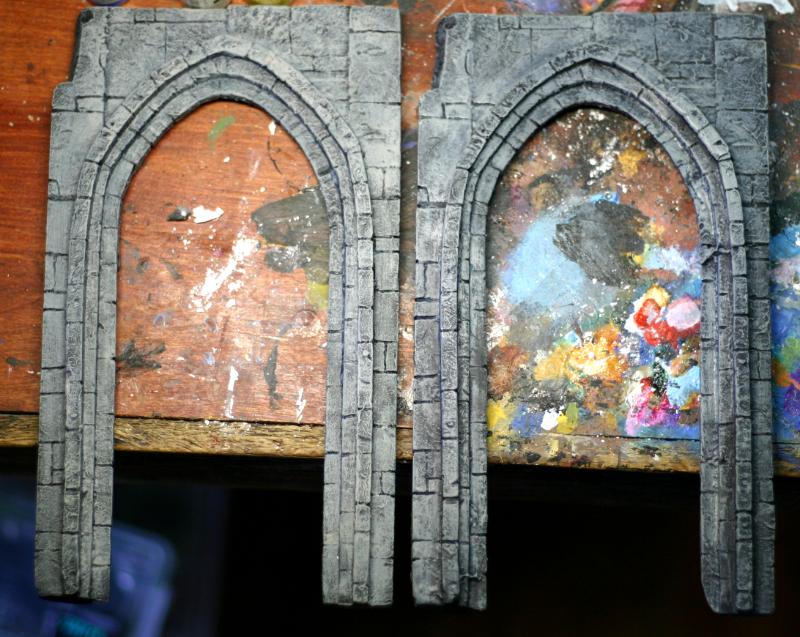
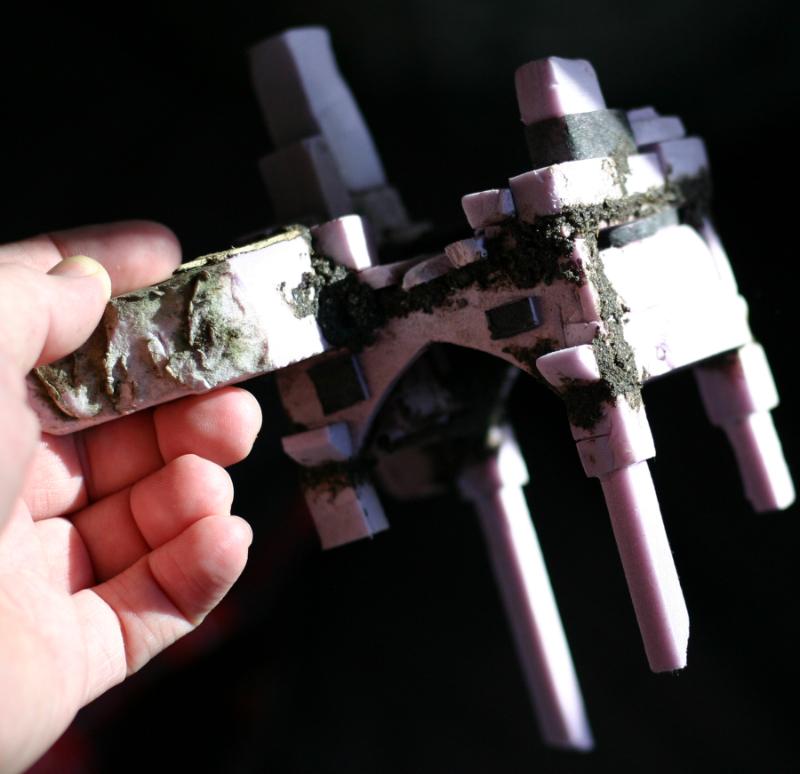
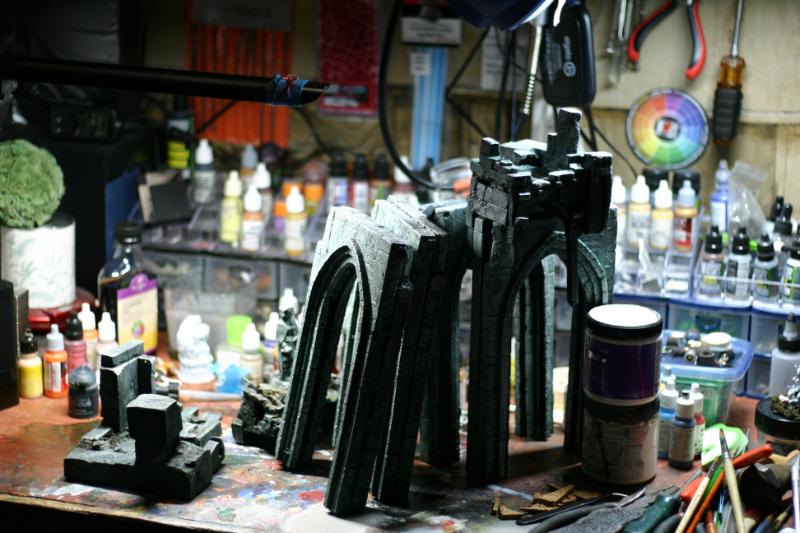
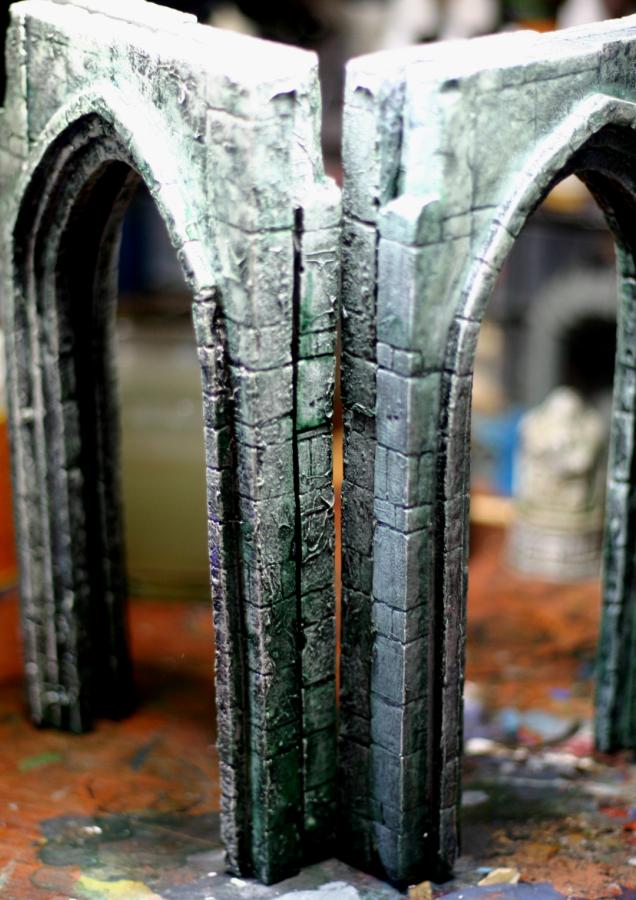
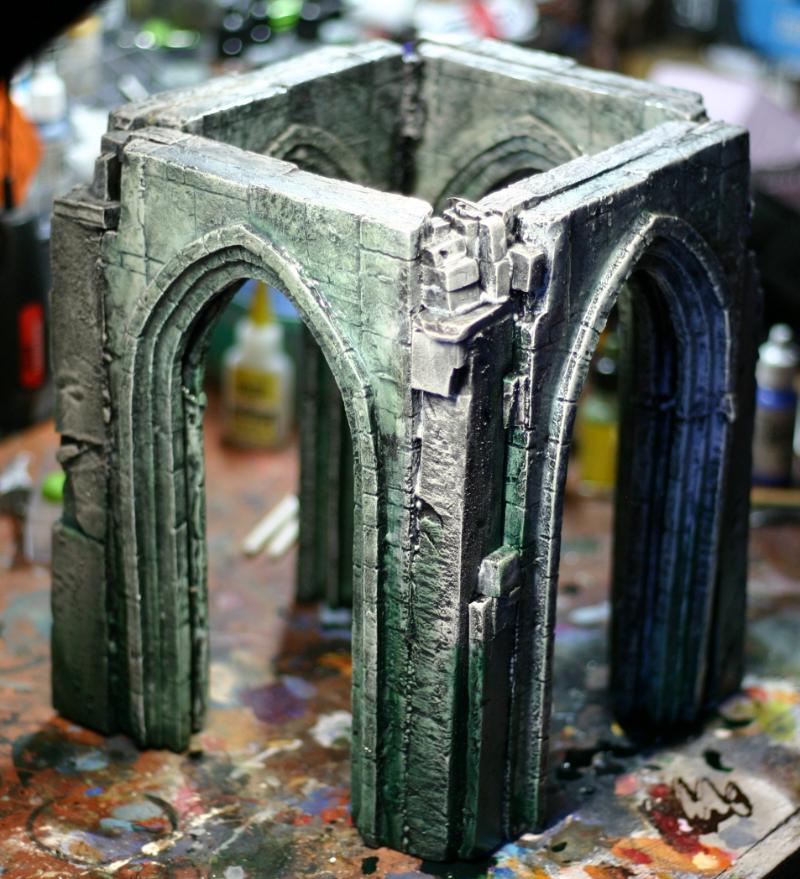
The plan is an attempt at a large Sunken terrain, a ruined gate arch.


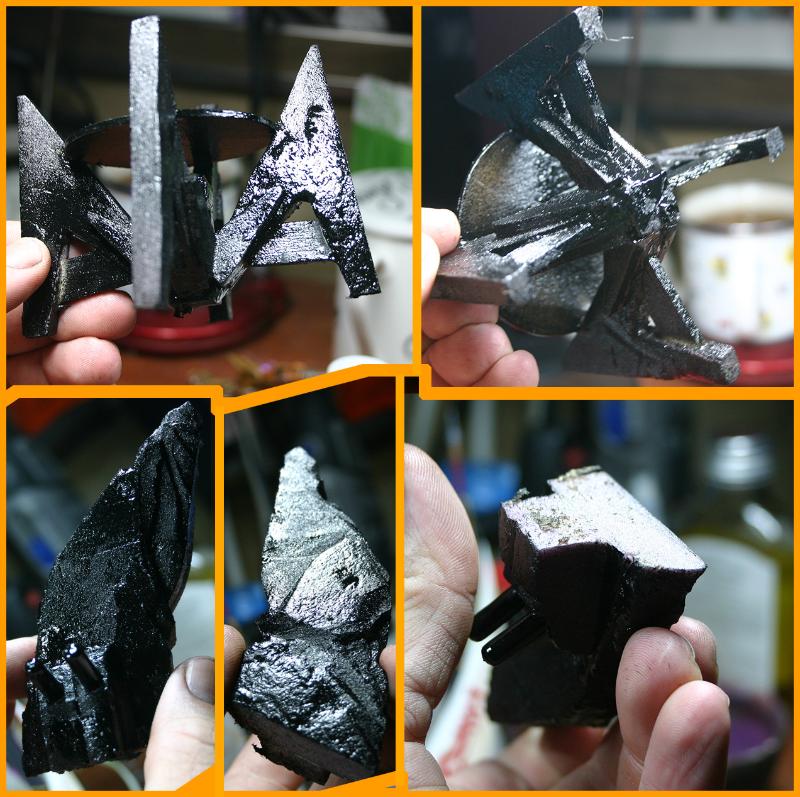
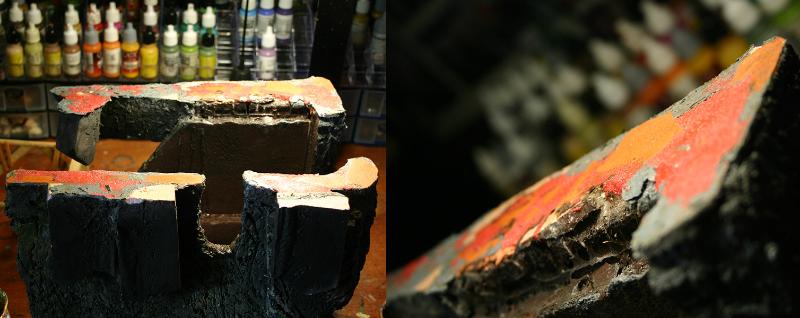
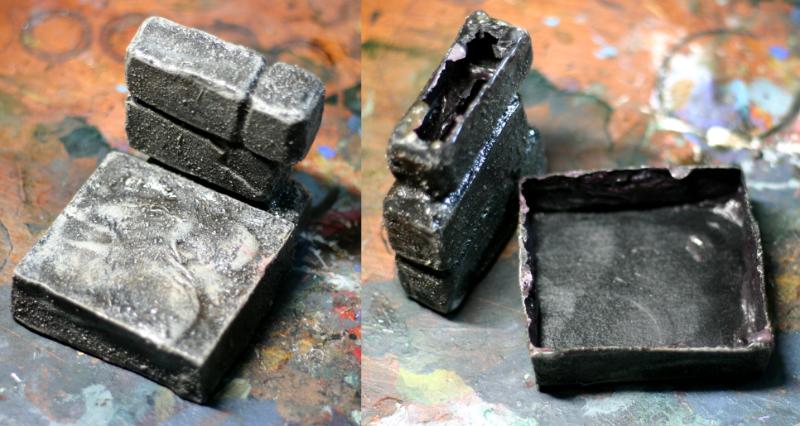
Made an arch, but want to try make a mold from this because I need 12 or more of those, but I has no more latex resins to cast molds and no monies for restocks for those resins are quite expensive.
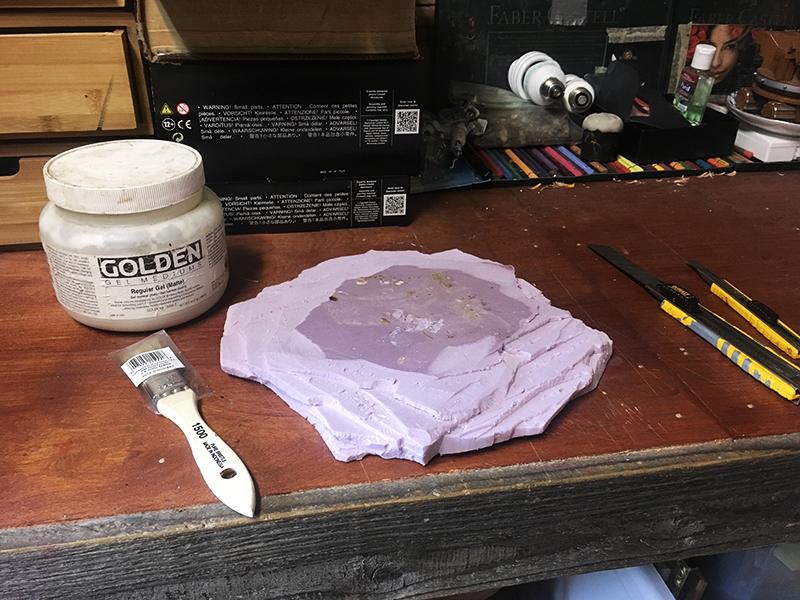
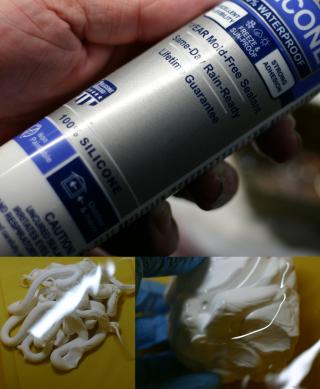
Found videos of folk making simple molds using silicone caulking and water. So that is the plan for caulking i has.
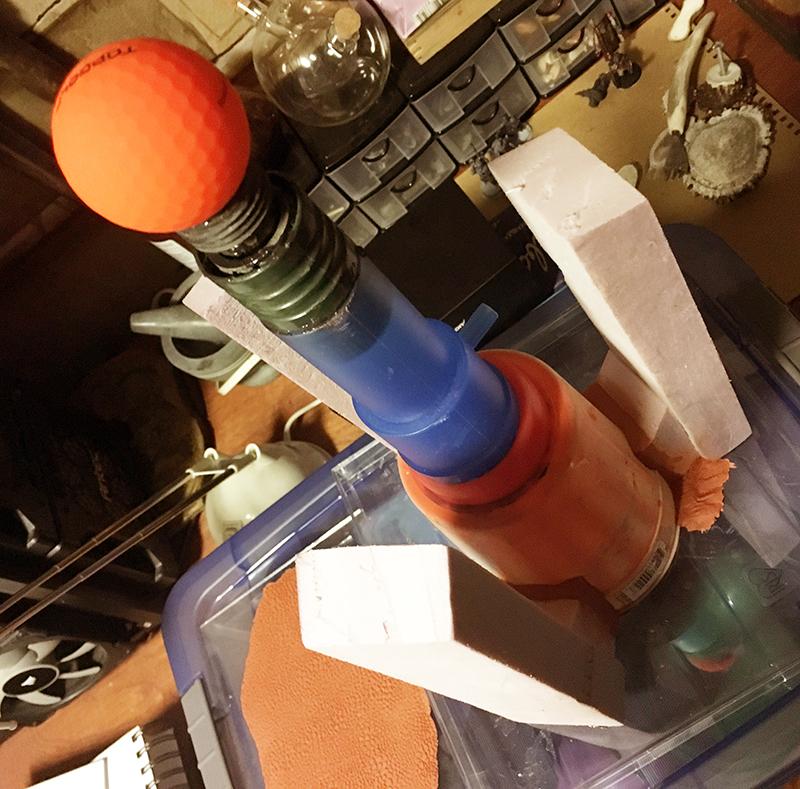
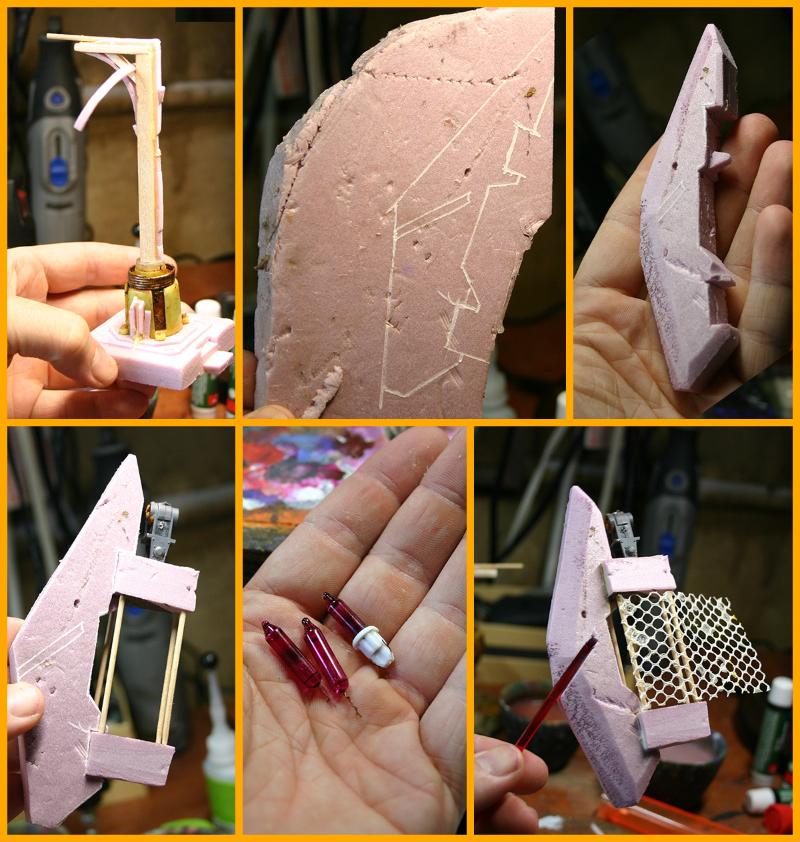
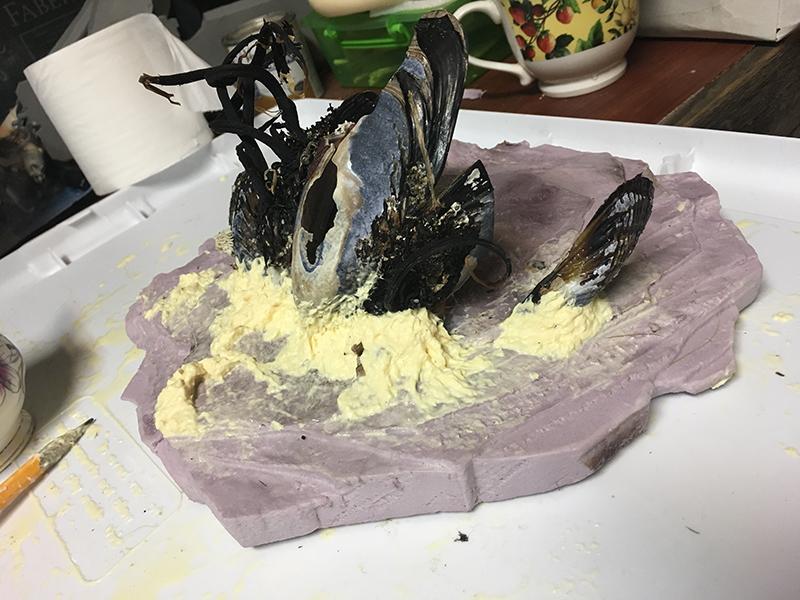
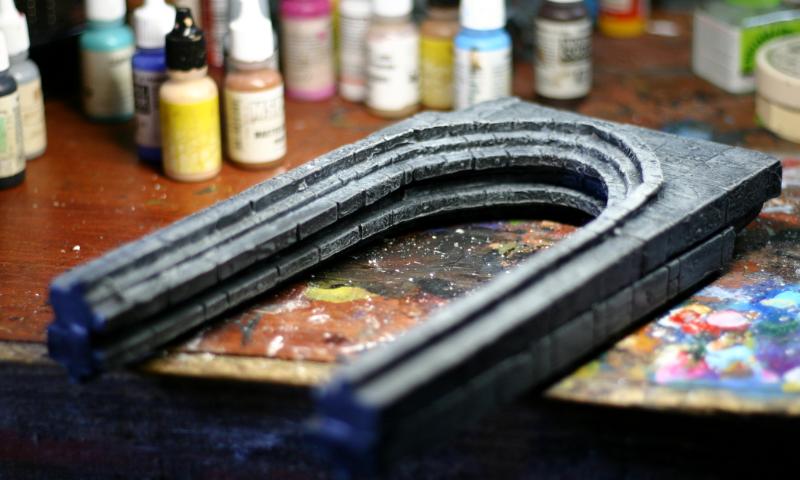
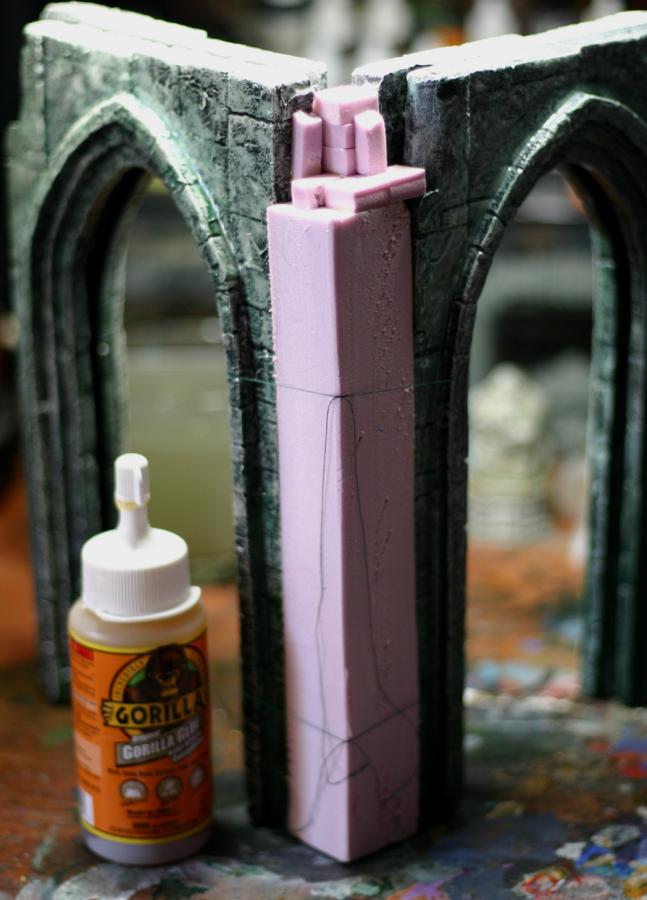
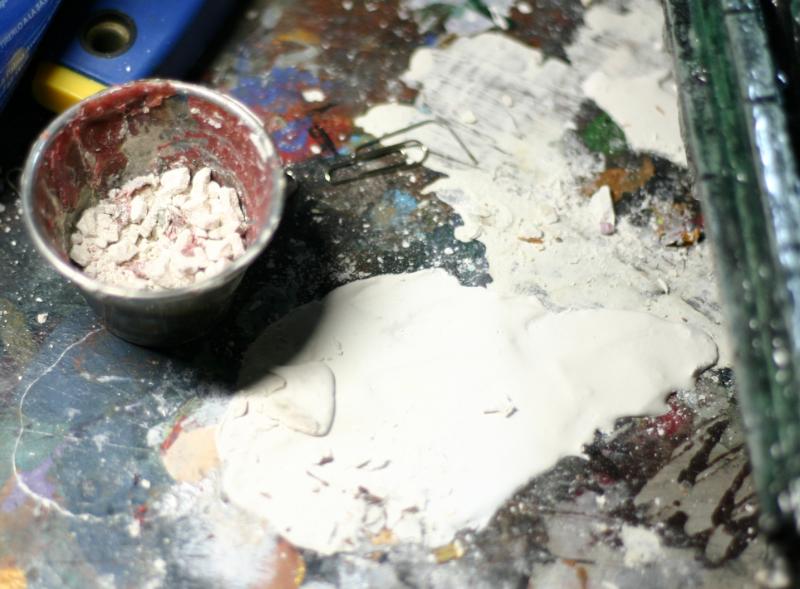
Prep for the mold make.
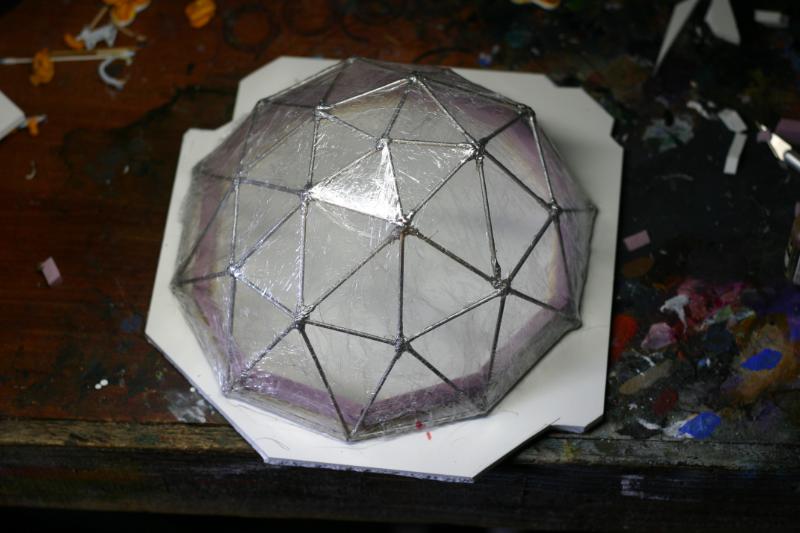
Lightly glued the arch to the plexiglass
Brushed on Bagbalm as "mold release"


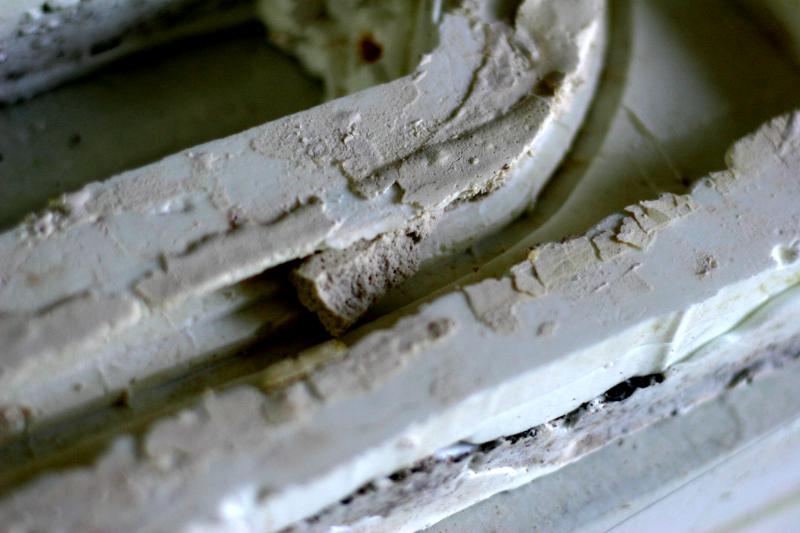
Never molded caulking before, so It is even more sticky than green-stuff, bagbalm does not help but soapy water does, like in tutorial videos.
Gloves proved to be quite useless, sticking to material too quickly.

Doing this on plexiglass turned out to be accidentally genius as it allowed to see through the back side during the application. SO I could see if caulking filled every gap or not.
Soapy water helped with the smell too, but not by much, will finish the rest outside.


Backside see-through was smart.


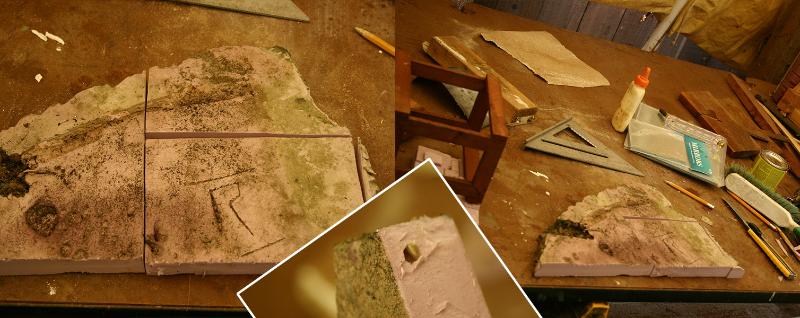
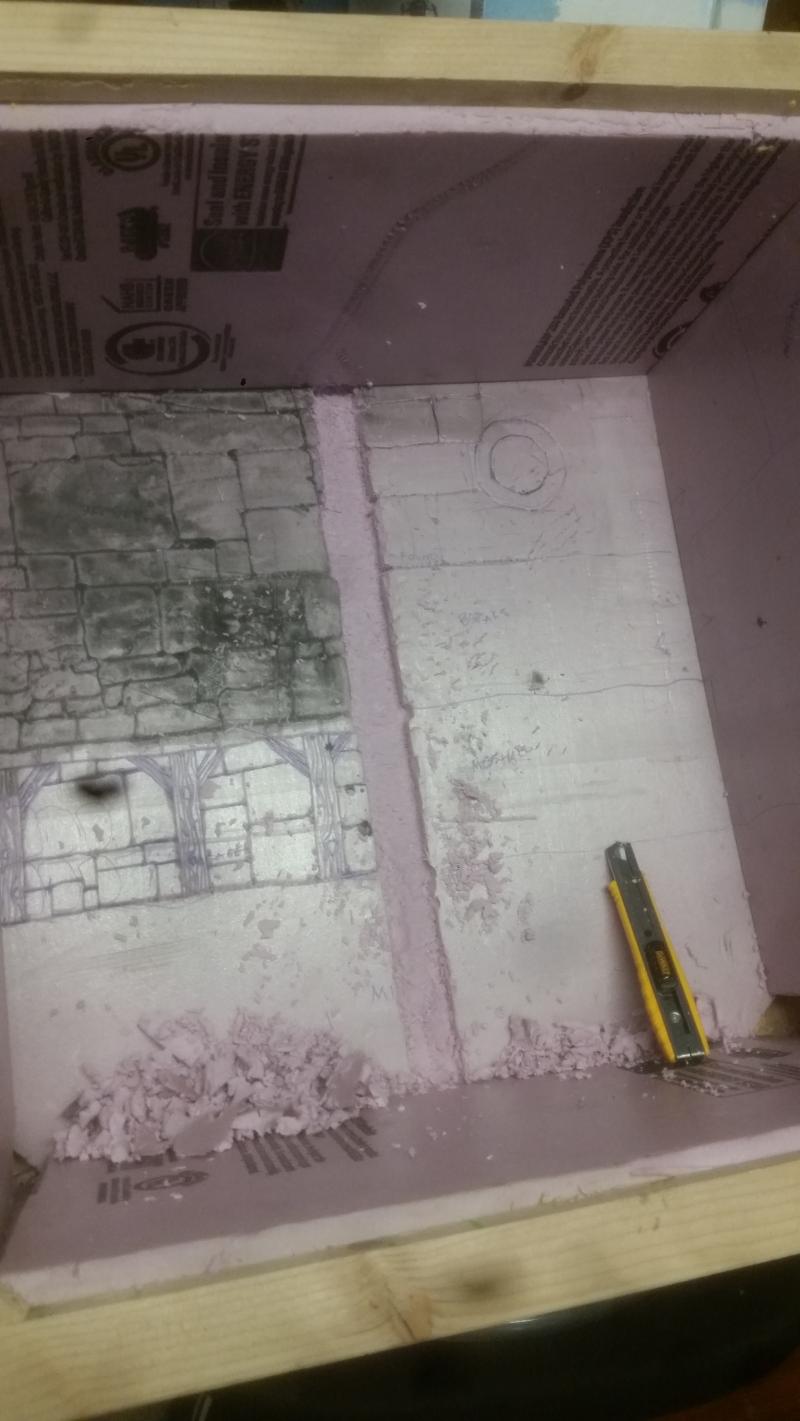
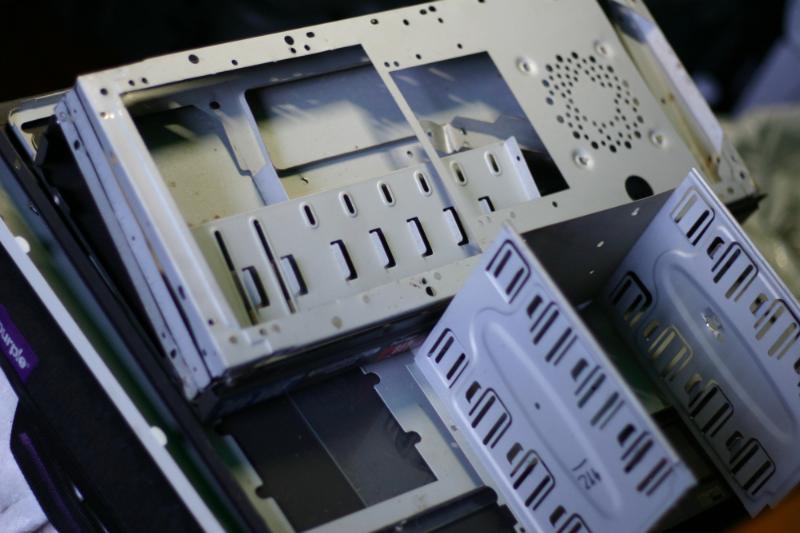
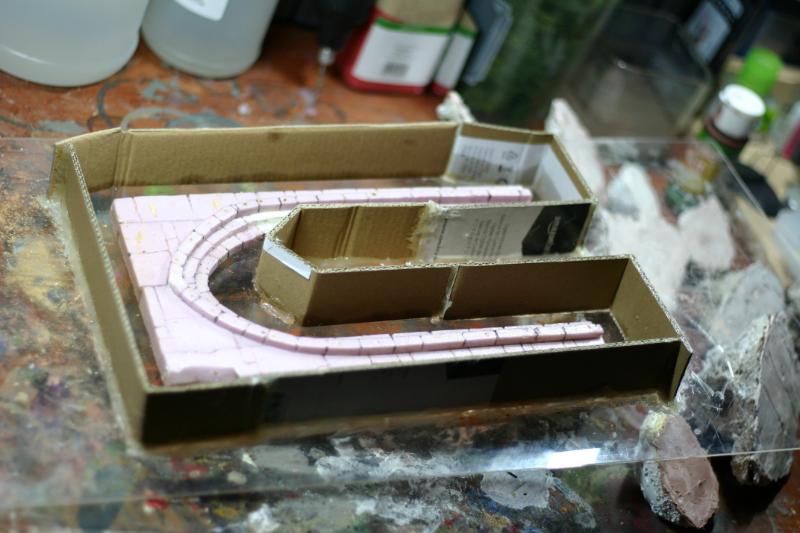
What was dumb is using cardboard for the sides, not only because it became soggy but because I cant level corners to cardboard uneven flimsy soggy edge.

Removed cardboard

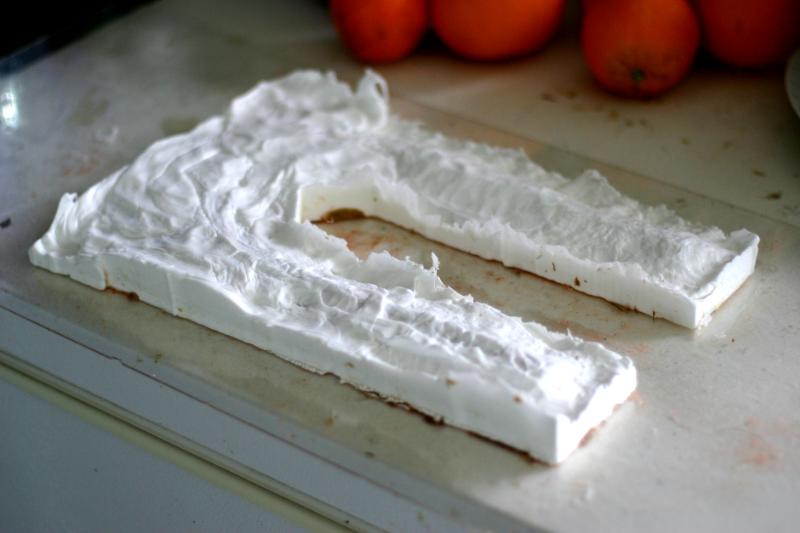
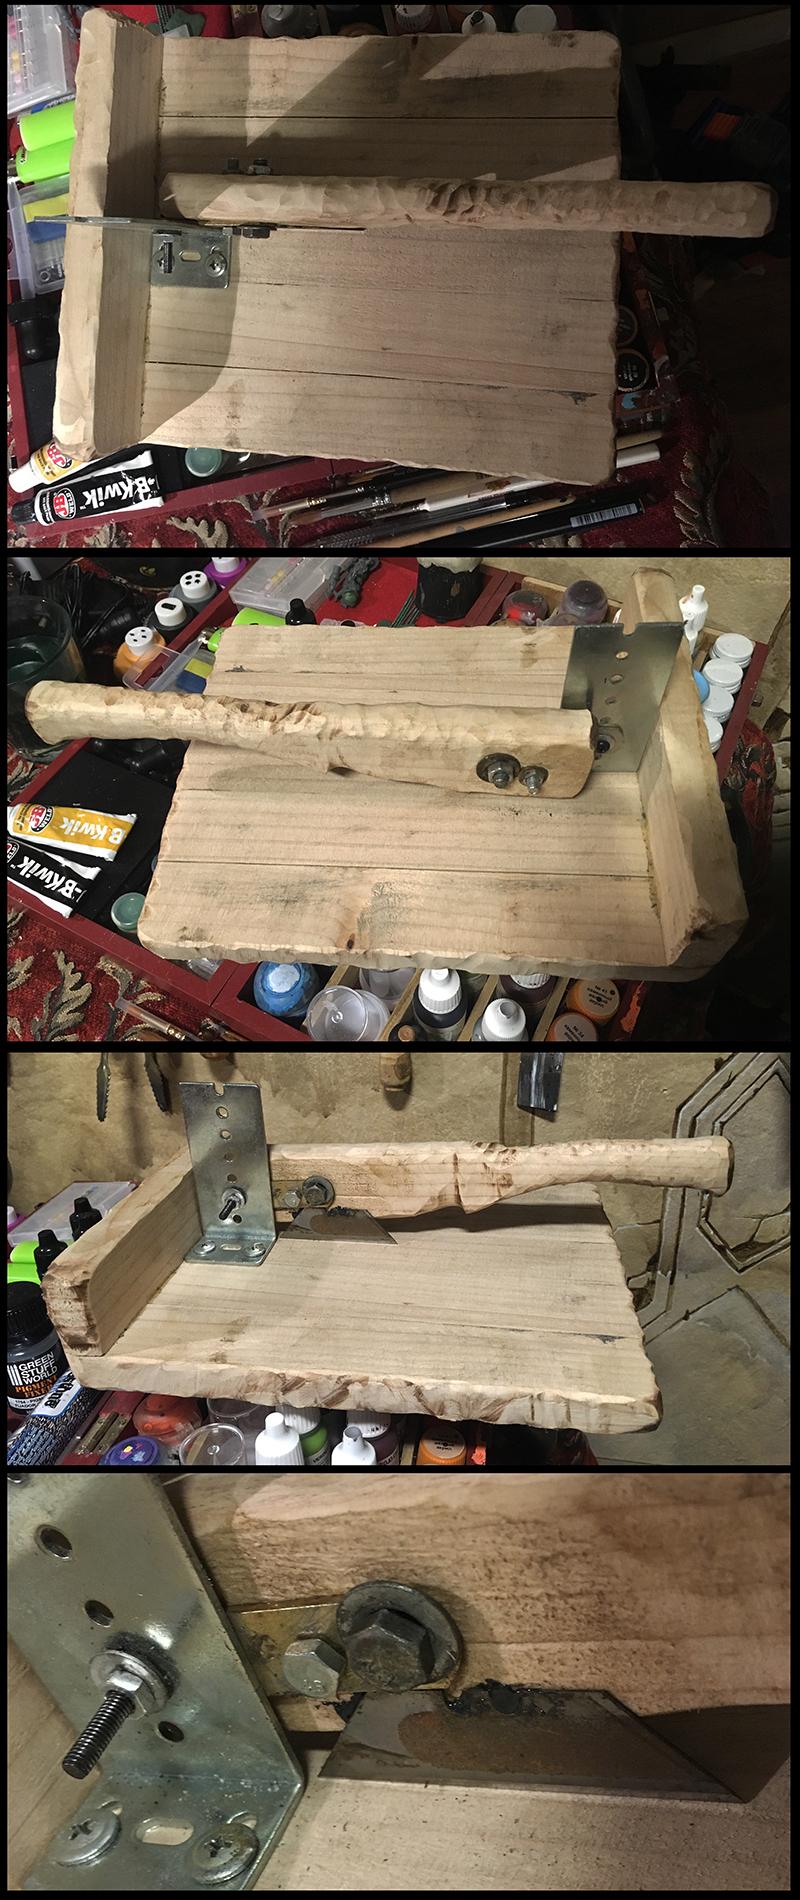
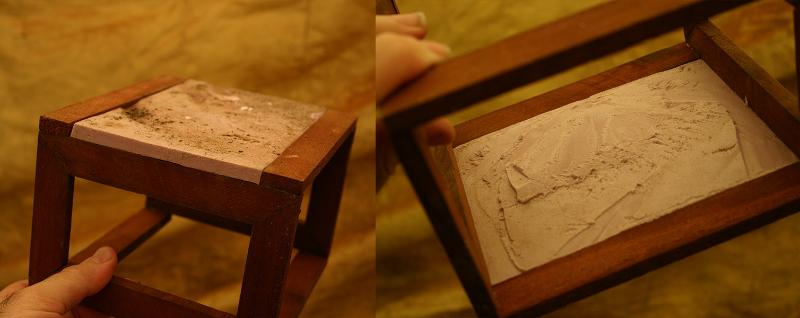
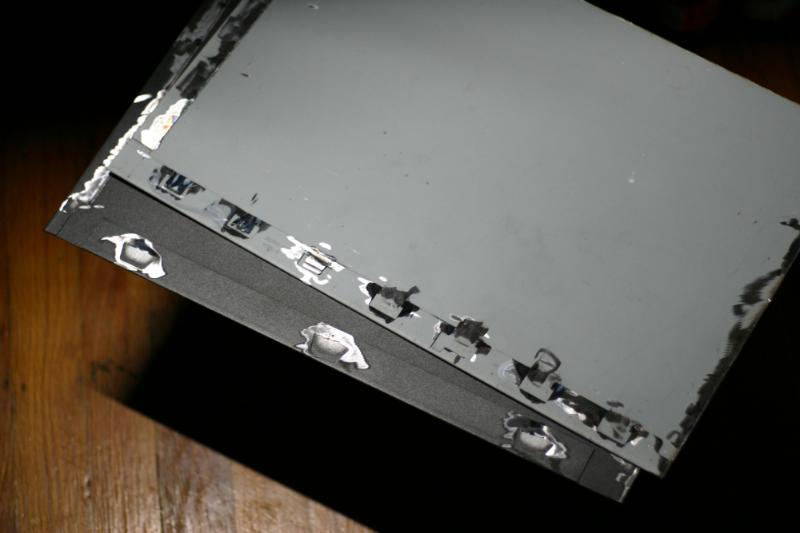
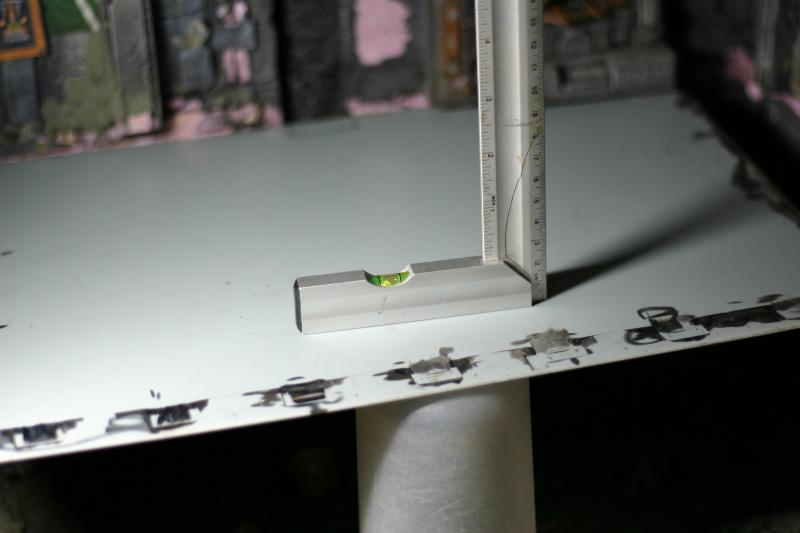
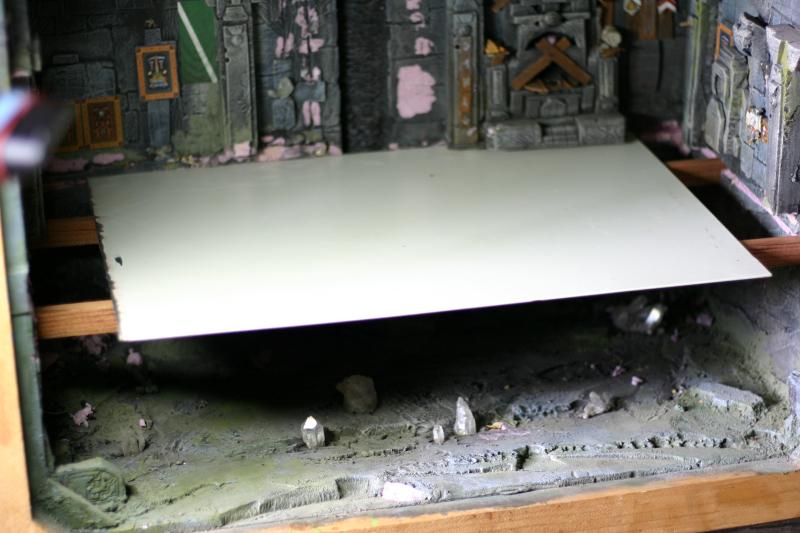
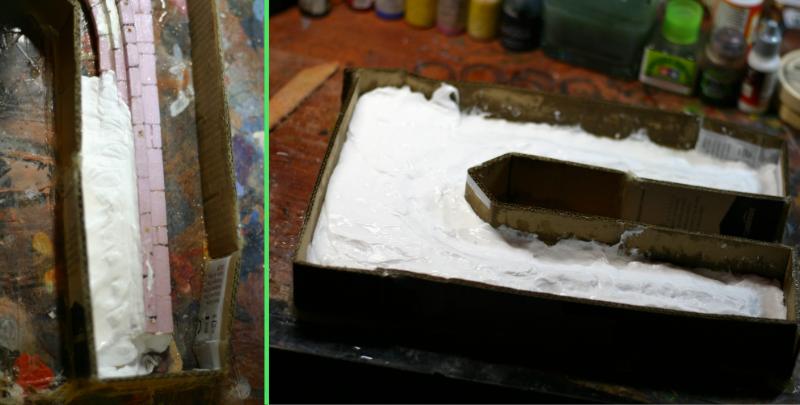
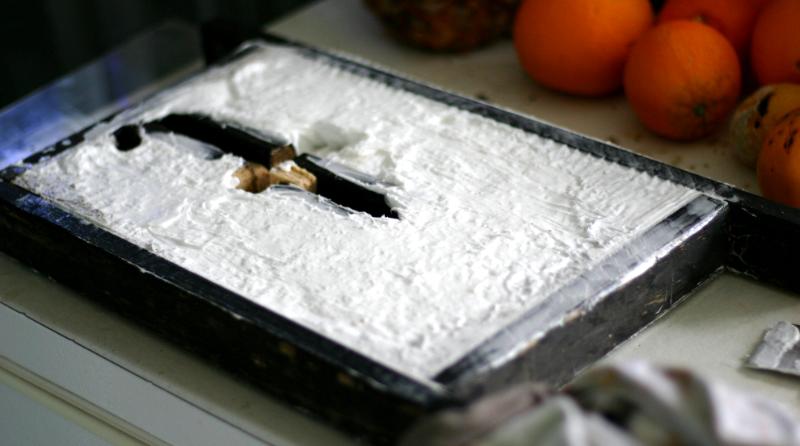
Built frame that has a rigid edge and consistent height

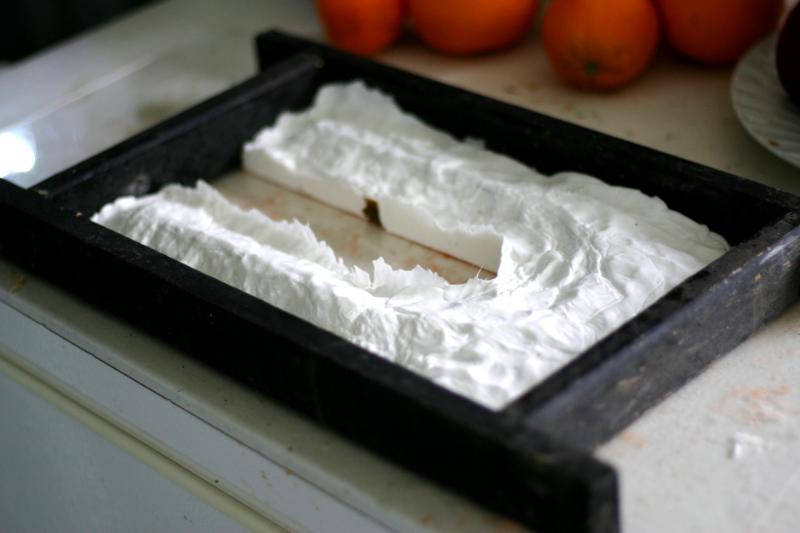
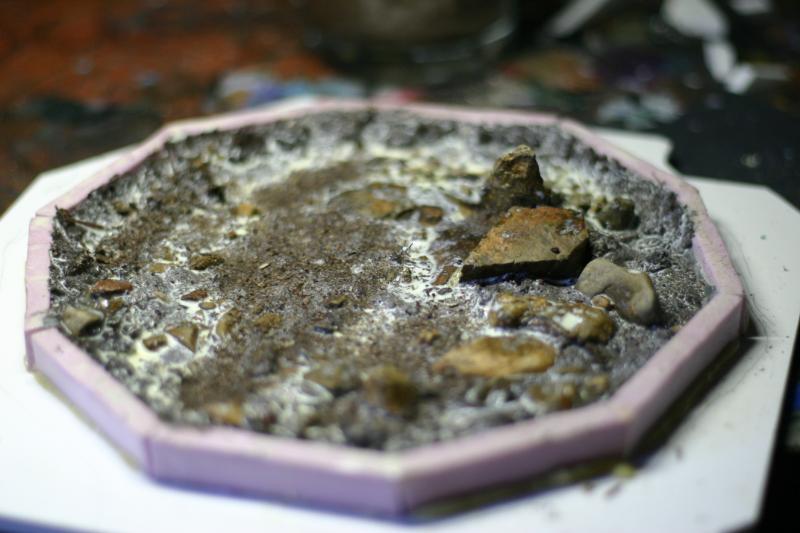
Threw in some dirt as filler in attempt to use less caulking and flattened the corners. So the mold when flipped will stand like a table on 4 corners. Hopefully leveled-ish.


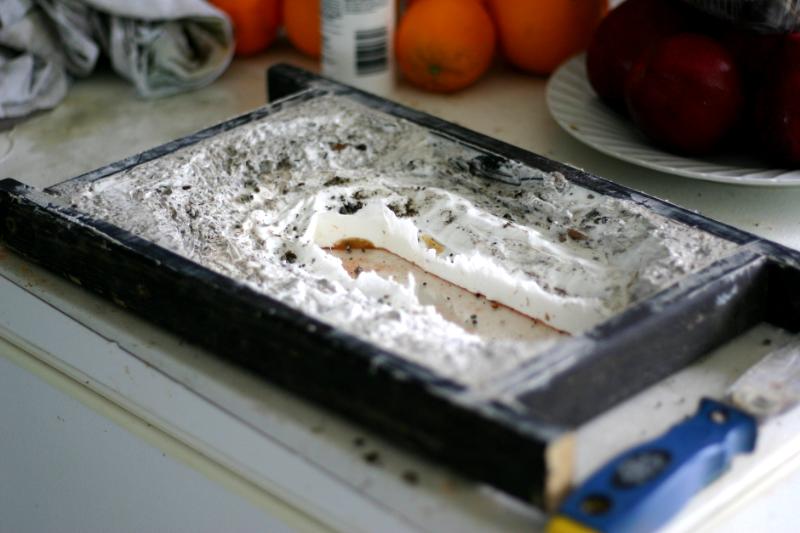
Luckyly I bought 5 tubes thinking that will probably only use 3
Last 2 went into building up the back because it does sag under its own weight.


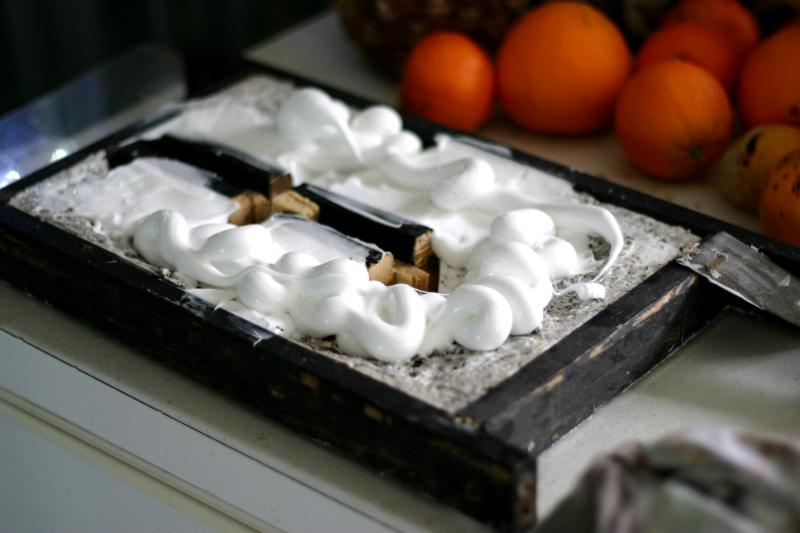
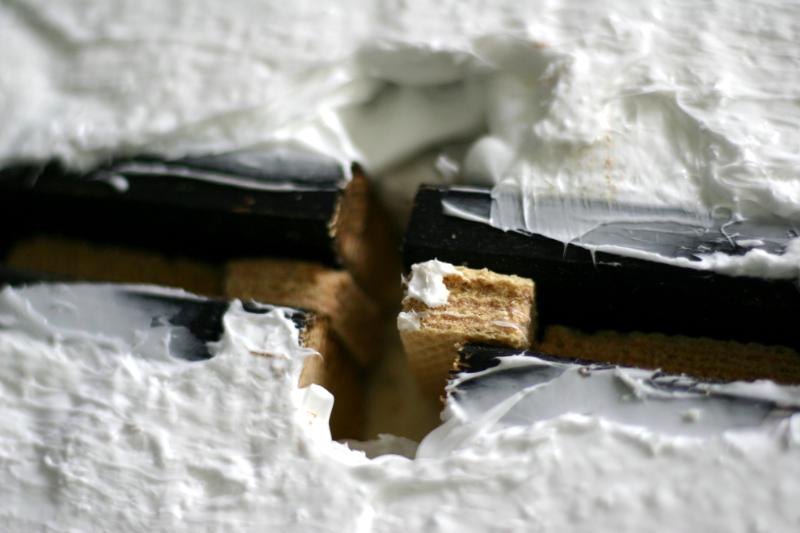
Pro tip - Stale Wafer Cookies shims !
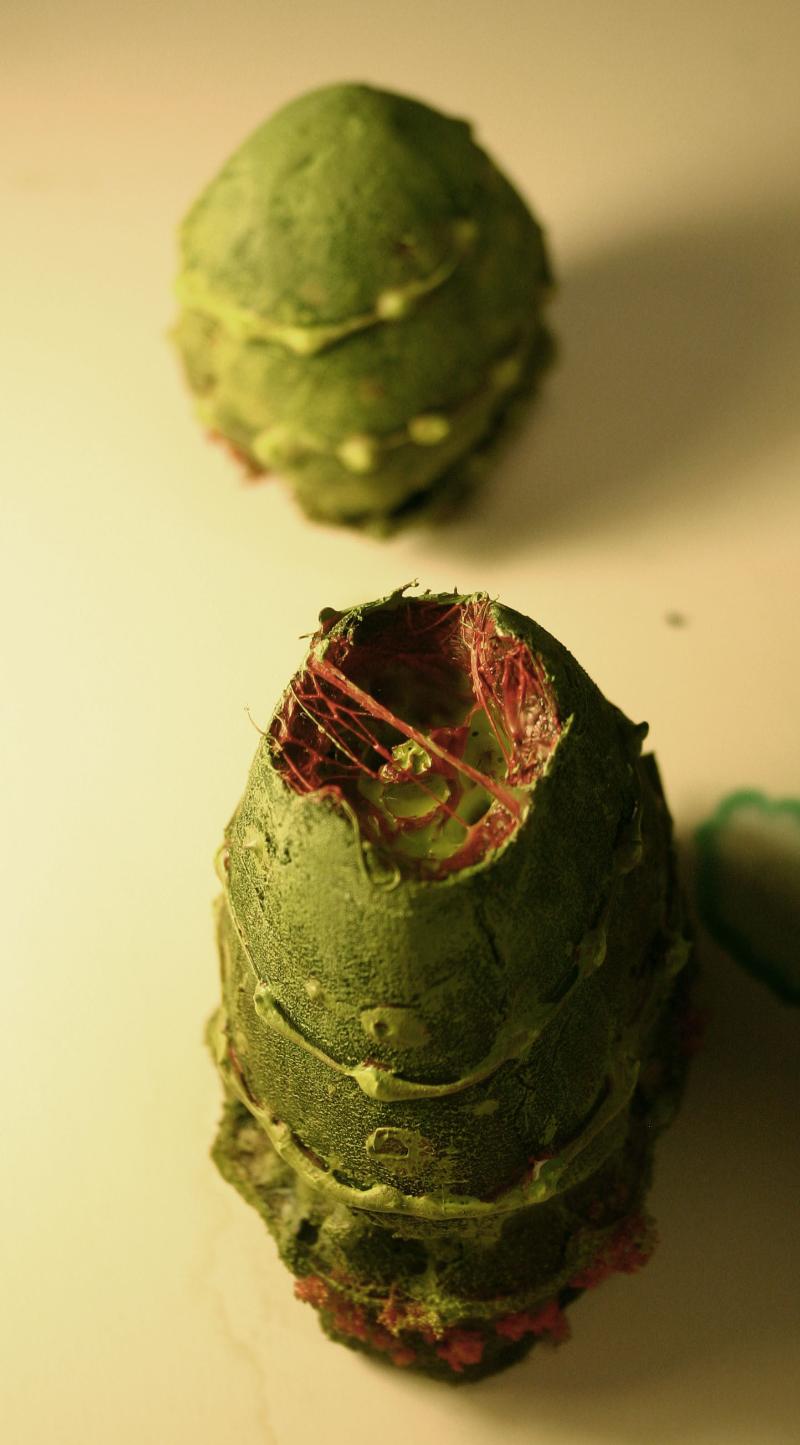
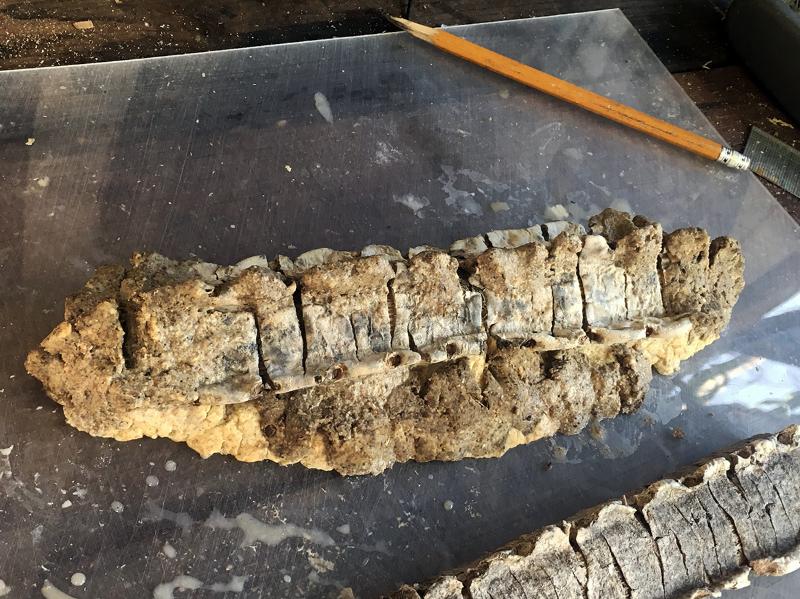
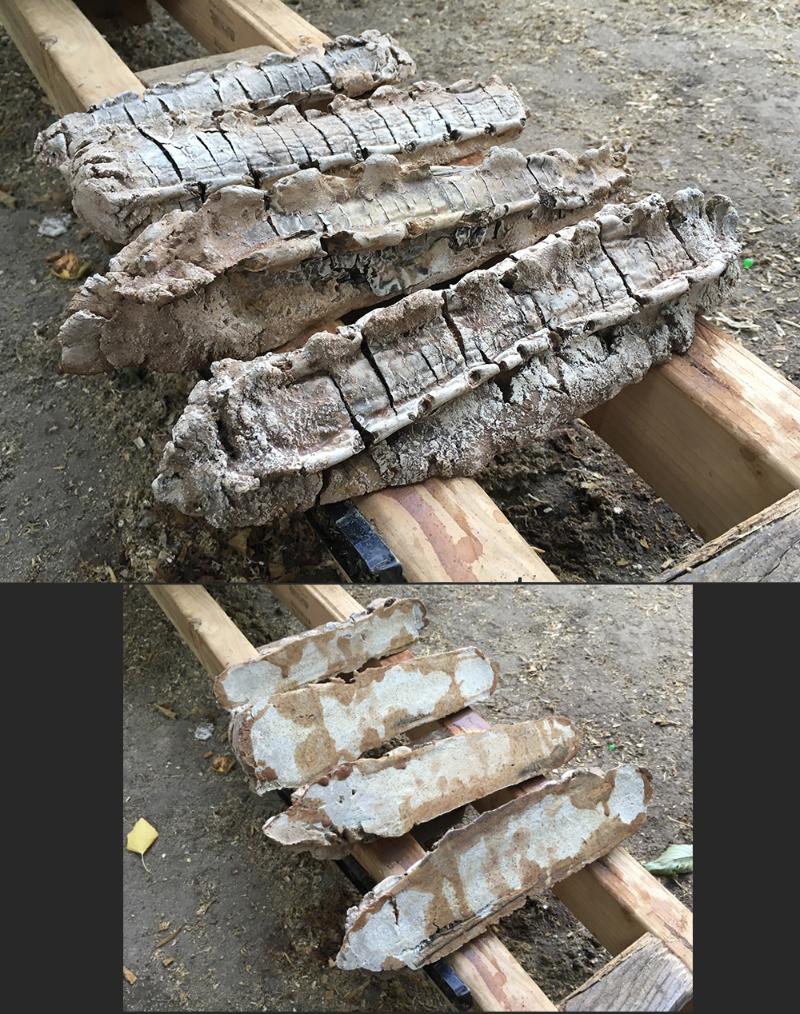
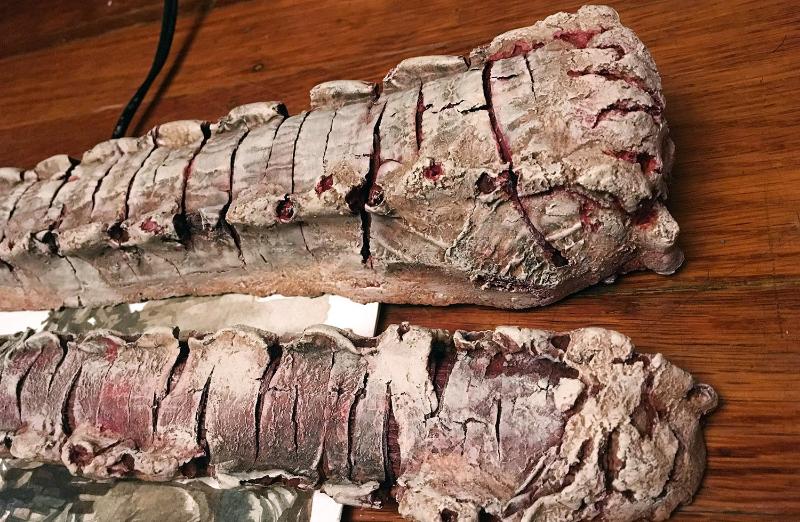
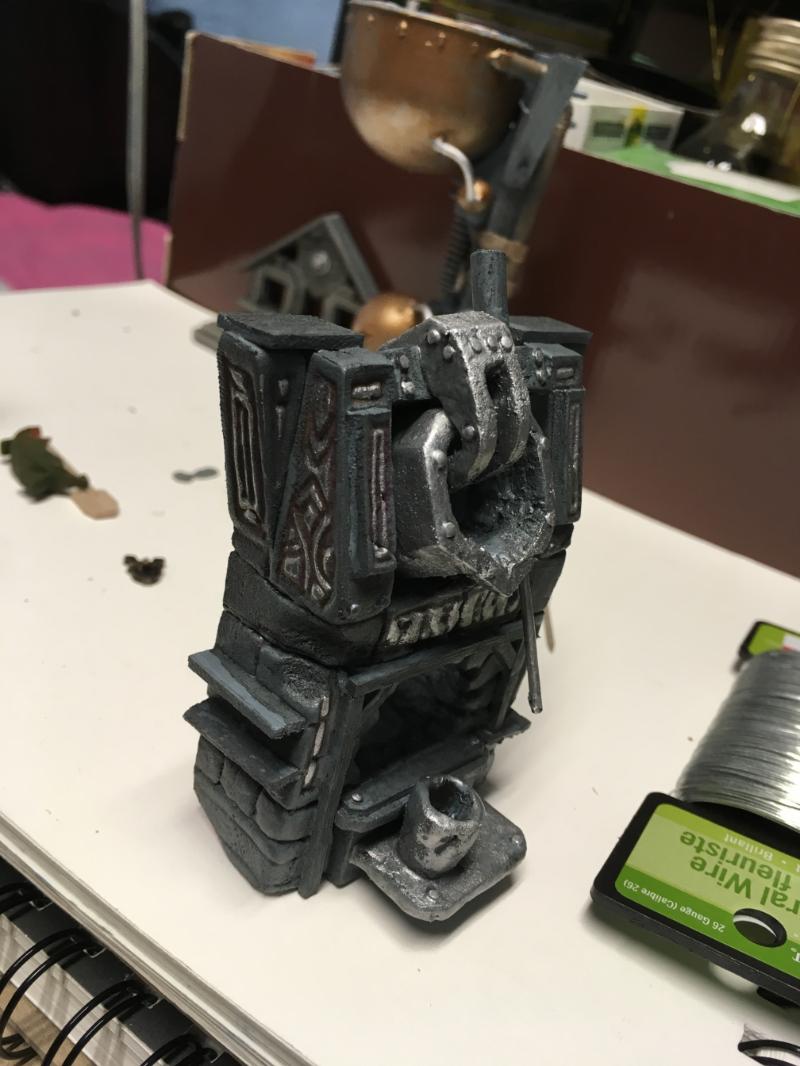
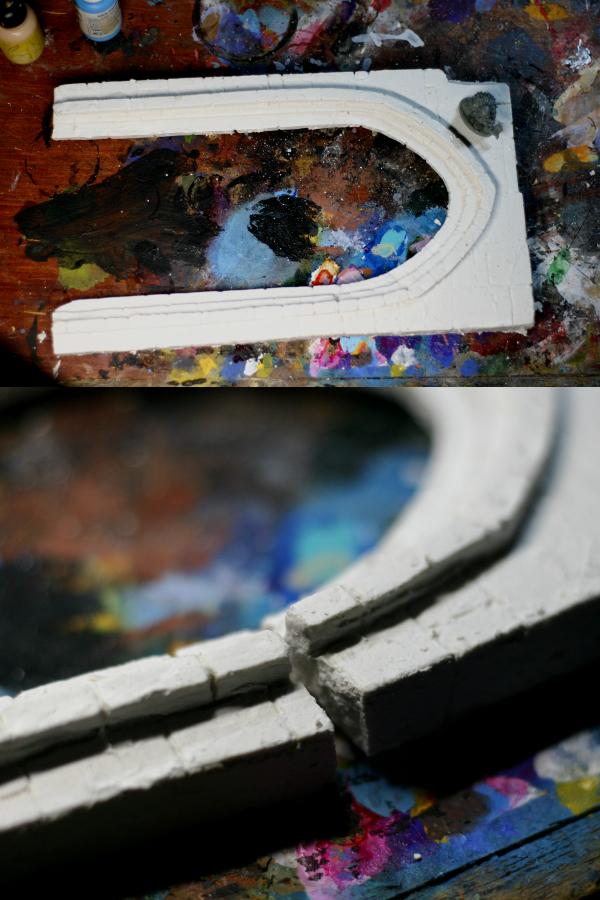
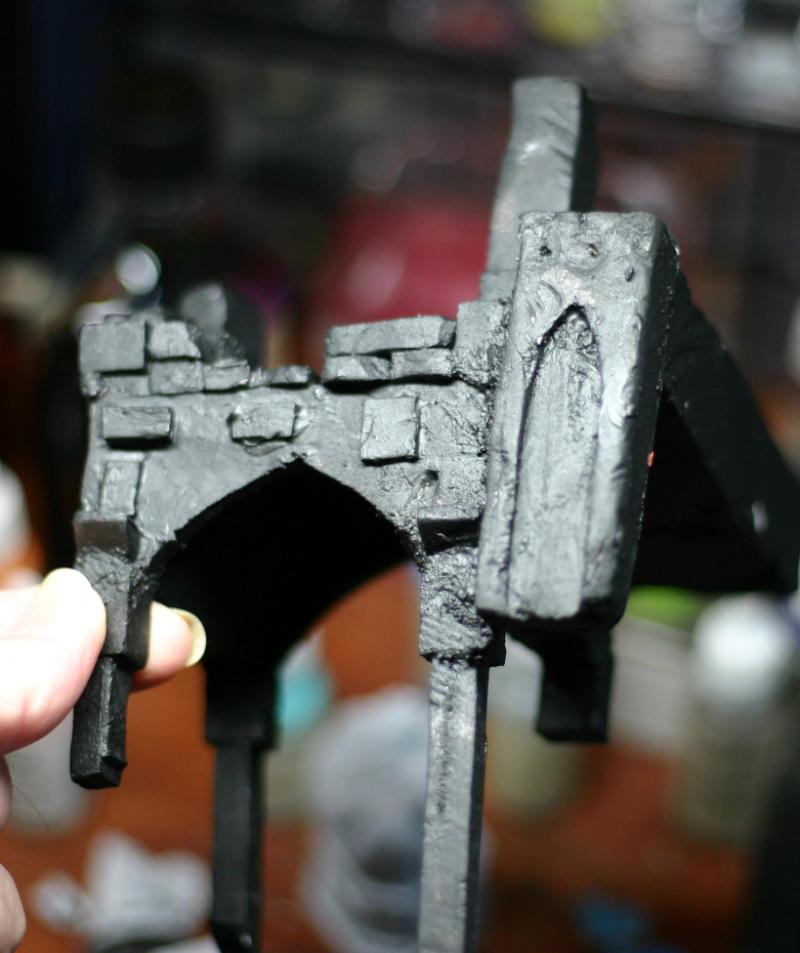
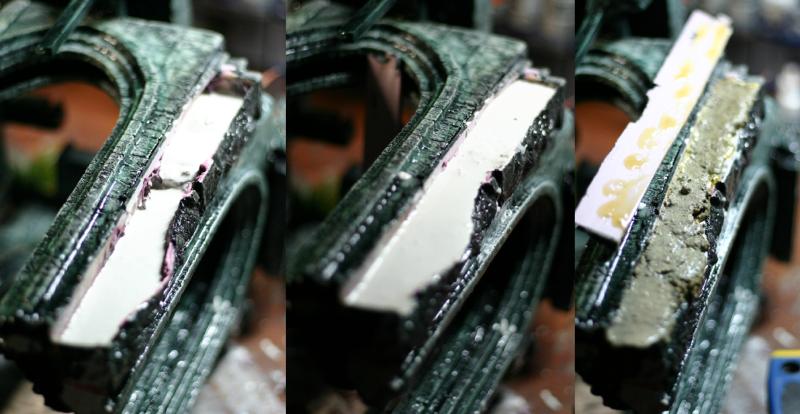

First cast!
Kinda meh... I'll see how it looks when painted.

The idea was to cast 2 halfs and glue them together into one arch. The backs might not be strait flat however...
From tutorial videos folks talk about using Joint Compound instead of plaster. Will try Joint Compound tomorrow because plaster is a bit brittle pricey and I am running out.


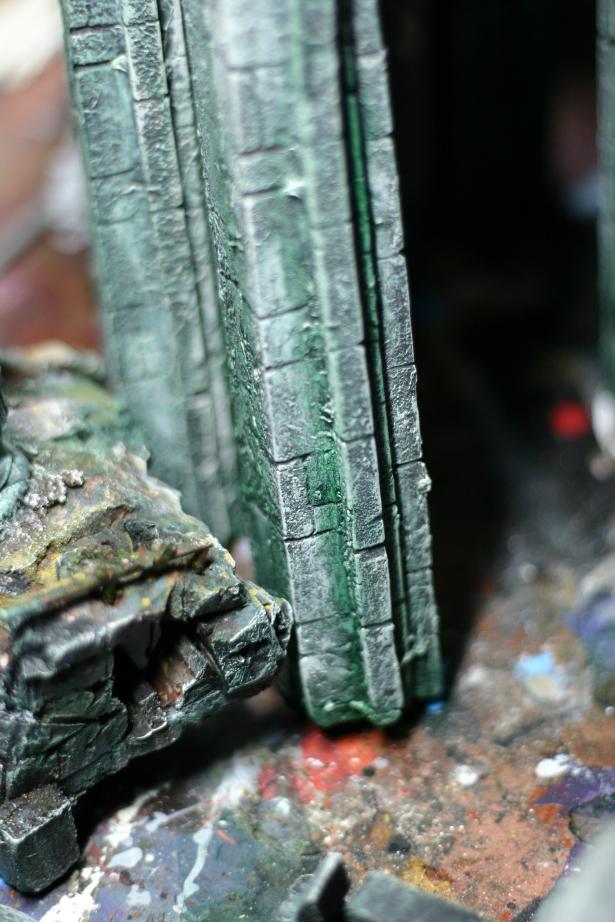
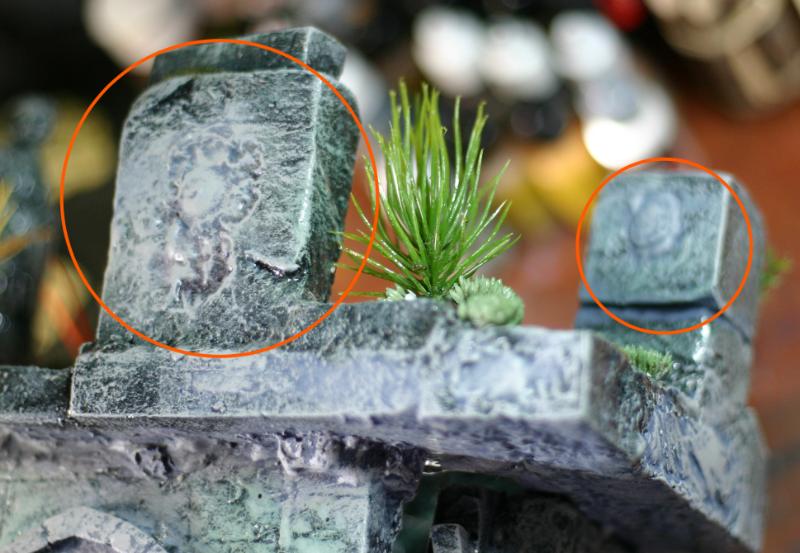
Rough dry-brush just to see how the first cast cameout
Quite impressed! The plan to cheap out on molding material by using caulking worked! About $30 spent

This is a first cast with plaster that was poured into the mold right after the silicone set, meaning that all small artifacts, tiny bit of extra water, and leftover (BagBalm) was still there when I poured. I took out plaster cast before it dried completely and it damaged the cast a bit, and I had to spray it black form a rattle-can , that must of clogged up some small detail. That had to be done because brush bristles would scrape of plaster and leave white scratches all over; At least with a film of paint spray paint I could dry brush the arch.

I expected the cast to look dull with less detail but it is not too bad at all!

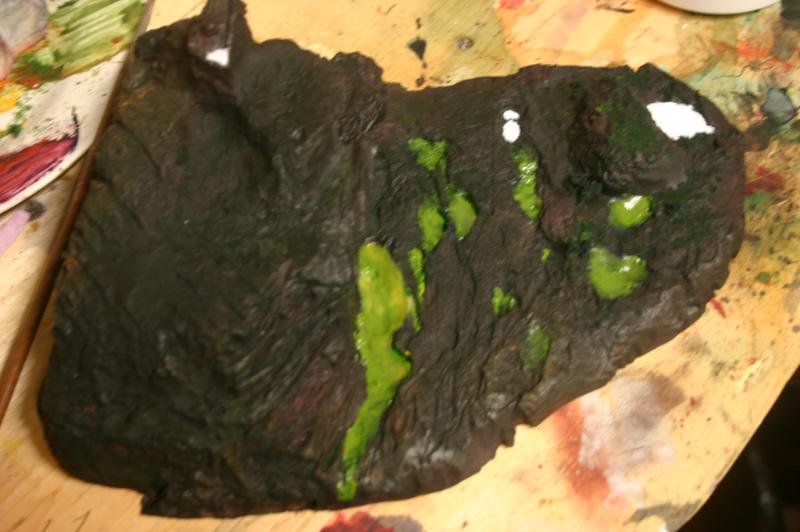
Foam matrix is on left, plaster cast on right. ( Keep in mind that the foam matrix on the left was covered in pieces and flakes of silicone and bagbalm, I just painted over everything, so the original detail is not there)


Glued both together with garilla glue


My progress was slow, lots of waiting for things to dry. I tried join compound. It mixed very well, poured beautifully but never dried after 3 days, so I took it apart and noticed that smaller pieces that are dry would crumble easily.
Big fail.
I even tried to mix 1/6 Woodglue with water into the joint compound for sturdiness but that did not help at all.
If I mixed more of the wood glue that would do the trick but then I am not saving any cost on the glue. Might as-well go back to plaster.

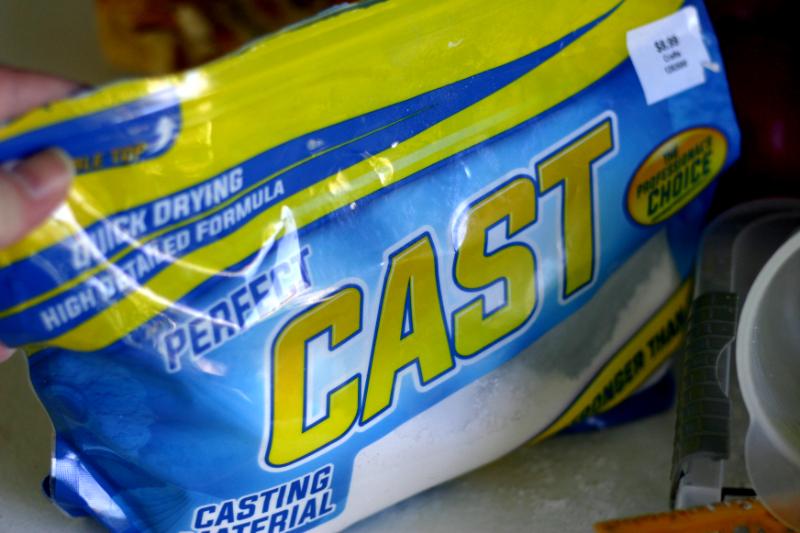
Next try I saw perfect cast material and will try that, suppose to be much stronger than plaster, but not as cheap.

I must try concrete too.


Progress.
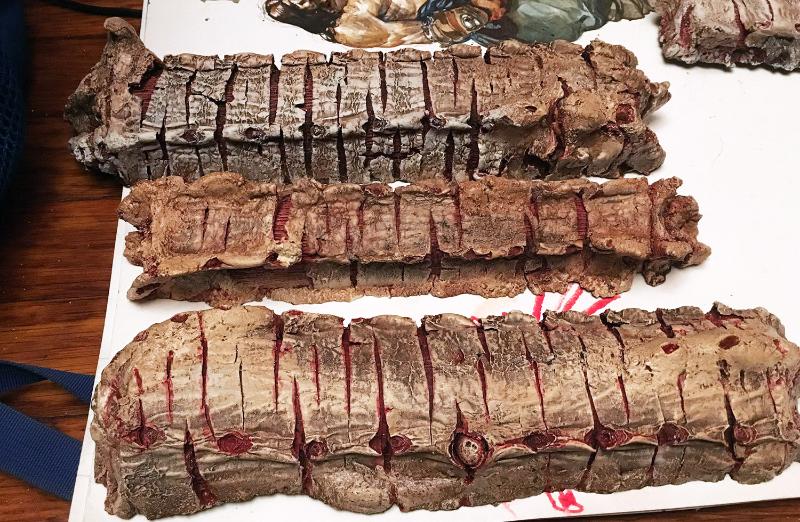
Finally some perfect cast came in.
This stuff really supercool! Mixes well, pours smoothly, after 30 mins hard enough to pull from that mold without breaking like plaster did.
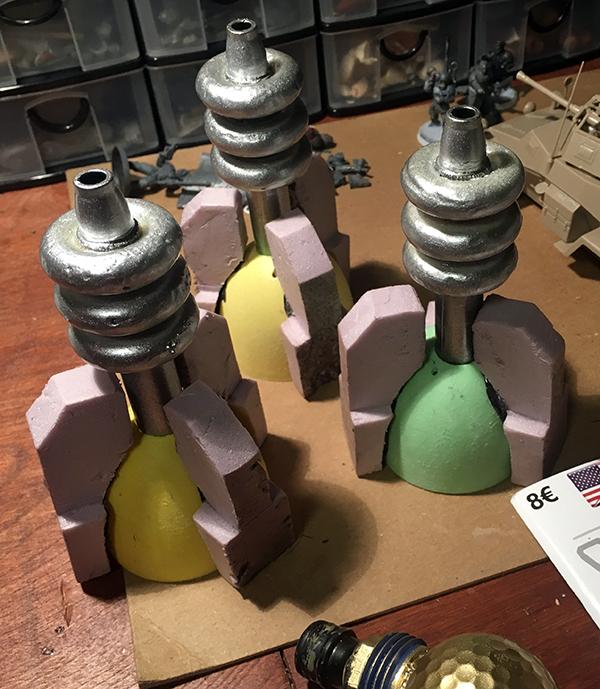
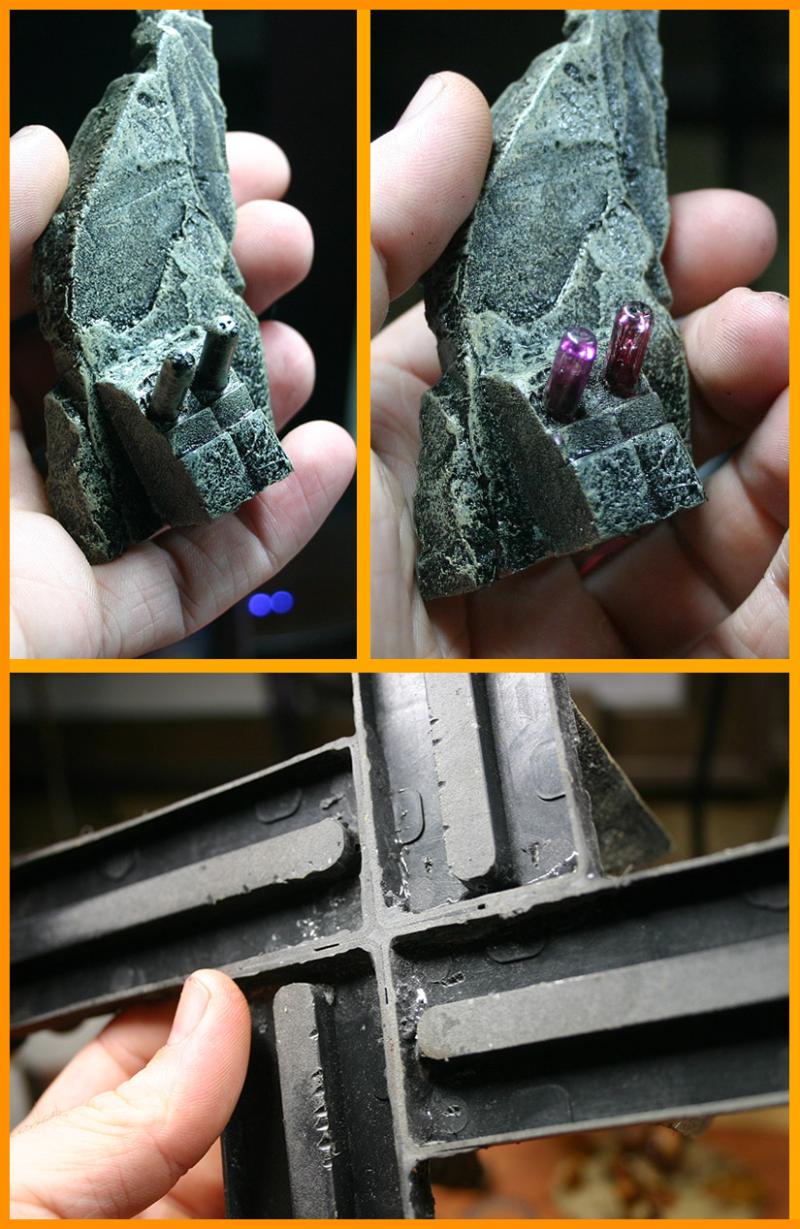
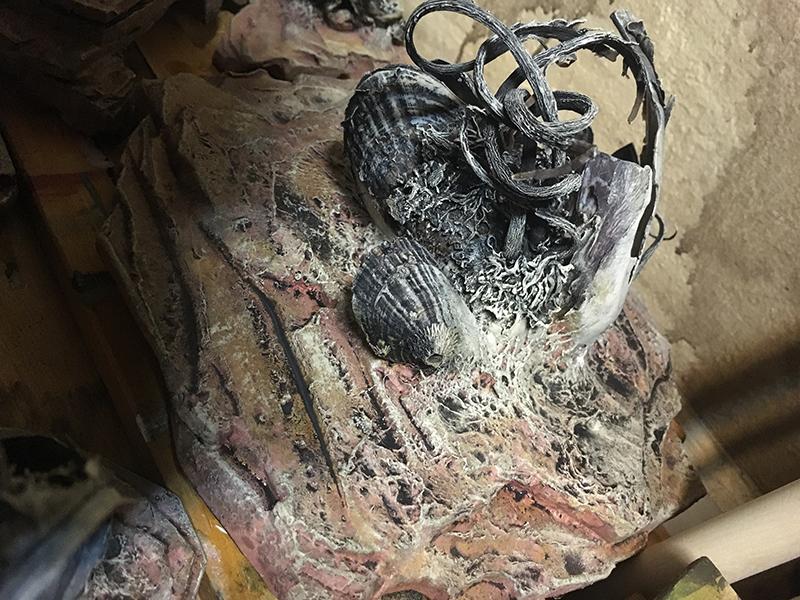
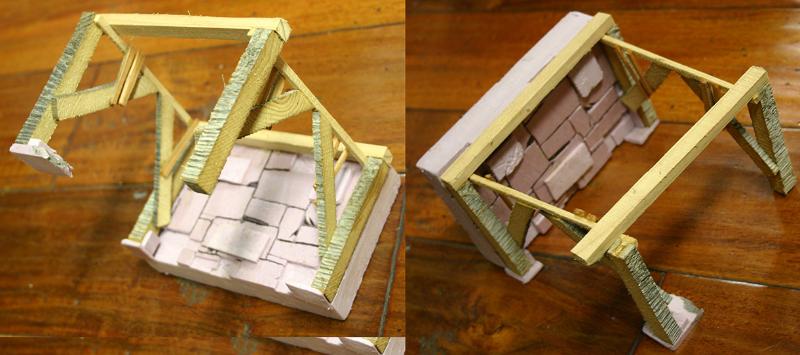
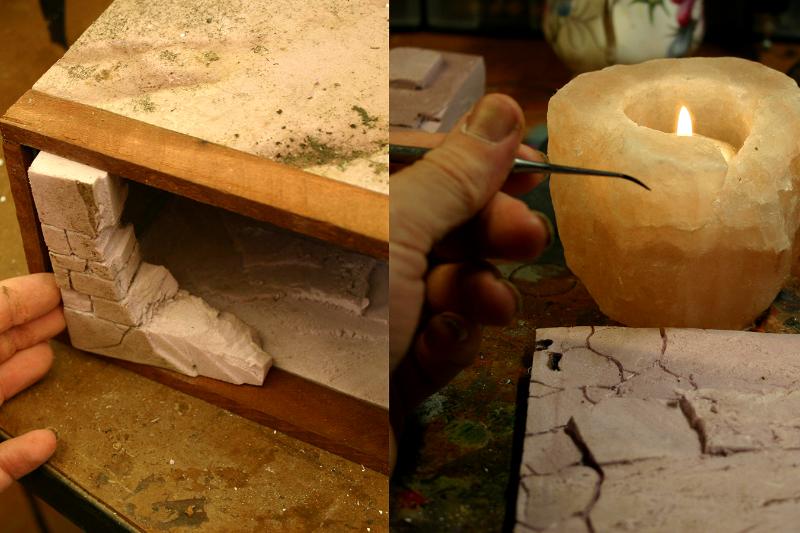
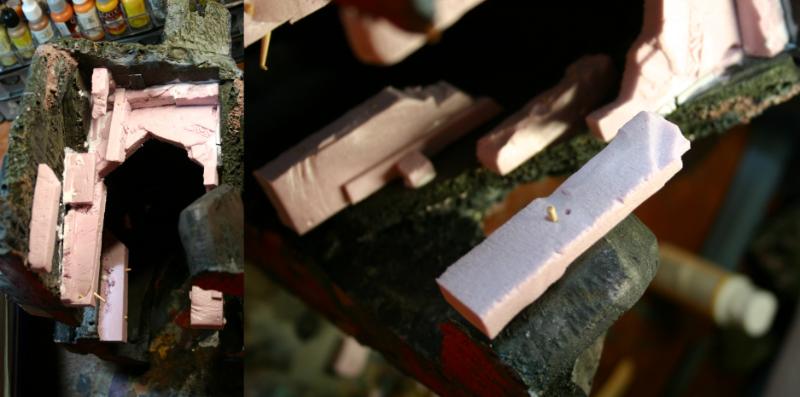
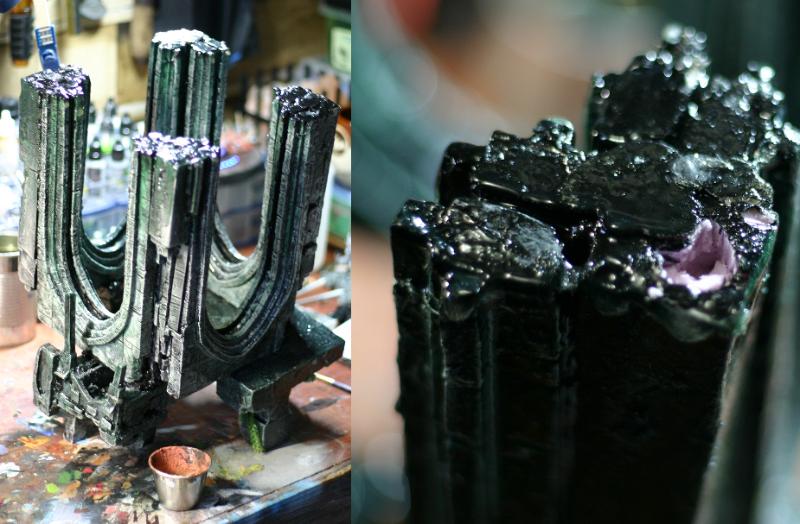
I even tried to put old spruces in for the support.

For the excess, I made dents in the ground with a rock, now I have some nifty solid rock pieces.
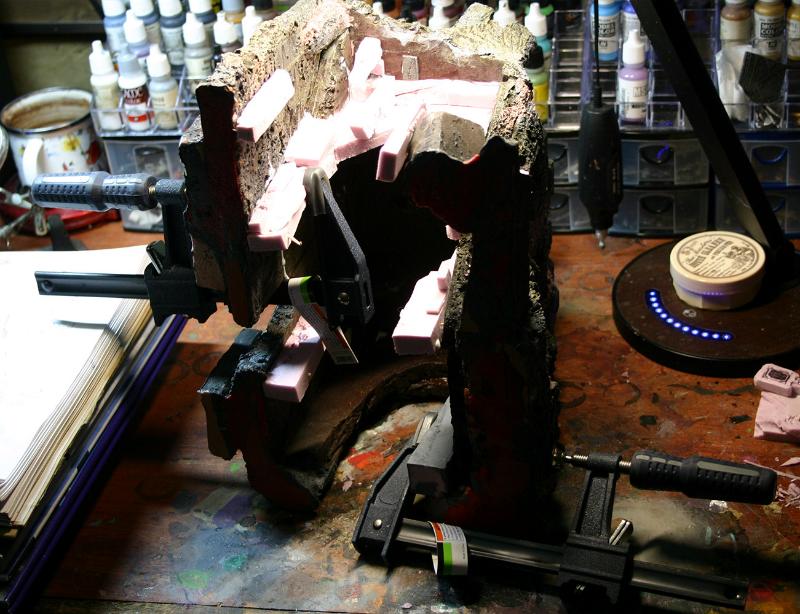


Progress
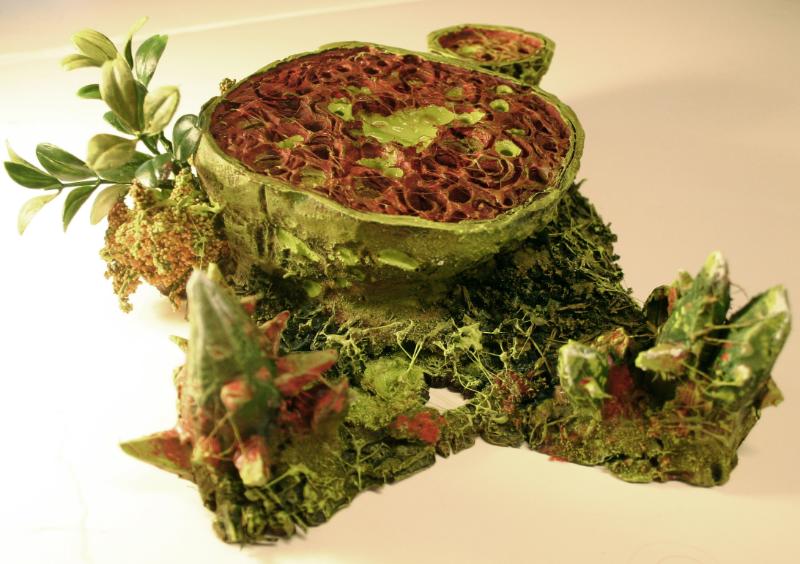
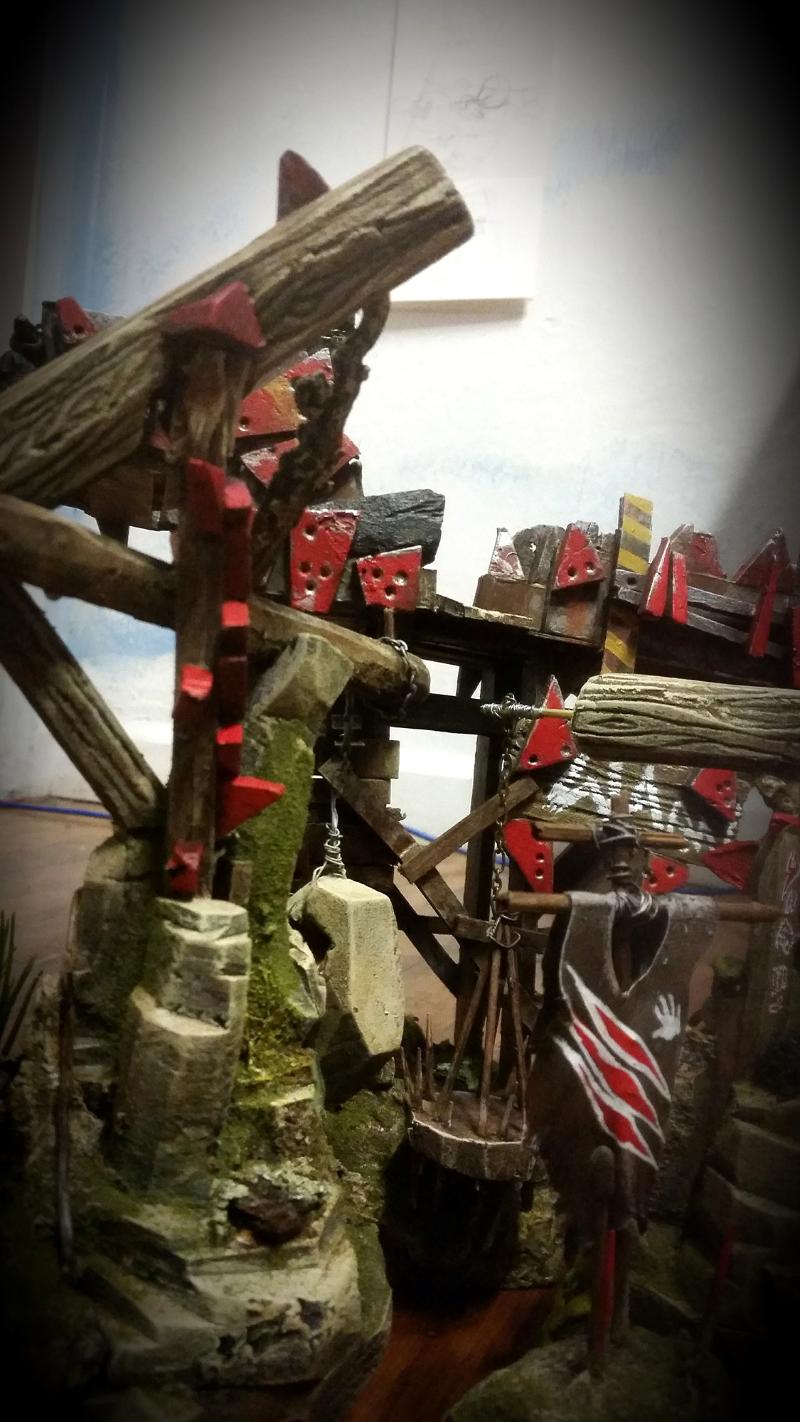
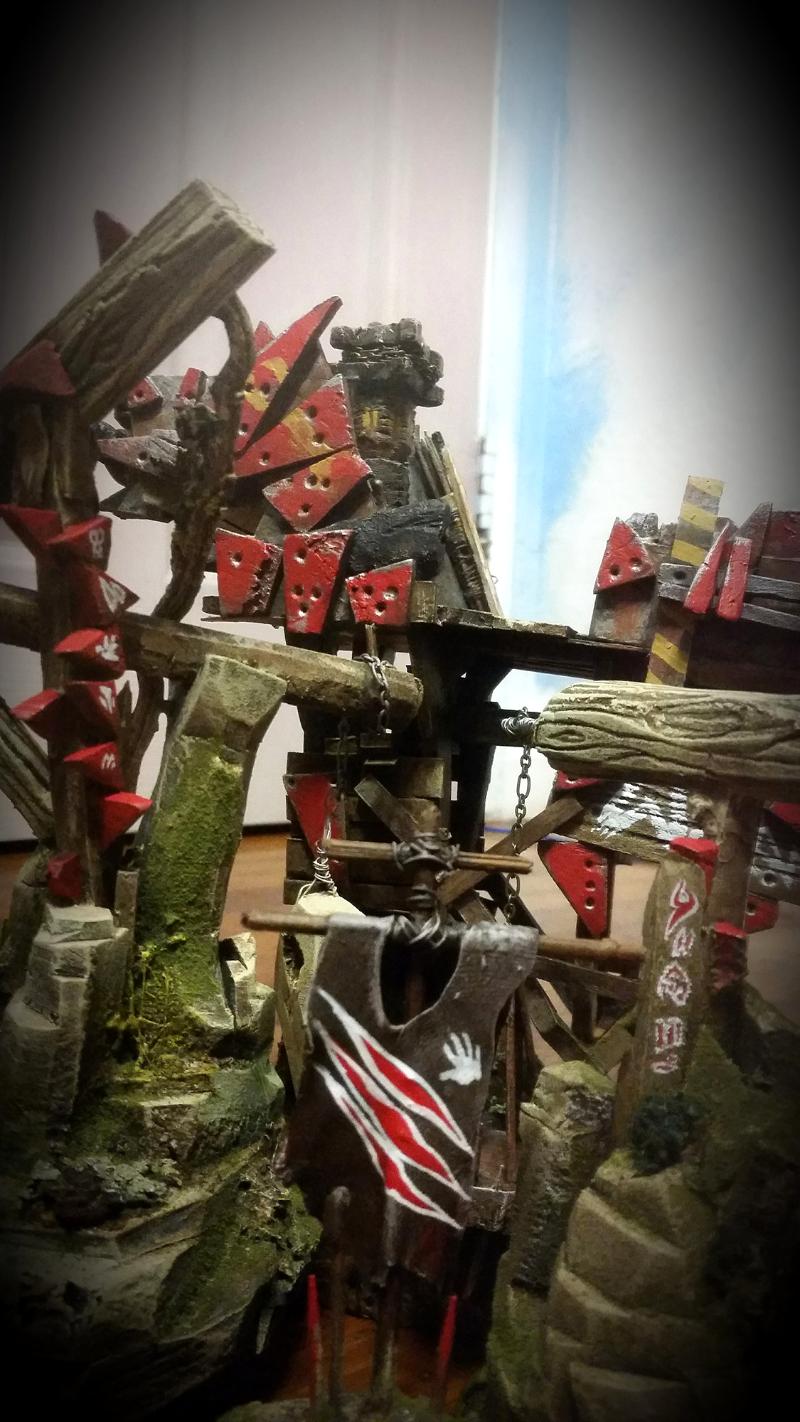
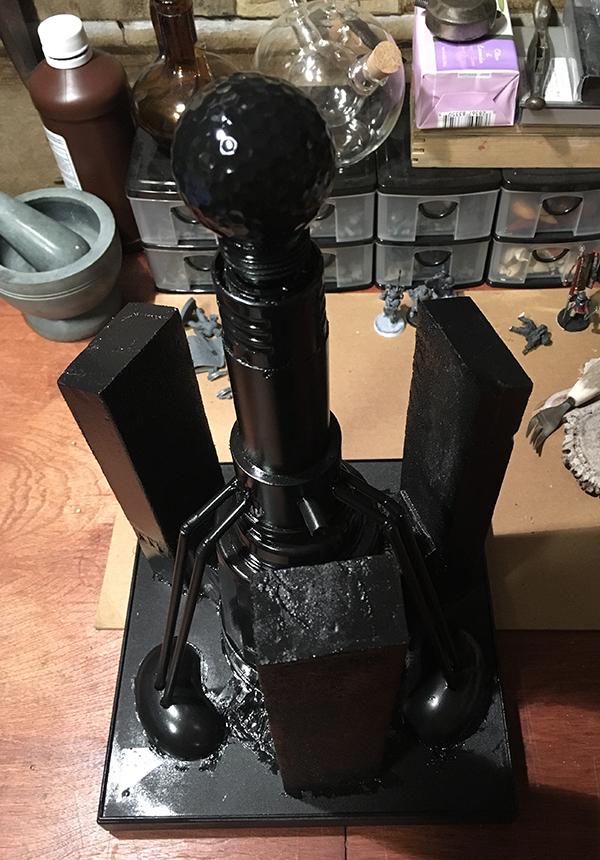
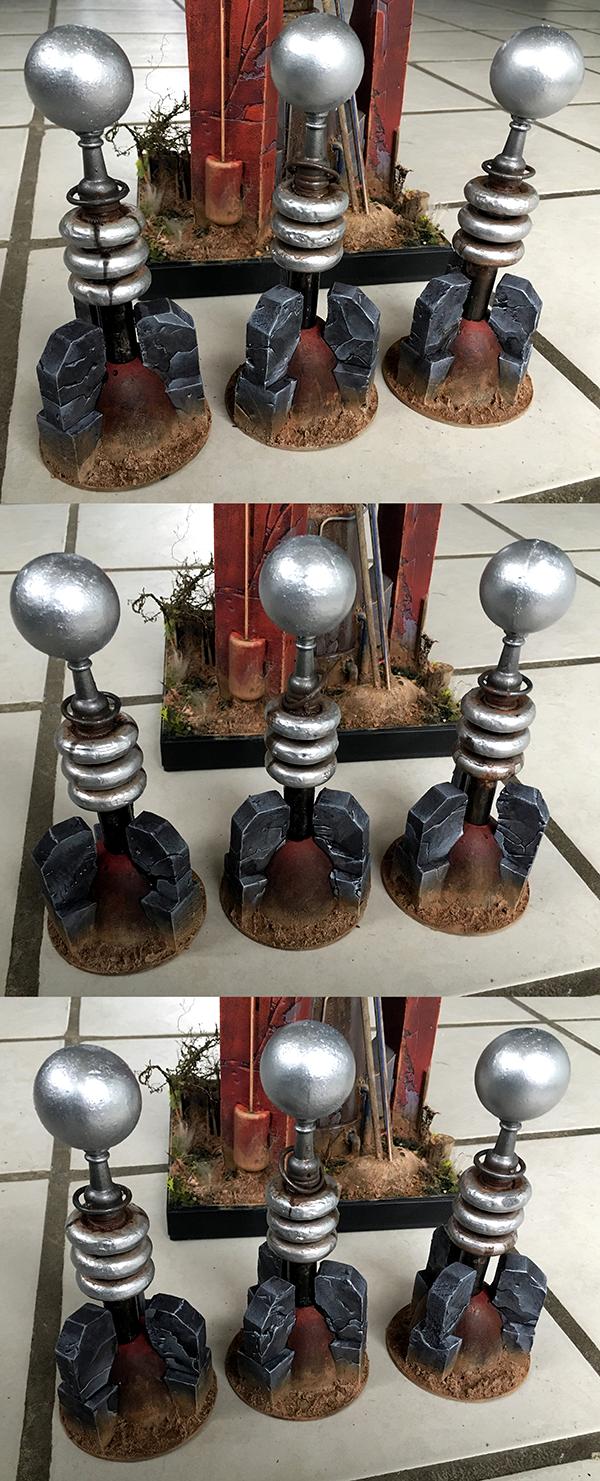
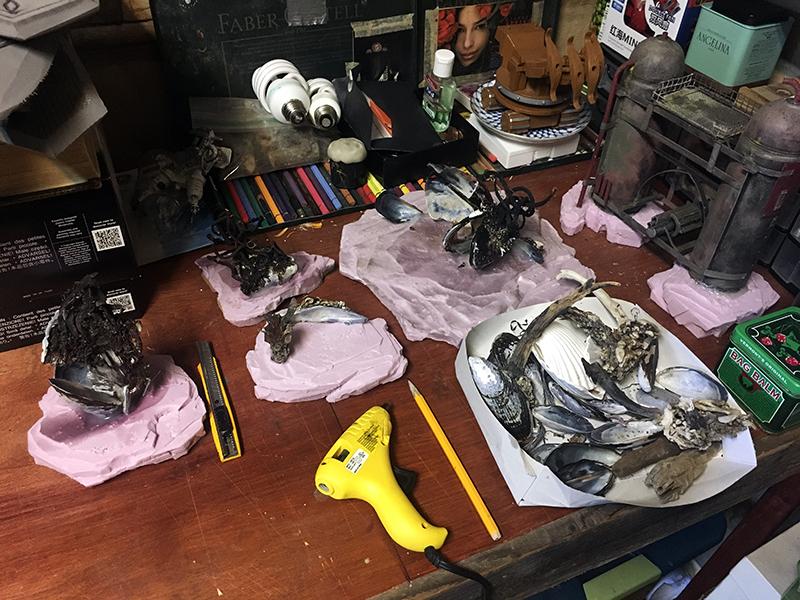
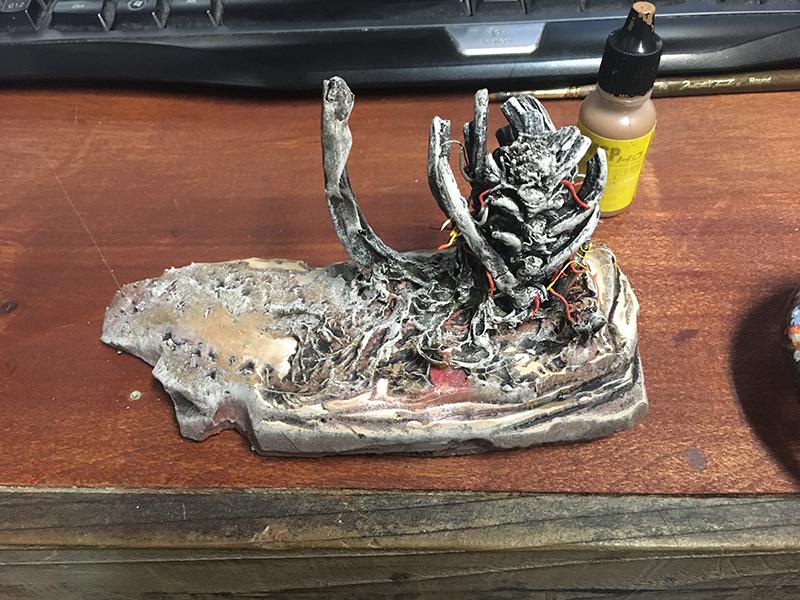
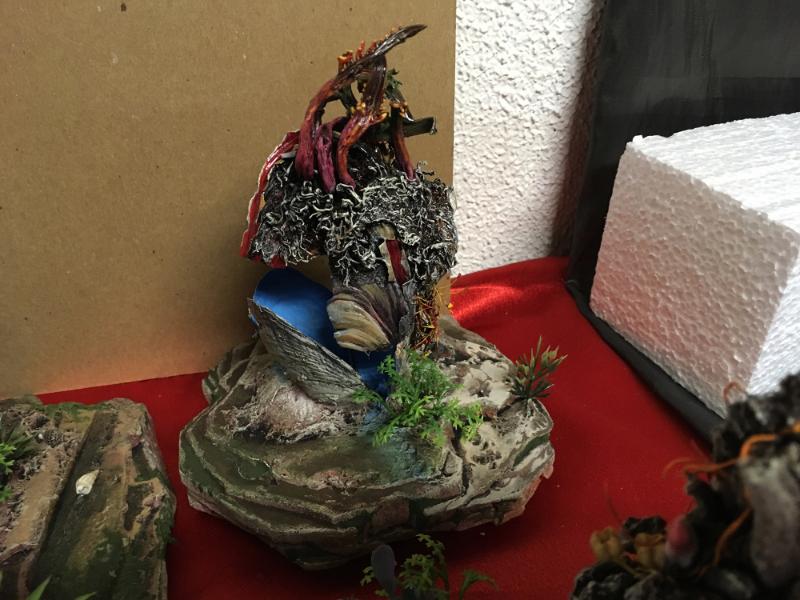
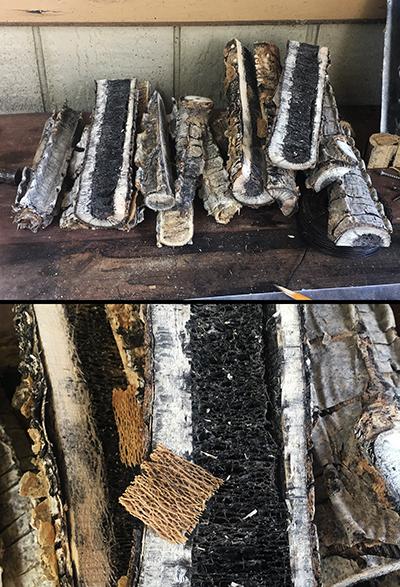
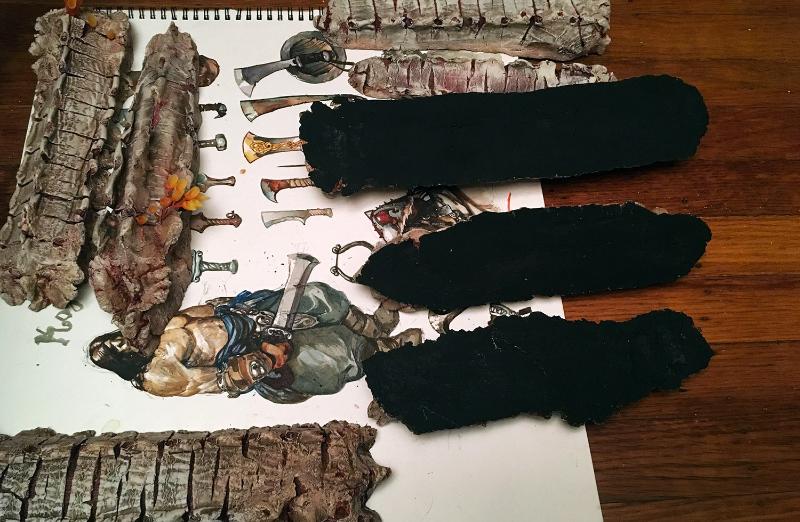
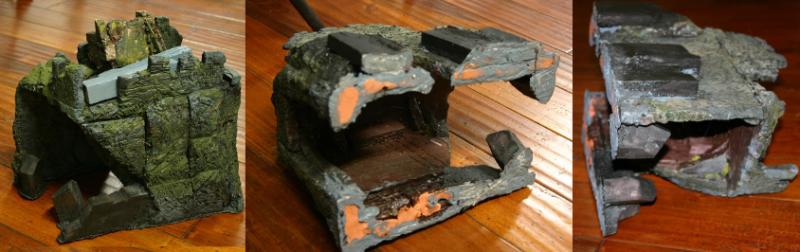
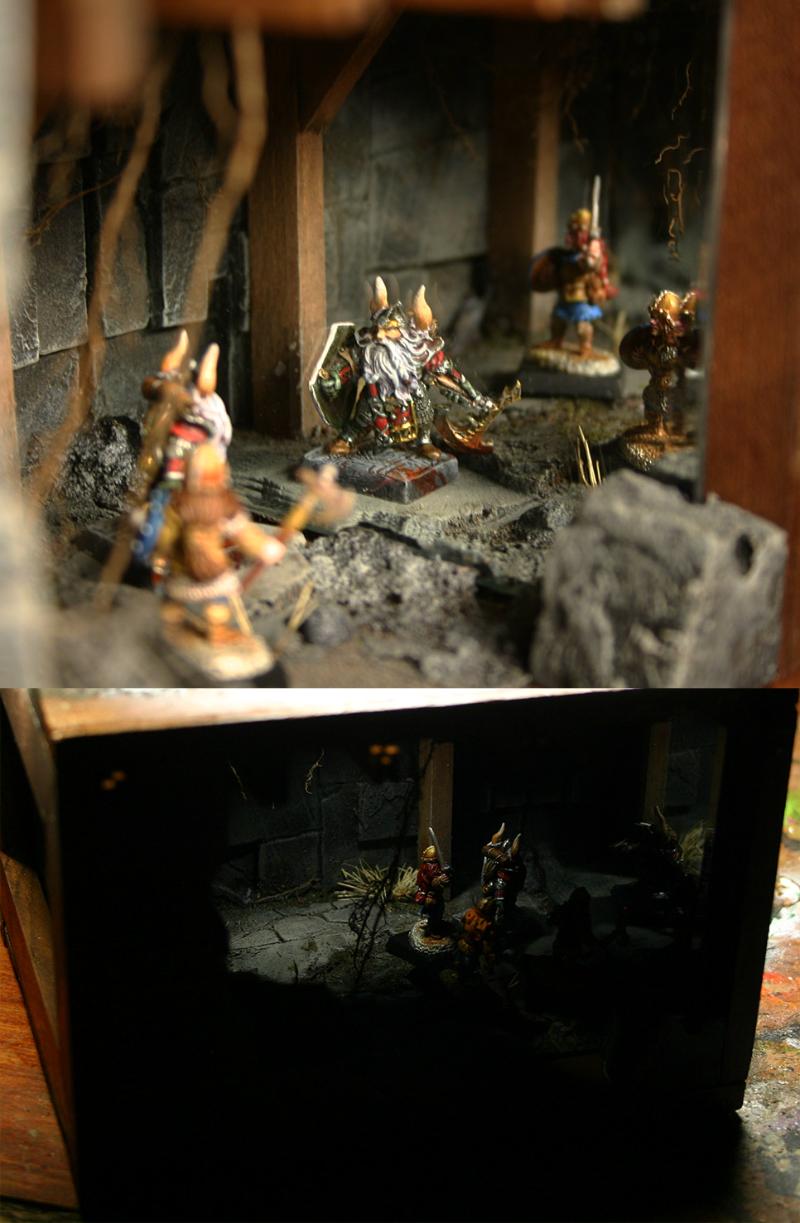
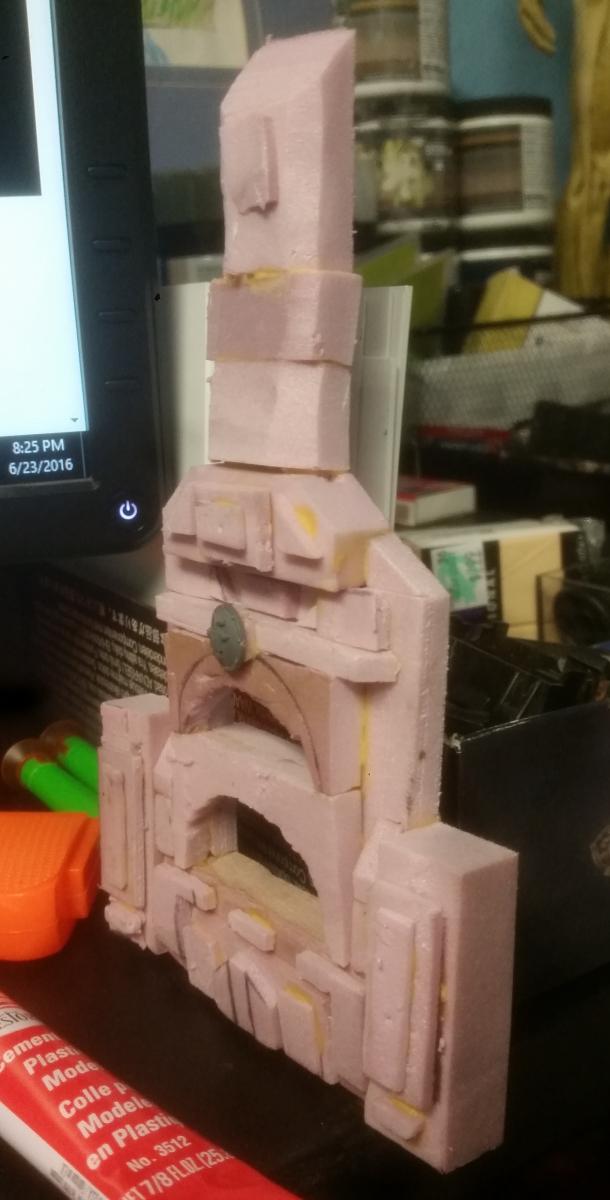
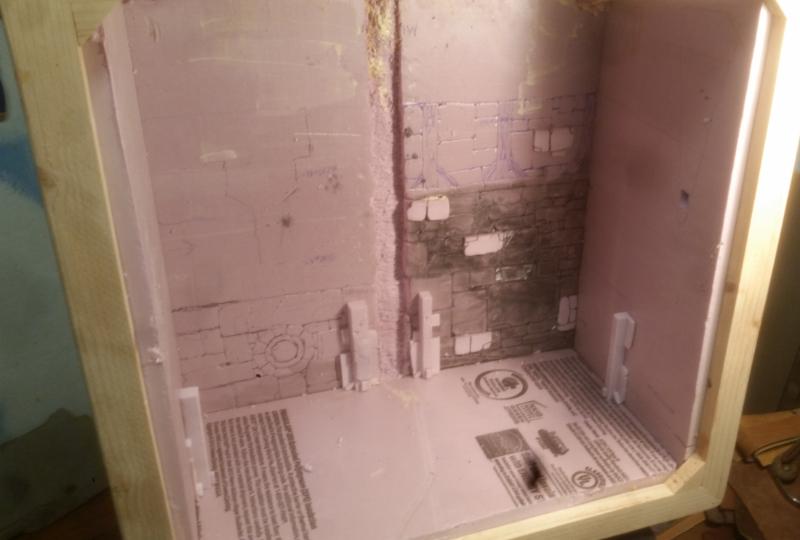
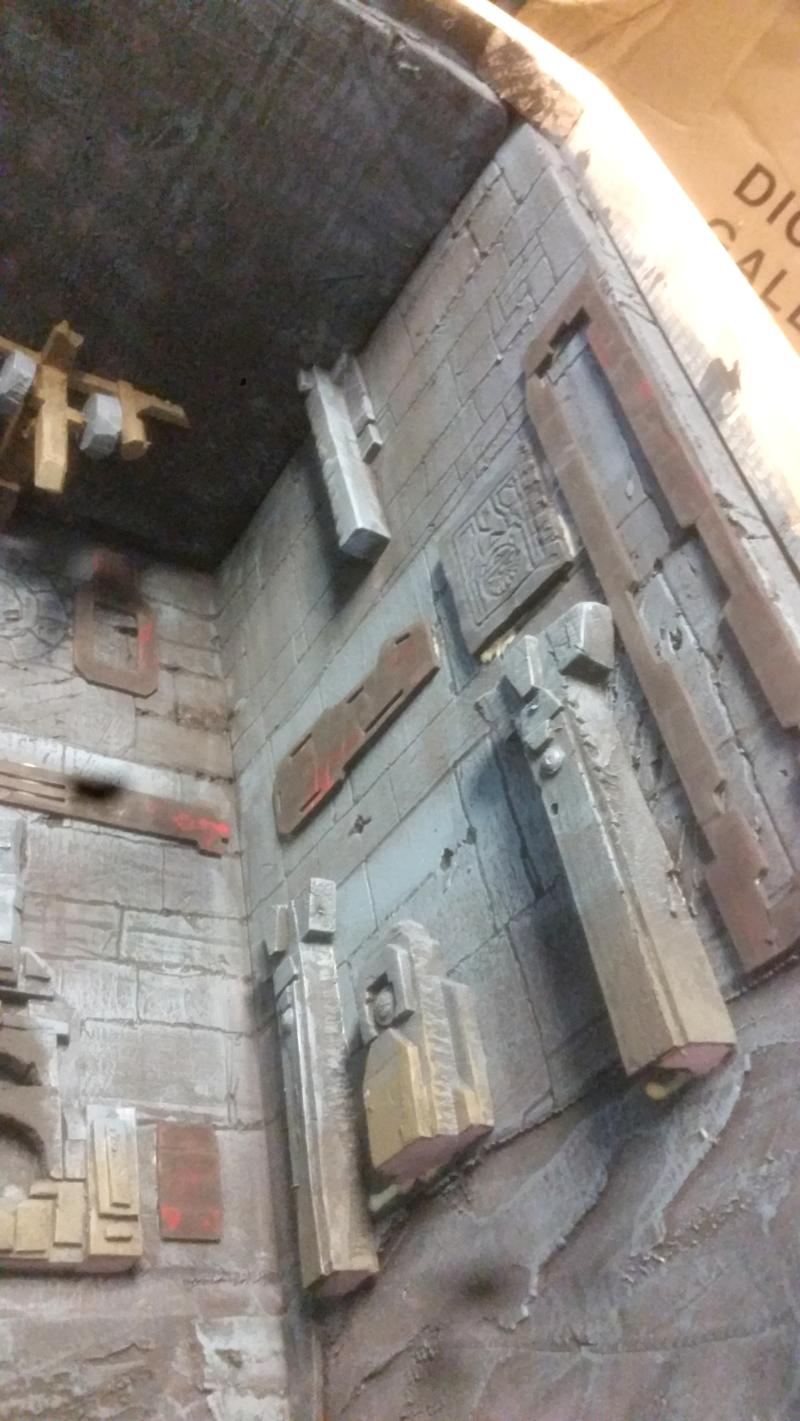
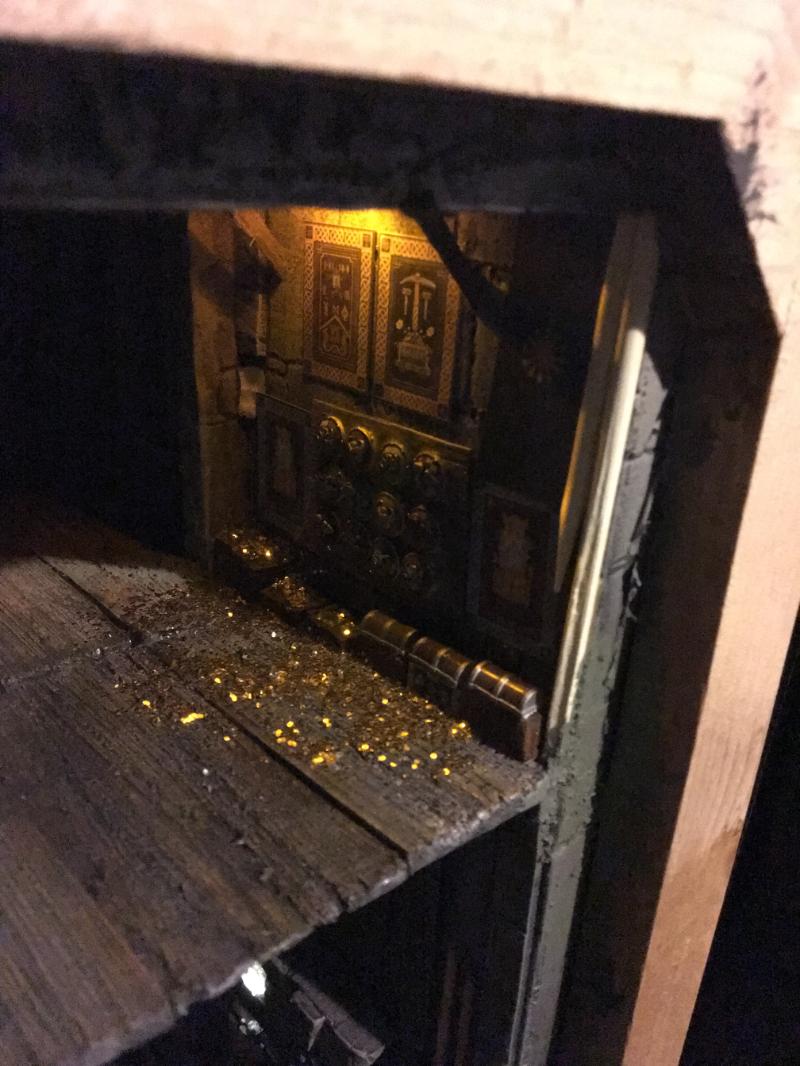
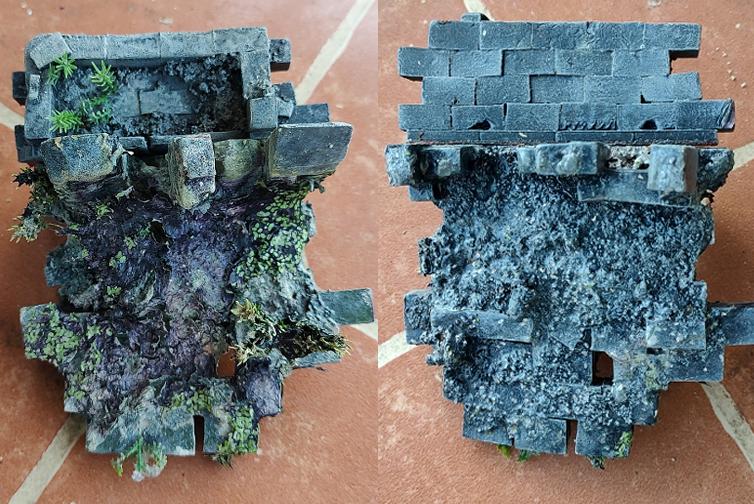
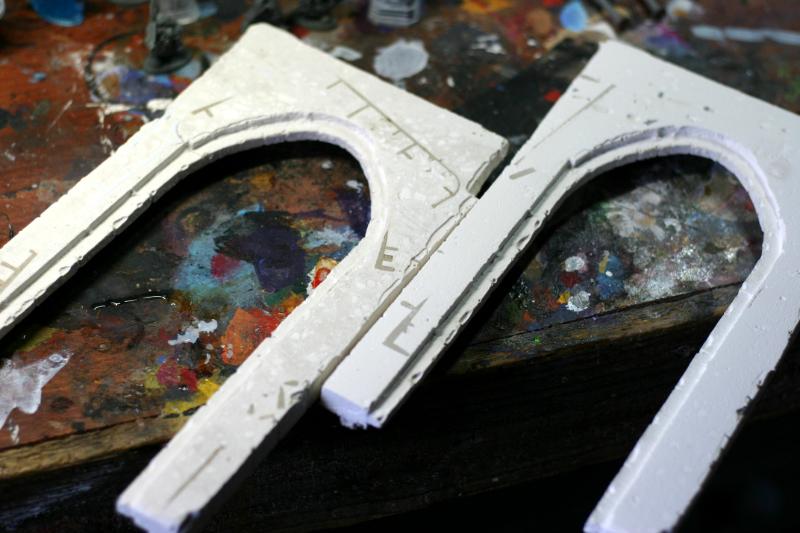
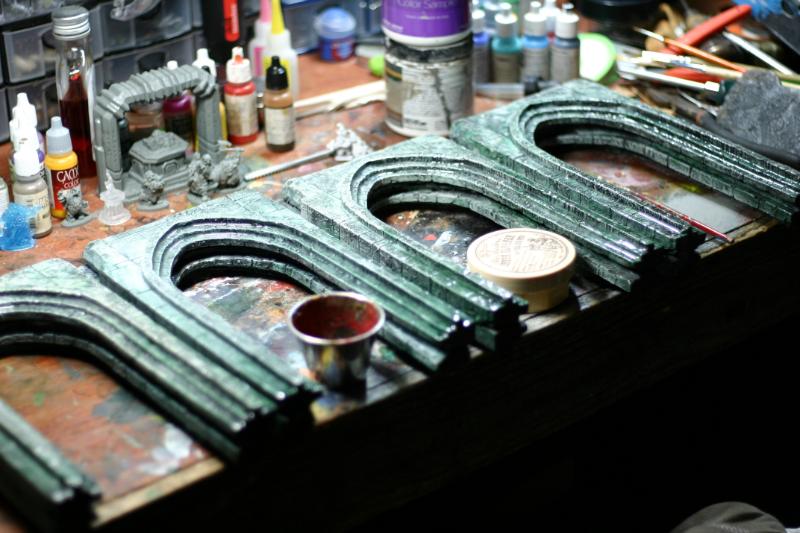
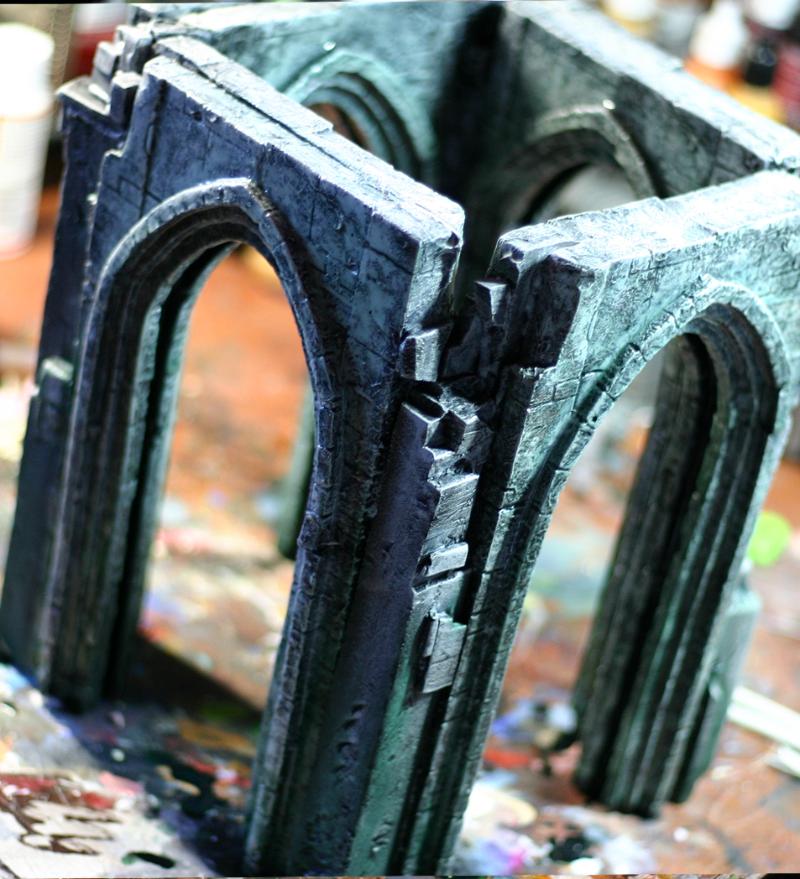
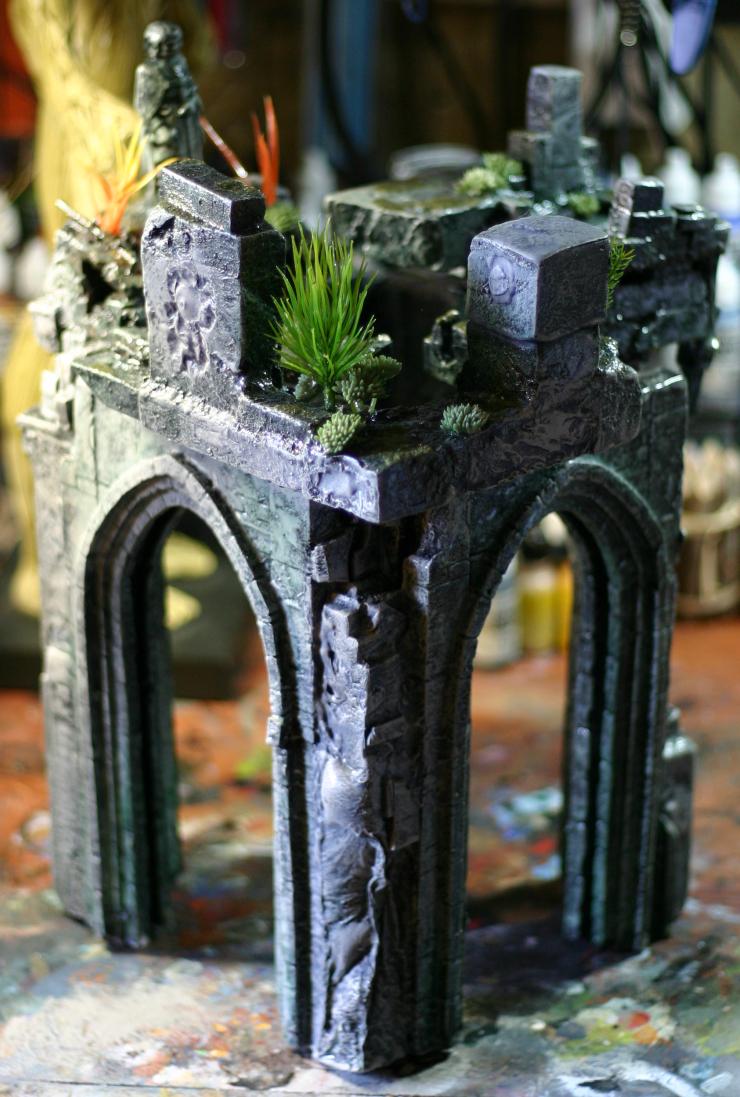
7 pieces cast, glued back to back, spray-painted black.


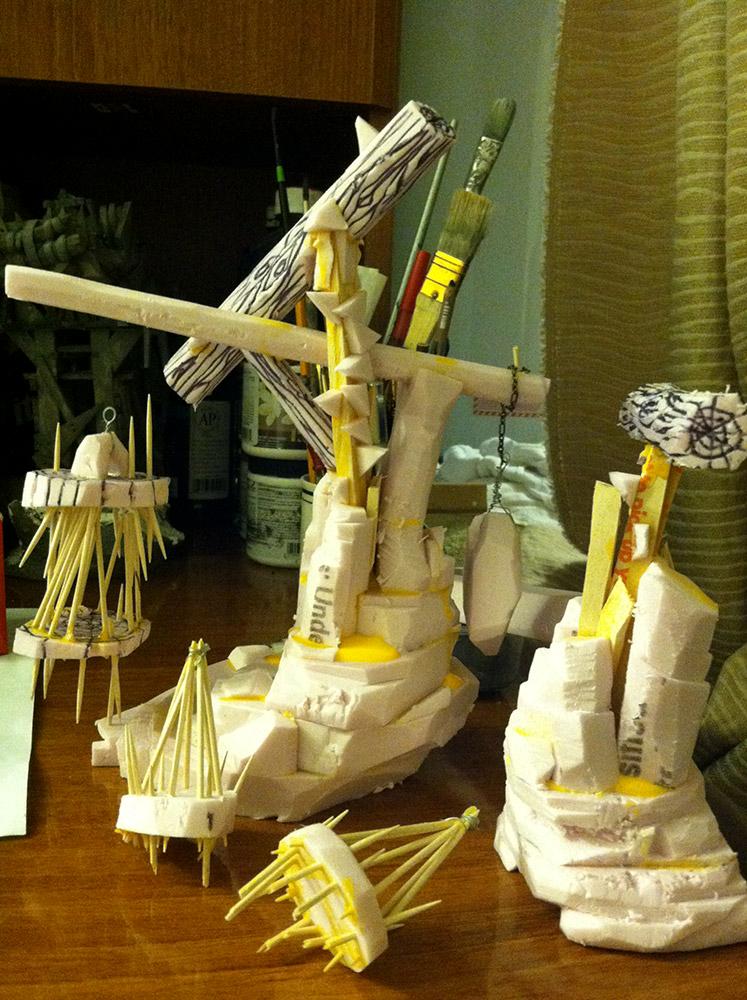
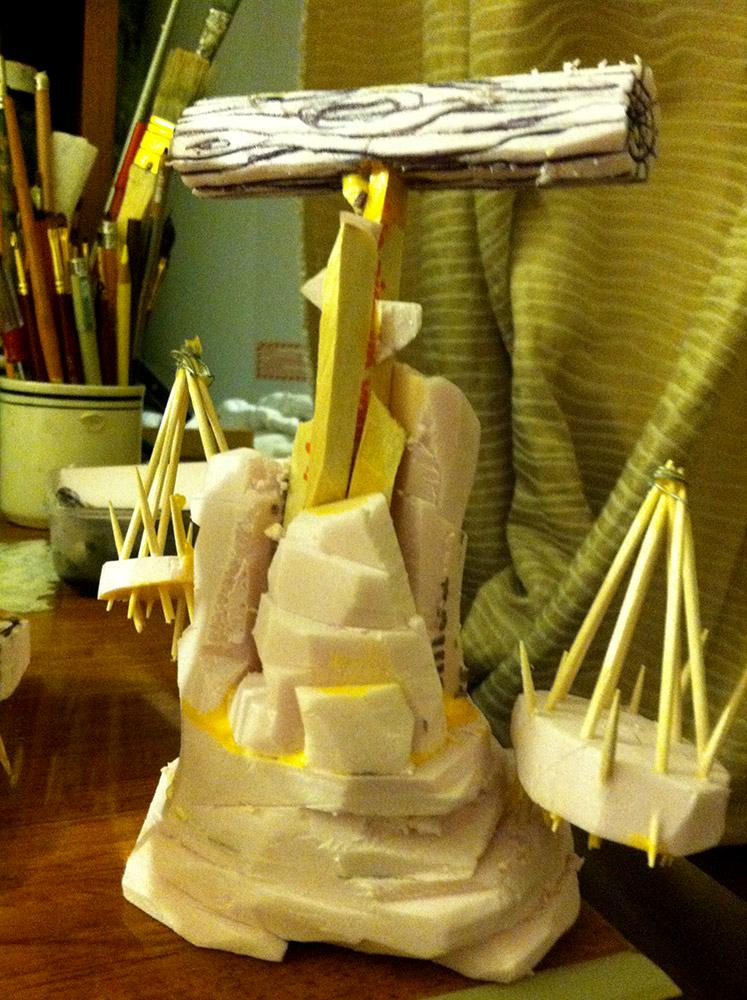
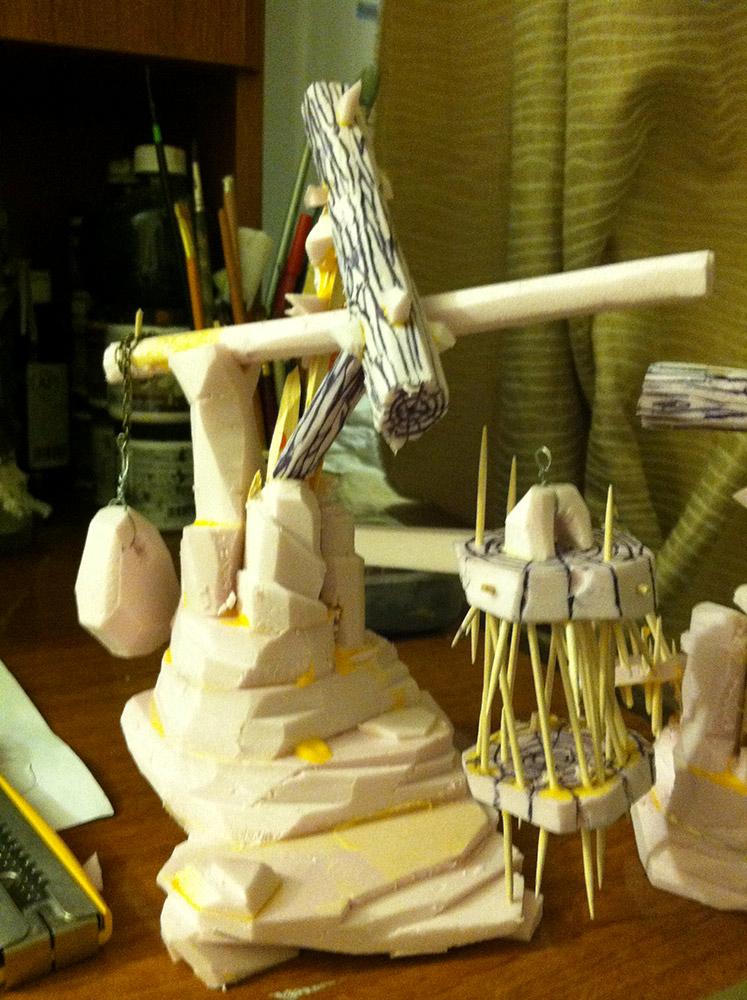
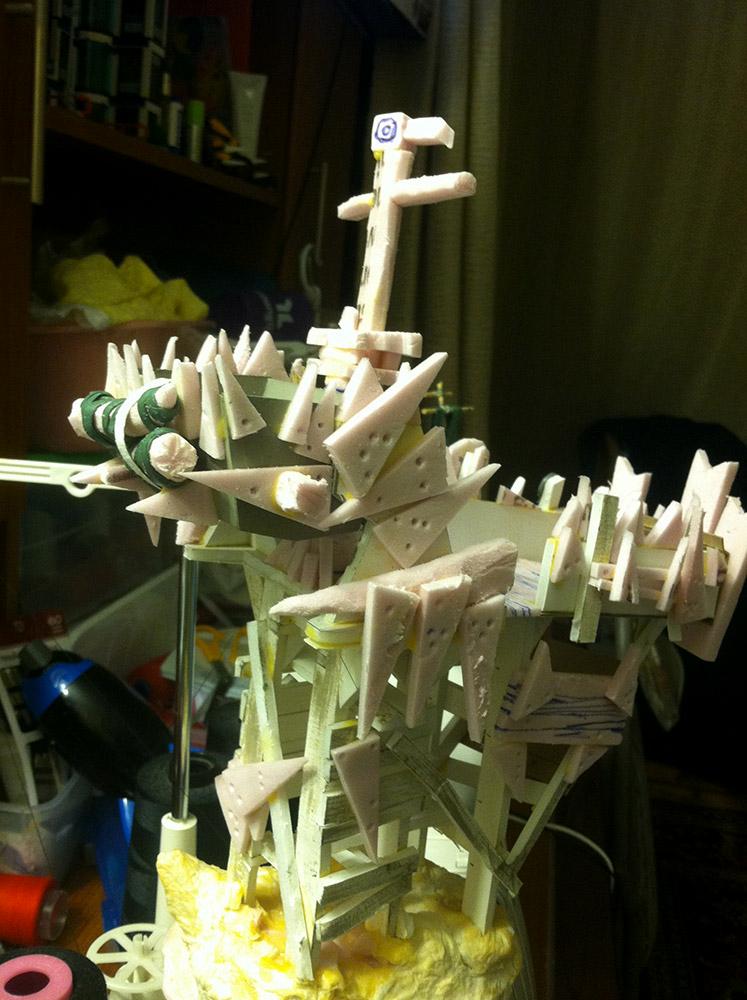
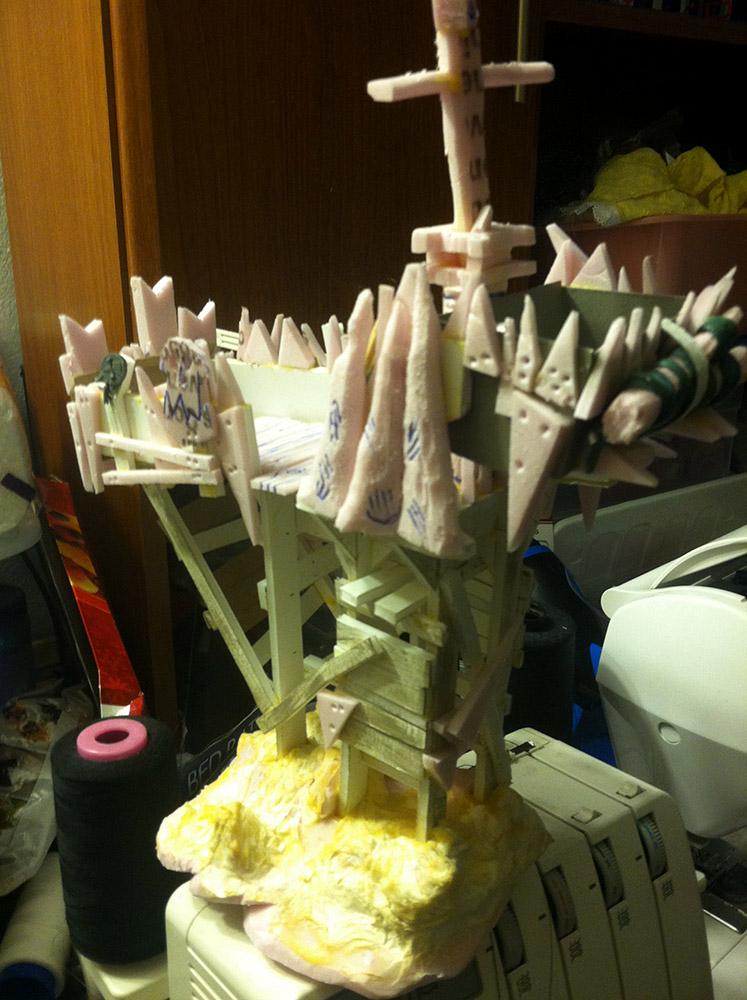
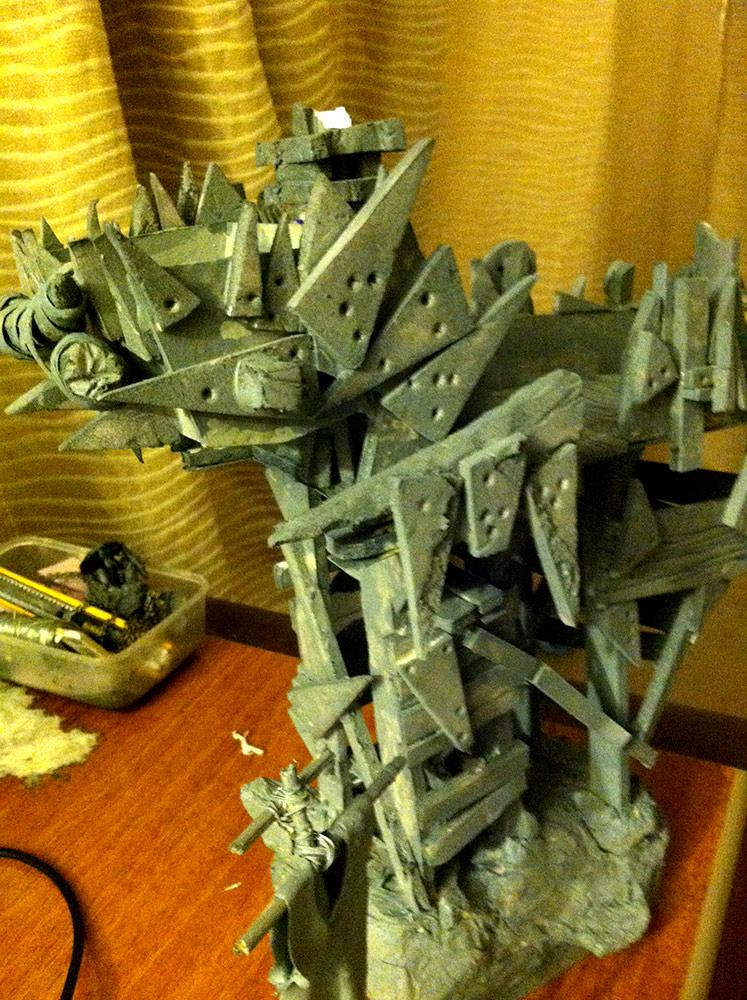
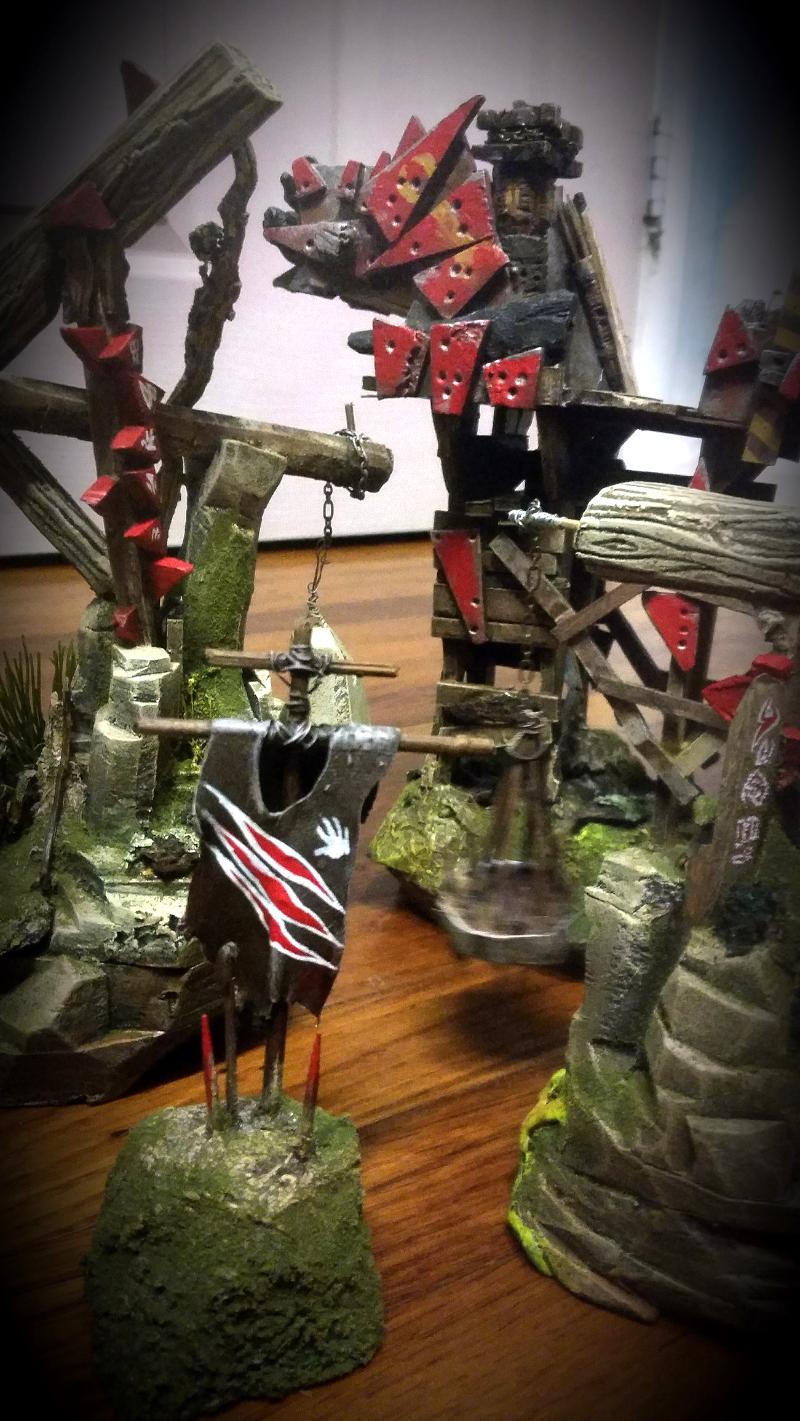
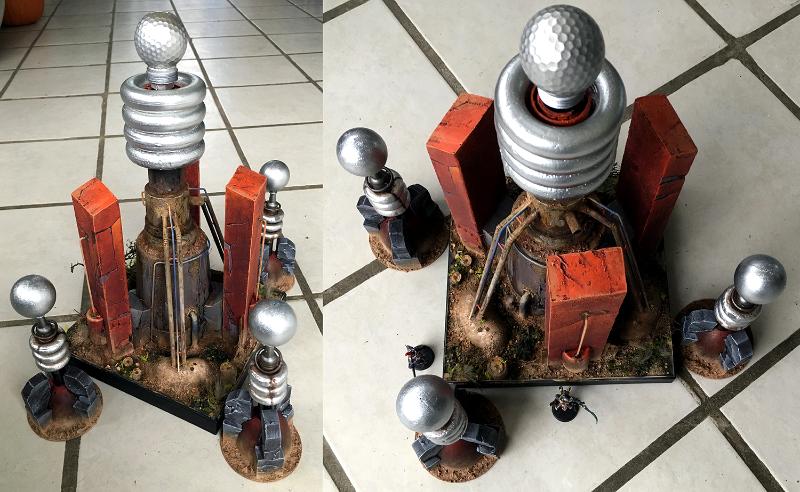
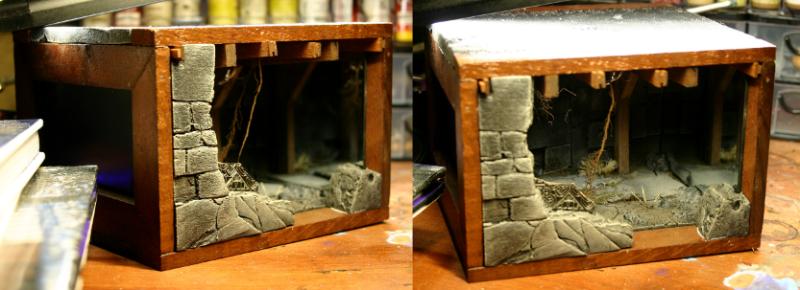
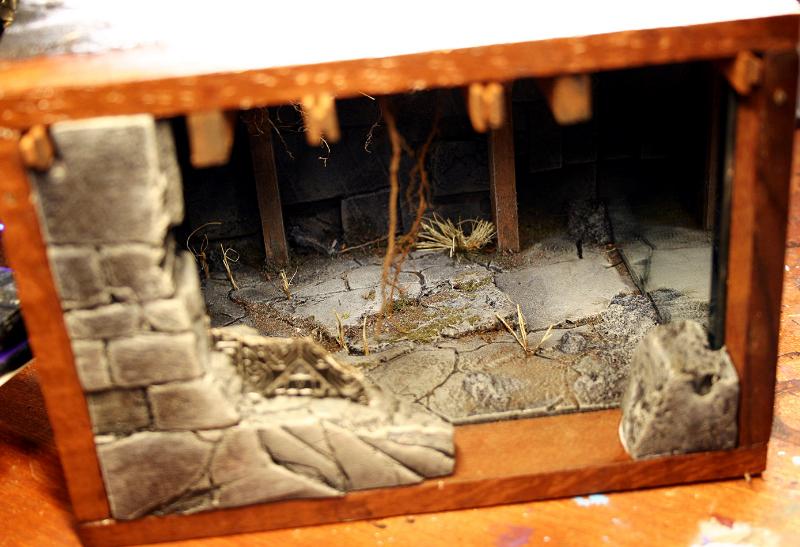
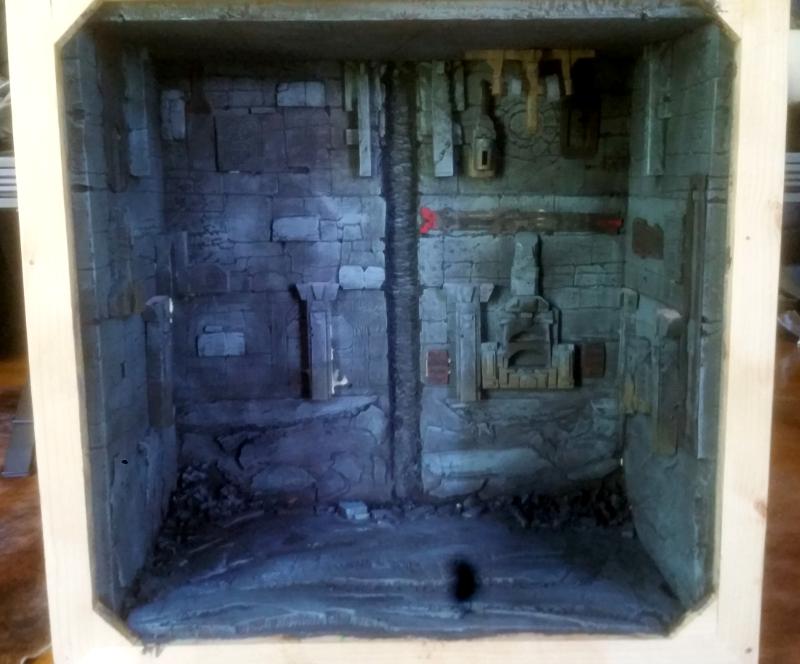
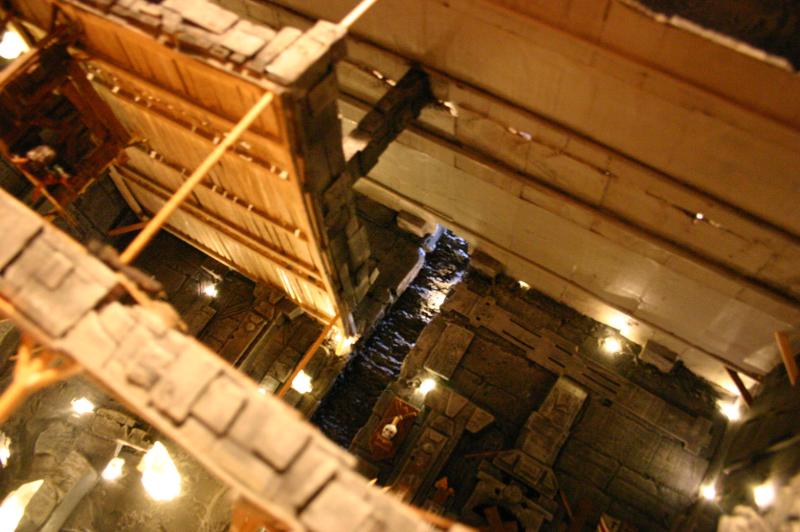
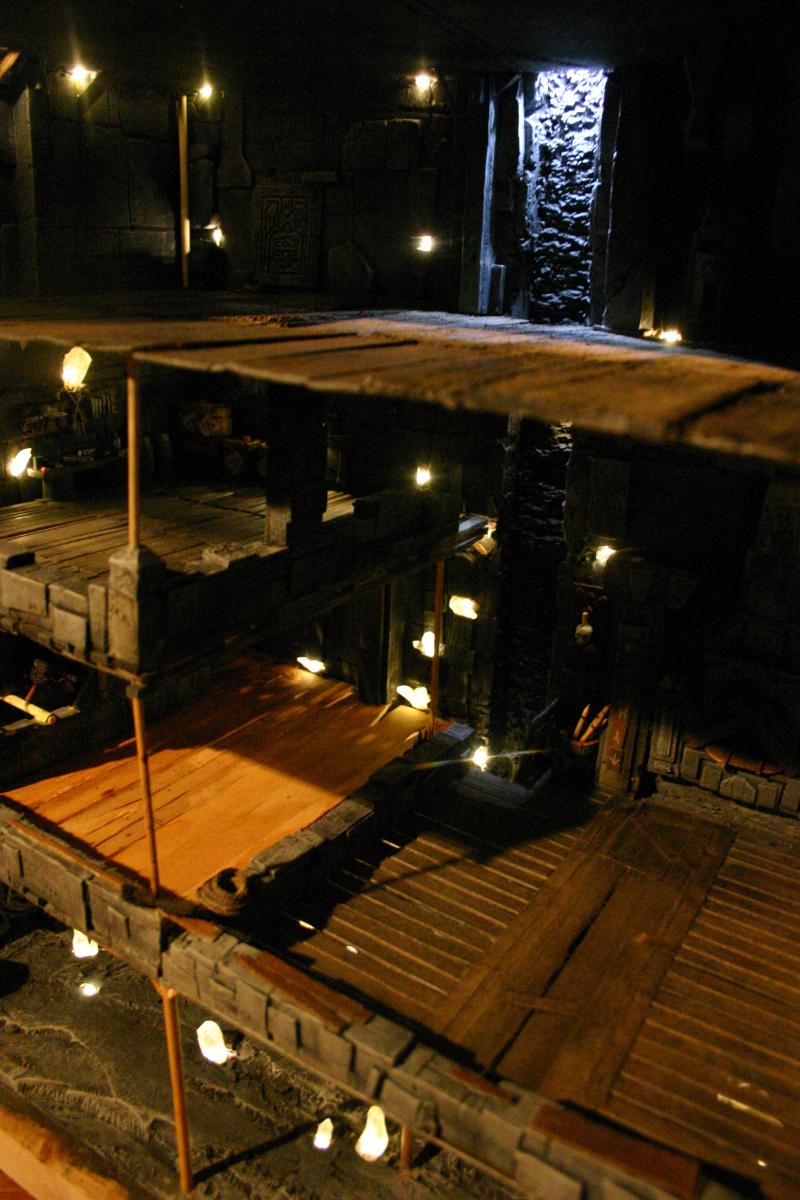
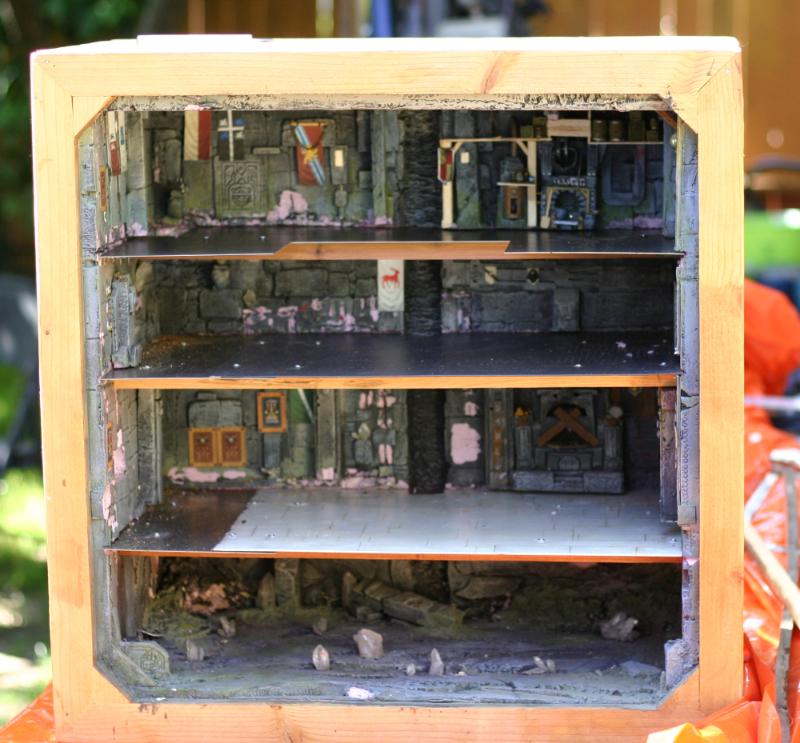
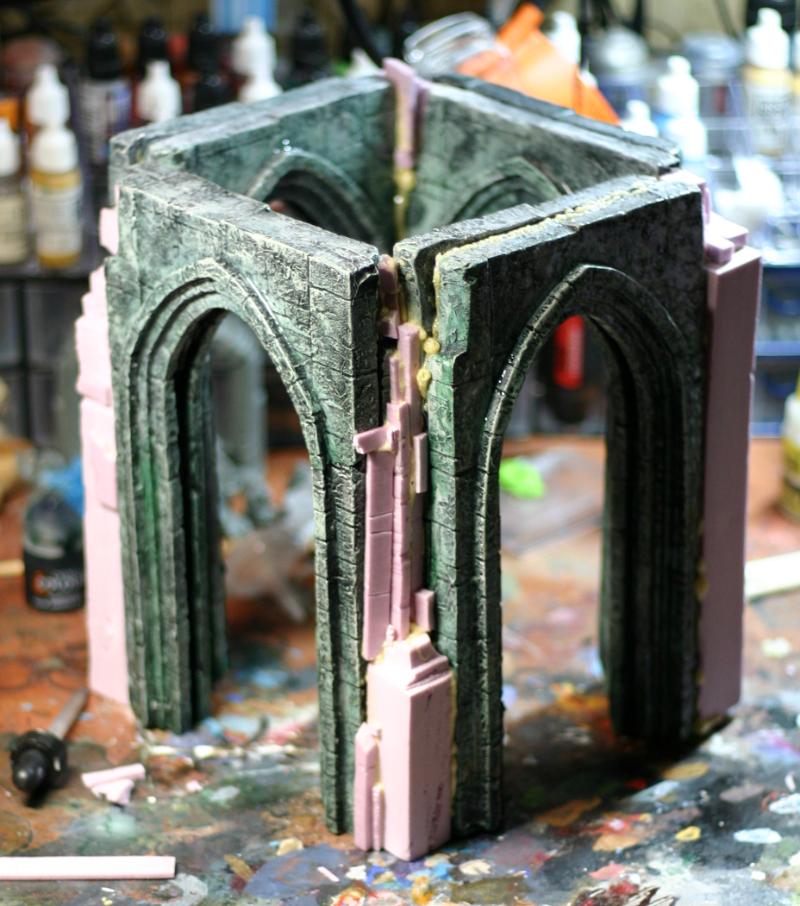
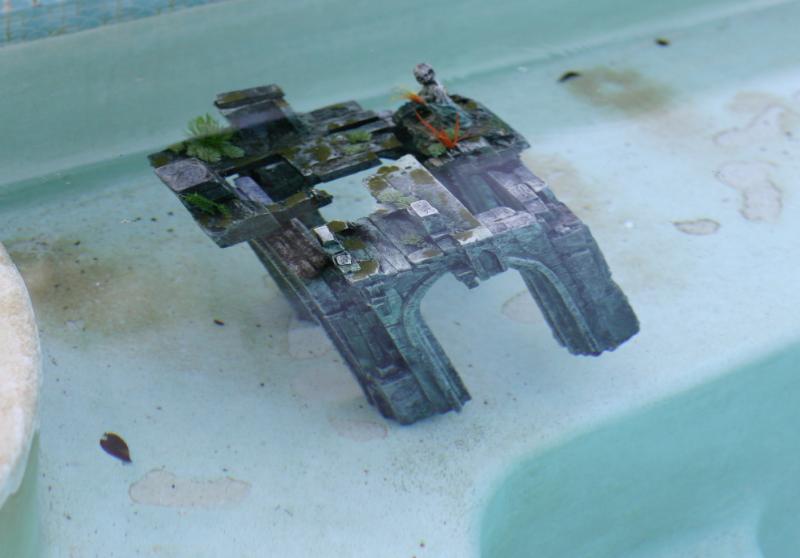
Adjusting the plan as I go. Instead of ruined wall section of a cathedral with the arches, I'll combine them into a tower of a sort. It is much easier to move it around that way.
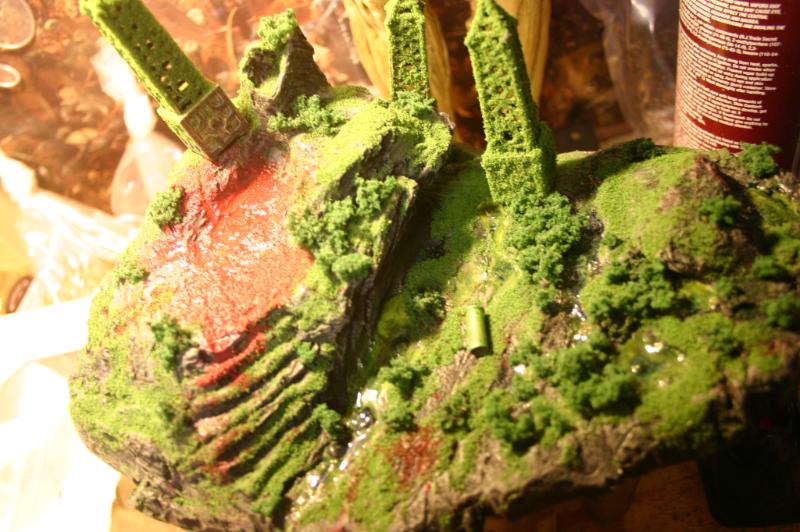
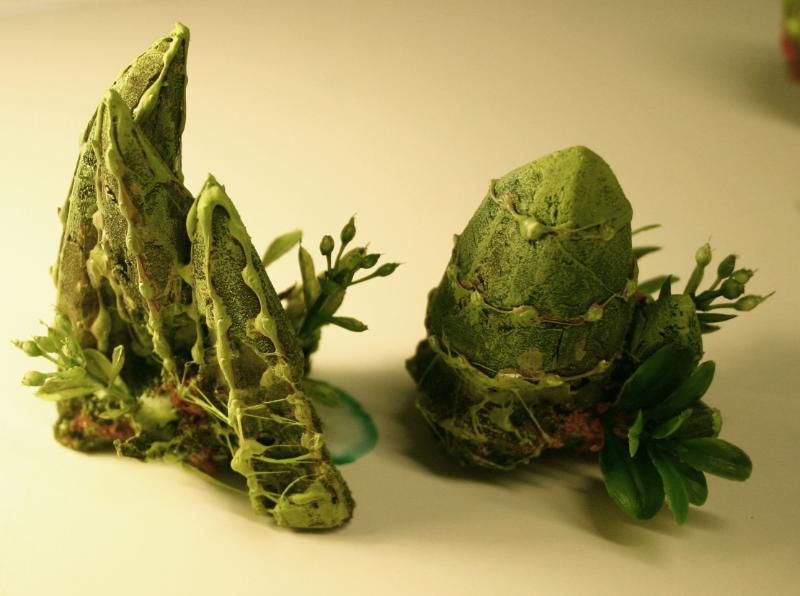
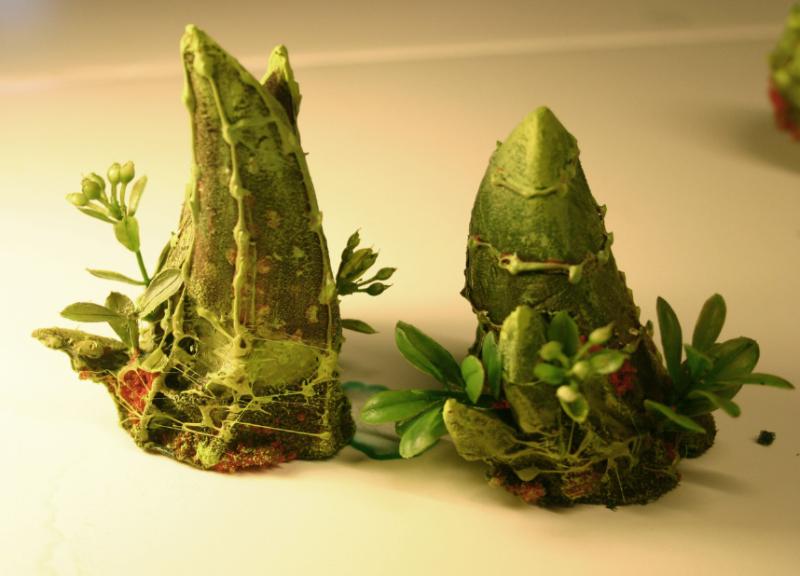
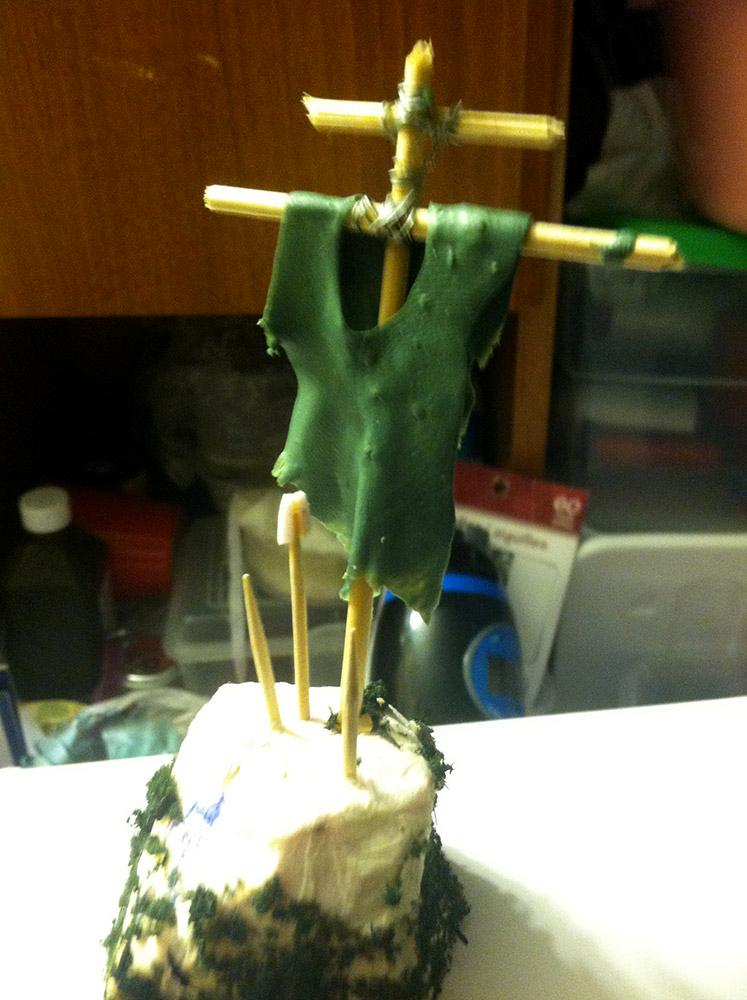
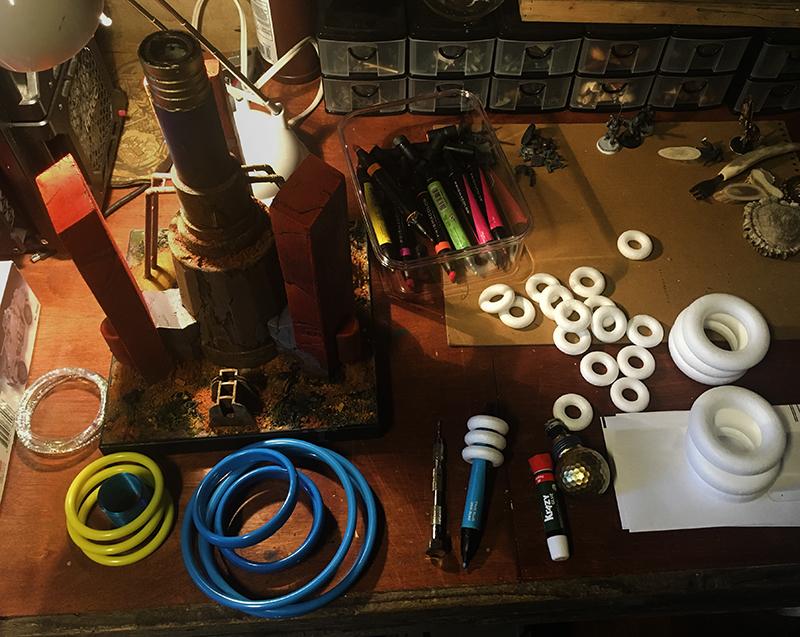
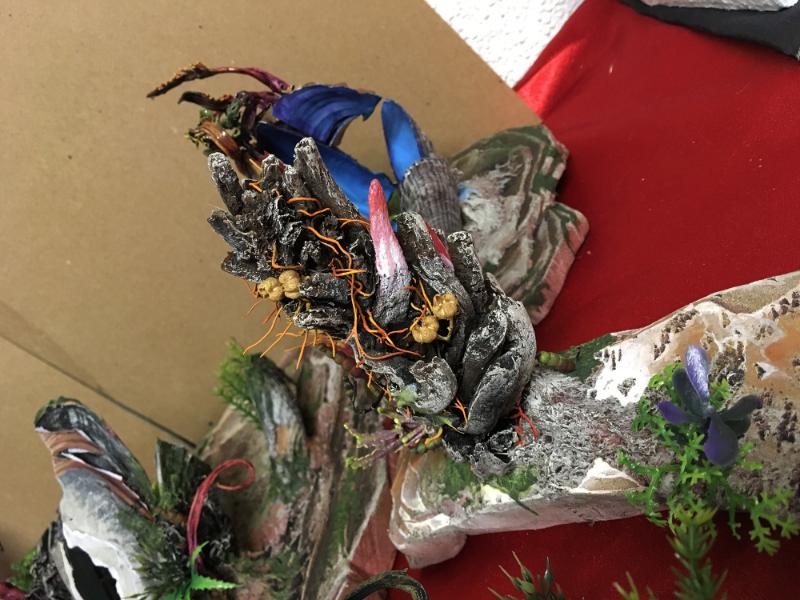
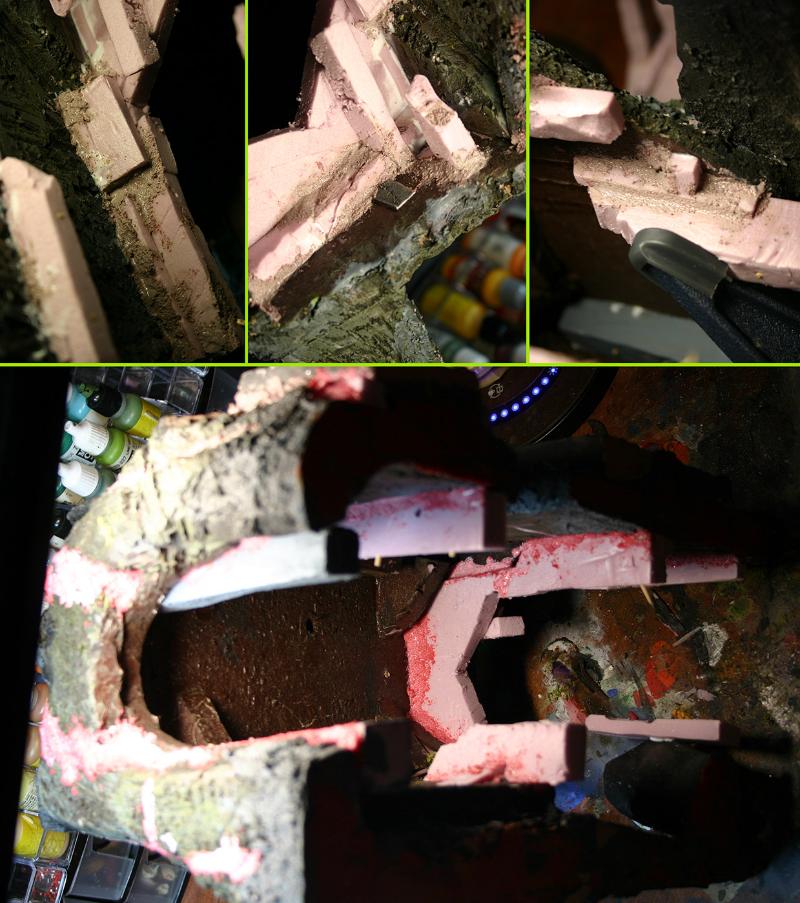
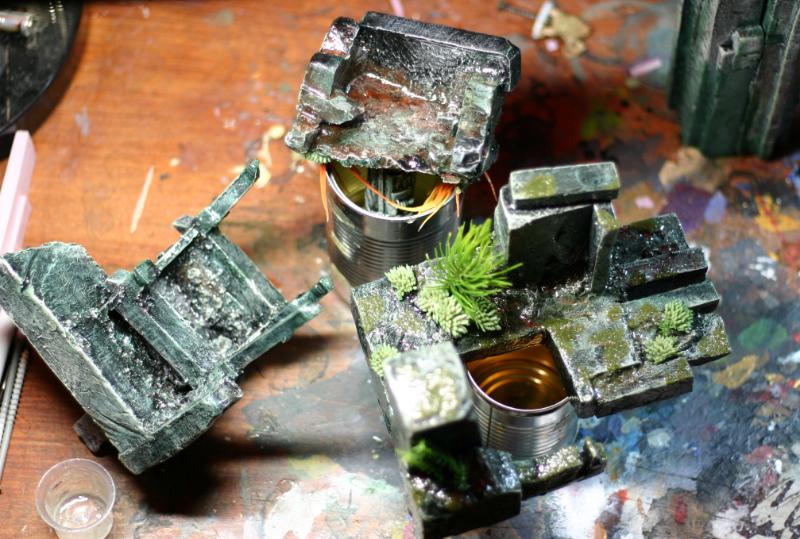
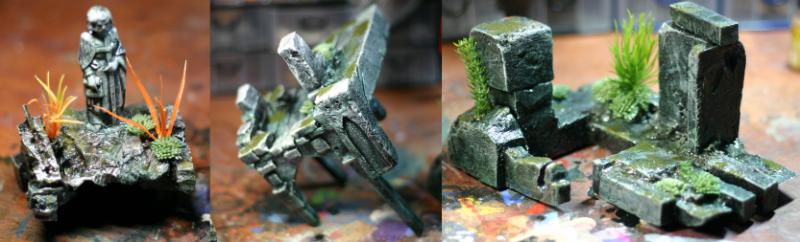
Need something for the top
Found some old foam pieces from old projects. Will try to put it all together.


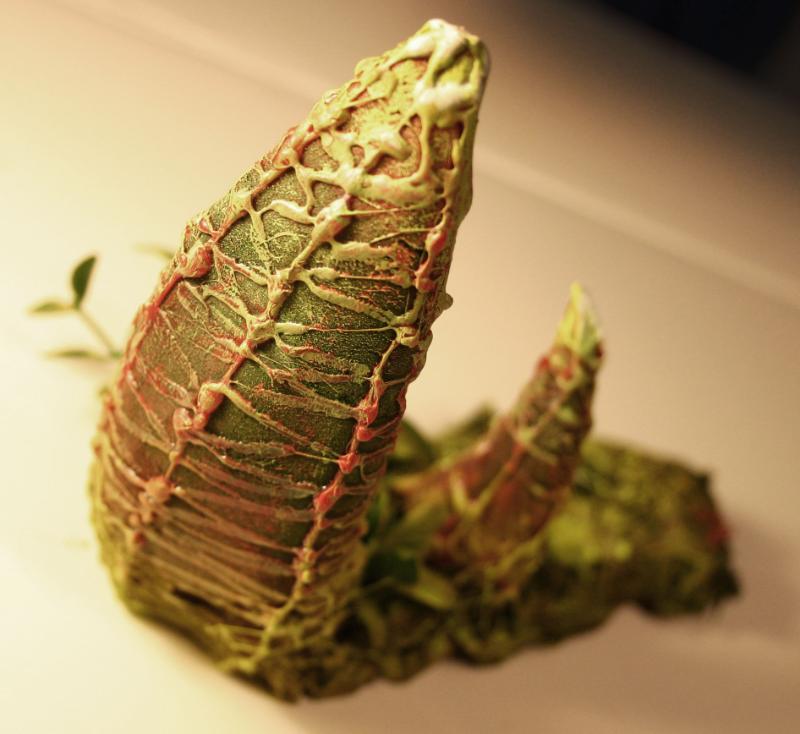
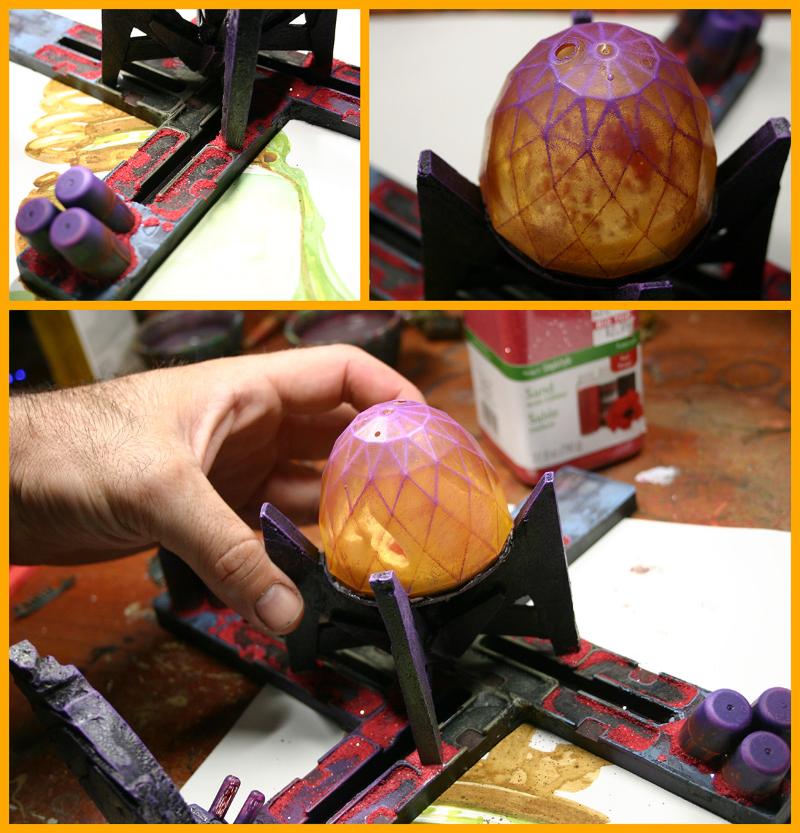
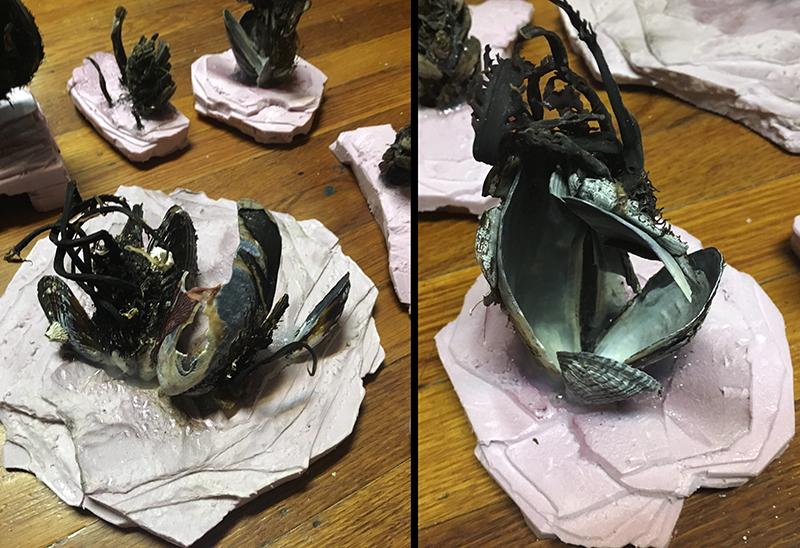
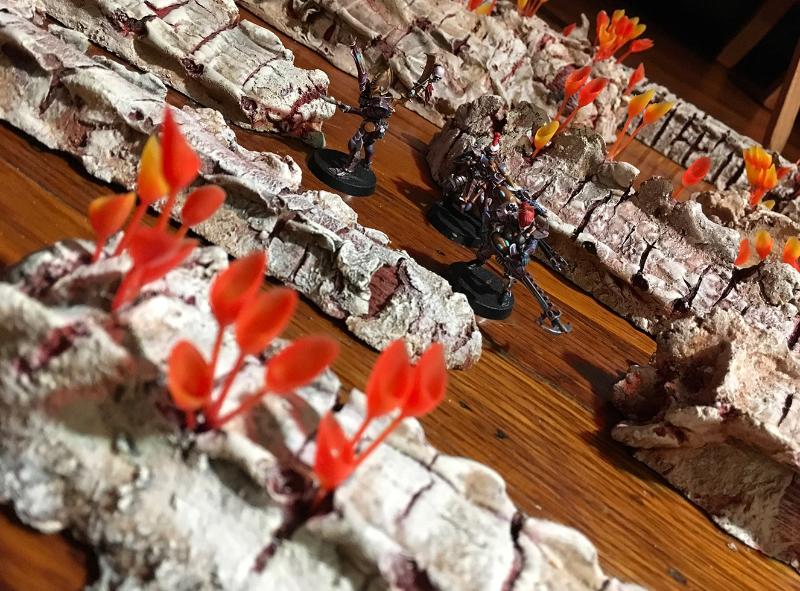
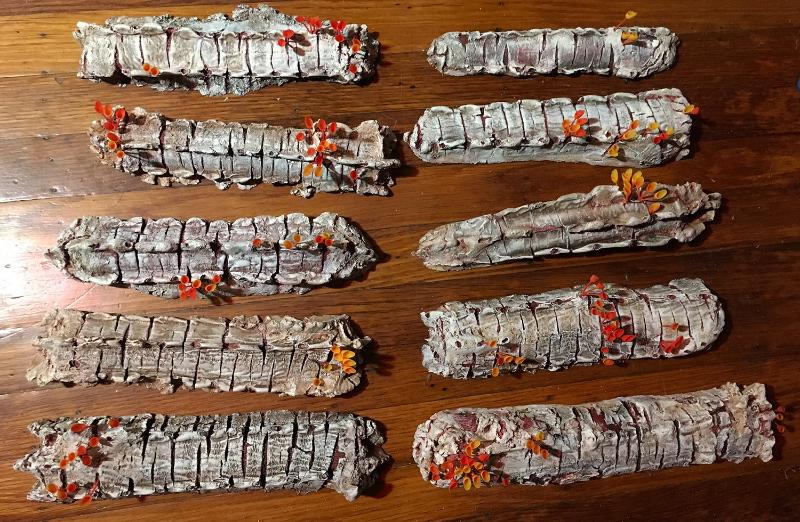
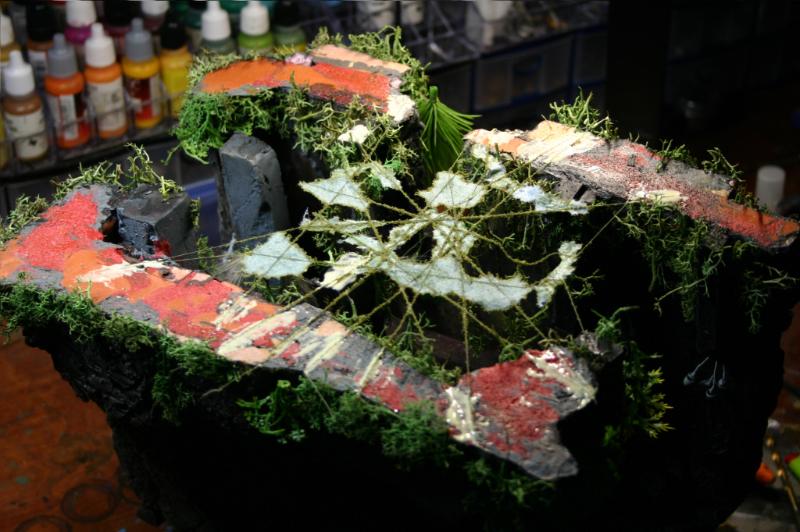
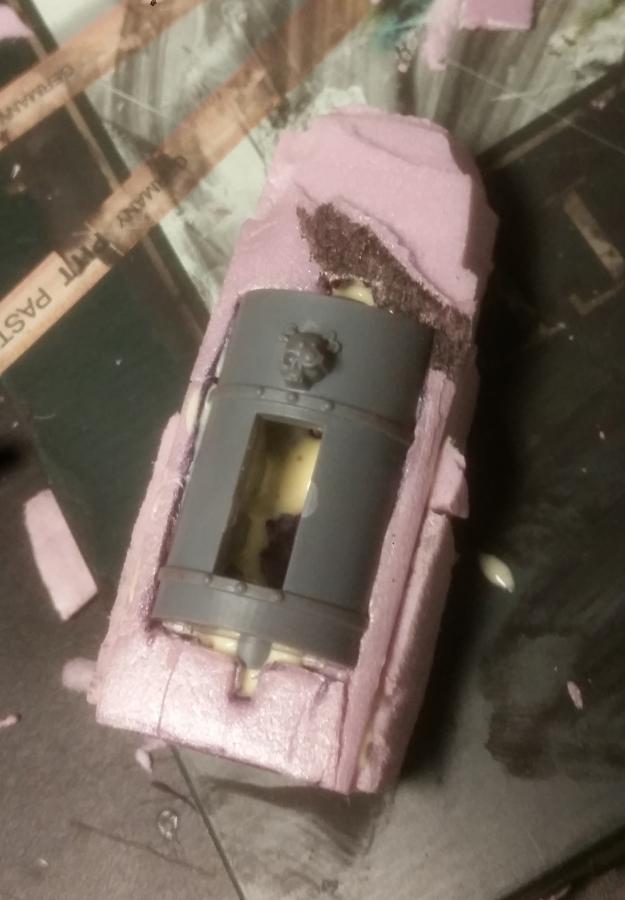
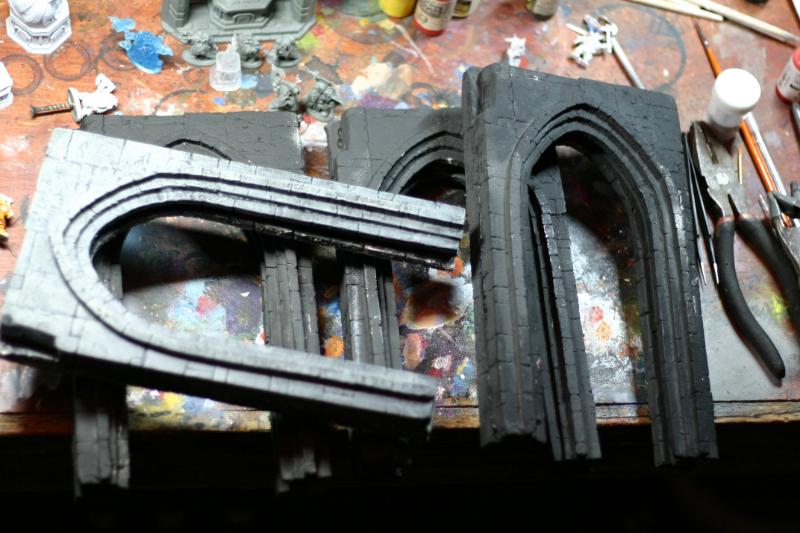
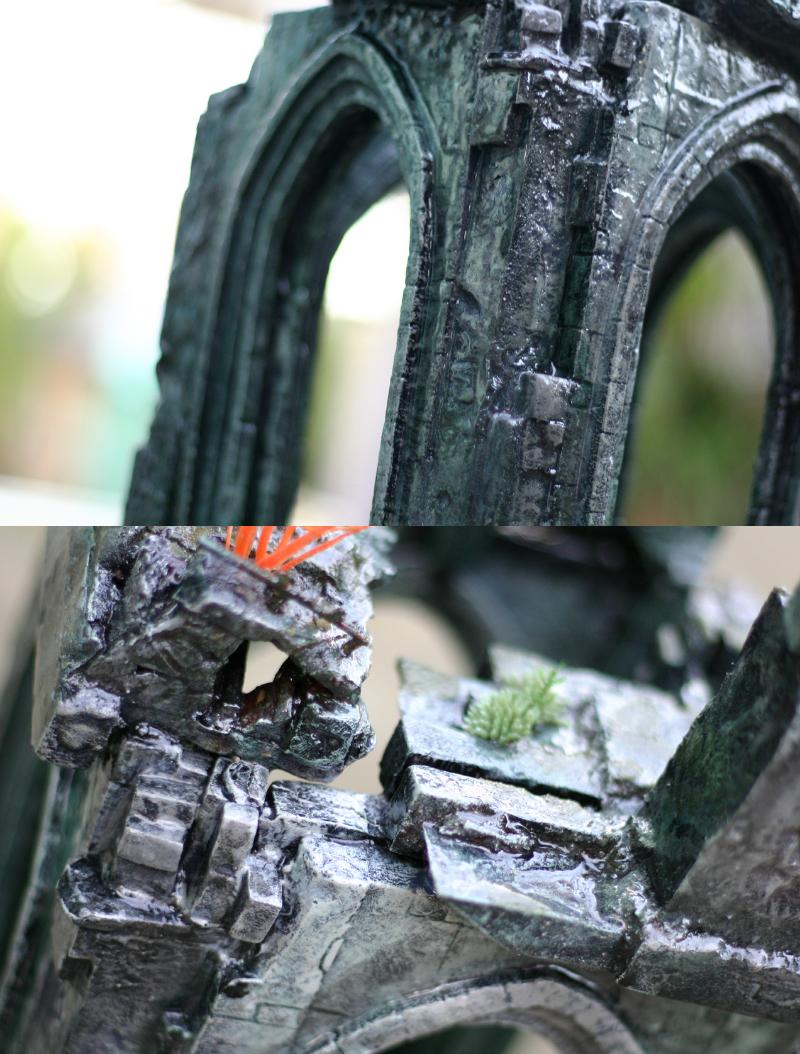
Dry brushed the arches, stained them a bit green (finally good use for that GW contrast pot), and begin to cover the arches in coats of resin.
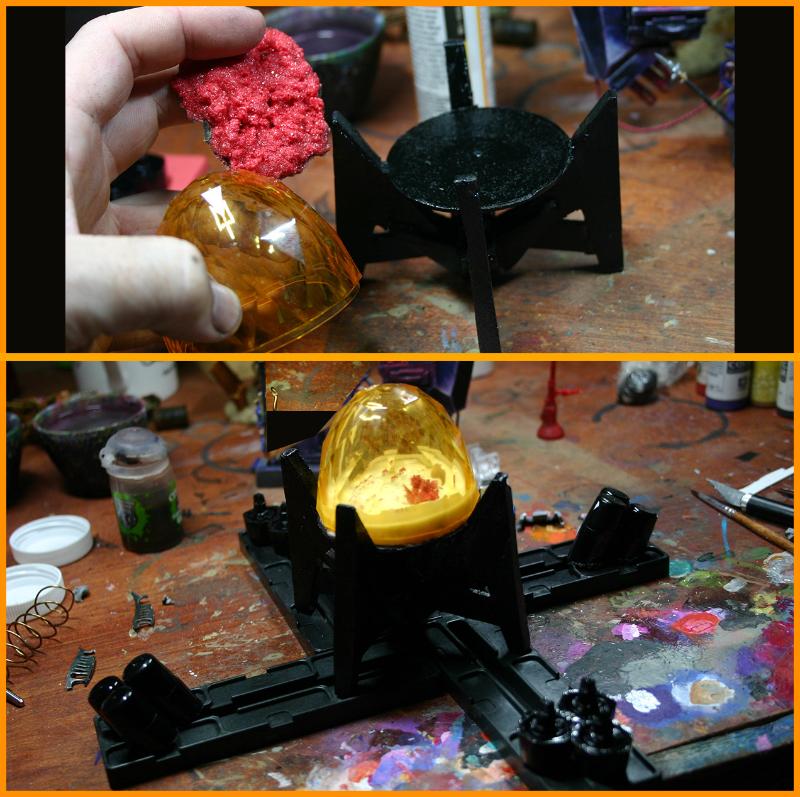
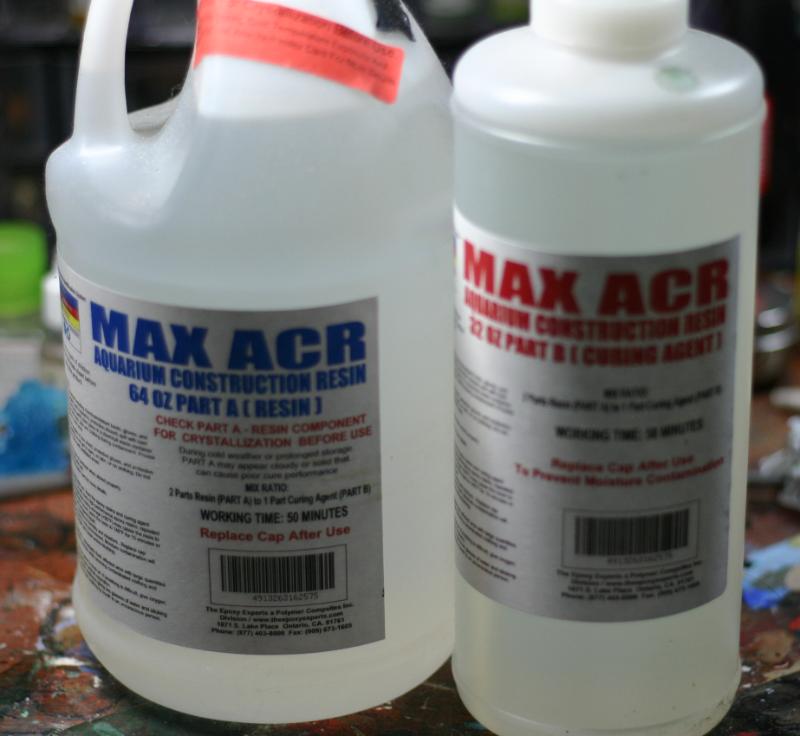
This is Aquarium safe resin, usually used in combination with calcium carbonate to make mold aquarium decorations.

So the idea is to coat terrain piece in that, and make it aquarium safe. I have done tests before and it will work.
Casting with that will be pricey, but coating saves a ton of resin and still has the terrain detail.


I have to do one side at a time for resins, and the glues have to cure for full 24 because pieces are big n "heavy" ish.
Progress is slow due to dry time for resins or glues.
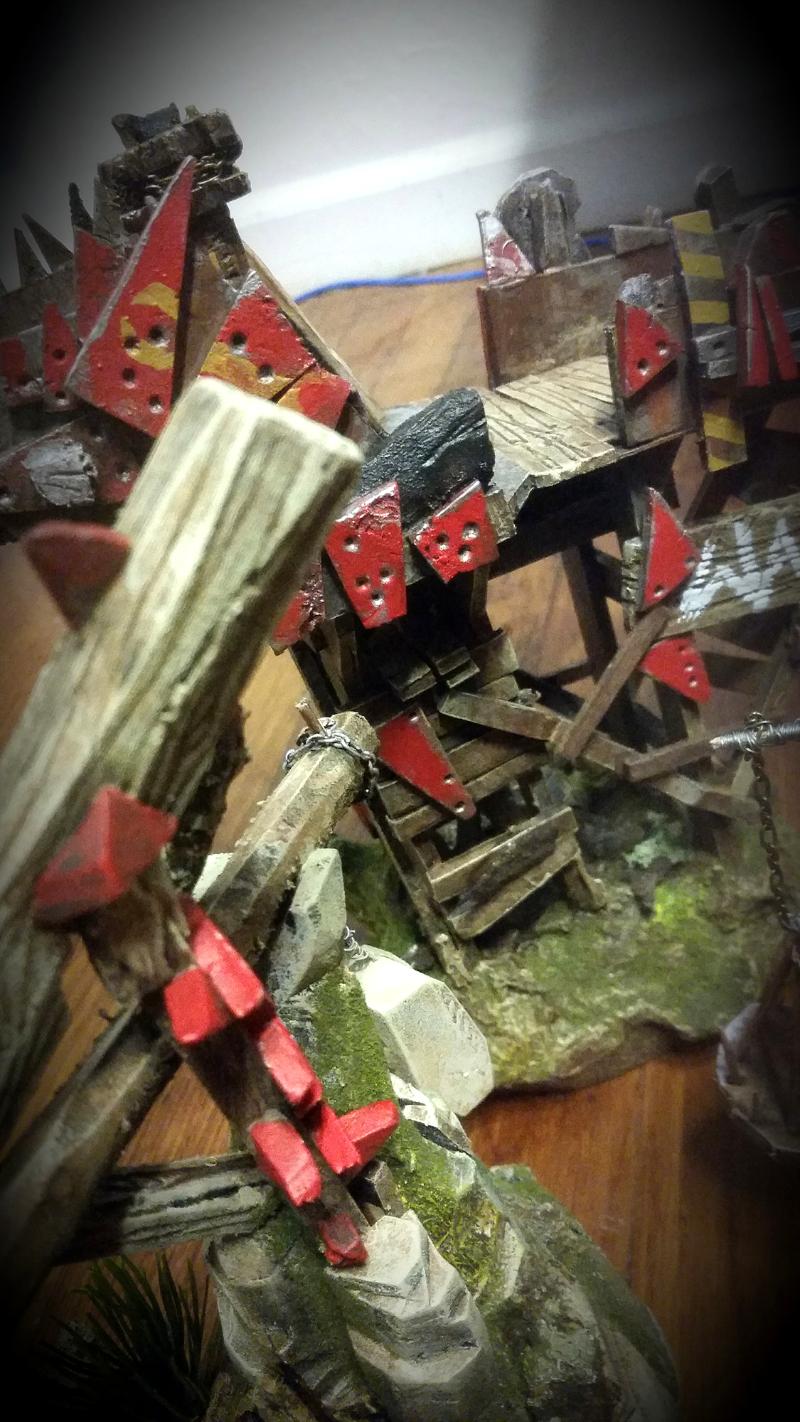
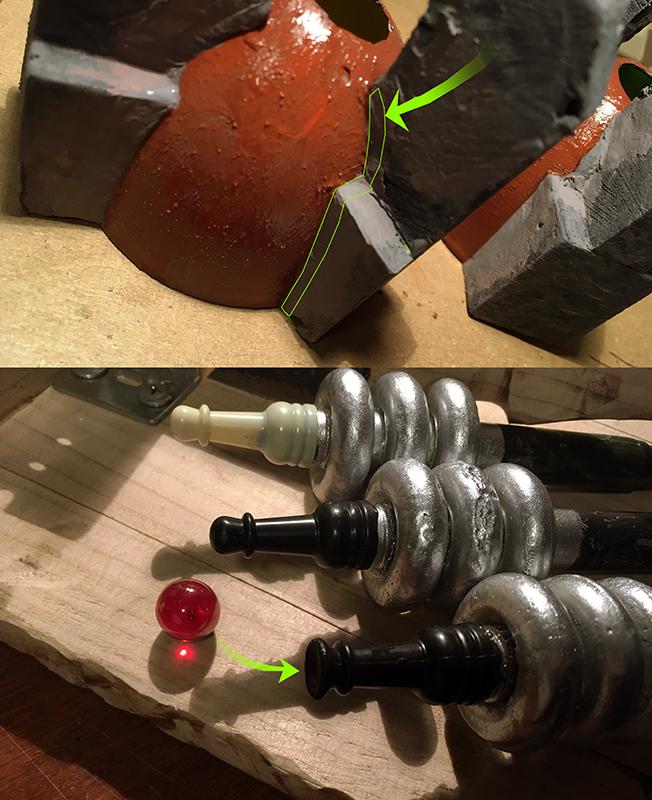
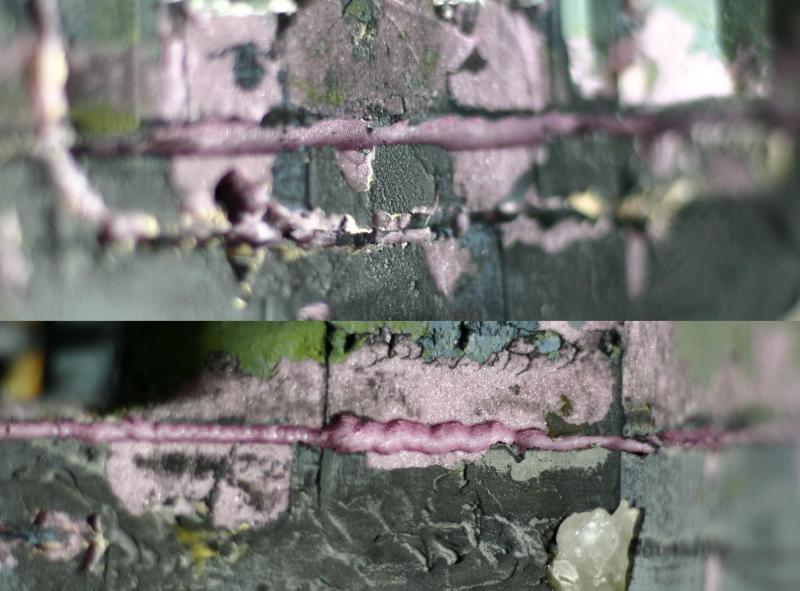
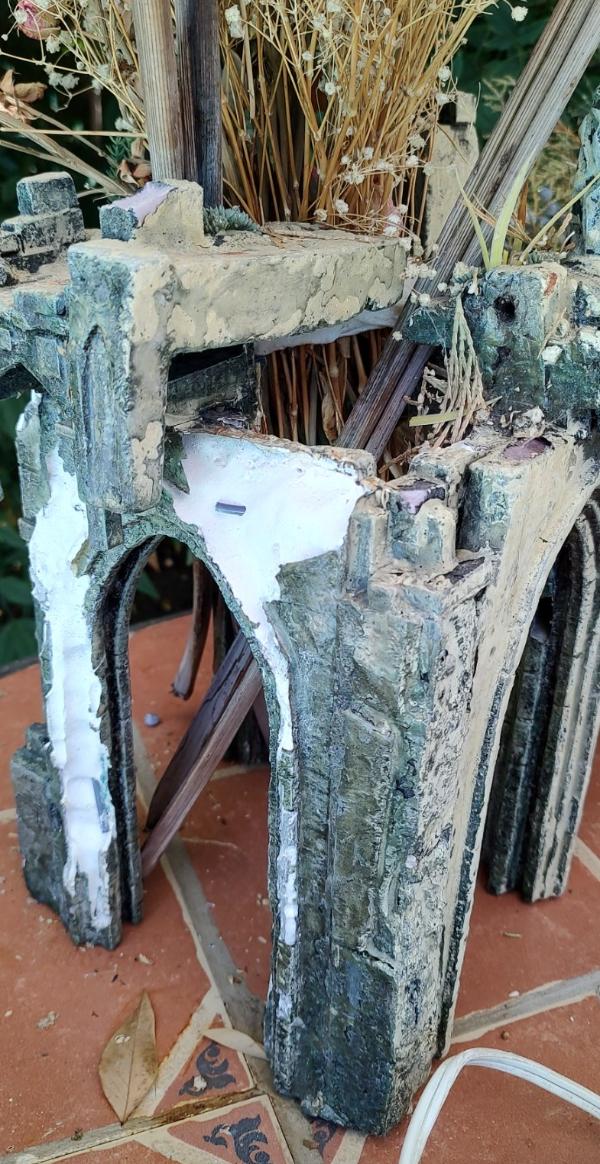
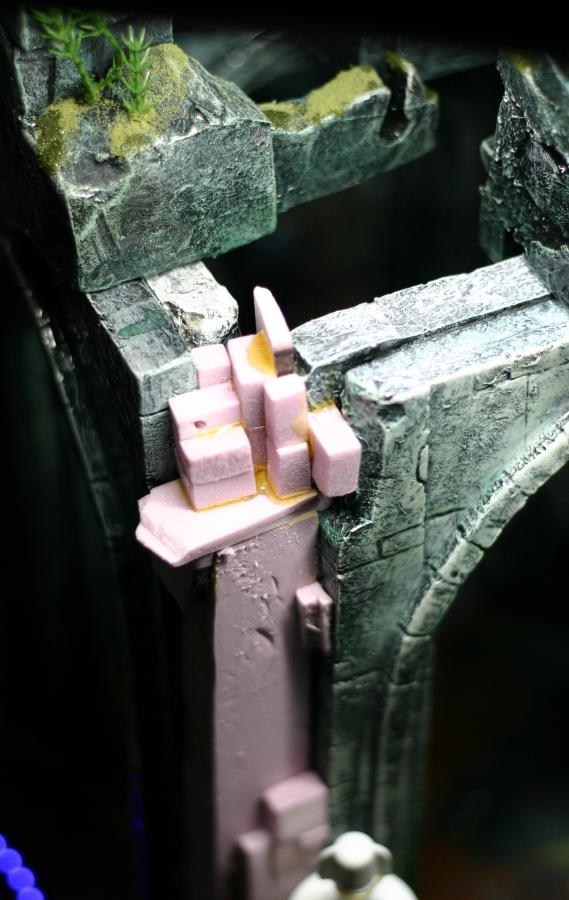
There is a bit of a gap, and bowing, the arches are not 90 degree leveled or even and that is due to my redneck-style mold making.

Therefor building up shapes for that extra detail and for the glue to get a good grip on the pieces that don't line up really well.


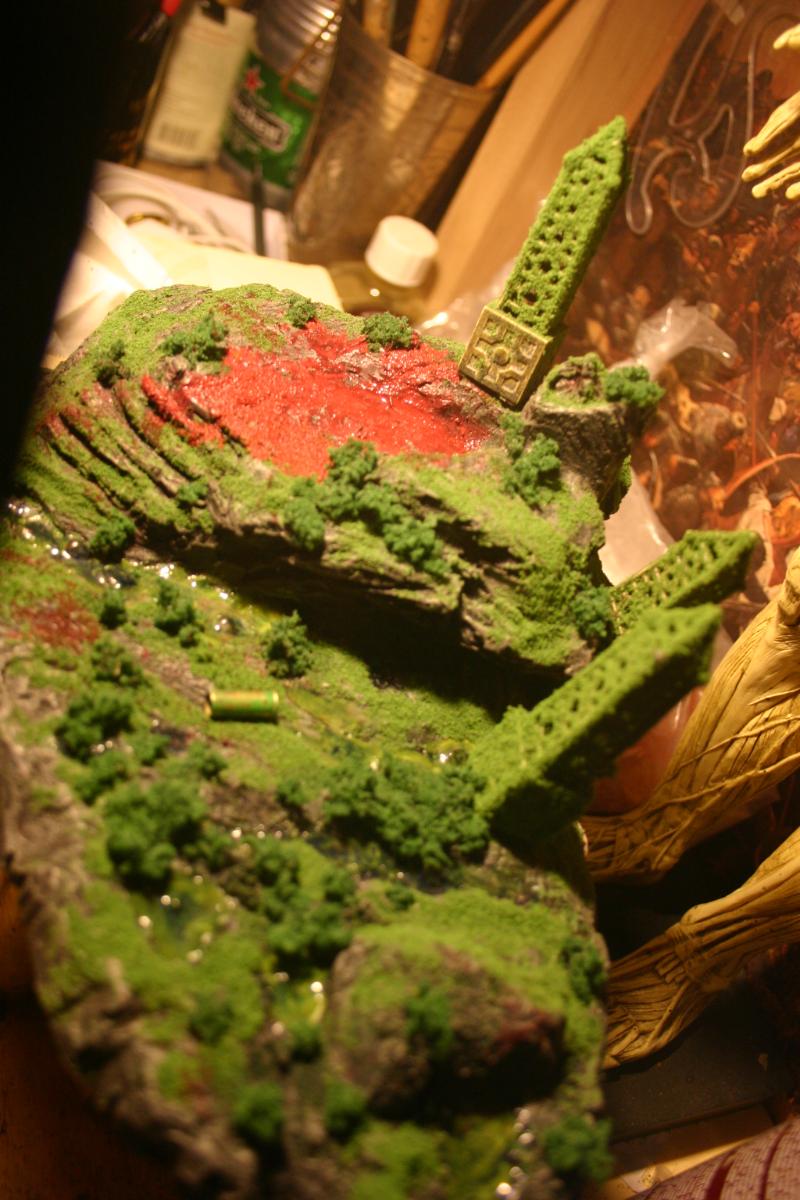
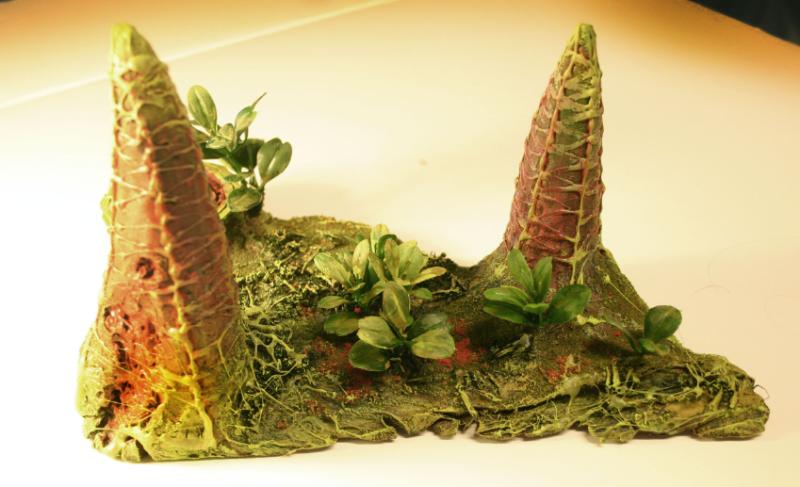
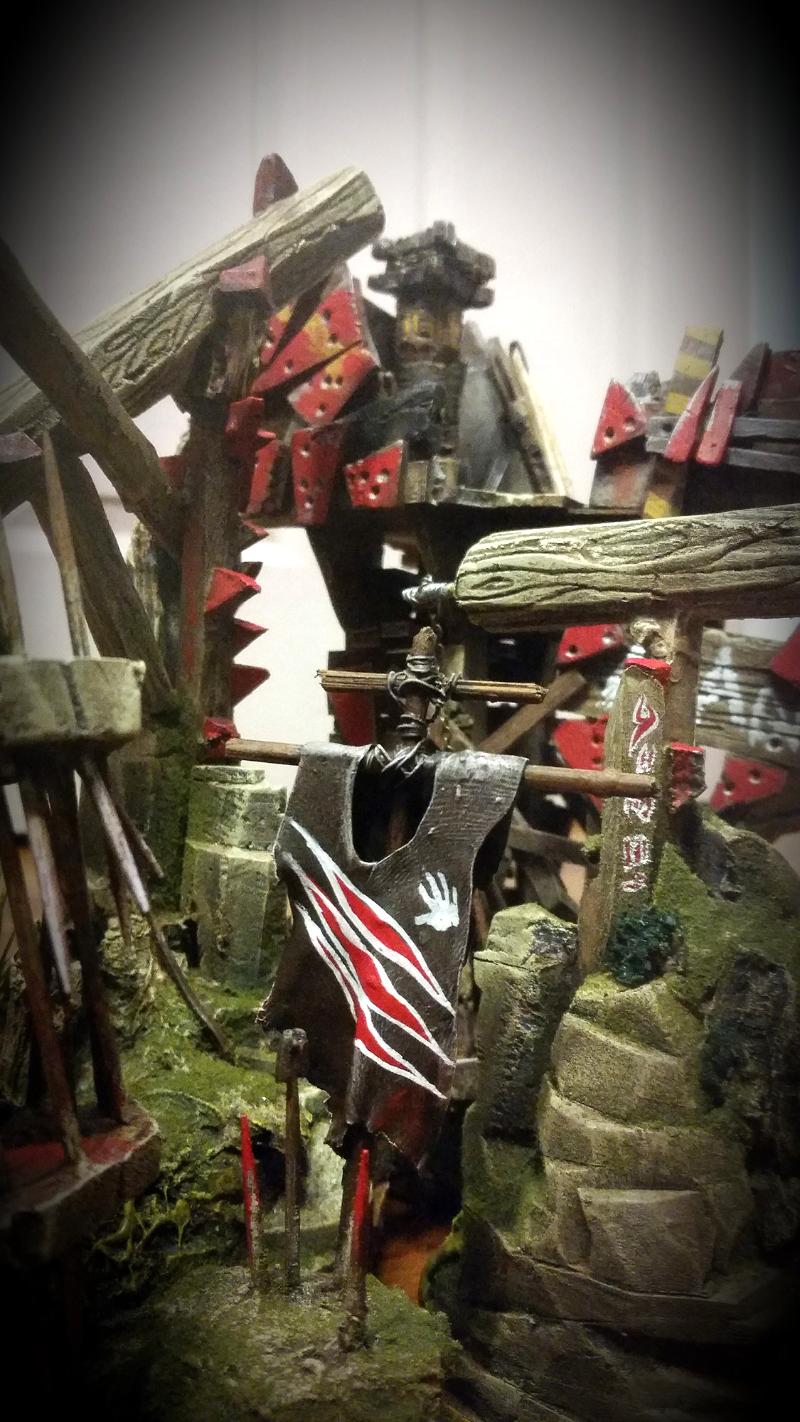
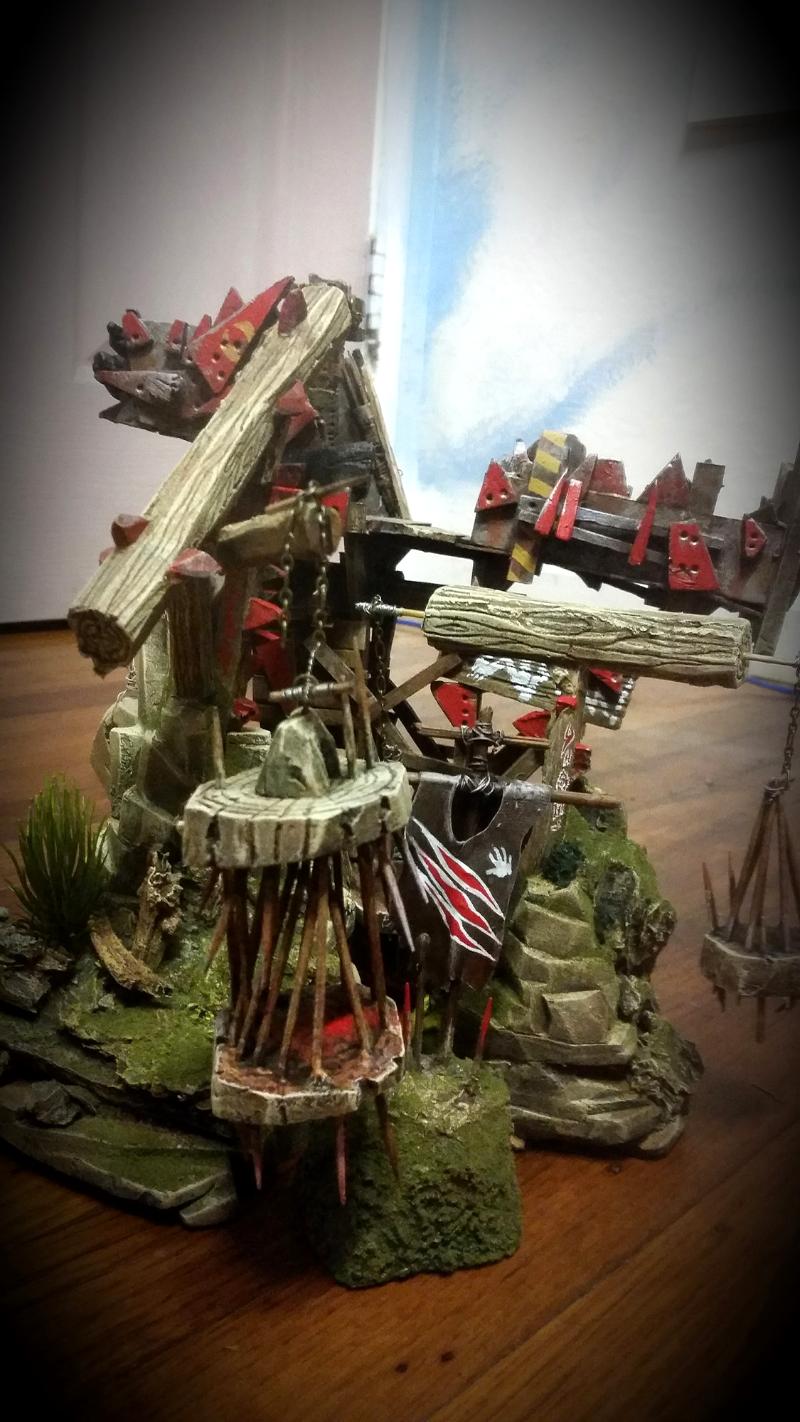
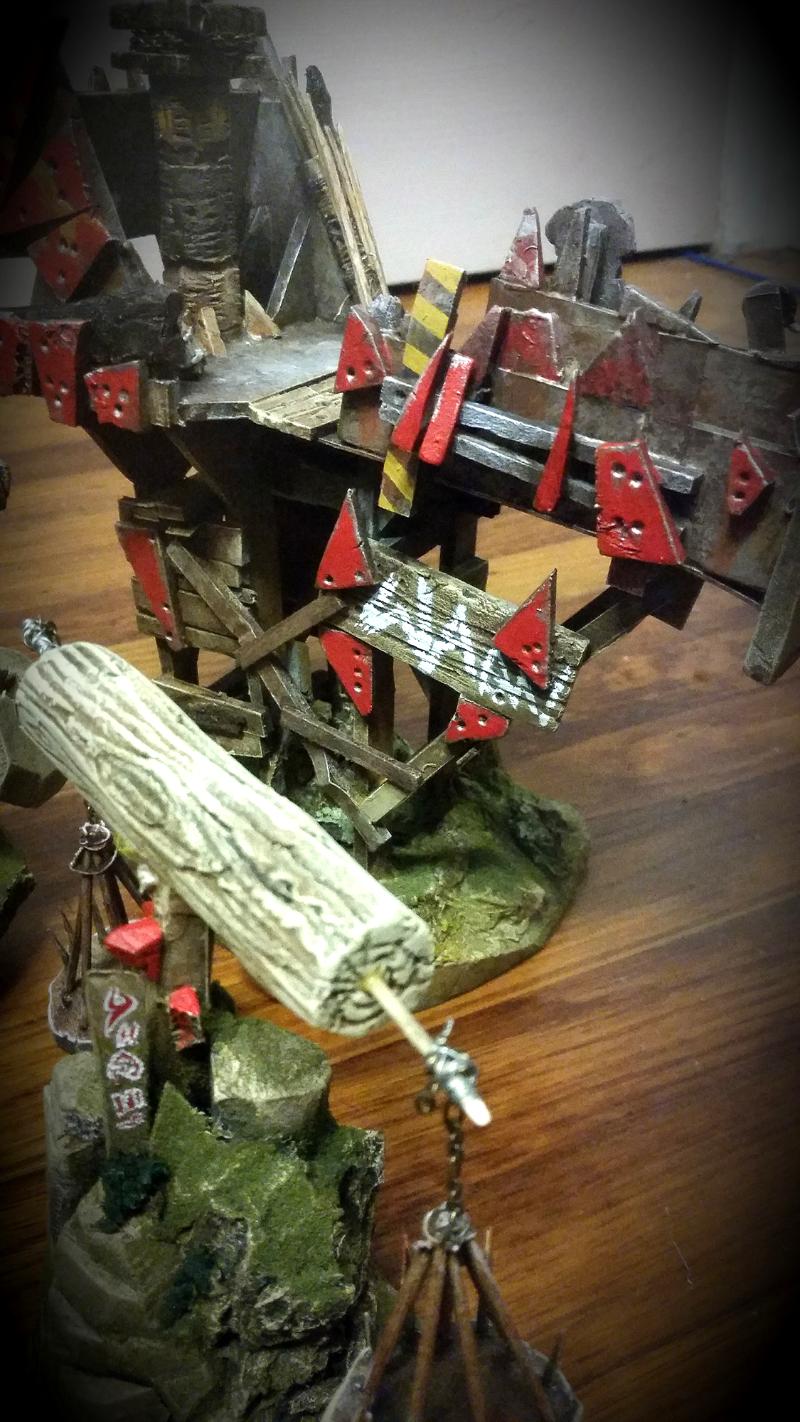
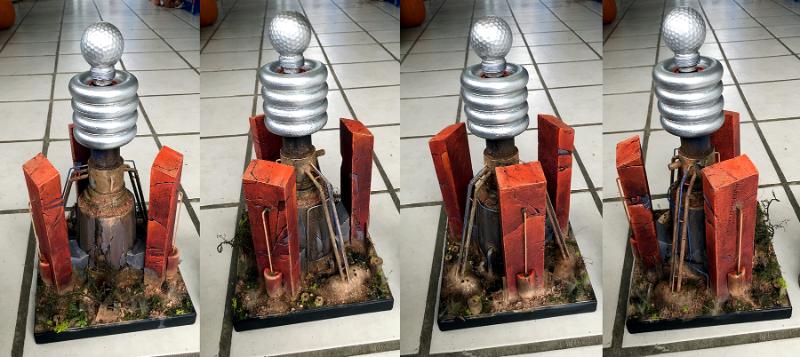
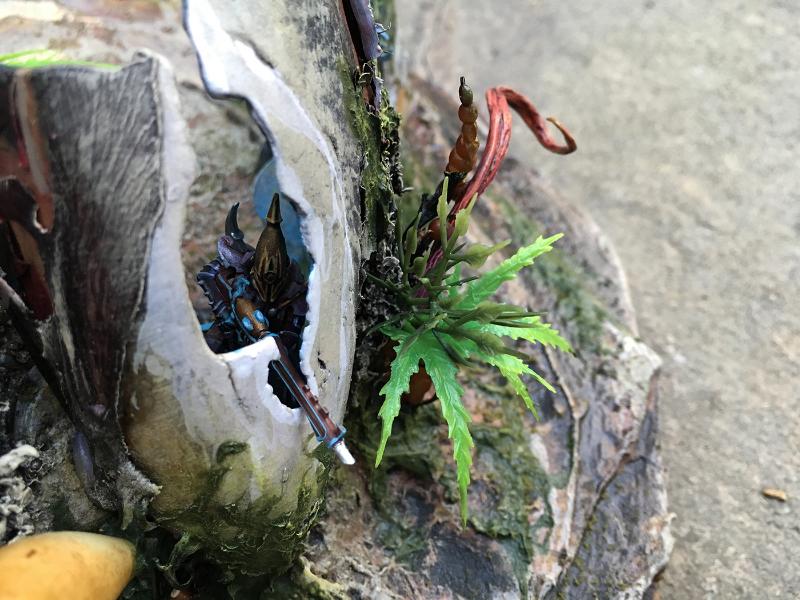
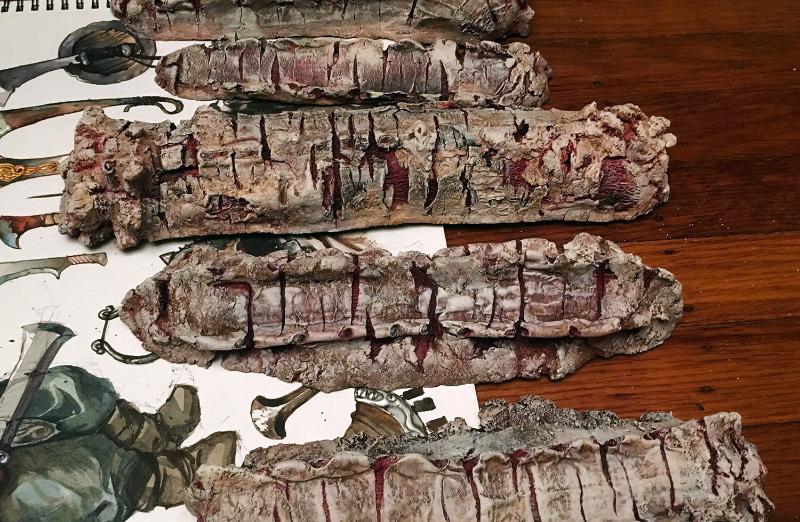
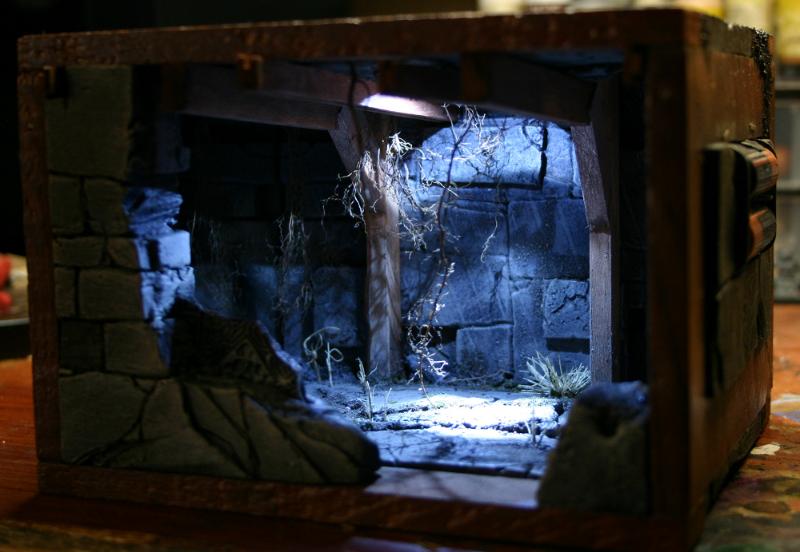
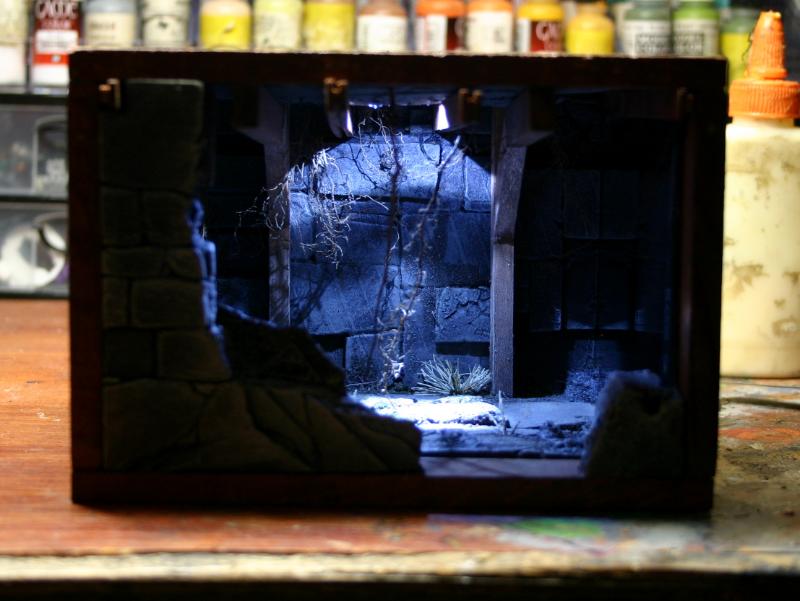
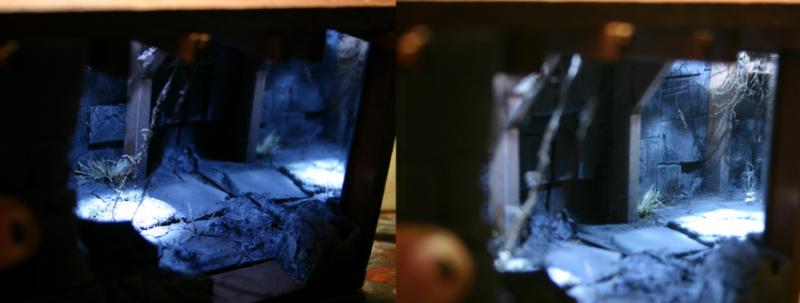
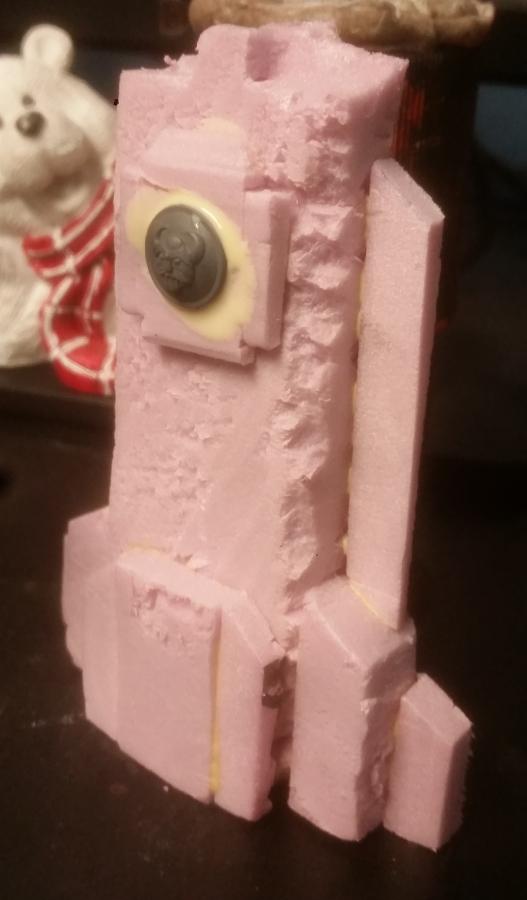
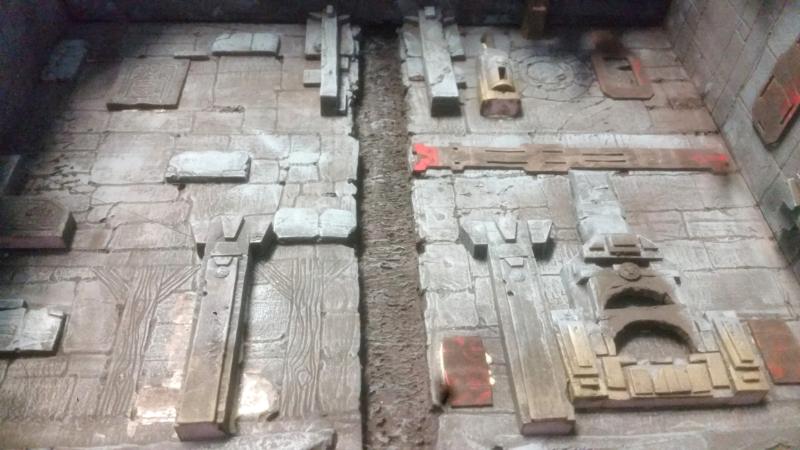
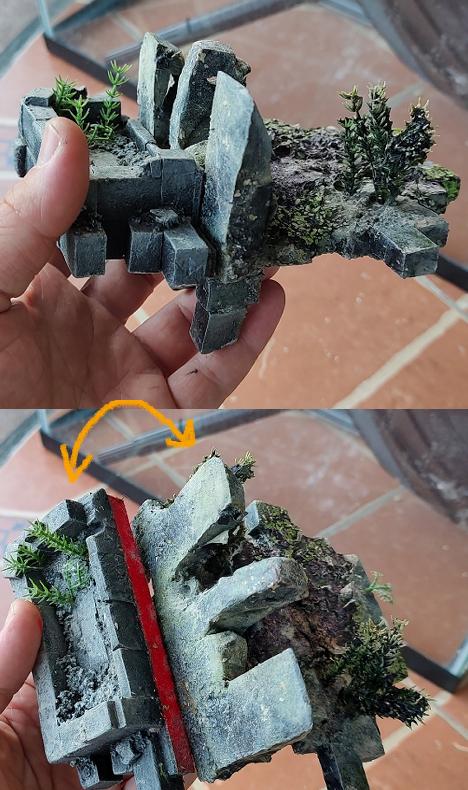
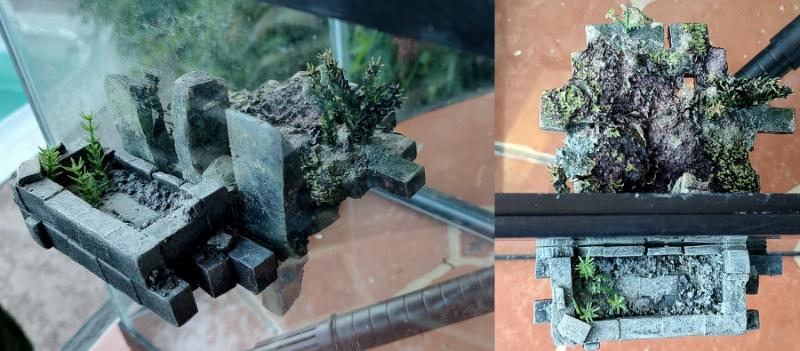
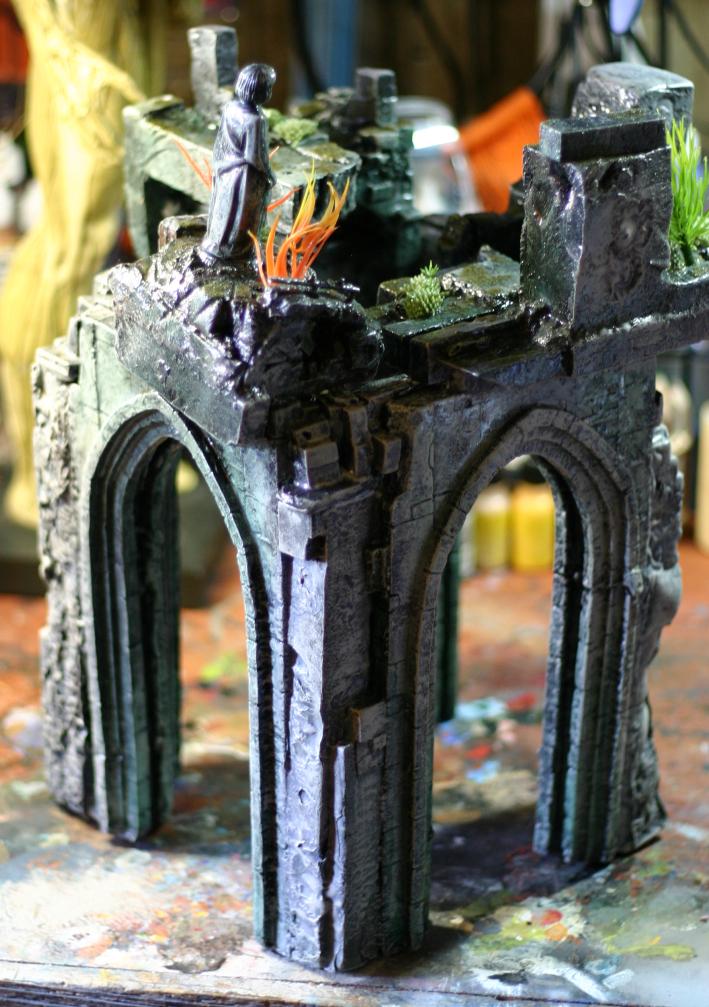
Progress, Glued, Trimmed, Painted

Now I need to coat the entire tower and newly added corners in that resin and glue the top pieces.


Finally the top pieces coated and dry. Waiting on resin on the arches to dry before gluing together.
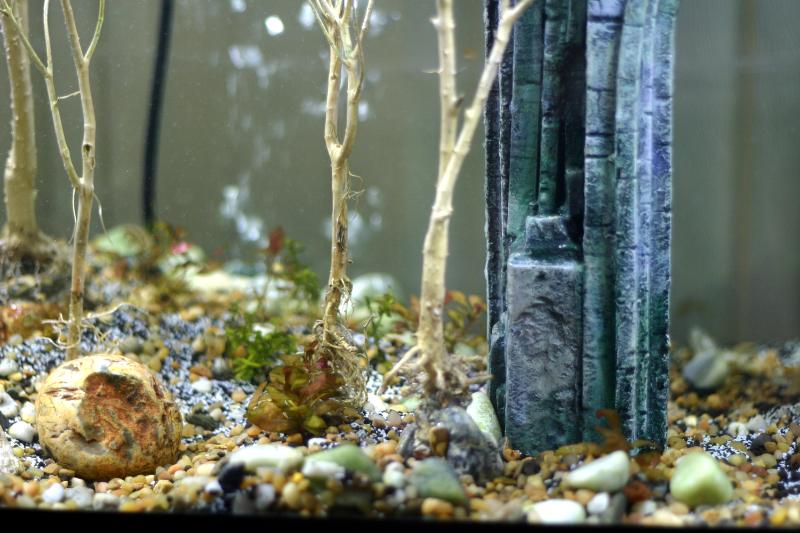
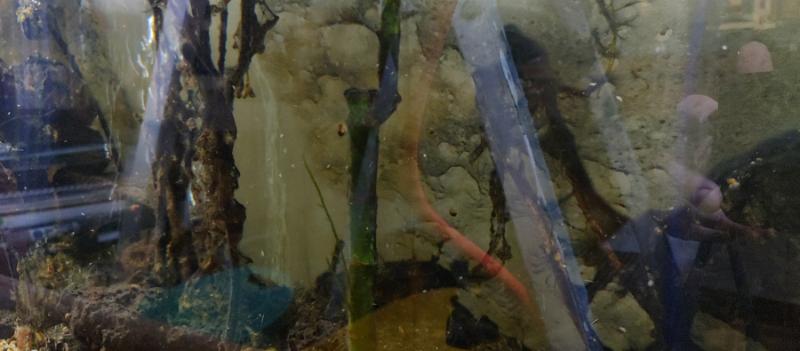
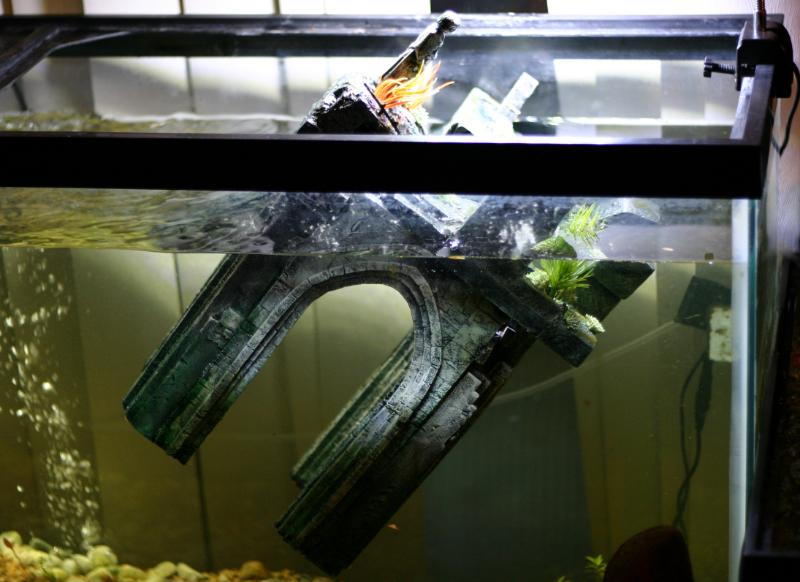
Btw, Shininess does not bother me because underwater you cant see it.


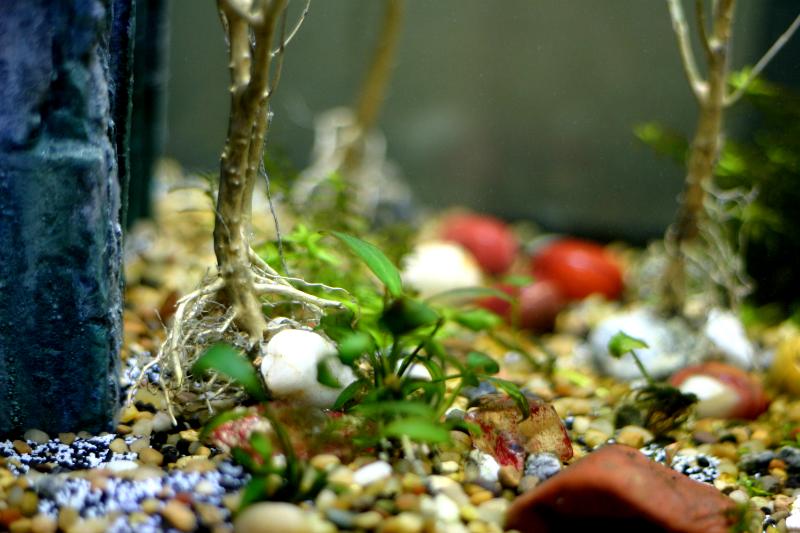
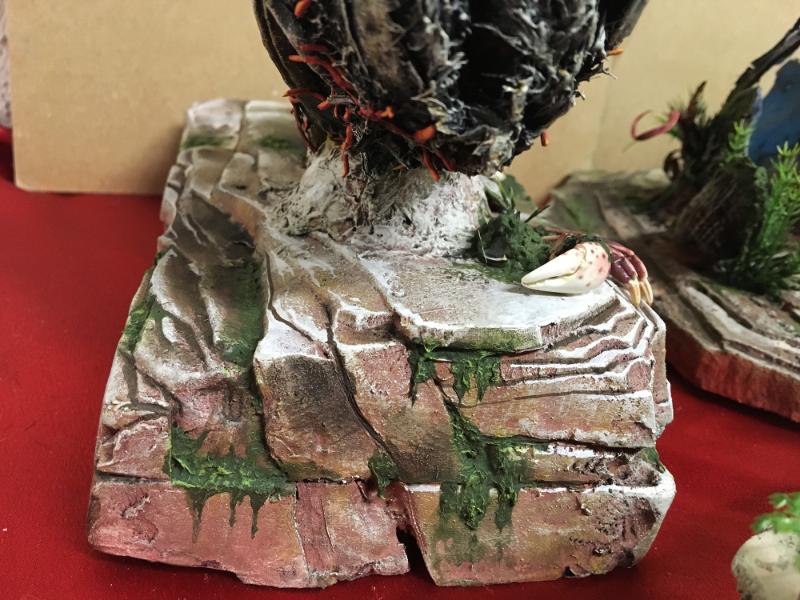
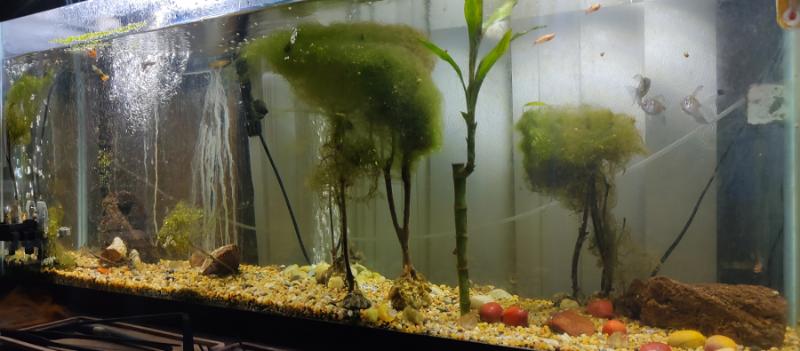
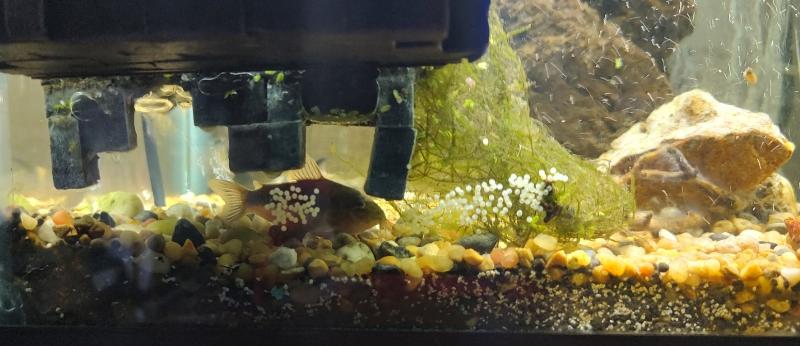
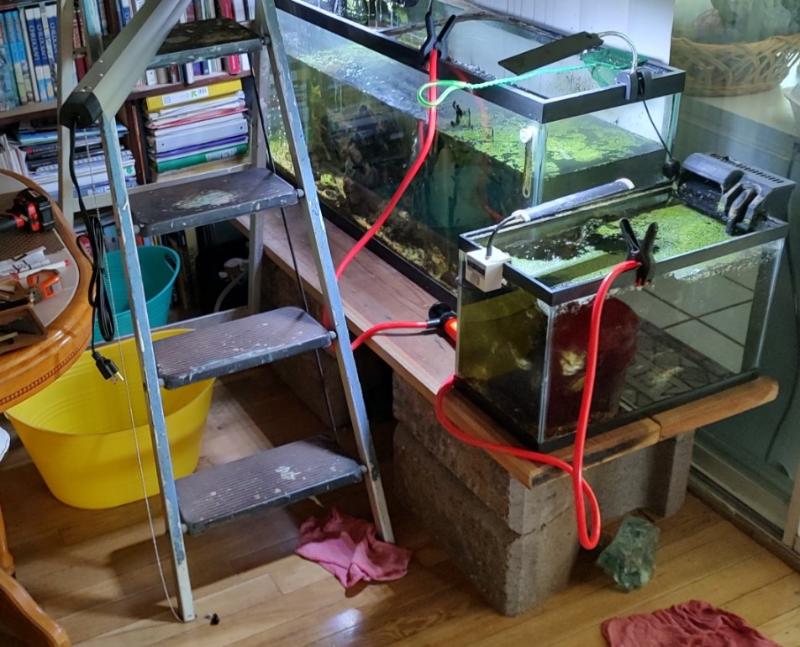
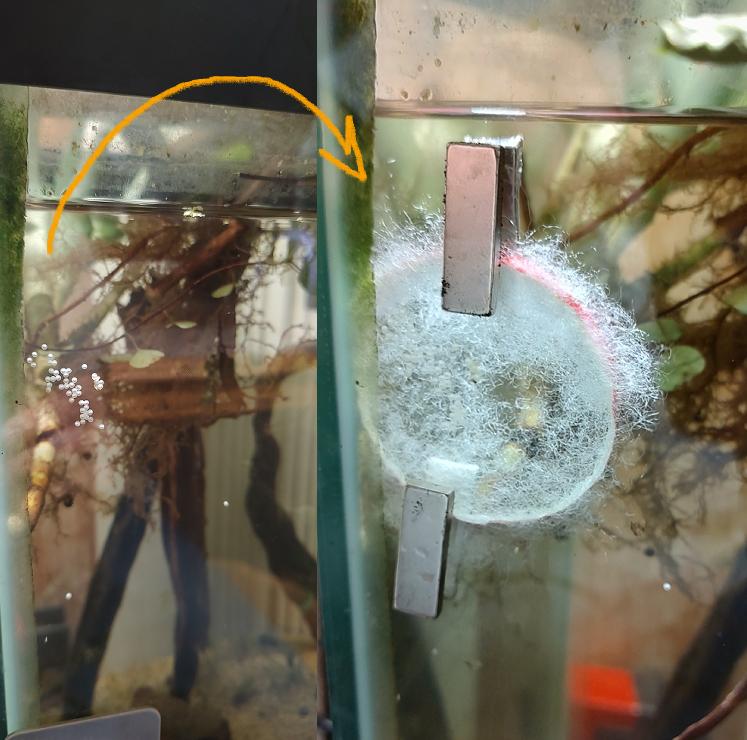
I think what you see by the filter is a yellow snail. No puffer, fresh water only
I have 2 fish in the big tank: some type of loach and a plecostomus, can't see them because both like to hide.
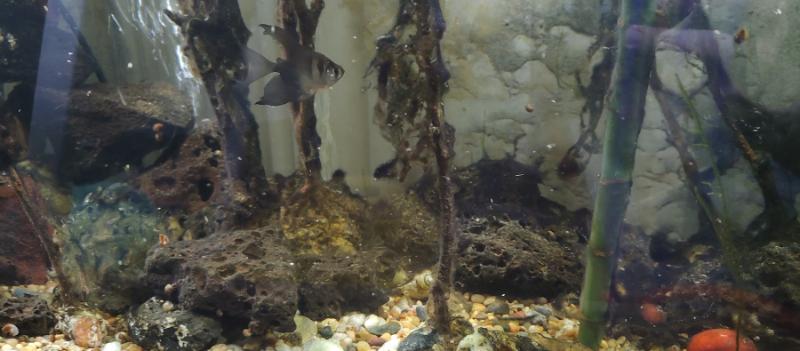
Smaller tank has 1-Betta, 1-Otocinclus, 5-Zebra danio, 1-Guppy and bunch of snails. I will get more fish for big tank when the decorations are in; don't know what fish though, perhaps a lot of small schooling fish be nice.

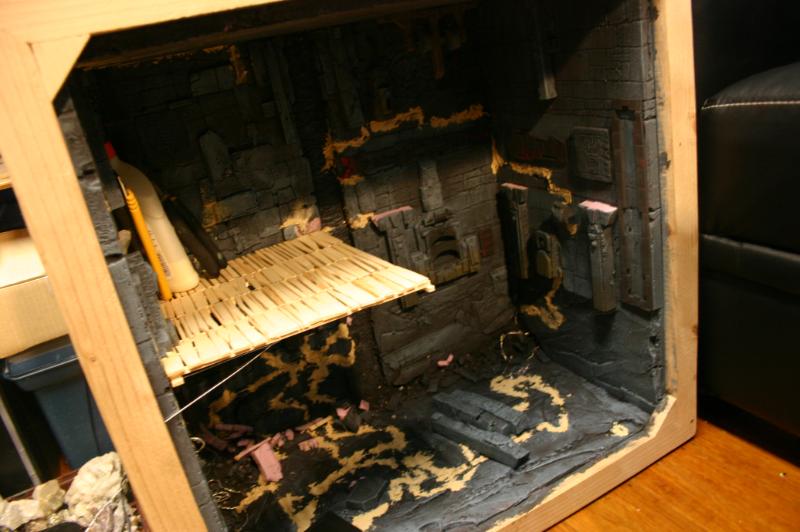
Speaking of, a bit of a problem. Too much foam, not enough plaster, the damn thing floats. Though I was almost done, nope.


So, I have done a test in the past. Used that aquarium safe resin with calcium carbonate to build up a thin shell of 3-4 layers, painted it, and hollowed it out using acetone that melted the foam and left the resin shell. Perfect for wide and larger pieces.
It did work, however there is not way for me to re-seal the inside on something long and narrow. On the arches all I have is 2 layers of paint and 2 thin layers of resin.

Ether need to build up 4-5 layers with calcium carbonate, repaint, re-seal, hollow-out with acetone, wash out, air-out, somehow re-seal the inside while losing all detail on the surface. Or just add something heavy to the arches so it sinks. Or, spray it with matt varnish and use it outside the tank for something else.


While I am at it. 
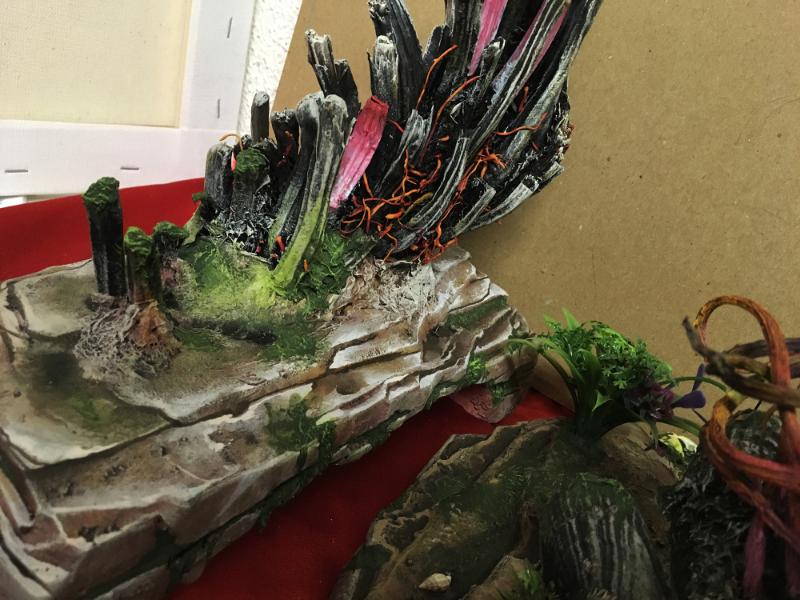
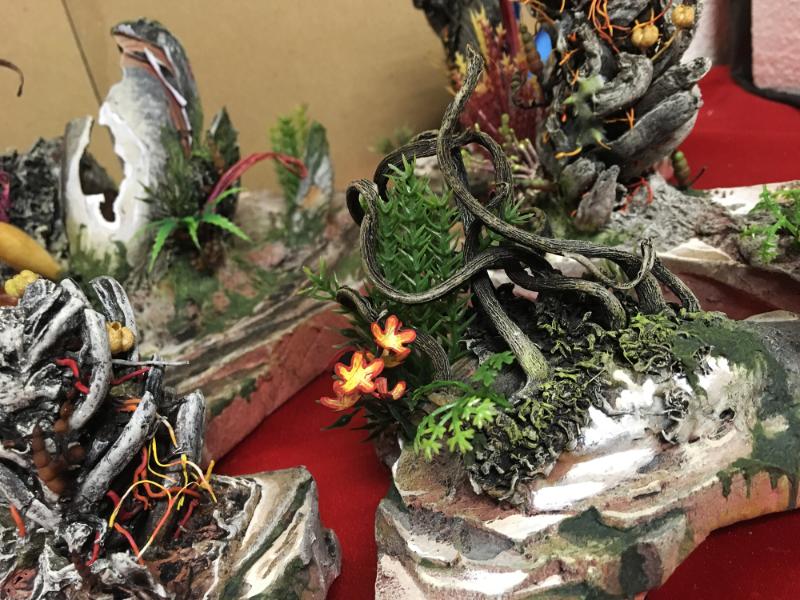
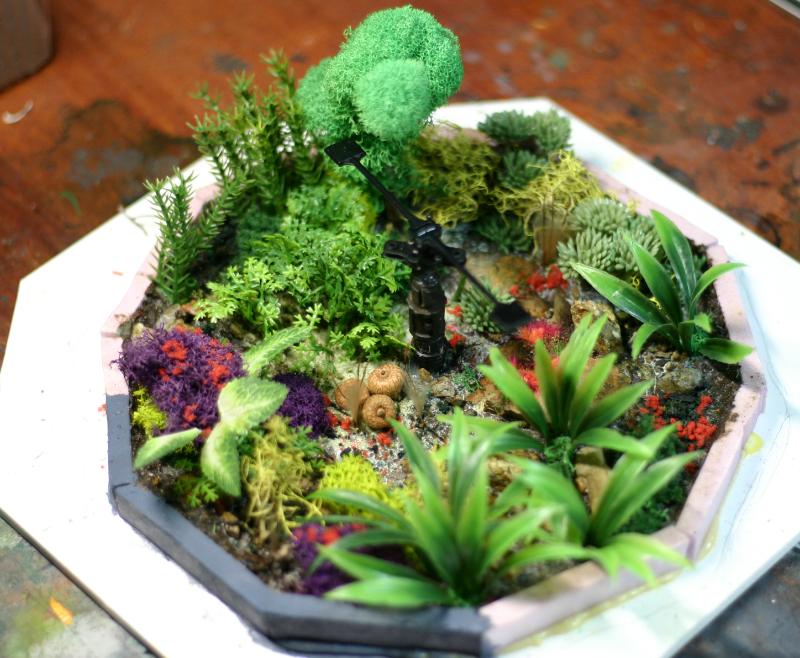
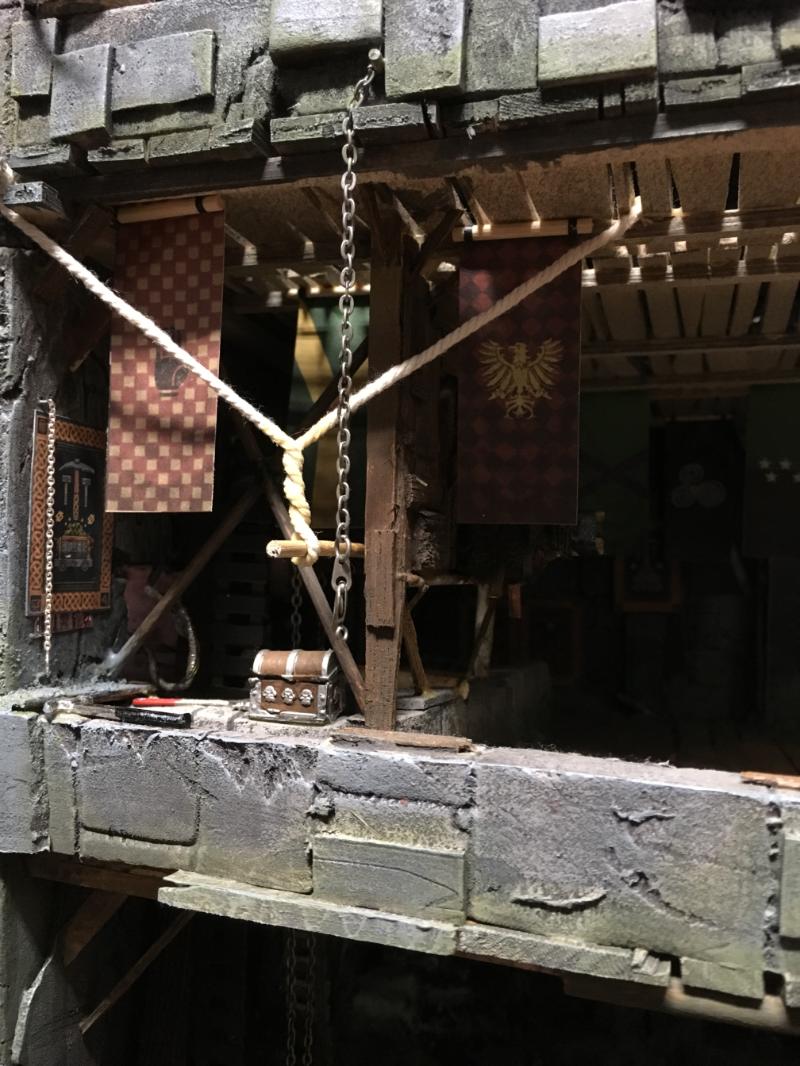
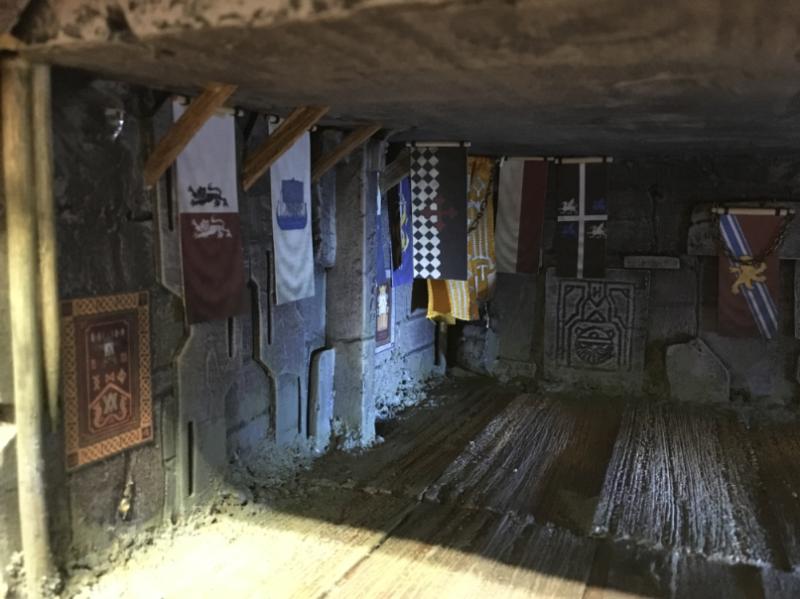
Indirectly relating to the arches but will be part of finished look.
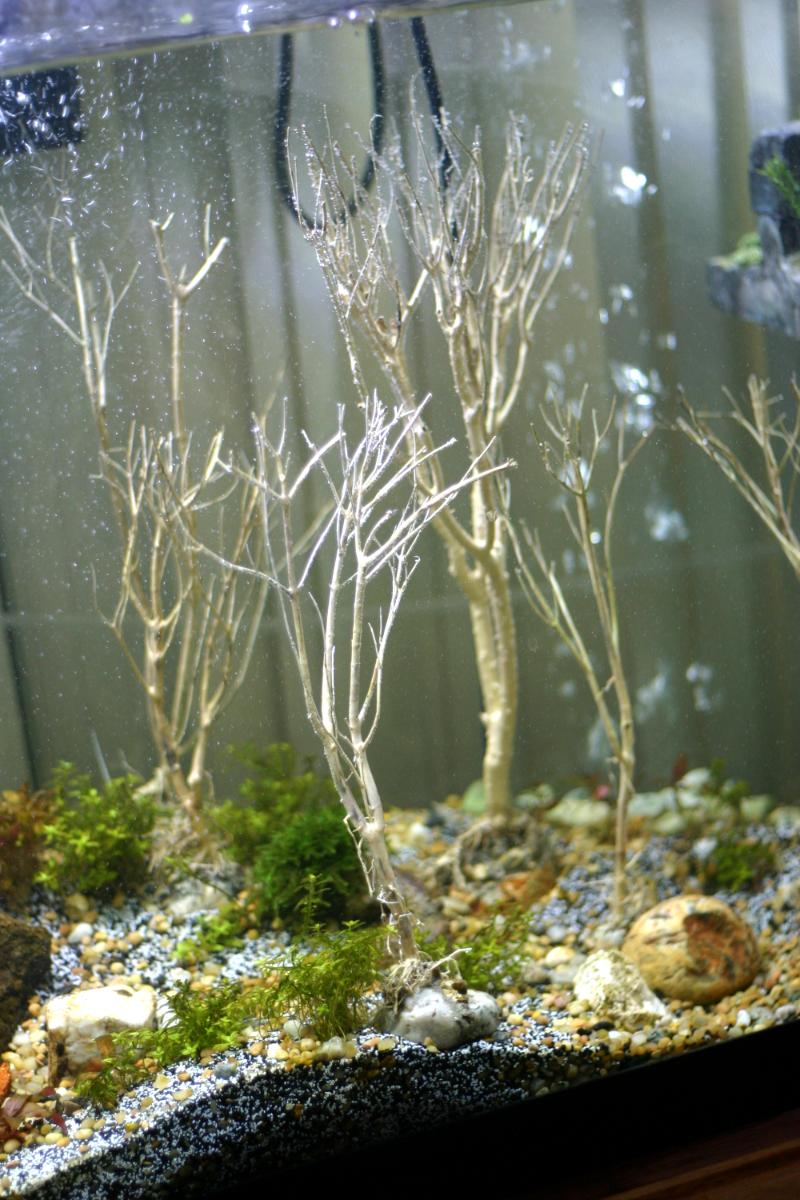
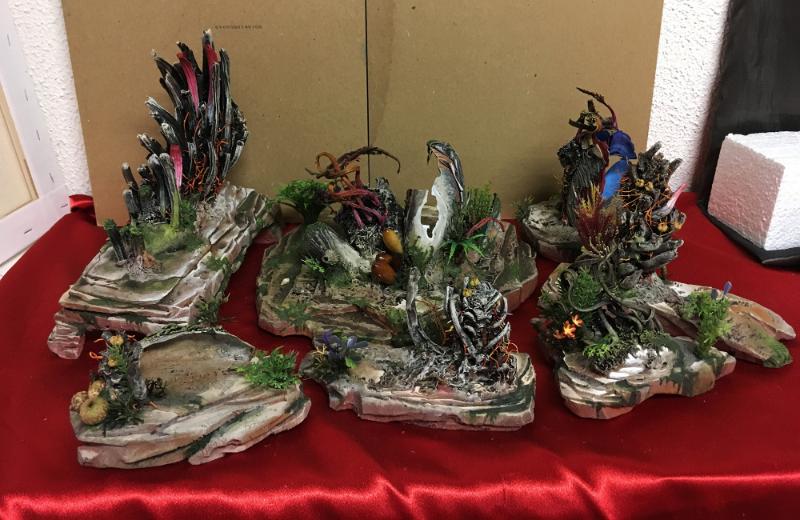
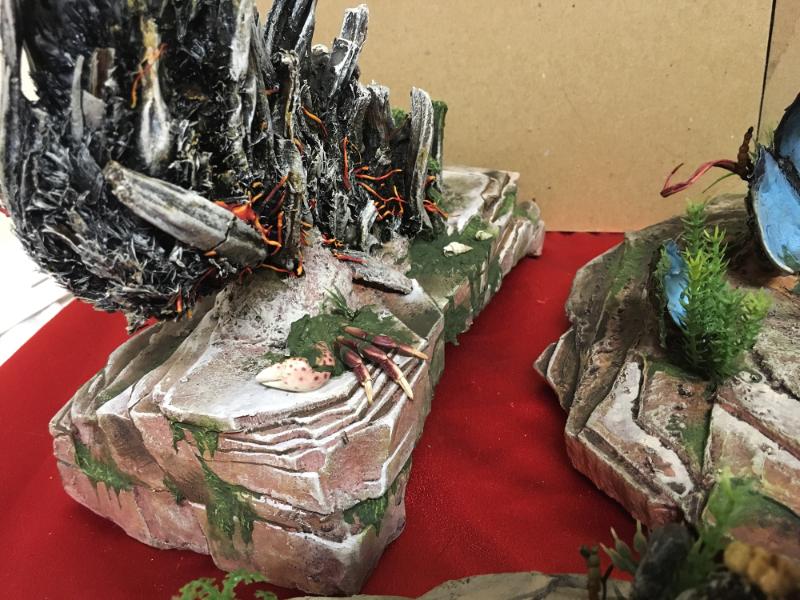
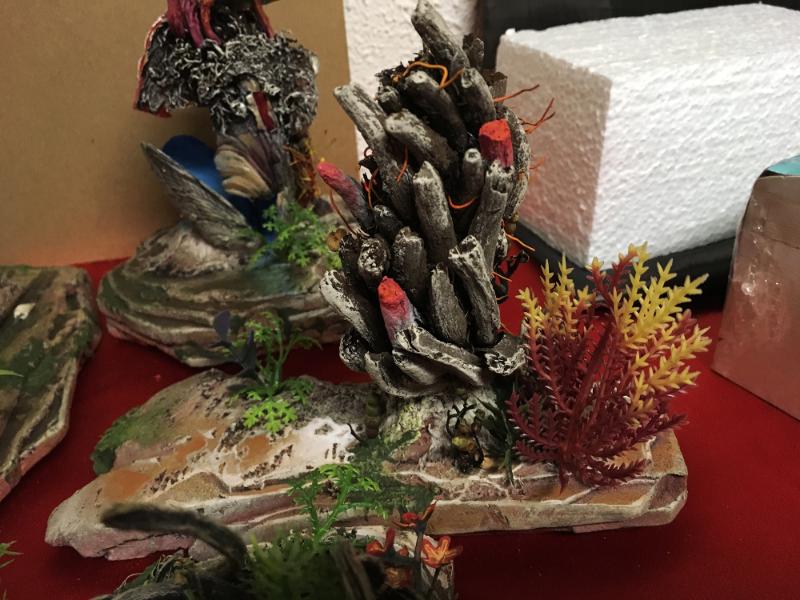
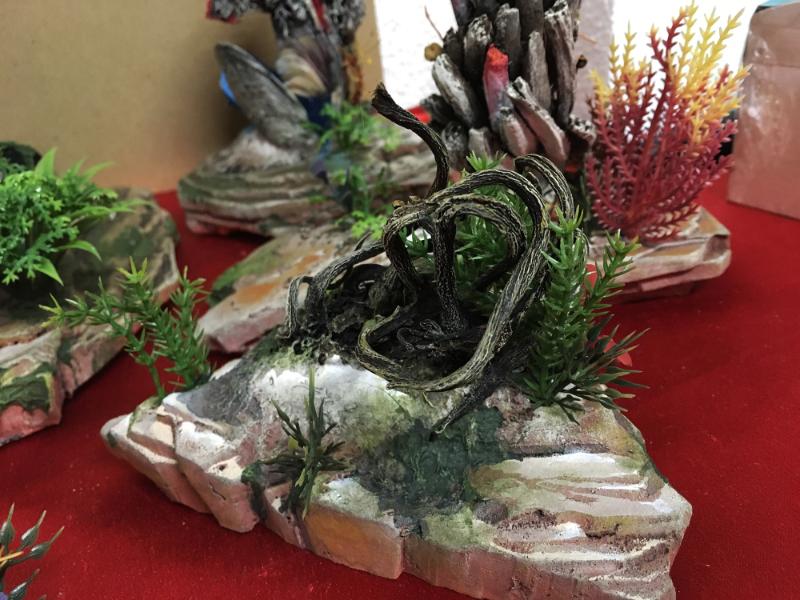
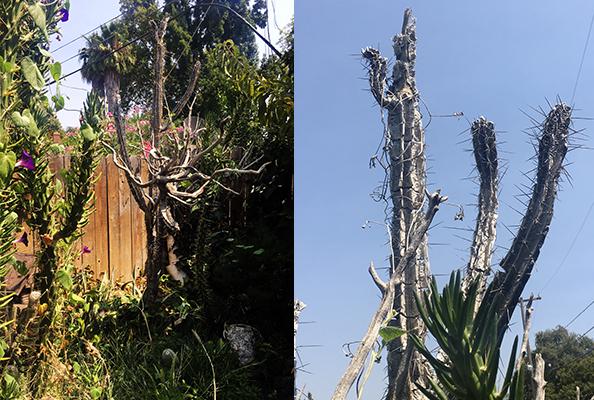
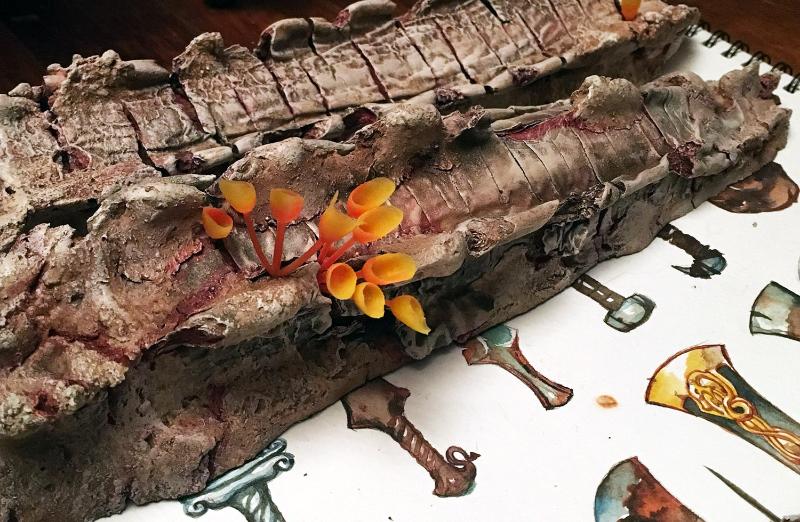
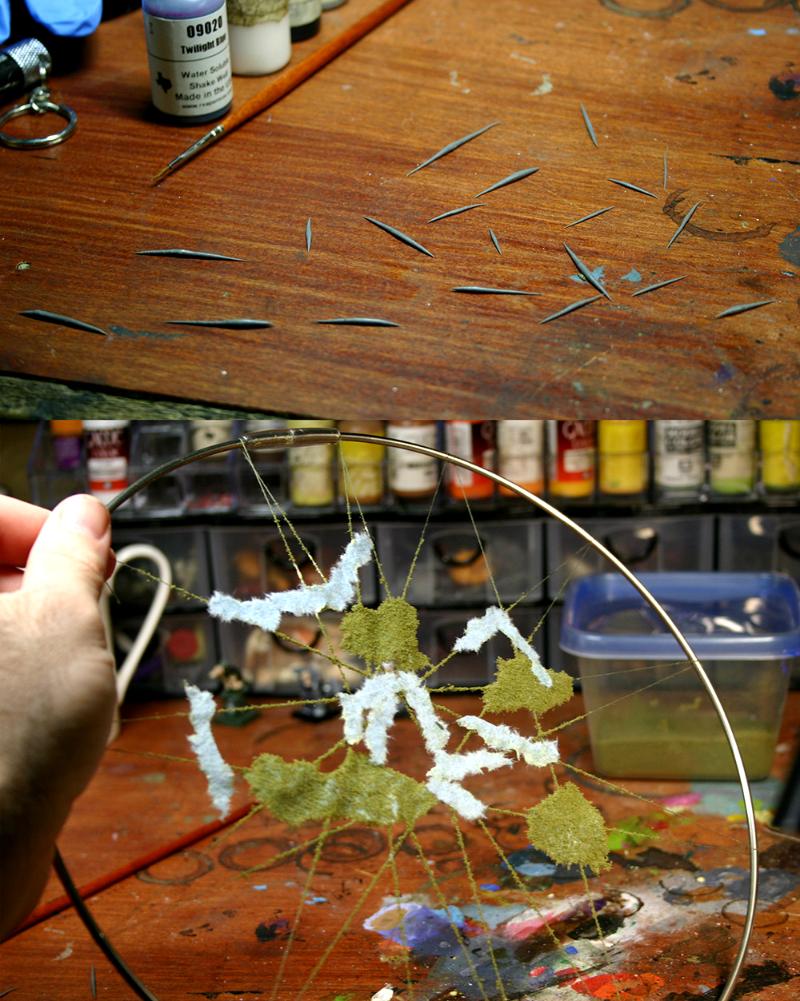
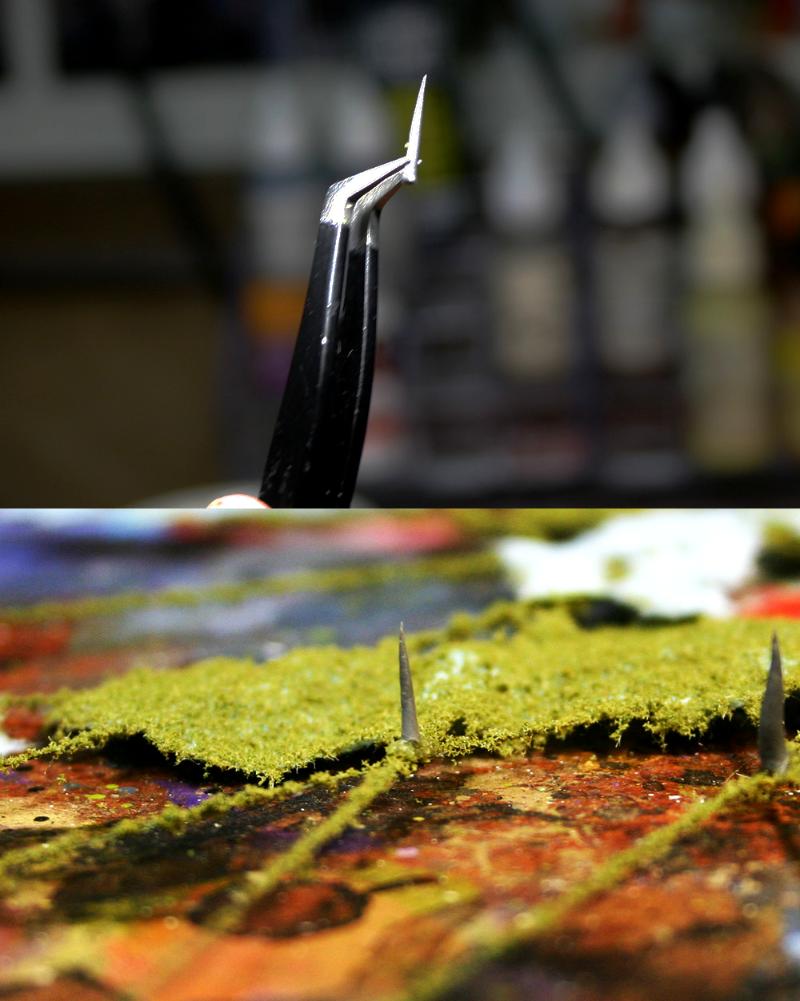
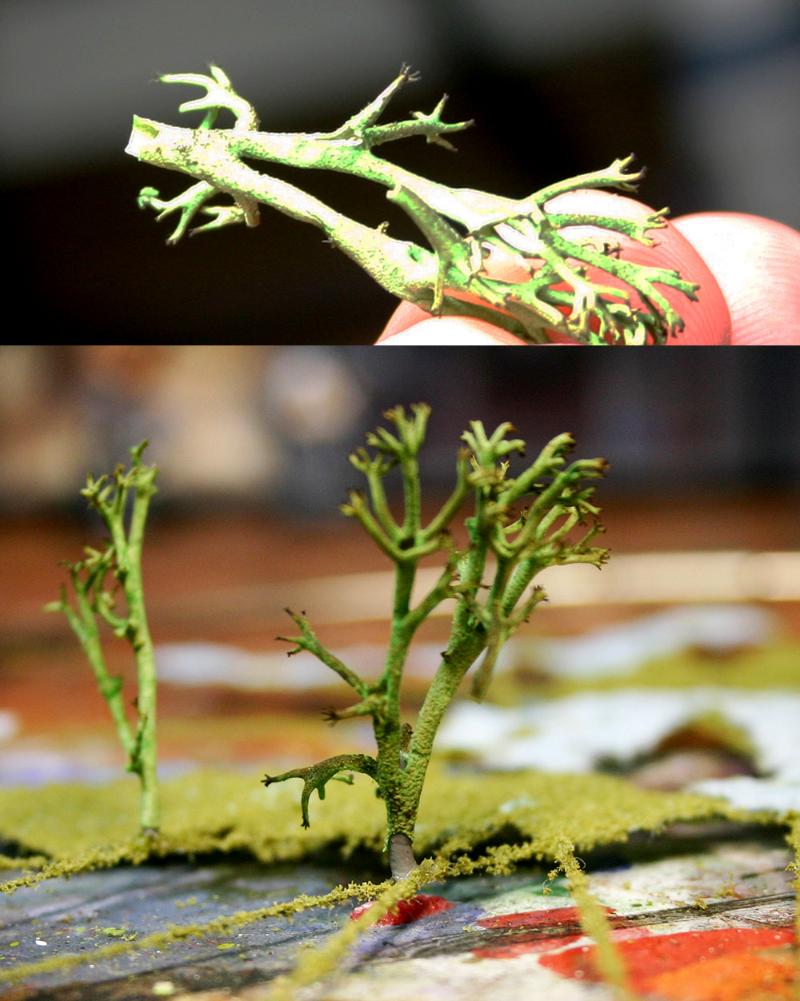
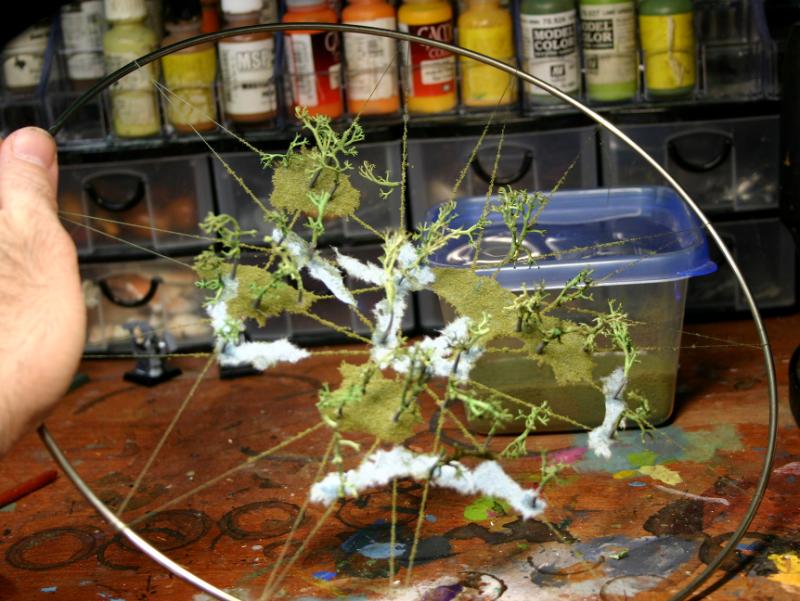
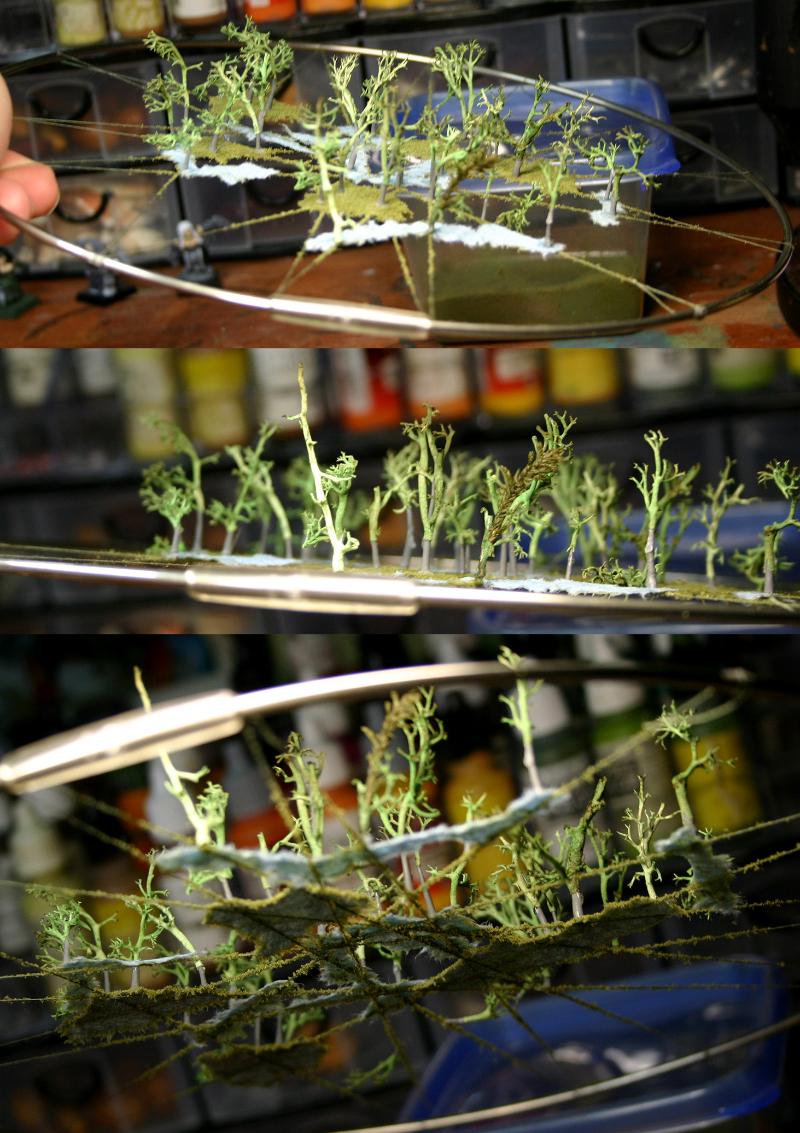
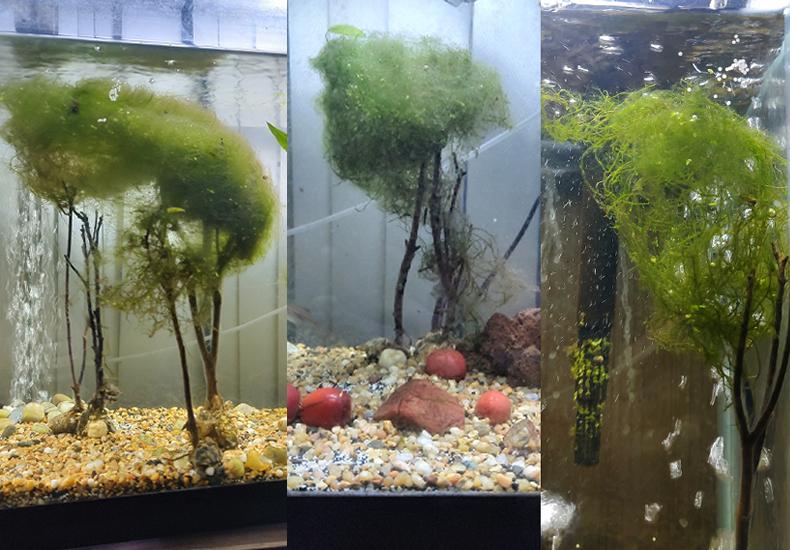
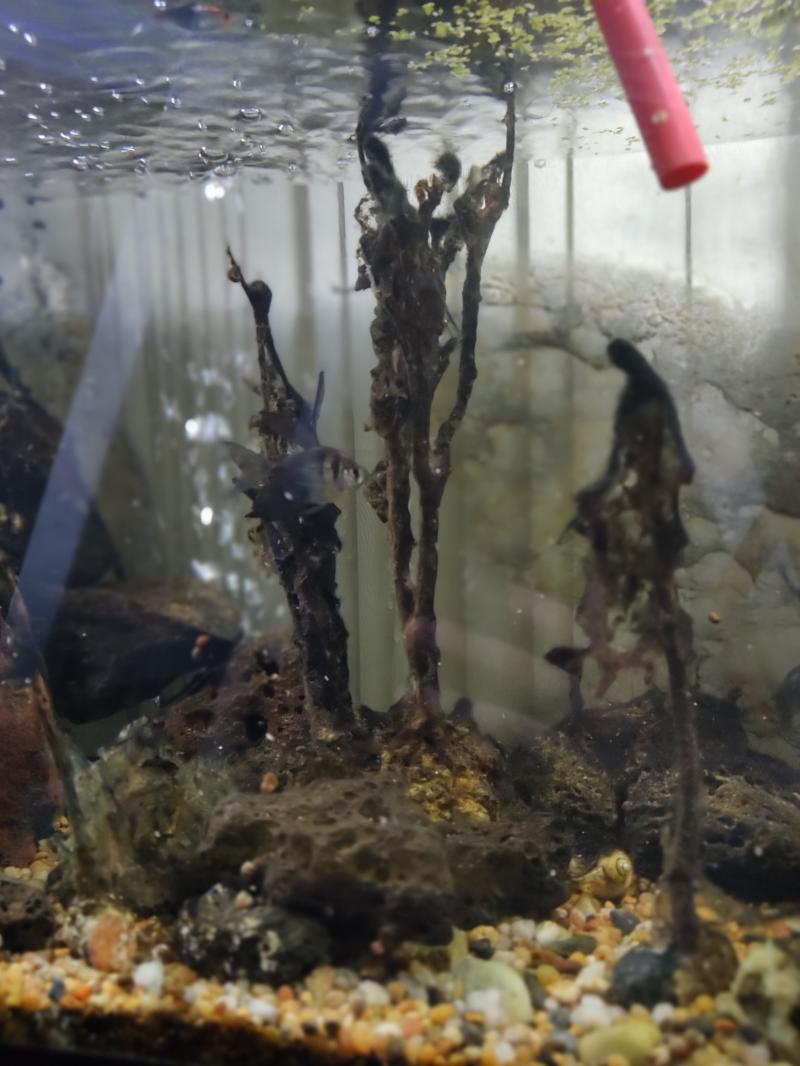
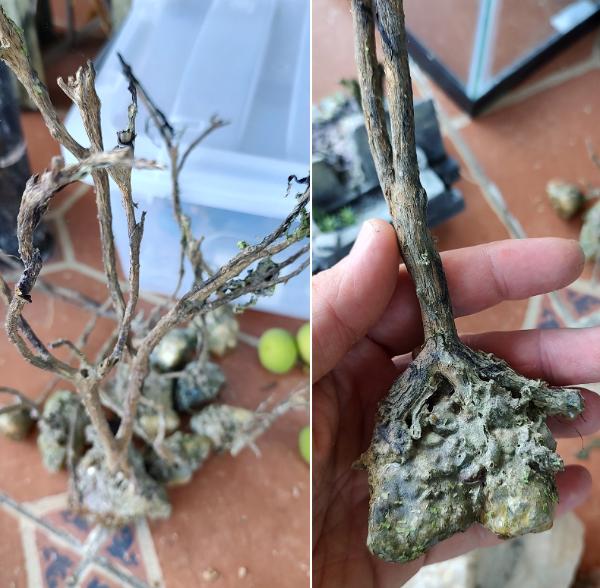
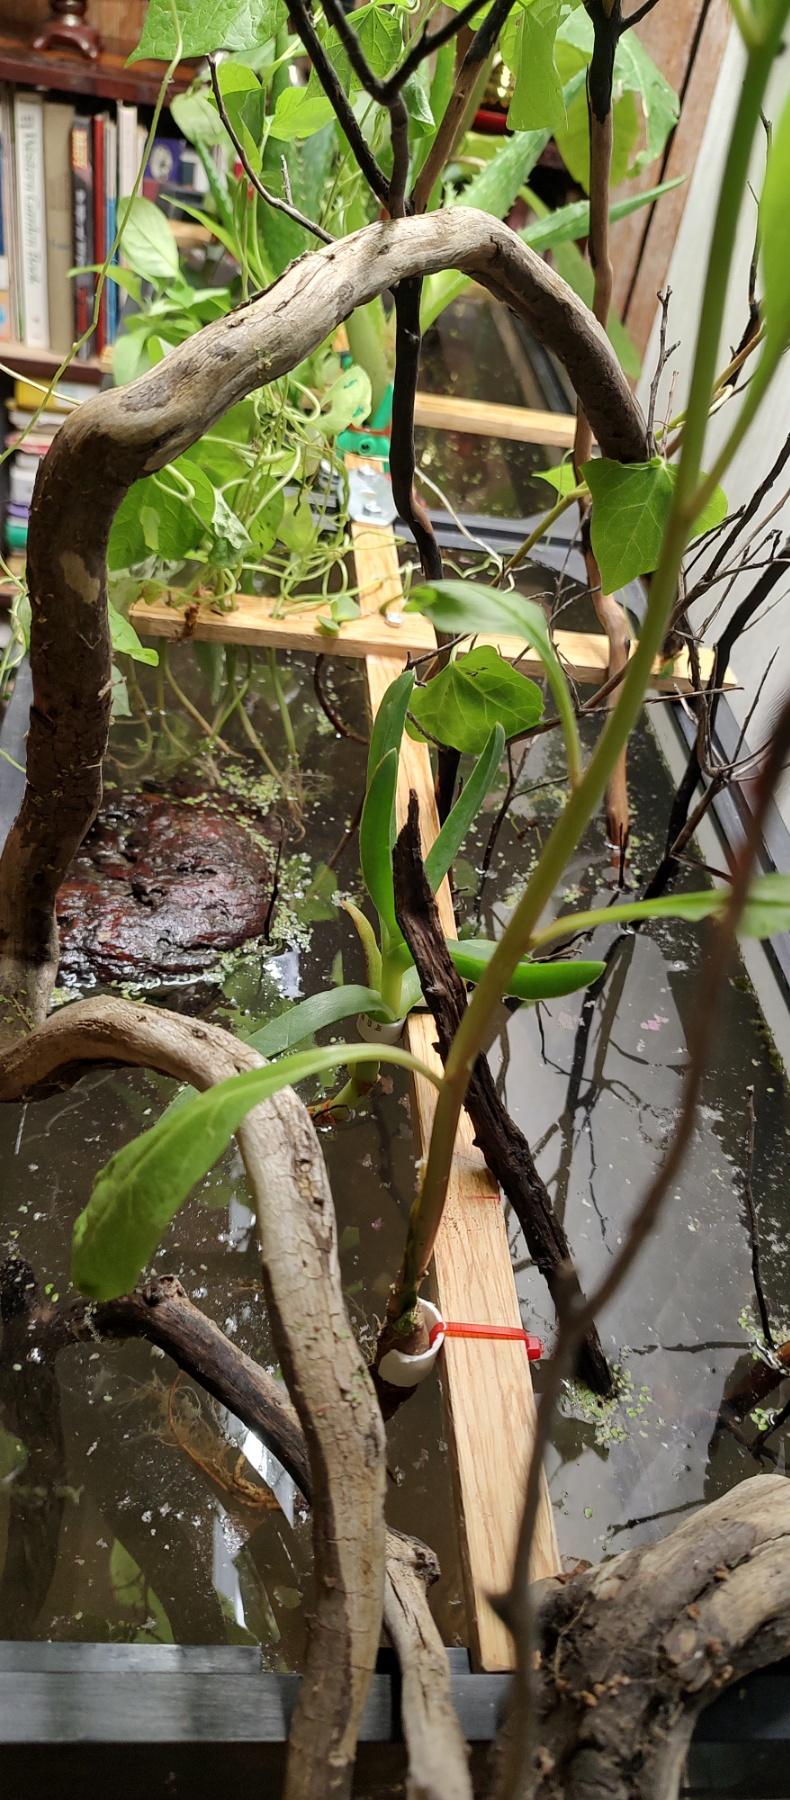
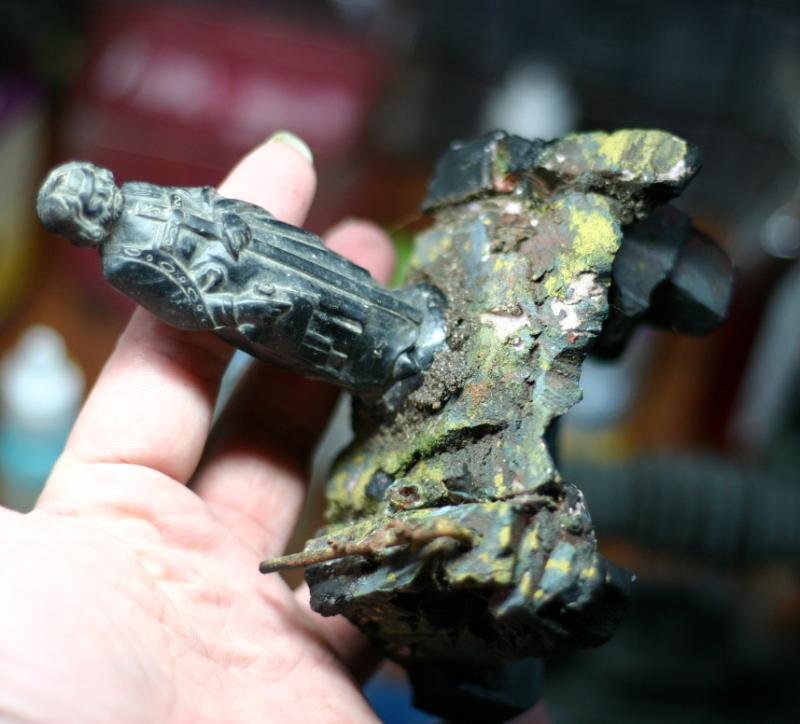
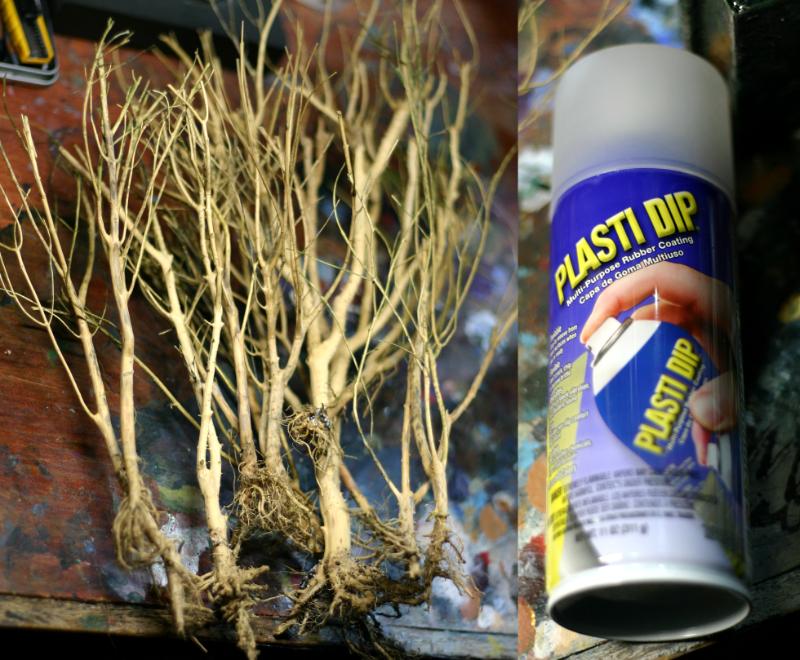
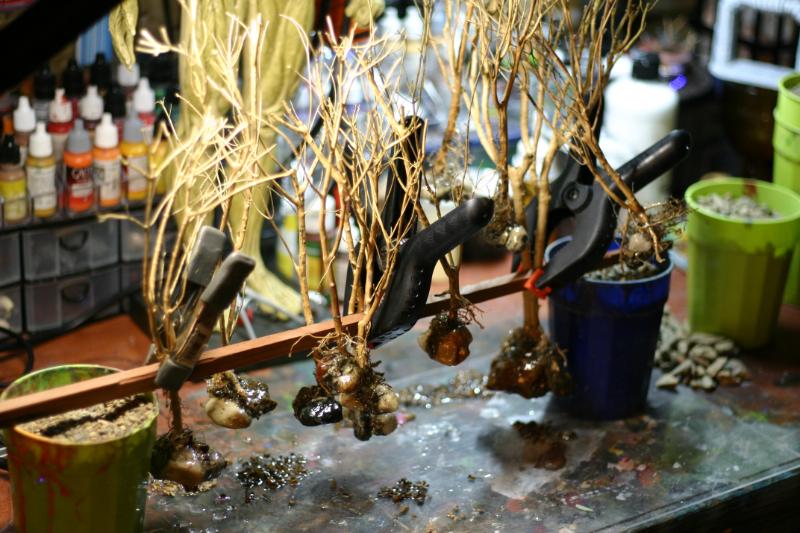
Got these driftwood trees. However over a month underwater I noticed some black and green molding happening. Pulled them out, dried them up, and want to coat them in resin too for long term use. But this time got PlastiDip clear Matt spray to seal the trees with. Folk use Matt black PlastiDip to paint aquarium filter piping to make it less visible and be aquarium safe. However this stuff is not very durable and the rubbery film can be peeled off (from my research), figured for the trees should be sturdy enough. Hope this works.


Automatically Appended Next Post:
 MacPhail wrote:
Oof, that's a bummer so close to the end. What about mounting it on a flat base that you could bury in the gravel? The acetone trick seems like a huge new step.

Base would make sense, also it will secure the legs together, because now they are by them selves and if accidentally bumped might crack off.
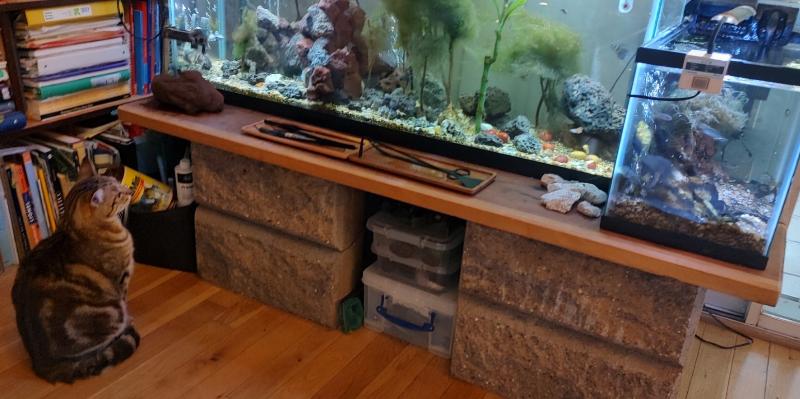
Well, my tank is already set up and planted, kinda don't want to disturb it.
Plus wanted the legs free standing (even if they are vulnerable) that way I can pull it out, clean tank, put piece back in.
Plus, I don't think that gravel is heavy enough to keep it down lolz. I feels like that thing need some serious weights to keep it down.

Think I figured out what to try.
Will attempt to pour acetone from the bottoms, down each "foam column" ie the corner, because the corners are the largest foam pieces.
Hopefully the 2 layers of paint and 1 layer of resin will hold-on long enough for me to pour plaster into the hole burned out by the acetone! Sealing the interior from melted foam and adding weight.
If this works then hurray! If not, then I will be posting progress of reattaching arches with new corners made from rocks and wood-glue.

________________________________________________________________________________________
IT WORKED!!!!

kidding, of course it didn't lolz
(decided to document process for such an unusual thing)

First try:
Made a hole to melt down the column.

Melting went well, and left extra thin wall. Here you can see the light shining right through it.

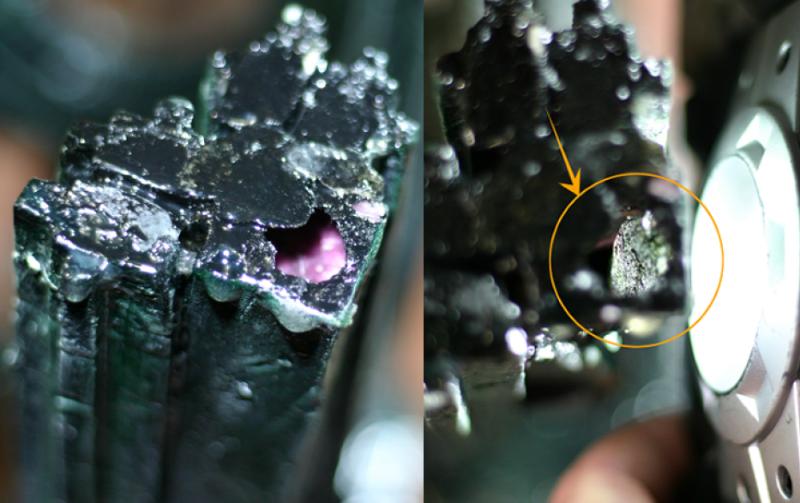
As more of foam melted, the column began to fold on it self and wrinkle. sadface

But it held together and I though to try and pour some PerfectCast but acetone must of melted through some cracks unseen to me. Emergency plastiline patching did not help at first. Lots of patch, pour, clean, patch pour clean, repeat.

Eventually:
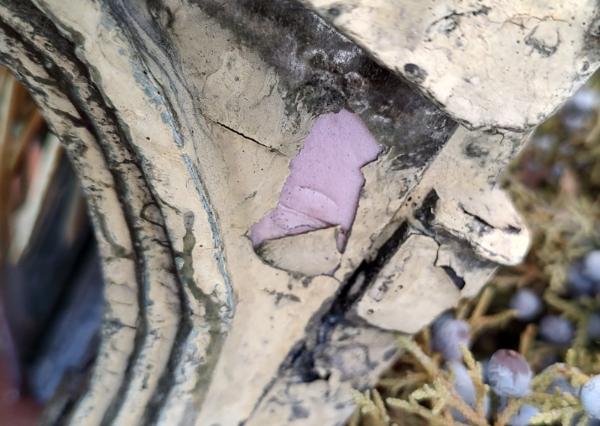
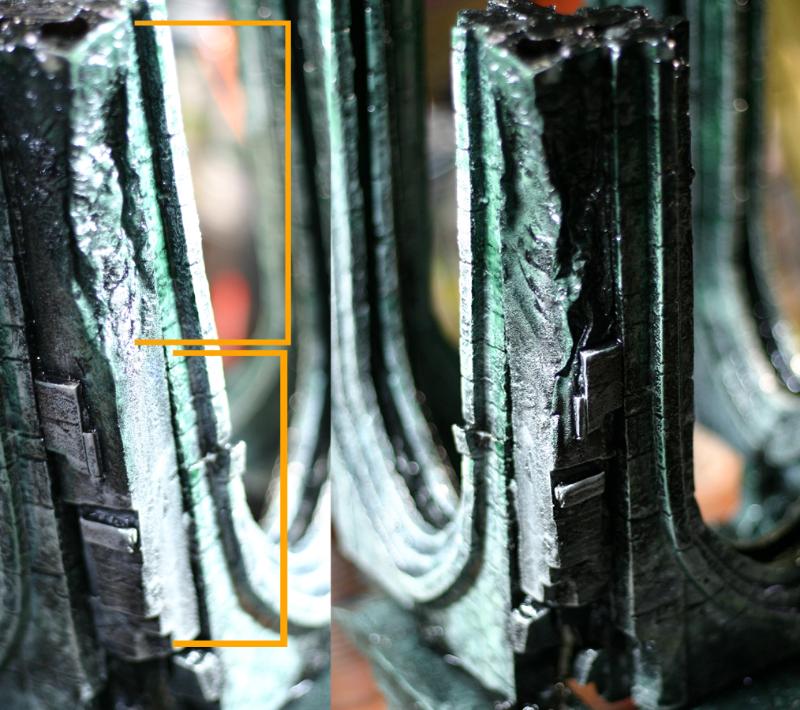
4) - Left this part foam
3) - Was the first "pour" that did not leak out but blew out the column.
2) - Second pour was a test and helped to seal up some other leaks.
1) - Rest filled up well with PerfectCast but I was unable to un-wrinkle the column
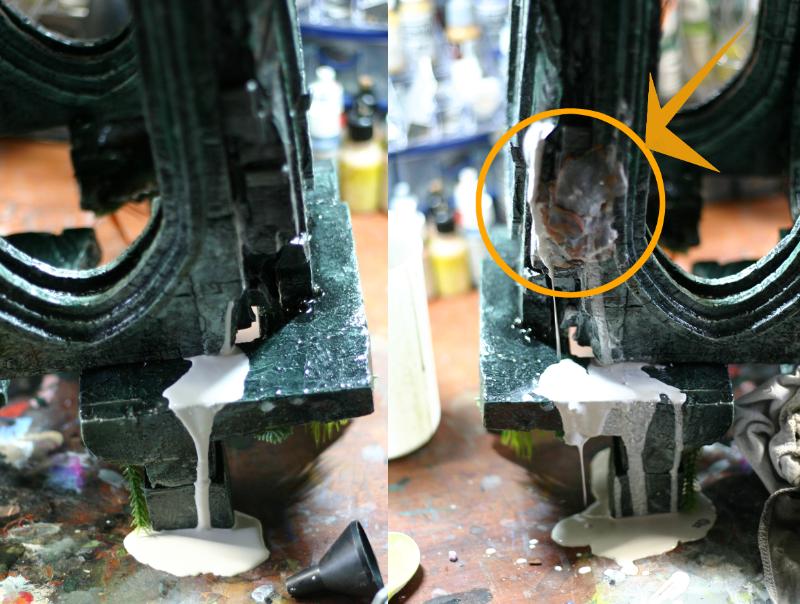
Second Try:
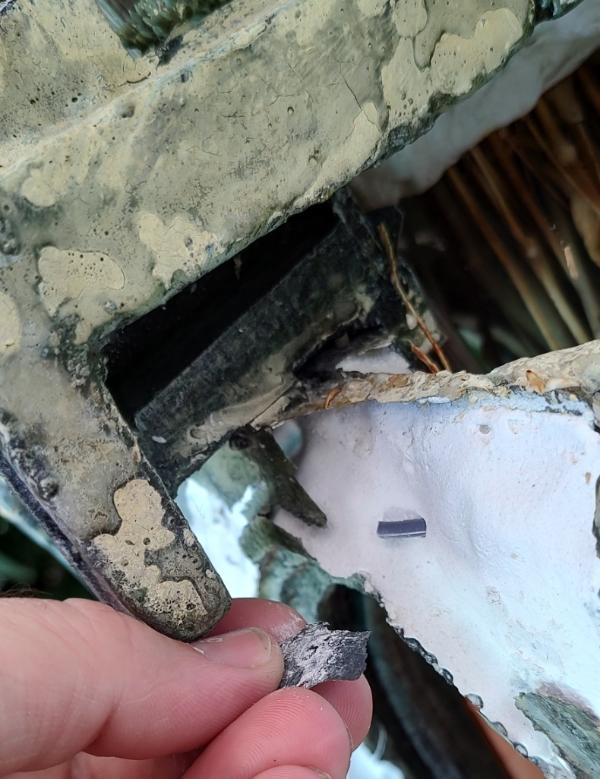
Decided to melt column in smaller sections and from the side instead of one big melt down from the bottom.
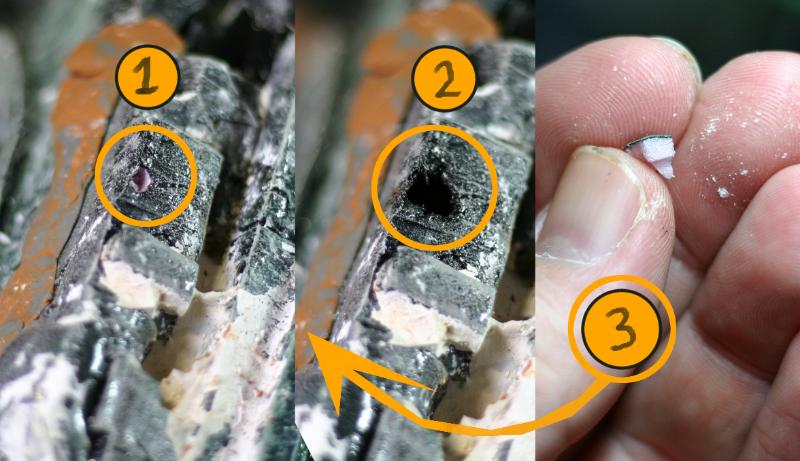
1) - Poke a hole
2) - Pour acetone, fill with plaster, move on.
3) - To give an idea of the thickness that I am working with. Plastelin helped in holding shape and prevent leaks.

Was able to fill 4 holes, even if its plaster foam plaster foam.
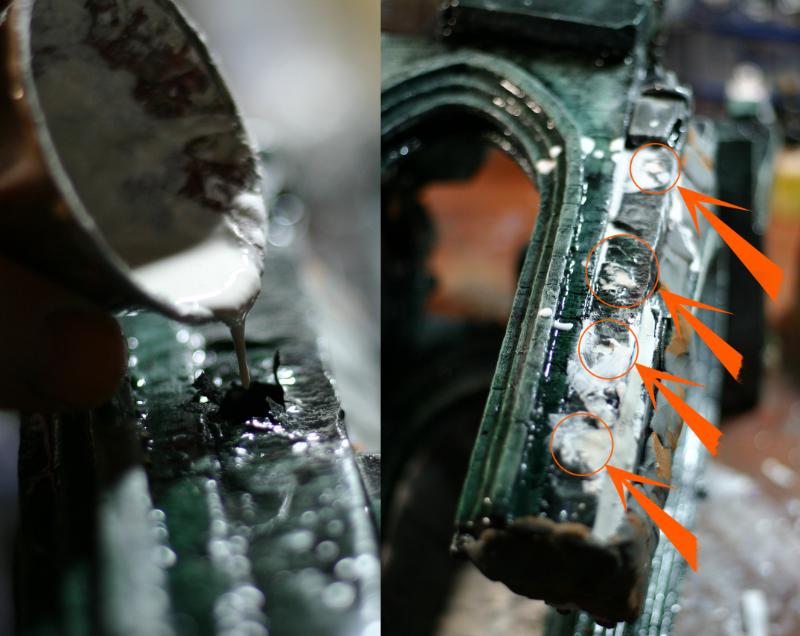
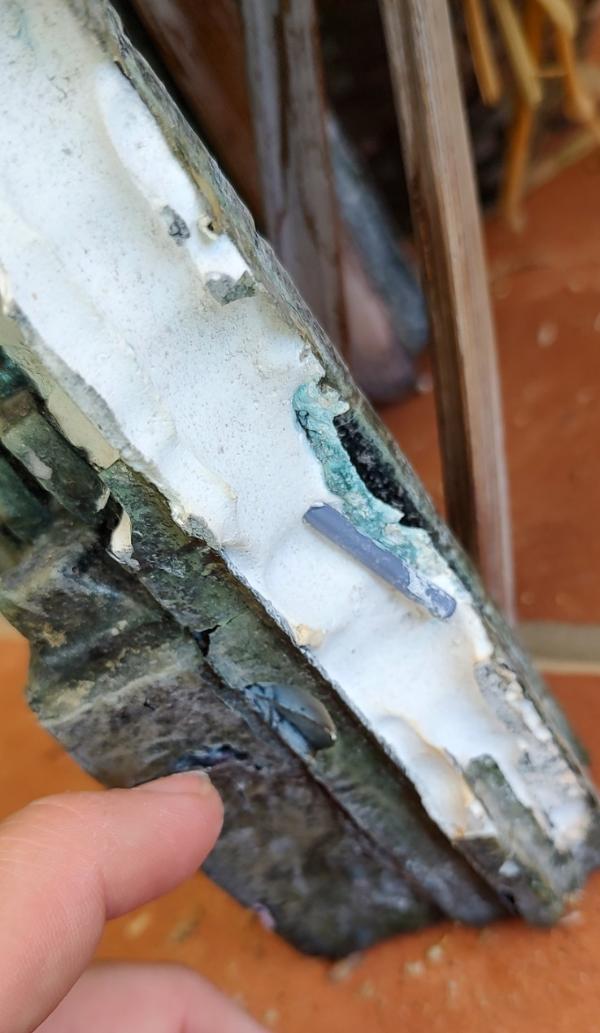
Third try:
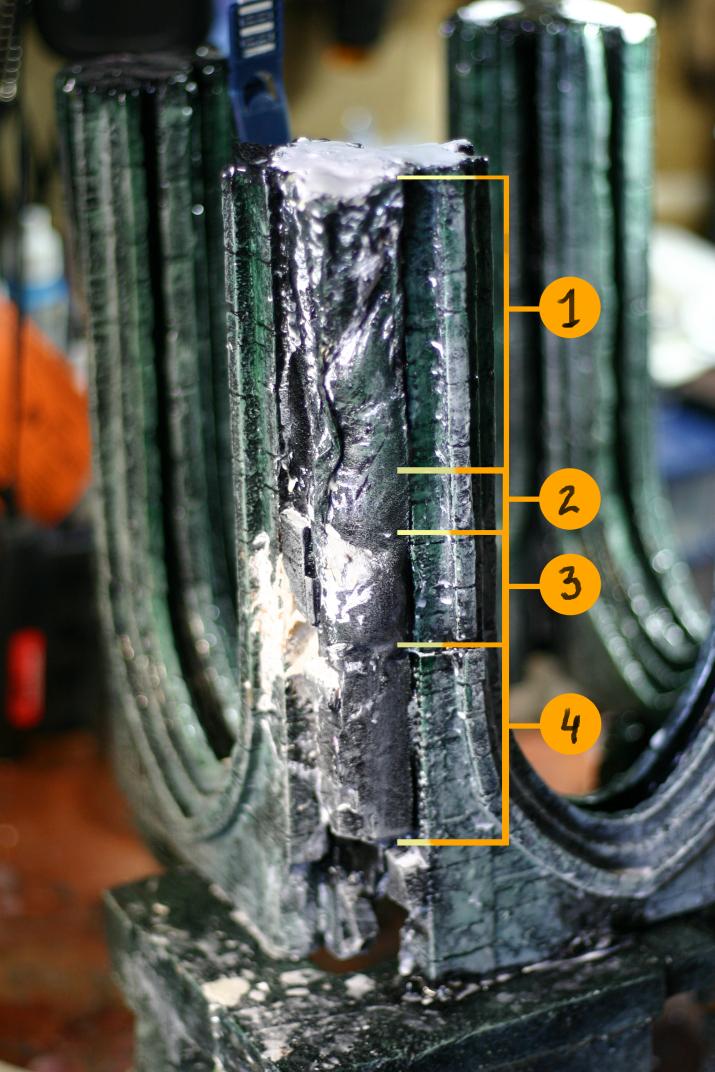
Decided to take entire top off the corner section and fill from top.

1) - Scoring before acetone accelerates melting dramatically
2) - Uneven melt left wall in places thin/thick, helps with holding the shape.

Extra plaster is poured over flat surface and later repurposed as filler for the next pour.

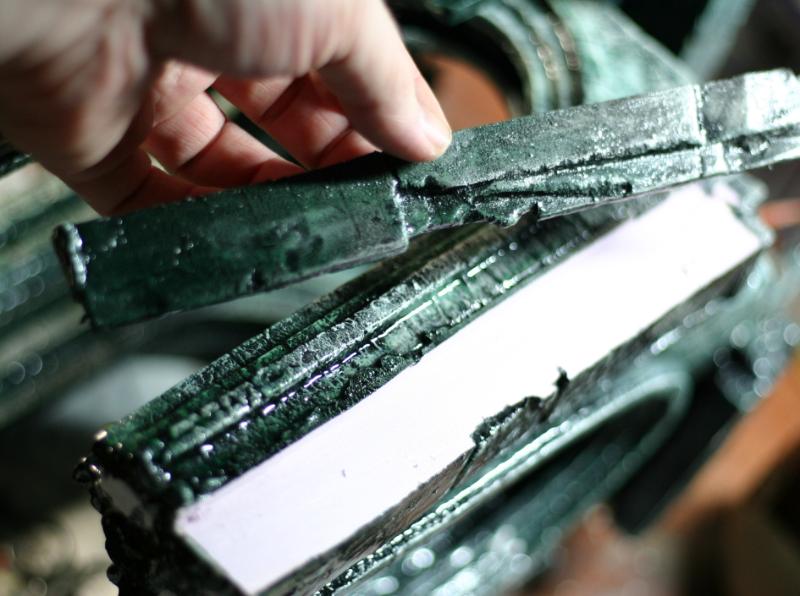
First pour pushed out the walls a bit. Second pour filled in the rest but was much lower due to wall bulging. Ended up building up wood-glue/dirt mixture to make up the difference.
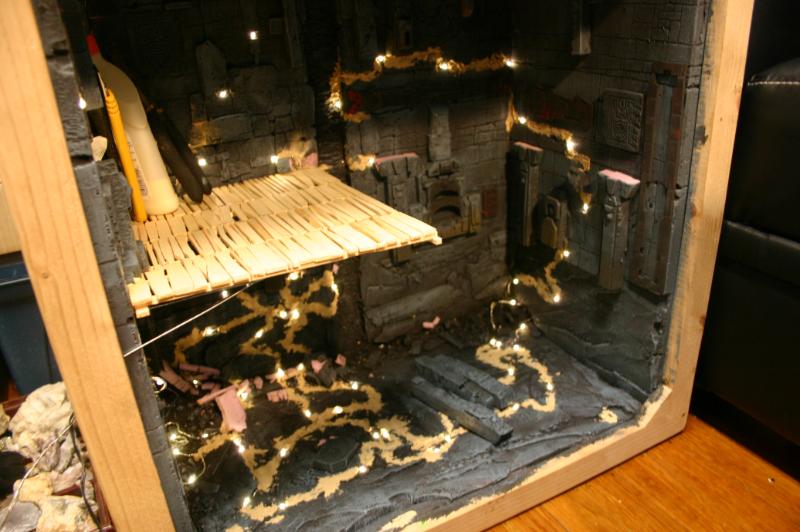

Progress
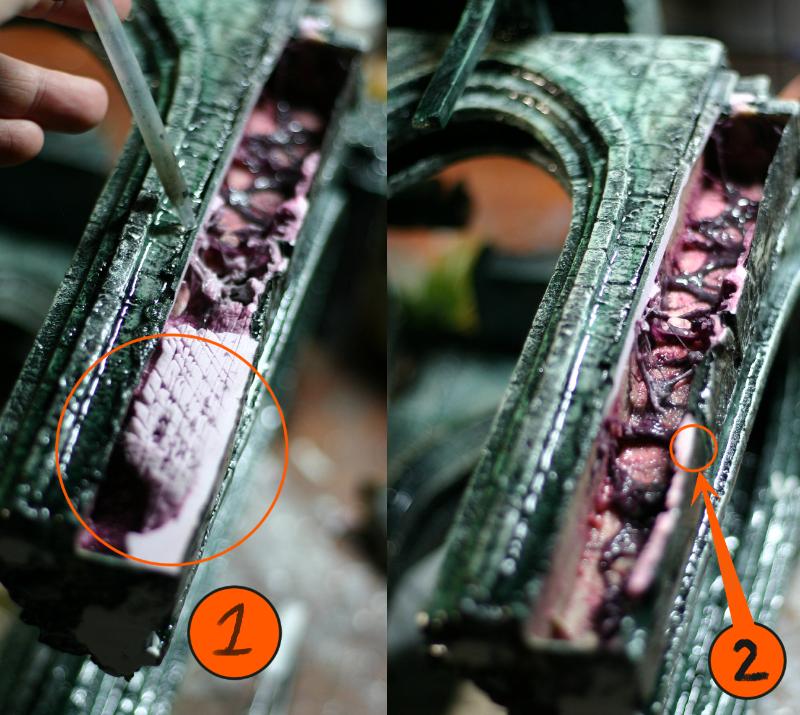
Did a quick dunk test, it no longer floats!
You can see warped corners and wrinkled holes around.
Now need to finish painting, sealing, waiting to dry.

I can always make more smaller pieces and glue to this rig at a later time to built it up some more. And eventually have part of it sticking out of water.


Progress
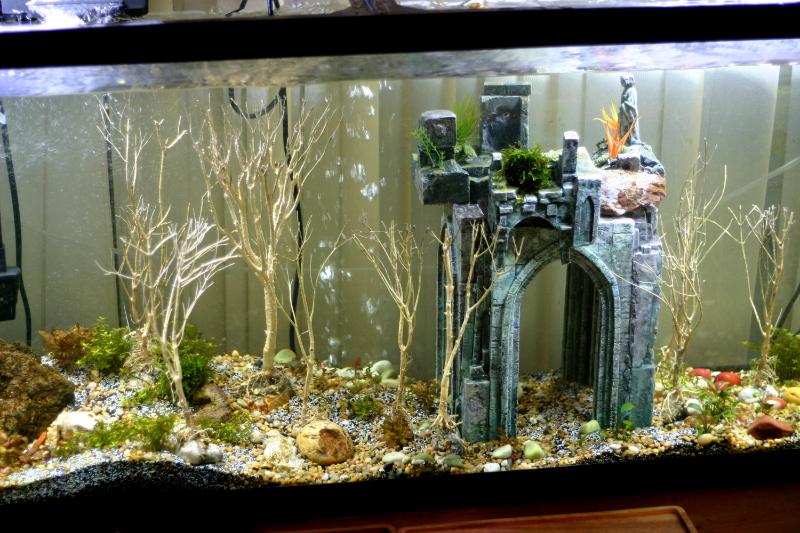
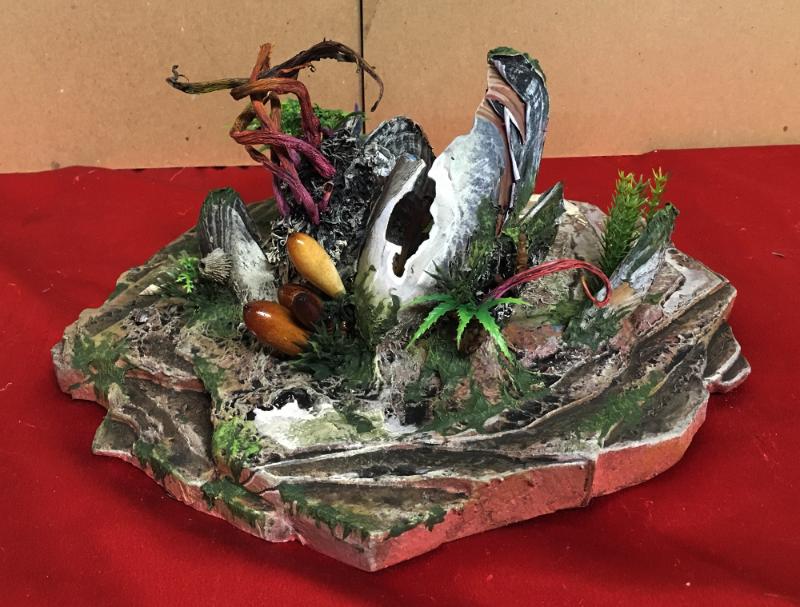
So it sinks but the side of the arch that was made from foam is still raised. However this time a small rock on top will do the trick.

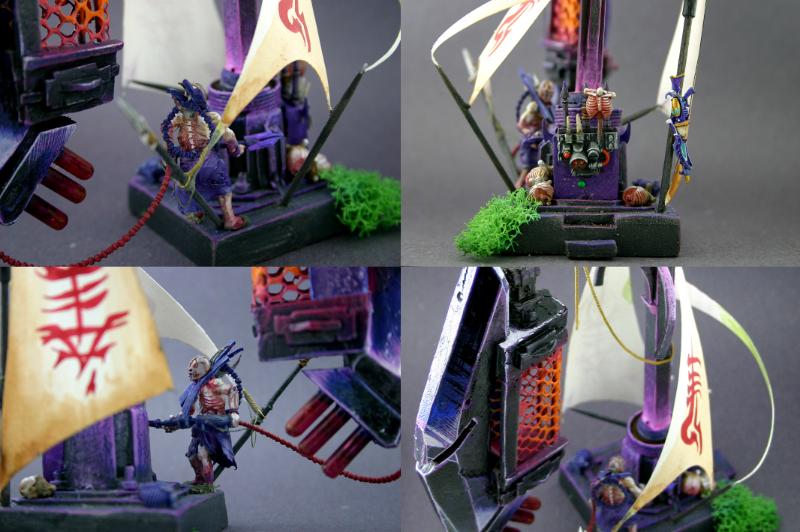
All coated in resin and dry.


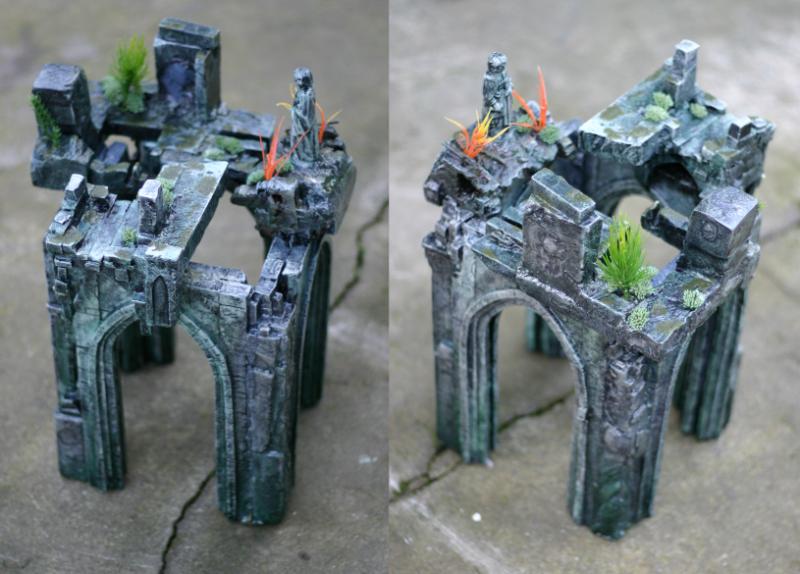
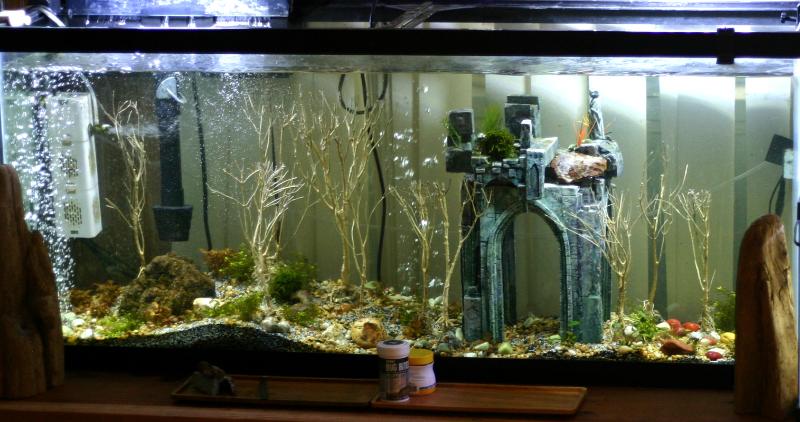
Will take pictures in aquarium after the trees are in.
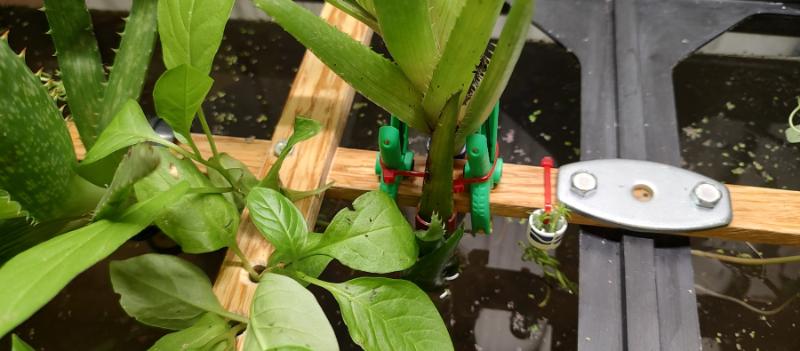
Had to glue them to rocks to give weight, because sticking them in and taking them out without disturbing the substrait would be much preferred.

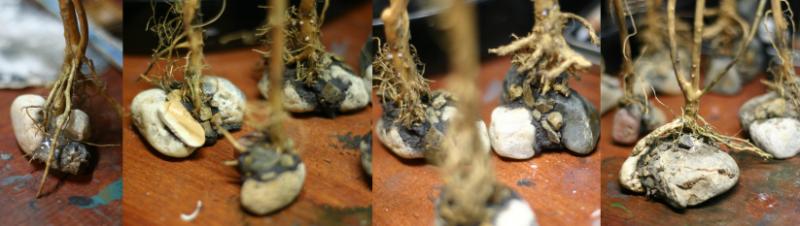
Coated them with resin too to seal the glue and paint.


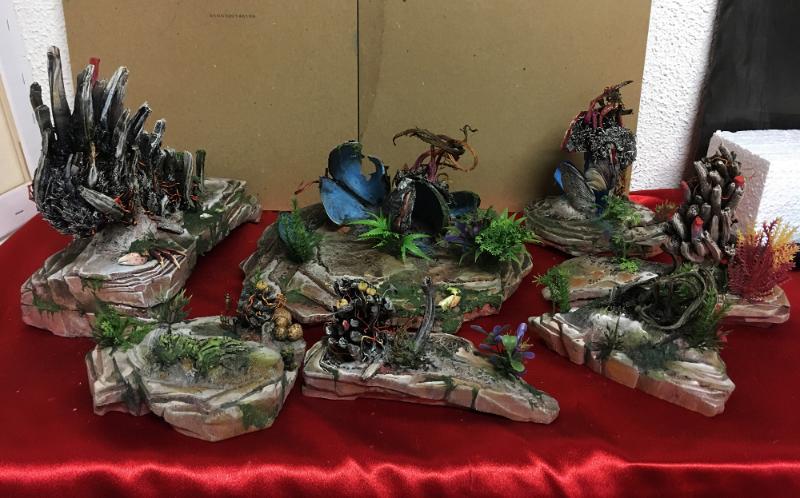
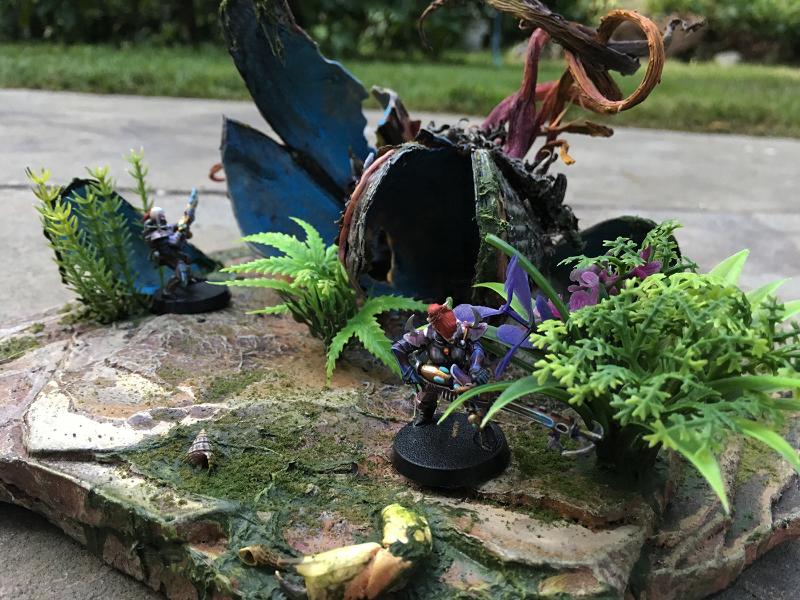
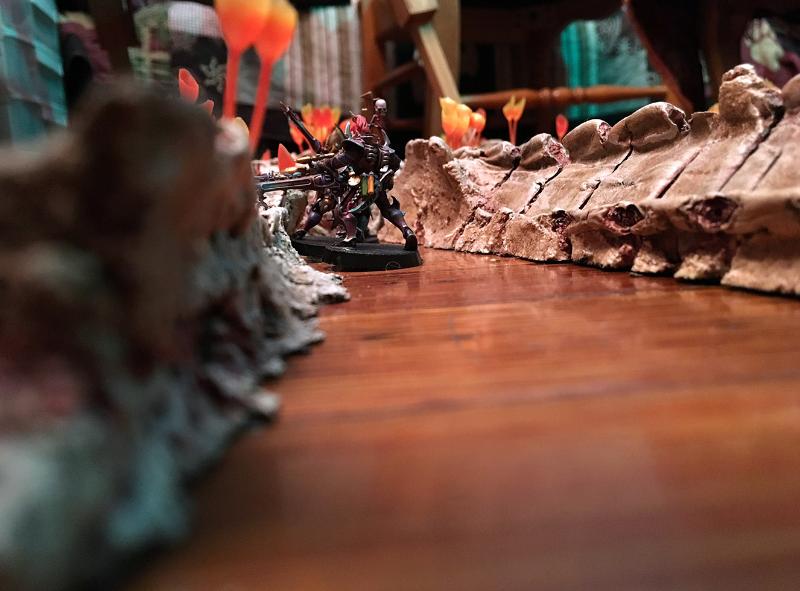
All done! this project is not finished yet, more ruin pieces must be added in the future. And a background be nice.


This message was edited 2 times. Last update was at 2022/03/05 11:27:46


Made in us
Grumpy Longbeard


League of Extraordinary Riveters Round 37 (March/April) Biomes

Could not wait, began work before the poll ended lolz
Biodome
Looked up how to build one.
Spoiler:


Without getting into the math I followed simple template instructions. The dome came out a bit lopsided (probably should of got into the math...)


Did a test for the "glass"
Used plastic food wrap to cover the dome, then used heat gun to shrink it tight over the frame. Worked beautifully! Took it off, will paint it first re plastic shrink it and hope this project will go smoothly unlike the last one.


Automatically Appended Next Post:
Firs time using Expanded PVC. This stuff is amazing.

Test fit

Woodglue+dirt+rocks

Small piece of junk toy worked out as "sprinkler"


With plenty of PerfectCast left from previous project though to cement the dome with plaster.
Used thick doublesided tape to layout the shape for the walls to sit on.

Foam stuck to that tape really well. Inside and outside barrier set.

Perfect pour. Stuck some details into wet plaster before it set.


[Thumb - d.jpg]

This message was edited 4 times. Last update was at 2022/03/05 12:00:42


Made in us
Grumpy Longbeard


Done!

Tips I have learned:
1 - Use smaller sticks to buildup smaller windows, it would look better.
2 - Do some math with online dome calculator before eyeballing and gluing!
3 - Add half inch extra for the bottom of the dome. Plaster part took some height, and the dome ended p lower than planned.
4 - Use real Shrink-Wapp instead of 4 layers of food plastic wrap. Windows would of turned out much cleaner.
5 - Mask out the dome, because matte varnish does dull the windows.

I do love how easy it was to heat shrink windows, and how plaster cemented the dome to the base.


Made in us
Blackclad Wayfarer


Philadelphia

You're pretty creative. That was an interesting scroll of scratch builds.

   
Made in us
Longtime Dakkanaut


Spectacular work. This was a joy to scroll through.
   
Made in gb
Longtime Dakkanaut


Nottingham

Absolutely lovely stuff. Can't believe that I haven't come across this before.

Have a look at my P&M blog - currently working on Sons of Horus

Have a look at my 3d Printed Mierce Miniatures

Previous projects
30k Iron Warriors (11k+)
Full first company Crimson Fists
Zone Mortalis (unfinished)
Classic high elf bloodbowl team 
   
Made in gb
Drop Trooper with Demo Charge


Hailsham

absolutely outstanding stuff, big fan of RA so those tesla coil are great to see and those tyranid pieces look spot on

Road to 5k Points current standing - 5,200

Astra Militarum army thread: https://www.dakkadakka.com/dakkaforum/posts/list/801034.page

Army fiction thread https://www.dakkadakka.com/dakkaforum/posts/list/0/801004.page#11222210 
   
Made in de
Shrieking Guardian Jetbiker


Great stuff! I think my favourite is the terrain with the seashells etc, very pretty but alien

~~~ I Love The Power Glove. It's So Bad. ~~~ 
   
Made in us
Grumpy Longbeard


Thanks guys
Glad yall enjoyed it.

After running into this https://buildwithhubs.co.uk/mini-downloads.html
Thinking of doing another geodesic dome before the LoeR round ends https://www.dakkadakka.com/dakkaforum/posts/list/803923.page
Those are good instructions If anyone want to build their own.

This message was edited 1 time. Last update was at 2022/03/11 01:30:45


Made in us
Grumpy Longbeard


Posting old 2016 images because resuming work on this (https://www.dakkadakka.com/dakkaforum/posts/list/804229.page#11331863) project.


Made in us
Grumpy Longbeard


So my clever idea was to use those tiny jar Christmas lights to make glowing crystals on the inside. Crystals are cheap quarts bits from broken decoration I found in garage.
Hindsight: Because adding lights was an after thought, I had to embed wires into the surface of the walls. Problem rose up after when half of the entire line stopped working due to a broken wire... somewhere...


Details


Adding floor


Details


Adding walls to the floors


Repurposing old toy bitz


This is how it looks without shining light directly into the box


More floors


More crystals


Ceiling trapdoor entrance will need a cold white LED for this effect.


[Thumb - Screenshot_10.jpg]


Made in us
Grumpy Longbeard


Details and testing a light


Made in us
Grumpy Longbeard


Playing with the light.
The Project (https://www.dakkadakka.com/dakkaforum/posts/list/0/804229.page#11332208)


[Thumb - Screenshot_10.jpg]


Made in us
Grumpy Longbeard


Took the case from storage and removed layers of dust.
There are few issues with this case that I need to do right.
1 - I made the floor wooden because I liked how the light shined through the floor boards on all the levels. But I wanted metal floor for the magnets to hold models in place. Thus ripped out all foam and wood floors first.
2 - In addition all of the details are not in scale and seem out of place when the models are in. Removed all those too.
3 - The paper banners look lame. Trashed em.
4 - Because the lights have a broken wire somewhere and most of the lights did not work, instead of finding the damaged piece, I cut off all wires that needed cutting, threw out the power pack and will rewire the entire thing, hopefully into one 3V wall adapter.


Was unable to find how to print on foil to make quick printed malleable banners. So far cut-up sodacan, primed will try to find some stencils.


Made in us
Grumpy Longbeard


Took apart old PC case for scrap sheet metal. Not too heavy not too thin, but not wide enough, yet think I can work with that.


Added more banners


Made in us
Grumpy Longbeard


Eyeballing the lvl for the floor. It is not crucial, as long as it looks leveled I am good.


Piece does not quite fit, but I think it will be ok.


Thought to score the surface to imitate dwarven stonework


Remembered that details in pensic armor is usually inked, though this trick will work here as well.


Worked pretty well


Melting the groves for the sheets to slot into.


Wooden sticks are supporting the metal sheets. Secured with screws. Not the prettiest job, but with the money and tools I have.


Made in de
Shrieking Guardian Jetbiker


Ooooh, this gonna be exiting! I mean, the old version looks very cool already, but I agree that paper banners belong in a "what was I thinking??" phase of everyone's hobbying biography

~~~ I Love The Power Glove. It's So Bad. ~~~ 
   
Made in gb
Ancient Venerable Dreadnought


Very cool, the scoring of the case looks to have worked really well. The cracks look spot on too! What’s the plan for hiding the screws? A mix of furniture/falllen rubble?

Goberts Gubbins - P&M Blog, started with Oldhammer, often Blackstone Fortress and Void Panther Marines, with side projects along the way 
   
Made in nl
Regular Dakkanaut


Wow, cool thread. I'm impressed with the 'tyrannid plants'.

Am I correct in thinking that you used a 3d-pen to get the 'strings'?
   
Made in us
Grumpy Longbeard


 MobileSuitRandom wrote:
Ooooh, this gonna be exiting! I mean, the old version looks very cool already, but I agree that paper banners belong in a "what was I thinking??" phase of everyone's hobbying biography

Lolz so true!
In my mind I still can't grasp the scale, keep making things bigger than they need to be.
 gobert wrote:
Very cool, the scoring of the case looks to have worked really well. The cracks look spot on too! What’s the plan for hiding the screws? A mix of furniture/falllen rubble?

It did work out very well, but a bit of a fail too.
For the top screws I couldn't get in there with a screw driver (not enough room) So I suffered with a Philips-bit two plyers to secure the top floor. After that I realized that I forgot to paint it light color for scoring I did not want to take it apart and put it back together. Screw it, moving on.
Also, top floor is in sections where the seem is clearly visible, not much I can do with that. Second floor (metal case section) has an area with bunch of holes (for computer case air flow), not much I can do with that ether.
I have not yet come up with a way to hide/fix those issues, but the screws will get hid definitely with furniture
 DoctorDanny wrote:
Wow, cool thread. I'm impressed with the 'tyrannid plants'.

Am I correct in thinking that you used a 3d-pen to get the 'strings'?

I used a cheap ghetto version of a 3D-pen. A Hot-Glue-Gun

_______________________________________________________
Progress


Lantern, out of scale, but the tape idea worked!

Of course something was overlooked and went wrong. I cant get the lantern piece in the floor without breaking it.

Tried anyways, broke it, undergoing repairs.

Banner for the fearless mushroom.


Sections ended up with a really tight fit. All the seems and gaps will be filler in later with some colored putty that will secure the pieces and visually blend floor with walls.


Made in gb
Stealthy Grot Snipa


UK

Lots of great stuff here - and lots of ideas to nick! Particularly love the tesla coils, any RA2 fan is a friend of mine :-)

Skinflint Games- war gaming in the age of austerity

https://skinflintgames.wordpress.com/


Made in gb
Drop Trooper with Demo Charge


Hailsham

I keep thinking about building some kind of scene/diorama into a box, - this quality of work just intensifies those thoughts! cracking stuff you've created

This message was edited 1 time. Last update was at 2022/06/27 21:20:39


Road to 5k Points current standing - 5,200

Astra Militarum army thread: https://www.dakkadakka.com/dakkaforum/posts/list/801034.page

Army fiction thread https://www.dakkadakka.com/dakkaforum/posts/list/0/801004.page#11222210 
   
Made in us
Grumpy Longbeard


2 years later - Thanks guys!
Progress/Update
I had to give an update to the aquarium situation, as it was an Terrain experiment, failed one, but good learning opportunity.

The main piece after a year in water ended up failing. The piece must of been poorly sealed, but I was not expecting plaster to degrade in water like that.
1 - The cracks began to form in the layers of resin.
2 - The plaster slowly broke down and began leaching into the water

This is 2 years later: 1 year in the tank and 1 year outside in the elements. The resin shell is just flaking off now exposing leached plaster.


The Arch removed, but left the trees in. Wrapped the tops in pieces of moss, and that green algae, to make nifty happy little trees. Note that the PlastiDip spray that was used on the wood decorations was useless, it came off after few months and did nothing in "sealing" the wooden pieces.


Corys are thriving.


Cat is helping
(Note - smaller tank has outbreak of BlackBeard algae that will later somehow infest the main tank)


A year later.
The green algae died, moss plants dwindled, the curse has befell this realm. BlackBeard overgrew and consumed life and casting all into darkness. Btw, that is an interesting idea to make a dedicated BlackBeard Evil tank setup, a project for a different time.


The trees did not held up any better. Will repurpose these for the TableTop terrain.


A Success that end-up working very well is this small Magnetized piece. Also sealed in same resin as the Main Arch was, but never flaked or cracked.


It is a very nifty idea, with good potential of making exterior/interior terrain for aquarium possible, perhaps with led lights. But that is a project for another year.


Reclimaton efforts


For now, After the reclamation efforts, another experiment. No more custom terrain for an aquarium, but this time a planted one.


Hobby skills come in handy! Another failed attempt, at reinventing the wheel lolz.
I though to be clever and make a "superior" plant holder. But ended up blocking the light in the center of the tank for the underwater plants. Will have to redo the plant mounts.


Corydoras are thriving again, and this time I though to activate my supper hobby skillz to make a baby-guard to protect the eggs from snails and hatched bebes from other fish.
Polyfiber clump attached to a round barrier held on glass by plastic-warpped magnets.


Automatically Appended Next Post:
All other Terrain efforts are on pause for now. No time and no room.

This message was edited 3 times. Last update was at 2024/06/21 21:47:31


Forum Index » Dakka P&M Blogs
Go to: