| Author |
Message |
 |
|
|
|
|
Advert
|
Forum adverts like this one are shown to any user who is not logged in. Join us by filling out a tiny 3 field form and you will get your own, free, dakka user account which gives a good range of benefits to you:
- No adverts like this in the forums anymore.
- Times and dates in your local timezone.
- Full tracking of what you have read so you can skip to your first unread post, easily see what has changed since you last logged in, and easily see what is new at a glance.
- Email notifications for threads you want to watch closely.
- Being a part of the oldest wargaming community on the net.
If you are already a member then feel free to login now. |
|
 |
2013/10/02 23:27:17
Subject: The Second Ravenwing Command Squad
|
|

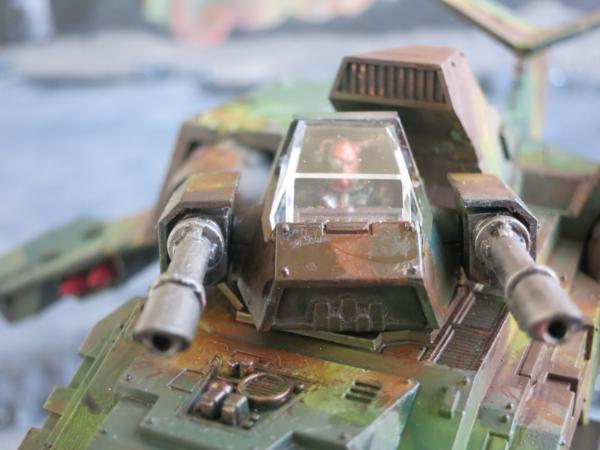
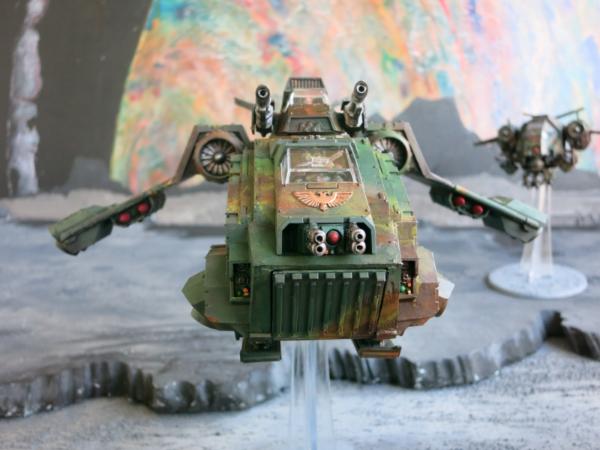
Focused Dark Angels Land Raider Pilot
|
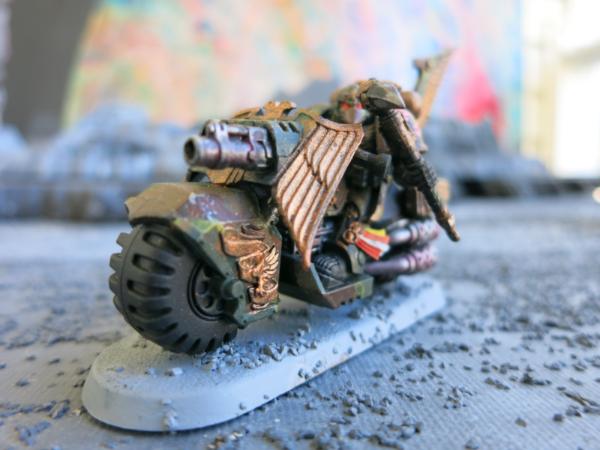
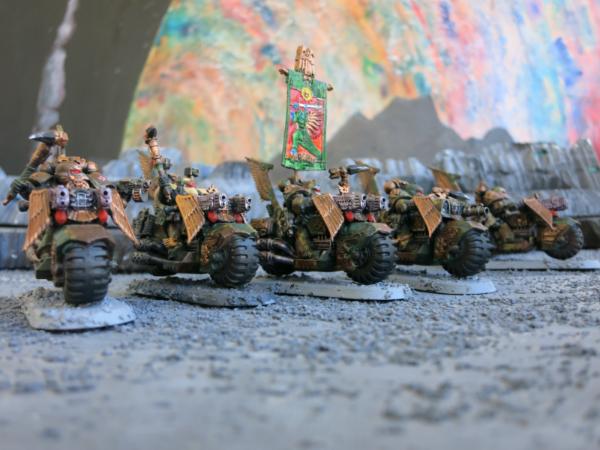
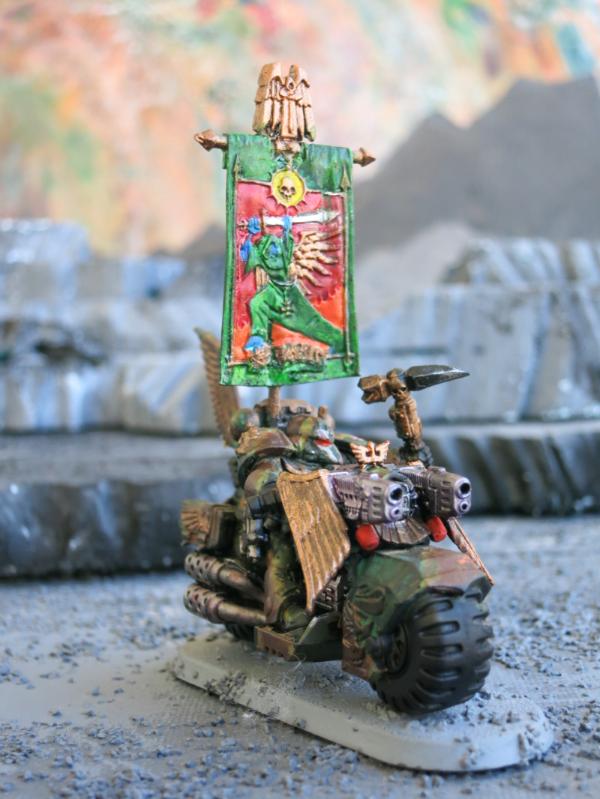
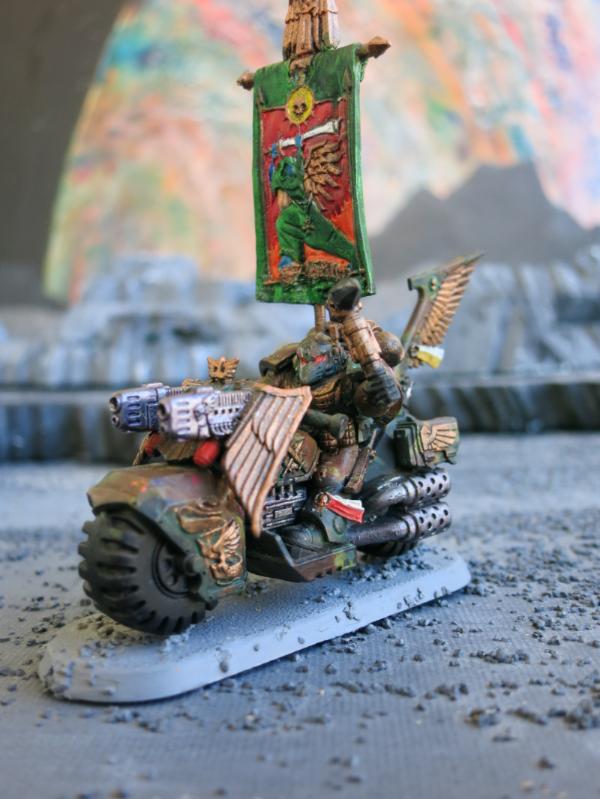
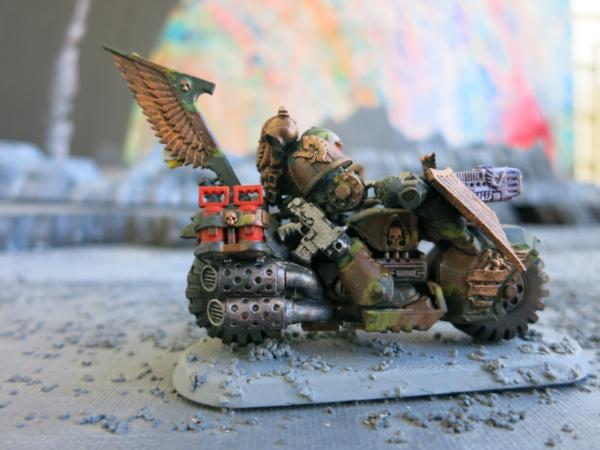
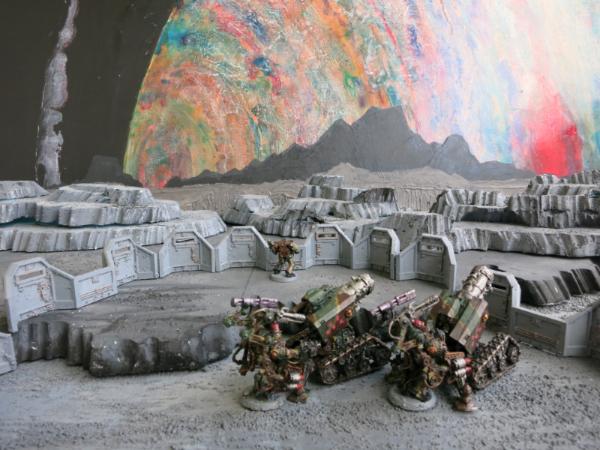
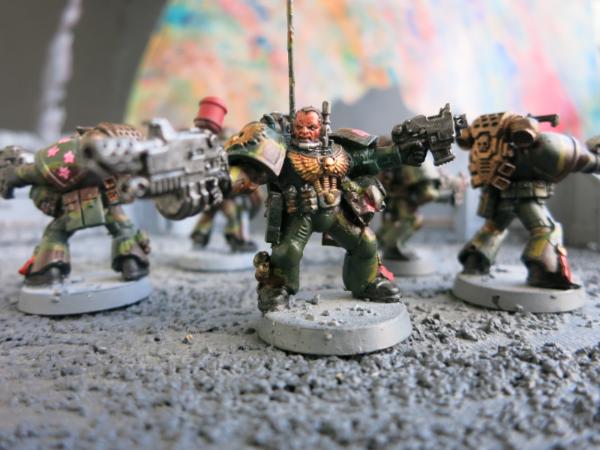
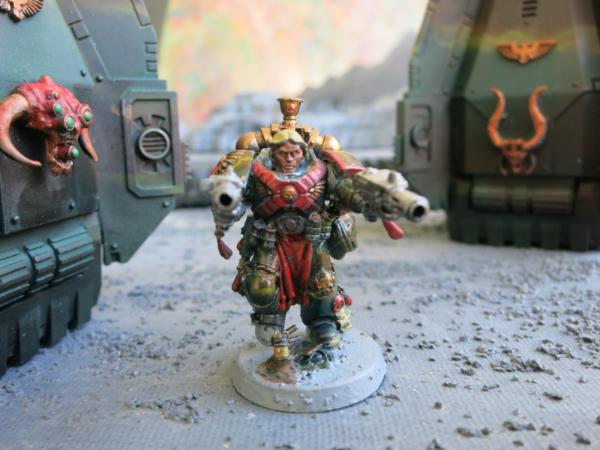
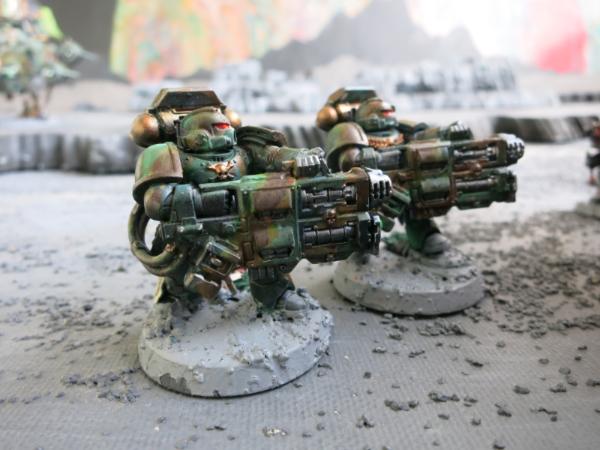
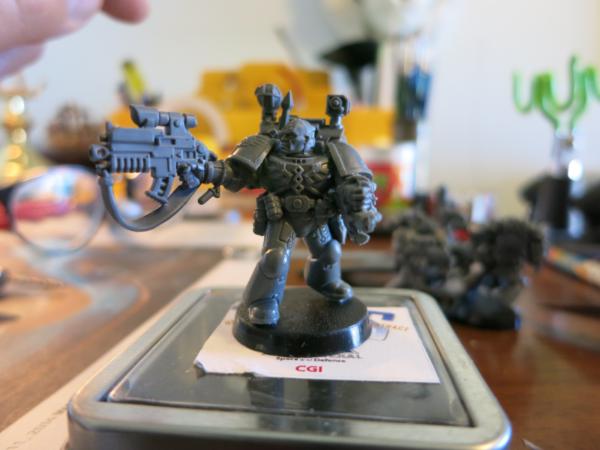
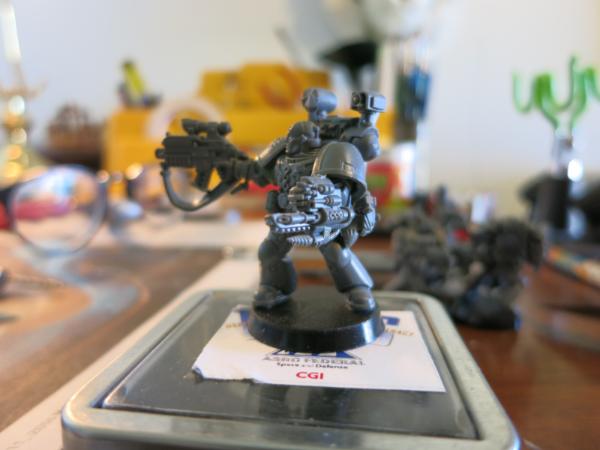
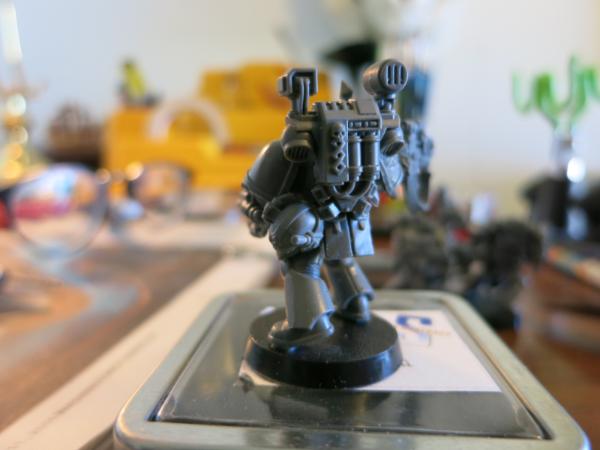
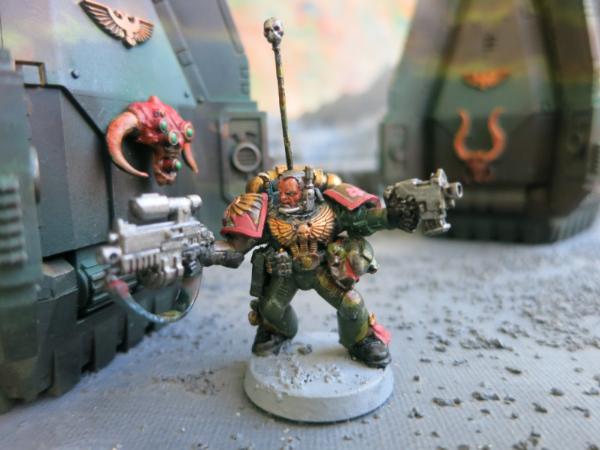
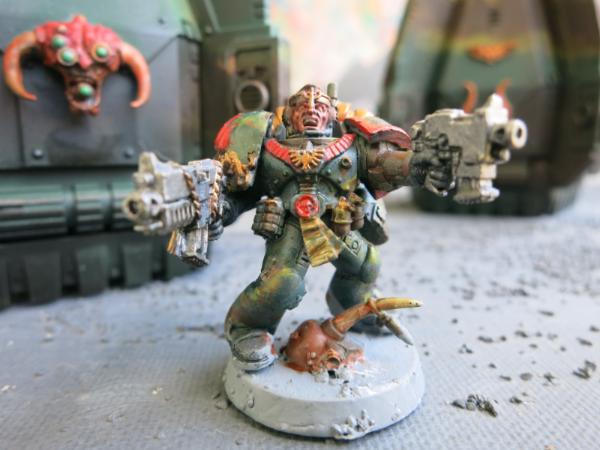
For NOVA, I built a second Ravenwing Command Squad. The second Ravenwing Command Squad was designed to carry and protect the Standard of Devastation. Except for the Standard of Devastation, the second command squad looks remarkably like the first command squad. Still, for the purposes of completeness, I am including pictures of the second command squad.
 The Second Ravenwing Command Squad
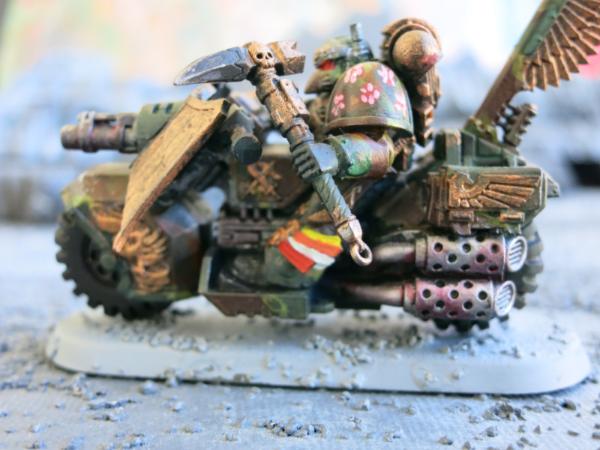
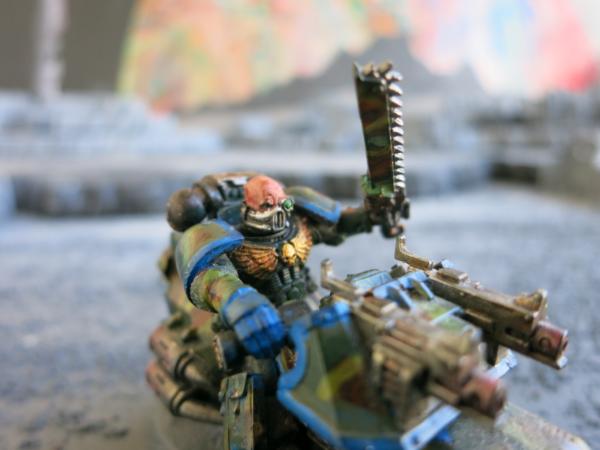
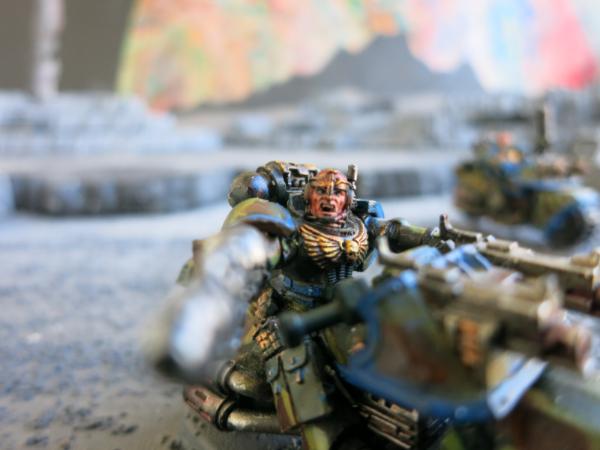
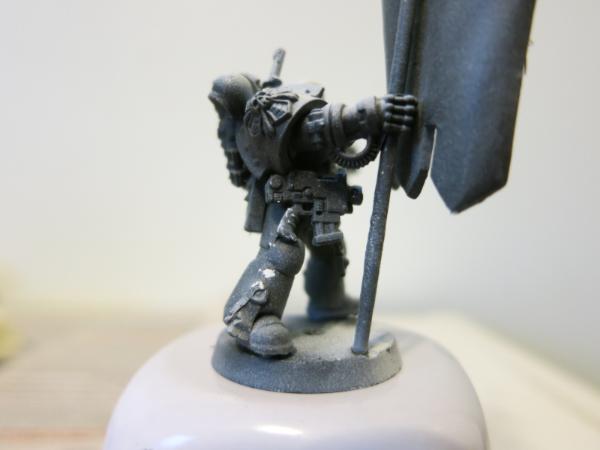
Enclosed is a close up view of the Black Knight bearing the Standard of Devastation. Actually, for purist, the standard is actually not the Standard of Devastation. I bought Asrael which I had considered as a HQ instead of Sammael. I don’t like personal standards on my independent characters so I cut off Asrael’s standard and used it as the Standard of Devastation. I don’t have the skills to free hand a banner so I needed a pattern to follow.
 Ravenwing Black Knight Bearing the Sacred Standard
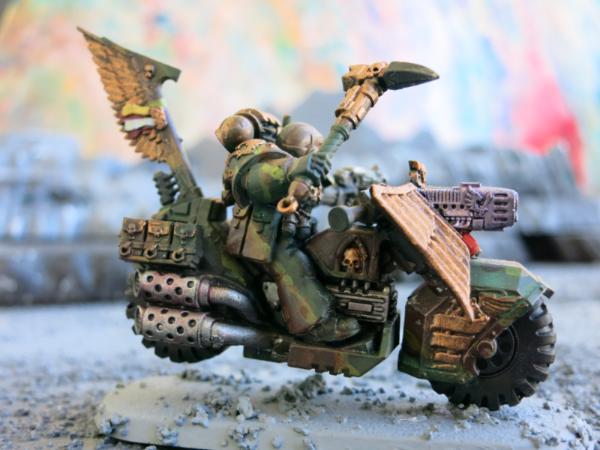
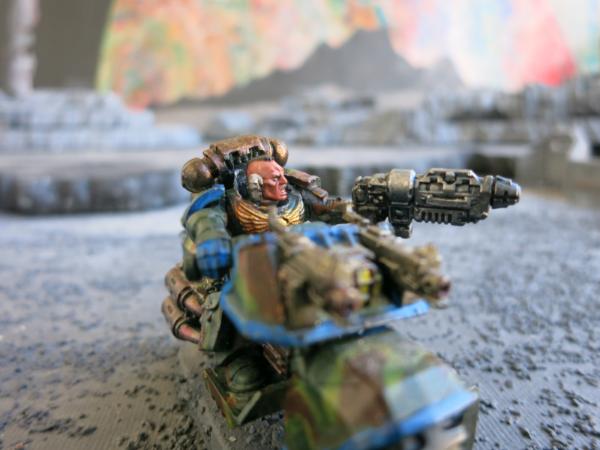
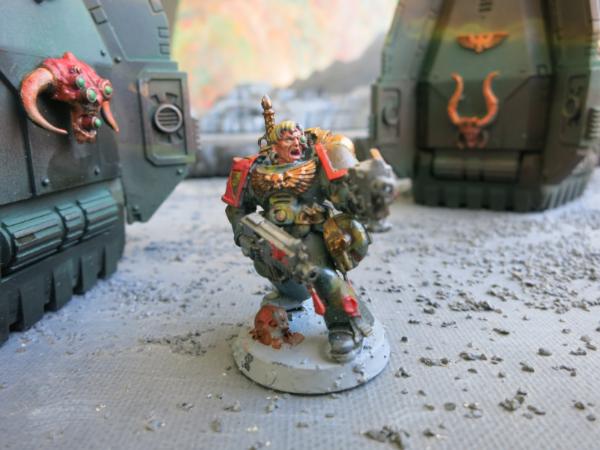
Unfortunately, the handle of the Corvus Handle broke and I have not yet fixed it. The base coat of the Black Knight is black while the base coat of the Sacred Standard is white which is why the colors are brighter on the Standard than on the rest of the model.
 Second View of the Ravenwing Black Knight Bearing the Sacred Standard
|
|
|
 |
|
2013/10/17 01:05:56
Subject: More Ravenwing Command Squad Bikers
|
|
Focused Dark Angels Land Raider Pilot
|
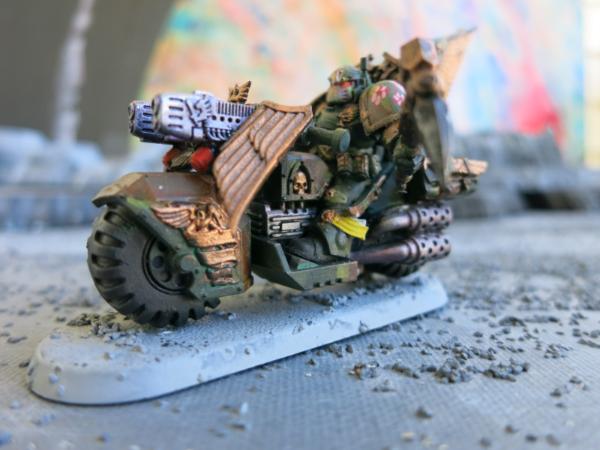
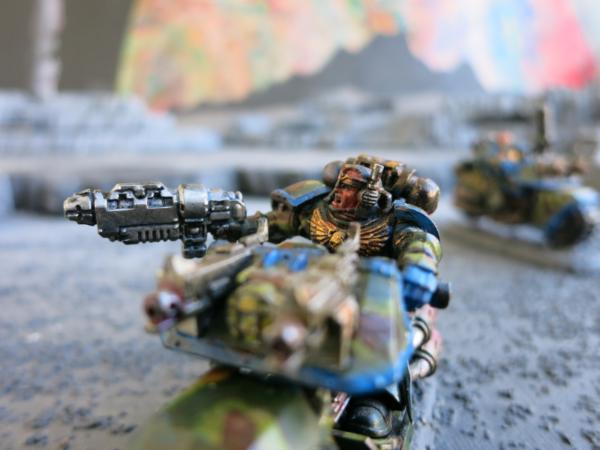
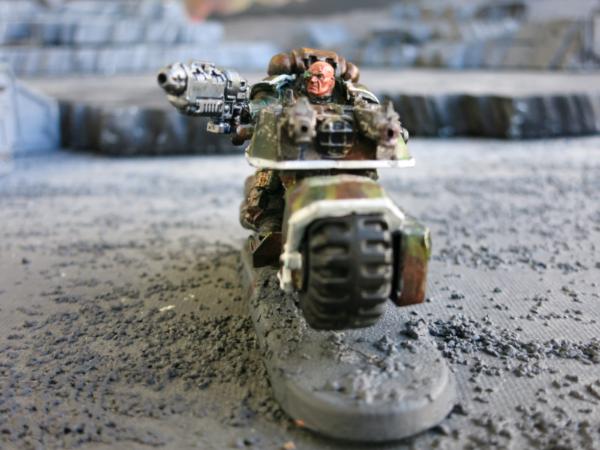
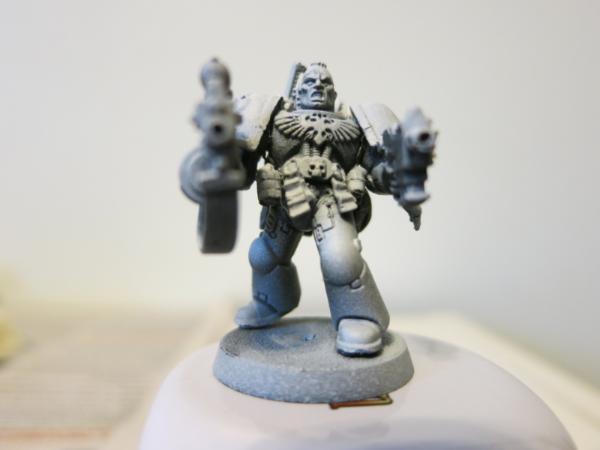
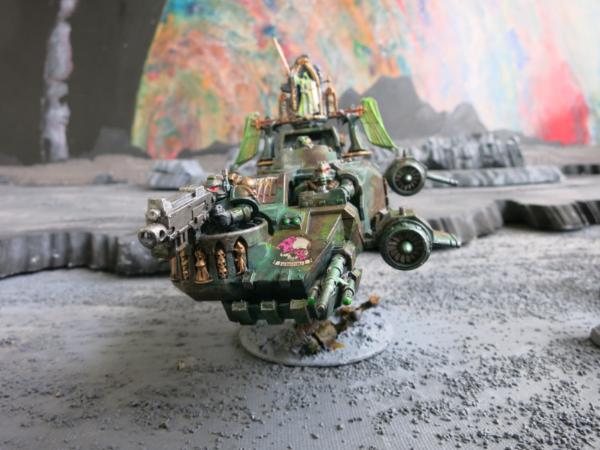
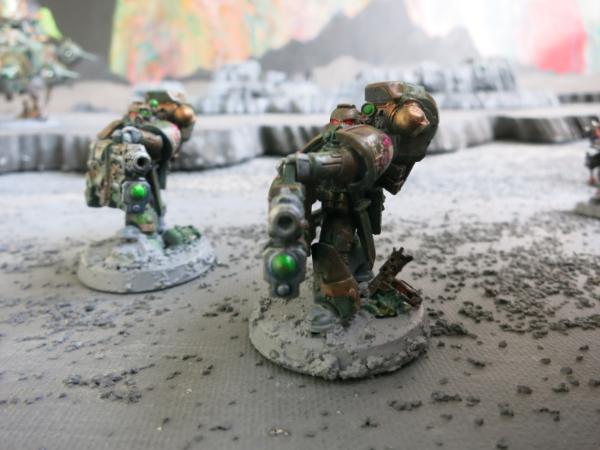
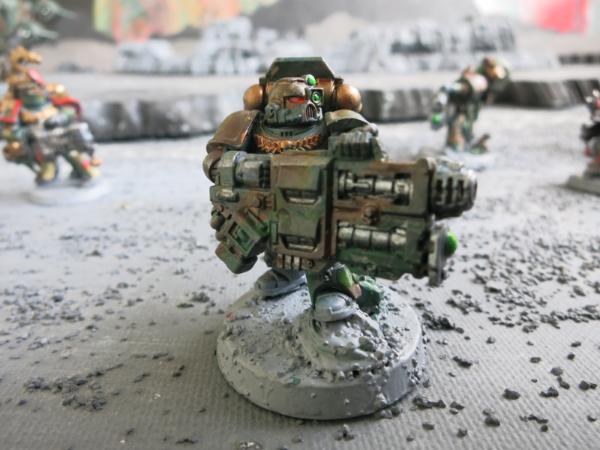
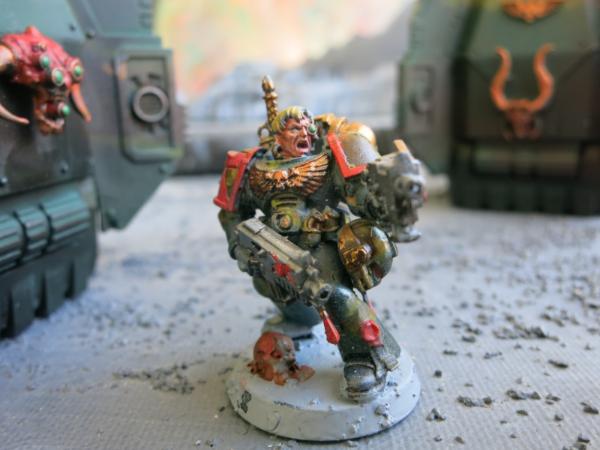
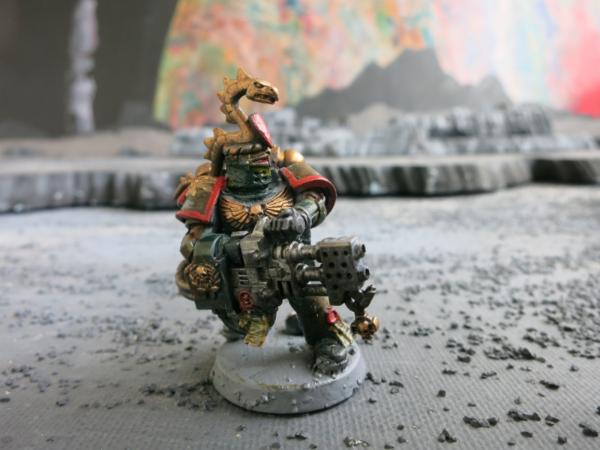
Enclosed are some more pictures of my second Ravenwing Command Squad. They look similar to the first Ravenwing Command squad. What can we say? If you have seen one Black Knight, you have seen them all. At least I don’t have a horde army.
 Black Knight
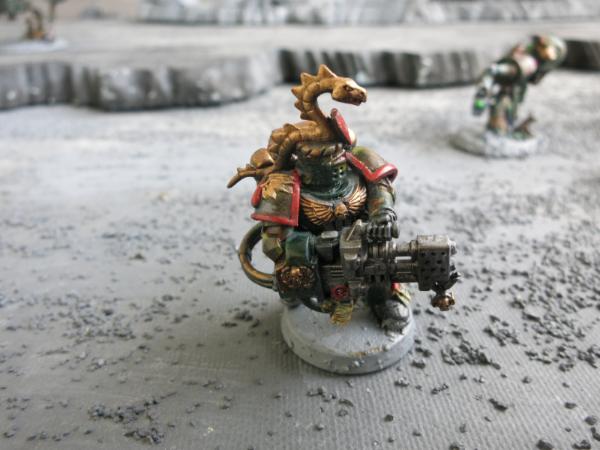
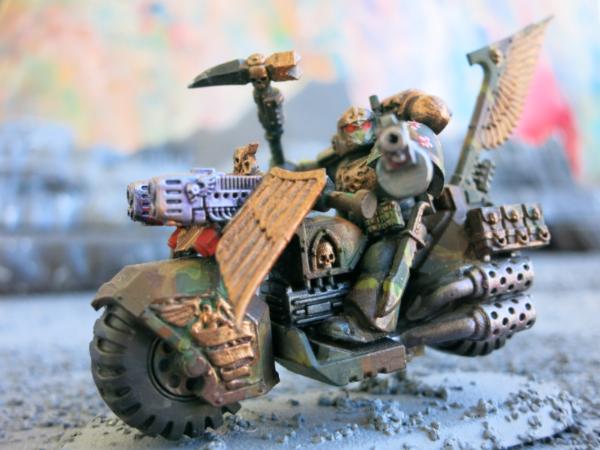 Black Knight – Another View
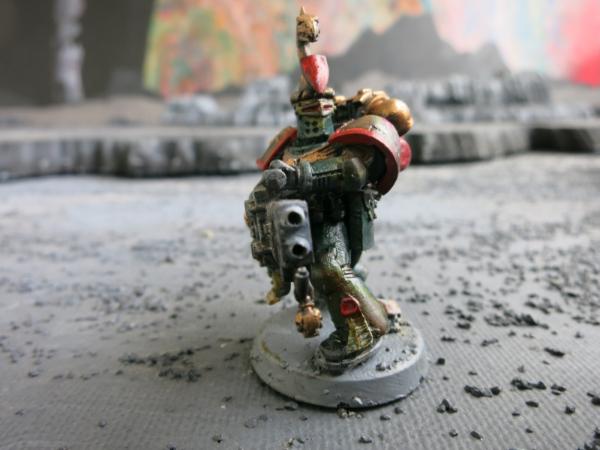
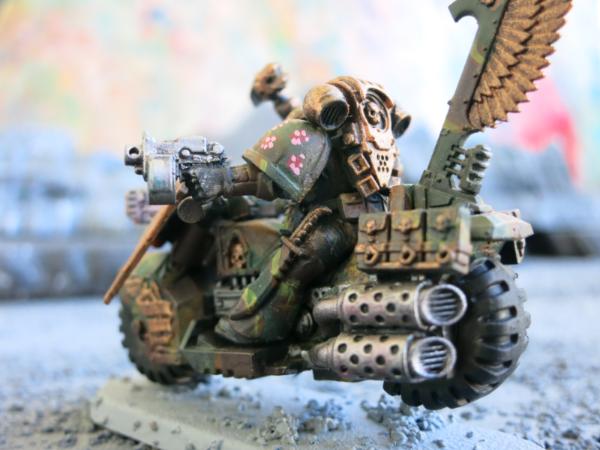 Black Knight – Back View
One of the oddities of the Ravenwing Command Squad is that you can take a Ravenwing Command Squad for any Dark Angels HQ choice (other than another Ravenwing Command squad) mounted on a bike. Unlike, the standard Dark Angels Command Squad, which specifically excludes the Techmarine from the HQ that enables it, the Ravenwing Command Squad makes no such exception. Thus, I can have a command squad for my two mounted techmarines as well as for my bike mounted librarian and Sammael. Of course, four command squads are rather much but this techmarine Ravenwing Command Squad is an option I am considering for allies for a Space Marine force.
|
|
|
|
|
2013/10/20 14:23:30
Subject: Another Black Knight in the Second Ravenwing Command Squad
|
|
Focused Dark Angels Land Raider Pilot
|
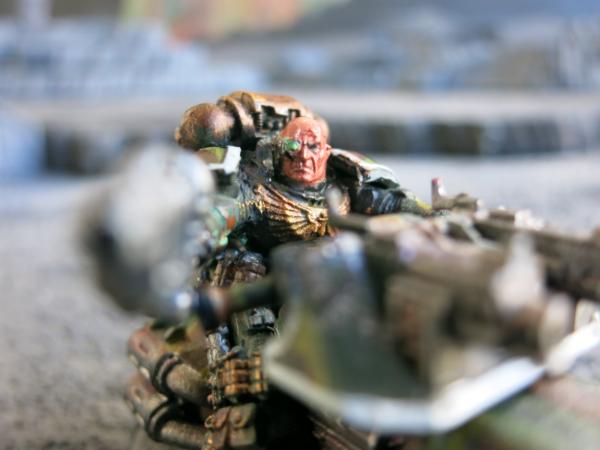
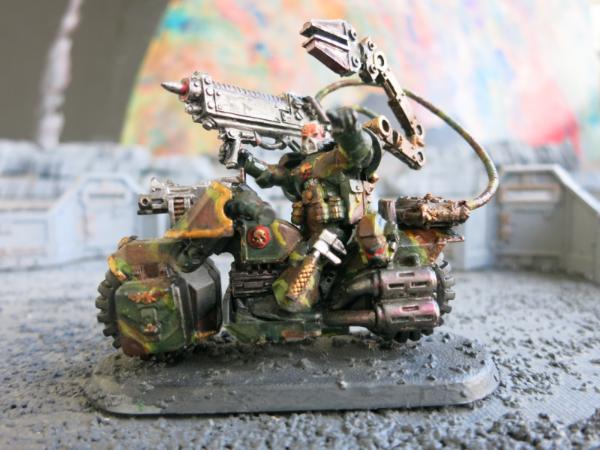
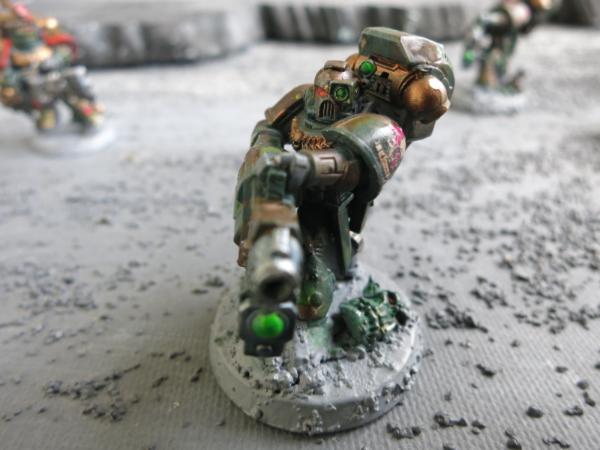
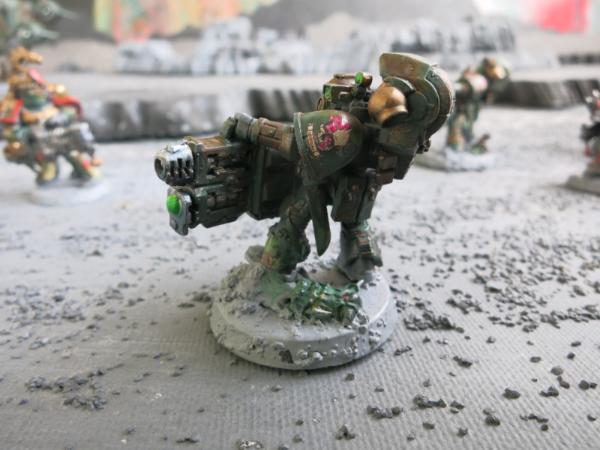
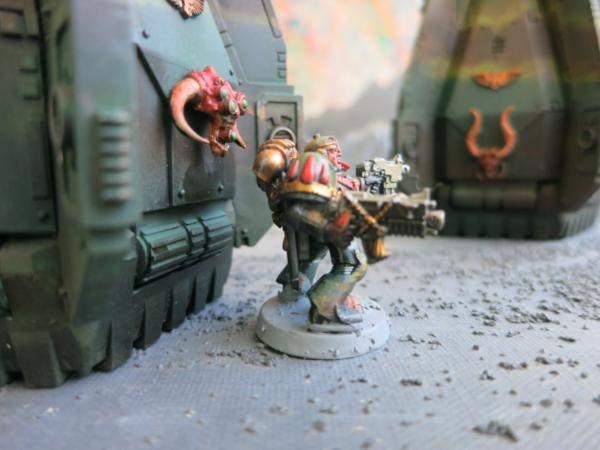
Another Black Knight in the Second Ravenwing Command Squad
In this Black Knight, I made two slight modifications over the other black knights. The first is that I added a melta bomb rack on the back of the bike. This is because it was the only rack bit I had left that would fit. Actually, the command squad is not authorized a melta bomb. I don’t like having a model that is not correct but I played it at NOVA with no problems since I didn’t use the melta bombs on this model. I like how it looks.
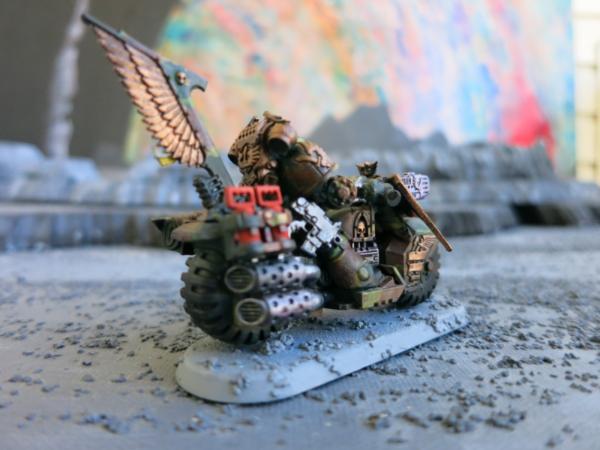 Black Knight with Melta Bomb Rack
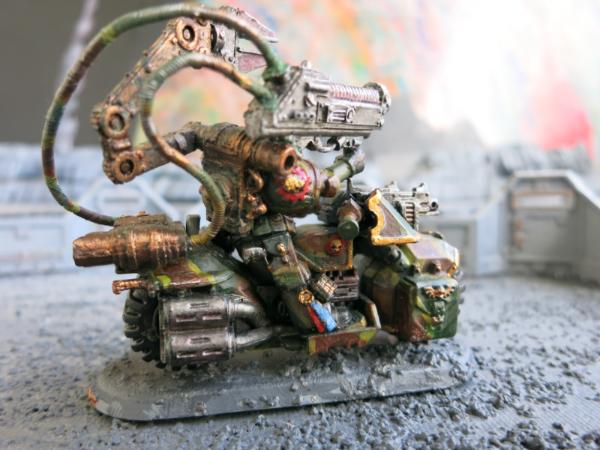
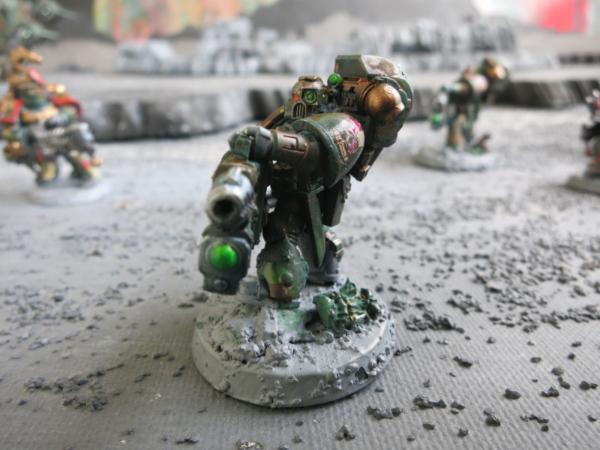
The second modification is that I gave it a bio-mechanical arm. I used paper clip wire and a spare part for the socket elbow. This was a fun modification.
 Black Knight with Bio-Mechanical Arm
 Black Knight - Another View
|
|
|
|
|
2013/10/26 01:53:16
Subject: Second Ravenwing Command Squad Apothecary
|
|
Focused Dark Angels Land Raider Pilot
|
This is the second command squad apothecary. He looks like the first command squad apothecary.
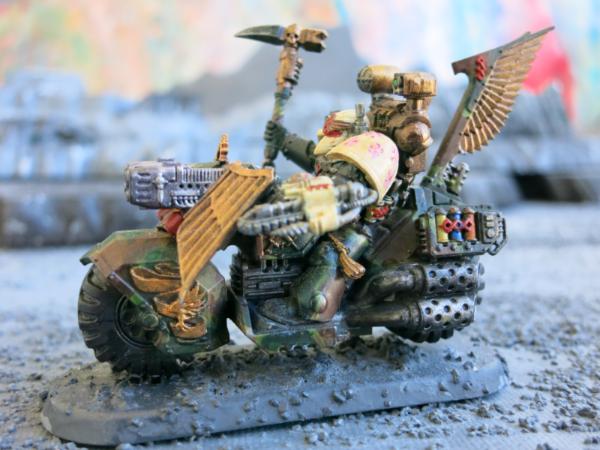 Second Command Squad Apothecary with Narthecium
As I did with all my biker apothecaries, I have the hand on the Narthecium bit on the handlebar of the bike so that the Narthecium is not randomly flopping around.
 Another View of the Apothecary
|
|
|
|
|
2013/10/27 13:43:15
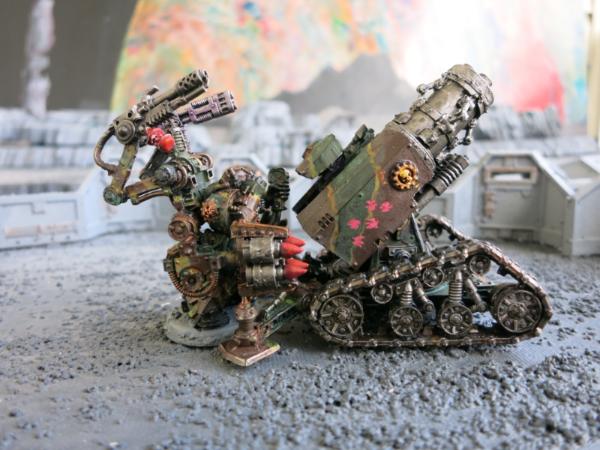
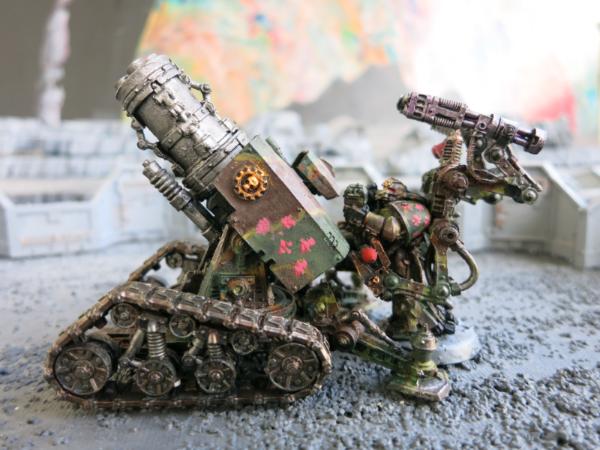
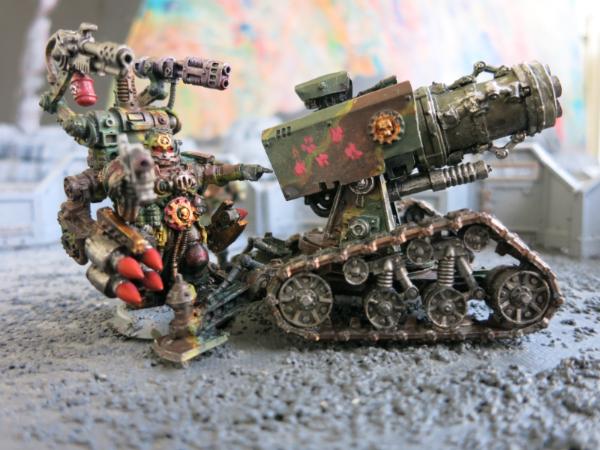
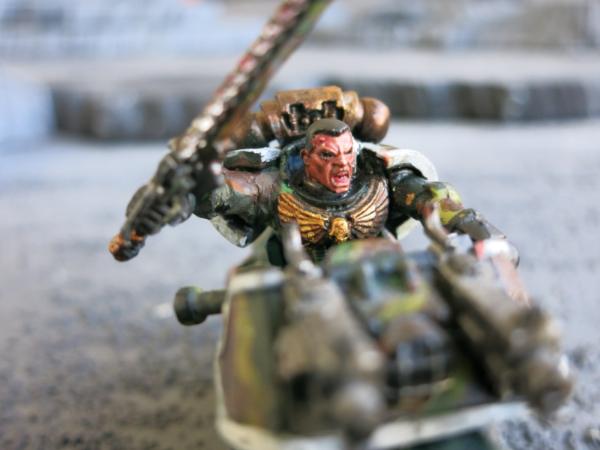
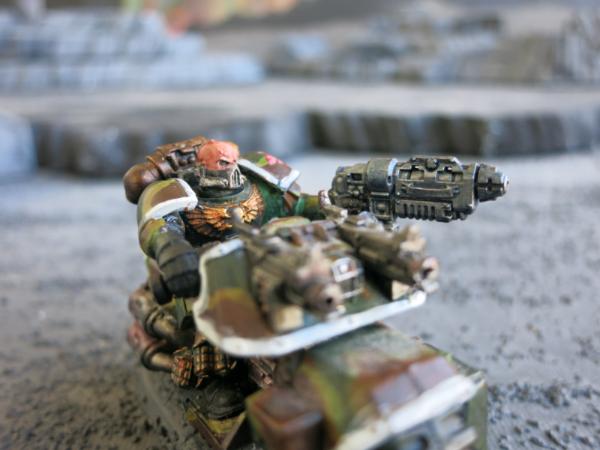
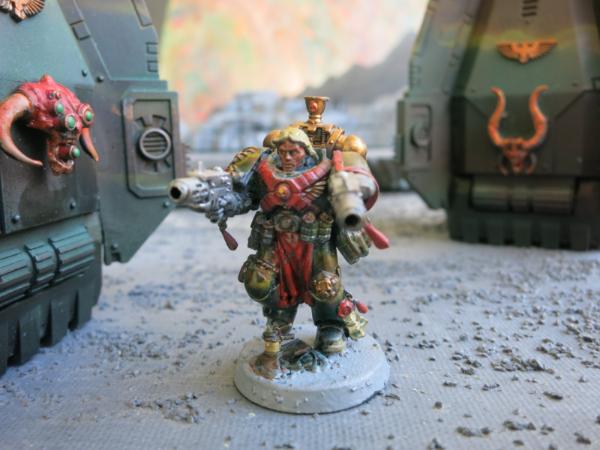
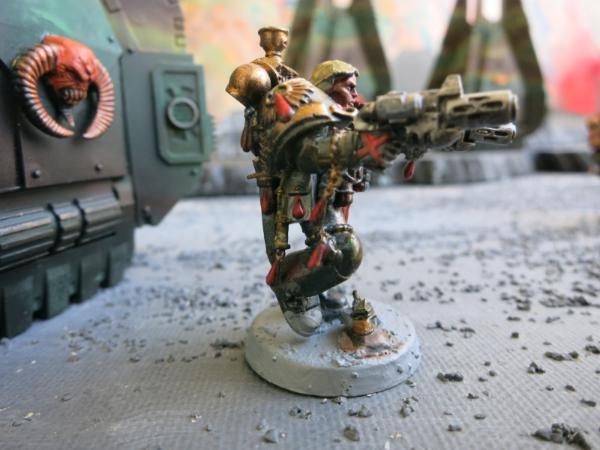
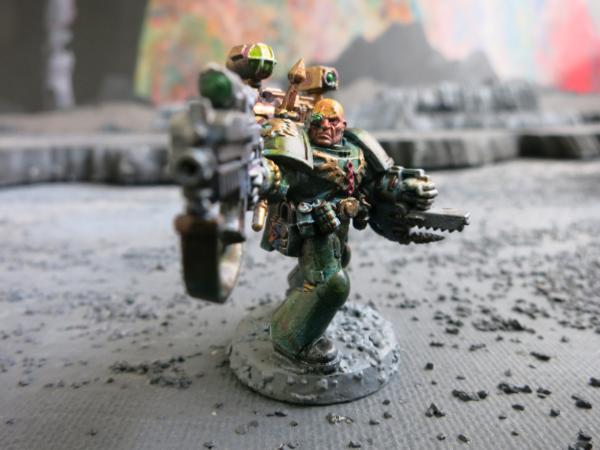
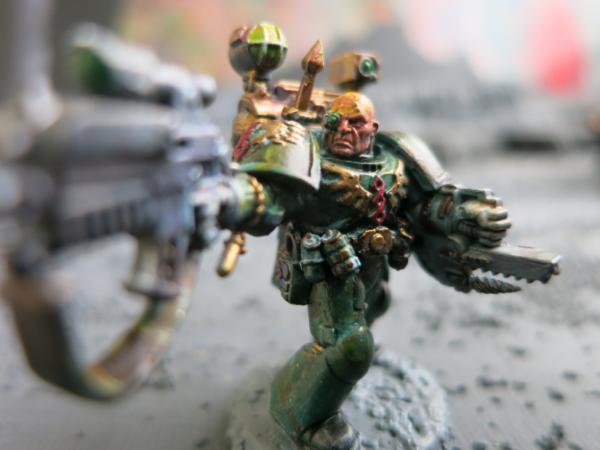
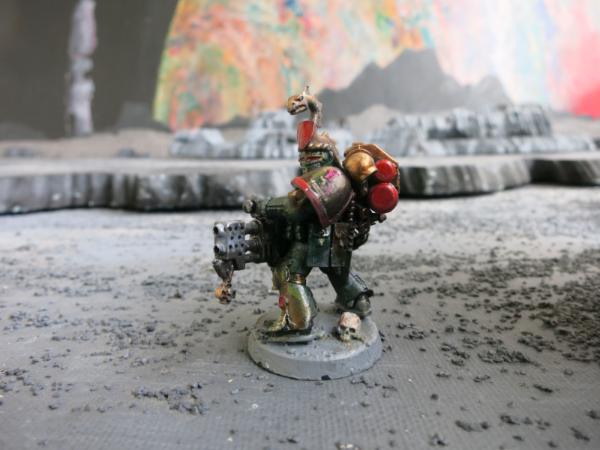
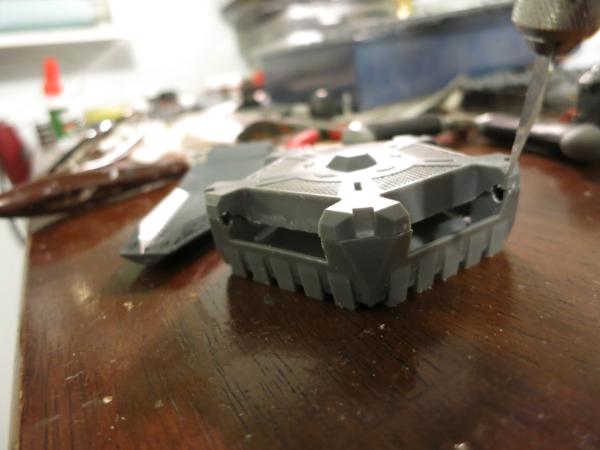
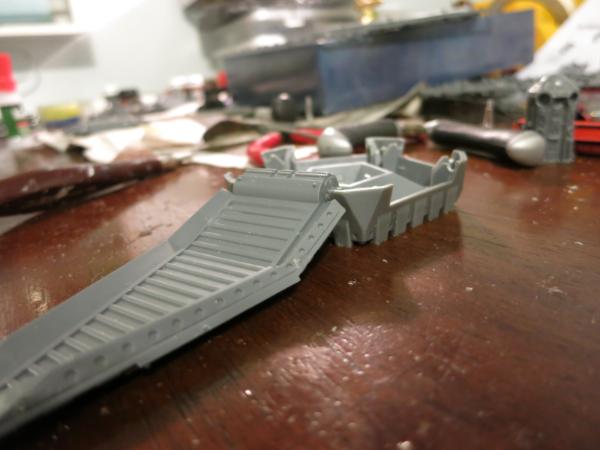
Subject: Second Ravenwing Command Squad Black Knight Grenadier
|
|
Focused Dark Angels Land Raider Pilot
|
|
|
|
|
|
2013/11/01 22:56:18
Subject: Never Use Plastic Cement on Your Models
|
|
Focused Dark Angels Land Raider Pilot
|
I never use plastic cement or glue on my models, whether those models are pure plastic or not. I only use super or instant glue. Plastic Glue melts the plastic so that it bonds plastic pieces together forming a bond as strong as the plastic pieces themselves. It also melts the plastic pieces that you don’t want to melt leaving finger prints and destroying details. Although plastic glue forms a stronger bond than the super glue, this is not an advantage even if you can avoid fingerprints and melted details. Rarely do my models break even if I am using superglue. If they do break, I want them to break cleanly so it is easy to re-glue the model anyway. Most of all, I want to be able to break the bonds so that I can modify and rebuild my models.
 Exhibit 1: Why I don’t Use Plastic Glue
Exhibit 1 shows eleven models that I have just rebuilt primarily to modify my bike army in response to the new Space Marine Codex. To rebuild these models, I tore off old arms, weapons, and heads and added replacement bits. In this picture, the replacement bits are still unpainted.
Ten of the models are bikers. One biker is a space marine commander who is being promoted from a captain to a chapter master and given the shield eternal. Four of the bikers are receiving the new gravguns. Two are biker sergeants who are getting combi-grav, two bikers are getting chainswords to replace their pistols since that is now allowed under the new Codex and chainswords look great, and one sergeant is getting a spare power maul left over from a Dark Angels spruce. Some are getting new heads to replace their helmets which now hang on the sides of their bikes. The lone infantry sergeant is getting a new combi-flamer.
Games Workshop recommends plastic glue for the plastic models and super glue for everything else. Why does it recommend plastic glue? The plastic glue forms permanent bonds that do not break for remodeling. Games Workshop does not want us to rebuild a model. Consider the 10 bike models in Exhibit 1 above. Each bike sells for $15 or three for $40. In addition, one of the rider’s is made from the space marine’s commanders set which now retails for $22.25. Thus, to duplicate these models I would have to spend over $150, not counting the bits I purchased from third parties. Although I am not one of these who hate Games Workshop for trying to make a profit, I still do not want to spend more than I have to.
I love rebuilding, however, not only for the money I save but because of the time I save. Although I enjoy building models, the building from scratch and painting does take time, and especially for the painting, can be rather tedious. Moreover, my favorite part of the building is modifying and personalizing each model. When I remodel, I work with the head, arms, and weapons of the model to give them each a new personality rather than going through the tedious assembly of the basic model, the bikes, legs, and torsos. After I rebuild a model, I only have to repaint a small portion rather than the whole thing. For example I took more time building and painting a single new Thunderfire Cannon model than I took rebuilding and repainting all of the 11 models above.
Is there any reason to use plastic glue? Am I missing something?
|
|
|
|
|
2013/11/07 01:29:12
Subject: The Backfield
|
|
Focused Dark Angels Land Raider Pilot
|
At NOVA I played an almost pure Ravenwing Biker. This allowed me to maximize the use of the Standard of Devastation to turn my biker bolters into relentless twin-linked salvo weapons to really increase my fire power. As a practical matter, although several times I was able to maneuver my biker army to administer a deadly salvo of bolter fire, it required me to bunch up and expose my bikers. My army lacked both the reliance to survive and the killing power I needed. Perhaps in the hands of better player, this army would have done better, but with my limited game time, I have not been able to master a pure bike army.
Thus, I am rebuilding my army to include more stationary but survivable shooting models to back up an objective grabbing more specialized bike army. My army will divide roughly into three groups, a highly maneuverable biker wing, a flyer wing, and long range stationary shooting group that I call my backfield. The mission of the backfield will be to hold objectives on my side of the board and to provide long range fire to immediately start killing enemy units.
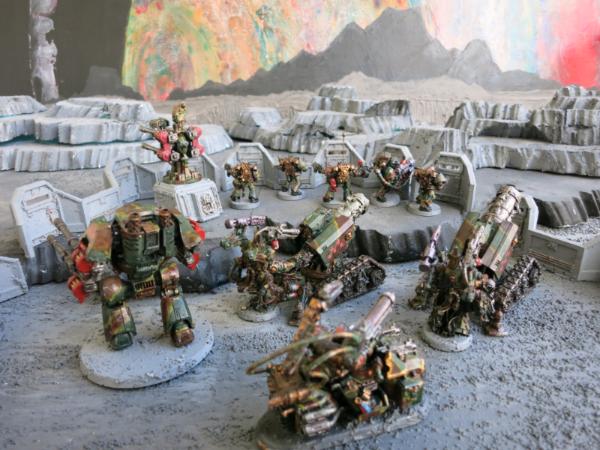 The Backfield
The backfield consists of 1) a aegis defense line and quad-gun, 2) a rifleman dreadnaught that I found pairs nicely with the quad-gun to administer an effective Alpha strike on any exposed units, 3) a five man tactical squad with a plasma cannon as a heavy weapon, 4) two thunderfire cannons with accompanying techmarines with servo harnesses, and 5) a bike mounted master of the forge with conversion beamer. I already had all the models except the thunderfire cannons and the techmarines although I did modify the tactical squad sergeant and the master of the forge.
|
|
|
|
|
2013/11/08 01:38:11
Subject: The Thunderfire Cannons
|
|
Focused Dark Angels Land Raider Pilot
|
Thunderfire Cannons are finecast models. I both love and hate finecast models. They are difficult to cut and drill, extremely brittle and likely to break especially while building them. They are covered with lead lines which are tedious to trim, and they are often warped. So there is a lot to hate about finecast models. On the other hand, finecast loves paint and paint loves finecast. Especially with dry brushing, I can pull out details on a finecast model that would blend in on plastic or metal models. I love the detail of finecast models.
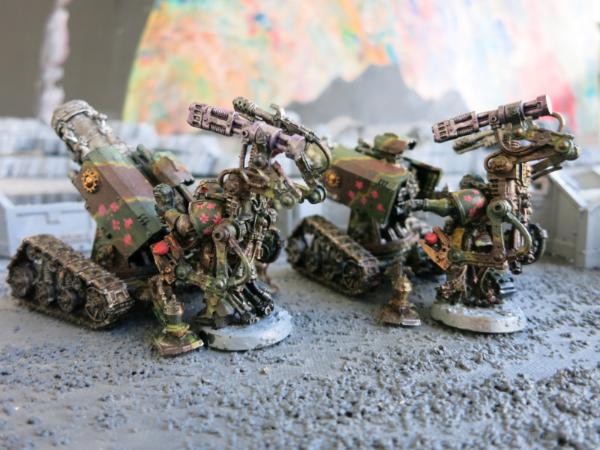 Two Thunderfire Cannons with Techmarines
The models are identical except that I used another techmarine model I had for one of the two gunners so each techmarine gunner has a slightly different pose. This makes them individuals. Still, the servo harness and the guns themselves are almost a complete match.
 The First Gun Right View
 The First Gun Left View
 The Second Gun Right View
 Both Gunners Rear View
This rear view shows how beautifully the finecast details are highlighted. Finecast models love paint and paint loves finecast models.
 Outpost on a Strange Planet
Oddly enough, this is one of my favorite pictures. It really looks like a lonely firebase on a distant moon.
|
|
|
|
|
2013/11/23 19:26:43
Subject: Painting Faces
|
|
Focused Dark Angels Land Raider Pilot
|
With the Dark Angels and the new Sternguard, Games Workshop has added a group of wonderful heads to its line. With bits from my old Space Marines and from my Blood Angels, I have enough variety of heads so that almost every model can have different looking head. Thus, almost all my bikers, except for the Dark Angels black knights have a bare head.
Painting a bare head is difficult. The eyes are especially difficult. I have done some figure and portrait painting with oils and still find it difficult. Generally, with oils, we hint at the eyes, painting and repainting until they are right. Unfortunately with small models, I can’t just keep repainting since the paint quickly gets too thick. I have a system for painting faces that I have experimented with but I must confess, it isn’t perfect and sometimes the heads turn out great and sometimes not.
I use the old Citadel paints mainly because each head takes so little paint that my paints haven’t run out so I don’t need the new paints. All my heads start with a black undercoat and are usually the last part of the model I paint. I start the face by painting the eye with astronomican grey. I choose grey because white is too bright. Even though eyes are supposed to be white, they are usually so shaded that the white is usually darkened to a grey. I am not too worried about the shape since I will use the flesh colors to shape the eye. I then, with a quill pen, dap in the iris so that the eye is facing in the direction of the weapon the model is shooting. This is the most critical step. If I place the iris right, the model will look great. If not, the model will be cross-eyed. If it is too thick, the eye is too dark. To thin and the eye is too light. I don’t know if I ever get it perfect.
Then I paint the flesh of the face, using a really fine point brush. My favorite brush now is a long handled 0 gauge Escoda Optimo Kolinsky which has a finer point that my 000 brushes which tend to flare out. I have learned that it is the quality of the brush that determines the point rather than the size. The first coat is tan flesh over the whole face and around the eyes. I often need two coats and have learned to wait for the first to dry before doing the second. Then I hit the high points with dwarf flesh on the face, the eyebrows, the cheekbones, the tip of the nose, and the tip of the ears, and the forehead or if bald the top of the head . I then put a slight highlight of elf flesh on the tip of the nose and maybe on a cheekbone or eyebrow or bare head. This mix from darker to lighter flesh gives the face a certain depth. I then finish up with a wash of ogryn flesh which actually appears like a purplish brown paint rather than flesh color but it is good wash. The dark purple collects in the creases, accenting the shadows with a slight blue shade while the highlighted areas go brownish red.
Below are my latest faces.
 Blue Biker with Chainsword
 Biker with Grav-Gun
 Second Biker with Grav-Gun – Side View
 Second Biker with Grav-Gun – Cross-eyed
 Tactical Sergeant with Combi-Flamer
 Third Biker with Grav-gun
 Third Biker with Grav-gun – Close up
 Biker Sergeant with Power Maul
 White Biker with Chainsword
 Fourth Biker with Grav-Gun
|
|
This message was edited 1 time. Last update was at 2013/11/25 13:57:52
|
|
|
|
|
2014/05/26 23:20:48
Subject: How to Make a Cable or Hose
|
|
Focused Dark Angels Land Raider Pilot
|
How to Make a Cable or Hose
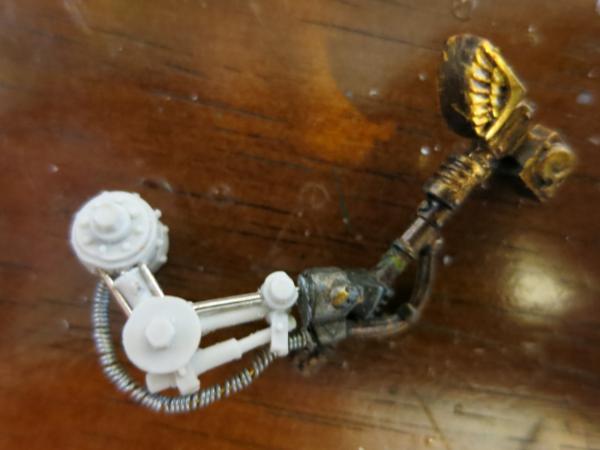
One effective way to customize a model is to add a cable or hose. These are easy to make and easy to install on any model. Moreover, these cables are flexible and can be maneuvered in three dimensions so that they can add a special interest to the model itself. Consider this Master of the Forge with a Conversion Beamer.
 Master of the Forge with Conversion Beamer
This model could have been an exhibit in recent Games Workshop vs ChapterHouse Studio lawsuit. The bike and the Master of the Forge was kit bashed from Warhammer 40K. The conversion beamer and the servo arm are from ChapterHouse Studio. We will focus, however, on the long cable from the back of the bike to the Conversion Beamer. Actually, there are two cables as seen in the next picture.
 Rear View of Master of the Forge with Two Cables
This picture shows two cables linking a power source on the back of the bike to the conversion beamer. The cable itself is fairly easy to make. You will need two types of wire. The first is a short length of wire to form the core of the cable. It needs to be a length that will reach from your source to the outlet. Thus, on the Master of the Forge above, the longest wire is about 3 inches (8cm), the shortest is about 2 inches (5cm), although I actually eyeball the length rather than measure it. Moreover, I will start with a long length of wire, place one end into the source and cut to fit the gap I need. I usually make the second cut at the end after I have made and fitted the cable. I find copper wire is the best for the core wire since it is reasonably stiff while being reasonably flexible but I have used a straightened out paper clip to form the core wire.
The second wire is floral wire which is readily available in crafts stores, especially crafts stores like Michaels that cater to arts and crafts for women. It is also available on the internet. Floral wire is extremely flexible. I use 30 gauge floral wire. Remember, the higher the gauge the thinner the wire.
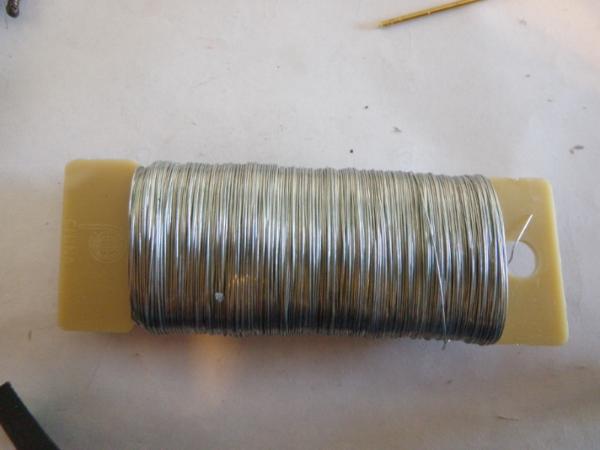 30 Gauge Floral Wire (Picture Suitable for framing)
Wrap the floral wire around the core as shown in the picture below; the tighter the wrapping, the better. Leave about an eighth to quarter inch (0.5cm) of the core wire exposed. This extra wire will be useful for attaching the cable to the model. Keep wrapping until the cable is the desired length. From time to time, push the curves of the floral wire tight to fill the gaps.
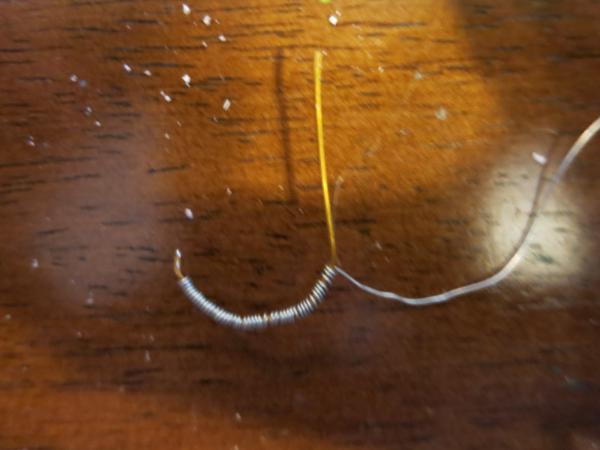 Floral Wire Wrapped Around a Copper Wire Core
Note in the picture I have a few gaps but the fewer the gaps the better. Pull the floral wire tight to avoid gaps. When finished, leave about an eighth to a quarter of an inch (0.5 cm) of the core wire exposed on both ends. These ends will be used to attach the cable to the model.
 Servo Arm with Thunderhammer
Drill a hole in the parts that you want to attach the cable to. Insert each end of the cable into one of the holes. Remember that I told you to leave a little of the core wire exposed at each end. They should fit right into the hole. Attach with super glue. The floral wire will not unravel so don’t worry about it. Once it is painted, small gaps and imperfections should disappear.
Remember, if your army looks just like everyone else’s, you might as well play checkers.
|
|
|
|
|
2014/09/18 19:34:57
Subject: Stormraven Gunship
|
|
Focused Dark Angels Land Raider Pilot
|
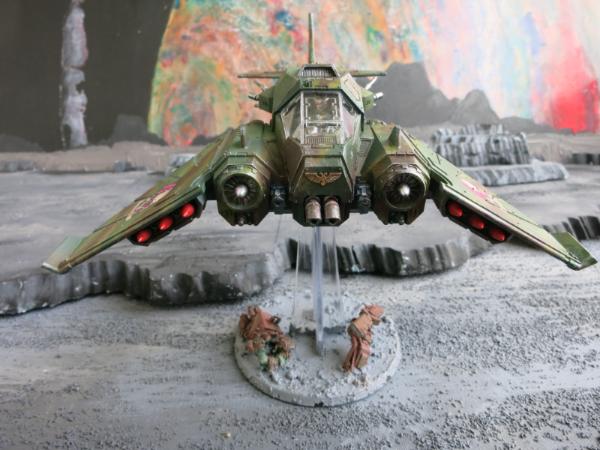
The basic rule for Warhammer 40K flyers, the uglier the model, the more effective it is in a game. If this is true, a Stormraven gunship must be the best aircraft in 40K because it is certainly the ugliest. Some models like the Stormtalon are ugly on the picture on the box but look much better when built. That is not true for the Stormraven. A Stormraven is all ugly all the time.
 Stormraven’s Ugly Front
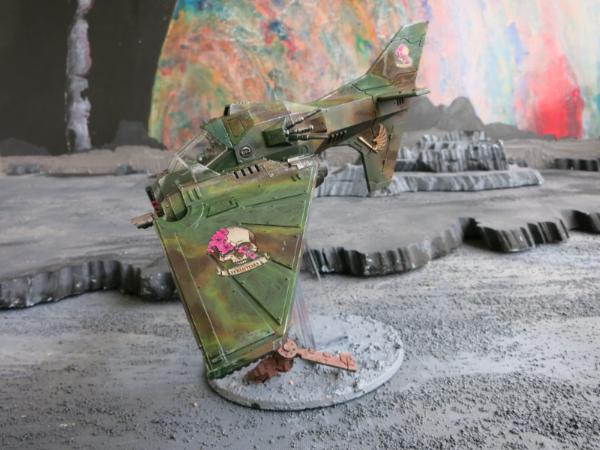
 Stormraven’s Ugly Side
 Stormraven’s Ugly Rear
I have not used my Stormraven in a game but I will in the next few weeks. I used Stormtalons at the NOVA Open GT but wished I had the multi--melta, the 4 Bloodstrike missiles, and 4 hull points of the Stormraven. I will be experimenting with the Stormraven in my next games but it is still big and ugly.
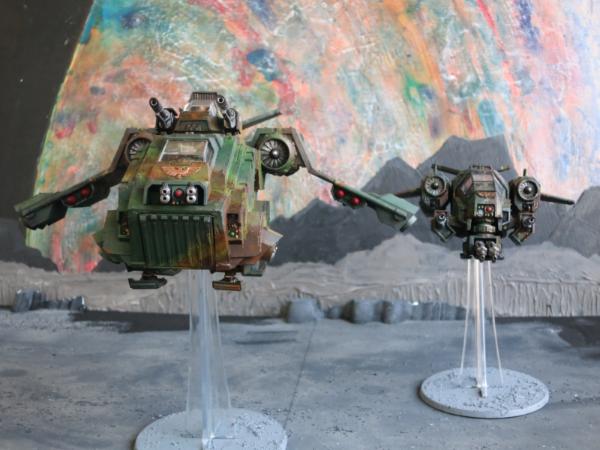 Stormraven and Stormtalon
I pretty much airbrushed this model except for the details. I like airbrushing my big models since it is so much faster and I think the camouflage paint job looks as good or better on a big model than hand brushing. I still think this model is big and ugly.
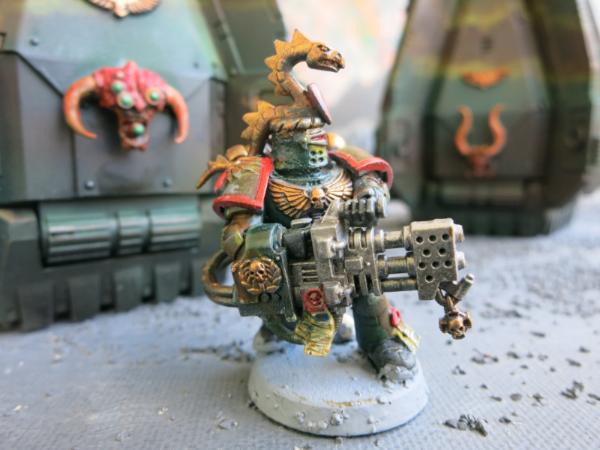
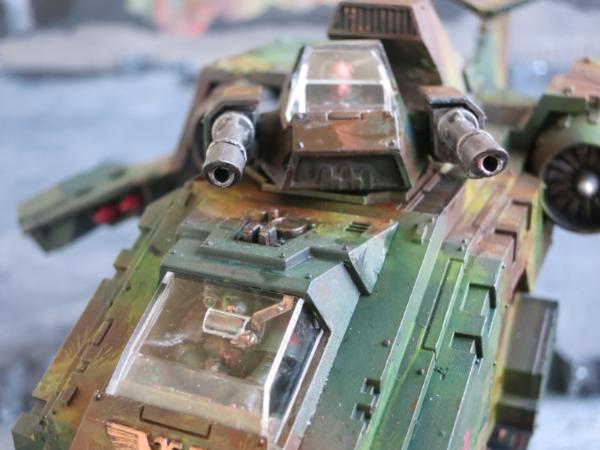 Stormraven Pilot and Servitor Turret Gunner
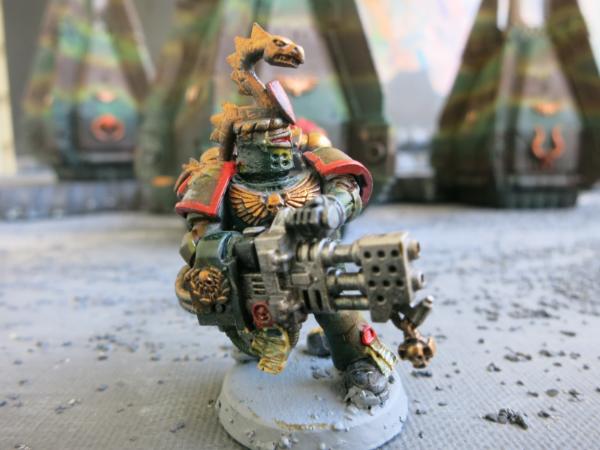
 Close-Up of Servitor Turret Gunner
 Twin-Linked Melta, twin-linked lascannon and Four Bloodstrike missiles
Did I mention that I think the model is ugly?
|
|
This message was edited 1 time. Last update was at 2015/10/02 18:59:51
|
|
|
|
|
2015/10/02 19:30:18
Subject: Re:6th Biker Troop - “Schrödinger's Apocalyptic Raiders”
|
|
Focused Dark Angels Land Raider Pilot
|
It has been over a year since I last posted anything. It isn’t that I stopped making models. In fact, I have been building and painting models the whole last year.
I have revamped the way I make models based on what I learned during a class at the NOVA Open 2014. The instructor was Caleb Wissenback. He recommended spraying on a black and white base coat with the black sprayed on the underside and the white sprayed from the top front so that the white would highlight the light areas and the black the shadowed areas. He gave me a model that he had spray painted that way.
 Caleb Wissenback Model with Black and White Base Coat
The idea is that in painting, I will paint with dark colors in the shadows and light colors in the light areas. I have tried it and it really helped my painting. Below is a flag bearer where I have laid two different base coats, a black and white base coat, using an airbrush.
Notice that it doesn’t look like a white and black base coat. Instead, our eyes see a white model with shadow. This is an illusion. If you handled this model you would quickly see that the dark areas are dark because it is painted black and the light areas are light because it is painted white.
 Dark Angel Command Flag Bearer
Note how the two tone base paint brings out the highlights.
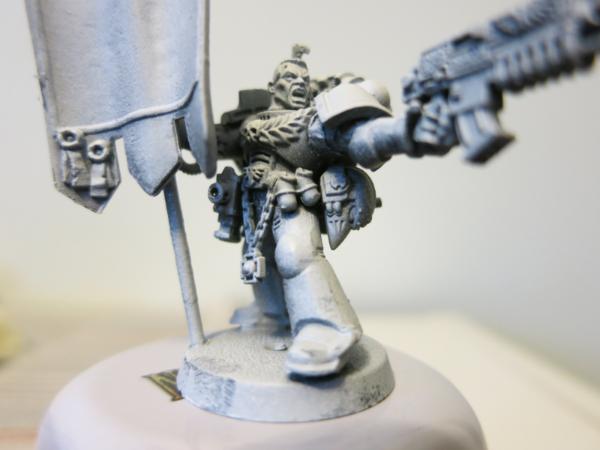 Flag Bearer Close-up
 Flag Bearer – Rear View
The picture below is of the flag bearer before I applied the base coat.
 Unpainted Dark Angel Command Squad Flag Bearer
Notice I replaced the pole of the flag with a brass wire so it isn’t so easily broken.
I will share pictures of painted models in the next few days.
|
|
This message was edited 1 time. Last update was at 2015/10/02 22:49:43
|
|
|
|
|
2015/10/16 16:21:23
Subject: Re:6th Biker Troop - “Schrödinger's Apocalyptic Raiders”
|
|
Focused Dark Angels Land Raider Pilot
|
A few days ago, I posted a new technique that I learned last year where I air brushed a black base coat in the shadowed areas and then air brushed a white base coat for the upper areas of a model. Notice how doing so creates shadows.
 Black and White Base Coat on a Model
Notice that it doesn’t look like a white and black base coat. Instead, our eyes see a grey model that looks naturally lite. This is an illusion. If you handled these models you would quickly see, however, that the dark areas are dark because they are painted black and the light areas are painted white.
I then painted the model using the light and dark patterns as a guide. In the light areas, I painted the model normally. In the black areas, I added color only if I perceived that it had no white in the paint. Thus, for the camouflage, in the white areas, I used the following old GW colors: Orkshade green, kerri brown, catachen green, scorched brown, bestial brown, cammo green, thraka green wash, and gryphonne sepia wash. Actually, that is the original color scheme. Since then I have replaced most of these with the equivalent Vallejo or P3 paints. In the dark area, I used Orkshade green, scorched brown, and the washes. The dark areas have a much simpler palette than the light areas. The result was fascinating. The camouflage pattern was much more subtle and pleasant but it still appeared to cover the whole model but the model had more depth. In other words, the model looked as camouflaged as my prior models, but looked better. Moreover, they were easier to paint but more striking the in the lighted areas.
 Same Model Painted
Notice that although this is the same model, I made several minor changes including the antenna and the knife.
This technique, although improved over the old models, had a minor problem in the white areas. If there is a cease or hole in the white area of the model, that area reminds white and thus is a highlight rather than a shadow. Thus, a place like the neck or the inside of the mouth, which should be in shadow, tended to be too bright. In my later models, I changed the white base to a grey base coat. That retained the pleasant three dimensional look with an easier paint job, yet did not leave undesired highlights in shadowed areas.
The drop pods in the background are painted with the grey and black base coat. The lower part of the drop pods, which look shaded, are actually darker and have fewer details that the upper part of the drop pods.
|
|
|
|
|
2015/10/21 18:50:32
Subject: Building a Cheap and Effective Display Board
|
|
Focused Dark Angels Land Raider Pilot
|
Building a Cheap and Effective Display Board
One of the most useful and fun gimmicks for a tournament such as the NOVA Open is a custom display board for your army. Such a display board serves three functions. 1. It makes it easier to transport your army, especially from table to table in the gaming area. 2. It show cases your army. 3. When the display is custom made for your army, it makes it easier to keep track of your army pieces, a very real consideration in the fast paced environment at NOVA. The Display Board should be:
CHEAP The display board should be both quick to make and inexpensive. If the display board is customized for a specific army which specific pieces, which makes it the most useful, it will really only be used during a single tournament. With constantly changing rules and codices, as well as the local rules and point limits for each separate tournament, the composition of your army will change over time and your display board will quickly become obsolete.
PORTABLE Although the display board needs to be portable so as to be carried from table to table at the tournament, the main limit for size and shape will depend on transportation to the tournament. For some gamers, this will mean that the display board will have to fit in a suitcase. At NOVA, it is possible to take a class on building a display and to build a display during the class just before a tournament. I have done so but found that I was not able to complete my display board in the time allocated.
ATTRACTIVE and FUNCTIONAL Of course the display board should be attractive and functional
I build my display board from 1” foam insulation board such as INSULPINK® or the Blue Styrofoam® which is easily found at places like Lowes and Home Depot. One sheet is enough for one or two displays. Build the display as follows:
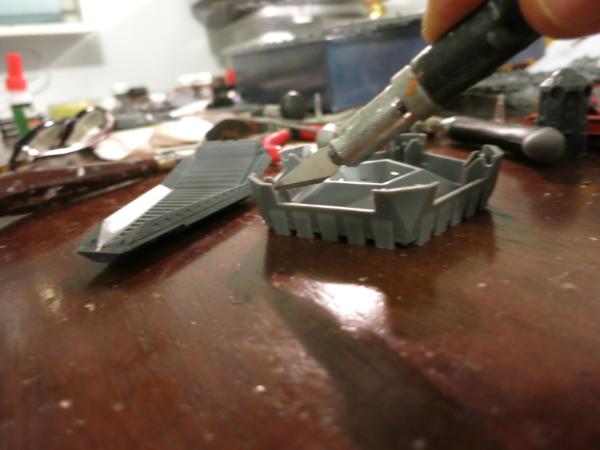
STEP 1: Cut out a base from the insulation board. It should be big enough to hold your army but small enough to be transported to the tournament. My display was 18” by 24”. Two methods can be used to cut the display board. Jawaballs uses an X-ACTO or other sharp knife to cut it. See http://the-jawaballs-way.myshopify.com. Others use a hot wire foam cutter. I have tried both and both work. I prefer the hot foam cutter.
 Fancy Hot Foam Cutter
STEP 2: Arrange your army in an attractive formation on the base both to make sure that your army will fit and to find an arrangement of the army that you will like. There are two ways to arrange the army. The first is generally symmetrical. This will give the army the appearance of being on a parade ground and may be best for an army such as the Imperil Guard infantry which has a lot of pieces. I like the second which is more asymmetrical. I arrange my pieces to tell a simple story or a quick snapshot of the action. My simple story could be labeled, “Victor Staghorn leads his bikers out of Firebase 17.”
STEP 3: Remove the army from the base and cut out additional smaller sheets of insulation board to place on top of the base to form high places or hills. I like to cut out the smaller sheets in irregular patterns to look like rock or naturally contoured hills but the sheets could be cut out straight to simulate buildings, a leveled training area, or landing field. Place the hills on the board and army pieces on the display to make sure that there is still sufficient room for all the models. Of course, models can be placed on the hills or high places. When satisfied, glue down the smaller sheets on the base6+ with white glue such as Elmer’s Glue-All or a wood glue. Be generous with the glue. Use books or other reasonably heavy objects to hold down the high places until the glue dries. Don’t use contact cement or other glues that may cause the insulation board to melt.
 Unfinished Display Board – Front View
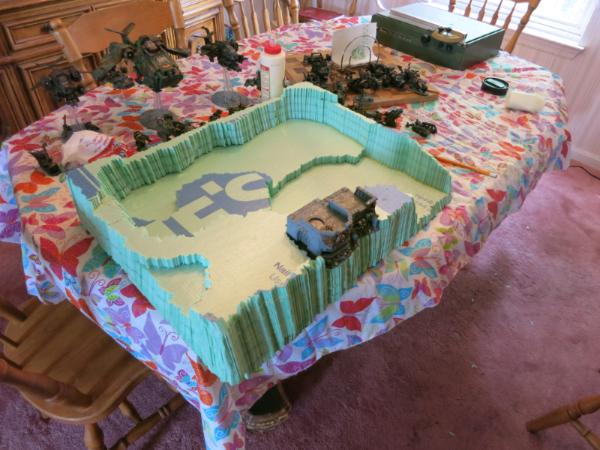 Unfinished Display Board- Top Side View
STEP 4: Place the army back on the display board in the arrangement you desire. Take a pencil or other marker and draw an outline around the base of each model on the surface of the display board. For models that do not have bases, such as a tank or a cannon, outline the tread or tires that will touch the board. For an object such as the Aegis Defense line pieces, simply outline the silhouette of that portion of the model that touches the display board. Remove the models.
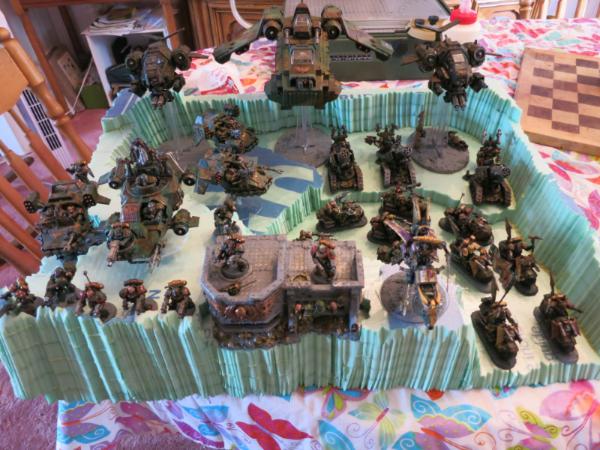 Army Arranged on the Display Board – Top View
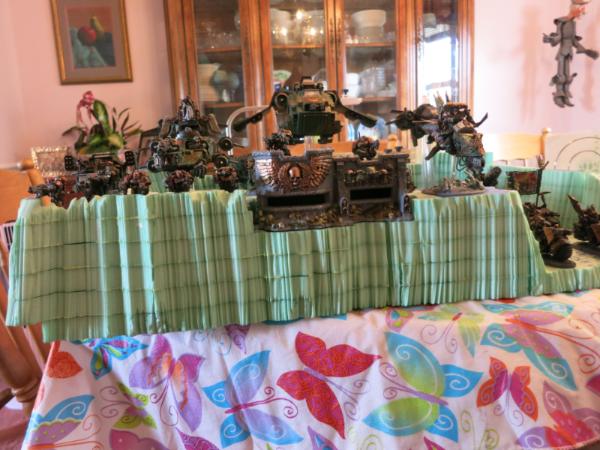 Army Arranged on the Display Board – Front View
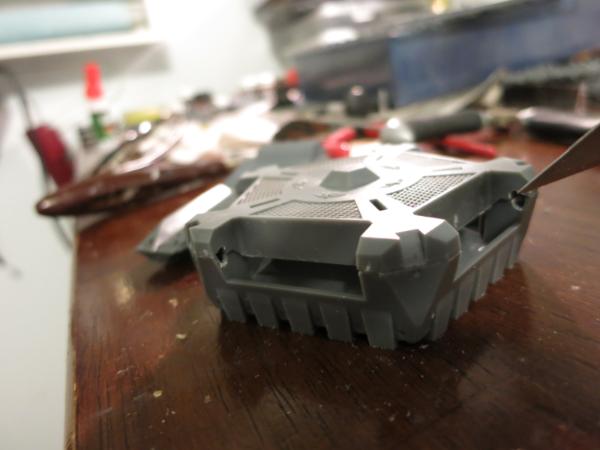
STEP 5: Using a grinder on a hobby rotary tool such as a Dremel® to cut out an indentation in the surface of the display board where the base of the model has been outlined. Once the indentation has been made, test it by placing the model back in the cut out hole to see if it is properly sized. This indentation will do two things. The first it will help hold the model so that it does not easily slide off the surface of the display. Second, it will form a obvious hole if the model is missing. This will make it easy to see if you are missing any models when packing up after a game. It is surprisingly easy to lose a model after an exhausting round or two of gaming, especially if you have been up too late the night before taking classes or partying.
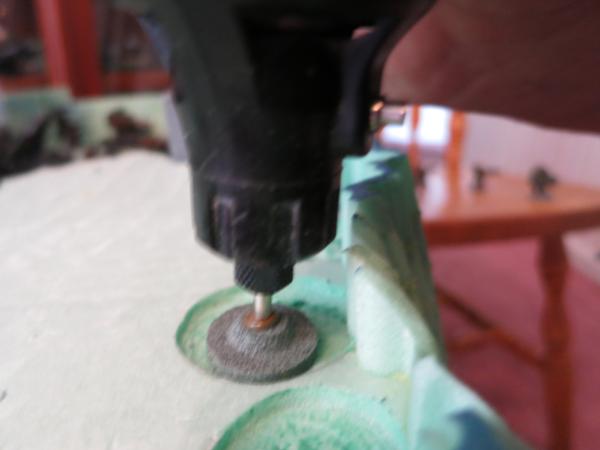 Grinding out an Indentation
STEP 6: Paint the surface of the Display board with Gesso. I actually add a little black Gesso to white Gesso to produce gray and then I mix in a little model railroading ballast to give my surface texture. I painted the insides of the indentations black so that any missing models would be readily noticeable. The Gesso protects the surface. Note that some spray primers and paints will actually cause the insulation board to melt.
STEP 7: After the Gesso has dried, place the models and make sure that they fit the indentations. Use a knife or the rotary tool to fix any problem areas and touch up with the Gesso.
These are the basic steps to create a display board. Of course, you can further paint it and experiment with techniques to make the terrain more realistic. For example, I often double cut the edges, the first cut generally parallel to the surface of the insulation board to form the contours of the raised areas, and a second cut at about a 45% angle to the first cut to give it a second contour. At the last NOVA, I took a lighting display class and cut fissions into the display and filled them with hot glue and red LEDs to create cracked lava effects but that was an experiment on my cheap foam display board. Cheap displays boards lend themselves to such fun experiments, experiments that you may be reluctant to perform on expensive models or more intricate terrain features.
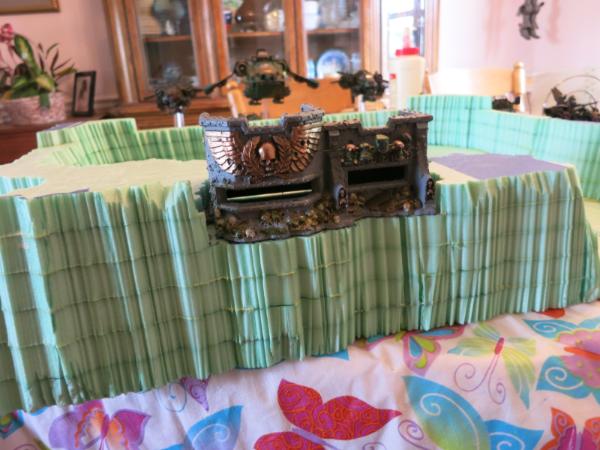
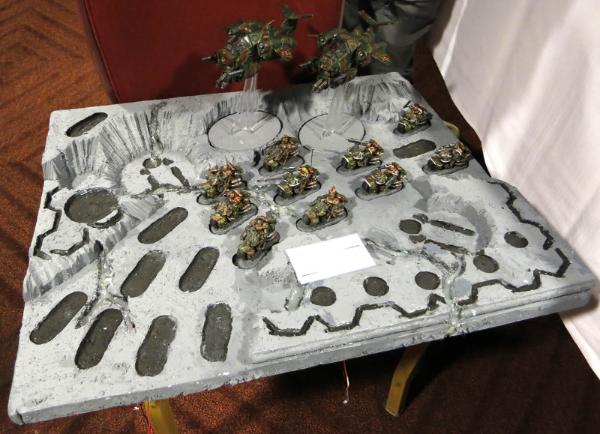 Display Board – Nova Open 2014
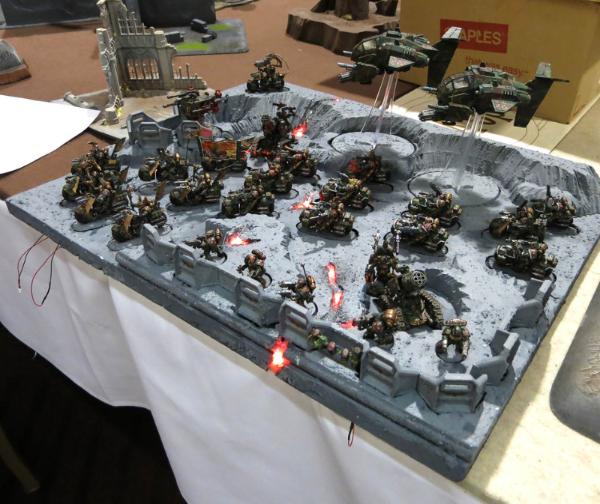 Display Board with LED lighting – Nova Open 2014
|
|
|
|
|
2015/10/21 19:04:25
Subject: Re:6th Biker Troop - “Schrödinger's Apocalyptic Raiders”
|
|
Land Raider Pilot on Cruise Control
|
Super cool!! Thanks for sharing. That LED board looks great.
|
|
|
|
|
2015/10/22 20:07:15
Subject: Melta Assault Squad
|
|
Focused Dark Angels Land Raider Pilot
|
Melta Assault Squad
Thanks for the kind remark, Spacewolverine.
As mentioned in a prior post, I am experimenting with a two colored base coat. I tried a black and white base coat but the white base coat was a problem since the exposed white in hard to reach ceases would create a highlight where a shadow should be. Thus, I am now using an black base coat which I spray up on the model for shadow, and a gray base coat that I spray from the top front to create a lighted area. If I miss a indented area on the lighted area, such as the inside of the mouth or the neck, these parts are neutral gray rather than highlighted white and thus the shading is better. Below is an melta assault squad for a blood angels successor unit.
 Melta Assault Squad Gunners
The Gunslinger sergeant has two inferno pistols. His head is one from the Bretonnian knights errant. I love these particular heads and will often order them from bit supplier.
.
 Melta Assault Squad Gunners – Close-up.
The two melta gunners are painted with only a black undercoat, while the gunslinger sergeant is painted with the black and gray undercoat. Can you tell the difference? Actually, it is pretty subtle in the pictures. Still, there is a crispness to the gunslinger sergeant that the other two models lack.
|
|
|
|
|
2015/10/23 15:50:23
Subject: The Gunslinger
|
|
Focused Dark Angels Land Raider Pilot
|
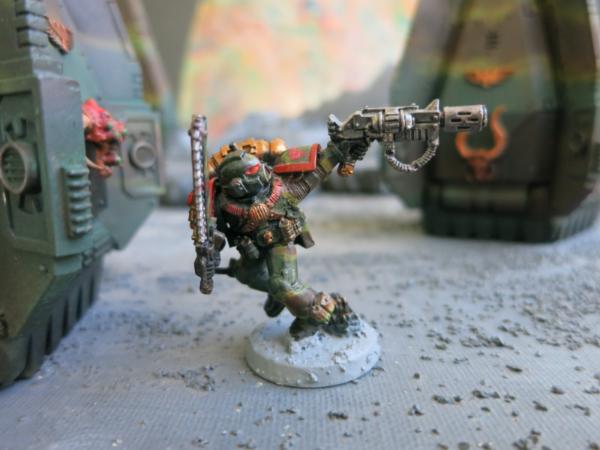
The Gunslinger
 Gunslinger with Two Inferno Pistols
This model is one of my favorites. The blood drop on the left (our right) broke off and I had to mold it out of green stuff. I glued in a thin wire into the pistol and used green stuff to broaden it out. These blood drops are so breakable.
 Gunslinger with Two Inferno Pistols
The trophy heads on the drop pods are bits I bought from eBay. I tend to order spare bits of heads when I need to order any Warhammer bits so I have a collection of fun heads.
 Gunslinger with Two Inferno Pistols – Side View
|
|
This message was edited 1 time. Last update was at 2015/10/26 17:41:33
|
|
|
|
|
2015/10/25 13:51:18
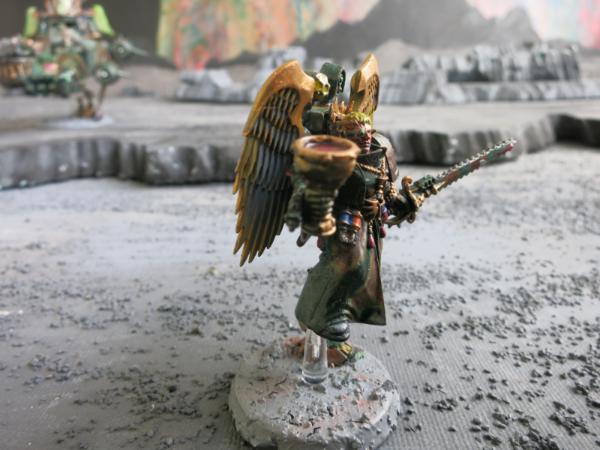
Subject: Watch and pray, for even the very elect have fallen - The Ravenwing Darkshoud
|
|
Focused Dark Angels Land Raider Pilot
|
Watch and pray, for even the very elect have fallen - The Ravenwing Darkshoud
 Ravenwing Darkshroud
Note the sword in the hand of the robed icon on the top of the altar. If you have the latest Dark Angels Codex, look at the Ravenwing Darkshroud entry on page 127. The sword is broken!!!! Are the artists who put together the photographs in the Codex aware of that flaw? I suspect so. There is the only one picture of the Darkshroud in the Codex although its inferior twin, the Land Speeder Vengeance, is shown 6 times. Yes, even the very elect, the artists and sculptures of Games Workshop, have fallen.
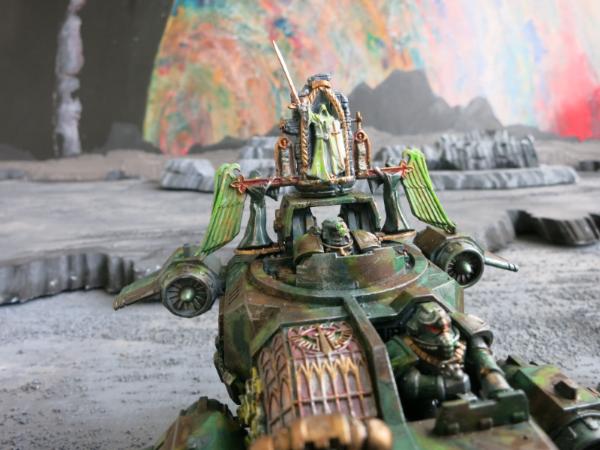 The Altar of the Ravenwing Darkshroud
The blade of the original plastic sword is extremely thin and brittle, easily broken. Mine broke almost immediately and I replaced it with a blade that I pounded and filed out of a brass wire. There are a couple of other techniques I used in painting this model. The model has a black and gray base coat with the black in the shadows and the gray on the well-lighted areas to give the model depth. Most of the gold trim is actually covered with a liquid gold acrylic over a gold painted base. The icon and other highlights are washed with fluorescent paints to make them pop.
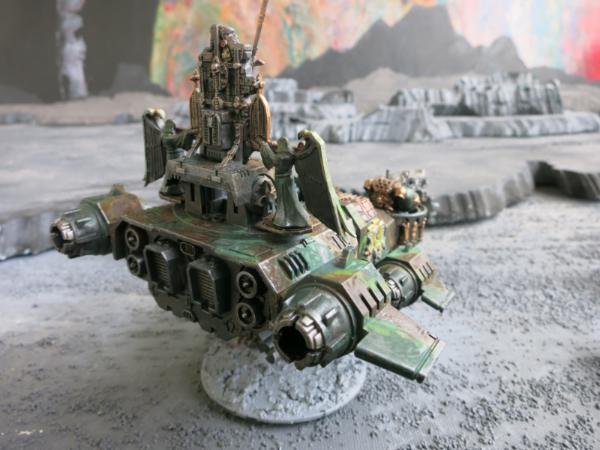 Rear of the Ravenwing Darkshroud
The rear view and the side view show the shadowed regions of the model that were base coated in black and then painted with a limited palette. Even with the limited palette, these dark regions give the impression of color and even the camouflage patterns in the dark areas seem complex although they are painted with fewer colors and thus lack the color variation of the brighter areas.
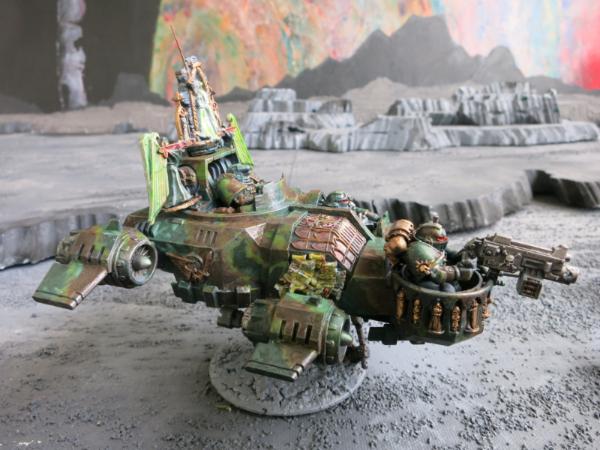 Side of the Ravenwing Darkshroud
As shown by the side views, it is difficult to determine whether the shadows are natural or painted. They are both. In the rear view, the back shadow is painted, although there is a little natural shadow.
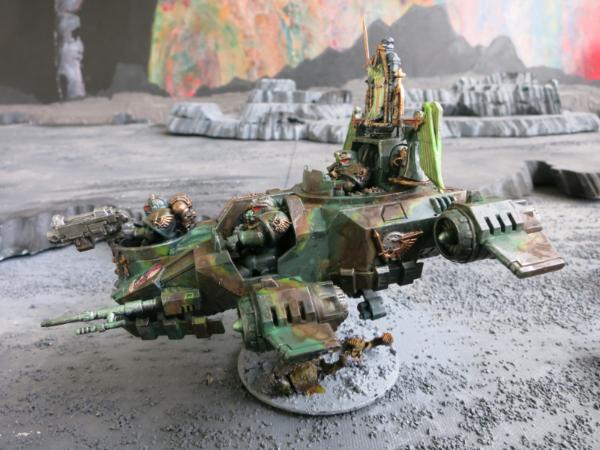 The Ravenwing Darkshroud
This was a fun model to paint.
And remember, watch and pray, for even the very elect have fallen.
|
|
This message was edited 2 times. Last update was at 2015/10/26 17:39:51
|
|
|
|
|
2015/10/26 15:00:31
Subject: Grav-Cannon and Grav-Amp
|
|
Focused Dark Angels Land Raider Pilot
|
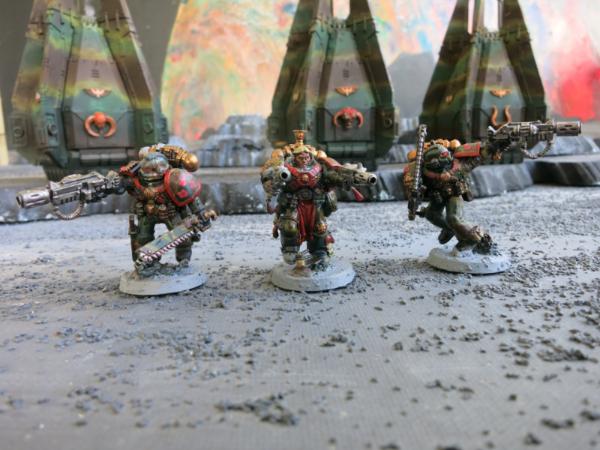
These two space marines are just good solid models, not my favorites but they do the job. The new technique I used on both was to base coat both with a black in the lower shadows and a gray in the lighted areas to give the models depth.
 Two Grav-Cannon Gunners
I also used a fluorescent paint on the green lenses and on the red eye glass lenses which really gives them a shine.
 Two Grav-Cannon Gunners – Front View
Note the shoulder pads. Fallouthobbies custom made the decal which I used. I will write more about this in the next few entries.
 Single Grav-Cannon Gunner
I used a pigment on the Ork head.
 Single Grav-Cannon Gunner
I put a little fluorescent magenta on the upper part of the decal and slightly shaded the lower part with a black wash.
 Single Grav-Cannon Gunner with Shoulder Decal.
 Single Grav-Cannon Gunner - Front View
|
|
|
|
|
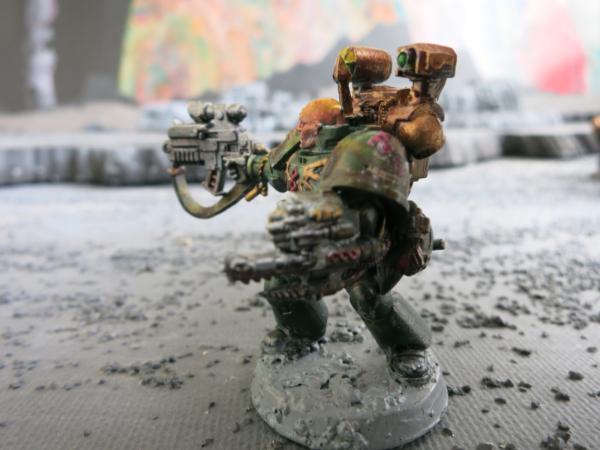
2015/10/27 12:12:56
Subject: Melta Gunners
|
|
Focused Dark Angels Land Raider Pilot
|
Melta Gunners
These melta gunners are remounted jump marines that originally had jump packs.
 First Melta Gunner
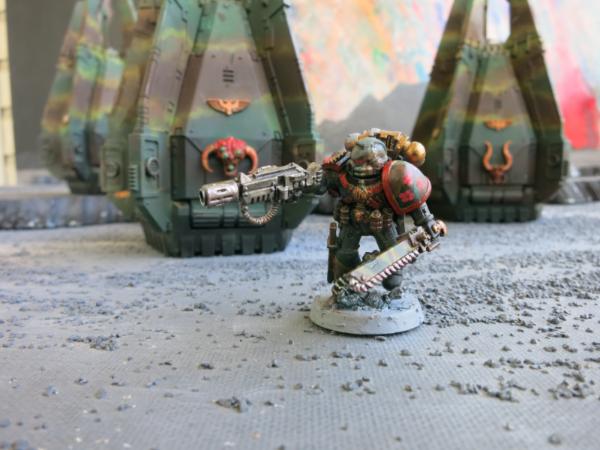 Second Melta Gunner
|
|
|
|
|
2015/10/28 12:58:24
Subject: ]Dark Angel Command Squad Apothecary
|
|
Focused Dark Angels Land Raider Pilot
|
Dark Angel Command Squad Apothecary
Dark Angel Command Squad Apothecary
Apothecary with Narthecium
Apothecary – Rear View
This Apothecary painted up really nice.
The Apothecary - Front View
I used a touch of fluorescent green paint on the green lenses and fluorescent yellow on the lens of the spotlight. On the spotlight, I washed the yellow over a base of gray and white.
The Apothecary - Side View
Raffa Picca of Massive Voodoo taught a class at NovaOpen 2015 on painting faces. One technique he suggested was tinting the face with three colors, the upper face, the forehead and scalp if bald, with yellow, the middle face around the eyes, ears, and nose, with red, and the lower face, the beard, with blue. I actually used fluorescent paints which are fairly thin and act more like a wash on the face. On this model, this technique was fairly effective. Of course, this is a really nice model and one of my favorites.
The Dark Angel Apothecary Close Up
The yellow highlights his scalp. The reds seem to bring out his nose, cheeks, and ears. The blue suggests a five o’clock shadow of his beard.
The Apothecary – Rear View
|
|
This message was edited 1 time. Last update was at 2015/10/28 13:31:50
|
|
|
|
|
2015/10/29 22:59:55
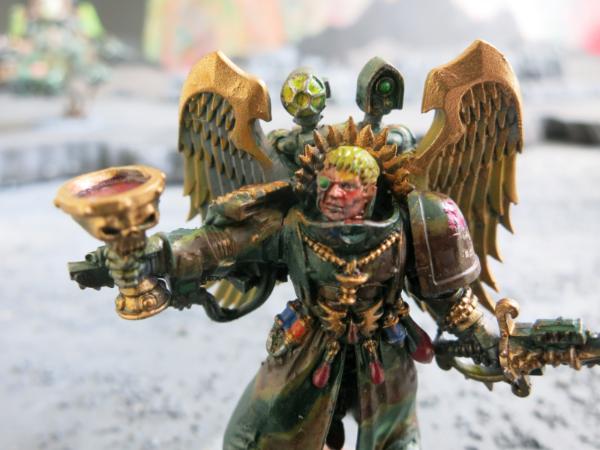
Subject: The Sanguinary Priest with The Angel’s Wing
|
|
Focused Dark Angels Land Raider Pilot
|
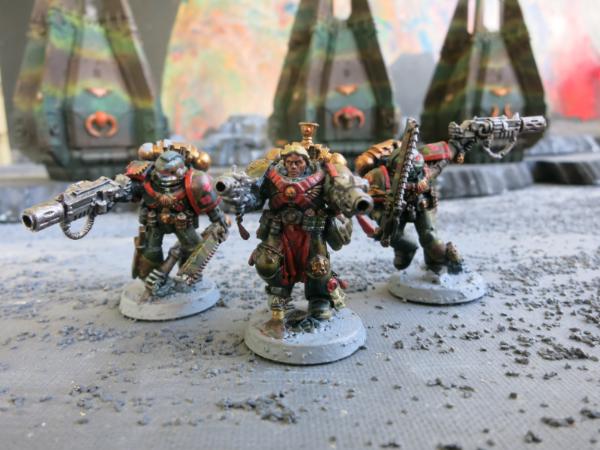
The Sanguinary Priest with The Angel’s Wing
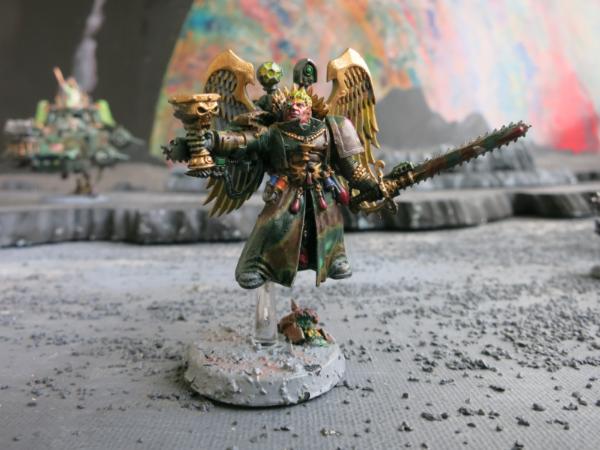
The Sanguinary Priest with The Angel’s Wing
In this model, all the techniques and tricks work, all but the last one. The wings, goblet, and necklaces are trimmed with liquid gold. The jewels and lenses are high-lighted with fluorescent colors. I had to pin on the wings and the jump pack and then pin and mount the spot lights to the top of the jump pack. I used pigment on the Ork head. I used a wet palette and I shaded with black and gray undercoats. I even added my new custom made decal to the shoulder pad.
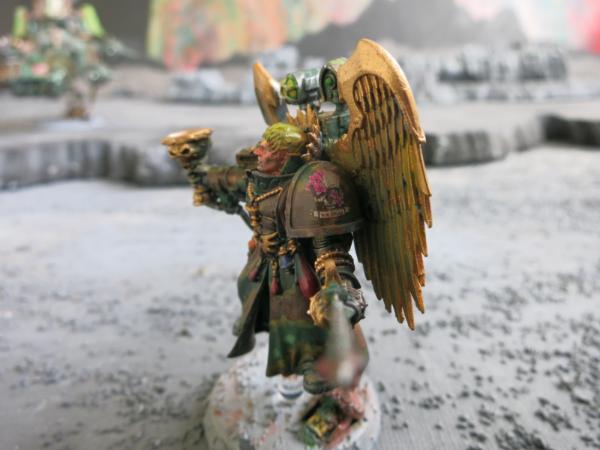
The Sanguinary Priest with The Angel’s Wing – Side View
I even shaded the decal and highlighted in the light the cherry blossoms with a magenta fluorescent paint.
The Sanguinary Priest with The Angel’s Wing with Blood Chalice
The only thing that didn’t really work was the use of a yellow, red, and blue fluorescent wash to highlight the face. At least in the close-up view, the face looks like he has an skin infection. It may be the light as close-ups sometimes distort the image but I will probably redo the face. Actually, I may tame the red down just a little but redden up the nose.
The Sanguinary Priest with The Angel’s Wing
|
|
This message was edited 1 time. Last update was at 2015/10/29 23:44:45
|
|
|
|
|
2015/10/30 18:26:31
Subject: Blood Angel Successor Space Marines
|
|
Focused Dark Angels Land Raider Pilot
|
Blood Angel Successor Space Marines
Blood Angel Successor Sergeant
Blood Angel Successor Sergeant
I put an antenna on my sergeants so I know that this is a sergeant. Notice the camouflage pattern and the mottled face. He is a model that was painted in the old completely black base coat. Compare this image to a model below painted with a black and gray base coat. Also notice the camouflage pattern and the face as well as the other details. Of course, part of it is that I am now using a wet pallet which gives me a little more control over the paints.
Blood Angel Successor Space Marine
Space Marine Close-Up
|
|
|
|
|
2015/11/02 13:35:27
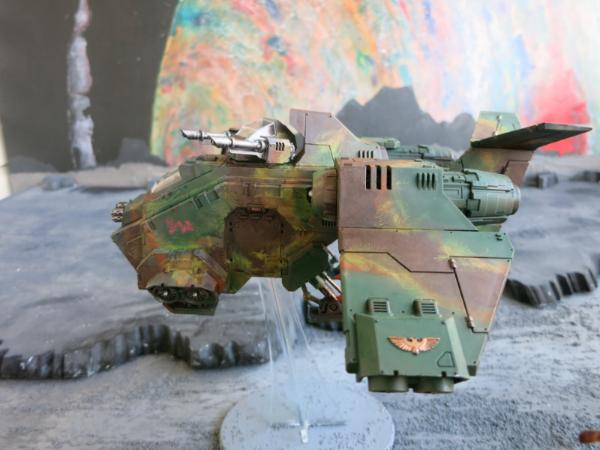
Subject: Nephilim Jetfighter
|
|
Focused Dark Angels Land Raider Pilot
|
The Nephilim Jetfighter
The Nephilim Jetfigher with Twin-Lined Lascannon
This is one of the best looking flyers that Games Workshop makes. So in keeping with the rule for flyers, that the uglier they are, the better they play, this is a mediocre flyer for gaming. For 25 points more, one can play a Stormraven Gunship with 12 rather than 11 strength armor plus a twin-linked multi-melta plus ceramite plating and transport capacity. Still, this jetfighter has Ravenwing which means that it comes in with the Ravenwing strike force and may be useful to deal with those flyers that can threaten the Ravenwing bikers.
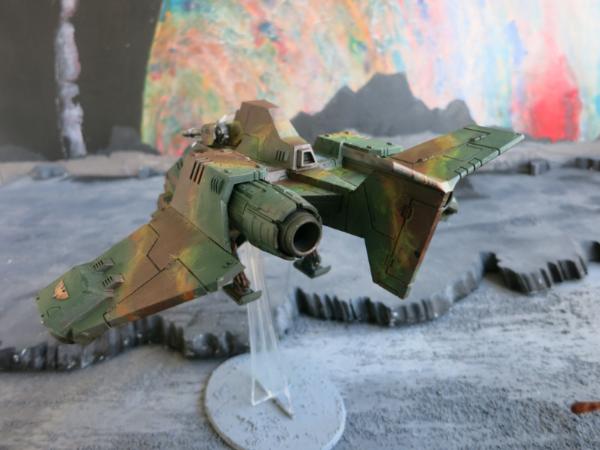
The Nephilim Jetfighter with Six Blacksword Missiles
The tips of the missiles have a little dap of fluorescent magenta.
The Nephilim Jetfigher with Twin-Lined Lascannon
The wings have the new decal that I custom ordered from Fallout Hobbies at www.fallouthobbies.com. I did touch the cherry blossoms with the fluorescent magenta to bring them out.

The Nephilim Jetfighter supporting Ground Troops
The camouflage paint gives it a different look than the traditional black and white color scheme associated with Ravenwing.
|
|
|
|
|
2015/11/03 19:39:13
Subject: Heavy Flamer – Part 1
|
|
Focused Dark Angels Land Raider Pilot
|
Heavy Flamer – Part 1
Heavy Flamer
The helmet is a bit from a Warhammer Fantasy Bretonnian knight. This is another of my favorite models.
Burn Baby Burn
|
|
This message was edited 1 time. Last update was at 2015/11/04 17:04:25
|
|
|
|
|
2015/11/04 17:02:19
Subject: ]The Heavy Flamer – Part 2
|
|
Focused Dark Angels Land Raider Pilot
|
The Heavy Flamer – Part 2
This is the same heavy flamer posted a day ago. I am adding him again because these pictures show a few details I added. I want to look at them side by side to see if they make any difference.
Heavy Flamer with Decal
I added a custom made decal to the right shoulder. I also added a little fluorescence paint to the reds, the tanks on his back and the shield on his helmet.
Heavy Flamer – Back View
Finally, I added a touch of liquid gold to his dragon crest and his other bling.
Heavy Flamer – Front View
I added pigment to the end of his flamer, black pigment to the shadow and white pigment to the light areas.
Heavy Flamer – Nozzle View
This is the last view you would have before you died in agony and pain. I added a little white pigment to the skull next to his feet
|
|
|
|
|
2015/11/04 18:37:51
Subject: 6th Biker Troop - “Schrödinger's Apocalyptic Raiders”
|
|

Pious Palatine
|
Very cool. I really like how those Bret heads work on the marine body.
EDC
|
|
|
|
|
2015/11/05 23:52:59
Subject: Re:6th Biker Troop - “Schrödinger's Apocalyptic Raiders”
|
|
Focused Dark Angels Land Raider Pilot
|
A Nut Case
Thank you for your compliment, Evildrcheese or EDC as you sign yourself. I like these Bret helmets too and they seem just right for space marines although I had to carve out the lower part to get them on space marine bodies. Still, they are fun. I noticed that the heads on the pictures of your models in your gallery have different non-space marine helmets. Where did you get them?
A Nut Case – Typical Space Marine
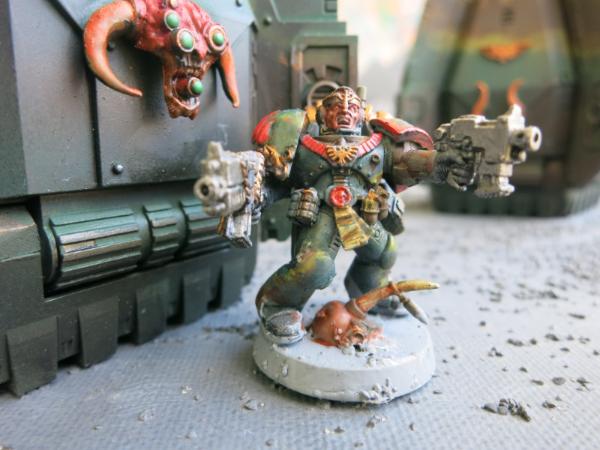
Some space marines are just nut cases. This is one. Although the bling for his uniform is derived from a blood angel successor unit, the head is a dark angel bit. Regardless, he looks like a nut case who you would want at your side when you find yourself drop podded into the middle of an Ork infestation.
Brother Nut Case
Nut Case – Side View
|
|
|
|
|
2015/11/09 21:39:16
Subject: Building Drop Pods[
|
|
Focused Dark Angels Land Raider Pilot
|
Building Drop Pods

Three Drop Pods
These are three drop pods to support an drop pod assault army. The door are magnetized so that they can shut and open. What I discovered when I built the first drop pod was the door did not fit quite right so I had to carve out the hinges and holes to make the doors flexible enough to fit closely so that I could then add magnets to the door and the rim of the door to hold the doors into place.
In building the second pod, I discovered that if I carved out and enlarged the holes that supported the hinge pin at the bottom of the door, that I could create a drop pod with enough flex in the position of the door so that the drop pod doors would fully seat on the drop pod door hinge.
Carving Out the Hinge Hole before assembling the base
Exact-o Knife pointing to Cut Hole
Exact-o Knife Blade pointing to Cut Hole
Drop Pod door on Base with cut out hinge hole
Close-Up of Hinge on Finished Drop Pod with Door’s Up
Unfortunately, I didn’t take any pictures with the doors down. Too bad because it would have shown the magnets. Maybe I will get some more pictures this weekend.
|
|
|
|
|
2015/11/09 22:43:17
Subject: Building Drop Pods[
|
|
Land Raider Pilot on Cruise Control
|
 Oldmanronald wrote: Oldmanronald wrote:
Unfortunately, I didn’t take any pictures with the doors down. Too bad because it would have shown the magnets. Maybe I will get some more pictures this weekend.
I was about to just ask this same question. That is a really good idea, one that I have never thought about.
I'm really on the fence about the usage of the bret helmets but how can you argue a serpent on top, looks very unique and awesome. They do look like they are part of the model though. 
I really like your greens on the Grav Cannons! Gives me ideas.
|
|
This message was edited 1 time. Last update was at 2015/11/09 22:43:34
|
|
|
|
|
|
|