| Author |
Message |
 |
|
|
|
|
Advert
|
Forum adverts like this one are shown to any user who is not logged in. Join us by filling out a tiny 3 field form and you will get your own, free, dakka user account which gives a good range of benefits to you:
- No adverts like this in the forums anymore.
- Times and dates in your local timezone.
- Full tracking of what you have read so you can skip to your first unread post, easily see what has changed since you last logged in, and easily see what is new at a glance.
- Email notifications for threads you want to watch closely.
- Being a part of the oldest wargaming community on the net.
If you are already a member then feel free to login now. |
|
 |
2016/03/23 18:42:58
Subject: Scouts
|
|

Focused Dark Angels Land Raider Pilot
|
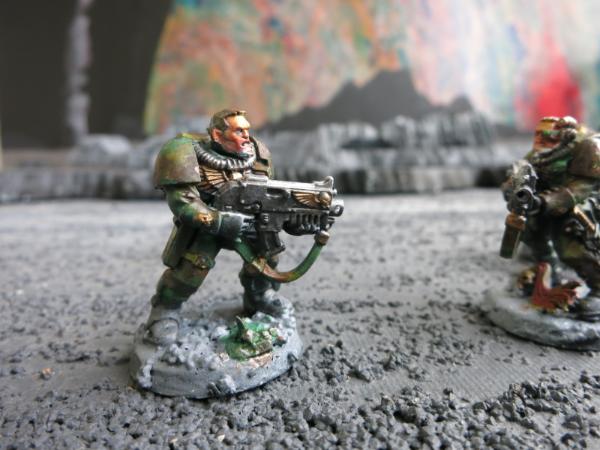
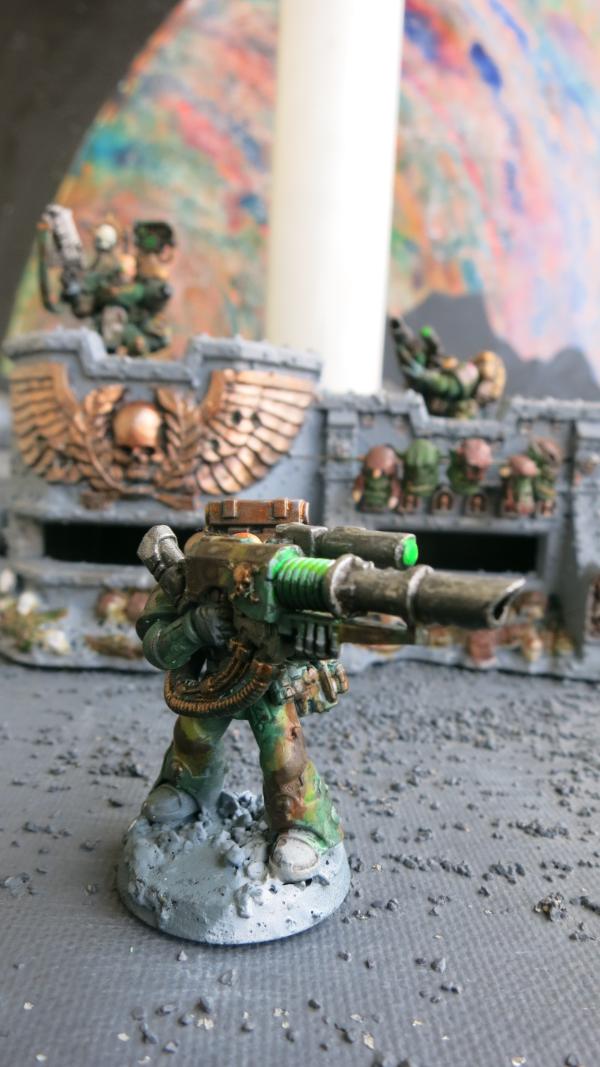
Scouts
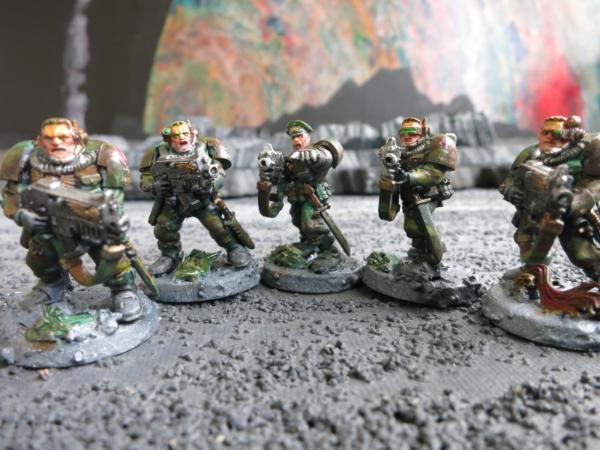
Five Scouts
Except for their armor save, Space Marine and Dark Angel scouts (but not Blood Angel scouts) now have the same stat line as full Space Marines. Although they are limited in weapons, they are an inexpensive unit that can scout and infiltrate to occupy key pieces of terrain. With little fanfare, they can help win games.
Still, the standard scout models are pretty bland. The heads are ugly and lack a helmet. Still needed some scouts so here they are.
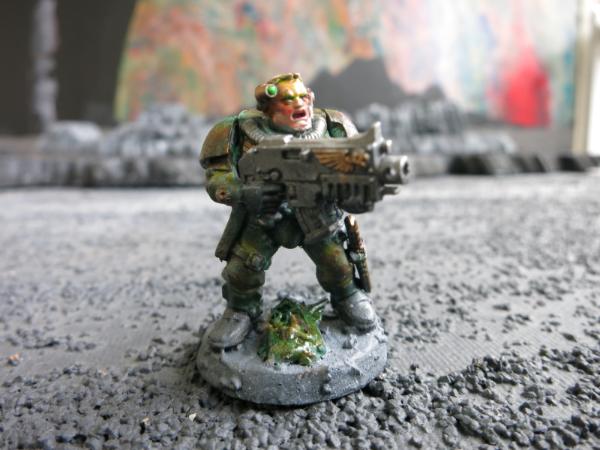
First Scout
Second Scout
Third Scout

Fourth Scout
Fourth Scout Again
|
|
|
 |
|
2016/03/24 17:47:37
Subject: The Scout Sergeant
|
|
Focused Dark Angels Land Raider Pilot
|
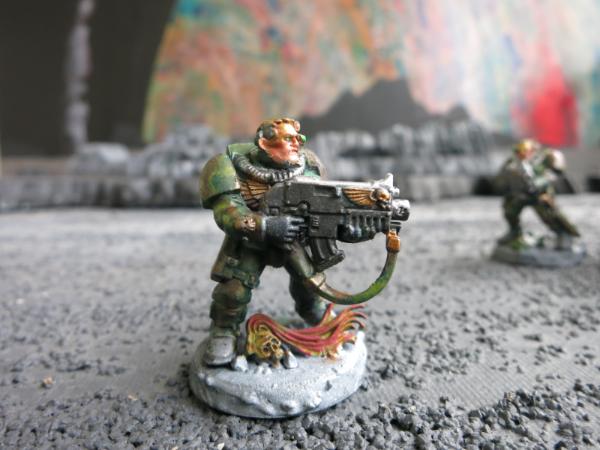
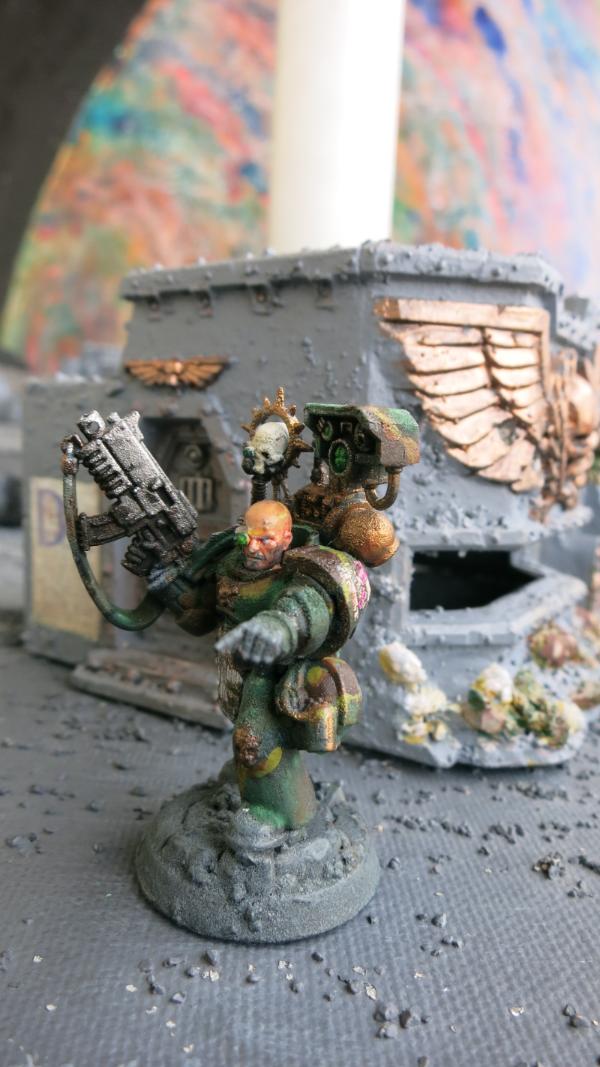
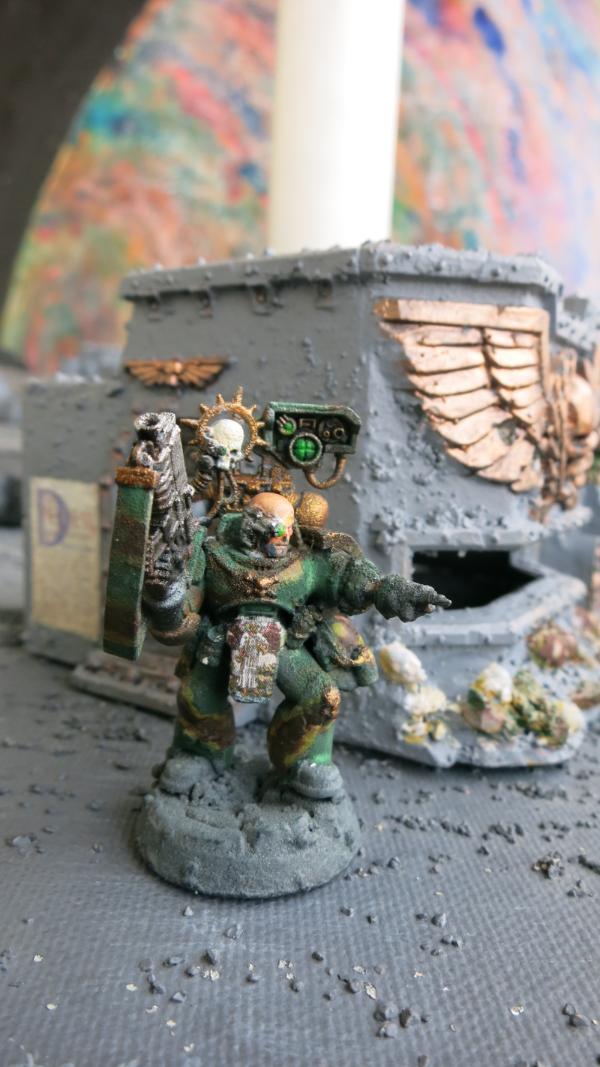
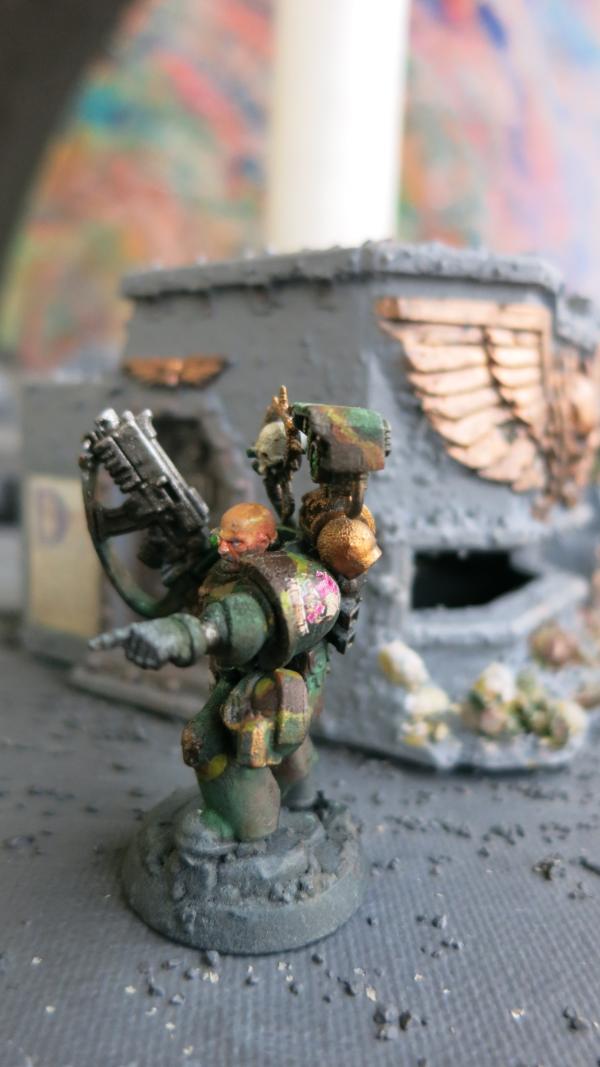
The Scout Sergeant
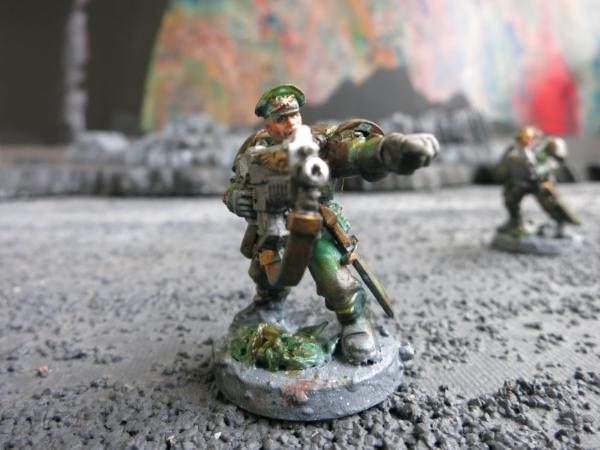
The Scout Sergeant
With a peaked caped Cadian head I picked up on-line, and the pointing finger, this scout sergeant has a little more personality than the standard scout model. This pointy finger may be the single best bit. It makes every model great.
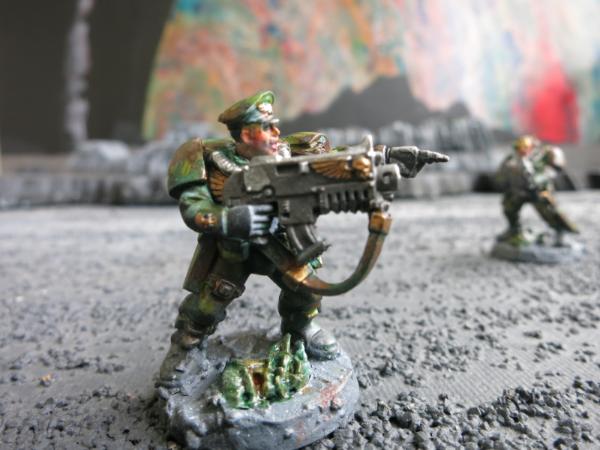
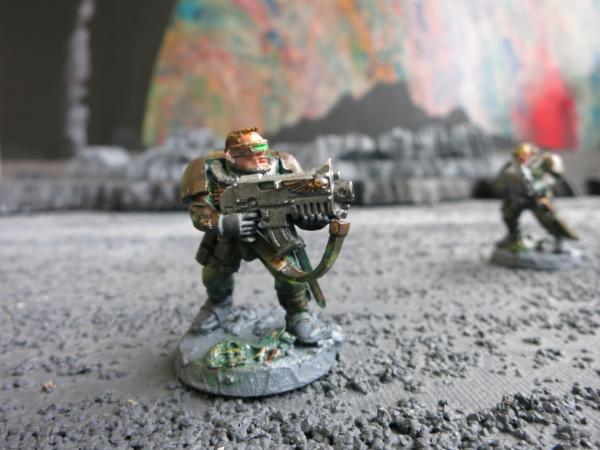
The Scout Sergeant and the Pointy Finger
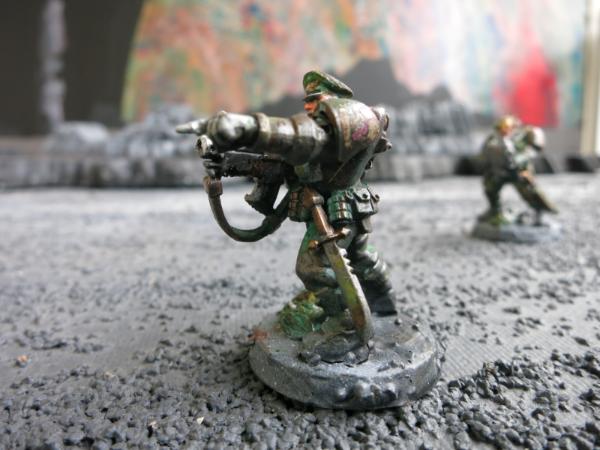
The Pointy Finger
|
|
|
|
|
2016/03/29 17:57:54
Subject: Astorath the Grim
|
|
Focused Dark Angels Land Raider Pilot
|
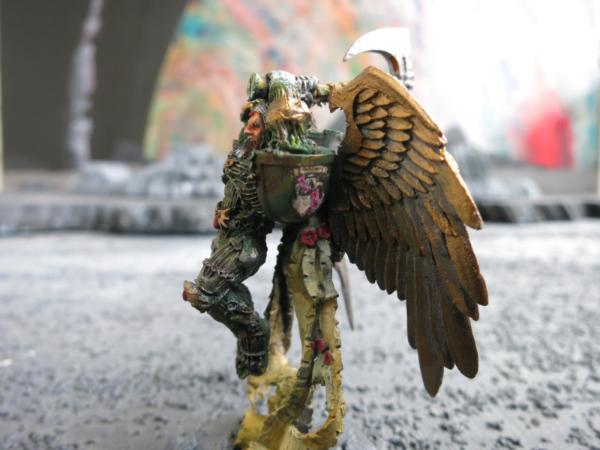
Astorath the Grim
Who is this Ugly Guy?
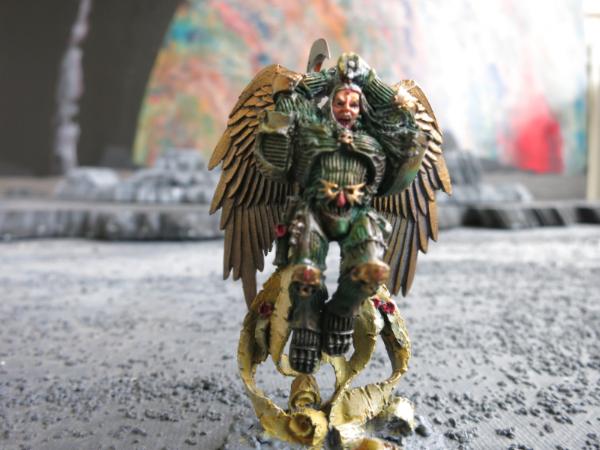
Astorath the Grim
This is Astorath the Grim and the model is pretty grim. Still, he was fun to paint.
Astorath the Grim with an Even Grimmer Head of Marine Lost to Madness
I did a little alteration of the model. I removed his left shoulder pad, which is the skull and put it on the right shoulder. I did this to replace the left pad with a blank shoulder pad to put the Servitor Decal showing the skull with cherry blossoms to match the other models in my army. I cut off his right shoulder pad and used it on another model. I added a little more hair with green stuff and put a Chaos Marine head on the base.
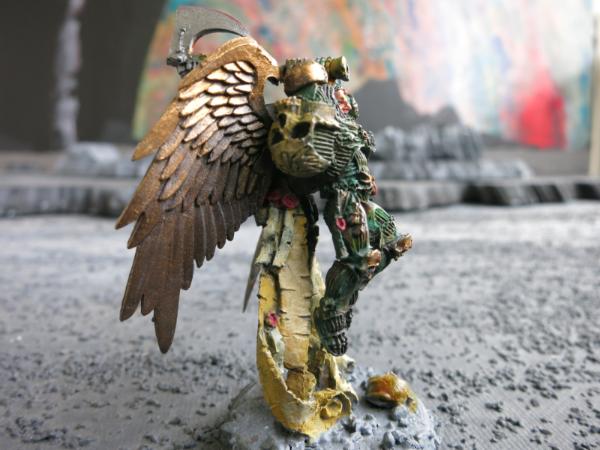
Skull Shoulder Pad on Astorath the Grim
This skull shoulder pad is pretty neat but almost over whelms the model. The wings and scrolls are pretty bold. In comparison, Astorath the Grim’s body is pretty scrawny. Of course, this fits with his Warhammer fluff which is to administer the final mercy to the brothers lost to the Black Rage. Even for a blood angel, this is grim work.
The Plain Should Pad with Decal
|
|
This message was edited 2 times. Last update was at 2016/03/30 19:19:05
|
|
|
|
|
2016/09/21 17:08:57
Subject: Re:6th Biker Troop - “Schrödinger's Apocalyptic Raiders”
|
|
Focused Dark Angels Land Raider Pilot
|
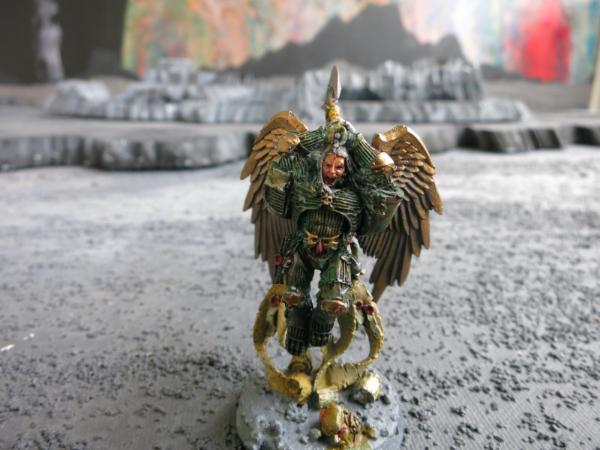
Astorath the Not So Grim
I entered several of my favorite models into the Capital Palette painting contest at NOVA Open. I didn’t win anything but it was fun displaying my models. Actually, I suspected that my models were not competition level before I even entered it. First, none of them are finished. Second, I use decals rather than freehand paint in some of the details. Third, I use metallic paints rather than non-metallic paints to create the metal surfaces. I really like metallic paints and will continue to use them for gaming but they are a handicap for completive modeling art contests. Fourth, the judges love the blending of colors; that is, for example a blue surface that has dark blue tinted with complimentary orange in the shadows and white blue in the highlights with the colors varying across the surface. This blending technique is difficult if not impossible with my camouflage colored uniforms. Finally, I am still mastering my painting and still need to improve my brush control.
They took professional pictures of my models which was fun. So I thought I would share these pictures. The first is one that I have shown in this forum before, Astorath the Not So Grim. I built him as a replacement for Astorath the Grim because I think the Games Workshop model is too ugly, even for a character called the Grim. This model, however, turned out a little too pretty for someone called the grim. He looks more like a guy who should be picking up some Adepta Sororitas at the local singles bar than administering the Emperors’ peace to those lost to the madness of the Black Rage. “Hey babe, why don’t you show me how the Penitent Engine works.”
Notice his wings. At the suggestion of my son, I pulled the wings off of my Astorath the Grim model and exchanged them for the wings I originally put on Astorath the Not So Grim. It actually improved both models.

Astorath the Not So Grim
|
|
|
|
|
2016/10/27 20:10:51
Subject: The Biker Chaplain
|
|
Focused Dark Angels Land Raider Pilot
|
The Biker Chaplain
This is the first model that I have built that was purely for show. This model has a lot of sculpturing. The body of the chaplain is the Blood Angels Chaplain with Jump Pack. To fit him on a bike took some real modeling, especially on the legs to fit the bike. I essentially cut them up and remade portions of them with green stuff. I also had fun with the run over Ork. I will post further instructions on how I created the run over Ork. I have already had written on how I created the cape and the braids from scratch. Since showing him, I have rebuilt him as a playing model. I removed the back cape and have made him a new cape that I painted white to make it show up more. I also replaced the inferno pistol with a grav-pistol so that I can run him with space marines or with Dark Angels.
The Biker Chaplain
|
|
|
|
|
2016/11/13 14:56:19
Subject: Four of Swords - Centurion Devastator with Grav-Cannon and Grav-Amp
|
|
Focused Dark Angels Land Raider Pilot
|
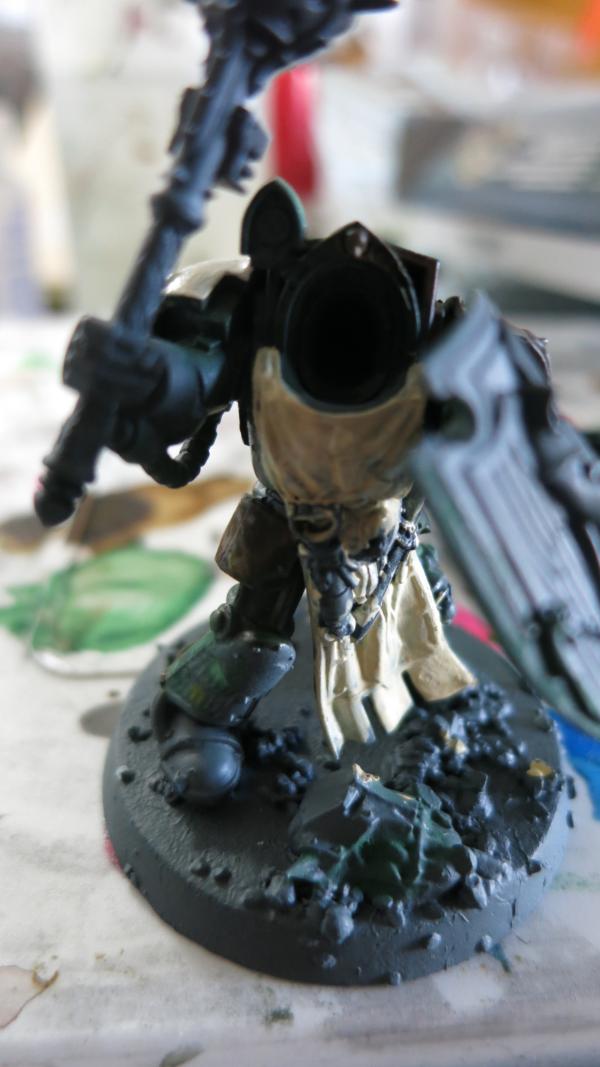
Four of Swords - Centurion Devastator with Grav-Cannon and Grav-Amp
This is the first of three Centurions Devastators. These may be my favorite models. I have made two major changes over some of my earlier models.
Bare headed Centurion Devastator
I use bare heads rather than helmets because heads are more challenging and fun to paint and because faces are more interesting to look at than helmets. Disciplined soldiers, especially on strange planets fighting against strange and possibly poisonous alien creatures, would wear their helmets in combat. Of course, these are imaginary soldiers so I am showing the heads regardless of what they would actually wear when deployed. I do put a helmet on the model in easy reach so that they can put them on in combat. Of course, these models never put their helmet on because they are plastic and can’t independently move.
Centurion Rear View
I have also started using custom decals which I ordered from Fallout Hobbies: http://www.fallouthobbies.com/ . I order three sets of decals. The first was the skull with roses that I use for my units insignia. I was so pleased, I went on the internet and looked up medieval manuscripts and ordered decals of these. These also turned out great and make the models look unique. Finally, I ordered some decals based on Tarot cards. With the three sets I am having fun making my models look unique.
Centurion Front View showing medieval manuscripts and portion of Tarot Card
This Centurion has a decal of the 4 of swords Torat card on his right shoulder.
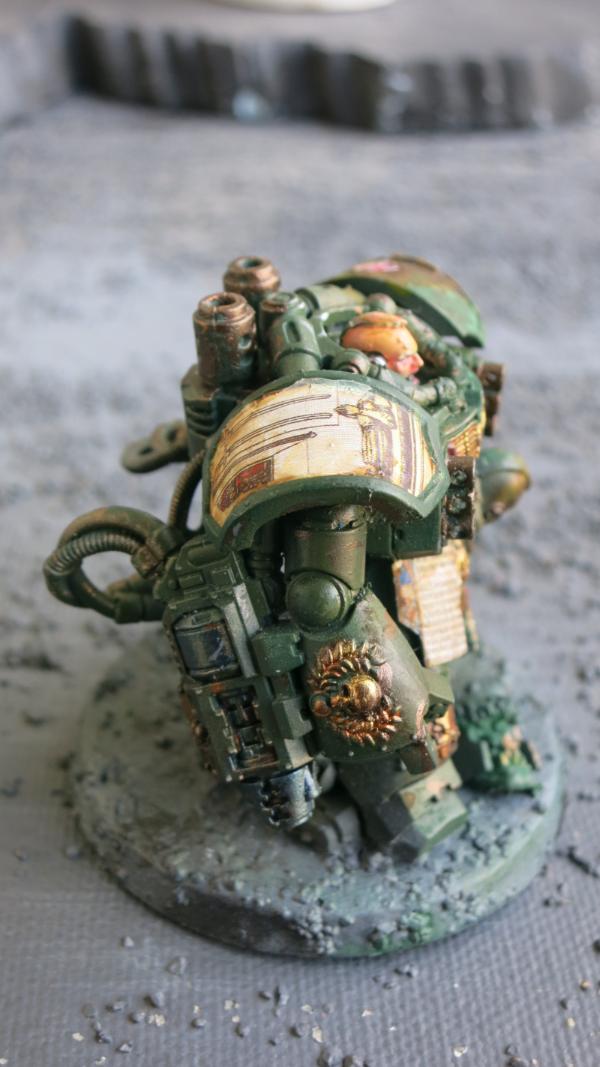
Centurion Side View showing Tarot Card Decal
Centurion Rear View
|
|
This message was edited 1 time. Last update was at 2016/11/14 15:02:13
|
|
|
|
|
2016/11/14 16:52:41
Subject: Ten of Swords – Centurion Devastator with Grav-Cannon and Grav-Amp
|
|
Focused Dark Angels Land Raider Pilot
|
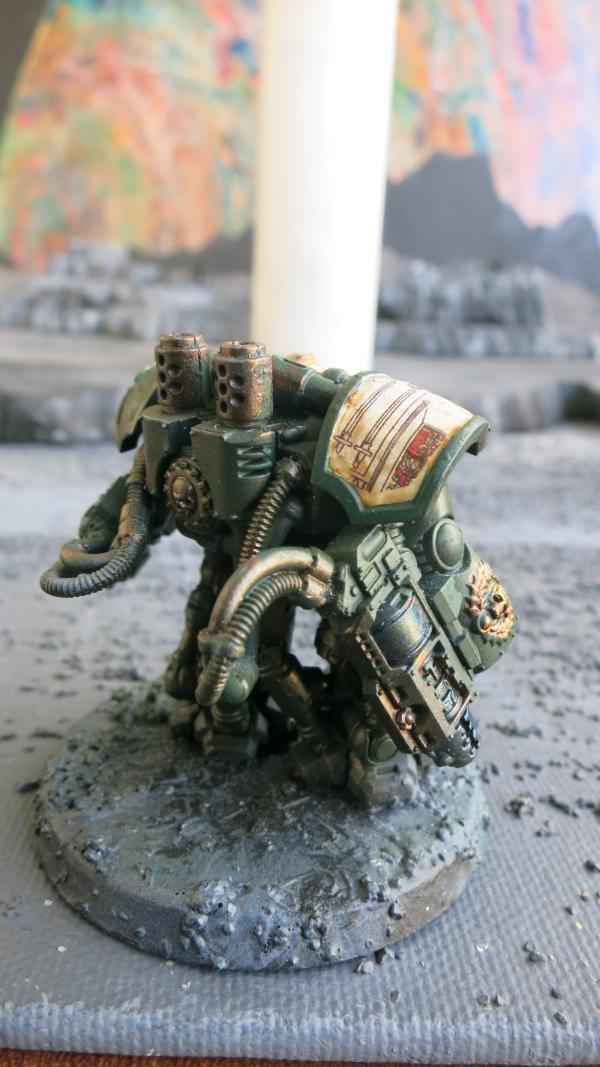
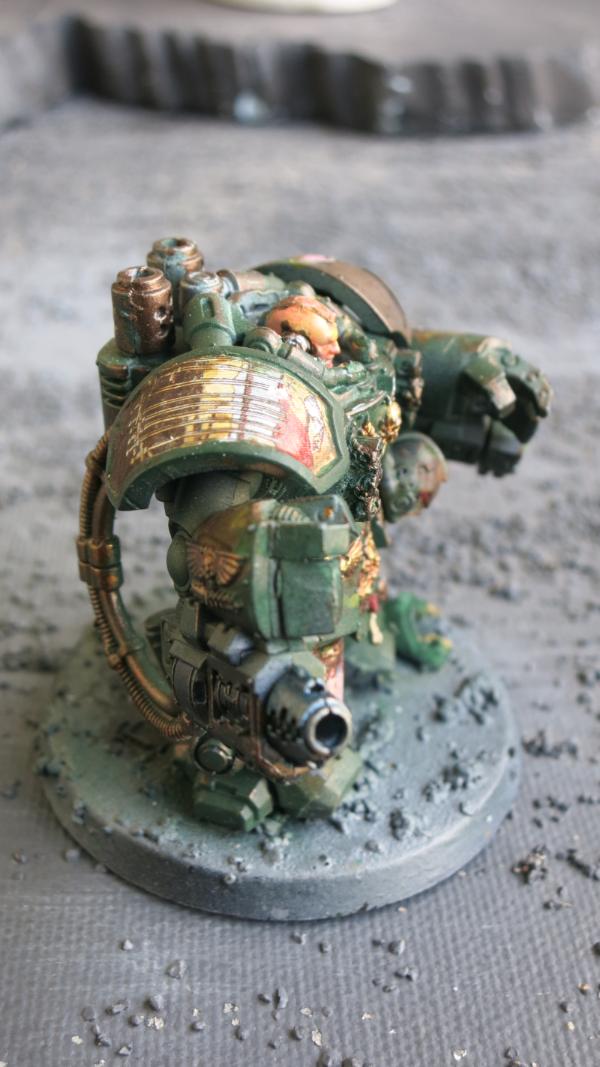
Ten of Swords – Centurion Devastator with Grav-Cannon and Grav-Amp
The Second Centurion Devastator
This is the second of my Centurion Devastators, with the Ten of Swords Decal on his shoulder. This is a fun model, not only to make and to look at, but to play. I placed them behind blocking terrain so that they were protected from long range fire but placed so that they had good field of fire to their max range into the approaches to my key positions. They quickly eliminated any enemy units that tried to cross these kill zones.
Centurion Devastator Side View
This Centurion has the Ten of Swords Detail on his shoulder and medieval manuscript on one of his front protective plates. This required that I had to grind off some of the bling on these surfaces using a grinder on my Drexel Hobby Tool and an X-ACTO knife.
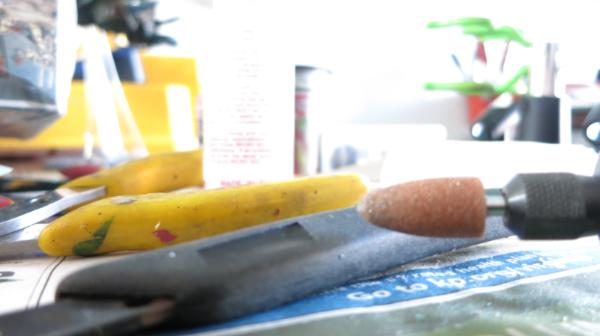
Grinder on tip of the Drexel Hobby Tool
I sanded it down with wet 180 grit sandpaper. I painted the undersurface white and then laid down the decals using Micro Set and liberal and repeated application of Micro Set. I then shaped and trimmed the decals to fit the space. I painted over the edges to cover any excess decals and then used washes to age and to shade the decals.
Centurion Devastator Side View showing 10 of Swords Decal
At these close up views, I can see things that I missed in making the model. On both the barrel of the Grav-Gun and the Exhaust Pipes, I have a gap where the two halves come together. I need to rework these with some plastic glue and with some liquid green stuff to remove the gap.

Centurion Devastator Right Rear View
Centurion Devastator Left Rear View Showing Footprints
I put in footprints with green stuff before I painted the base. I paint the base with a mixture of black and white (gray) gesso mixed with fine and medium model railroad ballast.
Centurion Devastator Front View
This last view shows the face in detail. I painted these faces separately from the rest of the model. I used a white and gray base coat. I then painted the eyes with a heavy gray and a dot of fluorescent blue which I apply with a sharped toothpick. I then paint the face with three tones of flesh, a dark flesh for most of the face, then a light medium for the raised surfaces such as the nose, cheek bones, and forehead. I then use a light flesh for highlights. I then finish it off with three fluorescent paints applied as a wash. The yellow goes on the upper third of the forehead and scalp. The red or orange goes on the middle third, the nose, ears, and eyes. The blue goes on the lower third, the chin, upper lips, and cheeks to give the face a five o’clock style. The three color wash is a classical Renaissance style painting technique for men’s faces. My innovation is using fluorescent paints rather than regular washes to give the faces a little more glow. I also use the fluorescent paints as a wash over some of the decals to bring out the colors. The hair also uses blends of brown and orange with fluorescent orange highlights.
|
|
|
|
|
2016/11/16 13:06:22
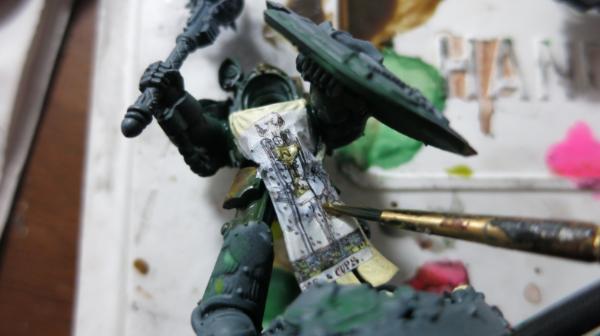
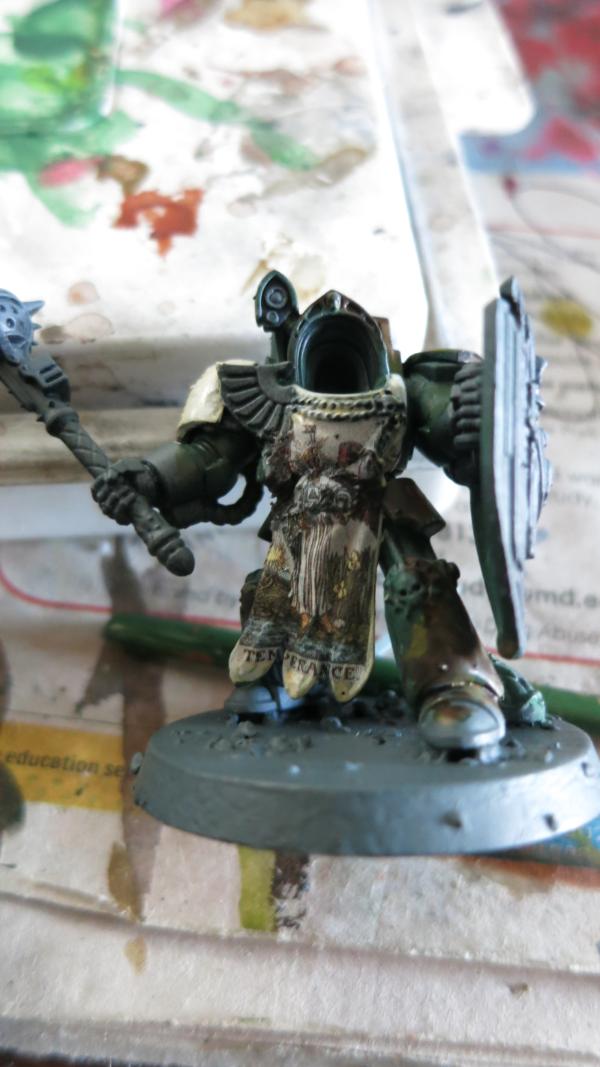
Subject: Temperance– Centurion Devastator Sergeant with Grav-Cannon and Grav-Amp
|
|
Focused Dark Angels Land Raider Pilot
|
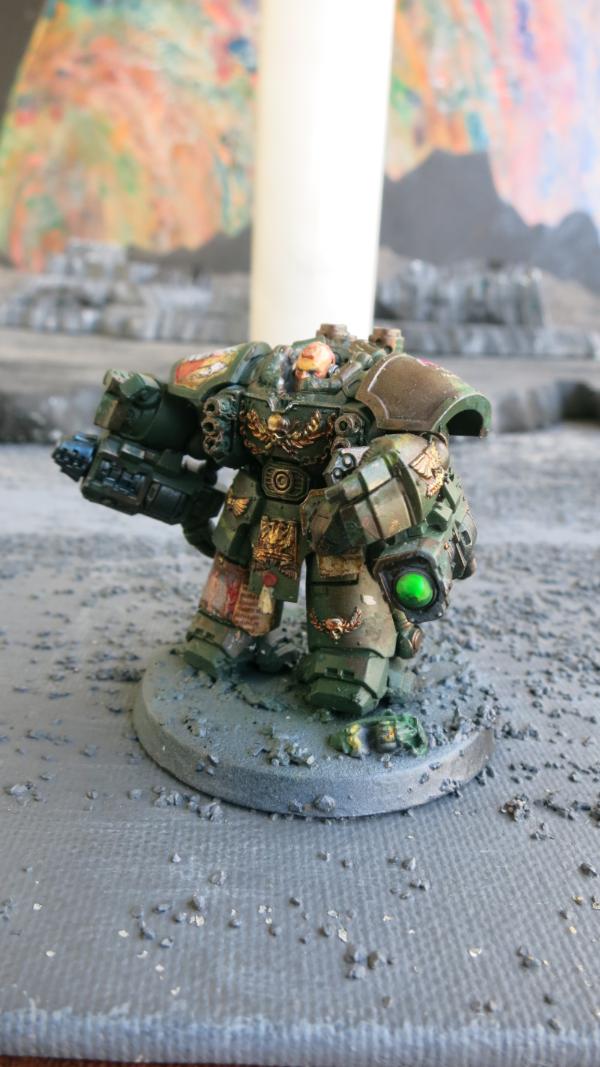
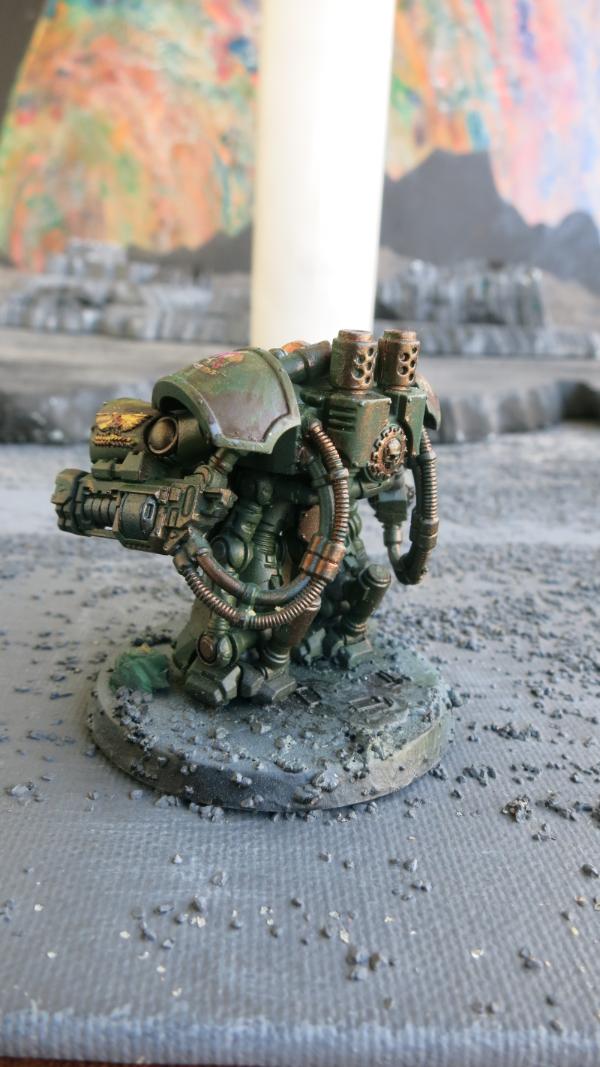
Temperance– Centurion Devastator Sergeant with Grav-Cannon and Grav-Amp
The Centurion Devastator Sergeant
The Devastator Sergeant, with his pointing finger and with the sway of his body, has swagger. I like the details including the omniscope and some of the bling in the front.
The Shoulder Pad with the Temperance Tarot Card Decal
Temperance is virtue not normally associated with any of the 40K armies, even the Space Marines. One associates anger, hatred, and vengeance with the soldiers of 40K. Still, for a Centurion Devastator Sergeant, the virtues of temperance, self-control, self-restraint and even moderation would be welcome both on the training fields and in the heat of battle. For those who are described as slow and purposeful and they shall know no fear, temperance may be the correct virtue. Besides the decal looks good.
The Centurion Devastator Sergeant Rear View Showing Details of the Temperance Decal
Other details include the footprint behind the right foot and the blued Grav-Cannon.
The Centurion Devastator Sergeant – Front View
I like this front view but it does show the flaw in the barrel of the Grav-Cannon. I need to rework this. A favorite detail that I like is the gold banner on his chest with the black lettering. Using Micro Sol softened the decal so the lettering could be slightly rounded to follow the curve of the gold banner.
The Centurion Devastator Sergeant – Side View
This view shows three nice details. The first is the lens of the Grav-Amp. The lenses is painted using several bright greens, including old GW snot green, and then finished with a newer fluorescent green. The Demon Prince’s head at the bottom is a favorite bit but I need to paint the eyes. Notice the medieval manuscript on the bottom leg. I like the pose of this model, from the movement of the legs to the pointing fist.
The Centurion Devastator Sergeant – Rear View Showing Footprints
|
|
|
|
|
2016/11/16 13:57:51
Subject: 6th Biker Troop - “Schrödinger's Apocalyptic Raiders”
|
|

Pious Palatine
|
Awesome work on the Cents, the bare heads looks really good. Loving the shoulder pads too.
EDC
|
|
|
|
|
2016/11/18 01:09:36
Subject: Wall of Martyrs Imperial Bunker
|
|
Focused Dark Angels Land Raider Pilot
|
Wall of Martyrs Imperial Bunker
First, a big shout out to the evil Dr. Cheese. Thank you EDC for your words of encouragement.
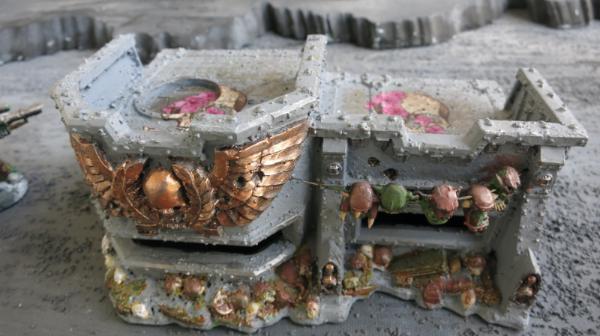
Wall of Martyrs Imperial Bunker
This picture shows the Large Skull Rose Decal on the Wall of Martyrs Imperial Bunker. Notice the decal on the left covering a portion of the trap door. Notice how it sinks right into the trap door. This is an exaggerated effect using Micro Sol solution to really soften the decal so that it conforms to the surface. One trick is to let it dry and then applying Micro Sol to rewet and soften it and then to let it dry again and again until the decal completely conforms to the surface. Sometimes I lightly tap the detail with a brush or toothpick to push it into crevices and corners.
Two other decals with Tarot Cards are on the bunker but they did not really require any reshaping. They required, however, that I painted a white background underneath where I place the decal.
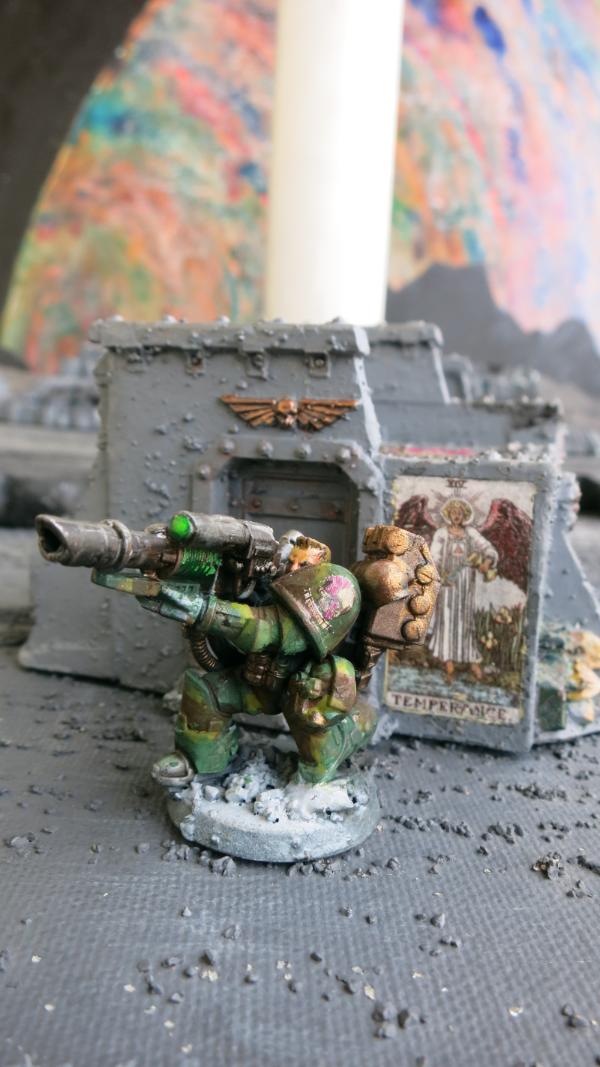
Kneeling Devastator with Lascannon with Temperance Tarot Card Decal on Wall

Devastator Sergeant on Bunker with medieval manuscript on the Wall next to the Door
|
|
|
|
|
2016/11/19 01:20:18
Subject: Fluorescent Paints”
|
|
Focused Dark Angels Land Raider Pilot
|
Fluorescent Paints
I have been using a lot of fluorescent paints lately. I use them as washes for decals and faces, highlights on lenses and other shiny surfaces, or any place I need a nice little accent. These are the fluorescent paints that I use.
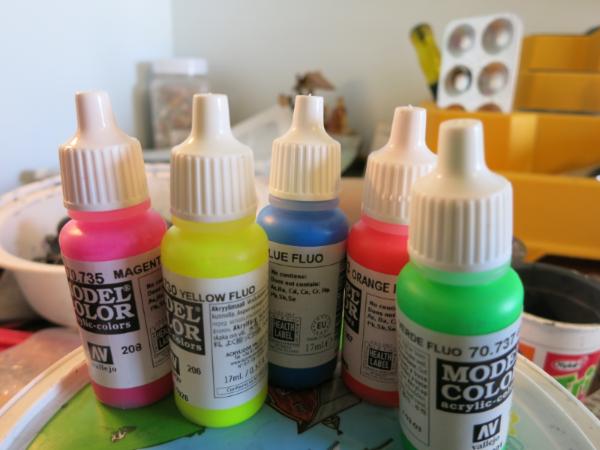
Vallejo Fluorescent Paints
|
|
|
|
|
2016/11/19 17:56:03
Subject: Fun with Magnets
|
|
Focused Dark Angels Land Raider Pilot
|
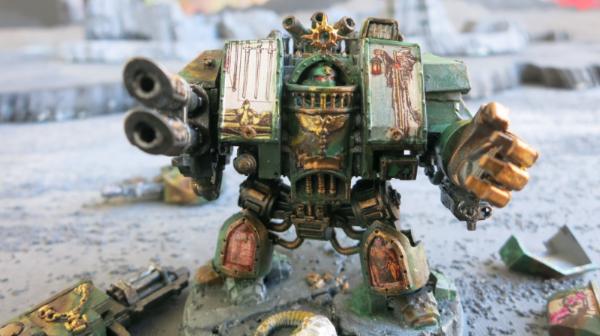
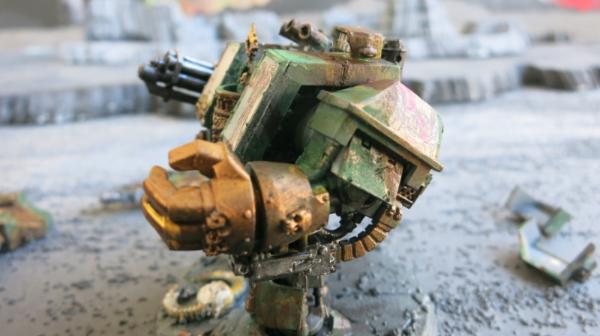
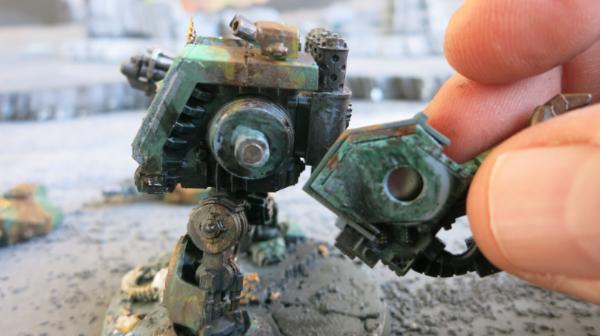
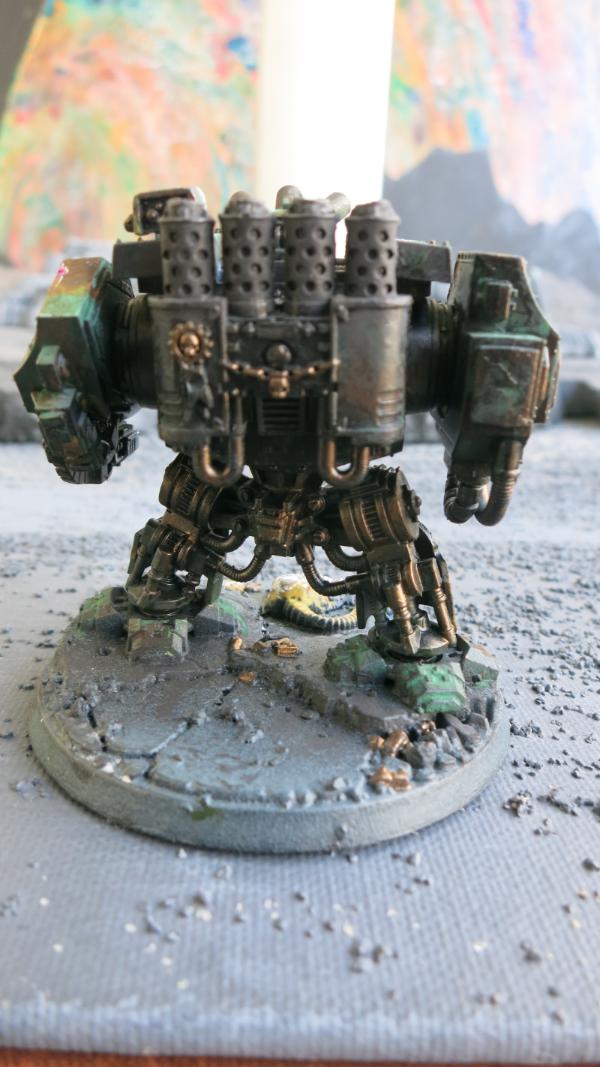
Fun with Magnets
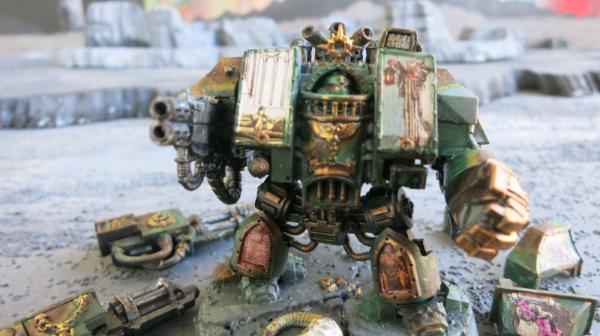
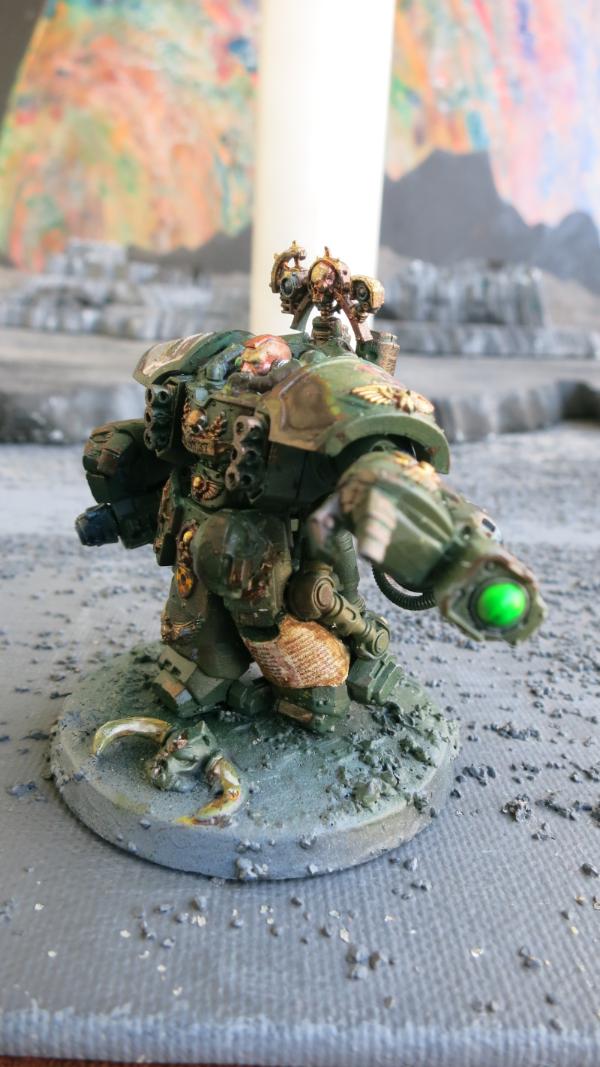
Venerable Dreadnought with Multi-Melta and Power-Fist
To the left of the dreadnought are other optional weapons systems including a twin-linked lascannon and assault cannon. These are magnetized so that I interchange them with the multi-melta. To the right are two shoulder pads to replace the shoulder pad on the power-fist so that I can match the shoulder pad with the left shoulder pad of each respective weapon system.
Venerable Dreadnought with Twin-Linked lascannon
I use magnets on some of my models. I primarily use them on doors and hatches so that I can open and close them during the game. I have used them on my models to exchange weapons but I have found that for most of my infantry and bike models, it is too much trouble. With few exceptions, it is just about as easy to make two models for two different weapons. If I want a space marine with a meltagun or with a storm bolter, I will just made two space marines and bring them both. Trying to magnetize their arms so that I only use one model is doable but the models never pose right and eventually I just glue the magnetized joint into place. The exceptions are Dreadnoughts. These models are big enough that I can mechanically fit the joints so that they are reasonably stable for play.
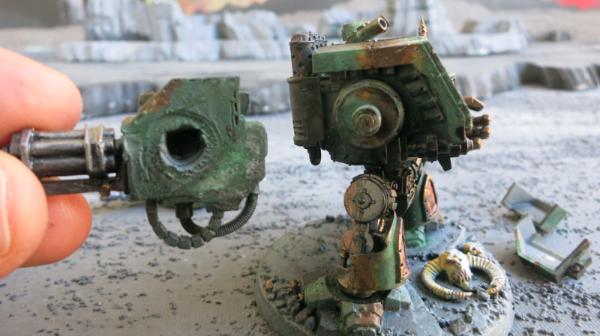
Magnetize Joint on Right Shoulder of Venerable Dreadnought
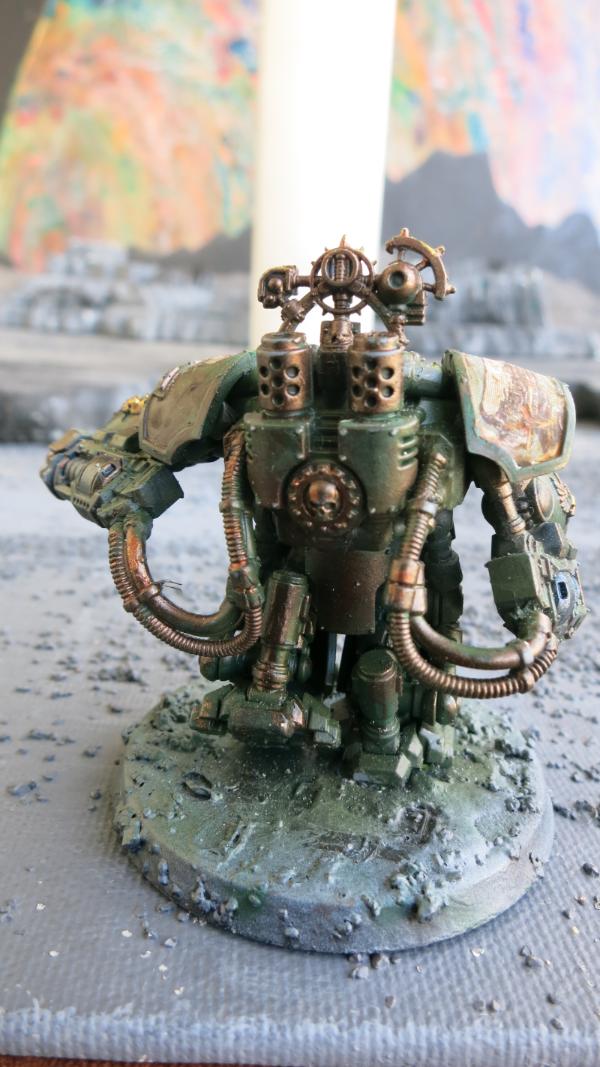
Note that the autocannon is has a magnetized female joint that corresponds to the male joint on the Dreadnought.
Venerable Dreadnought with AutoCannon
Notice that the shoulder pad on the powerfist has also been exchanged to match the shoulder pad on the autocannon.
Venerable Dreadnought with Both Arms Removed
The powerfist can also be removed. This is so that I could turn this into a rifleman dreadnought if I desire.
Magnetized Joint on the Left Shoulder of the Dreadnought
The powerfist arm has a magnetized female joint that corresponds to the male joint on the Dreadnought.
Venerable Dreadnought with Multi-Melta and Power-Fist
Happy hunting Mr. Venerable Dreadnought!!
|
|
|
|
|
2016/11/21 13:34:07
Subject: Experimenting with the Base Coat
|
|
Focused Dark Angels Land Raider Pilot
|
Experimenting with Base Coat
I have been experimenting with priming my models using a three color base coat. The first coat, sprayed on the lower part and up from the bottom is black. This covers most of the model. The second, sprayed from the top and front, is gray. The idea is that the light comes from the top front and lights up the surface to a neutral gray with the shadows left in black. The final coat is a quick spray of white towards the face and shoulders for accent. Originally, I used the Badger Airbrush three color pack of black, gray, and white but I found that these primers are not as durable as the Citadel base paints that I sprayed on. Sometimes I had some peeling. Now I use Citadel spray paints, Chaos Black, Mechanicus Standard Grey, Corax White. In the gray and white areas, I paint the models as I always has. In the black areas, I use a very limited palette with mostly dark colors. This allows certain details to show and the rest of the model to fade into shadow. The result is the models have more depth, are more dramatic, and yet appear brighter. They are also easier to paint since much of the model uses a limited palette. This technique is an old one. I have included three paintings to illustrate the technique. The first is a Madonna and baby Jesus in the manger by Carl Bloch. He is a very traditional painter from the late 1800s who learned his painting by copying renaissance artists. Note how he uses the darks with the important details in light. This is a terrible picture of a reproduction with too much glare but it illustrates the technique.

Carl Bloch Painting
The second is the cover for the former Dark Angels Codex. This and the Space Marine cover for the codex that come out about the same time are my favorite covers for Codices. Notice the limited palette with much of the image hidden in dark colors with a few bright areas. For example, notice that although his power armor is green, very little green is shown. The only saturated colors are the reds in the bolt pistol and seals and the green of the power armor. Most of the shapes are defined with dark and light desaturated browns, whites, and grays with a little yellow to tint the metals.
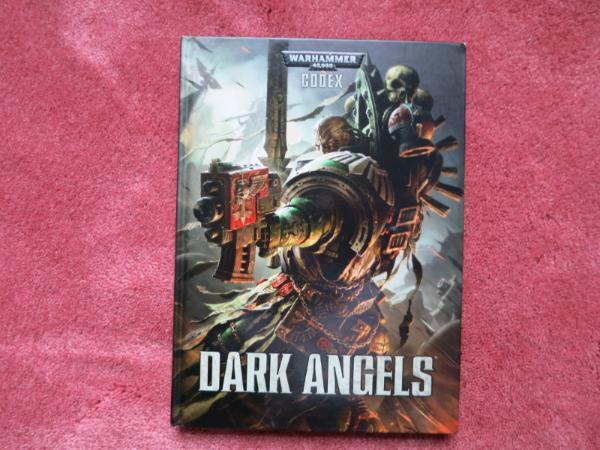
Dark Angels Codex
The last is a very traditional pastel drawing of fruit which I drew. Notice that the red apple actually has limited red with most of the apple being a reddish brown with light pink highlights. The greenish yellow pear has little pure yellow or green with most of the pear being gray.
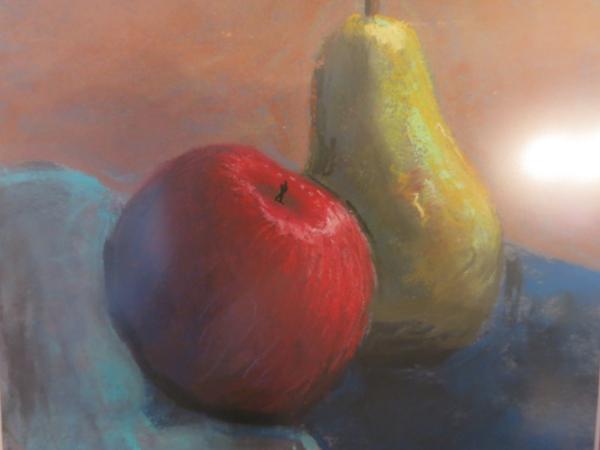
Pastel Painting of Fruit
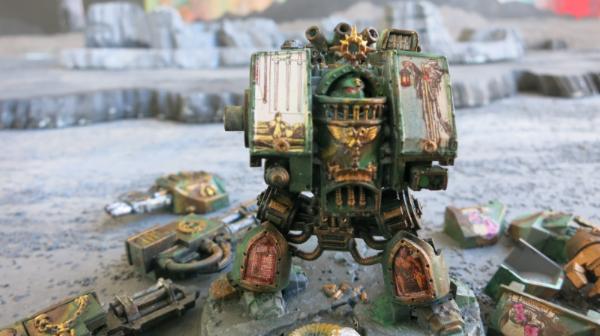
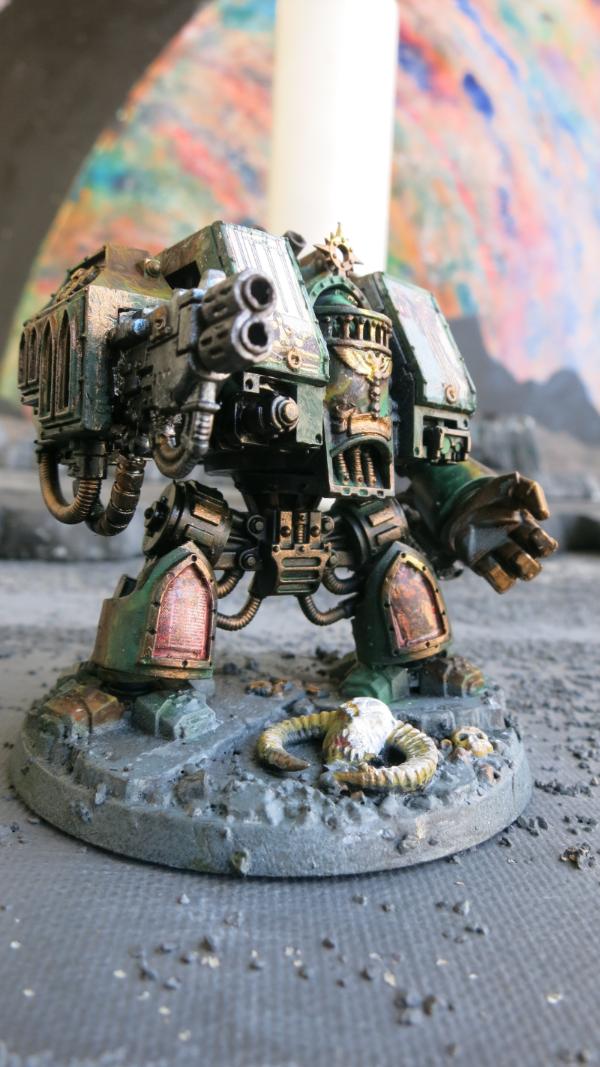
The technique shows on the Venerable Dreadnaught.
Venerable Dreadnaught
Notice the bright and light areas. The upper body is bright with highly saturated colors. The lower carriage is dark with just a hint of colors. The iron hand shows this with the outside of the hand being bright and the inside being dark. Even the melta gun shows this with the top and front being light metallic and the bottom and the area between the guns and the body being dark. Even the panels with decals use the dark and light scheme. The upper panels have light decals. The panels in the legs have dark decals.
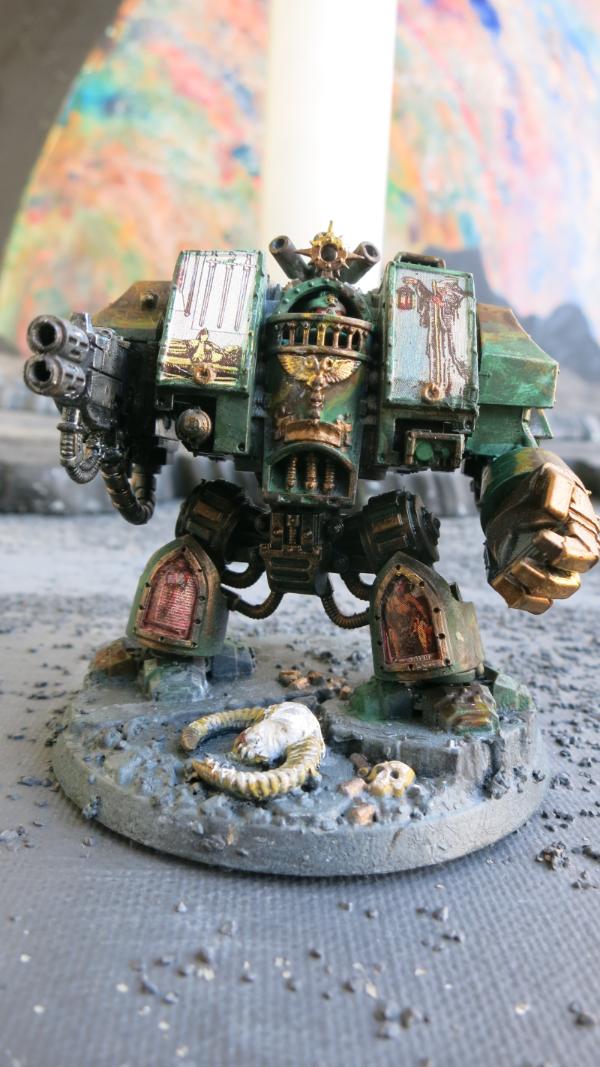
Venerable Dreadnaught – Gun Side
This view shows the technique and how it blends in with the natural light. The natural light is coming in from the right. The rim of the base is a fairly consistent color but notice that the right rim is darker than the left rim in the picture. But the underside of the carriage is more dramatically darker than the upper part of the body. The shadows and highlights cast by the natural light and by the painted shadows and highlights complement each other.
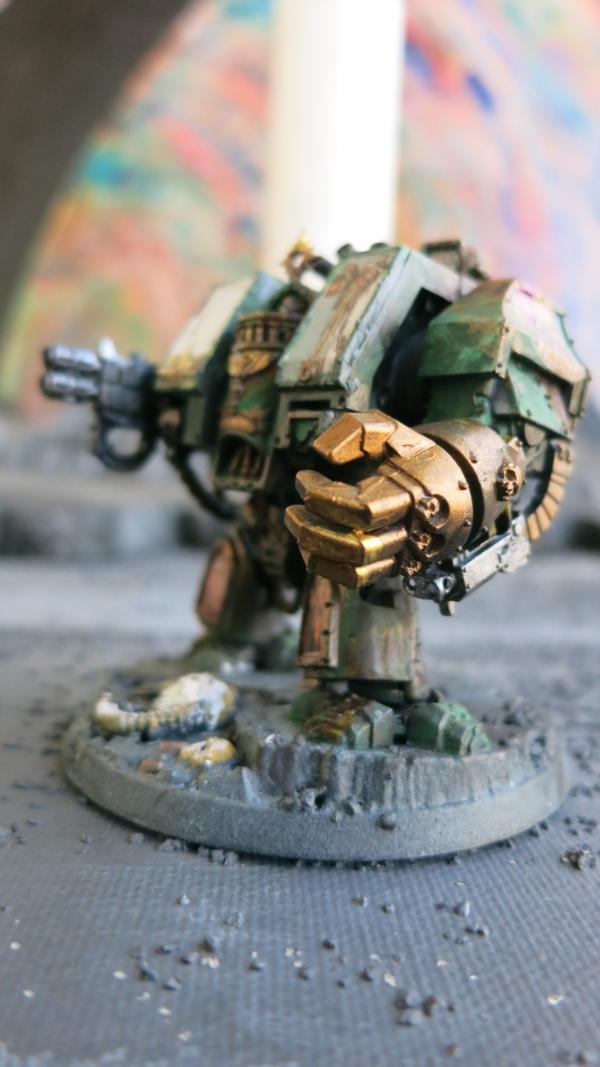
Venerable Dreadnaught – Hand View
This blending of the natural and painted shadows and light is shown in the hand. It is reflecting some light so it has a natural brightness and shadow but the paints themselves also increase the feeling of depth.
Venerable Dreadnaught – Rear View
This rear view shows the painted dark and light. Unlike the front, most of the back is left dark and bland. I did dry brush some of the metals and these dry brushed portions pick up some light, for example the leg hydraulics on the right of the drawing but this side has very little of the strong colors on the front and sides. Notice that the light is coming from the right. Look at the shadows in the base and the legs to verify this. But the brightest colors on the dreadnaught himself are on the left side where he should not be getting as strong of light. In this case the light isn’t quite natural but it isn’t too jarring since our eyes assume that the light must be right and is coming from a reflection or an odd angle.
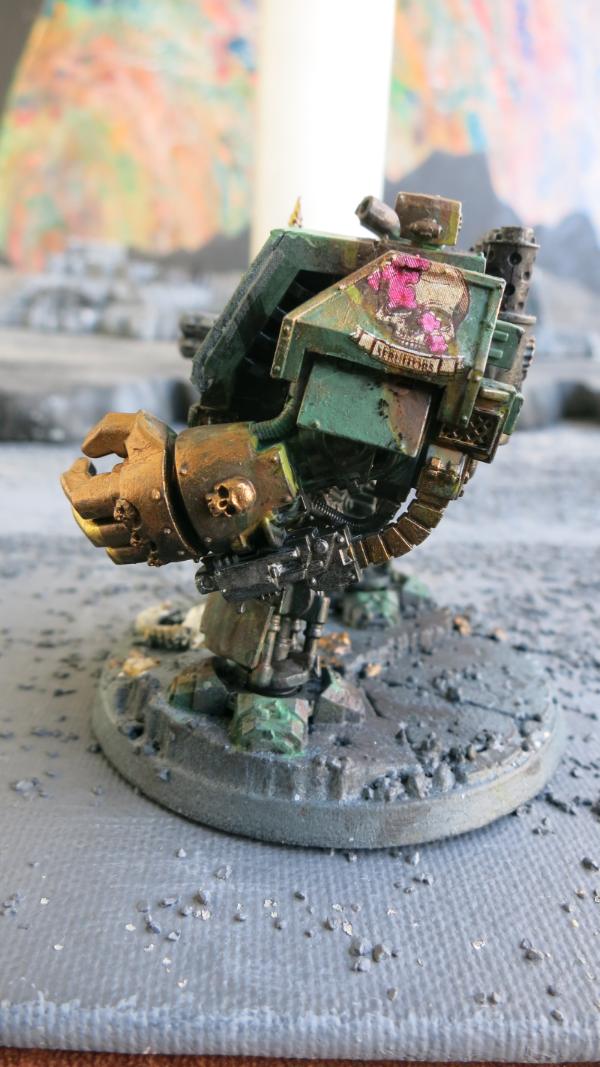
Venerable Dreadnaught – Side View
Here the painted shadow and the natural light fight each other but just a little. The light is coming from the right but the second finger is the brightest, clearly unnatural.
|
|
|
|
|
2016/11/22 15:48:11
Subject: Lascannon Devastators Old and New
|
|
Focused Dark Angels Land Raider Pilot
|
Lascannon Devastators Old and New
In the last entry, I wrote about painting with dark and light shadows. This next picture shows a new devastator with a black, gray, and white base coat next to an older devastator with only a black base coat.
Old and New Lascannon Devastators
The old style is on the left with the helmet The new style is on the right. Notice how much lighter the new style devastator is over the old.
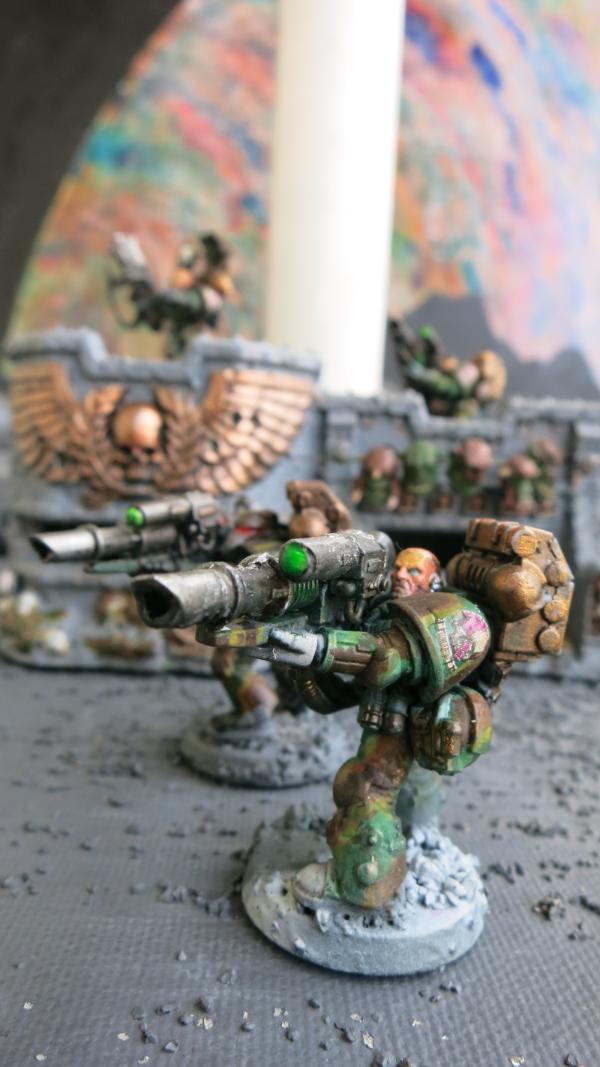
New Devastator – Close Up
Here the shaded areas are both painted and have natural shadow.
New Devastator – Gun Side View
This side has more shade and is darker.
|
|
|
|
|
2016/11/23 14:54:07
Subject: Re:6th Biker Troop - “Schrödinger's Apocalyptic Raiders”
|
|
Focused Dark Angels Land Raider Pilot
|
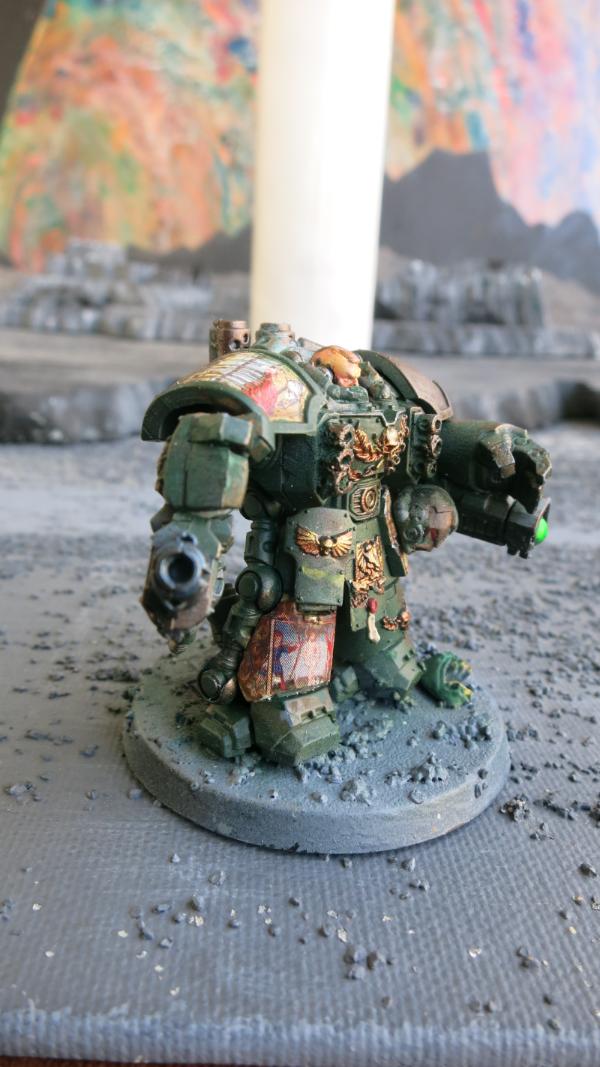
The Devastator Sergeant with Signum
The Devastator Sergeant with Signum
The prior post talked about using three primers. Sometime things go wrong. When I spray painted the white, the spray paint become grainy. Instead of immediately stripping the model to remove the graininess, I made the mistake of continue painting the model and so the model has a grainy texture.
The Devastator Sergeant with Signum – SideView
I looked up the problem on the internet. It appears that this is more common with white spray paint. It happens if I spray too far from the model and if the air is too dry or too hot or too humid. As I remember, it was a hot and humid day. I will strip this model down and repaint him. Fortunately, I primed and painted the head separately and I was able to remove it with little problem. Getting the head right is the most difficult part. Generally, it is pretty straight forward to paint the rest of the model.
The Devastator Sergeant – The Pointing Finger
I love the pointing finger.
|
|
|
|
|
2016/11/25 13:10:27
Subject: Devastator Squad with Wall of Martyrs Imperial Bunker
|
|
Focused Dark Angels Land Raider Pilot
|
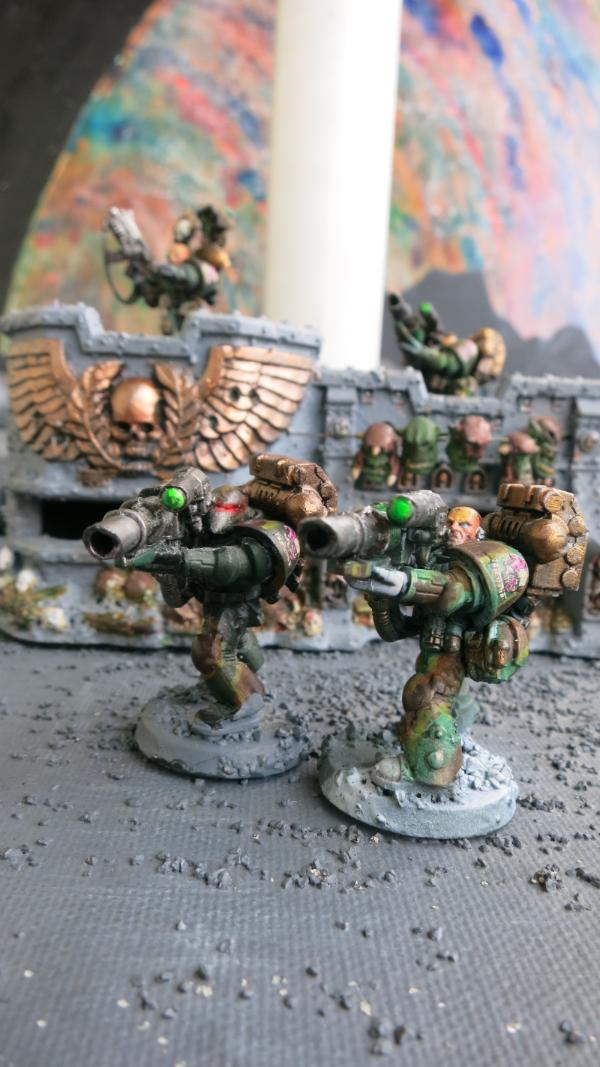
Devastator Squad with Wall of Martyrs Imperial Bunker
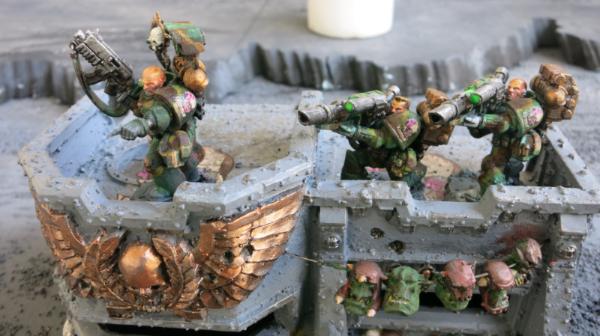
Devastator Squad with Wall of Martyrs Imperial Bunker
Although I build a lot of models, I rarely play. As a result, I tend to do poorly when I do play. I like bikes but they are expensive, have medium range firepower, and are good but not great at assault and with twin linked bolters are moderately good but not great at shooting. The problem is that I have a tendency to mis-deploy bikes and end up in a shooting match with cheaper or better shooters. I find I play better with a smaller bike force supported by good solid shooters such as Thunderfire cannons and Grav-cannon Centurions. To increase my long range fire power, I have now built a devastator squad with four lascannons to man the Wall of Martyrs Imperial bunker. If I add an ammo or ammunition dump and place the bunker on high terrain, I can put out a lot of firepower in every turn.
|
|
This message was edited 2 times. Last update was at 2016/11/25 14:56:46
|
|
|
|
|
2016/11/26 15:19:01
Subject: Deathwing Knights – Decals on the Shoulder Pads
|
|
Focused Dark Angels Land Raider Pilot
|
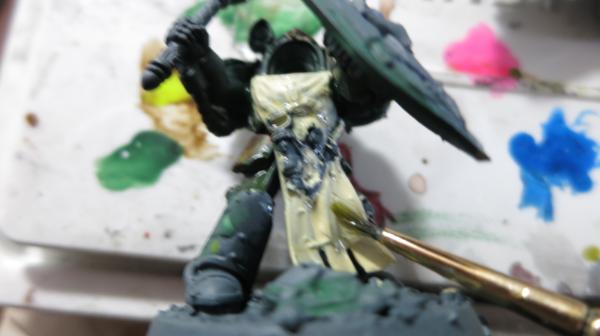
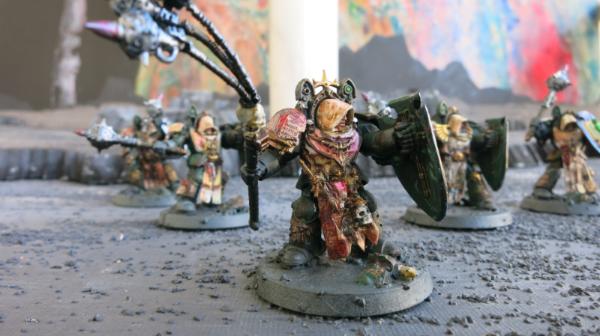
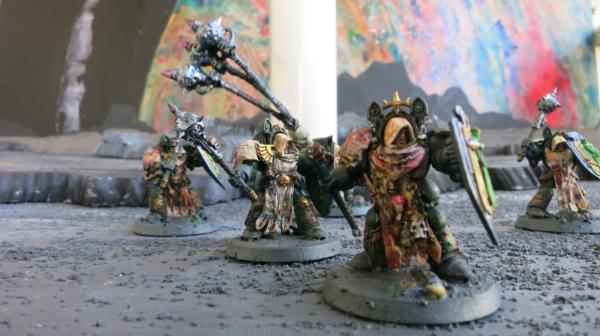
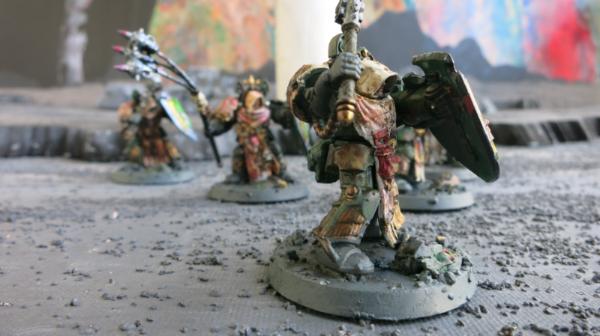
Deathwing Knights – Decals on the Shoulder Pads
I built a squad of Deathwing Knights that I am planning to Deep Strike using the Teleport homers on my Ravenwing. They seem like they would be fun to play and did provide some modeling challenges especially in the use of decals. The Deathwing Knight pushed the techniques of placing decals to the limit. The biggest problem with decals are that they are flat and that they are often mounted on curved or uneven surfaces. I wanted to see how far I could push them to cover both round shoulder pad and the robes with folds covered with bling.
To Do the Shoulder Pads:
1) Paint the Shoulder Pads White. Actually, I used a mixture of white, gold, and beige to get the color I wanted. The manuscript decals need a generally white base to properly show up.
White Shoulder Pad for Deathwing Knight
Note that I left the scrolls and other bling unpainted. I will cover them with gold and bronze paints later.
2) Cover the shoulder pad with Micro Set. This will help set the decal. Use an old brush.
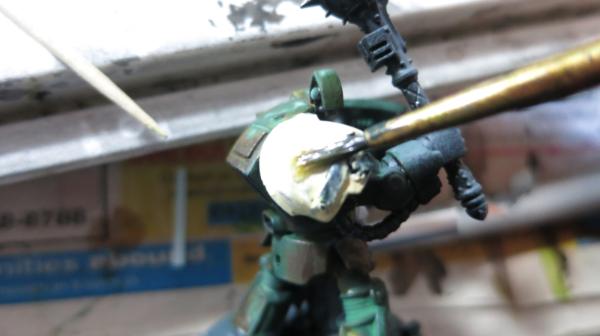
Brushing on Micro Set.
3) Place the decal on the pad as best you can. It will not lay flat.
Placing the Decal
4) Douse the Decal with Micro Sol. This will soften the decal so it will stretch over the rounded shoulder pad.
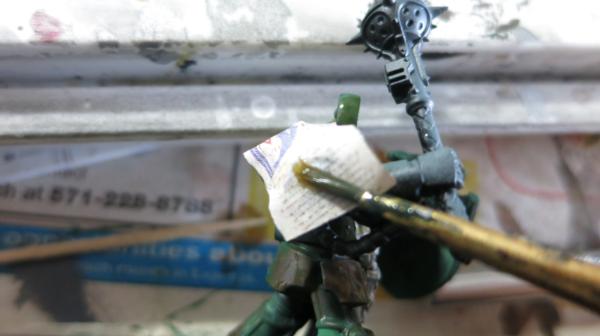
Dousing with Micro Set.
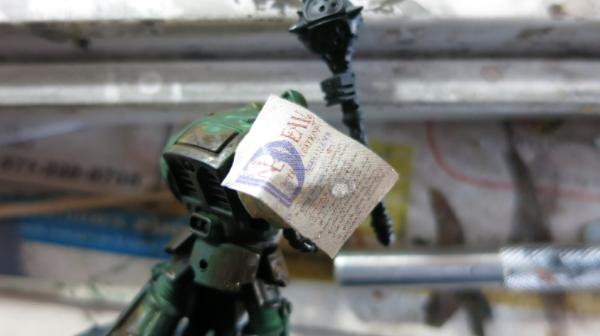
5) Use the Brush and Other Tools to Carefully Tamp Down the Decal.
Tamping Down the Decal
Notice that I have made no attempt to trim or cut the decal to size. Instead, I fold under the excess or gently (very gently) cut away excess. This is a careful step and it is better to go slow.
6) Let the Decal Dry. Rewet with Micro Sol and Continue Tamping Down the Decal. Between tamping, don’t be afraid to let the decal dry out even if it is not completely flat against the surface of the pad. After it dries come back, rewet with Micro Sol, let it sofen, and continue tamping again and again. A toothpick works reasonably well for tamping.
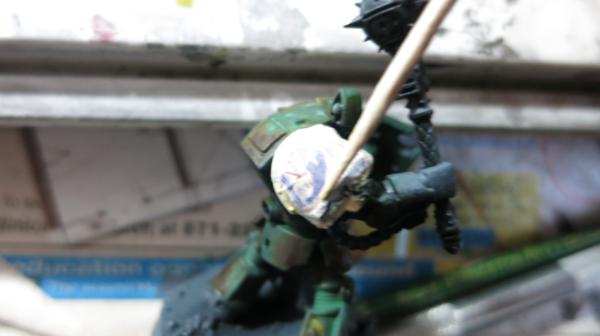
Tamping with Toothpick
It will take time and can be frustrating but it can work.
7) Finish with Washes to cover up Areas without Decals.
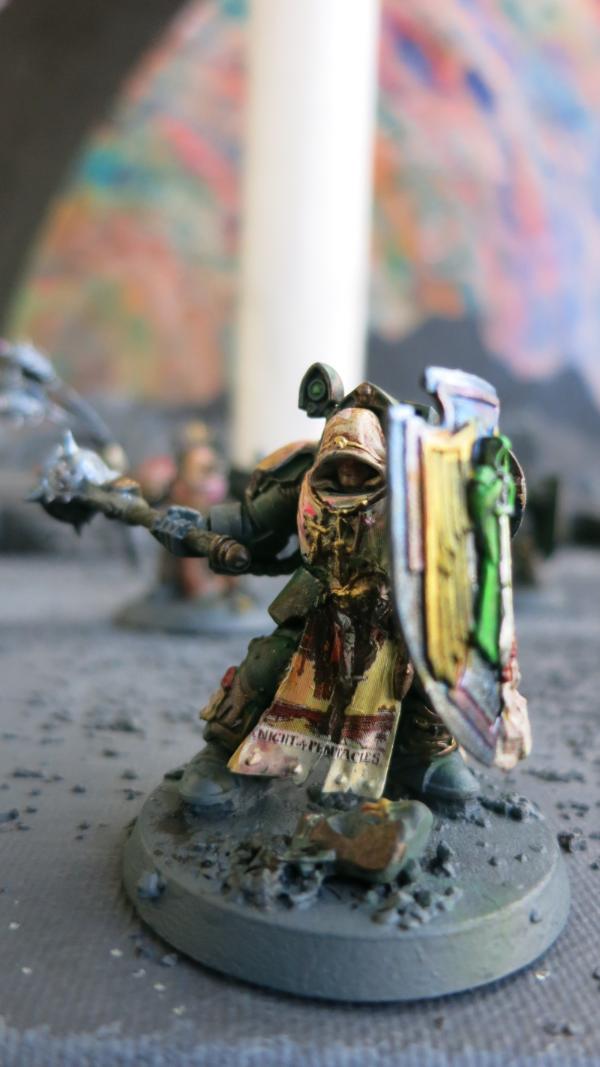
Shoulder Pad with Decal on Deathwing Knight (The Knight of Pentacles)
Look carefully at this the bottom of the Decal. The Decal wasn’t quite big enough to cover the whole shoulder pad. I took a dark wash and covered the gap over to hide the gap.
Shoulder Pad with Decal on Deathwing Knight (The Devil)
|
|
|
|
|
2016/11/26 16:44:55
Subject: 6th Biker Troop - “Schrödinger's Apocalyptic Raiders”
|
|
Speedy Swiftclaw Biker
Port Richey, Florida
|
Wonderful work! I really like your choice of color. The camouflage is great
|
It is your shock and horror on which I feed.... |
|
|
|
|
2016/11/27 14:47:51
Subject: The Deathwing Knights – The Decals on the Robes
|
|
Focused Dark Angels Land Raider Pilot
|
The Deathwing Knights – The Decals on the Robes
Thank you Corporal Chaos for the encouragement. I like your pen name. I thought at first that you would have to be exterminated since Chaos must be exterminated without mercy. But I notice that you are listed as a Blood Claw of the Space Wolves so you must still be on the side of righteous and thus shall be allowed to live. Regardless, I appreciate your remarks. Thank you.
The robes on the knights were also challenging. Not only did I have to deal with folds, I had to deal with the bling.
To do the robes:
1) Paint the Robes White. Actually, I used a mixture of white, gold, and beige to get the color I wanted. The Tarot Card decals need a generally white base to properly show up.
The White Robe
Note that I left the knives and other bling unpainted. I will cover them with gold and bronze paints later.
2) Cover the robe with Micro Set. This will help set the decal. Use an old brush. Note that these are almost identical steps for the shoulder pads but they are a little easier because of the robes are flatter but a little harder because of the bling.
Brushing on Micro Set
3) Place the decal on the robe as best you can. It will not lay flat and may not completely fit the robe.
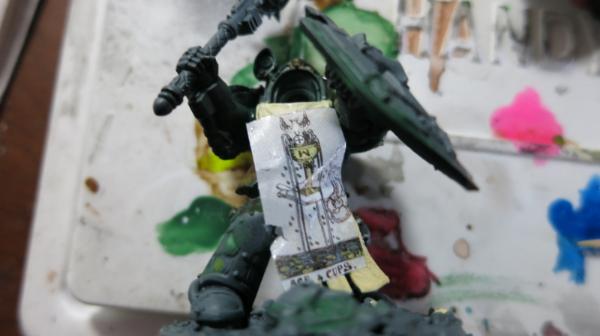
Placing the Decal
4) Dose the Decal with Micro Sol. This will soften the decal so it will stretch over the robe and around the bling.
Dosing with Micro Set.
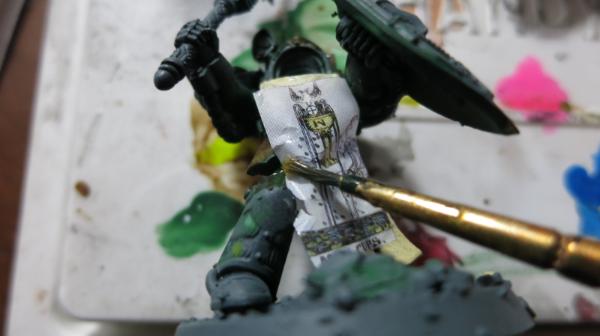
5) Use the Brush to Carefully Tamp Down the Decal.
Tamping Down the Decal
Notice that I have made no attempt to trim or cut the decal to size. Instead, I fold under the excess or gently (very gently) cut away excess. This is a careful step and it is better to go slow.
6) Continue Tamping Down the Decal. Don’t be afraid to let it dry, even if the decal is not completely in place. Rewet with Micro Sol and continue tamping again and again.
Temperance Decal on Robe
Devil Decal on Robe
7) Finish with washes to blend the decal and to cover up areas without decal.
Deathwing Knight – The Devil on Robe
8) Paint over the Bling. Although the bling is covered by the decal, just paint over the decal with the colors needed.
Deathwing Knight – Temperance on Robe
Deathwing Knight – Ace of Cups
Actually, when I finished these Deathwing Knights, I felt that they have turned out like they will play. Building them took a lot of work and it was a lot of fun but they aren’t as good as I had hoped. I suspect they will play the same way. To use them effectively, it will take a lot of work but it will be fun. Even so, they may not play as well as I hope. I guess I will find out.
|
|
|
|
|
2016/11/27 15:54:11
Subject: 6th Biker Troop - “Schrödinger's Apocalyptic Raiders”
|
|
Speedy Swiftclaw Biker
Port Richey, Florida
|
Thank you oldmanronald.... my pen name merely reflects the world I live in..lol Not Major or Private or even general merely corporal Chaos so as not to come crashing down. But Ot now. I like it when we all move away from the standard color schemes and explore the themes we all like. You have done an excellent job of breaking away from the boring single color and have made the camo work. I did a camouflage scheme years ago and really miss using them. Most have been repainted but I have kept several blooodclaws in the scheme. Keep it up. Thanks for the respite for the name...
|
It is your shock and horror on which I feed.... |
|
|
|
|
2016/11/28 17:50:15
Subject: Deathwing Knights – The Shields
|
|
Focused Dark Angels Land Raider Pilot
|
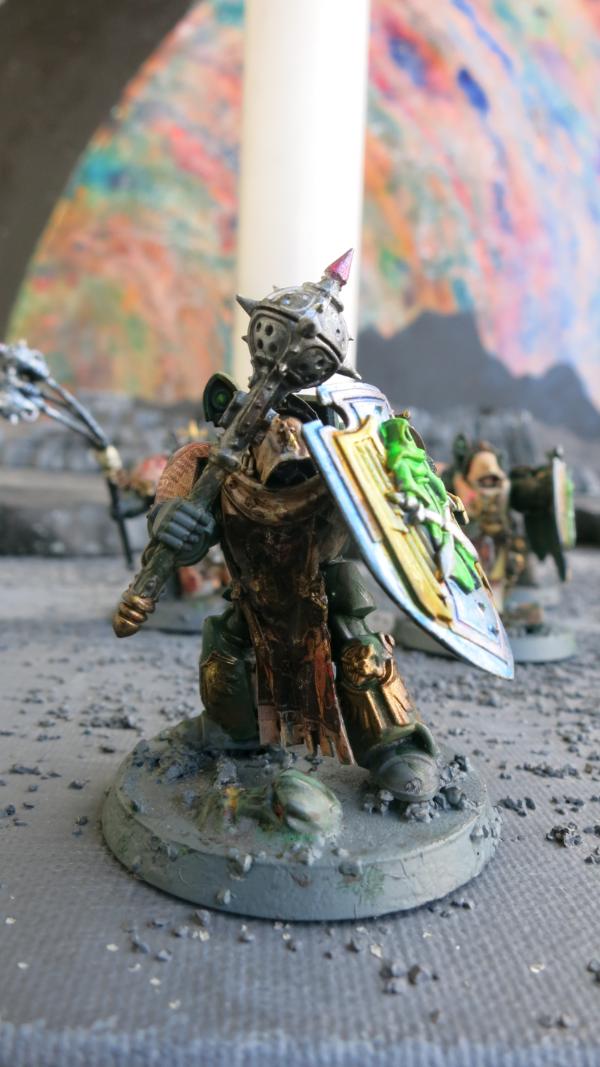
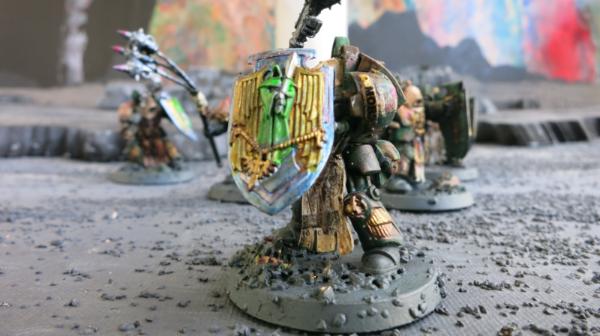
Deathwing Knights – The Shields
I agree, Corporal Chaos. I like the non-standard color schemes. I like seeing armies with personality.
The shields for the Deathwing Knights are easy to paint. I painted the whole front of the shield silver. Then I painted over the silver with washes, green wash for the robed figure, yellow wash for the wings, and magenta and blue washes for the trim. I think I actually used fluorescent colors and also washed with a little black and sepia brown. After I added the washes, I highlighted the swords on the shield with the silver and highlighted the bling with a gold paint.
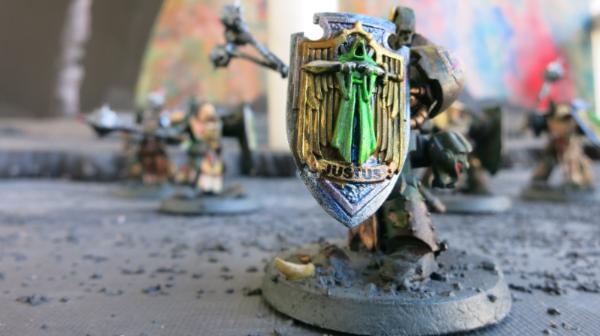
Deathwing Knight Master
Note the decal on the shield, the Justus, on the banner.
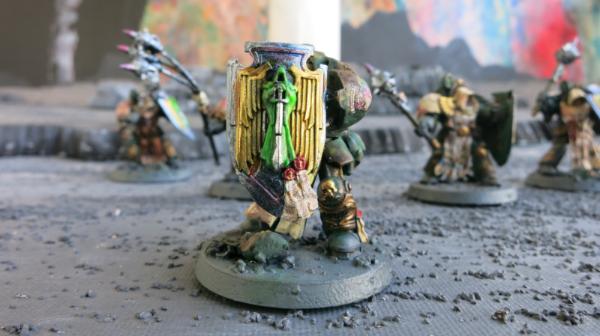
Shield with Purity Seals - Deathwing Knight
The strips of paper below the red seals are made from decals I had made from medieval manuscripts I found online.
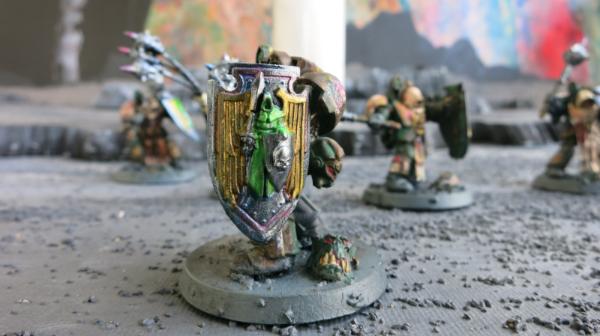
Shield with Skull – Deathwing Knight
Shield with Gold Cord and Amulet – Deathwing Knight
The amulet and cord are painted with gold paint which had a slightly different look than the yellow wash over the silver that is in the robed figure’s wings.
Shield with Crossed Swords – Deathwing Knight
|
|
This message was edited 1 time. Last update was at 2016/11/28 17:51:58
|
|
|
|
|
2016/11/29 12:54:56
Subject: Knight Master - Deathwing Knight – Justus the Magician
|
|
Focused Dark Angels Land Raider Pilot
|
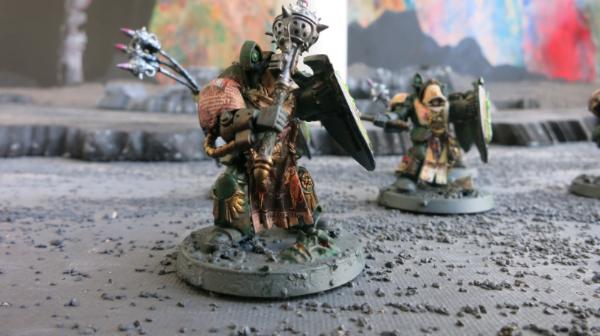
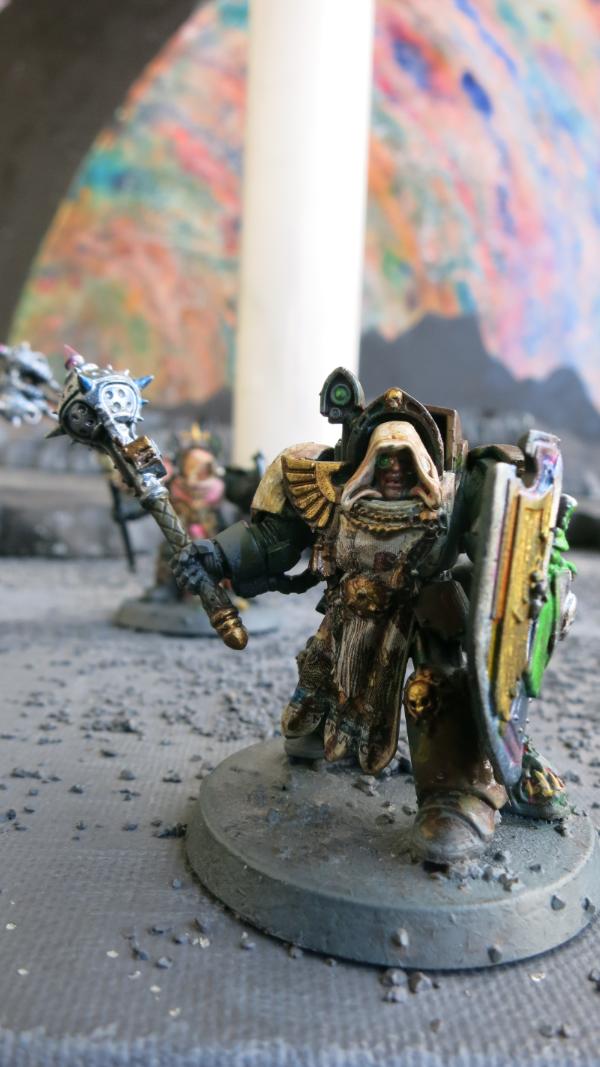
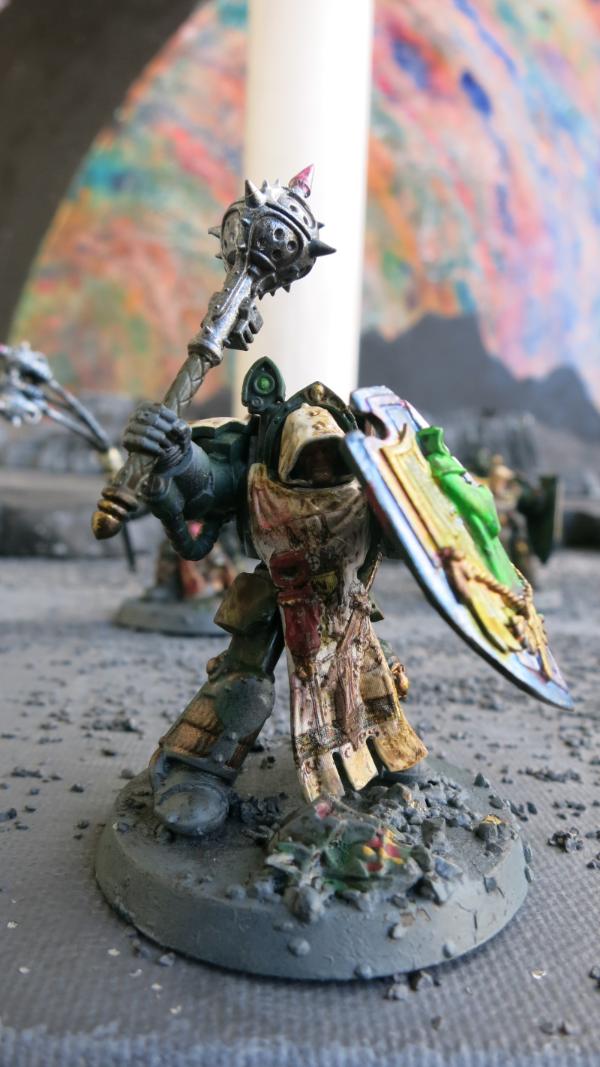
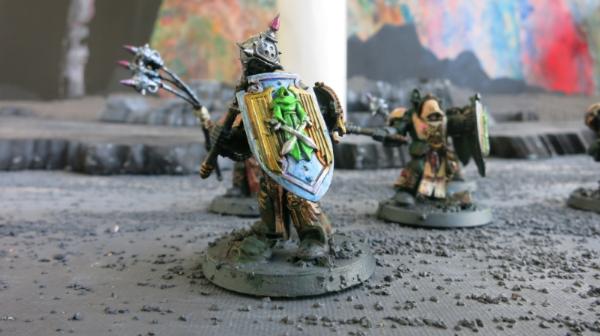
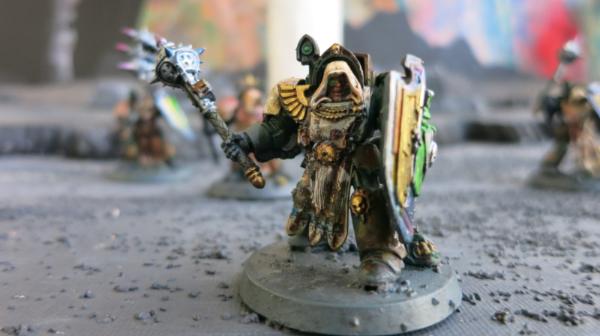
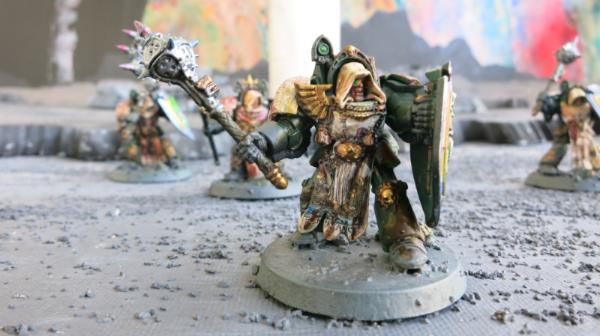
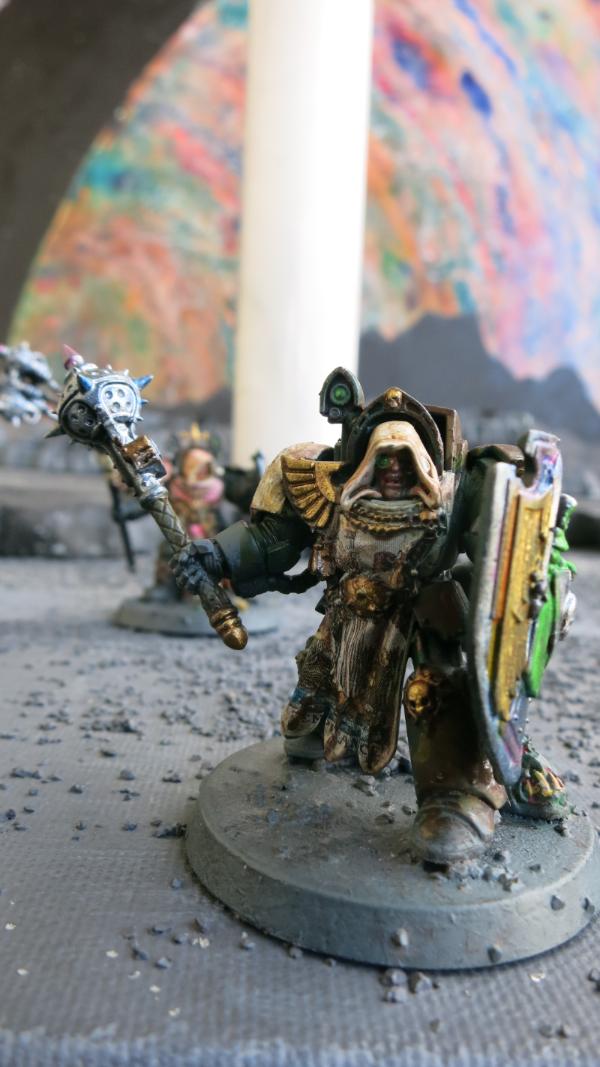
Knight Master - Deathwing Knight – Justus the Magician
Deathwing Knight Master
I named each deathwing knight after the symbol on his robe but since I put Justus on his shield, I have named the Knight Master, Justus the Magician. This Deathwing Knight Master had the Magician Tarot Card although because of his bling, the actual Magician tarot card decal has almost disappeared. Moreover, the Magician tarot card would be better for a librarian but still, it could be argued that this deathwing knight is a magician in his handling of the Flail of the Unforgiven.
I like the skull amulet hanging in front and his general character. I am not totally sold on the hoodies these knight wear. I would have preferred bare heads but they came with hoodies.
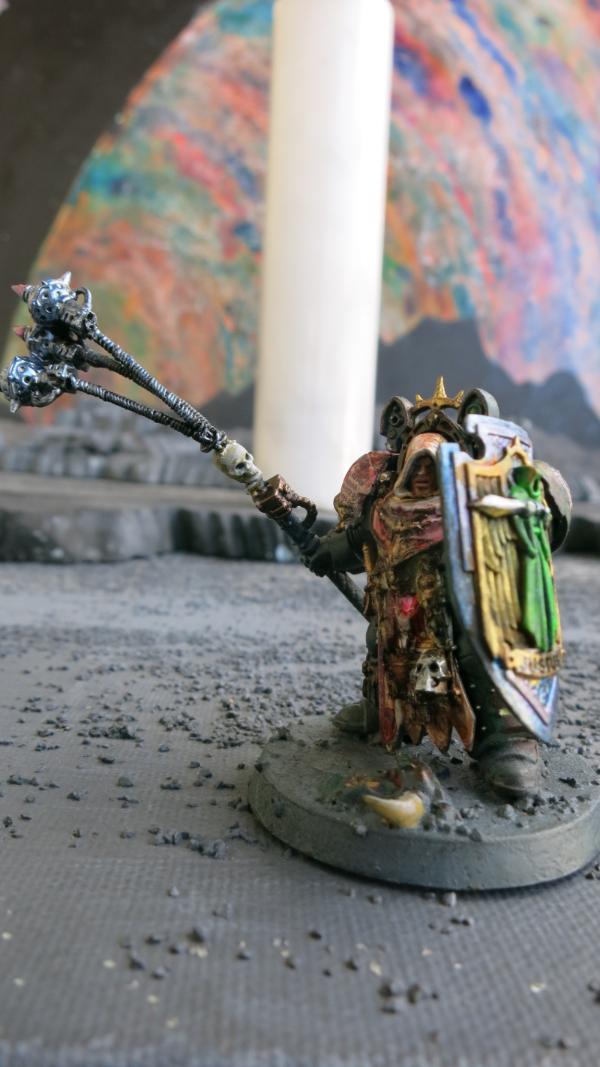
Knight Master with Flail of the Unforgiven
I reworked the Flail of the Unforgiven so instead of the mace heads hanging down, they are upright and swinging.
The Swinging Flail of the Unforgiven
Knight Master Wielding the Flail of the Unforgiven
|
|
|
|
|
2016/11/30 12:39:59
Subject: Re:6th Biker Troop - “Schrödinger's Apocalyptic Raiders”
|
|
Focused Dark Angels Land Raider Pilot
|
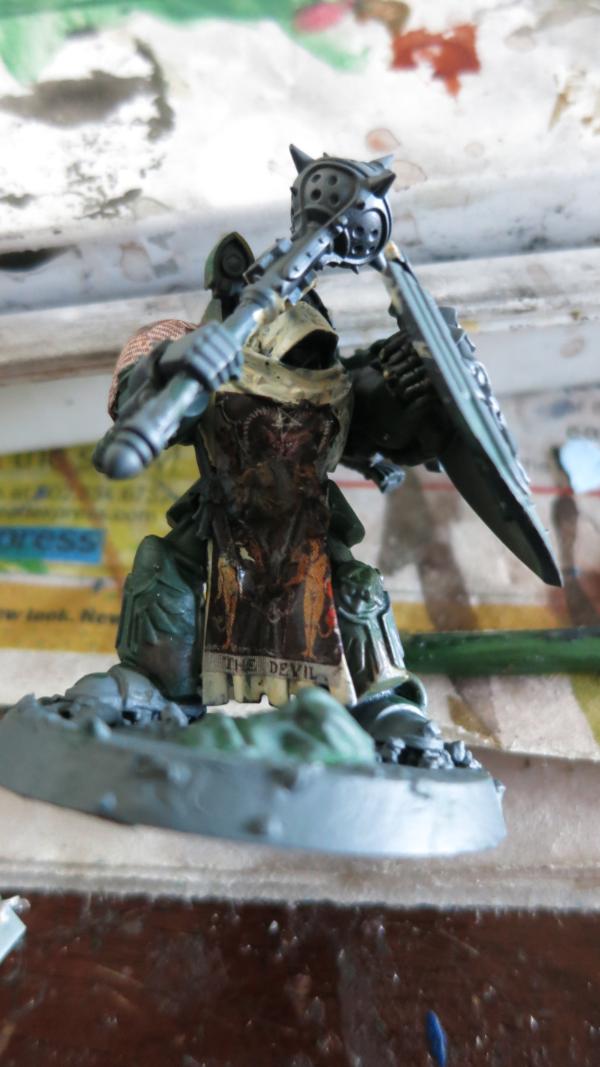
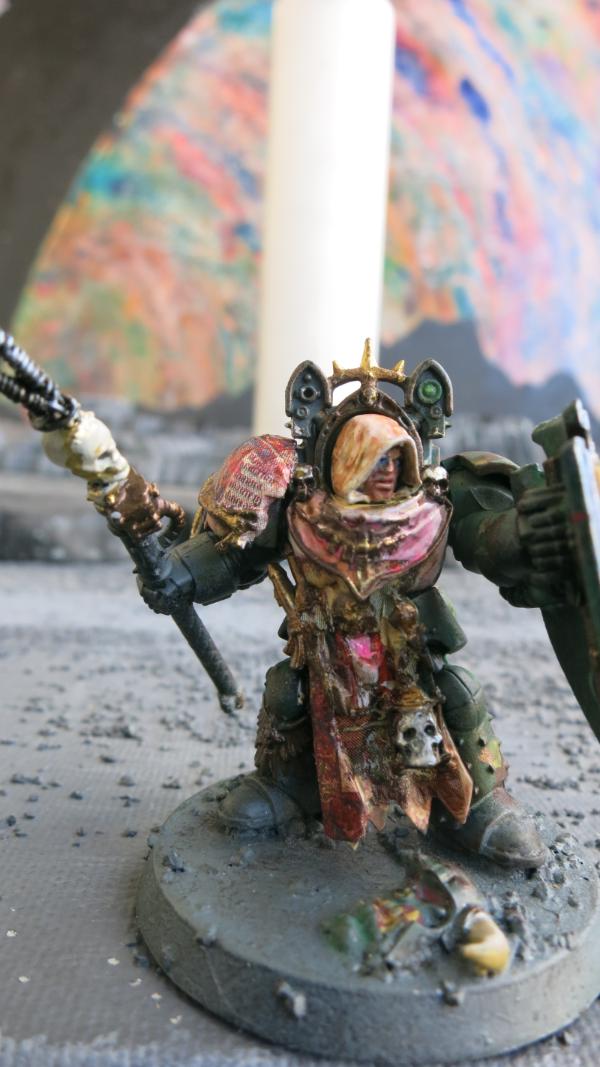
Deathwing Knight – The Devil
Deathwing Knight - The Devil with the Mace of Absolution
The Devil is the most mysterious looking of the Deathwing Knights. His face is behind a dark metal mask or helmet which is hidden under this robes. In fact you can just barely make out the slight nozzle of helmet under his hood. His eye lens are dark but one of them can just be seen if you look very closely. The Devil robe is dark and most of his body is hidden under this shield.
Deathwing Knight - The Devil with the Mace of Absolution – Side View
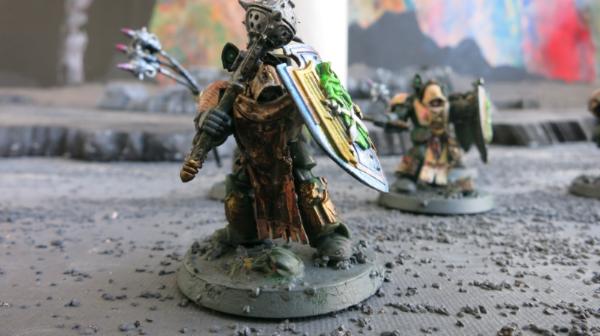
Deathwing Knight - The Devil with the Mace of Absolution – Front View
|
|
|
|
|
2016/12/01 19:49:32
Subject: Deathwing Knight – Knight of Pentacles
|
|
Focused Dark Angels Land Raider Pilot
|
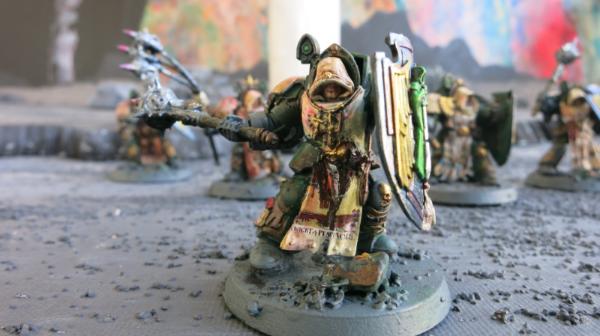
Deathwing Knight – Knight of Pentacles
Knight of Pentacles with the Mace of Absolution
The problem with the hoodie is that it the hood covers the face. The face is easy to paint, however, having no eyes - just a chin.
Knight of Pentacles with the Mace of Absolution
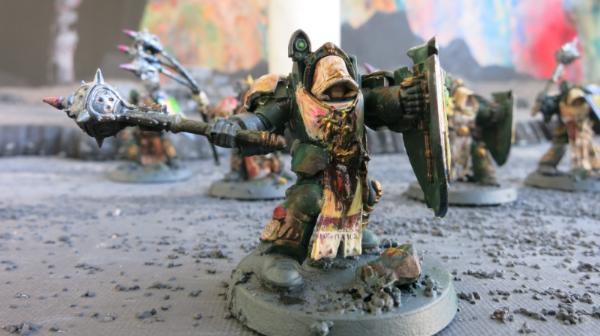
Knight of Pentacles with the Mace of Absolution
This view show the back of the shield. I kept it dark with a green wash over the undercoat and a touch of bronze dark and light paint on the handle and supports. Also note the Mace with the dark underside. Although its shadow is consistent with the light that comes in from the upper right (see the light on the rims of the bases) the mace is actually painted dark to make the shadow more dramatic. Notice that the model itself casts very little shadow on the ground around it. Much of the strong shadow on this model is painted so it complements the natural light. This is true even for parts of the face under the hood.
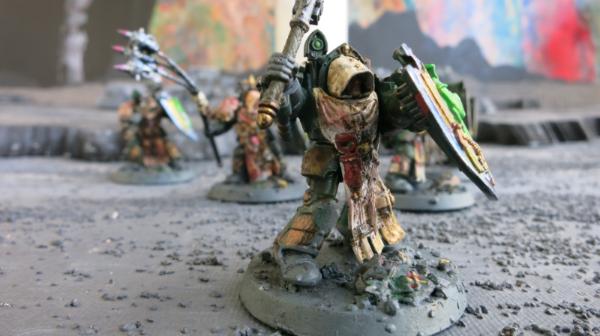
Knight of Pentacles with the Mace of Absolution – Rear View
This rear view illustrates the painted shadow against the natural light. Again the natural light is coming from the right front as can be seen on the bases but the back is dark. Again, these shadows are painted on, including the shadows on the left and right shoulder pads. The dark shadow on the right shoulder pad with the manuscript is placed in part to cover up the fact that the manuscript decal was too short to cover the rear corner of the pad. If you blow up the picture, you can see where the decal ended and the dark wash partially covering the part of the pad uncovered by the decal but the effect is subtle and the seam between the decal and the non-decaled area of the shoulder pad is difficult to see.
Also note the terminator helmet. All my space marines without a helmet on his head will have a helmet hanging from his belt such as this model or from the bike for my biker models.
|
|
|
|
|
2016/12/02 13:44:40
Subject: Re:6th Biker Troop - “Schrödinger's Apocalyptic Raiders”
|
|
Focused Dark Angels Land Raider Pilot
|
Deathwing Knight – Ace of Cups
Deathwing Knight – Ace of Cups
This knight has the Ace of Cups tarot card on his rope and carries what appears to be a meltabomb although none is authorized for Deathwing Knights in the Dark Angels Codex. Again, his face is covered although it shows a little more than some of the other deathwing knights.
Deathwing Knight – Ace of Cups with the Mace of Absolution
Deathwing Knight – Ace of Cups with the Mace of Absolution – Side View
|
|
|
|
|
2016/12/02 15:49:26
Subject: 6th Biker Troop - “Schrödinger's Apocalyptic Raiders”
|
|
Pious Palatine
|
Looking good.
Does Ace of Cups instigate the drinking games 
EDC
|
|
|
|
|
2016/12/02 16:53:23
Subject: 6th Biker Troop - “Schrödinger's Apocalyptic Raiders”
|
|
Focused Dark Angels Land Raider Pilot
|
Of course.
|
|
|
|
|
2016/12/05 23:40:01
Subject: Deathwing Knight – Temperance
|
|
Focused Dark Angels Land Raider Pilot
|
Deathwing Knight – Temperance
Deathwing Knight – Temperance with the Mace of Absolution
This model shows a little more of the face in spite of the hood.
Deathwing Knight – Temperance with the Mace of Absolution
This is my favorite Deathwing Knight because the Temperance Tarot Card blended well into the robe. Temperance seems to be a virtue not normally associated with the 40K universe but it fits even for a Deathwing knight, disciplined, self-control, self-restraint and even moderation.
Deathwing Knight – Temperance with the Mace of Absolution
Temperance is ready to smash the skull of the sinner marshaled in the ranks of sin.
The critical questions about the Mace of Absolution is does the mace grant absolution to the sinner whose skull is crushed or does it grant absolution of the sins to the Deathwing knight as he wields the mace that crushes the skulls of the enemies of humanity and righteousness?
|
|
|
|
|
2016/12/06 14:30:06
Subject: Re:6th Biker Troop - “Schrödinger's Apocalyptic Raiders”
|
|
Focused Dark Angels Land Raider Pilot
|
The Beauty Contest - What I learned as a NOVA Open Army Appearance Judge
For the 2016 NOVA Open, I volunteered to be an Army Appearance Judge. This was fun for me and I enjoyed looking at all the different armies. One of the fun factors of a war-gaming tournament is seeing well painted armies do battle.
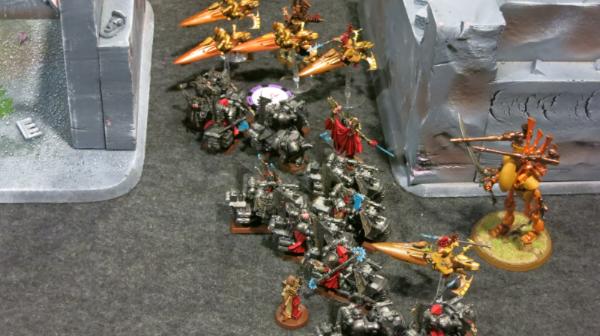
NOVA OPEN - Two Well Painted Armies Doing Battle
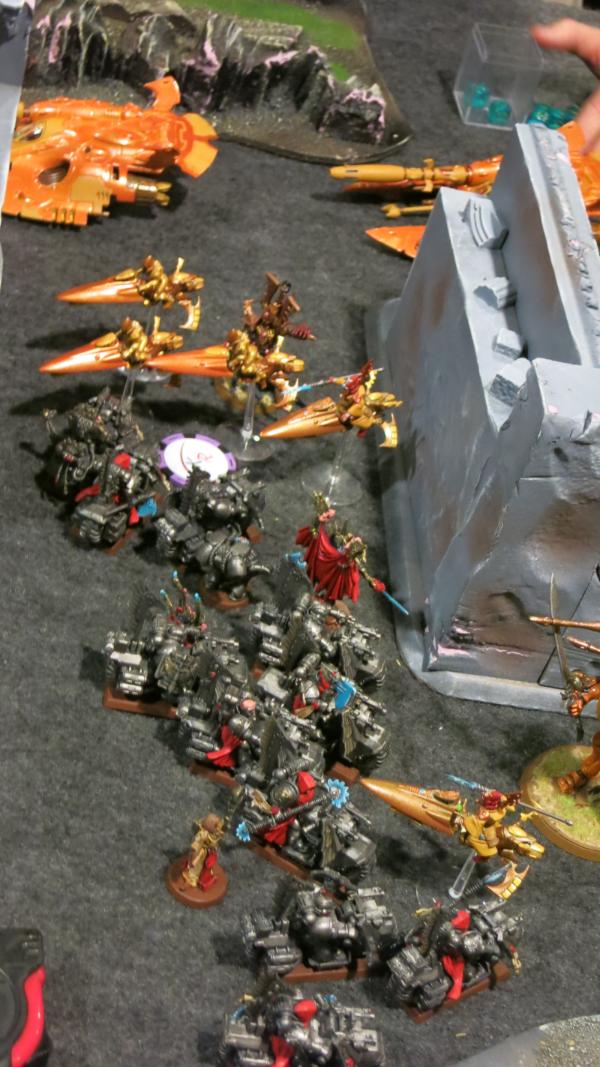
NOVA OPEN – Another View of Two Well Painted Armies
I also learned what impresses an appearance judge and how I could better increase my appearance score.
For almost every NOVA Open Tournament event, the armies were scored for appearance. Three appearance judges graded the army’s appearance, with an Initial Round and a Final Round. In the Initial Round, two judges separately and independently judged the armies on a four tier scale.
Tier 1 is ineligible armies that didn’t meet the minimum requirements because they had one or more unpainted models or bases or had models or bases with just primer or one color.
Tier 2 is tabletop minimum. These are the models that make the standard but lack shading and details. Sometimes called three color minimum models, these are the first models that most hobbyist paint until they start mastering more advanced techniques.
Tier 3 is tournament standard. These are the good standard armies that you find at the tournaments. Most armies are in tier 3.
Tier 4 are works of art and represent world class painting. Sometimes this is called having the wow factor.
Although this four tier system was new this year to NOVA, I suspect that for most appearance judging, even on a 100 point scale, the judge would place most models into these or similar categories and issue the scores accordingly.
At the NOVA Open, the first two judges placed the armies into one of the four tiers. The third judge reviewed the results and where the two judge’s scores were different separately judged the army and issued a final score. I was one of the two judges and tended to be a little more generous in grading then the other judge. So occasionally I gave a 3 and he gave a 2. In this case the third judge usually broke the impasse usually giving either a 2 or a 3.
In the Final Round, only the top tier armies were judged to determine the overall winners. Thus, if you don’t make the top tier in the Initial Round, you will not be looked at in the Final Round. To be considered in the Final Round, you need to stand out in the Initial Round.
In the initial round, the time spent on judging an individual army was short. We had to judge almost a hundred and fifty armies for the main 40k tournament and we tried not to interfere with the game play. We also judged between the games although it was harder unless the armies had the name of its owner displayed so we could assign the score.
I did learn a few tips that would be helpful to one that is trying to get into the top tier in the Initial Round. In other words, what do you need to do to make sure that your army has the Wow factor!
Tip 1. Use a Display Board. If you want to be in the top tier you need to stand out and a display board can help do that. Even the NOVA Open Army Appearance Scoring Primer admits this.
“[D]isplay boards are fully encouraged as a growing and exciting part of the hobby, which peers and judge alike are sure to appreciate and which undoubtedly supplement the ‘wow factor’ of your army.”
Primer," p. 6.
The display board can supplement the “wow factor” by drawing the judge’s eye to the army as a whole. Moreover, if carefully built, the display board can draw the eye to select models and downplay other models. Thus, place your beautifully painted and customized War Lord on a highpoint to invite the judges to examine this model in detail. Bury your mediocre scouts or uninspired Thunderfire cannons in the lower terrain toward the back. Lighting and other tricks can accent certain models and themes in the army. You can add Terrain features, flags, and other nonplaying models that enhance the overall appearance of your army.
Tip 2. Put your name on your display board. Yes, armies look better on a display board and so generally an army on the board will score higher than an army on the table but not if the army can’t be identified as belonging to someone. You will be graded when your army is in play and your display board is empty if your name is not on the display board.
Tip 3. Big models are more impressive than little models. This may be unfair but a beautifully painted Imperial Knight will attract the judge’s eye while a dozen meticulously painted imperial guardsmen will be ignored. Even in the examples in our judging handbook, the top tier examples show an imperial knight and a land raider, both big models, while the lower tiers were illustrated by small model armies. So consider adding a big impressive model to your display board. Moreover, since your big models sale your army, take the time to make them your best work.
Tip 4. Don’t make stupid mistakes. An unpainted or finished base will drop an army to the bottom tier. Some judges will overlook a single model or base that is unpainted but others will not.
Tip 5. The judges don’t know what models are actually played. Thus, on the display board, make sure to include that big impressive model. If you have to replace or add a model at the last minute and don’t have time to paint it up to your standard, remove it when you are not playing it. This may seem like cheating but most judges don’t want to put a top tier army into the bottom tier because one model had to be replaced at the last minute.
Tip 6. Conversions don’t show. I love to convert models and will spend hours modifying a model with custom parts. As I judged the armies, however, some of the players told me about their conversions. Because I love converting my own models, I listened politely but usually had already determined the tier. Moreover, unless it was poorly done, I couldn’t spot the conversion even when pointed out because I don’t remember what the original model looked like. Thus, don’t count on conversions to move your army to the top tier.
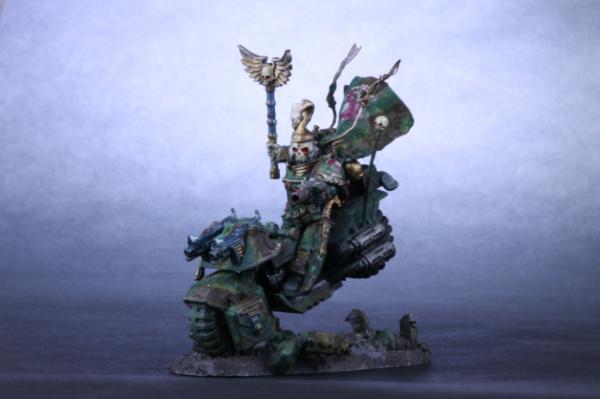
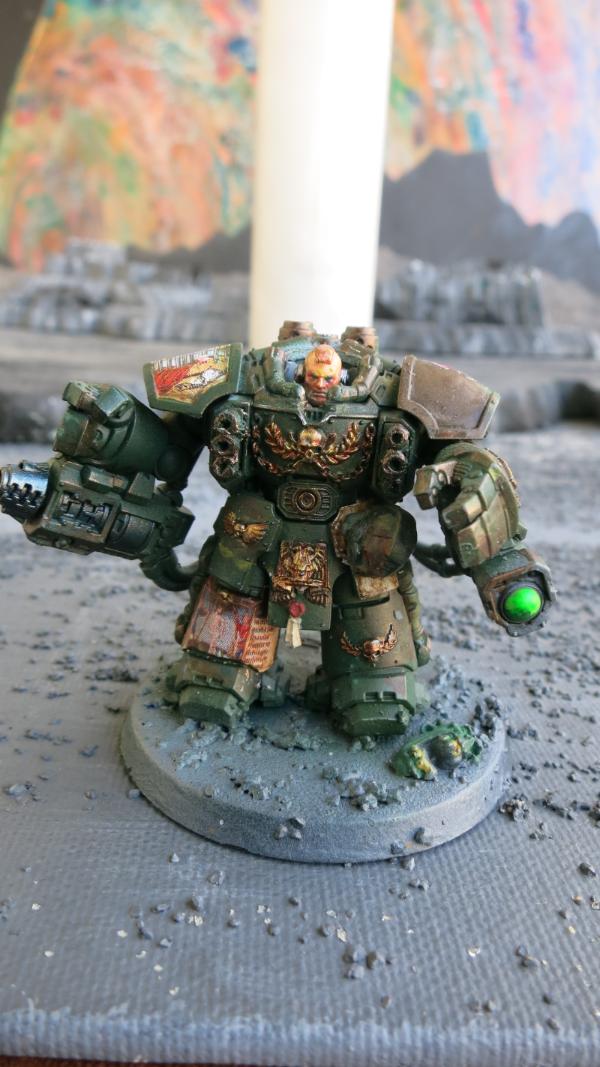
For example, consider my model of Sammael.
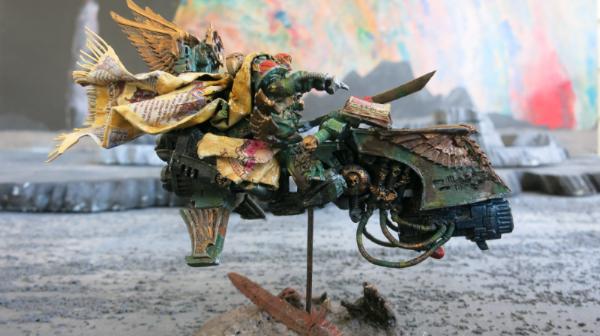
Sammael on Convex.
How many conversions do you see? You might spot one or two but unless you look up the original model online or in a codex, you would miss most of the conversions. Actually, this models has a lot conversions, including from front to back, replacing the plasma cannon, making and adding the cable to the plasma cannon, replacing the short raven sword with a raven sword made from a piece of brass wire, cutting off the right arm off of the handle and rebuilding it with the pointing finger which was taken off the Ravenwing Dark Knights banner holding hand and adding a pointing finger made of wire and green stuff, replacing the sword holding right hand with a mechanics bit I ordered, rebuilding the handle, adding a wire support to the base, cutting up an old metal demon prince for the body on the base, adding a helmet from Ravenwing Command squad company champion, cutting the jetbike in the center and adding a heavy wire to length it and to make it more symmetrical, cutting Sammael’s body in half and adding green stuff to raise him up and to straighten out his posture, replacing his backpack with a double eagle command pack, removing Sammaul’s clock and replacing it with a new clock made of green stuff and wire, and removing the tail on the Corvex, and replacing it with the icon altar tail that is found on the Ravenwing Company Champion’s bike. Most judges will not realize that he has been extensively converted. It is the quality of the painting, not the conversions, that sale the army.
Tip 7: Be a master painter. I am sorry, but after all these tricks, if the models aren’t painted great, you are not going to be in the top tier. Unfortunately, this is a matter of talent and practice. Still, often a master painter will be overlooked and placed in the second tier because the judges don’t look carefully enough or weren’t wowed when they first looked at the army. If you are a master painter that wants to be the top tier, use these tips to catch the judge’s attention.
|
|
|
|
|
2016/12/07 12:45:51
Subject: Making Bases - The Gesso Mix
|
|
Focused Dark Angels Land Raider Pilot
|
Making Bases - The Gesso Mix
I tend to keep my bases simple. I follow the following basic steps.
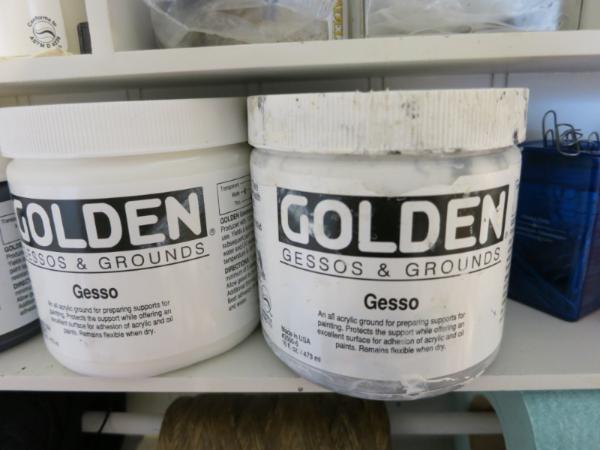
I mix black and white Gesso to make a Gray Gesso base. I find that a little black goes a long ways so I really add a little black to a lot of white.
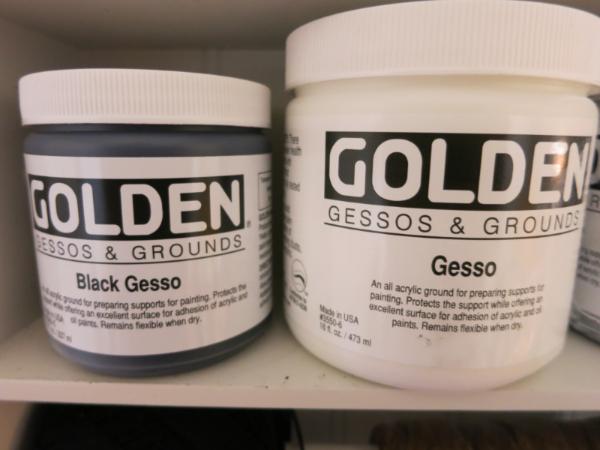
Black and White Gesso
I add model railroad ballast to the gray Gesso to give it a texture. I use a mixture of fine and medium ballast with a little bit of course. I mix up a lot at a time since I have found that this mixture will last for years if kept sealed in an old Gesso container.
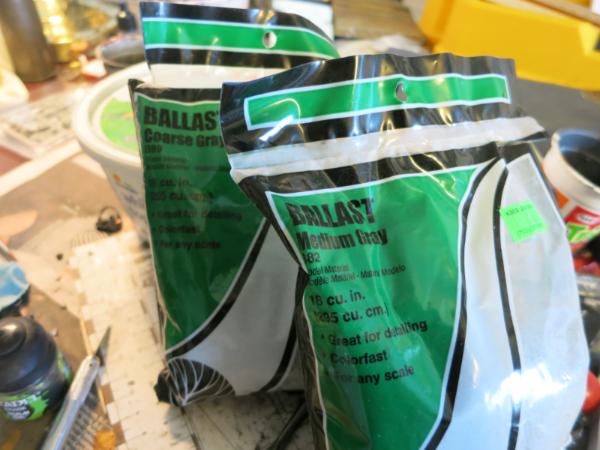
Model Railroad Ballast
The Premixed Gesso and Ballast in the Gesso Container on the Right
I keep the mixture in an Old Gesso container.
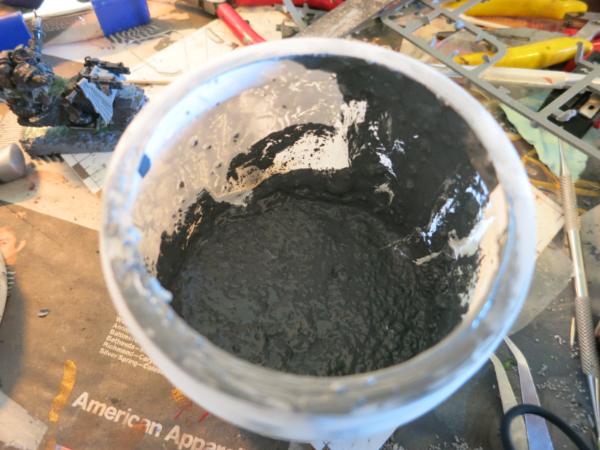
The Premixed Gesso ready to Apply
When I am ready to use the Gesso, I simply gob it on with a stiff bristle brush.
Base with the Gesso Mix Gobbed On
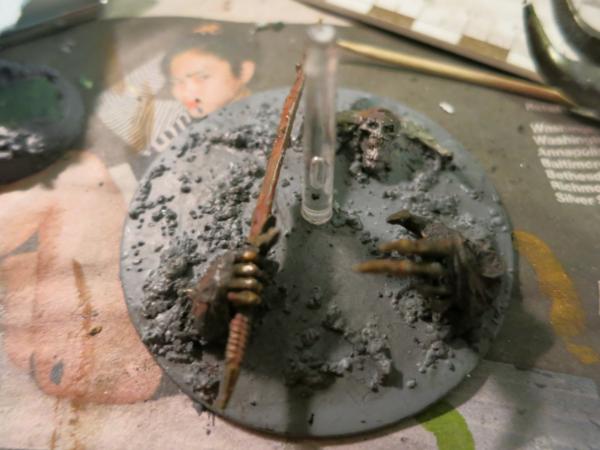
The base can be painted, pigmented, or just left as it is when it dries. I use mostly washes and pigments on my bases rather than regular paint. This keeps the base dull and weathered looking so the base does not distract from the model. I also use this gesso mixture to paint my display boards so it the display boards and the bases match.
|
|
|
|
|
|
|