Another adventure for my
DE using the webway portal known as the internet. Probably one of the most frustrating battles, too, because it should have been easy, but Murphy was alive and well. I’ll have to catch him and give him to a haemoculus for this…
My standard list of:
2 x Dracon with agonizer, pistol
4 incubi
2 warriors with splinter cannons
Raider with
DL
6 x 5 warriors, 1 with splinter cannon, 1 with blaster
Raider with
DL
3 x Ravager 1
DL 2 disintegrators
Vs
Hive Tyrant
Enh senses, Toxin Sacs, Venom Cannon
Devourers, Warp Field
184
2 Tyrant Guard
Flesh Hooks
92
1 Broodlord
Ext Cara, Toxin Sacs, Feeder Tendrils, Flesh Hooks
96
9 Genestealers
Scuttlers, Toxin Sacs, Flesh Hooks
198
9 Warriors
Enh senses, ext cara, toxin sacs, 4 deathspitters
4 devourers, 1 barbed strangler, 4 scything tALONS, 3 RENDERING CLAWS
335
12 guuabst
72
12 gunats
72
14 gunats
70
2 zoanthroipes
110
1 carnifex
barbed
str x2
spine banks
120
1 carnifex
crushing claws, scything talons. reinforced chitin,
ext cara, spores
139
Copied and pasted from his list message….think the cheaper gaunts were spinegaunts, and the more expensive broods were termigaunts.
Hadn’t seen a large, mixed weapon warrior squad like that before, but figured overall I should have a fairly easy time blasting his ranged stuff at range first, then the melee oriented stuff as it got closer, and use the incubi to clean up/kill his troops.
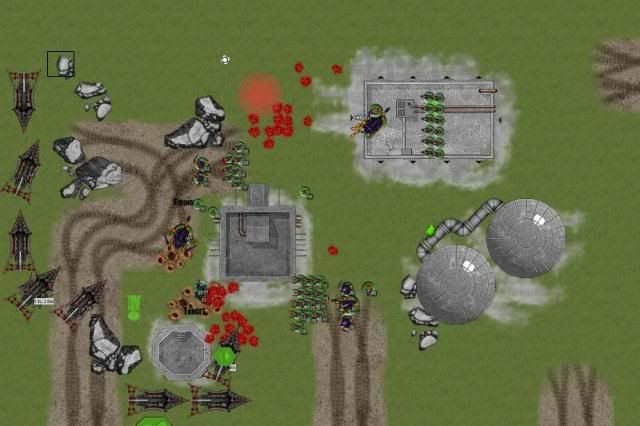
Mission was Capture and Control, spearhead setup. He won the roll for choosing corner and for choosing first turn, and he took the upper right corner and chose to go first.
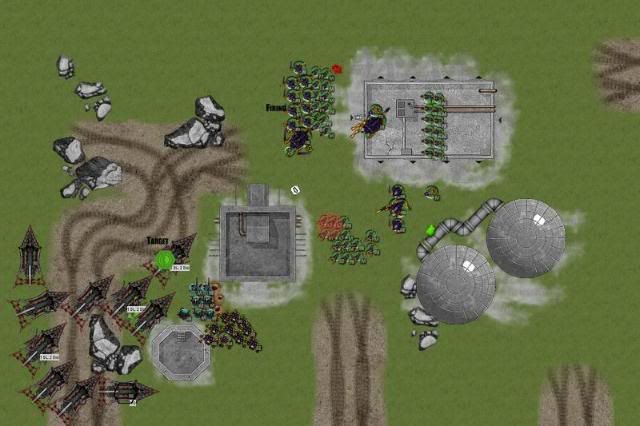
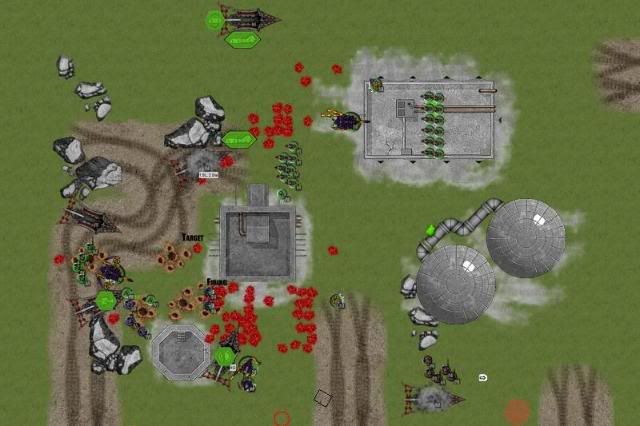
FINAL SETUP:

My objective marker was buried in the middle of my deployment area among the raiders, while his was buried under the termagaunts in the large building in his corner. Forgot to save after he placed his broodlord/stealers, which he put near the middle building. They used their scout move to go around the southern edge of the building. I hoped to drift most of my forces north, shooting up that half of his army, then drift south and nuke the tyrant (which I assumed would be trying to head around the same as the stealers).
Failed to steal the initiative, so on to turn 1!
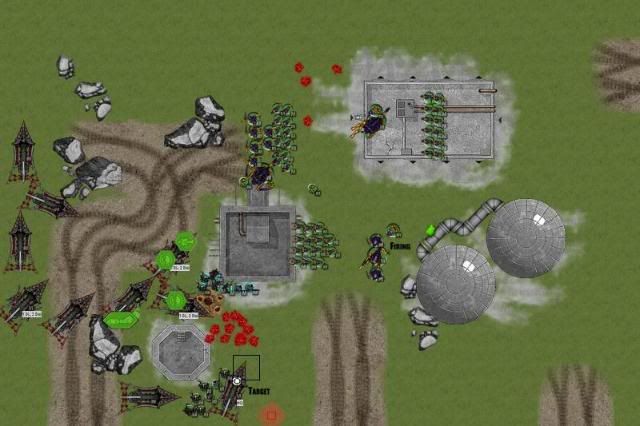
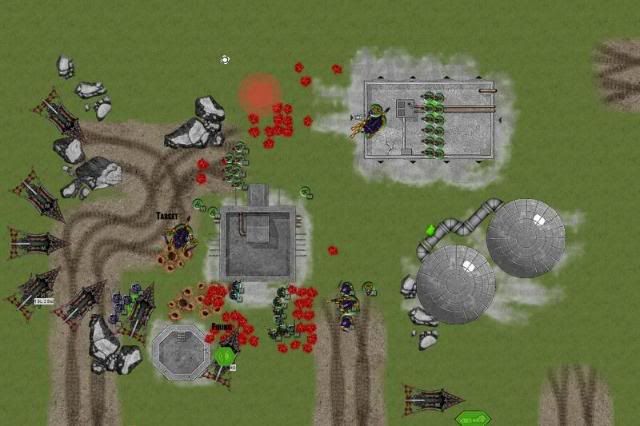
Turn 1A, Tyranids.
As expected, most of them moved forward. Shooting from the warriors immobilized a ravager, and the stealers killed an
HQ raider. No casualties from the blast on either side. Not bad overall.
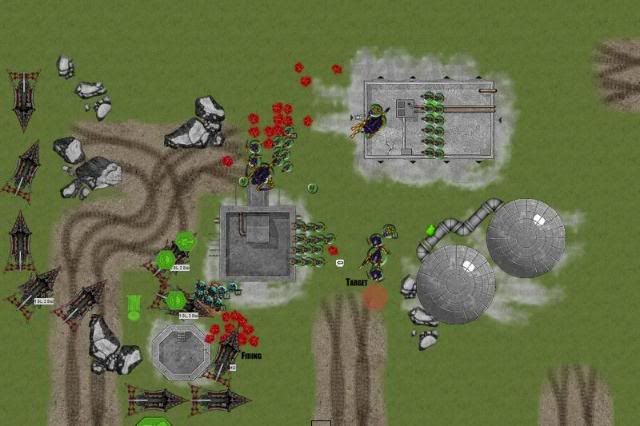
Turn 1B,
DE

Obviously the stealers had to die. With no extended carapace, I hoped the job would be fairly easy. Both
HQ squads dumped their firepower into them, along with the ravager (shooting on low power to avoid nuking my own troops, and because of the movement involved). All but the broodlord with one wound remained. Not pleased, until I remember the
HQ raider hadn’t fired. Thankfully, it hit and took the guy out.
Rest of the firing was about average. Several wounds on warriors, 1 on the fex.
Turn 2A Tyranids
More forward movement from the nids, and some “meh” shooting. Immobilized ravager loses a weapon (he chose the
DL), and the tyrant immobilizes the
HQ raider.
Turn 2B
DE
Setting up the shooting gallery on the left side, waiting for the fex to walk in. Kill several warriors and some termagaunts, put another wound on the fex as well. Firing does nothing to the tyrant and guards, although a shot does drift left enough to kill a termigaunt. 3
DLs, 1 dis and 4 splinter cannons for that? A bad sign of things to come…
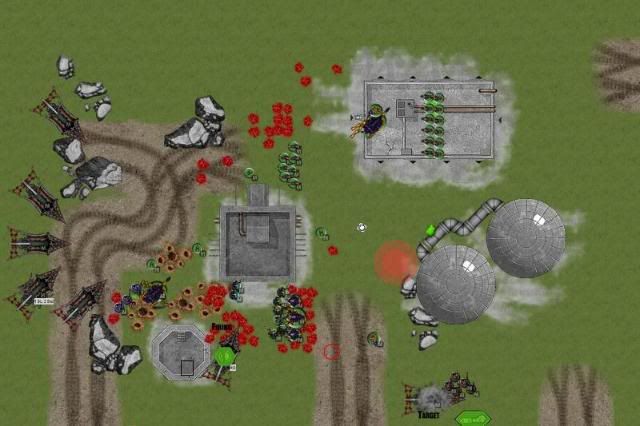
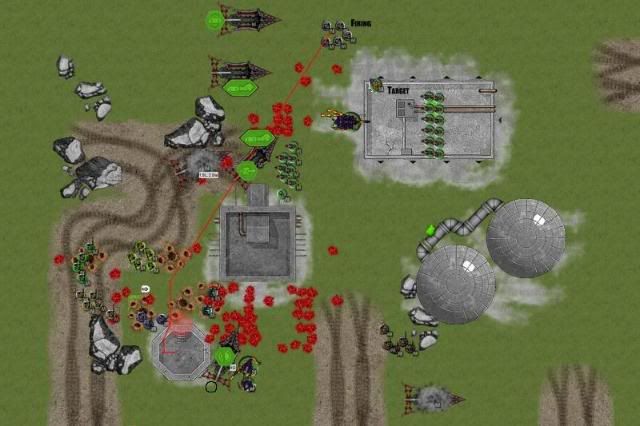
Turn 3A Tyranids
More forward movement. Carnifex eats the immobile ravager. Tyrant shoots and kill the other ravager. Warriors shoot up the dismounted
HQ squad, and the dracon gets insta-killed by a round (forgot about that when I assigned a wound to him!). Still, they hold.
Turn 3B
DE
Now, time for the counter attack!
HQ squad dismounts and assaults the spinegaunts, killing them all. Almost everything on the left opens up on the carnifex…6 raider
DLs, 2-3 blasters, 4 splinter cannons…..and not a single wound inflicted. THAT wasn’t the plan. I end up using the ravager to kill off the warriors…no more synapse, so MAYBE I’ll get lucky…
I turboboost a raider along the southern edge to get ready to contest/claim the enemy objective.
Turn 4A Tyranids
As expected, the fex trudges along and eats a raider, with the blast killing a few warriors. The southern zoan’s attack on the raider fails, so the tyrant shoots the raider down. Of course, that foiled his plans to assault my incubi, but it screwed me, too, so I guess that makes it even. His termigaunts have to retreat back for synapse….not that they were a major threat, but good to push them back a bit.
Turn 4B
DE
Turn 5 is coming up, and I’m potentially going to lose at the rate things are going. I need everything I have to kill the fex (and possibly tyrant) that may contest my objective, but I need to at least contest
HIS objective, too. So, I run the gambit and split my forces, trying for both…go big or go home, right? Shooting from the lower right raider squad puts a wound on the zoan, and everything else shoots the carnifex. From 4
DLs, 4 blasters and 6 splinter cannons, I get 2 wounds (he did pass 7 armor saves from splinter cannons!). So, 1 wound left. Great.
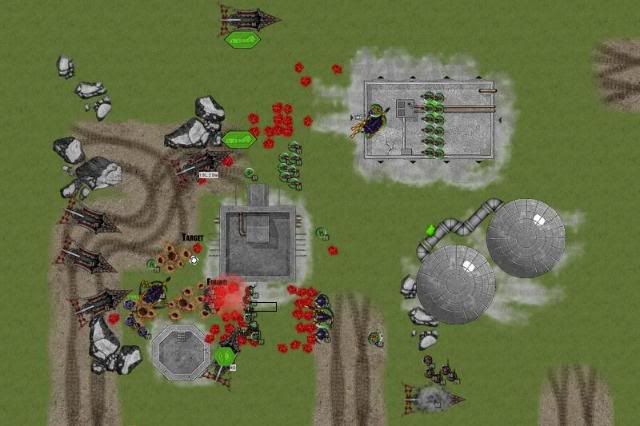
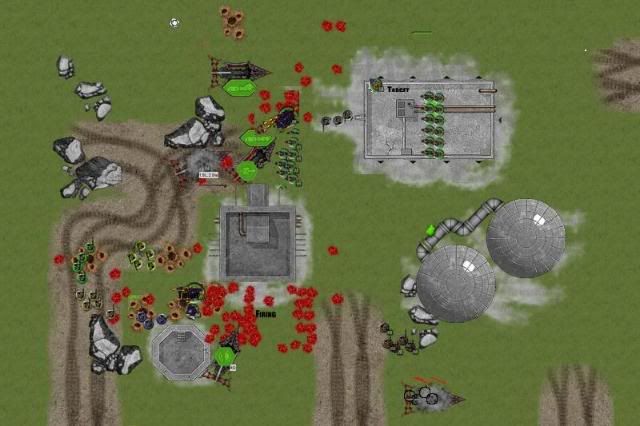
Turn 5A Tyranids
Having never really dealt with spore mines, I hadn’t paid too much attention to the trail of them the carnifex was leaving. That hurt this turn. One drifts into my ravager, destroying it. Another takes the
DL of a raider. The fex eats another raider. My northern raider gets stunned, ruining its chances of contesting the objective. The tyrant assault my
HQ, and my dracon hits and wounds with all three attacks! He loses a guard, then cuts the squad down.
Turn 5B
DE
FINALLY kill the stupid carnifex, ensuring I’ll at least tie if the game ends (and I won’t lose another raider/squad). As I need to contest, I dump all my warriors at my objective, and turbo all the raiders forward to try to overflow his firepower near the objective. Southern squad kill the zoan, which is good, as I need to keep throwing troops in his tyrant’s way to block it from my objective.
Game continues
Turn 6A
Screwed up my screen capture a little bit this turn, so excuse the crude cut/paste corrections. Raider up north dies, another gets smacked around a bit and loses a weapon. Northern warrior squad gets shot and starts running. Tyrant kills incubi and start moving towards my objective…not good. Tried to move troops in his way the previous turn, but terrible
DT rolls prevented me from setting up a screen. If the game goes to turn 7, I’ll have a tough time stopping him from contesting my objective.
Turn 6B

Maybe a wound or two on the tyrant from all the shooting (couple
DLs, blasters, cannons and rifles). Not enough to stop it. Raider boosts forward, as close to the building as possible.
Game ends.
Unfortunately, no agreement on my contesting his objective. He felt I was outside 3”, and I thought the corner of my raider was in. Probably should have boosted both raiders onto the roof or something to make it more absolute. So, either a tie or minor victory for me, depending on your thoughts/measuring.
Lessons learned here are rather limited. I think I had the right gameplan, but terrible rolling against the carnifex screwed everything up. Every turn was something like “well, we’ll move in, blast him with everything (cannons, blasters,
DLs), and then move on from there….it just never happened.
Still, a bit worrying, as this was not (
IMHO) not the most optimized list, and I struggled with it. More shooty, advancing
TMCs would have been a problem.
Also, as usual, not owning the enemy codex left me unable to intelligently argue odd issues that came up. For example, go look at the top of turn 3…you can see where his carnifex was prior to charging my immobile ravager. I said he shouldn’t be able to charge, as the spore mines were in his way, but he said they have a special rule that you can move through them…okay, I have to take his word for it. Would it have made a huge difference? Probably not, but it could have helped if his call was incorrect (which I still don’t know for sure…anyone out there want to clarify for me?).