Part 1 is
HERE
That’s right! It’s time for the thrilling conclusion to the epic tale of Abaddon’s ill fated beer run.
CoachNitro and I decided to play a 3 turn only Apocalypse game using as many crazy datasheets as we could fit into 4000 points as a finale to the previous game.
After the bloodthirster – Ted totally got his butt kicked by the Battle Sisters of Delta Nu the fateweaver took off in their car leaving them stranded. Thinking fast, Abaddon called his frat brothers to come get them while Ted called his older brother An’ggrath. Their only hope is that help can come in time…
Apocalypse
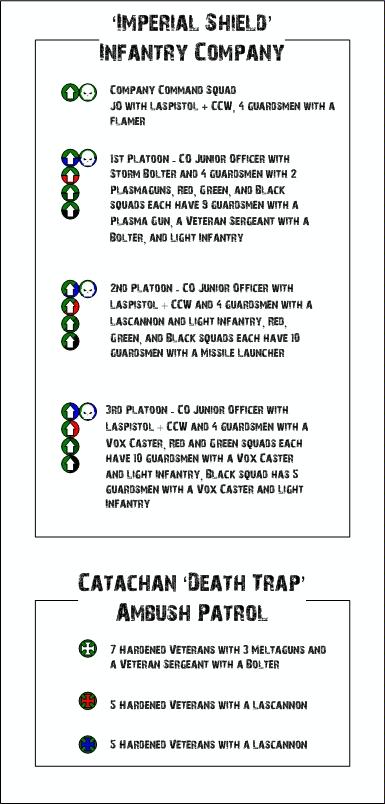
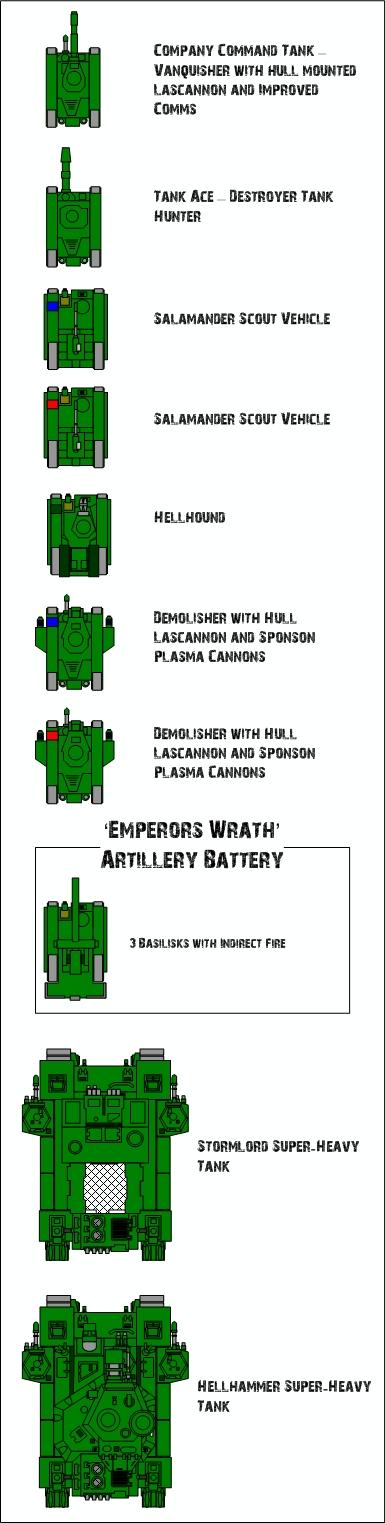
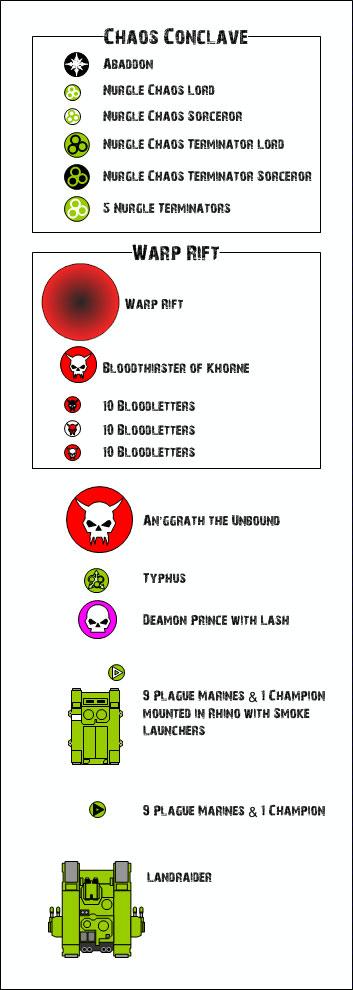
Armies: Imperial Guard and Armored Company vs Chaos Space Marines
IG
AC
CSM[/size]
 Deployment

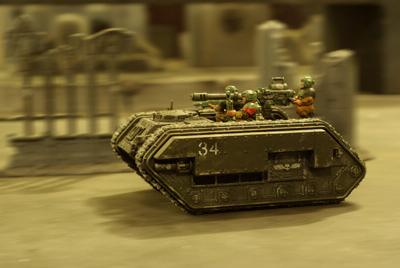
We actually rolled the table slice and came up with what you see above. I bid super high to get second turn and it worked so my infiltrators got almost free reign of the battlefield. I also set some of my allowed defense lines in front of the Warp Rift and the ruins next to the Landraider. I was just hoping to slow the tide down a bit to try to ride out the game. What I was really hoping for was to exploit the Ambush and ‘On My Coordinates’ assets on things coming in. Then make some fast Tank Riding moves with the Salamanders. Oh yeah, did I mention I took Tank Riders? I know, awesome right?!
Turn 1 CSM

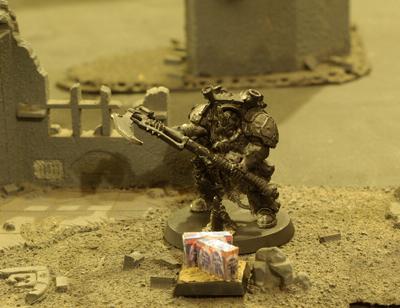
Abaddon starts out by using his Planet Killer to destroy one of my Basilisks and Indiscriminate Bombardment to stun the driver of the Hellhammer and knock a structure point off. The same attack on him only results in the loss of a wound from his Terminator Sorcerer. The Demon Prince barely edges in right between my infiltrators and assaults the sacrificial guardsmen with the Vox Caster killing 2 of them. Meanwhile Typhus drives his Landraider right up to the cases of Pabst and defiles them (I won’t go into the specifics of HOW he did it) eliminating the objective.
Turn 1 IG

I’m pretty sure the Warp Rift marker is supposed to go down later in the game or something but since it went down with the terrain I targeted that spot for all of my scheduled bombardment attacks. With nothing there this turn it goes off harmlessly, but it doesn’t really matter either way since this is the only turn I remember to use it. Since I also forgot to use my ambush asset on the Demon Prince when he came on I decide to make up for it by using ‘On My Coordinates’ on the unit in
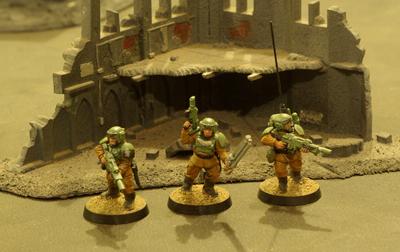
CC with him. In a spectacular act of selflessness and stupidity all of the guardsmen are wiped out by the bombardment leaving the Demon Prince unscathed. Not sure on the rules of whether or not he’s fair game nothing else decided to shoot him this turn. The Vanquisher and Salamander combine fire to destroy the Rhino and the nearby vets pick off a couple of Plague Marines as they escape the wreckage. The Demolisher destroys the LAndraider as two more stranded Plague Marines are cut down by the Shadowlord. Of course, the Basilisks fail to even hit anything.
Turn 2 CSM
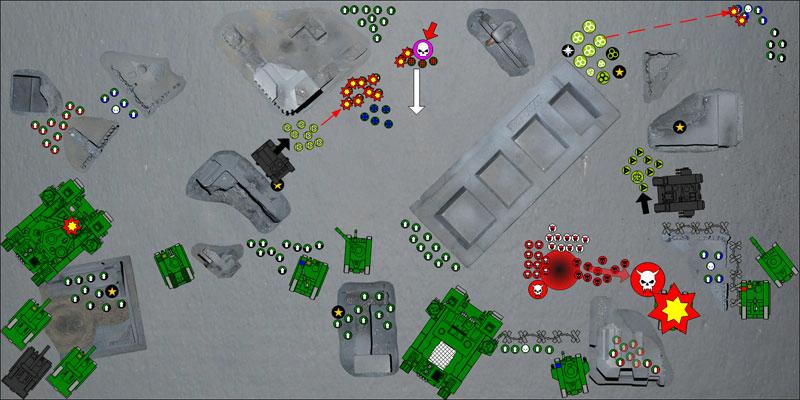
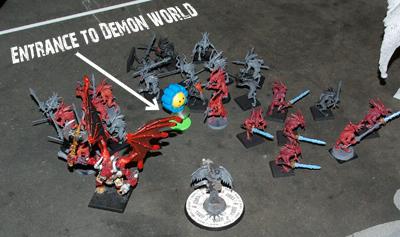
Another Planet Killer Strike shakes the main gun crew in the Hellhammer just as An’ggrath leaps from the Warp Rift closely followed by 30 lesser demons and Ted. The first thing the super demon does is kick one of the Demolishers for a 47 yard field goal which is a personal best for him. The Nurgle Terminators in the backfield pick off two guardsmen who are just in bolter range. The Plague Marines in the center leap over their wrecked transport to blow away the Meltagun armed vets while the Demon Prince charges and kills 2 others. The boys and me are kind of thinking we should have just let Abaddon go at this point.
Turn 2 IG

Since I forgot to use my Ambush asset on the demons during the opponent’s turn I decide to just go ahead and forget to use the Scheduled Bombardment as well. Even without the use of a fully functional brain though I still manage to cause large amounts of carnage around the Warp Rift. The Shadowlord decides it’s Ted’s time to die and makes it happen as it unloads all of it’s fire into the poor Bloodthirster destroying it. Surprisingly enough the Demolisher lands a shot right in the middle of the lesser demons and destroy a fair chunk as the nearby guardsmen and Vanquisher pick off a few more. Even the Missile Launcher armed guardsmen on the roof of the nearby building get some action as they knock a wound of An’ggrath who’s too busy scraping Imperial Guard armor off of his hooves to notice. The Basilisks score a good marker round as they both land their shots right in the middle of Typhus’ Plague Marines killing all but one of them. The Salaanders each pick up a unit of guardsmen and haul them as far forward as they can while the units in the middle kill 3 Plague Marines. The celebration comes to a grinding halt though as another ‘On My Coordinates’ attack ends up wiping out another unit of guard without taking down the intended Demon Prince.
Turn 3 CSM
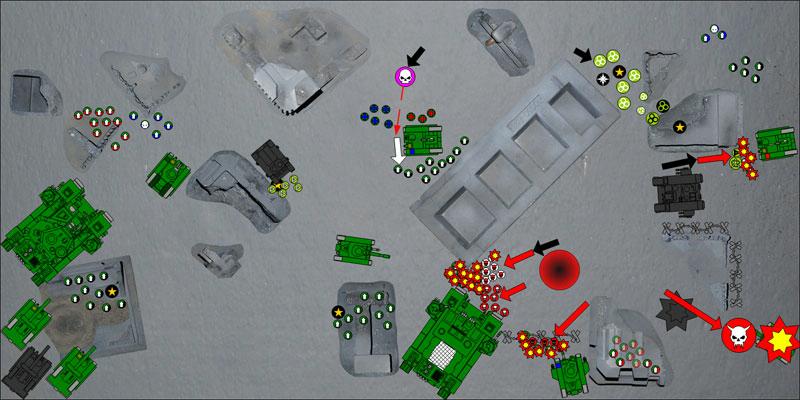
An’ggrath goes two for two as the Destroyer on the far right becomes little more than a smoking crater. Typhus charges the newly arrived Command Squad on that side and wipes them out. The Lesser Demons all charge the guardsmen in front of them destroying two more of my units while the Shadowlord remains unscathed. In a moment of confusion the Demon Prince lashes the guardsmen in front of the Salamander around it leaving them out of charge range. Meanwhile the Plague Marines near the middle hunker down on the objective there as Abaddon orders his cronies forward to do the same on the top right.
Turn 3 IG

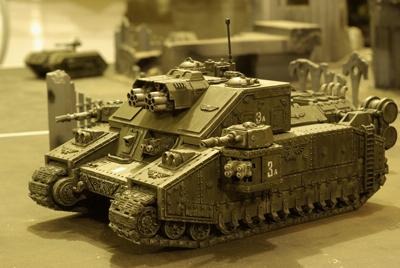
In a last ditch effort to come up with the win the Salamander in the center picks up a unit of guardsmen and deposits them on the objective while the nearby command squad gets off a lucky shot at the Plague Marines dropping them below half. Unfortunately for me, he’s got the ‘Hold At All Costs’ dealy and even with his Plague Marines counting for half points they still count for more than the guard squad. Oh yeah, and I’m pretty sure the Hellhound was immobilized by one of those Planet Killer thingies even though it isn’t illustrated. Even I’m not stupid enough to forget to move a scoring unit toward an objective on the last turn …most of the time. The other Salamander tries to get to the objective Abaddon’s Terminators have been camping on the whole game but comes up just short as the rest of the force focuses fire on the unit bringing them just below half.
Results:
IG – 2
CSM – 2
Draw!
Post Battle Report:
I’m actually pretty sure that Abaddon got pretty badly wounded on that last turn but my notes at the end of that game are indecipherable. So, it looks like Abaddon got away but just barely! What a fun game though! I obviously cannot function with more than one asset per game though. That much is clear. Other than that, I was pleased with ‘Tank Riders’ as a fun choice. As always I can also count on the destructive power of the Shadowlord’s twin-linked Vulcan Mega-Bolter too. This is the first time I’ve ever used the Hellhammer though so I’m obviously going to have to try it again since it played no part in this battle whatsoever (other than bullet magnet). Good time though! At least the kegs are safe …for now.