| Author |
Message |
 |
|
|
|
|
Advert
|
Forum adverts like this one are shown to any user who is not logged in. Join us by filling out a tiny 3 field form and you will get your own, free, dakka user account which gives a good range of benefits to you:
- No adverts like this in the forums anymore.
- Times and dates in your local timezone.
- Full tracking of what you have read so you can skip to your first unread post, easily see what has changed since you last logged in, and easily see what is new at a glance.
- Email notifications for threads you want to watch closely.
- Being a part of the oldest wargaming community on the net.
If you are already a member then feel free to login now. |
|
 |
2009/05/12 17:34:52
Subject: Any tips when it comes to painting faces?
|
|

Space Marine Scout with Sniper Rifle
|
I couldn't find any tutorials on faces in the tutorial section...If I overlooked one, give me a link and I'll have a mod delete this thread.
Well, it won't be long before I start painting my sergeants(one from a tac squad, and another from a termie squad), but since they don't wear helmets, that means I'll have to paint faces for the first time.
I saw a couple of tutorials in an edition of WD a few months back, but most of them are pretty advanced and I don't wanna risk ruining the great models.
So do any of you guys have tips/guides/tutorials/pics on how to easily paint faces?
A few recommendations perhaps?
I'd love to know. 
|
The Emperor Protects.
I have two  chapters in the works now. chapters in the works now. |
|
|
 |
|
2009/05/12 17:44:00
Subject: Any tips when it comes to painting faces?
|
|

Lone Wolf Sentinel Pilot
|
I just keep it as simple as possible, layers, maybe a wash.
My general (very orangey) formula is:
o Dark Flesh base
o Tanned
o Tanned/Dwarf
o Dwarf
o Dwarf/Skull White
o TINY slits of Skull White, sparingly.
No eyes, it's a silly assumption unless their eyes are sticking out like bowling balls that you'd see any white in them at all at the scale we model at. Just slits.
sA
|
My Loyalist P&M Log, Irkutsk 24th
"And what is wrong with their life? What on earth is less reprehensible than the life of the Levovs?"
- American Pastoral, Philip Roth
Oh, Death was never enemy of ours!
We laughed at him, we leagued with him, old chum.
No soldier's paid to kick against His powers.
We laughed - knowing that better men would come,
And greater wars: when each proud fighter brags
He wars on Death, for lives; not men, for flags. |
|
|
|
|
2009/05/12 17:47:42
Subject: Any tips when it comes to painting faces?
|
|

Junior Officer with Laspistol
|
WD 350 had a nice tutorial on face painting.
Since I am also not such a good painter myself I will not attempt to try and tell you anything further than this:
Taken from WD 350 pg 97.
Step one.
start with an even basecoat of tallarn flesh.
Step two
Now give the face a couple of washes of ogryn flesh,making sure it flows into the depressions.
step three
Next add a mid-tone highlight using a 1:1 mix of bleached bone and dwarf flesh.
step four
Finally highlight the most prominent areas of the face with bleached bone.
|
"I refuse to join any club that would have me as a member."-Groucho Marx
|
|
|
|
|
2009/05/12 17:49:36
Subject: Re:Any tips when it comes to painting faces?
|
|
Space Marine Scout with Sniper Rifle
|
sA: Thanks for the tip!
Deff Dread: I have that issue, but I haven't got neither Ogryn Flesh nor Dwarf Flesh, so it looks like those and Dark Flesh'll have to be on my shopping list next. 
Thanks for the tip though!
|
|
This message was edited 2 times. Last update was at 2009/05/12 17:57:32
The Emperor Protects.
I have two chapters in the works now. |
|
|
|
|
2009/05/12 17:54:43
Subject: Any tips when it comes to painting faces?
|
|

Fresh-Faced New User
|
Bleached bone can be used as a highlight on the right skin tones. You want to thin all of your paints when painting faces because brush strokes are more noticeable on faces, as is anything else that roughs up the surface.
My main tip is to really get a feel for thinning your paints. If they're not thin enough you wind up with a guy with really bad acne. If they're too thin then your highlights flow like a wash into the recesses which totally destroys your shading. You have to get the paint just thin enough to be smooth but still thick enough not to flow too much. This is most critical with highlight layers. Base coats and washes can be as thin as you want.
How many layers you use is up to you. For rank and file troopers, I generally just do a basecoat of some kind of brown, one layer of some kind of flesh and a wash (usually Ogryn). For more important models, I'll do multiple layers of flesh tone, a wash and highlights, maybe multiple highlight layers. But for the cannon fodder, just stick to a quick three-step process.
My other tip is to lay off the caffeine when painting eyes.
|
|
This message was edited 1 time. Last update was at 2009/05/12 17:57:42
|
|
|
|
|
2009/05/12 17:59:08
Subject: Re:Any tips when it comes to painting faces?
|
|
Space Marine Scout with Sniper Rifle
|
MEP:
Thanks for the informative post! 
Luckily I don't drink coffee. 
|
The Emperor Protects.
I have two chapters in the works now. |
|
|
|
|
2009/05/12 20:31:03
Subject: Any tips when it comes to painting faces?
|
|

Nimble Pistolier
|
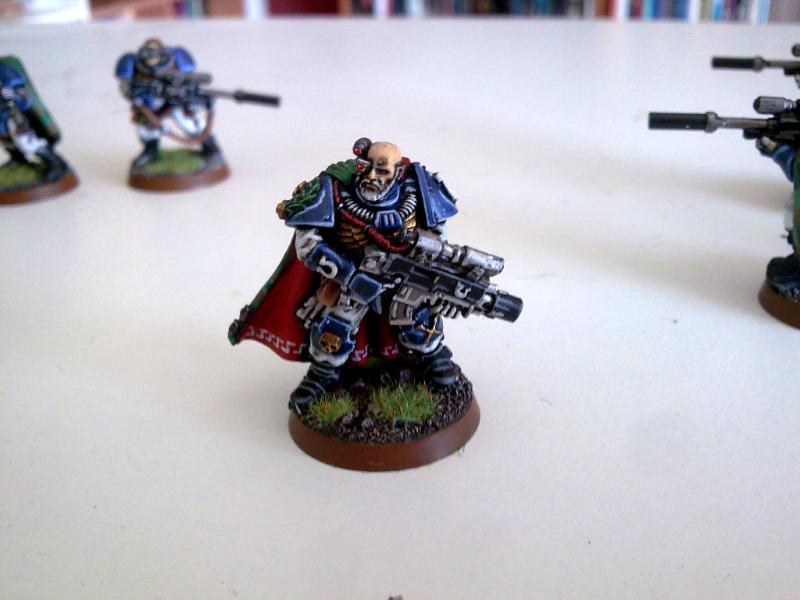
How bout a really simple method?
1. Bronzed Flesh
2. Devlan Mud Wash
3. Bronzed Flesh leaving the the resesses
4. Dry brush a mix of Bronzed Flesh and Bleached Bone
5. Repeat step 4 but add more Bleached Bone and highlight the very tips
That is the same method I used here
|
Too many armies to count now.. mainly all 40k and AoS
 Cleanse, Purge, Kill. Cleanse, Purge, Kill. |
|
|
|
|
2009/05/12 20:33:56
Subject: Re:Any tips when it comes to painting faces?
|
|
Space Marine Scout with Sniper Rifle
|
Sicarius:
Thanks for the good tip!
Looking forward to try it. 
|
The Emperor Protects.
I have two chapters in the works now. |
|
|
|
|
|
|