Hey All, I haven't been posting that many bat reps lately but hopefully I'll get back on track here.
Imperial Guard Army List
Company Command Squad w/ 4 melta guns, krak grenades, chimera w/ hull heavy flamer, multi-laser
Elites
Marlboro (Printers were down at work so I wasn't able to print my list, completely forgot I took Marlboro)
Troops
Platoon Command Squad, 4 flamers
Infantry Squad, lascannon, plasma gun, chimera w/ hull heavy flamer, multi-laser
Infantry Squad, lascannon, plasma gun, chimera w/ hull heavy flamer, multi-laser
Special Weapons Squad, 3 flamers
Special Weapons Squad, 3 flamers
Veterans Squad, 3 melta guns, chimera w/ hull heavy flamer, multi-laser
Veterans Squad, 3 melta guns, chimera w/ hull heavy flamer, multi-laser
Fast Attack
Vendetta
Vendetta
Vendetta
Heavy Support
Demolisher w/ hull heavy flamer
Demolisher w/ hull heavy flamer
Leman Russ Battle Tank w/ hull heavy bolter, sponson heavy bolters
Tau
HQ
1 Shas'
el w/ multi-tracker, missile pods, fusion gun
Ethereal
Troops
6 Fire Warriors
6 Fire Warriors
6 FIre Warriors, Devilfish w/
sms, disruption pods, multi-tracker
Fast Attack
6 Pathfinders, Devilfish w/
sms, disruption pods, multi-tracker
6 Pathfinders, Devilfish w/
sms, disruption pods, multi-tracker
Heavy Support
3 Broadsides, 4 shield drones, team leader, target lock,
3 Broadsides, 4 shield drones, team leader, target lock,
3 Broadsides, 4 shield drones, team leader, target lock,
Mission: Capture and control (objectives in own deployment zone)
Deployment: Pitched battle
Imperial Guard win the roll to go first and they take it!
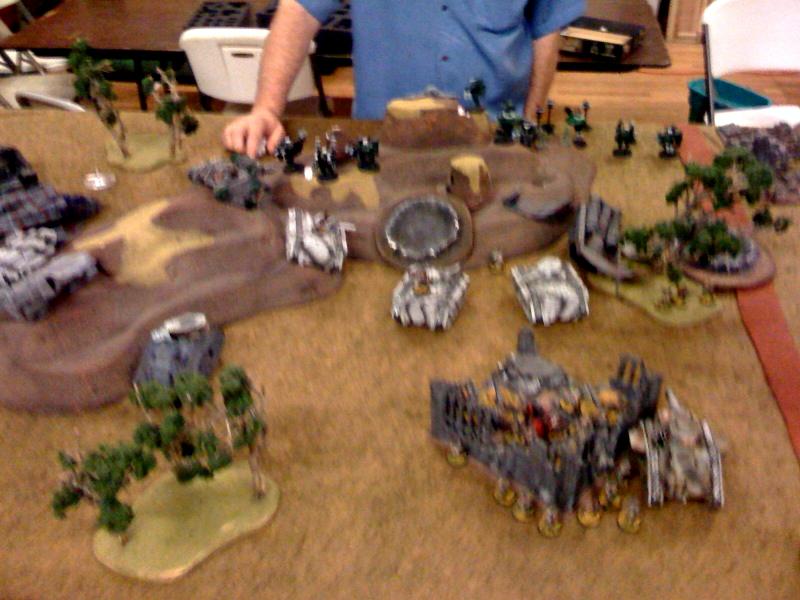
Imperial Guard Deployment
There was a big hill going down one side and into the middile and a large building behind that. I chose to deploy in a corner that would shelter me completely from everything on the other side of the hill. I deployed line abreast with the whole army. Wanting more melta on my opponent I actually deploy my 2 vet squads in vendetta's, and the
pcs.
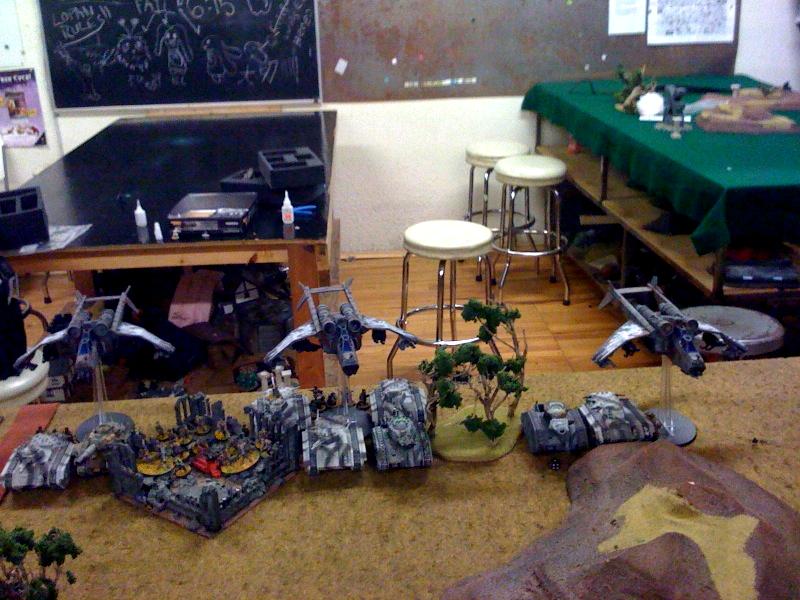
I just finished getting the basic job done on my new valkryies and was itching to try them out.
Tau Deployment
The Tau were in a bit of a bind if they deployed on the other side of the mountain it would severly limit his shots and allow me to move up my chimera line unmolested so he chose to deploy everything opposite me on the hill.
Pre-game
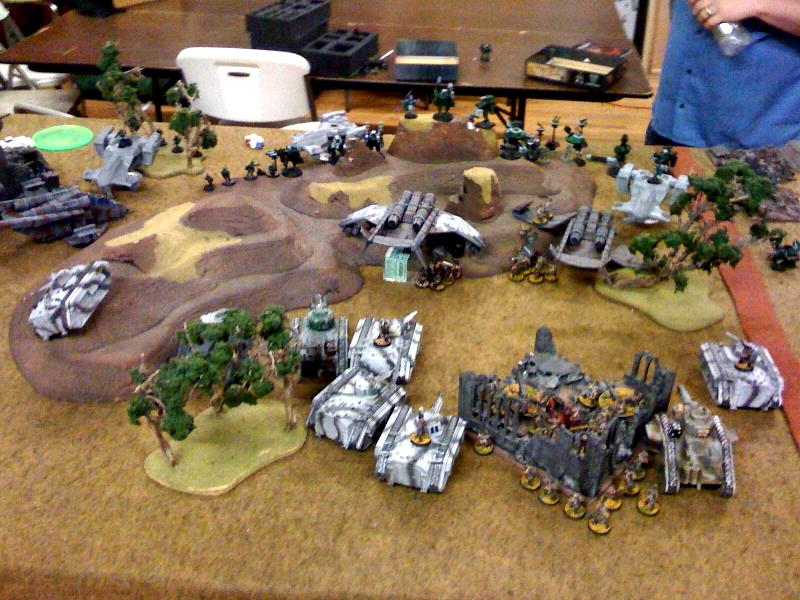
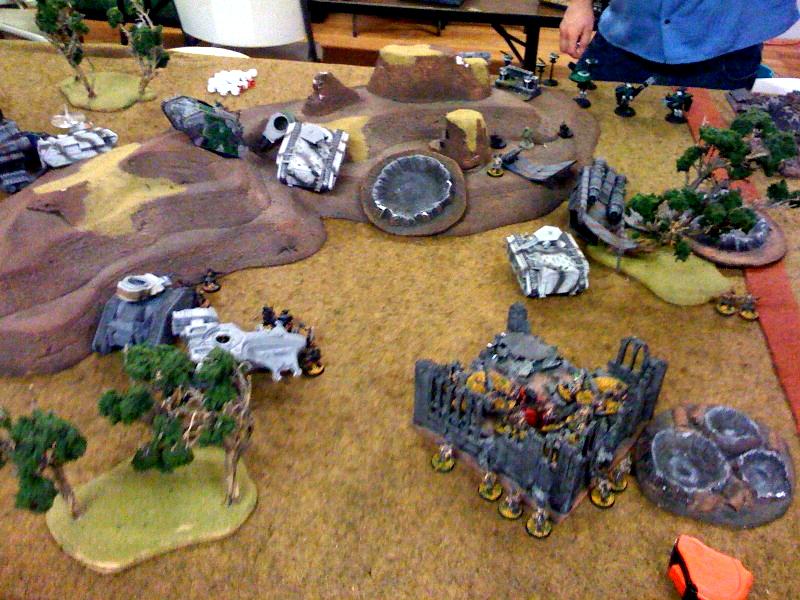
Vendetta's all move up to get a little closer. (we made a mistake here, you are supposed to alternate scout moves, first time I've ever played with more than one). He roll's and fails to seize the initiative.
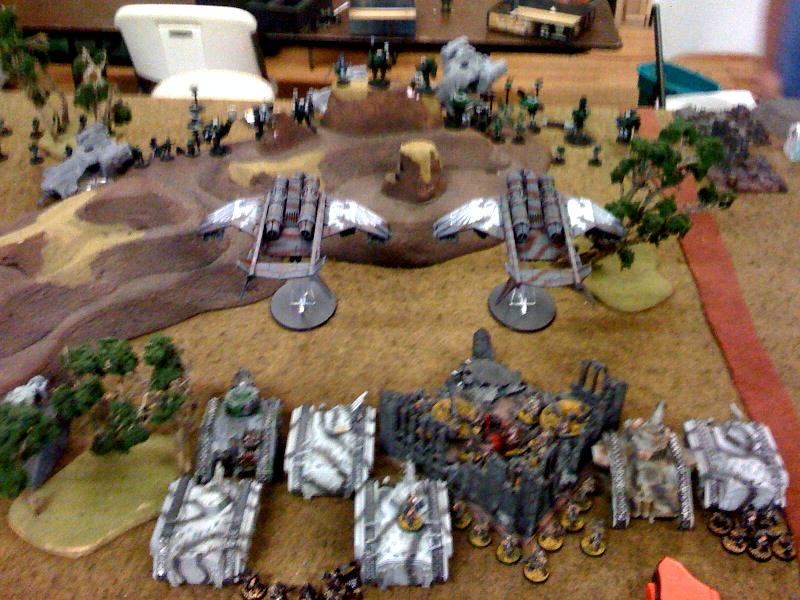
You can't see it but the 3rd valkryie is left of the leftmost devilfish next to a large building. Okay so let me see here, yep that's 9! broadsides over there.
Imperial Guard Turn #1
The Imperial war machine rumbles forwards a mighty 6 inch's and unleashes hell on the Tau. Okay well that was the image that went through my head but it didn't really pan out that way. The Command squad twin links both lascannon guard squads who rip a gun off the left most devilfish. The left most vendetta moves up 6 and deploys the
pcs, they shoot 4 flamers into the very spread out tau line and manage to kill 3 from 2 different squads. One squad fails morale but only run's 3 inch's. 2 demolisher cannons, 9
tl lascannons, and 6 melta gun cannons shoot into Tau broadsides, peeling 3 drones from 2 different units. 15 multi-lasers shoot into pathfinders killing 2 models. The russ fires into the pathfinders, deviates and kills a couple of fire warriors. And the guard turn is done.
Tau Turn #1
The one tau squad rallies and hides behind a devilfish. The leftmost devilfish picks up the other trimmed down squad. And the tau movement is done. The pathfinders each mark a valkryie squad. 9 broadsides fire and when the dust settles 2 of the valkryies are destroyed as well as one of the demolishers. The center vendetta is immobilized and the Leman Russ Battle tanks is immobilized as well.
OMG the horror the sheer horror. Well the vendetta's didn't stay on their bases very long!
Imperial Guard Turn #2
Whats left of the imperial guard tank line rumble's forward another 6 inch's. The 2 vet squads move up closer to the broad sides. The command squad bid's on both lascannon squads but they fail to do anything this turn. 6 melta guns a demolisher cannon and 3 twin linked lascannons later not a single shield drone nor broadside was felled. Multi-lasers flash out and kill 2 pathfinders. The vets bravely charge into 2 of the broadside units. The ethereal's unit smacks down a vet squad and forces them to flee. The other broadsides win the combat but hold the guard locked.
Tau Turn #2
A devilfish pick's up the rightmost fire warriors and moves forwards. Pathfinders mark the surviving demolisher and the running vet squad. The burst cannon from the rightmost devilfish wrecks the chimera the special weapon squad was in. The other 2
sms the vet's down to a single vet w/ a melta gun. He destroyes the command squad chimera but everyone survives and miraculously the demolisher and vendetta survive (my opponent rolled his only miss the entire game with a broadside this turn, and rolled double 1's for penetration roles on the demolisher and vendetta). In
hth the broadsides finish break and run down the vet squad. The etheral leaves the center broadside unit and falls back.
It's times like this that I wish I had bought a demo charge, a power fist, something, anything! If you notice the middle is suspiciously empty of vets all except that one lone melta gunner.
Imperial Guard Turn #3
The imperial guard tank line rumble's fowards another 6 inch's. The command squad hop's in an empty chimera for a ride. The special weapons squad on the right moves up into the area terrain. The command squad bids both of the lascannon squads who stun the left side devilfish and destroy the rightside devilfish pinning the fire warriors inside. The vendetta shoots into the center broadsides killing their last drone. My lone fleeing vet melta is still in range and downs a broadside (first dead broadside of the game). The demolisher peels off the last shield drone from the other squad.
Tau Turn #3
The last moving devilfish moves it's 2 man fire warrior squad behind the hill near his objective. The broadsides open up immobilizing the demolisher and finally downing the immobilized vendetta.
Imperial Guard Turn #4
My other special weapon squad in chimera is now stuck behind the immobilized demolisher so they tank shock the broadsides, who wreck the chimera. The special weapons team moves up and flames the fire warriors killing 3 out of 4. The company command squad rallies the lone melta gunner who hides behind a chimera and meltas another broadside, and bid's the leftmost broadside unit killing all 3 of them. The demolisher fires and stuns the devilfish behind the hill. A lascannon squad kills the last broadside, and the other squad removes the
sms from the leftmost devilfish.
Tau Turn #4
The commander deep strikes in behind the leman russ in the backfield and blows up it up. The last unit of broadsides take's out another chimera. The lone fire warrior rapid fires into my special weapons squad killing 1 I fail my break check and flee. The left most devilfish moves up towards my objective and fires at my special weapons squad killing 2 and they fail their break check and run.
So if I had taken a picture at the end of this turn you would have seen the command squad near to where the leftmost broadside used to be.
Imperial Guard Turn #5
I bid a lascannon squad who open up on the suit commander, he fails the re-roll on his cover save and goes down with a las cannon to the head. The command squad moves up and destroyes the gun and immobilizes the devilfish. They then assault and destroy it with their krak grenades. The demolisher misses the devilfish and kills a couple of pathfinders.
Tau Turn #5
The broadside team kills the demolisher.
Thats right at the end of the game I still had 1 chimera left, whose the boss now!
The game ends in a tie!
This was a great game, it went back and forth and the destruction was awesome. Some lessons learned. Remember all of your dang units! Marlboro with a well placed demolition charge would have really helped me out, oh well. My multi-lasers did almost nothing the entire game. I think I would have been much better off rushing to get within heavy flamer range. Moving at cruising speed first turn, cruising speed second turn and then popping smoke would have put me right in his lines. This was my first time using the new valkryie models, they look awesome, and really make you feel the 3 dimensions of the game. But they are huge! I was more worried about trying to figure out how to deploy troops and keep them from falling over than making sure they were facing the right way. I should have had them all turned to focus on one broadside unit but because of the way I ended up facing them it forced me to split my fire between two different broadside units. If I had paid more attention to where my fire arcs were I might have been able to down a broadside unit on the first turn.
People have said it before, but I had to try it for myself, I just don't think special weapon squads are worth it. I will probably drop a chimera and just put two vet squads in the vendetta's and call it good. The Leman Russ was also fairly lack luster, maybe it's because it was immobilized first turn, but I may go back to dropping it for an eradicator.
I know a
PBS would probably have just decimated this tau army and I think a competitve tournament list should probably always include one but I don't think you have to have one for fun games.


 22-3(Local) GT Circuit 2-0-1

 54-8-4 (local) 5-1 Ard Boyz

 3500
3500

 10/2/1,
  10/3/0,
  2/0/1,
  0/1/1
0/1/1
 . It's hard to tell in those pictures but all of my infantry are steel legion, so every squad is either transported in a valkryie or in a chimera to keep with fluff. I do think putting in some infiltrators would help out my list a lot but the harker squad is really expensive!


