| Author |
Message |
 |
|
|
|
|
Advert
|
Forum adverts like this one are shown to any user who is not logged in. Join us by filling out a tiny 3 field form and you will get your own, free, dakka user account which gives a good range of benefits to you:
- No adverts like this in the forums anymore.
- Times and dates in your local timezone.
- Full tracking of what you have read so you can skip to your first unread post, easily see what has changed since you last logged in, and easily see what is new at a glance.
- Email notifications for threads you want to watch closely.
- Being a part of the oldest wargaming community on the net.
If you are already a member then feel free to login now. |
|
 |
2009/11/25 09:51:58
Subject: Photoshop Forgeworld
|
|

Raging-on-the-Inside Blood Angel Sergeant
|
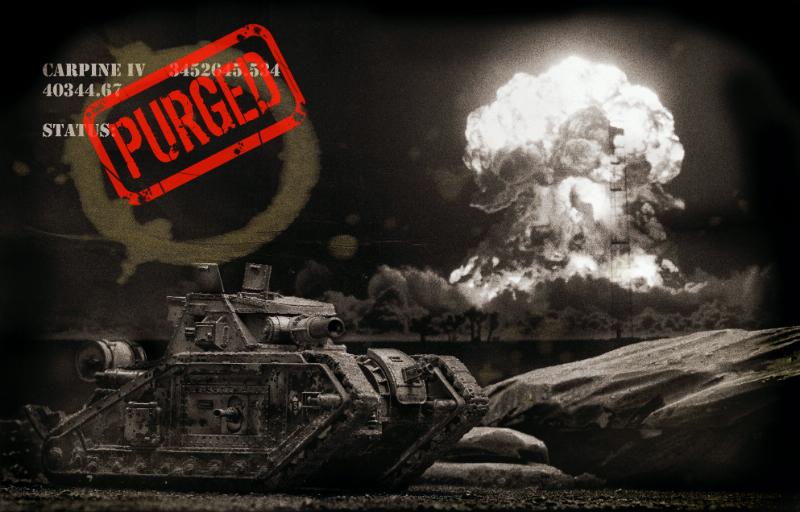
So Pat from Senji Studios let me take some photos of the forgeworld models he's been working on.
And I can't help but have some fun with the pictures. I combined the tank photo with some graphics and a picture of a mushroom cloud I took the other day.
Also used is a photo of a coffee stained piece of paper.
Edited: Sorry I meant space war coffee, not regular coffee, obviously regular coffee would be useless...
More to come in this vein. Constructive criticism appreciated.
Thanks,
Dave
|
|
This message was edited 1 time. Last update was at 2009/11/25 09:56:48
|
|
|
 |
|
2009/11/25 09:54:01
Subject: Photoshop Forgeworld
|
|

Dakka Veteran
|
Sweet 
|
2500 pts  | 1500 pts | 1500 pts  | 1000 pts | 1000 pts  | 1000 pts | 1000 pts 

|
|
|
|
|
2009/11/25 11:18:55
Subject: Photoshop Forgeworld
|
|

Revving Ravenwing Biker
|
Very nice work Dave. May I ask where on earth you were taking a pic of a mushroom cloud?!
|
|
|
|
|
|
2009/11/25 11:36:05
Subject: Photoshop Forgeworld
|
|
Morphing Obliterator
|
Yeah, you took a photo of a mushroom cloud?
|
|
|
|
|
|
2009/11/25 11:50:40
Subject: Photoshop Forgeworld
|
|
Warplord Titan Princeps of Tzeentch
Pat that askala, O-H-I hate this stupid state
|
Well from the looks of that cloud i sure hope that is not a regular thing you see.
Oh hey look a mushroom cloud. Oh look another one..... oooo that one was pretty.
|
Then it comes to be that the soothing light at the end of your tunnel, its just a freight train coming your way! 
 Thousand Sons 10000 Thousand Sons 10000
  Grey knights 3000 Grey knights 3000
 Sisters of battle 3000 Sisters of battle 3000
I have 29 sucessful trades where others recommend me.
Be sure to use the Reputable traders list when successfully completing a trade found here:
Dakka's Reputable Traders List |
|
|
|
|
2009/11/25 16:39:06
Subject: Photoshop Forgeworld
|
|
Morphing Obliterator
|
And the internet tells me there hasn't been a nuclear weapon test in over 15 years (in the US), unless of course you're in N. Korea...
|
|
|
|
|
|
2009/11/25 16:58:40
Subject: Photoshop Forgeworld
|
|
Decrepit Dakkanaut
The Battle Barge Buffet Line
|
Tek wrote:And the internet tells me there hasn't been a nuclear weapon test in over 15 years (in the US), unless of course you're in N. Korea...
or india... or pakistan... or soon to be in iran...
|
We Munch for Macragge! FOR THE EMPRUH! Cheesesticks and Humus! |
|
|
|
|
2009/11/25 17:24:18
Subject: Photoshop Forgeworld
|
|
Enigmatic Sorcerer of Chaos
|
Looks good! Only critisism is that it doesnt show off the models paint job. The whole thing is grey D:
|
|
|
|
|
2009/11/25 19:07:00
Subject: Photoshop Forgeworld
|
|
Raging-on-the-Inside Blood Angel Sergeant
|
@ Butterthepug--Yeah I had problems with it looking old and being in color. I'm working on doing the model more justice, which does need to be done.
Vindicator #9 said "Oh hey look a mushroom cloud. Oh look another one..... oooo that one was pretty. "
That's exactly the kind of positive attitude that I like to see.
Its really not that hard to get a photo of a mushroom cloud, just get some uranium and a centrifuge...
I mean, ahhh, um, its an old government file photo, yeah. Nothing to see here. Move along.
|
|
|
|
|
2009/11/25 22:07:50
Subject: Photoshop Forgeworld
|
|
Regular Dakkanaut
|
Great stuff Dave! Your commentary always leaves me in stiches
Have a safe trip!
|
               All painted and pushing 60,000 points combined. All painted and pushing 60,000 points combined.
senjistudios.com
A good game of 40k is one part competition and two parts cooperation. |
|
|
|
|
2009/11/25 22:20:14
Subject: Re:Photoshop Forgeworld
|
|
Nasty Nob on Warbike with Klaw
|
Are you sure that wasn't just one of the many mushroom clouds that Adam and Jaime on Mythbusters are always making?
I wish I had a massive rubber stamp like that. *PURGED* indeed.
|
WAAAAAAAAAAAAAAAAAAAAAAAGGGGGHHHHH!!!!!!!!!! |
|
|
|
|
2009/11/26 00:32:33
Subject: Re:Photoshop Forgeworld
|
|
Raging-on-the-Inside Blood Angel Sergeant
|
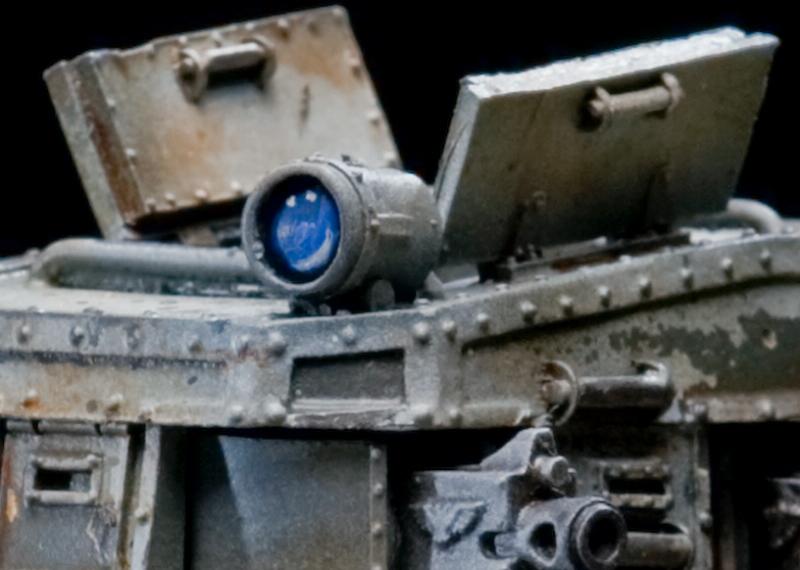
Here's some color shots...not finished yet but in the preliminary stages.
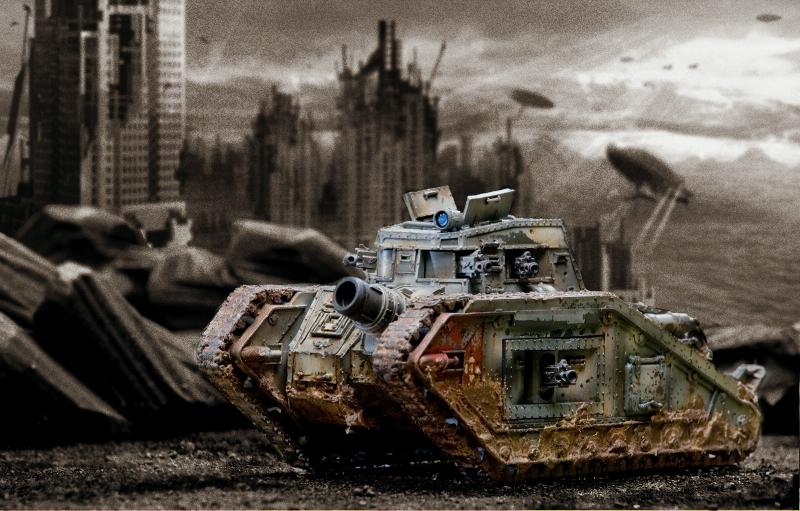
You can see with the close up shot how much I can zoom in and still see fine detail.
The full pictures I uploaded were downsized for sanity's sake
You can see more of Pat's stuff at http://senjistudios.com/
|
|
This message was edited 2 times. Last update was at 2009/11/26 00:34:04
|
|
|
|
|
2009/11/26 06:11:13
Subject: Photoshop Forgeworld
|
|

Pyromaniac Hellhound Pilot
|
Constructive criticism would include and be limited to the phrase 'you rock'.
|
It's better to simply be an idiot, as no one can call you on it here. -H.B.M.C.
Cap'n Gordino's instant grammar guide:
"This is TOO expensive." "I'm going TO the store, TO get some stuff."
"That is THEIR stuff." "THEY'RE crappy converters."
"I put it over THERE." "I'll go to the store THEN."
"He knows better THAN that." "This is NEW." "Most players KNEW that." |
|
|
|
|
2009/11/26 07:21:51
Subject: Re:Photoshop Forgeworld
|
|

Monstrously Massive Big Mutant
An unknown location in the Warp
|
nice photoshop skills mate! 
|
|
|
|
|
|
2009/11/26 13:29:21
Subject: Photoshop Forgeworld
|
|
Thinking of Joining a Davinite Loge
|
I love them. Adds some great atmosphere to a great model.
|
Armies:
(CSM/HH) - Iron Warriors; Death Guard; World Eaters; Night Lords
IG - Vestfalian Expeditionary
Force (Solar Auxilia - HH)
SM - Blades of Inaros (Homebrew)
DE - Kabal of Ouroboros
|
|
|
|
|
2009/11/26 14:04:27
Subject: Photoshop Forgeworld
|
|
Reverent Tech-Adept
|
Great photoshop work and a fantastic model. Cudos to the both of you. If you have time mind doing a "how-to" on your photoshop, its something I've always wanted to learn to do when I photo my minis.
|
|
|
|
|
|
2009/11/26 21:58:41
Subject: Photoshop Forgeworld
|
|
Kinebrach-Knobbling Xeno Interrogator
|
Looks very post apocalyptic war
|

Follow me on Twitter too! @Jake_TooTall |
|
|
|
|
2009/11/27 00:14:16
Subject: Photoshop Forgeworld
|
|
Raging-on-the-Inside Blood Angel Sergeant
|
Well I'll tell you that having someone who can paint like Pat makes the photography part pretty easy
Now I'm going to Thanksgiving Dinner, then I'm going to Maui so I'll do some screen shots and a tutorial next week.
Enjoy the holiday!
|
|
This message was edited 1 time. Last update was at 2009/11/30 21:11:05
|
|
|
|
|
2009/11/27 02:05:12
Subject: Re:Photoshop Forgeworld
|
|
Crazed Spirit of the Defiler
|
Those are sweet pics! The pic of the H-Bomb destroying Bikini Atoll is especially perfect for a guard tank! DO MORE!
|
|
|
|
|
|
2009/11/27 03:38:53
Subject: Photoshop Forgeworld
|
|
Raging-on-the-Inside Blood Angel Sergeant
|
Pretty sure that pic is from the desert, shots of bikini are usually from the air or a neighboring piece of land with palm trees. Do you know for sure it's bikini? Does anyone know for sure where this nuclear test is?
|
|
|
|
|
2009/11/27 04:25:01
Subject: Photoshop Forgeworld
|
|
Enigmatic Sorcerer of Chaos
|
Question: If someone was to say get a you a good picture of one of their vehicles would you be able to do up something awsome like that? Cough Cough.... PM me if you want cause I think it would be pretty cool have something like that... My user picture (the one to the left of this post  ) is one of my few attempts at photoshop... however Im using photoshop Elements (I dont even know what that is but it sounds old and it sure as heck looks old...) It has like half the features and buttons I hear people talk about when they do tutorials on photoshop... I tryd and failed sadly
|
|
This message was edited 1 time. Last update was at 2009/11/27 04:25:55
|
|
|
|
|
2009/11/27 11:14:45
Subject: Re:Photoshop Forgeworld
|
|
Frothing Warhound of Chaos
Belfast
|
Hi to all
They are great works of Photoshop rdlb
Here is one of my attempts from a few months back

all comments welcome good or bad
Thanks
|
|
|
|
|
|
2009/11/30 19:57:33
Subject: Re:Photoshop Forgeworld
|
|
Raging-on-the-Inside Blood Angel Sergeant
|
Okay so here's the original photo I took of Pat's tank. The background is black because I used flashes so the camera couldn't see the room full of gamers. I had a softbox directly over the tank and three SB800s snooted for fill light in certain spots. You don't need to do this or have all this stuff. Just hang a white sheet over a window so the sunlight is softer, and hang a black sheet as a background so there is no clutter behind the tank and terrain, so all you need so far is a white sheet and a black sheet. Change the angle of the camera to experiment with different light angles, keep the window right behind you, then keep the window on your left, etc...see what works for your miniature. You'll have to keep moving the model and the black sheet, but that is easier than moving the window. PLEASE!!!! put as much thought and effort into the photo as you can, it is way easier than doing extra work in photoshop!!!! So now I have this photo. First I created a layer mask to make the black transparent. 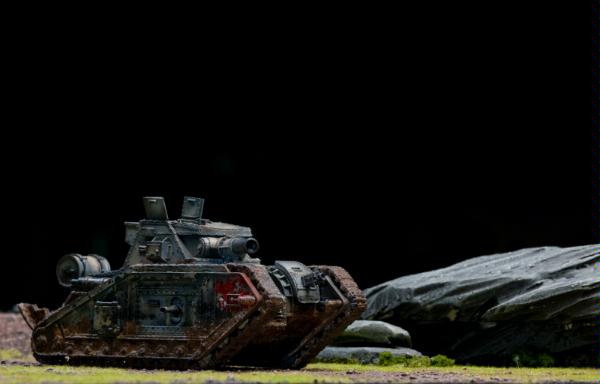 Right click on the background layer and click duplicate...then turn the original layer off so you can't see it. We just keep it there in case we need to start over... Goto Select, Color Range, and click on the black background with the dropper. After you make this selection it will not be perfect. Use the lasso tool trim the selection so only the black background is selected. Holding shift adds to the selection, holding option subtracts from the selection. So now all the black is selected go down and click create mask it is a little icon with a circle in a box on the bottom right of the layer palette. You can paint it black to make the mask transparent or paint it white to make it opaque. This is better than erasing because you can undo it ant any time while working. Search the internet for layer mask tutorials if you need help there are tons of them out there. I thought it would be funny if I said I took the mushroom cloud picture, but a bunch of people decided I was trying to sound cool and called BS---obviously its BS! jeez I don't want to be anywhere near those things... So search google images for you mushroom cloud photo and add it to your picture as a new layer. You can go to Layer, New and create a new layer to paste it into. This new layer should be behind your actual photo in the layer palette. So the tank is in the front, and the mushroom cloud shows up through the mask you created...You can make it black and white now if you want to. 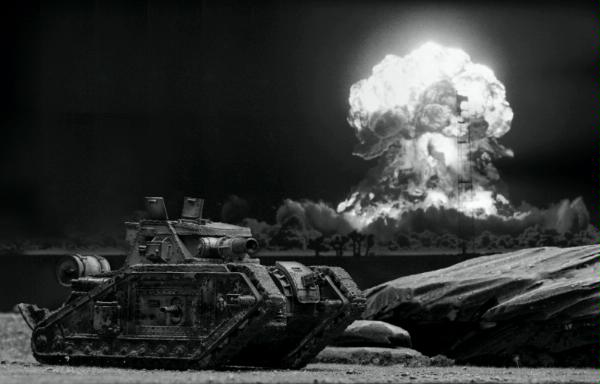 So pretty cool, tank and atomic death, but needs some more detail. To make it look like some uncaring clerk has this evidence of annihilation just scattered around his desk I went with the coffee stain. Just get coffee all over your mug to make a ring on a piece of paper and then flick coffee drops all over the place while you're at it. Don't do this next to such a nice model, or any model... Now wrinkle the coffee paper up with a bunch of creases and take a picture of it. Add it as a new layer on top of the other layers you have so far The different photos of the coffee stain, mushroom cloud, tanks etc are all different sizes. Click on a layer then use Edit, Transform, Scale to make the different images work together. Use Select, Color Range again to remove the white from the coffee paper layer. Then use the Opacity slider that is located just above the list of layers to make the coffee stain translucent. Mess with it till you like it. 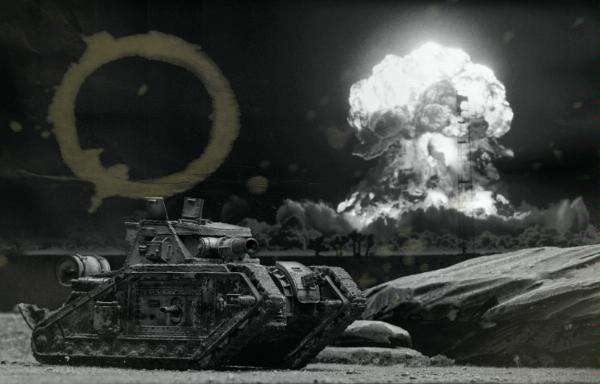 I added some text to make it look like a military file. The font is Stencil Std. 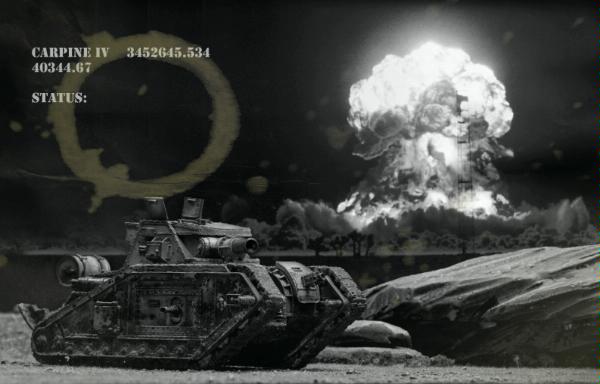 Better, but it looks too clean, lets add a vignette and some film grain to make it look old. Go to Layer, New---When the little dialog box comes up select Overlay in the mode pulldown, and then click on the box that says "Fill with 50% gray" Now you can use the paint brush to paint black and white, which will darken or lighten up the image. So I painted around the edge in black and it fades to a darker image around the edges.  Now to add grain start out the same way. Layer, New Choose overlay for the mode and check the "fill with gray" box again. But this time go to Filter, Noise, Add Noise Slide it all the way up to 400%, click on Gaussian, and Click on MonoChromatic. Now it will look terrible, but slide the opacity down to between 10-20% and it will just look a little grainy. 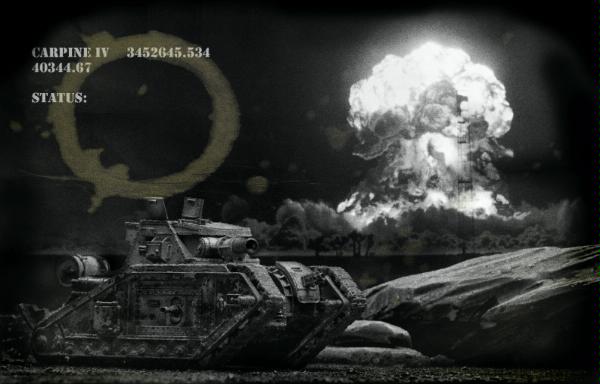 Now straight black and white is a little boring, I want the photo to have a slight sepia tint so again, Layer, New--Mode=Overlay, Fill with 50% Gray Now go to the colors and pick a light brown and use the paint bucket tool to fill your layer with it. You can mess with the opacity slider or you can go to Image, Adjustments, Curves, and change the layer curve to change how brow layer looks. Pulling the middle of the curve up will lighten the layer and your image. 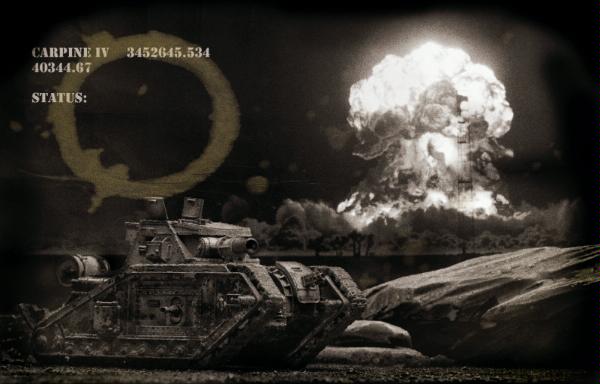 Finally, I added the stamp which I created using the drawing tool and the font, dirty ego which is available for free . There are a bunch of good fonts and brushes free on the internet from artists willing to share. 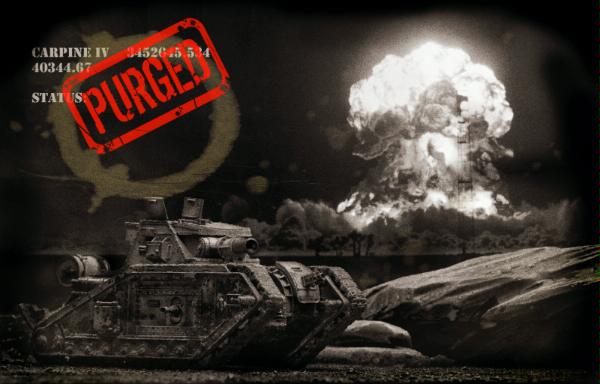 Here is the list of layers that I had when I was done. You can see what order they are in and you can see the original background photo on the bottom with no eyeball next to it, meaning its not visible. 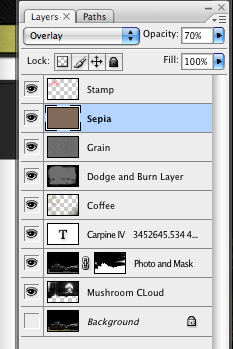 Some final advice--if your changes aren't working right make sure you are in the right layer. This happens to me all the time. The layer you are working in should be highlighted in blue or something like Sepia above. Also, don't just follow these steps word for word, play around with all the settings on all the tools and see what you like, this is how you learn!! Please feel free to say, STEP 4 WASN'T CLEAR!!!, or THIS PART MAKES NO SENSE!! Thanks, Dave Automatically Appended Next Post: Vraks--that looks good. Only thing is that the base kind of blurs out into the background. Put the model in some terrain when you take the photo so you don't have to blend it. I would tell you that your model is really cool but its chaos and all of you traitorous scum will pay the ultimate price at the hands of the Emperor's faithful...
|
|
This message was edited 2 times. Last update was at 2010/01/12 00:00:22
|
|
|
|
|
2009/11/30 23:00:49
Subject: Photoshop Forgeworld
|
|
Hooded Inquisitorial Interrogator
|
Lots of good info there on 'shopping. Now I get to try fiddling around to find the GIMP equivalents...
|
 Angels of Nezeria (Dark Angels successor chapter) Angels of Nezeria (Dark Angels successor chapter)
 Tau Marines: Defectors to the Tau Empire (let the nerdrage begin!) Tau Marines: Defectors to the Tau Empire (let the nerdrage begin!)
 Fledgling Cadian Imp Guard: because I want to paint tanks Fledgling Cadian Imp Guard: because I want to paint tanks
 Member of the Cadian 642nd -- even in death we serve the Emperor! Member of the Cadian 642nd -- even in death we serve the Emperor!
DR:70--S+GM+++B+I+Pw40k09#+D+++A++/wWD-R++T(F)DM+ (except i really suck and my last game was during 6th ed)
KamikazeCanuck: It's more like a big, giant red button in a glass case with a little hammer that says "Break in case of Galaxy on fire" |
|
|
|
|
2009/12/01 00:29:10
Subject: Photoshop Forgeworld
|
|
Raging-on-the-Inside Blood Angel Sergeant
|
I found out the mushroom cloud photo was taken by Northrup Grumman...not sure where they did their testing...
|
|
|
|
|
2009/12/02 16:47:12
Subject: Re:Photoshop Forgeworld
|
|

Regular Dakkanaut
|
Nice one!
Very comprehensive step-by-step as well, I loved the coffee-paper effect! 
|
|
|
|
|
|
2009/12/02 18:47:43
Subject: Photoshop Forgeworld
|
|

Fresh-Faced New User
Greece
|
Thanks for the pics and more so for the tutorial. I've been forced to learn some graphic design skills for the plasmablast shop and Photoshop is certainly the daddy for that. Keep up the good work!
Just a question: How did you make the "purged" stamp? Did you find it somewhere as it is or did you make it yourself? I like very much the way it looks chippy and worn, just like a real hard-used stamp does.
|
|
This message was edited 2 times. Last update was at 2009/12/02 18:49:46
|
|
|
|
|
2009/12/02 19:25:52
Subject: Re:Photoshop Forgeworld
|
|
Raging-on-the-Inside Blood Angel Sergeant
|
http://www.misprintedtype.com/v3/fonts.php
You can download that font from there and many other places--Its called Dirty Ego.
So I typed Purged using the font size I wanted, then I drew the border using the rounded rectangle tool.
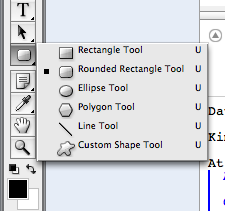
There are a lot of options for this tool in the tool bar at the top like line thickness, corner radius, etc, just mess around with it till you like it.
Then I just used a bunch of different brushes for the eraser tool to make it look like the stamp was splitting and had chunks missing.
Something like this is very much done to feel (the stamp and the whole picture) so when you're doing it try something and see how you like it, make extra layers and turn them on and off, and use the wonderful undo key to see what happens.
Practice makes per.....well better then when I started
Thanks for all the positive comments everyone!
|
|
This message was edited 1 time. Last update was at 2009/12/02 19:27:35
|
|
|
|
|
|
|