Kilted_Cleric (Aka Collin) and I (Jim) arrainged to play a game at our
FLGS last Monday.. in
PM we agreed on size and army.. I waffled between Orks and Nuns with Guns, deciding on Orks with 24 hours to spare.
K_C is fairly new to the game, this being his 3rd outing, and his first with his Tau. I have played my Orks a couple times before, and THINK I know what I am doing. His model list was a bit low, so he went overboard with upgrades to get to the 1500.
Point Value -1500 (we both went over by a couple)
Waagh Magshak
HQ
"Nails" Bohrk
Big Mek with Kustom Force Field, Power Klaw - 110
Elite
Burna Boyz - 12 burnas - 180
Lootas - 10 lootas - 150
Troops-
30 Slugga boyz, with 3 rokkits, Nob with
PK - 250
20 Shoota boyz, with 2 big shootas, Nob - 145
Trukk Boyz, 12 boyz, sluggas/choppas, with big shoota, and Nob with
PK (trukk has red paint, boarding plank, big shoota) - 167 - AKA "Red Cap Trukkas)
Trukk Boyz, 12 boyz, sluggas/choppas, with big shoota, and Nob with Big Choppa (trukk has big shoota) - 144 Aka "Lugnutz Ladz"
Fast Attack-
3 Deffcoptas with
TL Rokkits - 135
3 Deffcoptas with
TL Big Shootas - 105
Heavy Support-
Battlewagon, 2 big shootas, lobba, red paint, Deffrolla - 115
Total - 1501
Tau Exploratory Force
HQ:
Shas O with Missle Pod, Plasma Rifle, Drone controller, 2x shield drone, multi-tracker: 134 pts
Elites:
Shas’vre Crisis Suit with Missile Pod, Burst cannon, Multi Tracker, Drone Controller, 2xShield Drone= 90pts
Shas’vre with Missle Pod, Plasma Rifle, Multi Tracker, Drone Controller, 2xShield Drone=102
Stealth Team
5xShas’ui 2 with fusion blaster, 1xShasvre with Marker Light=207
Troops
11x Shas’la fire warriors, 1x shas’ui with marker light, hardwire target lock and bonding knife= 150
Dedicated Devil Fish with targeting array, disruption pod,, multi-tracker, decoy launcher=105
11x Shas’la fire warriors, 1x shas’ui with marker light, hardwire target lock and bonding knife= 150
Dedicated Devil Fish with targeting array, disruption pod,, multi-tracker, decoy launcher=105
Heavy
Broadside team (2) with Drone controller and 2xshield drones= 200
Sniper Drone Team=80 points
Hammerhead Gunship with Railgun,
SMS, Disruption Pod, Target Lock, Multi-tracker=180
Total=1503
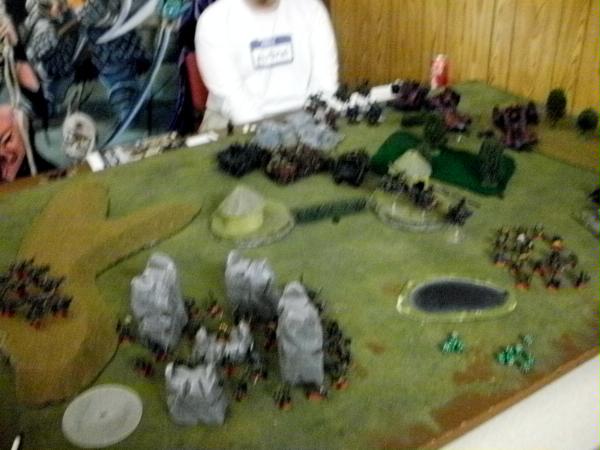
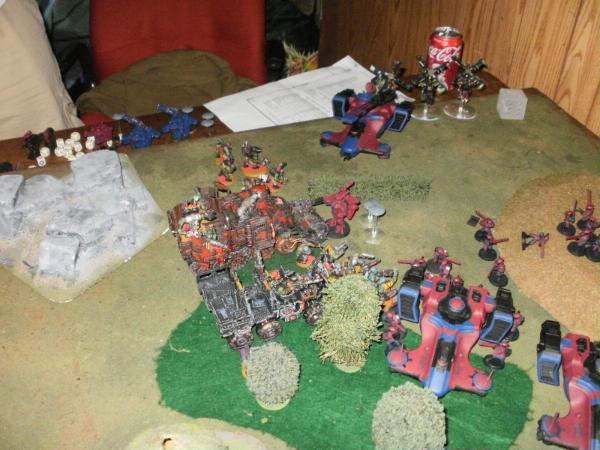
Setup-
Mission was Seize Ground (rolled 5 Objectives) and Deployment was Spearhead. Orks won the roll to deploy 1st, and take the first turn. Orks placed the 1st objective near the center of the table, 1 in some rocks in the Ork Deployment zone, and 1 in a woods in the Tau area. Tau objectives were placed near the western hill, and in his own deployment area. (Objectives were represented by square magnets, as neither of us had remembered to bring any)
We also discussed that the rocks in the
SW and the Woods in the E would be considered to be areas of difficult Terrain and would grant cover saves to units inside them.
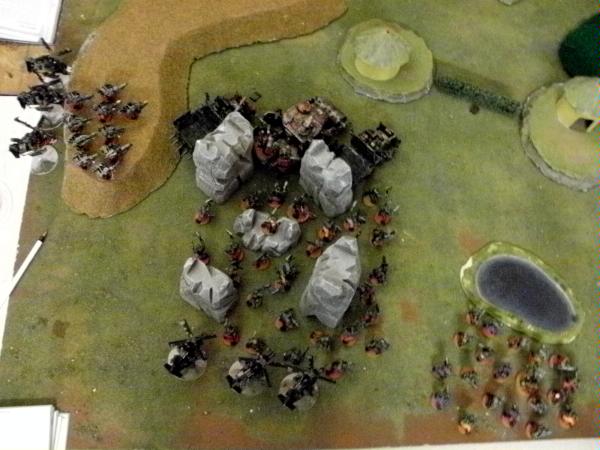
Ork Setup-
I decided to leave nothing in reserve. The Burnas and Big Mek loaded themselved into the Battlewagon. The Battlewagon proudly led the charge, with outrider Trukks on each side. The Lootas stood on a hill on the west side of the board, with fairly clear line of site to the northern edge. The 30 strong Slugga mob sheltered in the rock dolmens in the
SW, and the Shoota Boyz were just south of a pond. The 2 Deffcopta squadrons deployed near the table edges ready to grab sky and race for the Tau backfield.
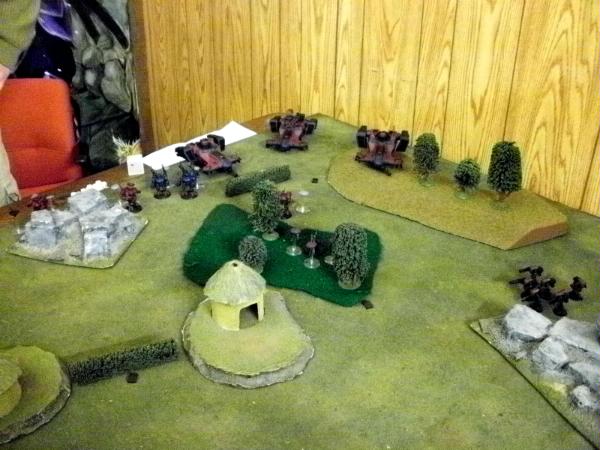
 Tau Setup
Tau Commander also decided to place all units on the field, and not worry about reserves. His Commander was placed on the edge of rocky ground in the north, with a Crisis Suit and 2 Broadsides behind the rocks. Hammerhead was in the NE corner of the board, flanked by his 2 Devilfish. The remaining XV8 Suit was deployed behind the eastern forest, and his Sniper Team was placed inside the woodlands. After all setup was done, he placed his XV25 Stealth Suit team on the SE corner behind another rock pile.
 Ork Turn 1
Following the mighty Ork Doctrine of War.. MOST of the army headed at speed to close with the enemy! Get
EM! The Battlewagon and trukks headed out, around the hut. The Rokkit Coptas Turbo Boosted almost to the Tau Commander and near the north board edge... whereas the Shooty Coptas flew a lesuirely 12 inches across the pond and turned their gaze upon the stealth team. The Shoota boyz started their long amble around the pond, heading towards the objective at the tip of the eastern woods. Meanwhile, the boyz mob in the rock oblisks started slowly edging their way to the north, planning on getting a couple boyz near enough to claim their second objective.
Shooting wise, the Lootas on the hill realized they had a clear shot to the Tau Commander.. but alas their Deffguns only worked minimally and the small amount of fire they sent his way he was easily able to duck, dodge or have bounce off his shield drone. The Shooty Coptas fired into the Stealth suits, and the slugga boyz shot with their big shootas into the Sniper team, all with no effect.
 Tau Turn 1
Collin sent his 2 Devilfish forward.. and one disembarked a Fire Warrior team on the Eastern Hill. His commander stayed put, as did the Crisis Suits, Sniper Team and Broadsides. The Stealth Team rounded the rock pile to take a bead on the Shoota boyz. The Hammerhead slid forward to where one of the Devilfish had been, and took up a 45 degree angle position to the northern table edge.
Shooting, the Tau were frustrated. The Stealth Team opened up on the Shootas, and managed to only eliminated 2 boyz. The Sniper Team failed to hit ANYTHING. The Commander and Both Crisis Suits unloaded at the Rokkit Coptas, and managed to infllict 1 wound (love that 3+
TB save!). The Broadsides and the Hammerhead fired at the convoy headed their way, and either MISSED or had successful hits fail to penetrate. The one shot that managed to penetrate a trukk was deflected at the last minute by the
KFF in the Wagon..
Afterwards, the Commander jumped back behind the rocks (didn't want to get seen by the Lootas again) and the Stealth Suits retreated back to their start position.
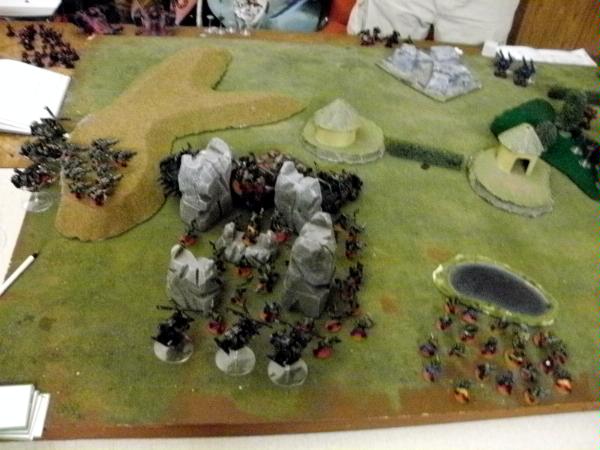
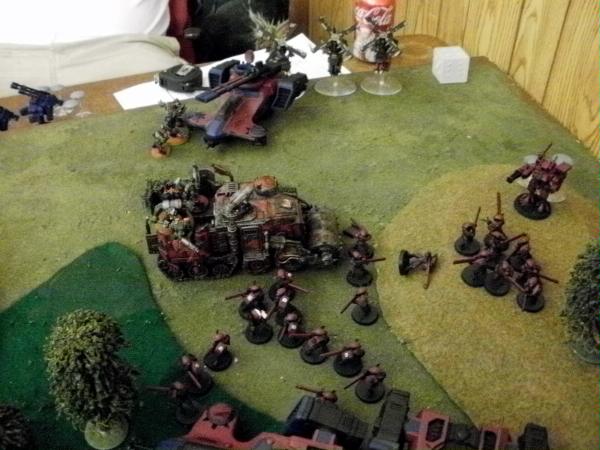
 Ork Turn 2
The Rokkit Deffcoptas continue their Hell fer Leather ride down the northern table edge, ending up right behind the Broadsides. The Shooty Coptas advance slightly to use the Hut for incidental cover, and the Shoota boyz continue towards the eastern wood objective. The Land Train swings around the hut, and gets poised for a 3rd turn potential deffrolla flattening, once again moving 13 inches. The Sluggas in the rocks stay put, but the Lootas shoulder their weapons and head north, so they can see future targets.
Shooting time - The Shooty Coptas manage to pick off a Stealth Suit.. and in an inspired episode of frenetic blasting.. the Shoota boyz see, target and totally eliminate the Sniper Team.
(sorry for blurry pic)
Tau Turn 2
Tau Commander jumps across the rocks to flank the left Trukk. Stealth Team again comes around their rockpile to face down the Shoota boyz. The troop-less Devilfish comes across to support the Steath Team, while the other Fish comes down and unloads it's Fire Warrior cargo behind the eastern wood. The Crisis Suits, Hammerhead, and Broadsides don't move (good fire lanes).
Shooting goes better for the Tau this turn.. the Stealth Team and Devilfish reduce the Shoota boyz to 10 models. (made
LD check). The Hammerhead and Broadsides decide to fire into the Deffcoptas, wounding them all. (probable rule mistake here, but as it pans out, not a big issue down the line). The Crisis suits rain fire off the right side Trukk (Lugnutz Ladz) , the
KFF saving the day many a time. The Commander showed how it is done.. unloading into the side of the left Trukk, and finally seeing a way past the
KFF.. causing the Trukk to Wreck/Careen .. which took the trukk into and over the rockpile, exploding near the Crisis Suit, killing 4 of the Red Cap boyz inside. Shaking their heads and blinking, the Boyz make the pinning and
LD tests.. and see the Broadsides in front of them.. (grin)
Both Crisis Suits move back a bit behind the woods, and the Stealth Team retreats behind the rocks.. again!
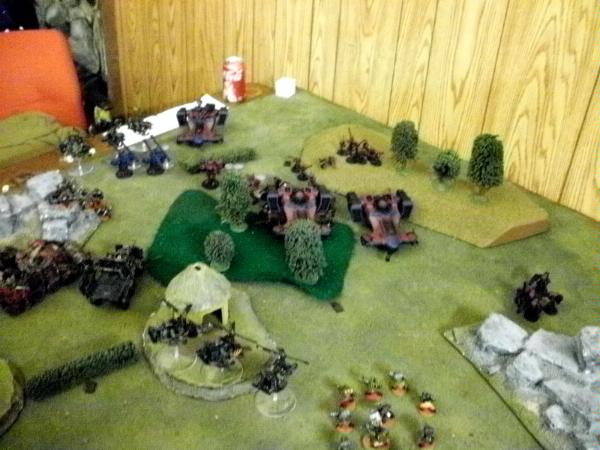
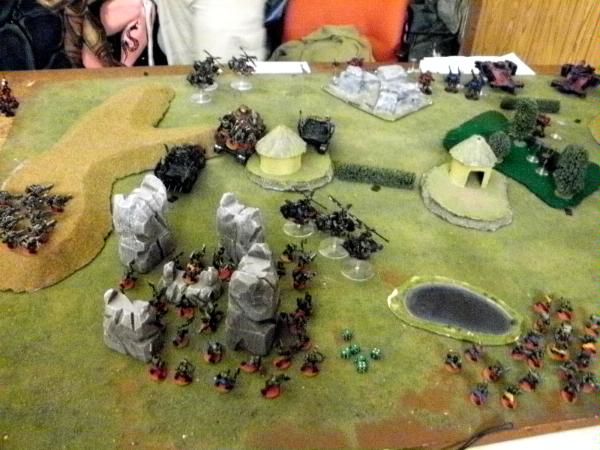
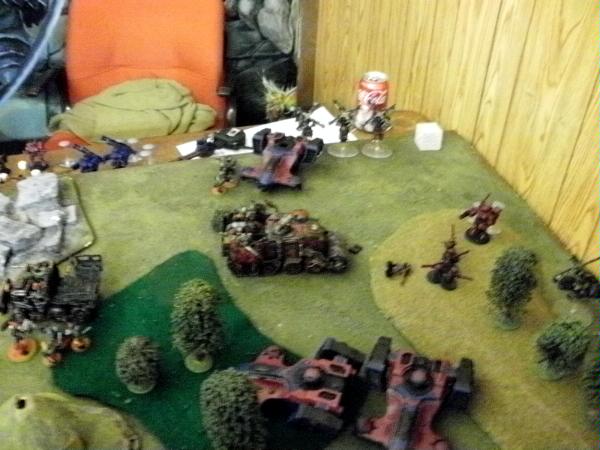
Ork Turn 3
The rock bound Red Caps howled with glee and ran towards the Broadsides.. and made it within 2 inches. The Slugga boyz continued to inch towards the second objective near them, and the Lootas re-shouldered their guns as they realized the Tau commander had failed to jump back across the rocks and was in their sights! The Rokkit coptas drift along, and end up in prime shooting position behind the Hammerhead, looking straight at it's rear hatch door. The Shooty coptas turboboosted behind the eastern hill and the Shoota boyz almost make it to the objective! The Battlewagon rams into one Crisis Suit with his deffrolla, expecting to hear tin-can crunching sounds.. and is amazed when the Battlewagon comes to a HALT as all dice rolled come up a 1. (Sigh from Jim, and much rejoicing from Collin). Lugnutz's Trukk plows into the woods and unloads the boyz right in front of the second crisis suit.
Shooting was interesting for the boyz of green.. the Ladz in the woods manage to kill both shield drones on the crisis suit, as do the Red Cap boyz killing the shield drones on the 2 Broadsides, all with slugga fire. The Rokkit Coptas roll 2 hits on the Hammerhead, and both Pen rolls are Immobilized.. (so, even if we had done wound allocation wrong on the unit in the prior turn, the duplication of results cancelled that out). The Shoota boyz fire into the Stealth Team and eliminate 2 more Suits. The Lootas unload into the Commander, with 20 shots, and eliminate all his drones and put 2 wounds on him.
And.. now we have the first Assault phase for the Orks. (Collin is NOT happy about this). The Red Caps charge the Broadsides, the Ladz pile into the Crisis Suit... and the Broadsides get eliminated as does the Crisis Suit. 2 or so Orks fall in each combat though, so there is some comfort for the Greater Good. The Red Cap Trukkers consolidate to the immobilized Hammerhead, and the Ladz go along the woods (facing 24
FW, we need a cover save!)
(once again, blury pic)
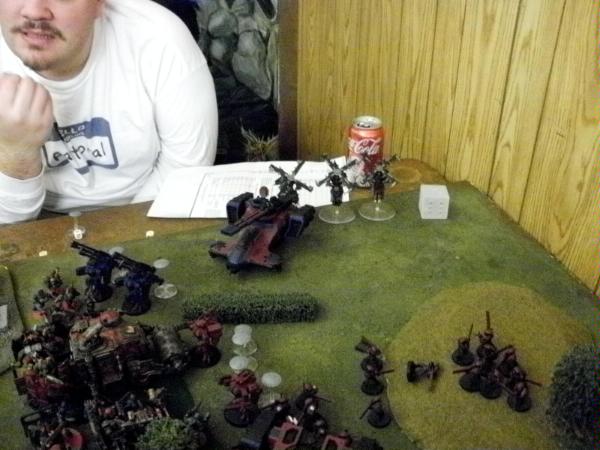
Tau Turn 3
Tau Commander positions himself for a rear shot on the Battlewagon. Surviving Crisis suit moves back an inch, and takes aim on the Rokkit Coptas. Fire Warriors don't move, and the devil fish spread out into the woods. The Stealth Suit team comes around the rocks AGAIN to blast the hapless Shoota boyz.
Shooting......The Hammerhead fires its
SMS system into the oncoming Red Caps, eliminating 2 of them.. and firing the Railgun into the ground in front of the Battlewagon. (obviously rattled crew). The Crisis Suit nails 2 more of the trukkas, leaving 2 boyz plus Nob with
PK. The 2 Fire Warrior teams both shoot into Lugnutz's Trukkas hugging the trees.. thanks to markerlights and good rolling, 8 boyz fail to make it. Ouch! The Devilfish and the Stealth team fire into the Shoota boyz, eliminating 7 of them. Double Ouch! Both squads fail their morale, and book towards the edge of the table! Triple Ouch!
Assault phase.. once again, the Stealth Team retreats, the Crisis Suit heads back up the hill, and the Commander.. advances? He moves to get a good shot at the oncoming trukk.. ??? (meanwhile, on the western hill, the Lootas are waving a banner "Go Go Tau Commander!")
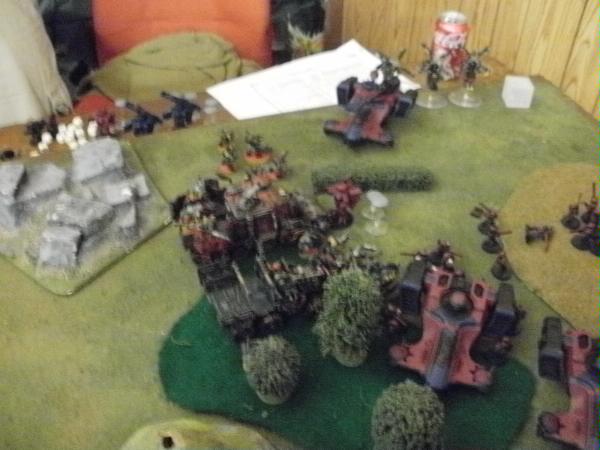
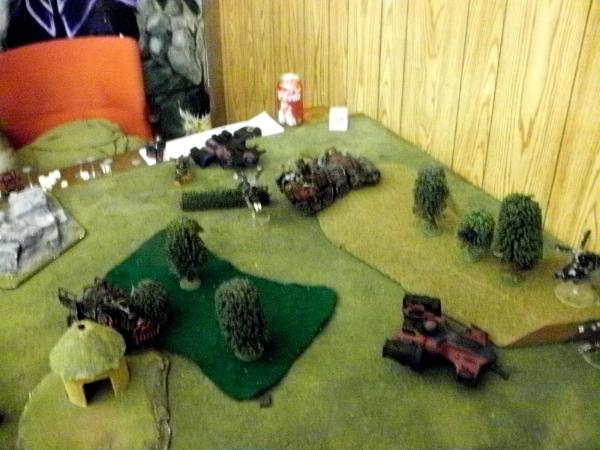
Ork Turn 4
Battlewagon rolls up to the first Firewarrior team. Lugnutz Ladz continue to retreat.. their Trukk goes along to assist when they recover and might need a ride. The Shoota Boy 3 manage to rally. The Sluggas in the rocks managed to cover both objectives! The Shooty Coptas drift over to see the Stealth A-team, and the Rokkit Coptas stay where they are, thank you very much. And.. the Red Caps head to the Hammerhead and easily make it.
Shooting.. The Lootas pour it on and the Tau Commander goes down. The Shooty Coptas take out the remainder of the Stealth Suits (best shooting of the day for them). The Rokkit Coptas all manage to miss the barn door on the Hammerhead. And.. the Battlewagon borne Burnas shock the hell outta the Tau. ("ok, so, you cover 8
FW with the Flamer template.. that is 8 hits.
Umm, no, I have 12 guys in there with this weapon, that is *96* hits.. Oh Lord. <scoop scoop scoop> I am not even gonna make you roll to wound").
Assault- The Red Caps hit the Hammerhead automatically, and remove the Railgun
Tau Turn 4
The Tau only move a Devilfish a bit to get a bead on the recovered Shoota Boy 3.
Shooting.... the Crisis suit on the hill manages to take out 2 of the 3 Rokkit Coptas, (the remaining one rolls a 3!) The Firewarriors on the hill try to shoot the Shooty Coptas, but roll poorly and only damage 1. The Devilfish manages to eliminate the last 2 Shoota Boyz, leaving only the Nob (who makes his morale check)
The Red Caps stun the Hammerhead in Assault. The Crisis Suit decides to sit tight.
Ork Turn 5
The sole Rokkit Copta heads towards one of the Fish in the woods... has a side on view! The Battlewagon trundles up the hill and hits the Crisis Suit again with the rolla, and this time the appropriate sound effects are heard, as the Suit and drones get pounded. The Ladz continue to retreat, but the Shoota Nob gets an idea to head for a safer objective. The Lootas decide to head over to the Tau Commander's battlesuit to see if anything neat might be stealable.
Shooting .. again the Burna Boyz barbeque them some Warriors.. all die again. The Rokkit Copta manages to Wreck the Devilfish, and the Shoota Coptas fail to damage the intact Devilfish.
The Red Caps also Destroy the Hammerhead in Assault.
At this point, Collin concedes. He has one intact Devilfish and that is about it.
After Battle Thoughts..
This was the first time I have used a
KFF/Battlewagon/outrider combo, and it was VERY good at getting in deep to his lines. Collin was unprepared for the amount of carnage the Burnas can deal from within an open topped vehicle. I suspect I will not be getting away with that again. He also didn't use the Tau Vehicle Mobility that he had.. and kinda castled up in the corner which hurt him once I got in there.
On my side, I KNOW I should have not been shooting with the Shoota boyz and running instead, but the chance to take pot shots at the Sniper Team was strong.. and it did work well in the end. I should NOT have been shooting at the Stealth Team though, I should have let the Shooty Coptas take them out.
Anyhow, hope you enjoyed reading this.
-Porkuslime


 2000 Orks
 1500 Tau