| Author |
Message |
 |
|
|
|
|
Advert
|
Forum adverts like this one are shown to any user who is not logged in. Join us by filling out a tiny 3 field form and you will get your own, free, dakka user account which gives a good range of benefits to you:
- No adverts like this in the forums anymore.
- Times and dates in your local timezone.
- Full tracking of what you have read so you can skip to your first unread post, easily see what has changed since you last logged in, and easily see what is new at a glance.
- Email notifications for threads you want to watch closely.
- Being a part of the oldest wargaming community on the net.
If you are already a member then feel free to login now. |
|
 |
2010/01/27 20:40:24
Subject: The Inner Geek work blog
|
|

Fresh-Faced New User
|
This is the beginning of my WIP blog here on Dakka Dakka. I'm hoping to have this as a secondary place to find my work, as opposed to my regular blog which can be found in my signature below. I looked around a bit and could not locate a picture size limit rule, so if I missed it, please let me know. I'll be happy to shrink down my pics... once I learn how. I appreciate you reading and always welcome comments and critiques.
Quick break from the Marauder... I know, we just got started, but this is important stuff!
The parcel delivery person rang my bell and left a box on my porch...

Well, the insides looked packed nicely. (Spoiler: I won't be able to get it packed that nicely when I'm done rummaging thought it.)

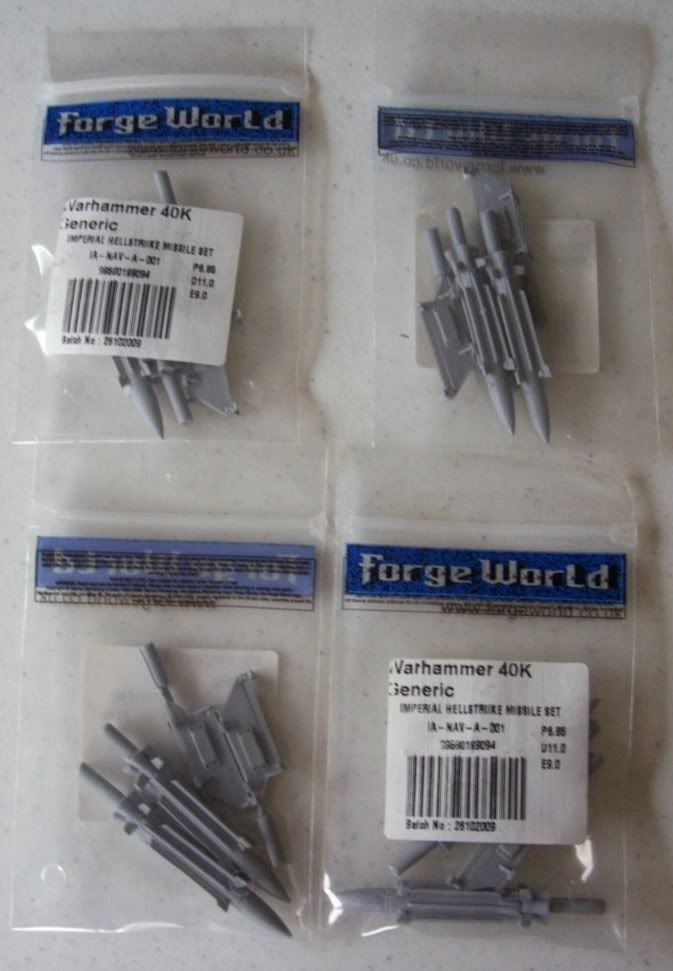
Not a bad start, we have the eight Hellstrike missiles I'll need soon for the Marauder Destroyer!
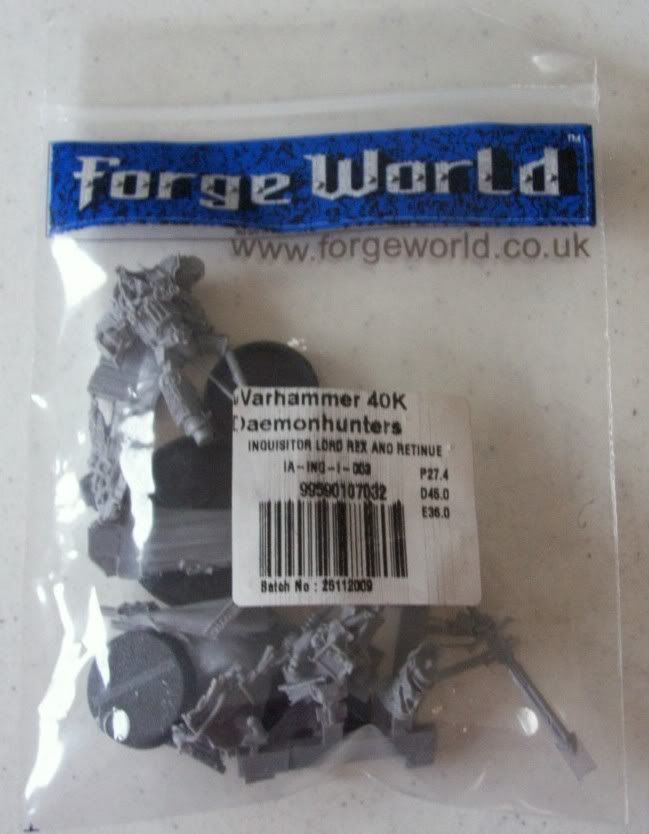
Next I find an Inquisitor Rex and retinue set. He's super cool looking and maybe will inspire me to dig out and repaint some Daemon Hunter stuff!
But wait, there's something hiding beneath all this (really it's not that hard to see, but I'm going for drama here)!

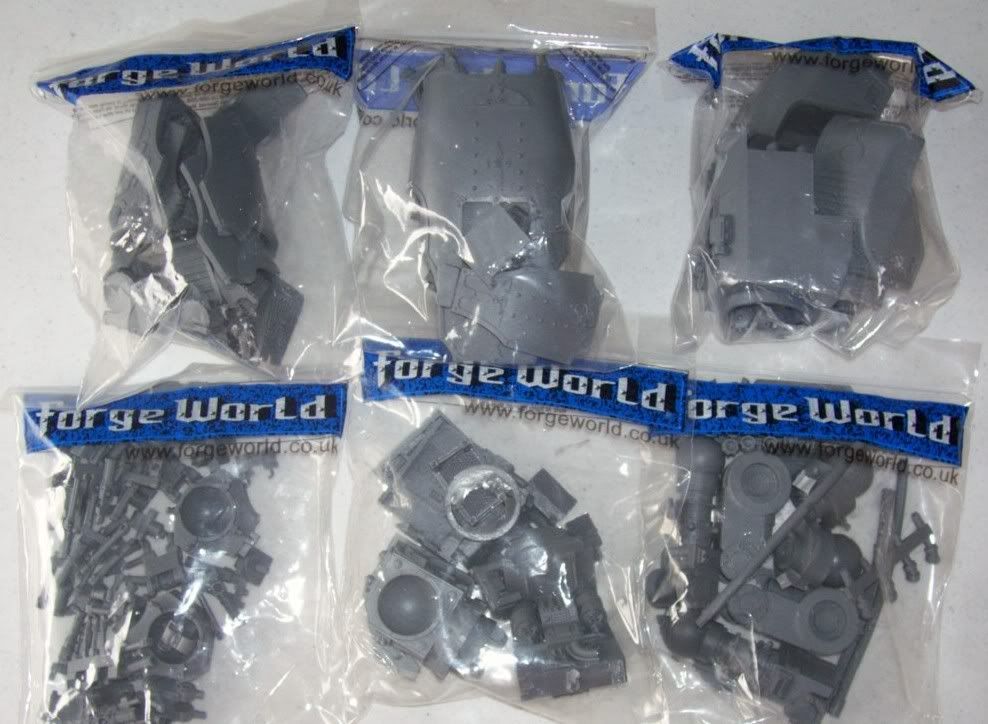
Yep, two Mars Pattern Warhound bodies! Here is a shot of the bits within their protective bags.
And for weapons? Eventually there will be a variety that are interchangeable via magnets, but for now, five Turbo Lasers...
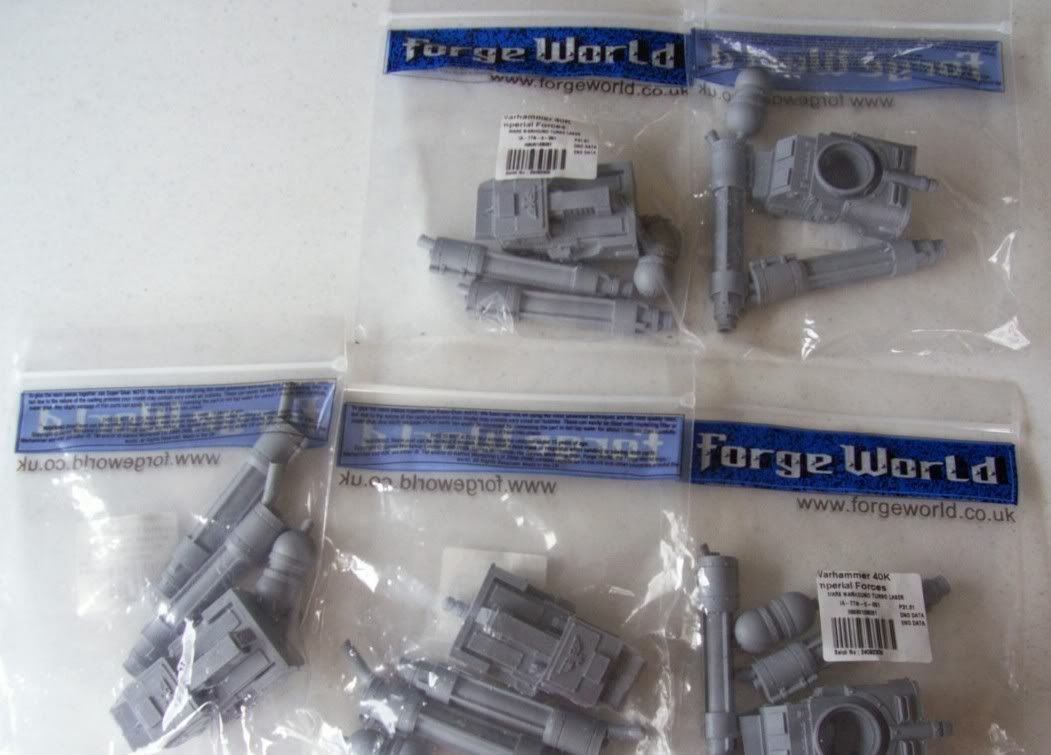
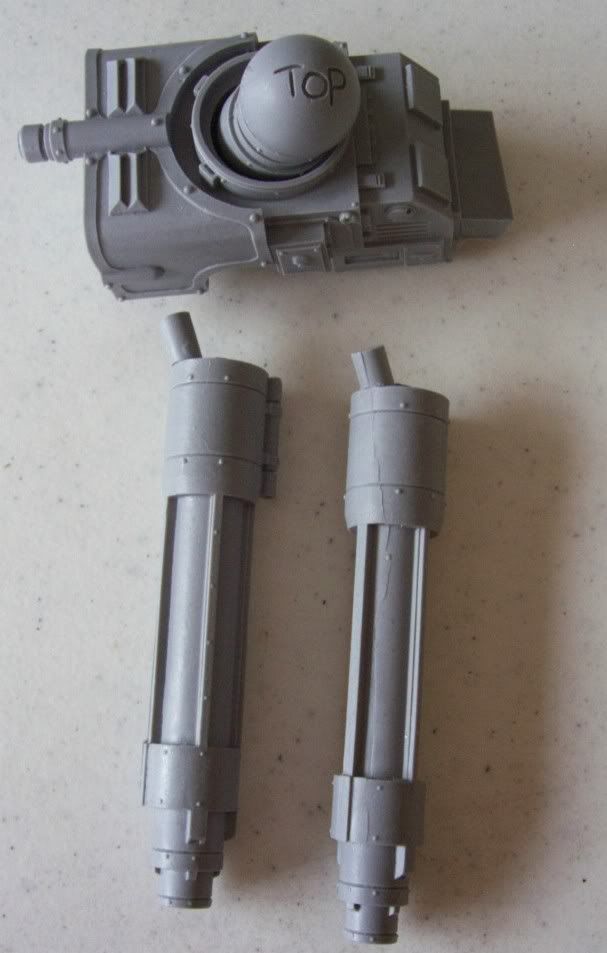
I know, five is too many for two Warhounds. I plan to modify one to go on the carapace mount of my Reaver Titan.
I'm happy to say that after going through each bag of parts, the quality is amazing. Nothing like the problems I had with the Marauder Destroyer upon arrival. All parts are cast well with minimal air bubbles. Some minor, but expected, warpage that will easily be straightened out during assembly. I'm sure tiny flaws may come to light during wash when I handle each piece more extensively, but as of now, I was only able to find one tiny fault as shown below.
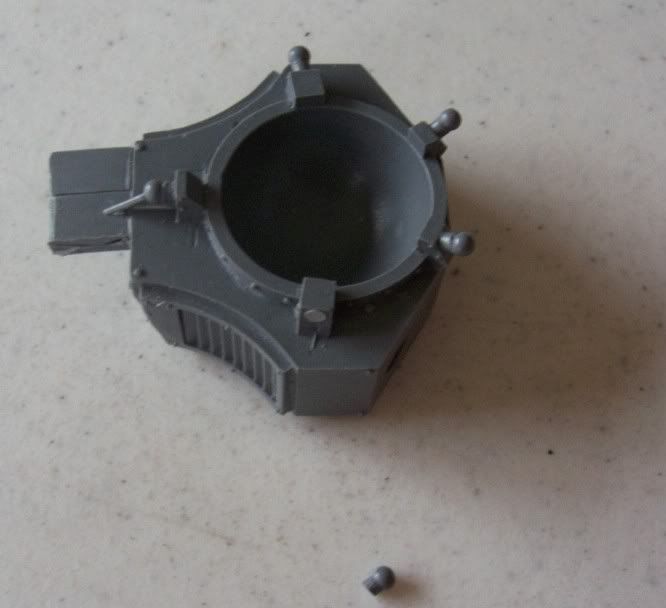
Not bad for two large kits worth of parts! The tiny ball joint has been mended using my nemesis, Super Glue. Overall, I'm extremely pleased with the kits. That and the super fast shipping. It was maybe three days in process and post to Texas, USA.
I'm excited to start on these Warhounds, but I'm not going to rush the Marauder to get to them. Well... maybe a little. I'm thinking they will be a simultaneous build, but honestly once I get started that idea may change. Of course, at some point down the road I'll be pestering Ron over at ++ From the Warp ++ to work me up some of his amazing banners like the banners for my Reaver Titan he did.
I'm always looking for ideas and input from you folks out there in internet-land so feel free to drop me a comment.
|
|
|
|
 |
|
2010/01/27 21:01:32
Subject: Re:The Inner Geek work blog
|
|
Alluring Sorcerer of Slaanesh
Union, Kentucky United States
|
You sir have way to much money for your own good, and we here at dakka love you for it  I can't wait to see these threw.
P.S welcome to dakka!!
|
Listen, my children, as I pass onto you the truth behind Willy Wonka and his factory. For every wonka bar ever created in existance, Mr. Wonka sacraficed a single Oompa Loompa to the god of chocolate, Hearshys. Then, he drank the blood of the fallen orange men because he fed them a constant supply of sugary chocolate so they all became diabetic and had creamy, sweet-tasting blood that willy could put into each and every Wonka bar. That is the REAL story behind willy wonka's Slaughter House! |
|
|
|
|
2010/01/27 22:49:42
Subject: The Inner Geek work blog
|
|

Mutated Chosen Chaos Marine
In a Toyota, plotting revenge.
|
Well start assembling them right now!
|
metallifan said: I almost wonder is "Matt Ward" another pen name for C.S. Goto?
metallifan said: The Imperium would probably love Hitler...
Play KoL! Click my sig to go to the main website and sign up!
 |
|
|
|
|
2010/01/27 23:35:25
Subject: The Inner Geek work blog
|
|
Executing Exarch
|
Counts up all the money spent on FW models.... Damn, you don't have a wife do you?
Well keep the pictures coming, some of us want to live vicariously through you...
|
|
|
|
|
2010/01/28 00:12:33
Subject: The Inner Geek work blog
|
|
Committed Chaos Cult Marine
|
Wow...expensive. Seems like this is going to be an good one!
|
Check out my blog at:http://ironchaosbrute.blogspot.com.
Vivano crudelis exitus.
Da Boss wrote:No no, Richard Dawkins arresting the Pope is inherently hilarious. It could only be funnier if when it happens, His Holiness exclaims "Rats, it's the Fuzz! Let's cheese it!" and a high speed Popemobile chase ensues.
|
|
|
|
|
2010/01/30 04:50:25
Subject: The Inner Geek work blog
|
|
Fresh-Faced New User
|
Clthomps wrote:Counts up all the money spent on FW models.... Damn, you don't have a wife do you?
Well keep the pictures coming, some of us want to live vicariously through you...
Actually, I do have a wife. Wonderful woman! She is very good to me and suffers my hobby well. Automatically Appended Next Post: I've been working for a couple days on the landing gear for the Marauder Destroyer. Well, a day and half was thinking type work... better to over think it than under think it, right? My whole reason for even considering this is that I would like to have the option of a flying base with gear up or a static pose with gear down. With the ability to pose the plane with gear down it can double as scenery or even a largish objective marker when not in play.
I figured magnetizing the struts and such to the plane would be easy enough. The problem was magnetizing the flat pad at the bottom of the gear in a way so that it could attach to either the bottom of the struts, or the bottom of the plane with struts set aside. Then it occurred to me that the pads are only detailed on the upper side. When the gear is up you see only the flat bottom, easy to replicate with plastic card. More on this towards the end. First, here's how I got my landing gear struts and plane magnets to line up.
First I drilled a hole almost deep enough to set two magnets on top of each other into.

It is important that the top magnet is slightly out of the hole as can almost be seen here...

I placed a small drop (very small) of super glue on the top magnet surface and then held the gear strut assembly in place firmly.

This attaches the top magnet to the strut assembly in the just the perfect spot. Next I went back and drilled the hole a little deeper so that two magnets would sit in the hole without sticking out. They are quite flush with the planes surface. I placed a second magnet on the one that is now glued to the strut assembly. Put a little glue into the hole in the plane and used the magnet and strut to push the second magnet into the plane body. This assures that the magnets are polarized correctly, though if you're careful you could just as easily push the magnet into the plane with your finger or other non metallic tool.
Now with the strut assembly magnetized, I added a brass rod pin to help against twisting forces. There were two small rivets on the back side of the struts, I simply shaved one off and drilled through where it once was. Leaving the brass rod sticking up out of the whole replaces the rivet. The rod is larger than the diameter of the old rivet, but I think it looks fine. They might have used a larger rivet in order to make it more secure in 40k pretend land anyway!

I mentioned earlier about the pads on the gear being fabricated. I just laid out an existing pad and traced around it to get the general shape. Then, cut it out and trimmed it to exact size. There is a slant at one end and this was added by scoring the plastic and bending it carefully.
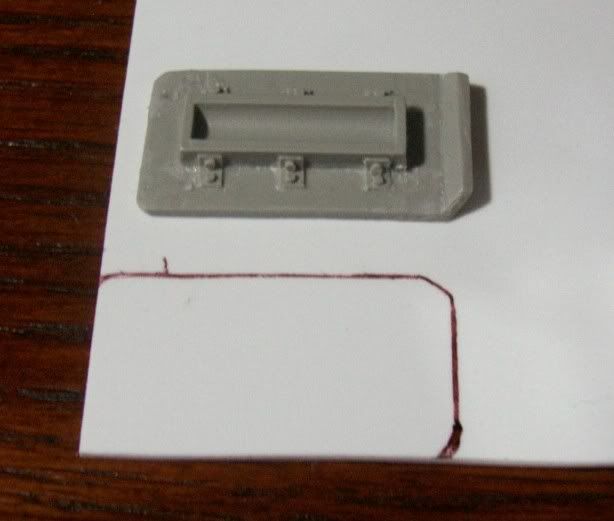
The original...

And the copy...


(Since you never see the underside of the 'up' landing gear, it doesn't matter much how it looks!)
And a shot of the whole bunch happily magnetized together...

I know this was a lot of post for just a bunch of landing gear. I wanted to share the way I did it in hopes of inspiring others. Even if they're only inspired to tell me their favorite way to magnetize flat surfaces together!
|
|
This message was edited 1 time. Last update was at 2010/01/30 04:51:30
|
|
|
|
|
2010/01/31 12:31:08
Subject: The Inner Geek work blog
|
|

Pulsating Possessed Chaos Marine
|
Thanks for sharing your way to use magnets! Now assemble the titans ;P
|
Woff, I'm a Cow! |
|
|
|
|
2010/02/04 01:55:12
Subject: Re:The Inner Geek work blog
|
|
Fresh-Faced New User
|
A quick update on the progress of the Marauder Destroyer and an impromptu product review as a bonus!
As with any other resin kit from any manufacturer in the world, the MD suffers from its share of warpage. So I thought I'd share my technique for taking the bends out.
I start with boiling a pot of water on the stove. Once it's boiling I back the heat down from a high setting to a medium setting. This should let the water get down to just below a boil temperature-wise. I keep a bowl of cool water on hand as well, to cool the parts down once I get the shape I want. I skipped pictures of that stuff as I'm sure you know what a stove, pot, water, and a bowl look like.
Instead I thought I'd show you the kinds of things I had to straighten out. The thicker pieces, like this Tail Plane, I hold submersed or partially submersed (depending on how much of the part is affected) for about 20-25 seconds.
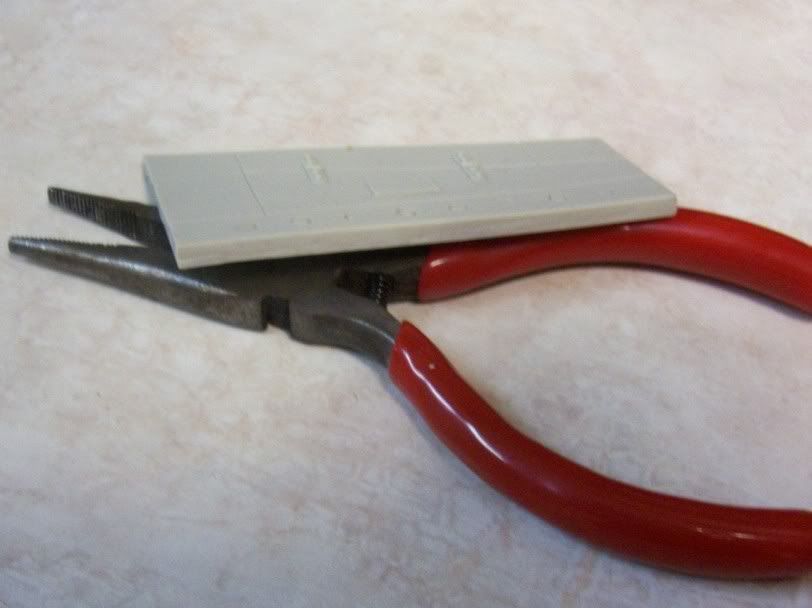
For thinner bits like these Flaps and Bomb Bay Doors 10 seconds or less should do.
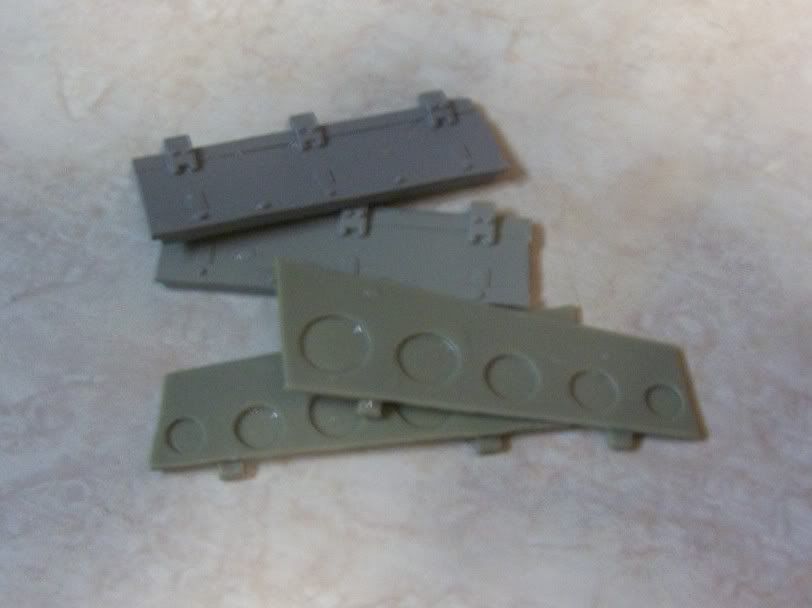
For even thinner bits, you have to be careful and probably use a 5 second or shorter dip in the hot water...

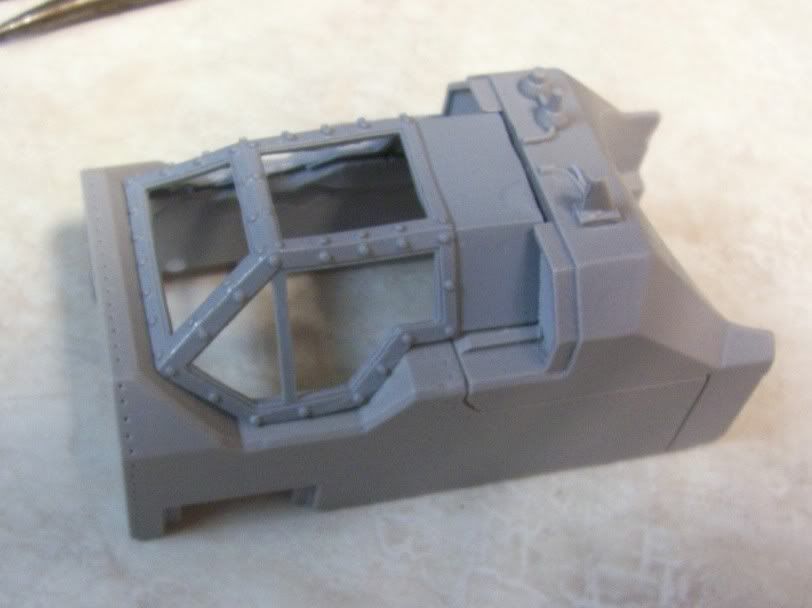
For the thinnest of parts, like the Canopy Frame, I literally just dip and remove. This still gets the parts as soft as a wet noodle so extra care must be taken with parts this thin.

Whenever possible, it's also a good idea to have the piece that the part will mate up with on hand. This insures you get the shape you really need. In this case I put the part in it's position over the cockpit to make sure it fit correctly.
These are not all the parts I had to straighten out a bit, just examples of different types and sizes of parts. With this stage out of the way it will be some priming and painting and some parts assembly next.
For the product review, I'd like to share with you my experience in finding a suitable mount to fly this bird when it's complete. I found acrylic rods for sale over at Dragon Forge Design. The site lists a six inch acrylic rod with a resin bit to assist in mounting the rod to the flyer of your choice. The product page can be seen here. I knew I wanted my Marauder to fly a little higher than 6 inches, in fact 12 inches is more what I wanted. I emailed Jeff at Dragon Forge Design and he was able to custom cut me a 12" acrylic rod with no problems. Not knowing much about acrylic rods and such I was a little worried that the weight of the Marauder might be a little much for a 1/2" diamter rod. Nothing could be further from the truth. I think you could just about put an actual airplane on this rod and not bend it.
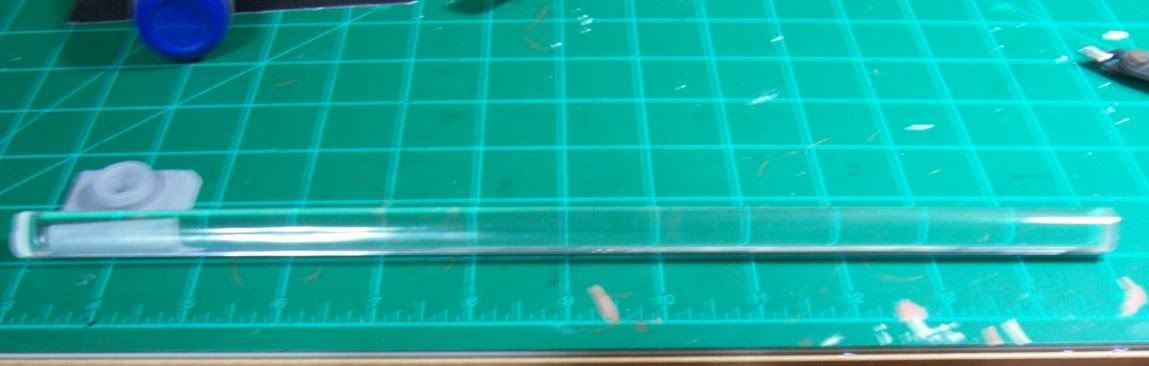
I would definitely recommend Dragon Forge Design for anyone looking for a way to raise up their flyer model. He also carries a large assortment of custom bases and such. In my opinion the products are priced reasonably and the customer service is excellent!
|
|
|
|
|
|
2010/02/22 17:12:43
Subject: Re:The Inner Geek work blog
|
|
Fresh-Faced New User
|
Just a quick update in an attempt to prove that I really have been working on this project!
I've sorted all the building out and even magnetized the Hell Strike missiles that go under the wings. All parts are ready to prime (have been for almost a week now) but the weather here is not cooperating. I have a garage I can spray primer in, but the weather has either been very wet and/or cold lately. The one nice day we had, when spraying primer wouldn't make me nervous, I had other obligations and wasn't able to get it done.
I cut the base from a bit of scrap 1/4" MDF board I had laying around. I folded a piece of paper in half twice to and cut 1/4 th the shape. This insured some symmetry in my pattern. The base is an oval of about 10"x7.5".
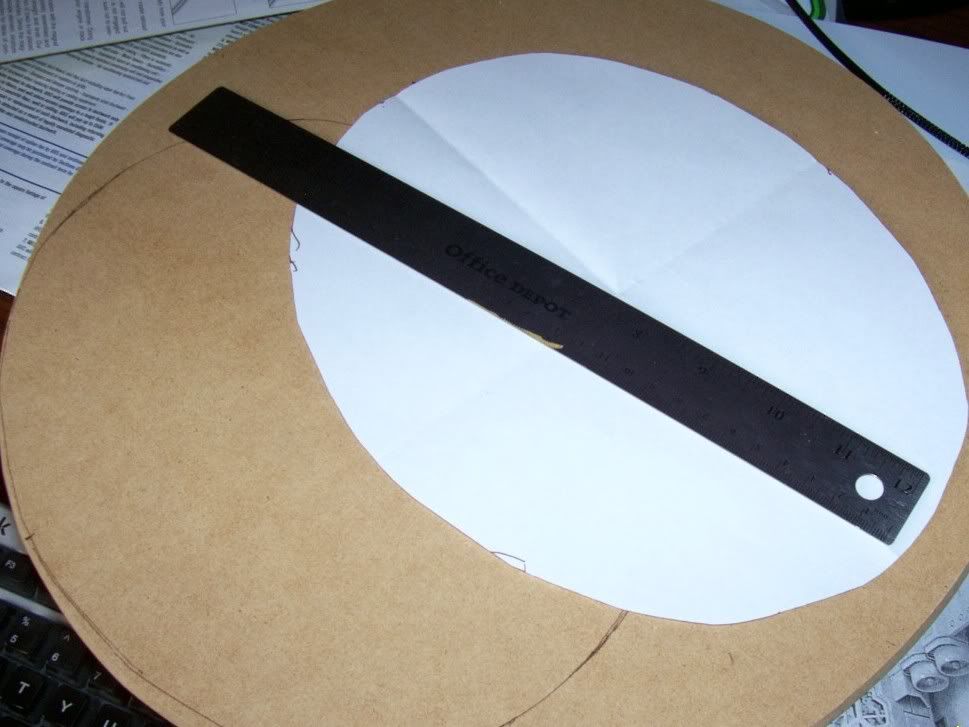
I also cut out some smaller pieces to use to build up the base where the stand would be placed.

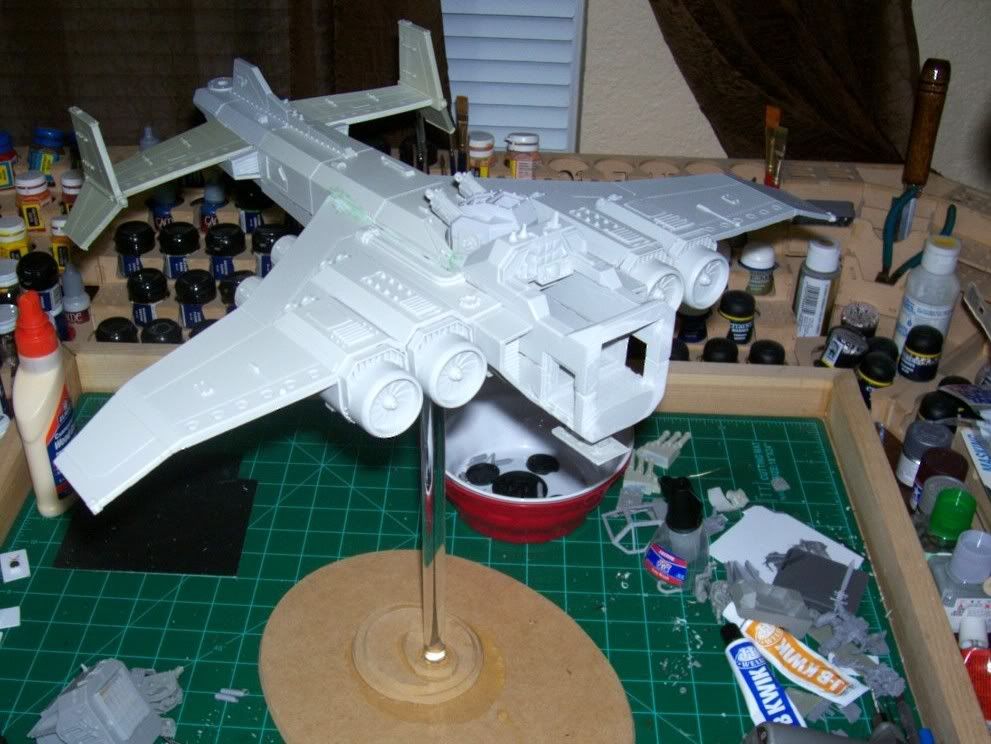
Here are a couple shots of the Marauder on the stand. You can see that the three extra pieces cut in the photo above give a total depth of 1" into which the acrylic stand was inserted. This was glued with wood glue and is amazingly solid!
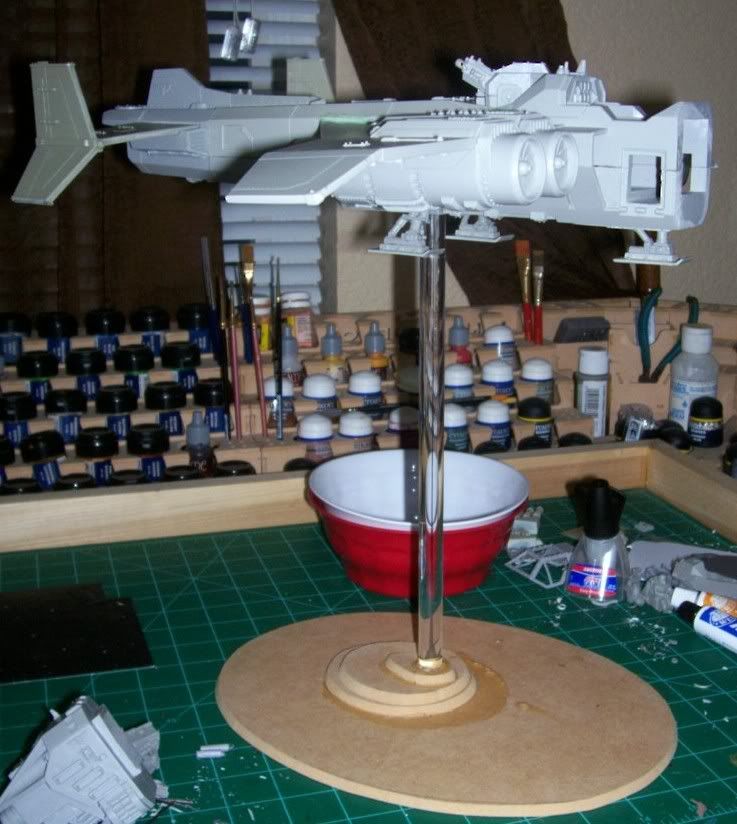
Bonus points if you can spot and name the distraction in this last picture...

The stand actually goes up inside the model, through the hollow body, and into the original mounting kit provided by Dragon Forge Design (who also came through with a 12" acrylic rod if you missed my previous post). I notched the top of the rod in a way so that I could glue the cut out notch into the mounting kit in the top of the fuselage. This prevents the model from spinning around on it's stand.
So there it stands... pun! Anyway, I'm excited about getting this primed up and painted. It's by far the worst Forge World model I've assembled as far as quality of parts fitting together. But, I'm hoping that the flaws are less noticeable to someone who didn't actually assemble it. Thanks for stopping by and, as always, comments, criticisms, and pointing & laughing are welcome!
|
|
|
|
|
|
2010/02/22 17:22:36
Subject: Re:The Inner Geek work blog
|
|

Navigator
|
Thanks for the Dragon Forge recommendation, I've been trying to work out how I was going to mount my Lightning and Destroyer for ages now
|
|
|
|
|
2010/02/22 20:28:09
Subject: The Inner Geek work blog
|
|
Pulsating Possessed Chaos Marine
|
Brilliant stuff so far. Now as for that distraction.. Warmachine, Retribution of Scryrah, Dawnguard Invictors i do believe.
|
 Oh stop complaining, its for the greater good... Now get in the box! Oh stop complaining, its for the greater good... Now get in the box!
Owner of R.S. Commission Studios. PM For a quote. Link in profile. |
|
|
|
|
2010/02/22 20:56:29
Subject: The Inner Geek work blog
|
|
Fresh-Faced New User
|
elaverick,
I can't recommend Dragon Forge enough. They will cut the rod to your specified length which is super handy as well.
stratassj,
Good eye! It's hard to resist a bit of Steam Punkery now and then!
|
|
|
|
|
|
|
|
