A relative of mine has started putting together a Black Reach army and I told them I would give them a little write up (with pictures) on how I paint figures. As I prepared this, I thought `hey, I should stick this on Dakka!'. This guide can hopefully prove useful to my relative, but I am hoping I could pick up some tips myself from the better painters here. I want to improve my painting, and what better way to get tips than to provide an account of what I already do?
----------
I will demonstrate how I paint three Zoanthropes from the Tyranids army. These are the largest Warhammer figures I have painted so far (not counting vehicles), so they are a bit of an experiment for myself too. Before this starts, I had already cleaned and glued the models as I had previously shown you. The first stage is really simple. Using the spray can I provided you with, base coat the models black. Depending on the colours you are using, sometimes it is better to use a white base coat, but we are using black today. The choice effects the final look of the figure. White is better for when you are painting light, bright colours; black for darker colours. In experimenting, I found black the better choice for my Tyranids. Now, no matter how hard you try, the spray will never completely cover the figure. It will look terrible, as shown.
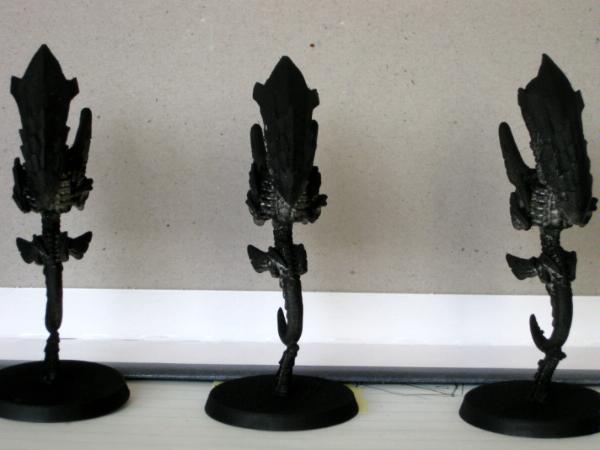
What we do next is to take some black paint and make it quite thin. I use Windex for thinning paint. Quick, easy, always on hand. Perfect! I then use a large brush and get paint all over the figure quickly. It is all going to be the same colour, so no need for delicacy. You may get paint on your fingers. No problem, it is non-toxic. You can lick it off. Try it... you did? PAINT EATER!!
Now, when I first started painting, people tried to explain thinning paint to me. It made no sense! The advice I received was to aim to make the paint the consistency of (non-thickened) cream. I have done it enough times now that I just `know'. When you are first learning, thinning paint is a very difficult concept to grasp. Basically, if you do not thin the paint, it will not come off the brush smoothly, dry in a horrid, gluggy mess and just look awful. If you thin it too much, the pigment will just run off the figure and you have nothing left. This is why you should always put some paint into a pallet of some form and thin it there. If you mess up, you can just adjust what is in the pallet. If you try to thin in the bottle and mess up... you need to buy new paints! As a general guide, drip Windex into the pallet until the paint seems to be breaking up on its own, then mix it up good with the brush. If, when you remove the brush, the colour seems to sink inside the bristles, it is too thin --- add more paint. This is something that will make more sense as you get experience.
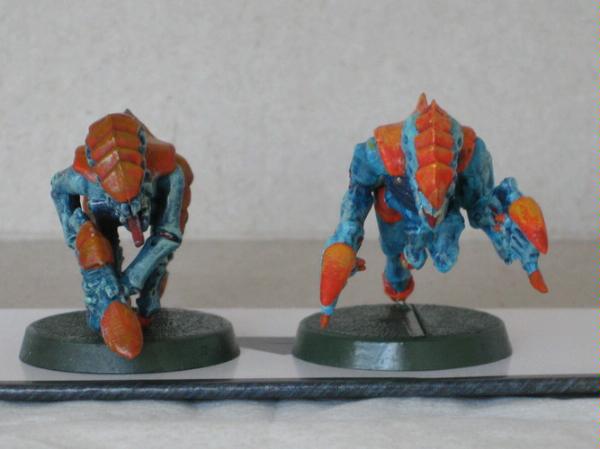
At any rate, after giving them another coat of black, they look something like this.
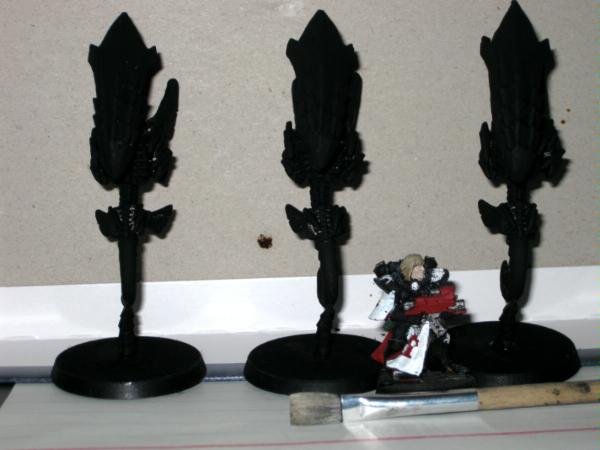
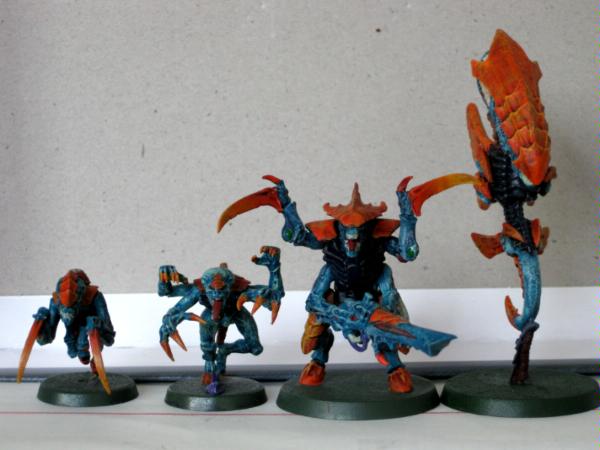
In this shot I included another of my figures to give you a size comparison. That figure is probably ever so slightly smaller than one of your Space Marines. I have also shown the brush I used. I use that same brush for doing this coat on the small figures too. Simple job: just do it quick and easy. This is a good chance for you to get a feel for painting too, as you cannot really make many mistakes. Does the paint feel like it is coming off the brush smoothly? If it feels rough, you may need to thin more. Are you getting a nice, solid colour? If not, it may be a little too thin (you can add a little more paint and mix it in if the case).
When painting, remember to clean your brush regularly. It makes your brushes last longer. What I do is to have two large jars of water next to me. I rinse the brush in one jar first, then the other. The bulk of the paint will come off in the first jar, and the water here will get dirty quickly, but the second jar is just for the left-overs. When the second jar gets cloudy, it is time to change the water in both jars. Also, keep a close eye on the figure as you paint. Even if you look after your brushes, bristles will come off from time to time. You want to remove these as soon as possible. I keep a pair of tweezers on-hand for when this happens.
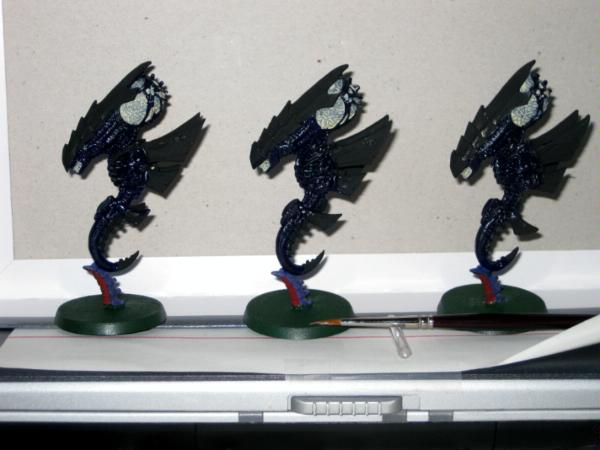
Now that we have the base coat done, it is time to start adding colour. Now, there is no right or wrong approach in how to do this. Some people start with the light colours and move into darker ones, others start in the middle and then do light and dark in sequence. I prefer to start dark and work my way up. On these figures, I started by applying a dark blue over most of the body. Again, I used the large brush and I was not too delicate --- mistakes are easy to correct at this early stage. Once I covered it, I then painted the base green and retired the large brush. I need a little more precision from now on, so I move down to a smaller brush. The figure rests on some `alien plant-life', which I painted purple and red. This is not an important part of the figure, so I did not waste much time on it. I then used an off-white to paint the teeth and exposed-brain (yes, brain) of the figure. I do not need these done yet, but for this particular figure I felt it would be useful for me to get some early contrast between different colours. The picture below shows the figures at this stage, along with the smaller brush I used.
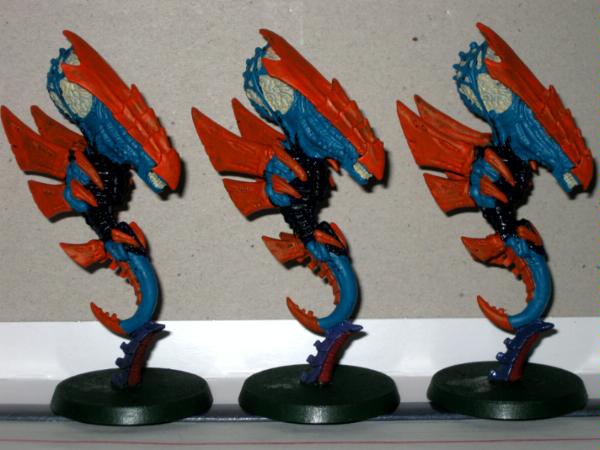
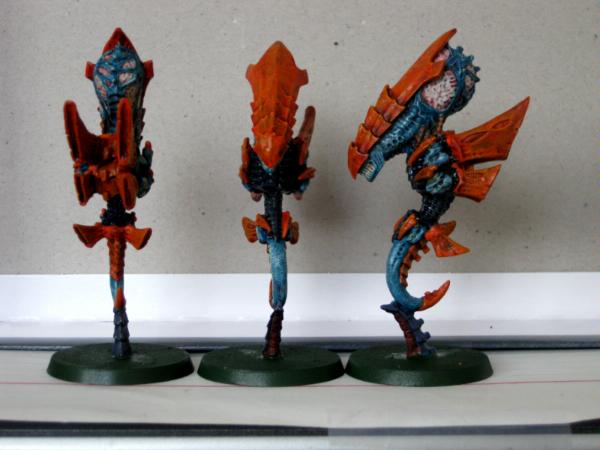
Once I have this out of the way, it is time for me to move onto the main colours. For my Tyranids, I am using turquoise and orange as my main colours. I started with the turquoise --- just because, there is no special significance. I was slightly more precise in my brush strokes from here, but I still do not worry too much about small slips. The turquoise went over most of the dark blue parts, though I kept bits with the first colour. With this layer, I do not try to get into the crevices; I leave them dark blue, which gives me a sense of shadow for no extra effort. I then applied the orange, though this time I made sure to apply it evenly across all parts that will be orange.

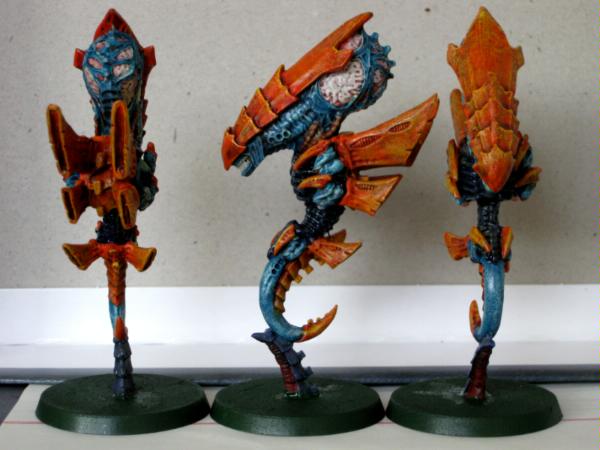
It looks kind of crappy, right? When you thin your paint, this is what happens. This is why we paint in multiple layers. As you will soon see, a second (or third, or fourth, etc) layer will solve the day. I again apply the turquoise, orange and off-white to the appropriate areas, this time making sure I am very precise. These layers take me twice as long as the others because I am very deliberate in my brush strokes. Mistakes can still be fixed, but they become increasingly painful from this point on. This time, I focus the paint onto the facings on the figure. The outer surface, not worrying about the bits that begin to fold into the crevices. Yes, this is to aid that sense of shadow from before. After this second layer, the colours are far more vivid.
We now have the hardest work done. From this point, I further emphasise the sense of light and shadow, but there are some very simple techniques that can be abused, I mean used, to get a good effect with little effort. The first is a `wash'. Essentially, a wash is a really, really thin paint. You can buy ready made washes from stores, which I highly recommend. They give an excellent effect with no effort at all. You use the wash in much the same way as the regular paint, but just go straight from the pot --- no need to thin here. Taking the wash onto your brush, apply it to the figure against the grain. This is important. The theory behind a wash is that, being very thin, it will naturally run towards the crevices. The pigment of this dark paint will rest there, creating a distinct shadow effect. For this figure, I applied a blue wash over the turquoise and purple, a brown wash to the teeth, and a red wash to the orange, red and the brain. If you look closely, you should see these new colours in the recesses of the figures.
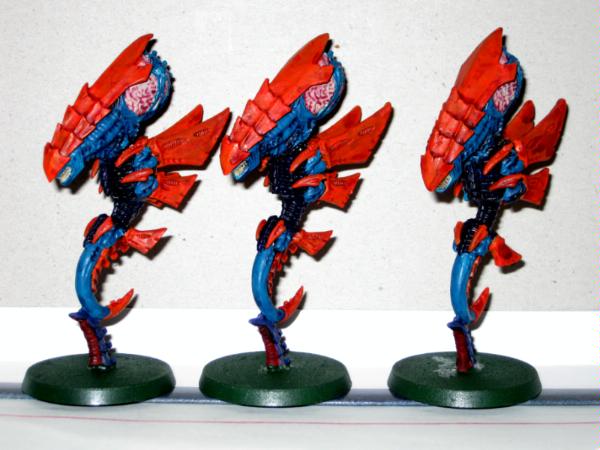
After washing, on my Tyranids I quickly grab the red paint again and add some red to parts where the turquoise is. I learned from experience that painting these parts before the wash was a waste of time, so I add them now. This is purely an aspect of how I decided to paint the Tyranids, and not a part of my usual painting process. Most of these places cannot be easily seen on this figure, so I have no photo to show this step. Anyway, we have shadow, so we now need light. Light is readily achieved from a technique called dry brushing. This is extremely easy: I got it right on my first try! Take a lighter colour and dip the brush straight into the pot. Try and wipe off as much paint as possible back into the pot, then grab a rag. Again, use the rag to wipe of most of the paint from the brush. There should only be a small amount of pigment left, and you brush quite dry. If you brush over the figure now, it will leave only a small amount of pigment behind, and only on the raised surfaces. Be warned: this technique murders your brush! It is common to use old brushes for this, but you would not yet have any. Make sure you have two brushes: use the one that seems better for regular painting, and the crappier-looking one for dry brushing. When you do this, bristles often come off: make sure those tweezers are on hand! If you pay close attention to the brush, you should notice bristles coming off and be able to pluck them before they get left on the figure. For these figures, I dry brushed a pale green over the turquoise, white over the off-white, and an orangie-yellow over the orange; I also put an orange over some of those last-minute red bits I did before. I finally dry brushed a blue-grey over the dark blue and purple parts. With Warhammer figures, it is generally best to highlight with distinctly different shades/colours. While a slightly-lighter shade looks good on your hand, if you are only doing one layer as I have here it will not be apparent on the table. There is a more complicated technique of gradually building up different tones, but I am not using that here.
The figures are not quite ready yet. You may notice, I broke my own rule. I used an orange/yellow over the orange, and it is not very apparent. I now go back and dry brush a brighter yellow over the orange/yellow. I make sure this is only on the tips, which makes it really stand out.
With that, the figure is basically done. The final step is to varnish. Warhammer figures are handled a lot, so there is a good chance you could accidentally chip/wear off the paint. Obviously, after all this effort, that is a pretty awful thing to happen! I get spray cans of various Japanese brands from the local Chinese hobby store, but everyone seems to have their own preferred solution for this. Once the final layer has dried, I make sure to give them a good over-all spray of varnish and they are done. MAKE SURE YOU HOLD THE CAN BACK FROM THE FIGURES! It is a common mistake to hold the varnish too close to the figures, which results in them getting a frosted look. Hold it a good foot or so back and you should be fine. Leave the varnish to dry, then the figures are ready to play.
Just a couple of final comments to finish with. Firstly, make sure you have a good plan on what you want to do before you start. Decide your colours, then test them out on a single figure. If you find you want to do something slightly different, it is better to have one figure a little different from the others than a whole squad that looks different. No one would notice my first test Tyranid figure on the table unless they were really scrutinising them all. I would also recommend considering a uniform colour scheme for the army. While you can have some extremely good looking armies that do not follow this rule, they are almost always painted by experienced players. As someone completely new, it is much easier to get an impressive-looking army by keeping things the same. I have used the same colours, process and techniques for every figure in my Tyranid army so far, and I am almost up to the last few figures. There is one final stage called `basing'. Basically, you decorate the base of the figure. Some people do this first, some last. Personally, I keep putting it off. I could base the figures, but I would rather paint those ones over there now! The idea of basing is the same as framing a canvas. It just brings out the figure and makes it look that much better. I will eventually make a grassy field sort of effect on my Tyranids, but I still have models to paint, so I will continue to put it off a little longer.
Finally, the materials I have used:
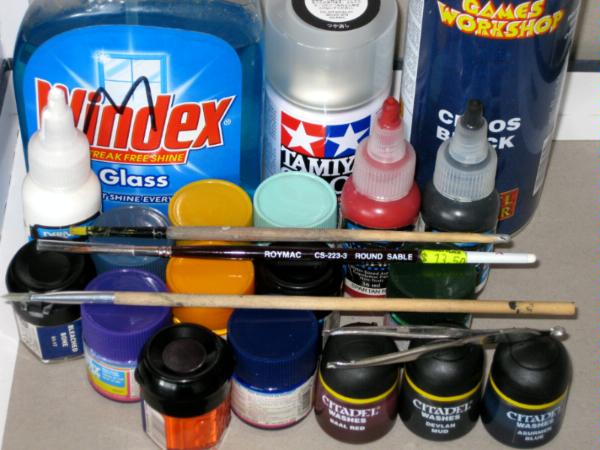
*Windex for thinning paints.
*A Tamiya-brand top coat to protect the figure.
*A Games Workshop-brand base coat.
*Three different brushes (one for dry brushing).
*Red, brown and blue washes.
*White, off-white, blue-grey, purple, yellow, orange-yellow, orange, pale green, turquoise, dark blue, red, black and green paints.
*Tweezers.
*Two jars of water [off-shot].
*A rag [off-shot].
*Two pallets [off-shot].
*A camera [off-shot].
*Five pots of tea [not a pretty photo].
I hope that helps you to get started. If you get stuck, the Internet (or I) will likely have the answers you need.


 Order of the Ebon Chalice, 2,624pts
 Officio Assassinorum, 570pts
 Hive Fleet Viracocha, 3,673pts

 562pts
 I also preferred the way the black emphasised the contrast between the blue, turquoise and green over the way the white brought out the orange and yellow. Combining black and white could have an interesting outcome, but way too much work for a hoard army.

 Children of Tzeentch (1850 points) W:11/L:6/D:5
 Kabal of the Twisted Storm (750 points) W:4/L:1/D:1