This is my first go-round on a battle rep. The game was 2000 points, one free
HQ. I played Orks, my opponent played Soul Drinkers. Dawn of War deployment. Capture and Control. We played
My Orks:
HQ:
Ghazgull Thraka 225(Free)
Big Mek Shokk Atack Gun: 110
--
PK
--Boss Pole
Elites:
Lootas x 15: 225
Kommandos x 10: 215
--2 Burnas
--Snikrot
Troops:
Ork Boyz Mob x 30: 225
--3 Big Shootas
--Nob/
PK/Boss pole
Ork Boyz Mob x 30: 225
--3 Big Shootas
--Nob/
PK/
BP
Shoota Boyz x8: 83
--Trukk
Nobz x 7: 255
--5 Big Choppas
--Painboy
--
PK
--Trukk
Fast Attack:
Deffkoptas x 5: 225
--
TL Rocket
Heavy Support:
Battle Wagon: 210
--KillKannon
--Deffrolla
--Kannon
--4 Big Shootas
Battle Wagon: 175
--Kannon
--Ram
--Kannon
--4 Big Shootas
Killa Kan: 55
--KMB
Total:2003
Soul Drinkers: (I’m not sure of values, so just listing units)
HQ:
Librarian
Chaplain
Troops:
10 man
tac squad
5 man Scout with heavy bolter
Elite:
Sternguard with drop pod x 10
Termies x 10
Fast:
Jump assault x 5
veteran jump squad x5
Heavy:
Demolisher
Thunderfire Cannon
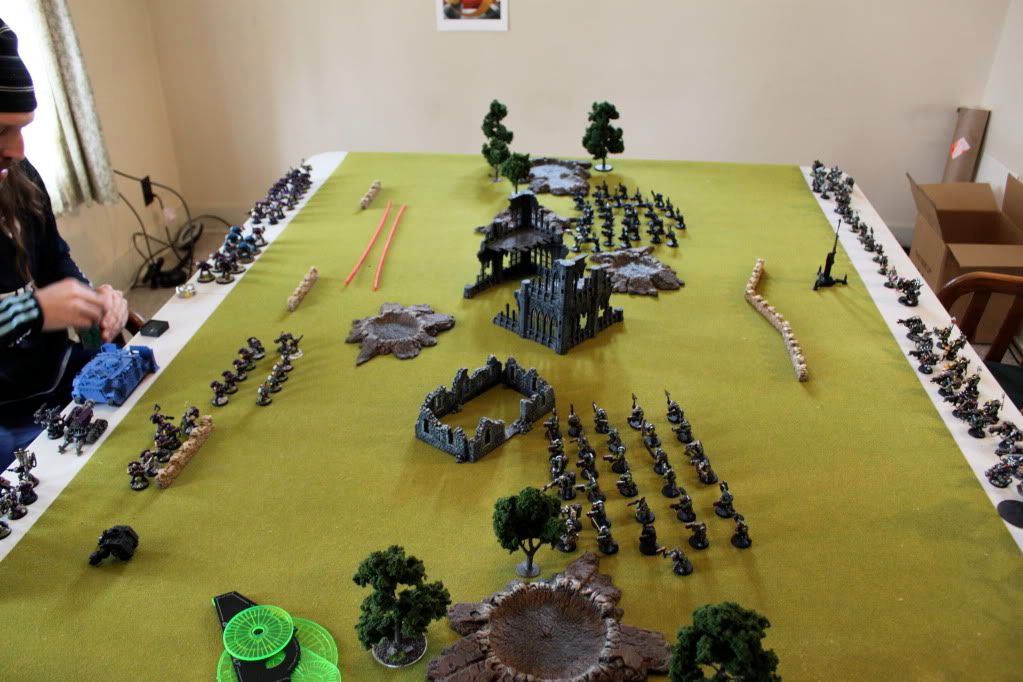
Deployment:
Orks deploy first. I chose not to deploy any
HQ’s on turn one. I deployed both my Ork Boyz mobs, one on each flank at the front of the deployment zone. He deployed his Tactical Marines and Scouts near his objective, the Marines behind cover. Honestly I think the game was over at that point. His only units that could take objectives were on the board turn one and looking at a massive charge from Grimskraga’s boyz:
TURN 1:
TOP
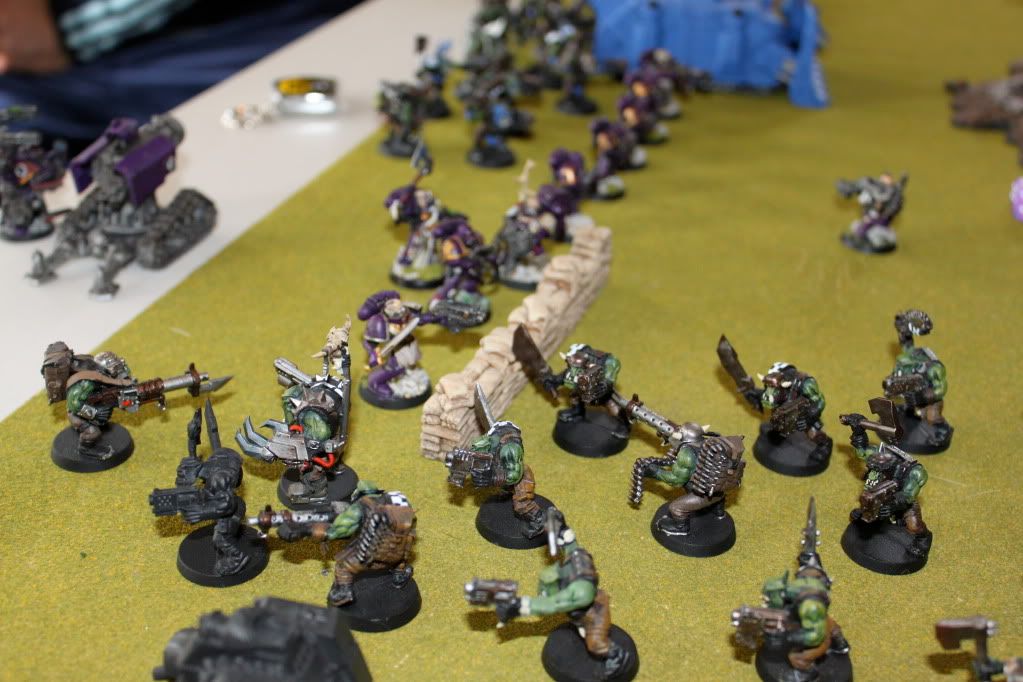
Grimskraga's Boyz move 6'' toward the enemy objective. Orks mob #2 moves through difficult terrain rather well, rolling a 4 and advance into cover up the left flank. Both Ork mobs have their Big shootas in range, and lay loose and incredible salvo of 18 shots causing only two wounds to the Space Marines, but saving on both.
BOTTOM:
The scouts move courageously toward Grimskraga's grizzly squad and let fly with their bolt pistols, killing two orks. The Tactical squad could not fare as well only killing one ork with their entire barrage.
Marines 1, Orks 0
TURN 2
TOP:
All reserve rolls fail for the Orks, save Ghazghkull and his unit of Nobz with
RPJ Trukk. They move onto the board Flat out 18’’ behind the ruins on the center of the board. Again Mob Grimskraga as well as Ork Mob #2 advance up their respective flanks. Mob #2 rolls poorly on difficult terrain, a 1. Slow going. Grimskraga’s Mob thins out the Marine Scouts with a volley of Big Shoota rounds. Two scouts mortally wounded. Big shootas from mob #2 all miss the Tactical Marines on the objective.
Using furious charge, the Orks didn’t really even bother to stop when assaulting the Scout squad. The Orks decimated the scouts killing all but one. He failed his morale check and was sent packing 4 inches. The Orks consolidated 4’’ toward the Marine Objective. However, they were not close enough to hold the objective.

Bottom:
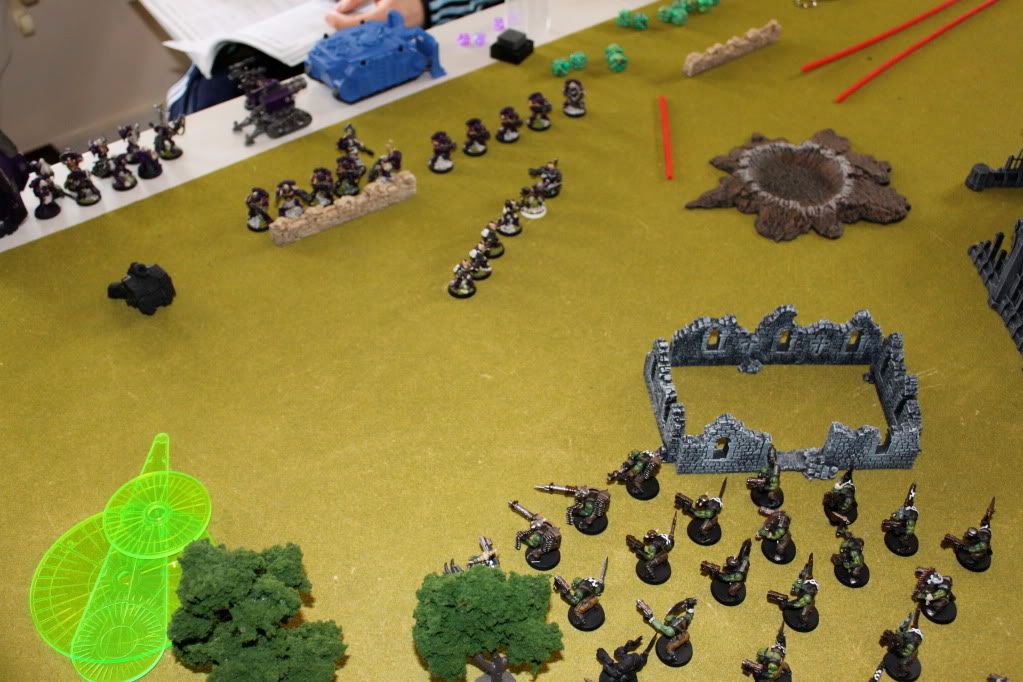
Reserve rolls for the Marines were equally as bad as the Orks, as only the Demolisher arrived. I was a bit worried here, as the main gun is
STR 10
AP 1. Large template. This could be bad for my Ork mobs. The demolisher deployed dead center on the Marine side. The Marines line aim their bolters, cutting a swathe into the Ork ranks. Near the back of the Ork mob could be heard the thunderous roars of the Demolisher cannon. In all, 9 Orks met their end. For whatever reason, the Marines decided not to charge Grimskraga’s Boyz. I feel that this was the turning point in the game. Near the objective, and 20 Orks staring him in the face, my opponent buckled under the pressure. Instead of doing some action, he decided to do nothing. It was this indecisiveness that began the slaughter that was to ensue.
Marines 0, Orks 0
TURN 3:
TOP
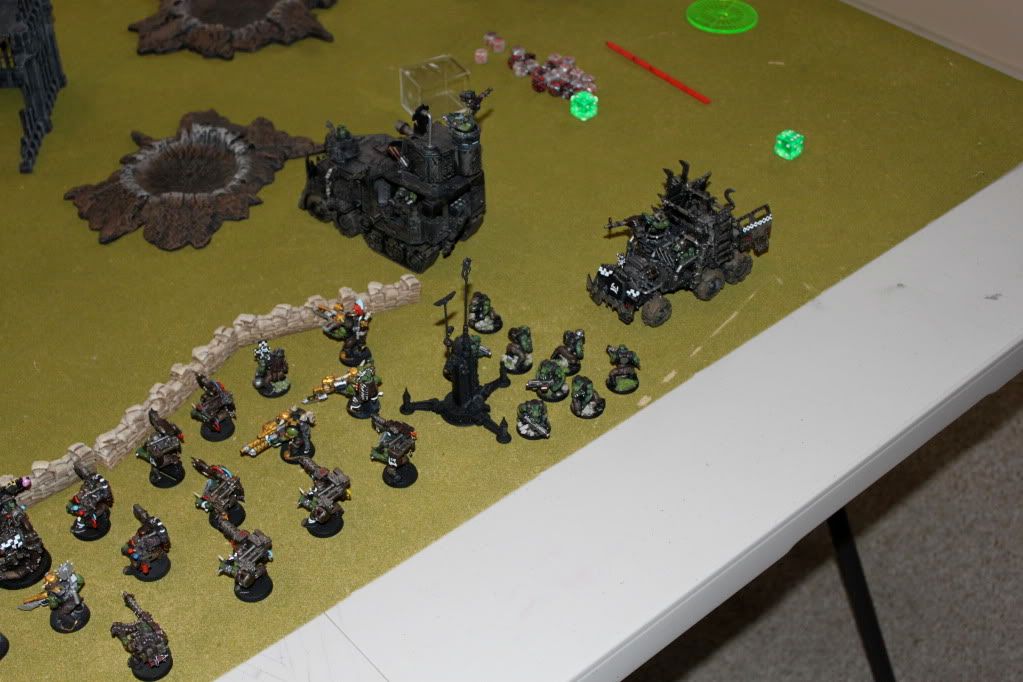
Much better round for my reserves. Snikrot, my Killa Kan, and my Deffrolla Battlewagon all come in. The Kan and the DR Battlewagon come in near the middle of the board to provide fire support to Grimskraga as well as sure up my left flank. Snikrot and his Kommandos use their ambush rule staring at the butt end of the Demolisher. If you look at the photo, his entire deployment zone is engulfed at this point. My left flank is locked down, and the right is bogged down by the mass of Orks invading his deployment zone.
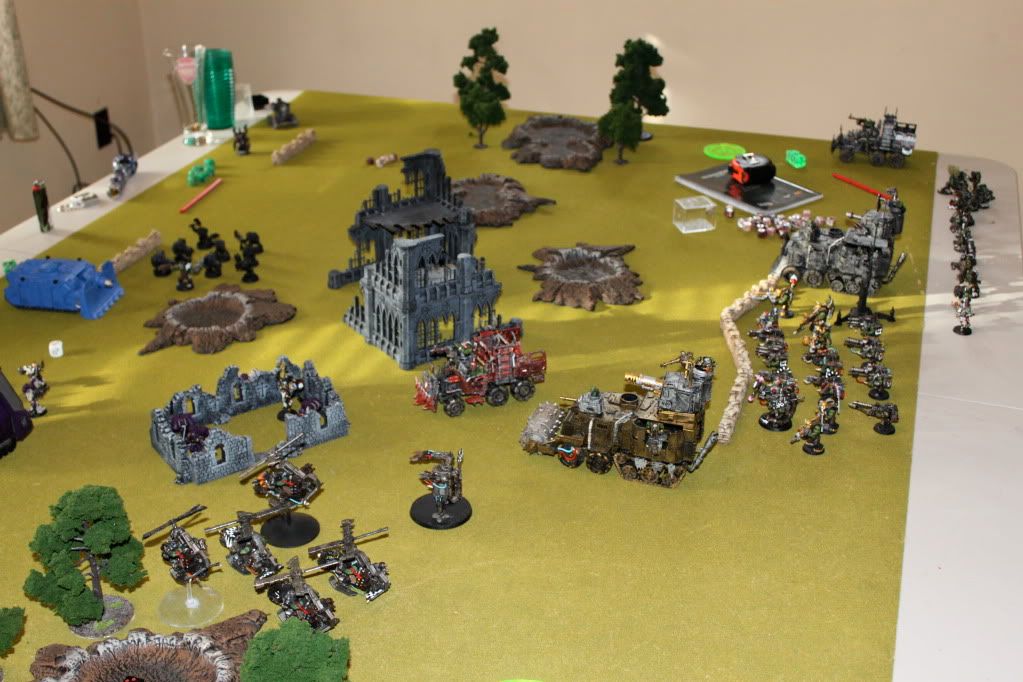
Snikrot and his boys really did a number on the Demolisher. The Burna Boyz both scored glancing hits, while Snikrot dealt out two penetrating hits, one of which wrecked the Demolisher, negating the
STR 10 pie plate.
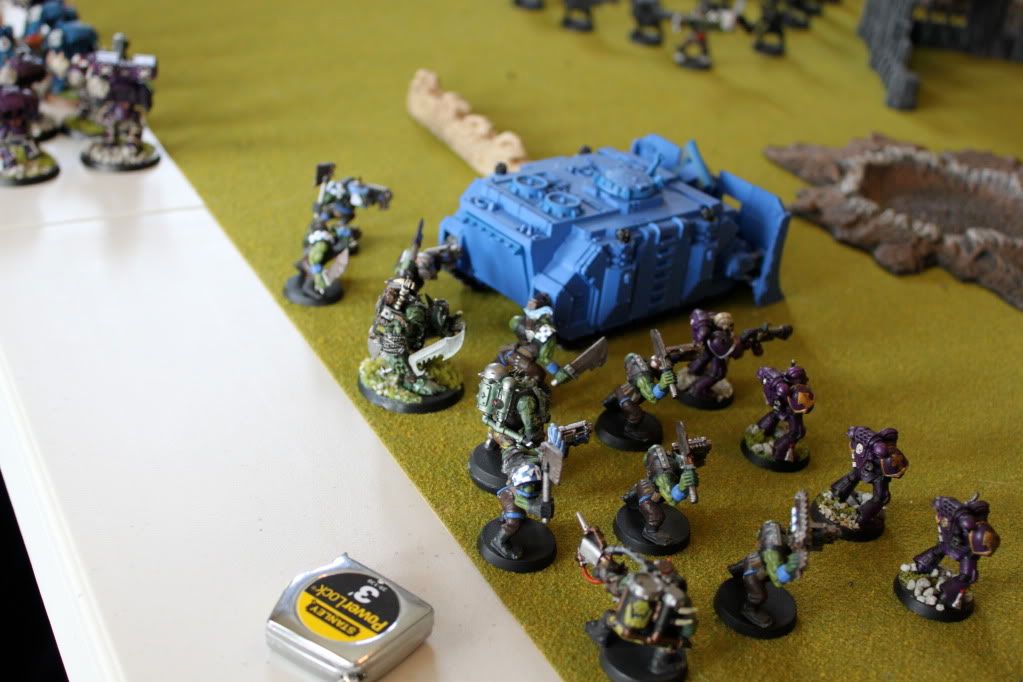
Grimskraga’s Boys, now at close range fire a volley of Big Shoota and Slugga fire, dealing a few casualties before the charge. Orks on the right flank move and run toward the objective. Grimskraga’s boyz engulf the Marines in combat, wiping out all but two Marines and the Librarian
HQ, who despite all of his powers missed with all of his attacks.
BOTTOM
With his back to the wall and all of his reserve rolls now in, my opponent takes a few risks, which in the end just delays the inevitable. The Thunderfire cannon, my personal bane parks on the right flank in the very corner aimed right at my second Ork squad. The Drop Pod, Termies and his Jump assault Marines all take risks in their landing, but they fall right where they need to, entering the fray. The Thunderfire Cannon does a number on the right flank Orks with its tremor rounds causing 9 wounds. The Termies train all of their firepower on Snikrot’s now exposed unit, tearing them to bloody shreds. Finishing the assault from the previous phase, the Marines are all wiped out. The
HQ flees and joins the Termie squad. At this point, the only objective holders that he has is a sole Scout with a heavy bolter.
Marines 0, Orks 0
Turn 4
TOP
Everything in reserve for the Orks arrive this turn. The Deffkoptas move onto the board on the left flank, the Lootas with Mek and
SAG deploy on the objective behind cover. Second Battlewagon deploys to immediate right of objective. Shoota boyz Trukk comes on right flank behind trees, waiting in the shadows. Grimskraga’s boyz fire on the Termies after seeing Snikrot wiped out to no avail. Koptas, BW with KillKannon and Killa Kan let loose on the Jump pack assault squad arriving from Deep Strike, killing four of them in a hail of fire. With nothing left to shoot at, Grimskraga’s Boyz charge into the ranks or the Termies. The Orks lose the battle of attrition losing all but Grimskraga and a lone boy. They fail the morale check, but Grimskraga kills the boy to take another check and passes. 5 Termies fell to the hands of the Orks. The Orks on the right flank move in to surround the Marines.
BOTTOM
With the game all but lost, the Soul Drinkers lay a vicious volley of fire on the Orks closing from the right flank. They are assaulted by the Veteran Jump pack Squad. Orks win the assault, leaving a sole Marine locked in combat. Termies finally kill off Grimskraga, effectively ending the push for the Marine objective.
Marines 0, Orks 0
Turn 5
TOP
Time to rout the enemy. Not much left to do here. He has no scoring units left save a lone scout. The Ork fire on him with everything, the Kill Kannon getting the final blow on the scout. He can no longer score, and has no way to contest my objective. My BW to the right of the objective moves up, Trukk moves in and boyz deploy securing the objective. Game, set match.
BOTTOM
MARINES SURRENDER!
Orks 1, Marines 0
This one was over early. With all of our troops on the board, I knew all I had to do was assault him and this one was going to be over. Then I would just protect my objective and run the boyz in the end to secure. He made one mistake and I buried him.


 9W-oL-2T
 0W-0L-1T

 da iron bootz (2500)
 en skaven symbol (3000)
 the angels of death (2500) (ard boyz semi finalist)