Hi all, played a game recently Space Wolves vs Orks at 1500 points (friendly). Hope you enjoy the Batrep.
Armies are as follows (copied from
AB files, I hope this is ok):
Orks:
1 Big Mek Power Klaw; Kustom Force Field; Mek's Tools)
10 Gretchin Grot Blasta;
1 Runtherd ((C:Orks,
pp. 50 & 100); Grot-Prod x1 Squig Hound)
11 Boyz Choppa & Slugga; Big Shoota x1; Stikkbombs;
1 Boyz Nob (( Power Klaw; Slugga; Stikkbombs (Squad based)
1 Trukk (Big Shoota x1; Armour Plates)
11 Boyz Choppa & Slugga; Big Shoota x1; Stikkbombs;
1 Boyz Nob Power Klaw; Slugga; Stikkbombs (Squad based) 'Eavy Armour)
11 Boyz ((C:Orks,
pp. 40 & 100); Choppa & Slugga; Big Shoota x1; Stikkbombs;
1 Boyz Nob Power Klaw; Slugga; Stikkbombs (Squad based);
3 Deffkoptas Buzzsaw x3; Choppa; Twin Linked Big Shoota x3;
3 Deffkoptas Buzzsaw x3; Choppa; Twin Linked Big Shoota x3;
3 Deffkoptas Buzzsaw x3; Choppa; Twin Linked Big Shoota x3;
1 Deff Dread Dreadnought
CCW x2; Dreadnought
CCW x2; Armour Plates)
3 Killer Kans Dreadnought
CCW; Rokkit Launcha x3)
2 Killer Kans Dreadnought
CCW; Rokkit Launcha x2)
Total Roster Cost: 1497
SWs:
1 Rune Priest (Unit Type: Infantry; Frag Grenades; Krak Grenades; Power Armour; Melta Bombs; Wolftooth Necklace; Bolt Pistol x1; Runic Weapon x1; ; Murderous Hurricane; Tempest's Wrath)
1 Dreadnought Searchlight; Smoke Launchers; Extra Armor; Wolftooth Necklace; Dreadnought
CCW; Heavy Flamer; Twin Linked Heavy Bolter
9 Grey Hunters Pack (Unit Type: Infantry; Frag Grenades; Krak Grenades; Power Armour; Wolf Standard; Bolt Pistol x9; Bolter x8; Close Combat Weapon x9; Flamer; Power Fist
1 Grey Hunter w/ Power Fist (Unit Type: Infantry; Frag Grenades; Krak Grenades; Power Armour; Bolt Pistol x1; Bolter x1; Power Fist
1 Rhino Searchlight; Smoke Launchers; Extra Armor; Hunter Killer Missile; Storm Bolter)
9 Grey Hunters Pack Frag Grenades; Krak Grenades; Power Armour; Wolf Standard; Bolt Pistol x9; Bolter x7; Close Combat Weapon x9; Flamer; Power Fist; Flamer
1 Grey Hunter w/ Power Fist Frag Grenades; Krak Grenades; Power Armour; Bolt Pistol x1; Bolter x1; Power Fist;
1 Wolf Guard Pack (Wolf Guard in Terminator Armour; Wolf Guard in Terminator Armour; Wolf Guard in Terminator Armour; Wolf Guard in Terminator Armour; Wolf Guard in Terminator Armour; Drop Pod)
1 Wolf Guard in Terminator Armour Terminator Armour; Combi-Flamer; Frost Weapon;
1 Wolf Guard in Terminator Armour Terminator Armour; Combi-Flamer; Frost Weapon;
1 Wolf Guard in Terminator Armour Terminator Armour; Combi-Flamer; Frost Weapon;
1 Wolf Guard in Terminator Armour Terminator Armour; Combi-Flamer; Frost Weapon;
1 Wolf Guard in Terminator Armour Terminator Armour; Frost Weapon; Heavy Flamer
1 Drop Pod (Deathwind Missile Launcher)
4 Long Fangs Pack (Unit Type: Infantry; Frag Grenades; Krak Grenades; Power Armour; Close Combat Weapon x4; Heavy Bolter x4
1 Squad Leader (Unit Type: Infantry; Frag Grenades; Krak Grenades; Power Armour; Close Combat Weapon; Power Fist;
1 Predator Searchlight; Smoke Launchers; Extra Armor; Hunter Killer Missile; Autocannon; Heavy Bolter (each side))
1 Land Raider Power of the Machine Spirit; Searchlight; Smoke Launchers; Extra Armor; Hunter Killer Missile; Multi-Melta; Twin Linked Heavy Bolter; Twin Linked Lascannon x2)
Total Roster Cost: 1500
We rolled sieze ground with spearhead and agreed on 6 turns.
3 objectives were rolled with Orks getting 2 and
SW 1. Orks won the roll off and setup first.
SWs followed failing to seize the initiatve.
Orks deployed their Deffkopts in reserve with
SWs drop podding the termies.
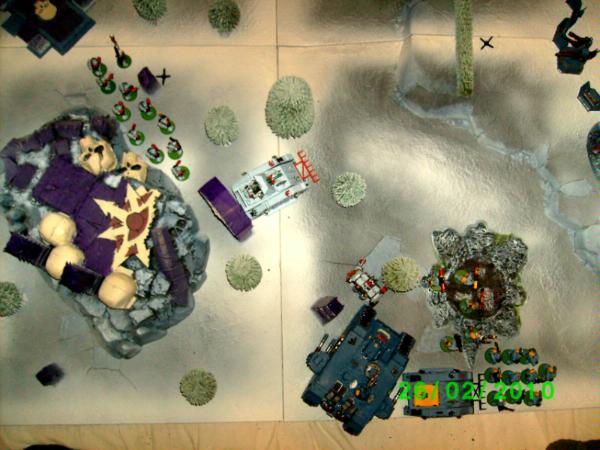
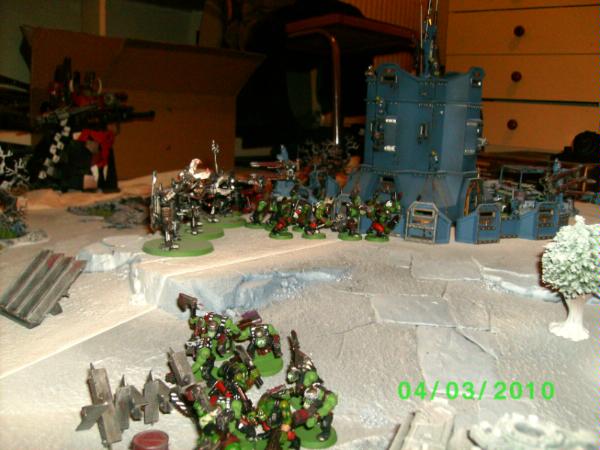
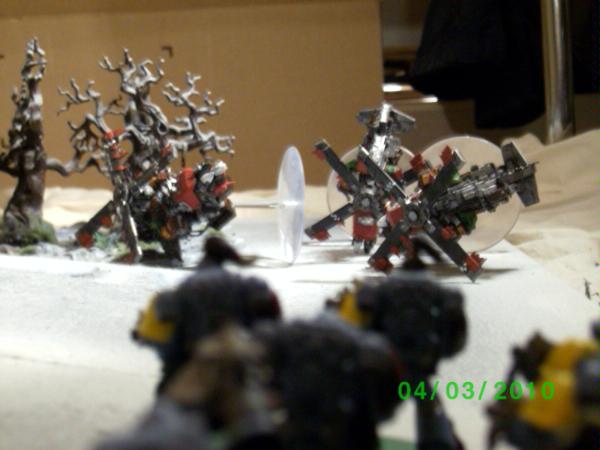
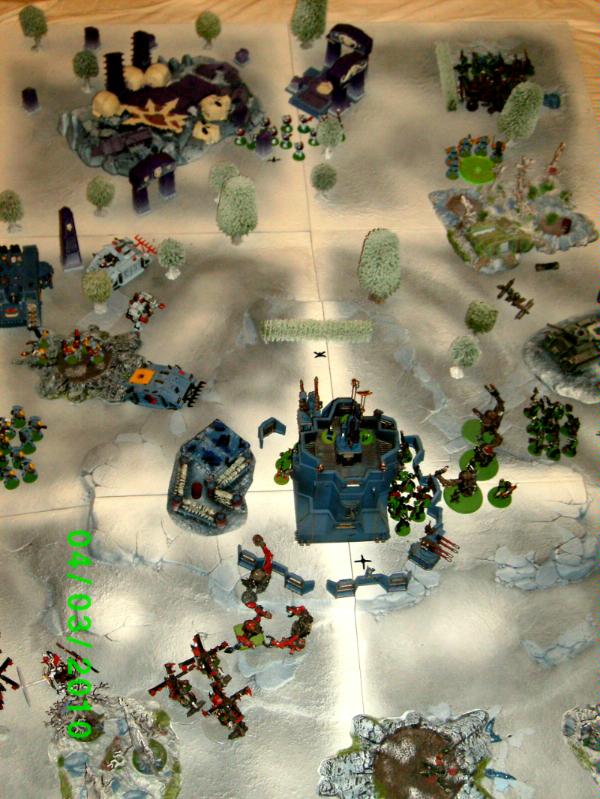
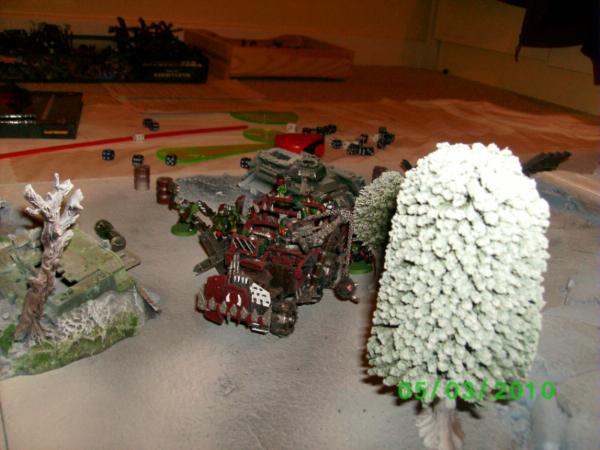
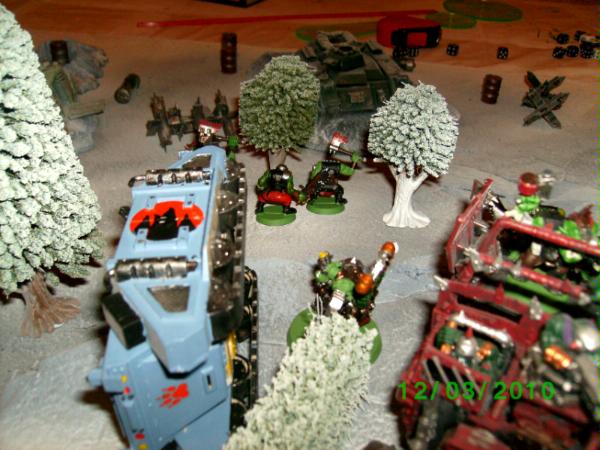
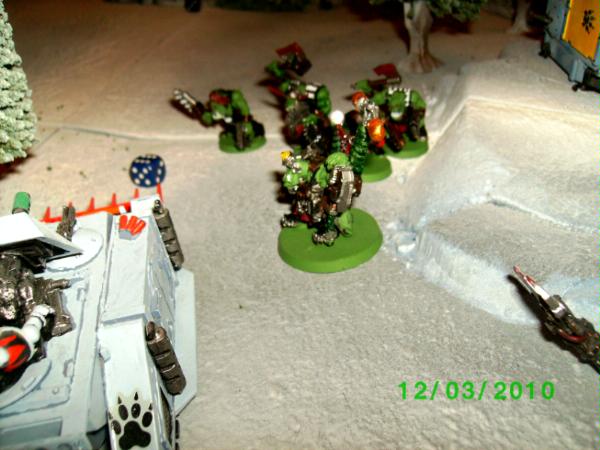
Force setup. Markers can just be seen as small Xs.
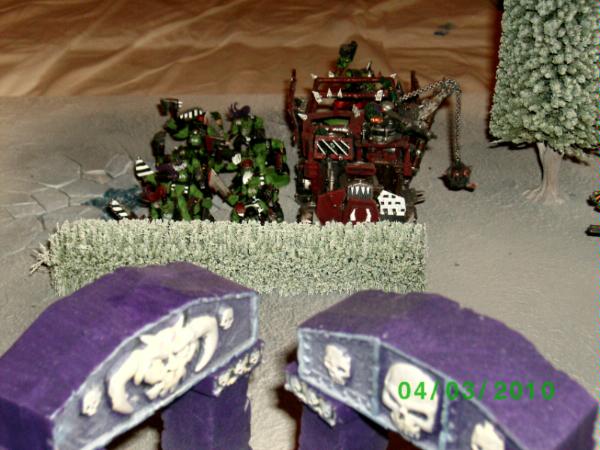
Orks:
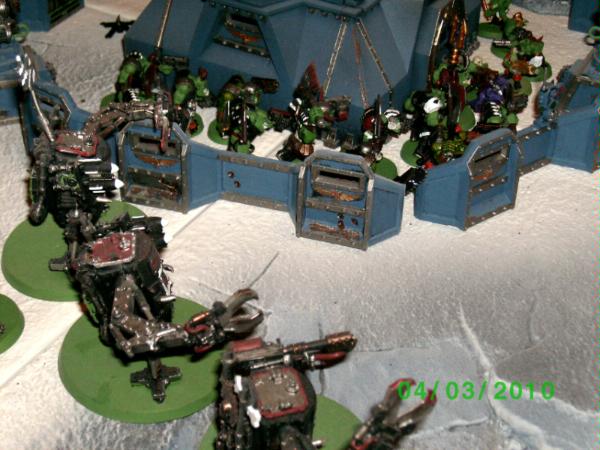
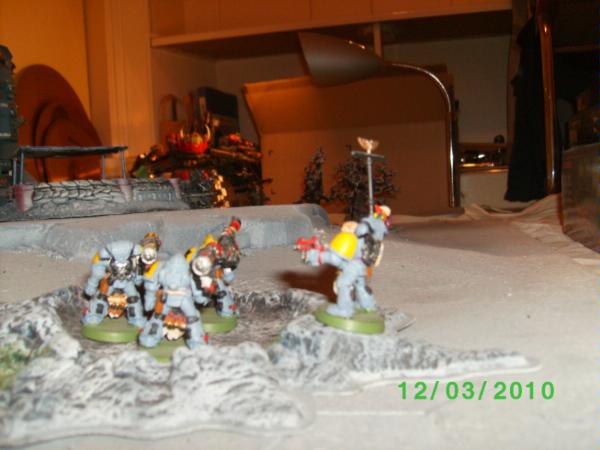
 SWs
SWs:
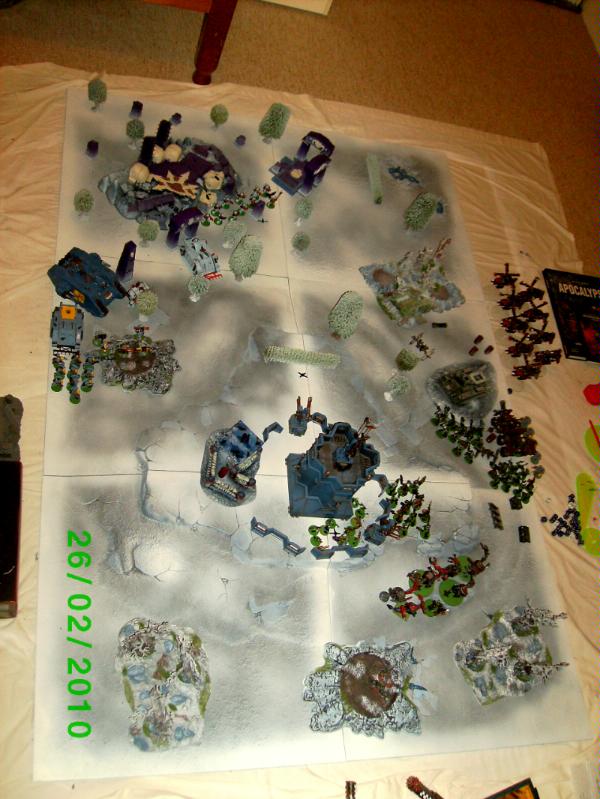
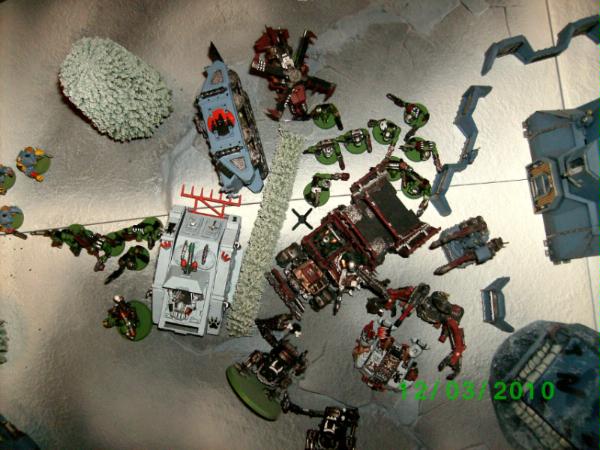
Overall battleifield.
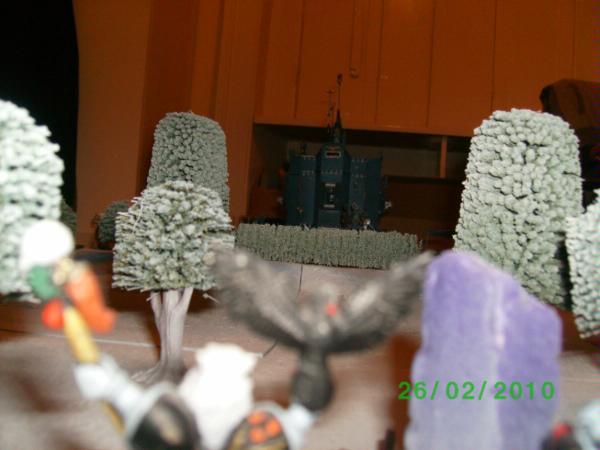
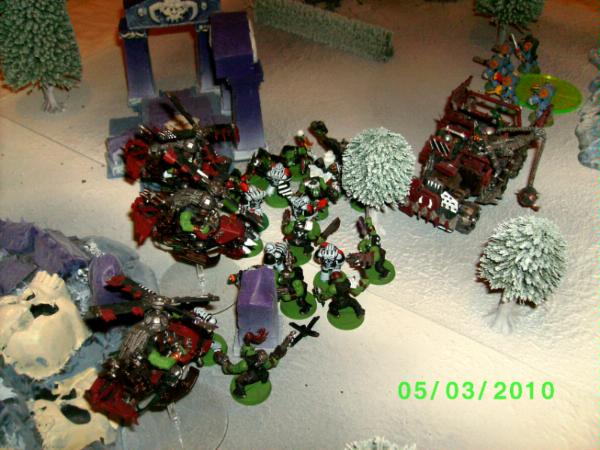
Da plan.
Orks decided early on to use the Gretchin to hold their home obj. Having the bunker so close meant they could move into it and still hold the obv which was within 3 inches making it difficult for the
SWs to dislodge them. One unit of KKs and a Dread were going to flank to the left to pressure the
LFs and
GHs rhino unit and support the Gretchin. The rest of the KKs and Big Mek along with the 2 Boyz units were going to move to the center to hold that obj whilst the Trukkboys flanked right to pressure the
SWs home obj.
For the Wolftime.
Sws decided to hold their home obj with the Runepriest and 1st
GH squad. They setup a fire base to cover the middle obv comprised of the
LFs,
LR, Predator and Dreadnaught which also allowed them to support the Runepriest. The
GH rhino squad was going to try and flank into the Ork home obj whilst the termies would drop pod where needed.
Ork turn 1.
The 1st KK squad and Dread broke off left to begin the flanking.
Both boys squads accompanied by the 2nd Kan squad and BM moved towards the middle obj whilst the Gretchin moved toward the bunker door.
The Trukkboys began their flank passing their diff terrain test with ease.
Ork tactics:
The Orks stuck with their battle plan and moved their units pressuring both
SW flanks whilst securing the middle ground.
SW turn 1.
The
SWs decied to play defensively holding their ground. The Long Fangs spied the 2nd Boyz unit over the hill and let rip with their
HBs killing 3 Orks. Rather disconcertingly the Orks failed their morale test and fled right back to where they had started!
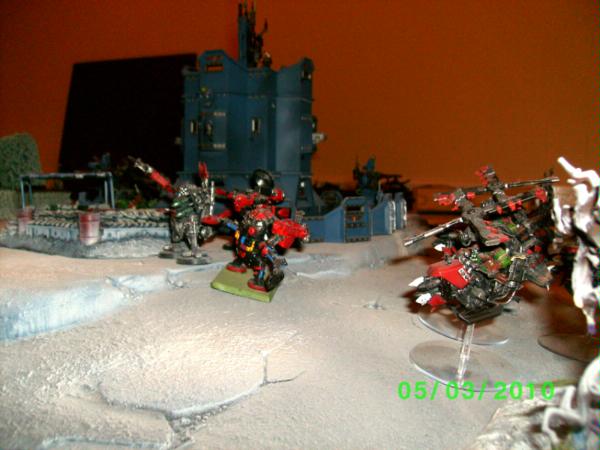
The Runepriest considers his options as he surveys the 2nd objective.
 SW
SW tactics.
SWs decided to see how the Ork first turn panned out and overall had a defensive start. With the termies to come and a strong firebase they felt they could hold their home obj and take the 2nd with firepower towards the end.
Taking the Ork obj would prove hard but the Rhino had a good chance.
Ork turn 2.
With Mork looking on the Boyz squad passed their rally test and got back into the action, although their approach was a little less gung ho this time.
With some extremly lucky rolling 2 of the Ork Deffkopta squads came on from reserve from the left further bolstering that flank.
The Trukkboyz moved up taking up a position behind a hedgerow.
The KKs all advanced whilst the gretchin made it into the bunker. The rest of the Orks moved behind the aegis line supported by the KKs
Ork tactics.
Having both Deffkopta squads arrive was a great piece of luck and really helped that flank and would realy pressure the
LFs now. The Trukkboys were wary of the possible podding termies but felt on the charge they had a chance vs the
RP squad and had a nice position to get into the
SW home obj. Having seen the devastating
LF firepower the Orks decied to use the defense lines. Although not within range of the middle obj it was a secure position and with 4 turns to go they could always make a break out of it later on. Overall both flanks looked strong and the middle was very secure.
SW turn 2. Again
SW movement was cautious preferring firepower over movement. Seeing the potential threat from the DeffKs the
GH squad moved out from the Rhino and both them and
LFs opened up on the 1st Deff squad obliterating it wholsesale. The Predator/Dread and
LR had few options to fire at this turn.
 NOTE:
NOTE: We made a mistake by failing to drop pod the termies the first turn and decied they could do it the 2nd instead which was a bit of an advantage to the
SWs but in friendly games its all good! They duely podded and scattered badly into the nearby forest but the homing beacon allowed them a recovery arriving just near the Trukkboyz instead. They opened up with flamers on it but failed to scratch it. The
GHs then tried and had similarly poor luck.
 SW
SW tactics.
The option was to leave the
GHs in the Rhino and continue the flanking manouver but with the threat of the KKs and Dread looming over the hill, they decided to attempt to destroy the Deffs which worked out very well. The
RP squad was in potential trouble withe the termies failing to wound the Trukk (having being armed more for massed Ork units) and disappointing rolling by the
GHs on the Trukk too was also a concern as it survived unscathed but supported by termies they felt confident. At this point
SW felt their home obj was secure, they could pressure the Ork obj later by remounting the
Ghs and contest the middle with the Dread/Pred.
Turn 2 end:
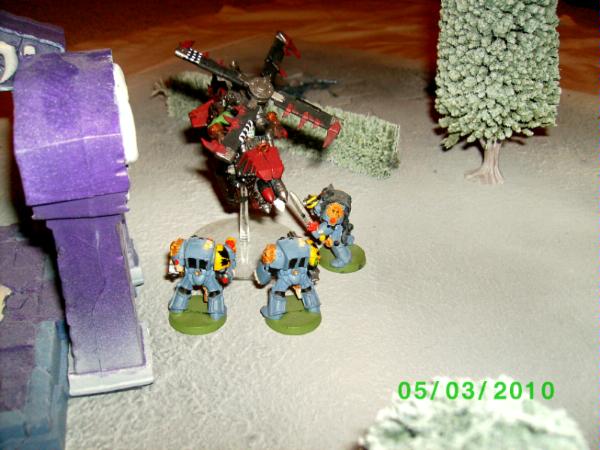
Orks turn 3.
With some more incredible rolling the 2nd Deff squad flanked and rolled which edge they wanted to arrive on. Seizing the opportunity both the Trukkboyz and Deffs assaulted the
RPs GH unit.
In a raging melee of charge and counter charge the Orks took heavy casulaties but nothing could stop the Deffkopts frenzied assault and both the
GHs and
RP fell before the onslaught of axe and whilring buzzsaw.
The Boyz conslidated consolidated the best they could wary of the Terminators and the Deffkoptas likewise.
Both KKs on the left flnak along with the 2nd Deff squad opened up on the coverless
GHs squad, killing 5 but they passed their morale check.
The central Kks opeend up on the Dreadnaught but failed to damage it.
Ork tactics.
Having the Trukk positioned so well along with the fortuitous arrival off the Dks meant it was too tempting to pass up the opportunity of a charge and really pressure the
GHs despite the openess of the position and the Terminators.
The Deffs really won this though, they hit incredibly hard and units in support make sure they get to strike. At this point things were looking good, with both center and home objs secure and the
Sw one under pressure.
A very nice round of shooting meant the 2nd
GH squad was also in trouble and now the
Sws only had one scoring unit left. Overall the plan was to conolidate the middle whilst fending off thw
GH potential flank with the Dreadnaught and 2nd Dk squad. If the Trukkboyz and 3rd Deff squad could hold out it vs the terminators it could be a whitewash. In addition the 2nd unit of boyz could be ran towards the
SW home obj to further pressure it.
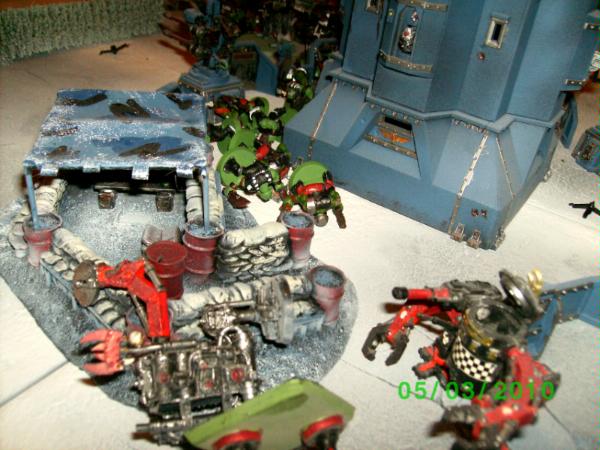
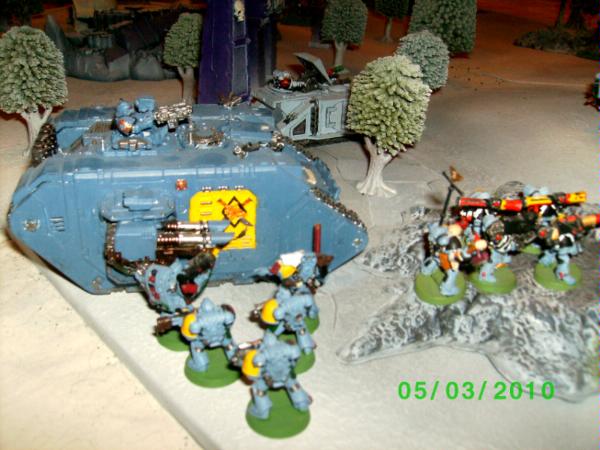
SW turn 3.
The terminators opened up on the last of the Trukkboys being out of charge range killing all but the Nob who failed his break test and was removed.

The
LR opened up on the KKs killing both in a firestorm of lancing Lascannon. The Predator and
LFs both opened up on the Orks behind the aegis line and took a heavy toll, killing 7 of them.
Having lost the
GH squad options were limited after that.
SW tactics.
Losing the
RP/
GH in such a devastaing assault really hurt. It meant no one could hold the
SW home objective at this point and the Terminators were unluckily out of charge range of the Boyz/Deffs. However the demolition of 7 boys and 2 KKs (a little lucky but needed) was a welcome result. At this point the Ork home obj flanking was looking unlikely as the 2nd
GH squad would have to most likely
LR mount and move toward the home obj. The center was still contestable meaning at best a draw could be gained.
Ork turn 4.
The flanking DeffK squad on the left opened up on the
GHs again but failed to kill any. The center KK squad moved up securing the middle obj whilst the Dreadnaught moved more centrally to try and get towards the
SW firebase. The Deffkoptas that remained after the assault fired on the terminators killing 2 successfully but they passed their test.
The Trukk moved back to pick up the 2nd Boyz squad enabling them with more manouverability.
Ork tactics.
The decision to fire on the termies and not assault was a bit of a mistake but armed with Frostblades they were always going to hit first and the hit and run rule was an option if assaulted themselves. Killing 2 was decent though.
The 2nd DeffK squad were disappointing failing to kill any
GHs despite being in the open. The Dread was getting isolated so repositioning towards the
SW firebase which was proving trouble some seemed useful. At this point the likelyhood of taking the
SW home obj was remote even though the Trukk gave the 2nd (wounded) boys squad a chance. The still mobile Pred/
LR/Dread and Rhino were a concern and the Orks were lacking anything to really hurt them.
However home and center objs were still Orky and with the Mekboy and Dread well positioned along with the KK Mork wasnt raging yet.
SW turn 4.
The terminators had but one option and assaulted the Deffk squad whilst firing killing 2 but it passed its morale check.
In the assault phase it hit and ran leaving the remies to consolidate to the nearby ruins.

The Dreadnaught decided to begin the pressure move on the center obj and ran towards it. The
LR opened up on the center KK squad killing one and stunning another whilst the
LFs had no targets due to the Orks moving deeper into the aegis line and out of
LOS.
The last of the
GH mounted back into the
LR.
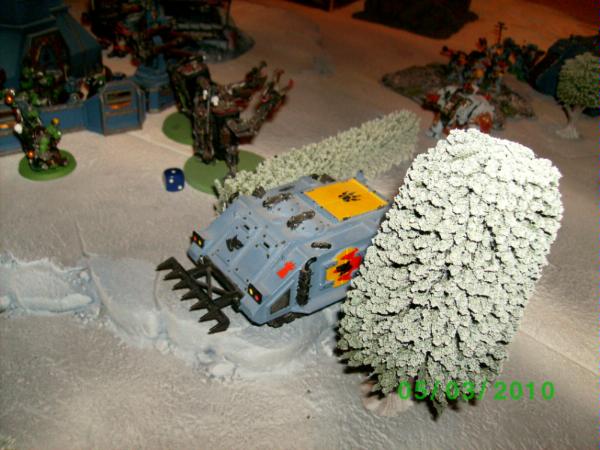
The Rhino decied to break for the Ork home obj via the shortest route to try and pressure it.
 SW
SW tactics.
Forcing the Deffk to withdraw was a good move and left the terminators in a dugin position should the Trukkboys assault whilst the remounted
GH would hopefully arrive at the
SW home obj the next turn.
The
LFs had no targets unfortunately.
Moving the Dreadnaught was a calulated risk, against 2 KKs it might be tough but striking first on the charge was an option (since one was stunned they couldnt assault). Moving the Rhino again was a calcualted risk, there was now nothing that could pressure the Ork home obj except it and having moved fast the Orks would need 6s to hit.
At this point things were becoming chess-like, the
GHs had to take the home obj, the Dread/Pred could still contest the middle obj and maybe the Rhino could make it to the Ork home.
Ork turn 5.
The Mekboy and Trukboys assaulted the Rhino needing 6s to damage it and with the last roll duely tore its hull open, destroying it. However the resulting explosion killed 2 Orks who failed their morale test and gain were off.
The last of the DeffKs on the right sought cover whilst the unit on the left moved to fire on the
LFs, killing one.
The KKs fired on the
SW Dread again failing to wound it.
Ork tactics.
At 1500 points in a 6 turn game things were becoming tough. There was nothing to stop the inevitable
SW Dread charge on the KKswhich meant the middle obj was under real pressure but perhaps the KKs could hold out. The Ork Dread had a miserable diff terrain test and could only barley escape the aegis line. The choice between rushing the
SW home obj with the trukkboyz or assaulting the Rhino to scure Ork home obj was a tough one. orks felt however that the charge by termies couple with the
GH LR squad would prove too much in the following turn and securing the Ork home obj was priority as the center was still quite takebale.
Having the Boyz break from the Rhino explosion really annoyed Mork although theres no accounting for dice!
SW turn 5.
The
SW dreadnaught charged headlong into the KKs remembering the wise words Bjorn had given him and with 2/3 hits and 2 full penetrations crushed them both into smouldering metal.
The terminators moved from cover to flame the last DeffK and killed it.
The
LFs had only 1 target left and opened up purposefully on the flanking 2nd Deffk squad, killing 2 and forcing them to break, effectively wiping them out.
The
LR moved the last of the
GWs through the forest towards their home obj whilst the Predator had to move out of the way preventing it from firing.
 SW
SW tactics.
The Dreadnaught obliterating the KKS was excellent and gave a real chance at the center obj.
Remounting the
GHs also proved a worthwile move as it meant the Orks had nothing to scratch it and meant in turn 6 they could secure the home obj meaning at least a point. The Ork home obj was now unreachable but at worst it would be a 1-2 loss, at best a draw. The
LFs again proved brillaint wiping out the last of the DeffK squad, although they now had no viable target since the Ork trukk blocked
LOS.
It would come down to dreadnaught vs Dreadnaguht for the middle obj with the Pred as a possible backup.
Final Ork turn (6).
The Ork Dreadnaught charged its
SW counterpart, surviving the intial assault and in a whirling flurry of attacks inspired by Mork tore the Marine from his sarchophagus.
The Mekboy and remaining boyz decided on a final charge for glory to take out the Predator which threathened the middle obj. The Mk howver fell short and even with the Waagh banner so did the Boyz.
The remaining boys all moved behind the trukk but within rnage of the middle obj.
The Grecthin continued to hold the home obj and the last Deffk chose to move to cover having no chance vs the termies/
GHs.
Ork tactics/final thoughts.
With the home obj secured and under no threat, all that was left was to try and stop the Pred. But it was not to be, both the Mekboy and Boyz failing to reach it, falling just short.
The
SW obj could not be taken at this stage, having nothing on that side of the table. A draw was in order and Mork whilst not displeased wasnt too happy. All in all the game was there for the taking considering the obj locations and scoring unit ratio. In hindsight not gabmling the Trukkboyz near the end on the
Sw obj proved fortuitous since the other boyz squad who had borken were actually out of range of the middle obj at the end, meaning if the
Sws had wiped the Trukkboys out Orks would have lost 1-2!
All in all, a very tactical game rather then the expected fury charge.
MVP: Deffkoptas and the trukk (great options for manouverability.
SW final turn.
The Pred moved to contest the middle obj and the
GHs dismounted to claim the
SW home obj.
The
Lfs were depressingly left with nothing to shoot!
 SW
SW tactics/final thoughts.
Losing the
GH/
RP was quite devastating but a nice tactical repositioning by the 2nd
GH/
LR proved game "drawing" as did the Pred rush at the end. The Orks lacked firepower to take the armored units out and could have done with some more Rokkits. Despite the
Sw being a "hand to hand army" their firebase proved devastating. All in all quite happy with the draw since the Orks got to place the 2nd obj and
SW scoring units were only 2. Never liked meach but theres something to be said for it!
MVP: Dreadnaught and
LFs.
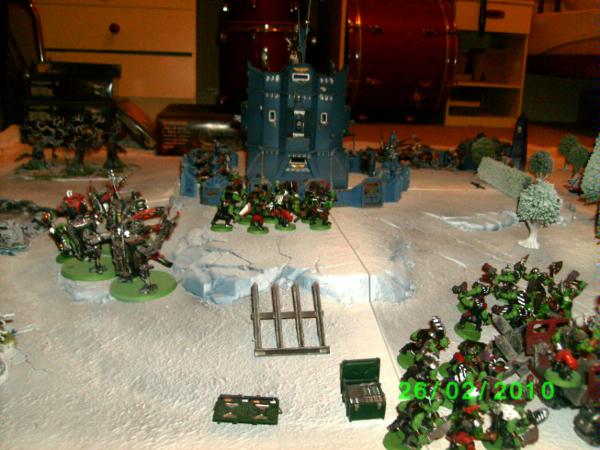
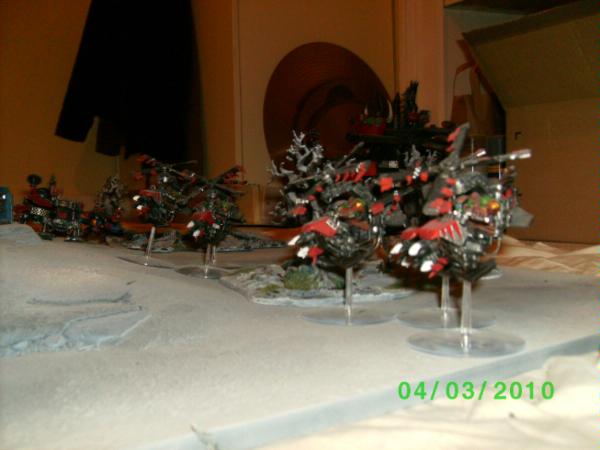
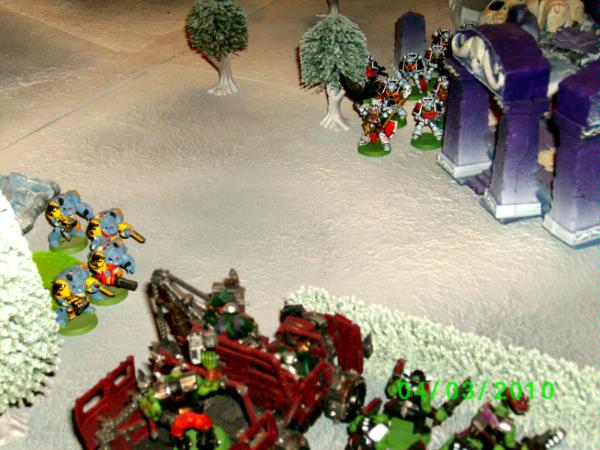
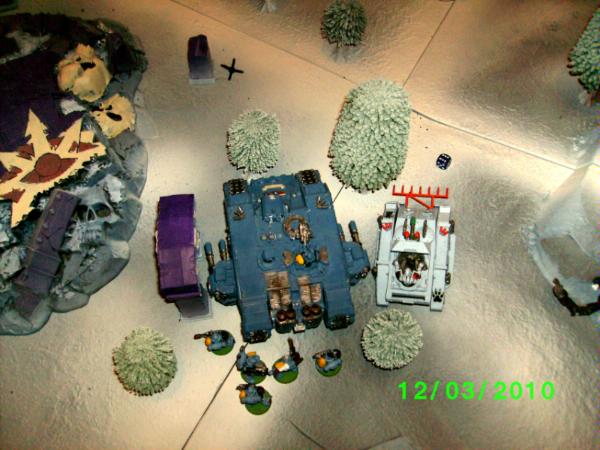
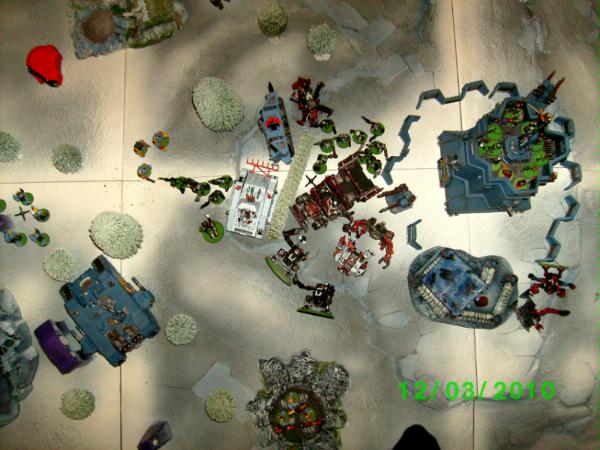
The final stance:
Hope you all enjoyed the batrep as much as I enjoyed posting it.
Apologies for any typos and thanks dakka for the awesome "image adjust" feature on picture uploads. Really makes a difference!
Until next time (maybe we'll see Mork call out Ragnar

)

